Printable Version of Topic
Click here to view this topic in its original format
914World.com _ 914World Garage _ OU8AVW's Build Thread
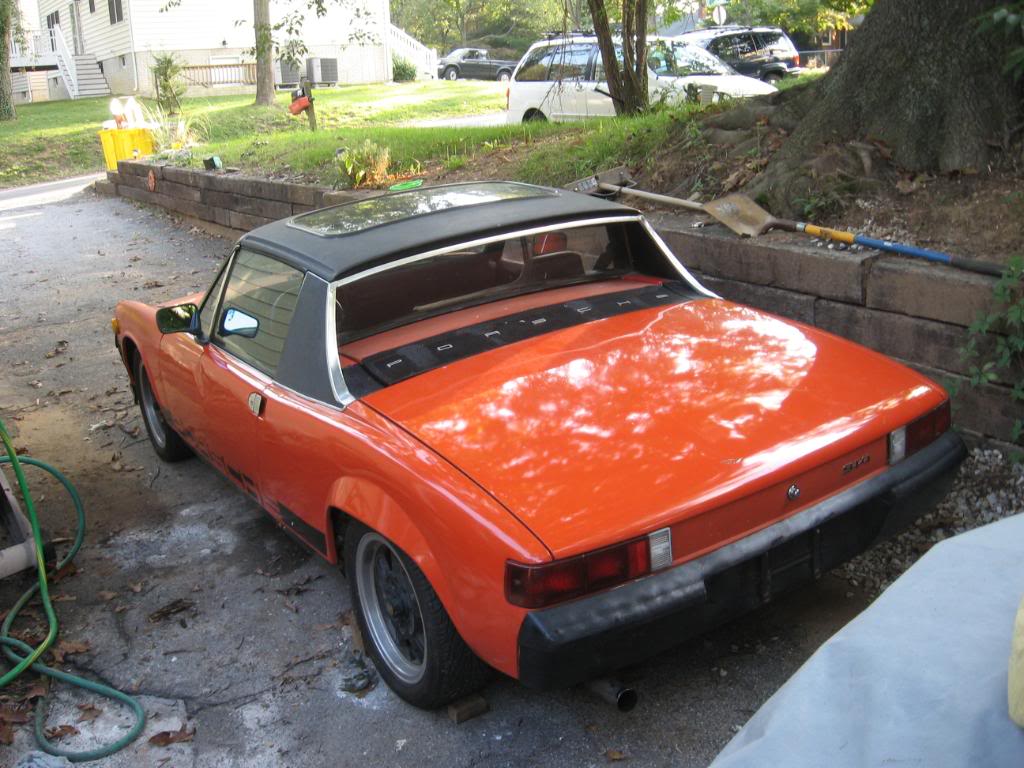
Posted by: OU8AVW Jan 31 2012, 09:48 AM
I've been lurking here for four years, I signed up the day after I bought my 914. It's a 1971 car and I bought it because the doors clinked shut like a Porsche is supposed to. I have learned allot from this forum and I'll say it again, this is the best auto forum on the intraweb!
Work situations, other car projects, a sailboat and three kids that play Lacrosse, swim, ect I have not really worked on the car at all until recently. I have been prolifically collecting parts, knowledge, and building a network of trusted friends and vendors.
As it stands:
-I have 75% of the sweet parts I need
-Scotty B and I made a good deal to have him paint my car
-I have a running motor with 40 Webers, another fully machined motor with rebuilt heads and six new injectors waiting to be assembled and a sideshift trans.
-My good friend Eric of Willswerks in VA and I trade labor. He's a transmission guru like Dr. Evil. He also has a huge stash of NOS part's he hooks me up with
-I have a full interior with new leather seats, new carpet and new door panels
-A set of sway bars for both ends
-A nice set of 2.0 Fuchs
I need-
-Brakes
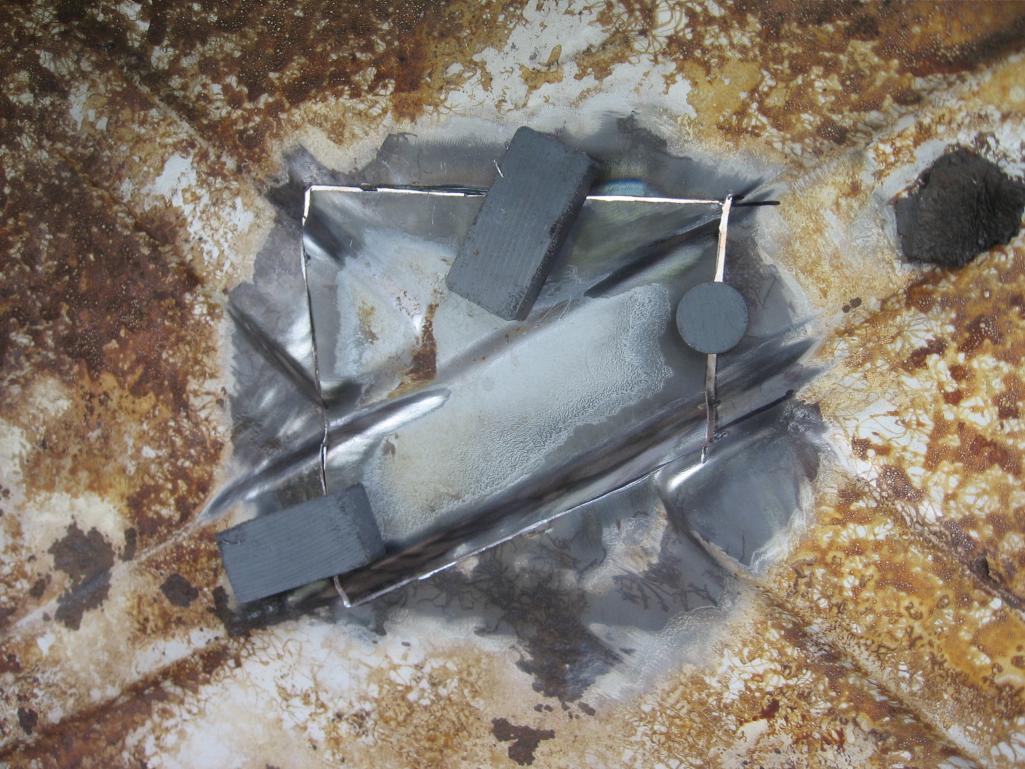
-A little pan repair
-A dash
-a few more bits i can't remember now 
-A freakin' garage!
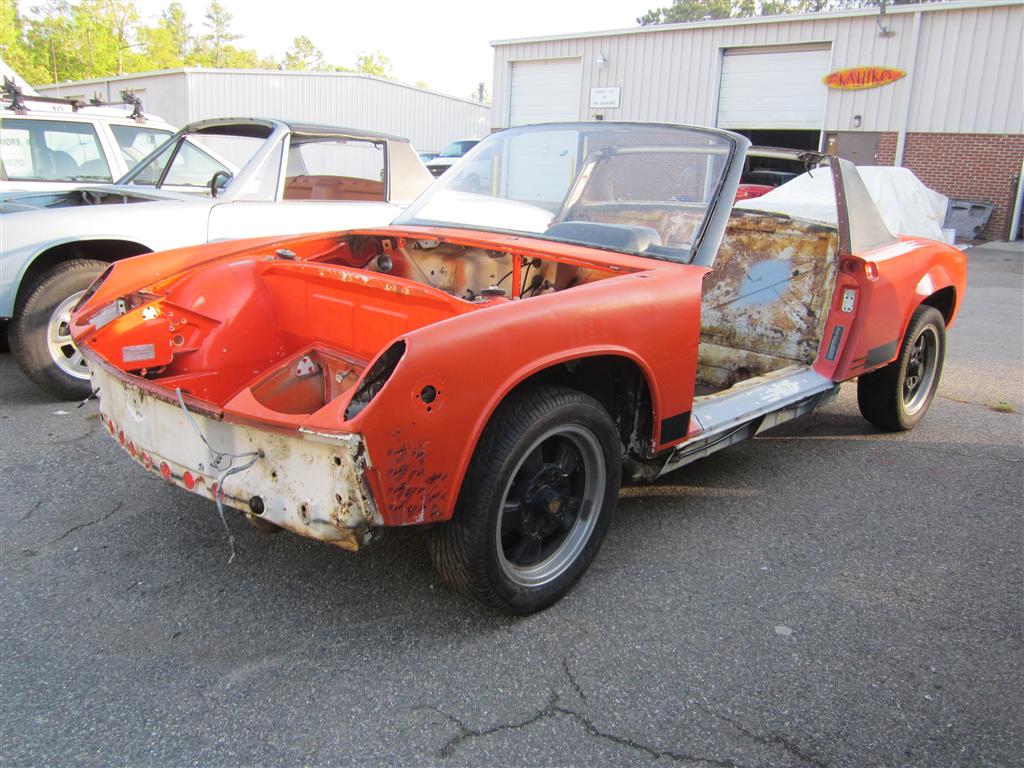
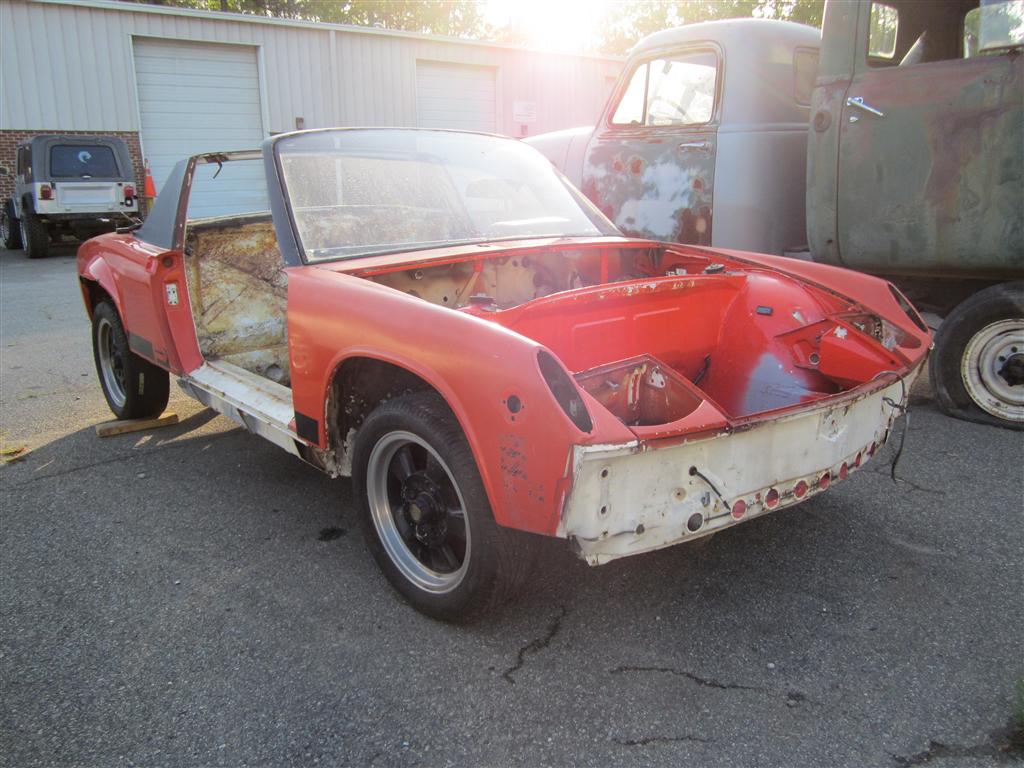
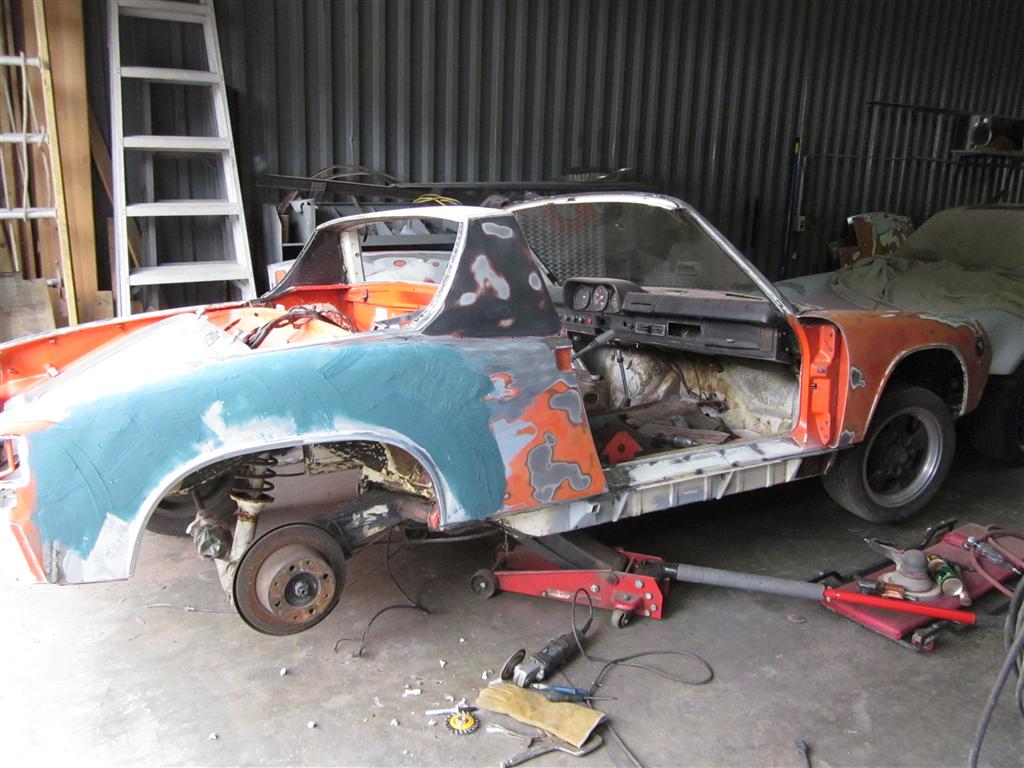
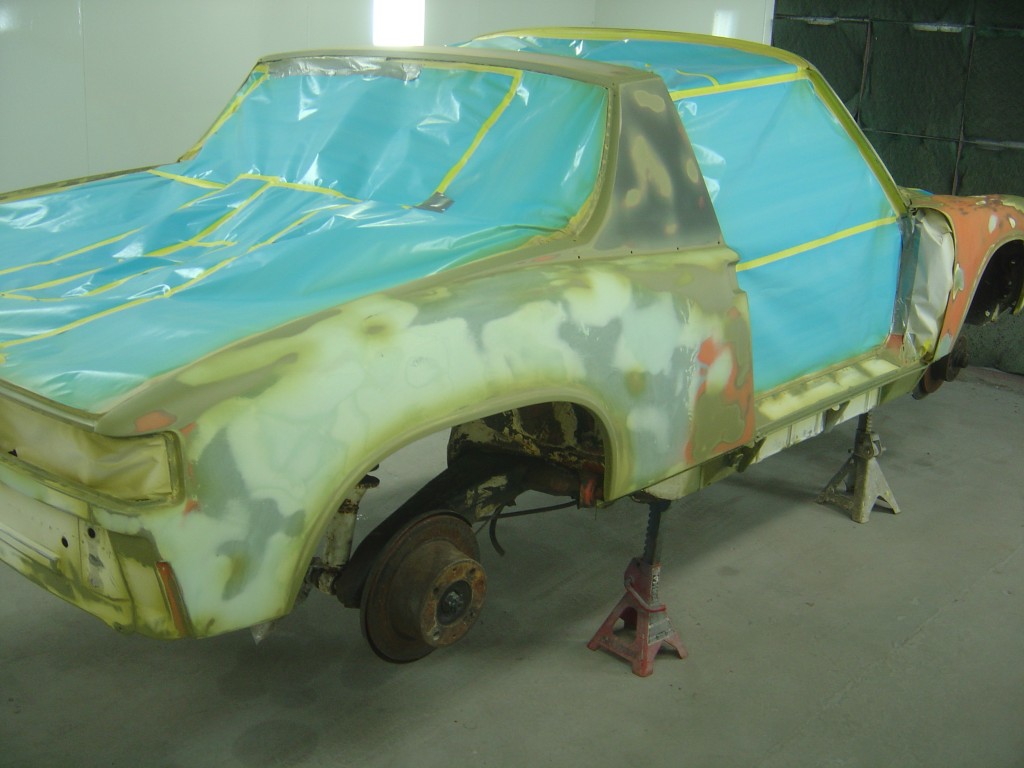
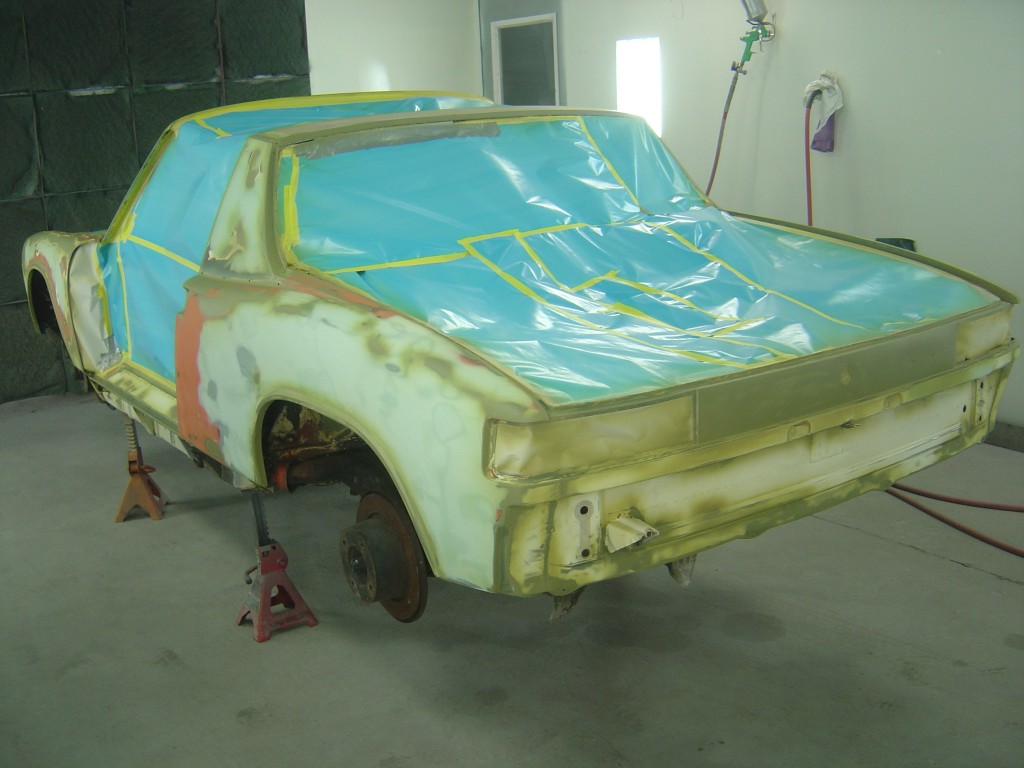
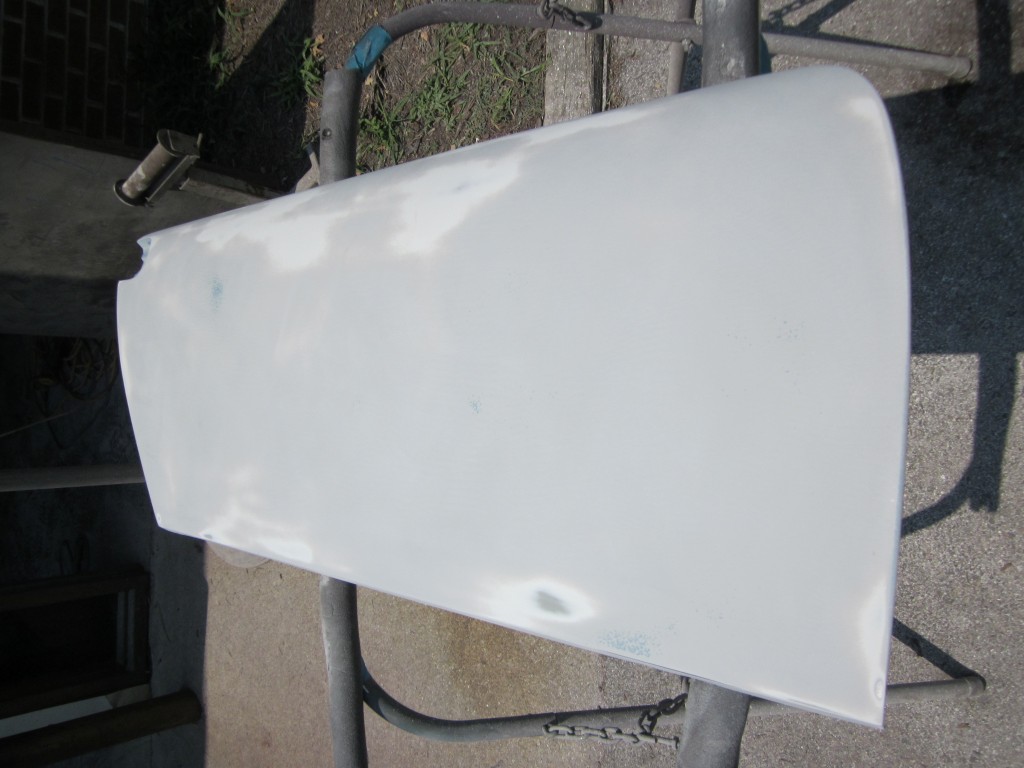
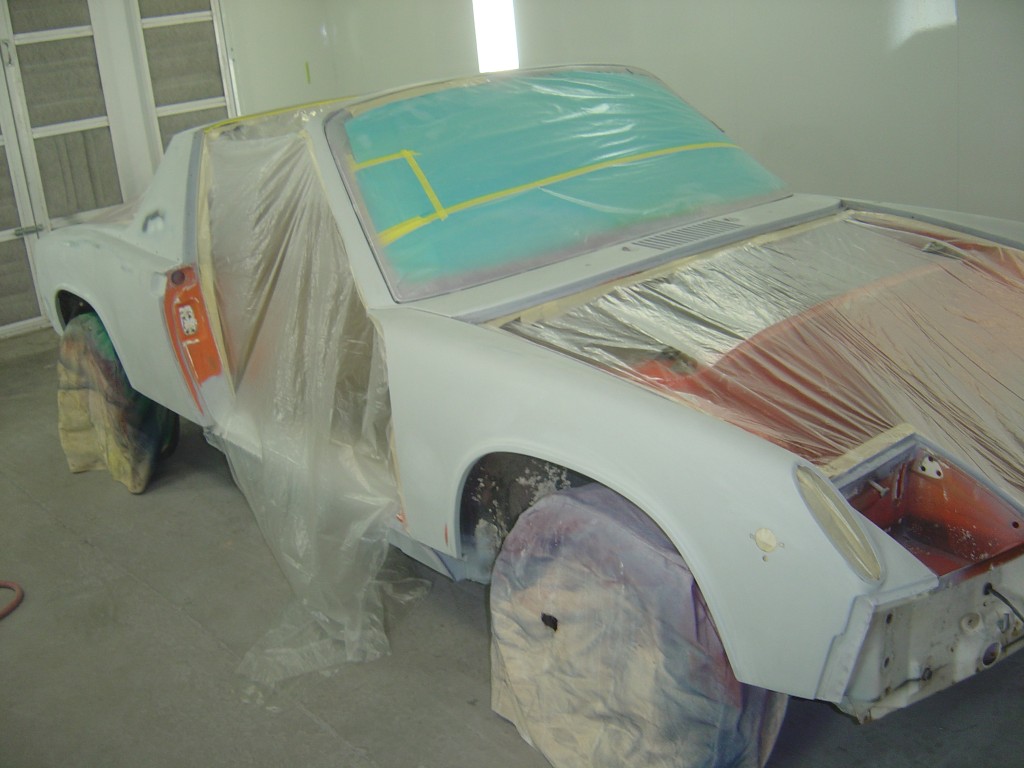
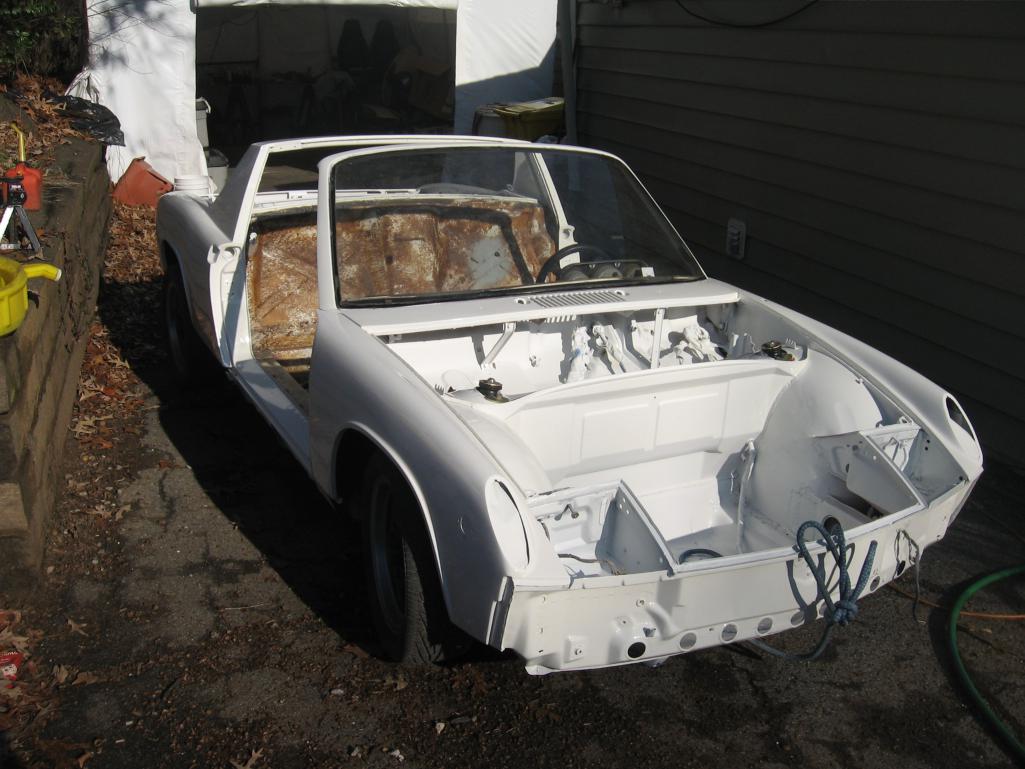
Here's what she looks like now-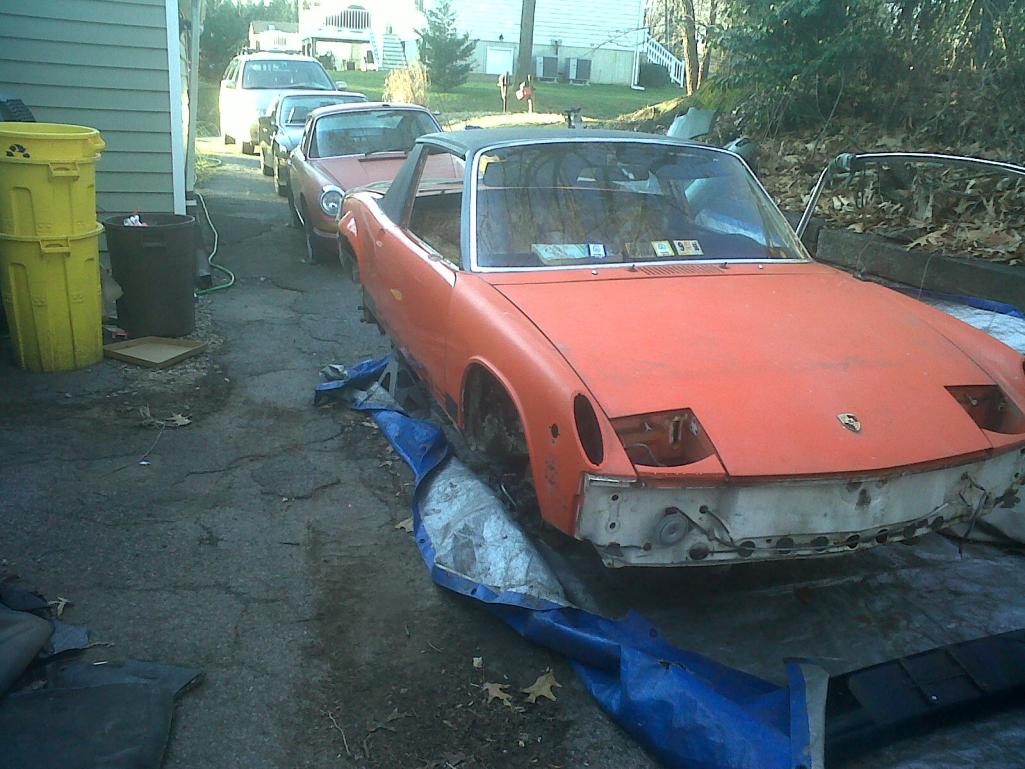
She's supposed to be white and I think I'll go back to the original color. Here's my inspiration: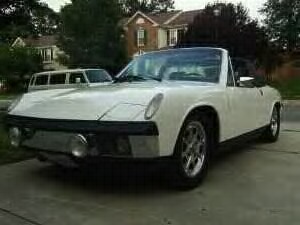
Posted by: OU8AVW Jan 31 2012, 10:02 AM
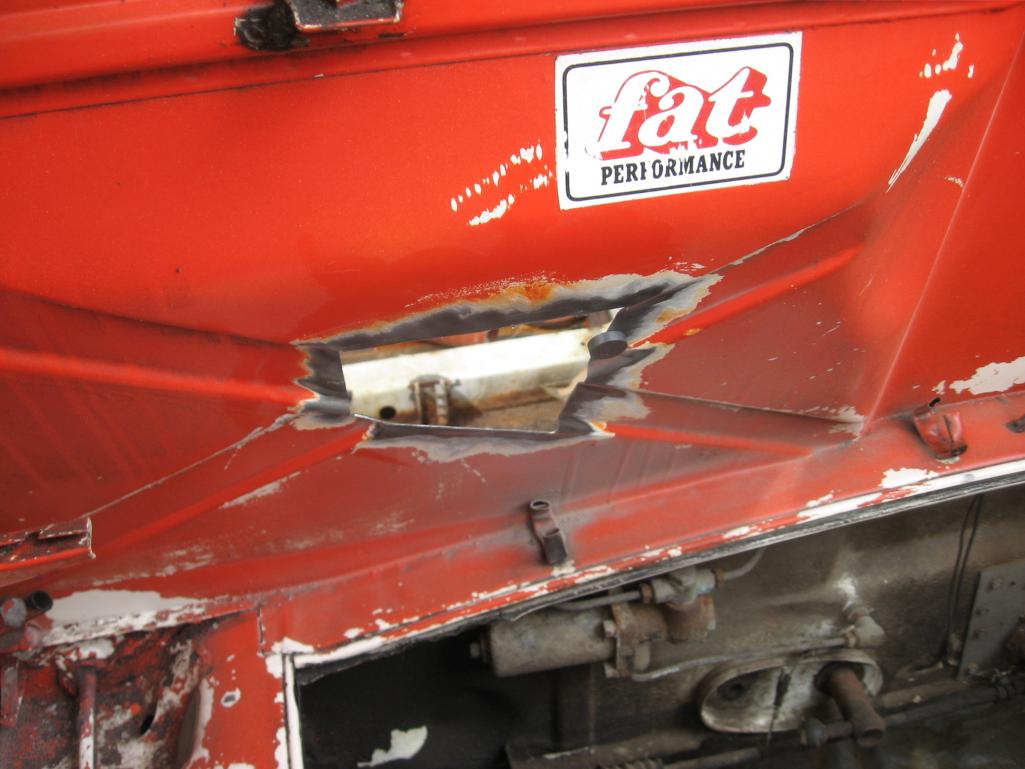
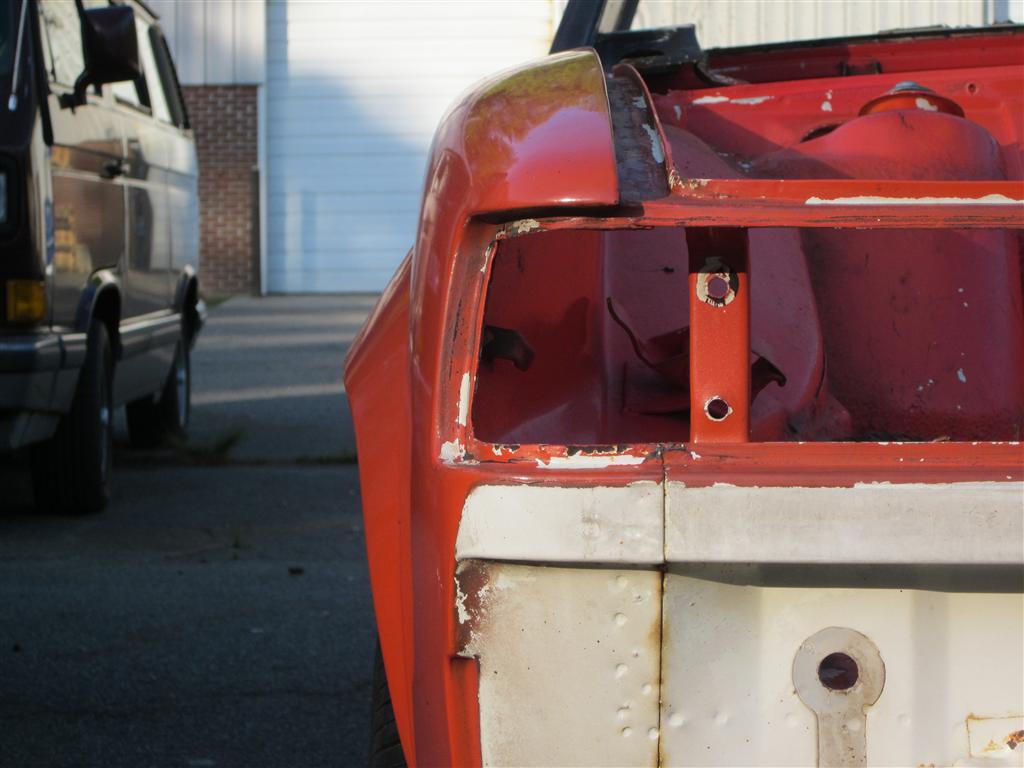
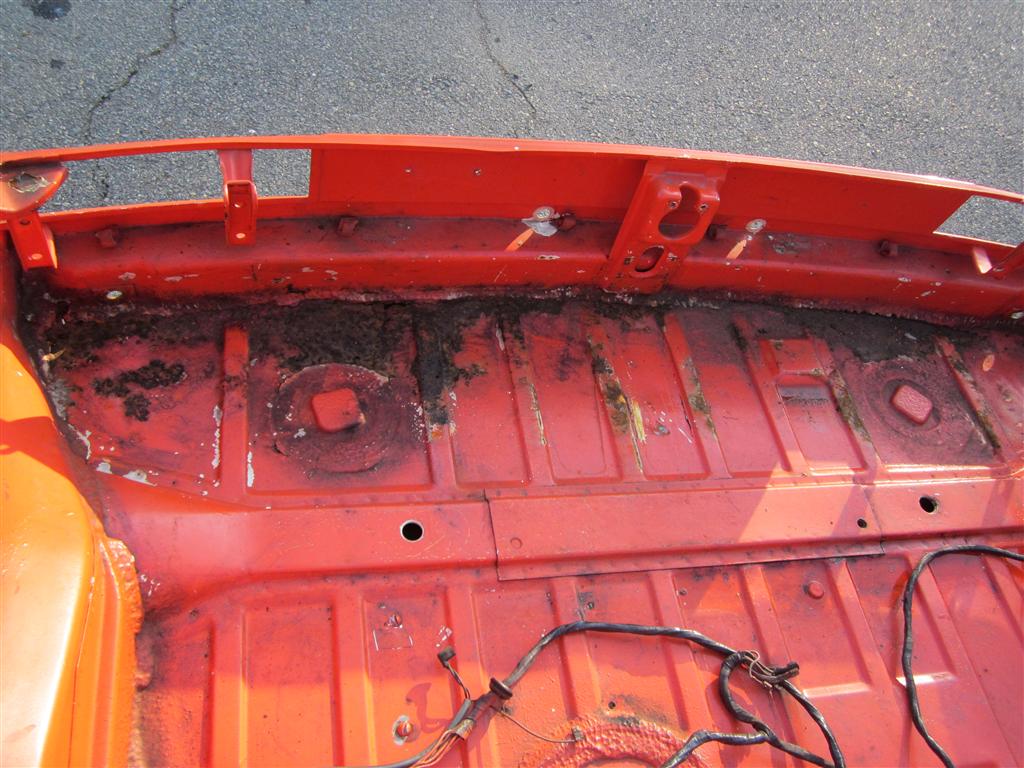
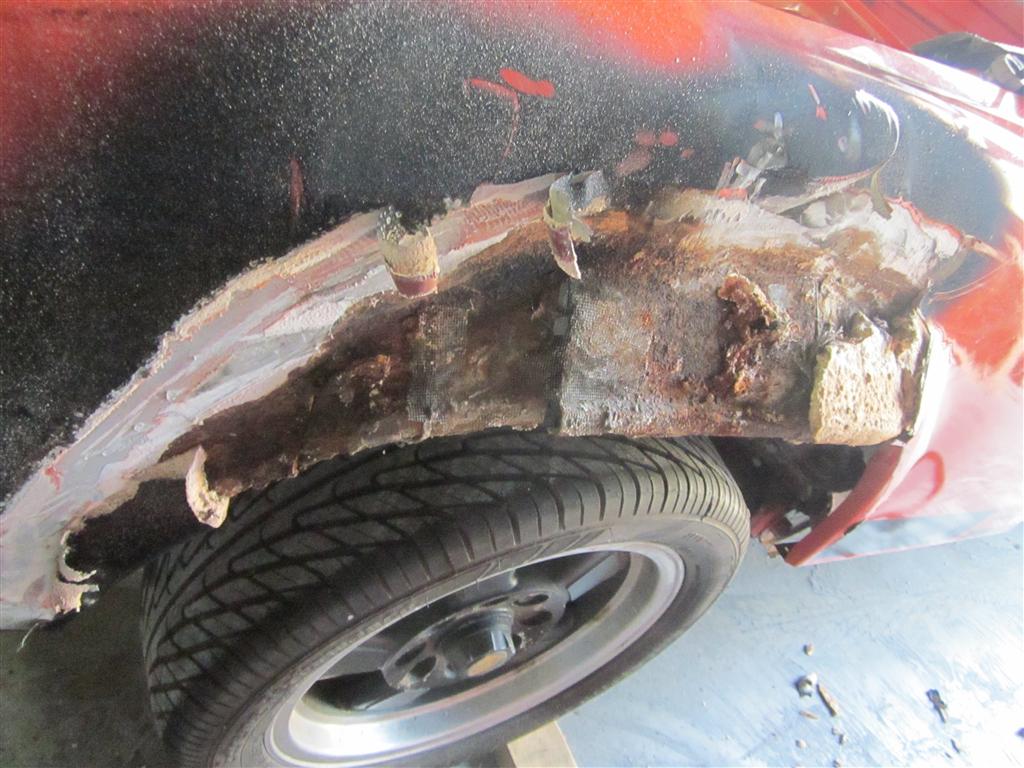
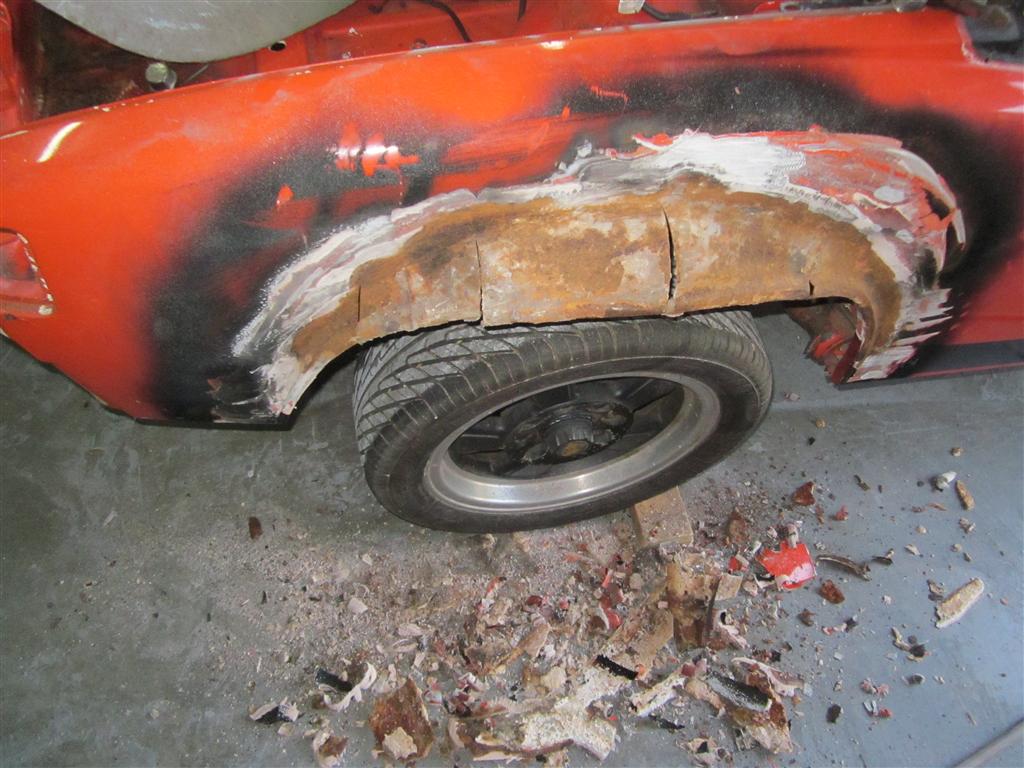
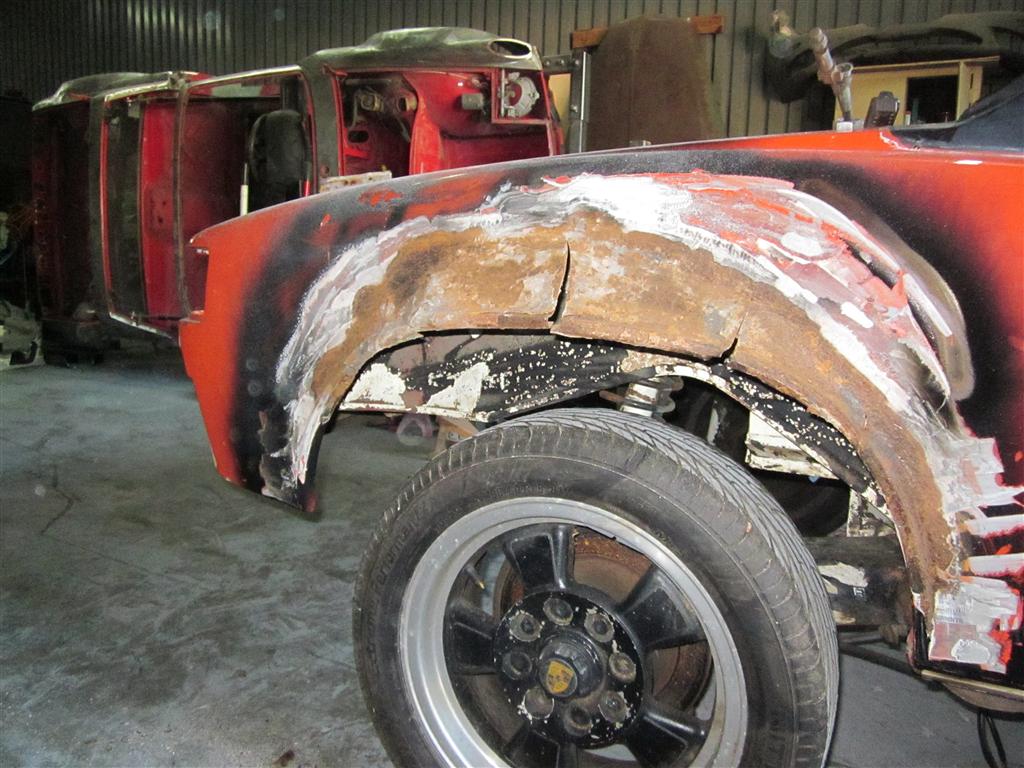
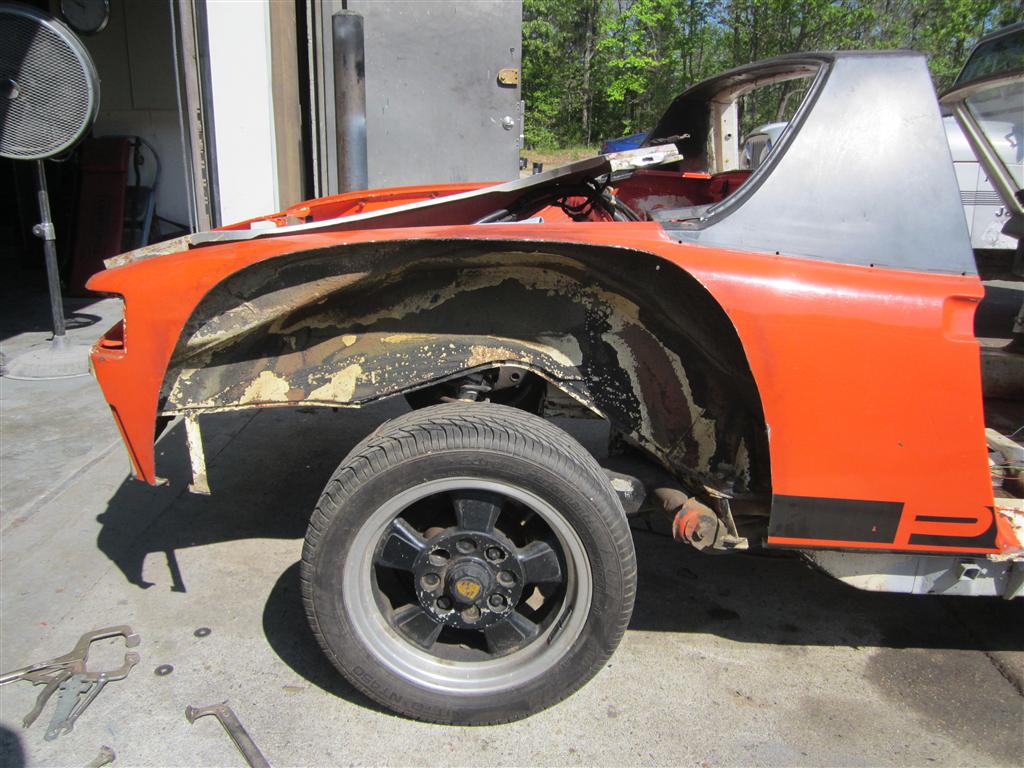
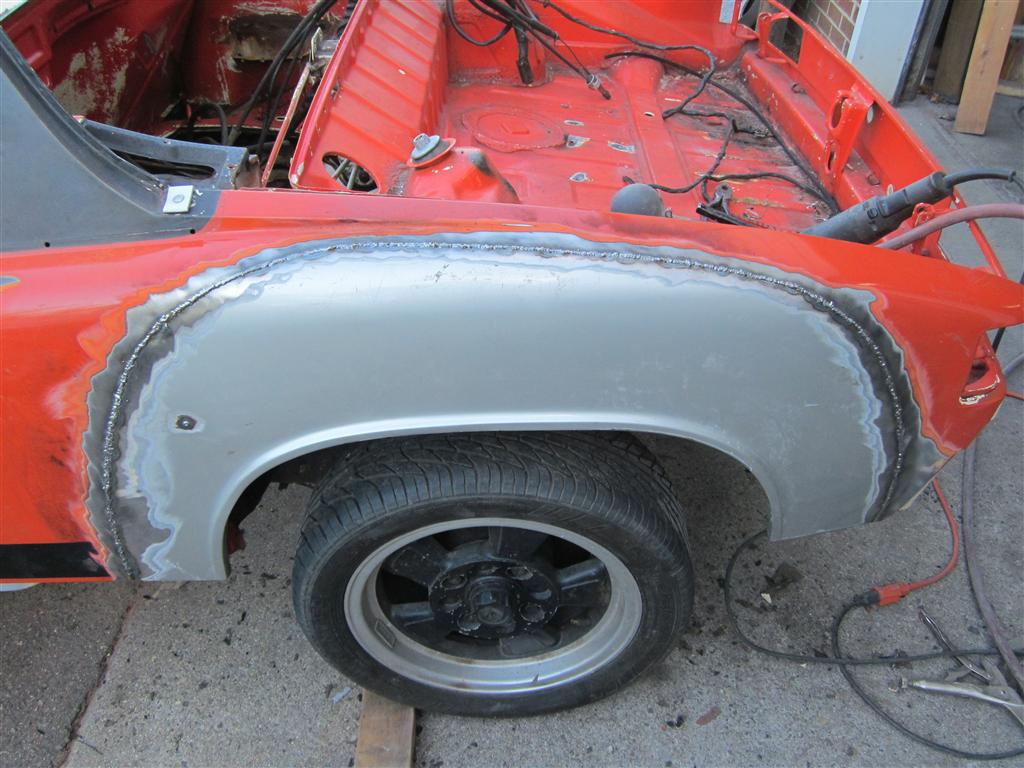
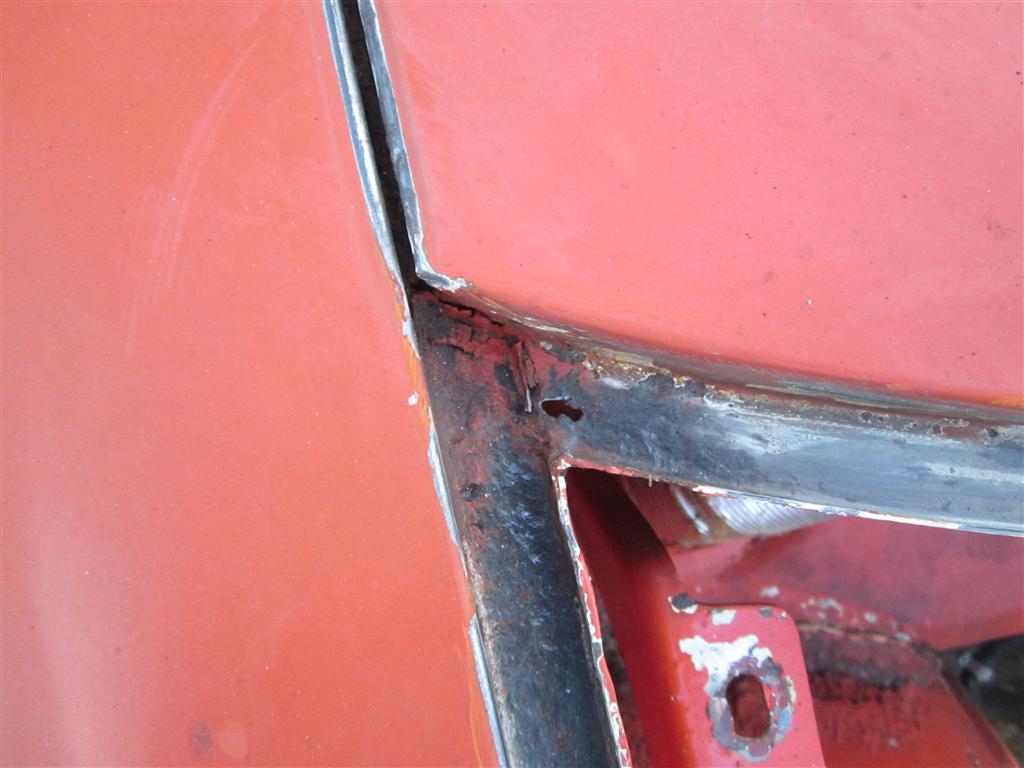
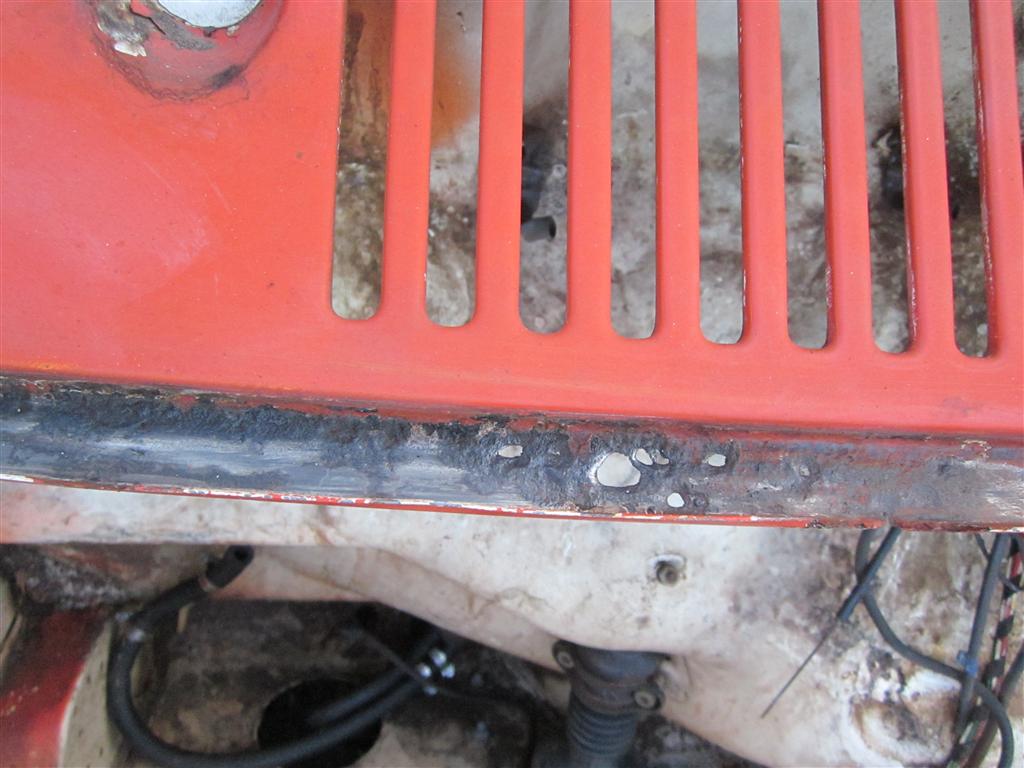
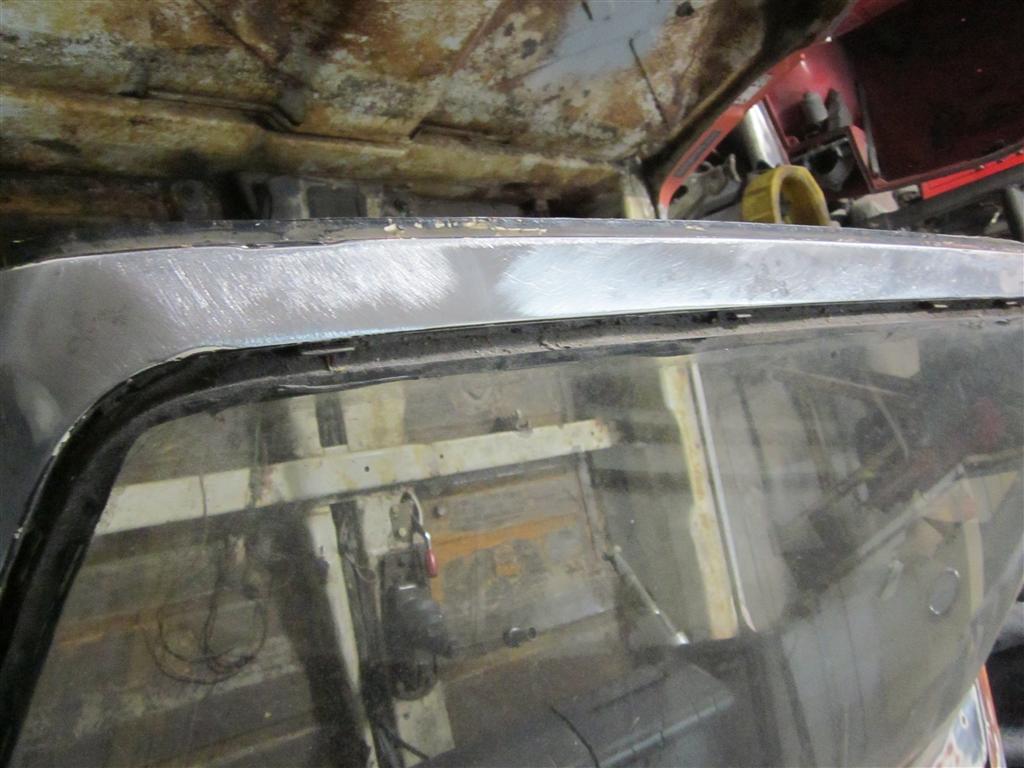
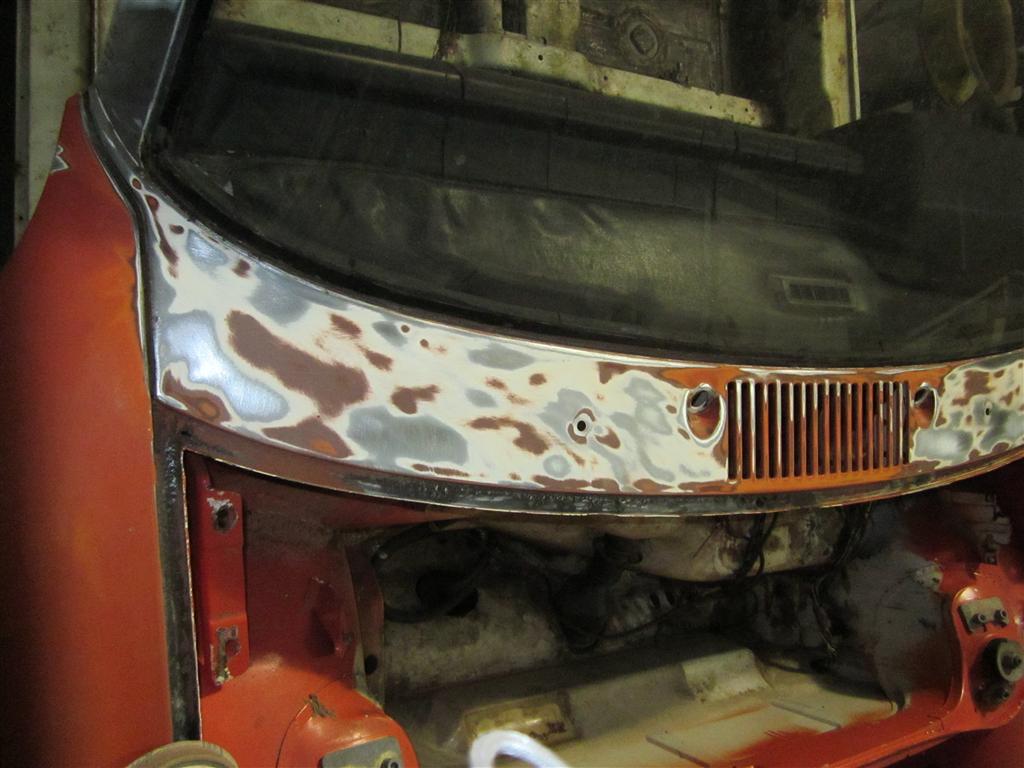
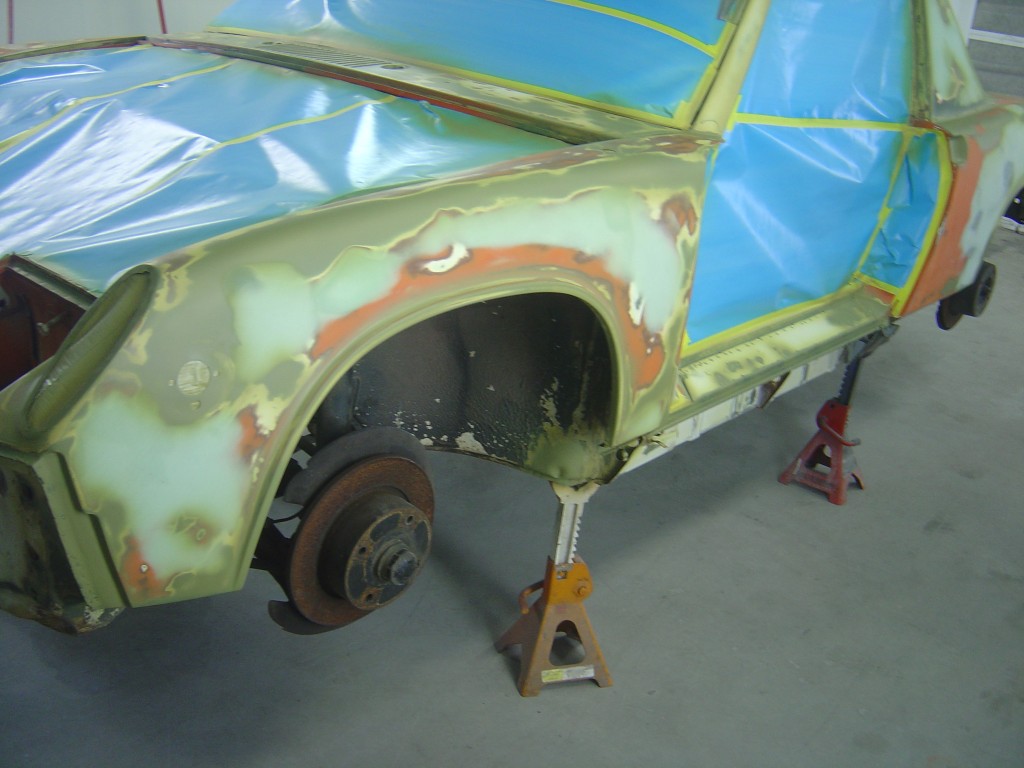
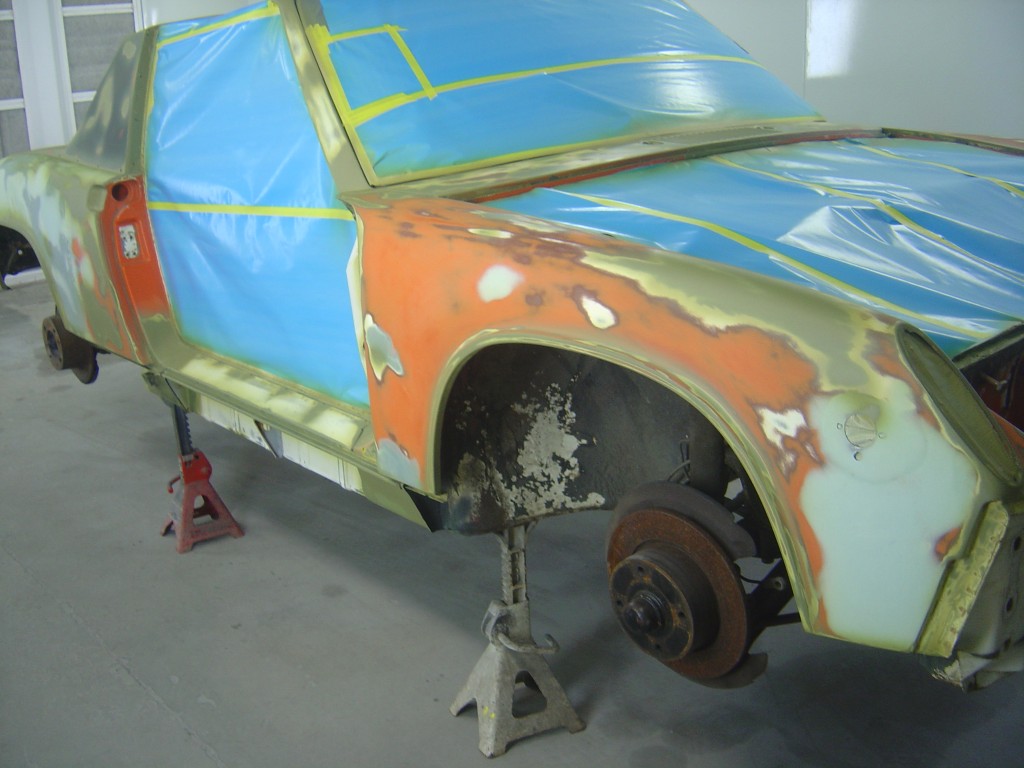
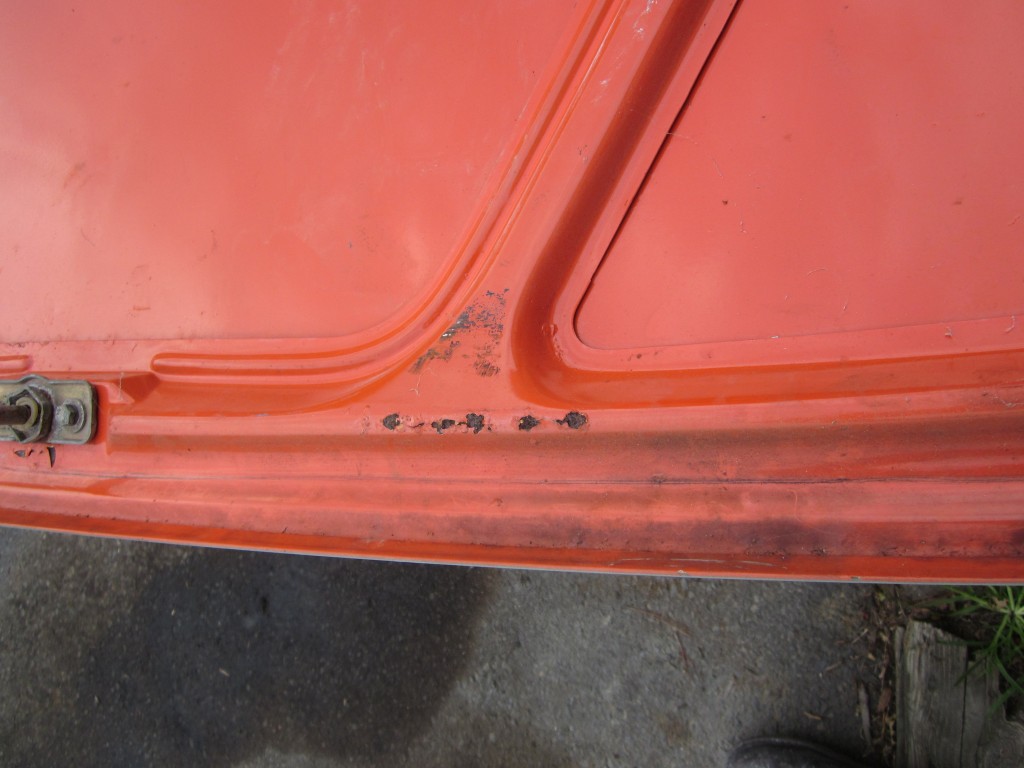
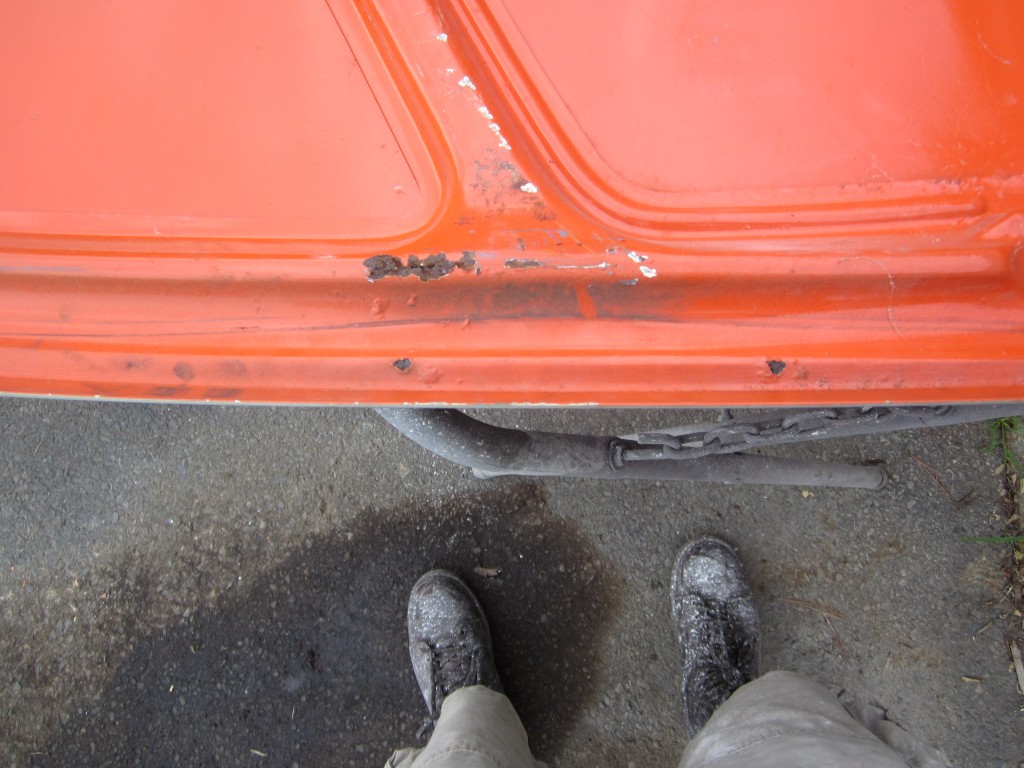
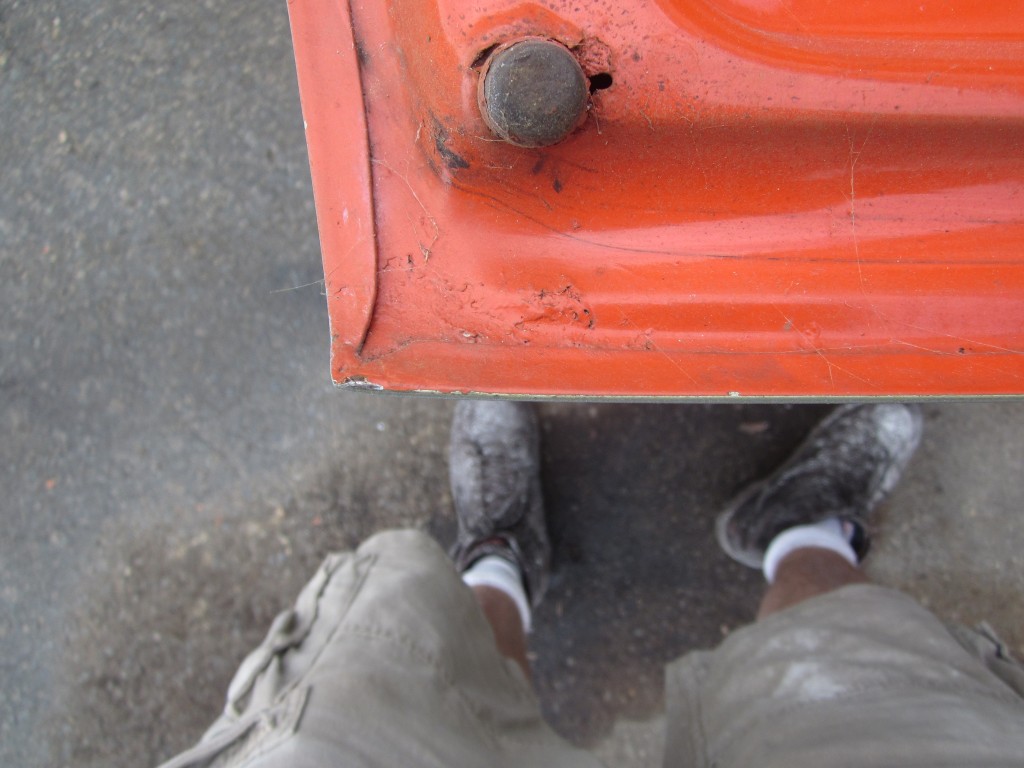
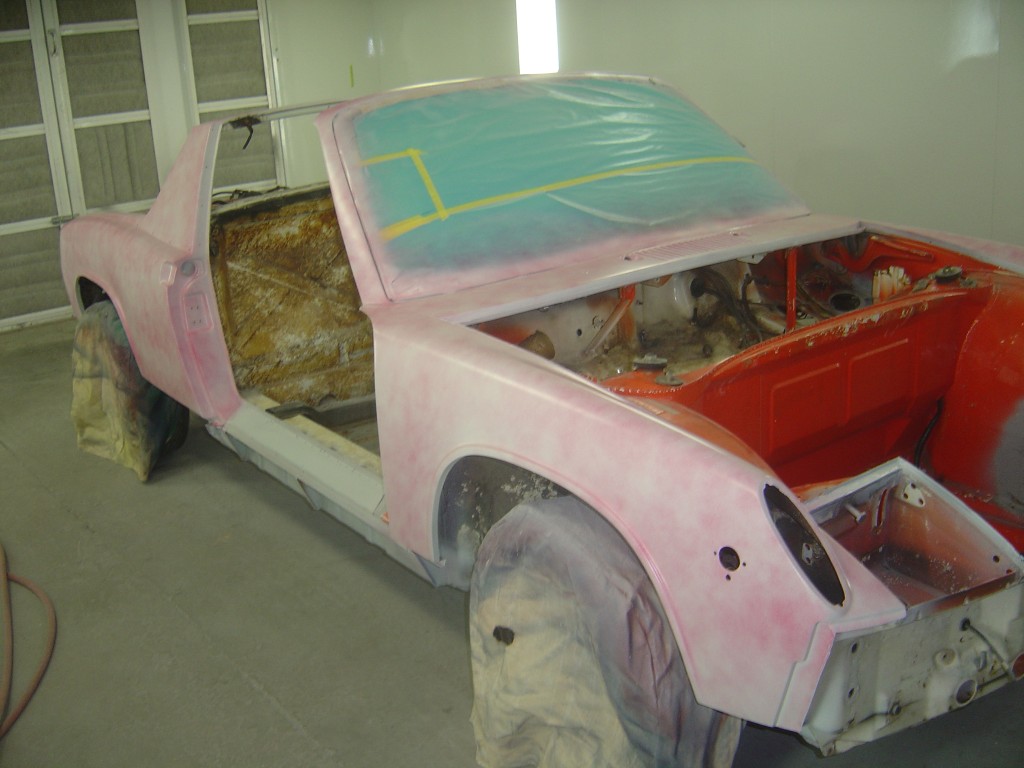
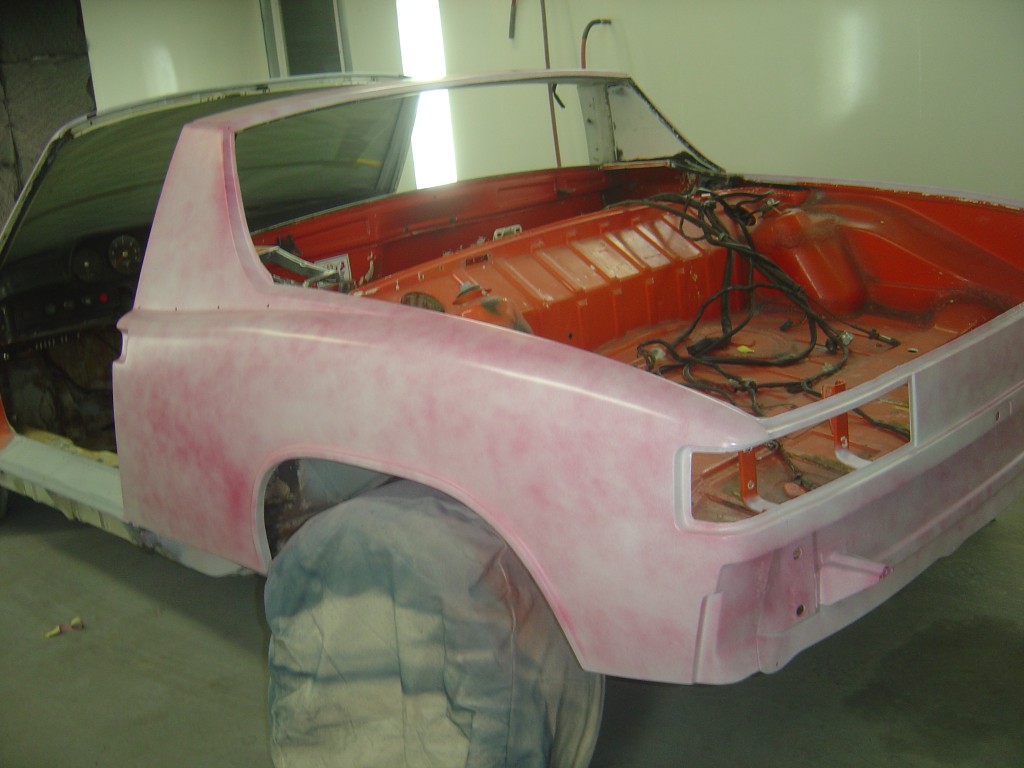
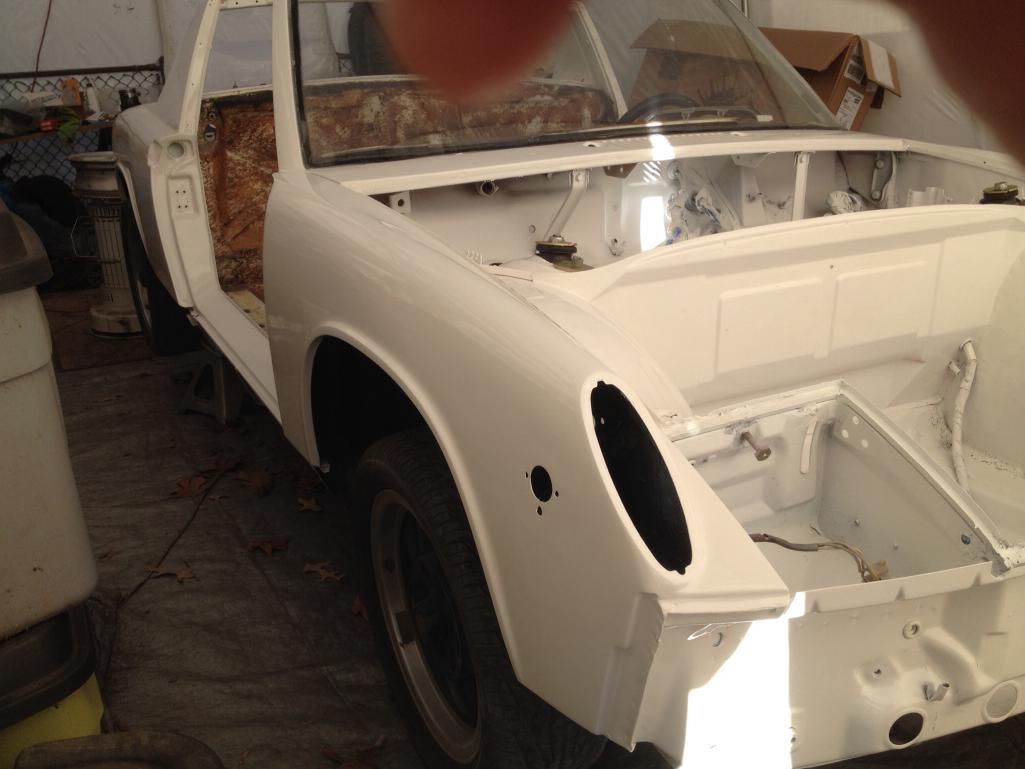
Scotty B should be coming over this week to grab his new 1973 911 and the doors/trunks off the teener to get started. I need to prep the engine bay and front trunk for paint. The PO did a color change that was pretty thorough but not well executed. That is to say they painted almost everything. wires, headlight motors, you name it, it has paint on it. We also have to graft on the proper wheel well flairs and get rid of the crapy PO installed units. 
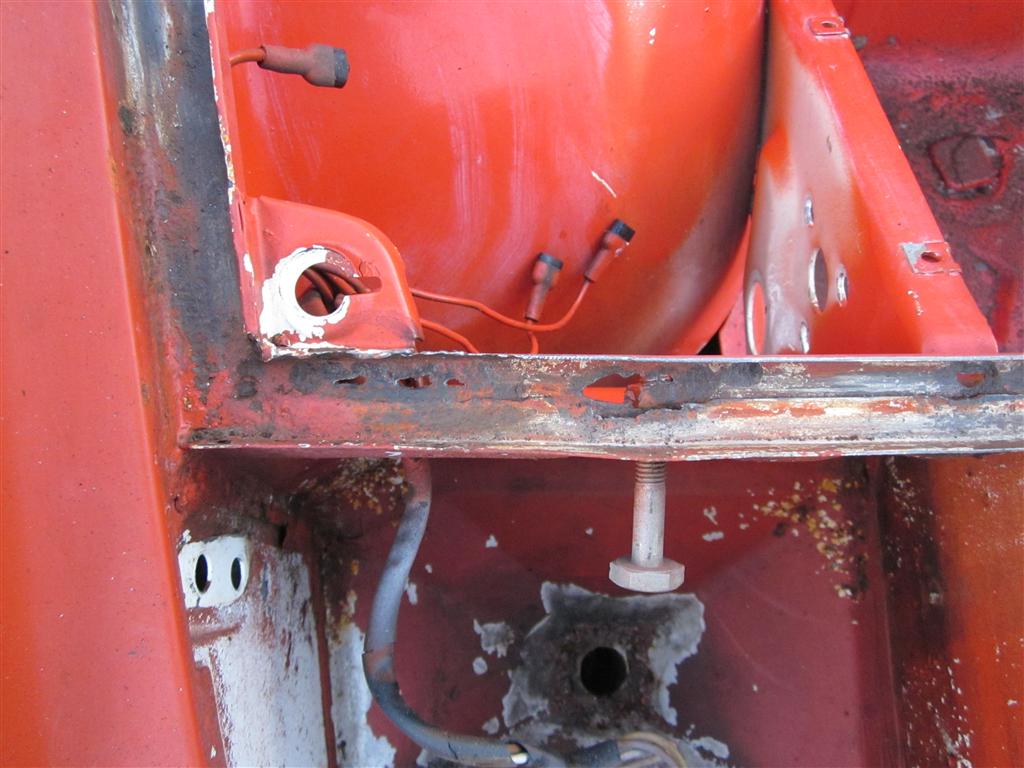
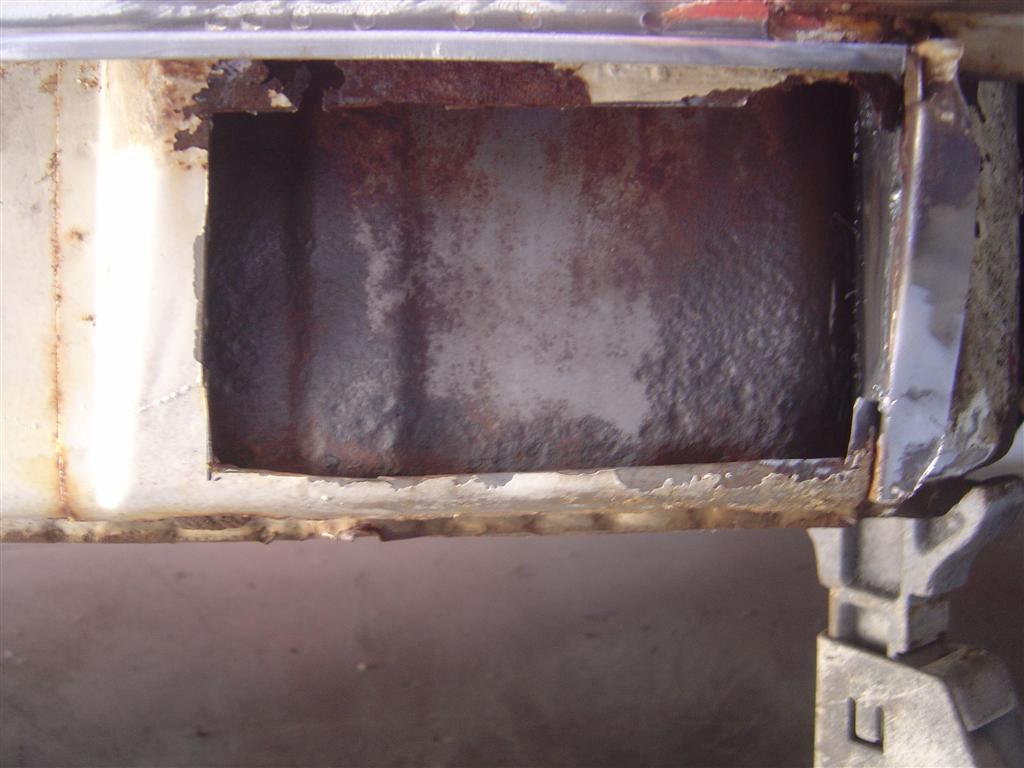
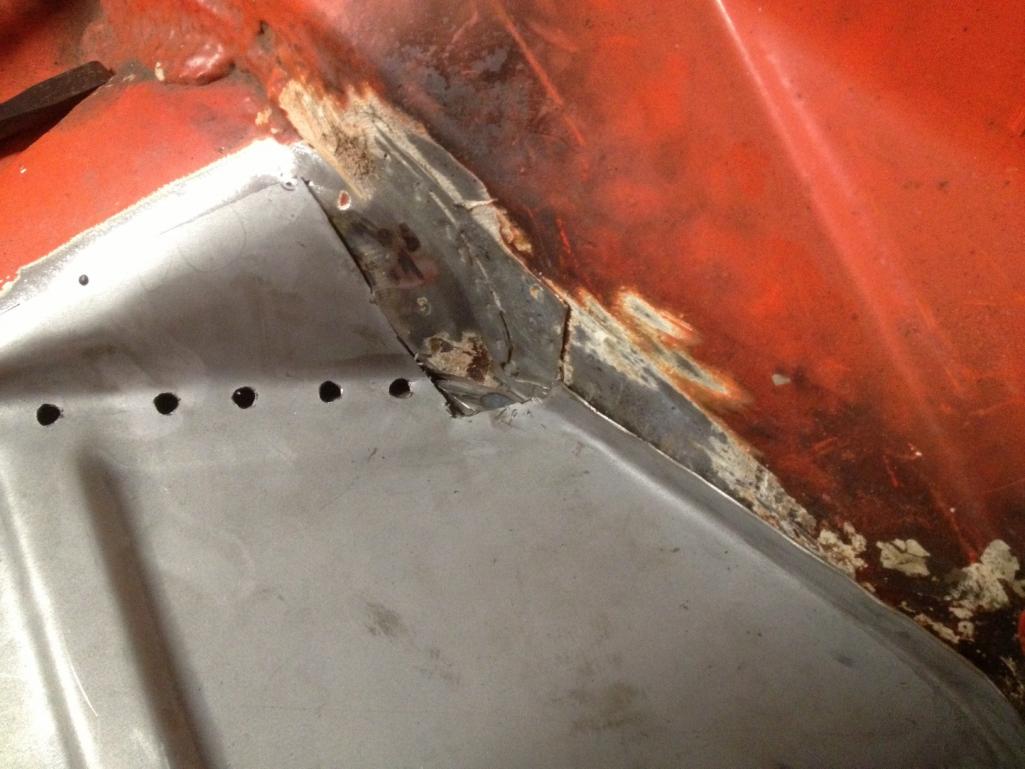
There is a little rust on the car but the longs and hell hole are super solid
I was even able to remove the battery tray top but save the supports!
Posted by: type47 Jan 31 2012, 11:35 AM
What do you need in regards to brakes?
Posted by: OU8AVW Jan 31 2012, 01:26 PM

What do you need in regards to brakes?
I'm going to work with Eric on those. Just getting them all rebuilt with new rotors and pads. Thanks for asking....
Posted by: Tom_T Jan 31 2012, 01:37 PM
Known first & last cars in a MY can be significant (at least at some point), and your VIN being 4712900001 marks it clearly as the first 914/4 in 71 MY! Good find!! 
Here's some more "White" (L80E - Light Ivory officially per VW-Porsche) inspiration - 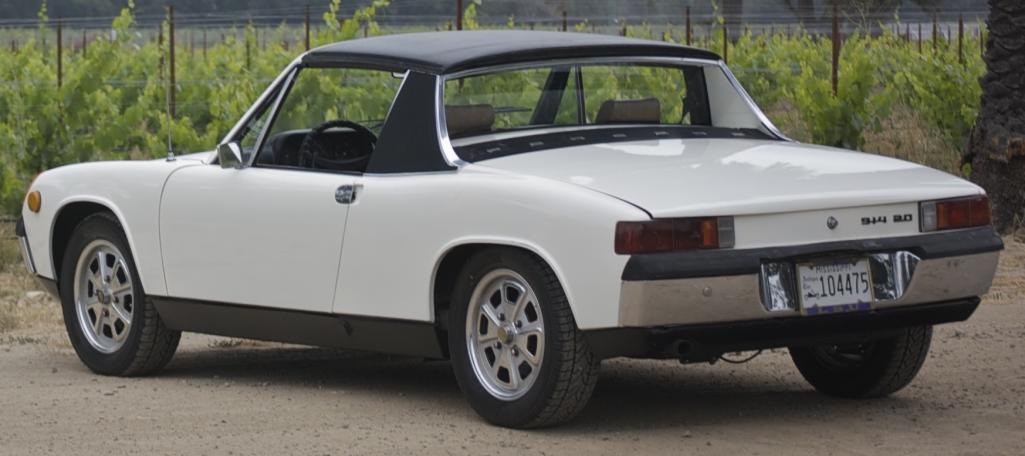
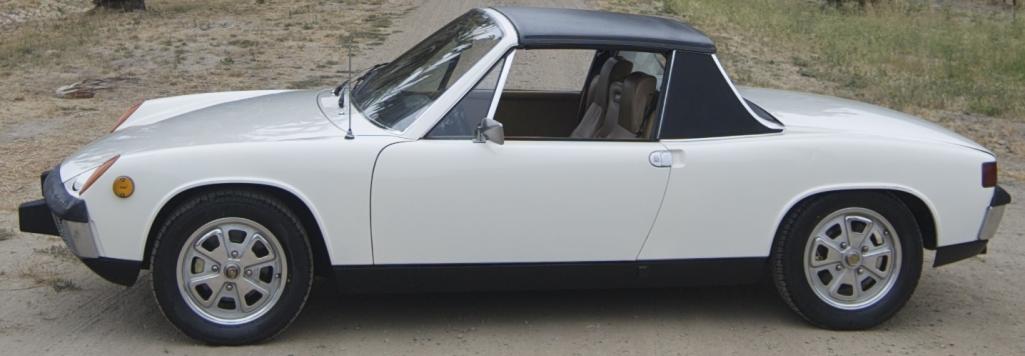
Pix, bodywork/repaint to original L80E & 2056 build courtesy of Scotty's left coast body-cousin McMark - This 73 914-2.0 with Beige interior is a near clone to how mine was originally & had at least one of my 914's prior color changes on it (L94K Copper Metallic), & is owned by Brent/bembry on here.
I use it for my "I really do like white 914s 12 step program" - since I'd really prefer to have had Alaska Blue or Marathon Blue metallic with Beige interior on mine, had I not been a starving recent college grad in 75 when I bought my 73 that I'm now slowly restoring.
Posted by: OU8AVW Jan 31 2012, 01:46 PM
Seriously? First '71? That's crazy. I did not put 2 and 2 together on that one. Did you check the data base or something? I'm not close to my car now to look. I know I entered it when I joined in '08.
Update: Not sure where that VIN came from. I better check my tittle, my car was built in July '71 and that VIN is not mine.
Posted by: mepstein Jan 31 2012, 01:56 PM
Mike - I'll be at Scott's in the next month or so. I'm bringing down a lot of small, spare parts that I removed from a parts car. It might help pare down your - need to buy list. Mark
Posted by: OU8AVW Jan 31 2012, 03:40 PM
Mike - I'll be at Scott's in the next month or so. I'm bringing down a lot of small, spare parts that I removed from a parts car. It might help pare down your - need to buy list. Mark
Sweet, it's the last 10% of the stuff that take 90% of the effort!
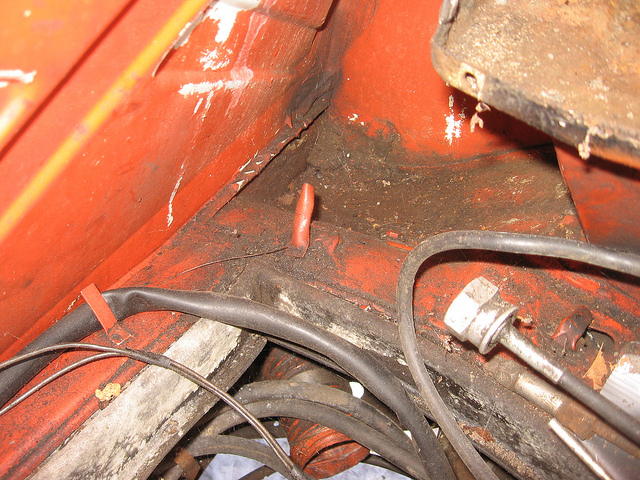
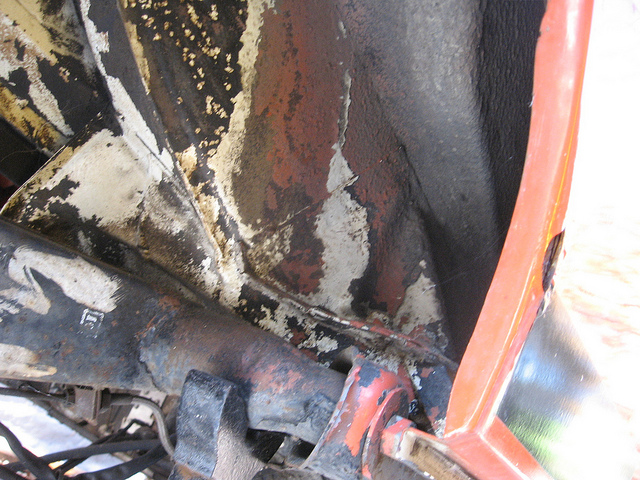
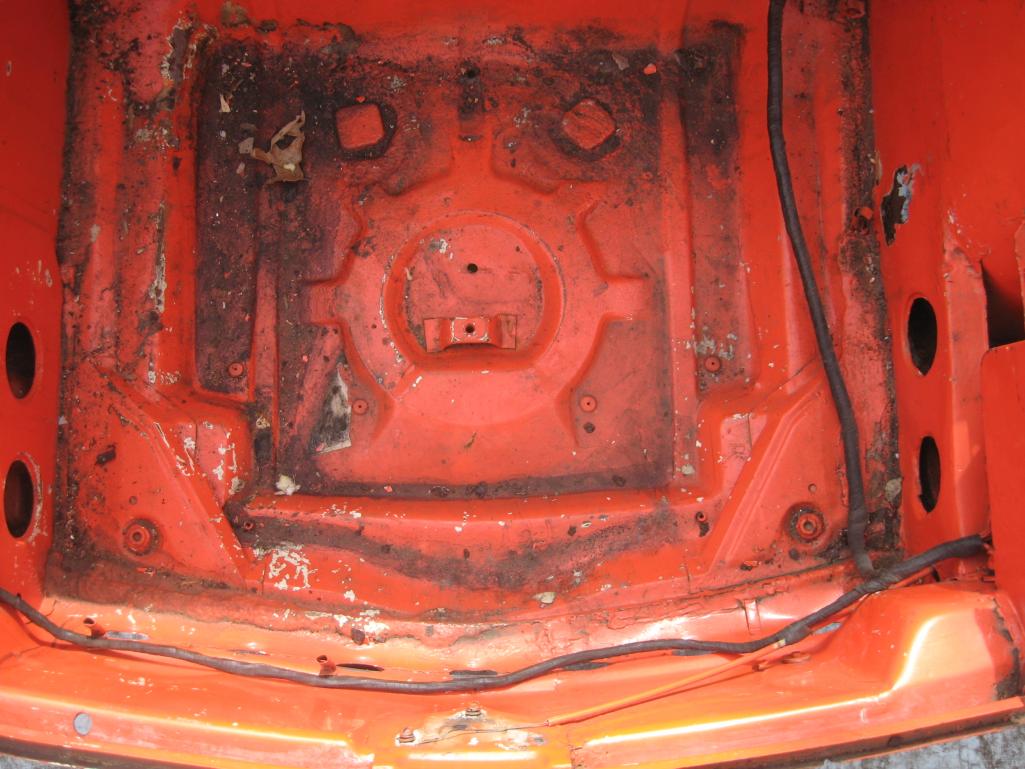
Posted by: OU8AVW Jan 31 2012, 08:33 PM
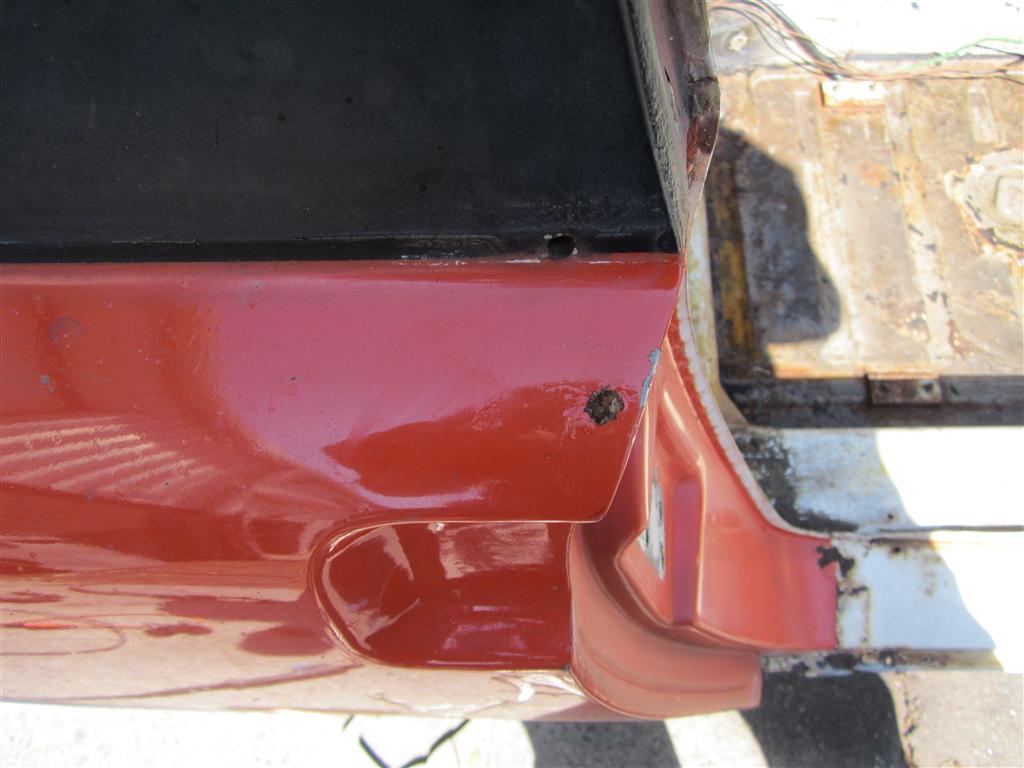
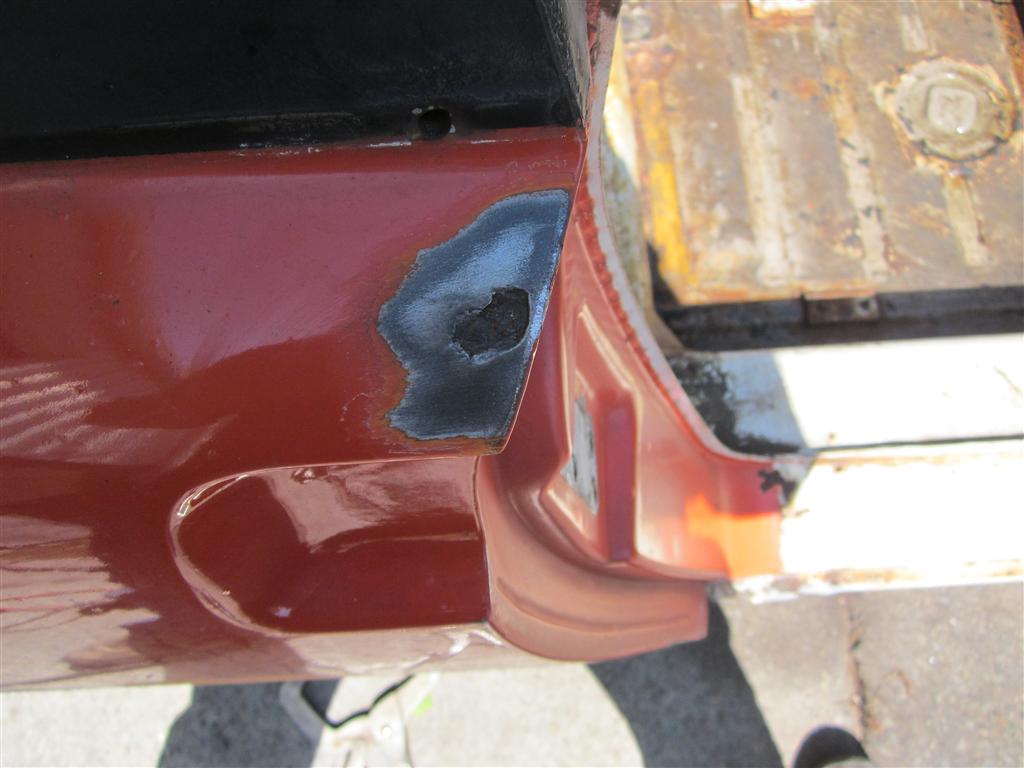
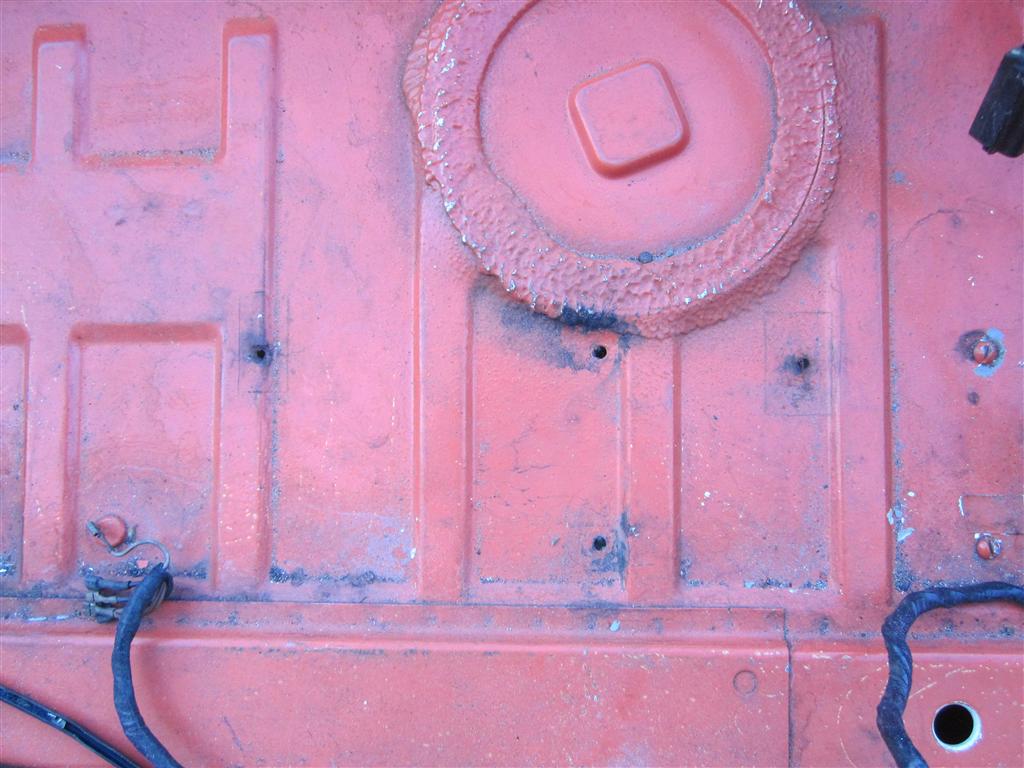
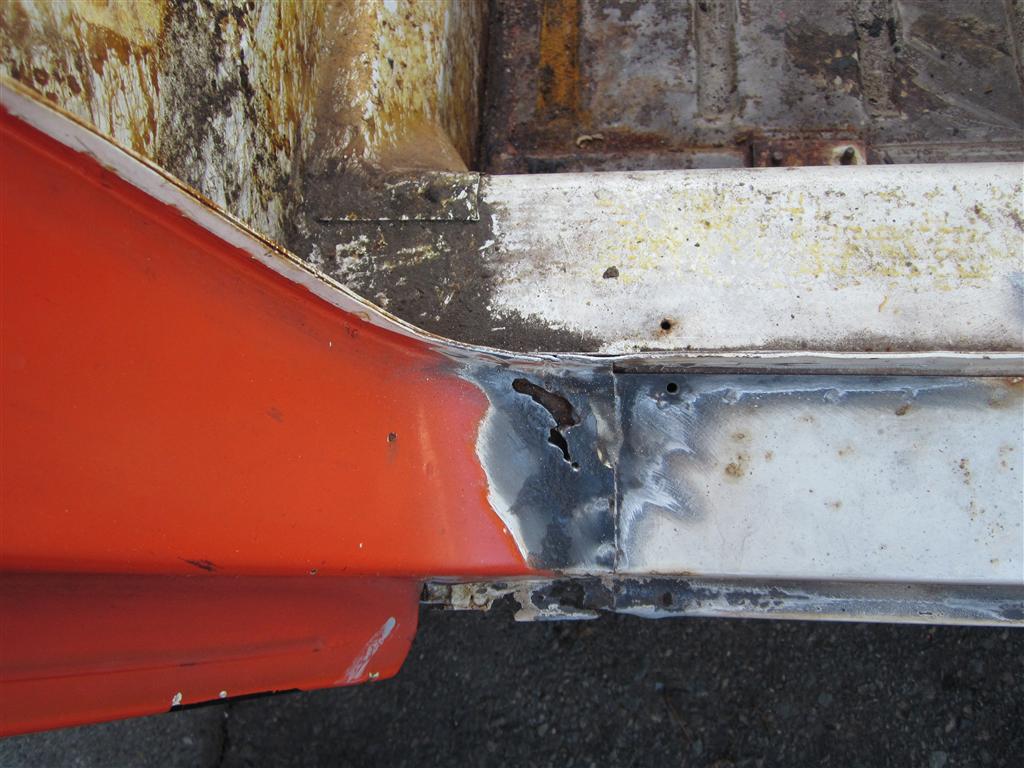
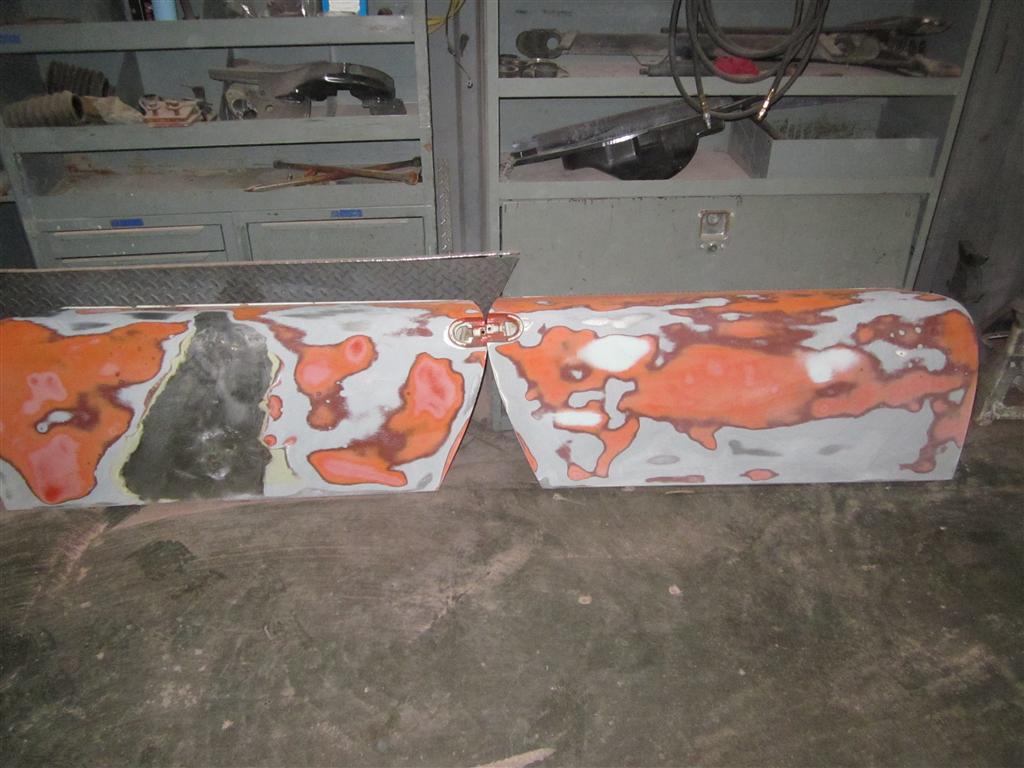
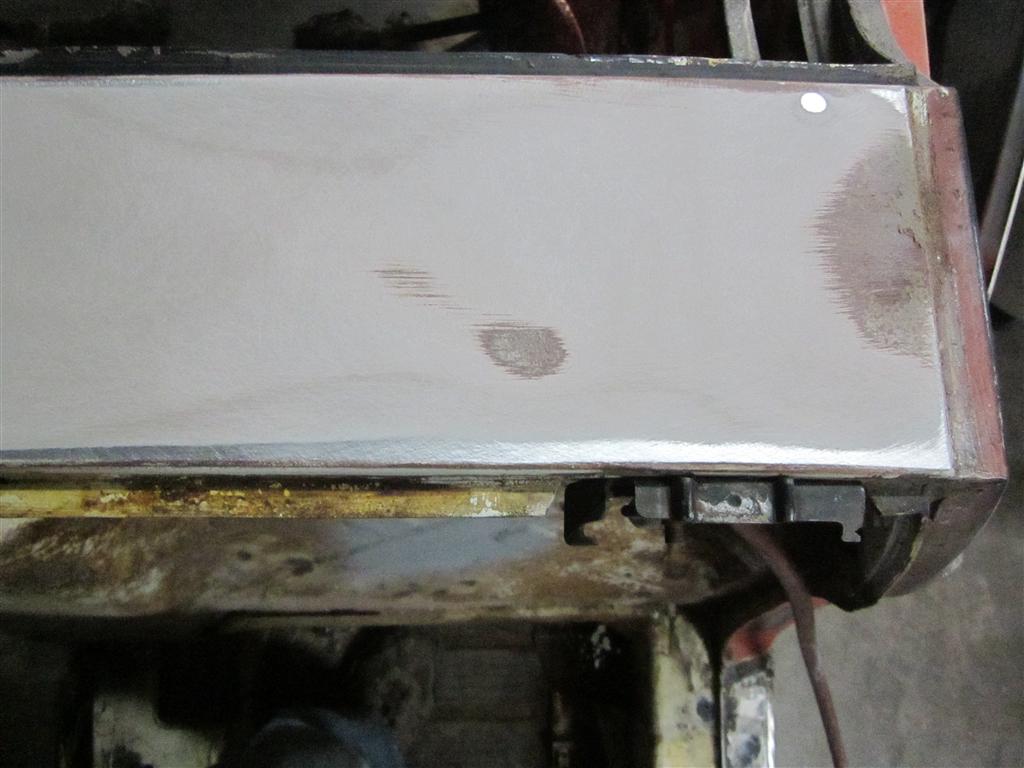
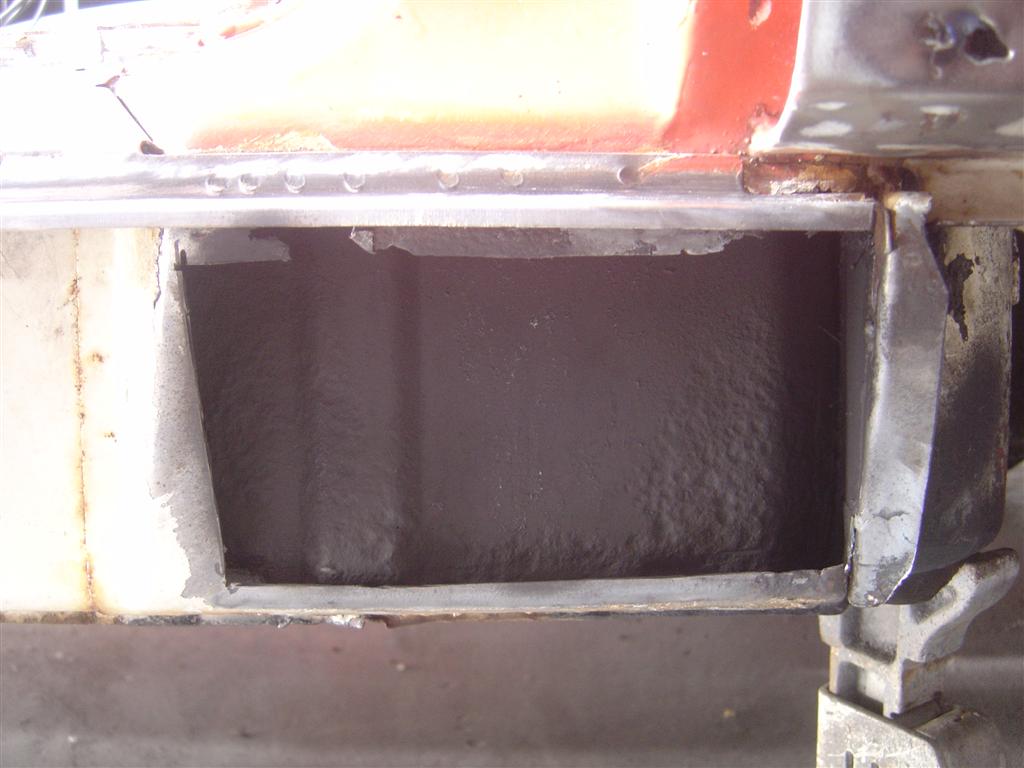
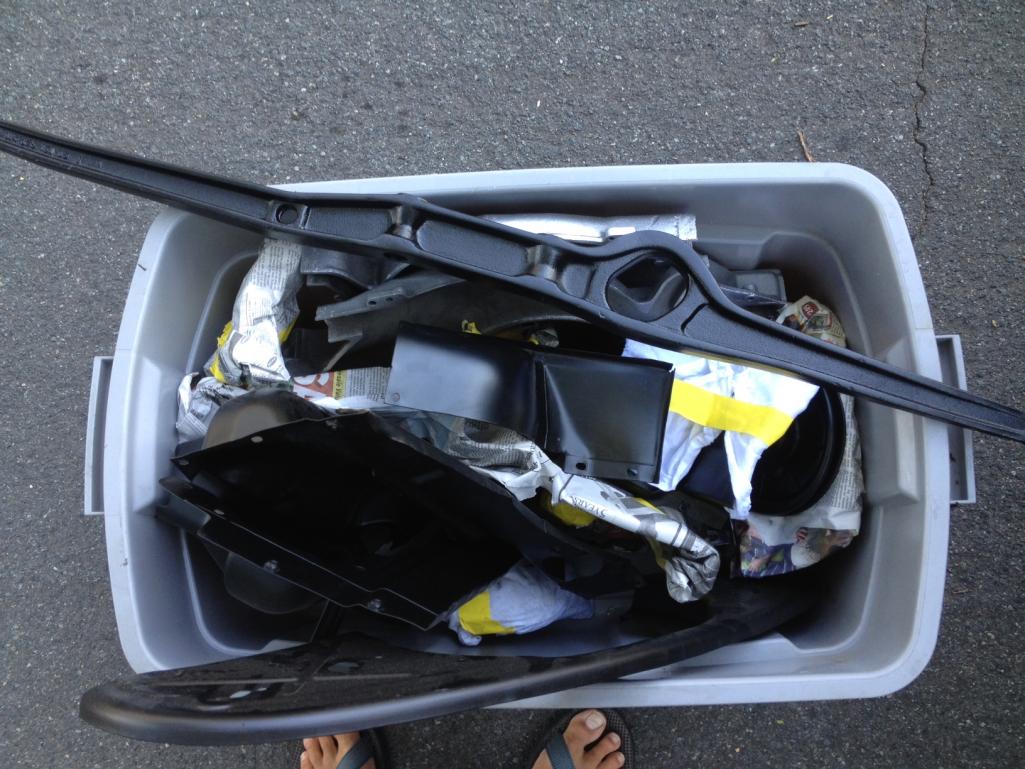
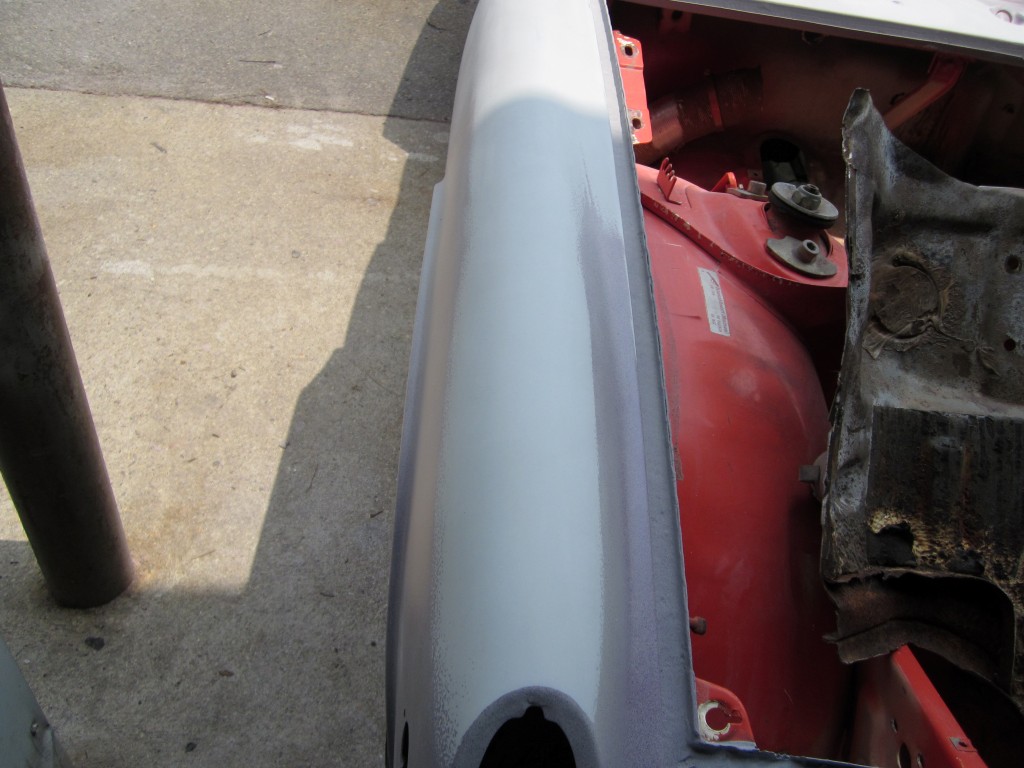
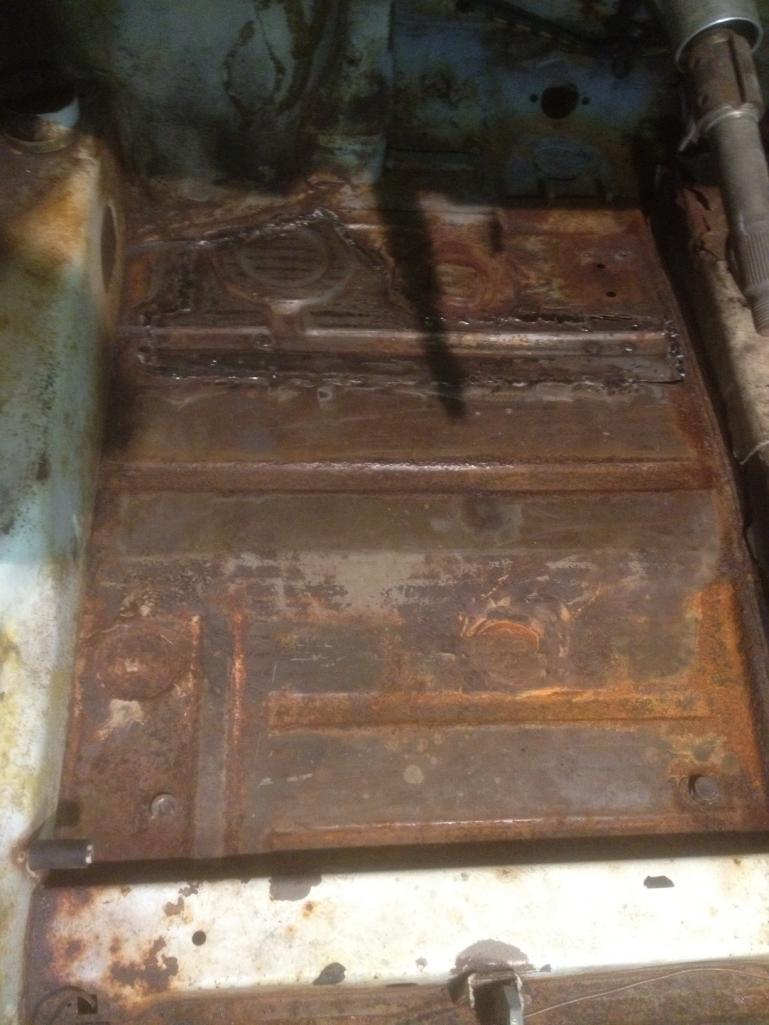
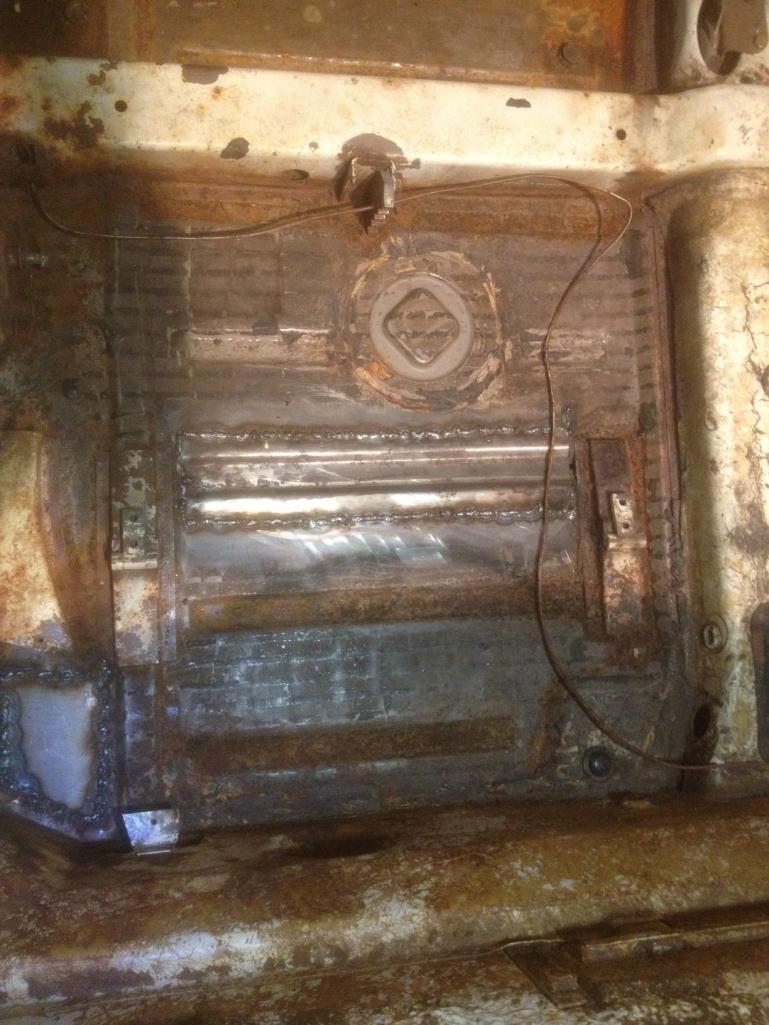
Hell hole after clean up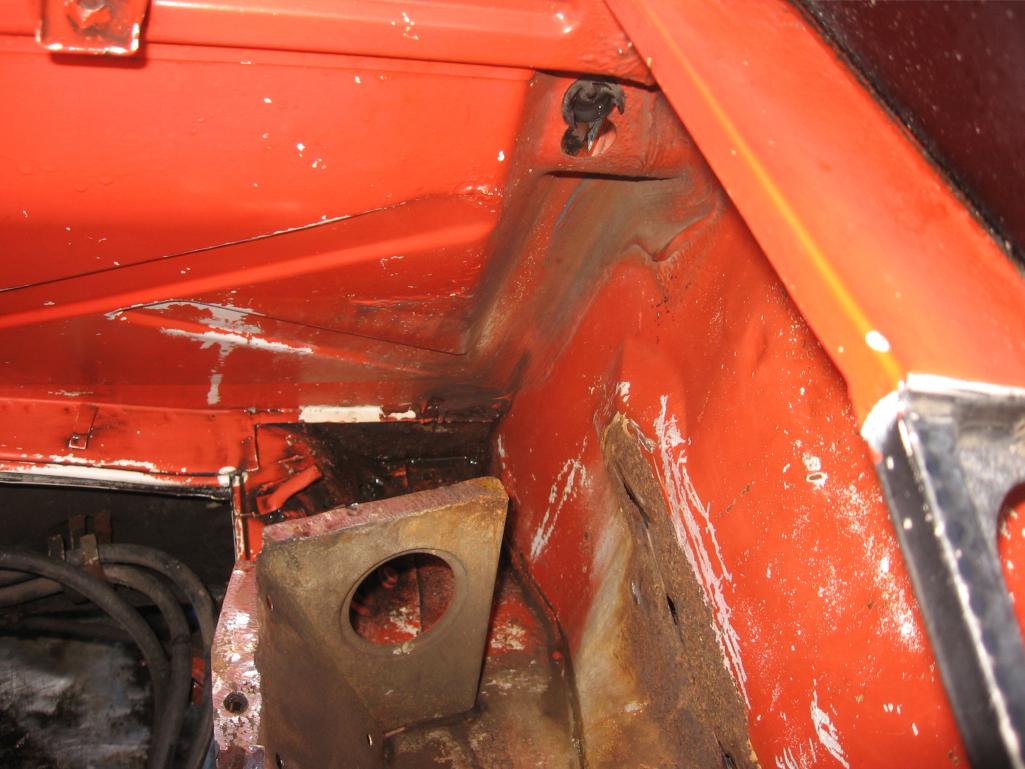
Other side. 
Posted by: OU8AVW Jan 31 2012, 08:35 PM
Are these cool? They are new but really old. I was thinking of mounting them on my bumper like my inspiration pic above.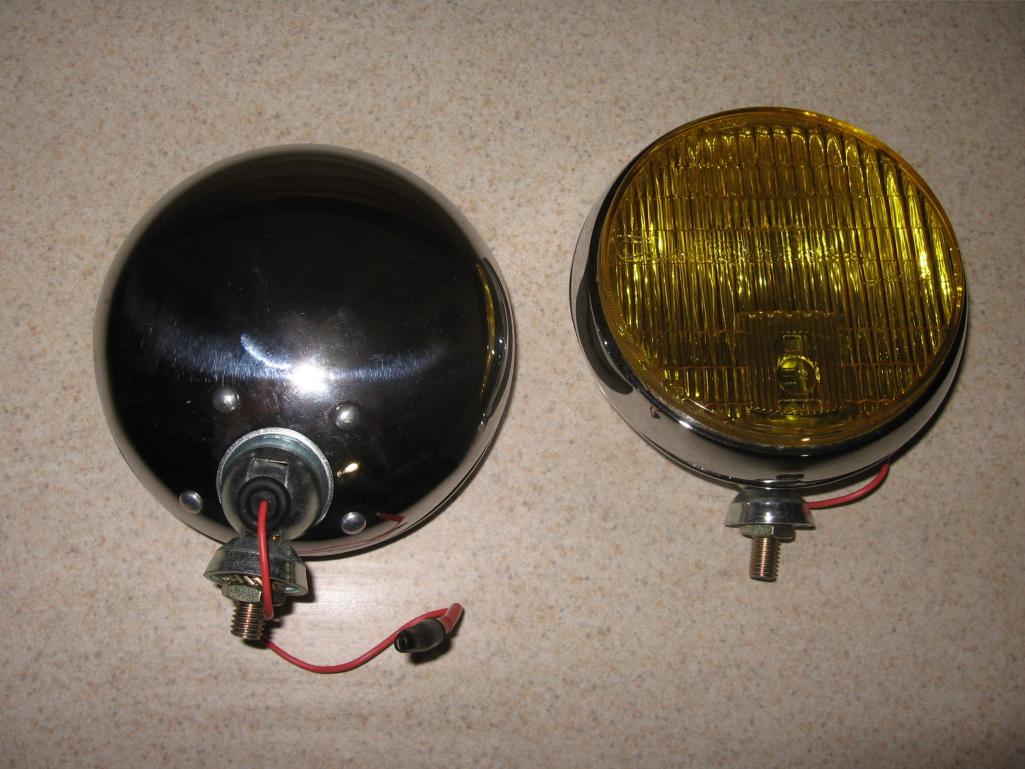
Posted by: OU8AVW Feb 3 2012, 07:33 PM
Scotty with his deposit for my paint job! Good to hang out with the body guru. 
Posted by: OU8AVW Feb 11 2012, 09:32 AM
Rainy day, cleaning parts and hittin' the sand blasting cabinet.
Posted by: OU8AVW Feb 11 2012, 12:53 PM
Here's my seats. They came to me in leather but the bottoms were trashed. I had the inserts redone. Not the best job, but I think they look pretty sweet. Plus, they're leather. Since this pic I got the headrest to fit properly. I think the leather will tighten up nicely.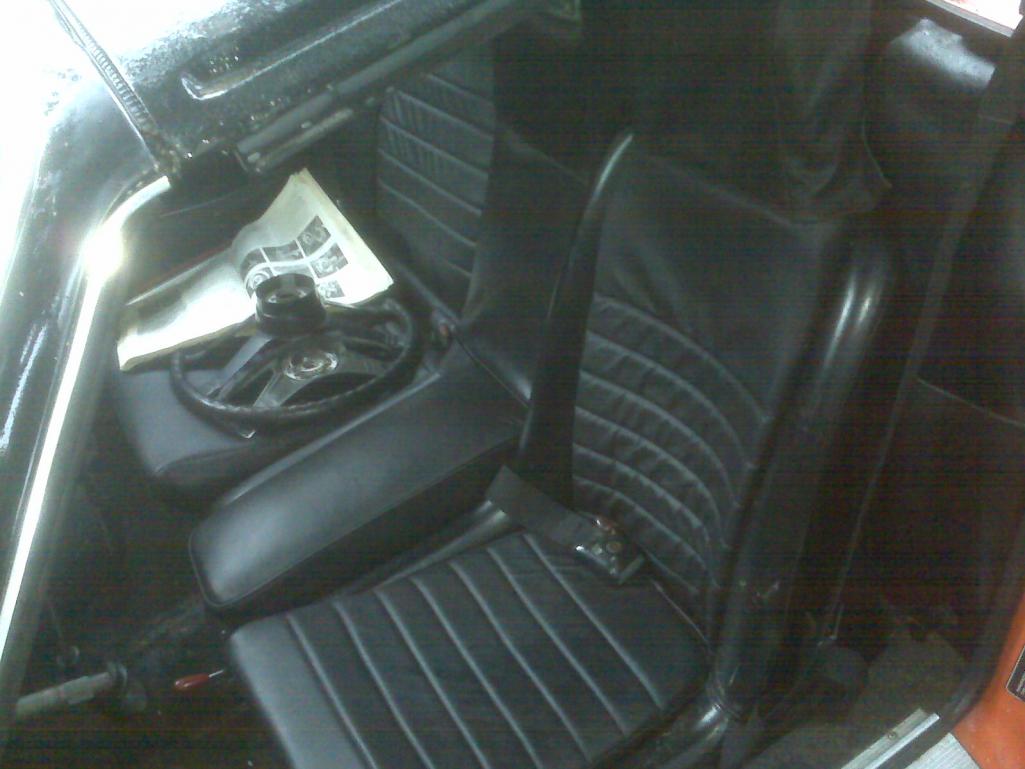
Posted by: OU8AVW Feb 23 2012, 07:58 PM
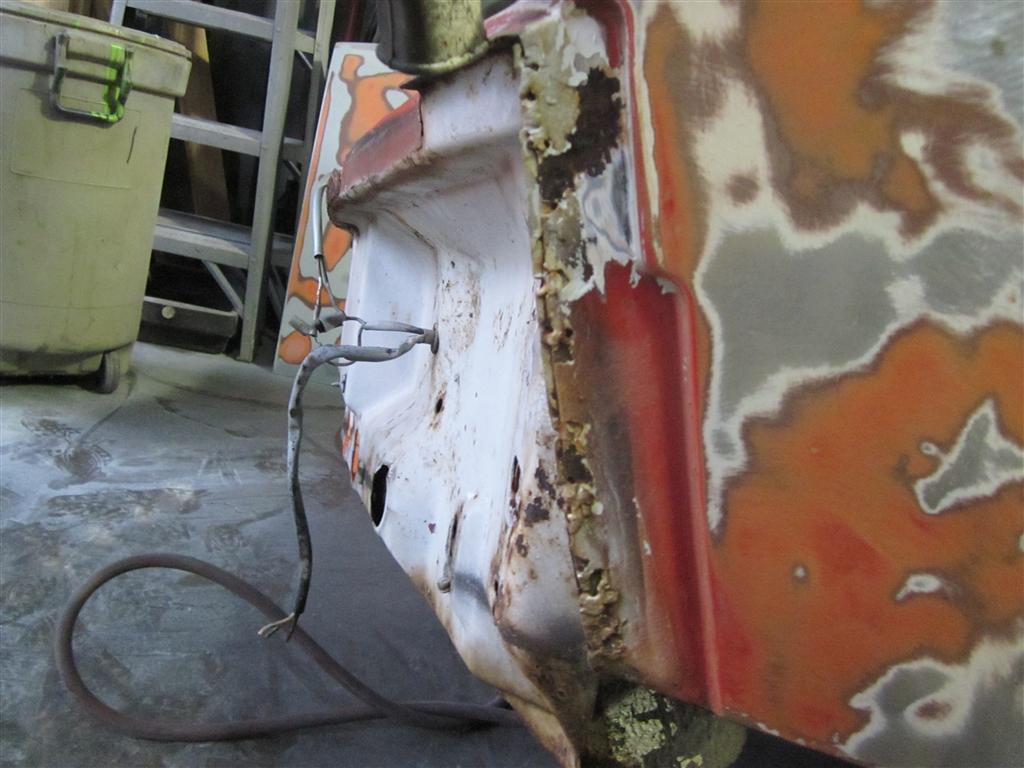
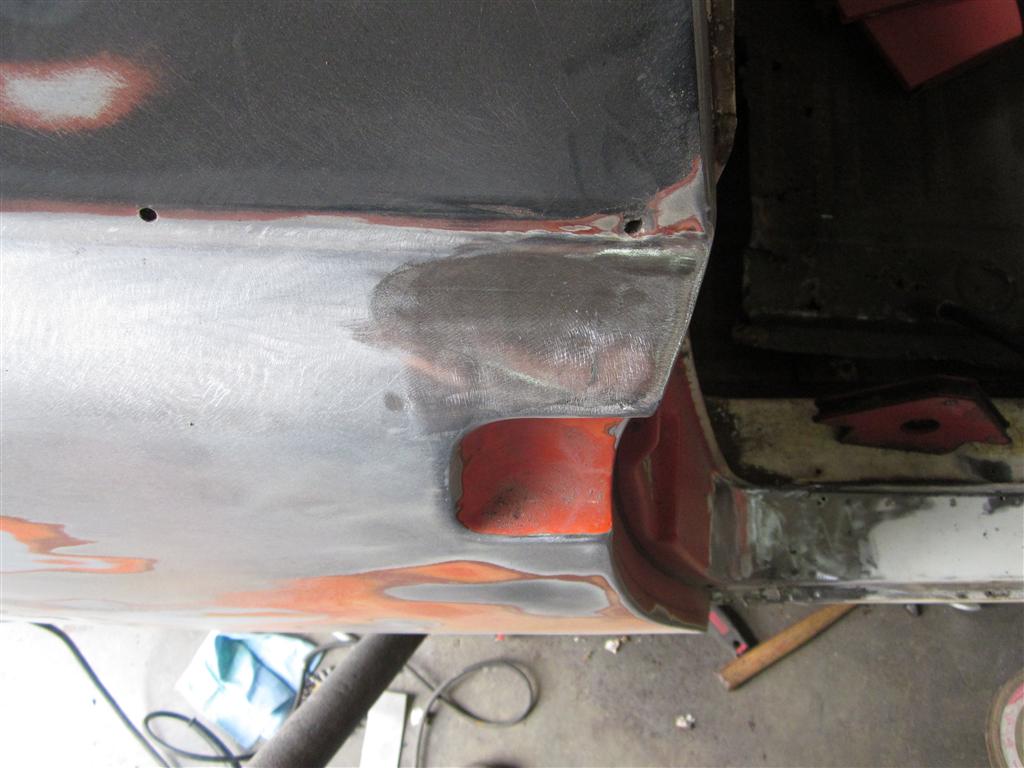
I played hookie from work yesterday and continued prepping for paint. I got a doner floor pan that I'm going to use for some patchwork on the driver's side. All and all not too bad. 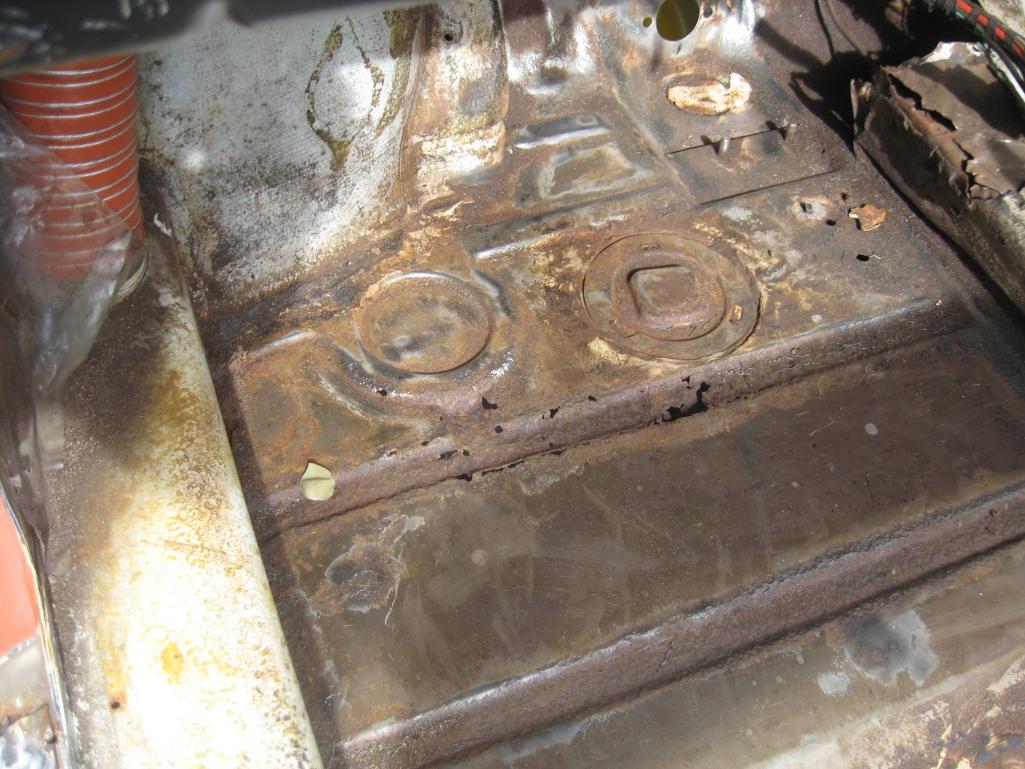
Posted by: OU8AVW Feb 23 2012, 08:01 PM
Scotty said it's one of the cleaner cars he's seen on the East Coast. He should know I guess. 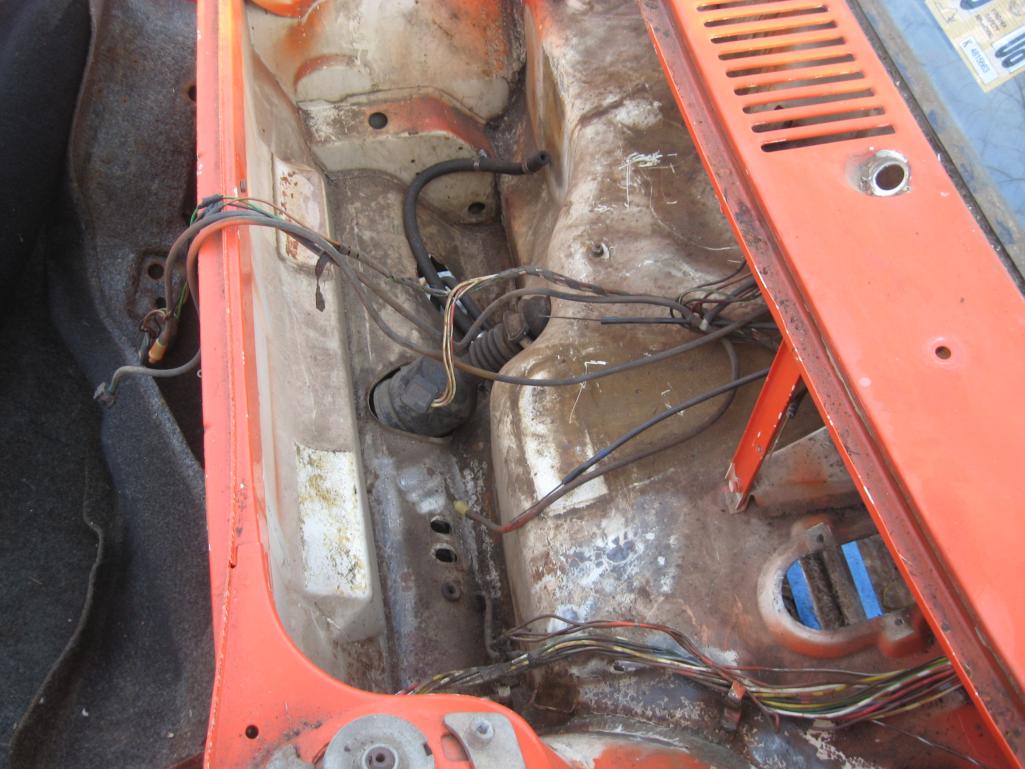
Posted by: OU8AVW Apr 14 2012, 01:58 PM
Little bit O' progress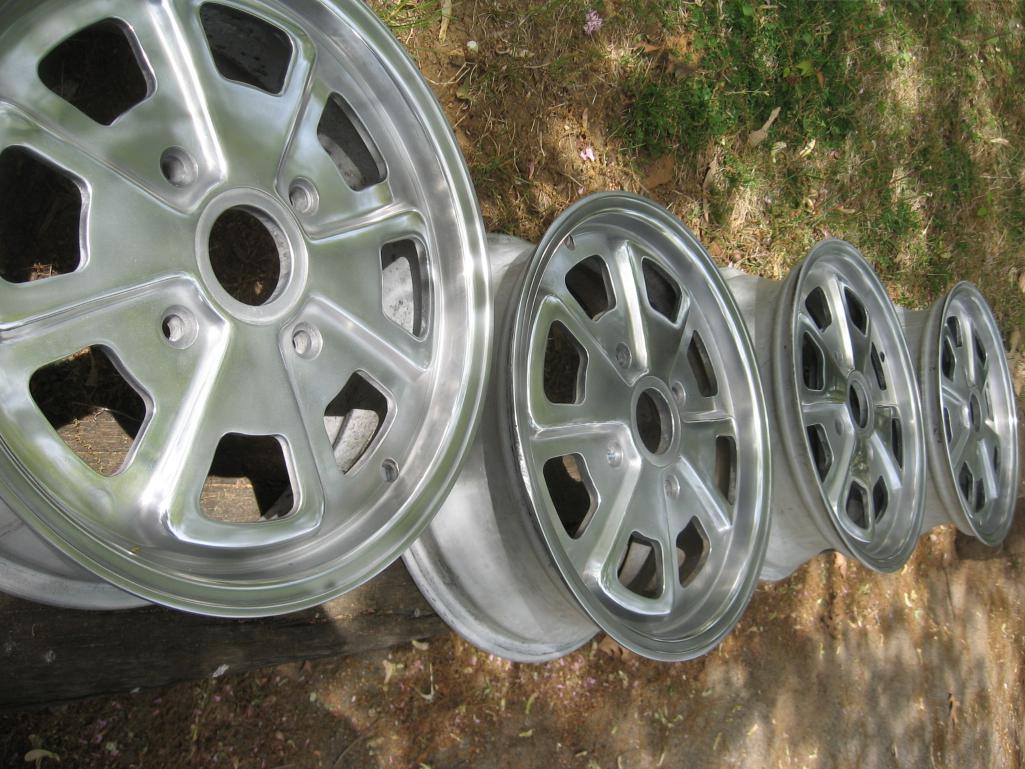
Posted by: OU8AVW Apr 14 2012, 01:59 PM
Tomorrow 
Posted by: OU8AVW Apr 14 2012, 02:02 PM
I got all my engine parts back from the machine shop, bought a Triad exhaust and some restored heat exchangers, placed my order with PMB, bought a Mega Squirt system and new Pistons/Cylinders, and a bunch of other stuff I can't think of.
Posted by: 3d914 Apr 14 2012, 06:38 PM
Mike,
Best of luck on the project. I noticed you're looking to go the MegaSquirt route. You won't regret it - more drivable & better mileage than carbs any day.
Here's a http://www.msruns.com/viewtopic.php?f=90&t=3485 which was MegaSquirt, but 2.0L if it can help.
Posted by: scotty b May 3 2012, 06:16 AM
qwe
Attached image(s)

Posted by: scotty b May 3 2012, 06:28 AM
Attached image(s)


Posted by: scotty b May 3 2012, 06:36 AM

Attached image(s)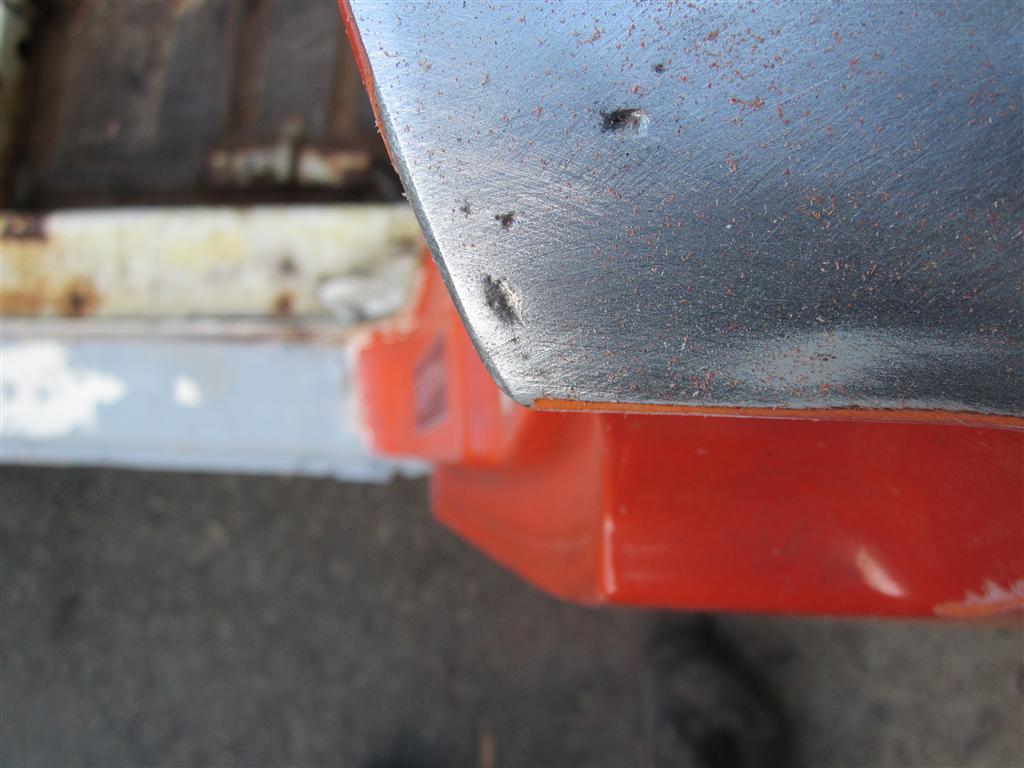
Posted by: BajaXJ92 May 3 2012, 06:37 AM
Mike,
I'll have you know that your car is a slick one!
Damn thing kept trying to slip off the trailer on the way back. We had to readjust 2 or 3 times....in the rain. 
Posted by: MDG May 3 2012, 06:52 AM
It's always nerve wracking when Scotty is in strip-down mode and he starts using this guy:
When he switches to this guy:  . . Don't look.
As usual, nice stitching on the flare! Go, Scotty, GO!
Posted by: OU8AVW May 15 2012, 05:23 AM
I'm speechless.....
Posted by: scotty b May 20 2012, 08:12 PM
mne
Attached image(s)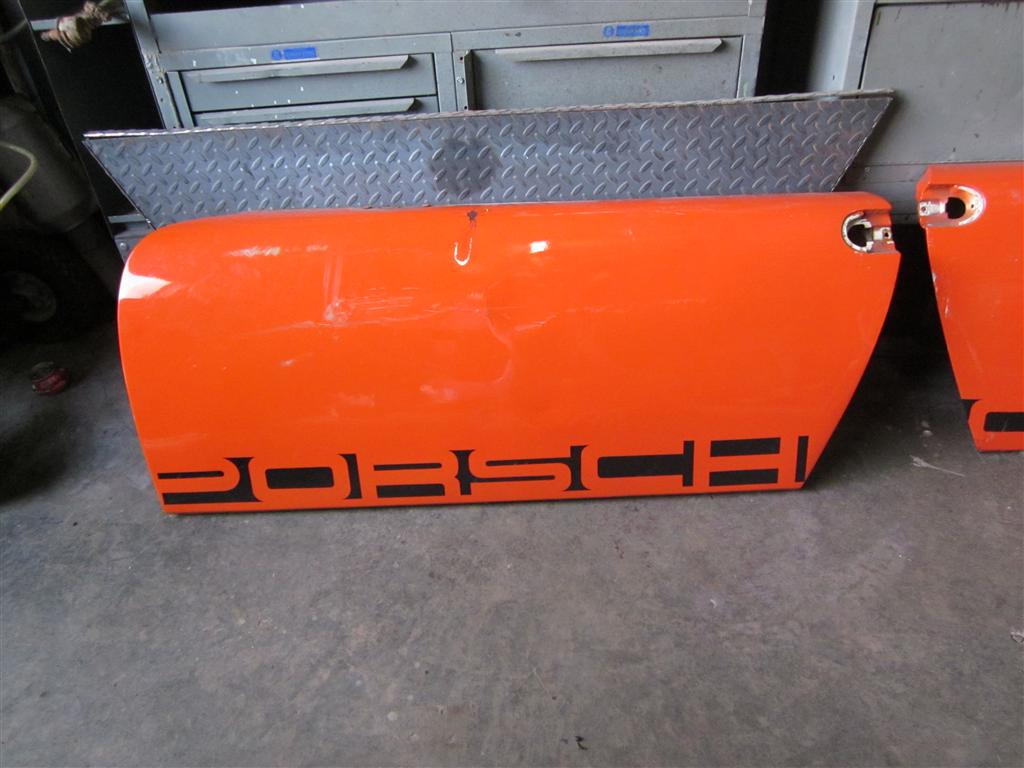


Posted by: scotty b May 20 2012, 08:16 PM
Roll bar was coverd in straight libne scrathches from someone in the past hard blocking it...yet somehow it was still far from straight  I did all this with only a mudhog and got it flatter and more properly contoured then the p.o. did with a block
Attached image(s)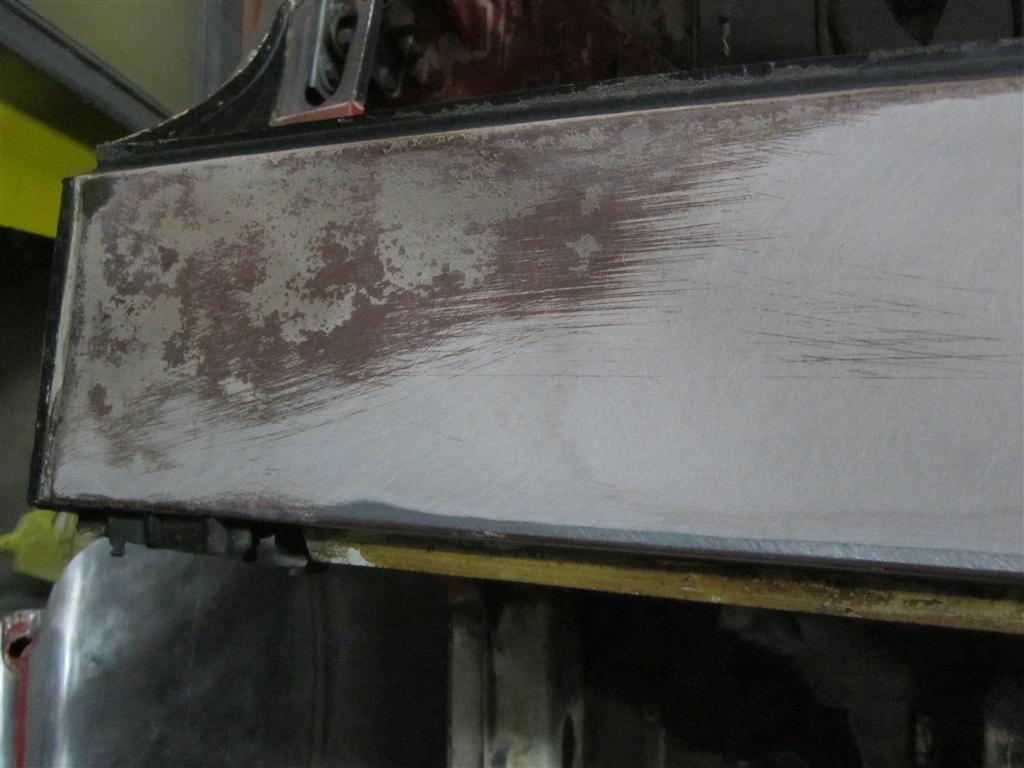
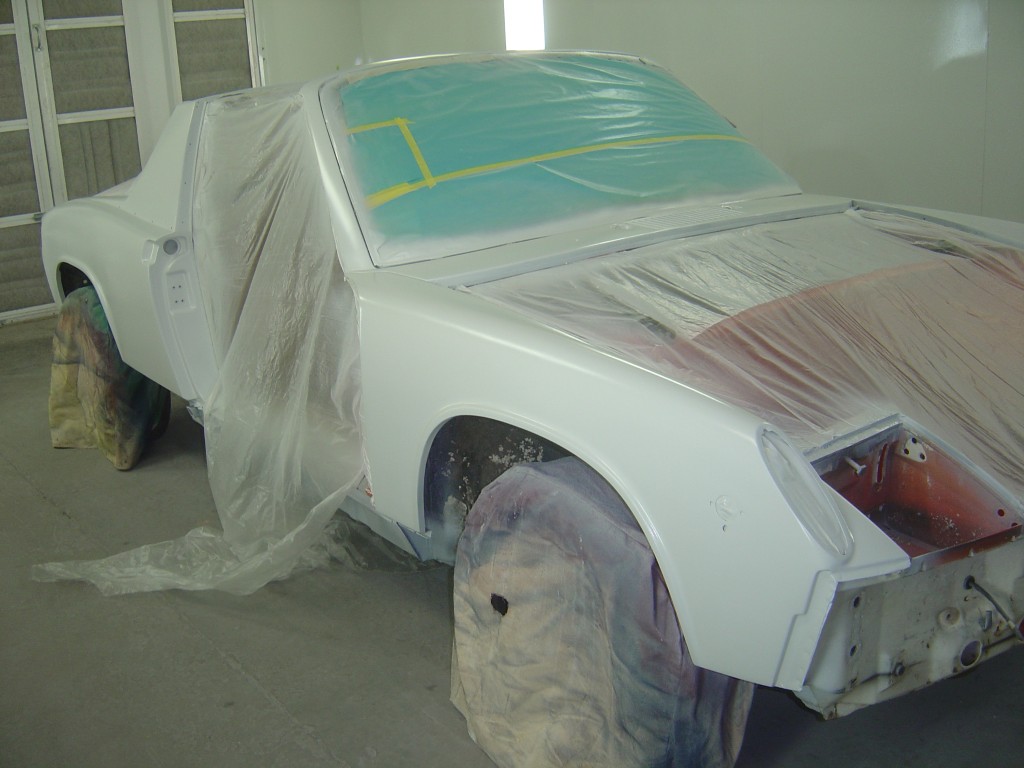
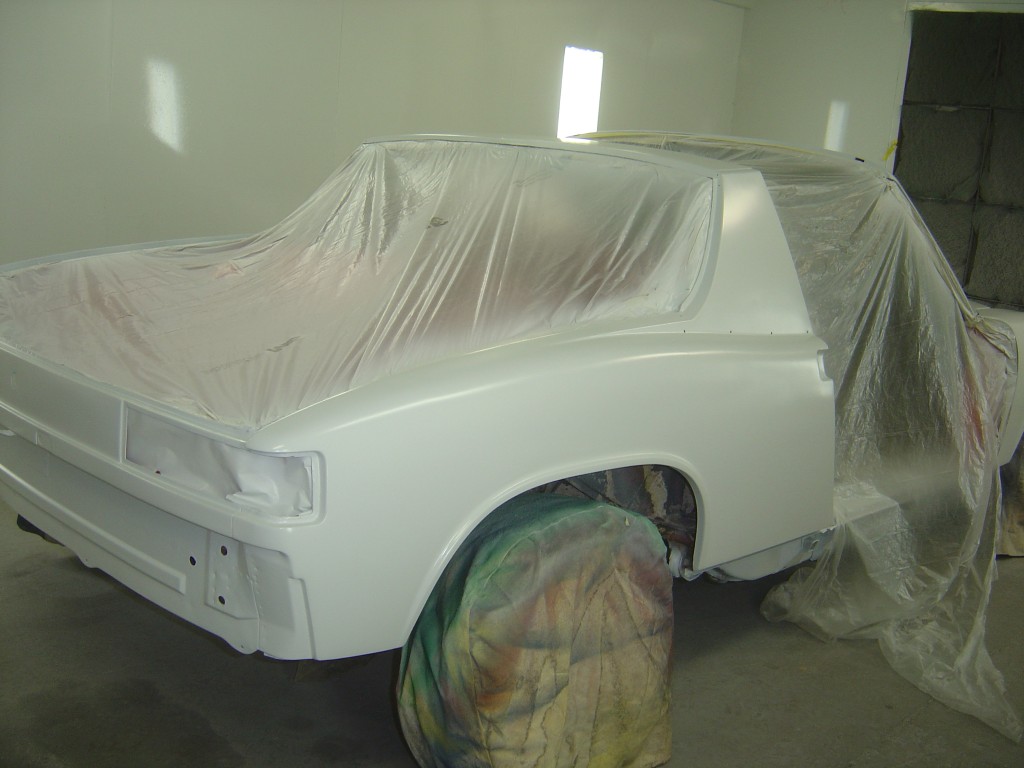
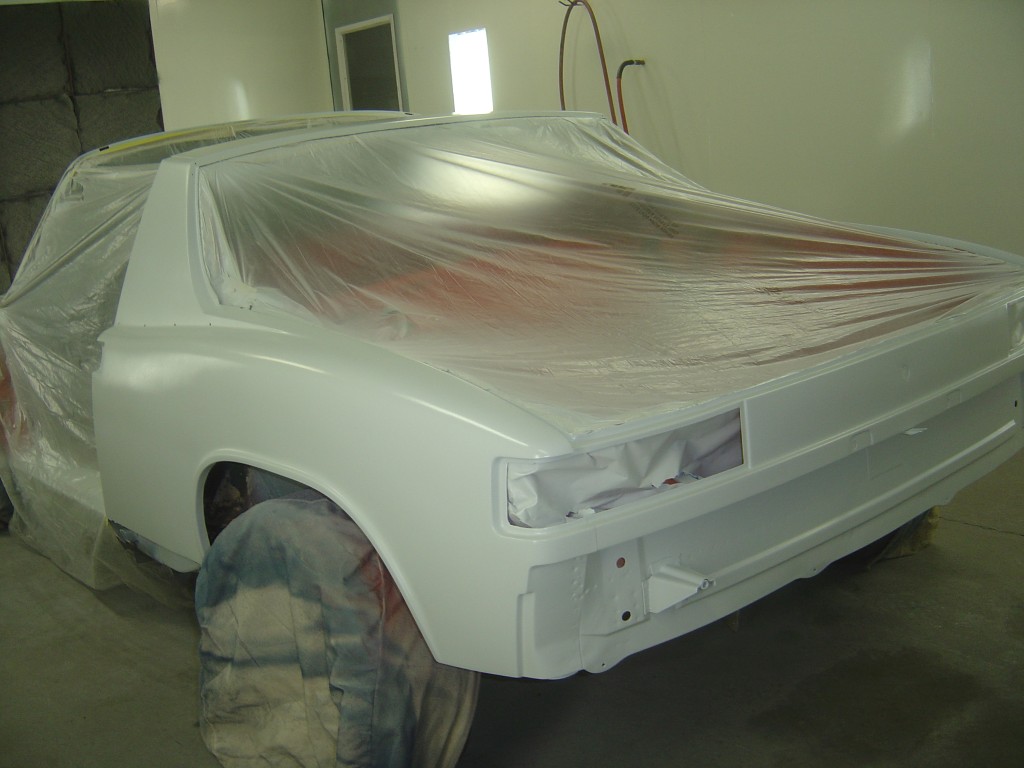
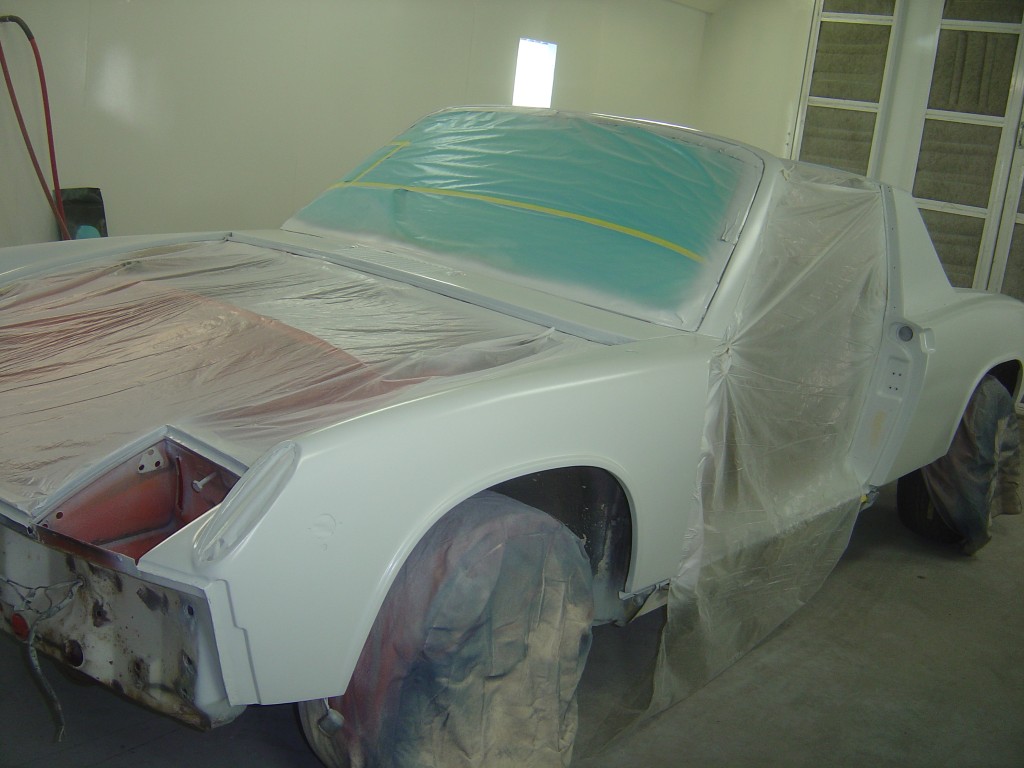
Posted by: scotty b May 20 2012, 08:30 PM
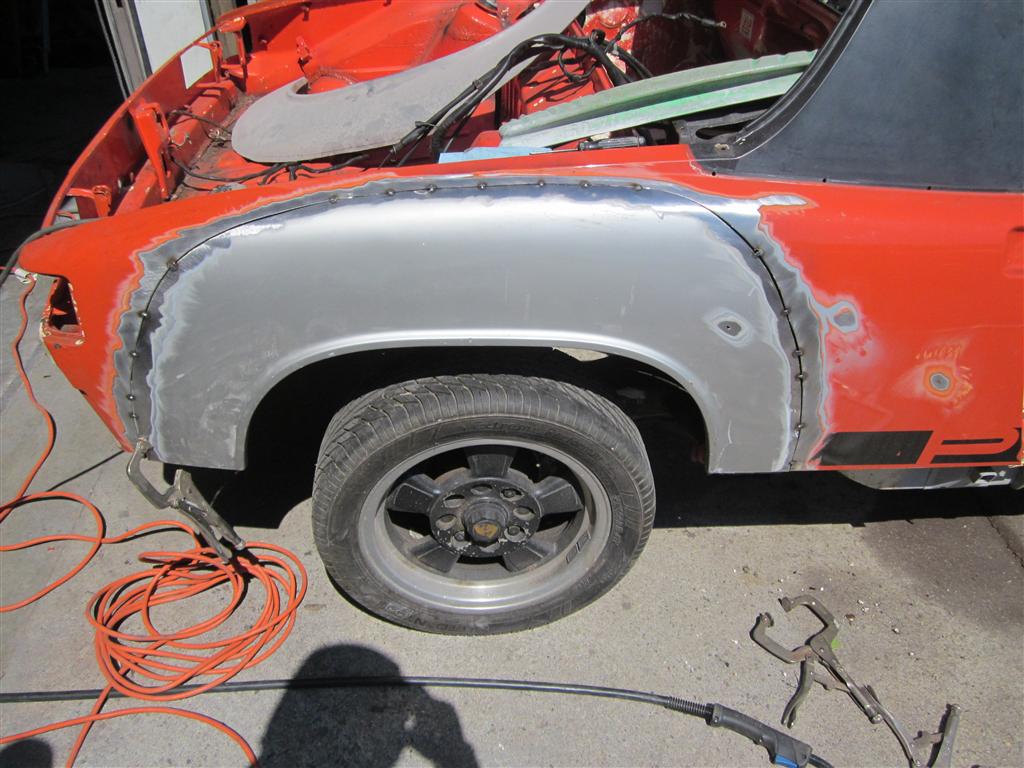
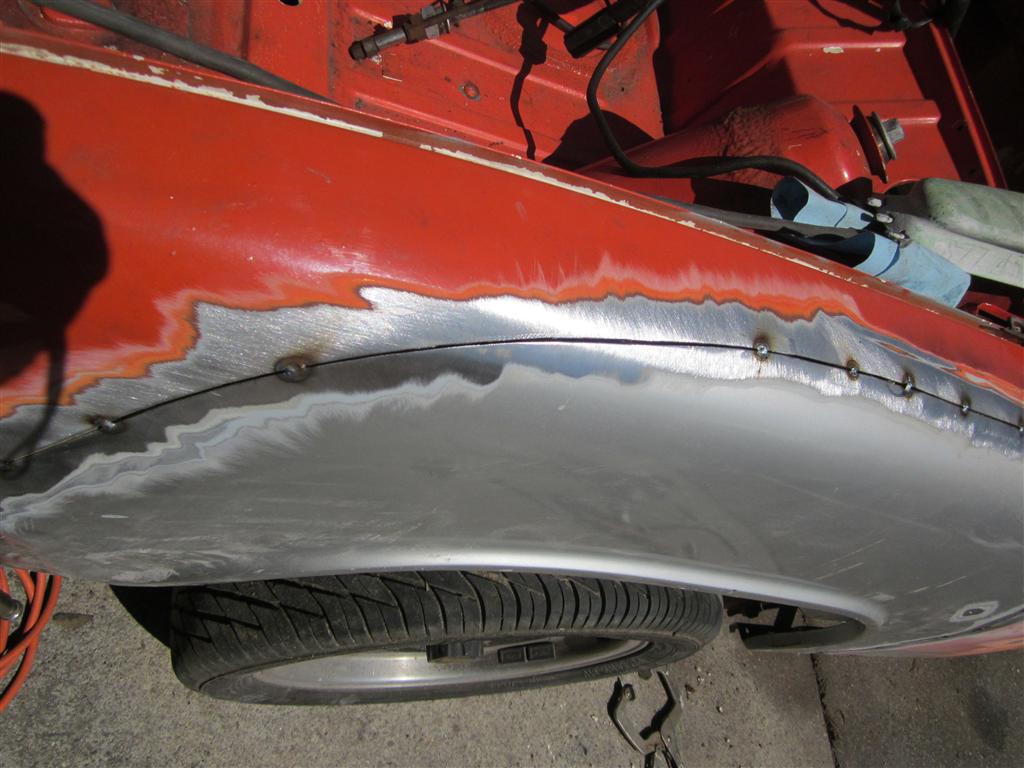
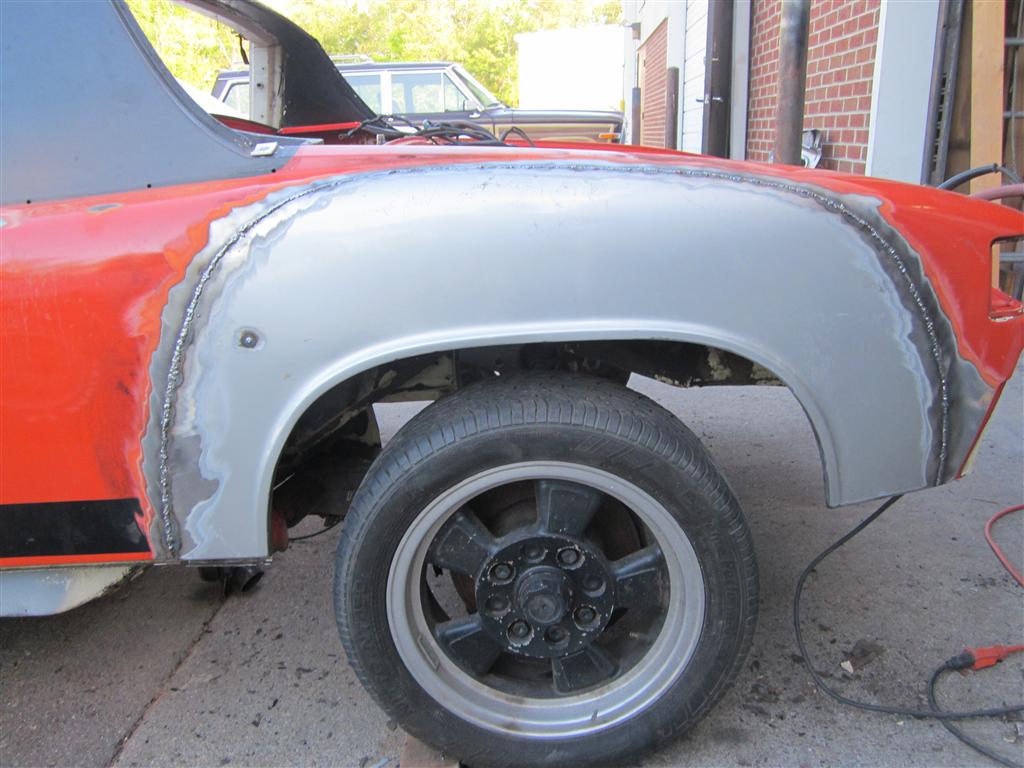
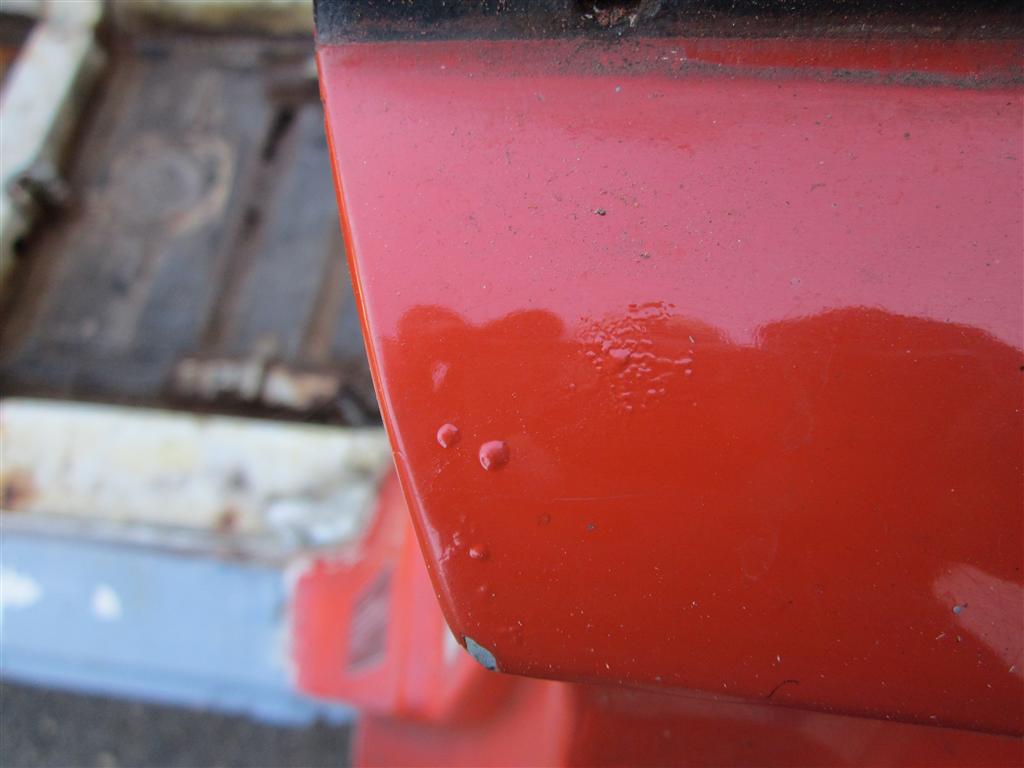
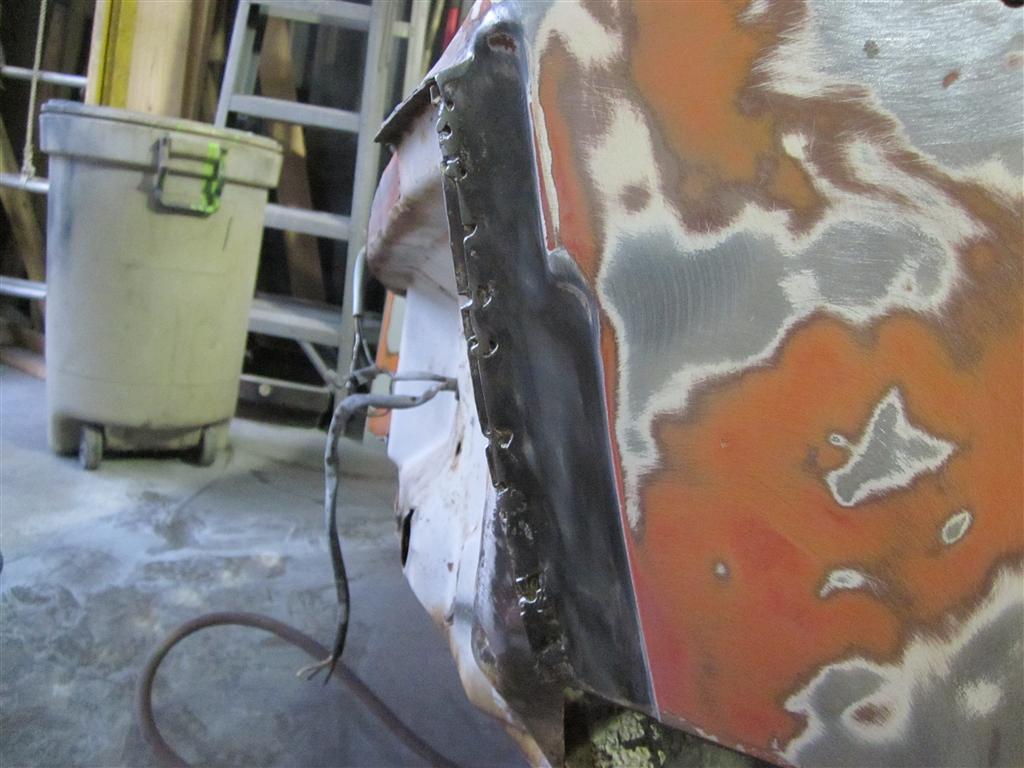
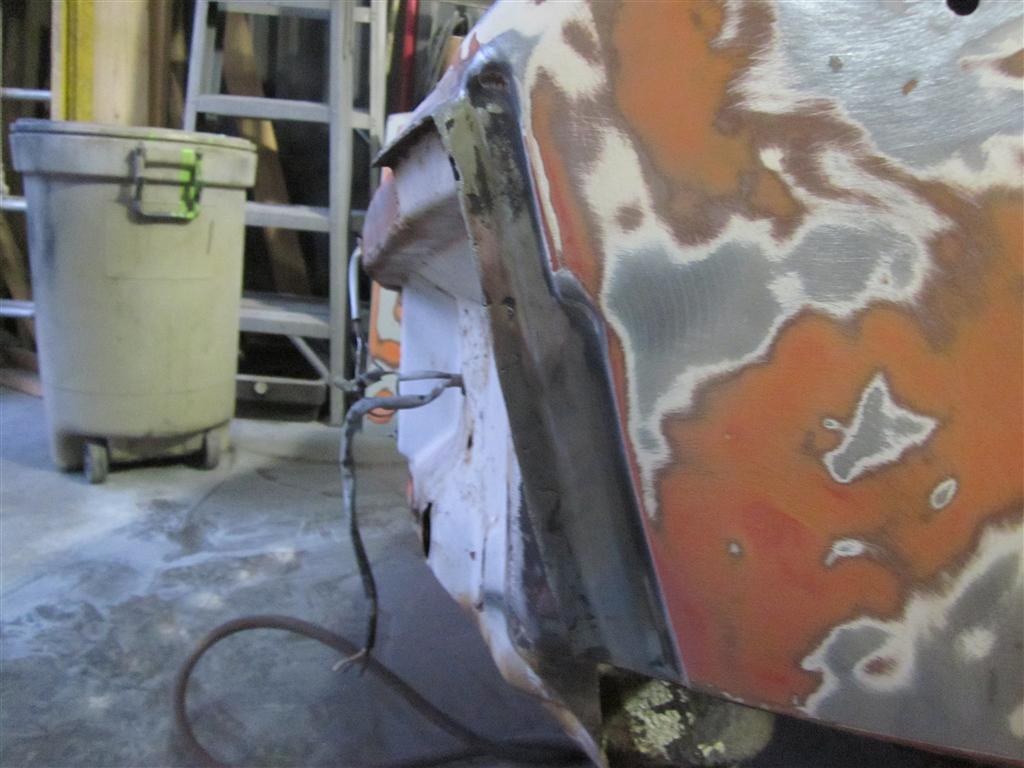
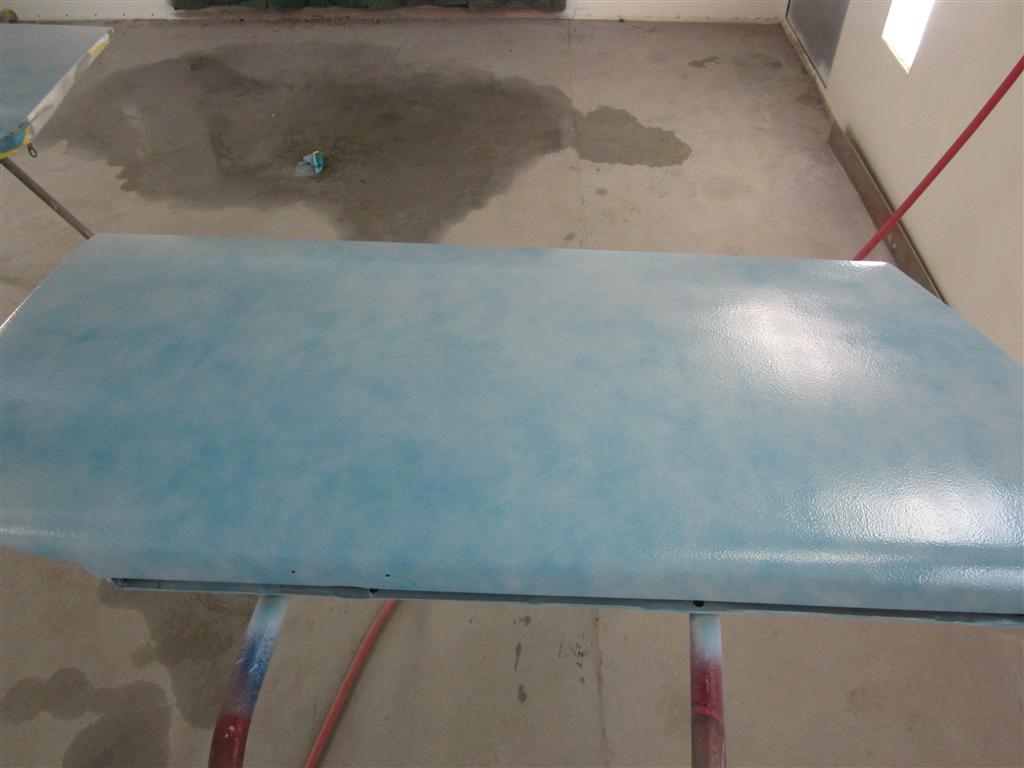
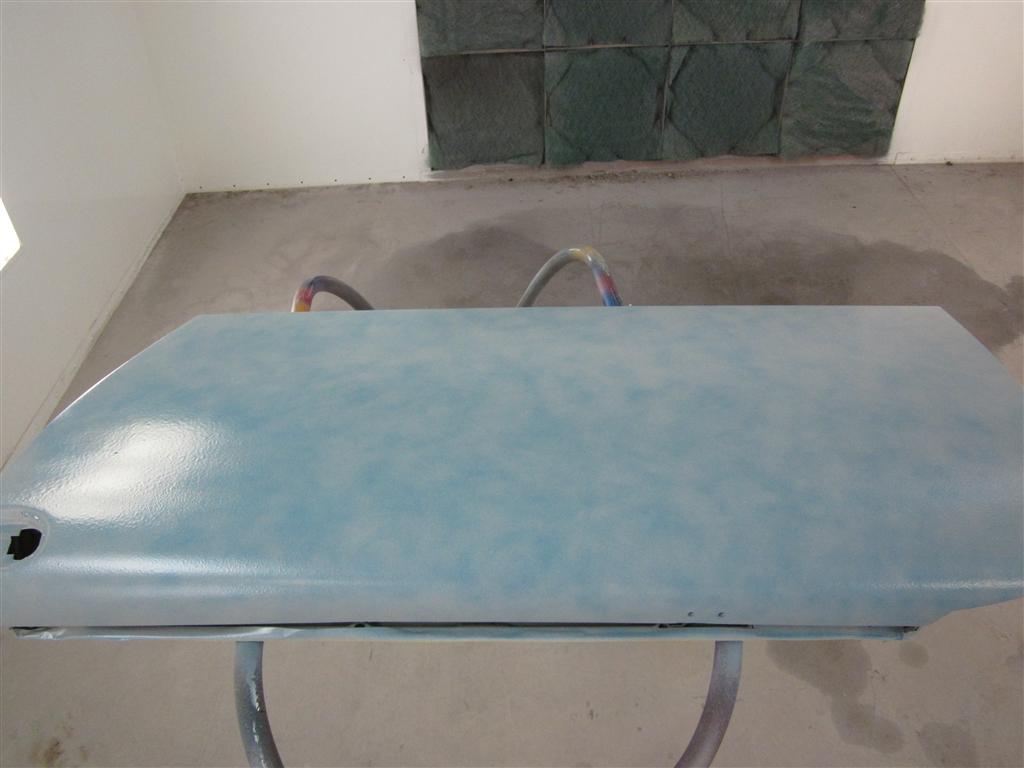
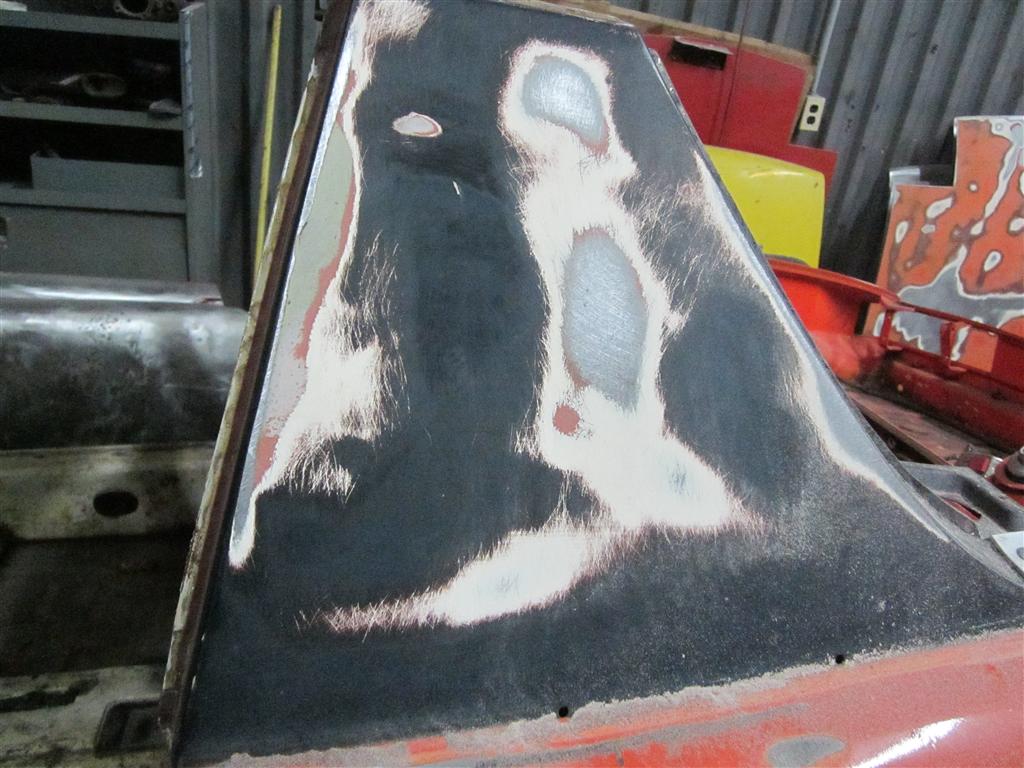
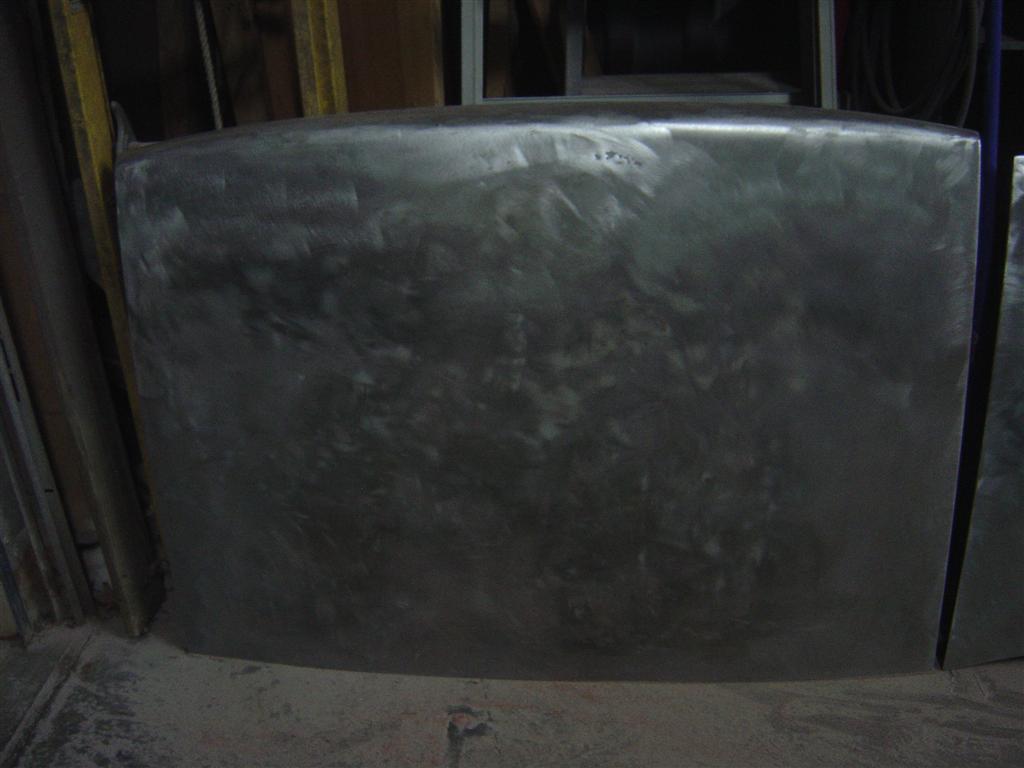
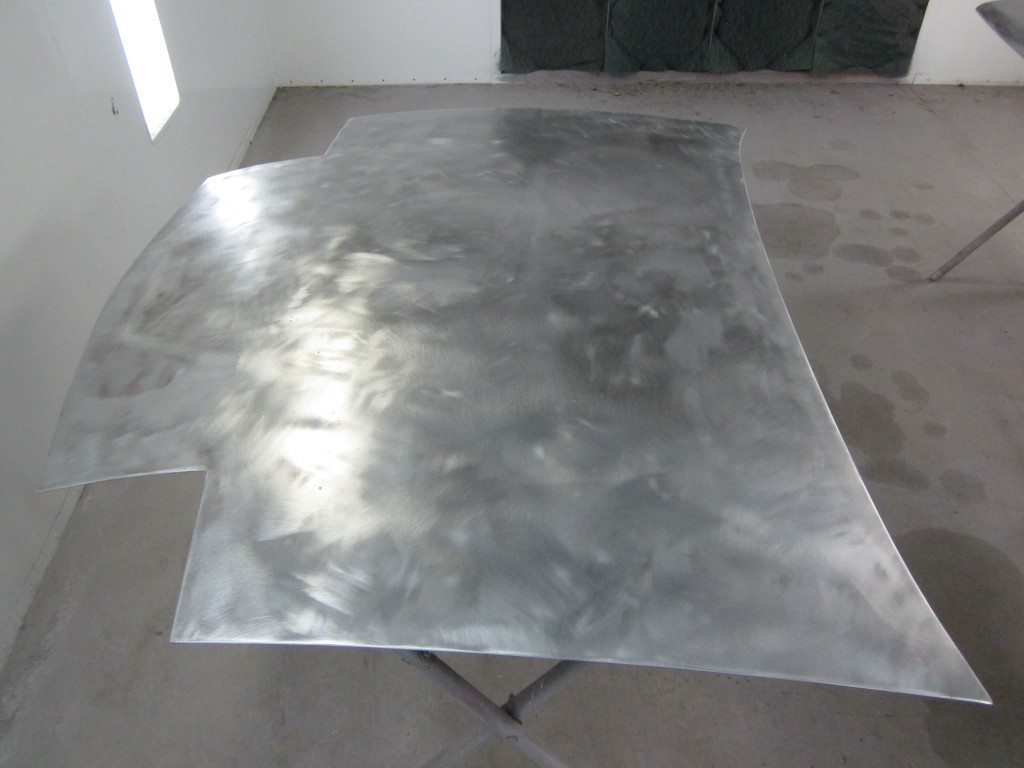
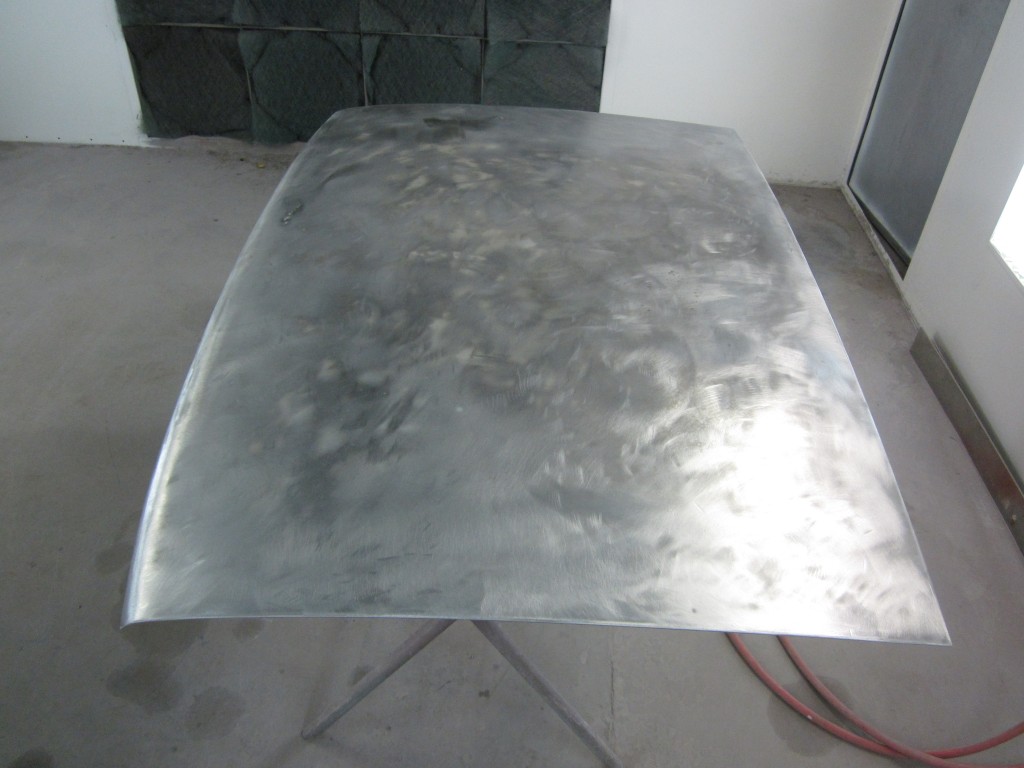
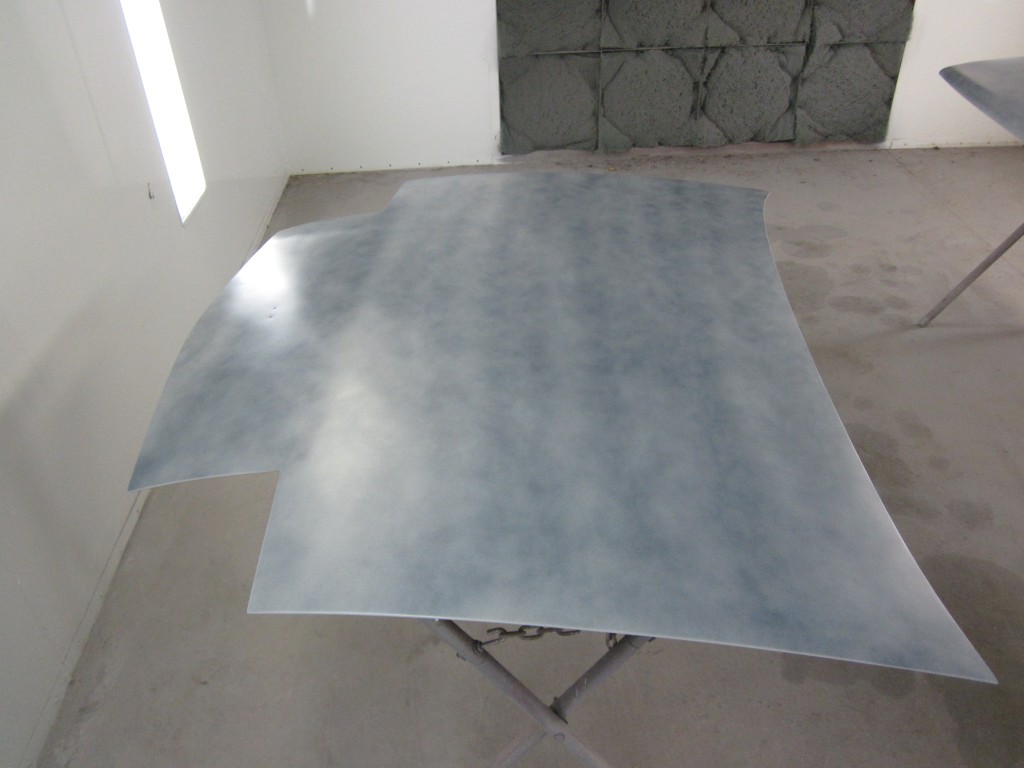
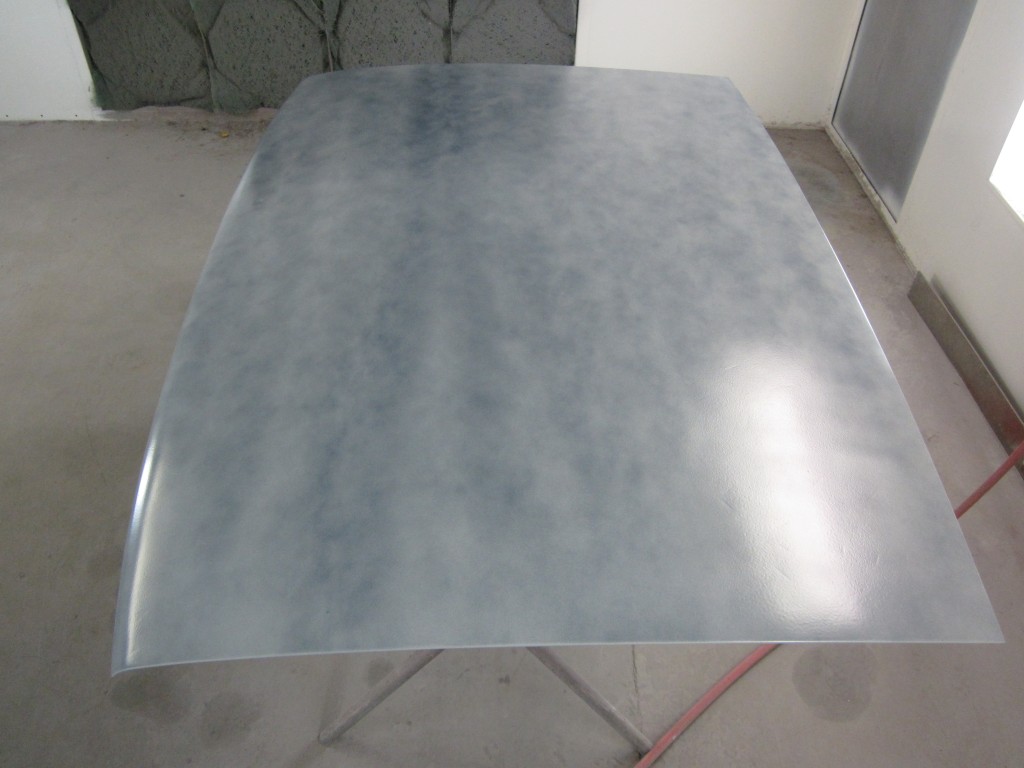
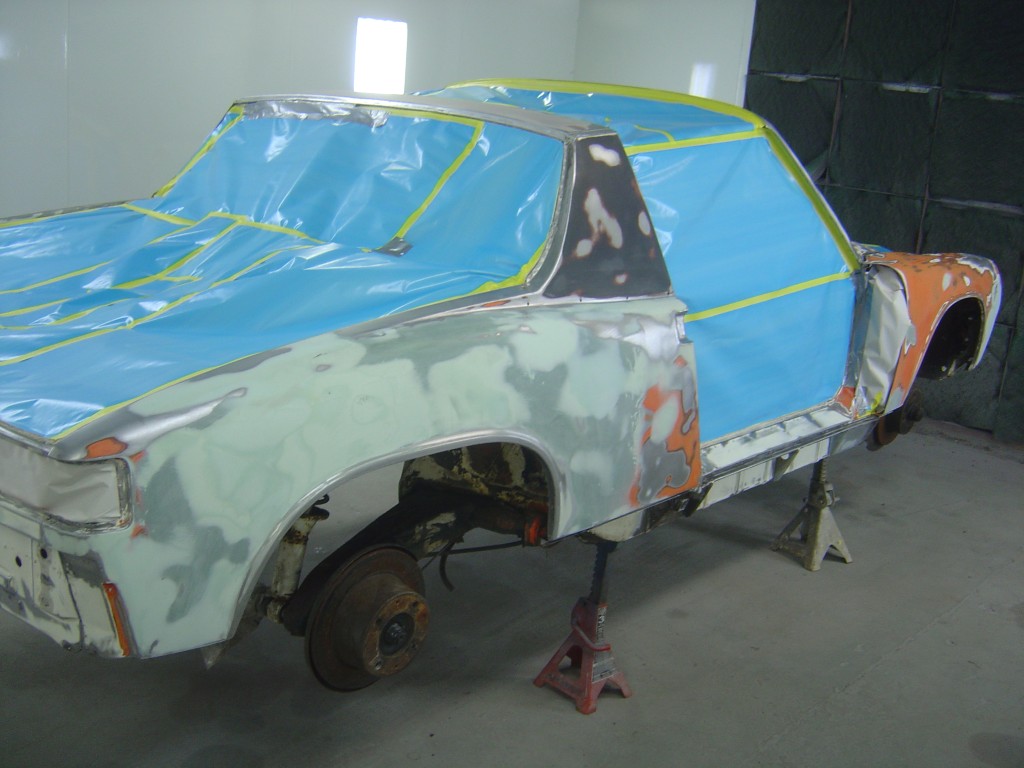
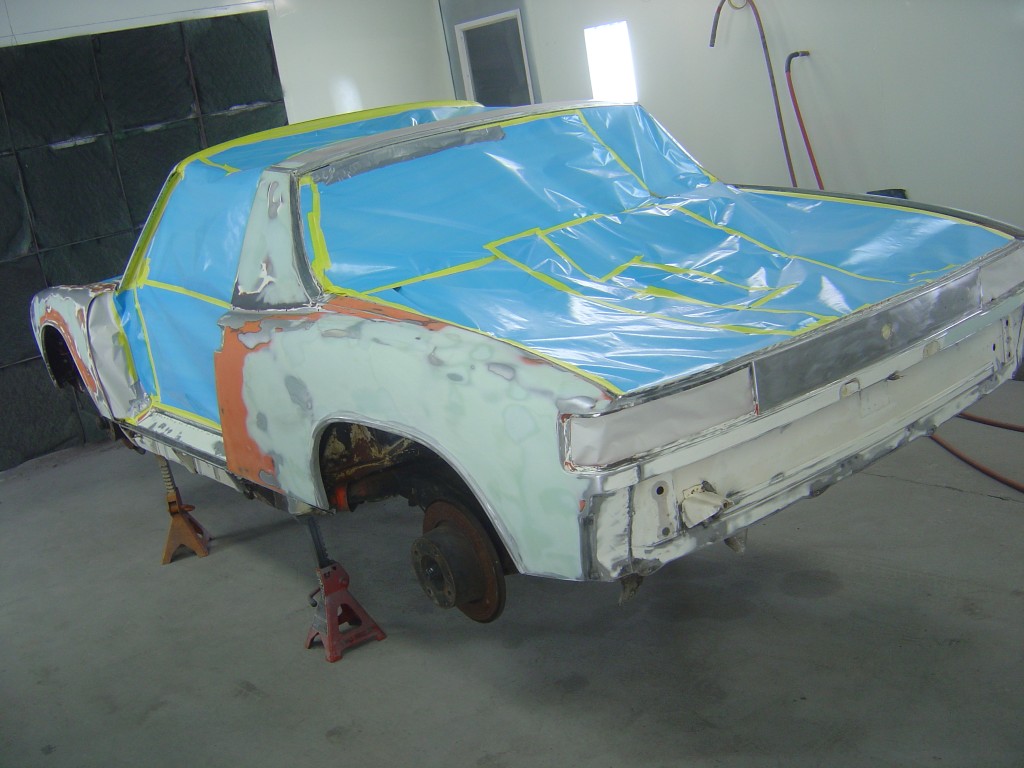
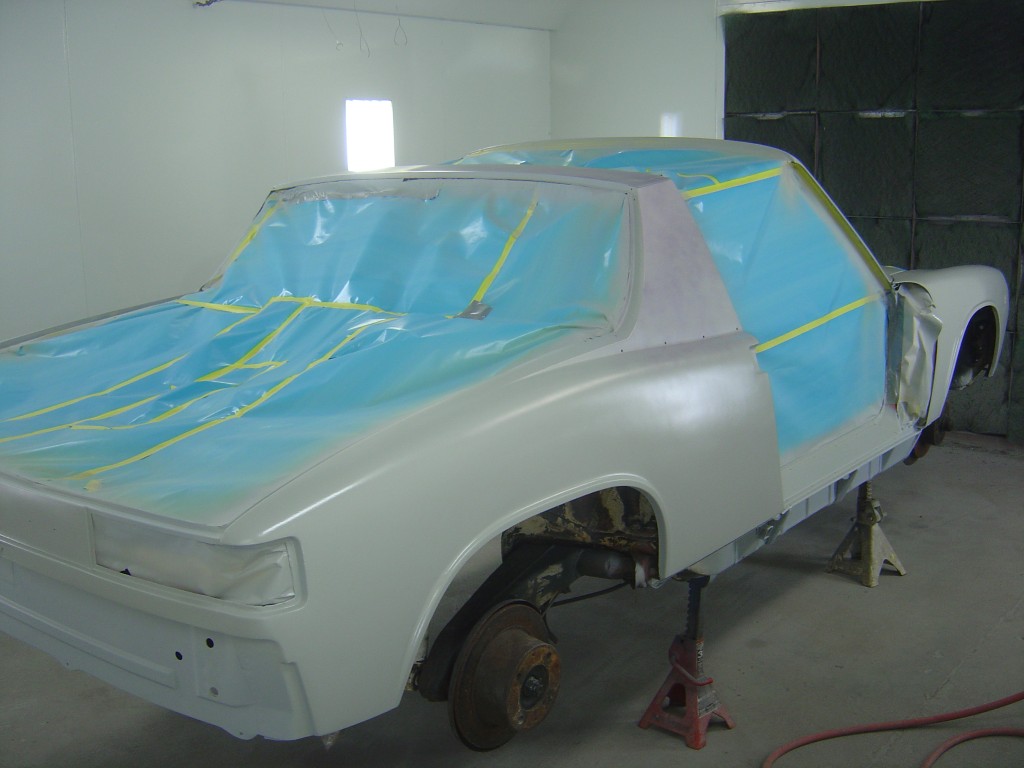
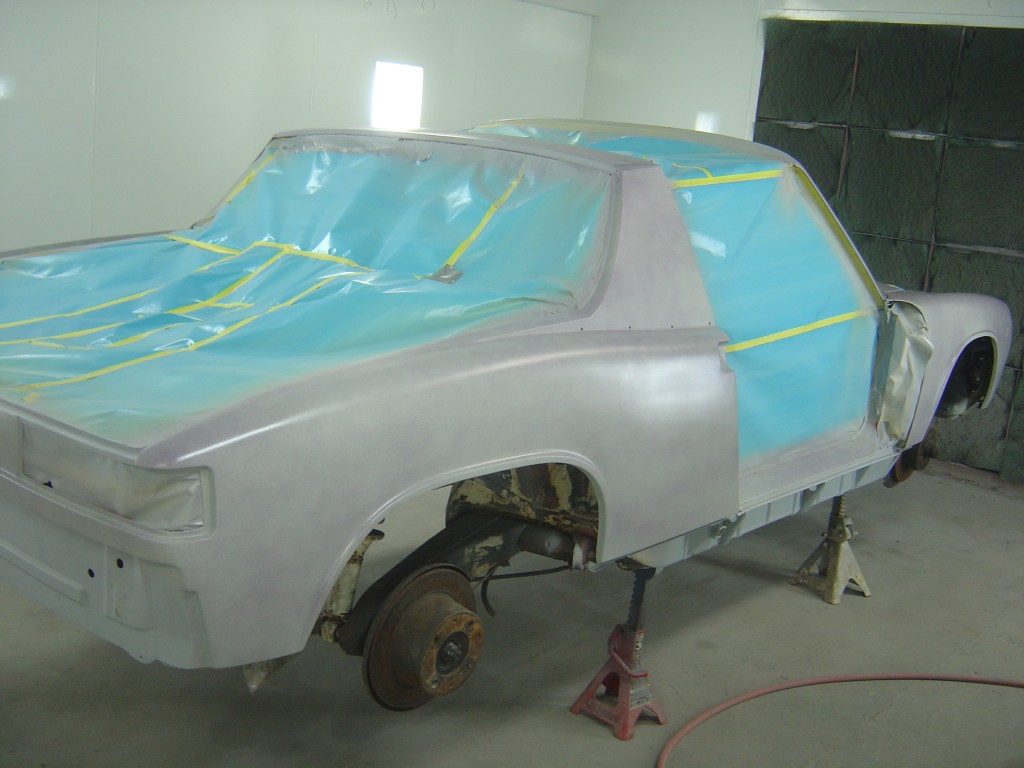
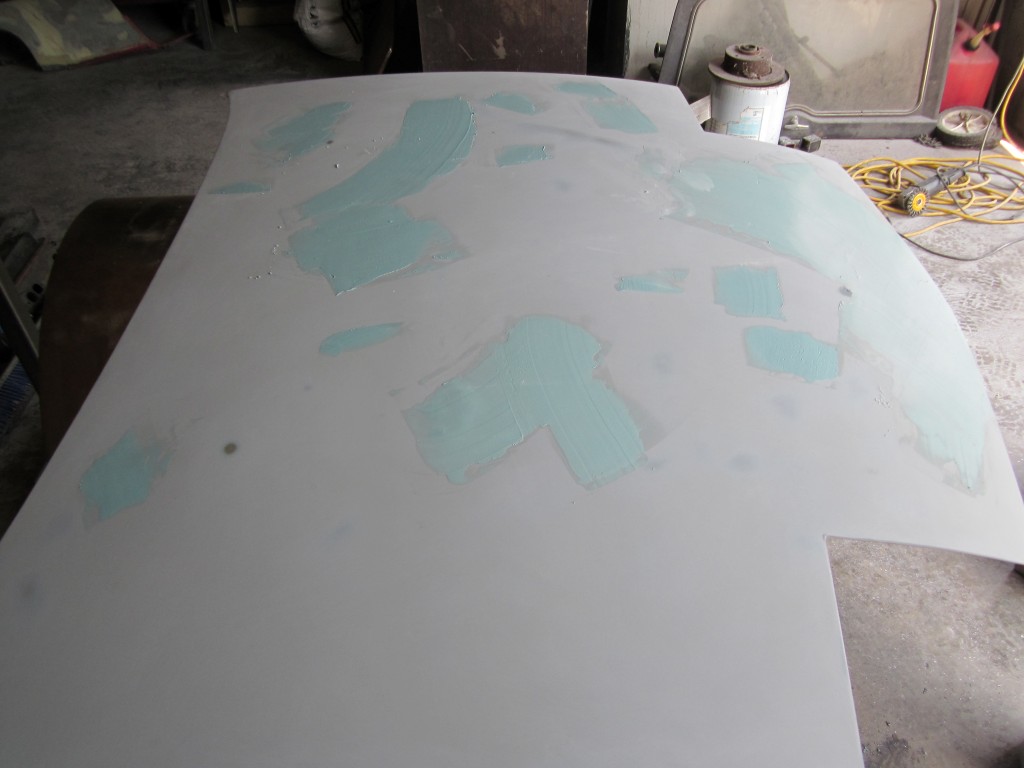
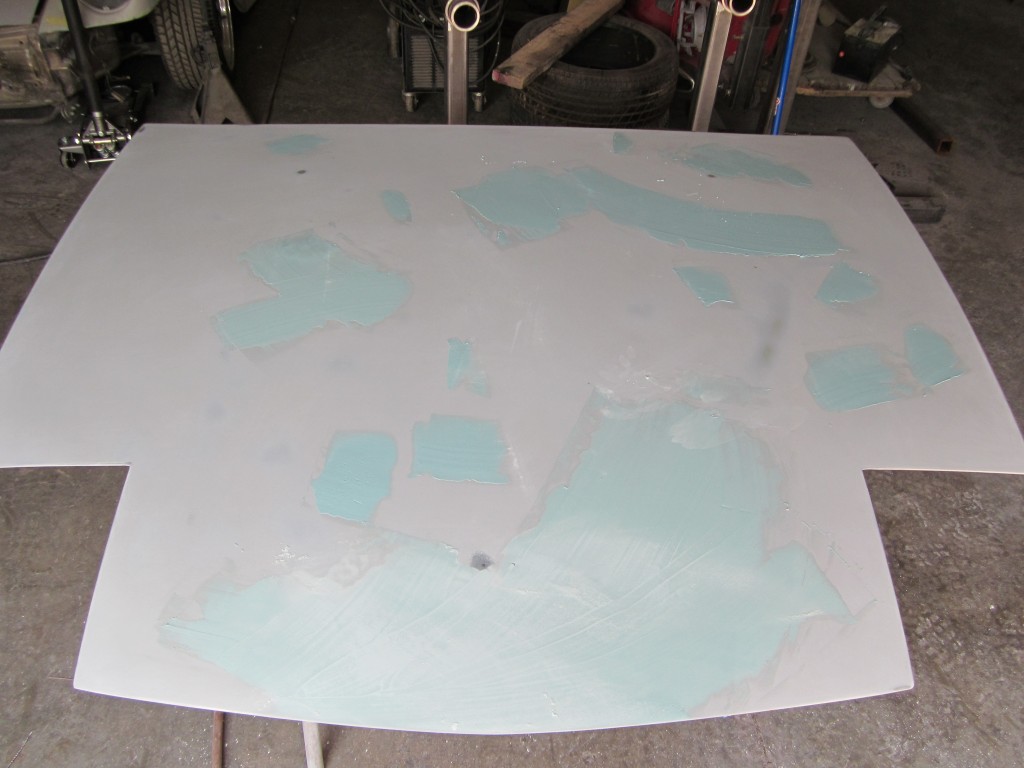
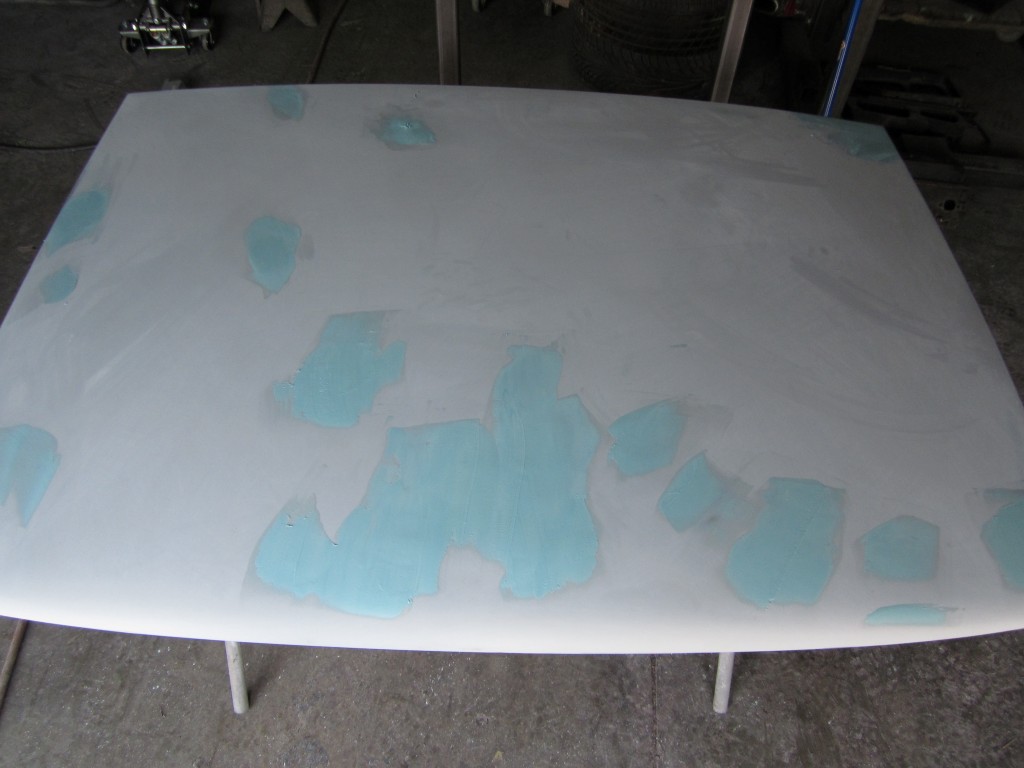
The plan on Mikes car was to repair the rear 1/4's, smooth the body out a bit more and repaint. Once these bubbles in the hood and trunk were looked into it became clear thet lids needed to be completely stripped. I'm guessing that these are a result of a past chemical stripping that wasn't properly neuitralized 
Attached image(s)

Posted by: arkitect May 22 2012, 10:45 AM
Scotty,
When you replace the rain gutters up front. Do you replace a whole section of the u channel...weld the ends to the exiting? How do you grind it smooth in the channel?
Dave
Posted by: scotty b May 22 2012, 11:36 AM
Scotty,
When you replace the rain gutters up front. Do you replace a whole section of the u channel...weld the ends to the exiting? How do you grind it smooth in the channel?
Dave
Honestly it all depends on the customers budget, how extensive the damage is etc. I've had times where I made a small section from scratch and welded it in, times when I have cut a length out of a donor, and times where the owner didn't have the funds to repair properly so I cleaned it, backed it up with some chrome tape, and wiped J.B. weld over the holes then primed it. As far as grinding down in the channel, the first key is to get a nice flat weld so there is minimal grinding, then there are a variety of ways to get it ground. Flap wheel on a grinder, a 80 grit roloc disc will flex enough to get it done, a die grinder with a tulip cutter etc. I usually cut most of it down with my cut off wheel then clean it up with some other method
Posted by: hot_shoe914 May 22 2012, 06:23 PM
![popcorn[1].gif](style_emoticons/default/popcorn[1].gif)
Posted by: OU8AVW May 22 2012, 06:29 PM
I am left wondering which category I fit into 
Posted by: hot_shoe914 May 22 2012, 08:16 PM
I am left wondering which category I fit into
I think I am in a category of my own. He just didn't mention it as it is very embarassing.

Posted by: scotty b May 22 2012, 08:53 PM
I am left wondering which category I fit into
Which one do you want to be in ??

Posted by: scotty b May 22 2012, 08:54 PM
I am left wondering which category I fit into
I think I am in a category of my own. He just didn't mention it as it is very embarassing.
Your blue car is actually being worked on. the rear trunk is now ready for primer

Posted by: hot_shoe914 May 22 2012, 09:14 PM
No pics on my build thread? Actually reconsidering what you suggested at Hershey. Also about to list everything 914 I own for sale for one lump sum.
Posted by: OU8AVW May 23 2012, 05:33 AM
I am left wondering which category I fit into
Which one do you want to be in ??
Somewhere in the middle I think....
I do understand that our deal is a bit of a moving target but I'm not so naive to think that a surprise or two won't cost me.

Posted by: Dr Evil May 24 2012, 06:46 AM
You heard him, Scotty. Time to up-charge! Those breast implants are as good as yours! When can you come to my shop for the install?
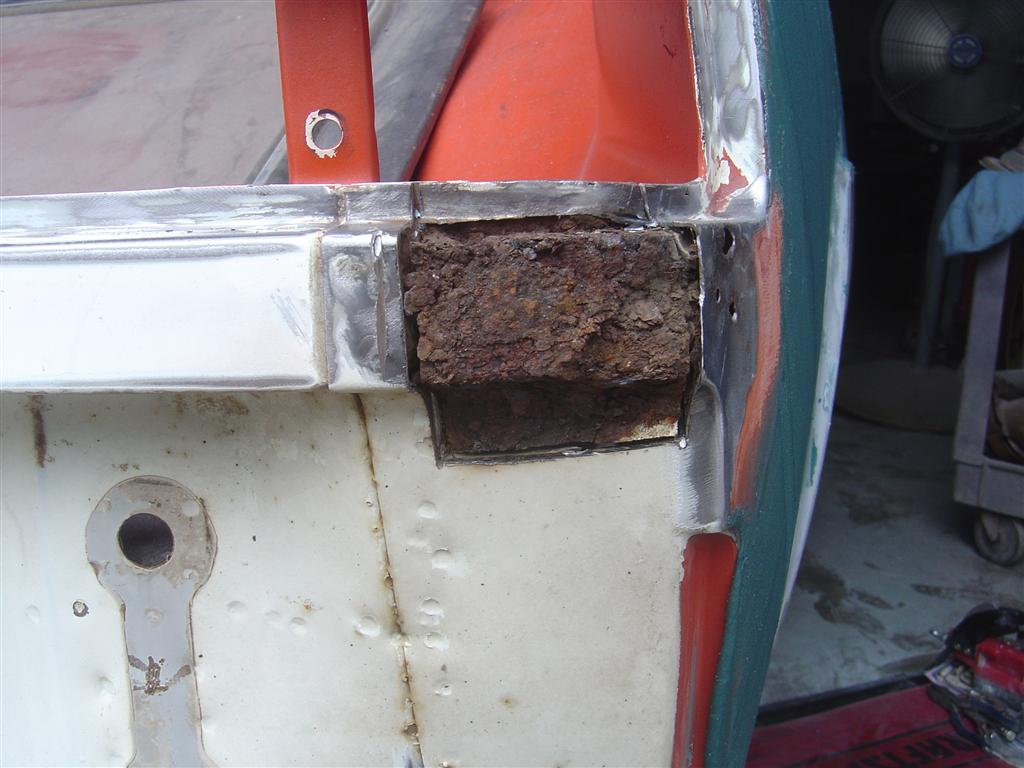
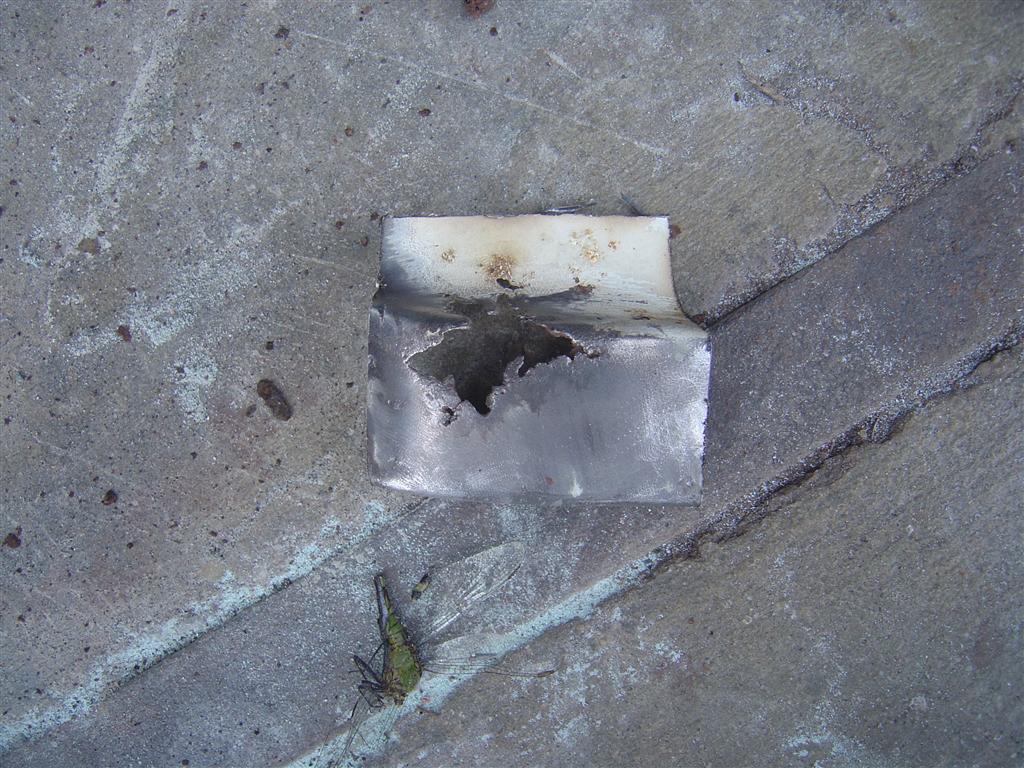
Posted by: scotty b Jun 4 2012, 06:42 PM
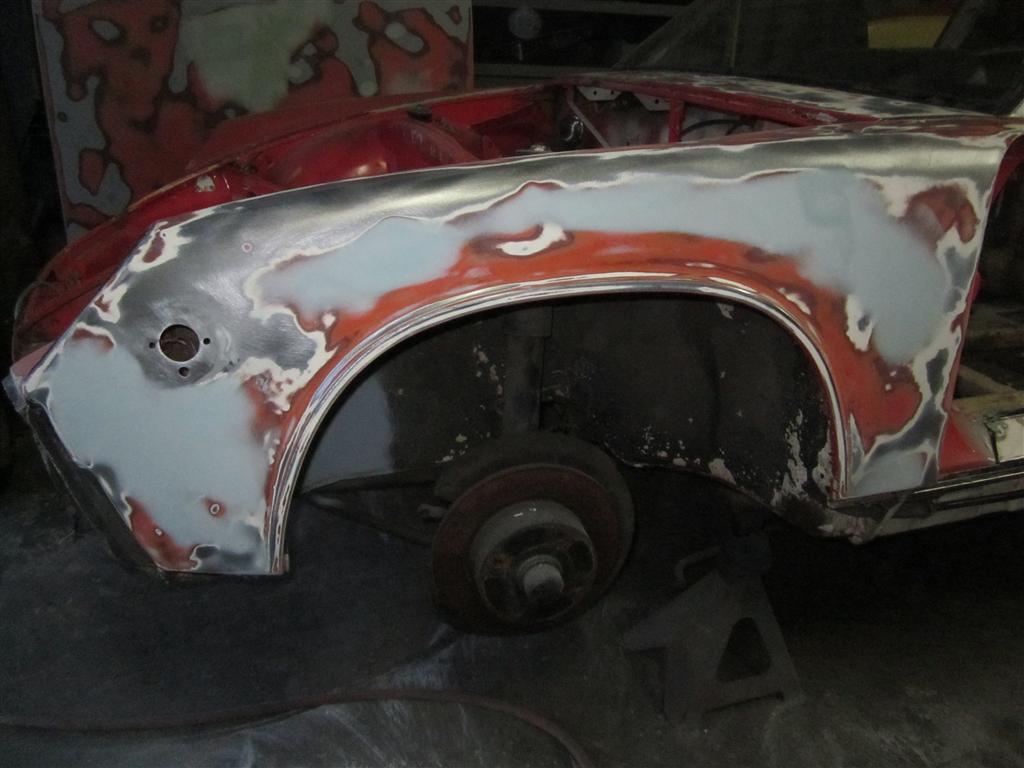
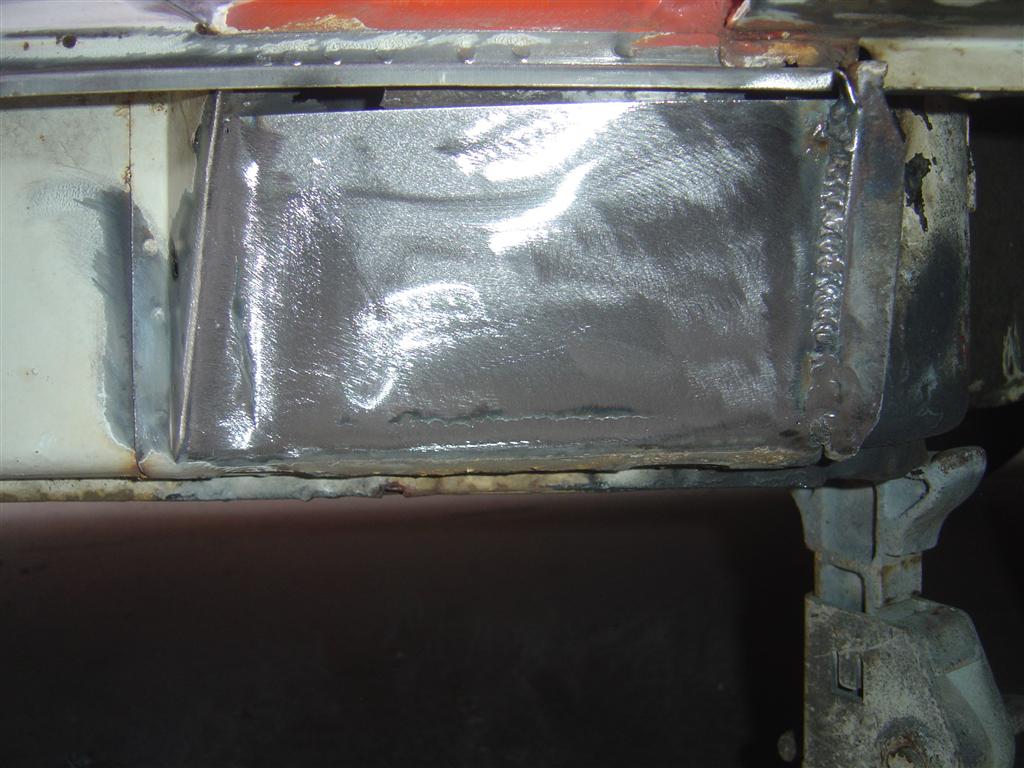
Pics not taken include stripping all of the edges on the car, stripping the wheel well lips, stripping the rear trunk channels, sanded down the front fender, sanded the pass door sill blah blah blah. Hood and trunk lid get stripped bare tomorrow 
Attached image(s)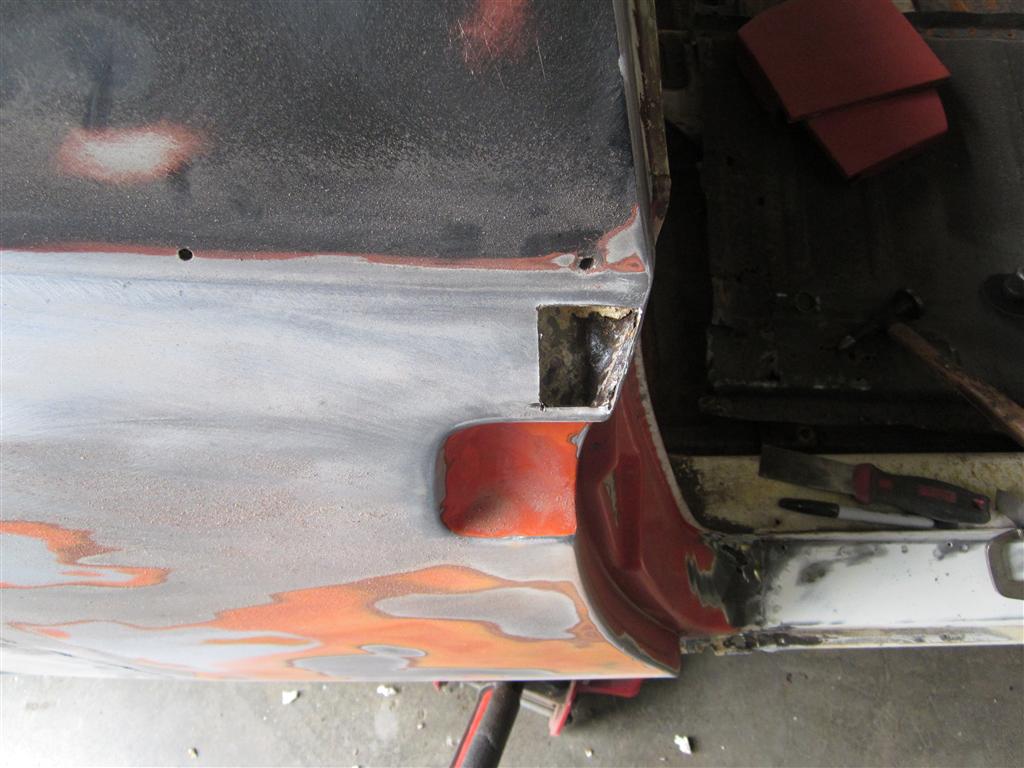

Posted by: scotty b Jun 10 2012, 09:08 AM
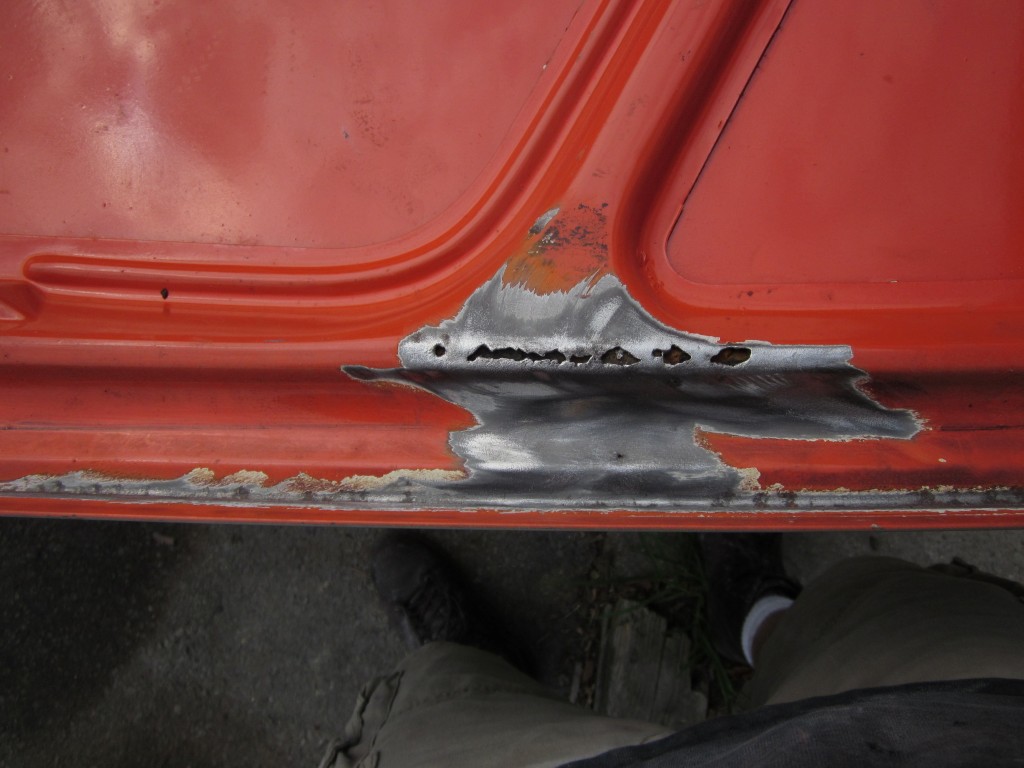
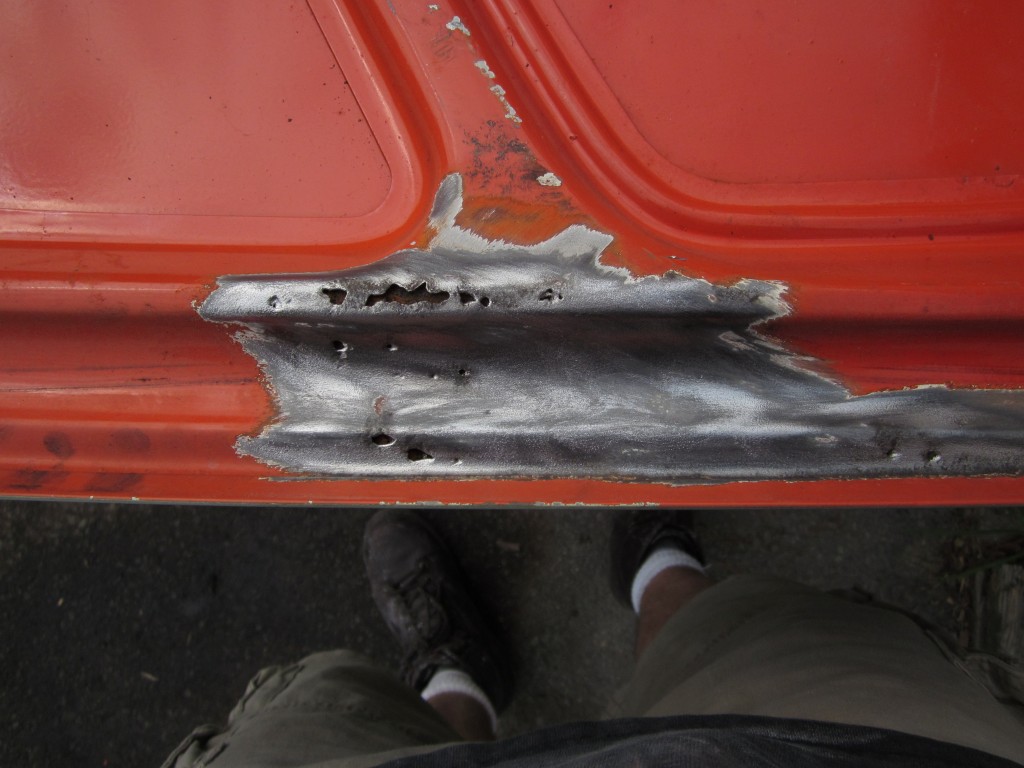
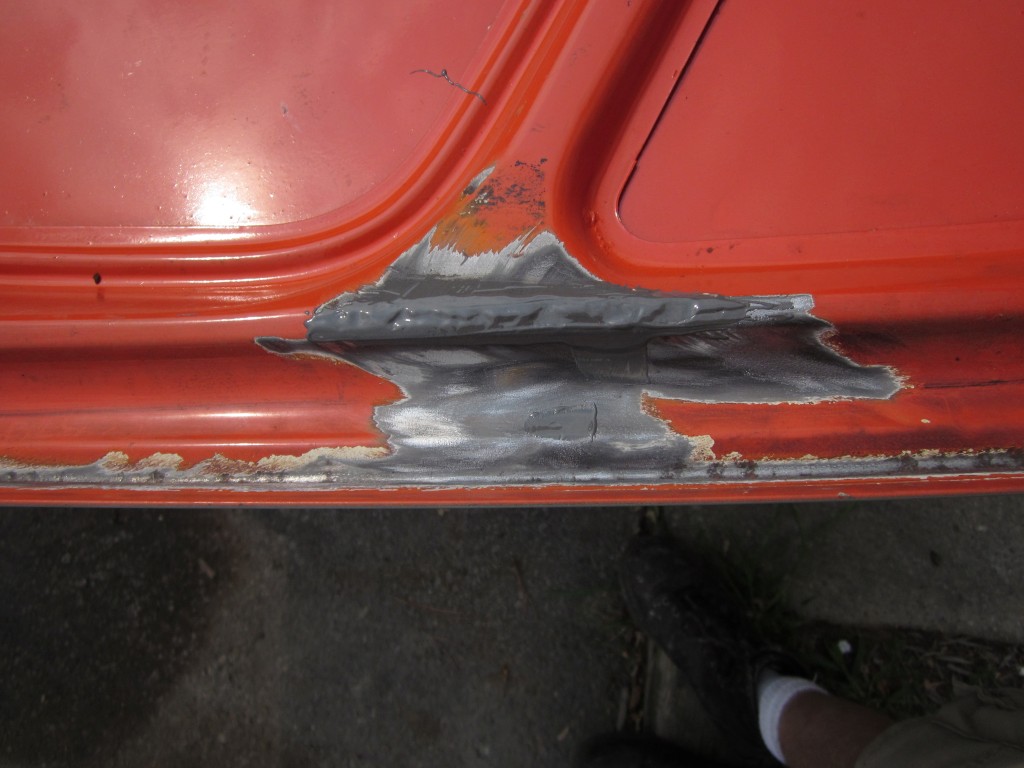
I still have a little bit to do on the rocker patch. The piece of metal I had was just shy of filling in the whole hole, So I will make a small strip to fill in thsat lst bit at the top. I have the passengers side all body worked and ready for primer. Still a little "fine tuning" of the body work on the drivers side, and the front trunk channels to deal with
Attached image(s)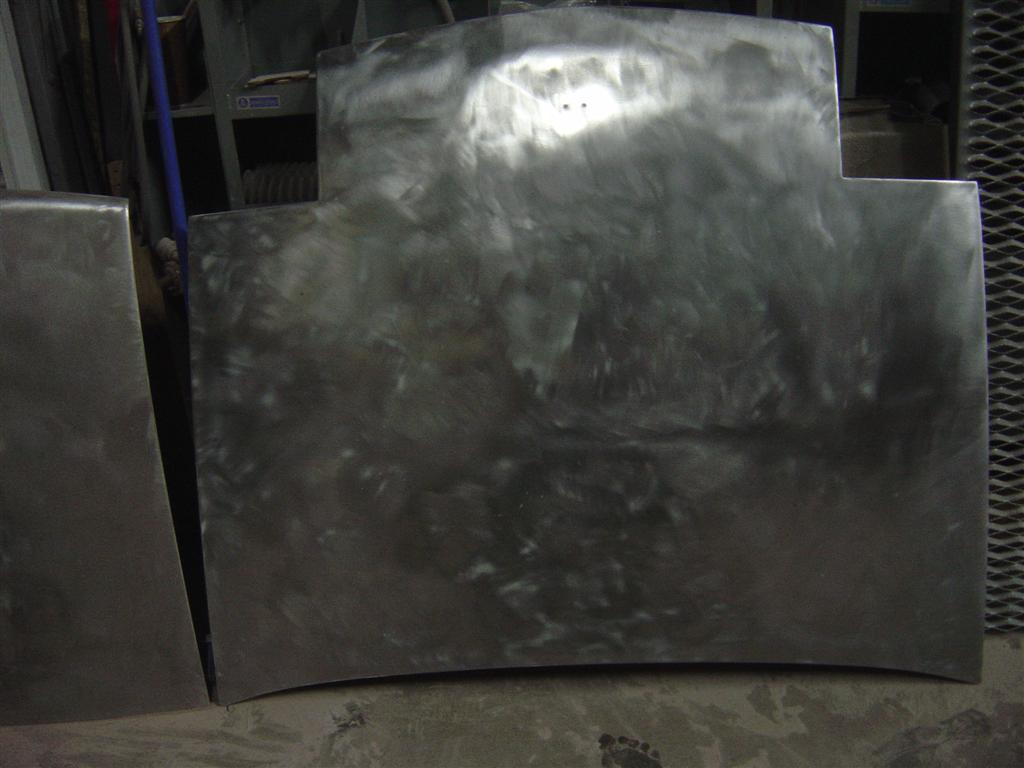

Posted by: OU8AVW Jun 10 2012, 01:50 PM
Lookin' sweet!
Posted by: scotty b Jun 18 2012, 07:26 AM
Attached image(s)

Posted by: OU8AVW Jun 18 2012, 07:47 AM
Posted by: OU8AVW Jun 18 2012, 01:49 PM
Hey Scotty,
Could be worse......
http://www.thesamba.com/vw/classifieds/detail.php?id=1293984
Posted by: Dr Evil Jun 18 2012, 03:51 PM
Hey Scotty,
Could be worse......
http://www.thesamba.com/vw/classifieds/detail.php?id=1293984
Ha, I know the guy selling that and his rust is gold plated

Posted by: MDG Jun 18 2012, 04:55 PM
Looking Good!!
Mike - that bit of duct tape is left over from one of Sc'tooey's old flare installs.
You lucky bastard.
Posted by: OU8AVW Jun 18 2012, 06:56 PM
Oh, i know. This thread is a major distraction at work. I've got a horde of cool parts waiting for this. Unfortunatly i'm out of cashola so i'll be doing the trunks myself. I need to sell some stuff to build up the paypal account again. Anybody need some used sailing gear?
Posted by: Dr Evil Jun 18 2012, 07:02 PM
You could sell semen 
Posted by: billh1963 Jun 18 2012, 07:03 PM
Looking good! Now I know why Scott hasn't posted any progress pictures on my car....looks like he will be busy this week!
Posted by: OU8AVW Jun 18 2012, 07:17 PM
You could sell semen
My mother told me if i kept wacking off i would go blind.
So i asked if i could do it until i needed glasses.
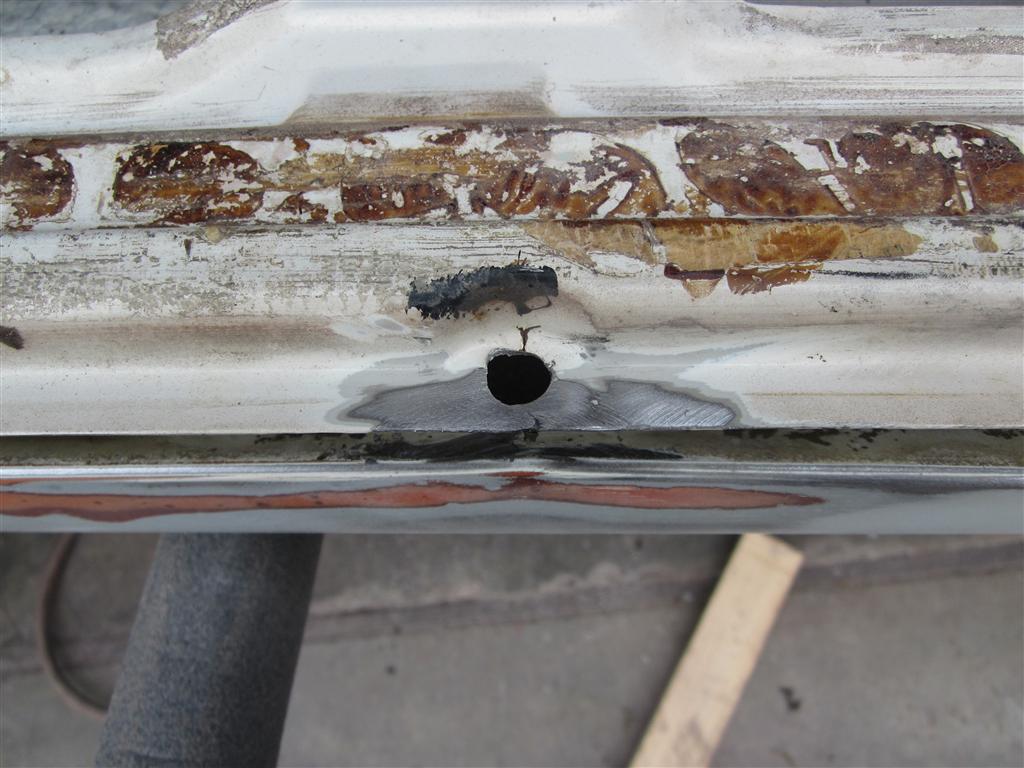
Posted by: 3d914 Jun 18 2012, 11:11 PM
Scotty,
Hope you don't mind some questions about your work. Not meant to be critical - just trying to learn from your vast experience.
First, what type of welder are you using to get such nice "puddles" on thin material (pic-1) or welding on this thin channel without burning through?
pic1
pic2
Also, do you go back and weld in small cavities (right side of pic3) or save them for finish filler and primer?
pic3
Thanks for the insight and keep up the great job.
Posted by: scotty b Jun 19 2012, 05:41 PM
Miller 140 MIG for most of the welding and as far as the little crater on the outside of the weld goes, primer and a touch of filler does the deed. 
Posted by: Dr Evil Jun 19 2012, 07:14 PM
Do you use gas or flux core?
Posted by: scotty b Jun 19 2012, 07:15 PM
gas 
Posted by: OU8AVW Jun 20 2012, 11:38 AM
I picked up my engine tin and engine mount from the powder coater's last week. It all looks super sweet!
Posted by: TargaToy Jun 21 2012, 08:26 PM
Love the progress. More pics as they come, please.
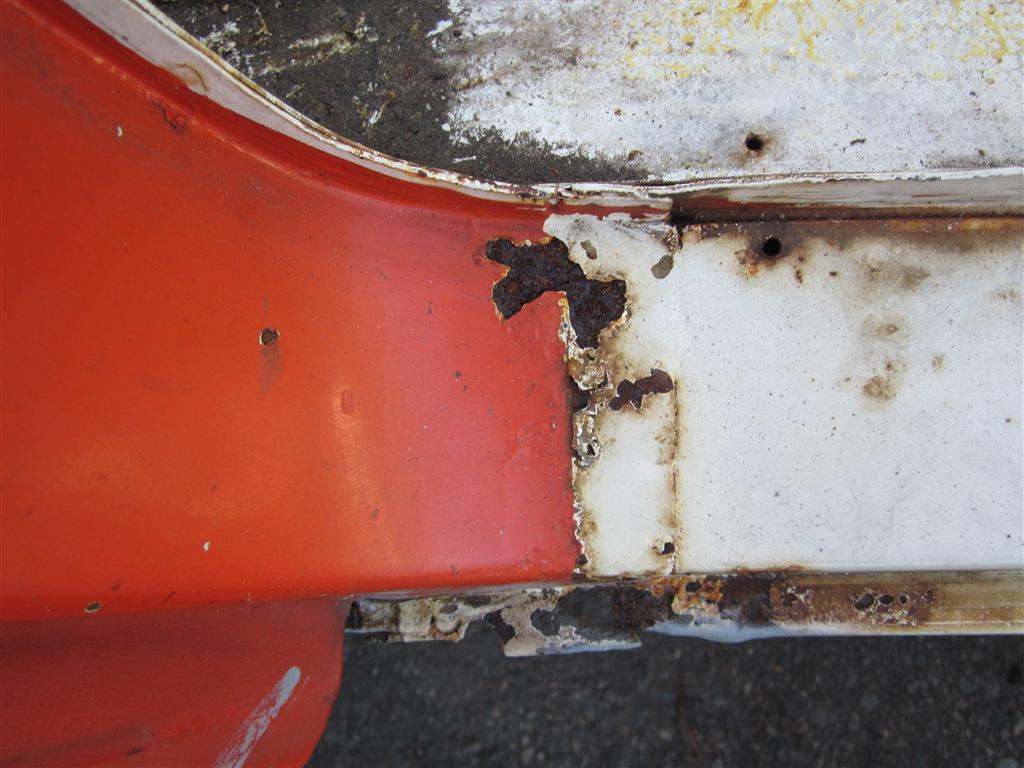
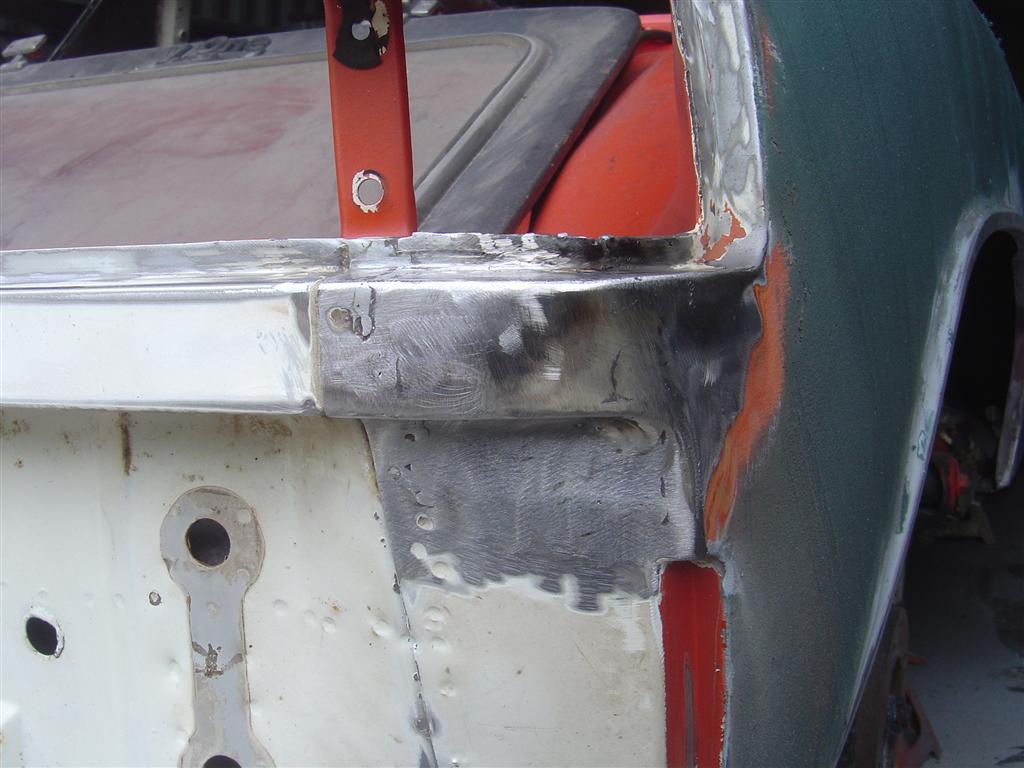
Scotty, I know you replaced the exterior corner after you cut this out. What did you do about the crusty skin behind it--the outside of the trunk wall? I presume wire brush, ospho, etc...but were there no pin holes?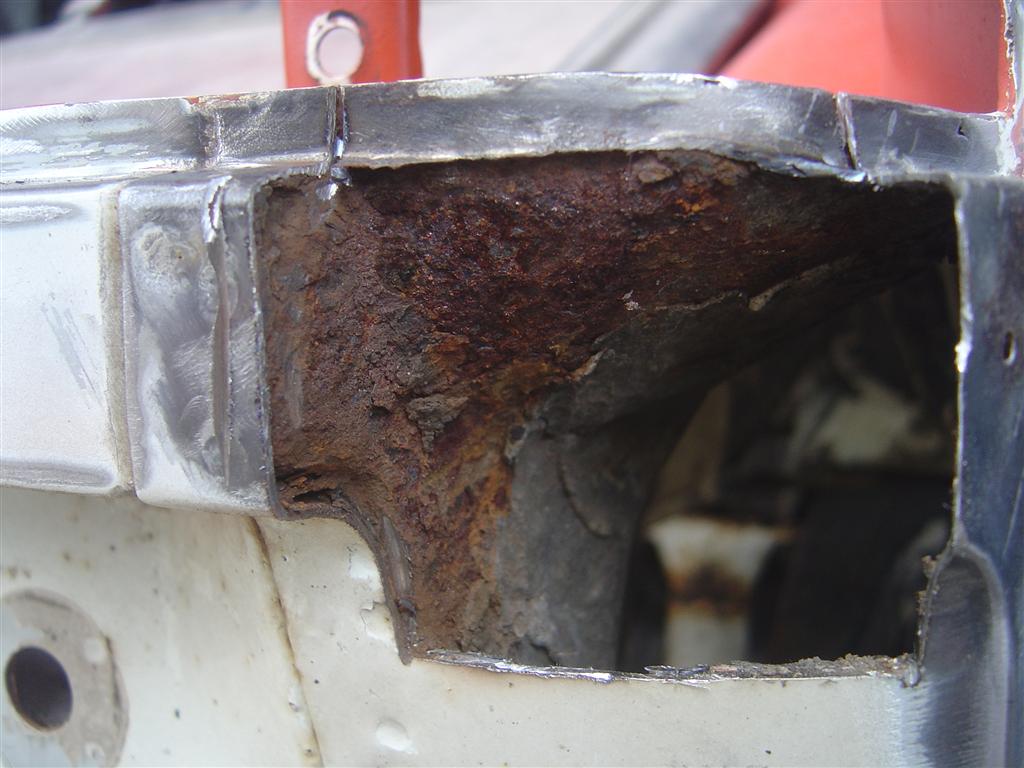
Posted by: scotty b Jun 22 2012, 05:17 AM
Yep, wire brushed, Ospho and a coat of black, fortunately there were no pinholes
Posted by: TargaToy Jun 22 2012, 04:53 PM
Yep, wire brushed, Ospho and a coat of black, fortunately there were no pinholes
Do you seam seal the back side of those welds or not worry about it since it's painted?
Posted by: OU8AVW Jun 24 2012, 09:11 AM
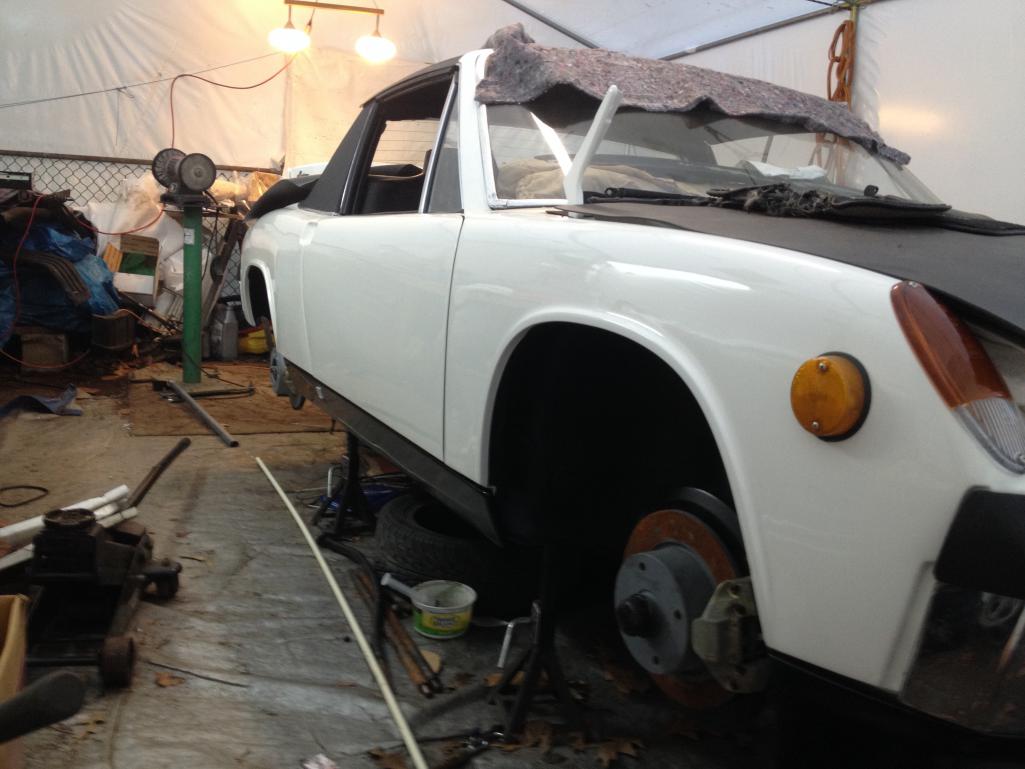
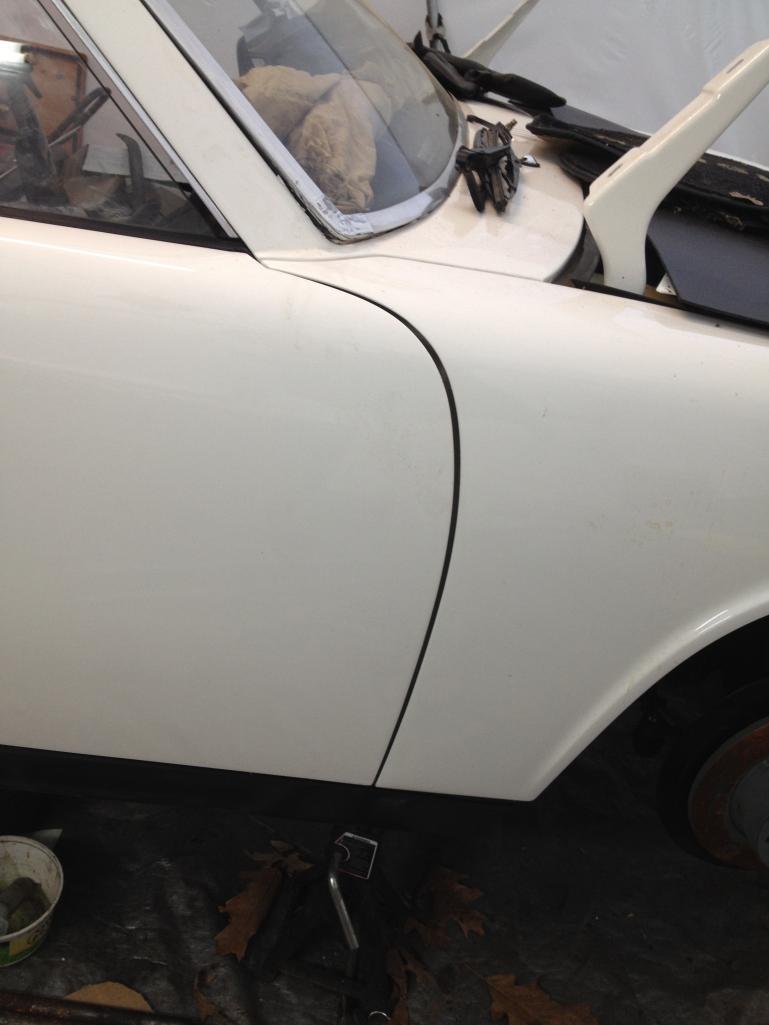
A quick reference for what it looked like when I bought it.....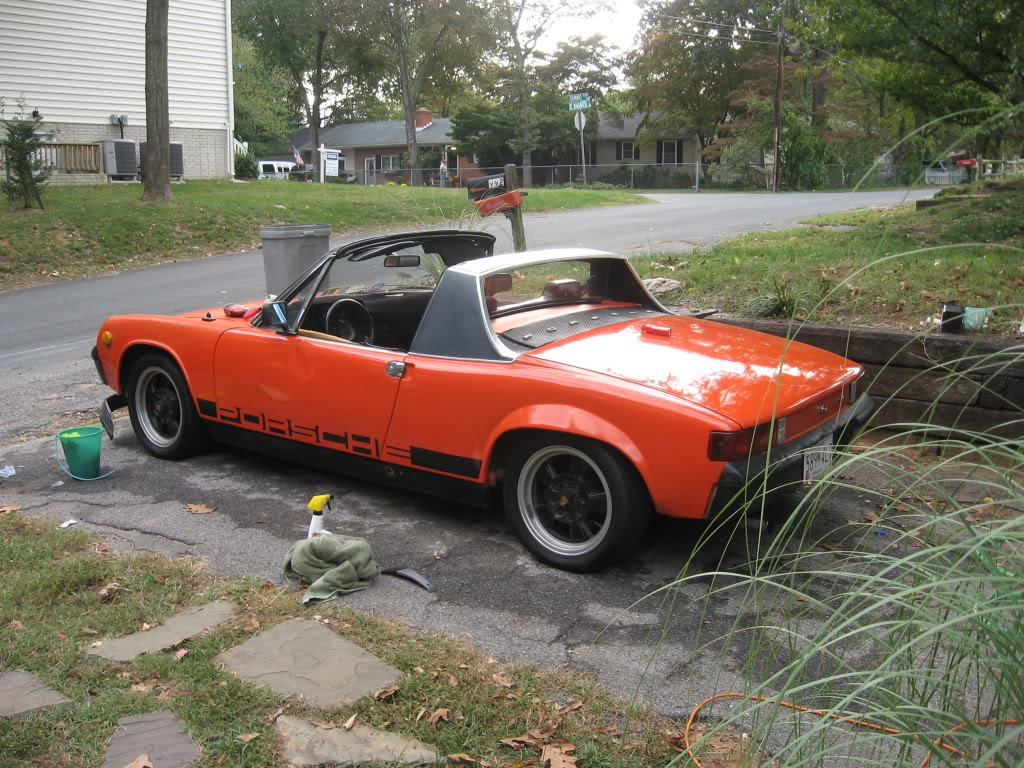
Posted by: OU8AVW Jun 24 2012, 09:14 AM
Few More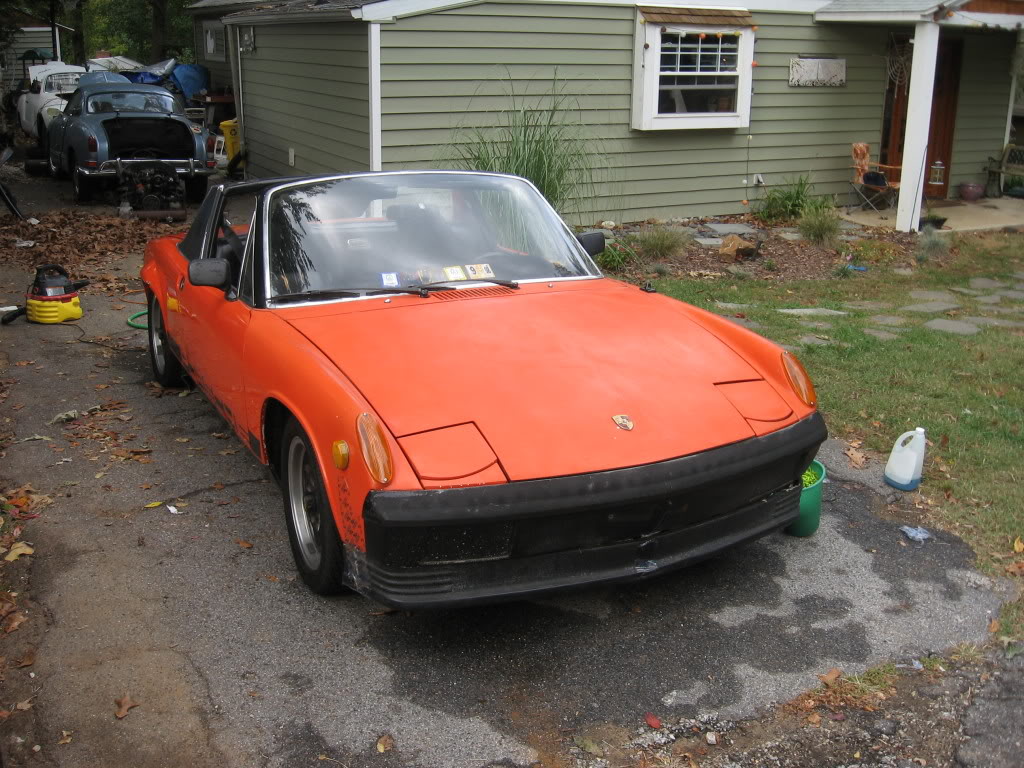
Posted by: seanery Jun 24 2012, 08:36 PM
You're keeping the sunroof, right?
Posted by: OU8AVW Jun 26 2012, 02:46 PM
No sunroof, but I do still have it.
Posted by: scotty b Jun 26 2012, 06:00 PM
you should put it back on. Along with those nekkid lady mudflaps you're using on it 
Posted by: OU8AVW Jun 27 2012, 07:51 AM
The PO said he found it in West Virginia, so that look might work.....
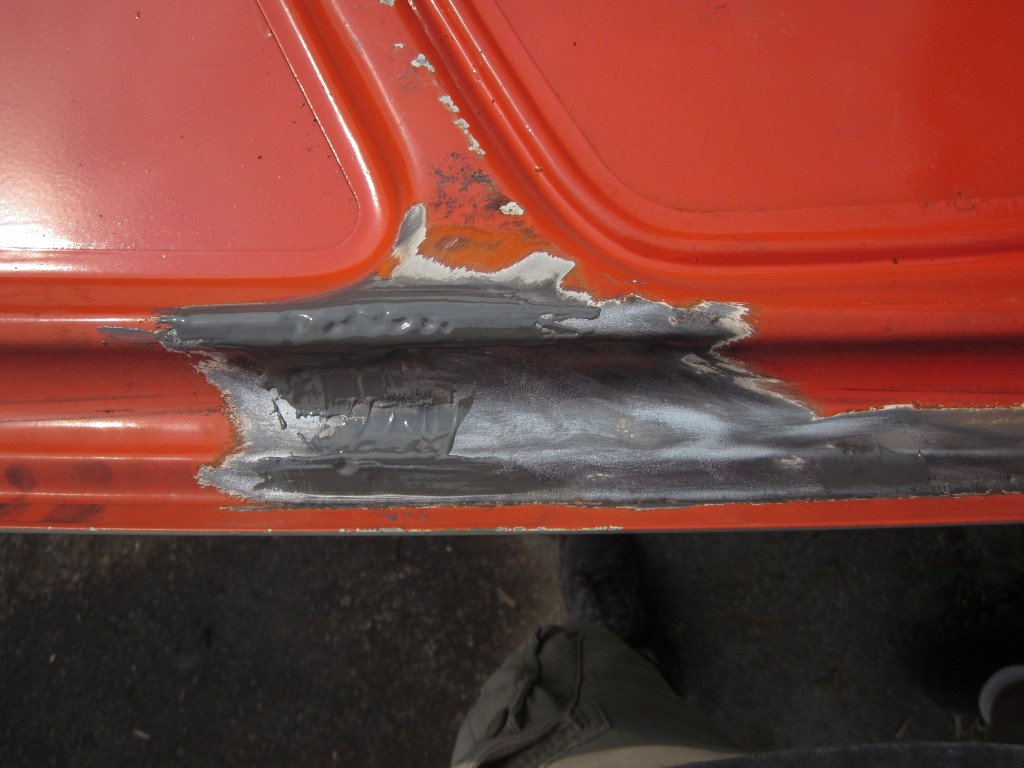
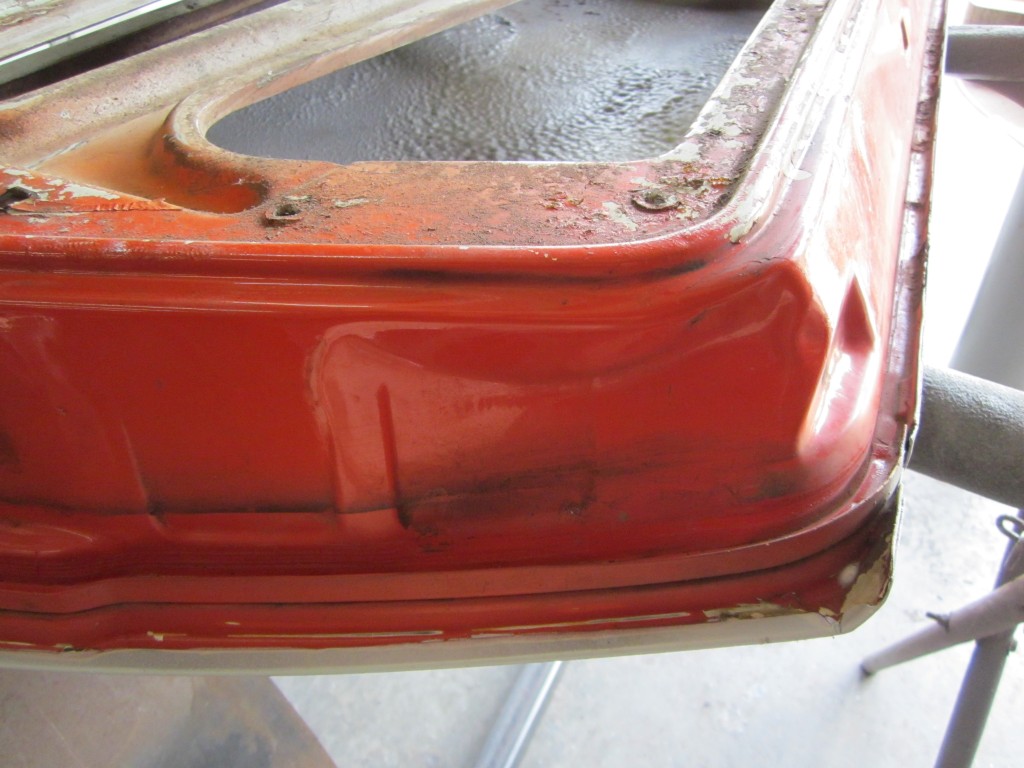
Posted by: scotty b Jul 8 2012, 04:27 PM
where's that sanding smilie ? I'll finish dealing with the bashed in door corner tomorrow
Attached image(s)
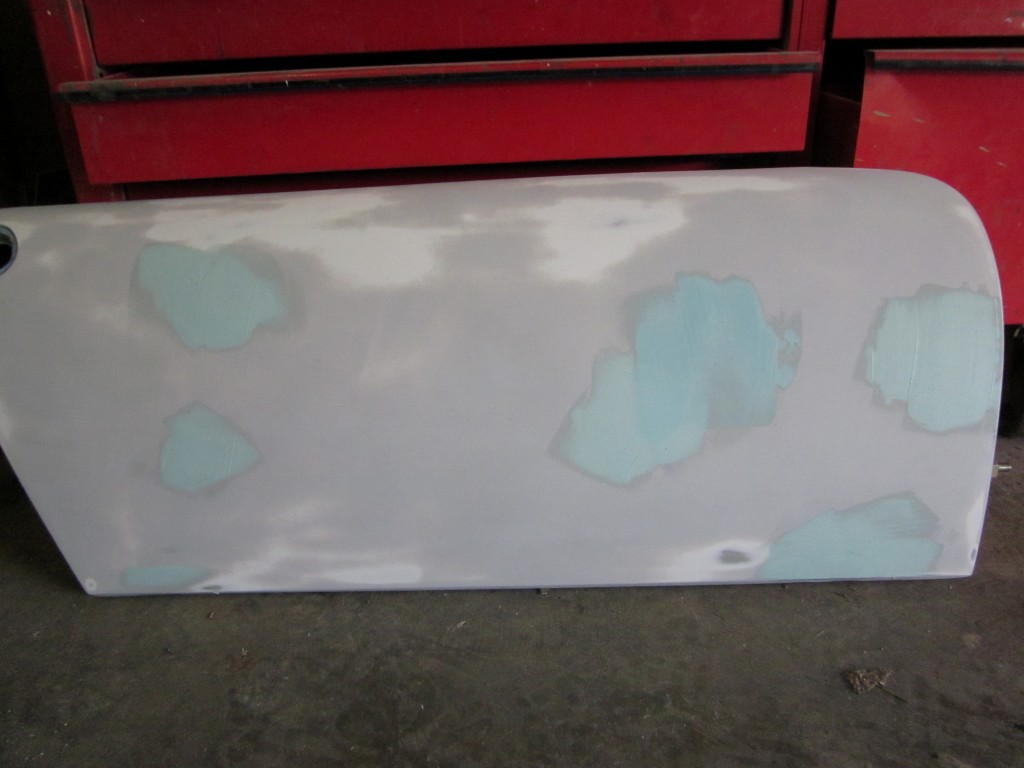
Posted by: scotty b Jul 18 2012, 05:52 AM
all ready to go back to Mike for the trunk and interior prep work
Attached image(s)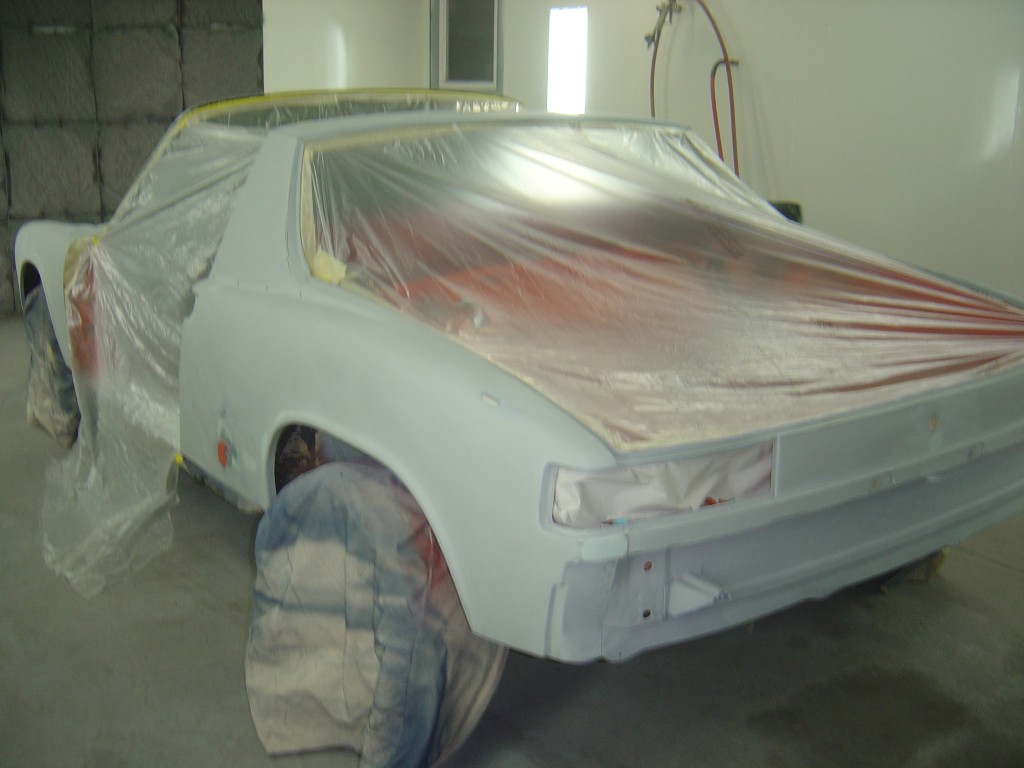

Posted by: MDG Jul 18 2012, 06:02 AM

Posted by: OU8AVW Jul 20 2012, 12:48 PM
Pickled until I have some time and $ to spend on her....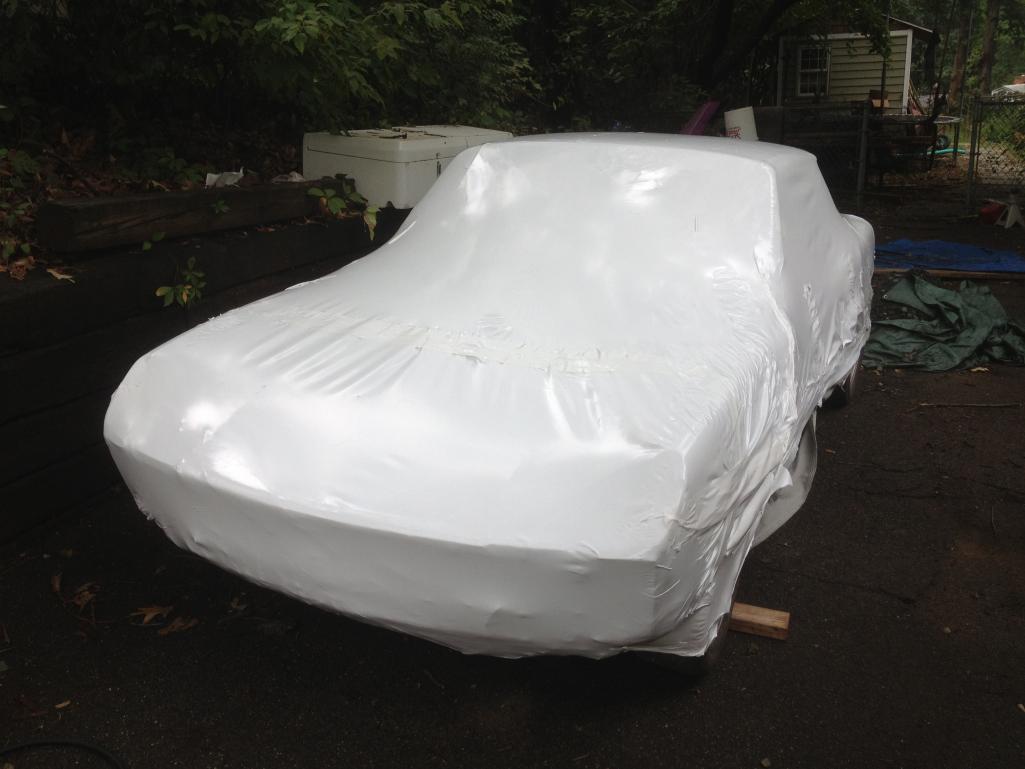
Posted by: OU8AVW Aug 21 2012, 09:30 AM
So I've been looking for one of these for years. Scored one on ebay at 1:00am this morning. Only paid $54! I think that's a sweet deal for an NOS part. I almost had a NOS 914-6 badge too but some auto snipers kicked the bid up to $261 at the last second! Zowwie! 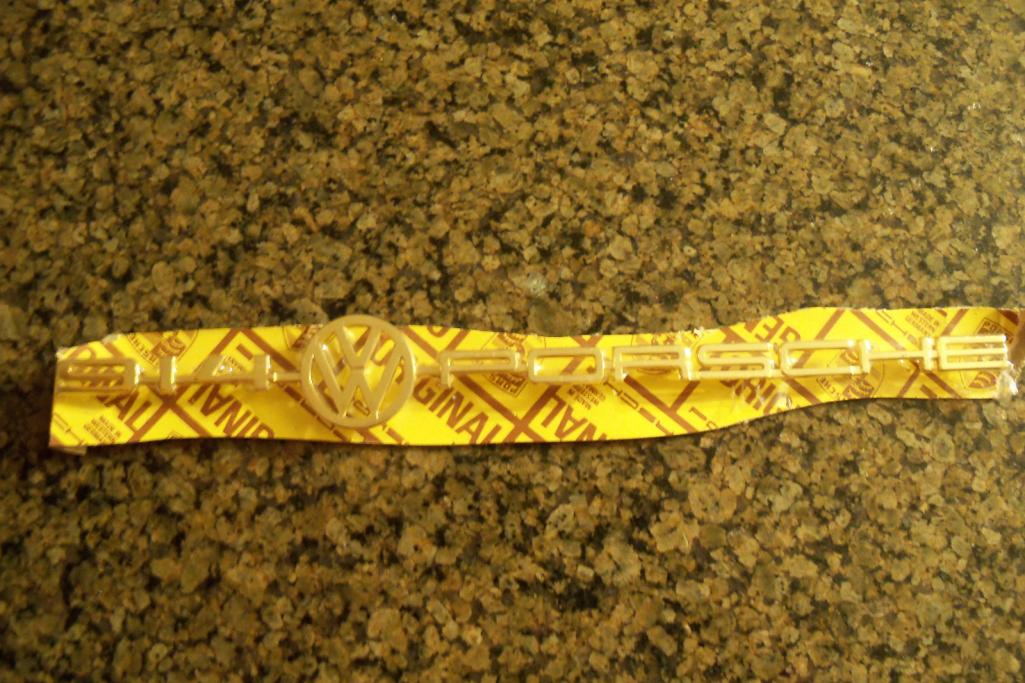
Posted by: sixnotfour Aug 21 2012, 04:04 PM
So Close...good luck ..hit the bone yards for more Fuchs..
says the 2 time customer. 
Posted by: Dr Evil Aug 22 2012, 09:24 AM
So I've been looking for one of these for years. Scored one on ebay at 1:00am this morning. Only paid $54! I think that's a sweet deal for an NOS part. I almost had a NOS 914-6 badge too but some auto snipers kicked the bid up to $261 at the last second! Zowwie!
I wish I knew. I have one and would have sold it. I need to list it
Posted by: MDG Aug 22 2012, 10:33 AM
How does Scotty keep his socks so clean? 

Posted by: balljoint Aug 22 2012, 10:43 AM
Those aren't socks. That's a tan line.
Posted by: hot_shoe914 Aug 22 2012, 03:14 PM
So I've been looking for one of these for years. Scored one on ebay at 1:00am this morning. Only paid $54! I think that's a sweet deal for an NOS part. I almost had a NOS 914-6 badge too but some auto snipers kicked the bid up to $261 at the last second! Zowwie!
I wish I knew. I have one and would have sold it. I need to list it
Don't list it. Sell it to me. Send it when you send the 5 pack you were gonna send me. Never did tell me how much money to send you.
Posted by: OU8AVW Sep 28 2012, 02:09 PM
I bought a set of Pistons and cylinders here for $75. I expected to keep them as an extra set to play with. I opened the box and they are a set of unused KB 96mm pistons! stoked!
That was about the last thing i needed before engine assembly can begin....
So engine spec will go a little like this:
2056 with 2.0 case Fully balanced
KB pistons and AA cylinders
Rebuilt heads with new SS valves and new guides
Raby 9550 cam kit
Chromoly push rods and NOS tubes
D-Jet with NOS injectors and NOS air temp sensor (so far)
Triad twin exit exhaust
Powder coated tin
Car specs should be something like this:
Rebuilt side-shift trans
Fully polished 2.0 fuchs
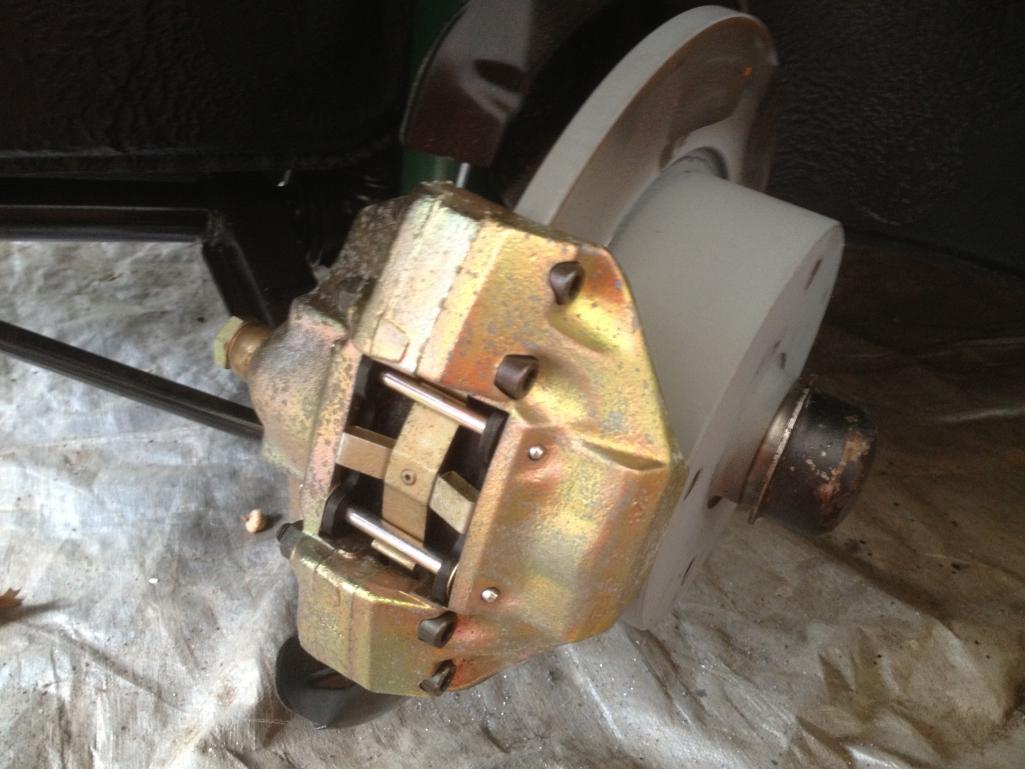
Full PMB restored brake set-up
Tangerine fuel hose and pump relocation set-up
90% new rubber, OEM and 914 rubber
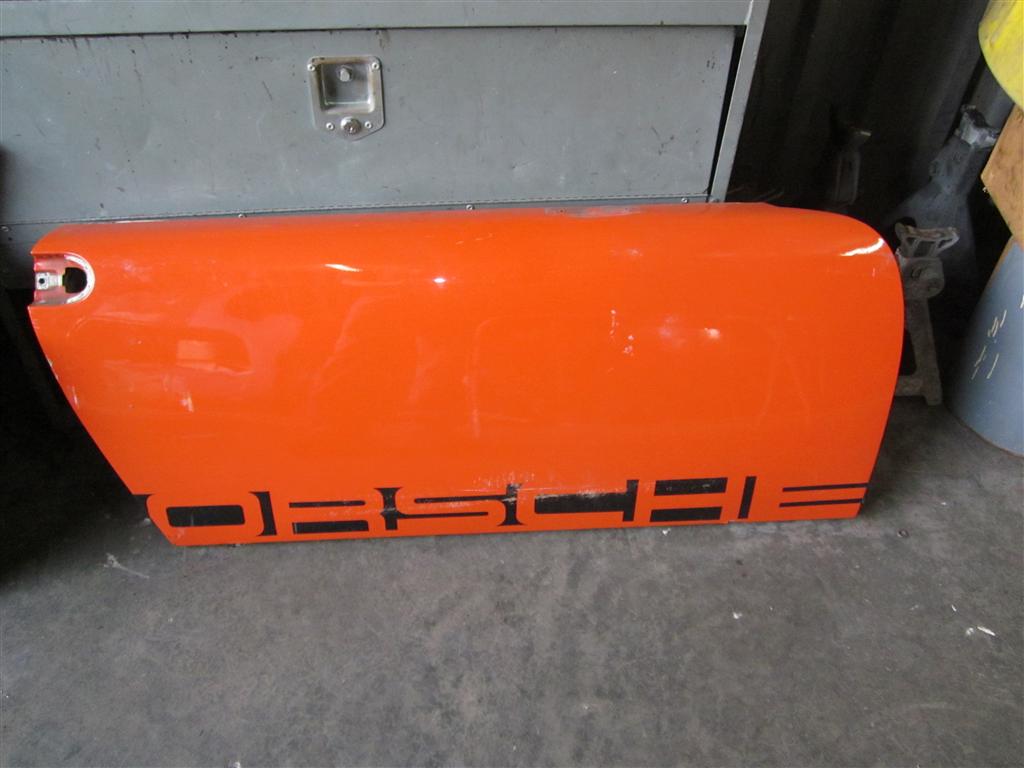
Scotty B body work and paint
Leather stock seats
New door panels and carpet kit from 914 Appearance
Under dash gauges (in the market for the gauges)
LE front valance
Chrome bumpers
et al.....
Posted by: OU8AVW Dec 22 2012, 03:22 PM
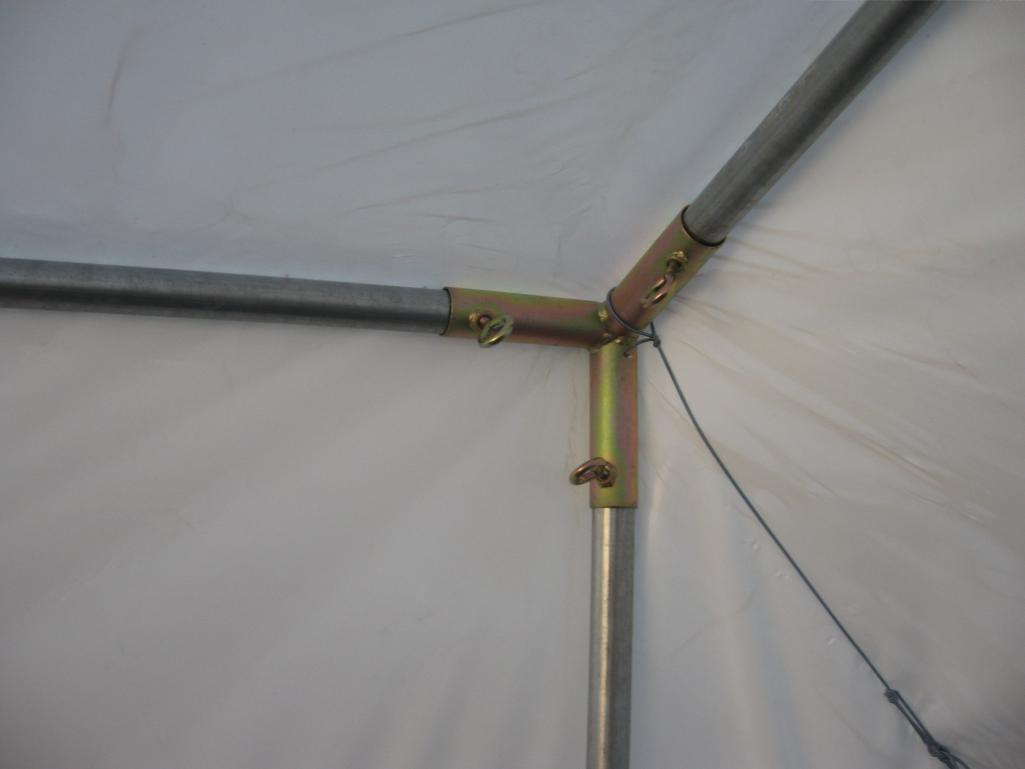
Built a Garage....
We use this shrink wrap stuff to store boats for the winter. I built a tube-frame then covered it with the shrink wrap. Voila! Instant garage. Now I can work on the car again 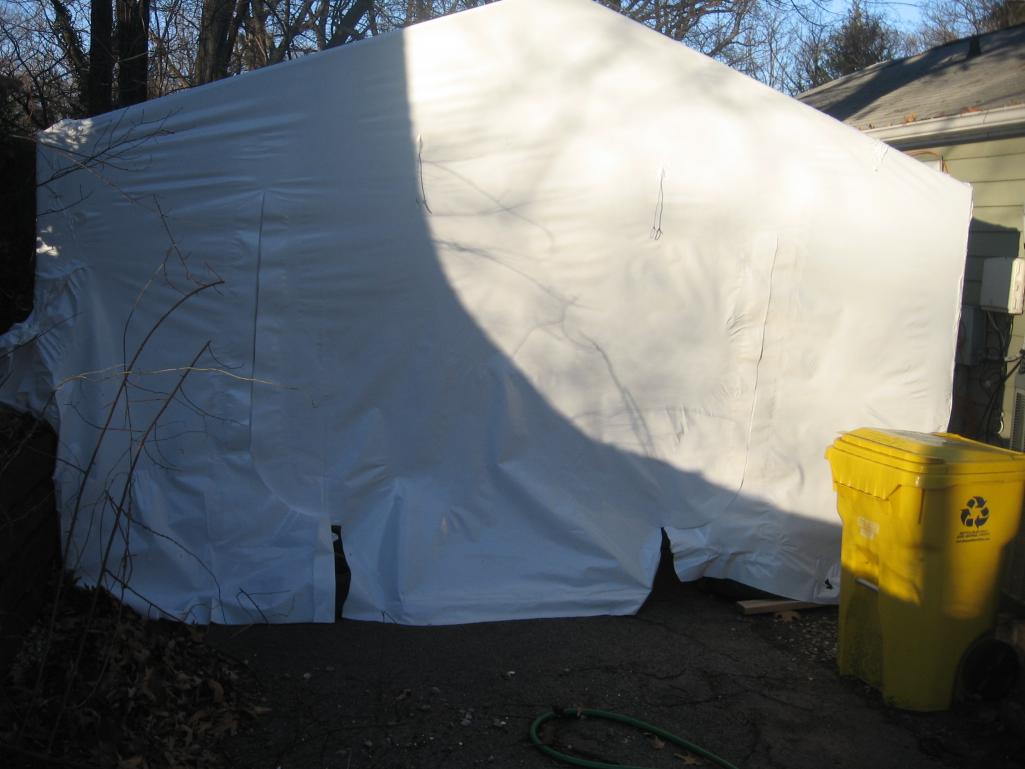
Attached thumbnail(s)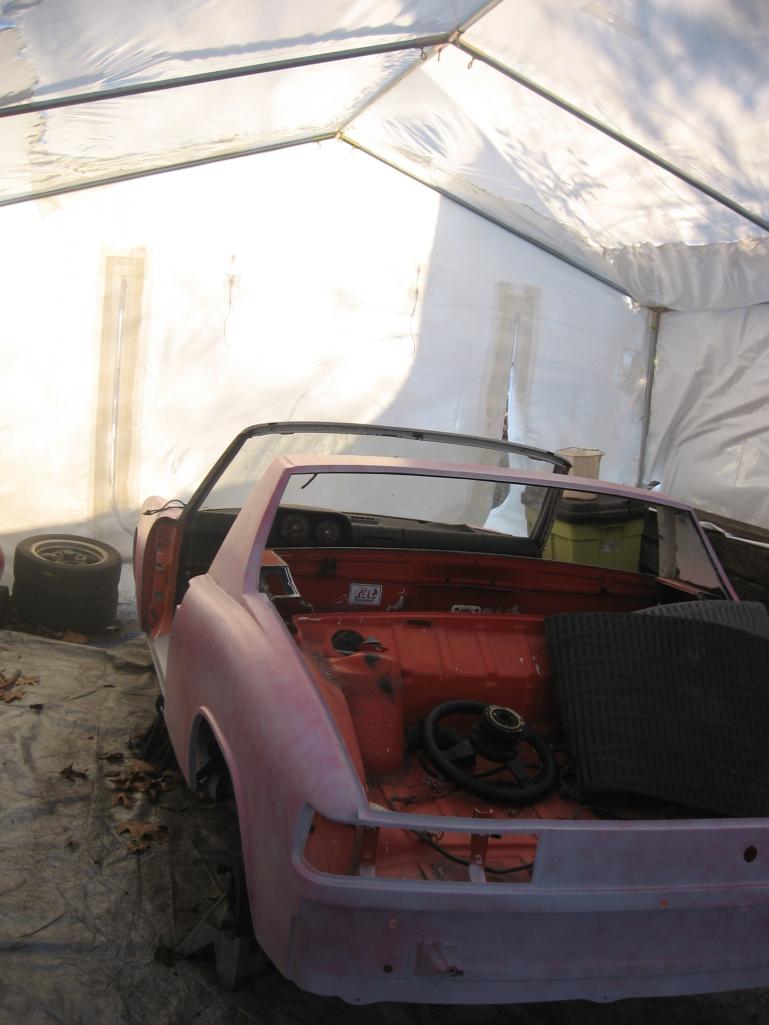
Posted by: scotty b Dec 22 2012, 03:40 PM
Makes a nice love shack too 
Posted by: Dasnowman Dec 23 2012, 02:00 AM
Makes a nice love shack too
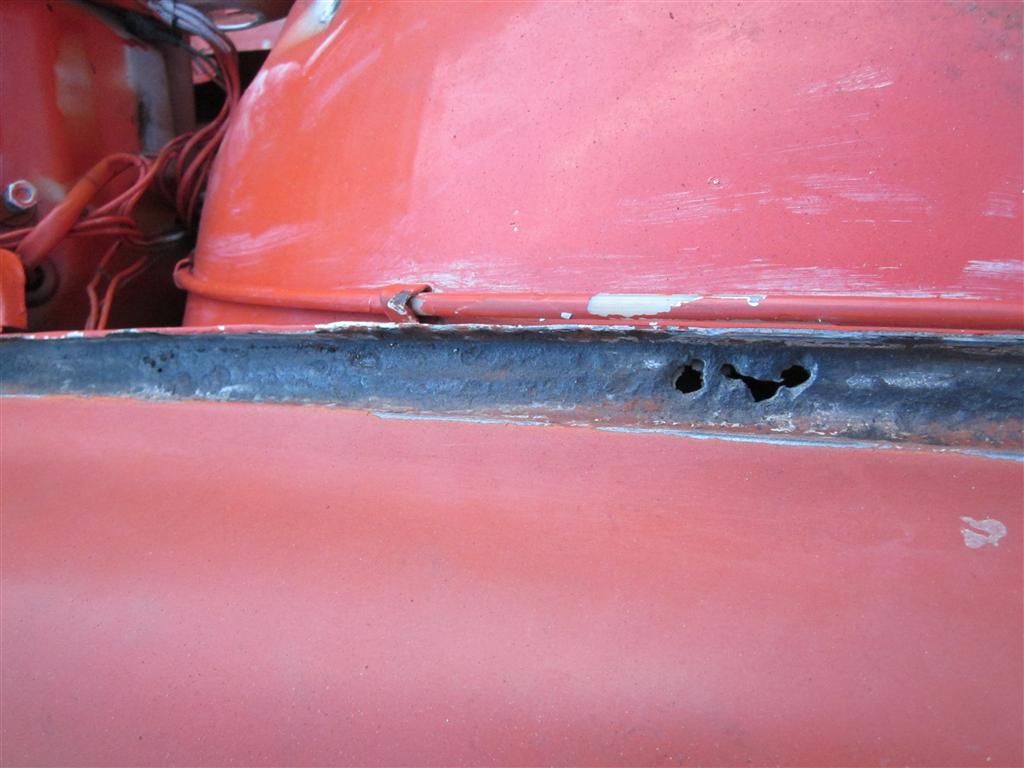
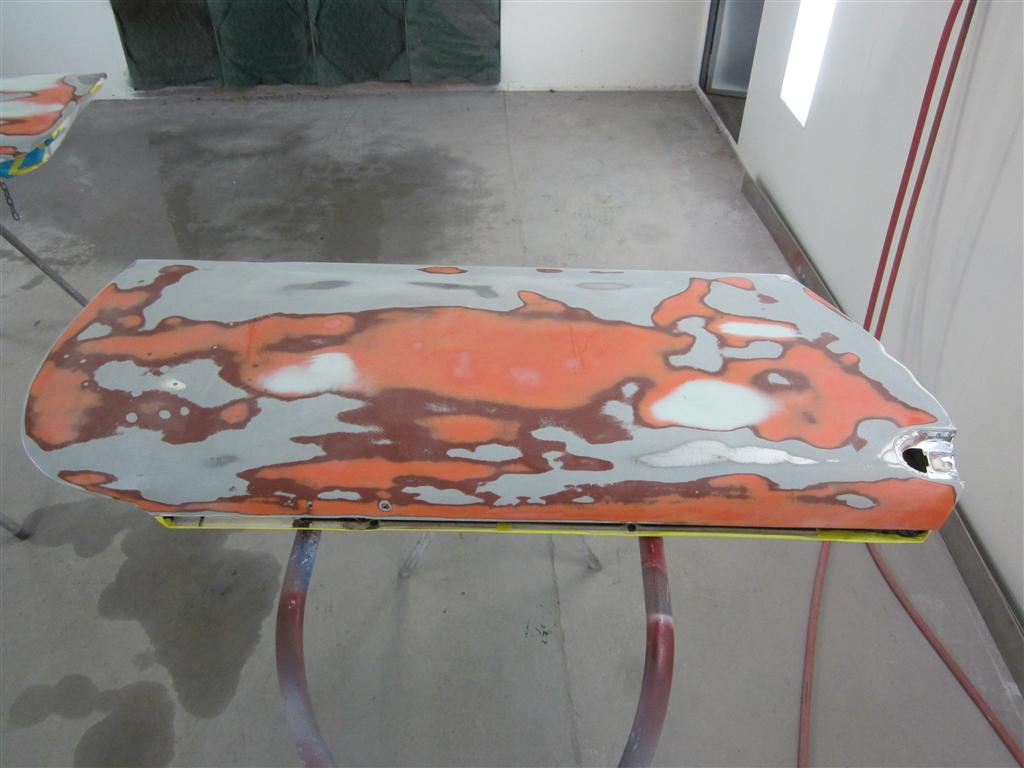
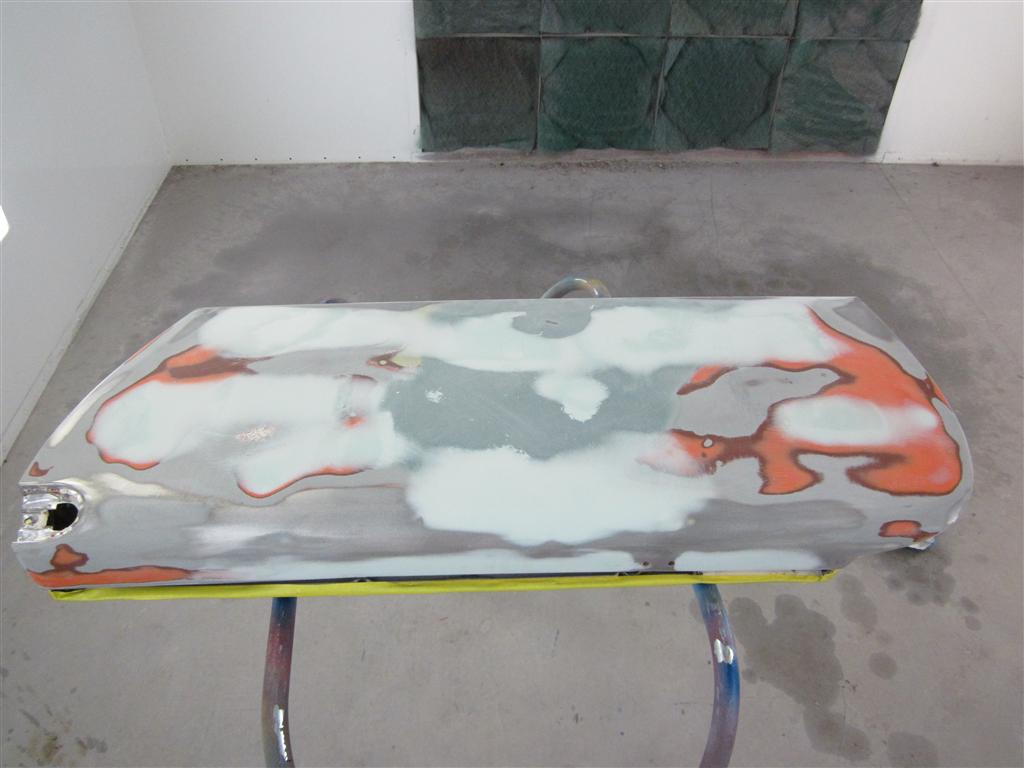
Scotty what was the primer and paint used? Looks like it was primered grey, then sealed with white but what was the redish orange it turned to or is the photo's not in sequance?
Also on my car I have a few pin holes in the front trunk channel above the fenders should I just spot weld to fill them in? Also the front channel is toast by the front trunk latch did you make the c channel or is there a supplier that sells it?
Sorry the the high jack!
Posted by: OU8AVW Dec 23 2012, 07:20 AM
The funky color was a sanding coat Scotty gave it. He sent it back to me to do the floors/trunk so I wouldn't hose up the new paint. Also he said something about some "real work". I think he meant a 911
Posted by: scotty b Dec 23 2012, 07:27 AM
Makes a nice love shack too
Scotty what was the primer and paint used? Looks like it was primered grey, then sealed with white but what was the redish orange it turned to or is the photo's not in sequance?
Also on my car I have a few pin holes in the front trunk channel above the fenders should I just spot weld to fill them in? Also the front channel is toast by the front trunk latch did you make the c channel or is there a supplier that sells it?
Sorry the the high jack!
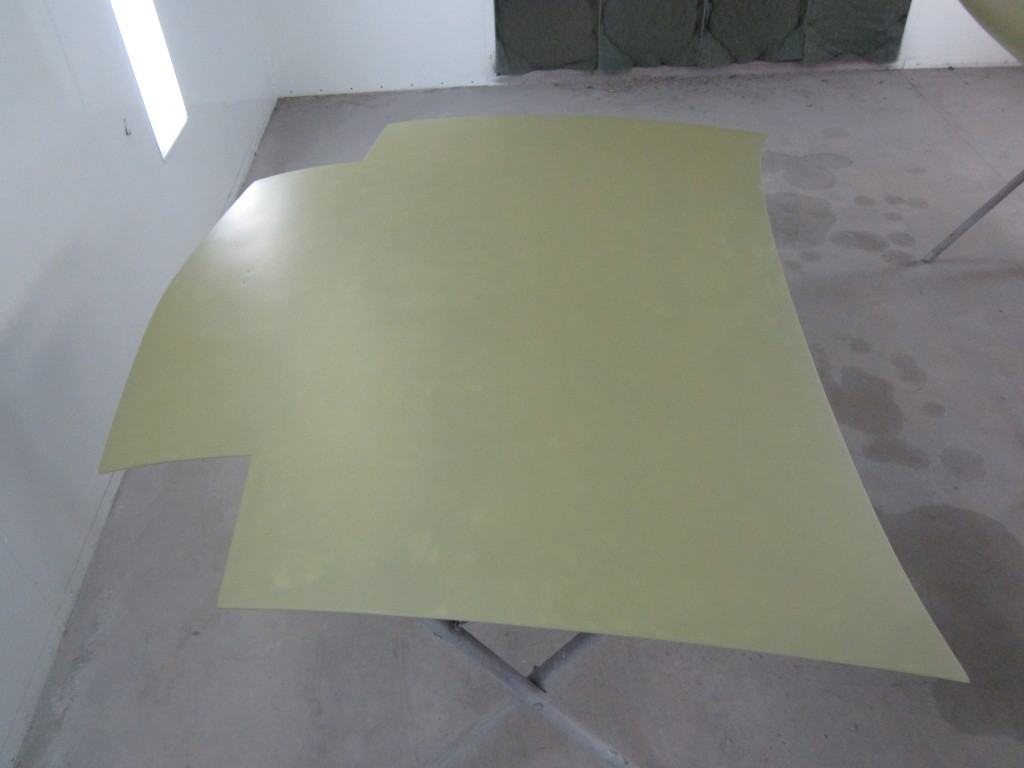
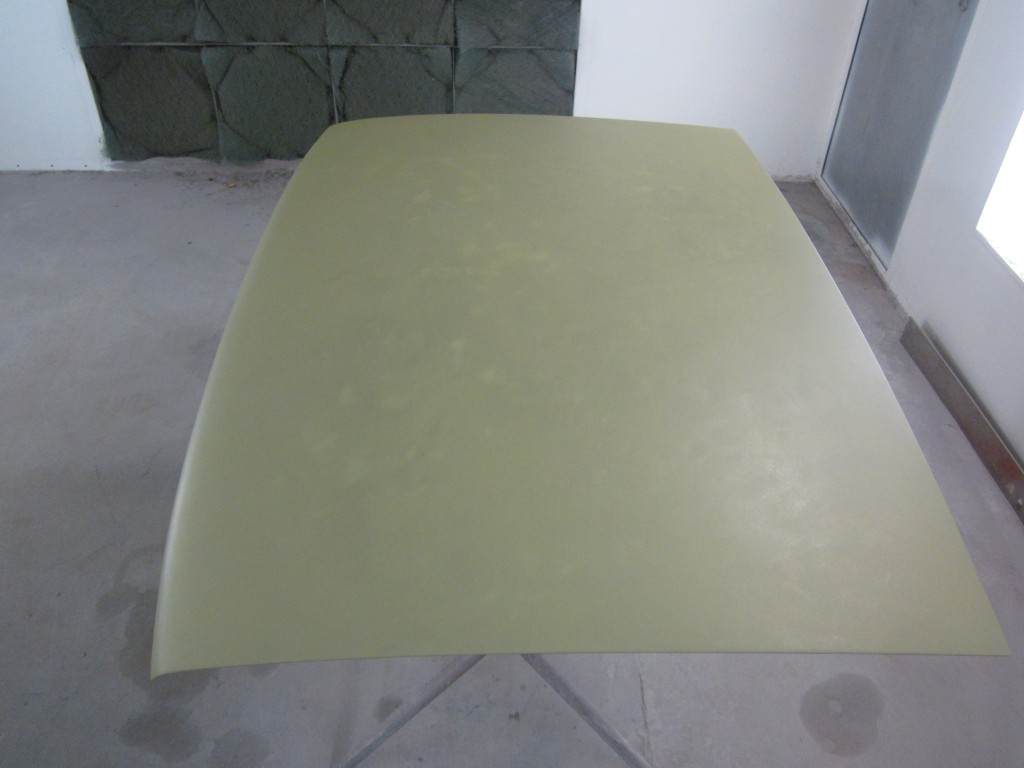
the grey was a high buiild primer that got sanded smoth then epoxy was put on since it was going to sit for a while. Like Mike said. the red was just a guide coat to let me know where any high or low spots are when I go to do a fnial sanding.
for the trunk channel you either have to make it, or fill the pits with some filler. I use JB weld in that case. Just make certain you get it good and clean before putting any filler in or you will just waste your time.
Posted by: OU8AVW Jan 17 2013, 08:42 AM
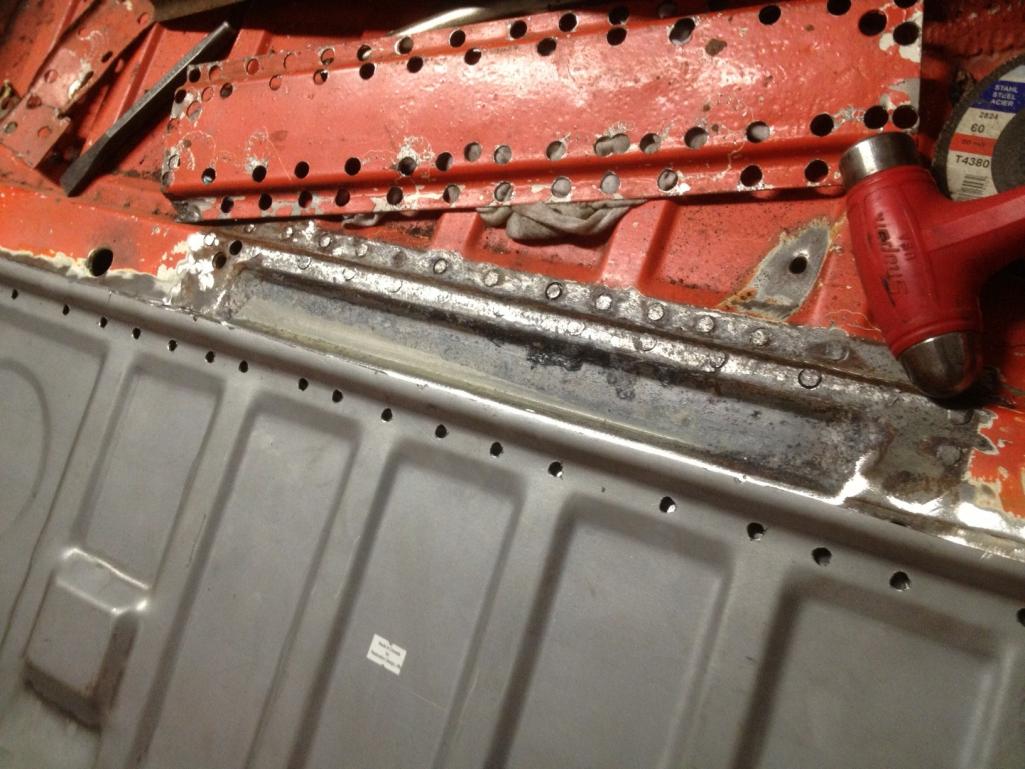
Got the car all sorted in my workspace and started patching the floors. The pans were in pretty good shape with a few exceptions and I can't really afford all new pans, so a few well placed patches will suffice. My welding skill got much better as I went along. 
Posted by: OU8AVW Jan 17 2013, 09:21 AM
Pulled my dash out to make it ready for new vinyl. My friends at the sail loft/canvas shop have some special UV stable upholstery I'm going to check out. 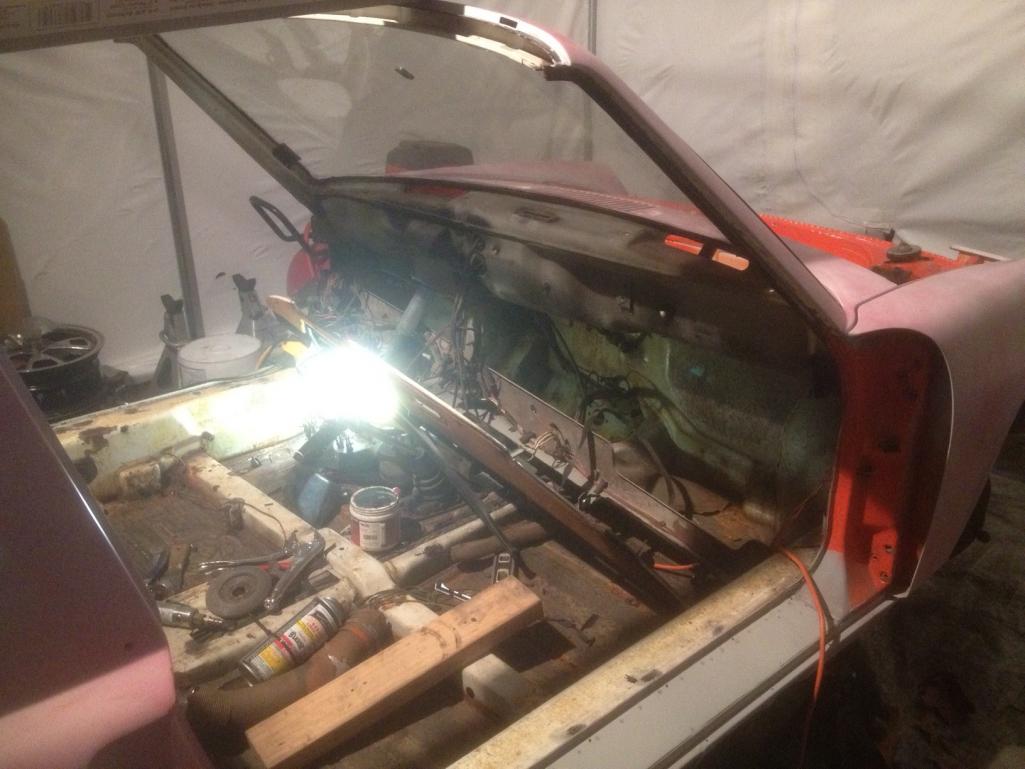
Posted by: OU8AVW Jan 24 2013, 03:07 PM
I need one of these
Posted by: OU8AVW Feb 11 2013, 09:03 AM
I started to remove the rear trunk pan. Using an air saw was very effective. Until the thing locked up on me. I'll buy another as this one was an old $40 unit that I borrowed from a friend. 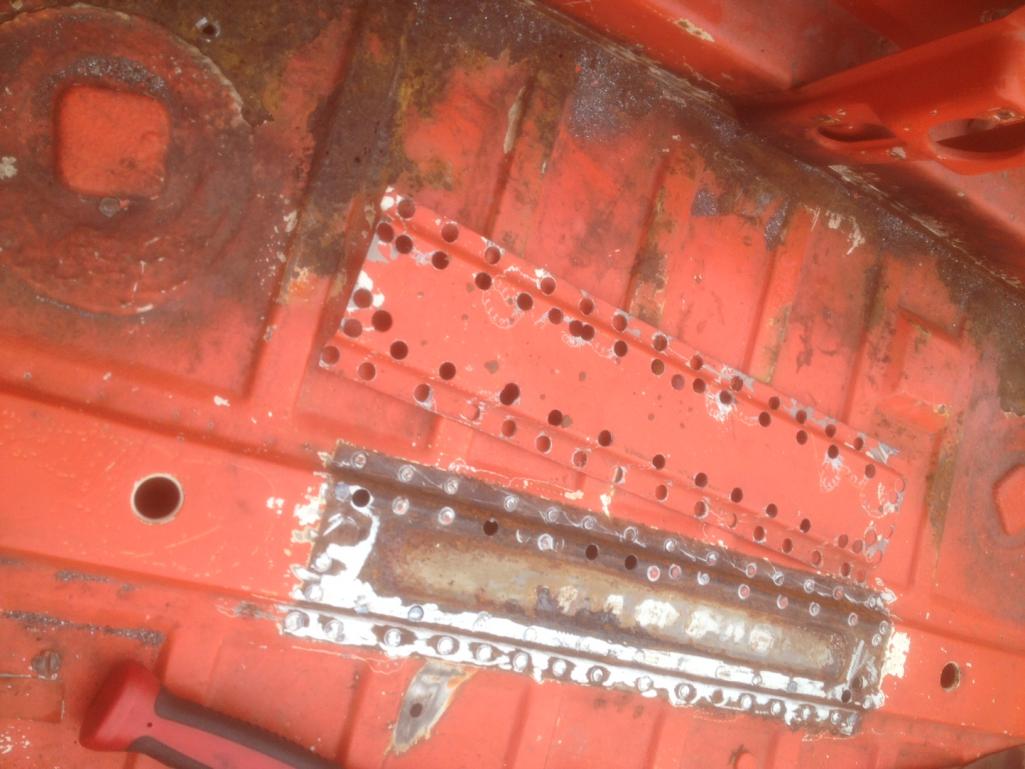
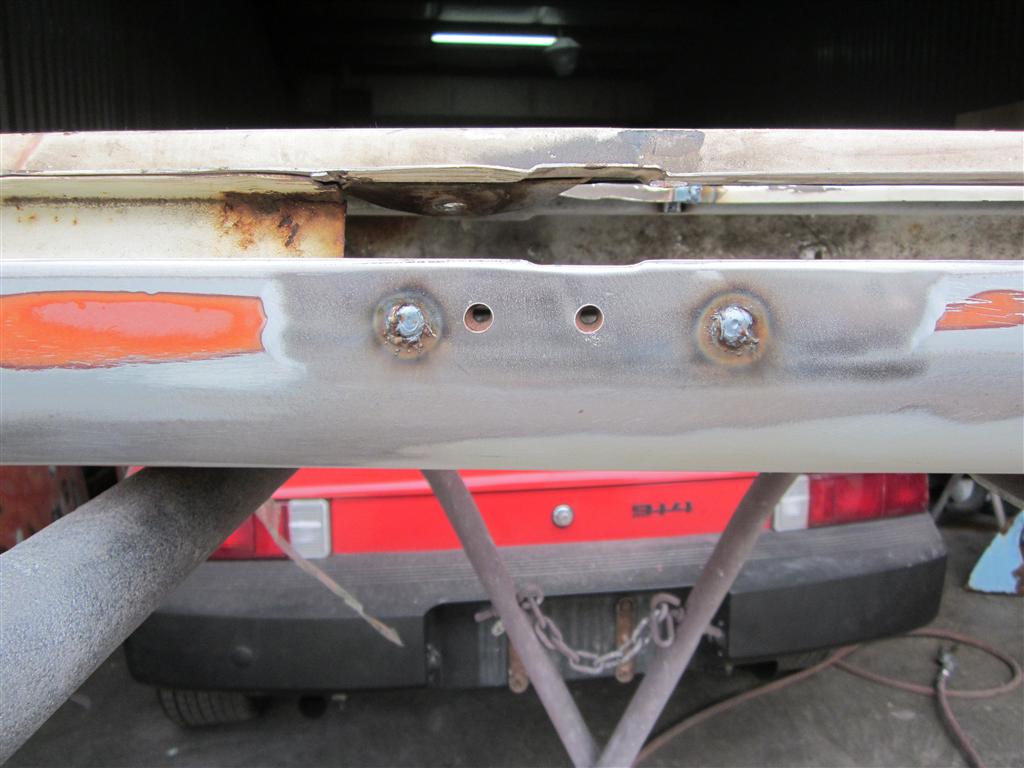
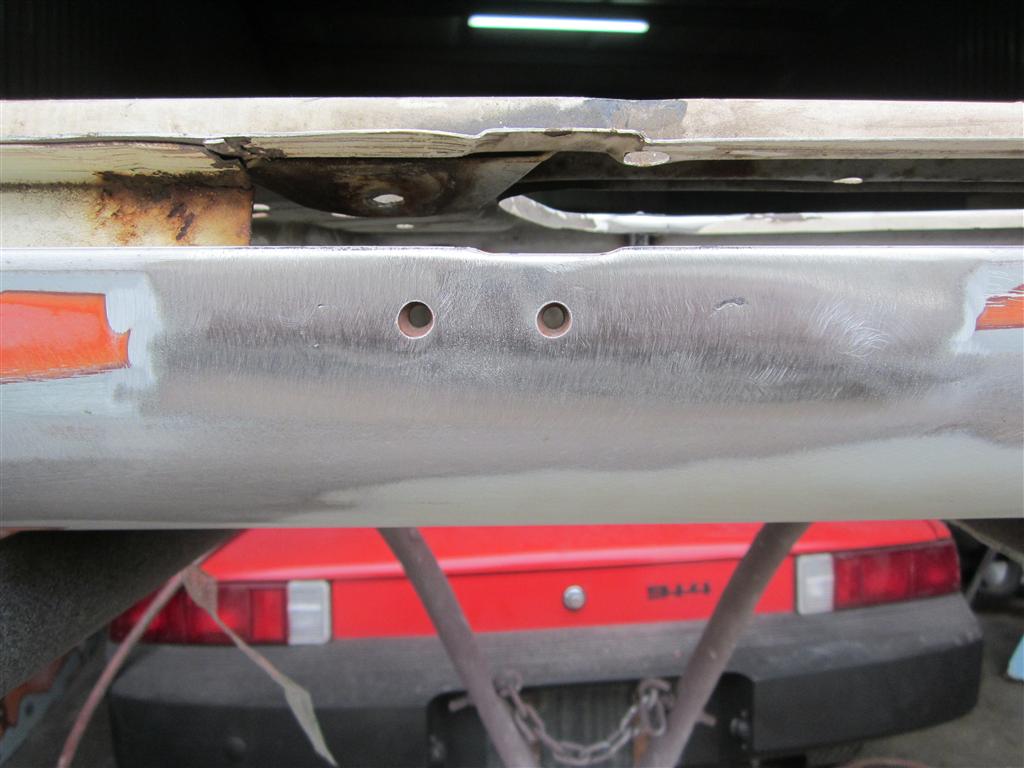
Posted by: OU8AVW Feb 11 2013, 09:12 AM
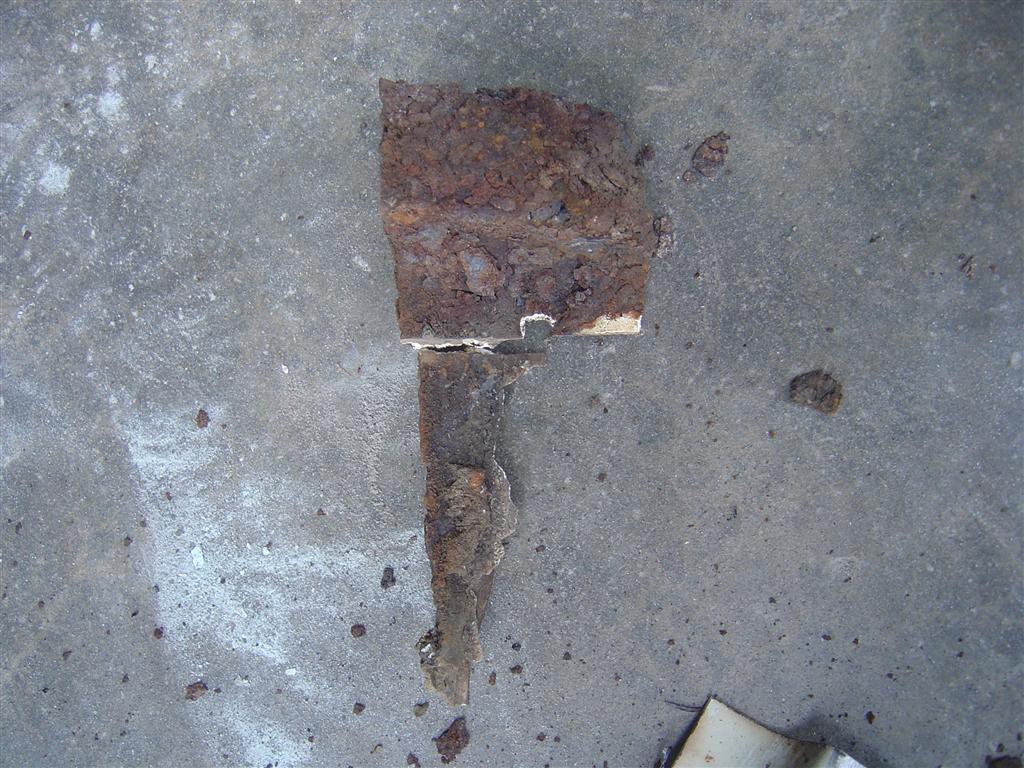
So, I just got my replacement panel from Restoration Designs for the trunk. What a beautiful part. I was thinking about making the cut just forward of the aft curve of the support, see image. Then using a flange tool to flange the car to accept the new part overlapping the car. This will let me do a better job of welding these pieces together. The rest of the spot welding can be done like the factory from the outside of the rear apron. The original brace can then attach on top of the cross member.
What do you think? 
Posted by: 914itis Feb 11 2013, 12:13 PM
I played hookie from work yesterday and continued prepping for paint. I got a doner floor pan that I'm going to use for some patchwork on the driver's side. All and all not too bad.
How did you approach these rust holes? Did you replace the panel or just clean and weld using small pieces?
Posted by: OU8AVW Feb 12 2013, 08:58 AM
I played hookie from work yesterday and continued prepping for paint. I got a doner floor pan that I'm going to use for some patchwork on the driver's side. All and all not too bad.
How did you approach these rust holes? Did you replace the panel or just clean and weld using small pieces?
I cleaned and welded small patches. The pans were in fair shape, just a three spots that had rust-through. I cut out the sections and then used them as a template for cutting a doner I bought on this board. Not the best way to do it, but cost effective and easier than whole pans. I'm building this car to be a fun driver so it works for me. Carpet and undercoating will cover the patches.....
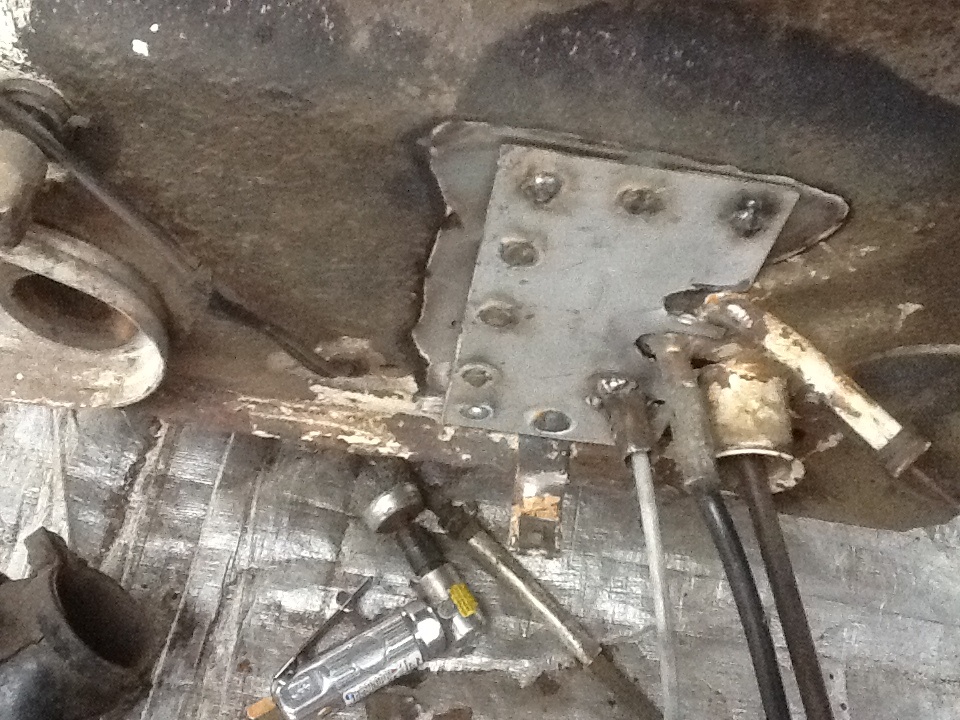
Posted by: OU8AVW Feb 15 2013, 05:26 AM
Welded on a new engine lid bracket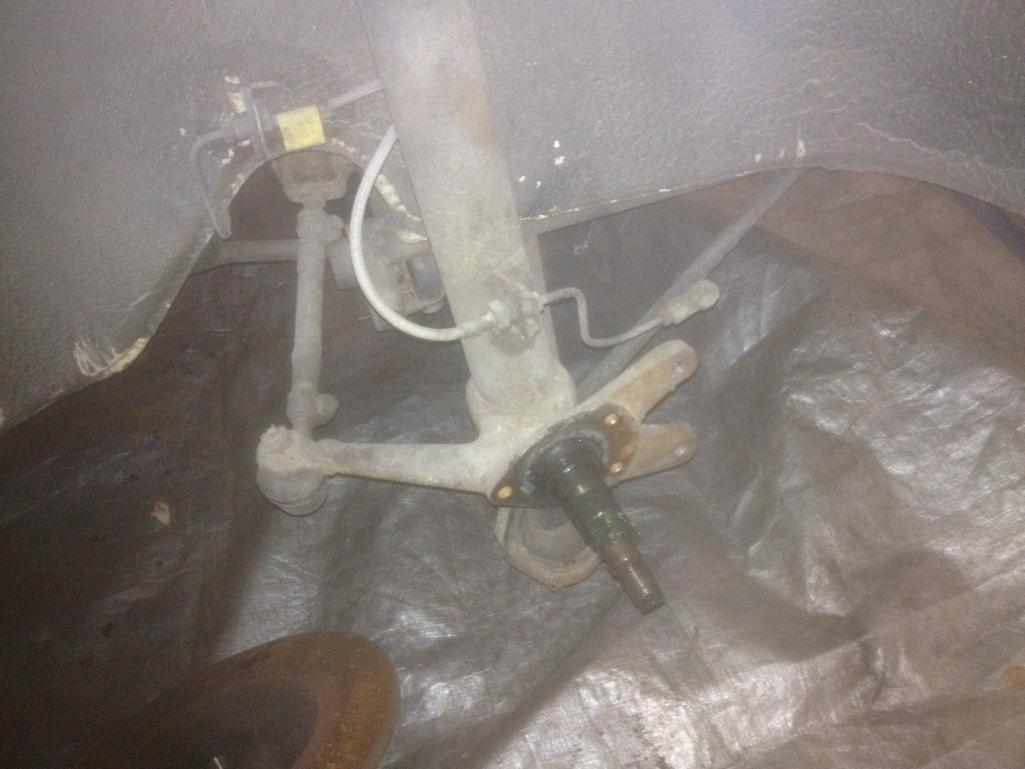
Tore down my front end a bit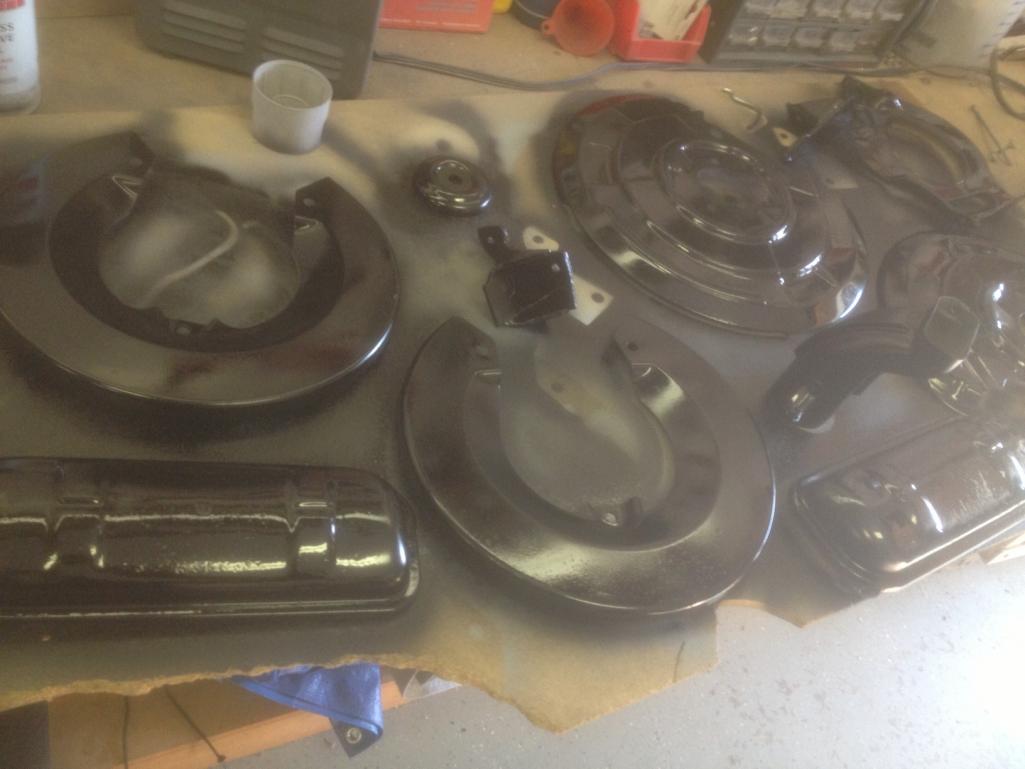
Painted dust shields
Cleaning up CV Joints
Posted by: OU8AVW Feb 18 2013, 11:50 AM
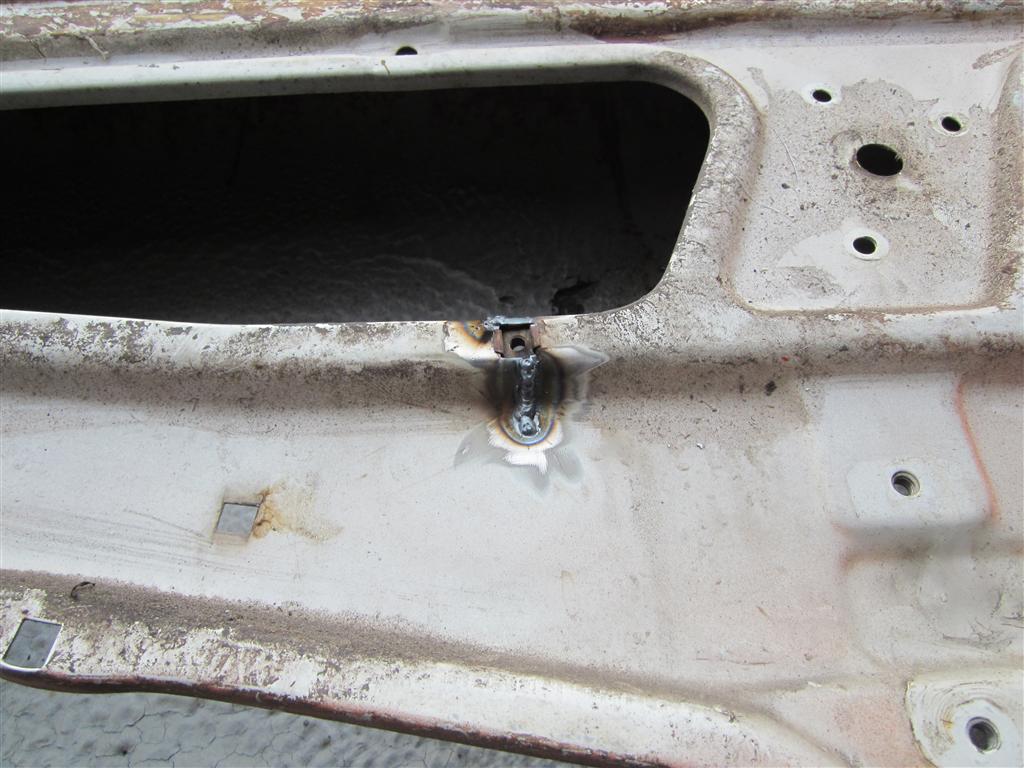
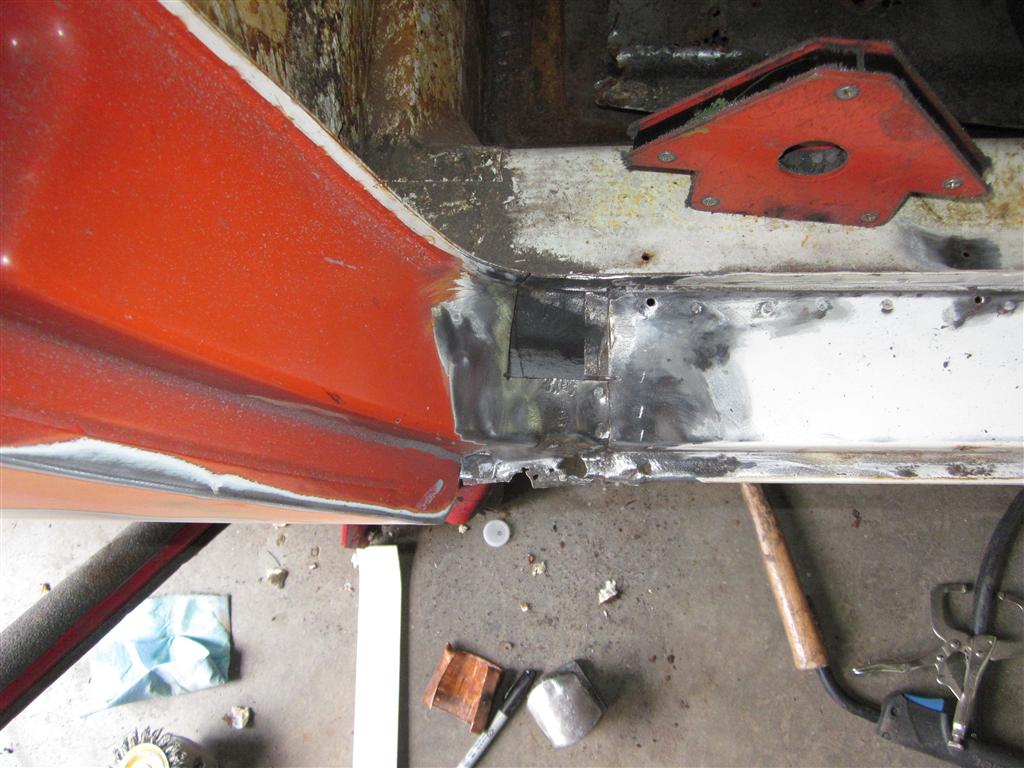
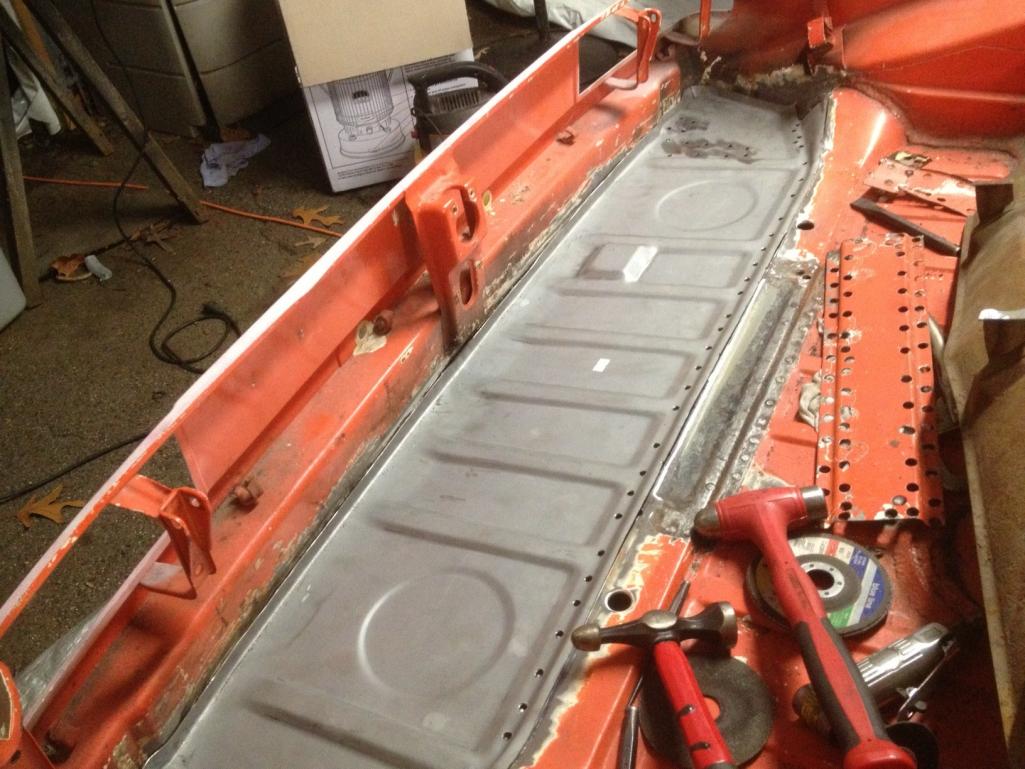
I had some time this weekend and got the rear trunk pan removed. I cut along the trailing edge of the trans support. An air saw got the aft end of the pan removed close enough to the welds that I could grind down the remaining material with little effort.
[attachmentid=369533]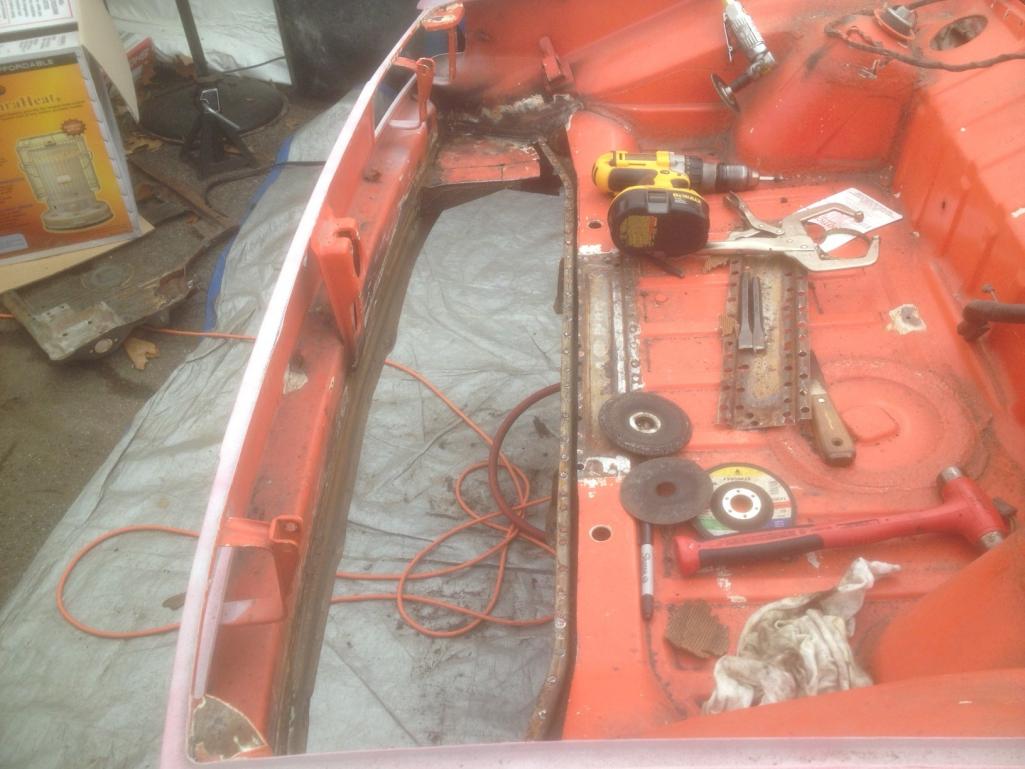
Attached thumbnail(s)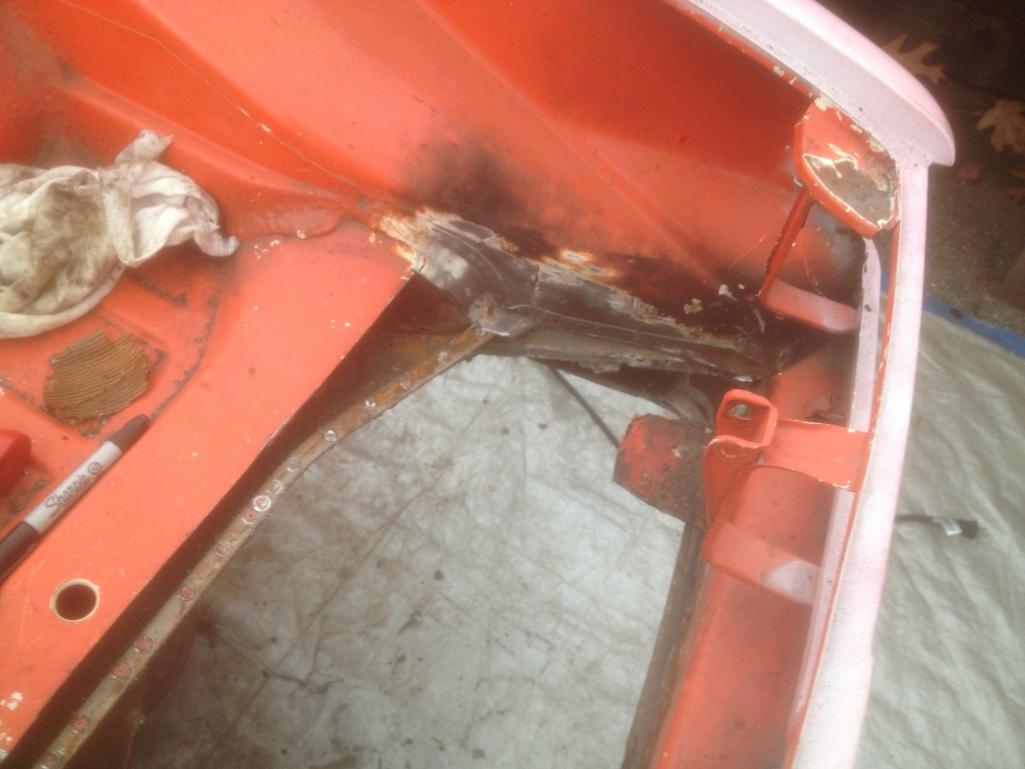
Posted by: FourBlades Feb 18 2013, 12:25 PM
Nice work!
John
Posted by: OU8AVW Feb 20 2013, 10:28 AM
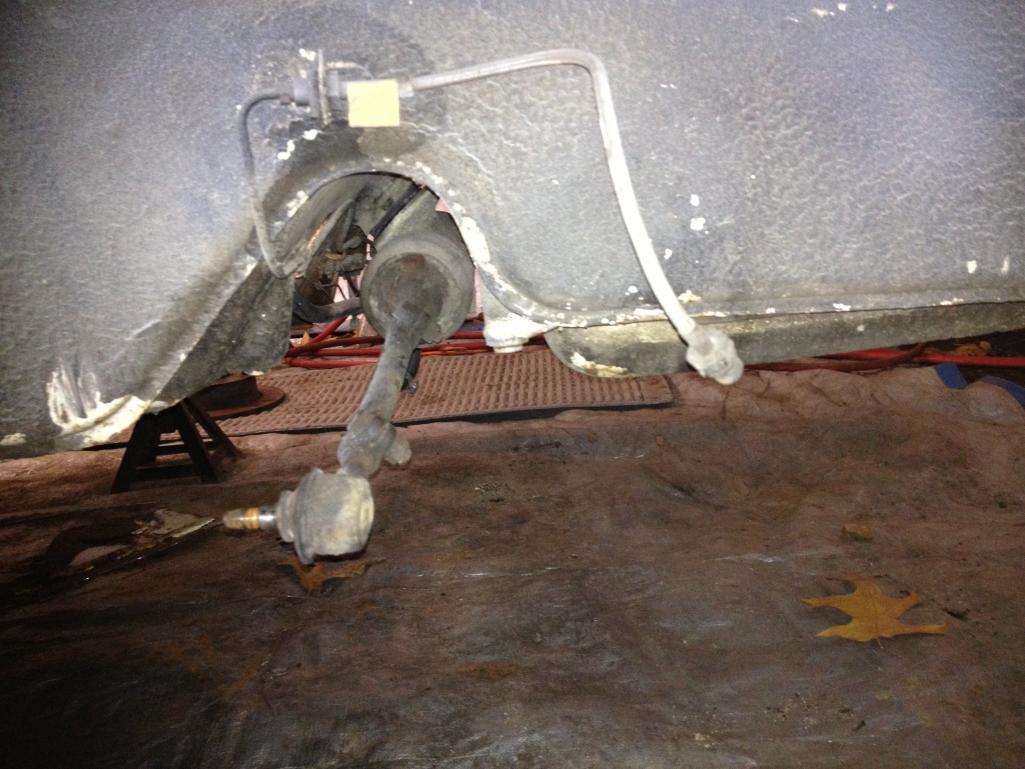
Front end is oot....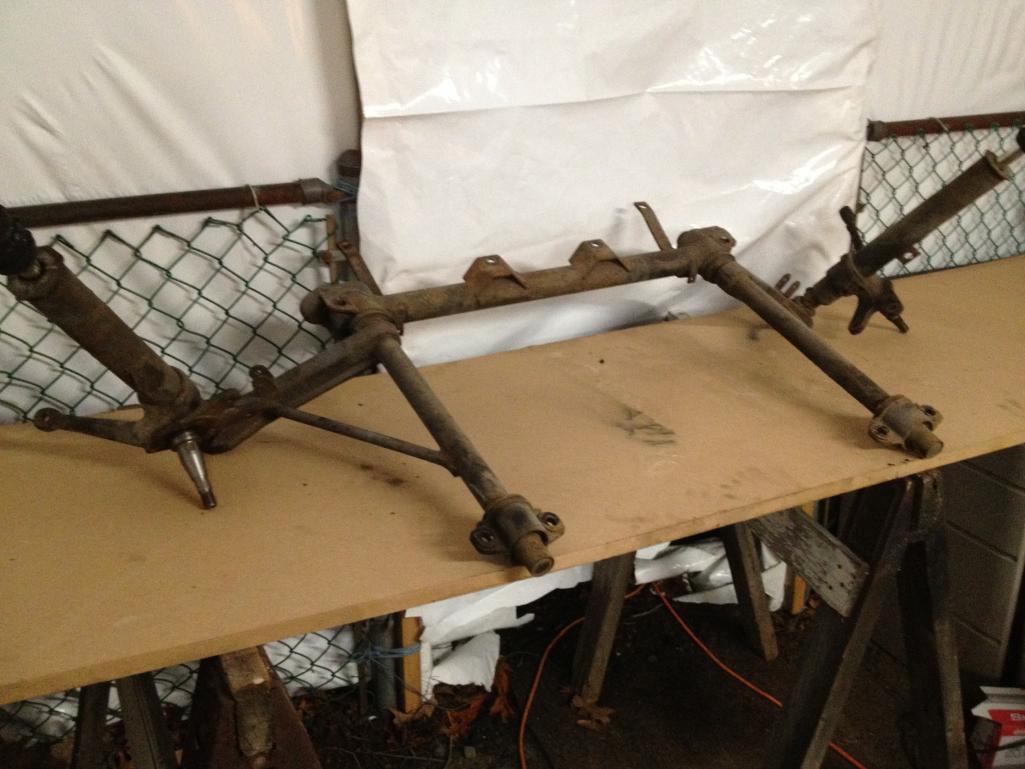
Posted by: OU8AVW Feb 20 2013, 10:28 AM
Posted by: OU8AVW Feb 20 2013, 10:29 AM
Posted by: OU8AVW Feb 20 2013, 10:37 AM
Ok, any tips on removing the torsion bars? I got the A-arms off the crossbeam but I cant's get the torsion bars free....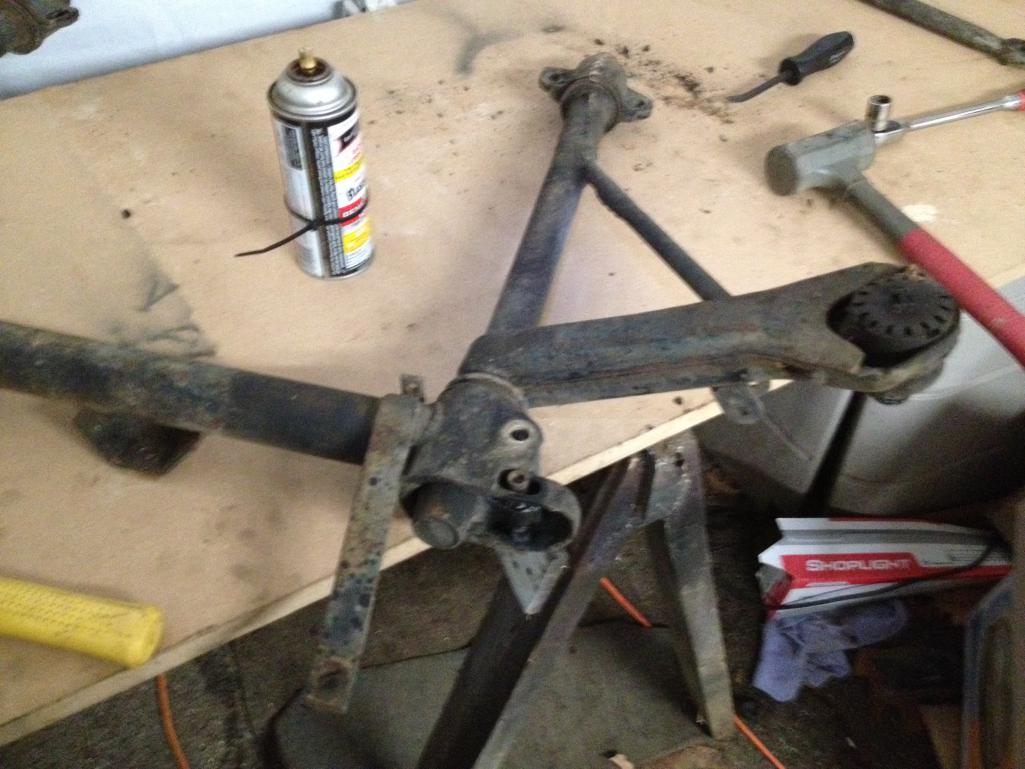
Posted by: FourBlades Feb 20 2013, 11:14 AM
It is dirt in the splines holding it in.
Turn it vertical and shoot some PB blaster down there.
Wait a few hours then turn it over and wiggle it and whack it.
It should come out.
John
Posted by: boogie_man Feb 20 2013, 11:34 AM
Nice work, that is going to look awesome. Keep the pix coming....
Posted by: nathansnathan Feb 20 2013, 12:09 PM
914 post count there , awesome job on the trunk floor.
Posted by: OU8AVW Feb 25 2013, 04:49 PM
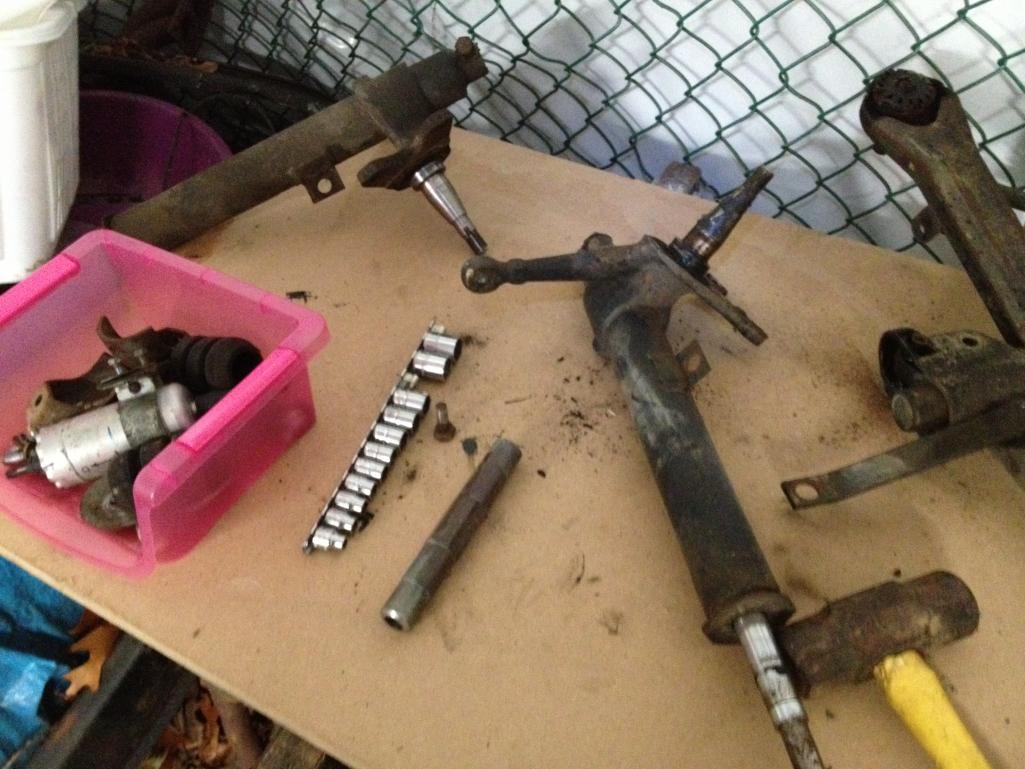
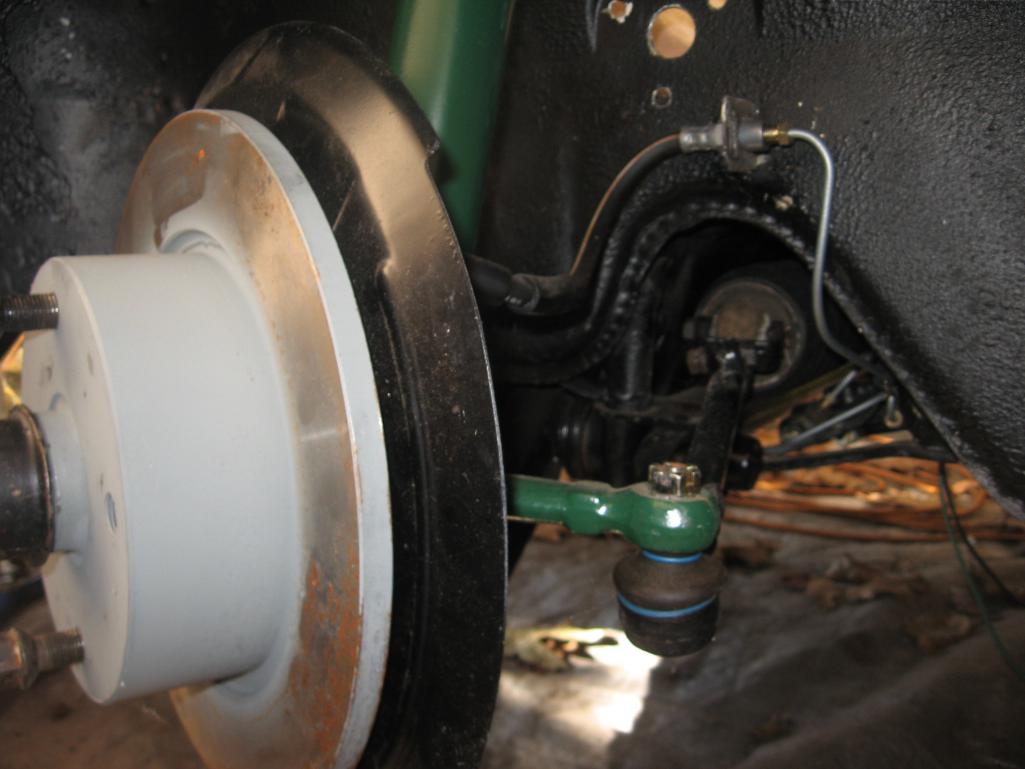
Working on the restoration of the front suspension. Removing the torsion bars and bushings....
The torsion bars were pretty frozen so I drilled out the forward caps with an anular ring cutter and used a Mini Inductor to heat things up. 
Cool tool! It uses an electrical field to heat metal to white hot is seconds. The tool itself stays cool to the touch as does any non-metallic items in the field. 
Heats up in less than 30 seconds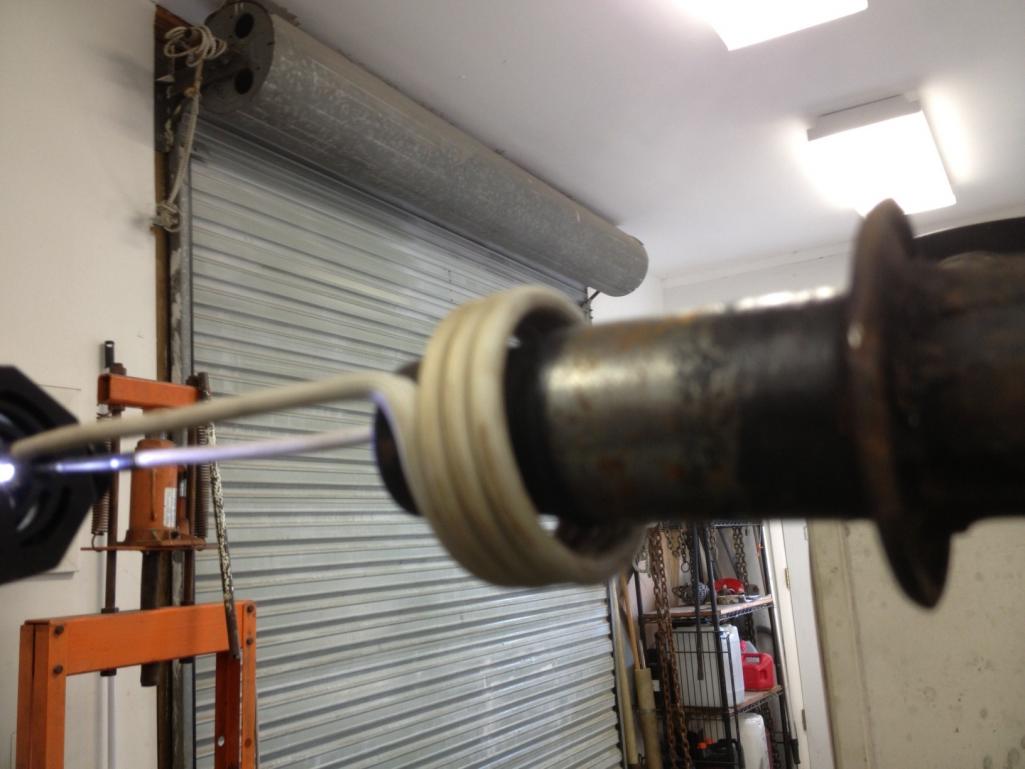
Then a little pressure with the press.
Posted by: OU8AVW Mar 1 2013, 10:48 AM
I had a strut cap walk away
I have asked Rich is he has one, I may be in the market. You know it's going to turn up the second a replacement arrives....
Posted by: OU8AVW Mar 1 2013, 10:50 AM
I pulled out my stash of NOS goodies to make sure I don't buy stuff I already have.
Posted by: OU8AVW Mar 12 2013, 03:41 PM
Last night I was able to do the final fitting of my rear trunk. I'll wind up butt welding some of it but adding a flange on the straight part across the trans support. The Restoration Designs part fits great.
Tonight I should fire up the welder! 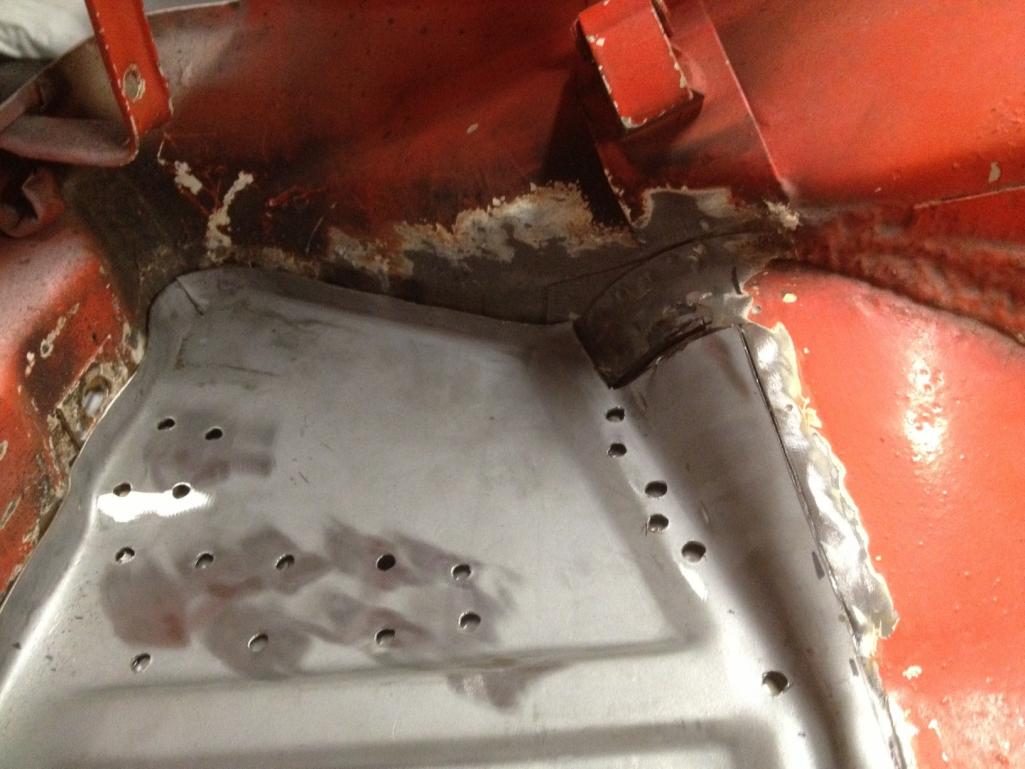
Posted by: OU8AVW Mar 16 2013, 10:37 AM
When is doubt, get your 10 year-old daughter to weld it for you 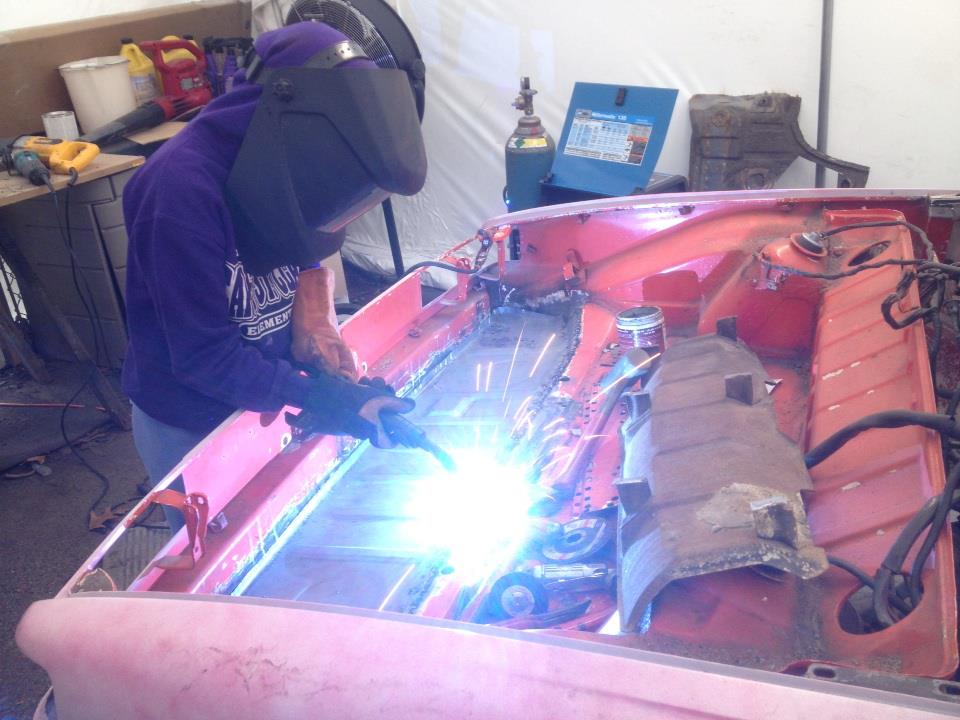

Posted by: OU8AVW Apr 3 2013, 03:27 PM
Fixed my clutch cable tube. Looks better in person 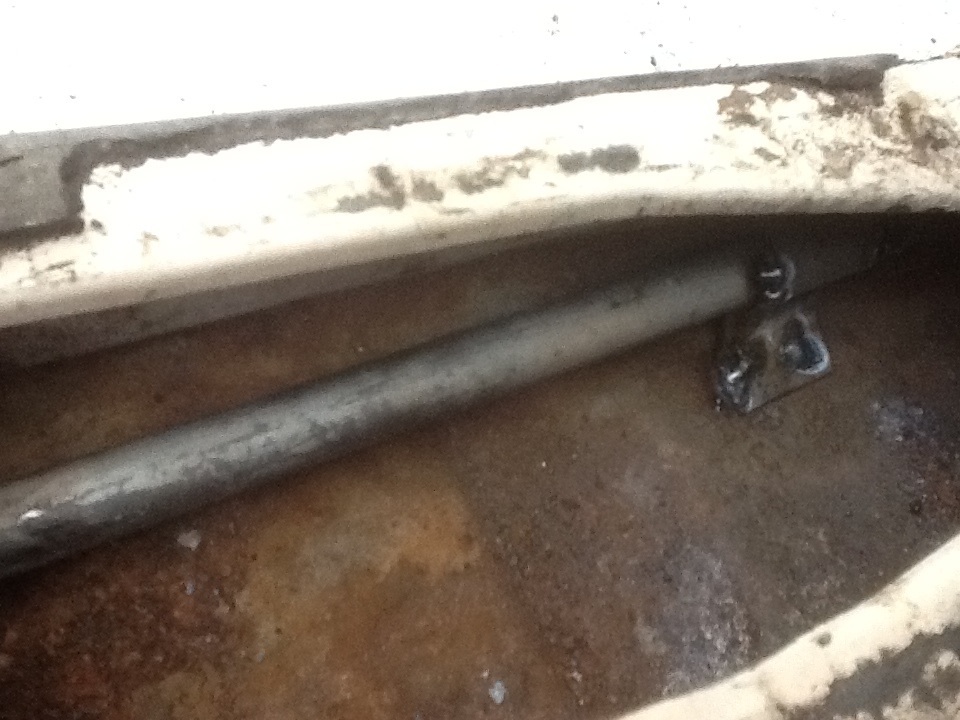
Posted by: OU8AVW May 4 2013, 02:57 PM
So yesterday I had some guys from a local body shop stop by to quote finishing the paint job on my car to see if I could save me some drive time and save Scotty B some space. They spoke to my wife who's reasonably car savvy and also pretty hot. she kept the phone in her pocket so I could hear the conversation.
They asked if I had done the body work, she said yes. They replied, "he's done a pretty good job but you can tell he's very inexperienced"
I'll put a quick emoticon in for Scotty:
Pretty funny these guys say that about one of the best Porsche metal guys in the country.
Soooooo, I think I'll be making that drive to Richmond after all
Posted by: wingnut86 May 4 2013, 07:24 PM
Damn Mike. Screw them guys 
Have your daughter school them, she appears to have more skills than they have brains
Ask Scott to lend you that nice chassis stand he has with wheels when he's done whacking on mine 
Great work so far
Posted by: scotty b May 4 2013, 07:58 PM
Thanks for draggin me into this 
Posted by: wingnut86 May 4 2013, 09:32 PM
...just trying to help a brotha out...

Posted by: scotty b May 5 2013, 05:29 AM
...just trying to help a brotha out...
I was actually referring to Mikes little "Porschegate", escapade with the local body shop
Posted by: OU8AVW May 13 2013, 08:43 PM
Putting the suspension back together so she'll roll back to Scotty B's for final paint! 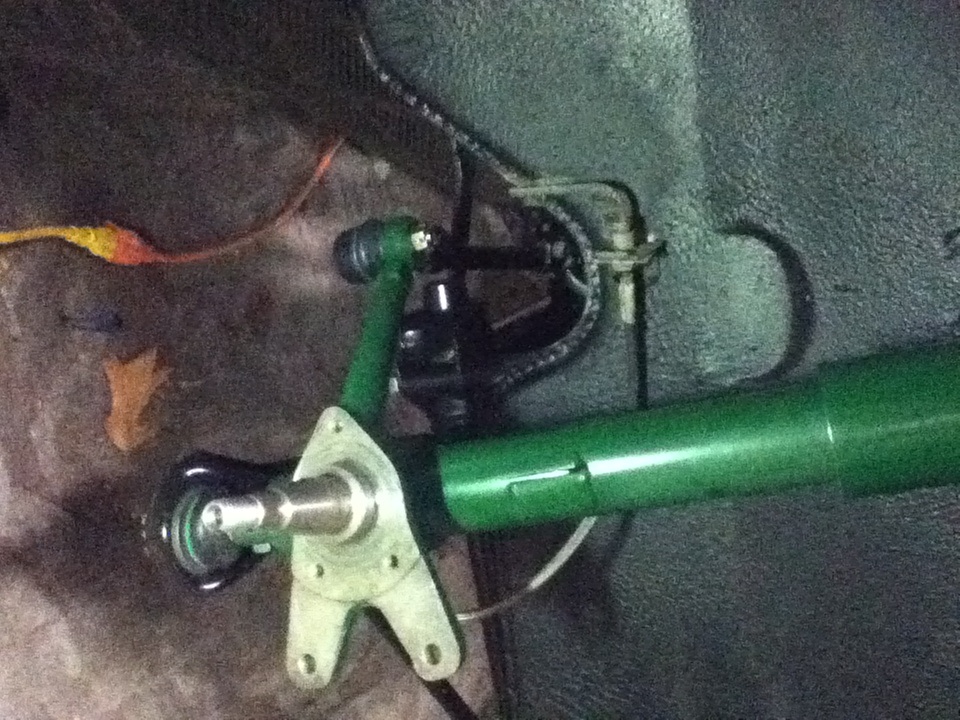
Posted by: OU8AVW Jun 20 2013, 09:51 AM
Getting close Scotty. Better make some room!
Let me know when you want her....
Posted by: scotty b Jun 20 2013, 09:55 AM
Getting close Scotty. Better make some room!
Let me know when you want her....

Posted by: OU8AVW Jun 27 2013, 12:42 PM
OK Scotty, 'bout there.....
Posted by: MDG Jun 27 2013, 03:36 PM
Getting close Scotty. Better make some room!
Let me know when you want her....
Oh dear. I've seen this before with Scotty.
Dood - he's totally forgotten who you are I'm afraid.
Posted by: scotty b Jun 27 2013, 08:31 PM
Getting close Scotty. Better make some room!
Let me know when you want her....
Oh dear. I've seen this before with Scotty.
Dood - he's totally forgotten who you are I'm afraid.
 Were you the guy with the hot neighbor or the scary one ?
Posted by: BajaXJ92 Jun 28 2013, 12:36 AM
Getting close Scotty. Better make some room!
Let me know when you want her....
Oh dear. I've seen this before with Scotty.
Dood - he's totally forgotten who you are I'm afraid.
Were you the guy with the hot neighbor or the scary one ? That's Mike's wife, Scott!
Posted by: OU8AVW Jun 28 2013, 04:39 PM
Hot wife, Cougar neighbor
Posted by: OU8AVW Jul 24 2013, 03:45 PM
It's been a pretty good few weeks in the garage.
I got my CVs and shafts squared away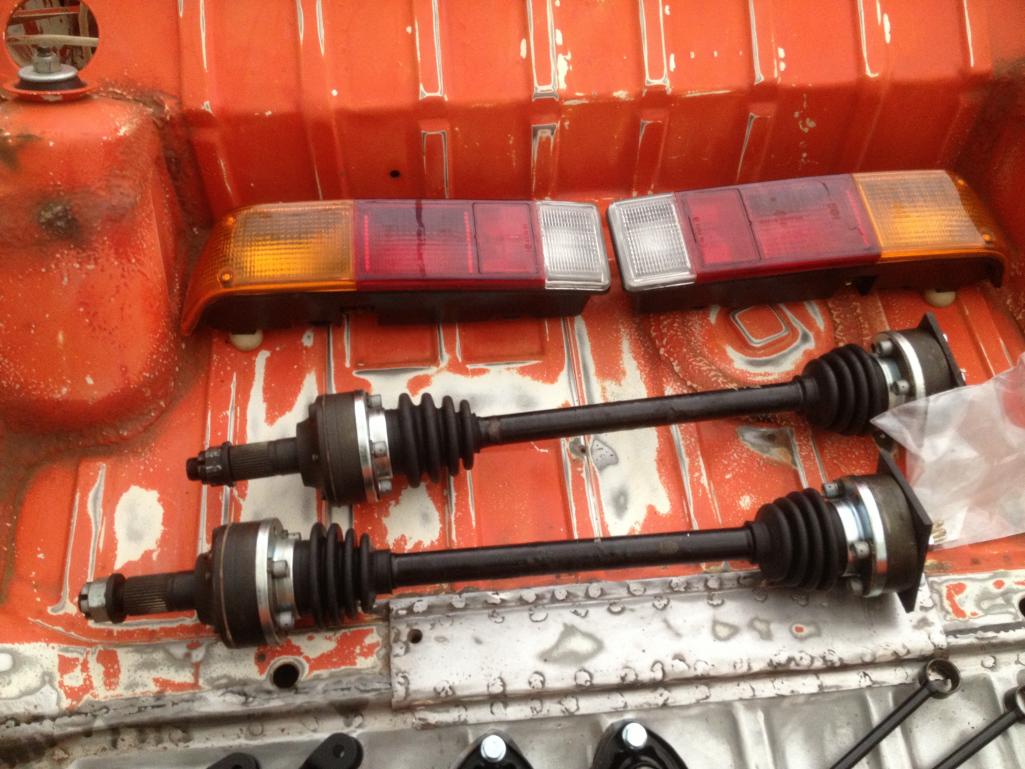
Posted by: OU8AVW Jul 24 2013, 03:47 PM
I cut plastic covers for the open end of the CVs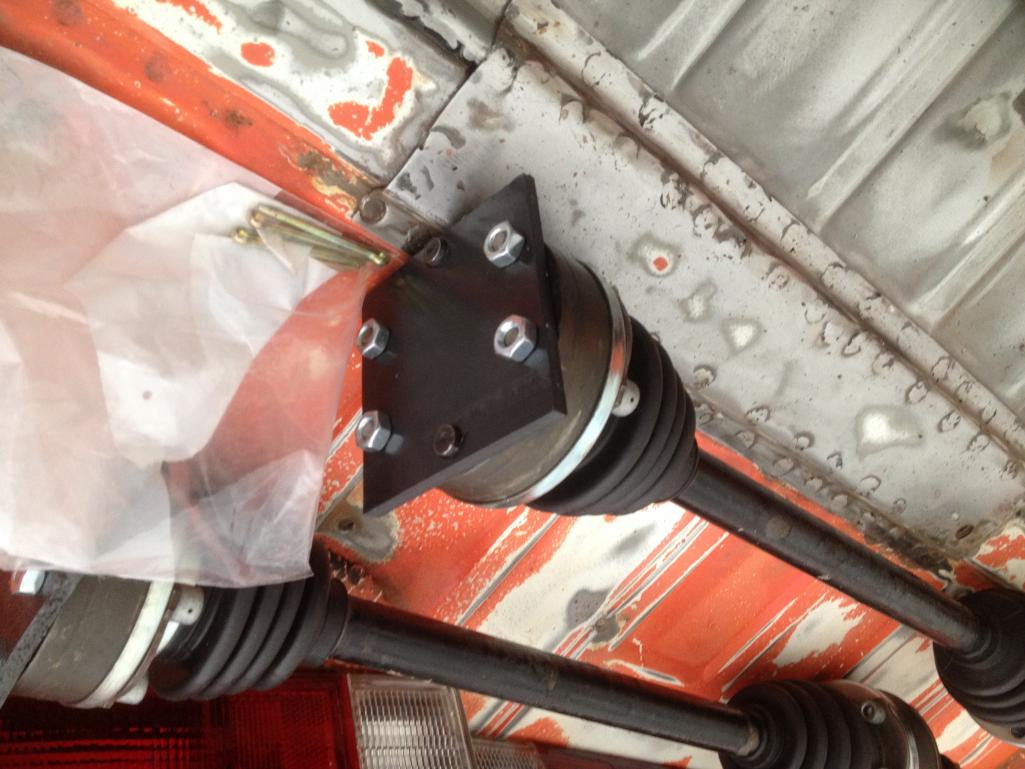
Posted by: OU8AVW Jul 24 2013, 03:54 PM
I restored my tail light housings and reflectors. I bought the Hela Euro tail light lenses from someone here for like $30. The clear lens was broken off but we have some pretty strong adhesives in the marine industry so i glued them back together. The results were pretty good. 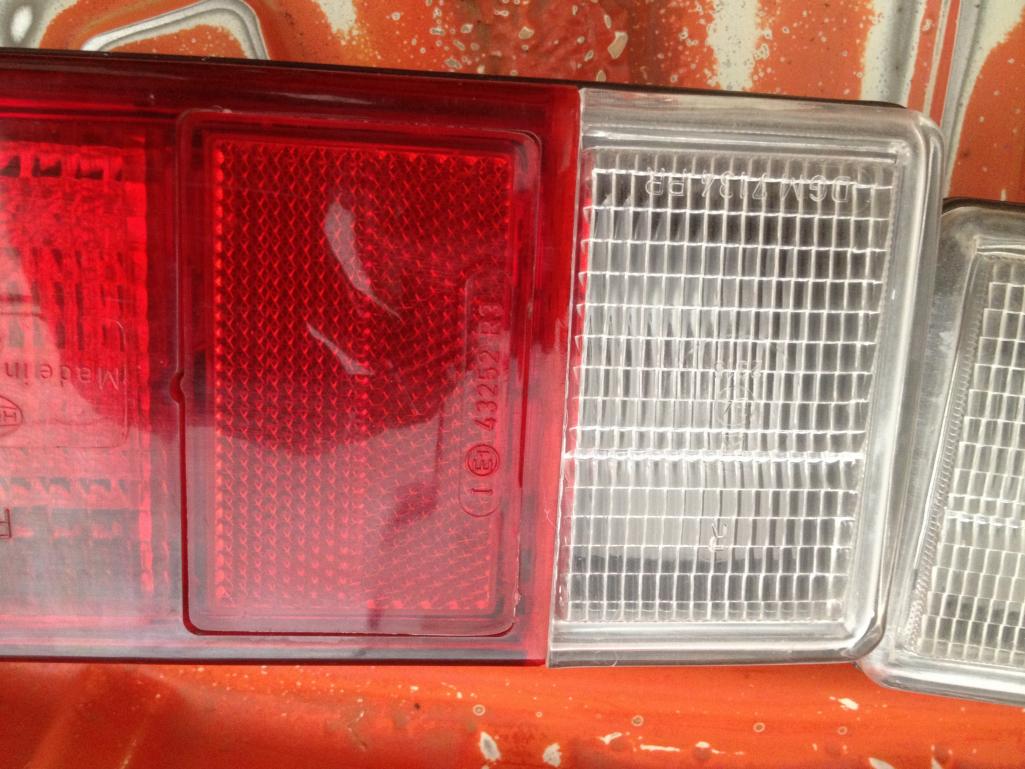
Posted by: OU8AVW Jul 24 2013, 04:01 PM
Rear suspension is together and looking tidy. I just ordered a full set of hard brake lines from PMB. I'm trying to get Erc to feature me in one of his unstoppable ads 
Posted by: hot_shoe914 Jul 24 2013, 09:00 PM
Ugh, all that work and you still have KYBs on there. Dude, Don't be THAT GUY!!!
Posted by: BajaXJ92 Jul 24 2013, 09:43 PM
Ugh, all that work and you still have KYBs on there. Dude, Don't be THAT GUY!!!
You've been that guy for years, Donald.
Posted by: hot_shoe914 Jul 25 2013, 06:03 AM
Ugh, all that work and you still have KYBs on there. Dude, Don't be THAT GUY!!!
You've been that guy for years, Donald.

Posted by: OU8AVW Jul 25 2013, 02:26 PM
Just gotta get it on the road. I can save up for shocks later.
Posted by: OU8AVW Sep 25 2013, 09:53 AM
Brakes are done! 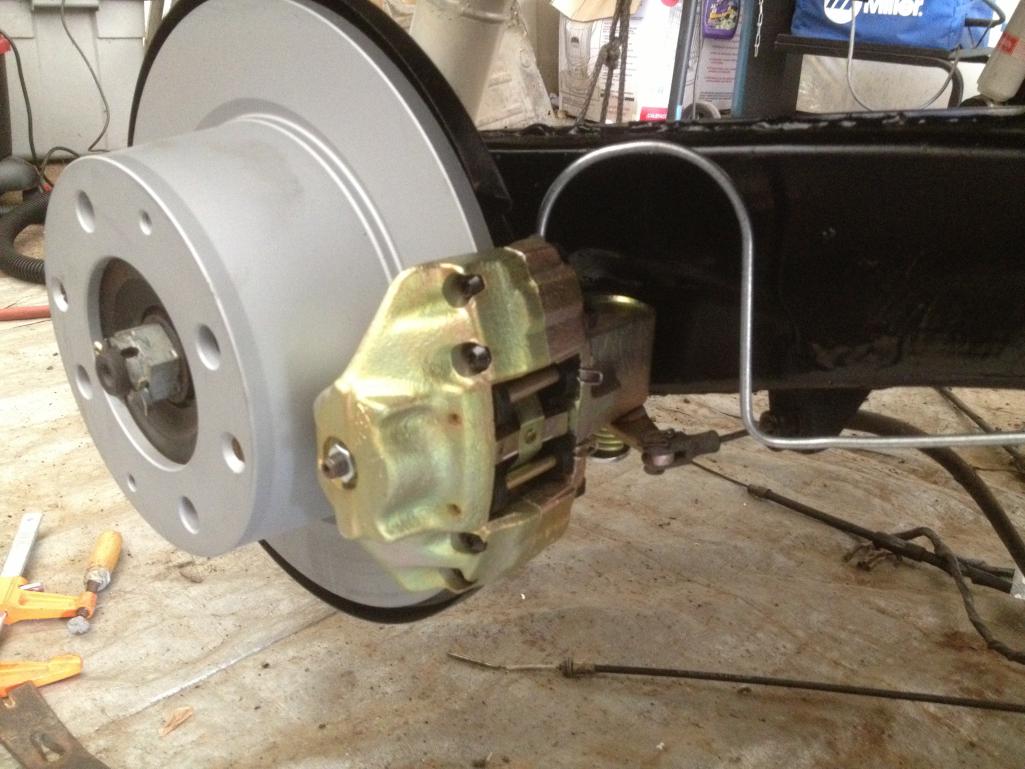
Posted by: OU8AVW Sep 25 2013, 09:54 AM
Posted by: OU8AVW Nov 2 2013, 05:01 PM
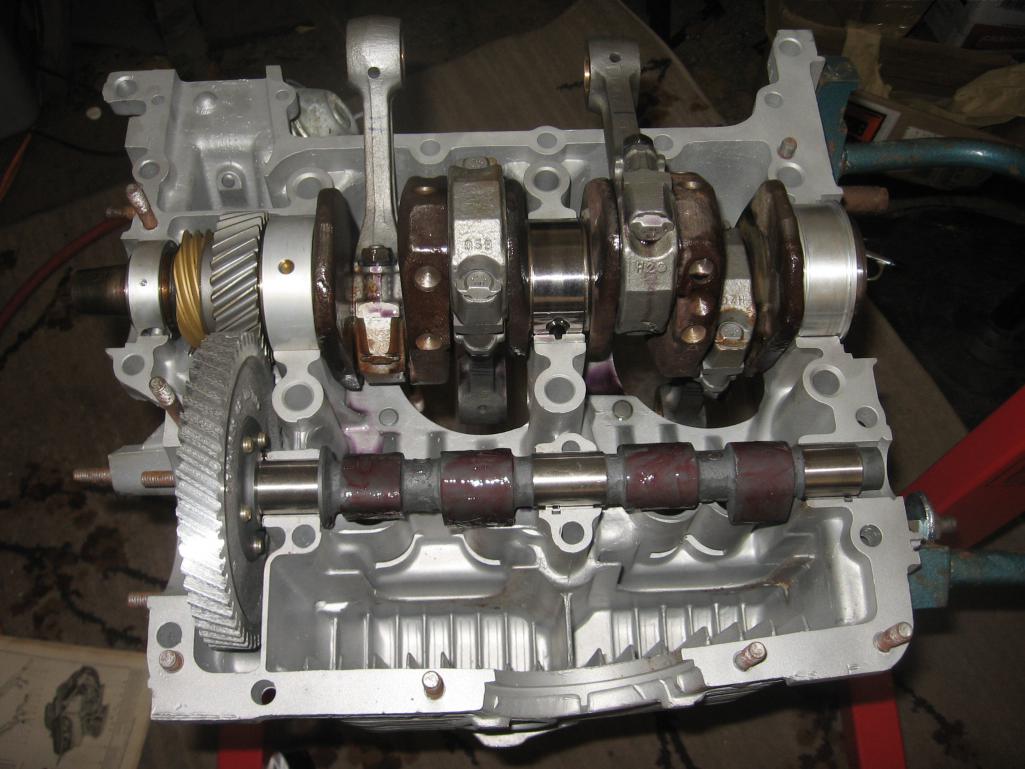
Gettin' some work done. My 11yo daughter and I are assembling the engine. So far we have....
Late 2.0 case
Balanced crank and rods
Raby cam
Posted by: OU8AVW Nov 2 2013, 05:07 PM
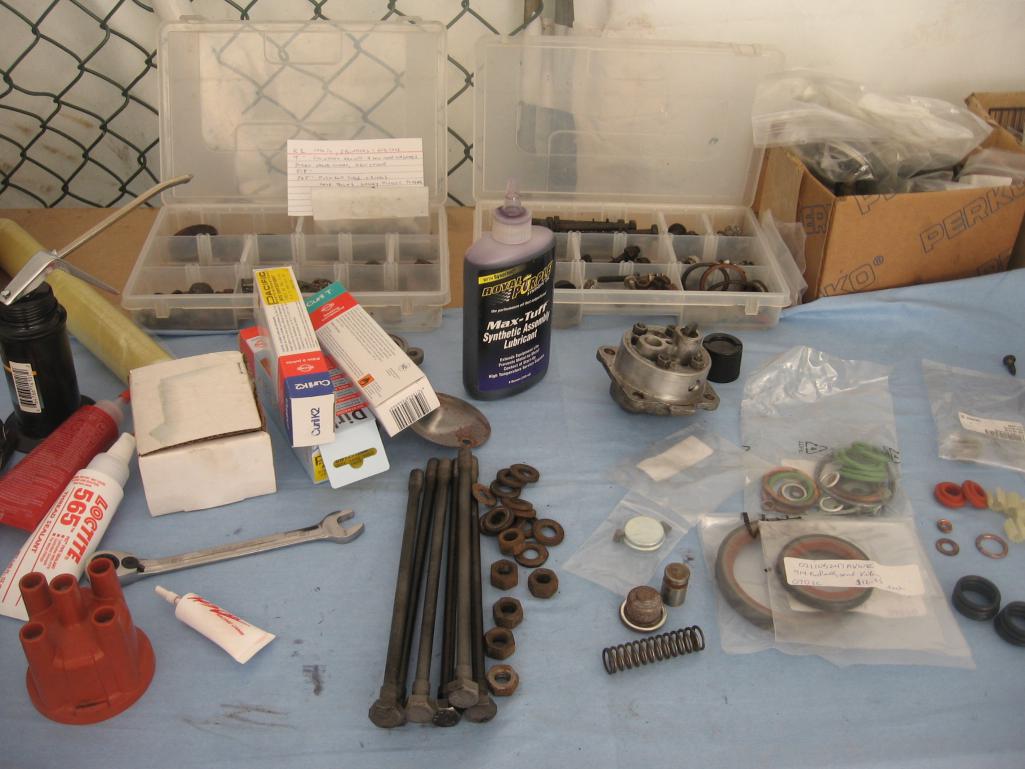
Work space is getting a bit cramped. I have just about everything that I need. I used the sealant list off of the type 4 store. I couldn't figure out how to buy it from there I had to assemble the stuff from various vendors. 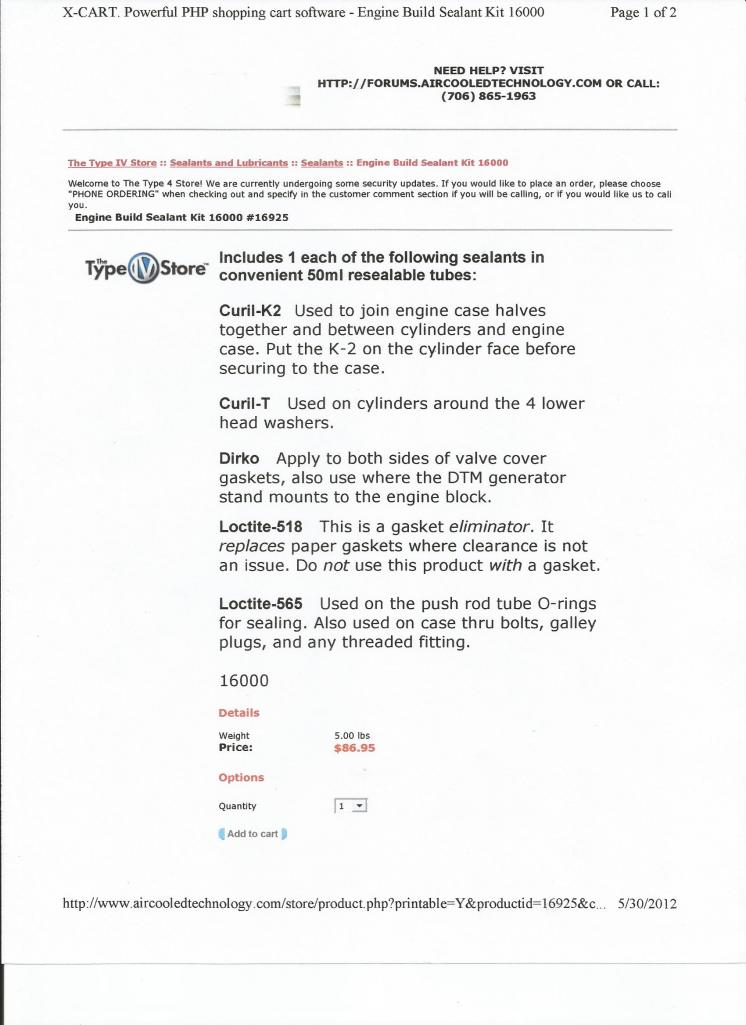
Posted by: OU8AVW Nov 2 2013, 05:10 PM
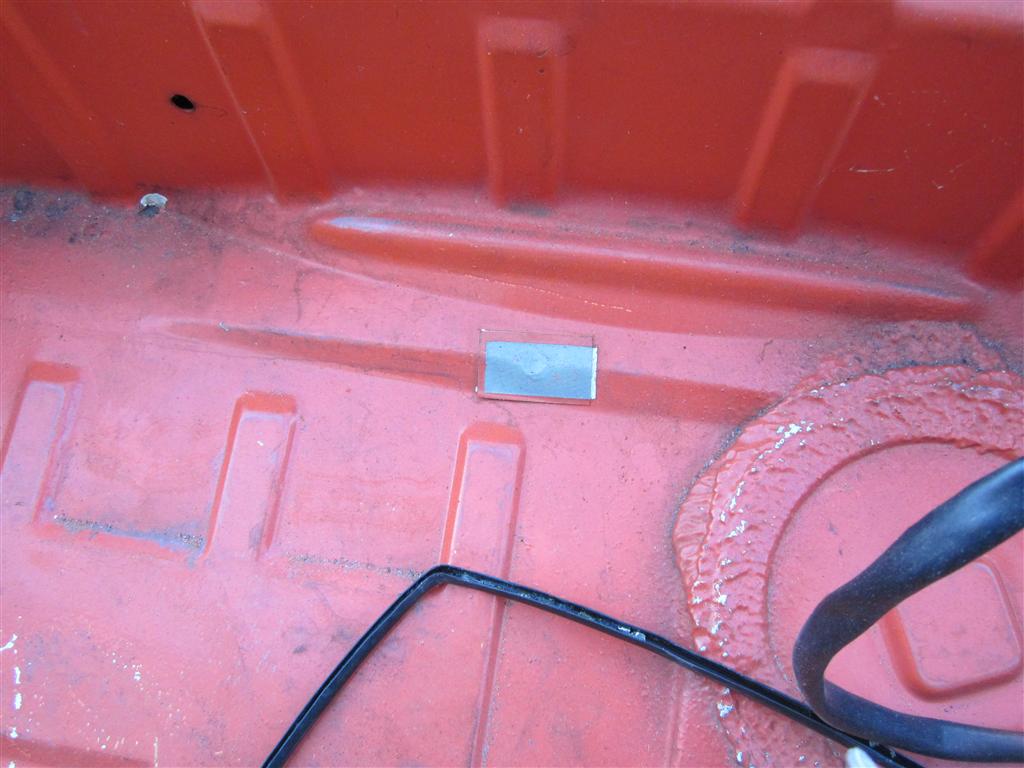
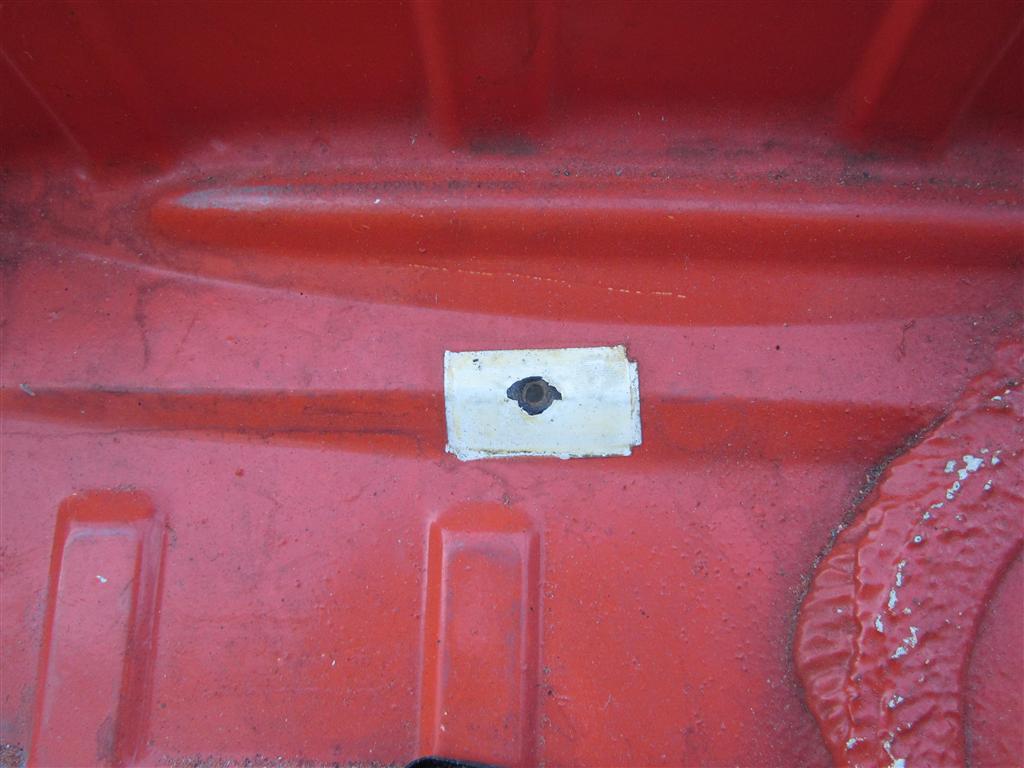
a few shots of the under belly 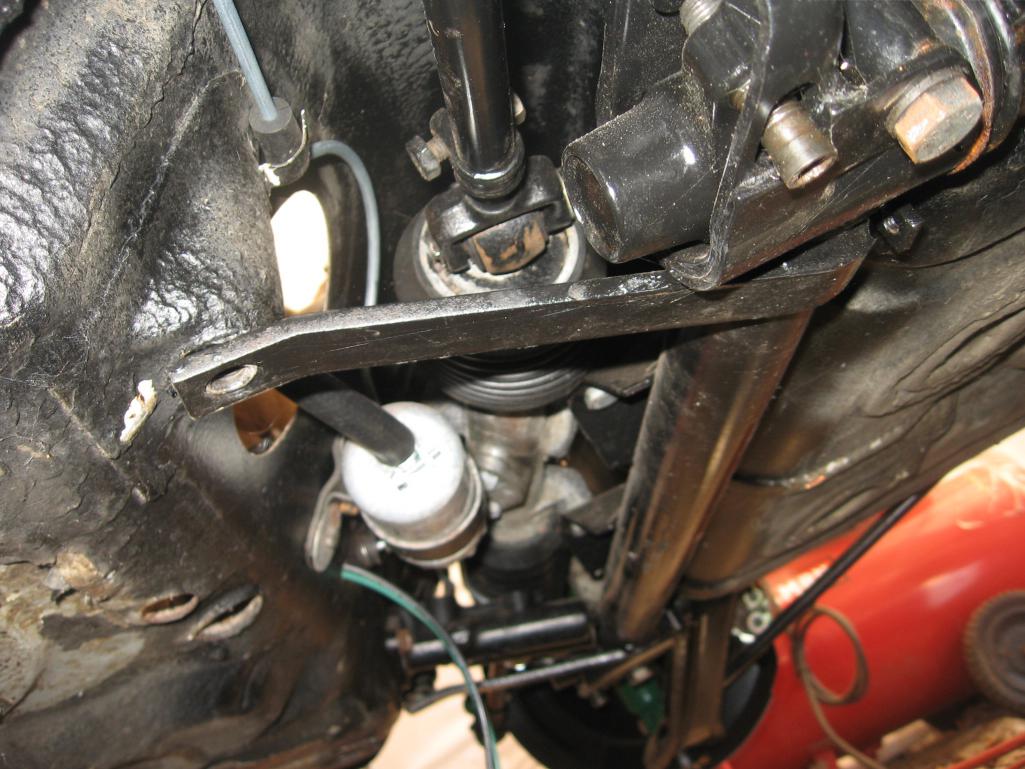
Posted by: OU8AVW Nov 16 2013, 03:33 PM
Engine assembly in progress
Gotta love a girl who can hold her own in the shop 
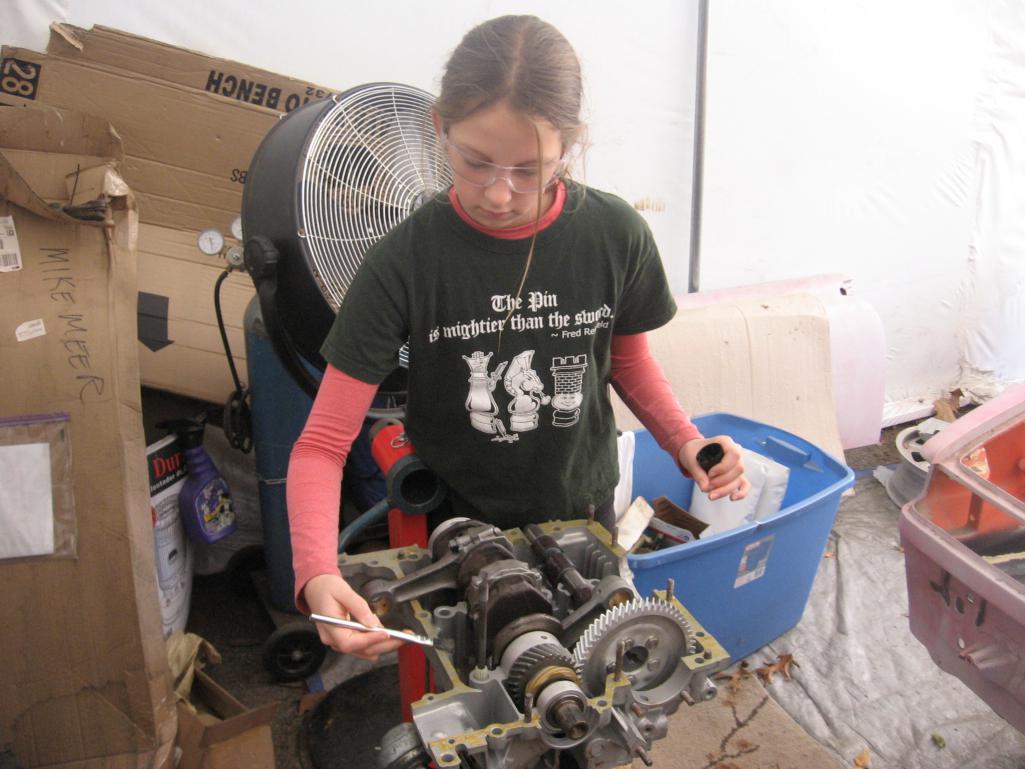
Short Block....
KB Pistons and new Hastings Rings
Posted by: OU8AVW Nov 16 2013, 03:44 PM
Coming together....
I have a couple of questions pending on other threads, heads are up next.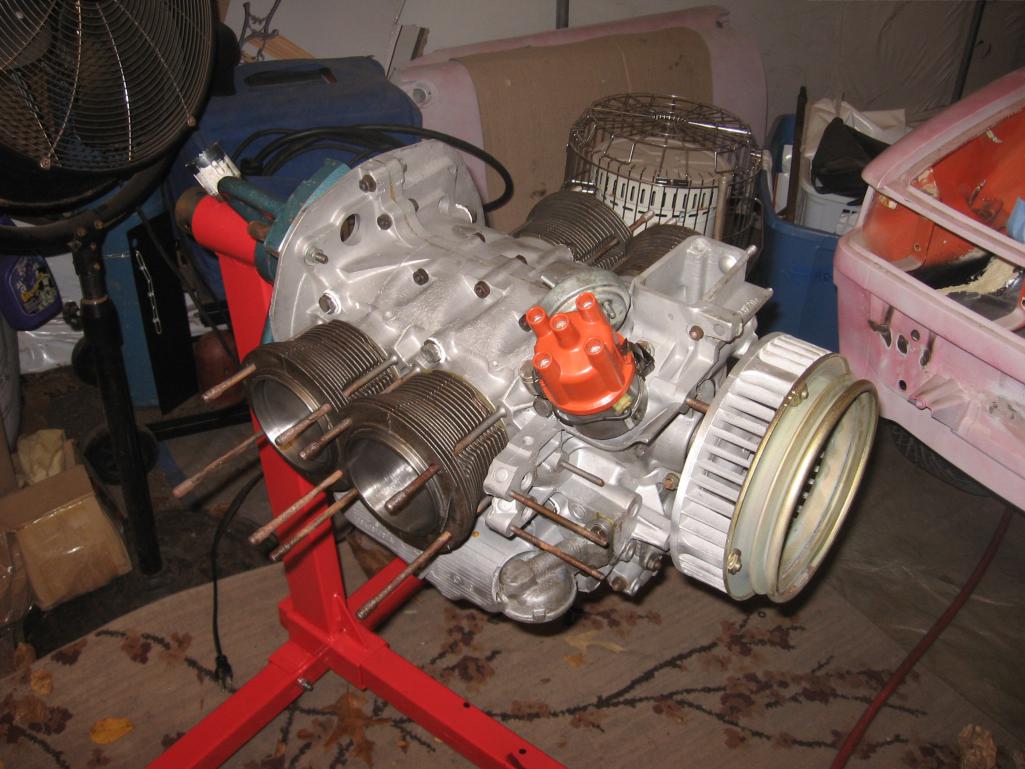
Posted by: OU8AVW Nov 26 2013, 12:04 PM
Every once and a while the Ebay gods smile on us. NOS Hella euro turn signal lenses for $25 each! With free shipping 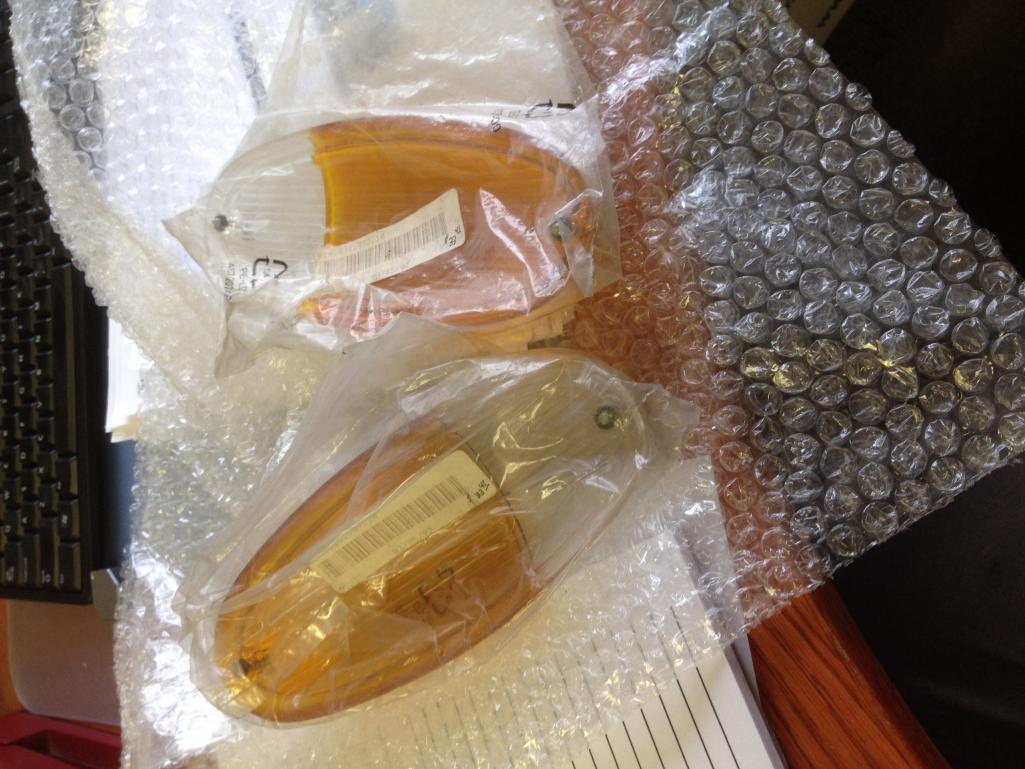
Posted by: scotty b Nov 26 2013, 12:32 PM
Every once and a while the Ebay gods smile on us. NOS Hella euro turn signal lenses for $25 each! With free shipping
Smile nothing. the Ebay god just gave you an old fashioned !!
Posted by: OU8AVW Nov 26 2013, 02:11 PM
Every once and a while the Ebay gods smile on us. NOS Hella euro turn signal lenses for $25 each! With free shipping
Smile nothing. the Ebay god just gave you an old fashioned !!
How so my bro?
Posted by: zambezi Nov 26 2013, 02:34 PM
He means your deal is much better than just a smile.
Posted by: wingnut86 Nov 26 2013, 04:25 PM


Posted by: scotty b Nov 26 2013, 04:33 PM
He means your deal is much better than just a smile.
http://www.urbandictionary.com/define.php?term=old%20fashioned
Posted by: onielsen Nov 26 2013, 04:34 PM
I think I am a previous owner. I owned the car from 2001 until 2004. I was in high school. There are only two modifications I made: Installed a 2.0 fuel injected engine from a 1973 and, in typical high school style, added a new CD player and extra speakers (see passenger floor board of interior photo).
While I wish that I never sold it the car appears to be receiving a lot of attention that I would not have been able to provide. I look forward to keeping up with your progress. If you find that upon completion you need to swap it for a new project please let me know.
Who did you purchase the car from? If I remember correctly I sold it to a high school kid from northern VA in 2004. Is there any information about this car in any other threads?
Here are some pics that I think are from 2001:
http://www.flickr.com/photos/77566932@N06/11074593895/
http://www.flickr.com/photos/77566932@N06/11074593895/ by http://www.flickr.com/people/77566932@N06/, on Flickr
http://www.flickr.com/photos/77566932@N06/11074684756/
http://www.flickr.com/photos/77566932@N06/11074684756/ by http://www.flickr.com/people/77566932@N06/, on Flickr
http://www.flickr.com/photos/77566932@N06/11074684176/
http://www.flickr.com/photos/77566932@N06/11074684176/ by http://www.flickr.com/people/77566932@N06/, on Flickr
Posted by: OU8AVW Nov 26 2013, 05:25 PM
onielsen, looks like this is your old car. I bought it from a real estate guy in Woodbridge, VA. I think it was in 2008. The car looked just like your pictures when I got it. He wanted one price but couldn't get the car to start, so I got it allot cheaper. I got the engine to start when I got it home to Annapolis but it had a bad tick. Turns out there was a stuck lifter that ate the cam. Lots of gas in the oil too. Weird that it had leather seats but I kept them that way. I have a ton of new/OEM parts to throw at it and it just left for paint today!
Awesome that you found it here! Stay in touch......
Posted by: OU8AVW Nov 26 2013, 05:29 PM
He means your deal is much better than just a smile.
http://www.urbandictionary.com/define.php?term=old%20fashioned
I understand. Yes, an Ebay hand job it was.....Now if could just get Ebay to go down on me
Posted by: OU8AVW Nov 26 2013, 05:34 PM
The Teener is headed out for paint!
She'll be back in six weeks.... 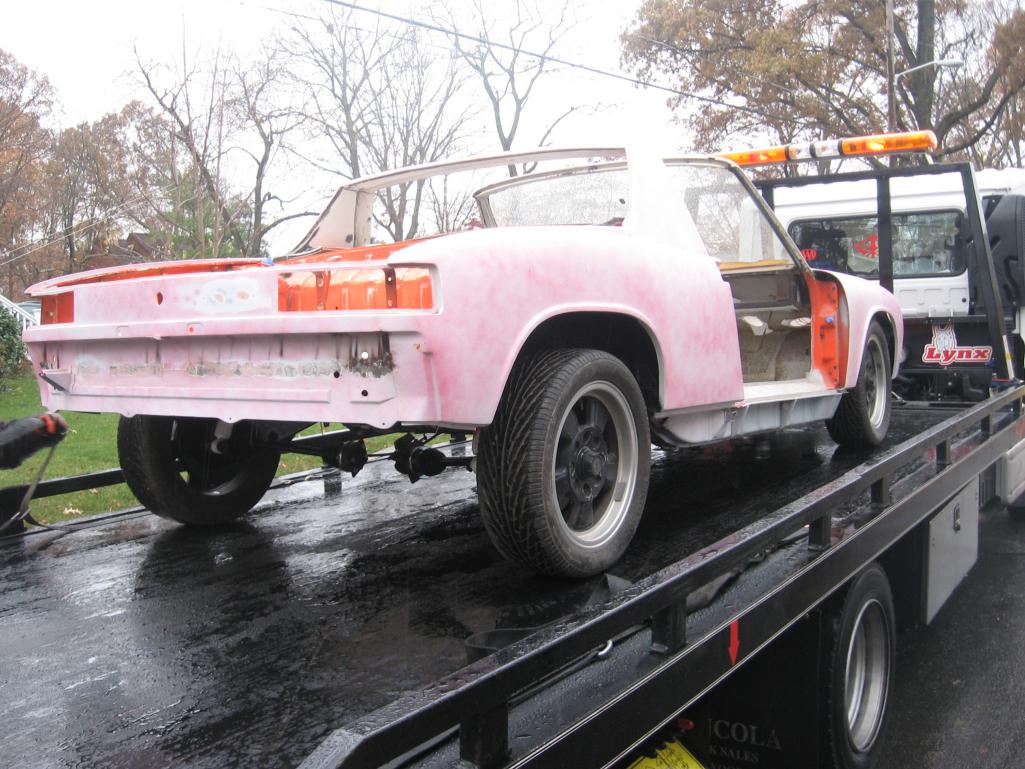
Posted by: type47 Nov 27 2013, 06:32 AM
Just an observation but when I looked at the pic I thought that the dowel pins that locate the bearings may not have been installed. I looked at the left bearings and saw the little hole in the bearing that I thought used the dowel pin to located the bearing and then looked at the right bearing and didn't see the corresponding hole. I am most likely mistaken but thought I'd offer my thought ...
Posted by: OU8AVW Nov 27 2013, 07:30 AM
An astute observation. I can't recall at what point this was taken but I know we oriented the dowels an the holes when we assembled. Also, the thing went together great and turns smooth as silk
Posted by: OU8AVW Dec 10 2013, 07:53 PM
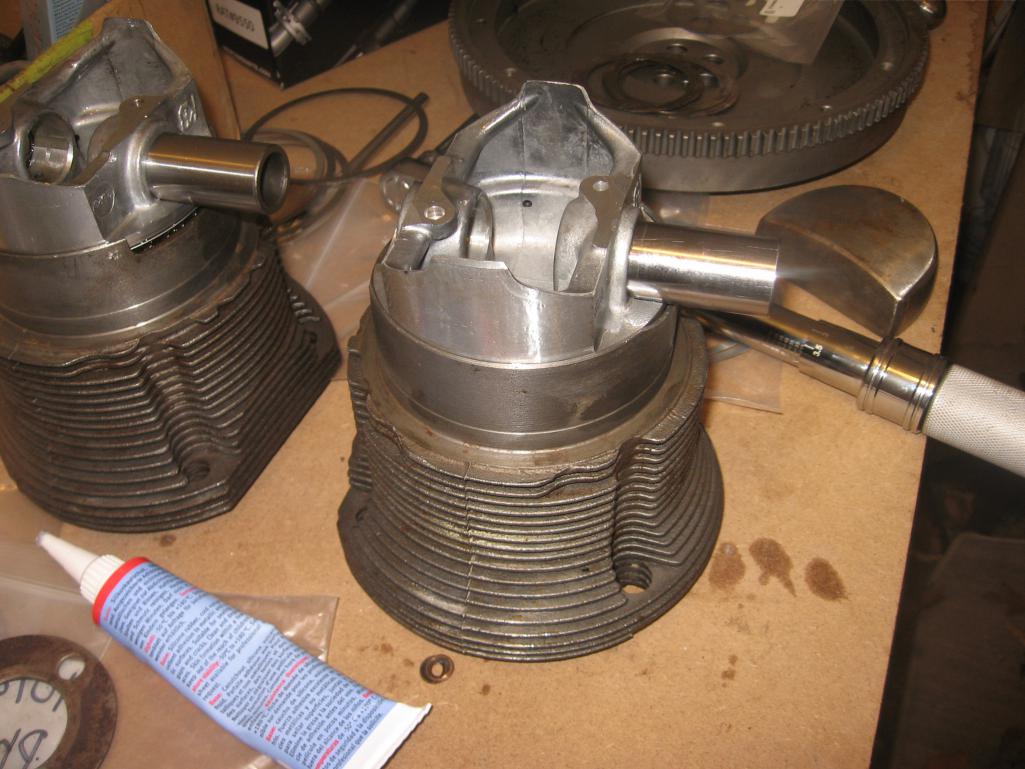
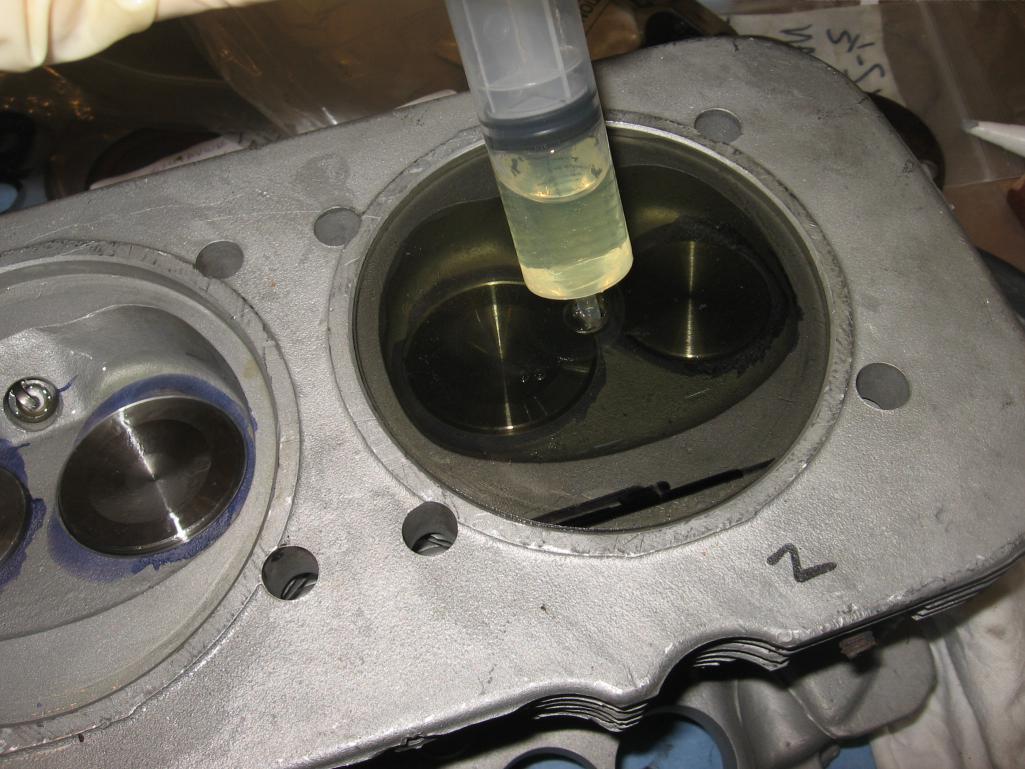
My machinist buddy and I made a custom lexan disk to mate to my heads. My wife is a nurse so she got me a 30ml syringe from work. Time to CC my heads and figure out my compression ratio. They came to 62.5cc. With that and a deck of .045 that's about 9.17:1. Seems a bit high?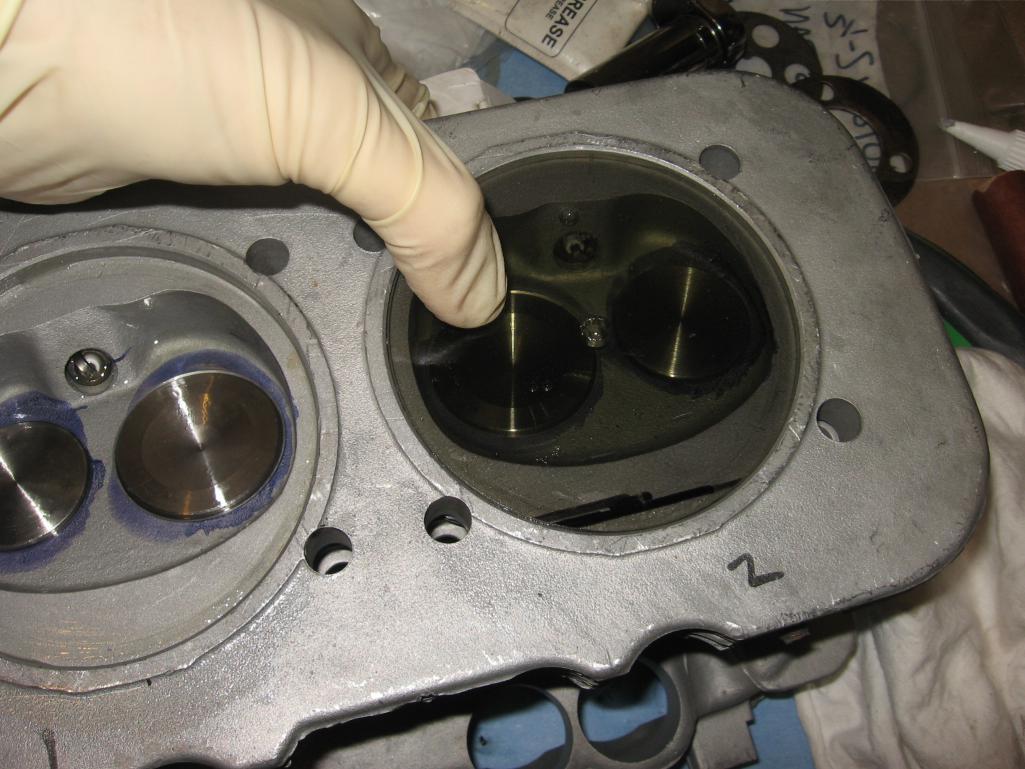
Posted by: CptTripps Dec 11 2013, 06:22 AM
Great build. I love that your daughter is helping. My sons are a little young this time, but in another year or do they'll be ready.
Can't wait to see the body after paint!
Posted by: dcheek Dec 11 2013, 07:10 AM
Just curious, have you tallied up your cost to day, including the initial purchase of the car?
Dave
Posted by: bulitt Dec 11 2013, 08:29 AM
My machinist buddy and I made a custom lexan disk to mate to my heads. My wife is a nurse so she got me a 30ml syringe from work. Time to CC my heads and figure out my compression ratio. They came to 62.5cc. With that and a deck of .045 that's about 9.17:1. Seems a bit high?
Do these motors use head gaskets?
Posted by: Spaceman Spiff Dec 11 2013, 09:13 AM
Just curious, have you tallied up your cost to day, including the initial purchase of the car?
Dave
Do any of us add up the cost?
Posted by: OU8AVW Dec 11 2013, 09:28 AM
My machinist buddy and I made a custom lexan disk to mate to my heads. My wife is a nurse so she got me a 30ml syringe from work. Time to CC my heads and figure out my compression ratio. They came to 62.5cc. With that and a deck of .045 that's about 9.17:1. Seems a bit high?
Do these motors use head gaskets?
So....
I entered my numbers in inches into a metric calculator and got bad results on my CR. Looks like 8.26:1 this time. Now it seams low but my deck height will be set at .045" which I think is about a low as you can go?
My next step is to get the custom spacers to set my deck, then I can install the heads. I think the thing to do will be to make an adjustable pushrod and use it to set the geometry. I have machinist friends who can help make this. I'll pass it along if timing works out. I have Cro-mo pushrods so I can set the lifters to zero lash. I'm not used to this as I've usually dealt with Type 1 motors and stock Hydraulic lifter Type 4s.
If .045" is around the minimal deck height and I can achieve this then my CR will be 8.26:1. Kind of low but then again I might be a little off on my measurements. I made a tool that helps measure this. One issue I had was that my pistons went .01" prod of the cylinder when I first installed it. This means that I will need the custom shims or use a head gasket. Not sure what I'll do next. It usually takes about a week to sort all the info/opinions before I make a decision. That clock started last night
Posted by: CptTripps Dec 11 2013, 10:56 AM
Just curious, have you tallied up your cost to day, including the initial purchase of the car?
Good lord...WHY IN THE WORLD would you ever do such a thing?
Don't you know...that's a job for the NEXT owner to do, so he can brag about what the DAPO spent!
Posted by: dcheek Dec 11 2013, 11:59 AM
Just curious, have you tallied up your cost to day, including the initial purchase of the car?
Good lord...WHY IN THE WORLD would you ever do such a thing?
Don't you know...that's a job for the NEXT owner to do, so he can brag about what the DAPO spent!
I guess you missed the first two words "just curious". Actually, I just like keeping track of the break ever point of collector cars as to when it's economically practical to restore as opposed to buying a car that's original or already restored. Since the author of this thread is cost conscious, I thought he might be keeping track. Also, others that are contemplating such a project might be interested to know what they are in for from both a time and financial commitment.
Dave
Posted by: CptTripps Dec 11 2013, 12:25 PM
I should have put a smiley on my post. It was meant more "tongue and cheek" than anything.
Posted by: dcheek Dec 11 2013, 12:40 PM
I should have put a smiley on my post. It was meant more "tongue and cheek" than anything.
No problem, I didn't take it personally. I don't want to hijack the thread, so I withdraw the question. On with the rebuild!
Dave
Posted by: OU8AVW Dec 11 2013, 01:35 PM
Closer to the truth to say the owner has become cost-unconscious
Posted by: Eric_Shea Dec 12 2013, 08:28 AM
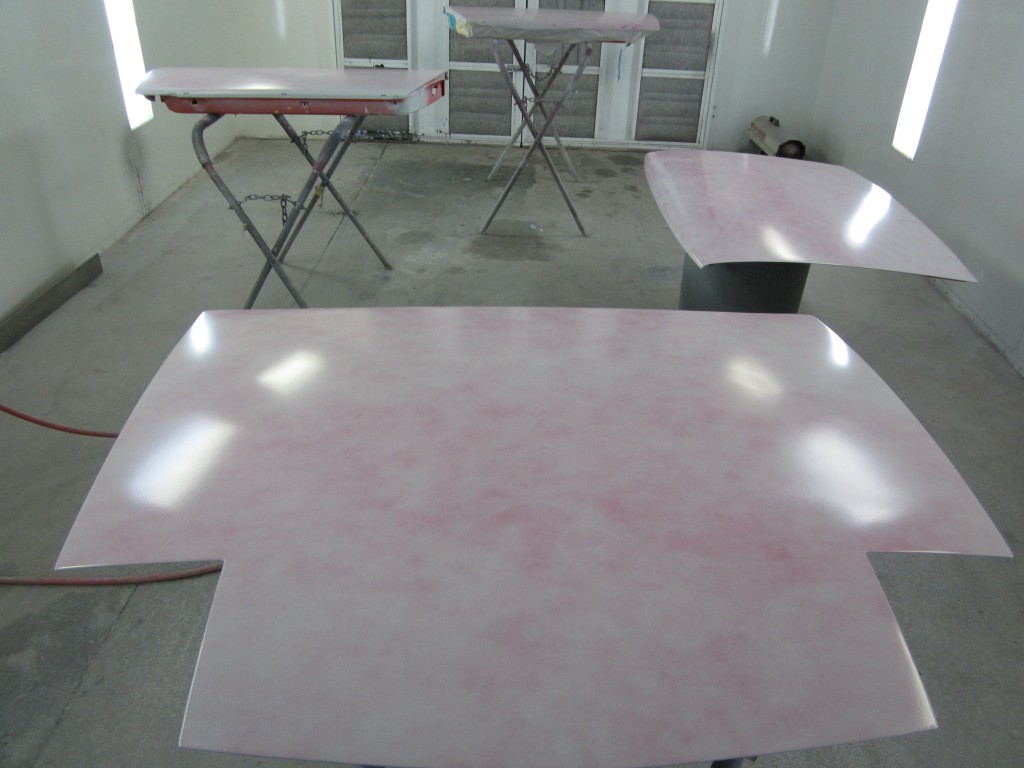
Headed out for paint? You're going to cover the pink?
Posted by: scotty b Dec 12 2013, 08:37 AM
Headed out for paint? You're going to cover the pink?
The carpet doesn't match the drapes Eric
Posted by: rdauenhauer Dec 12 2013, 09:04 AM
Headed out for paint? You're going to cover the pink?
Its Salmon Eric
Posted by: OU8AVW Dec 12 2013, 06:02 PM
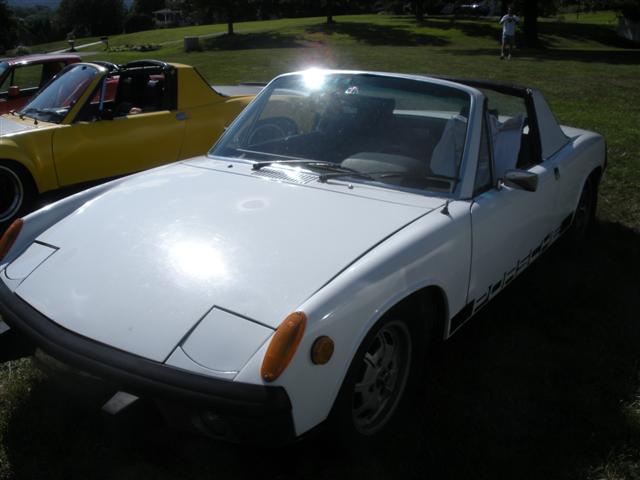
Going back to original L80E Light ivory.
Not too exciting but original and clean. Black interior, silver negative stripe and chrome bumpers. Polished 2.0 Fuchs, Euro lenses and funky Euro additional fogs.
No backup light. I wouldn't want anyone thinking I'm pretentious
My brakes are zink colored
Posted by: OU8AVW Dec 18 2013, 12:29 PM
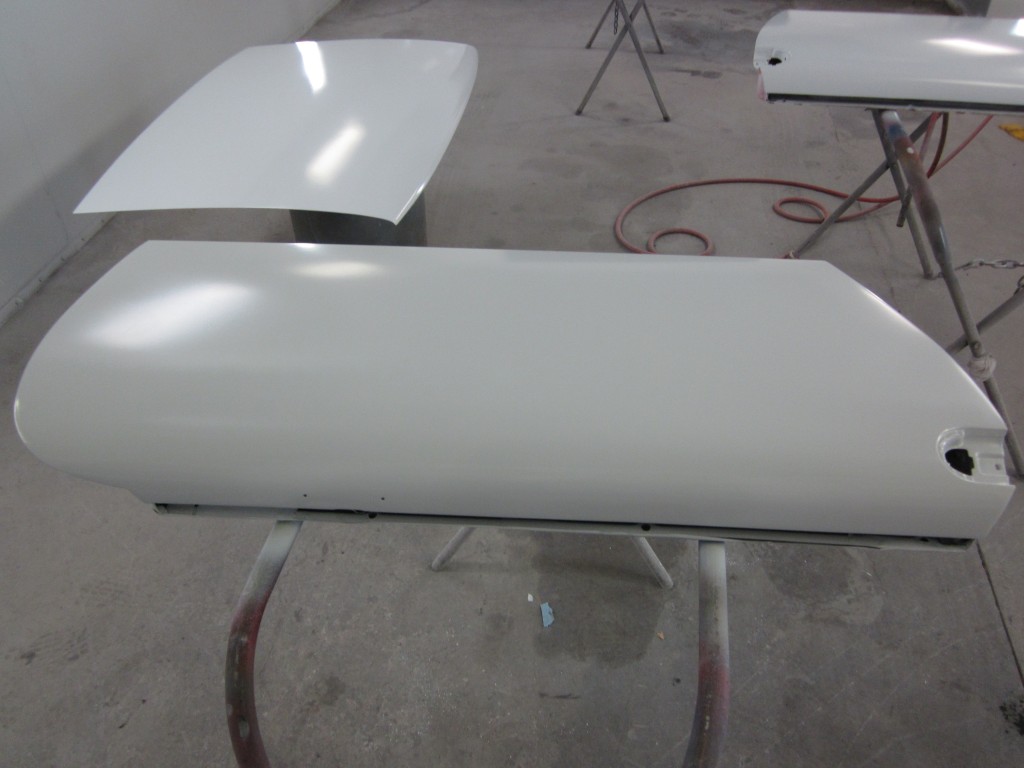
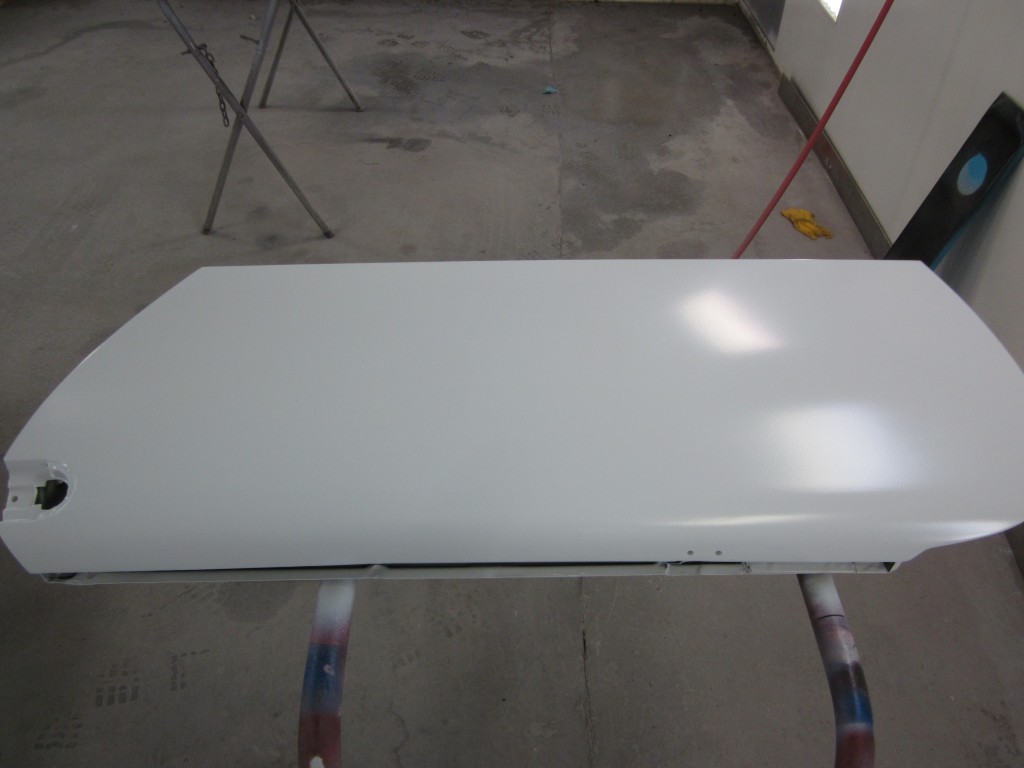
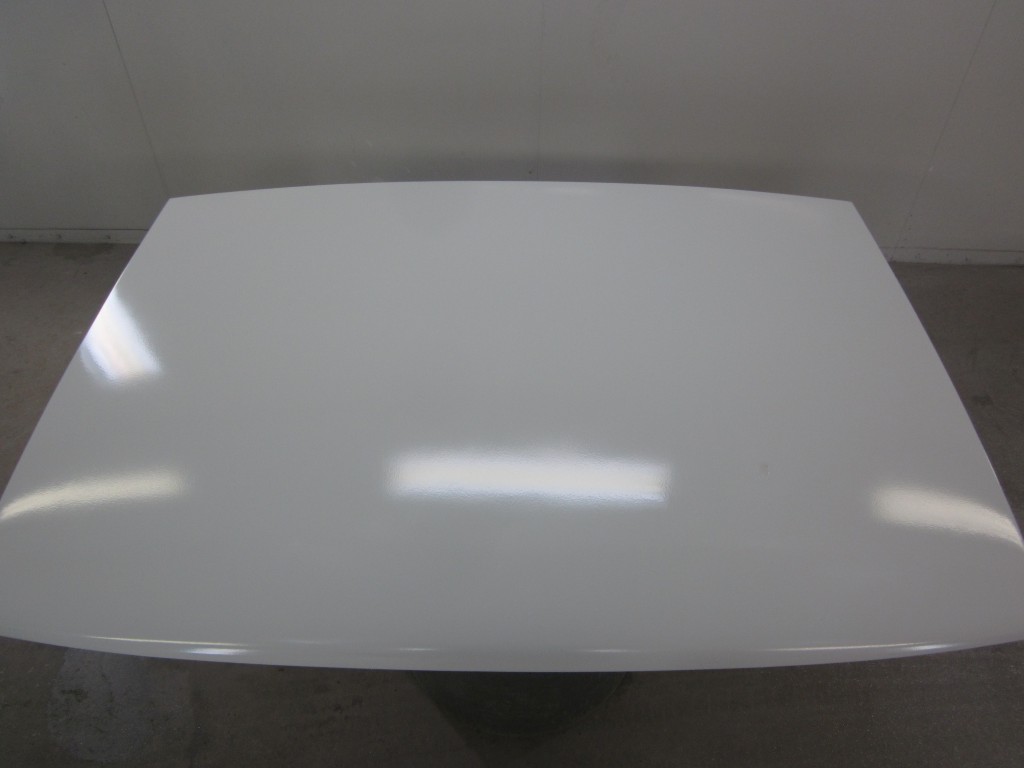
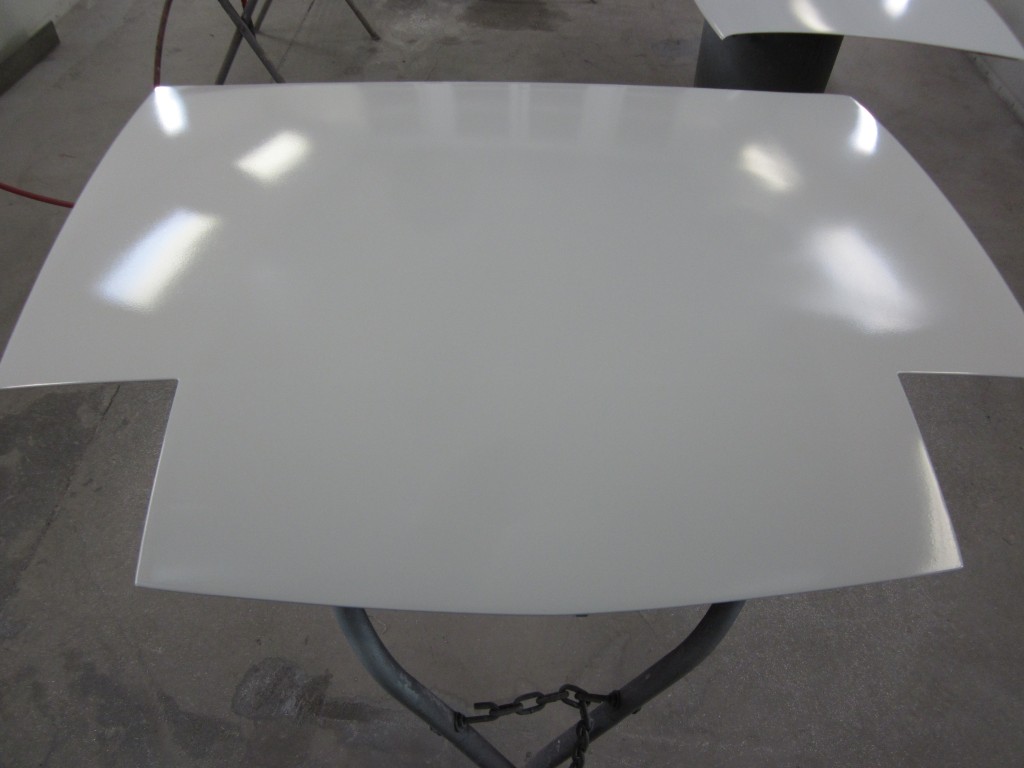
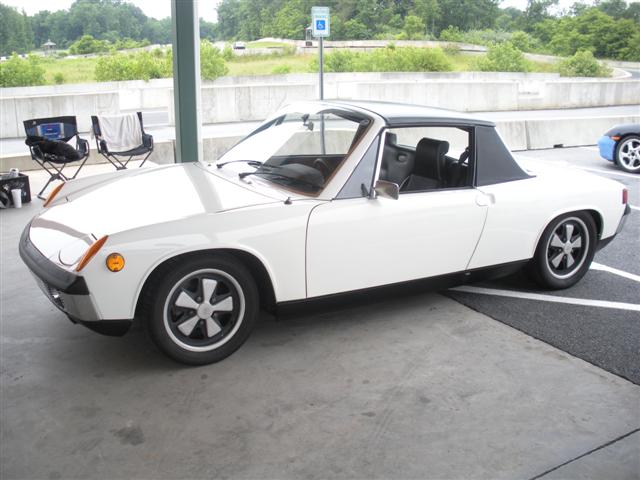
All painted Light Ivory! 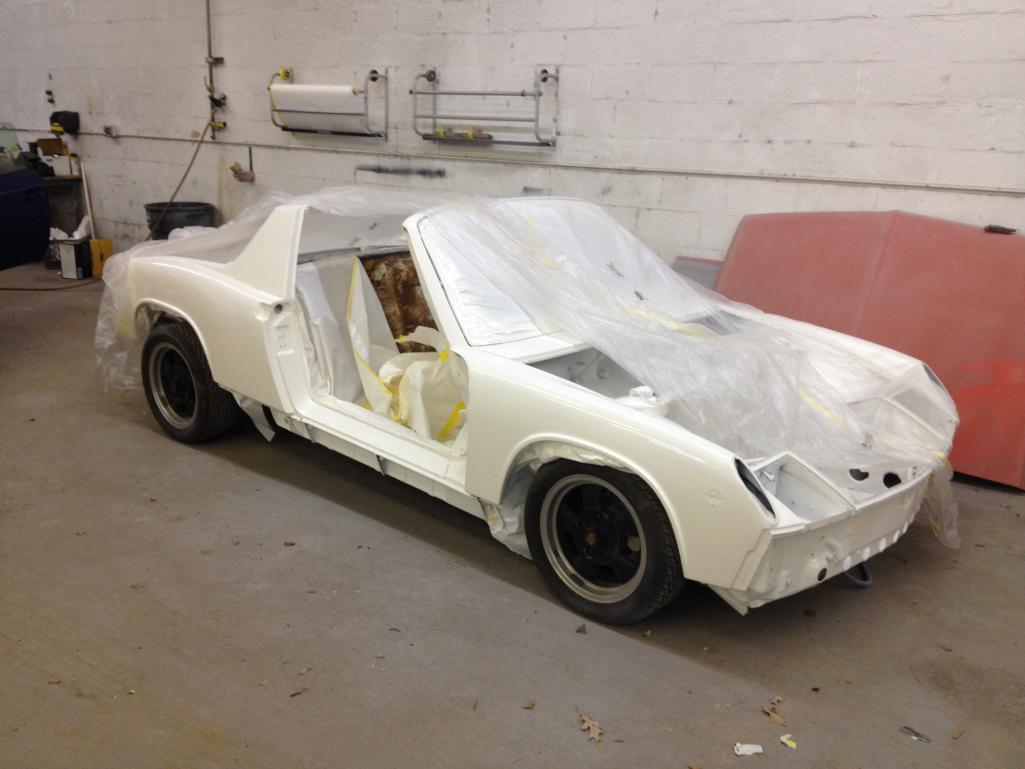
Posted by: OU8AVW Dec 18 2013, 12:37 PM
So the paint shop said it would take six weeks to paint my Teener. As usual, painters have no concept of time and are generally full of crap
So....They did it in a week and a half. Kind of a problem for me as I had a wrecked 944 being torn apart in my shop and the six weeks would have been convenient. But as I try not to assess the oral hygiene of a free equine I ditched the water pumper and am moving into the build phase of my true love.
I have the answers I need on the motor and I should be able to put it together over the holiday. The I'll start putting the body back together
I am particularly looking forward to doing the interior and figuring out how to mount my cool Euro fogs on the front bumper.
Posted by: 2mAn Dec 18 2013, 02:13 PM
All painted Light Ivory!
fresh paint always looks so good, yours is no exception! cant wait to see what it looks like when its all back together
Posted by: Java2570 Dec 18 2013, 02:16 PM
Awesome! That looks great and I'm very partial to Light Ivory since that's what my car is!!
Good luck with the engine build
Posted by: OU8AVW Dec 18 2013, 02:41 PM
Yeah, I wasn't super excited about the white color, but after seeing it I'm stoked! It was the right choice and no one can fault a PO for going back to the original color
Posted by: type47 Dec 18 2013, 02:50 PM
some light ivory cars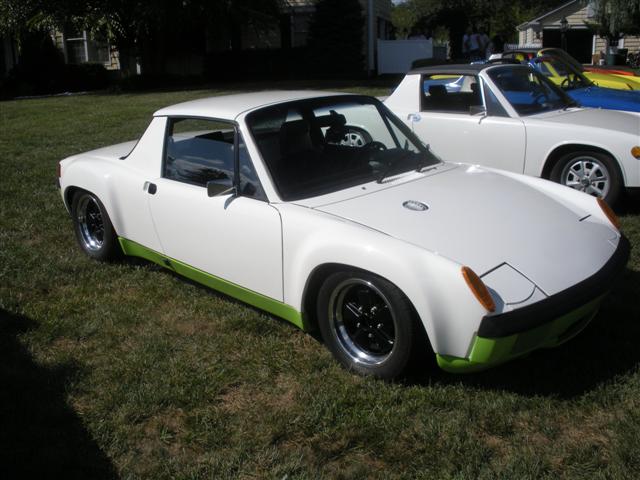
Posted by: wingnut86 Dec 18 2013, 03:13 PM
Mongo LIKE!
Posted by: OU8AVW Dec 28 2013, 09:58 AM
Got her back in the tent Christmas eve but I had to travel for the holidays.
Posted by: effutuo101 Dec 28 2013, 10:10 AM
Looking very nice!
We will say it is on a rotisserie and call it good.
Happy new year!
Posted by: OU8AVW Jan 5 2014, 05:39 PM
Spent Saturday pulling out parts and doing jobs I had materials for. It all seems daunting until I start one small task and just work through it one step at a time. A little extra time equates to better details.....
Engine bay wiring and hold down clips cleaned up and installed. I cleaned each one and coated it with protectant. I then heated them over my heater for a few minutes to make them pliable for install.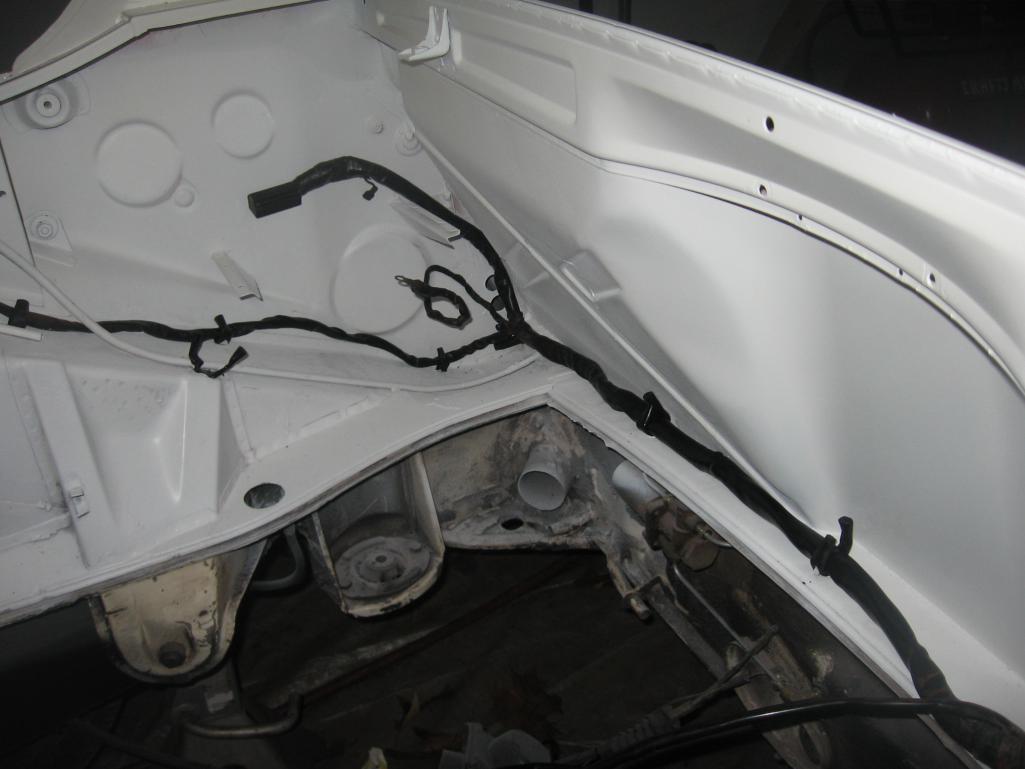
Sway bar restored and installed (mostly). I scored some restored suspension mounts from Bruce here too. Everything he sells is uber top notch!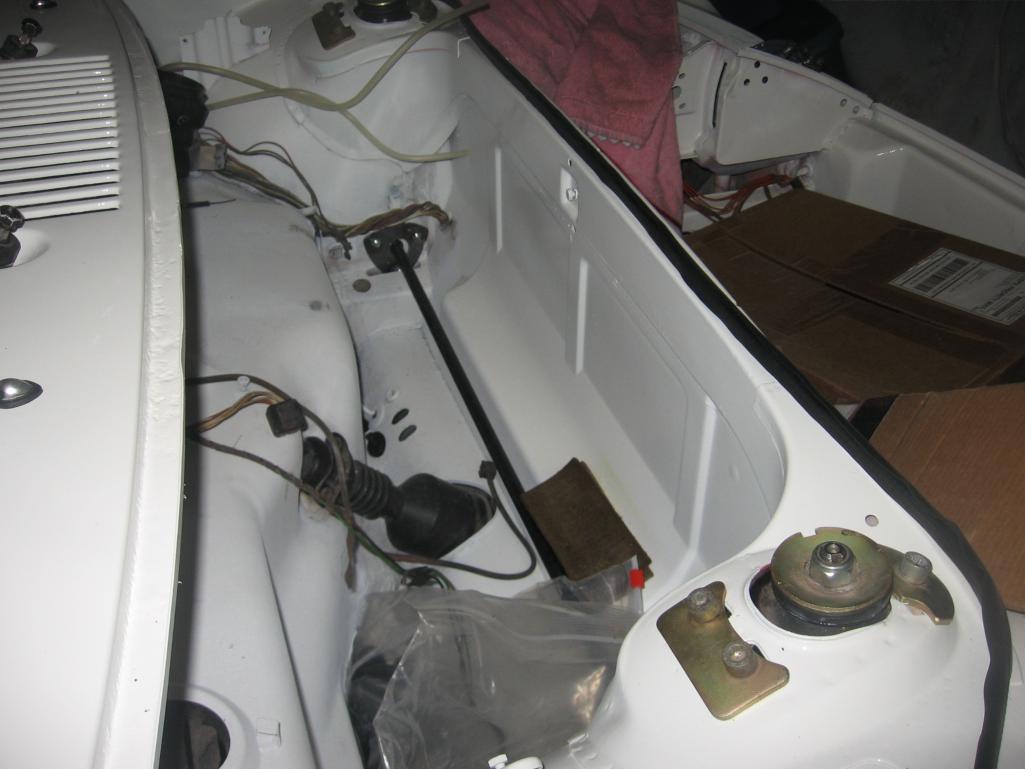
Wiper assembly refreshed and installed. I read a post on different wiring on early vs late cars so I swapped my original and working motor out on the clean assembly I bought here. Wiper jets were in the stash of NOS bits my friend Eric Wills gave me. 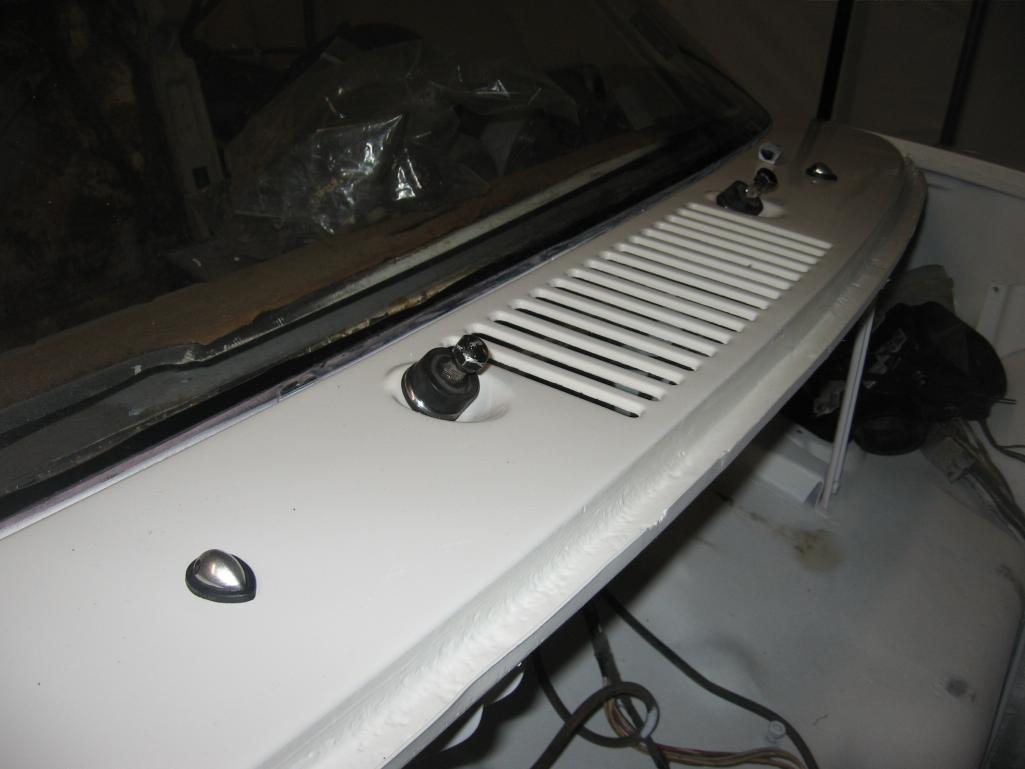
Posted by: OU8AVW Jan 5 2014, 05:47 PM
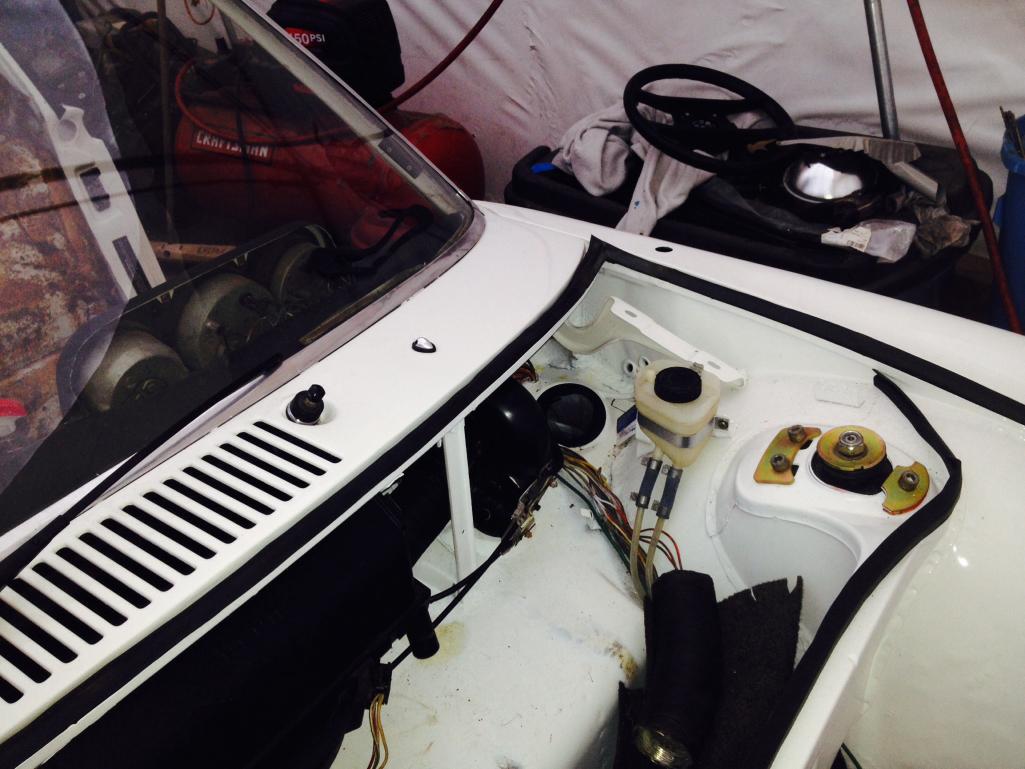
Installed my upper dash and secured the dash itself. a little heat should tighten up the vinyl. 914 Rubber dash to window seal went in easier than expected. 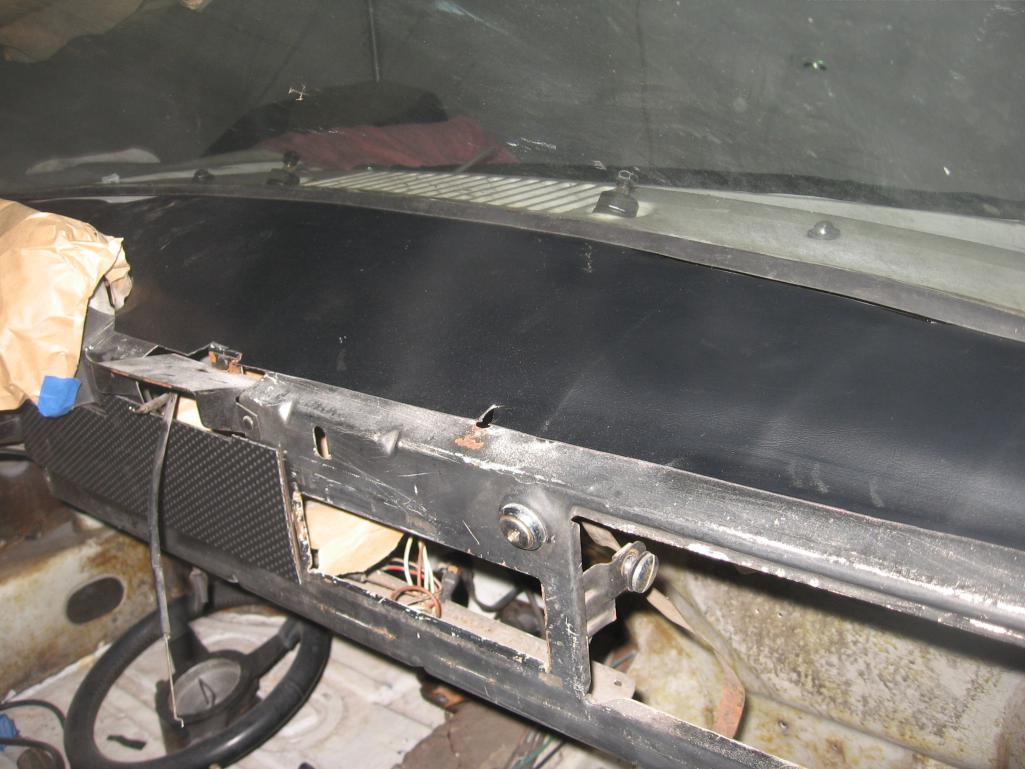
Rear trunk wiring going in. I have a few connections that I need to refresh. The PO had painted all this orange so I took the easy rout and just wrapped it back up after inspection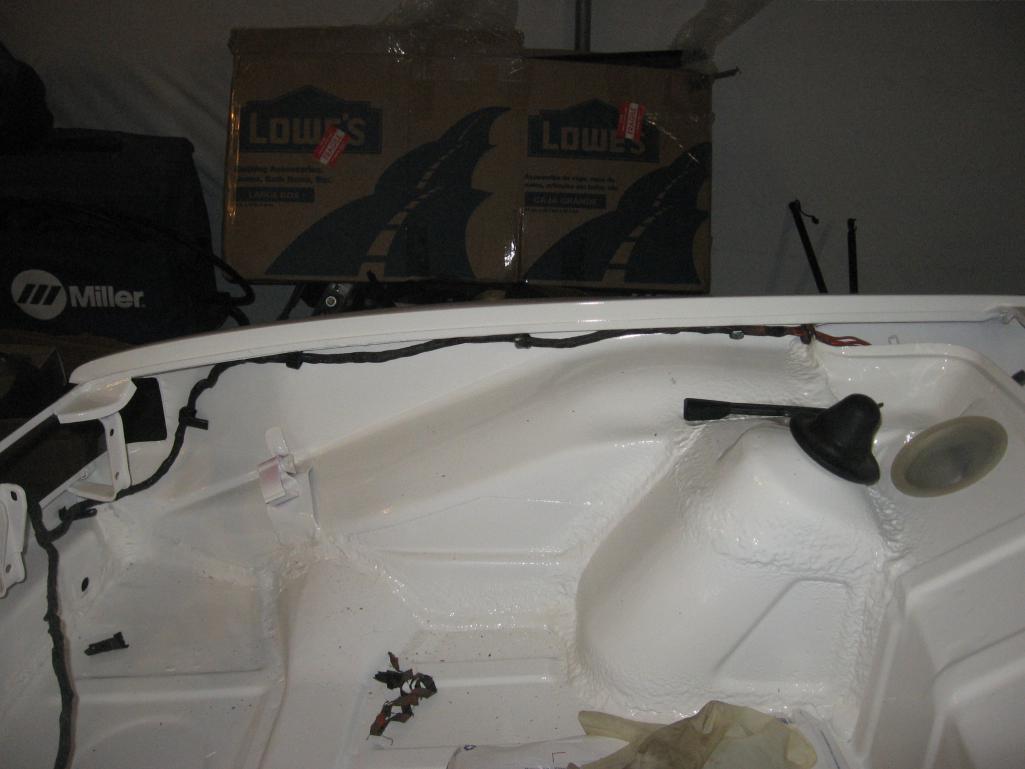
I had to mount one of my Euro tail lights to check it out. New seals fit well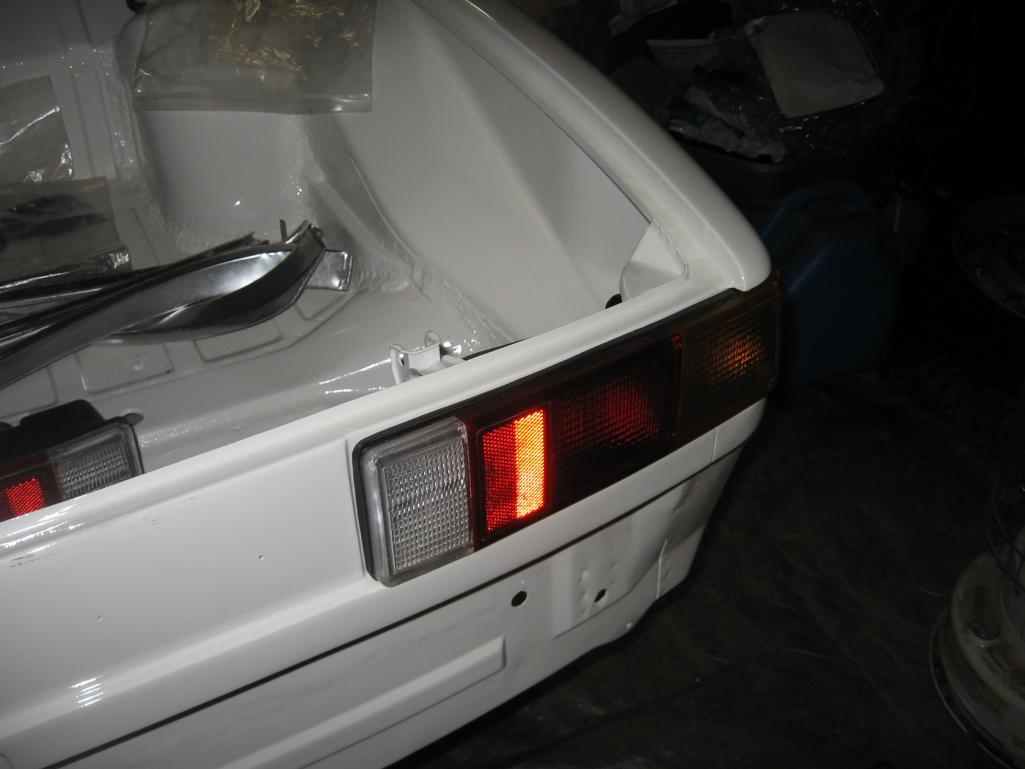
Posted by: OU8AVW Jan 5 2014, 05:54 PM
I'm pretty happy with my handy work on the rear trunk repair. It's not super perfect but it's pretty good for a first timer. 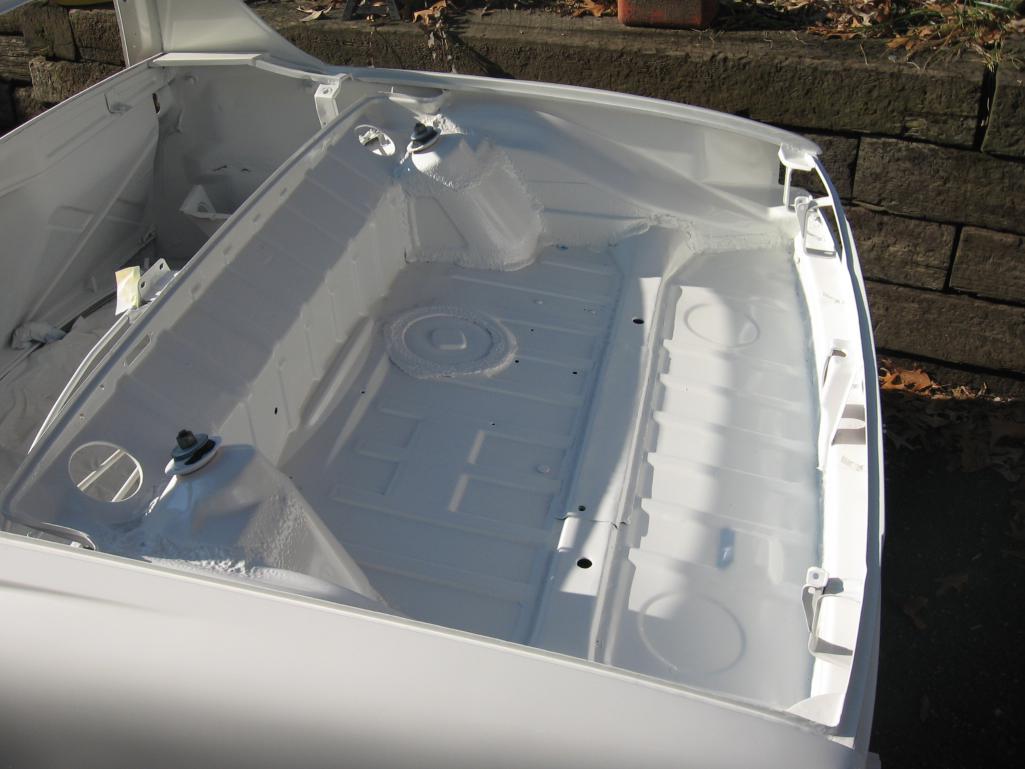
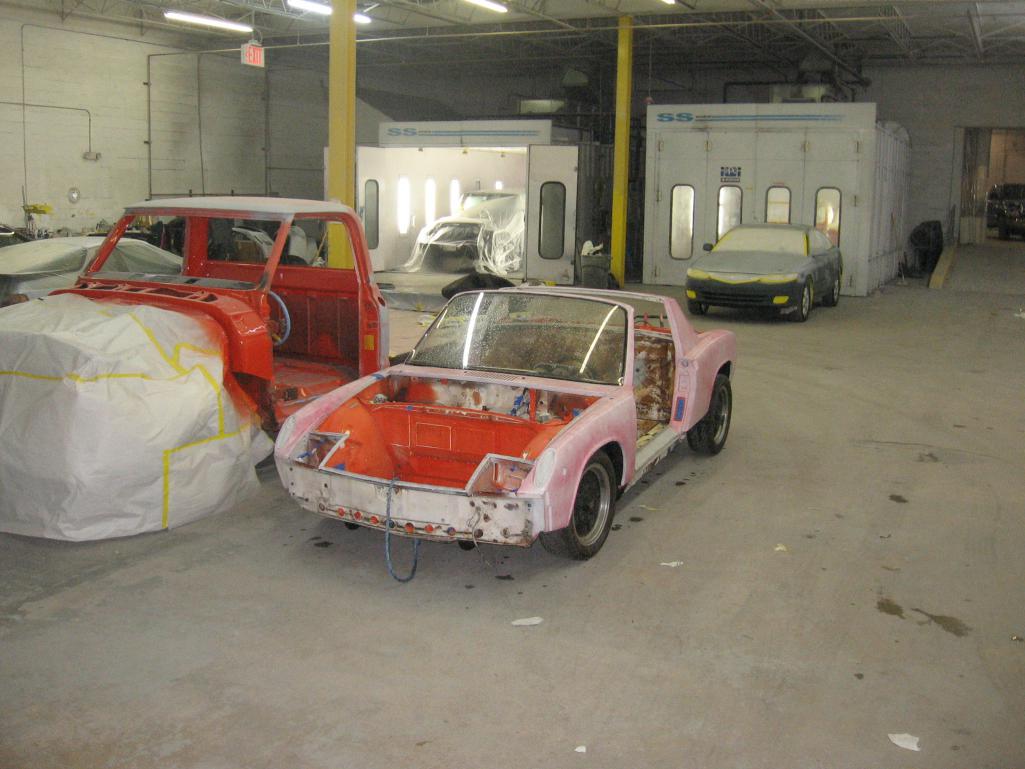
My work is nothing compared to Scotty B's. Scotty got busy with better paying projects so I had a local shop do the final paint. I think the body paint is a 9.5 but the details are lacking a bit. Trunks and engine bay could have been better but I'm happy. 
Posted by: OU8AVW Jan 5 2014, 06:00 PM
Finally unpacked the bumpers I bought three years ago. Rear is great but the front will need some polishing. 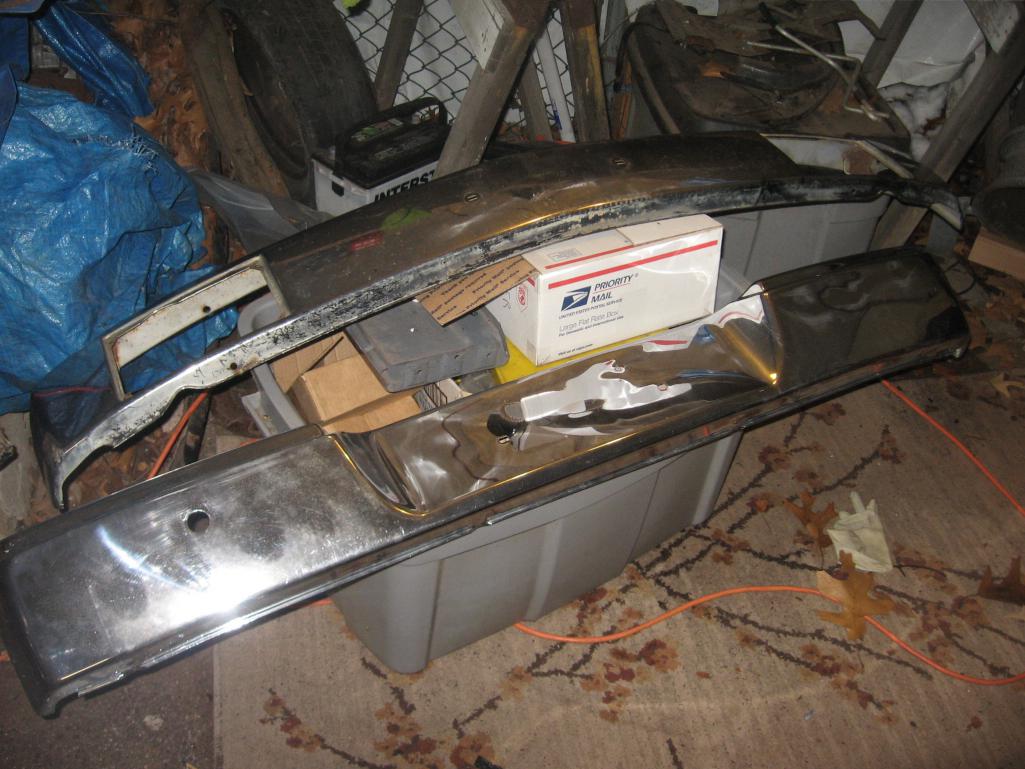
Shea restored headlight carriers. Like allot of stuff I've bought from Eric, the quality is beyond compare. But I need allot of fasteners 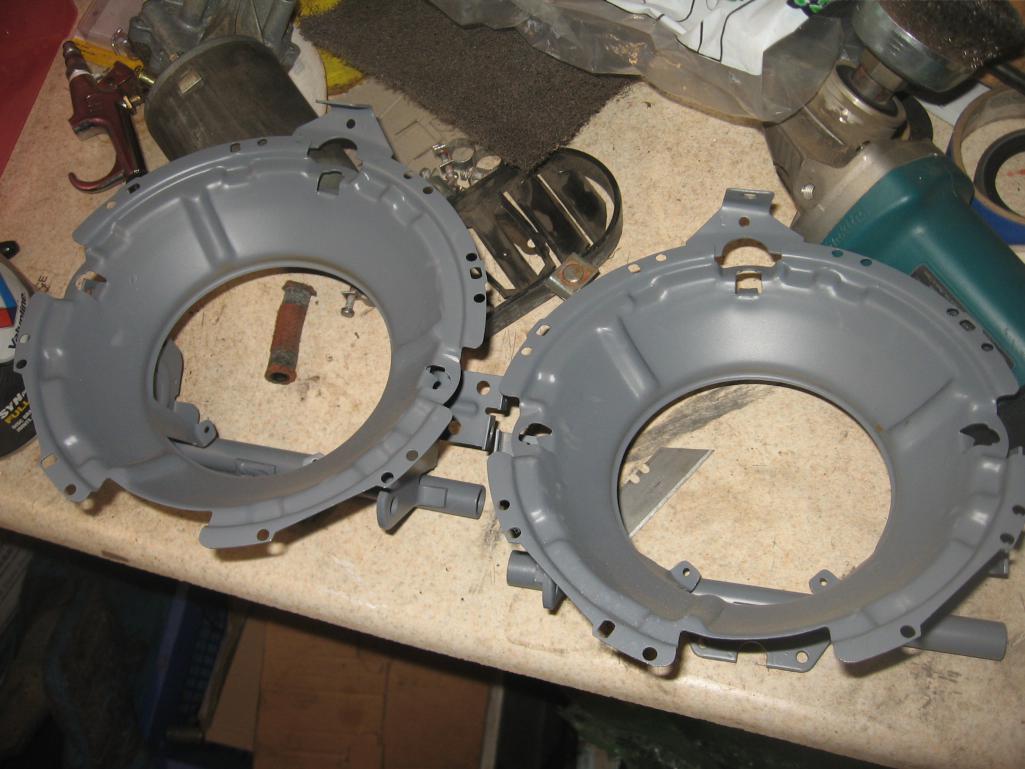
Posted by: scotty b Jan 5 2014, 06:30 PM
Lookin good mang
Posted by: FourBlades Jan 5 2014, 06:58 PM
Very nice!
Looking forward to seeing it all come together.
John
Posted by: wingnut86 Jan 5 2014, 09:17 PM
Vedy Shagadelic...
Posted by: CptTripps Jan 6 2014, 02:24 AM
You're CRUSHING the rebuild. This is the best part to watch, and most rewarding by a long-shot. Shows you what all the hard work has accomplished.
Stay at it mate!
Posted by: OU8AVW Jan 14 2014, 03:44 PM
Good times in the g-rage. I sanded and polished my trim, washed allot of the original rubber so I could salvage the outer door seals and front hood seal. Installed rear trunk seals and stuck the logo on the back. It's straighter than it looks 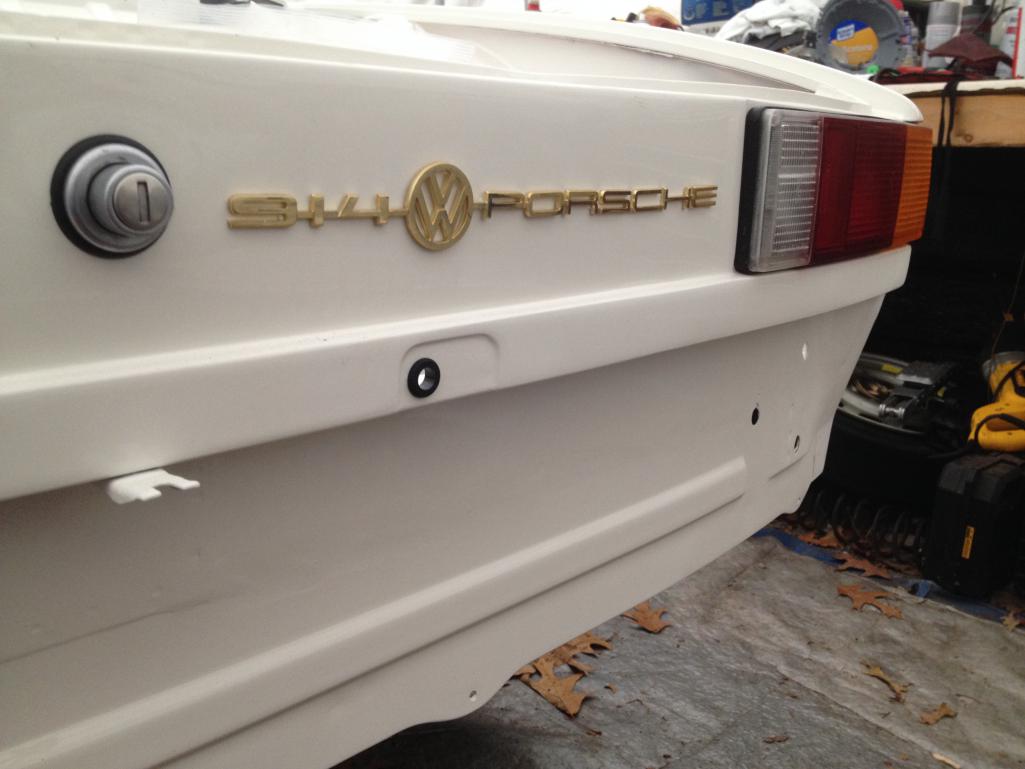
Posted by: OU8AVW Jan 14 2014, 03:46 PM
I also worked on cleaning and finding all the little parts on the light housings. I have a few favorite used vendors that I have made requests for the missing pieces. 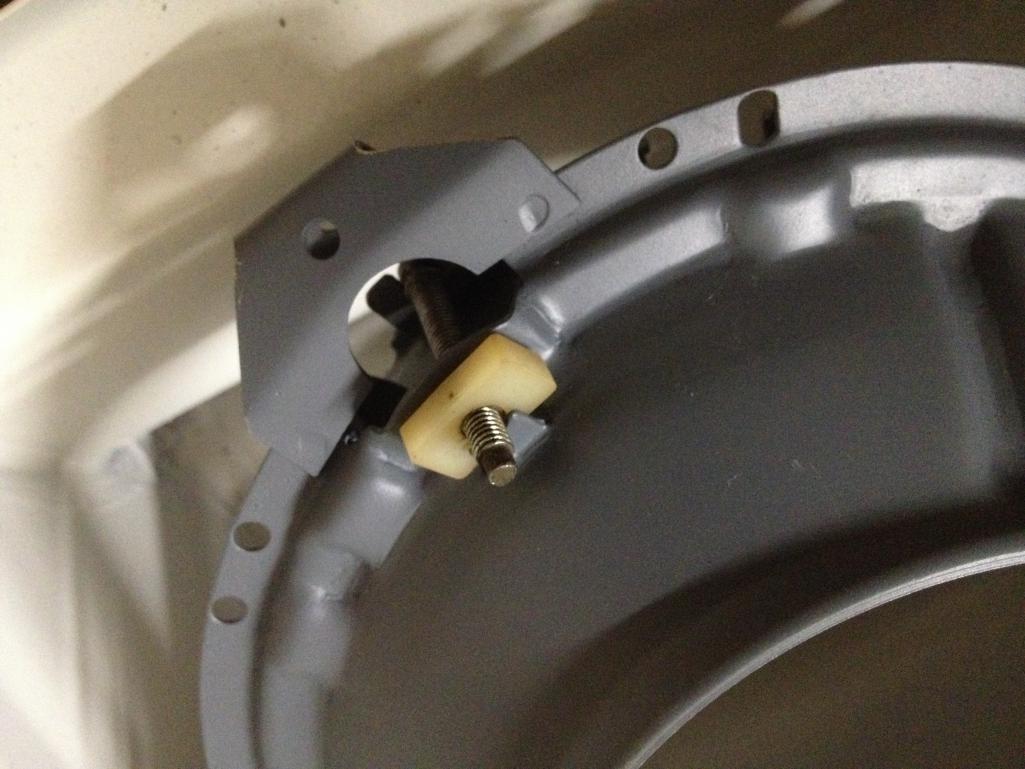
Posted by: OU8AVW Jan 14 2014, 03:49 PM
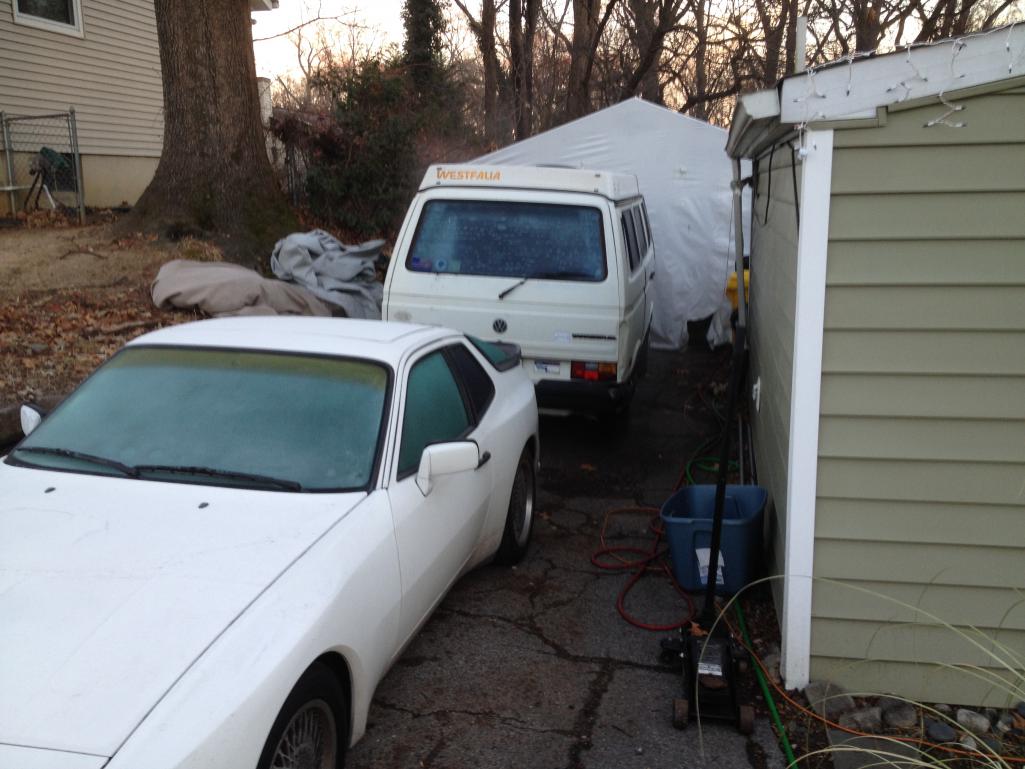
A new distraction arrived Saturday
Yes, my other dream car, an '89 Westy. $4500 
PS.
I was never a fan of white cars
Posted by: OU8AVW Jan 22 2014, 05:41 AM
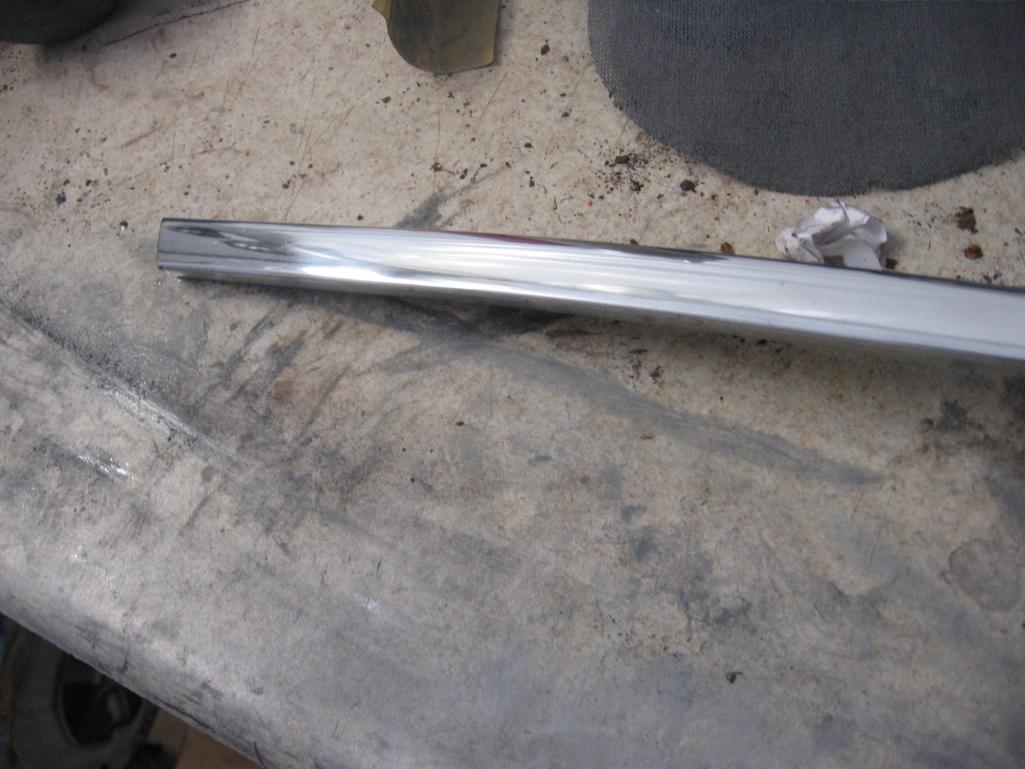
I worked on my trim last week. It all looked pretty tired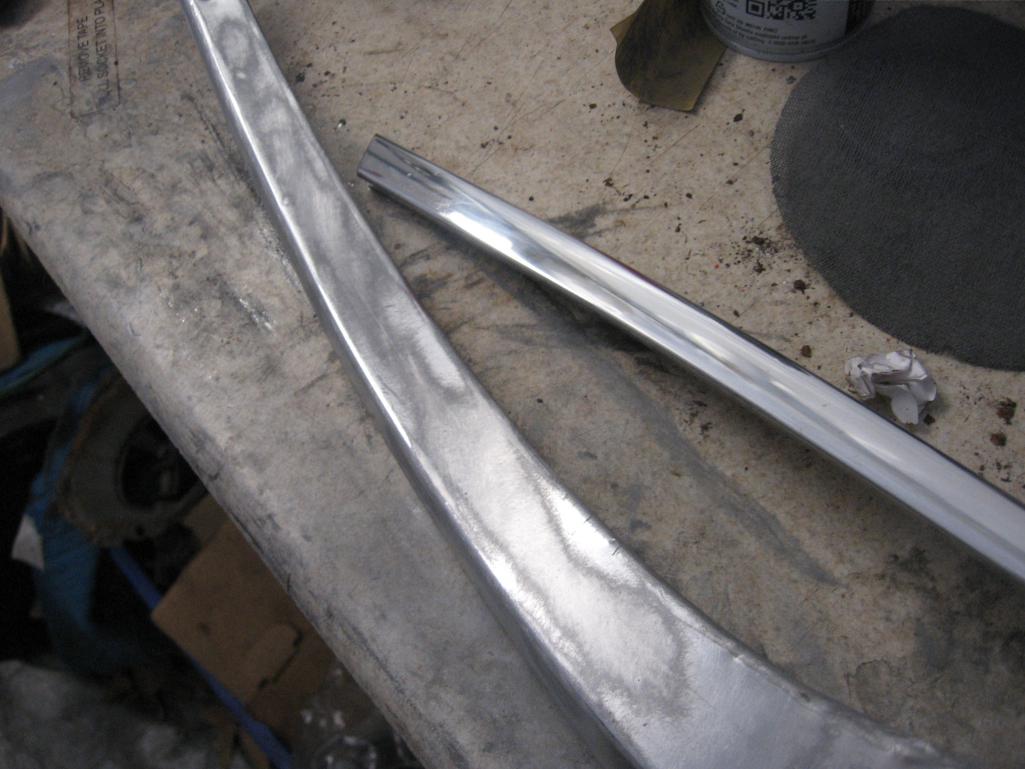
So I sanded it with 400, then 600, then 1000. Then I used a buffing wheel and some metal polishing compound followed by a little mother's aluminum mag polish. The toughest part was getting past all the old anodizing and getting the surfaces flat enough to sand.....
Voila
Installed the rear bumper and top along with the signals and trunk electrical
Posted by: CptTripps Jan 22 2014, 08:51 AM
Great looking build Mike...really nice.
Posted by: 3d914 Jan 22 2014, 12:08 PM
Lookin really nice, Mike. I'm sooo jealous!
Posted by: OU8AVW Jan 22 2014, 07:48 PM
Thanks guys. No garage time today, it's 6 outside and I'm working in a tent
Posted by: OU8AVW Feb 3 2014, 12:09 PM
I worked on the front signals this weekend. Got them painted and partially installed. I bounce around allot as required knowledge and needed parts send me back to the computer
NOS Euro lenses look sweet! My housing seals seals were in perfect shape too. I replaced the harness seals behind the housing with some good used units. This forced me to replace the connections, they were toast anyway. I'm finding that a fine 3m pad and some tire cleaner cleans up the rubber real nice. Then a quick coat of silicone to give it that dull shine. 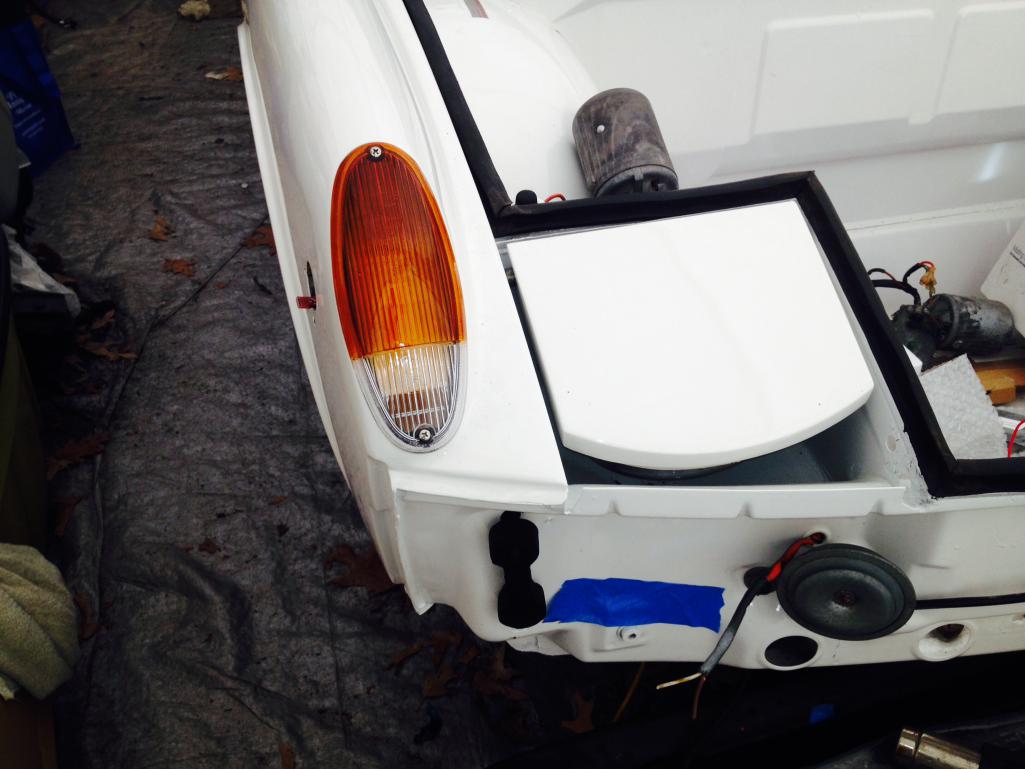
Posted by: CptTripps Feb 3 2014, 01:50 PM
Looking good man...
Posted by: OU8AVW Feb 8 2014, 07:59 PM
Started my transmission rebuild Friday. My amigo Eric gave me a hand. I had the tailshift that came with the car and a sideshift i bought from a member here (who's name i will not mention, you'll see why....)
The hope was to make on good sideshift trans out of these two.
Sideshift on the bench ready for disassembly. 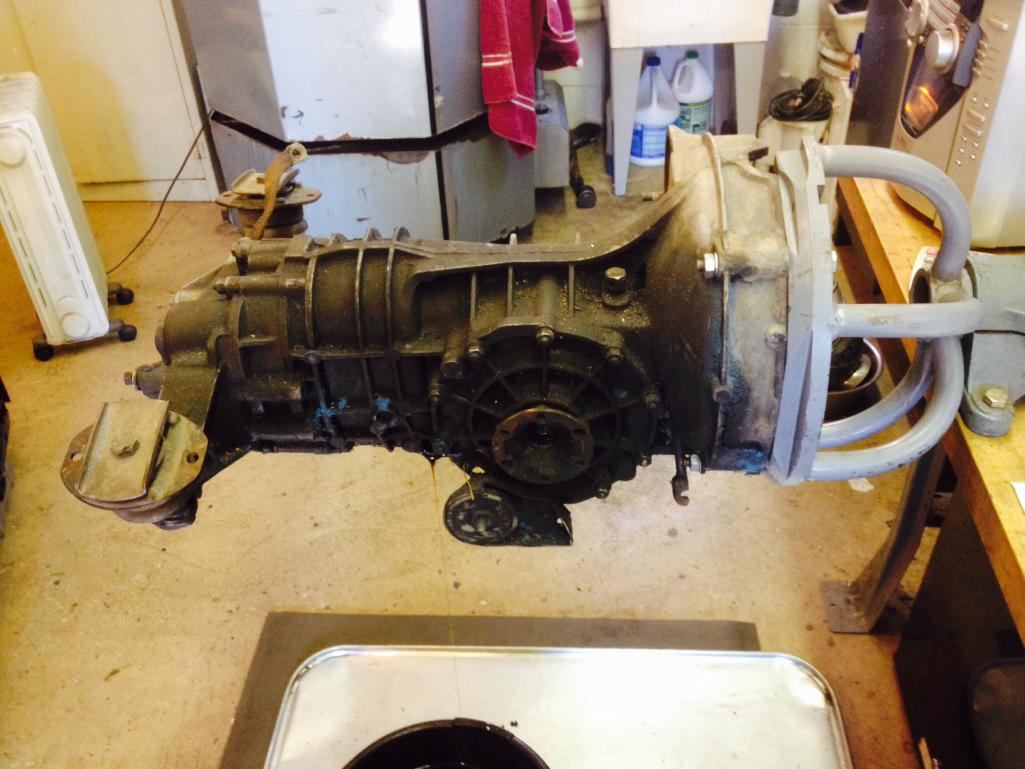
Coming apart. The DAPO put this together without any gaskets. The problem with this is that the pinion lash was off.....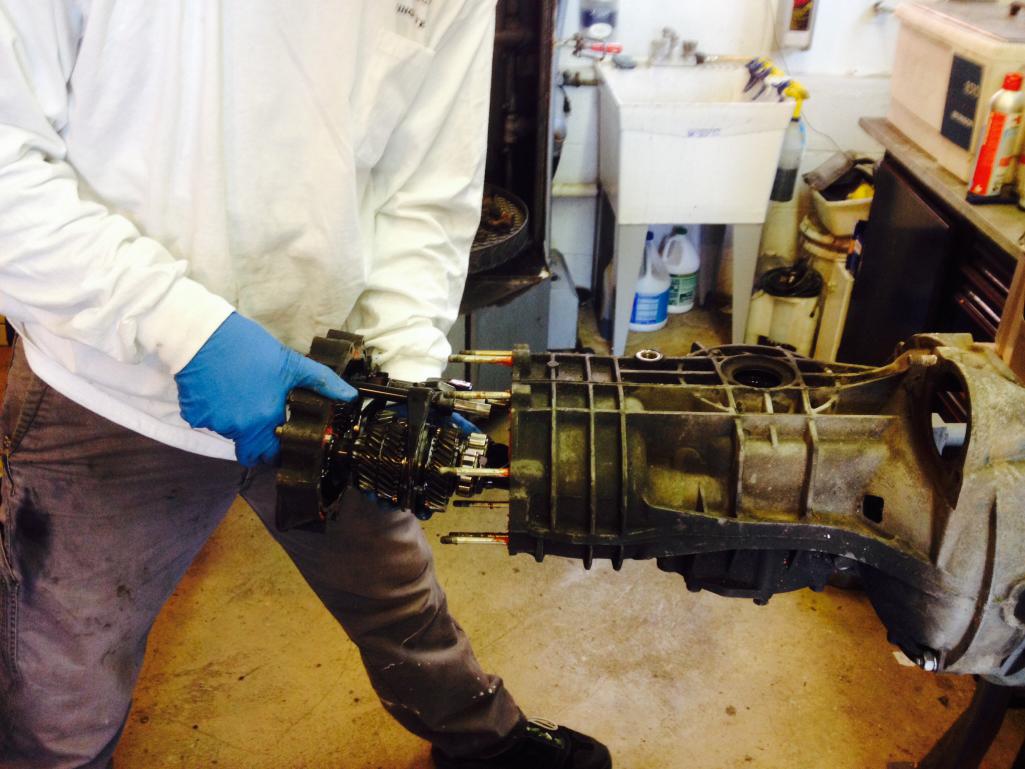
Posted by: OU8AVW Feb 8 2014, 08:06 PM
Because the pinion lash was off the pinion went too far into the pinion gear causing wear on the pinion. The pinion and the gear are a matched set. There are numbers that correlate to each other. 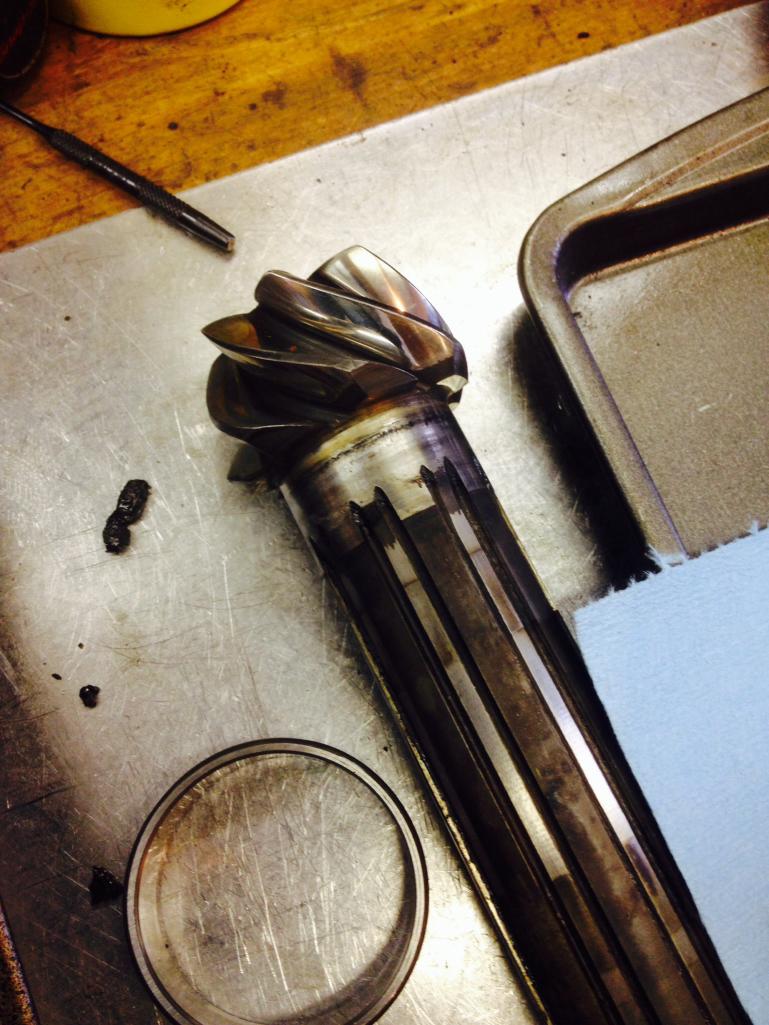
So we pressed out the main shaft and pinion from the intermediate plate. The factory tool is pushing evenly on both shafts so they come out together. Much more accurate than a hammer 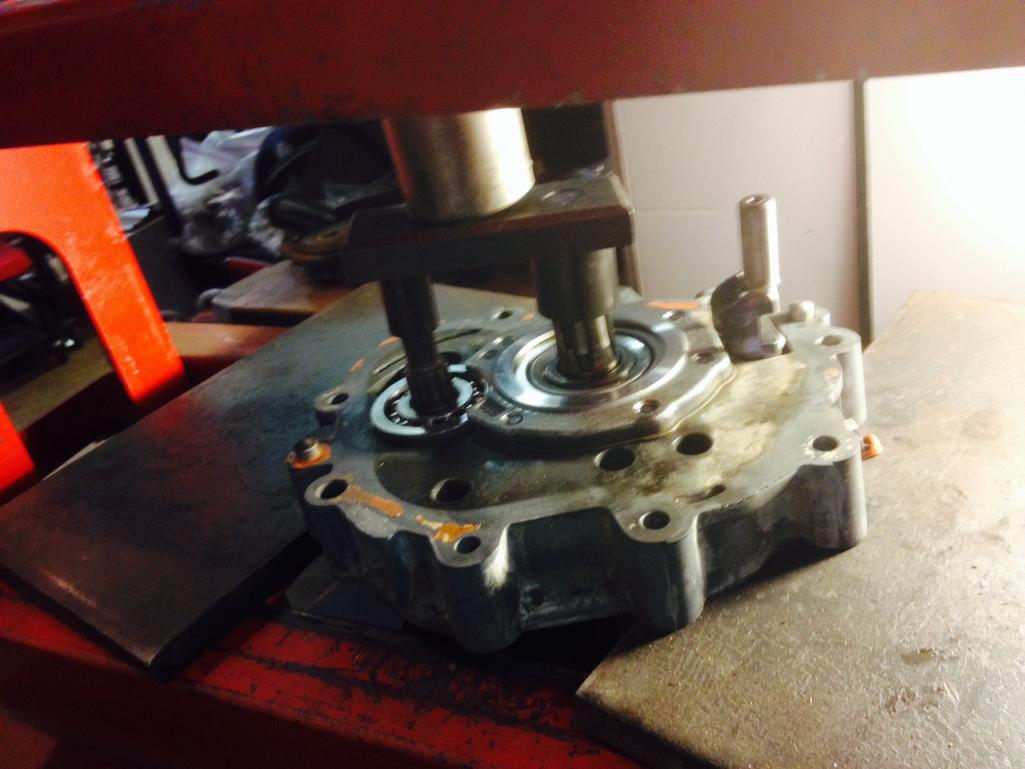
Posted by: OU8AVW Feb 8 2014, 08:17 PM
Ok, so far i have a bad pinion, first gear was bad and fifth gear was toast too. All this transmission's dog teeth were suspect as were the syncros. Hopefully the second tranny would be in better shape. Remember, this was a working trans i bought here
So we pulled the tailshift appart....
Not so good.....
Fortunately Eric had a reasonable pinion and gear. First the bad gear comes off the differential and gets swapped out. We used a big torque wrench to get these to 80lbs...
Then the locking washers are installed. Now I'll have Porsche not VW spec pinion. There is a difference. The Porsche parts are measured and factory tested. Notations are seen on the parts....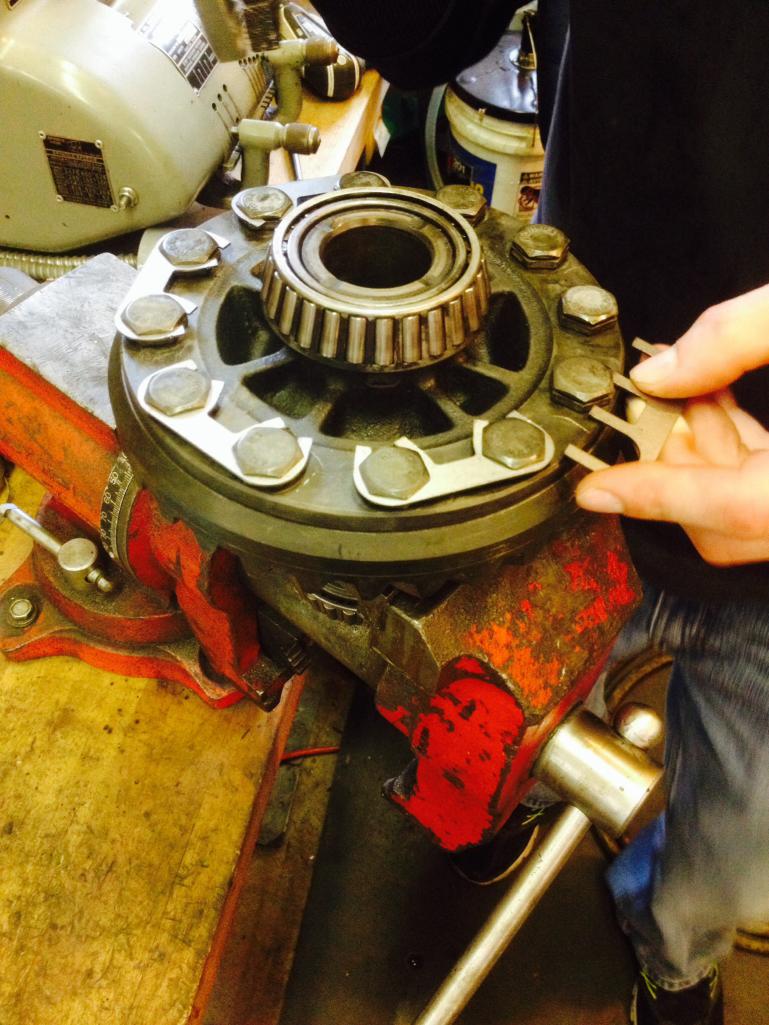
Posted by: OU8AVW Feb 8 2014, 08:24 PM
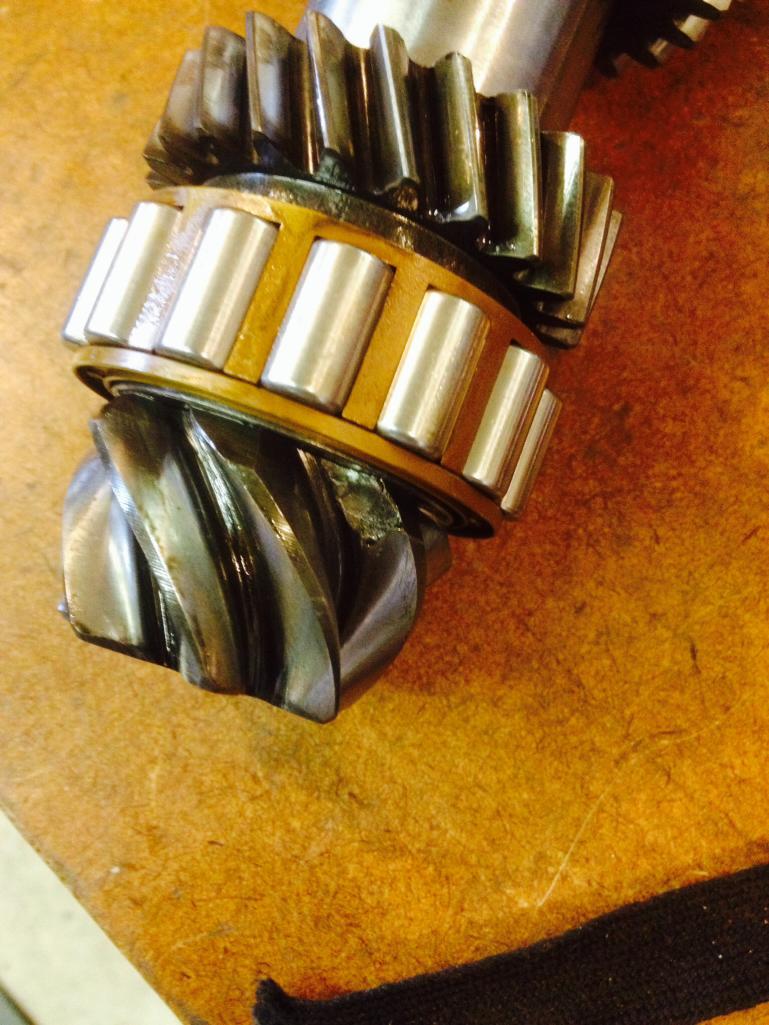
Next we strip all the shafts and start the hunt for good parts....
More factory tools make this job much easier. 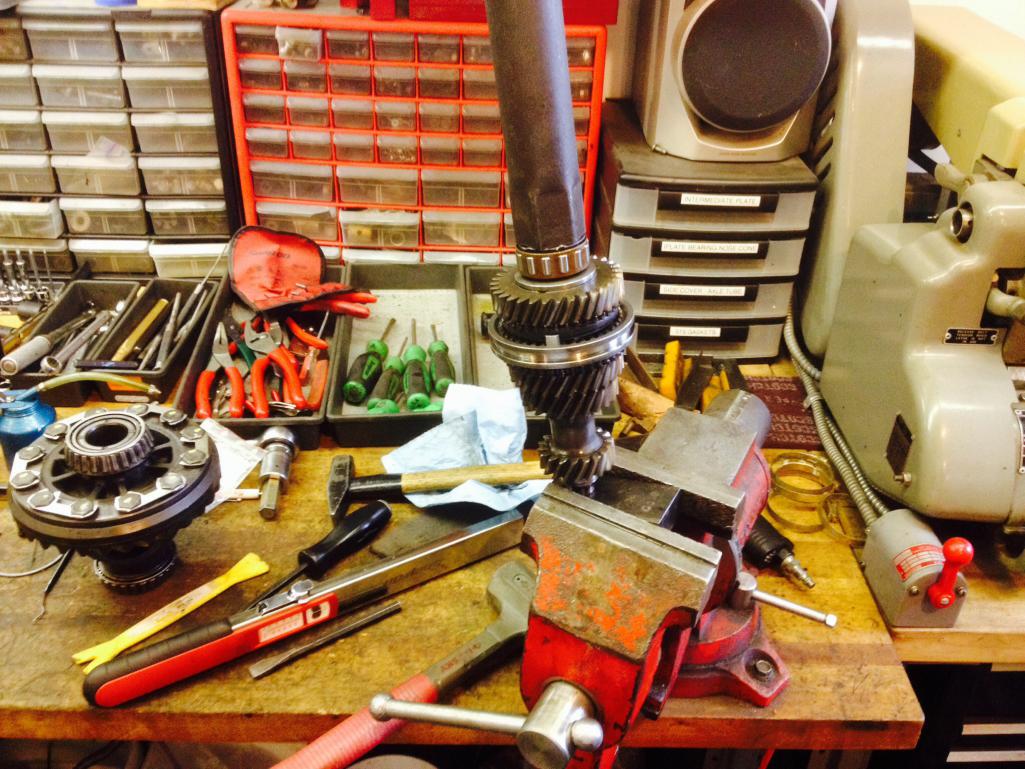
Next we chalk the shaft up in the lathe to make sure it's straight and we use a little 3m pad on the sealing surfaces to ensure they are smooth. This one checks out. 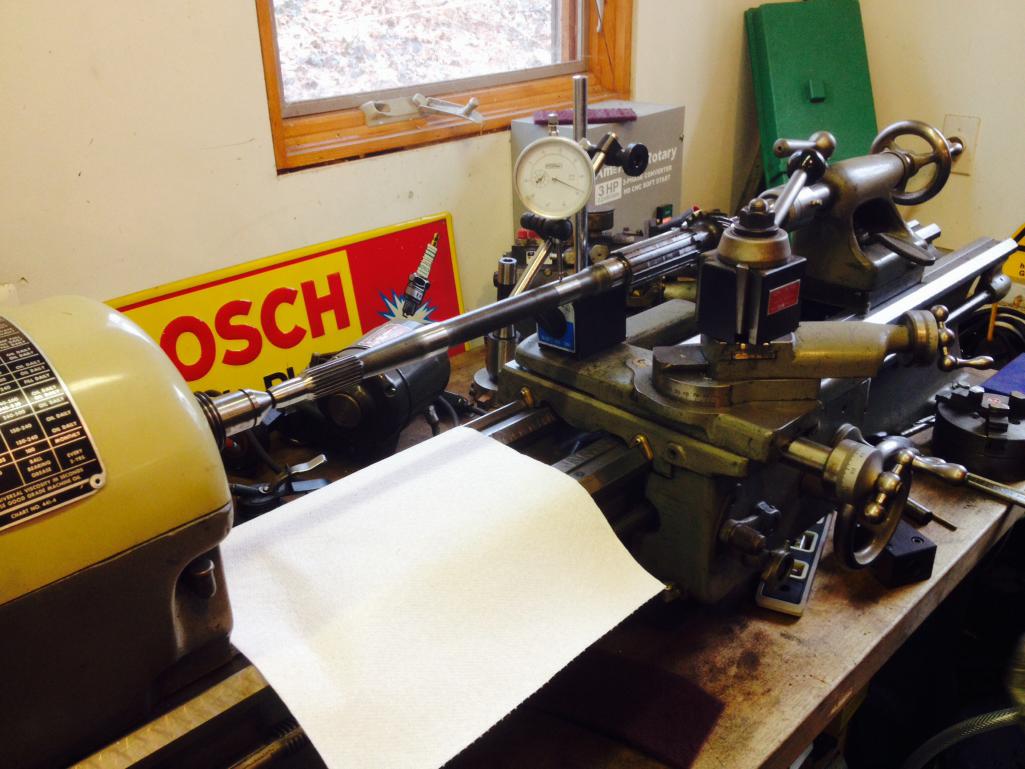
Posted by: OU8AVW Feb 8 2014, 08:33 PM
Now to dig into the gears and sliders. I was in need of a few sliders that we sourced from eric's stash and the other trany. We made sure all the gears stayed matched pairs. Another slick tool holds the recess on the slider.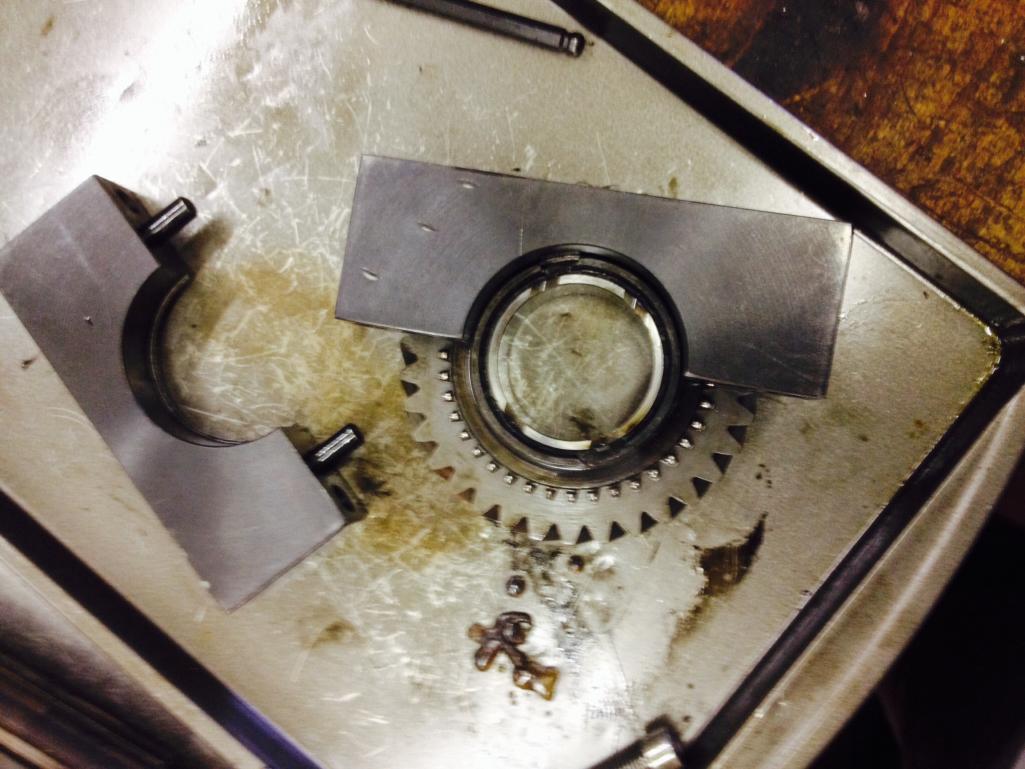
Then the gear can be pressed out. This tool will also work to install the slider and gear back together. 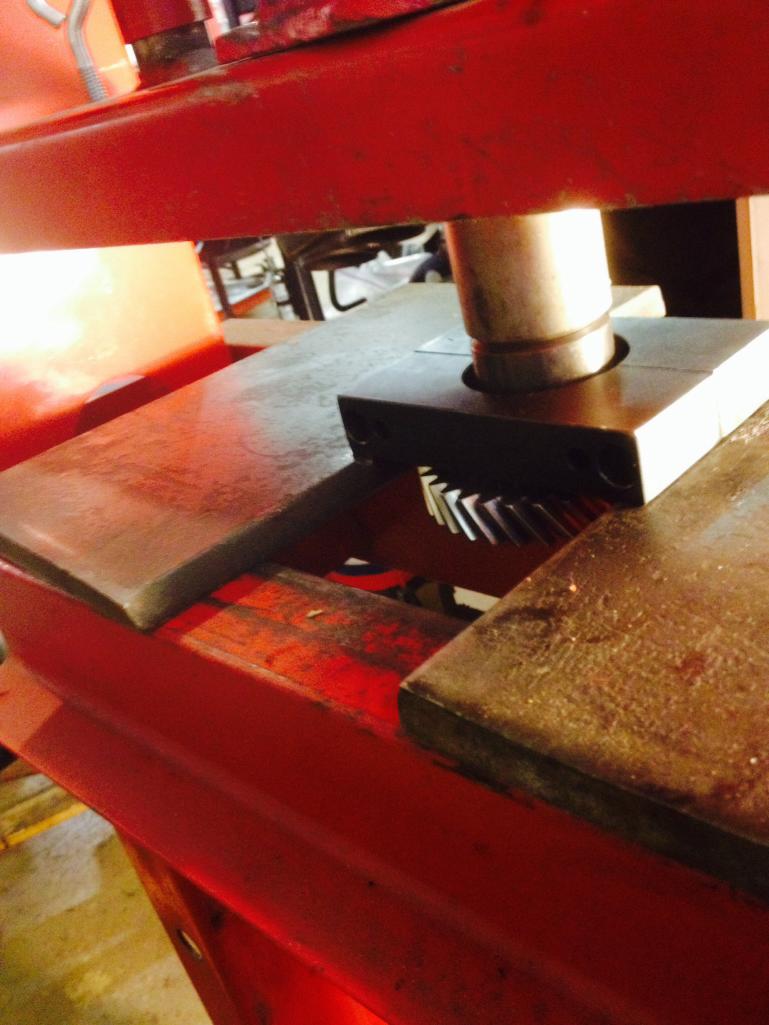
Posted by: OU8AVW Feb 8 2014, 08:37 PM
The gears go back together with new syncros and updated brakes. 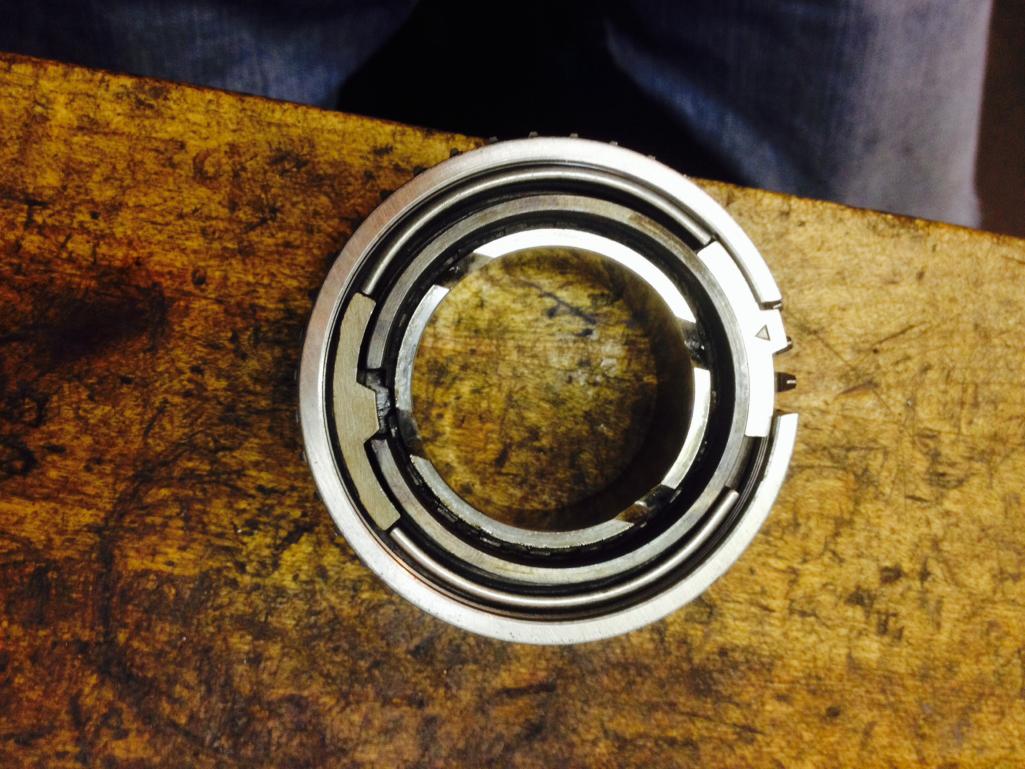
I spent some time detailing the case today. More on that next time....
I should be doing the assembly next week with new bearings and seals. I do need a nice 5th gear (ZD). Everything else is fully pimped
Posted by: Steve Pratel Feb 9 2014, 10:50 AM
dude, kudos on tackling this. Transmissions scare me... I of course am not doing anything on mine except clean up the outside, and changing the fluid......
Posted by: type47 Feb 10 2014, 08:40 AM
Nice! I did the trans clinic this last weekend and all those photos and discriptions are what we went through with ours.
Posted by: computers4kids Feb 10 2014, 10:56 AM
I learned so much at one of Evil's clinics-very rewarding. You're a brave soul tackling one without Evil. Having those custom tools is will make all the difference.
Posted by: OU8AVW Feb 10 2014, 01:33 PM
Evil is the man. He's like the Obi Wan Kenobi of transmissions.
Eric is Yoda
I am far from doing this alone.
Posted by: OU8AVW Feb 18 2014, 12:44 PM
Cool little project. I installed a battery switch using a Porsche center cap as a centering plate.
I machined it to fit....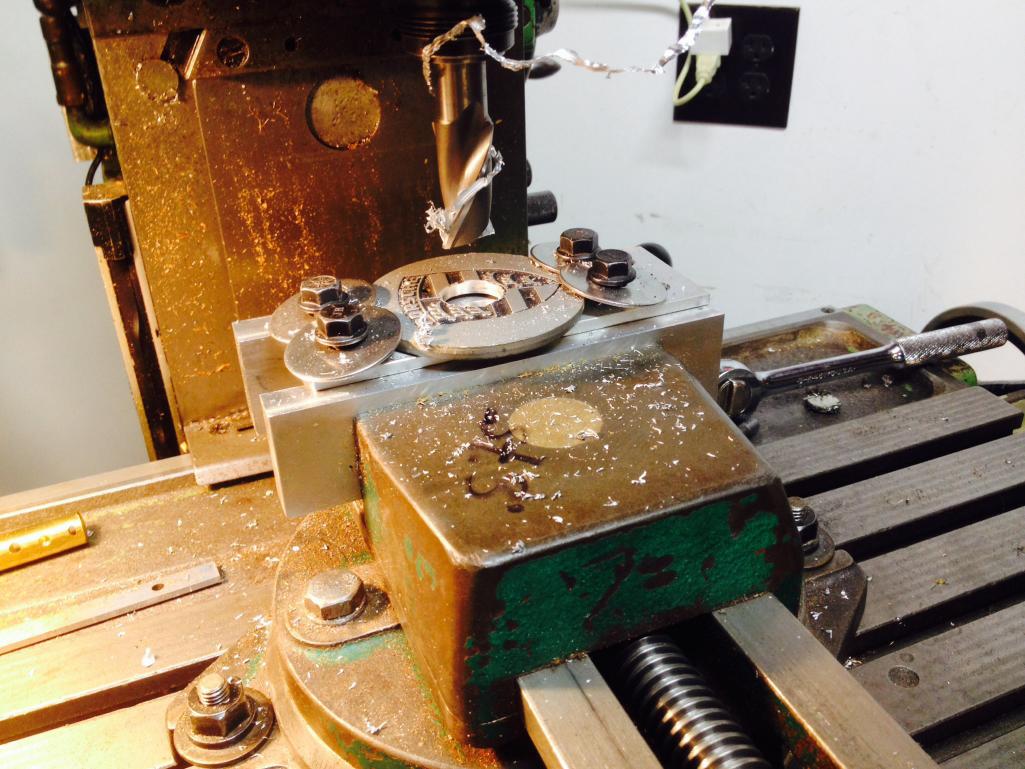
Finis....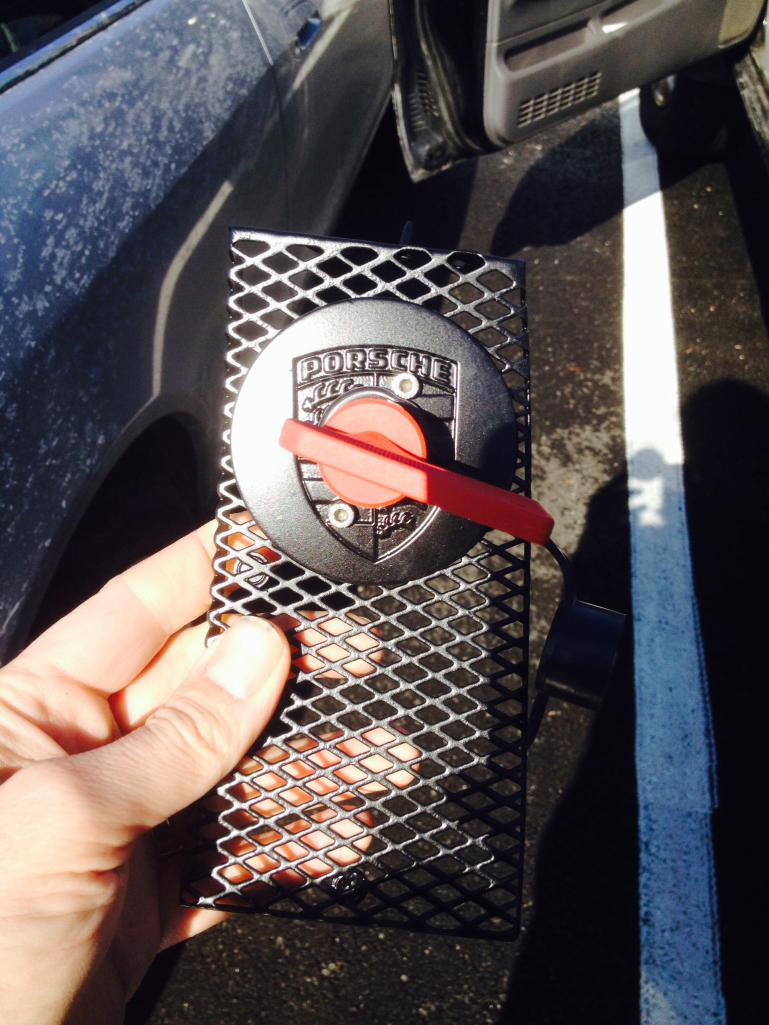
Posted by: OU8AVW Mar 19 2014, 09:11 AM
Making steady progress.....
Installed my fresh air system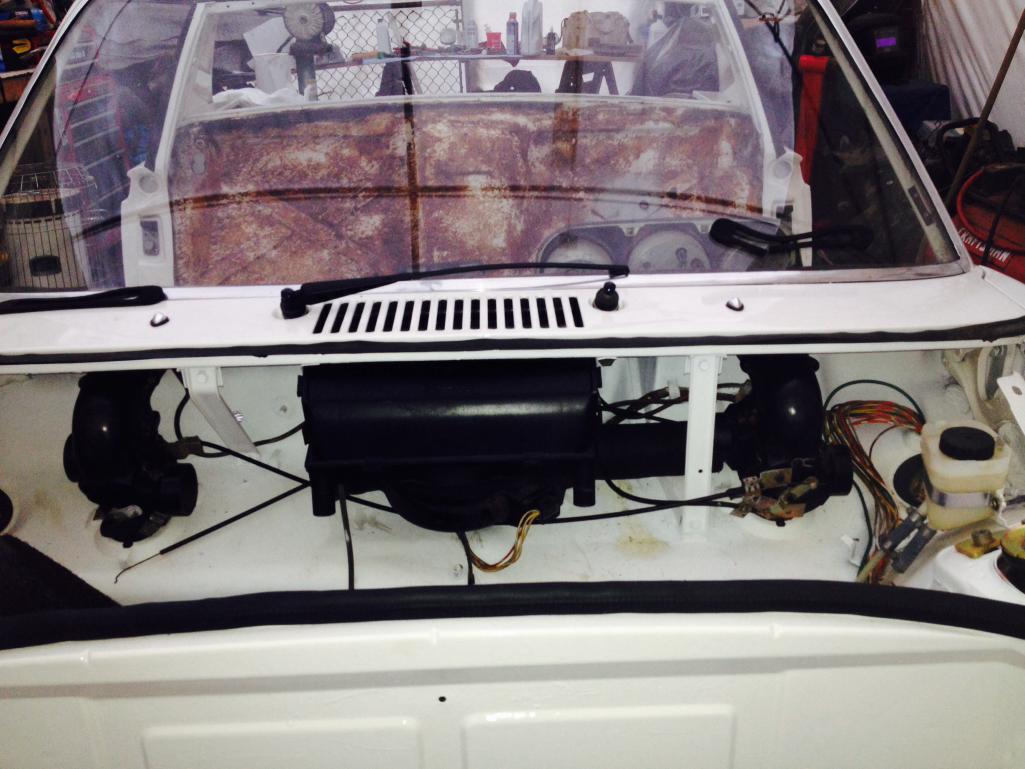
Sorted the lights, running lights and Pilot lights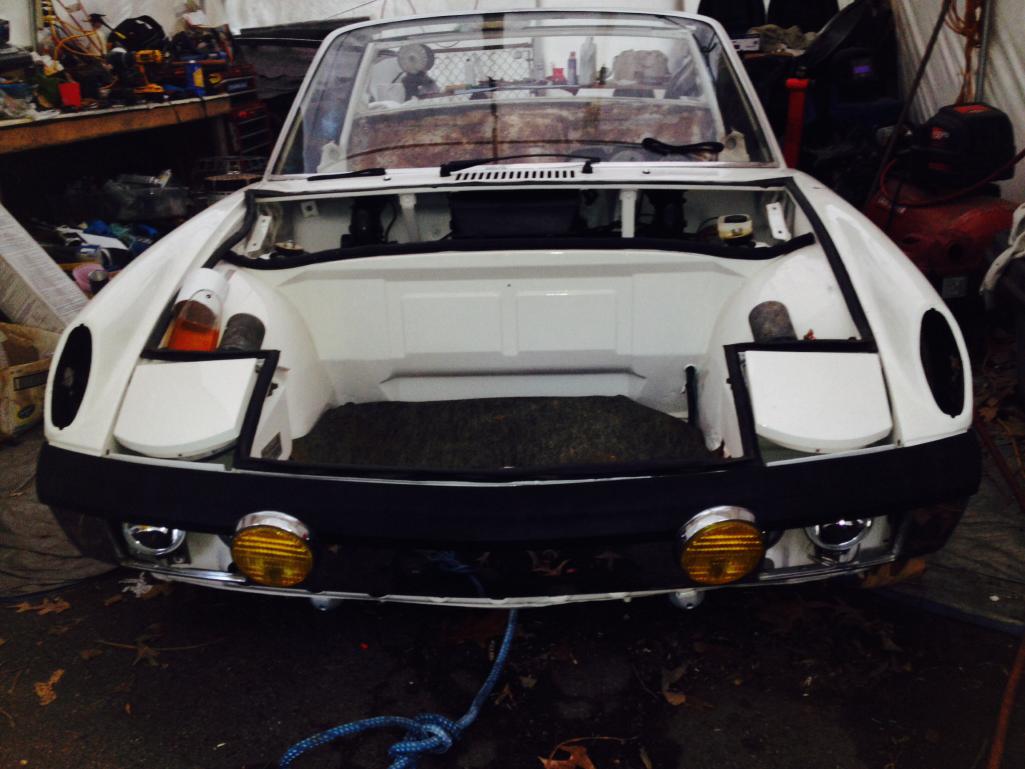
Dash face and heater controls in....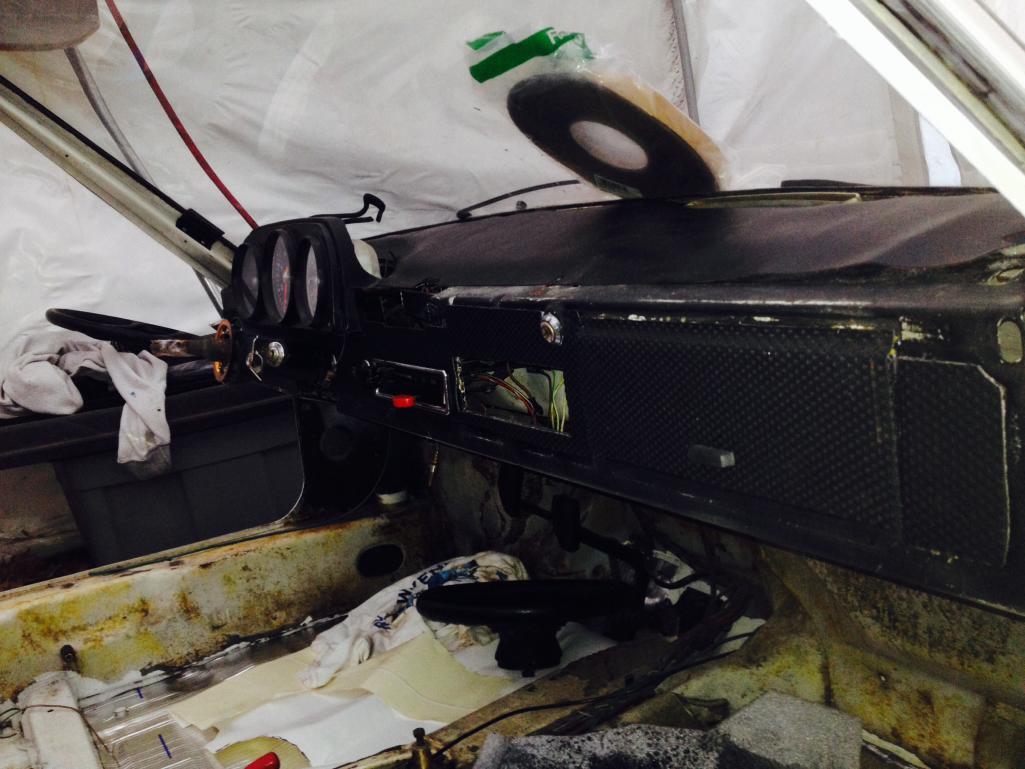
Posted by: CptTripps Mar 19 2014, 11:22 AM
Keep on it man....it'll all come together real fast!
Posted by: OU8AVW Mar 22 2014, 11:29 AM
Installed the rear window and more sound deadening. I'm using peel and seal roofing material. Cheap and effective.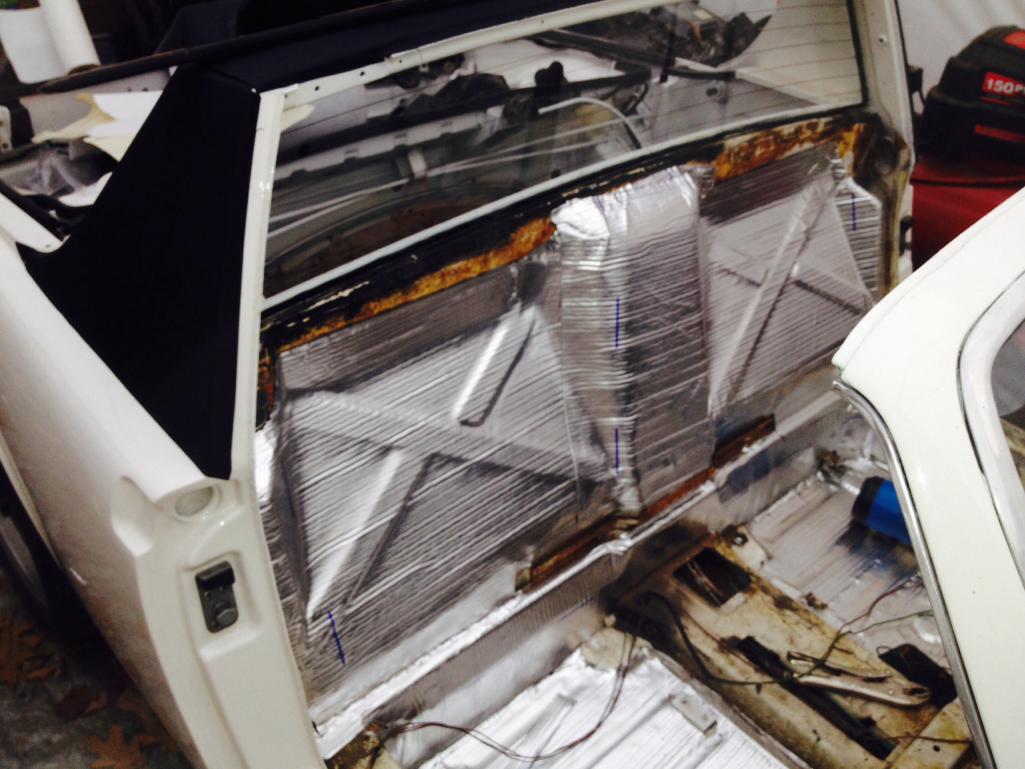
Posted by: OU8AVW Mar 28 2014, 07:55 AM
Transmission build continues. We did the pinion depth setting. The pinion and all gears were installed with a single gasket. The setting was checked with a factory tool and dial indicator. It was .20mm to far in. The gaskets are .25mm thick so we added a second gasket. It came up perfect.
This tool approximates a diff and uses the same bearings. A dial indicator is held inside that can be seen inside the hole. It bears on the tip of the pinion shaft. 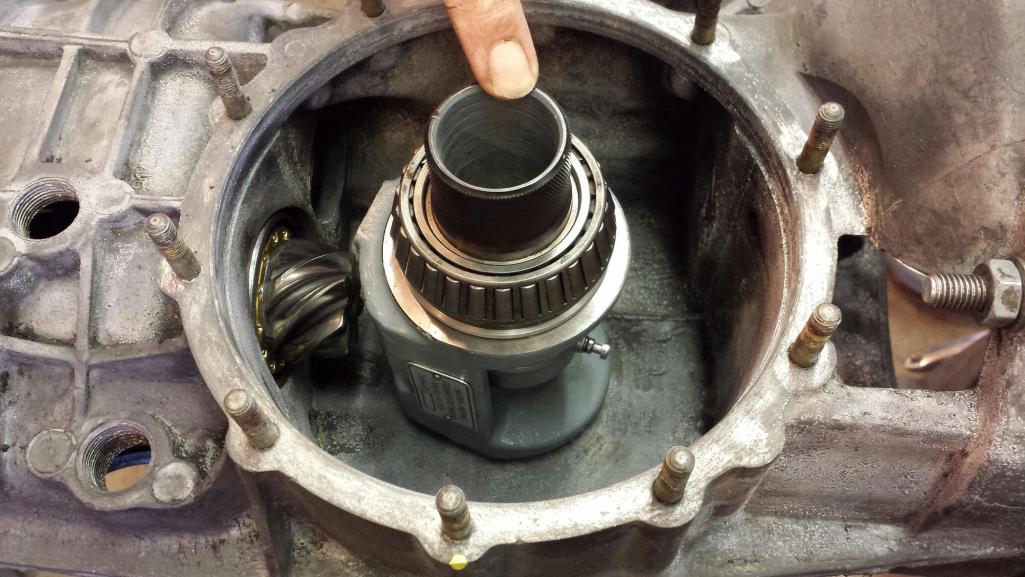
Posted by: OU8AVW Mar 28 2014, 08:00 AM
Next we set the lash. This factory tool attaches to the output shaft. We used a spacer to lock the shaft and pinion so the whole assembly rotates. .15-.20mm is optimal. Mine was .17mm. Done! We also set the drag while we were at it. Drag is a product of how much shim installed, lash is adjusted by where the shims are installed, port or starboard side of the diff. 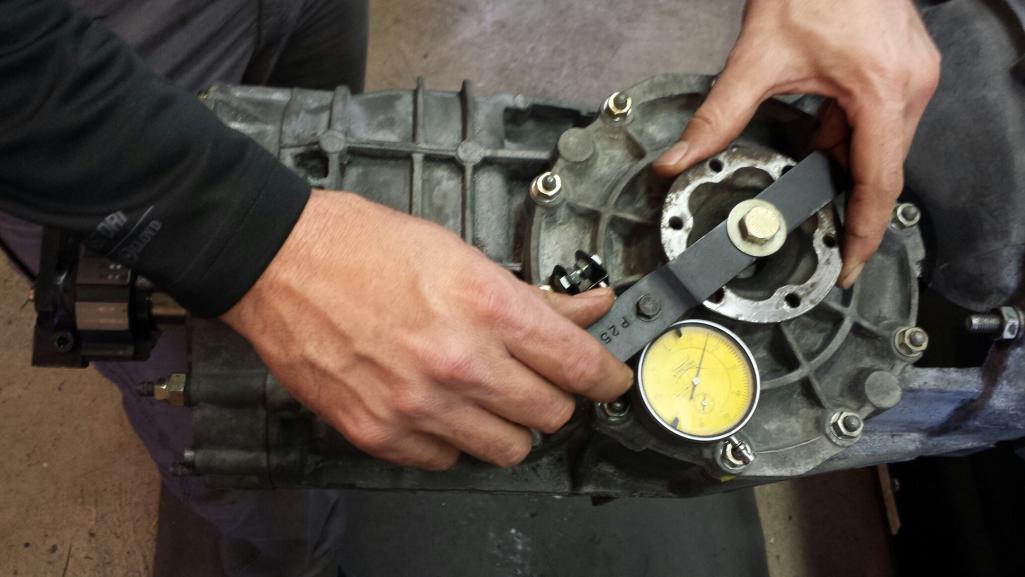
Posted by: OU8AVW Apr 18 2014, 01:56 PM
So, is this cool? 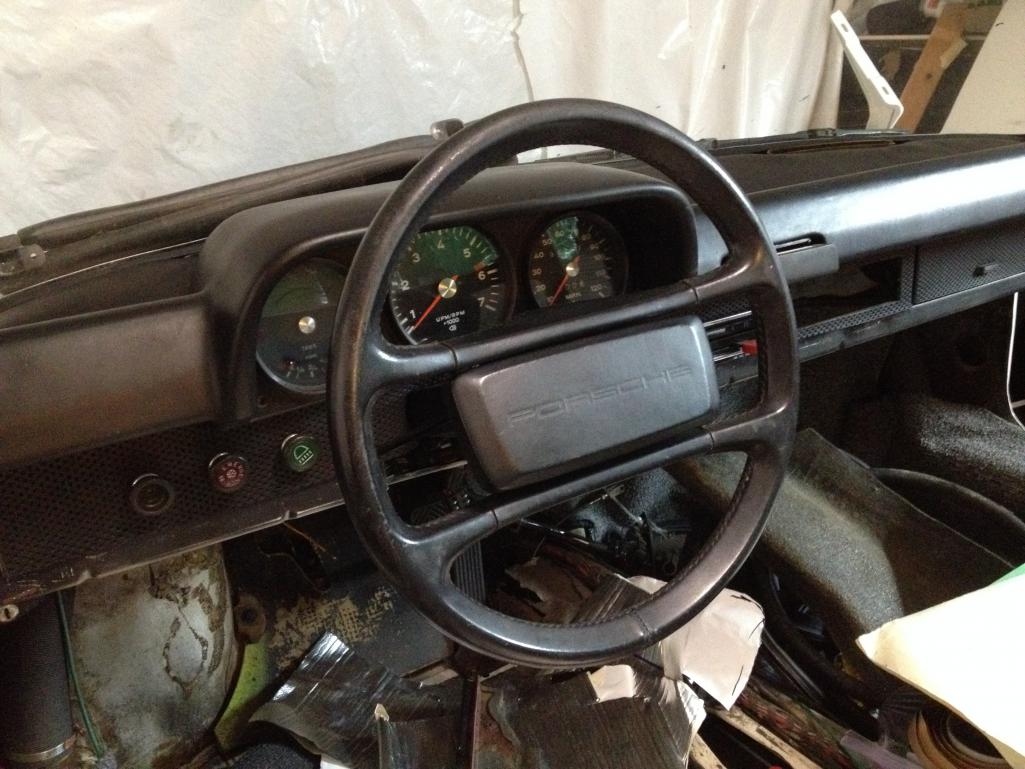
Posted by: bigkensteele Apr 18 2014, 02:02 PM
So, is this cool?
Not my cup of tea. I prefer the carpet installed.
Nice looking wheel, though.
Posted by: veekry9 Apr 18 2014, 05:36 PM
No dash cracks?
So that's how it should look.
The wheel fits.
Attaching oneself to the road.
928 motorsports
//http://www.928motorsports.com///
Soon,I may simply repair the original.
Posted by: wingnut86 Apr 20 2014, 09:46 AM
There are always a few hairline cracks somewhere.
Just depends on your level of tolerance
Hey, my Momo wheel didn't come in a "Nerd" model...
Dangit
Posted by: OU8AVW Apr 27 2014, 04:00 PM
Little bit of progress....
Posted by: veekry9 Apr 30 2014, 04:15 PM
Hey, my Momo wheel didn't come in a "Nerd" model...
Dangit
Hey!It does say nerd.
Posted by: veekry9 Apr 30 2014, 04:22 PM
Little bit of progress....
This looks really really nice,I am so waiting for the eventual results of similar labor.
Scrape,sweat and tears,the hours and days of sanding those voluptuous curves.
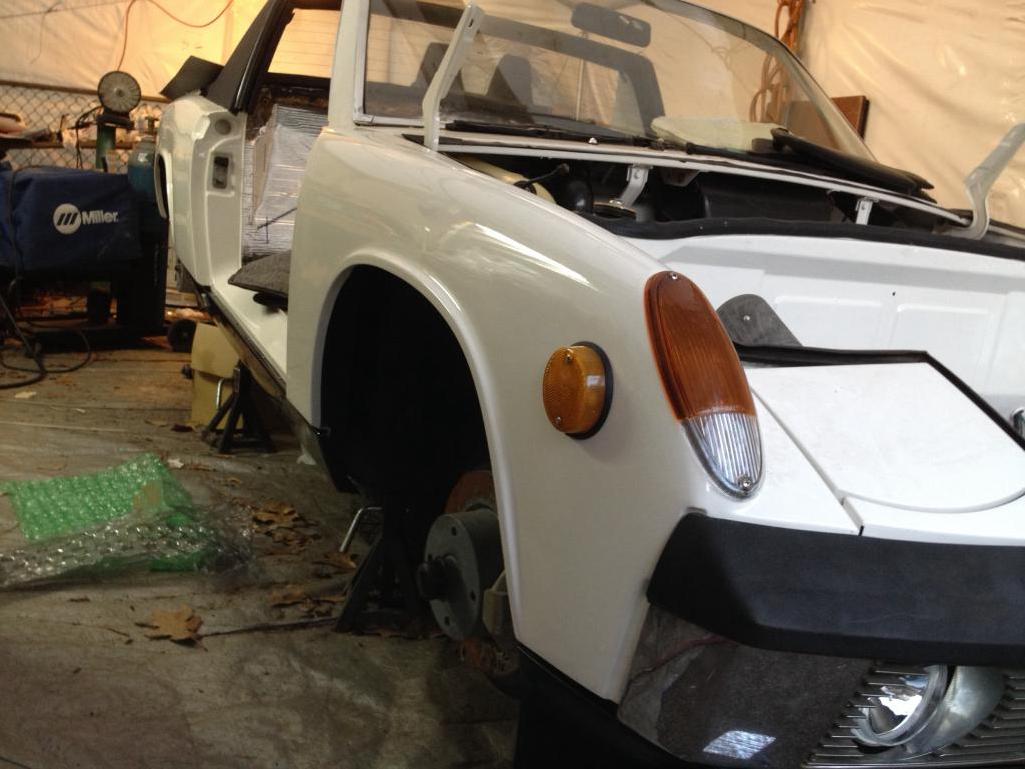
Posted by: OU8AVW May 20 2014, 01:27 PM
Passenger door fits 
Posted by: CptTripps May 20 2014, 01:38 PM
That's awesome man. Keep it up!
Posted by: OU8AVW May 29 2014, 03:32 PM
Interior started this week end....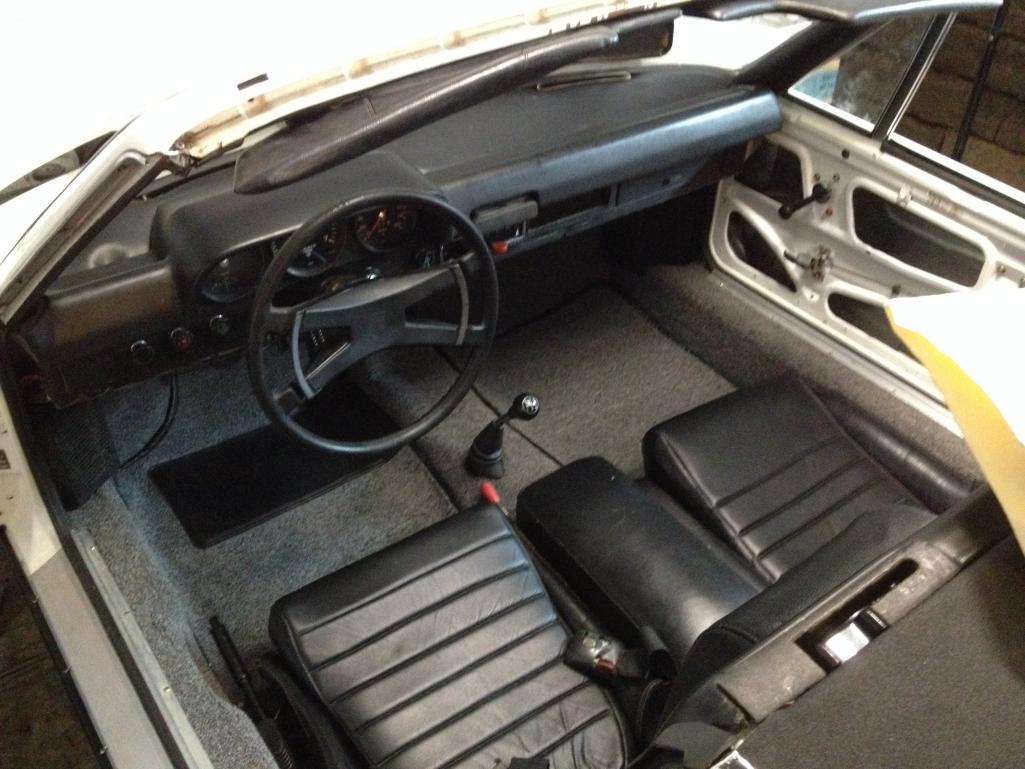
Posted by: OU8AVW May 29 2014, 03:33 PM
Now I can at least sit in it and go "vroom vroom".... 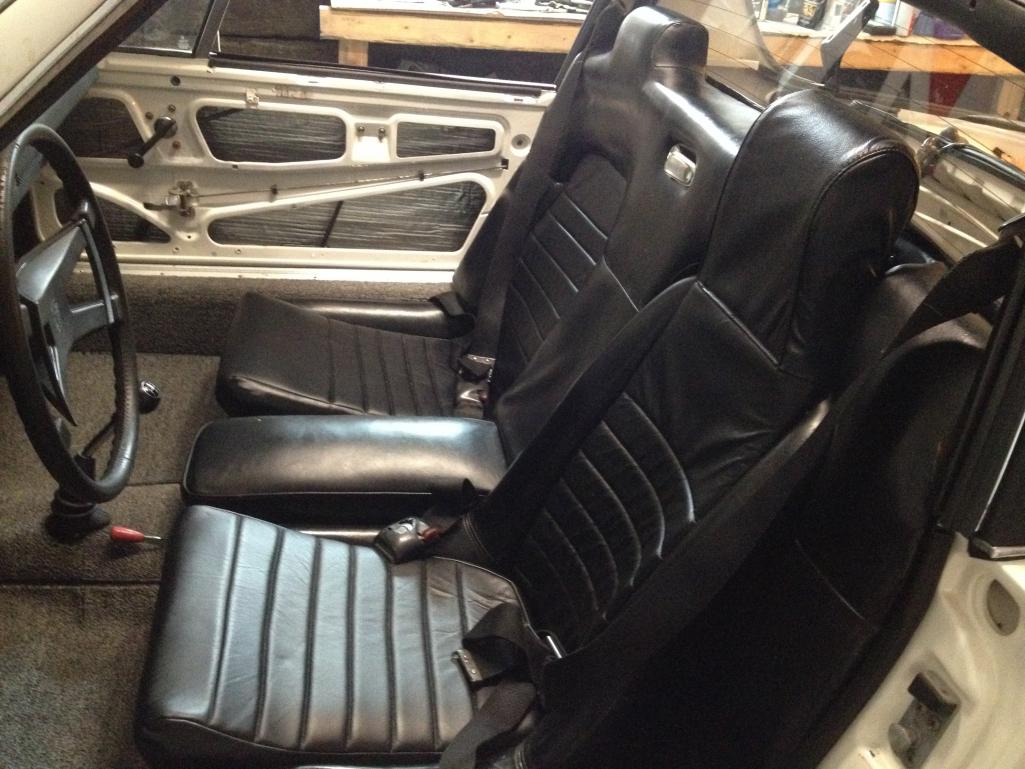
Posted by: scotty b May 29 2014, 05:06 PM

Posted by: CptTripps May 29 2014, 06:00 PM
Didn't I sell you a set of speaker pods? Where are they?
Posted by: OU8AVW Jun 1 2014, 10:26 AM
Didn't I sell you a set of speaker pods? Where are they?
Not me bro....
Posted by: OU8AVW Aug 12 2014, 10:08 AM
Working on the Valve train now. That thread is here: http://www.914world.com/bbs2/index.php?showtopic=229571&st=0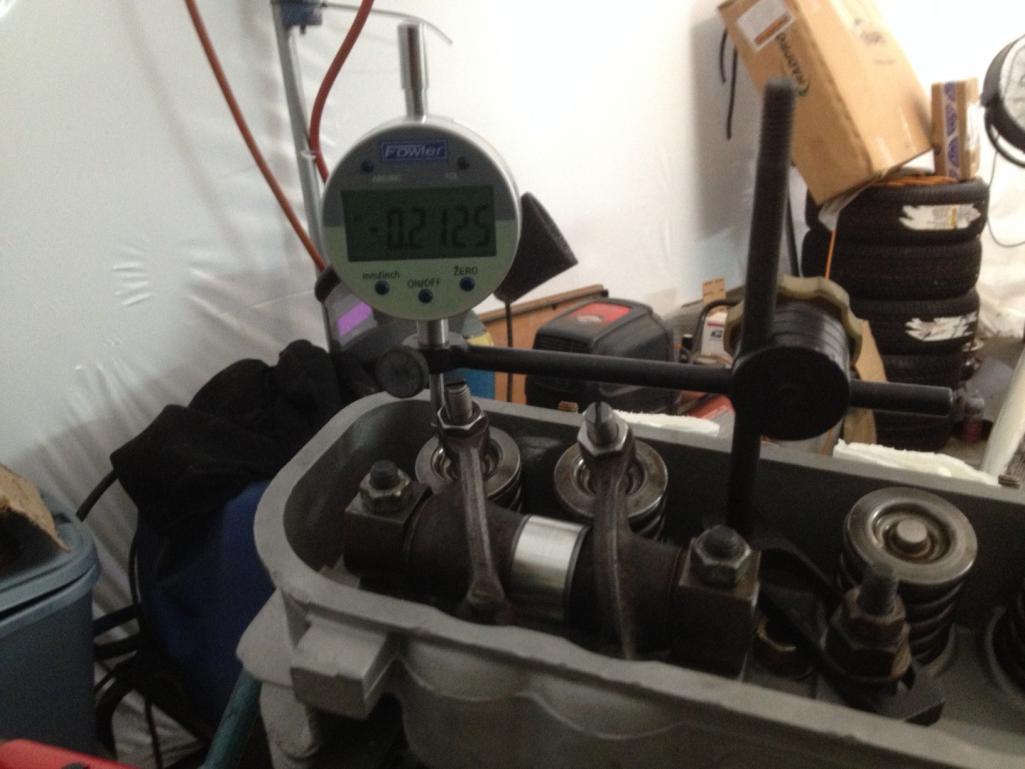
Posted by: mepstein Aug 12 2014, 01:13 PM
Didn't I sell you a set of speaker pods? Where are they?
Not me bro....
I bought your speaker grills at Hershey and gave then to Sfrenck for his yellow car
Posted by: OU8AVW Aug 13 2014, 07:58 AM
Didn't I sell you a set of speaker pods? Where are they?
Not me bro....
I bought your speaker grills at Hershey and gave then to Sfrenck for his yellow car
Nope, not me....
You are mistaken, please stop stalking me.
Posted by: CptTripps Aug 13 2014, 10:41 AM
LOL...I got people messed up. mepstein bought some ole plastic grills from me, and effutuo101 bought my Blaupunkt pods.
Back to your regularly scheduled build thread.
Posted by: OU8AVW Sep 27 2014, 02:43 PM
Valve train all hooked up.
Posted by: OU8AVW Sep 27 2014, 02:49 PM
Dash, stereo, glove box 100%
I installed factory switches and relays for both pair of driving lights.
Thanks to Mepstein my horn is all sorted out. 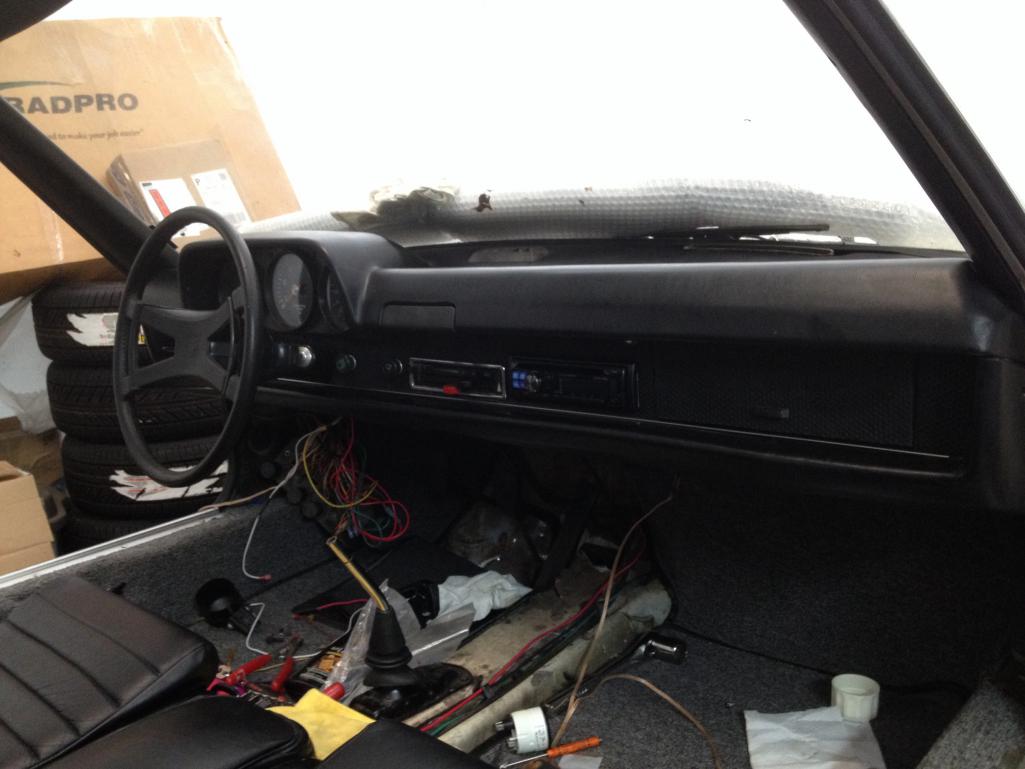
Posted by: A&PGirl Sep 27 2014, 03:26 PM
Great work! Your interior looks awesome.
Take five.
Posted by: OU8AVW Oct 4 2014, 12:25 PM
Final trans assembly happened yesterday. New syncros, new bearings and we replaced all the iffy dog teeth and fist gear slider 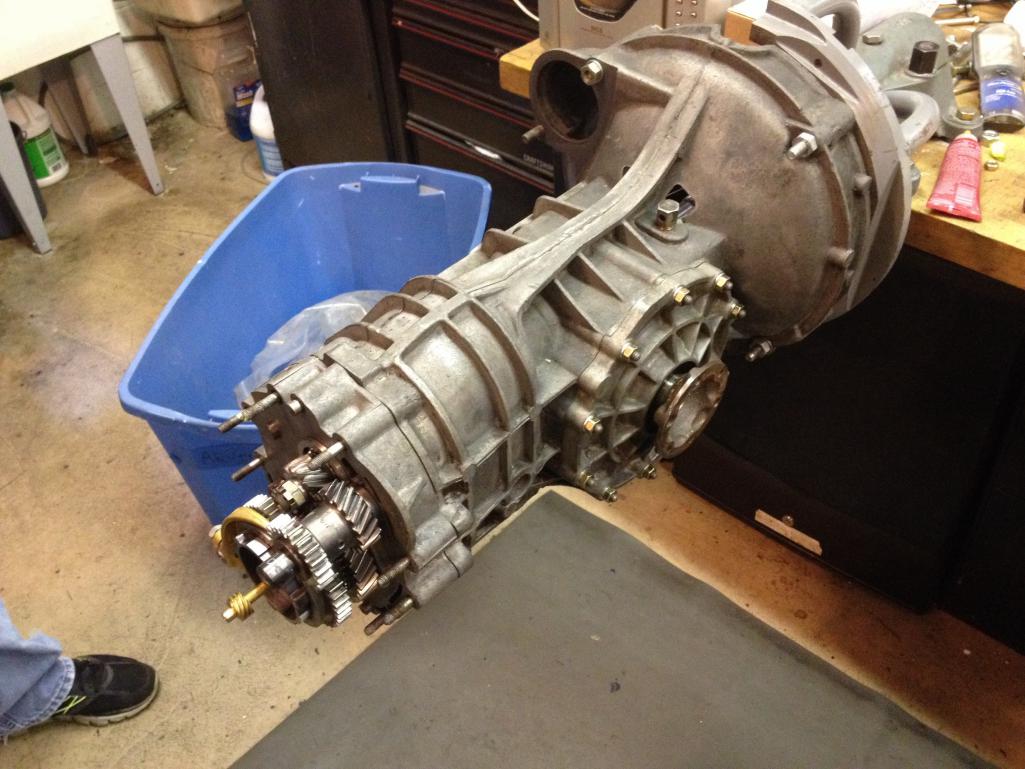
Posted by: OU8AVW Oct 4 2014, 12:27 PM
Done! 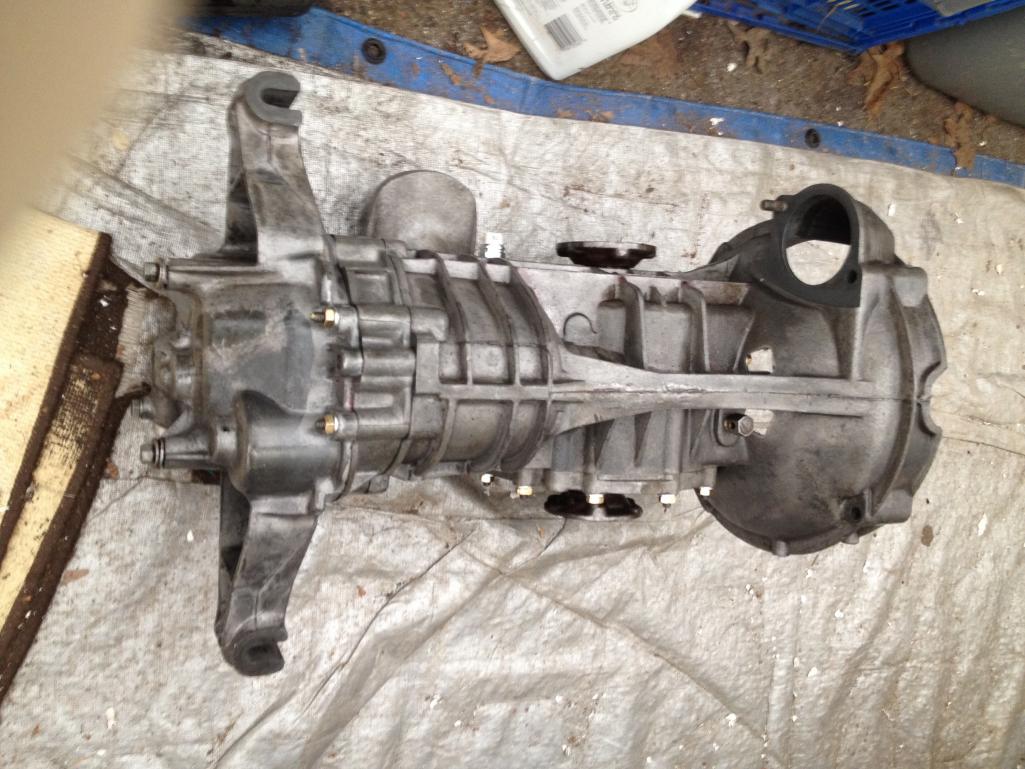
Posted by: OU8AVW Oct 4 2014, 12:28 PM
Engine work continues. 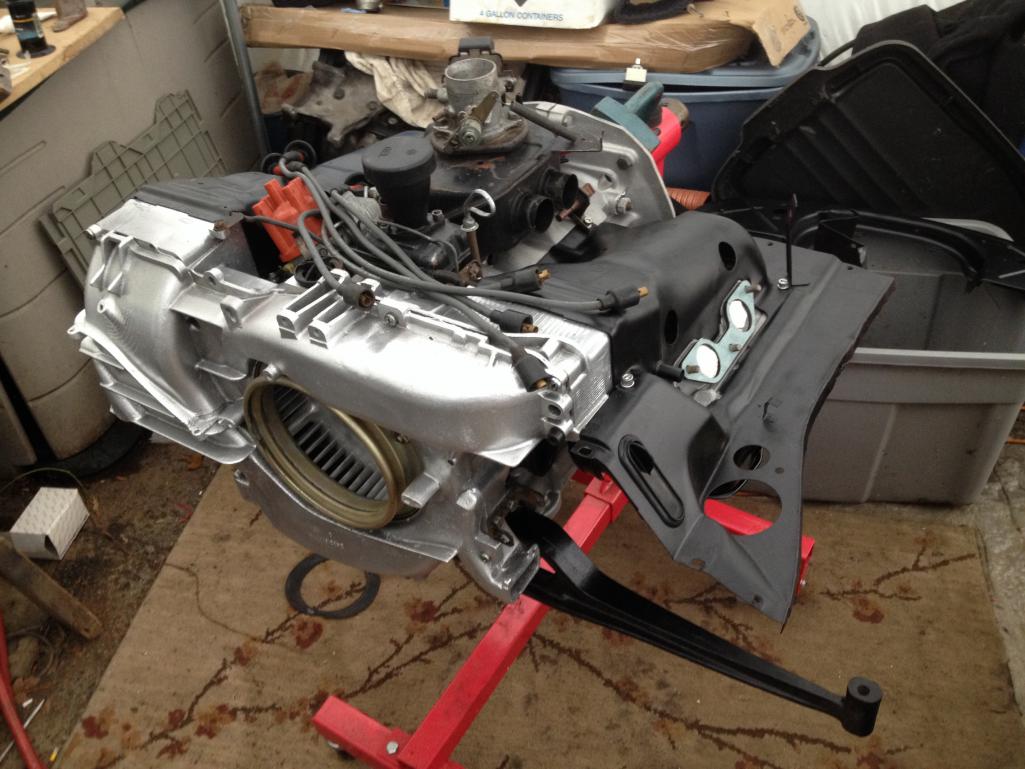
Posted by: mepstein Oct 4 2014, 12:43 PM
Engine looks great. Do you need a shift knob. I have one that isn't pretty but its functional. Also a repro that is new but not identical to orig.
Posted by: OU8AVW Oct 4 2014, 01:09 PM
No thanks, i'm good on knobs. Just need to polish mine a little more
Posted by: OU8AVW Oct 23 2014, 11:44 AM
Here's a cool detail. Cut off switch behind passenger side.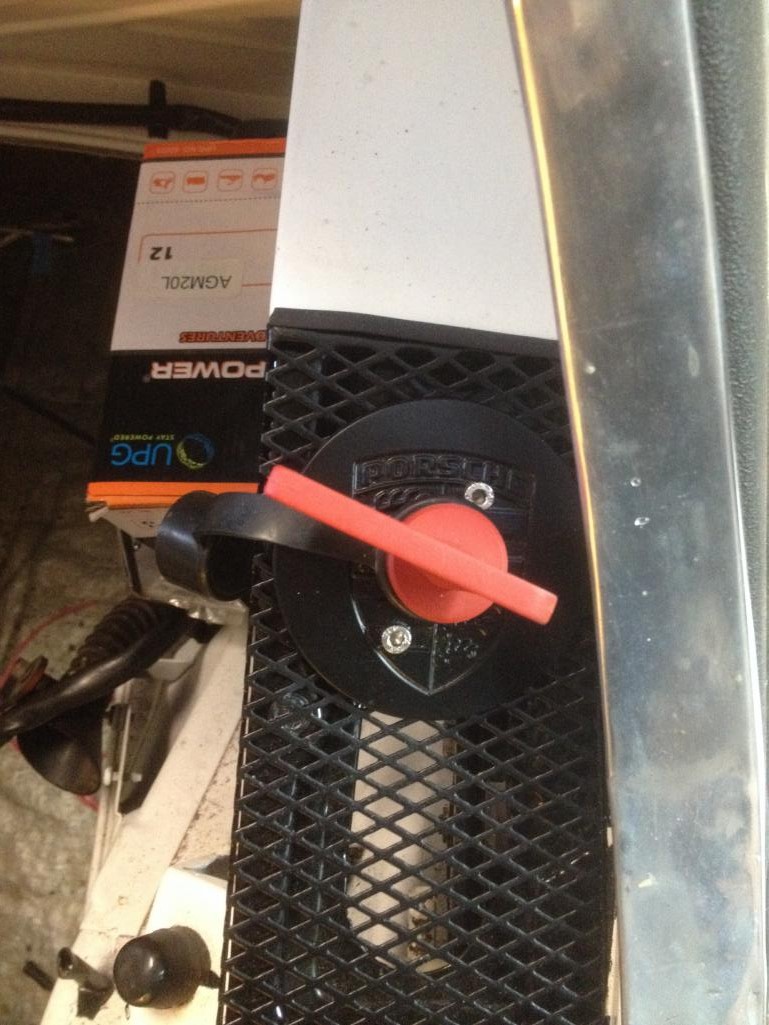
Posted by: OU8AVW Nov 6 2014, 03:02 PM
Transmission, meet Engine. Engine, this is the transmission....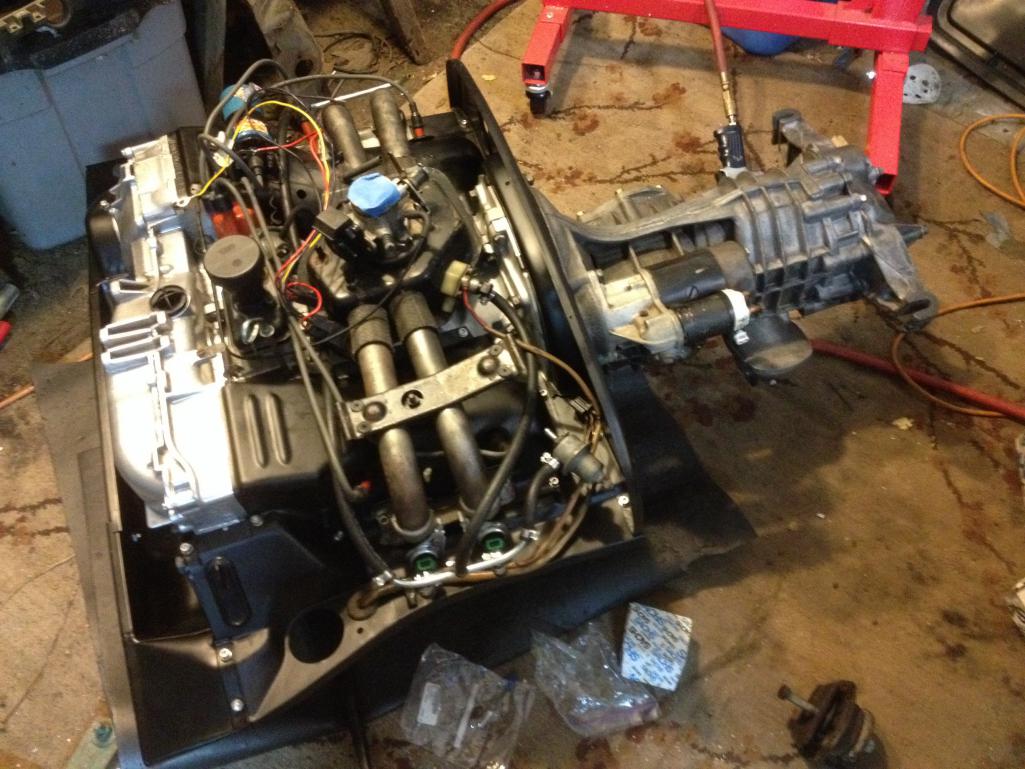
Posted by: OU8AVW Dec 6 2014, 08:38 PM
The motor is in. Now to hook it all up and see if she'll start!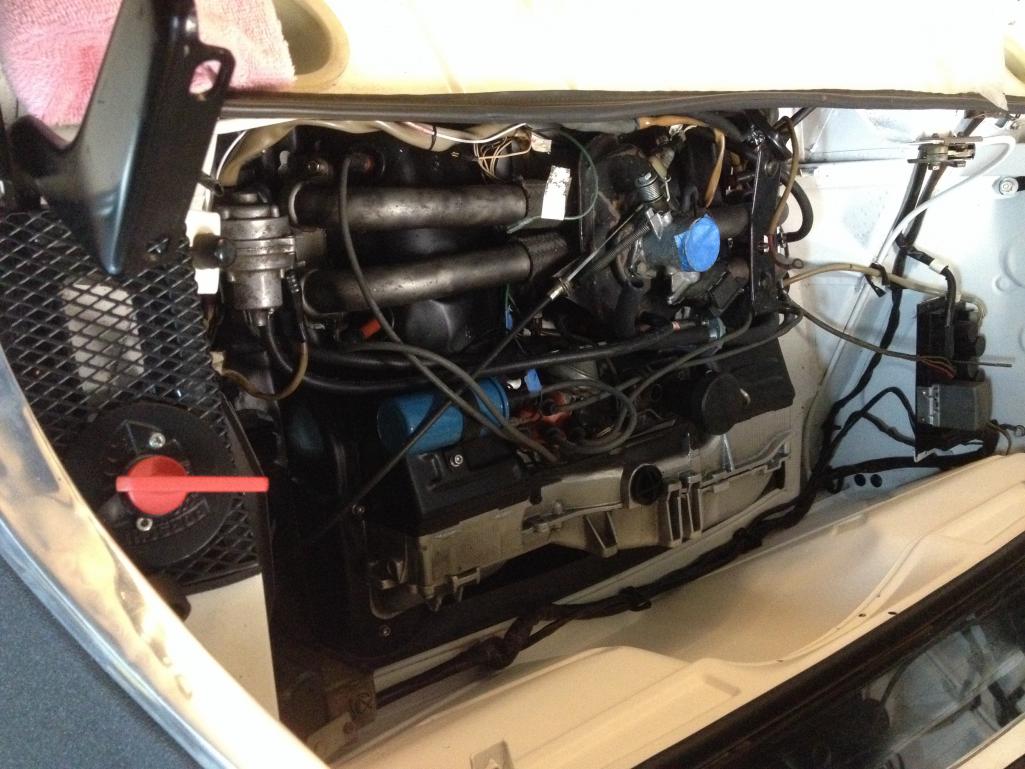
Posted by: bigkensteele Dec 6 2014, 10:16 PM
The motor is in. Now to hook it all up and see if she'll start!
I bet you $100 it won't start if you don't take that tape off the intake!
Looking great - not much further!
Posted by: veekry9 Dec 6 2014, 10:27 PM
Engine work continues.
This looks so right,I woke and realized I had been thinking of this.
Something to do with alloy cylinders.
Spend more.
Meanwhile.
http://www.openmind-tech.com/en/products/hypermill-cam-software/hypermill-5axis-cam-software.htmlhttp://www.openmind-tech.com/en/products/hypermill-cam-software/hypermill-5axis-cam-software.htmlhttp://www.openmind-tech.com/en/products/hypermill-cam-software/hypermill-5axis-cam-software.html
http://americanmachinist.com/machining-cutting
45yrs+
Posted by: OU8AVW Jan 1 2015, 08:42 PM
New year's day in the sun..... 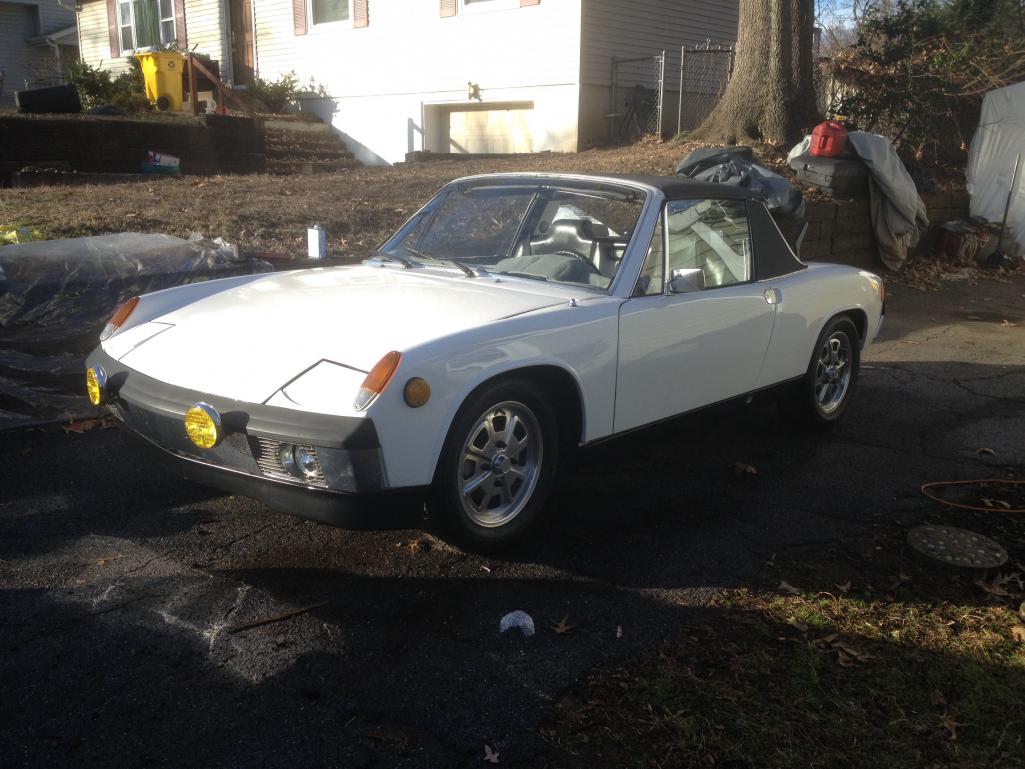
Posted by: Mueller Jan 2 2015, 11:58 AM
New year's day in the sun.....
Wow....great looking car...just finished going thru the build thread!
Posted by: OU8AVW Jan 22 2015, 09:07 AM
Tweaked the timing and she fired right up. 20 minute cam break-in is done! Now if all this fuching snow would melt!
https://www.youtube.com/watch?v=2xJjhk8VbOw
Posted by: Chris H. Jan 22 2015, 09:58 AM
It's turning out great man. Congrats. Almost time to drive it!
Posted by: BeatNavy Jan 22 2015, 11:18 AM
Looks awesome, Mike. Congratulations on a great journey, almost exactly three years, right? It's certainly inspiration for my attempt, which I need, as mine is just beginning....
Posted by: altitude411 Jan 22 2015, 11:44 AM
Beautiful car, congratulation! Inspirational to see.... nice work.
Posted by: OU8AVW Jan 22 2015, 08:10 PM
I'm staying cautiously optimistic. Thanks for the motovation! 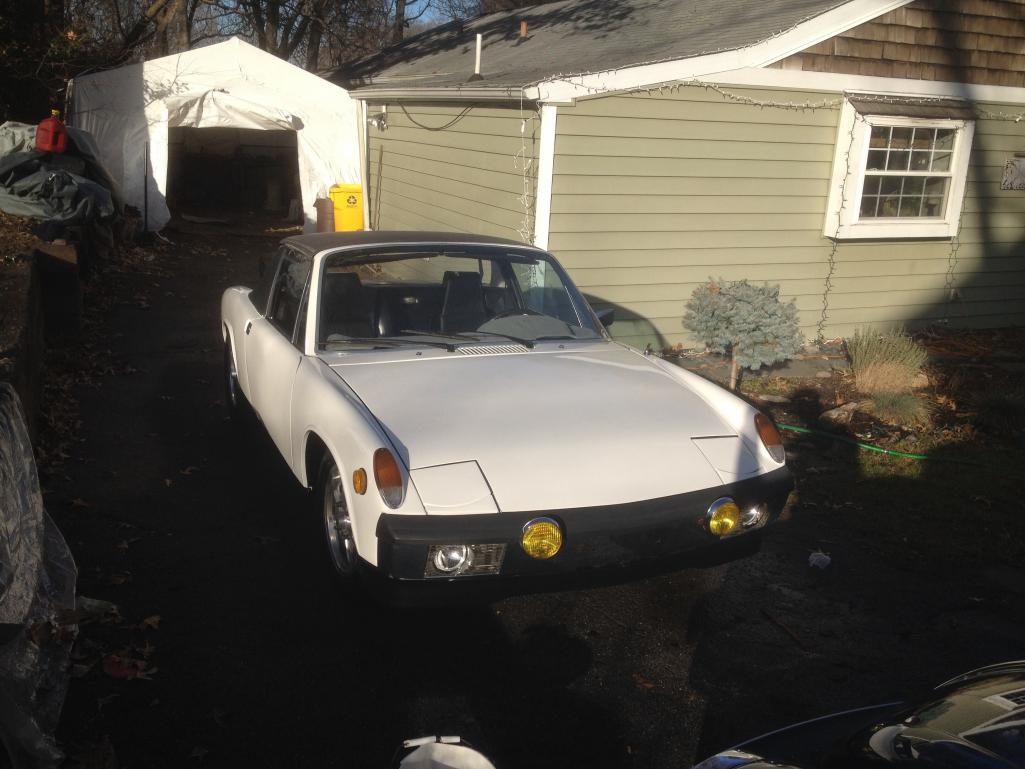
Posted by: OU8AVW Jan 22 2015, 08:11 PM
Posted by: OU8AVW Jan 22 2015, 08:13 PM
Dig the lo-pro Dead sticker 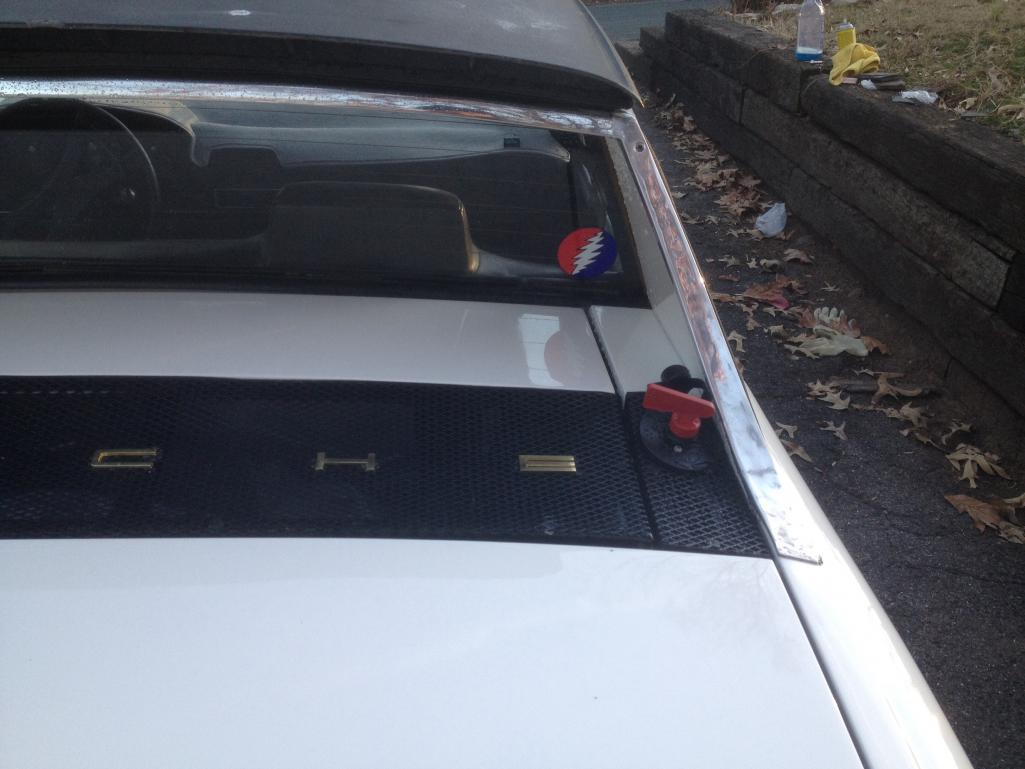
Posted by: scotty b Jan 22 2015, 08:44 PM
So you'll be driving it to work Monday ?
Posted by: JmuRiz Jan 22 2015, 09:04 PM
Not after they coat the roads in salt and S this weekend...
Posted by: JRust Jan 22 2015, 09:16 PM
Looks great man! I'm sending good weather vibes you way
Posted by: OU8AVW Jan 28 2015, 08:22 AM
Working through all the electrical gremlins. So far everything works but the headlights and licence plate lights. Still have to sort the heater and FA blowers. 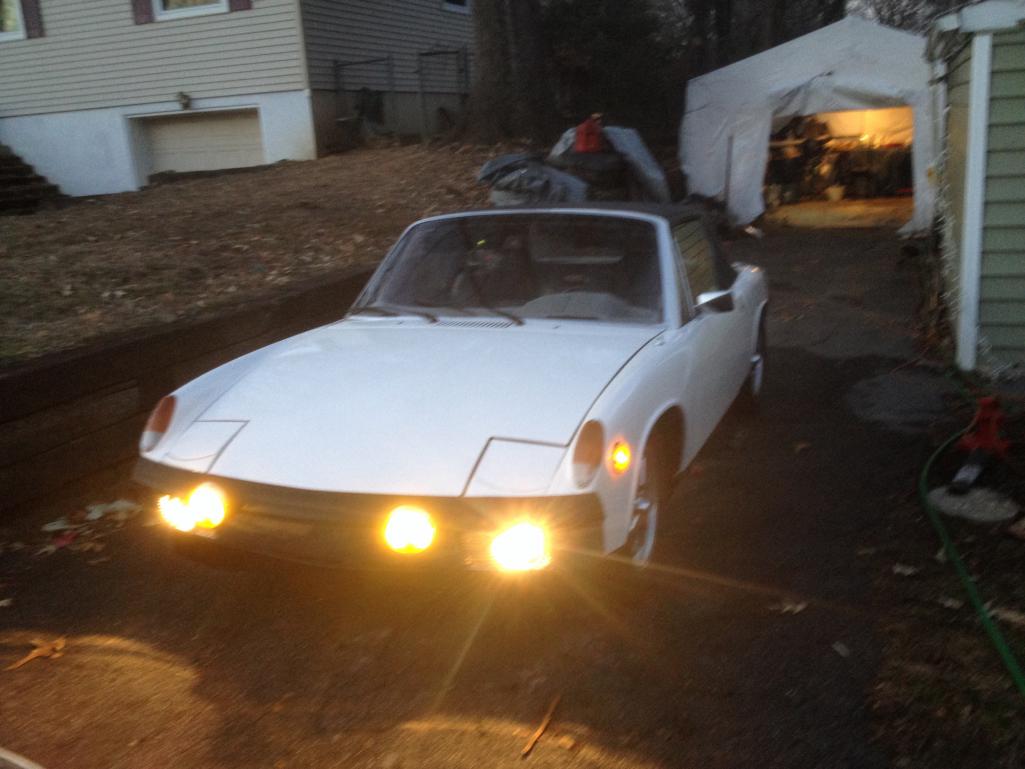
Posted by: OU8AVW Feb 20 2015, 03:38 PM
Taking the Teener to a shop here in Annapolis for an alignment and professional tune. 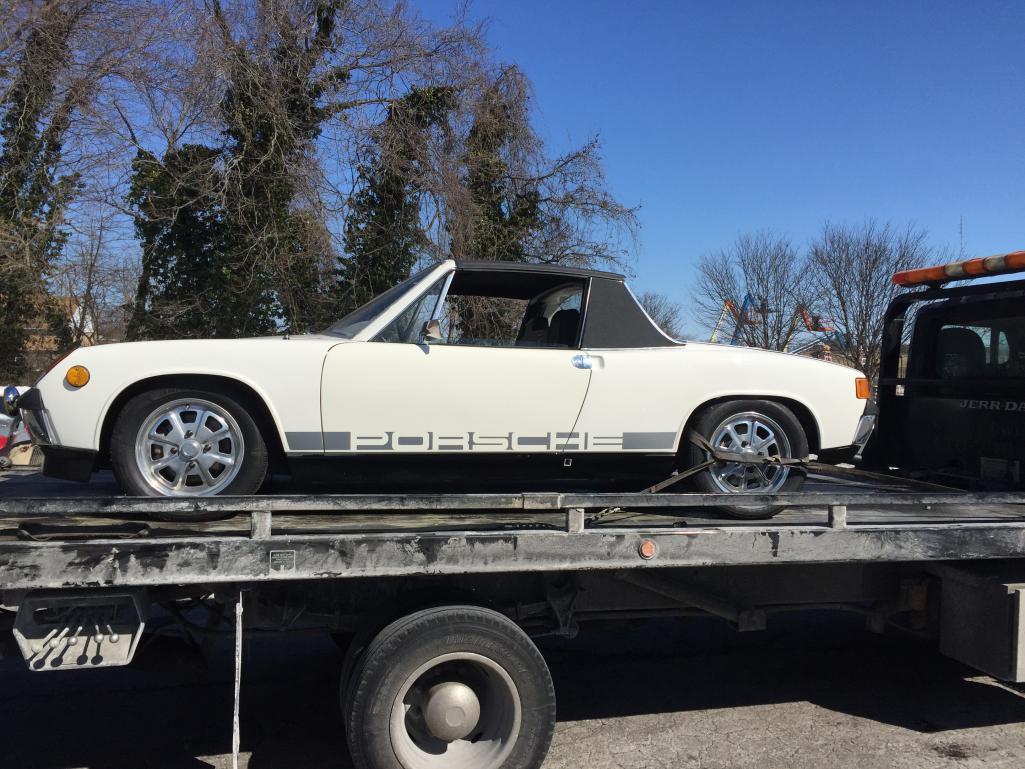
Posted by: OU8AVW Feb 20 2015, 03:39 PM
Cleanest car at the shop. With all the cousins 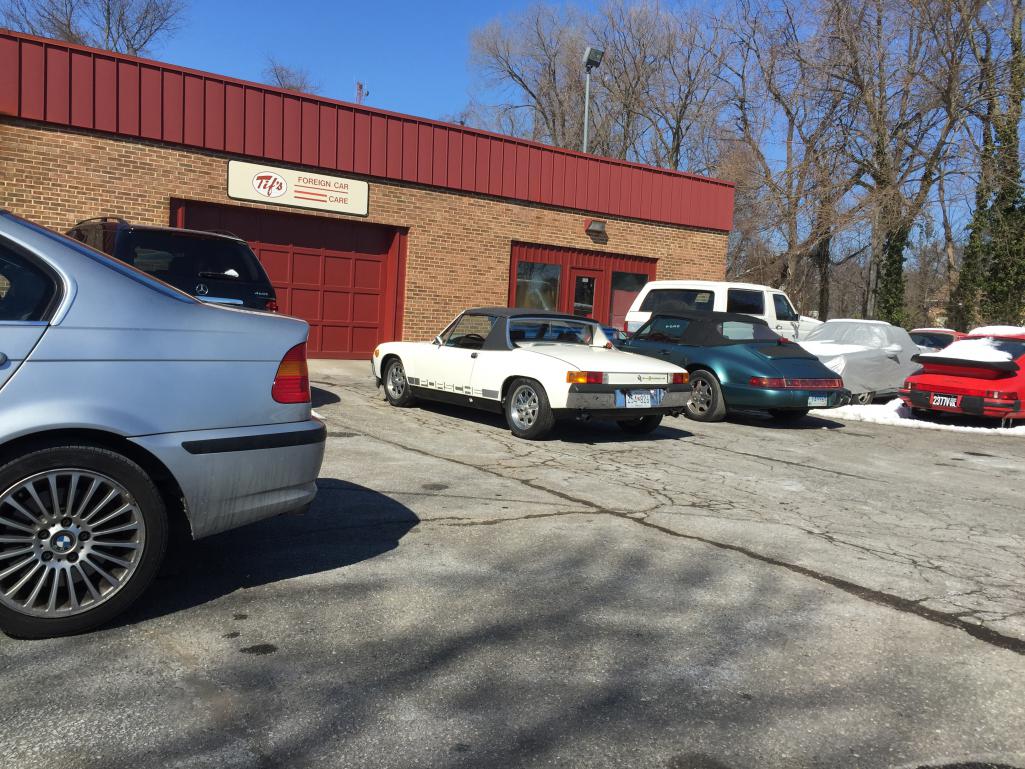
Posted by: OU8AVW Mar 4 2015, 05:28 PM
Tif's got the motor running pretty sweet. They said I did a great job and it's a happy motor. Problem was a bad MPS. They patched mine to make it run but Jeff has a rebuilt unit on the way.
https://www.youtube.com/watch?v=hu29nDKtE60
Posted by: 76-914 Mar 4 2015, 05:39 PM
Tif's got the motor running pretty sweet. They said I did a great job and it's a happy motor. Problem was a bad MPS. They patched mine to make it run but Jeff has a rebuilt unit on the way.
https://www.youtube.com/watch?v=hu29nDKtE60
Sweet ride. Congrats. These engines run pretty damn well when they have a "good" MPS. I've seen guys try to tune around a bad MPS for a year. I was one of them.
Posted by: BeatNavy Mar 4 2015, 05:42 PM
Or spend a year tuning around the incorrect / incompatible MPS, like me
Nice job, Mike!
Posted by: OU8AVW Mar 9 2015, 11:11 AM
Picked up the Teener today. First drive. She'll take some getting used to but all in all it's the best day ever! 
Posted by: mepstein Mar 9 2015, 11:24 AM
Congrats
Posted by: OU8AVW Mar 9 2015, 01:02 PM
Posted by: scotty b Mar 9 2015, 06:02 PM
Posted by: MDG Mar 9 2015, 08:29 PM
Picked up the Teener today. First drive. She'll take some getting used to but all in all it's the best day ever!
Posted by: OU8AVW Mar 10 2015, 10:19 AM
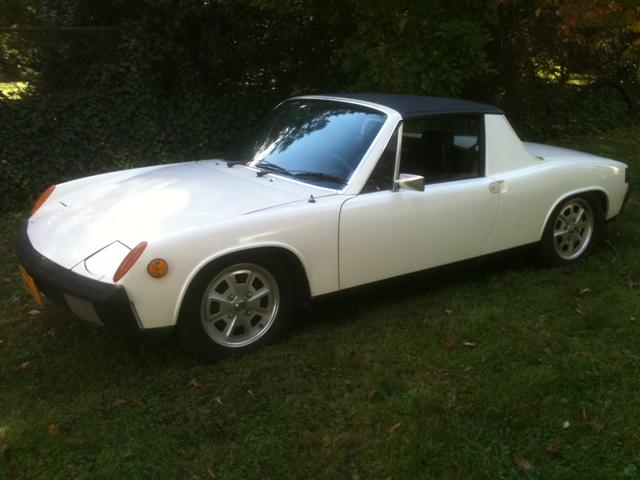
Perry's cover kicks ass! 
Posted by: OU8AVW Apr 22 2015, 02:28 PM
So I had the local independant Porsche shop looking at my car over the last six weeks or so. They did allot of good work making the engine run properly, but they never got it right. The car would buck at various RMP. Mechanic said that the fuel pump might be to blame so I say, "replace the fuel pump." He says, "we want to make sure that's the problem." I tell him if you charge me $135 an hour to figure out that it's the issue then you might as well buy a new pump for $130 and install it. Then I'll at least have a new pump to show for it. I also tell the guy that it's probably the TPS making it buck.
I get a call a few days later that my car's "ready and running great". No fuel pump and no TPS installed. I pick up the car and guess what? It's still bucking and running like crap....
Soooo.....
Last night I installed a new fuel pump. Car runs allot smother but still bucks
Soooo.....
This morning I installed a TPS that Rich sent me last week. You guessed it, that fucher's running like a fresh spun top. Why won't mechanics listen to people? I mean I obviously know a little bit about my car, I built the thing from scratch right?
People.....
Posted by: somd914 Apr 22 2015, 04:00 PM
We have countless threads about "great Porsche mechanics" who can't seem to get anything right...
Glad to see she is running.
How about Katie's in Great Falls Saturday?
Posted by: OU8AVW May 17 2015, 03:42 PM
Been driving the crap out of my Teener. Seems to run better every day. Oil has been running around 200-210. I'm due an oil change and valve adjustment. 
Posted by: OU8AVW May 17 2015, 03:44 PM
Perry's cover means I never have to put the top on 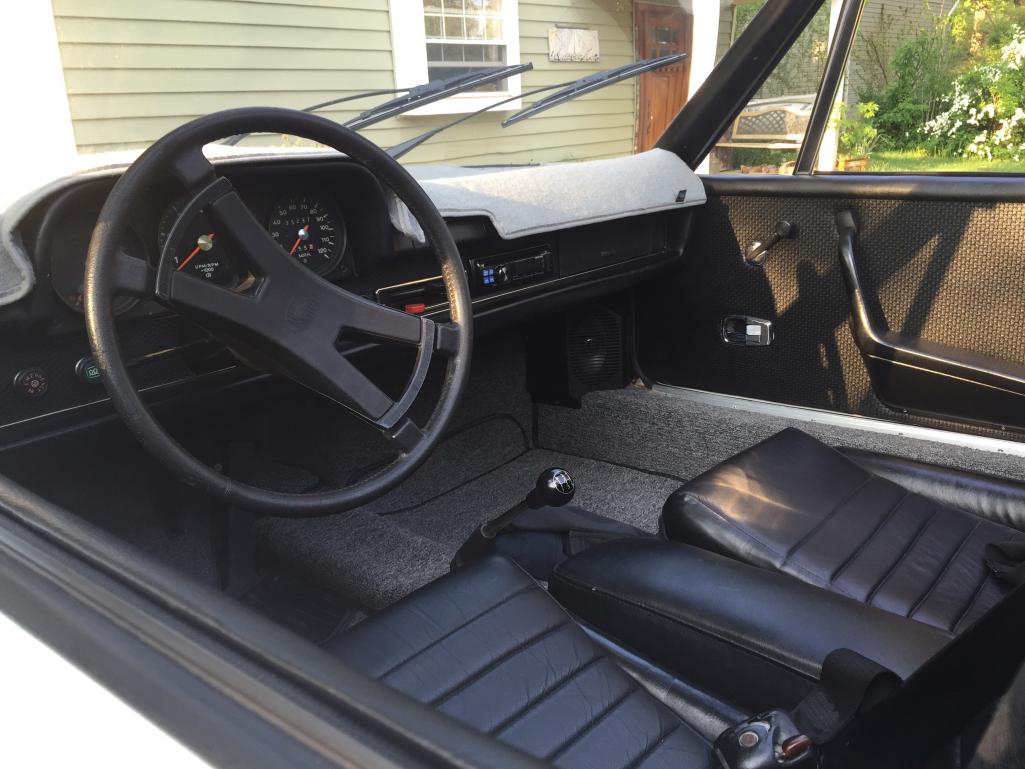
Posted by: Shadowfax May 17 2015, 03:53 PM
Nice car, man. Hope mine looks that good one day.
Posted by: OU8AVW Sep 6 2015, 05:14 PM
I've been dialing in my Air Fuel ratio lately. Got it about right. She's running pretty sweet. I drove it to work three days last week. It's a reasonable driver, if I can keep my foot out of it.
Still have to get the headlight switch swapped out and relocate the wiper rest. I'm not too excited about pulling the fresh air ducting out again.....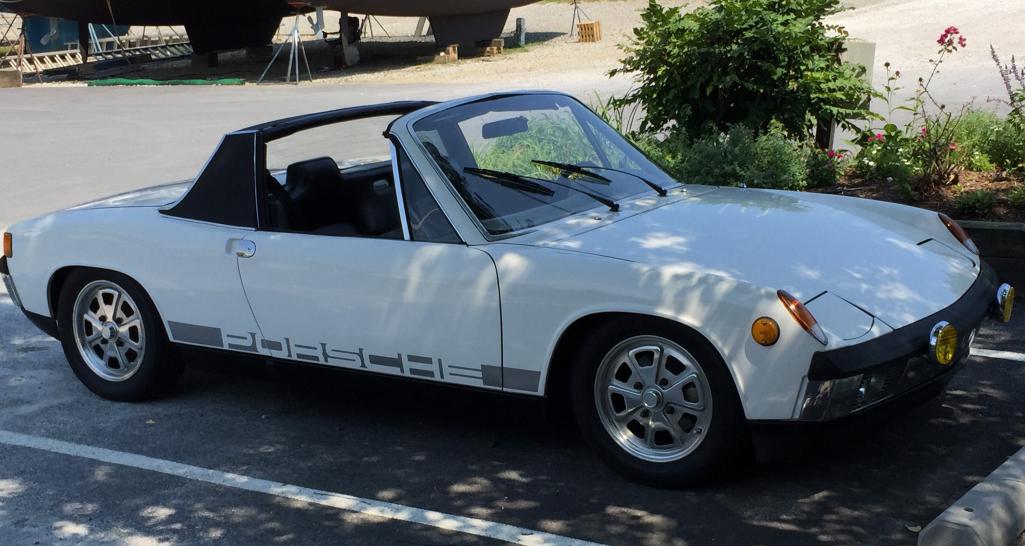
Posted by: Mueller Dec 5 2015, 10:49 AM
Wow, that was a lot of work, great job.
I like the decal on the sides, an almost subtle addition since they don't pop out like most colors used (like my green!)
Posted by: Arno914 Jun 3 2022, 01:52 AM
Hello Mike,
I just read through your restauration thread from 2015. Great work!!!
Seems like your 914 came off the assembly line on the same day like mine.
Same colour L80E.
The Karman plate on the door sill on my car reads 2729542, so it was the 42th car built that day (July 6th, 1971).
I am next on the world´s VIN page (4712915085).
Greetings from Germany!
Arno
Powered by Invision Power Board (http://www.invisionboard.com)
© Invision Power Services (http://www.invisionpower.com)