Printable Version of Topic
Click here to view this topic in its original format
914World.com _ 914World Garage _ Steel flare installation pictures
Posted by: Series9 Jan 12 2005, 10:12 AM
By request, I'm posting the few pictures I have of the installation of my steel flares.
I started by taping them to the car to find the correct position. It's a subjective placement and I recommend NOT using FG GT rockers as a guide. Mine would have been wrong if I had. Instead, I found that the arch of the flares was slightly larger than the arch of the factory fender. I taped them on in a position that split the difference when you looked at the car from the side.
Attached image(s)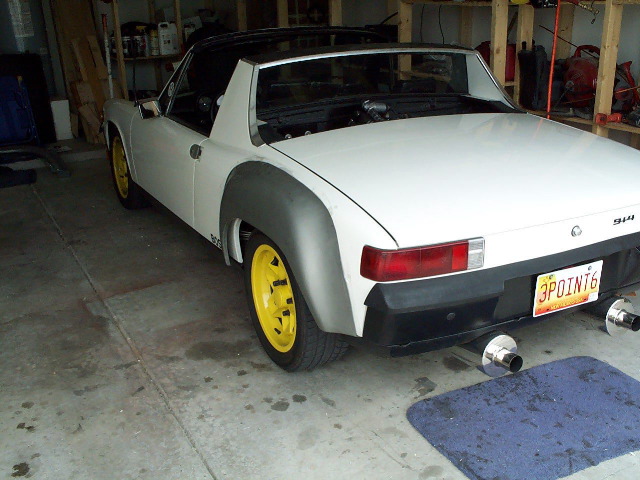
Posted by: Series9 Jan 12 2005, 10:13 AM
You can see the what I'm talking about in this picture. See the small amount of original fender visible at the bottom corners of the arch. Center the flare on the old fender arch.
Attached image(s)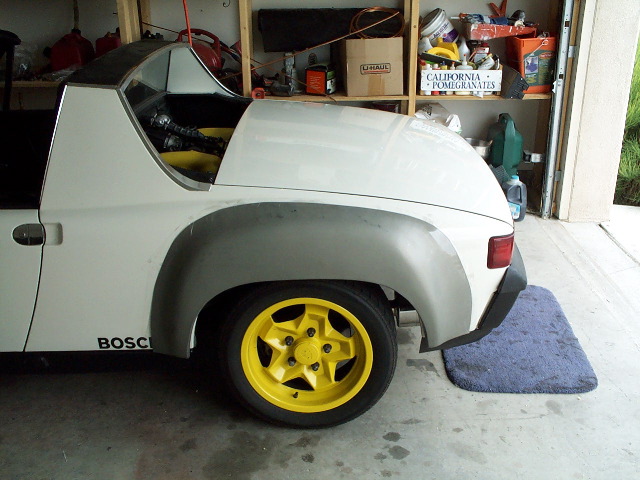
Posted by: Series9 Jan 12 2005, 10:17 AM
With self-tapping sheet metal screws, I then attached the fenders tightly down to the old metal so I could scribe a very accurate cut line:
Attached image(s)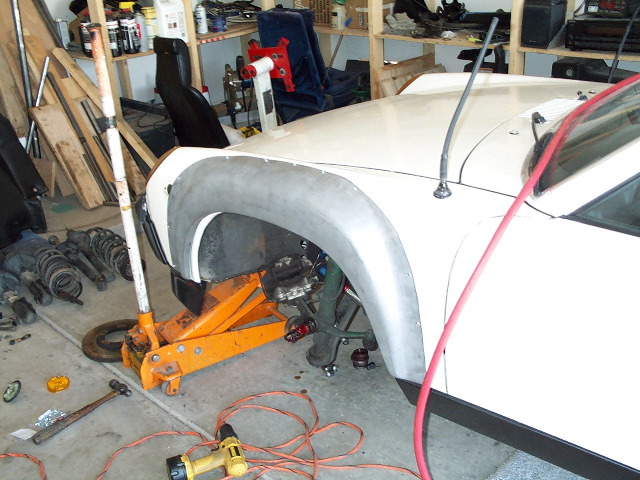
Posted by: Series9 Jan 12 2005, 10:19 AM
I then carefully cut along the scribe line, fit up the flares and started welding. It's a slow process, if you want it right. I did one flare per day. That's enough sheet metal welding for just about anyone. I used a TIG.
Attached image(s)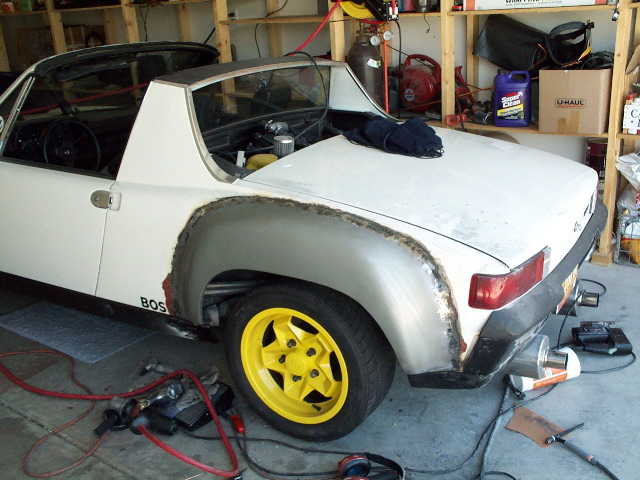
Posted by: Series9 Jan 12 2005, 10:20 AM
next:
Attached image(s)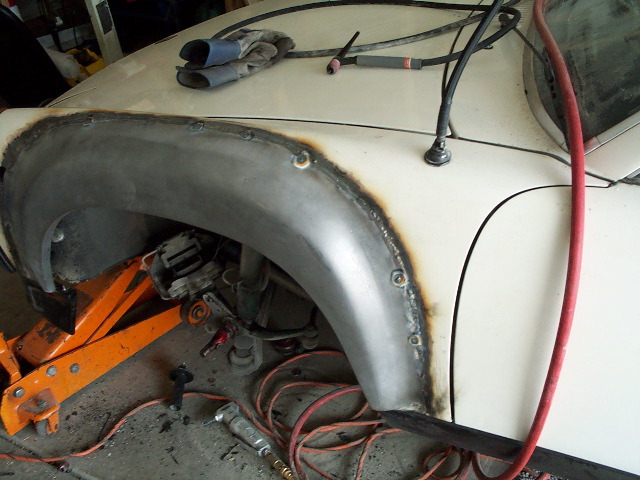
Posted by: Series9 Jan 12 2005, 10:21 AM
next:
Attached image(s)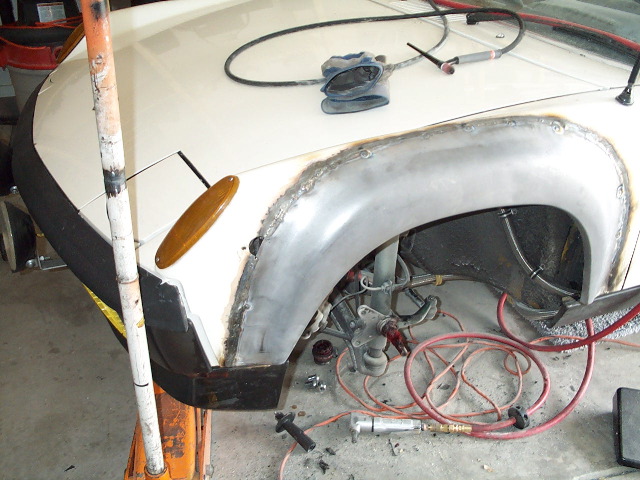
Posted by: Series9 Jan 12 2005, 10:22 AM
last:
Attached image(s)
Posted by: AndrewBlyholder Jan 12 2005, 10:24 AM
After you've cut the old fender at your scribe mark, I assume you're butting the new fender to the scribe cut, how do you hold the fender in place for the first tack welds? A helper?
Andrew
Posted by: Root_Werks Jan 12 2005, 10:27 AM
I put FG flares on my 914 and they look sweeeet, but I know I will go back to steel someday. Thanks for these pic's, it is inspiring to see it done. I plan on picking up the flares this year and putting them on next year maybe? Now that my 914 is done, I just want to enjoy an entire year of driving it without doing any major projects on it.  Yeah, like that will happen.
I thought TIG was only for aluminum? 
Posted by: Series9 Jan 12 2005, 10:28 AM
I left some small tabs on the old fender that I could leave screws in to get started. I later ground the tabs off. They are butt welded.
Next time I'll use a tool that I later found that's made for holding joints like this. They are like little clamps that actually reach through the crack of the seam.
Posted by: John Kelly Jan 12 2005, 11:16 AM
Nice job Joe!
John www.ghiaspecialties.com
Posted by: Phoenix-MN Jan 12 2005, 11:26 AM
I found that you can get a accurate cut line if you cut and weld as you go around the flare (just another method) I agree with 914RS on the FG rockers, I had several different one and no two were alike. I ended up using measurements that were from a true 916 to locate the flares and then used the rockers that best match the positions.
My method
http://www.phoenixhobbies.com/html/flares.html
Posted by: Series9 Jan 12 2005, 11:32 AM
| QUOTE (Root_Werks @ Jan 12 2005, 09:27 AM) |
| I thought TIG was only for aluminum? |
No, TIG is for everything! If you want a clean, strong weld, use a TIG.
Posted by: buck toenges Jan 12 2005, 01:26 PM
I sorta did the same thing when I installed my steel flares EXCEPT instead of a scribed line I cut both the flares and original sheet metal at the same time. Just cut it out below where the sheet metal screws are located. This way you get an exact cutout. But to do it this way you do have to cut off the "lip" that is bent 90 degrees of the fenders to the rockers on the old sheet metal before you can line up the new flares. Also I did the rear first then used the fg rockers to help me "locate" the front flares to the body. It only took about 2 hrs to "locate" and cut out each flare.
Posted by: JOHNMAN Jan 12 2005, 04:06 PM
Thanks a bunch 914RS, and thanks for the descriptions.
TIG. Hmm. Well I'm going to MIG because I can.
buck toenges, could you post a pic or two?
Posted by: East coaster Jan 12 2005, 07:44 PM
I clamped my flares on using C-clamps at the bottom edges and a Stanley slide bar clamp at the top. I then trimmed any high spots on the flare that kept it from fitting to the stock sheet metal neatly (mine were very roughly trimmed by AA for shipment).
I then used a felt tip "sharpie" to trace the outline of the flare onto the stock fender and removed the flare. Then came the 
Once the stock fenders were cut I fit the flare in place utilizing butt welding clamps. I got 3 bags of them from Harbor Freight for about 25 bucks. They do a nice job of lining up the metal for welding. I then tacked the areas between the clamps working around from end to end to keep the panel from heating up too much and warping. I have MIG and TIG, but I think the MIG imparts less heat/warping.
Once it's tacked between all the clamps, I removed the clamps and kept playing connect the dots until it was welded all the way around. Also, I agree with 914RS, one fender per day is probably enough for one day!
Attached image(s)
Posted by: East coaster Jan 12 2005, 07:45 PM
nuther...
Attached image(s)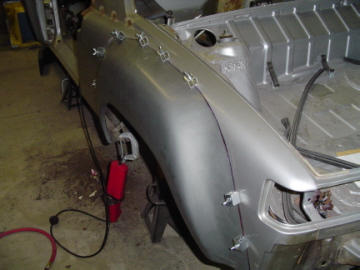
Posted by: East coaster Jan 12 2005, 07:46 PM
Now for a little.... 
Attached image(s)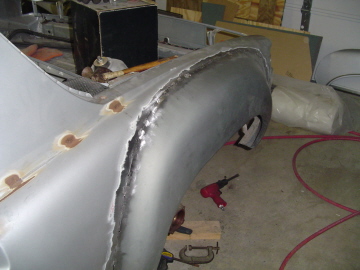
Posted by: East coaster Jan 12 2005, 07:47 PM
from the flip side
Attached image(s)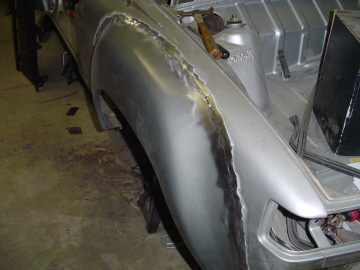
Posted by: East coaster Jan 12 2005, 07:51 PM
Haven't really figured out how I'm going to deal with the fitting of the bottom of the flares to the stock metal. It really fits like crap the way they make them. The stock piece has a double bend to it and the GT flares do not. It's not a biggie, but I'm saving it for last. I'll probably just do some sort of blend with a hammer and dolly. 
Attached image(s)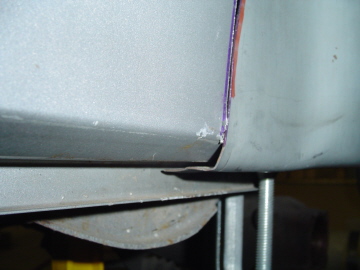
Posted by: trekkor Jan 12 2005, 08:03 PM
I have a question. Why not lap weld, seems stronger and could be welded from both sides. 
KT
Posted by: Mueller Jan 12 2005, 08:11 PM
| QUOTE |
| I have a question. Why not lap weld, seems stronger and could be welded from both sides. |
any rookie can lap weld......the surfaces would not be even and depending on how well the paint job is, you might see that the metal surrounding the flares stick out further than the rest of the body panels.....
Posted by: trekkor Jan 12 2005, 08:28 PM
| QUOTE |
| surfaces would not be even |
Body filler? You always use body filler.
The Flared Roller at the track looks perfect.
Butt weld if you can, lap if you want.
Main thing is, get it done!

KT
Posted by: Series9 Jan 12 2005, 08:30 PM
Butt welding is just the right way to do it.
It takes a little longer, but it's rewarding to know you went the extra mile and did it right.
Posted by: JOHNMAN Jan 12 2005, 09:27 PM
First off, thanks guys. This is exactly what I had asked for.
If there are any others with pics of flare installation, I would greatly appreciate seeing your welds as you go.
I have not yet installed flares, but have done lots of bodywork in other areas. I ordered my flares on Tuesday.
I prefer butt joints. It is cleaner on both sides of the panel and prevents an area from accumulating a bunch of crap. Besides, the flares on my 911 Turbo were installed with a butt joint.
Do you use anything to cool the area when welding? (wet rag?, compressed air?) I understand that you slowly "tack" the flare on (no more than about 1/2" weld at a time) and keep moving from one area to another to avoid adding too much heat and warping the panel. (Please Advise)
Posted by: mharrison Jan 12 2005, 10:14 PM
The preferred method of cooling for zero heat warpage.......
Just be sure it's not salt water!!!! 
By they way guys, the flare installation pics were impressive and inspiring. I hope to install steel on mine sometime. I just got a MIG welder a few weeks ago!!! Need a little practice first...
Posted by: scotty b Jan 13 2005, 07:28 AM
Another reason NOT to lap weld is the metal will sweat during temp. changes and will end up rusting the two pieces that you have lapped together, then you get to do it alllll over again!!!! 
Powered by Invision Power Board (http://www.invisionboard.com)
© Invision Power Services (http://www.invisionpower.com)