Printable Version of Topic
Click here to view this topic in its original format
914World.com _ 914World Garage _ dr dr gimmie the news...
Posted by: rhodyguy Mar 12 2005, 08:48 AM
in prep for the new bushings i found it easier to just pull the whole thing than fight the old bushings while removing the a-arms. more on what i found later.
k
Attached image(s)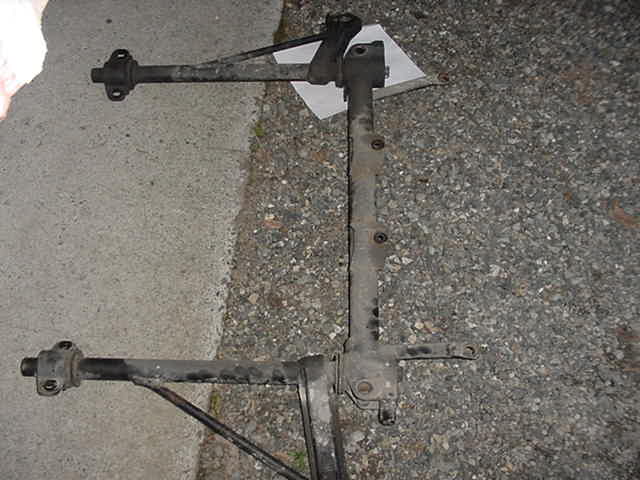
Posted by: rhodyguy Mar 12 2005, 08:49 AM
hard contact.
k
Attached image(s)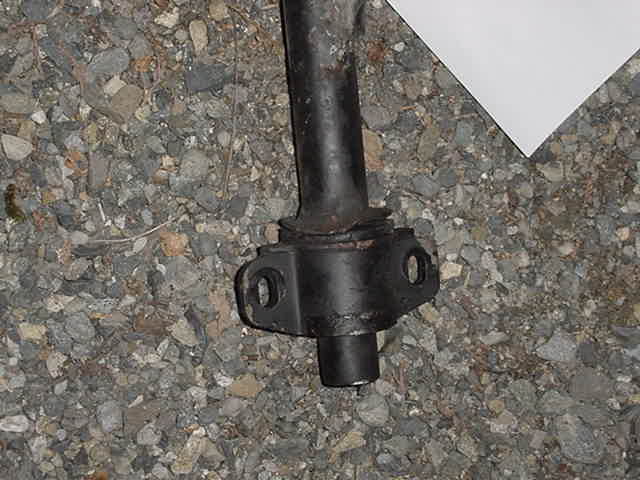
Posted by: ablose58 Mar 12 2005, 08:50 AM
I got the disease too 
Posted by: rhodyguy Mar 12 2005, 08:50 AM
at least both sides match. 
k
Attached image(s)
Posted by: rhodyguy Mar 12 2005, 08:52 AM
new to me used components. al blose is the man. probably should clean things up a bit.
Attached image(s)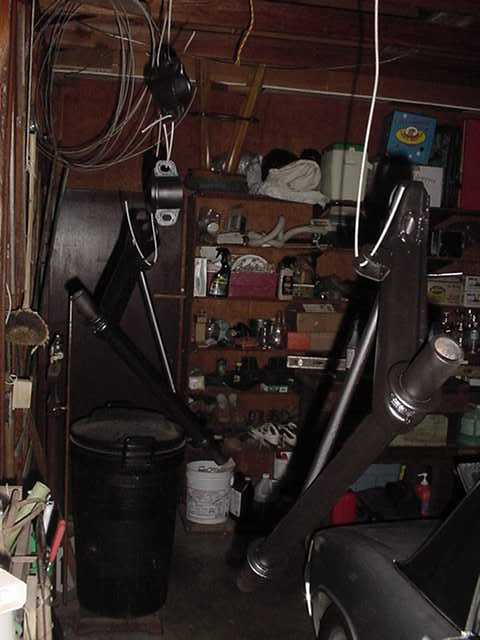
Posted by: rhodyguy Mar 12 2005, 08:55 AM
and more. i used a paint called Zero-Rust. all parts were blasted, run through the dish washer, and baked in the oven. painted while still warm.
k
Attached image(s)
Posted by: markb Mar 12 2005, 09:03 AM
| QUOTE (rhodyguy @ Mar 12 2005, 06:55 AM) |
| run through the dish washer, and baked in the oven. k |
I really think Marcie would have me by the short hairs if I used her dishwashwer and oven for car parts.
 Being that she loves her "little car" as much as I love mine, she seems to have her limits.
Posted by: rhodyguy Mar 12 2005, 09:16 AM
they went in after blasting and being cleaned with air. the tricks are... put them in the dual purpose g.e. dishwasher/hot tank and oven/drying machine when she's not home. check the filter when you're done, and no joke, put a 1/2 cup of tang in the washer and run it empty. cleans it like you wouldn't believe. no foul, if you don't get caught.  this will be a running thread while i do the bottom and front trunk after ac HUGE hole repair.
k
Posted by: rhodyguy Mar 12 2005, 09:22 AM
i'll add this. i don't want to lay on the garage floor to take bottom shots. again al, your the man, man!!!! 
k
Attached image(s)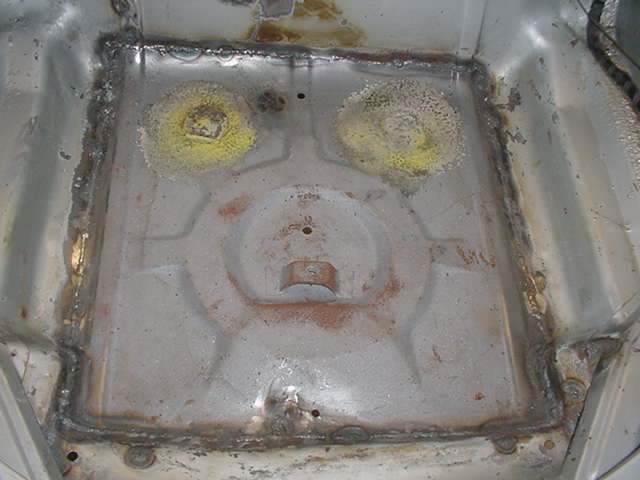
Posted by: bondo Mar 12 2005, 01:47 PM
| QUOTE (markb @ Mar 12 2005, 08:03 AM) |
| I really think Marcie would have me by the short hairs if I used her dishwashwer and oven for car parts. Being that she loves her "little car" as much as I love mine, she seems to have her limits. |
I have a dishwasher on wheels that I was going to use for a parts washer and never got around to it. Want it?
Posted by: Doug Leggins Mar 12 2005, 06:57 PM
The trunk repair is looking good!!! 
Mine has the same repair in the front trunk.
Posted by: rhodyguy Mar 12 2005, 07:21 PM
why the measurement from the center of the tierod end, to the face on the rack end was greater on one side. 
k
Attached image(s)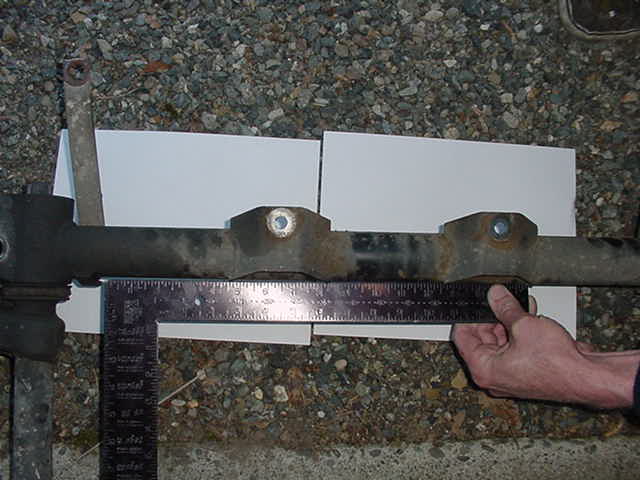
Posted by: red914 Mar 13 2005, 12:23 AM
good looking parts, there, Kevin! cant' wait to see them in action.
it was good to see you this morning. keep us posted on this progress, eh?
Posted by: Series9 Mar 13 2005, 12:41 AM
As long as you send a SASE, everything will be fine.
Posted by: rhodyguy Mar 13 2005, 09:51 PM
forward with a little step back. i got over zealous with the grinder. but still, forward.
k
Attached image(s)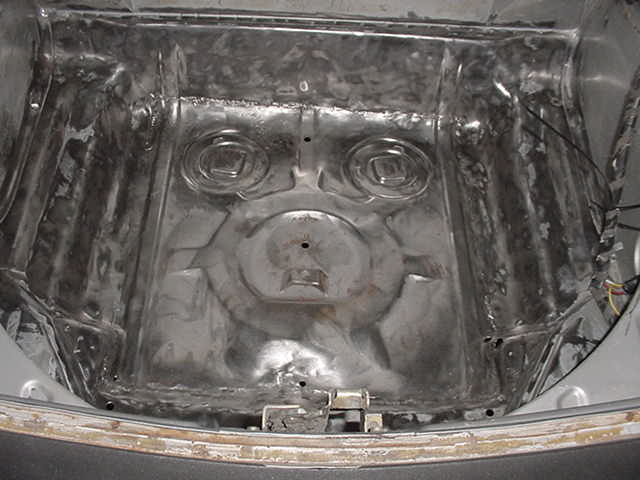
Posted by: red914 Mar 14 2005, 08:41 AM
dude! now what? POR15? paint? you do nice, even, work with a grinder.
Posted by: rhodyguy Mar 15 2005, 07:02 AM
"if i just take the light motors off it will make it much easier" . i need an intervention. corners were not too bad at all.
k
Attached image(s)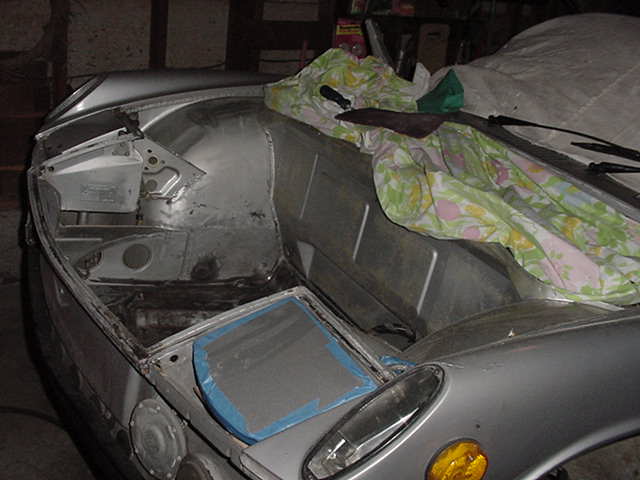
Posted by: rhodyguy Mar 15 2005, 07:08 AM
asdf
Attached image(s)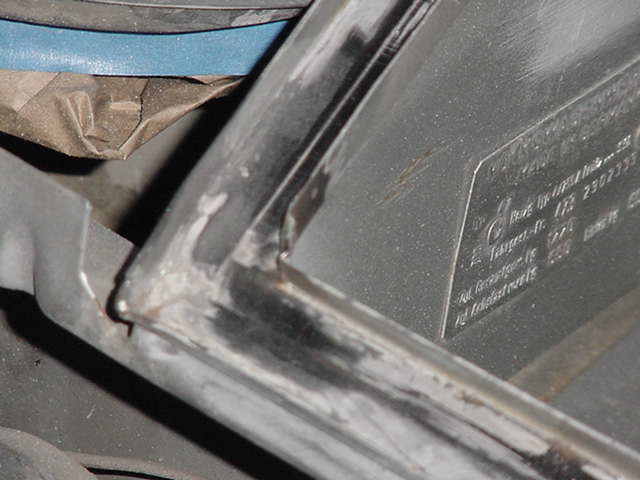
Posted by: rhodyguy Mar 15 2005, 07:10 AM
worst of the bunch.
Attached image(s)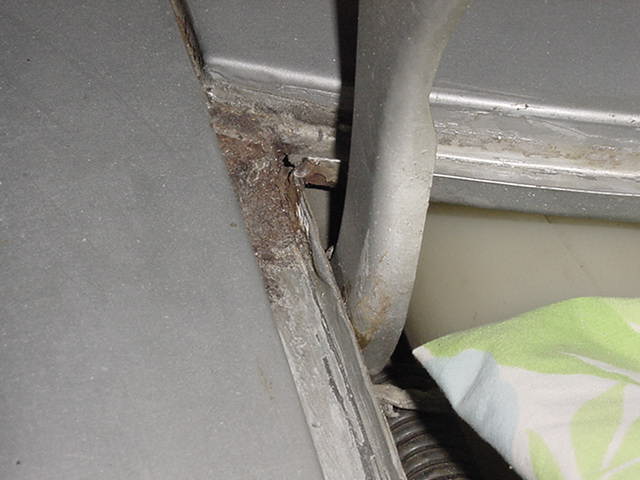
Posted by: rhodyguy Mar 15 2005, 07:11 AM
more.
Attached image(s)
Posted by: rhodyguy Mar 15 2005, 07:13 AM
more.
Attached image(s)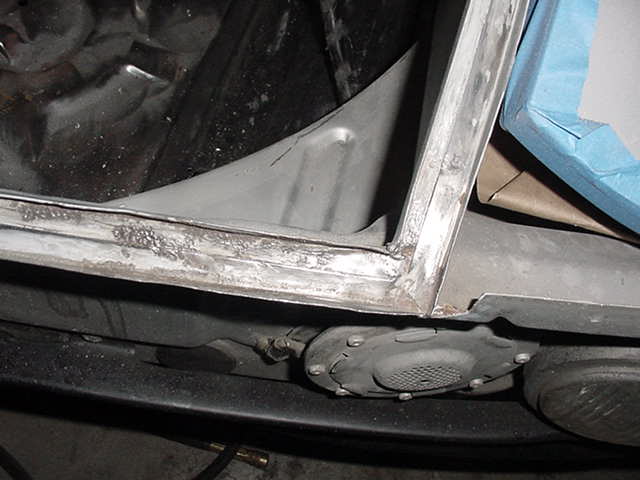
Posted by: rhodyguy Mar 15 2005, 07:14 AM
more
Attached image(s)
Posted by: Bleyseng Mar 15 2005, 08:19 AM
Its gonna take a case of rattle cans to paint all that!
Posted by: rhodyguy Mar 15 2005, 08:29 AM
the color match paint seems to have a lot of solids. i figure under 2 for the top side of the front trunk. i have one and a half and ordered some more yesterday. i'm not done removing items yet. 
k
Posted by: rhodyguy Mar 16 2005, 08:09 AM
Mar-Hyde and foil masking. paint today.
k
Attached image(s)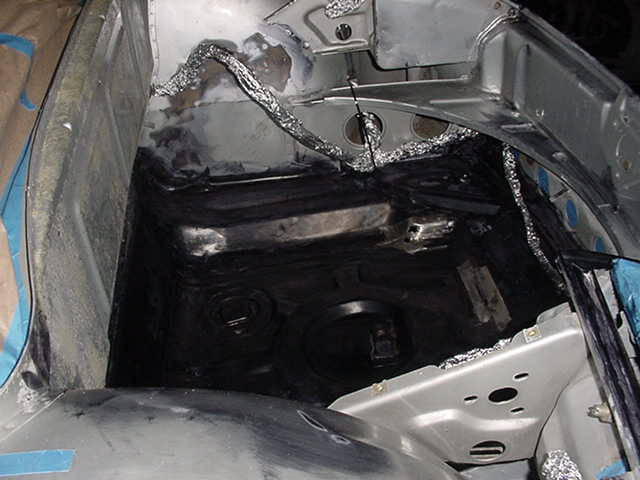
Posted by: rhodyguy Mar 16 2005, 07:56 PM
much better. reassemble tomorrow.
Attached image(s)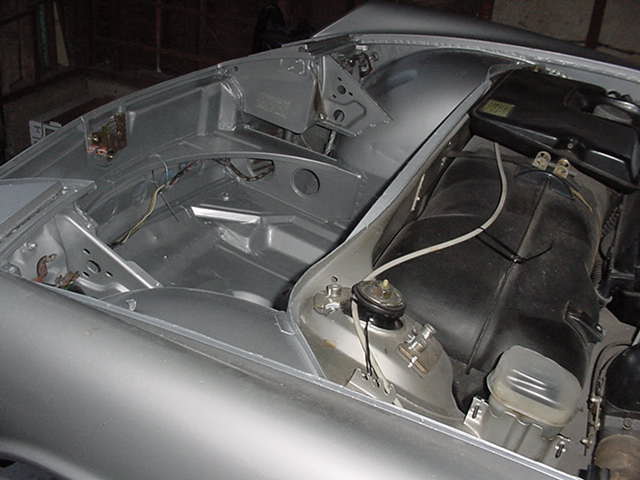
Posted by: redshift Mar 16 2005, 08:20 PM
Does it not rain where you are? It rains here, and my car was quite a bit worse two years ago...
Can we get some closeups of the jackstands?
M
Posted by: red914 Mar 16 2005, 10:31 PM
wow, Kevin, that looks great! i can't wait to see it up close. i will eventually need pointers on doing similiar things, only much more sweeping and all encompassing...
Posted by: rhodyguy Mar 17 2005, 12:59 AM
this car lived in sacramento prior to purchase. . yours must have lived closer to the beach miles  . a few corner pictures.
k
Attached image(s)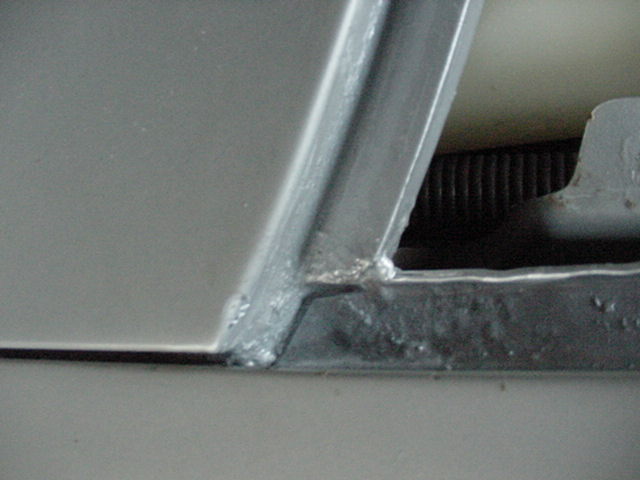
Posted by: rhodyguy Mar 17 2005, 01:04 AM
asdf
Attached image(s)
Posted by: ablose58 Mar 17 2005, 01:05 AM
 Nice kevin!!
Posted by: rhodyguy Mar 17 2005, 01:06 AM
asdf
Attached image(s)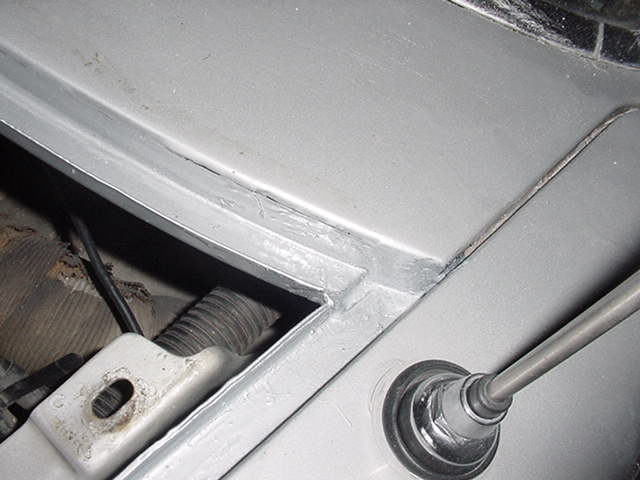
Posted by: rhodyguy Mar 17 2005, 01:07 AM
asdf
Attached image(s)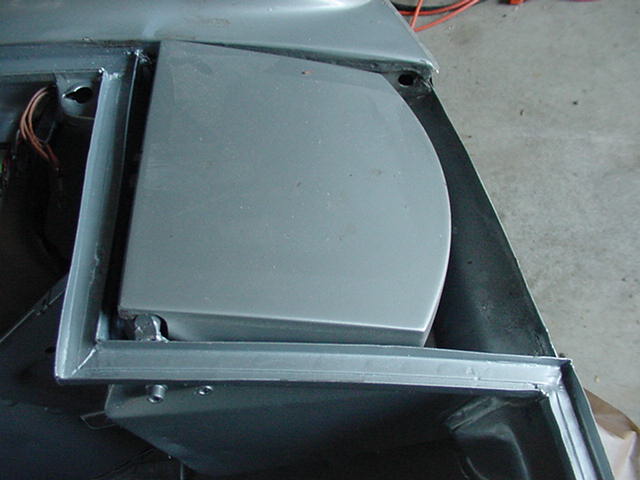
Posted by: redshift Mar 17 2005, 02:58 AM
Beach! Yes! I hate the beach.
Look, anytime you need a place to work on my car.. 4 year minimum active, and then... well, email me if you'd like more details... but it includes no traveling to exotic places, and daily rations of Purina People Chow...

I dunno Kev, sounds like a good offer. I'd take it.

Looks like a landslide.
Actually, just ship me your car, and I'll ship you mine, kind of even it out. 
M
Posted by: red914 Mar 17 2005, 09:09 AM
if i pulled my rubber seal out, i think the metal track would come with it.  kind of neat, how without the rubber your looks all neat and clean. did the car come that way?
i am convinced they built mine out of this interesting crumbly material, kind of a brick color.  doesn't hold up very well. i think yours is a better idea.
i am really looking forward to seeing your work in person. 
Posted by: rhodyguy Mar 17 2005, 09:26 AM
the rust demon gets underneath the seal adhesive and wrecks havok. i was lucky and only minor surface slab areas of the chanel came off when the seal was pulled. there was heavy, hard to remove primer like stuff in the corners. . weld spatter was everywhere. they never bothered to clean it up at the factory. me either  . i like to save the provenance
  . we are officially in a drought. no snow in the mountains to speak of and the dryest winter i can ever remember. washington is going to burn up this summer. everyone's going to pay through the nose for power and there will be irrigation issues with regards to new rules about water flow to maintain salmon habitat and spawnning. back on topic now.
k
Posted by: red914 Mar 17 2005, 09:51 AM
just the little ray of sunshine this morning, aren't we?
you are right, though. it isn't just the dry we will worry about. power, irrigation, salmon. at least all the time i would have spent mowing my lush, green lawn i can instead work on my car!  every cloud has a silver lining, right?
Posted by: Root_Werks Mar 17 2005, 10:39 AM
Kevin, that front trunk rocks! Great job! I can't wait to see the work in person. 
Posted by: rhodyguy Mar 17 2005, 10:47 AM
one more.
k
Attached image(s)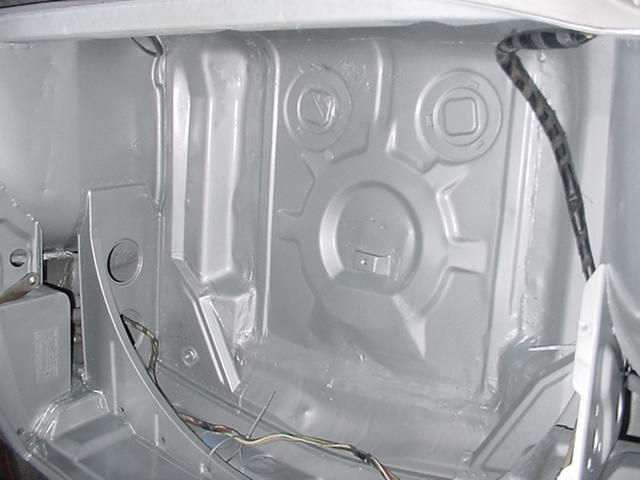
Posted by: Bleyseng Mar 17 2005, 06:38 PM
missed a spot!!!
hahahah
Posted by: rhodyguy Mar 17 2005, 08:56 PM
i hate this.
k
Attached image(s)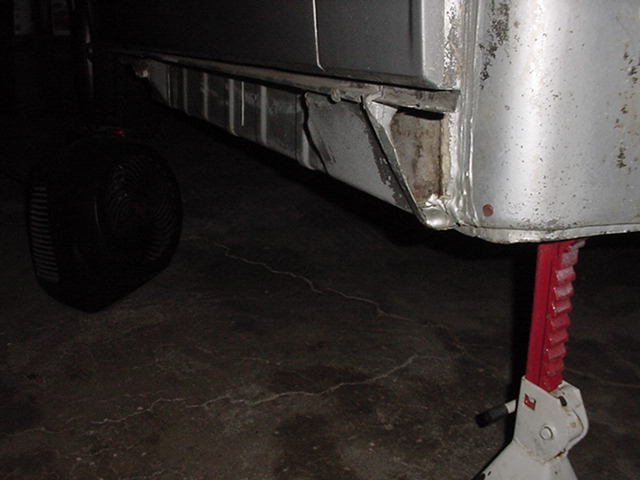
Posted by: rhodyguy Mar 17 2005, 08:58 PM
not as much as i HATE THIS!!!!
k
Attached image(s)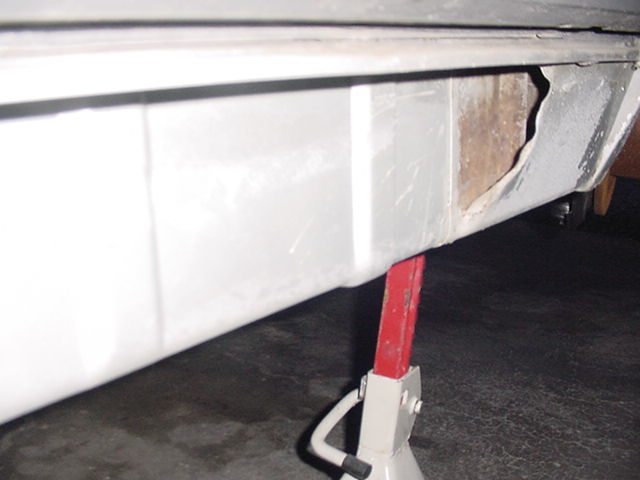
Posted by: jones Mar 17 2005, 09:19 PM
Kevin, Mine are COMPLETLY gone. When the AC lines were put in the entire sill supports were removed AND that entire front portion removed (portion close to the front wheel). I am watching this post close. I will be doing the same
Posted by: rhodyguy Mar 18 2005, 08:33 AM
when you're ready for it i'll tell you the cheap and easy way to fix the notch in the engine shelve that's cut for the ac compressor and belt.
k
Posted by: rhodyguy Mar 19 2005, 09:09 AM
in their zeal to put in the ac, they just peaned over the edges to not chaffe the ac lines. a little pry bar and hammer action and i have semi flat edges to put the patch on. i'll mar-hyde this area, AFTER repairing.
k
Attached image(s)
Posted by: watsonrx13 Mar 19 2005, 09:56 AM
K, this is the same section I'll be restoring on my car this weekend....
Attached image(s)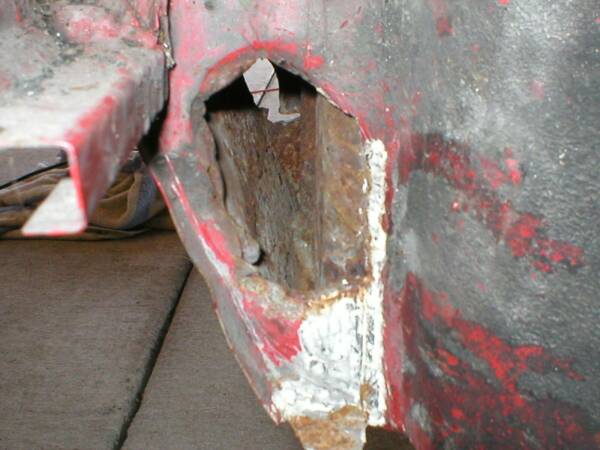
Posted by: watsonrx13 Mar 19 2005, 09:56 AM
Here's the other side...
Attached image(s)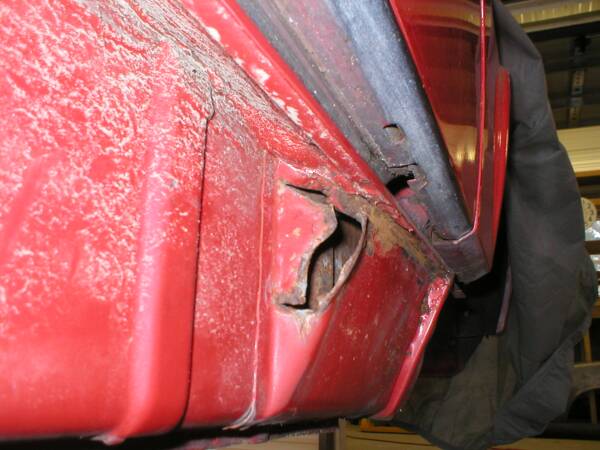
Posted by: rhodyguy Mar 19 2005, 10:24 AM
a heat gun and wood chisel will peel the seam seal at the front hole fast, as in a couple of minutes. this will give you more surface area to work with. you should be able to straighten out the surrounding areas pretty easily. how's the rust inside? i cleaned it out with a pointy bendy tool to get the crud at the bottom seam out.
k
Posted by: rhodyguy Mar 19 2005, 10:27 AM
where i live, i would deduct $500 from the price of a car that had ac installed. maybe more depending how butchered up the install was.
k
Posted by: rhodyguy Mar 26 2005, 10:58 AM
in sort of a holding pattern. 98% of painting done. this is ready to go.
k
Posted by: rhodyguy Mar 26 2005, 11:00 AM
oops
Attached image(s)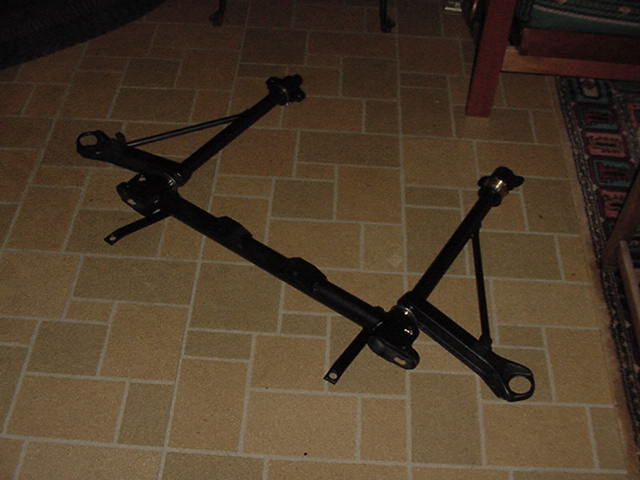
Posted by: rhodyguy Mar 26 2005, 11:01 AM
i hope this stuff works.
k
Attached image(s)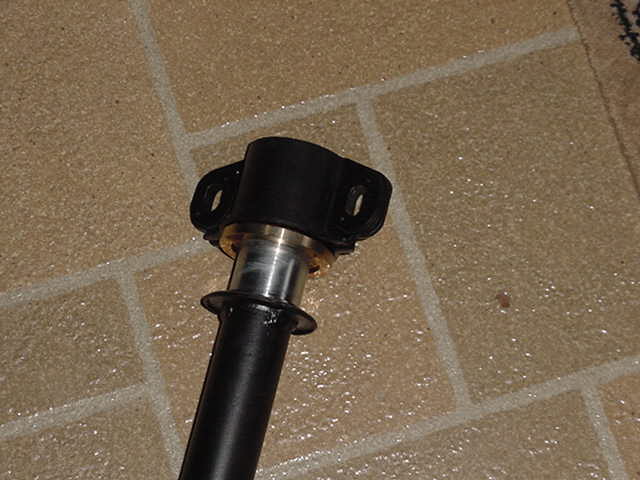
Posted by: rhodyguy Mar 26 2005, 11:08 AM
i'll finish the other fog when the parts get here.
k
Attached image(s)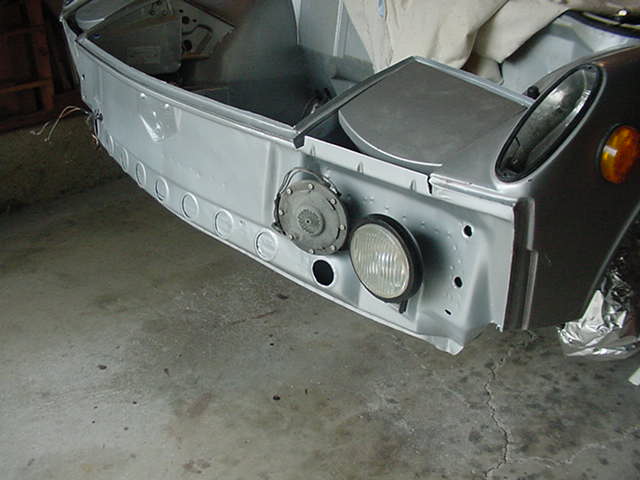
Posted by: rhodyguy Mar 26 2005, 11:11 AM
i'll do the rest of the pan when the rear can be put in the air. no more room.
k
Attached image(s)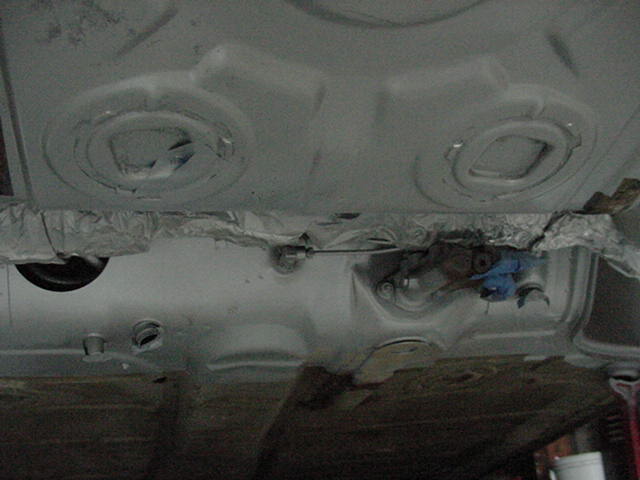
Posted by: Bleyseng Mar 26 2005, 11:31 AM
How is the front bearing replacement coming along?? Mine are still sitting in a box just don't have the time to work on the car now.
Posted by: rhodyguy Mar 26 2005, 11:41 AM
you mean bushings? piece of cake. i worried too much about how tight the races should turn on and tried a few combinations. you def know when tight becomes too tight. i have a tad more painting to do after a little welding. i could slap it together and paint later but then there's the whole overspray (black components vs silver paint) and remasking. no point in being all impatient at this time. it's not like your car is conveniently outside the door for small time projects. the whole driving to u.v. just to work on the car would get old. monique needs a 3 garage at her place out on the alley.
k
Posted by: Bleyseng Mar 26 2005, 11:51 AM
I am working on swapping in a new rear end in the Ranger this weekend. Great fun.....
I am sick of driving the Westy to work already....to little hp for stop and go city traffic besides being the object that EVERYONE has to pass and slam on their brakes as soon as they cut in front of me!!!!!! I need a 45 Peacemaker to shoot the assholes....
Geoff
Posted by: rhodyguy Mar 26 2005, 12:00 PM
you sure timed putting a new rear end in the ford perfectly. first real rain in weeks. don't let that cold wind blow up your skirt.
k
Posted by: Bleyseng Mar 26 2005, 02:42 PM
Yep, so this morning I shipped the heads down to HAM to get refreshed and bored out.
Looks like the rain isn't slowing down at all so perfect time to go work in the driveway..
I would like to thank my Boss for not letting take off an afternoon this week so I could work on it on a dry day. 
Geoff
Posted by: rhodyguy Mar 26 2005, 02:56 PM
if it's the same boss i had tell hi to f-o for me, would you please? rain and 46*. perfect outdoor, car working weather.
k
Posted by: Bleyseng Mar 26 2005, 05:50 PM
Came in for a change of clothes, damn its wet out there....
BTW Erik G just started working for us too... He will run the framing crew on the 2mil house that starts in 3 weeks which is why there is no way I can even fly to WCC05 this year.
Geoff
Posted by: rhodyguy Apr 7 2005, 07:55 AM
much better.
k
Attached image(s)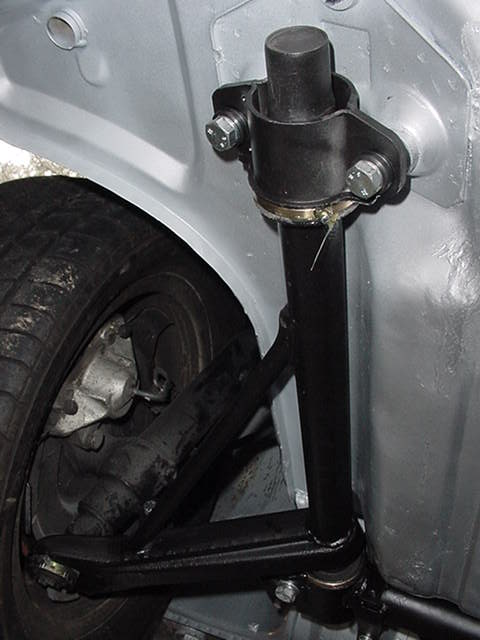
Posted by: rhodyguy Apr 7 2005, 07:59 AM
DOWN! i'll finnish the cup of coffee and be back on it.
k
Attached image(s)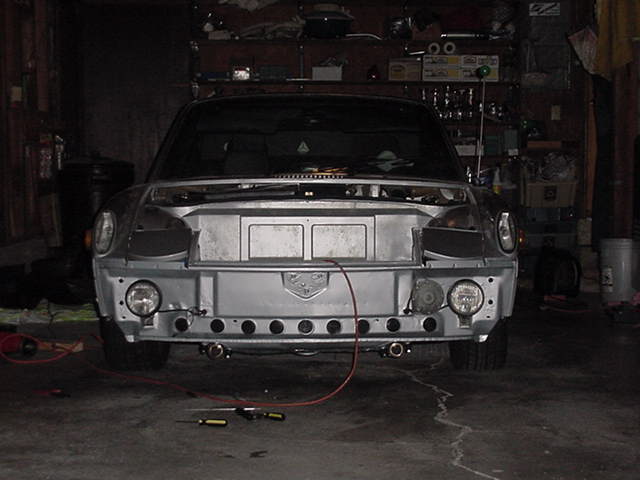
Posted by: Bleyseng Apr 7 2005, 08:10 AM
How did the bearings work out?? Any trouble with sticktation?
Geoff
Posted by: rhodyguy Apr 7 2005, 08:20 AM
you haven't done yours yet? i thought that's why you didn't come to b-fast? sandbagger!! i forgot it, it wasn't in SEATTLE!!! pretty simple. are you going to spruce up the whole suspention? when you start doing it, the instuctions state "do not torque the bolts" for the rear a-arm bushing. the instuctions are correct!! oops!! only time i cursed on the whole thing. bet you're ready for the parade in p-land in 06'
k
Posted by: Bleyseng Apr 7 2005, 08:25 AM
Car is all apart.....including the engine in that little garage. I have finished rebuilding and installing a rear end in the Ranger, in the rain. Got the bus running pretty good now too.
Heads are in Georgia now to get a go over.....
The engine is not going to be done for a while far as I can see, no time as work is busy.
Geoff
Posted by: rhodyguy Apr 8 2005, 02:20 AM
long day... but i'm motorvating. good gas station story but i'm too tired. later.
k
Attached image(s)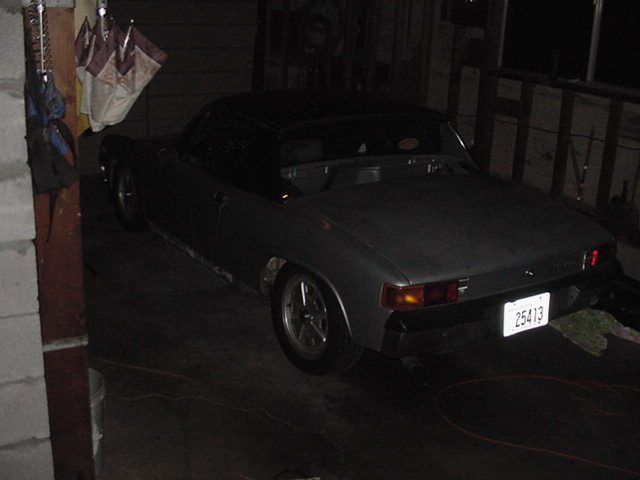
Posted by: rhodyguy Apr 9 2005, 09:07 PM
sometimes it's the little things. i'm ahead of schedule.
k
Attached image(s)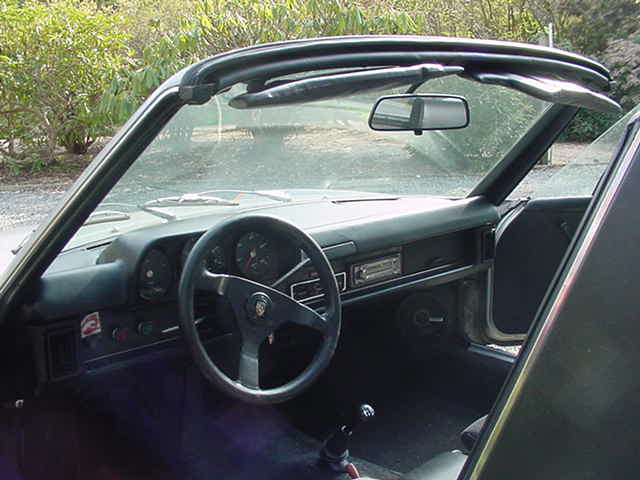
Posted by: rhodyguy Apr 11 2005, 01:27 PM
how to stop the rain. overcast, pockets of heavy stuff coming down. i've been driving around with no engine lid and i had visions of the engine getting soaked and dying. i like working on the engine with no lid but it's a major pain putting it on by yourself. so i turned the hinge arm holes in to slots with my grinder and squirted some paint on. start the bolts and it slides right in. just got done and it's blue skies again. off for a drive in the rain. 
k
Posted by: rhodyguy Apr 15 2005, 07:39 PM
too nice to cover.
k
Attached image(s)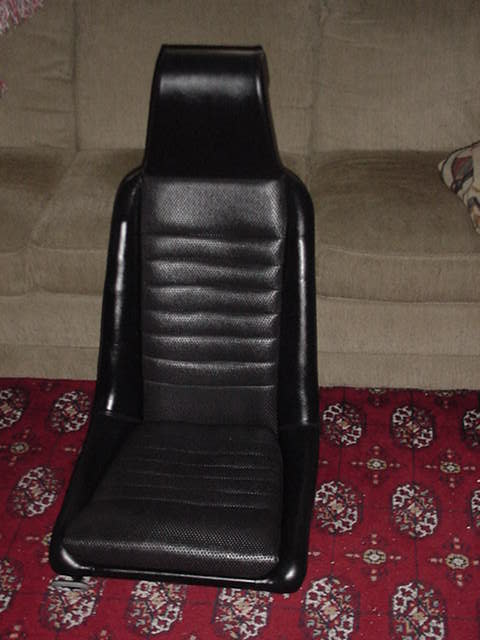
Posted by: rhodyguy Apr 15 2005, 07:41 PM
this seam is usually shot.
k
Attached image(s)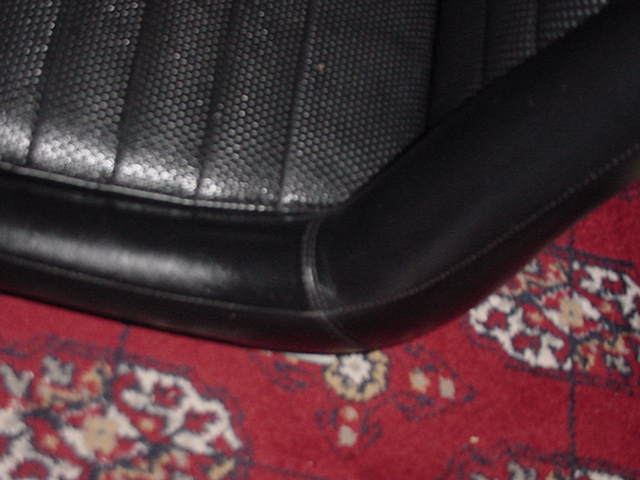
Posted by: rhodyguy Apr 15 2005, 07:43 PM
comfort over beauty any time. fresh and clean.
k
Attached image(s)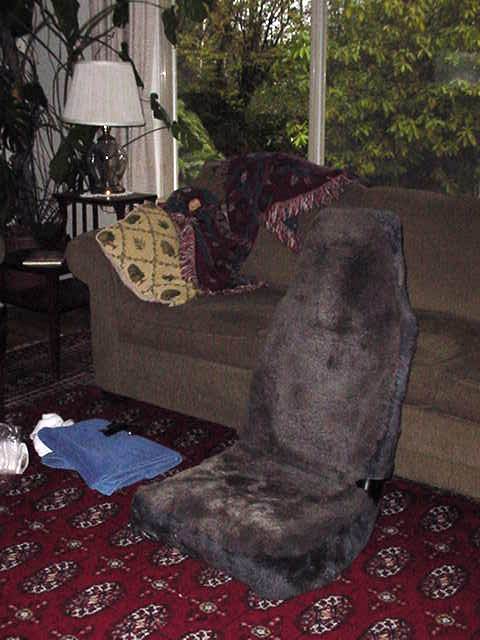
Posted by: rhodyguy Apr 20 2005, 06:33 AM
virus is currently in remission. in no certain order.
finnish ac repairs in front trunk and paint.
replaced p.s. a-arm and front suspention cross member.
blast and paint arms, crossmember and related pieces.
install elephant racing front a-arm bushings.
install bumpsteer kit.
new corner balance and alignment.
paint fog housings and clean the rest.
install msd 6a, mallory dist, and tach adpt.
new steering wheel.
new dr evil mirrior.
slot engine lid hinge arm ends.
adj venting.
discover rt rear calilper won't adjust, on a sunday. pull good cal off parts car.
organize garage. misplace much stuff.
clean car interior. find remote for stereo and $.18.
vapor barrier for dr door.
paint frt valance and rockers.
500 trips to hardware store to buy new fasteners.
i will have a relapse shortly after returning from WCC. hopefully duration will be short and go like a bat out of hell. see you all wed, thurs, fri, sat, sun, mon.
k
Posted by: maf914 Apr 20 2005, 06:49 AM
Kevin, Thanks for the the great thread and all of the photos. After you put a few miles on it please give us a report on how the Elephant bushings work on the front suspension. Do you intend to do the rear bushings also? Thanks again.
Posted by: rhodyguy Apr 20 2005, 07:18 AM
thanks. a labor of love. i've put about 150 shake down miles on with the elephants. anything would have been an improvement over the old pieces of crap that passed for bushings. the whole front end was fighting itself. the bushings work great!! . i think the car feels more supple, but not soft. roads that were tooth rattlers are still BAD road surfaces, but the suspention seems to dampen the bad jolts. i think the combo- correct tierod angularity, bumpster kit, and bushings- compliments each other.
yes, i intend to do the elephant rear control arm bushings also. while i'm in there i might as well do the rear axel bearings. might as well paint the control arms. while the car is in the air, continue mar-hyding and painting the rear portion of the pan, paint and install a rear valance. do the painted dash face i didn't get to. oh man.... here we go again!!! damn, i'd like to paint the car after the new engine goes in. i'll save a bunch of dough if i do the disassembly and reassembly.  the more things change, the more they remain the same.
k
ps. while i was doing the front end... well, it's apart, there's no better time to change those stock front torsion bars for 21mm units. i kill myself!!
Posted by: Bleyseng Apr 20 2005, 07:44 AM
You just suffer from DWD that's all!!!
Geoff
Posted by: Root_Werks Apr 20 2005, 09:00 AM
Car looks great Kevin! Great work!
Powered by Invision Power Board (http://www.invisionboard.com)
© Invision Power Services (http://www.invisionpower.com)