Printable Version of Topic
Click here to view this topic in its original format
914World.com _ 914World Garage _ BUILD-OFF CHALLENGE: Barn find with 50k original miles
Posted by: Matty900 Feb 4 2016, 03:05 PM
Looking forward to working on this project so I can drive my own car to WCR 2016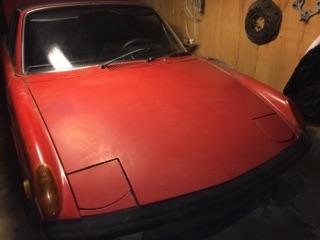
Posted by: CatDaddy60 Feb 4 2016, 03:23 PM
Good on ya, send more pictures!!!
Posted by: Matty900 Feb 4 2016, 08:19 PM
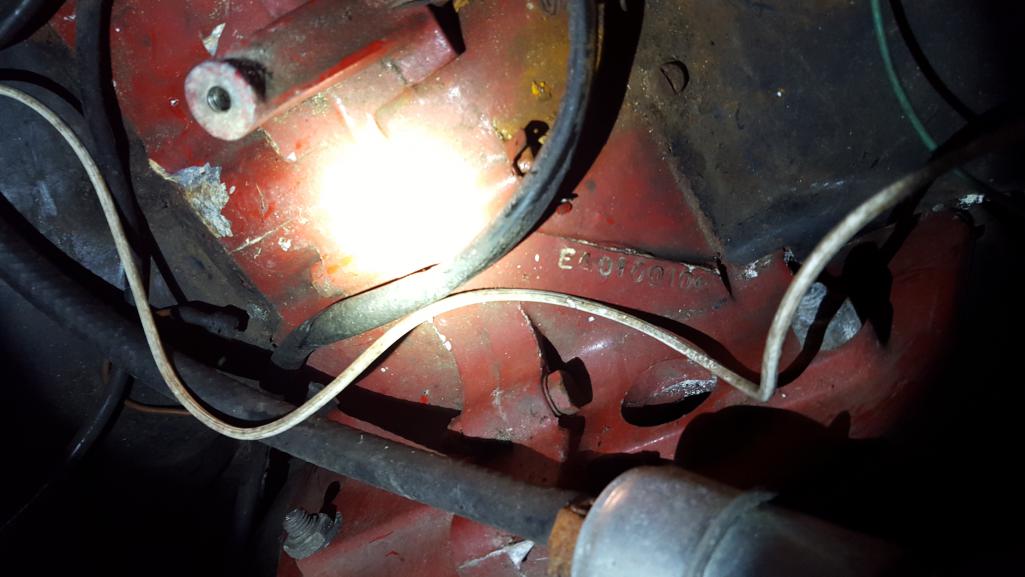
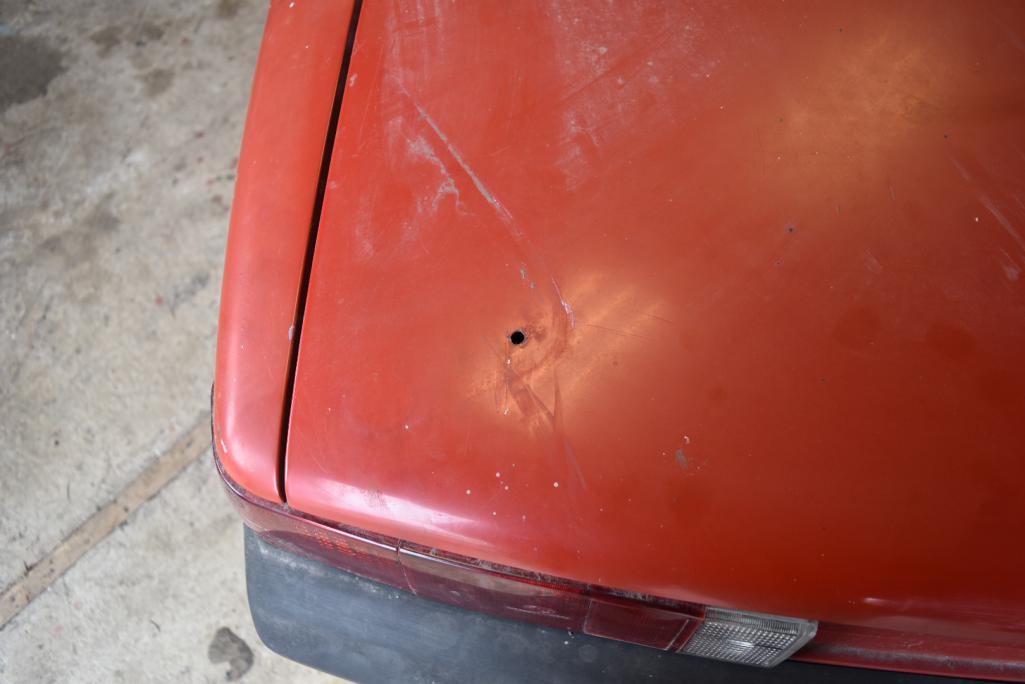
Here's the important picture. Seems to be a little bit of surface rust those pretty solid when I started poking at it underneath the battery tray. Car was purchased in 78 with 38000 miles on it. The woman who owned it paid $100 a month for 23 years to keep it in dry storage.
Attached thumbnail(s)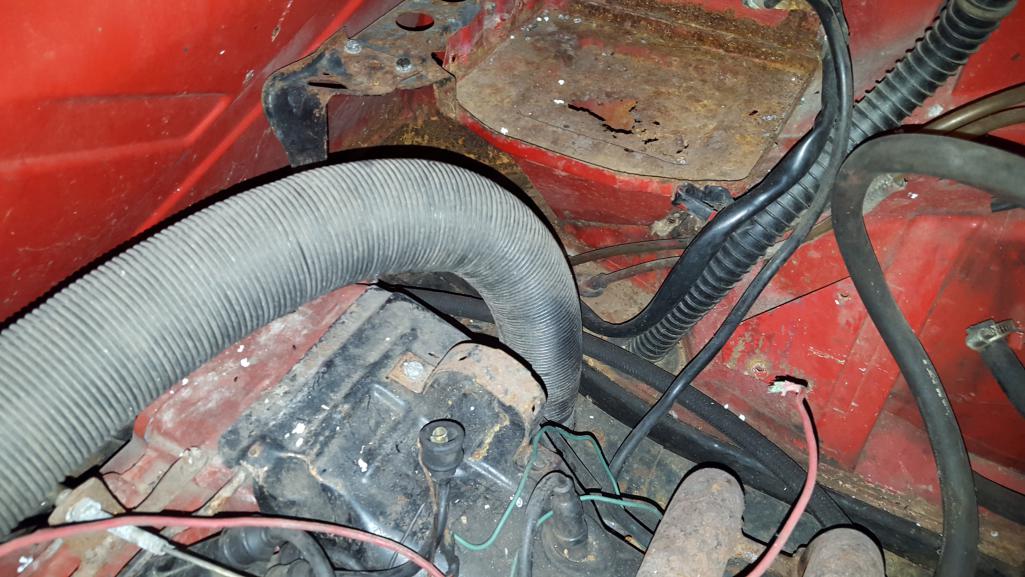
Posted by: Matty900 Feb 4 2016, 08:21 PM
Fuchs wheels including the spare wheel and the original factory steel wheels
Attached thumbnail(s)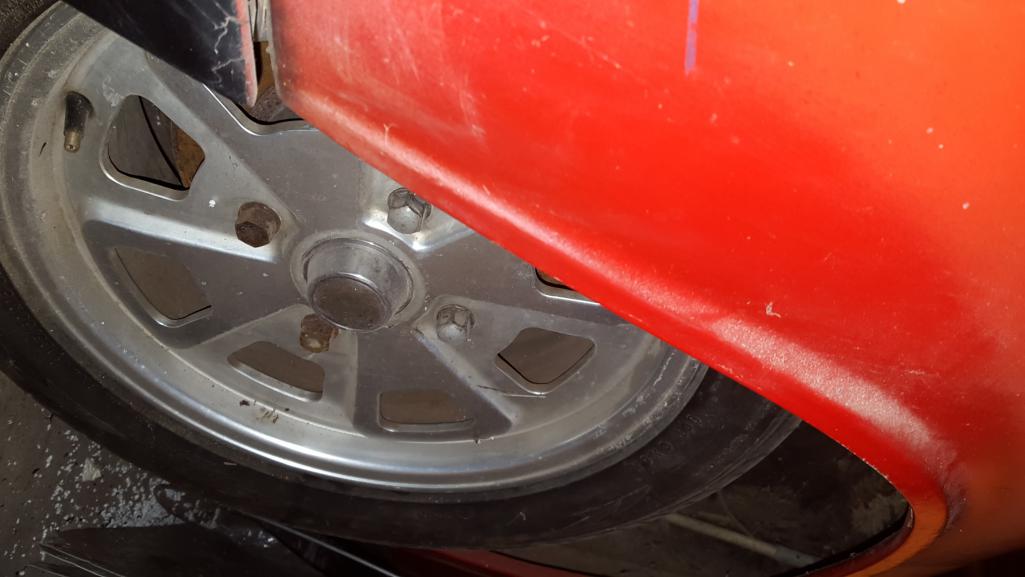
Posted by: Matty900 Feb 4 2016, 08:24 PM
Needs some interior help. Luckily I know where to get that from 
Attached thumbnail(s)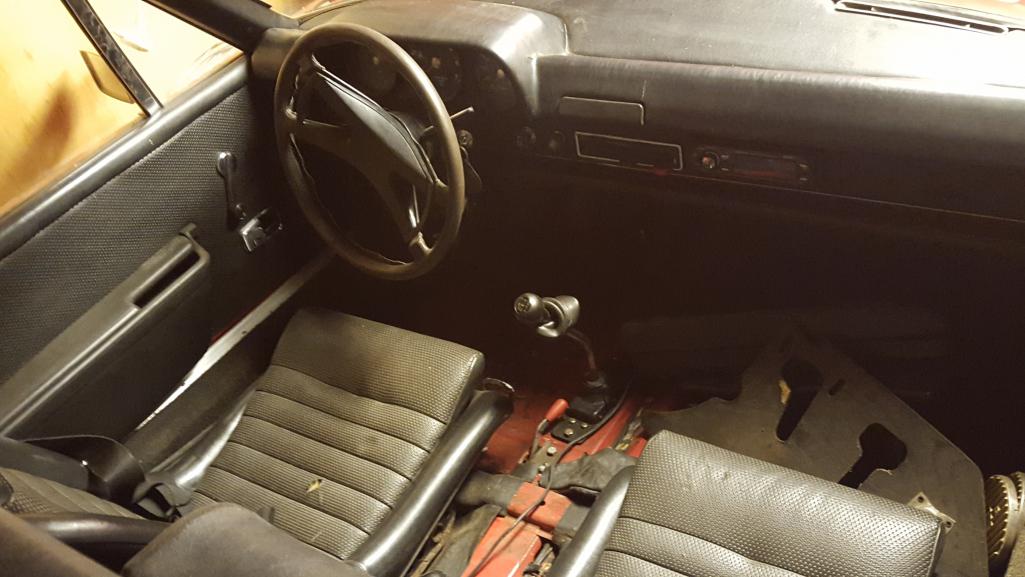
Posted by: Matty900 Feb 4 2016, 08:26 PM
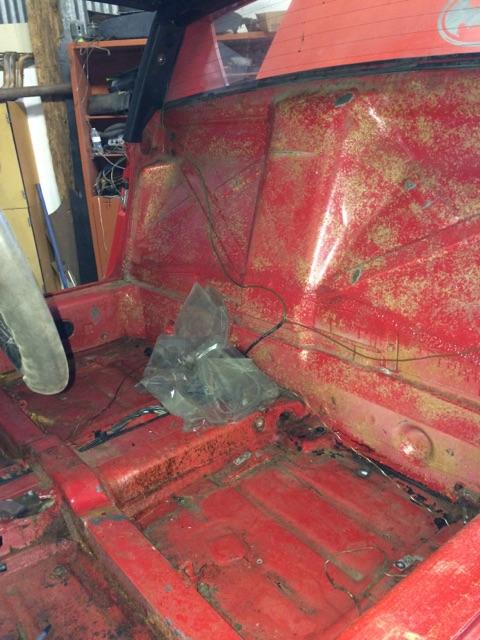
Little bit of surface rust in trunk
Attached image(s)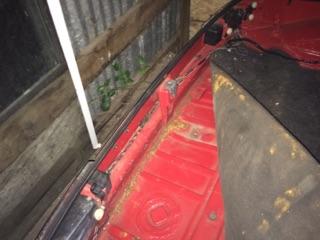
Posted by: Matty900 Feb 4 2016, 08:28 PM
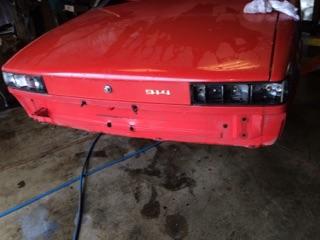
Not too bad
Attached image(s)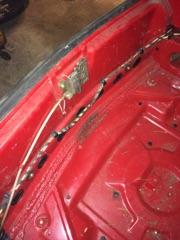
Posted by: Matty900 Feb 4 2016, 08:30 PM
Needs a new master cylinder or rebuild
Attached image(s)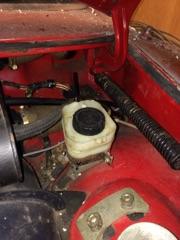
Posted by: euro911 Feb 4 2016, 08:31 PM
I'd just get a NEW M/C ... rebuild kits aren't plentiful these days
Posted by: Matty900 Feb 4 2016, 08:39 PM

I'd just get a NEW M/C ... rebuild kits aren't plentiful these days
Eric from PMB is helping me out in the break department.
Posted by: 914Sixer Feb 4 2016, 08:45 PM
Inside storage SAVED the car!
Posted by: iwanta914-6 Feb 4 2016, 09:37 PM
I'll never understand how people find these cars...
Posted by: Larmo63 Feb 4 2016, 10:02 PM
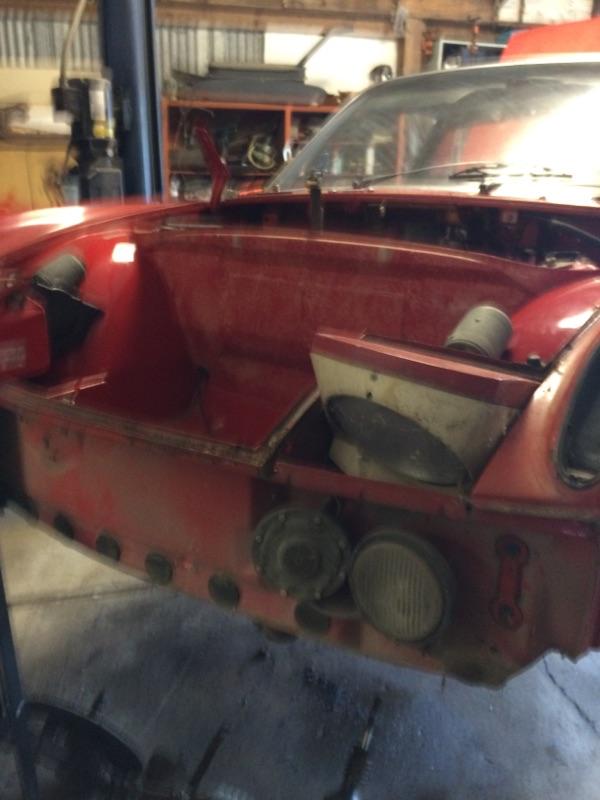
Your picture is not a picture of the master cylinder. That is the reservoir for the m/c.
The m/c is under the car.
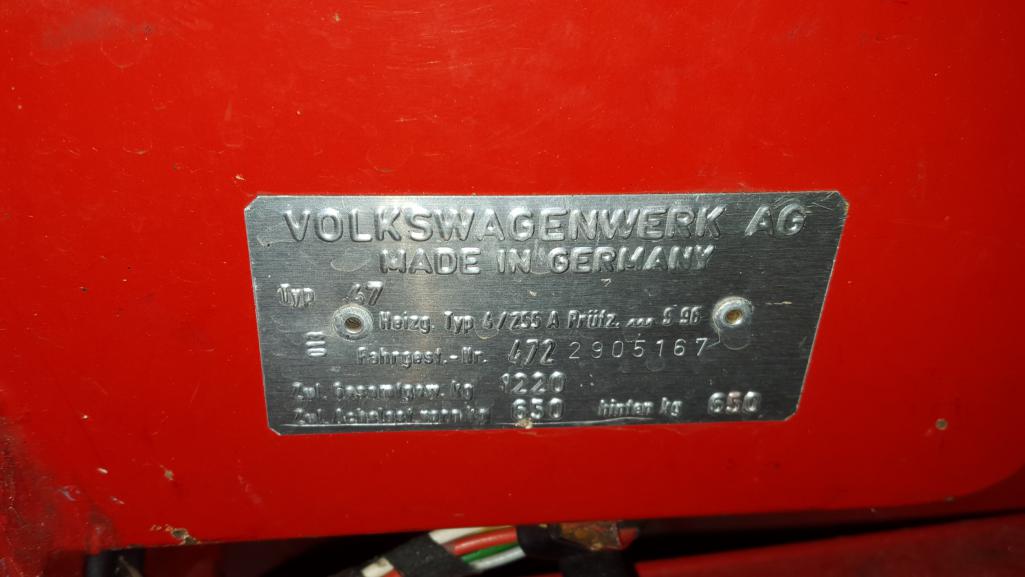
It looks like a good find!!! What year is it, what serial number, and it looks like a 1.7? and,….

Posted by: Matty900 Feb 4 2016, 10:38 PM
Your picture is not a picture of the master cylinder. That is the reservoir for the m/c.
The m/c is under the car.
It looks like a good find!!! What year is it, what serial number, and it looks like a 1.7? and,….
Attached thumbnail(s)
Posted by: whitetwinturbo Feb 4 2016, 10:53 PM

Posted by: Matty900 Feb 4 2016, 10:54 PM
Your picture is not a picture of the master cylinder. That is the reservoir for the m/c.
The m/c is under the car.
It looks like a good find!!! What year is it, what serial number, and it looks like a 1.7? and,….
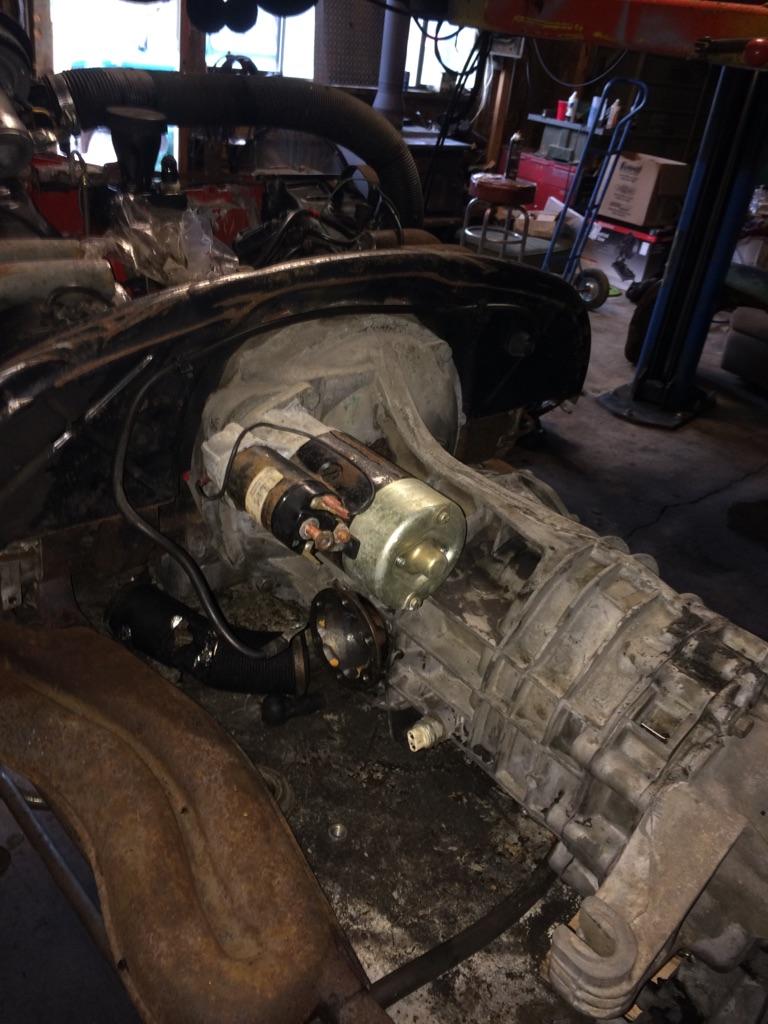
Car is still deep in the barn and I was not able to get to the drivers side yet. I will have more photos next week.
It is a 1.7 that has about 5,000 miles on a rebuild where they had it bor ed out to 19xx (don't remember), had the heads worked on and switched out the fi for dellortos.
Attached thumbnail(s)
Posted by: Larmo63 Feb 4 2016, 10:54 PM
A somewhat early '72, nice vintage. When do we see the rest?
Posted by: Matty900 Feb 4 2016, 11:12 PM
Thanks for the interesting thread. I think I will have to come back to that one when I get around to figuringout what I want to do with my other 914
Attached thumbnail(s)
Posted by: euro911 Feb 4 2016, 11:18 PM

Posted by: mgp4591 Feb 4 2016, 11:32 PM
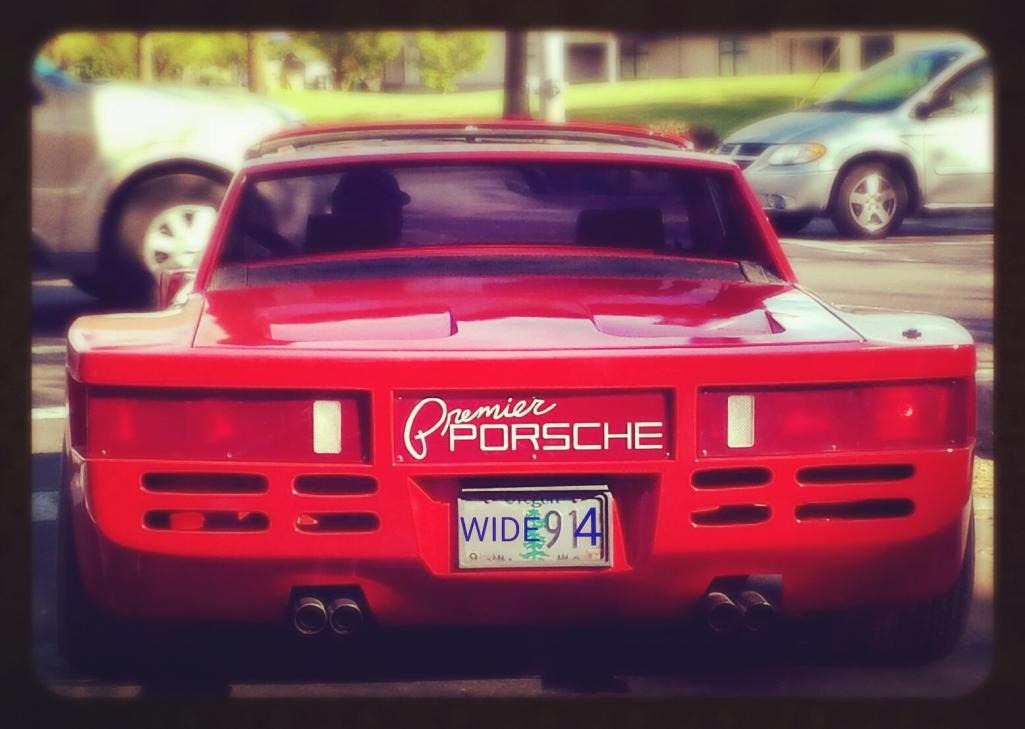
Wild looking wide body- any other pictures of that one? Your find is definitely not an everyday experience and more than a few of us (me included!) are a little jealous! That's okay- jump on it and enjoy it! And...
Posted by: pete000 Feb 4 2016, 11:44 PM
Nice find !
Posted by: Matty900 Feb 5 2016, 01:18 AM
Wild looking wide body- any other pictures of that one? Your find is definitely not an everyday experience and more than a few of us (me included!) are a little jealous! That's okay- jump on it and enjoy it! And...
I just happened to do a random Craigslist search for 914 and called the guy. He still had it but had lots of calls on it. I got in the car drove a few hours and gave him cash. I just got lucky. He wanted to sell it to make room in his barn shop to build hot rods. So to make it worth his wile I will have him do the work to get it road worthy. He seems pretty talented so I will be bringing him back the other car when it comes time to start figuring out a motor swap in the other car.
Attached thumbnail(s)
Posted by: cwpeden Feb 5 2016, 01:56 AM
You have 2 now? Whats wrong with the wide body?
Posted by: Matty900 Feb 5 2016, 03:11 AM
You have 2 now? Whats wrong with the wide body?
It was a car my brother had for a long time. He bought it wrecked and had some help from friends getting it back to working condition. He decided he wanted to sell it because he has a few too many project cars and the wife likes the "unmolested" cars so this one was ugly.
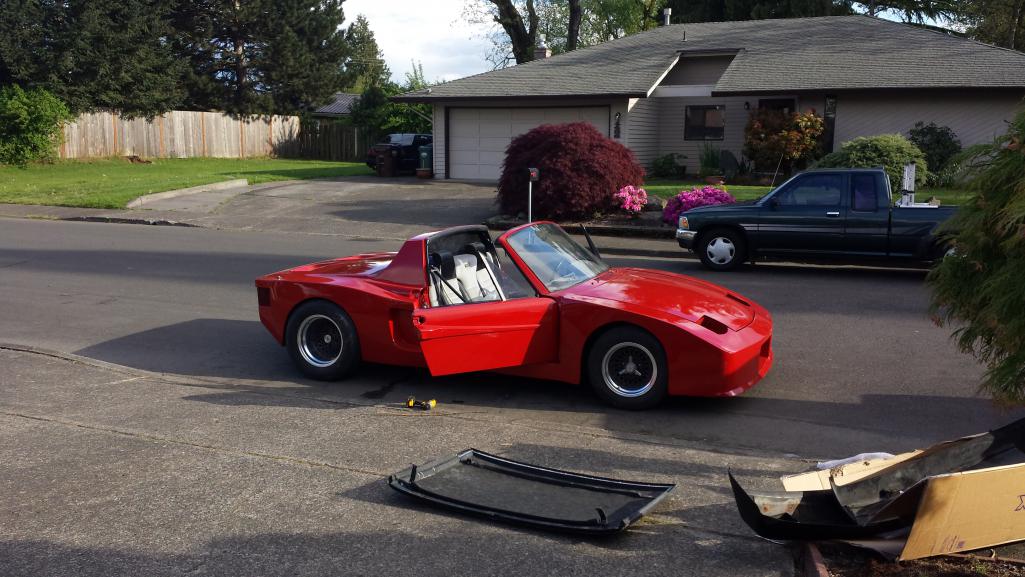
My son was looking for a really cool senior project and wanted to work on the car for his project.
He put in a few hundred hours and we got him in to a friend's paint booth. We cleaned up the interior, put in new seals, carpet, door cards and most importantly a cool radio. He took it to school and it was the coolest senior project.
After working on the car with my son I had to buy right? So I have one payment to my brother left and I was going to start going through everything that was not done, like suspension, body stiffening, and figuring out what motor to actually put in it.
The project inspired my son to go to college for automotive restoration. Now it’s "Dad, that paint job we did was crap. We need to repaint it and it needs to midnight blue" now I don't know about that color, but I will need paint in side of everything anyway, so I guess I can do it all "right" and actually start with fixing things in the correct order this time instead of just skipping to the cosmetic stuff.
I didn't think I would be able to get it all done before WCR, So on a whim, I checked craigslist and Bingo, I found the 72.
Sorry for the long answer.
Attached thumbnail(s)
Posted by: veekry9 Feb 5 2016, 07:40 AM
Fun with 14's.
Nice catch,a '72,I even like the colour.
A great candidate for a total restoration,with no metalwork,a rare thing indeed.
The fiberglass kit is so retro '80s,what a great way to inspire further study.
Coincidentally,the kits came up recently.
Here are a few more examples:
http://www.914world.com/bbs2/index.php?showtopic=274766&st=11
I recall the ads for those kits on the pages of vw and hotrodding mags in the late '70s or '80s on.
Had to do the big tire thing and cover them with something,they were available.
The reaction of some puristas is so out of proportion to their financial stake it's hilarious.
https://www.youtube.com/results?search_query=foam+and+fiberglass+car
The madness is a growing trend,the automotive designer at home.

Posted by: Matty900 Feb 6 2016, 01:36 AM
veekry9
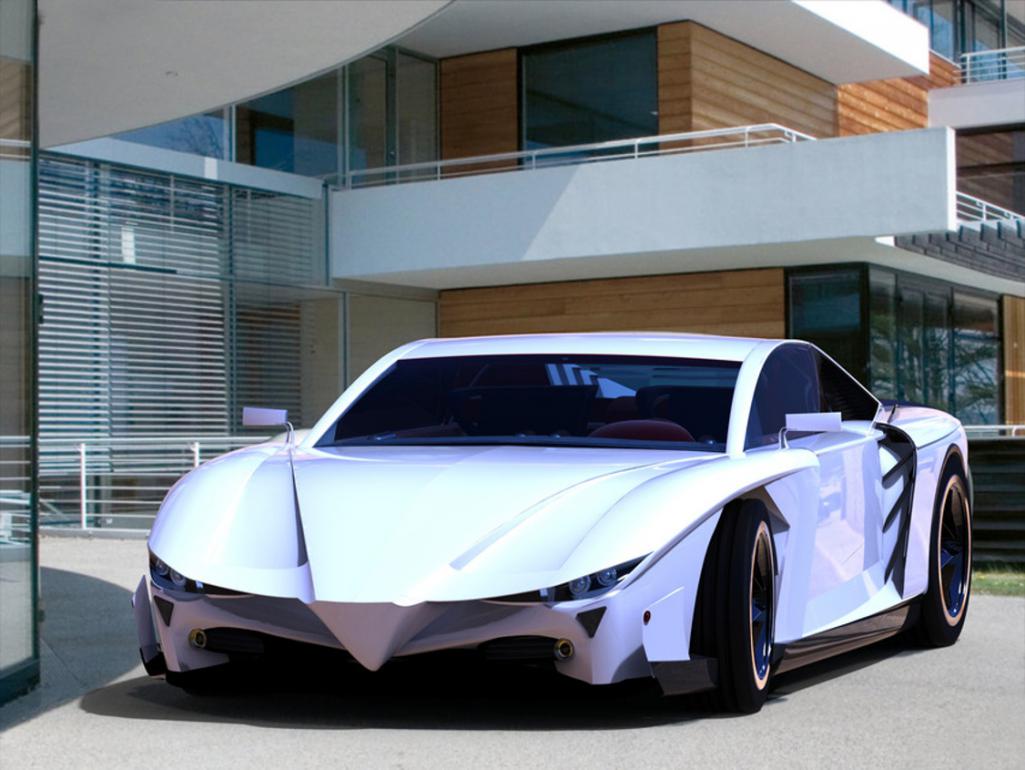
Thanks for the links. There is a lot of cool stuff going on with kits. I wouldn't have put the kit on the 914 as my 1st Choice of project. This was a very cool use of an infinity
http://vaydorexotics.com/about-vaydor/
But that is way off topic for these cars.
Posted by: veekry9 Feb 6 2016, 02:10 AM
Seems a guy has made it happen,and I'm sure that it appeals to a younger crowd weaned on drift cars and such.
The market will tell,I have a pix of a Cobra done in a similar way,all Transformer Decepticon looking.
What is good is that they didn't attempt a cheesy version of an Italian exotic.
Having the skills and will,as well as perfect timing,a guy could make a go of it,bringing his own hybrid powered car to market.
No easy thing though,years of sustained effort needed.
(edit)
Well,it kinda reminded me of a Cobra,turns out it far exceeds the 427 Roadster in performance,blown and all.Yikes.
https://www.google.ca/search?q=Zeno+STI&espv=2&biw=1280&bih=606&source=lnms&tbm=isch&sa=X&ved=0ahUKEwili-PIlOPKAhXBGx4KHZYwA20Q_AUIBigB#tbm=isch&q=Zenvo+STI
Posted by: Matty900 Feb 6 2016, 02:15 AM
A somewhat early '72, nice vintage. When do we see the rest?
Next week I will go back down to get it out of the barn. I will get some better pictures then and get it up on his rack to really get a good look under the car.
At that point I need to come up with the work that I want him to do for me.
So far I have the following punch list:
1 Pull the engine and replace battery tray and adress any rust issues.
2 Replace the breaks with new ones from PMB
3 Replace master cylinder
4 Pull, clean and treat gas tank
5 Replace fuel lines with stainless lines
6 Replace engine seals
7 Replace missing ignition (with new electronic ignition?)
8 Get car running
9 Cut her in the hood for gas tank fill (just kidding )
So here is where I need advice. What else should I be doing? What order should I do them in? Any tips on these things?
Thanks for any help
Posted by: veekry9 Feb 6 2016, 02:40 AM
All of the suspension rubber is likely beat and deteriorated.
If they are in workable condition,a longer term schedule can be made for replacement and or upgrading.
Some '72s didn't come equipped with antiroll bars,a feature most desired up front.
Careful with that engine,do not attempt to turn it without an internal scope inspection.
Any rust in the bores will break the piston lands upon startup,one cylinder has been open for 23 years.
The lubes must be re + re'd,being kinda funky by now.
Having a look at the clutch condition and its cable is a must,avoiding headaches later.
All of the drivetrain cv joints and bearings need inspection too.
The FI system is a task for an expert,the pinouts on the electrical harness critical to it's function.
Good looking car,a thorough going over will reap good results.

If the distributor has been removed,and the hole unplugged,check for squirrel stashes internally.
No kidding.
Posted by: Matty900 Feb 6 2016, 04:09 AM
All of the suspension rubber is likely beat and deteriorated.
If they are in workable condition,a longer term schedule can be made for replacement and or upgrading.
Some '72s didn't come equipped with antiroll bars,a feature most desired up front.
Careful with that engine,do not attempt to turn it without an internal scope inspection.
Any rust in the bores will break the piston lands upon startup,one cylinder has been open for 23 years.
The lubes must be re + re'd,being kinda funky by now.
Having a look at the clutch condition and its cable is a must,avoiding headaches later.
All of the drivetrain cv joints and bearings need inspection too.
The FI system is a task for an expert,the pinouts on the electrical harness critical to it's function.
Good looking car,a thorough going over will reap good results.
If the distributor has been removed,and the hole unplugged,check for squirrel stashes internally.
No kidding.
The engine was actually rebuilt when the owner got the car from his mom after she had it in storage all of those years. That's where the engine mods came from. Ithe has about 5k miles on the engine since then but has been in the sons barn/ shop for probably at least 5 years. But it was always parked inside when it was driven.
He said he had pulled the shocks out and checked them not too long ago and they were still working well. I would like to keep this car stock but want good performance from the suspension. He said that the adjusted the suspension to give it a better stance because he didn't like the factory look. There is no more fuel injection after he had it bored out and the heads done he put the Dual Dellorto's on.
Thanks for the tips
Posted by: euro911 Feb 6 2016, 10:27 AM
Just info, you mentioned the engine was built to a 19xx. The most popular big bore kit for the 1.7L is 1911. 96mm P&Cs on the stock 66mm crank. Nice peppy short-stroke motors
Posted by: Matty900 Feb 6 2016, 01:58 PM
Just info, you mentioned the engine was built to a 19xx. The most popular big bore kit for the 1.7L is 1911. 96mm P&Cs on the stock 66mm crank. Nice peppy short-stroke motors
What would be done to the heads and does this make them less reliable?
Posted by: euro911 Feb 7 2016, 01:06 AM
It all depends on which route the builder took. Stock 1.7L pistons are 90mm, the 1911 would be 96mm. Unless he used the thin wall barrels made to work with stock 1.7L heads, the heads and the case would have been fly-cut to allow for the larger diameter barrels. The only way to know for sure what the builder did (unless he provided you with documentation) is to pull a head and measure the barrel thickness.
Posted by: Dave_Darling Feb 7 2016, 12:13 PM
The case would not need to be cut, just the heads.
The 96es that fit in 1.7 heads are very thin at the top (2mm, I think) and don't tend to last that well. But they are quite useable for a while!
--DD
Posted by: Matty900 Feb 7 2016, 02:14 PM
The case would not need to be cut, just the heads.
The 96es that fit in 1.7 heads are very thin at the top (2mm, I think) and don't tend to last that well. But they are quite useable for a while!
--DD
Thanks Dave,
So I need to expect that at some point I will need to have some engine work. Does the engine grenade or will that case be reusable? Just replace the heads? I would think that the matching number engine would make it more a desirable car, but that may me already negated because of the work already done to it. I personally like the idea of more performance than the base 1.7 so for me I like it but I don’t know enough yet.
Posted by: euro911 Feb 7 2016, 03:13 PM
Dave is correct, the heads wouldn't require machining if the builder installed the 'slip-fit (thinner) 96mm barrels.
With these cars being as old as they are, and who knows how many POs, you never know what's been done to the motors (unless the PO can provide accurate/truthful details), or you pull it apart.
I wouldn't sweat it ... a 1911 will definitely test your skills in the twisties 
Being in my golden years, I'm more into fuel economy than muscle. A well-sorted FI 1.7L is in the cards for me. When my wife's '71 1.7L ('Howard') is finally finished, my hotrod 'BB' will be on the market.
Posted by: Matty900 Feb 9 2016, 10:46 PM
No rust just dirt
Attached thumbnail(s)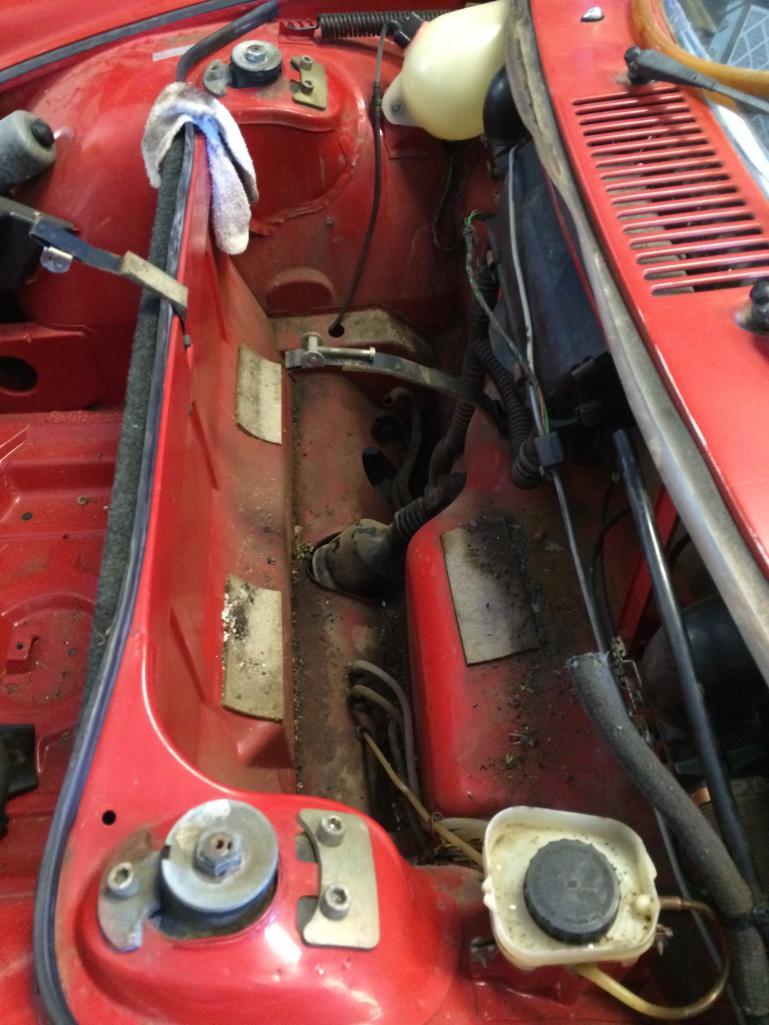
Posted by: Matty900 Feb 9 2016, 10:51 PM
I have a Restoration Design battery tray and support, thank you Mark (Mikey914) I know I need the tray, but do I need the support too?
Attached thumbnail(s)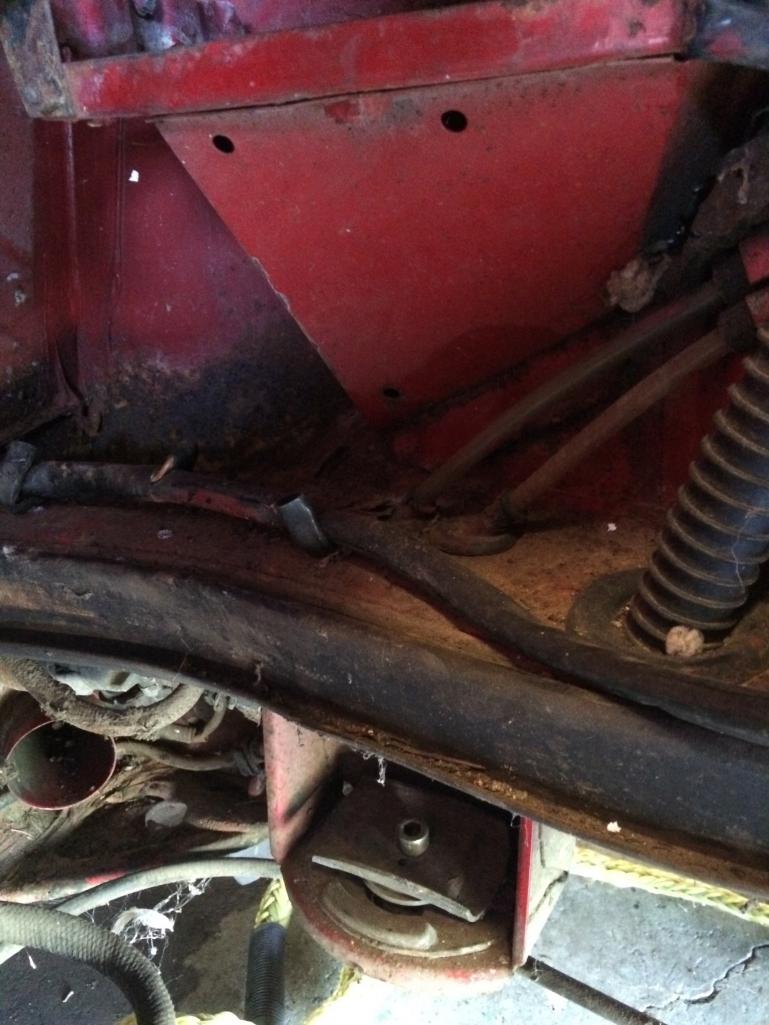
Posted by: Matty900 Feb 9 2016, 10:53 PM
Looking good.
Attached thumbnail(s)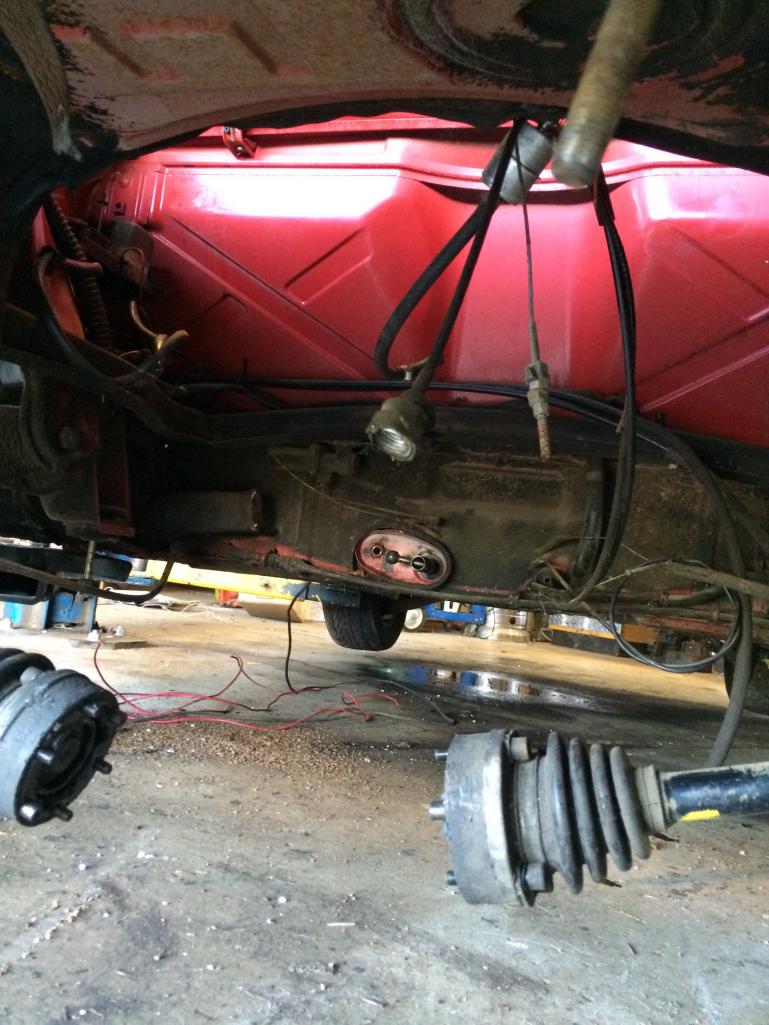
Posted by: Matty900 Feb 10 2016, 02:49 AM
Fun with 14's.
Nice catch,a '72,I even like the colour.
A great candidate for a total restoration,with no metalwork,a rare thing indeed.
Question about paint. It looks like the paint in the engine compartment is pretty good but the battery tray and some of the surface rust will need to be taken care of. That would you advise for touching up the rusted areas?
Posted by: veekry9 Feb 10 2016, 04:25 AM
https://www.youtube.com/watch?v=3O-Ol2OmZxg
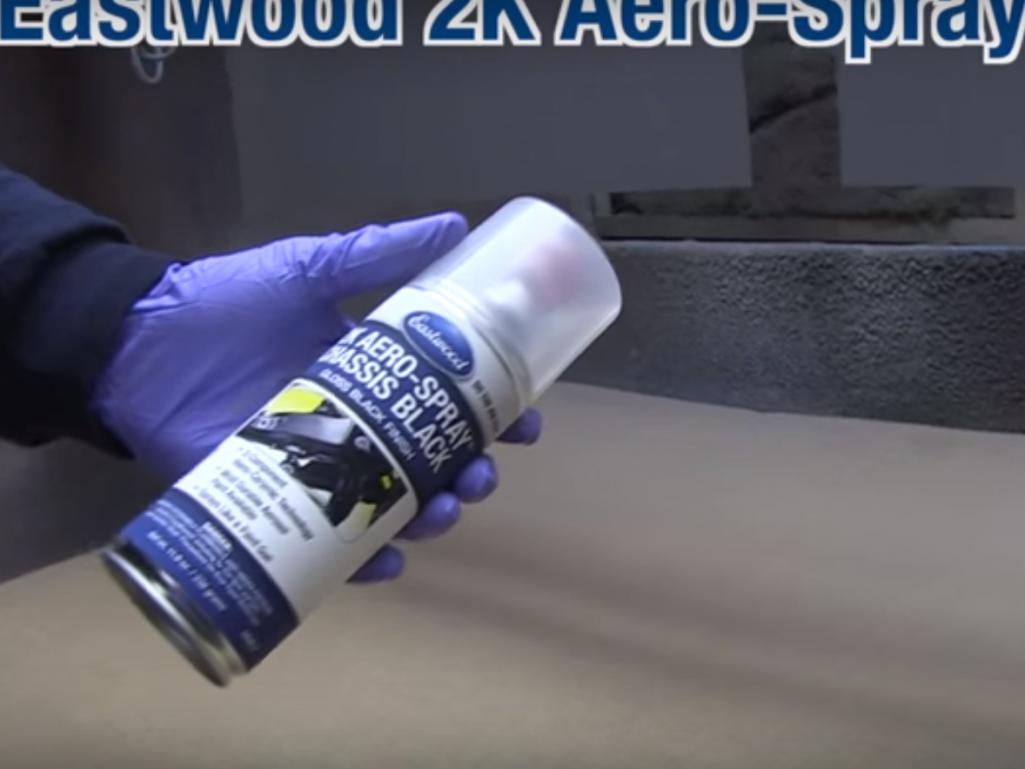
In your neck of the woods,a good choice in a one stop shopping trip is the Eastwood line of products.
Rust prepping,
rust neutralizing,
more prepping,
masking.
epoxy primer,
sanding,
masking,
more primer,
sanding,
masking,
color dusting,
color coating,
sanding,
buffing,
polishing,
gleaming.
A lot of work,you have to be prepared to be diligent in the details.
It's the why of automotive body and painting costs,a lot of work.
http://www.eastwood.com/paints/2k-aero-spray-paints.html
https://www.google.ca/webhp?sourceid=chrome-instant&ion=1&espv=2&ie=UTF-8#q=automotive+body+repair+paint+supply+oregon
Did I mention sanding?
First.
Try out your skills on a old rusted fender,2 square yards.
If you can,with the labor you supply,bring it back to a finish that everyone says is beautiful,why then proceed with the 914.
Posted by: Mikey914 Feb 10 2016, 09:32 AM
Told him to try cleaning with simple green 1st. There is a steam cleaner so that will help. See what you have before you make too many plans. It may mostly clean up nice, but I'm thinking the about of work needed is minimal . It looked pretty solid.
Posted by: Dave_Darling Feb 10 2016, 06:13 PM
If you're talking about the failure mode from thin barrels, then I would guess that the most likely one is that you start getting combustion gases blowing out around the seal there, burning away part of the head and part of the cylinder. Unlikely to affect the bottom end, but sometimes stuff does happen.
--DD
Posted by: Matty900 Feb 11 2016, 01:44 AM
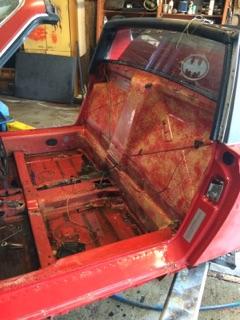
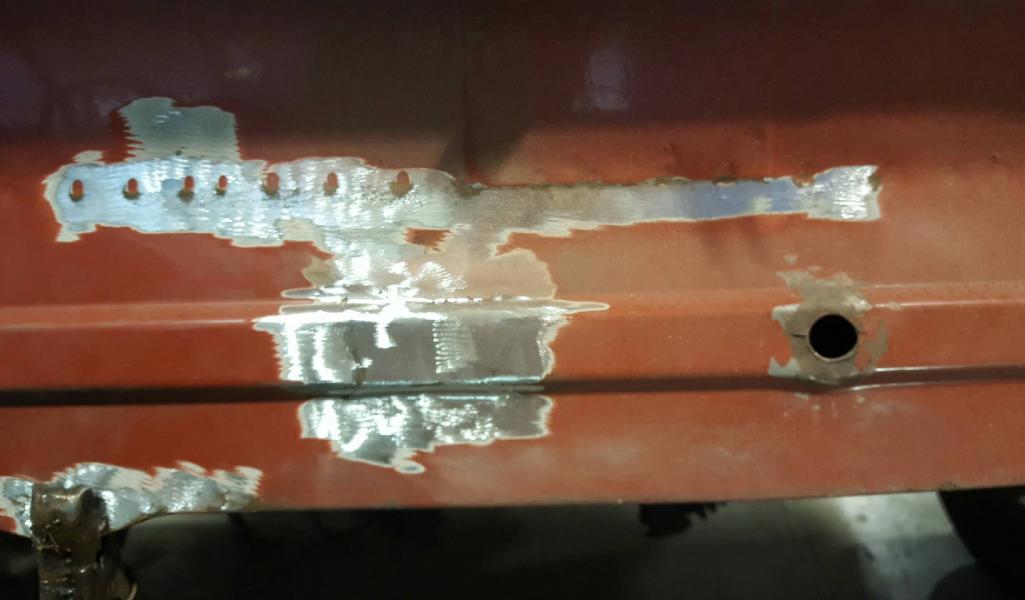
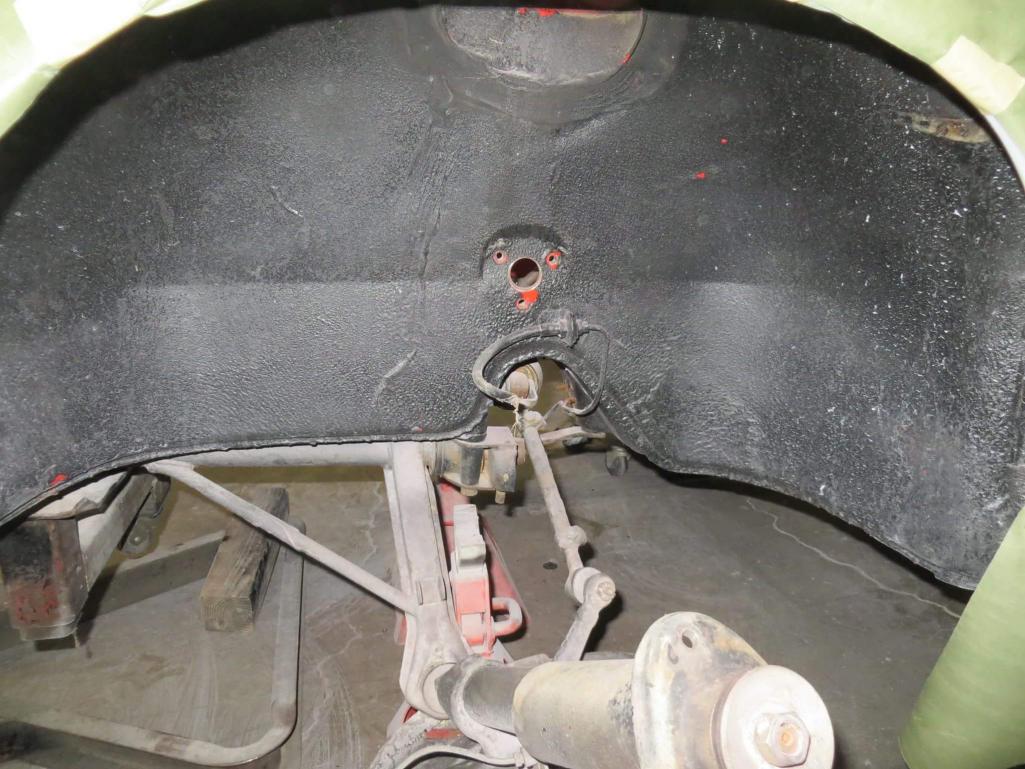
I was able to get a better look at the car today. It really is pretty solid. I did get some better pictures of it and in looking at the hell hole, I can see that the rust has go all the way through the metal in some pin holes.
Attached thumbnail(s)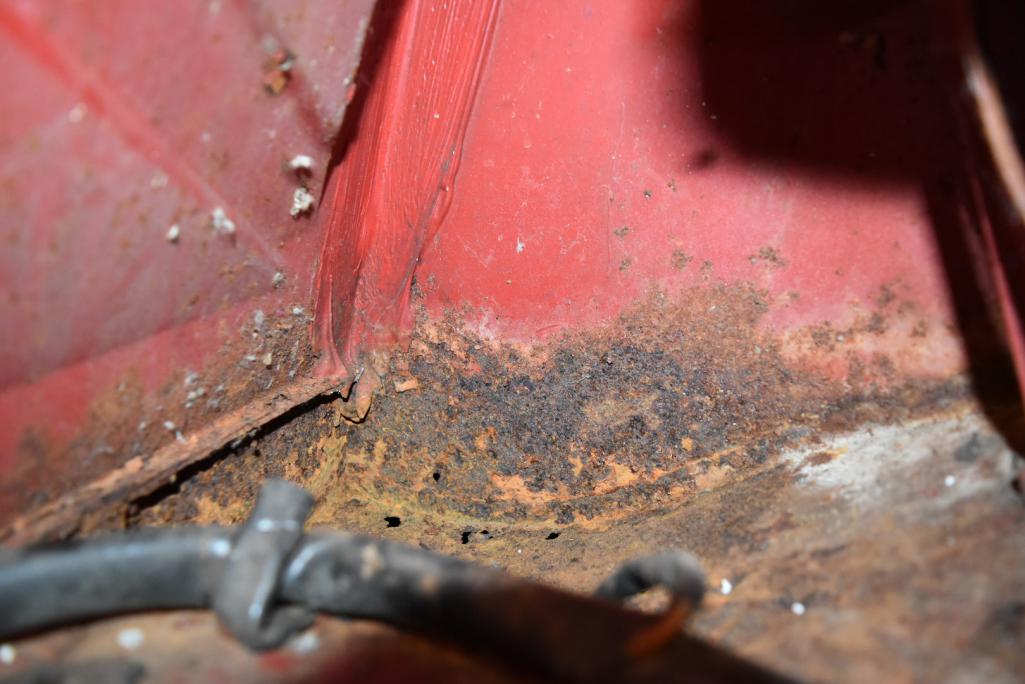
Posted by: Matty900 Feb 11 2016, 01:48 AM
I am not sure what rust issues I may have inside the longs.hopefully it is not too bad under the rocker pannels
Attached thumbnail(s)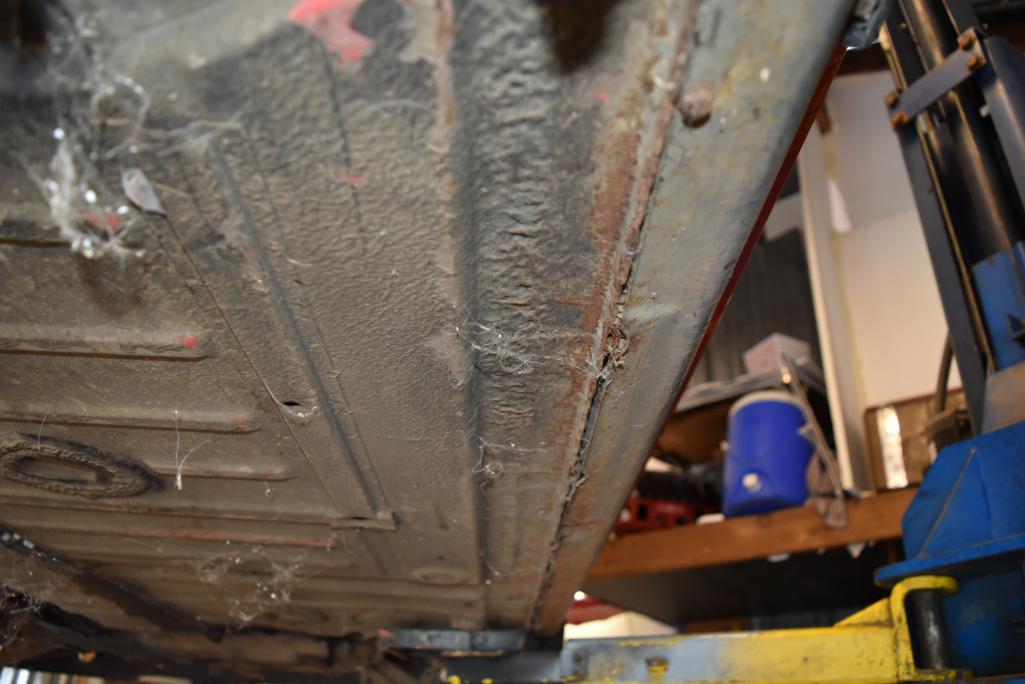
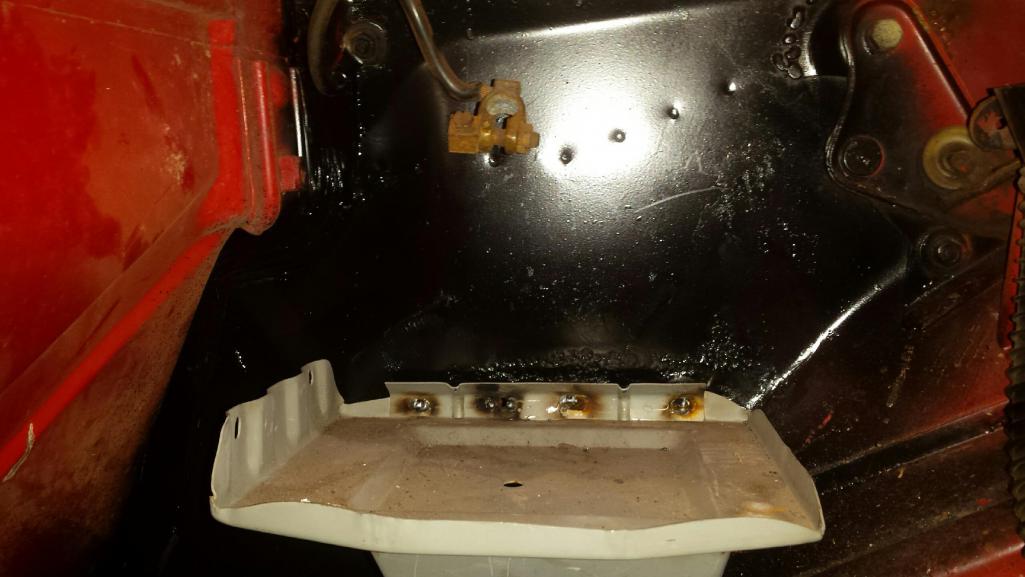
Posted by: Matty900 Feb 11 2016, 01:51 AM
Took off the rocker pannels and there was lots of dirt. (Thankfully very dry dirt) the rest looks great
Attached thumbnail(s)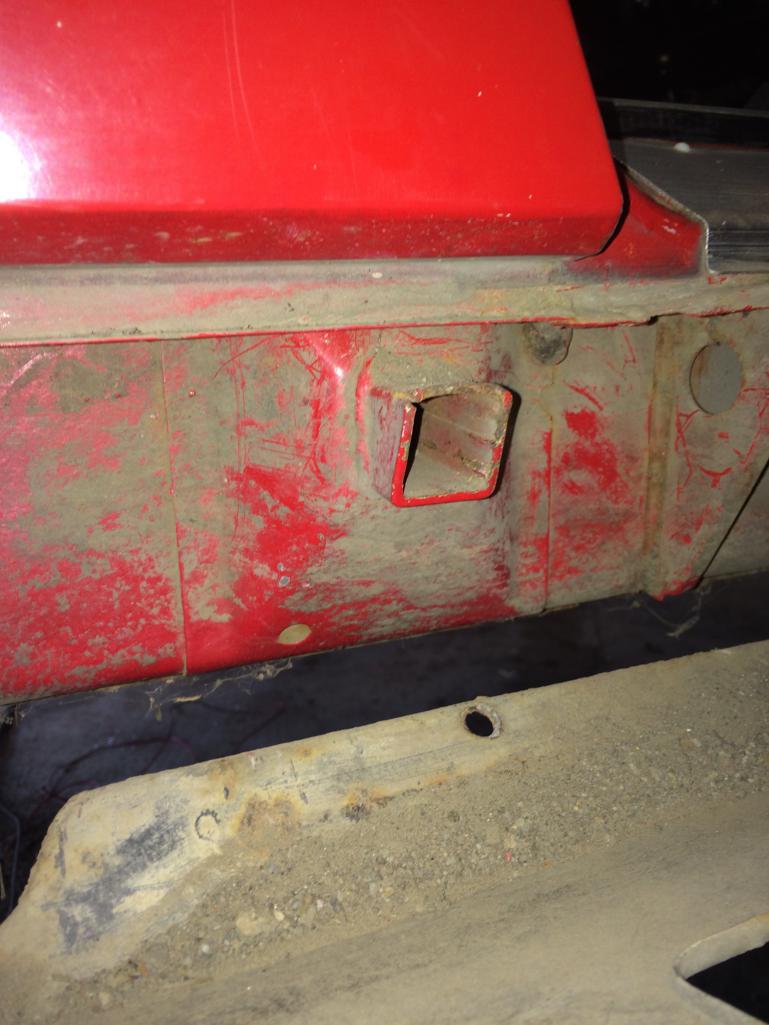
Attached image(s)
Posted by: Matty900 Feb 11 2016, 10:14 PM
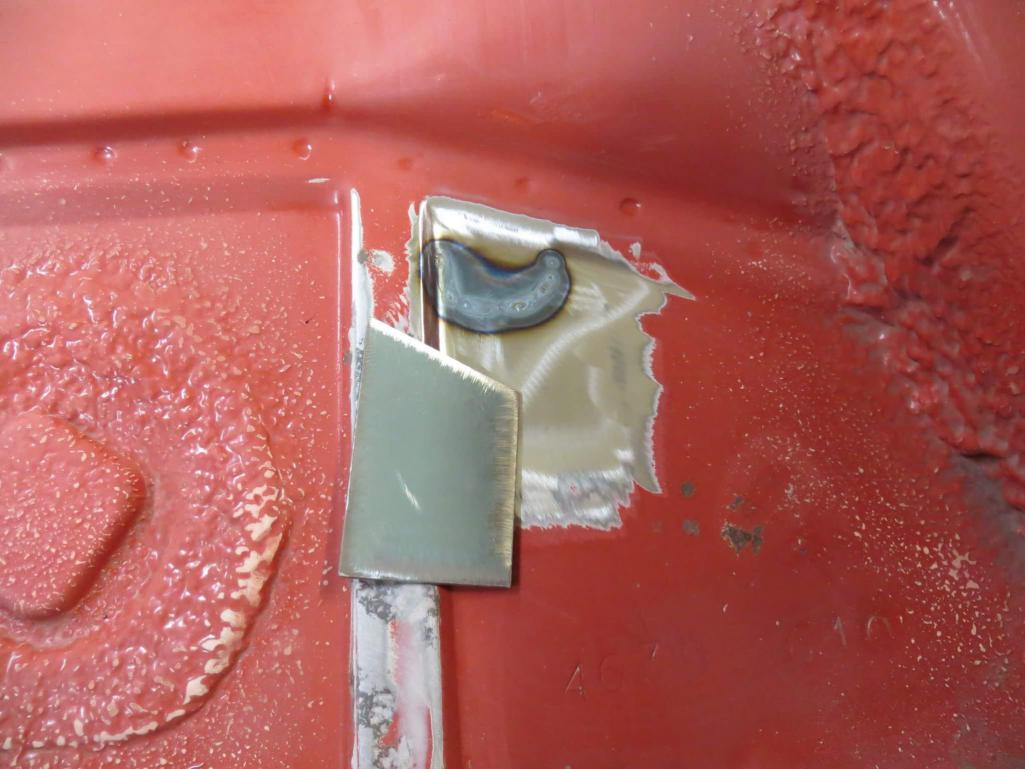
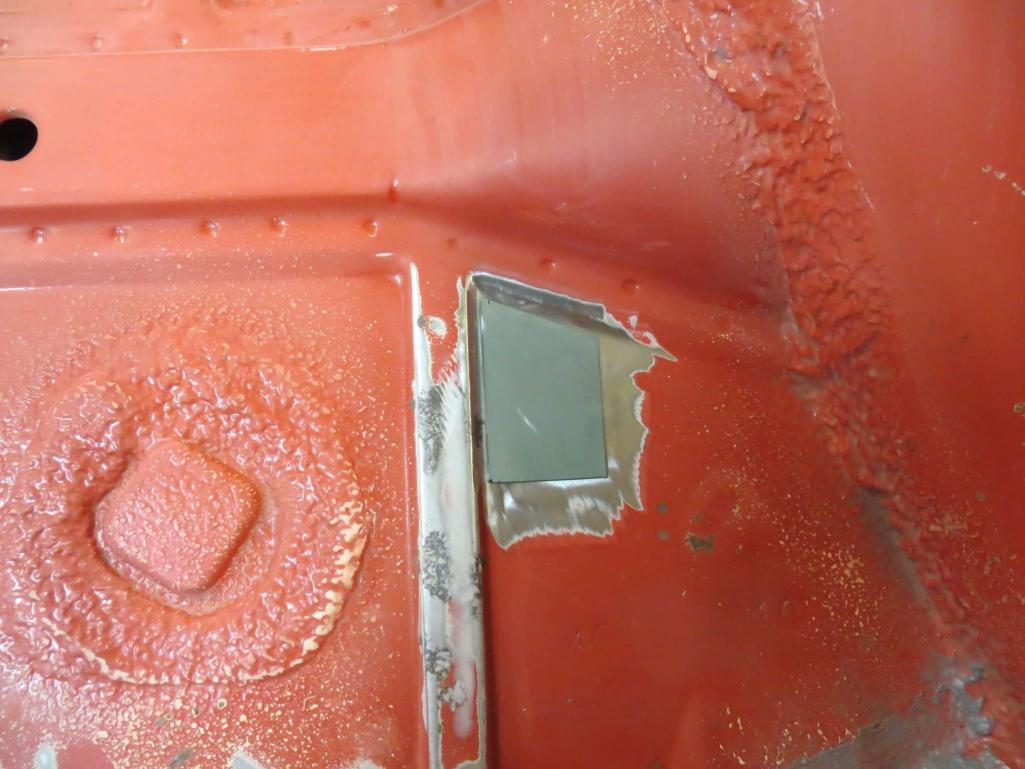
What is the best way to take care of this level of rust in the hell hole? Who do you prefer to get the metal from, or do you just make your own patch for this?
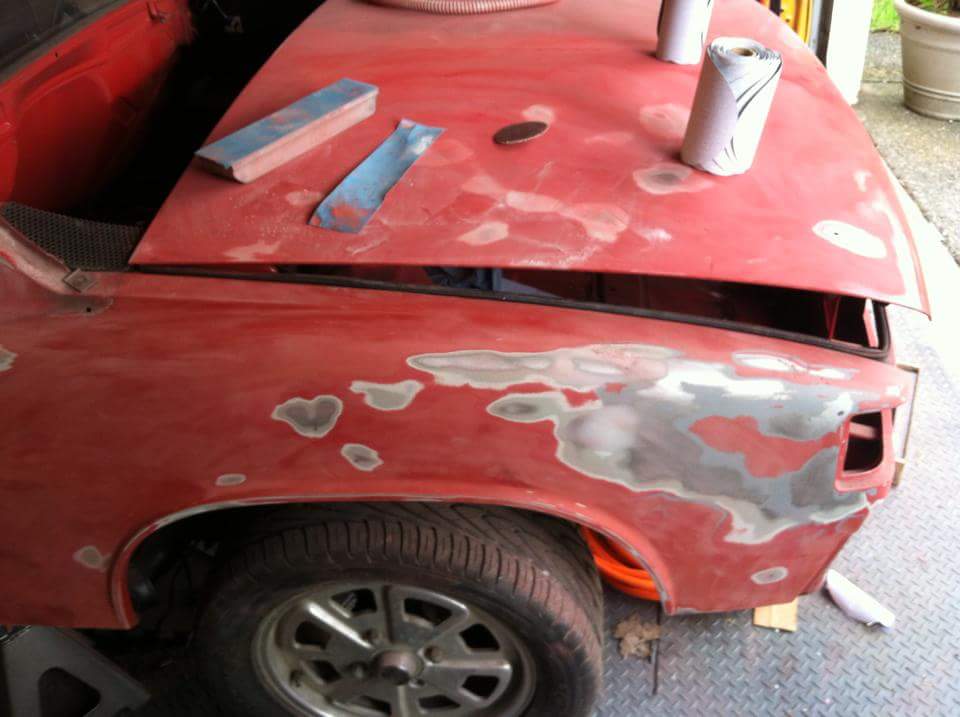
Posted by: Matty900 Feb 18 2016, 12:57 AM
Decided to go ahead and fix the damaged fender and minor dings aroundthe body and paint the car. So I guess this is project thread now.
Attached thumbnail(s)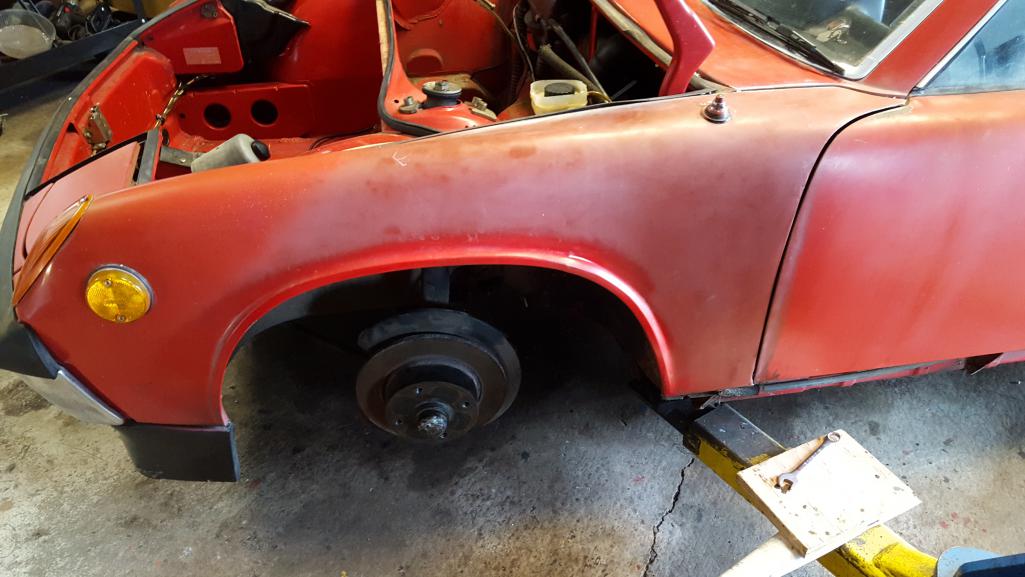
Posted by: Matty900 Feb 18 2016, 01:01 AM
Everything is coming apart nicely.
Attached thumbnail(s)
Attached image(s)
Posted by: Matty900 Feb 18 2016, 01:08 AM
Getting ready to steam clean everything.
Attached thumbnail(s)
Attached image(s)
Posted by: Matty900 Feb 18 2016, 01:17 AM
Very nice red breaks. I guess there was some leftover in the can after the fender. Sent these off to Eric at PMB. Will be replacing breaks, bearings and suspension all the way around.
Now I just need to find a factory front swaybar. Anyone have one they are willing to part with?
Attached thumbnail(s)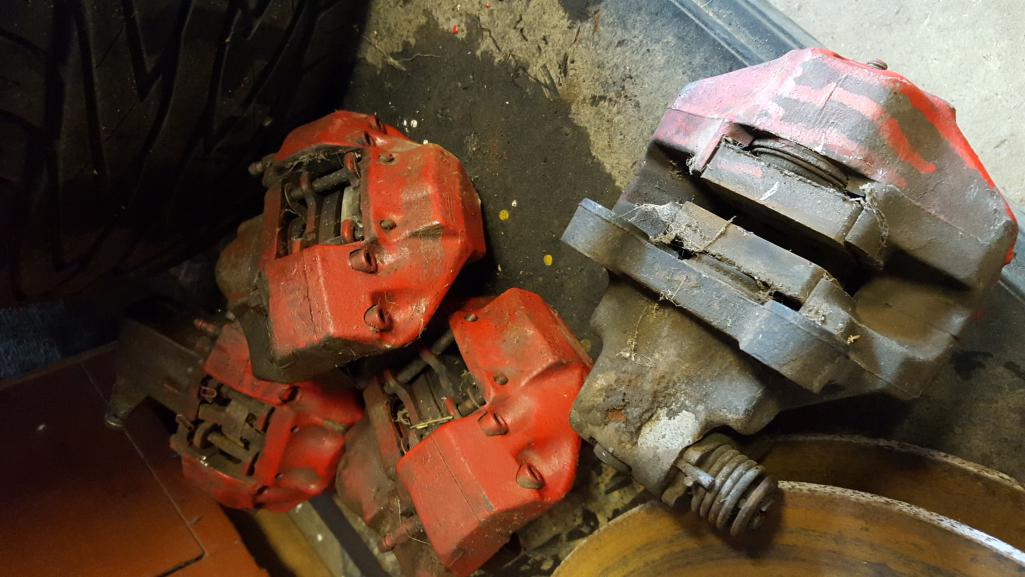
Posted by: Matty900 Feb 18 2016, 04:51 PM
Steam cleaning today
Attached image(s)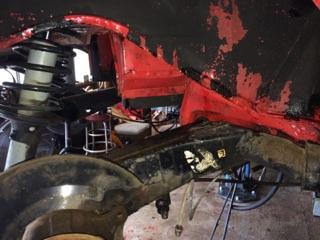
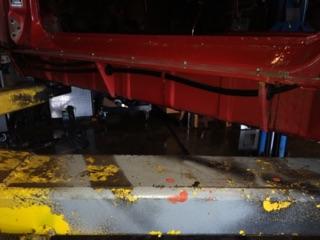
Posted by: Matty900 Feb 18 2016, 10:47 PM
Few more photos from today
Attached thumbnail(s)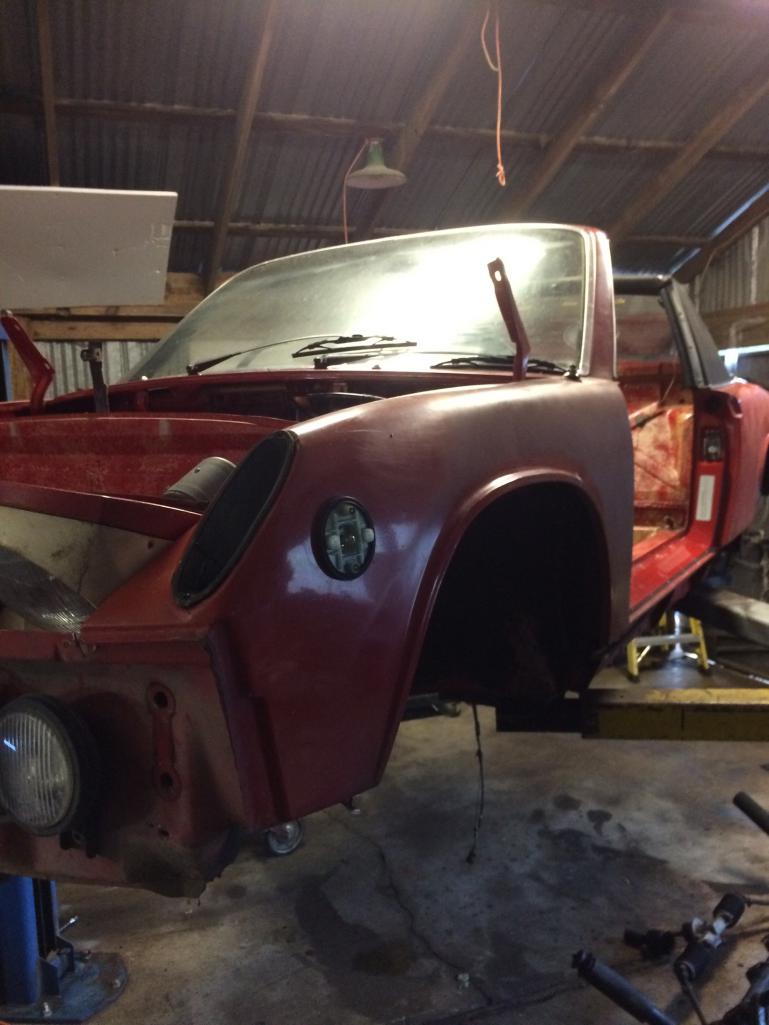
Attached image(s)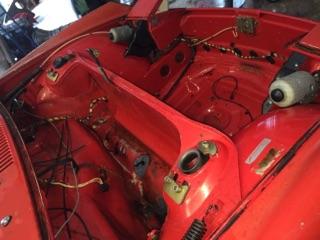
Posted by: Krieger Feb 19 2016, 12:04 AM
Nice find! Add the Vin to our data base.
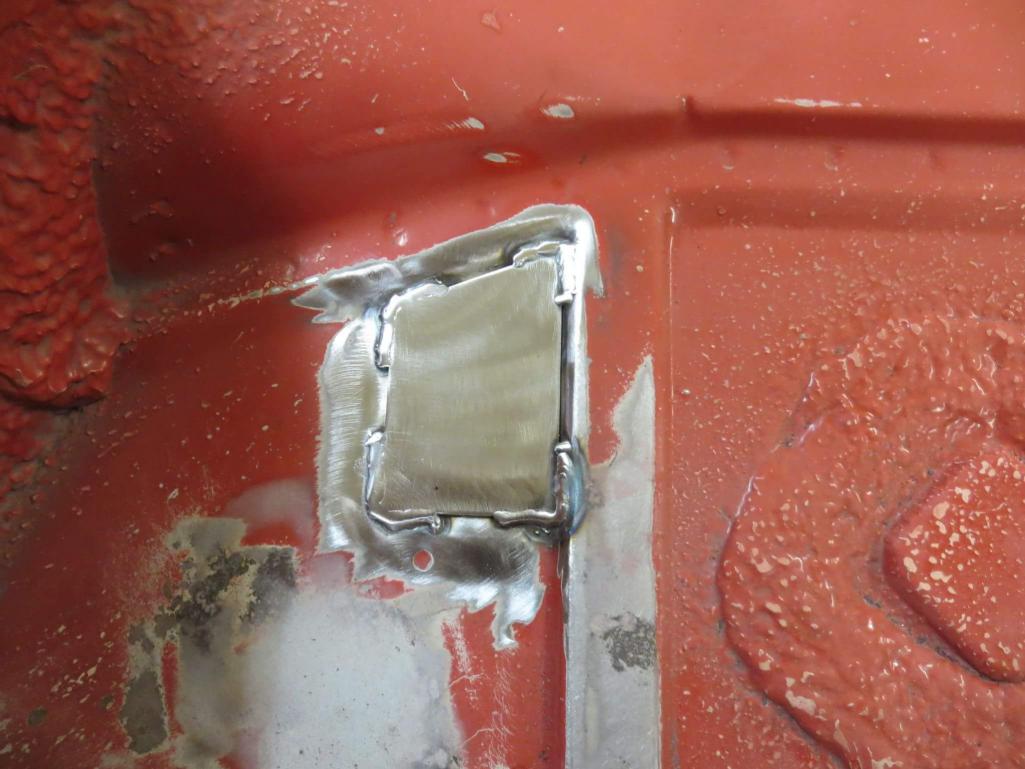
Posted by: Matty900 Mar 8 2016, 08:41 PM
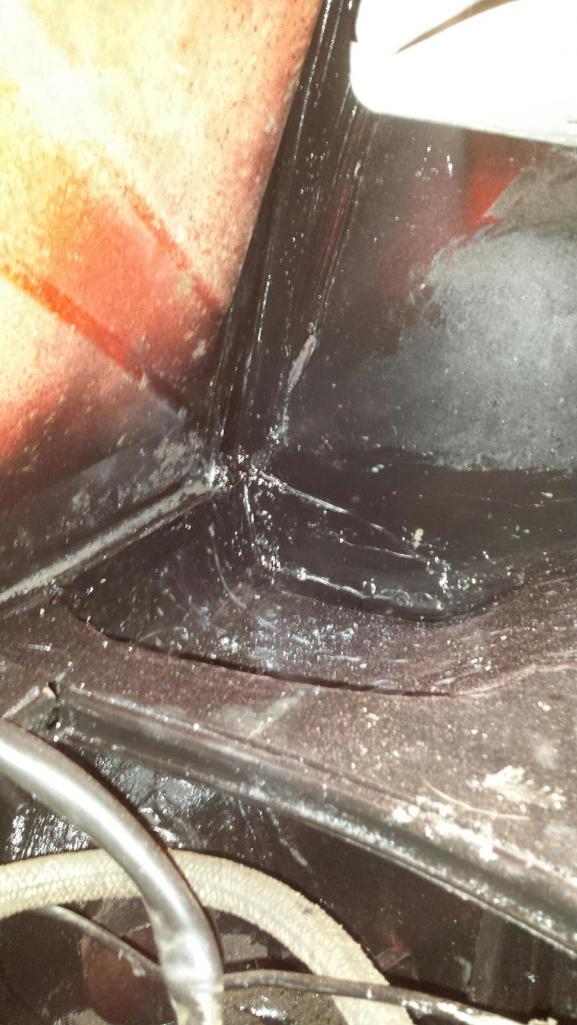
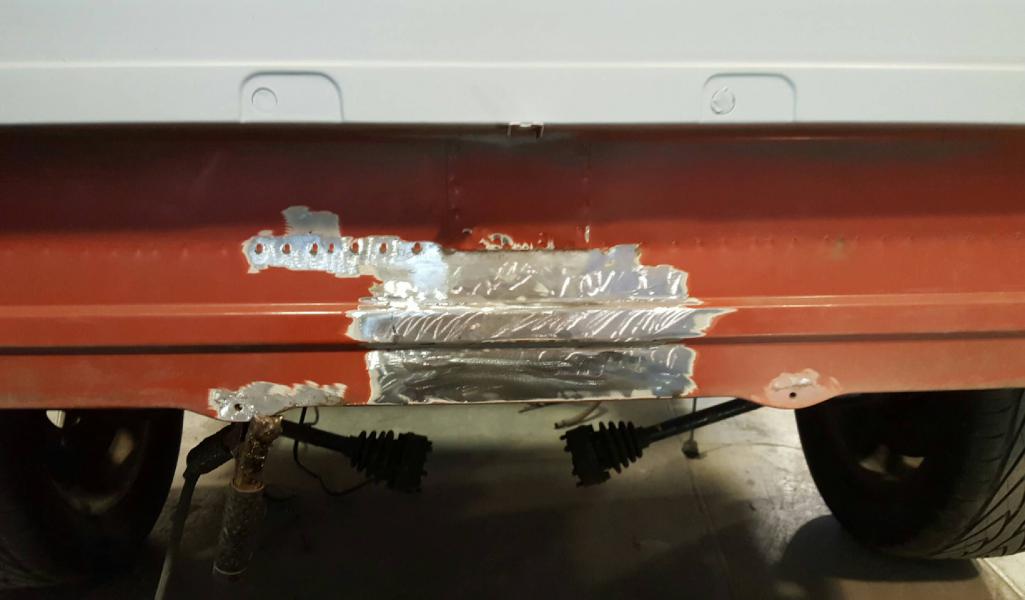
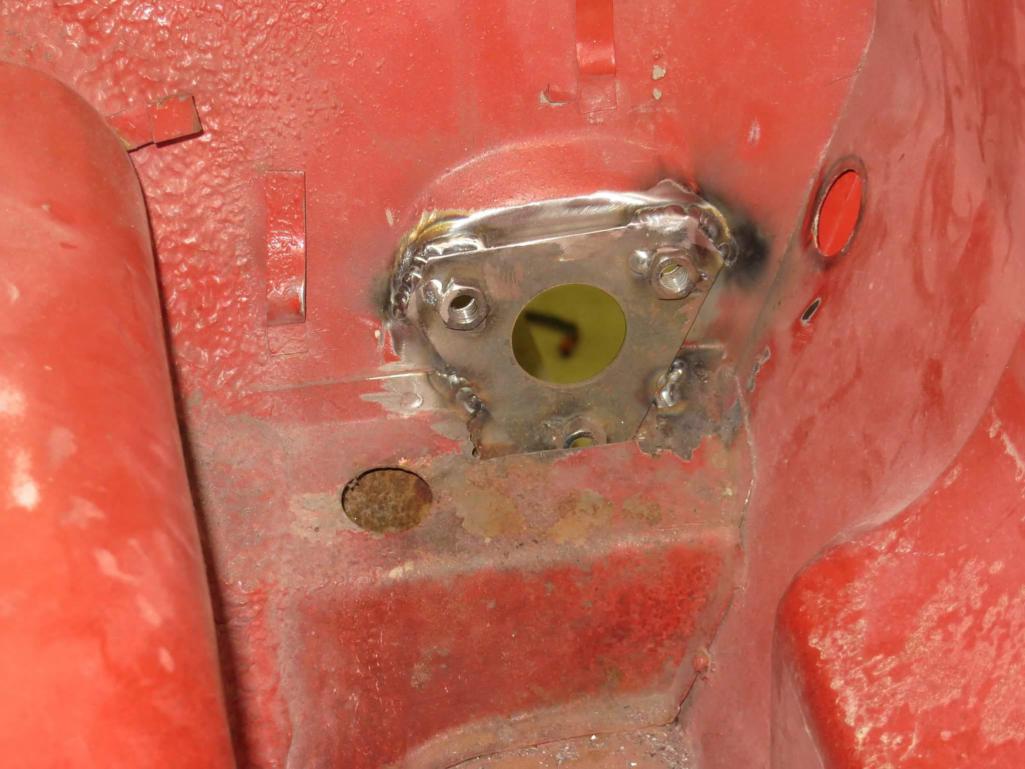
Hell hole fixed!
Attached thumbnail(s)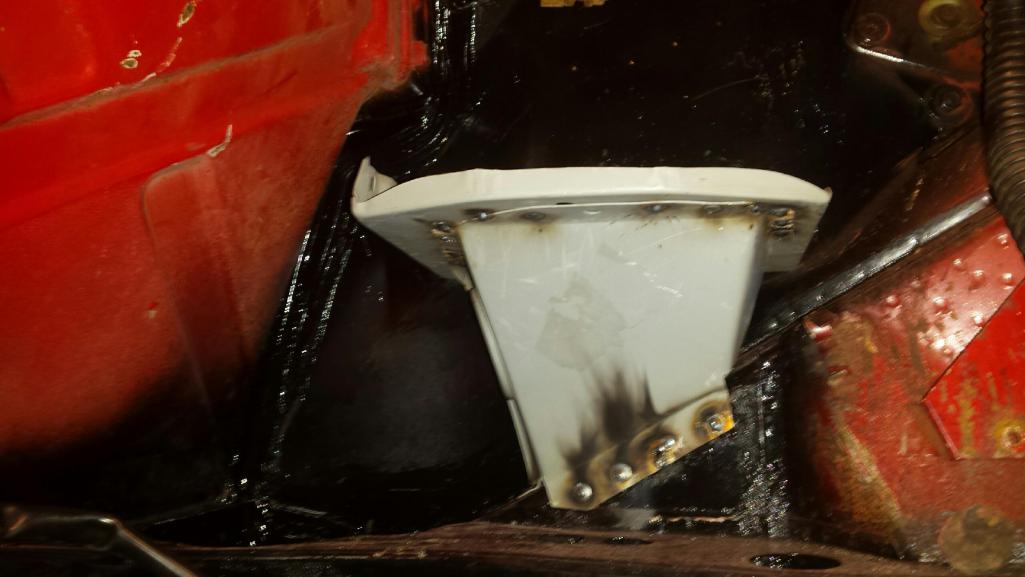
Posted by: cwpeden Mar 8 2016, 10:26 PM
Nice progress, looks like you have a mix of long and short wheel bolts. If you run the fuchs make sure to find a full set of long bolts.
Posted by: hot_shoe914 Mar 9 2016, 08:57 PM
I'll never understand how people find these cars...
I am considering buying a 75 garage find with only 23K miles on it.
Posted by: Hank914 Mar 9 2016, 10:34 PM
I'll never understand how people find these cars...
I am considering buying a 75 garage find with only 23K miles on it.
Good for you!
I'd rather have a car that has 123,000 on the odo, but was warm, dry, and driven every year for 42 years. That is much better than a car driven 23k in 3 years, and then stored outside for 40 years in the rain.
What's the history on that 75 garage find with 23k?
Posted by: Mikey914 Mar 10 2016, 01:20 AM
Hell hole fixed!Get some paint shot in there before you put it all back together. You can always re do it later, but it's not that hard to do in an engine compartment.
Posted by: Matty900 Mar 26 2016, 07:15 PM
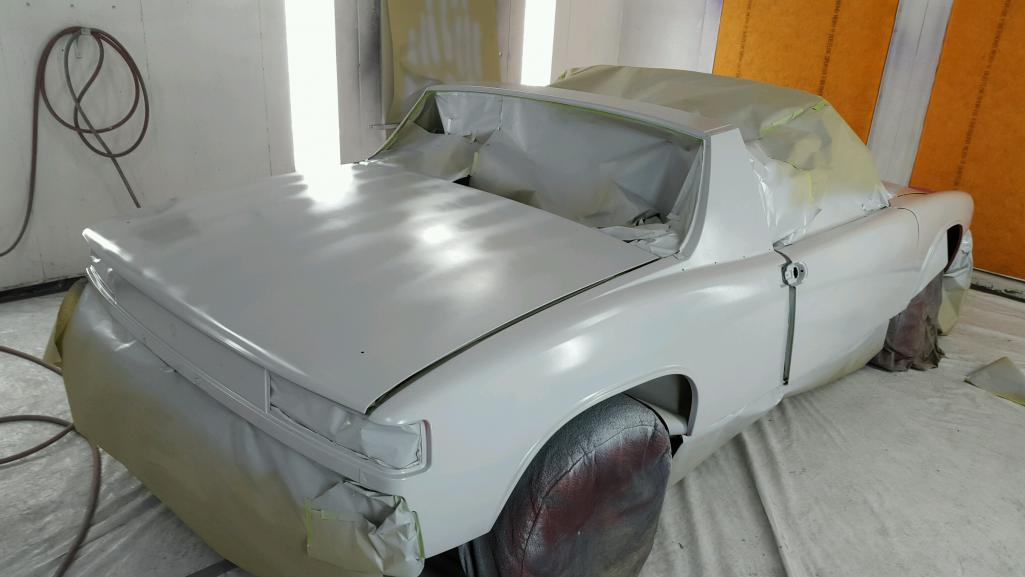
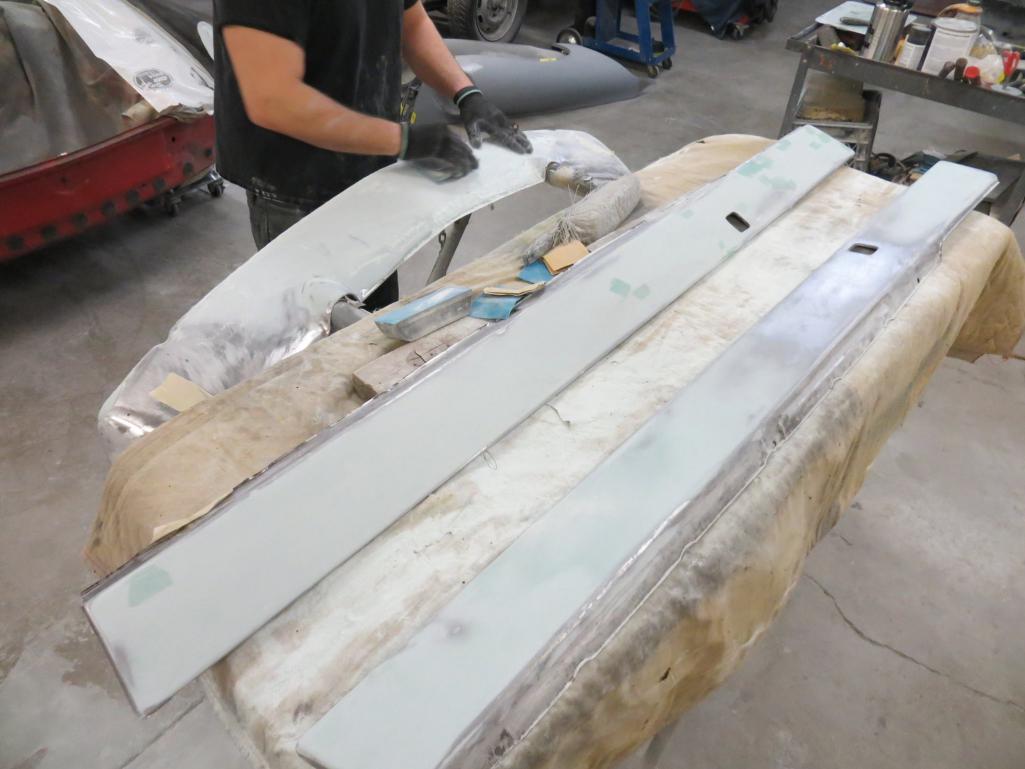
Coming and going. Got the 72 home to complete the body work and prep for paint. Lucas has been busy this week with with the DA sander, stud welder and dent puller.
Sent the wide body out to fix the wheel spacer issue and bent trailing arm. May be able to get both cars to West Coast Rally
Attached thumbnail(s)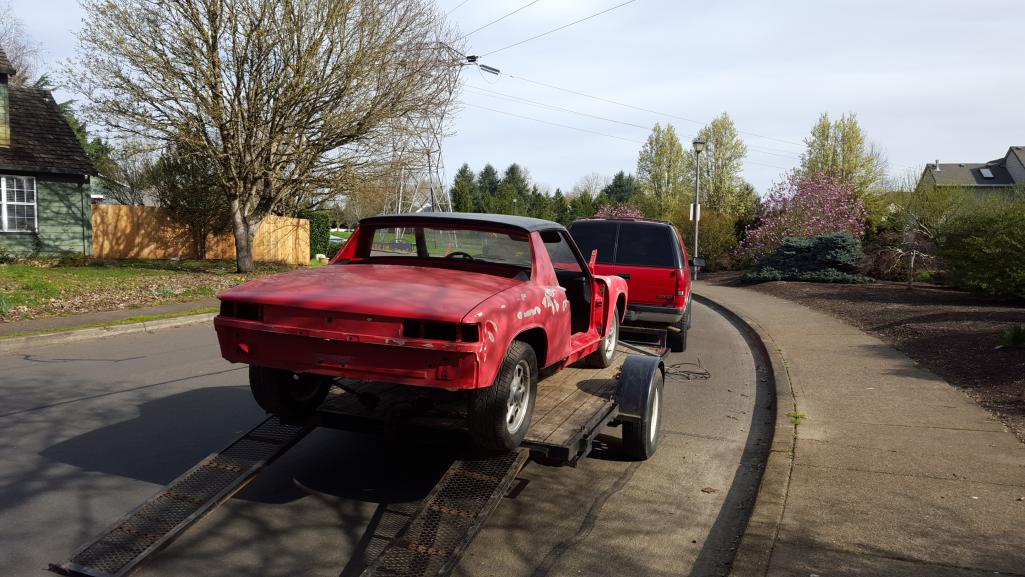

Posted by: Mr.Nobody Mar 26 2016, 09:25 PM
My car came off the line 15 cars after yours!
Posted by: Matty900 Apr 14 2016, 12:33 AM
Have not had much time lately to post progress on the car. Repairs made to the minor rust in the hood seal channel.
Attached thumbnail(s)
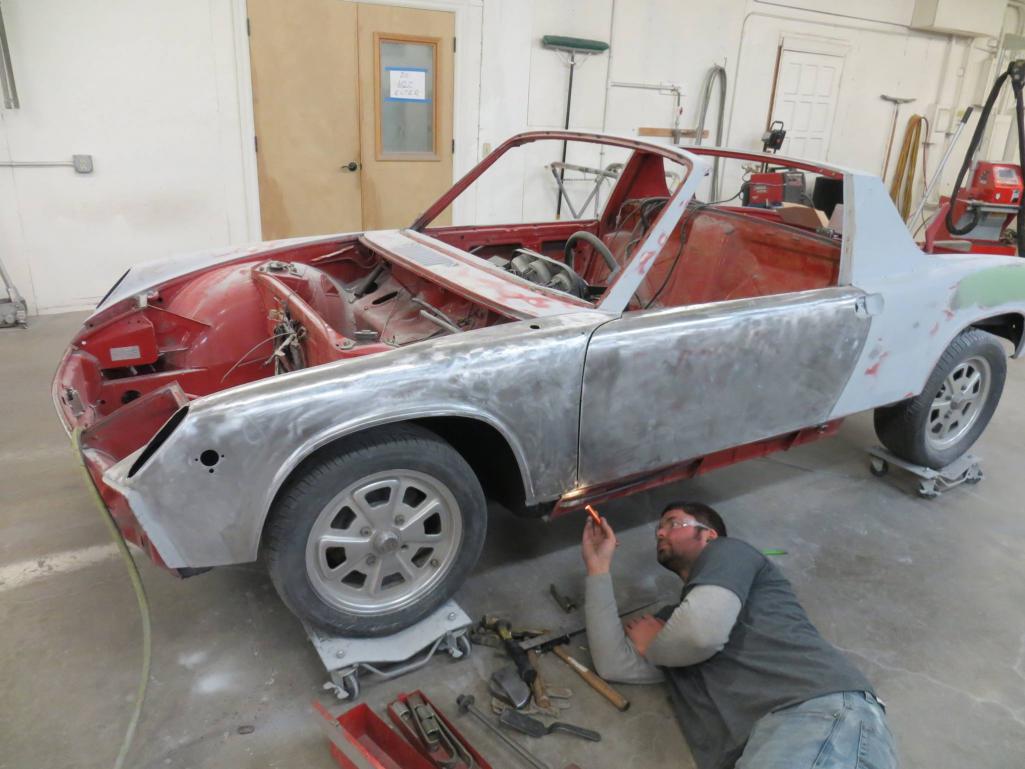
Posted by: Matty900 Apr 14 2016, 12:39 AM
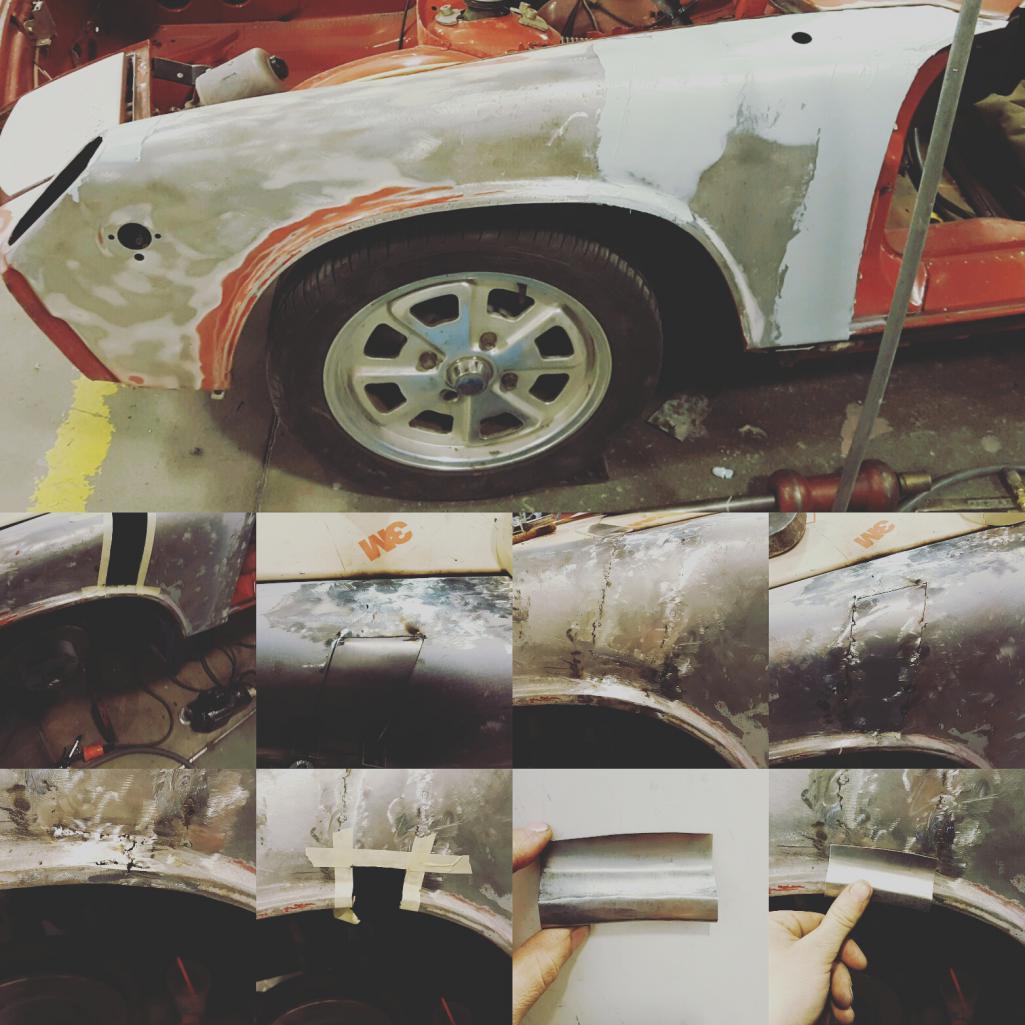
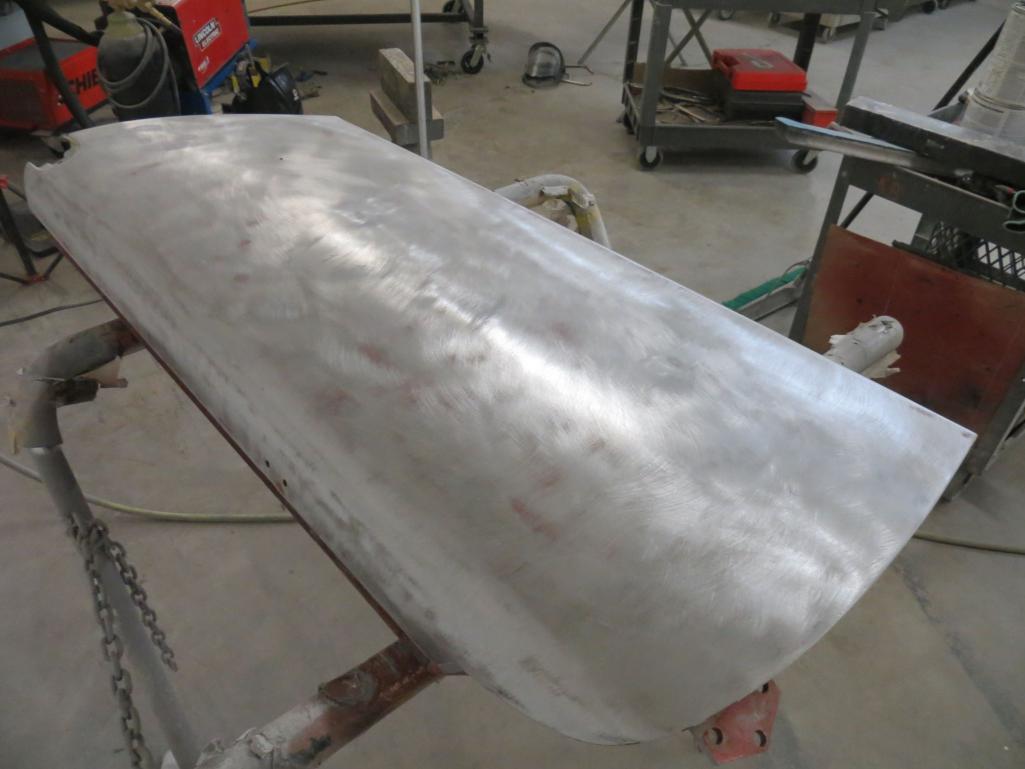
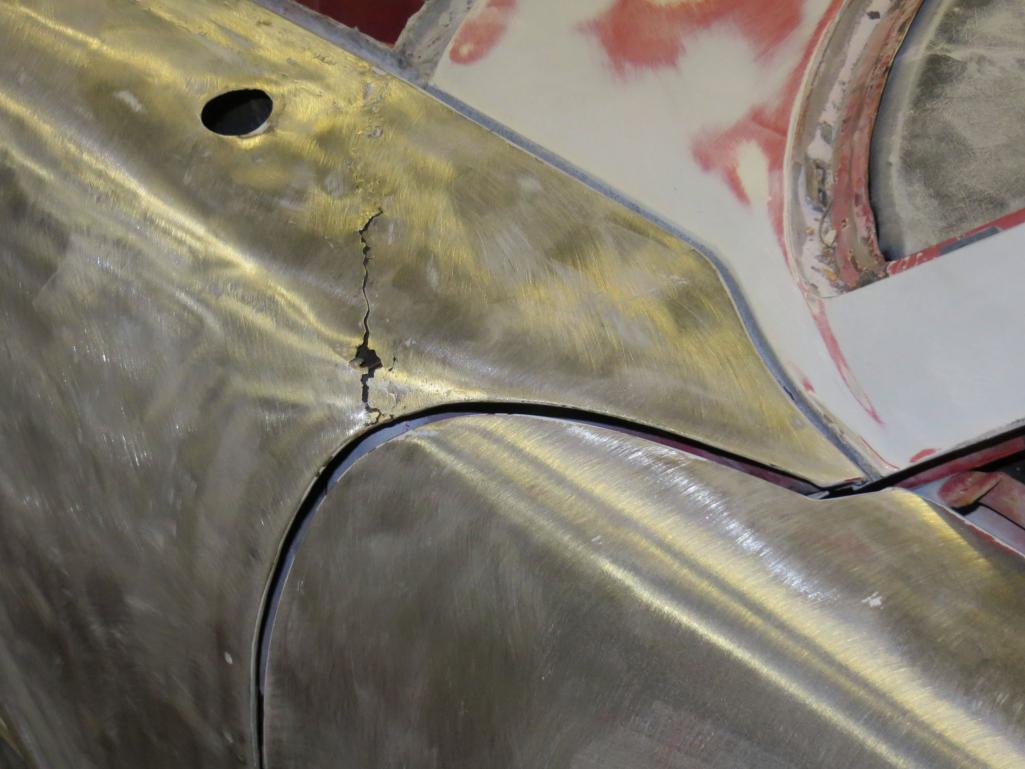
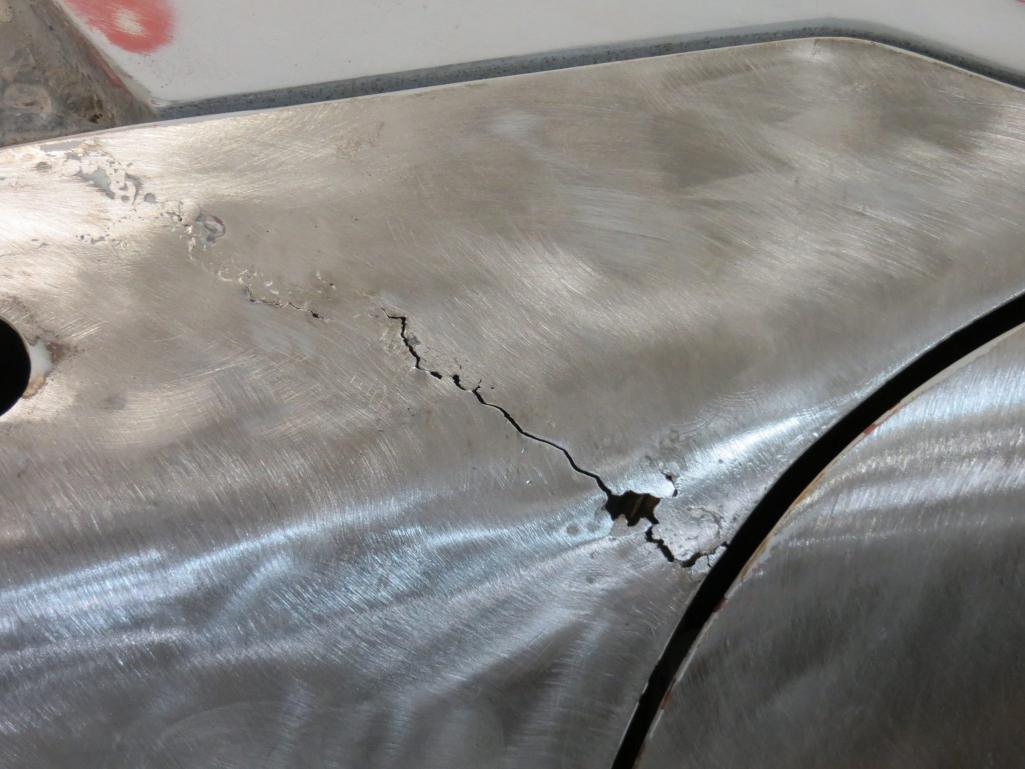
Driver's side fender had some issues after the bearings froze from sitting so long, and the wheel came off and split the fender. It had been repaired but needed a little help.
Attached thumbnail(s)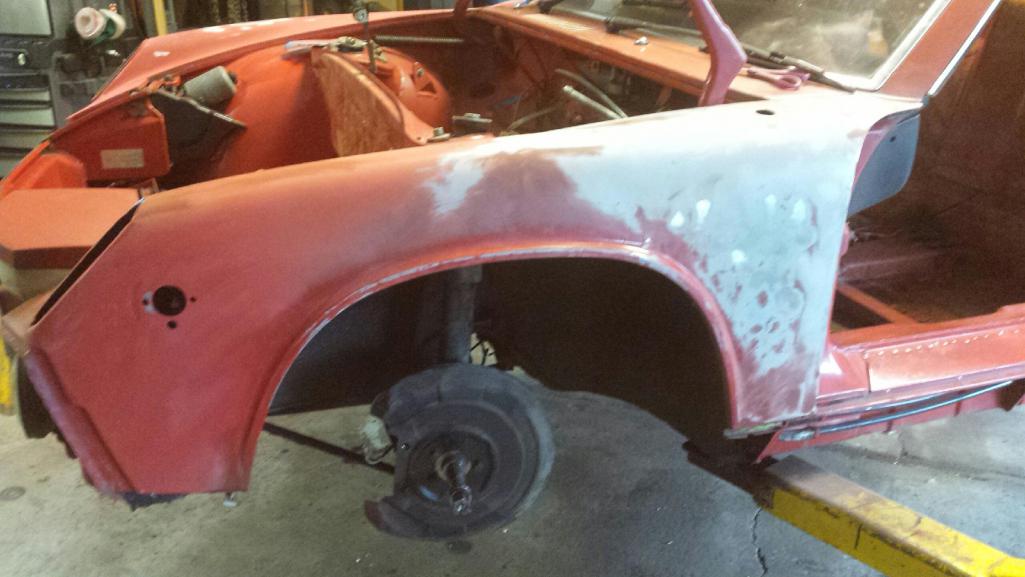

Posted by: Matty900 Apr 14 2016, 12:45 AM
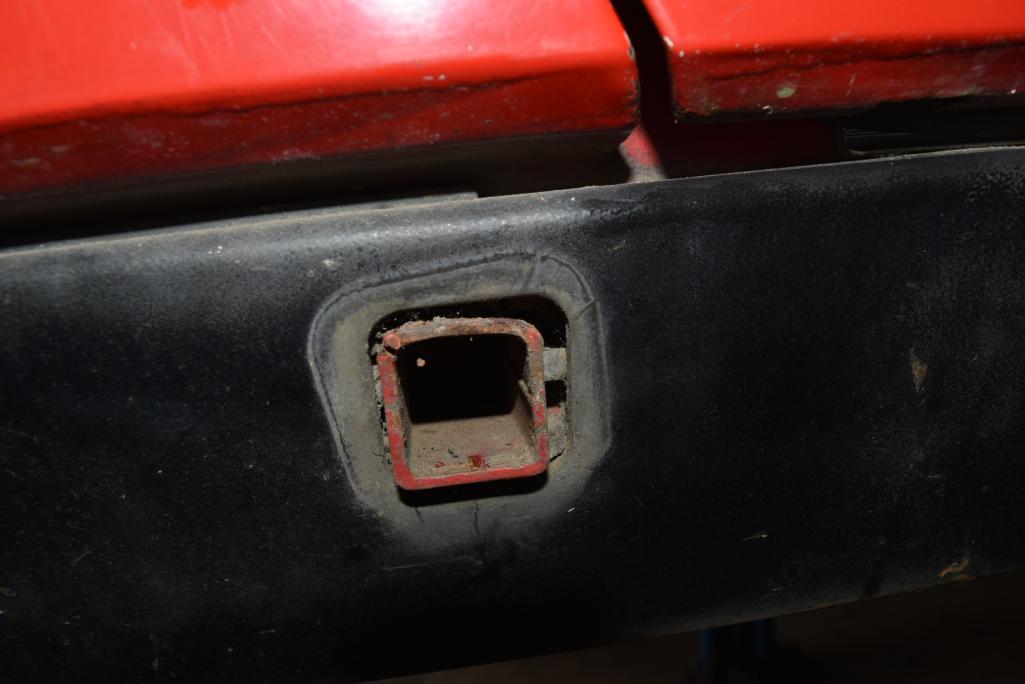
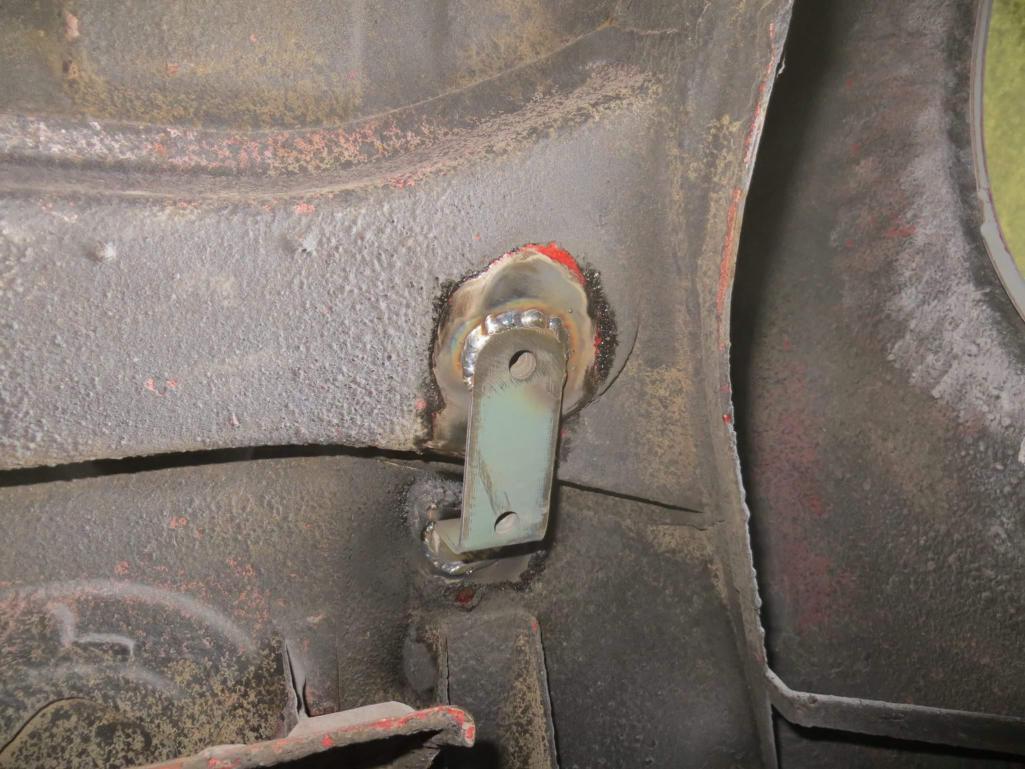
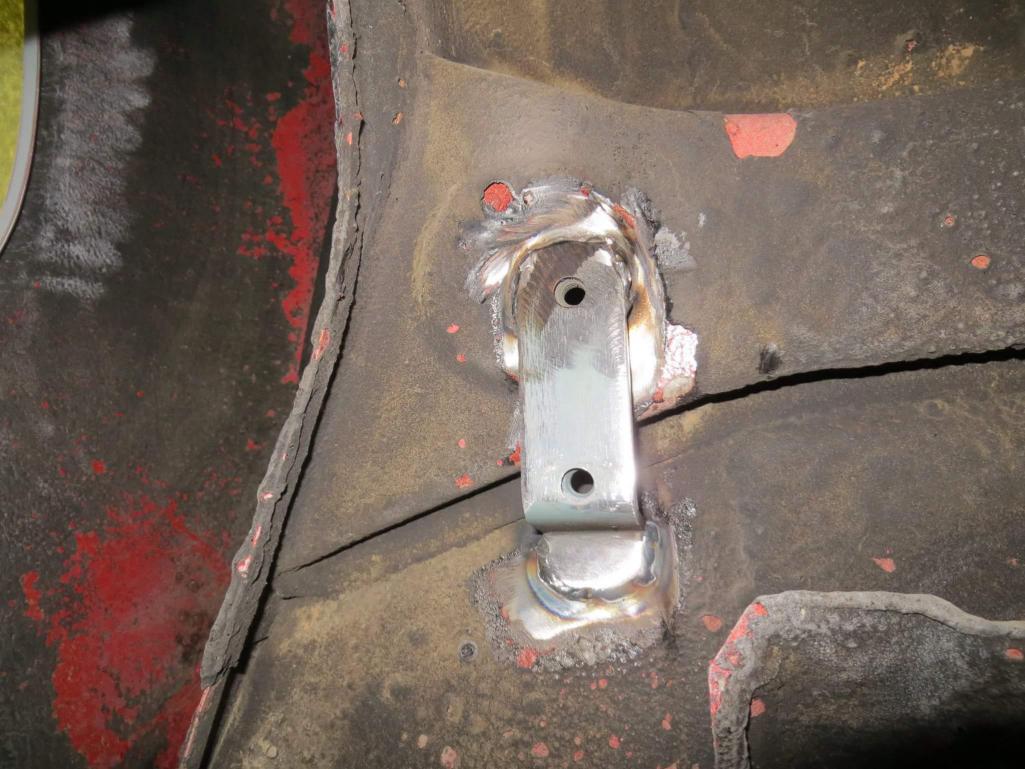
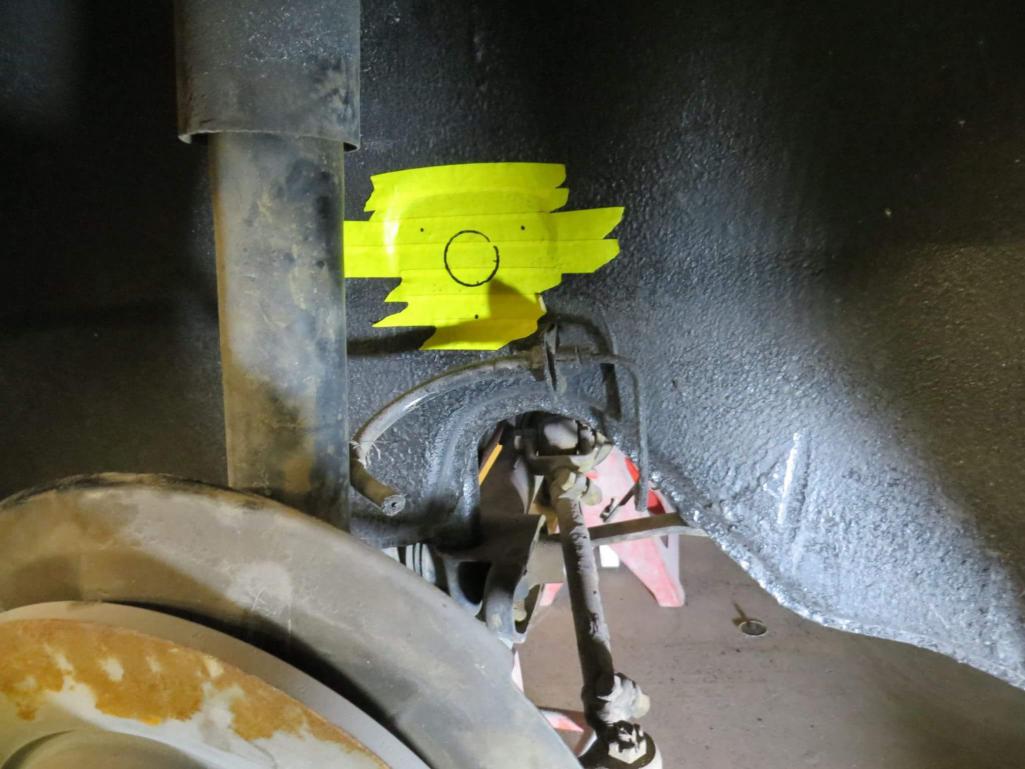
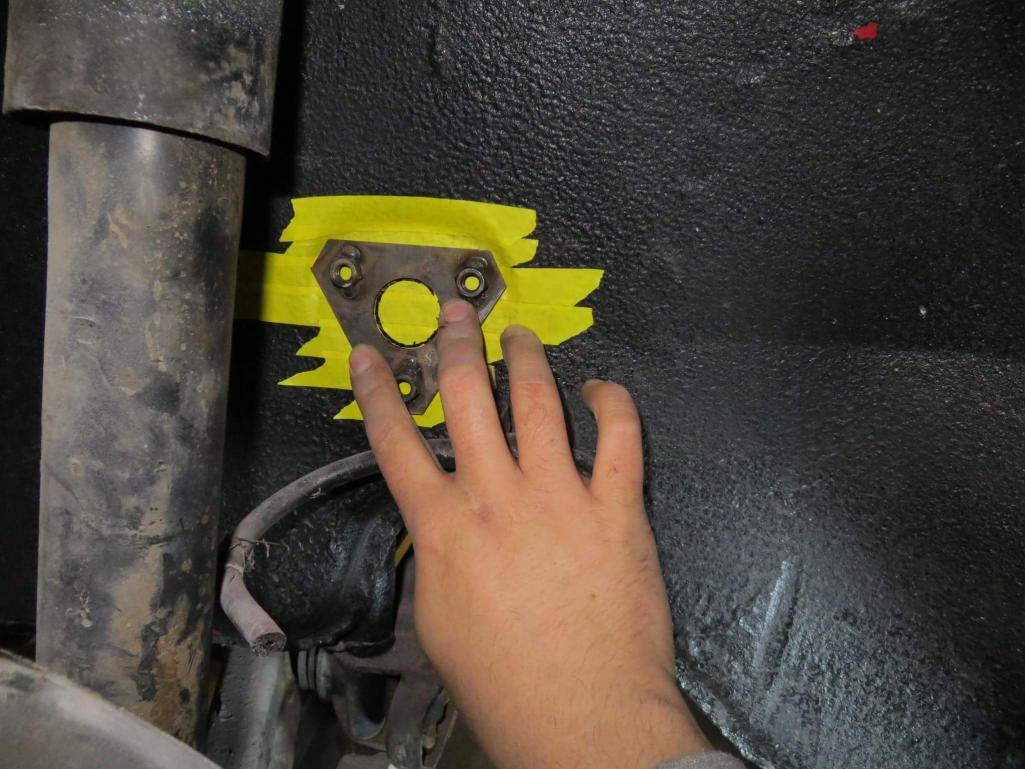
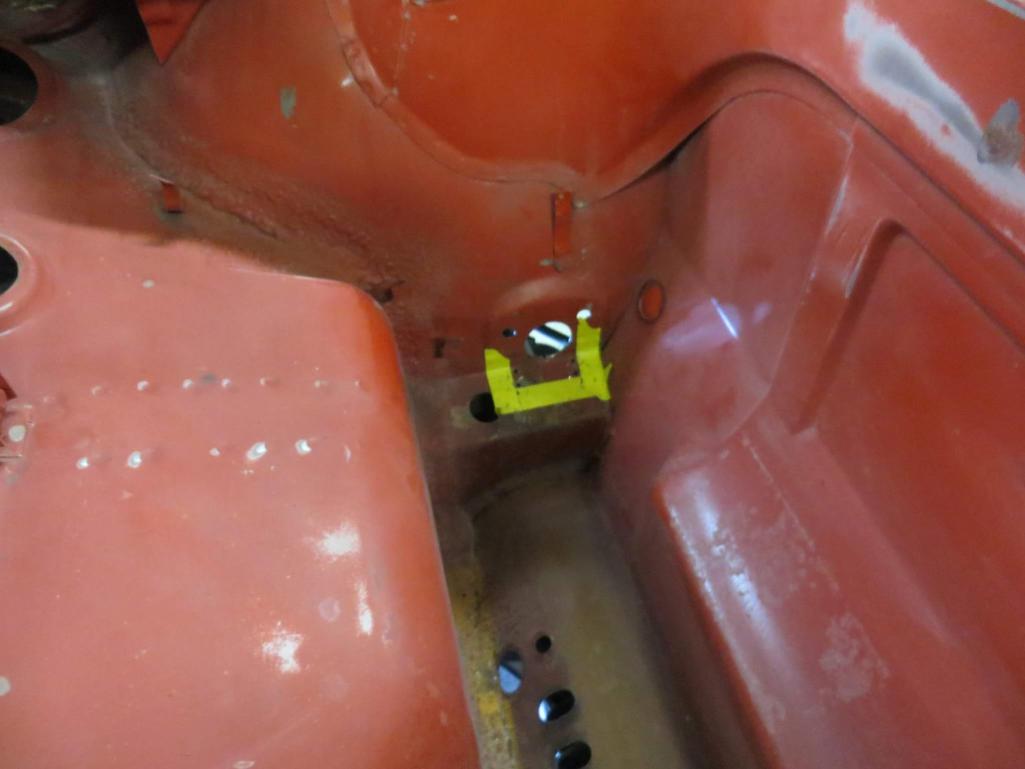
Someone had drilled a few holes in behind the bumper for something. Tow hitch? 
Attached thumbnail(s)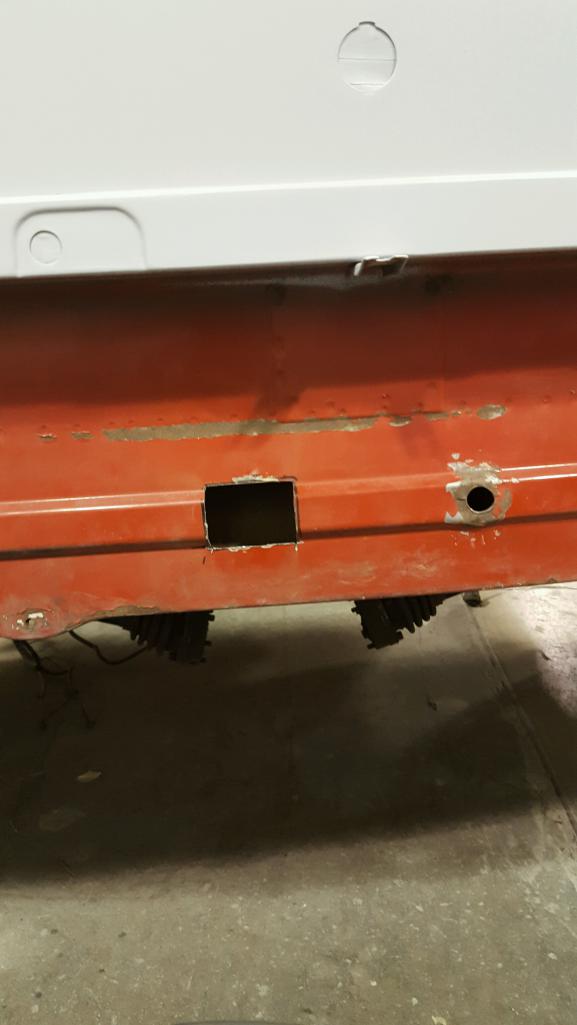
Attached image(s)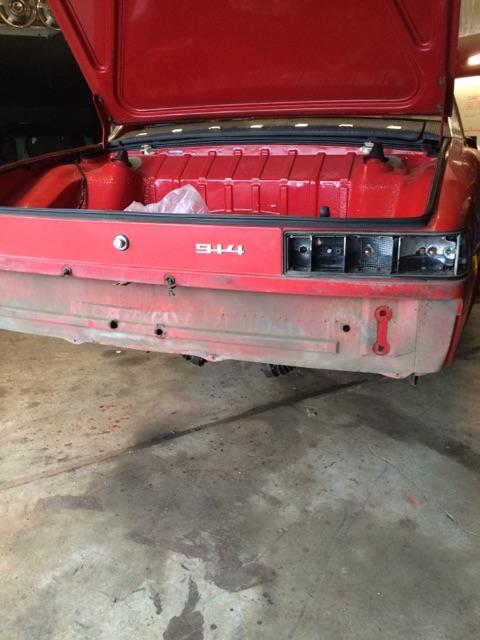
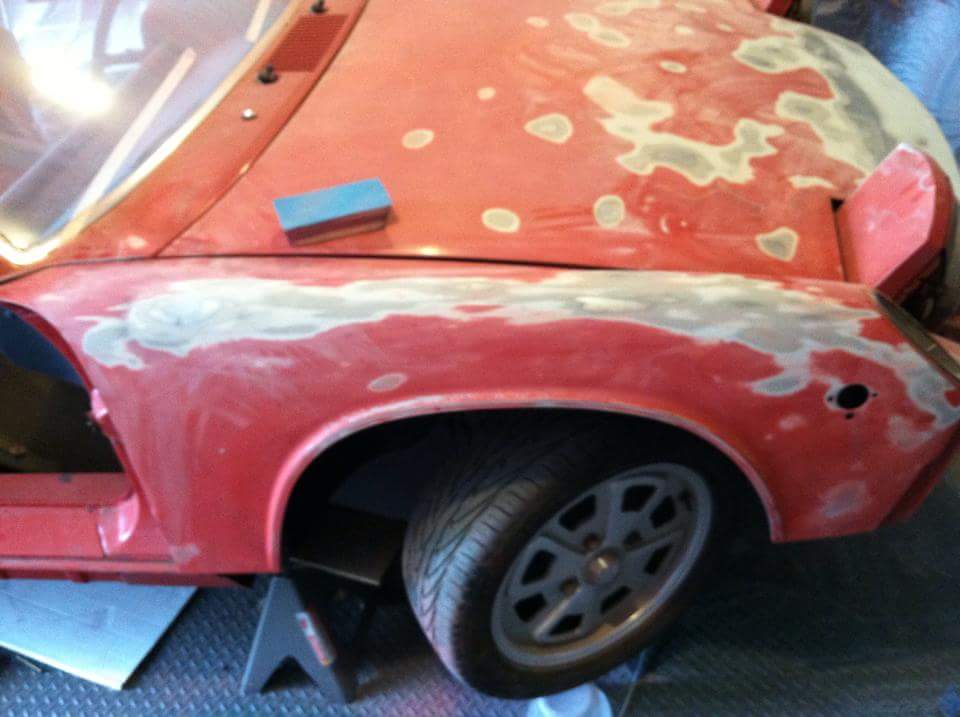
Posted by: Matty900 Apr 14 2016, 01:14 AM
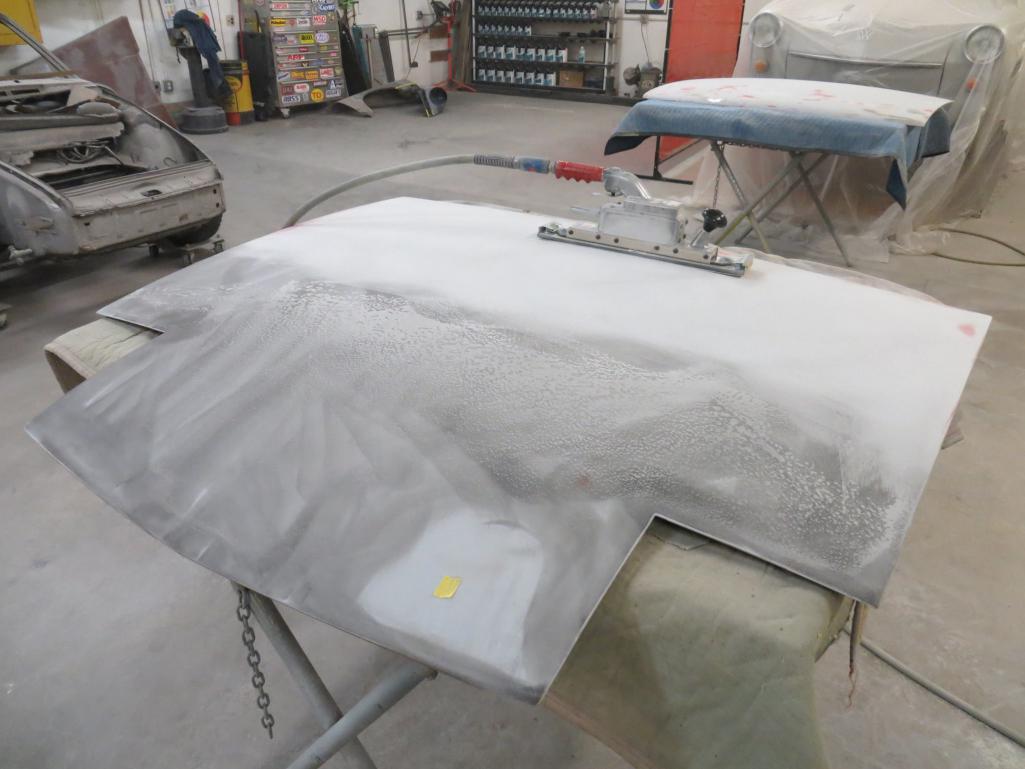
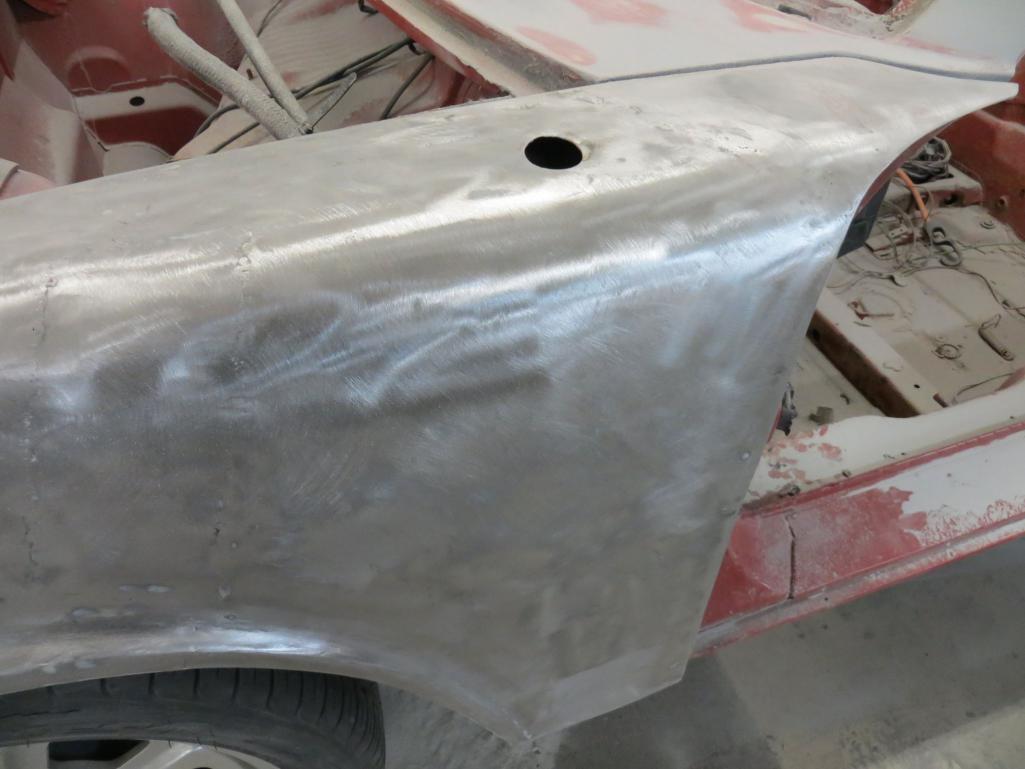
Dents are almost all pulled.
Attached thumbnail(s)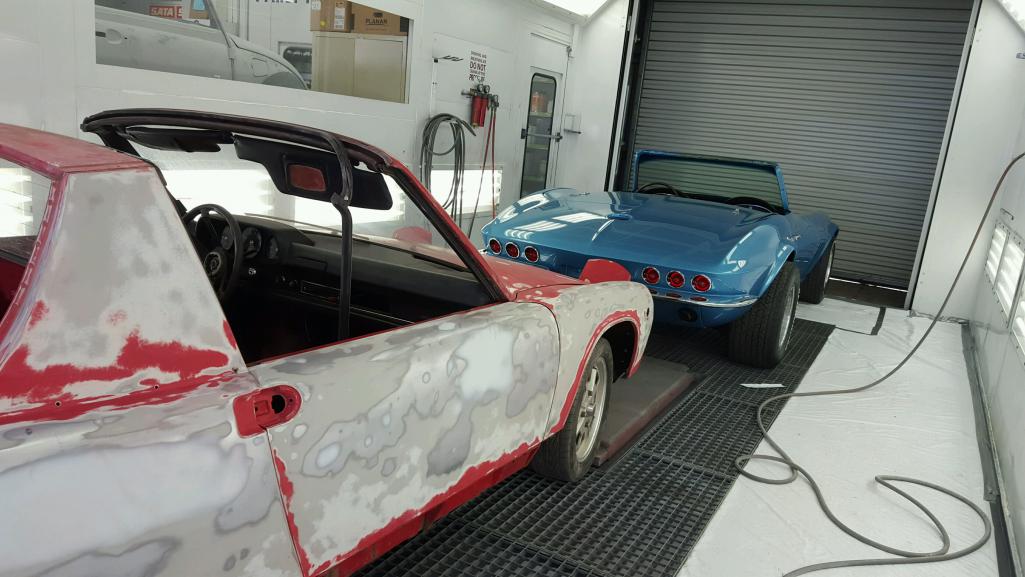
Attached image(s)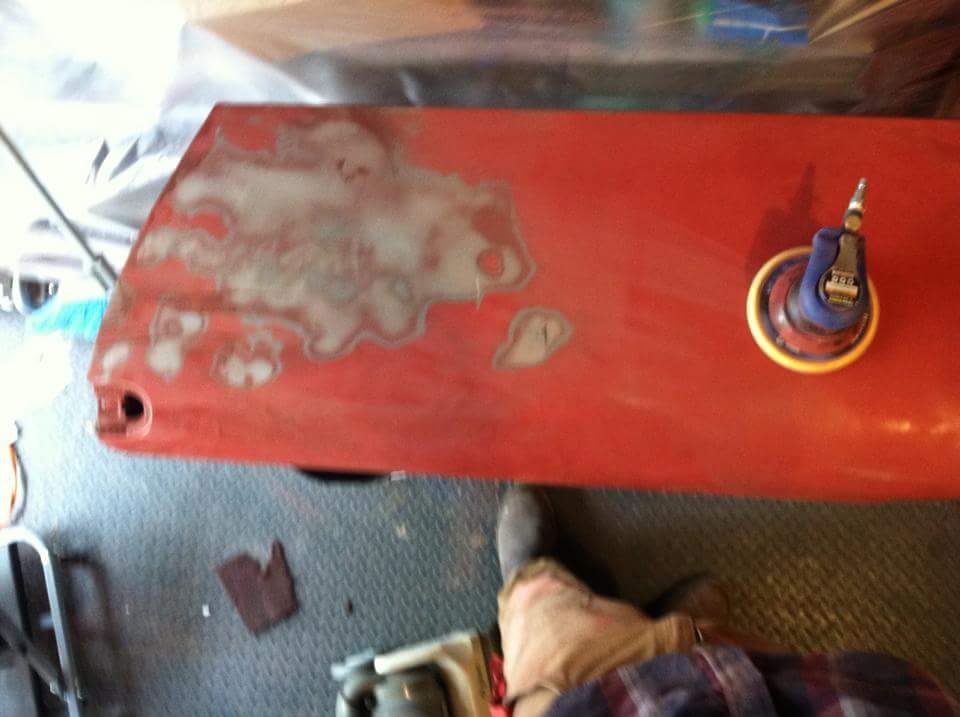
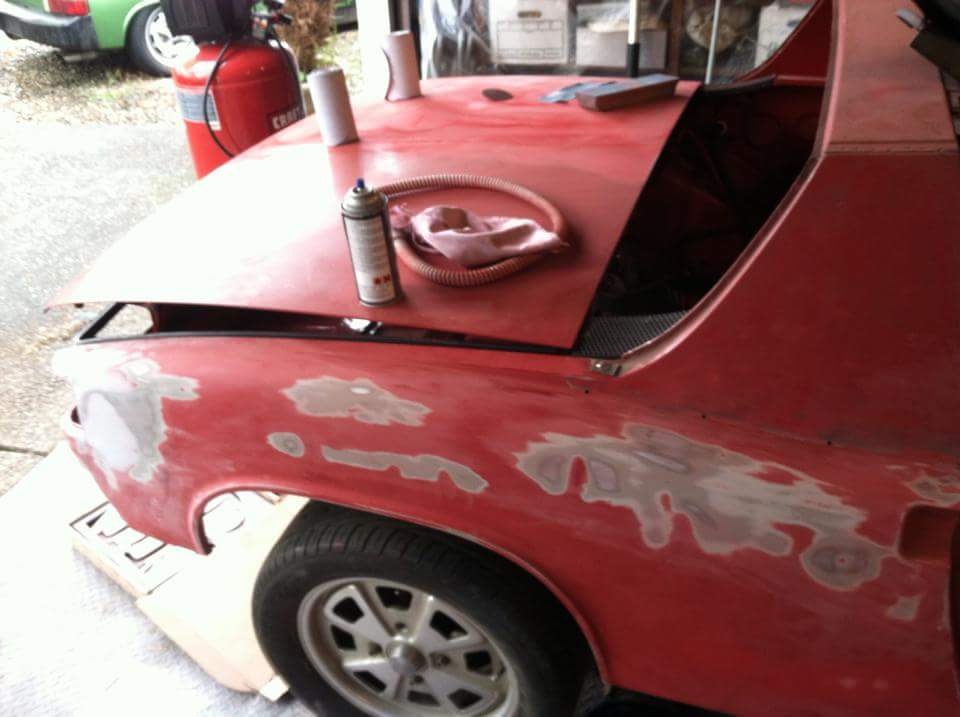
Posted by: Matty900 Apr 14 2016, 01:16 AM
Put down some primer just to keep any rust from starting while we do the body work.
Attached thumbnail(s)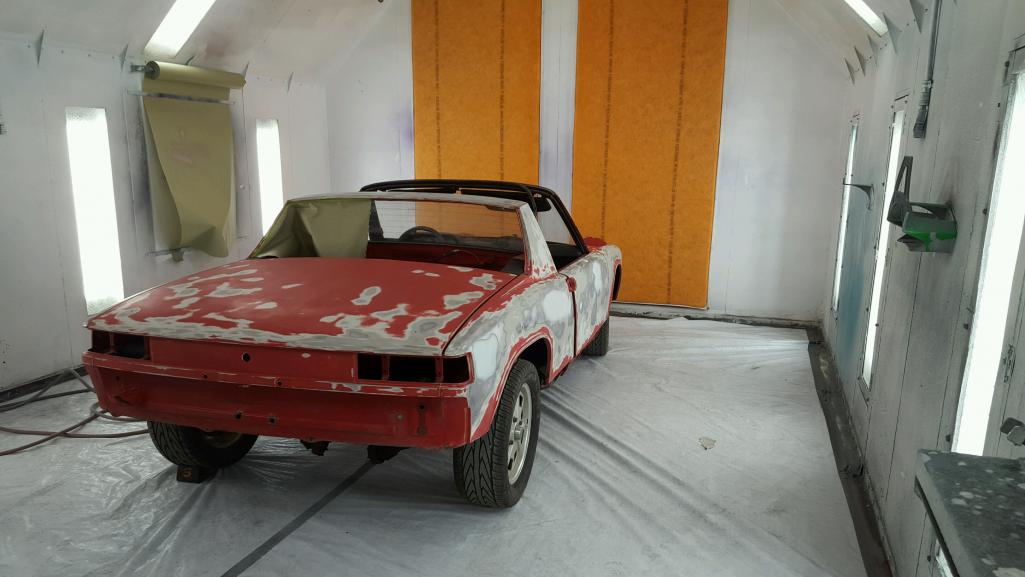
Posted by: Jason74914 Apr 14 2016, 10:22 AM
Just curious...what are the holes the rear trunk lid for?
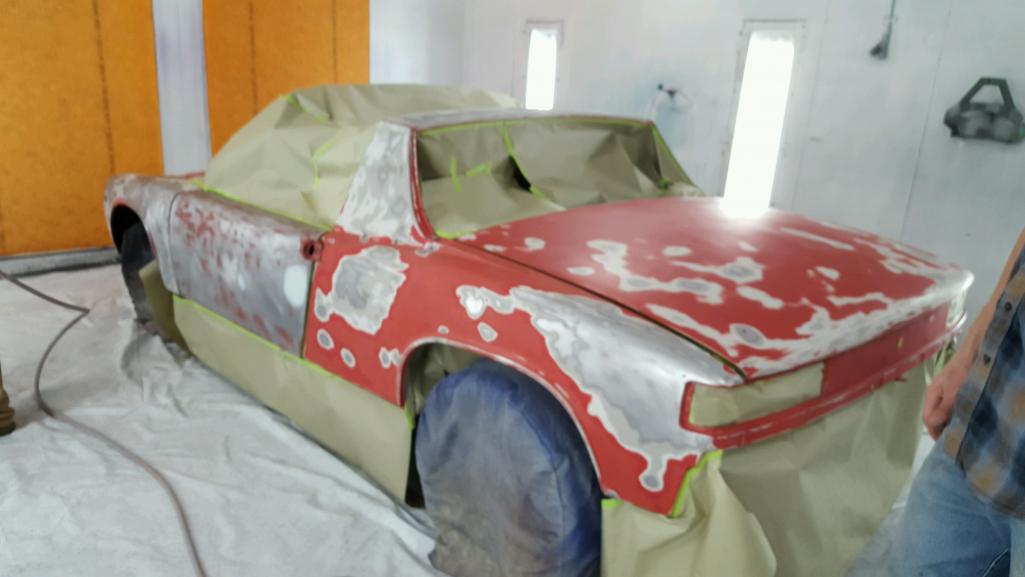
Posted by: Matty900 Jan 31 2017, 07:41 PM
Ok this car has been stalled too long. I have enlisted the services of Kent at Brosseau's Coachworks in Oregon City. I am hoping to get this car ready for a road trip back to Hershey PA in April.
Attached thumbnail(s)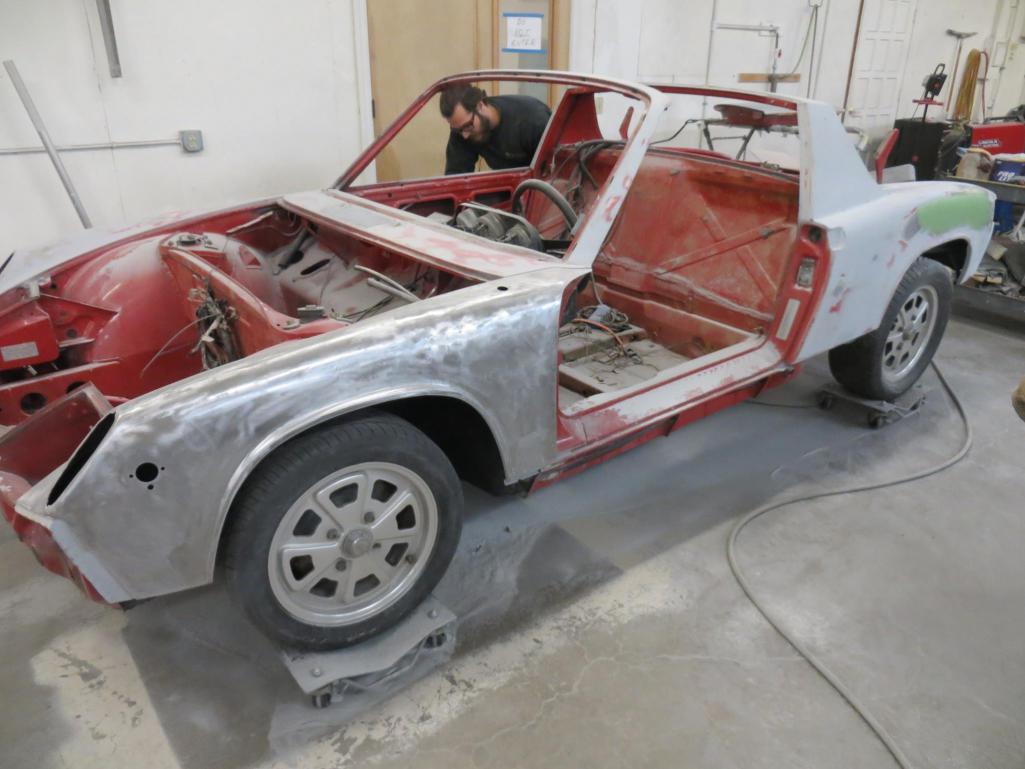

Attached image(s)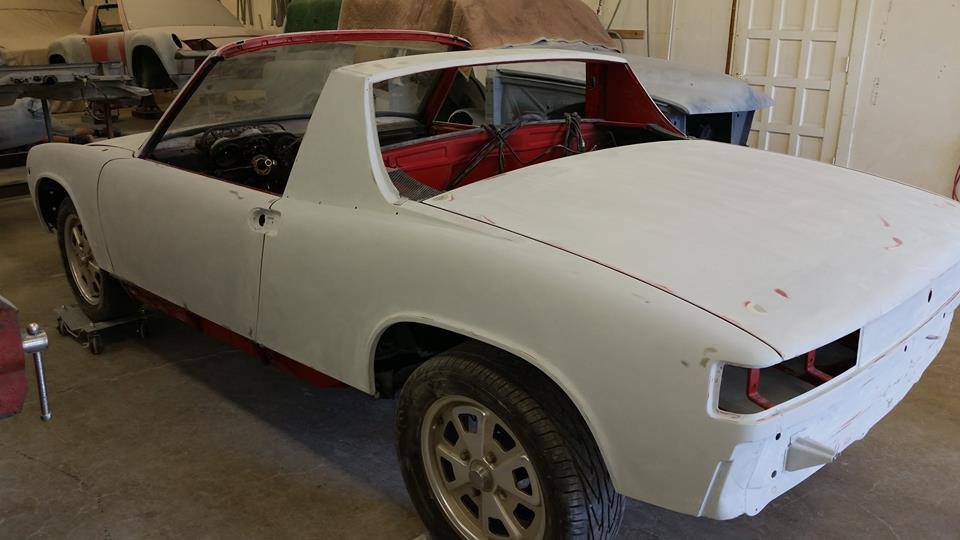
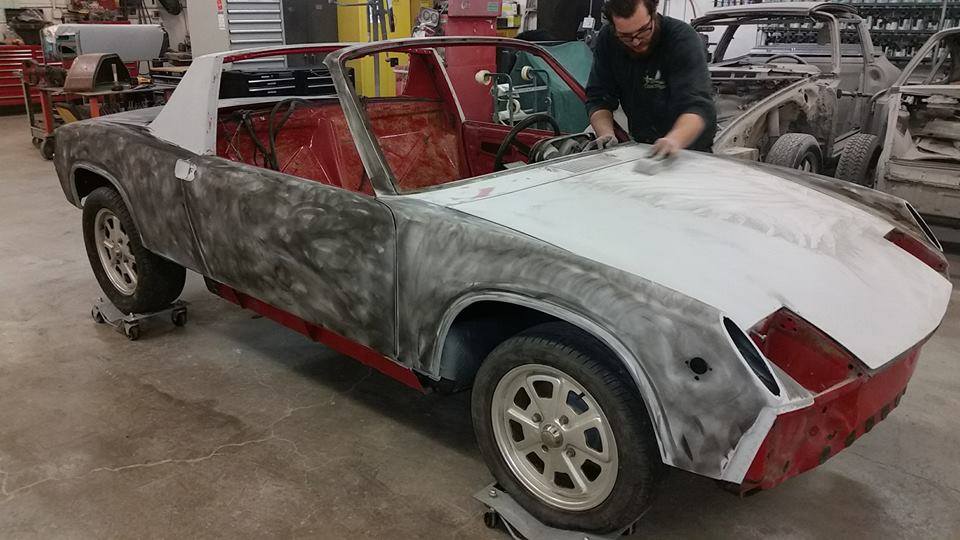
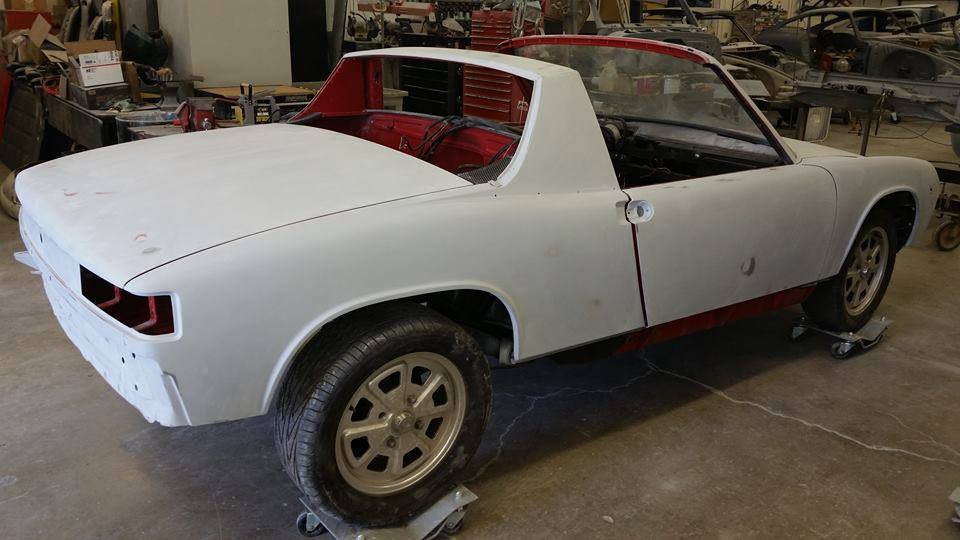
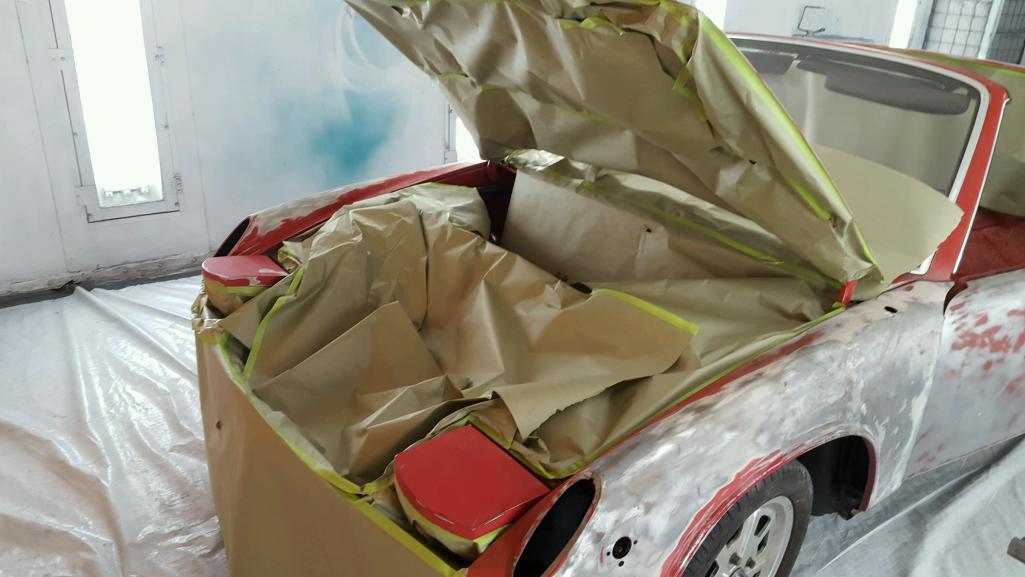
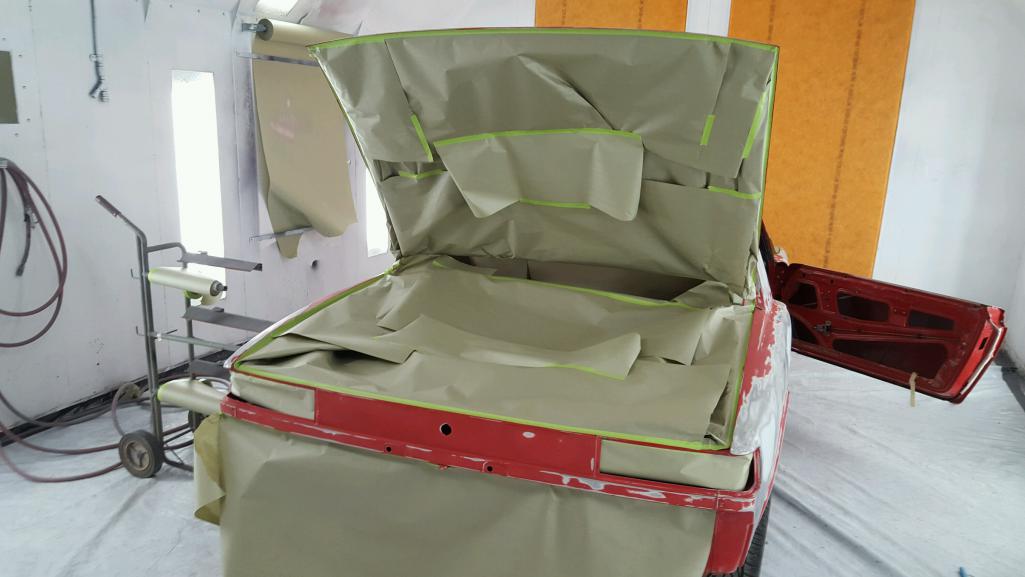
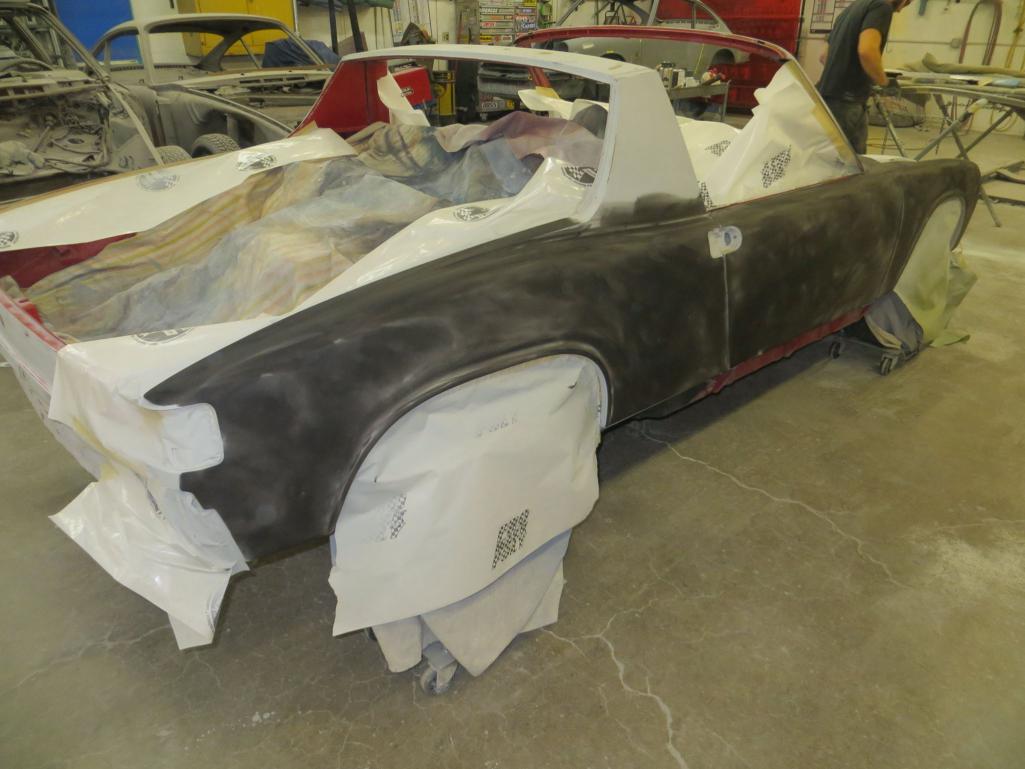
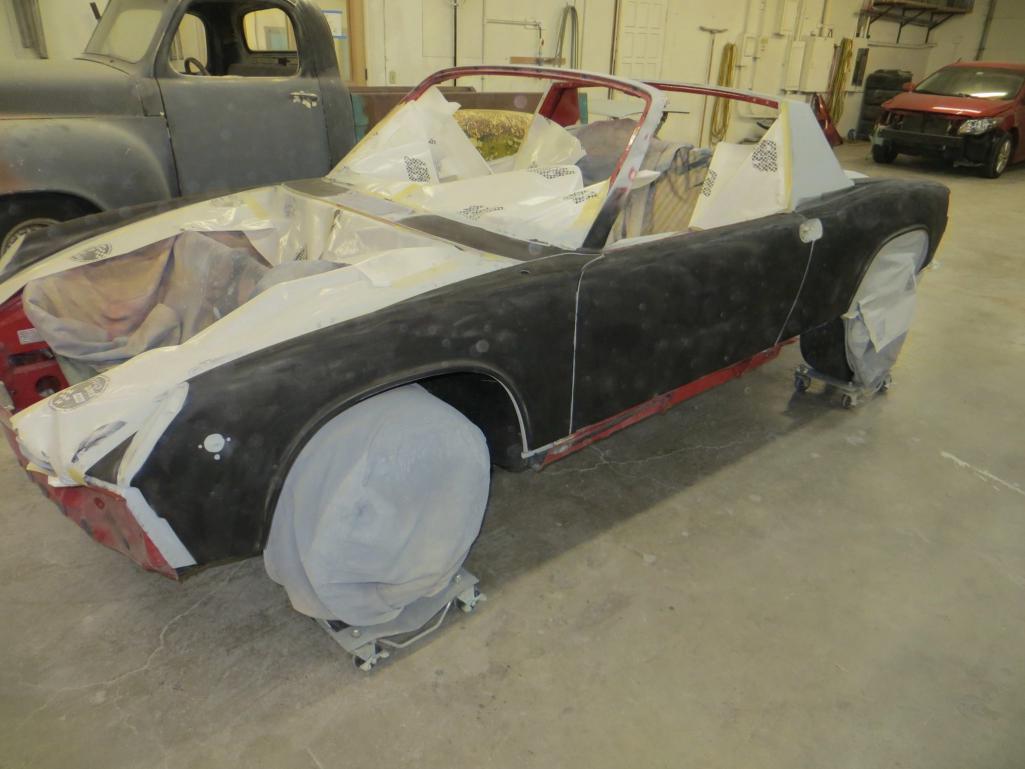
Posted by: Matty900 Jan 31 2017, 07:44 PM
A few more of Kent's progress on my car
Attached thumbnail(s)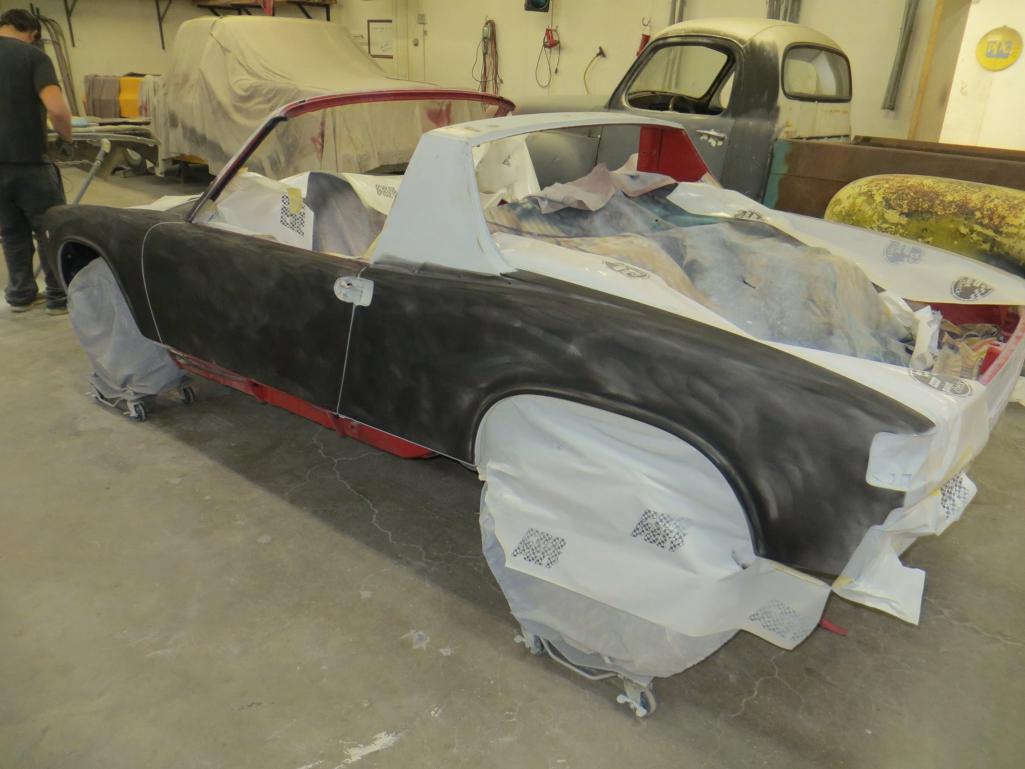
Posted by: pete000 Jan 31 2017, 11:04 PM
Nice find !
Nice save !
Posted by: Matty900 Feb 1 2017, 08:06 PM
Nice find !
Nice save !
Thank you,
It is in amazing shape and I should have just gave it a tune up and drove it. Oh well, now it will be really nice.
Posted by: Matty900 Mar 14 2017, 11:19 PM
Haven't posted progress on here for a little bit so here is a lot of photos on what's been going on.
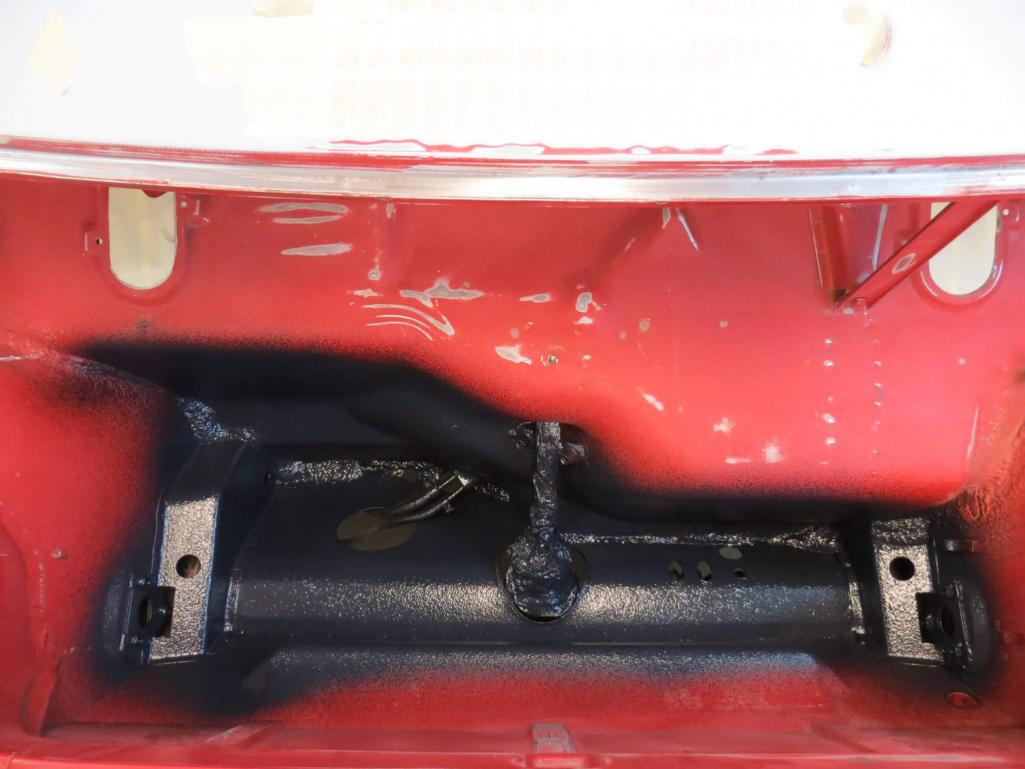
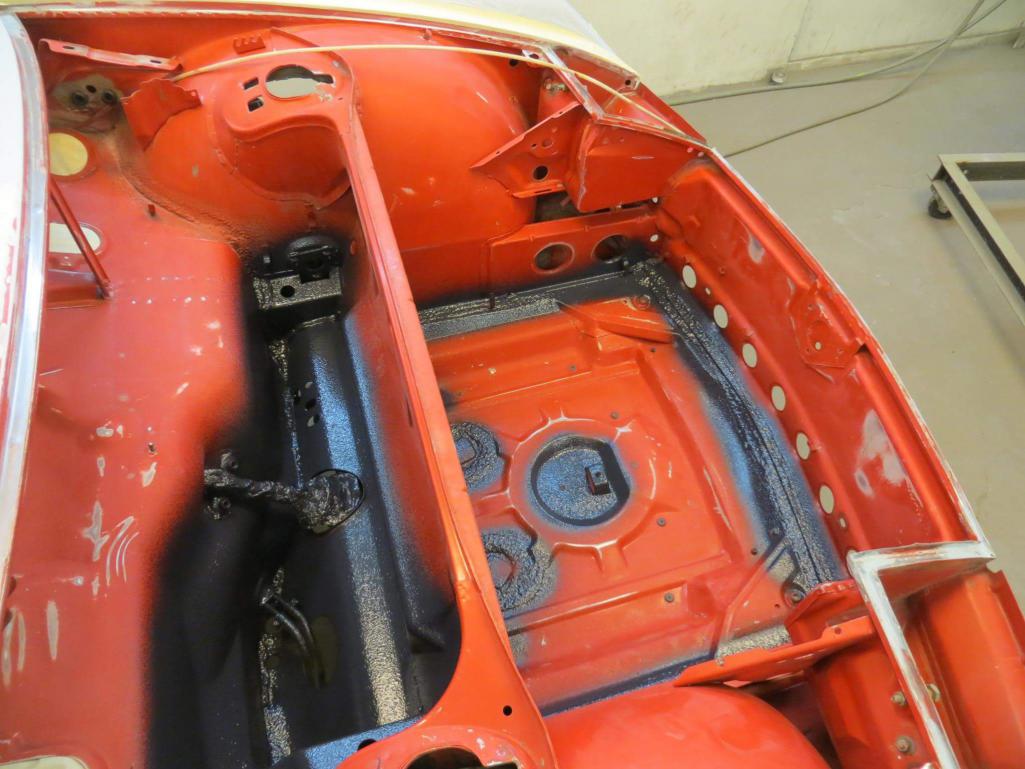
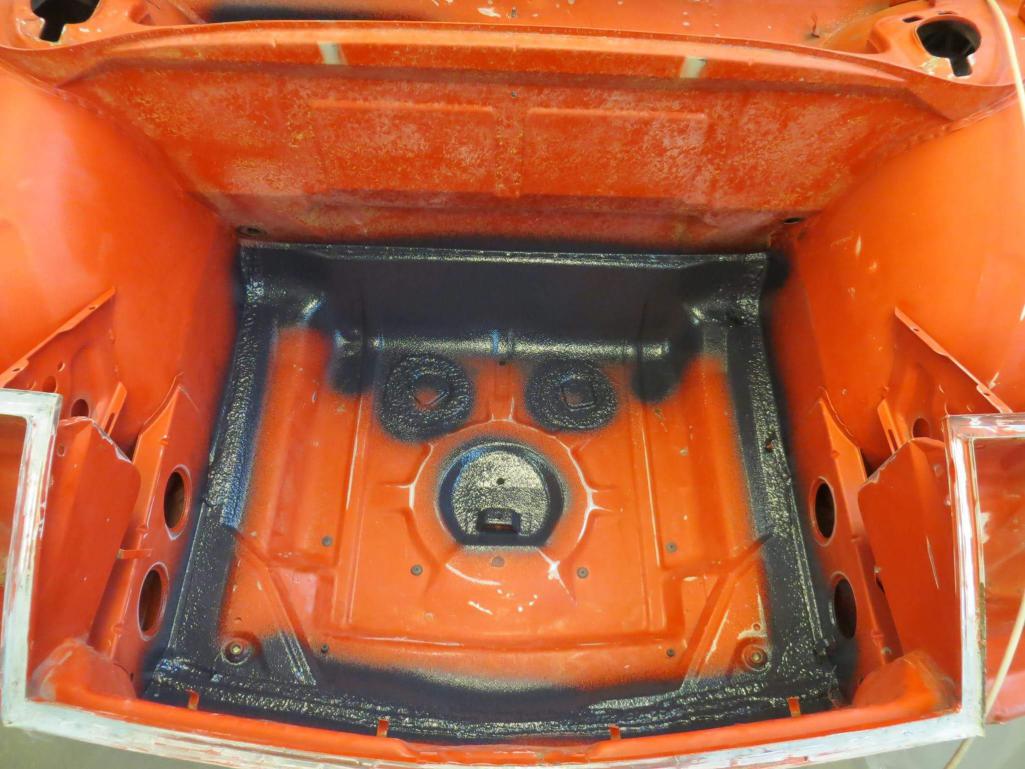
I decided to have factory swaybars put in front and rear for the car 
 . This is the progress on that along with the worth coating going on after the work was completed to look like it was installed at the factory.
Attached thumbnail(s)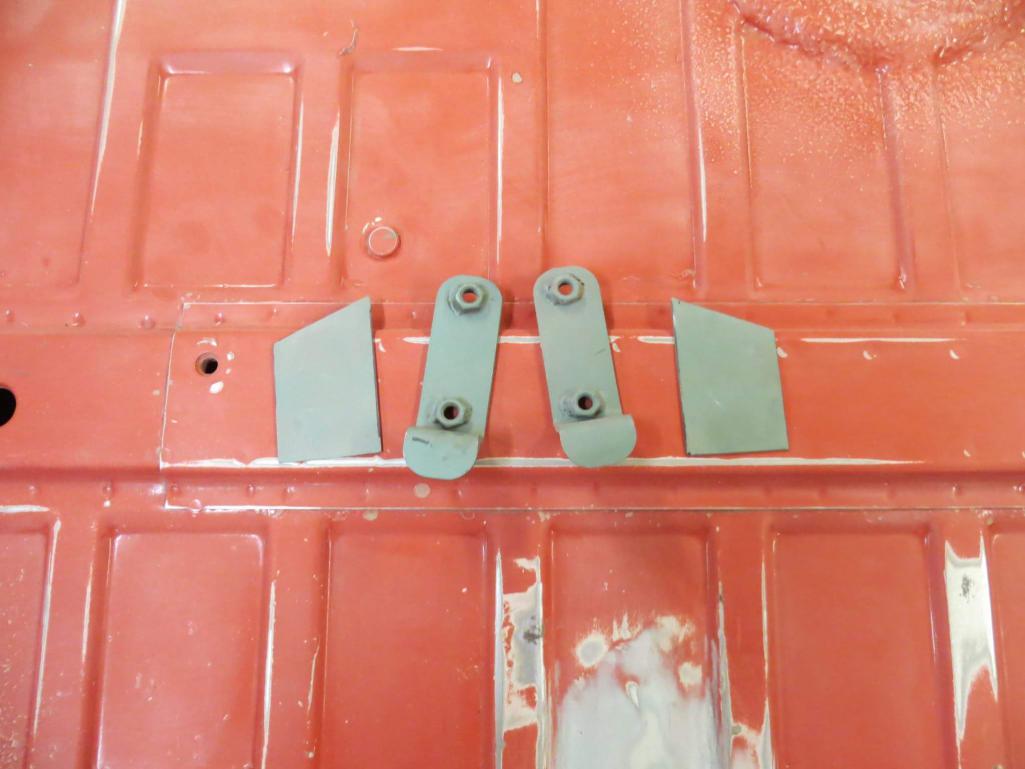

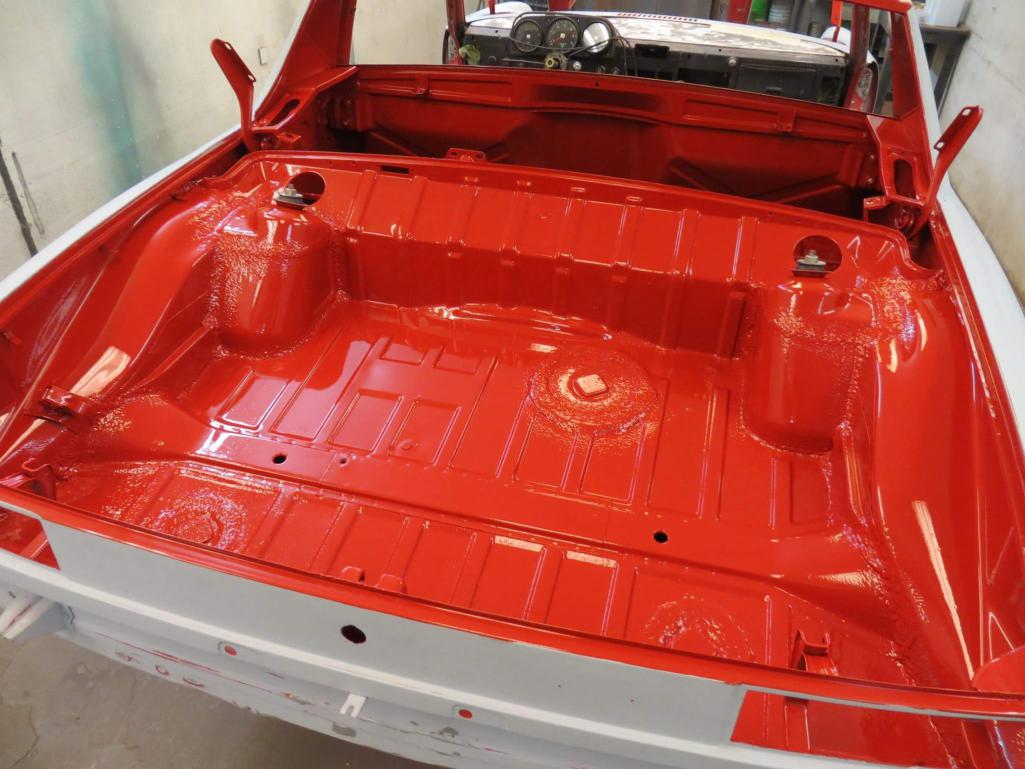
Posted by: Matty900 Mar 14 2017, 11:25 PM
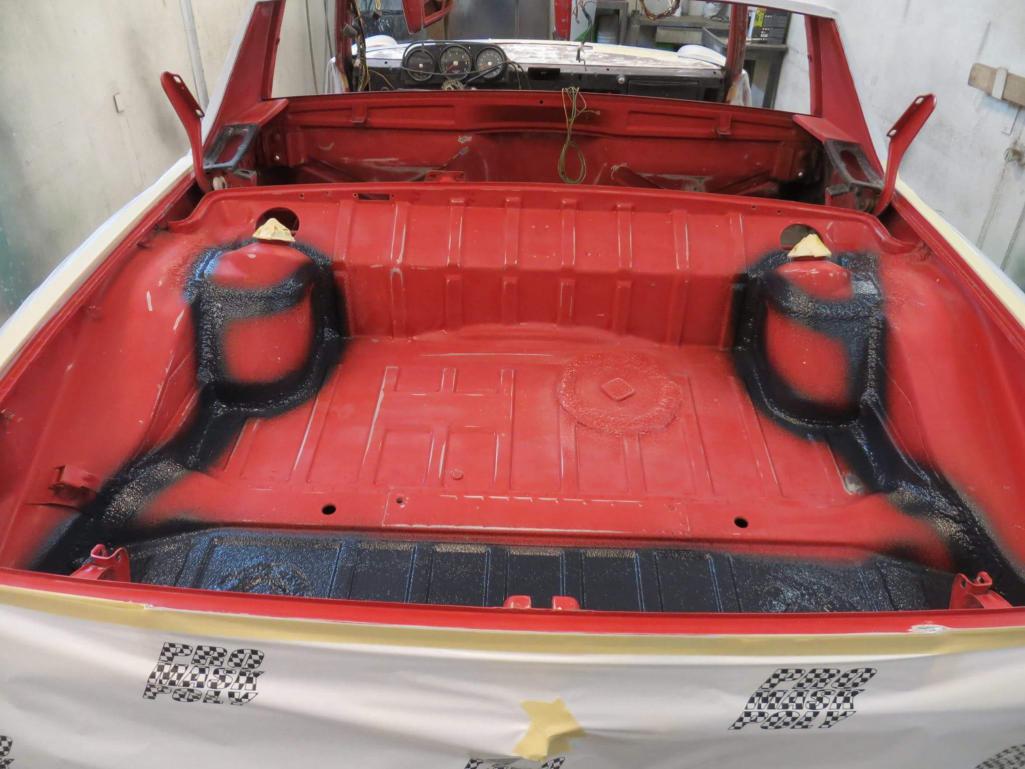
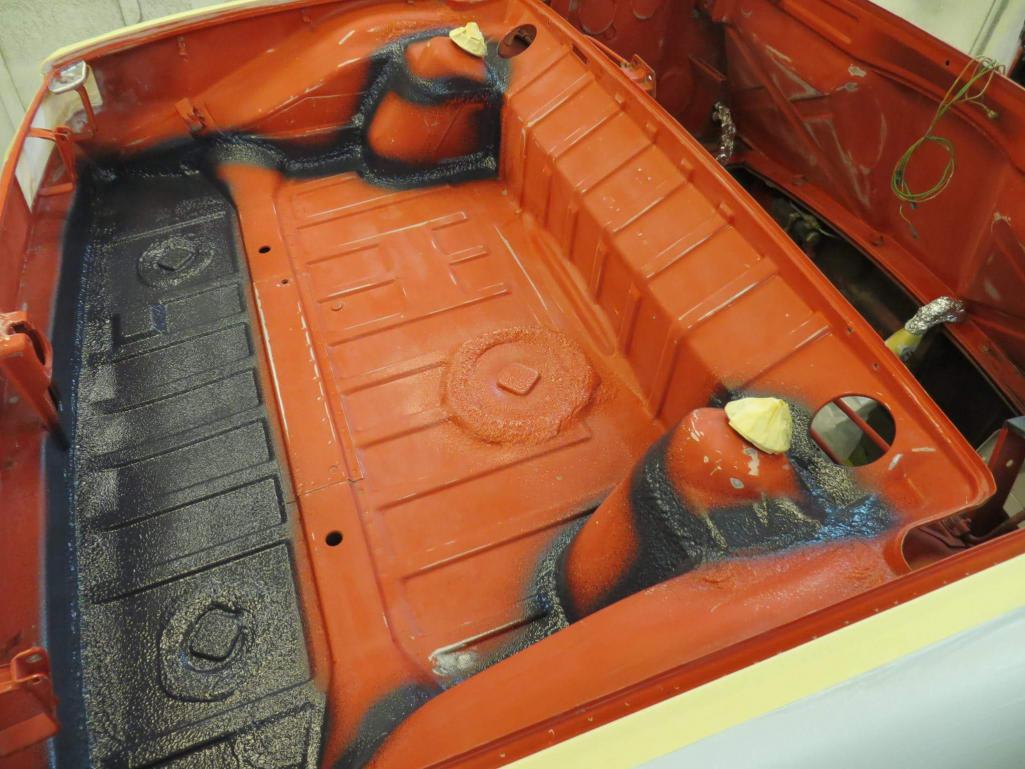
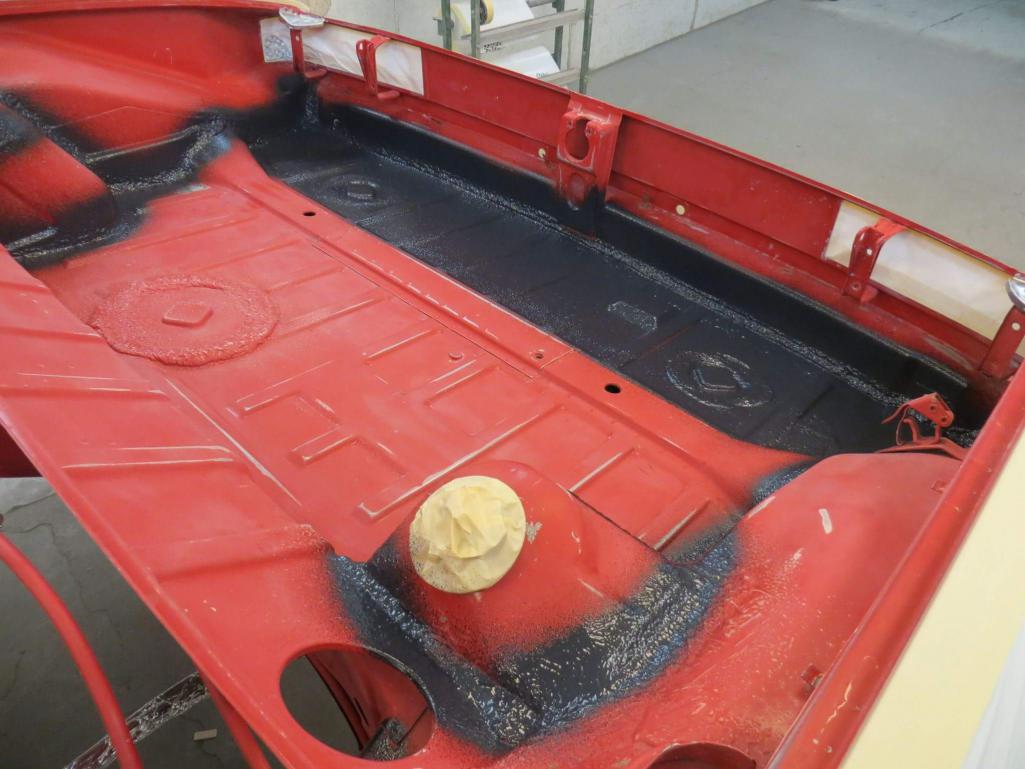
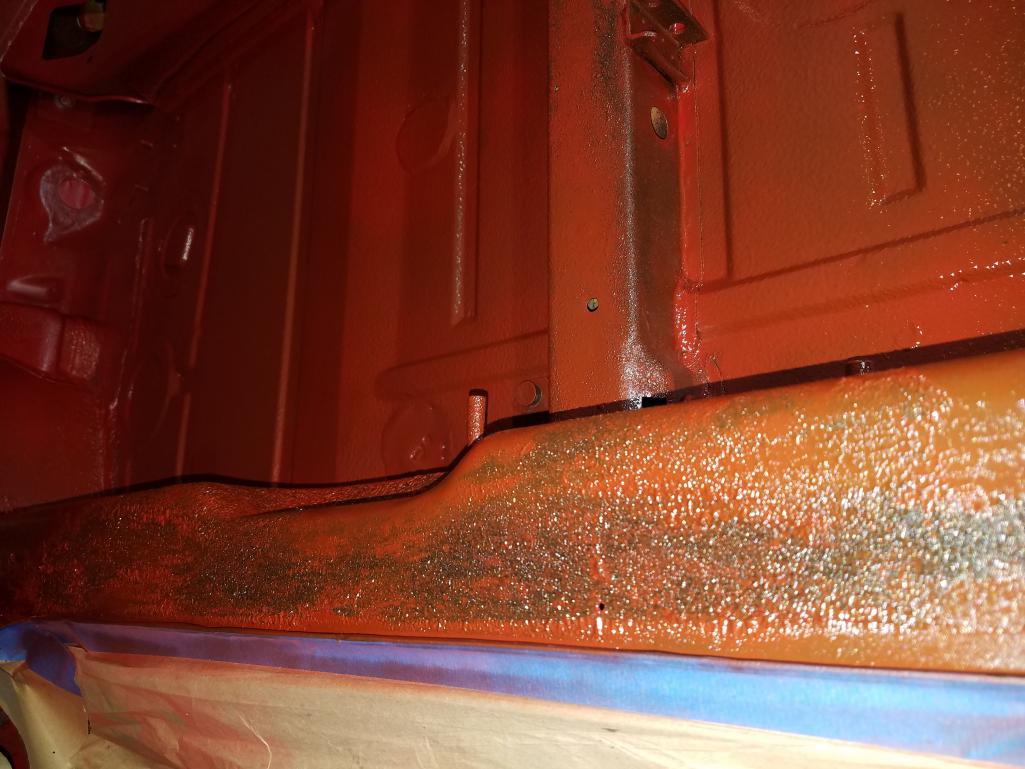
Next was laying color down in the trunks
Attached thumbnail(s)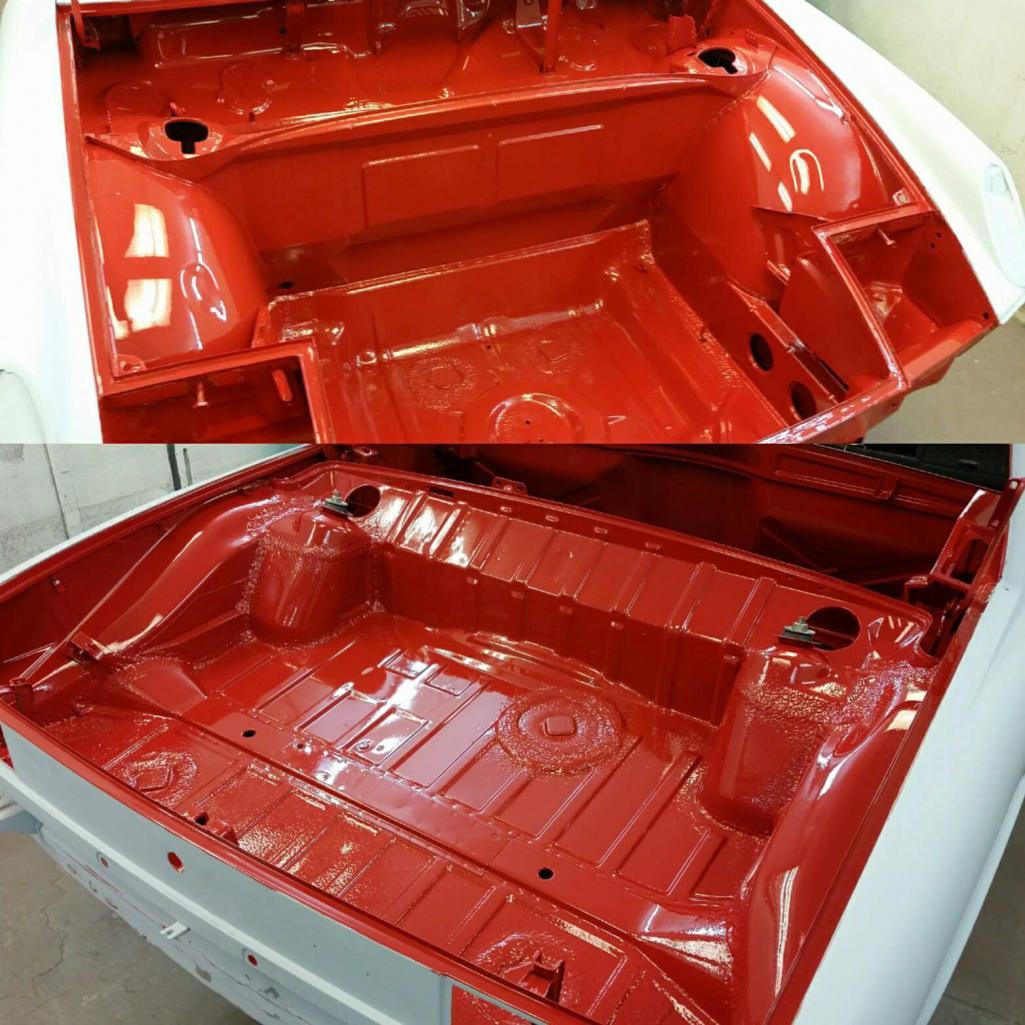
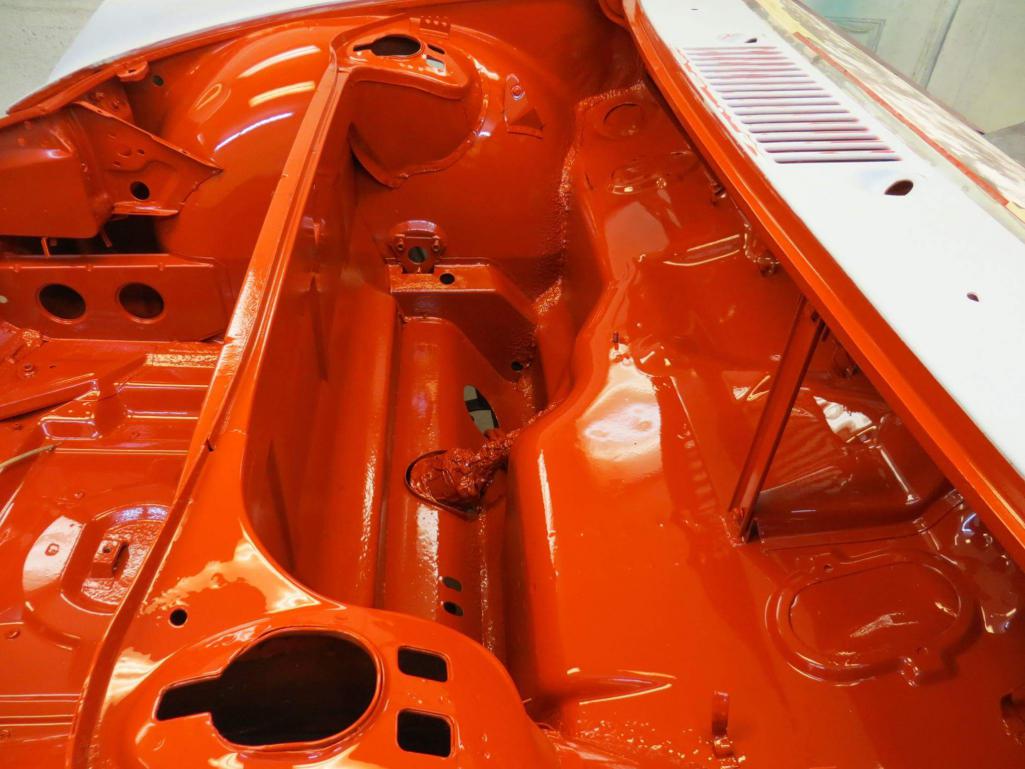
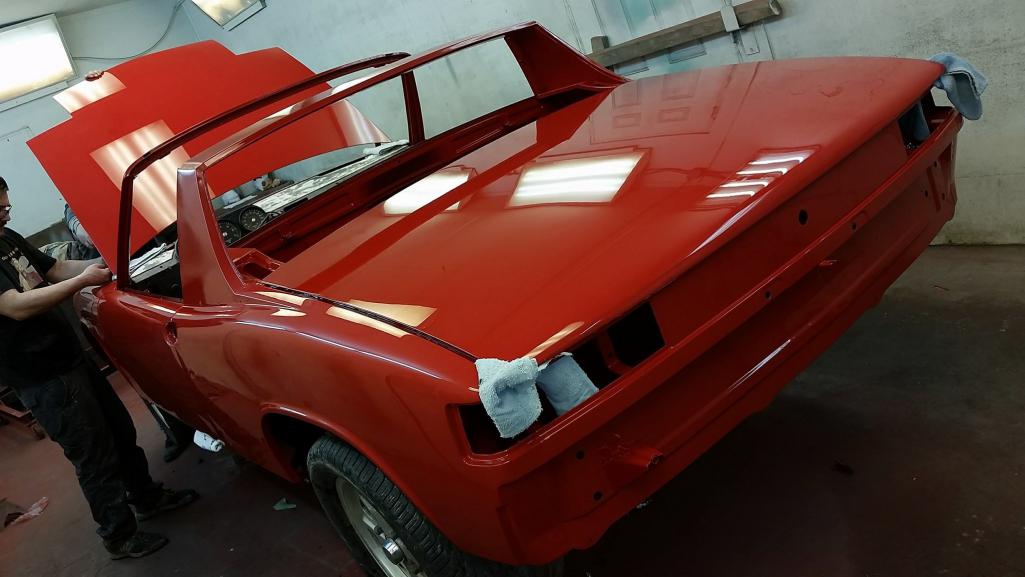
Posted by: Matty900 Mar 15 2017, 12:04 AM
Finally Color
Attached thumbnail(s)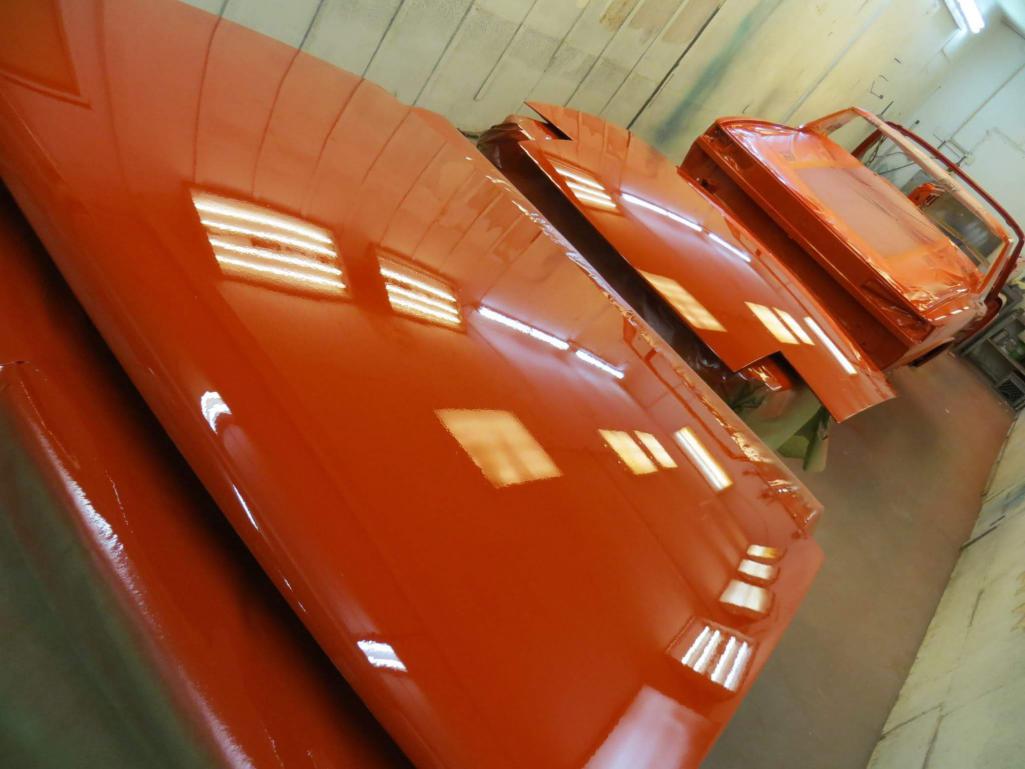
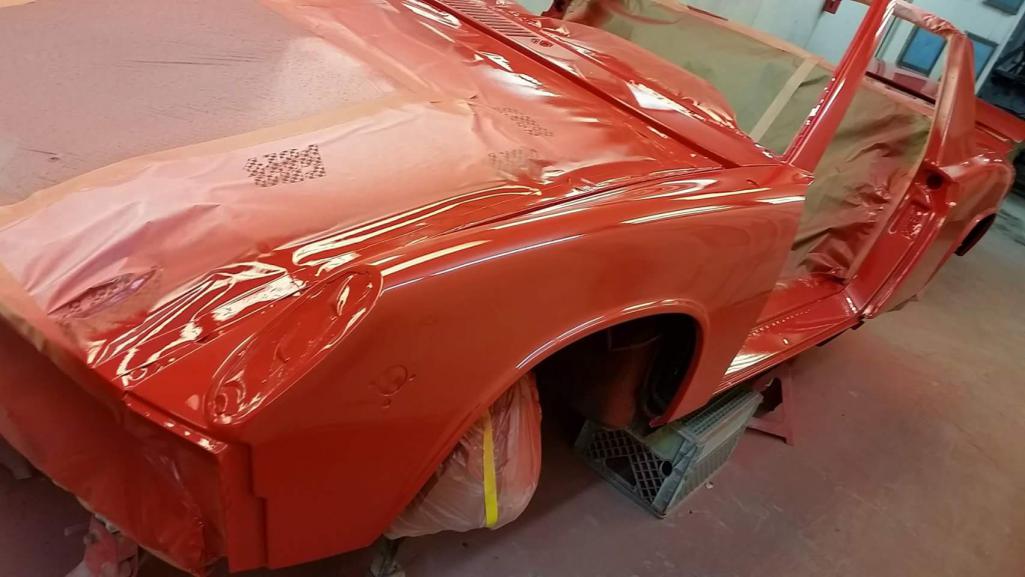
Posted by: Matty900 Mar 15 2017, 12:07 AM
More photos
Attached thumbnail(s)
Posted by: Matty900 Mar 15 2017, 12:10 AM
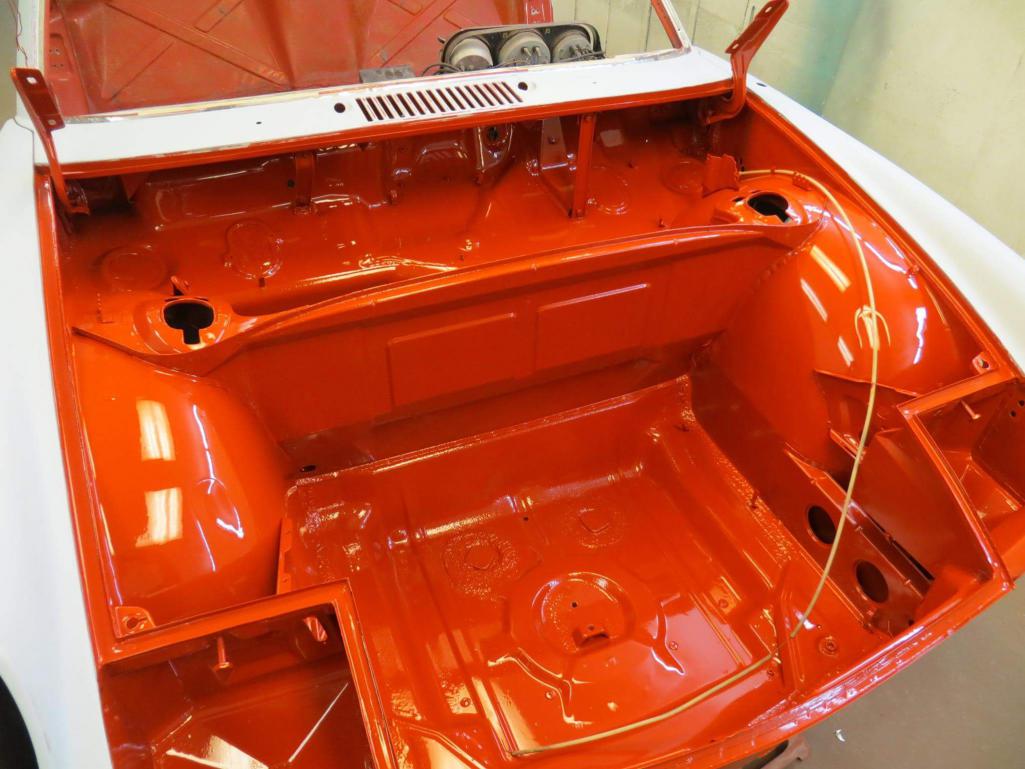
Engine bay is all good to go.
Attached thumbnail(s)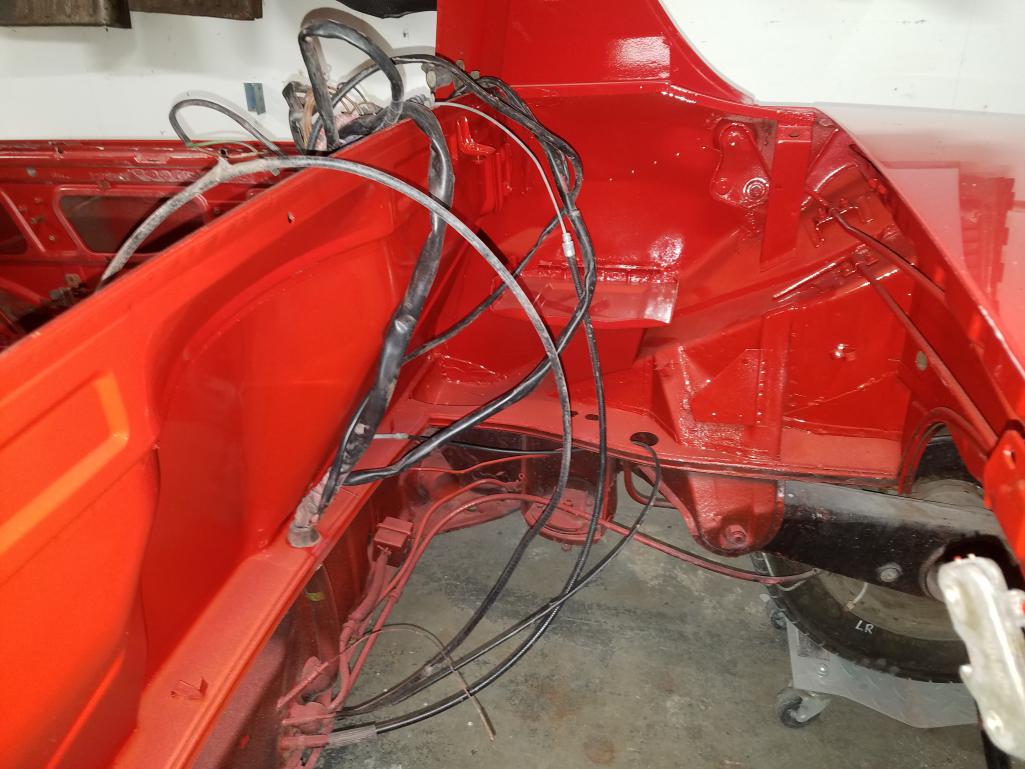
Posted by: Matty900 Mar 15 2017, 12:15 AM
and lots and lots of cutting and buffing (over 25 hours worth)
Attached thumbnail(s)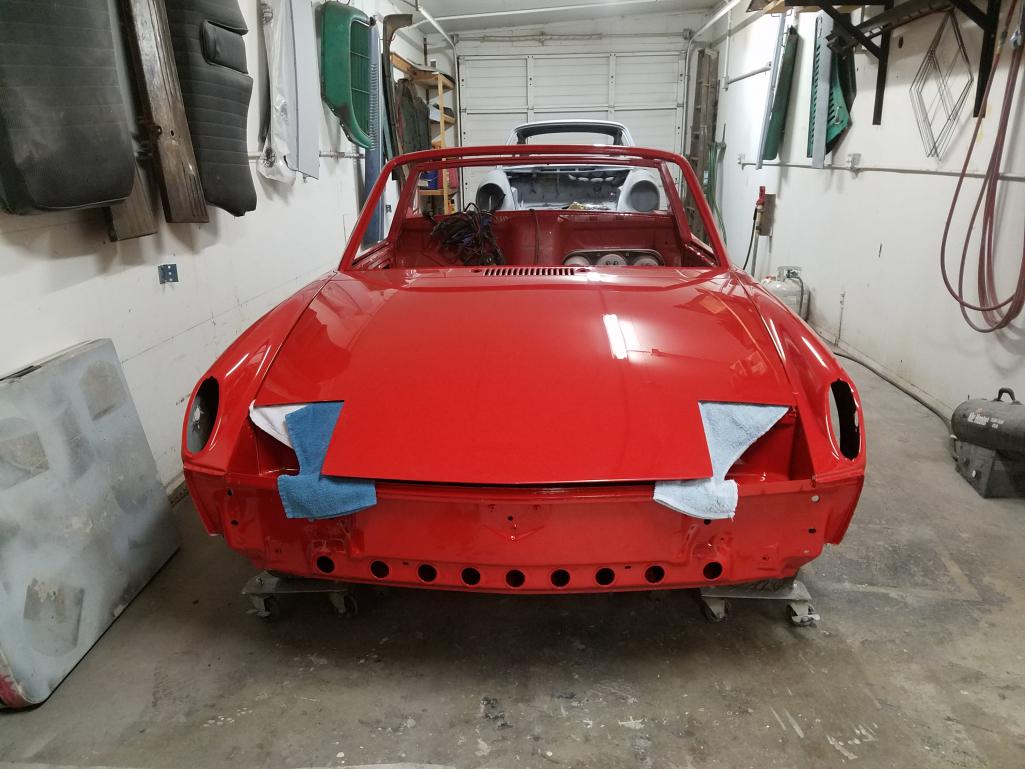
Posted by: Matty900 Mar 15 2017, 12:16 AM

Attached thumbnail(s)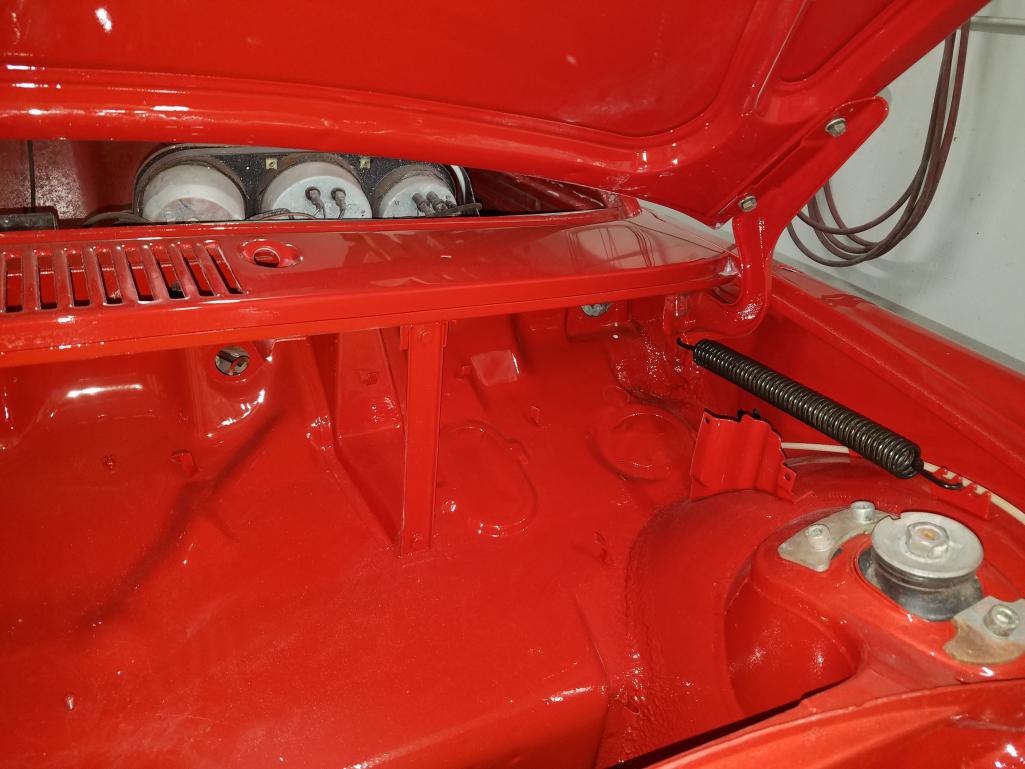
Posted by: Matty900 Mar 15 2017, 12:18 AM
Attached thumbnail(s)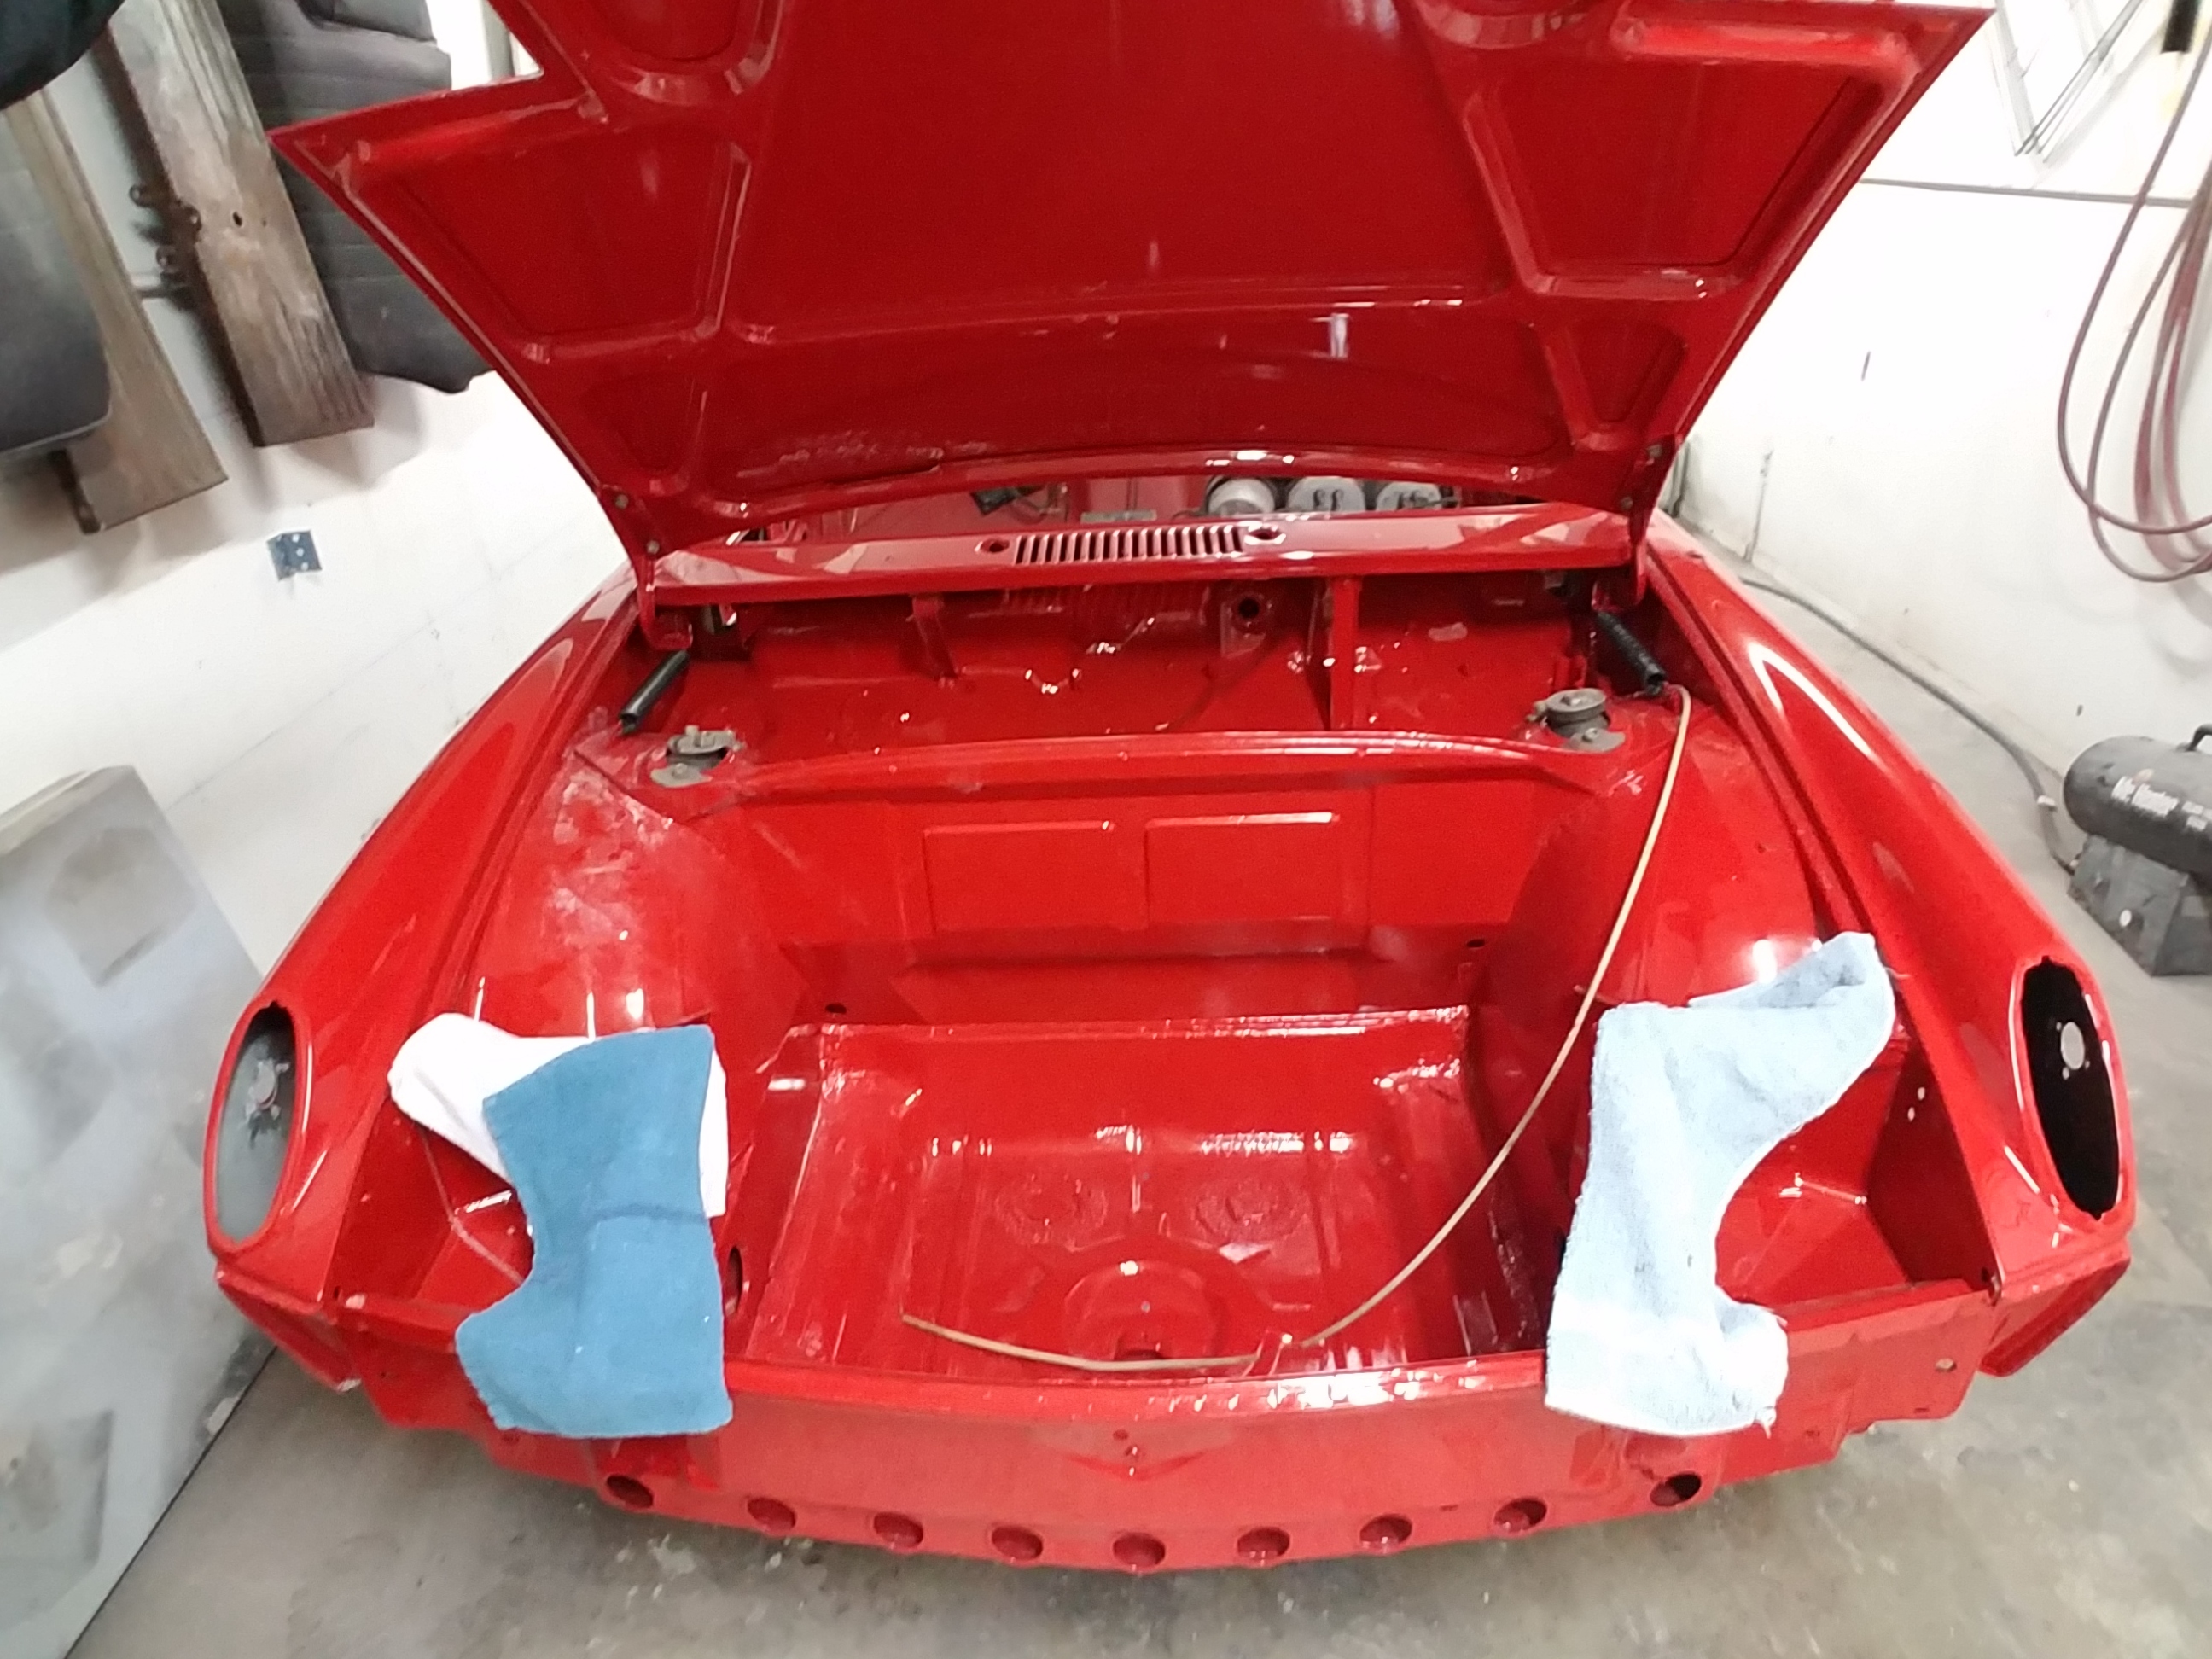
Posted by: Matty900 Mar 15 2017, 12:21 AM
Raptor floor boards (14 hours)
Attached thumbnail(s)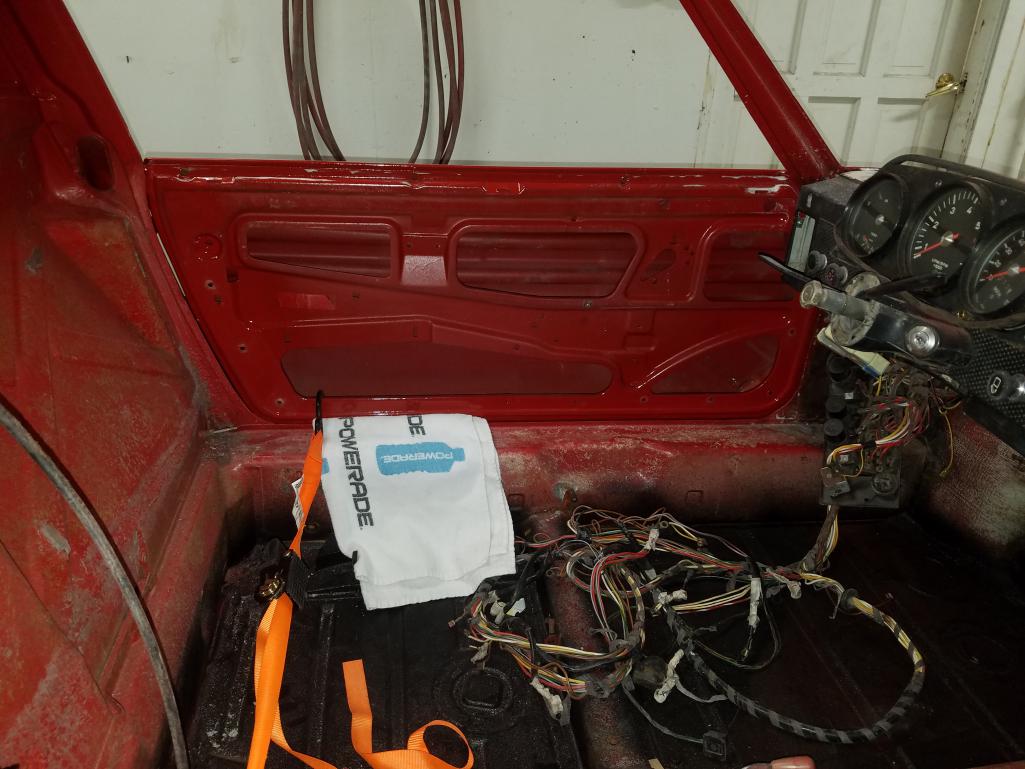
Posted by: Matty900 Mar 15 2017, 12:24 AM
Undercoated the complete car with rubberized undercoating
Attached thumbnail(s)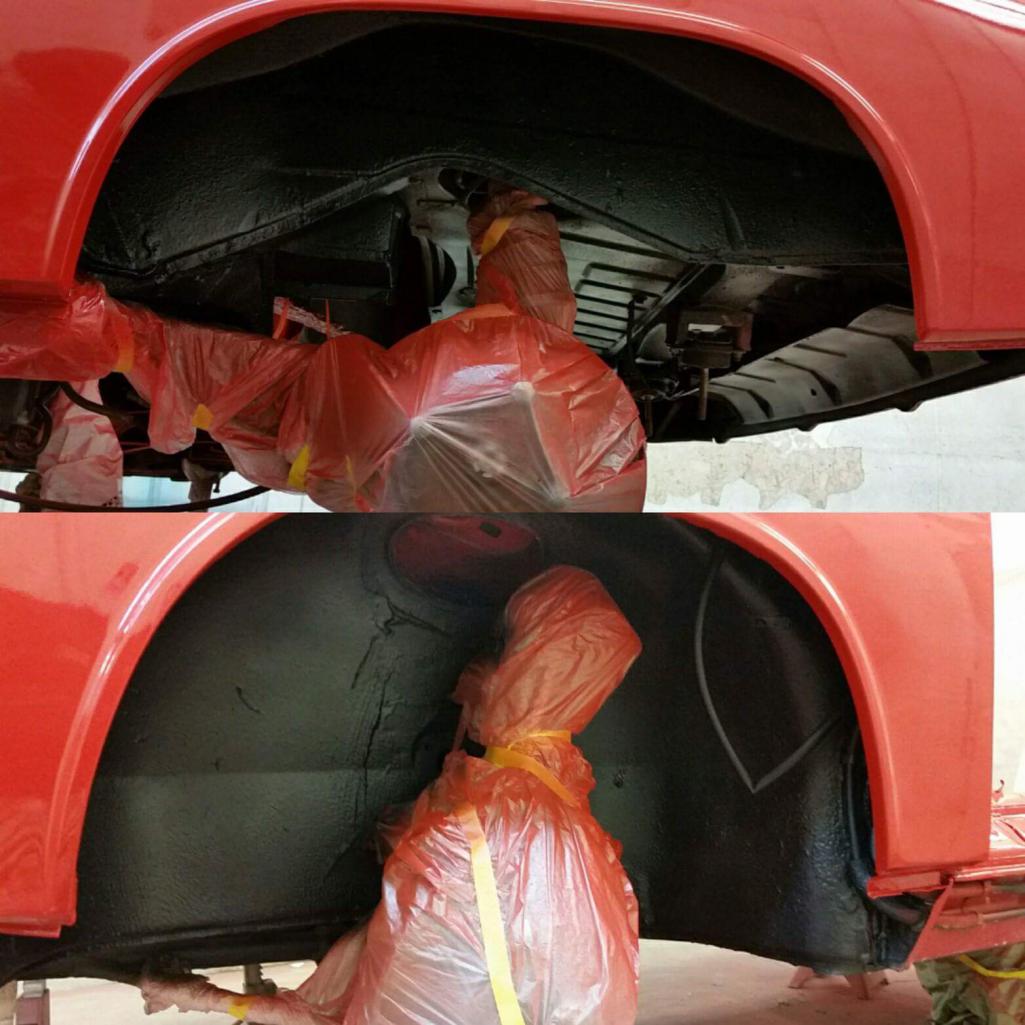

Posted by: Matty900 Mar 15 2017, 01:05 AM
My rear valance was a little too far gone. PO took it off so he could put on 4 tip monza exhaust. Then left it outside for years. Thankfully Craig and Camp914 is only about a mile from the body shop. Thank you Craig 
Attached thumbnail(s)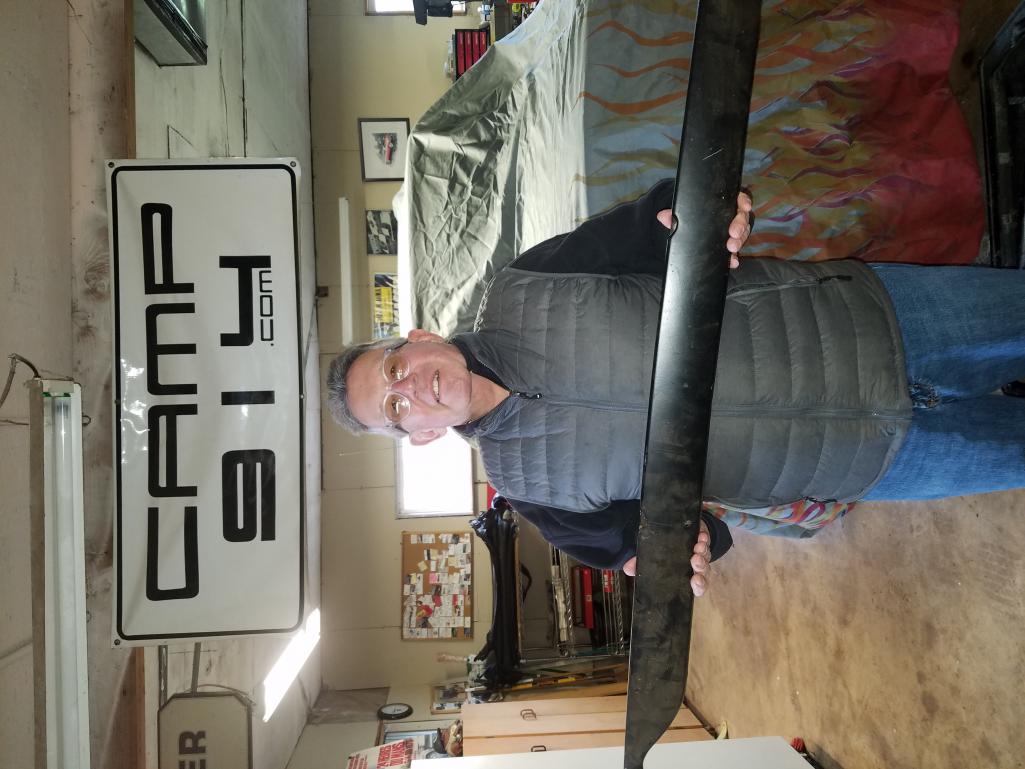
Posted by: Matty900 Mar 15 2017, 01:20 AM
Cary Kutter freshened up some of the suspension for me. The car will be going to his shop for me to do some work with his guidance. Getting excited to learn from him. Hope to get lots of install photos and possibly videos for the new website that we have been working on forever now. We will be putting in one of our rebuilt steering racks, Stainless steel fuel lines and getting the wiring harness back in place.
Attached image(s)
Posted by: Cairo94507 Mar 15 2017, 06:37 AM
Very cool and exciting. 
Posted by: RobW Mar 15 2017, 12:13 PM
Great color! Keep up the good work! 
Posted by: cary Mar 15 2017, 10:05 PM
What was the black stuff they sprayed in the trunk before they painted?
Looks great. I can see why your so anxious to get started.
Posted by: Matty900 Mar 16 2017, 12:56 AM
What was the black stuff they sprayed in the trunk before they painted?
Looks great. I can see why your so anxious to get started.
Wurth seam sealer https://youtu.be/Hb7NLnl0QJM
Posted by: Matty900 Mar 16 2017, 12:59 AM
Tank looks like new. Now I just need to coordinate the bodyshop, the guy I am borrowing the enclosed trailer from and Cary's schedule so we can get to the reassembly.
Attached thumbnail(s)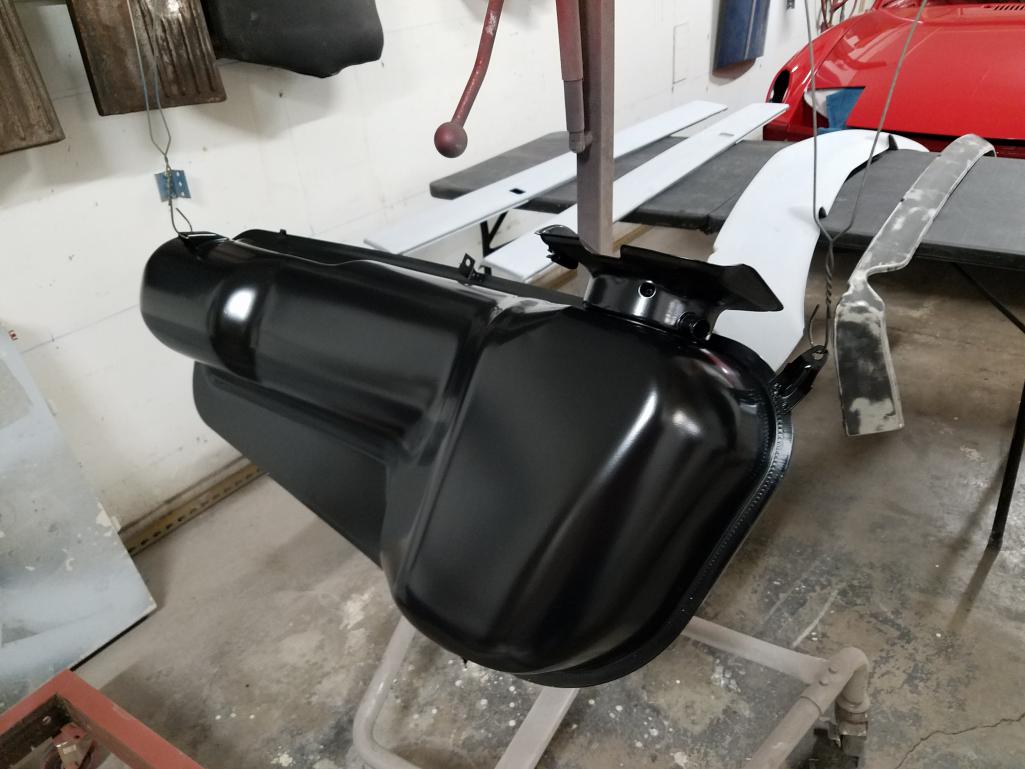
Posted by: cary Mar 16 2017, 08:04 AM
What was the black stuff they sprayed in the trunk before they painted?
Looks great. I can see why your so anxious to get started.
Wurth seam sealer https://youtu.be/Hb7NLnl0QJM
I have the Fusor version of the same gun. That's what I thought it was, but had never seen the material in black. Thanks.
Posted by: Matty900 Mar 24 2017, 12:59 AM
Some updates
Cary Kutter cam out to the body shop last Saturday with his enclosed trailer and pick up the car. He brought it back to his shop, Middle Motors where we will continue the project. He has been gracious enough to let me work on it on his lift and give me guidance that I will definitely need a lot if. Thank you Cary.
Attached thumbnail(s)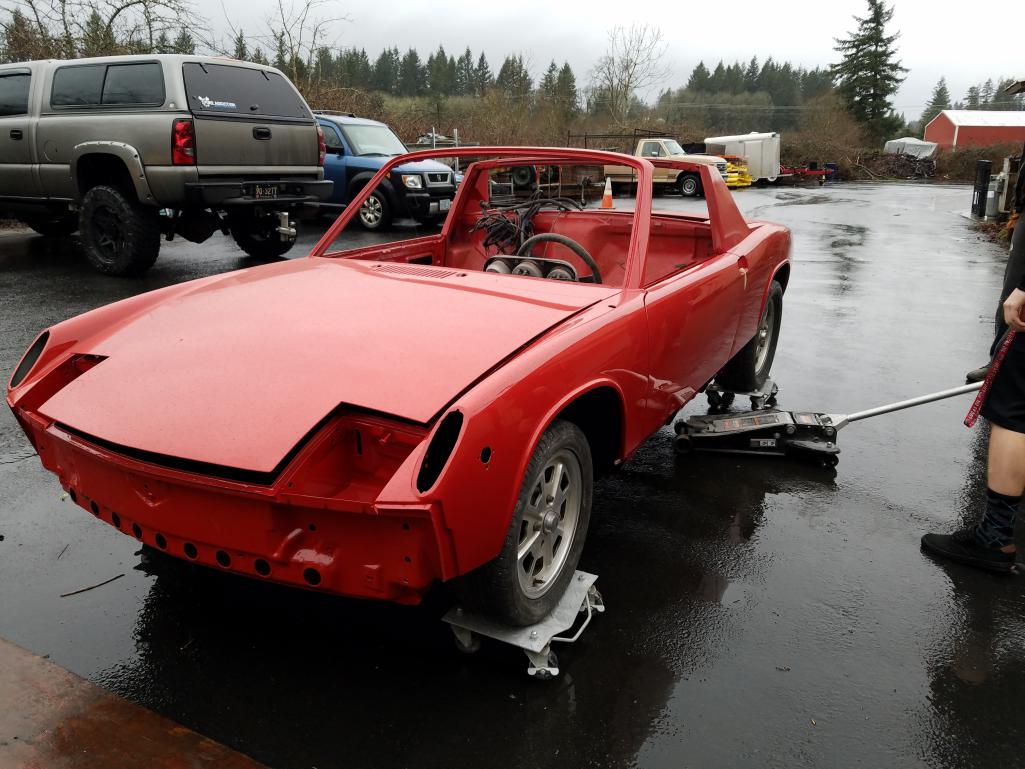
Posted by: Matty900 Mar 24 2017, 01:06 AM
Rebuilding the peddle cluster and replacing everything running through the tunnel.
Attached thumbnail(s)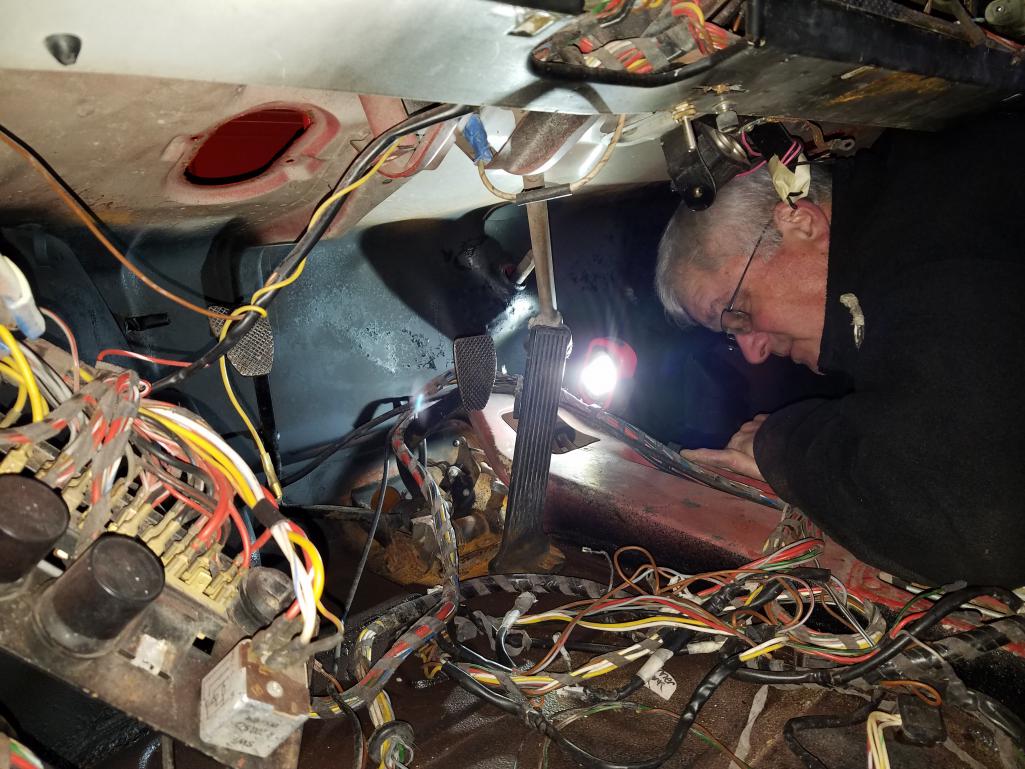
Posted by: Matty900 Mar 24 2017, 01:09 AM
A few nights a week to get work done, but a lift, all the needed tools and help when needed. I could do this every night
Attached thumbnail(s)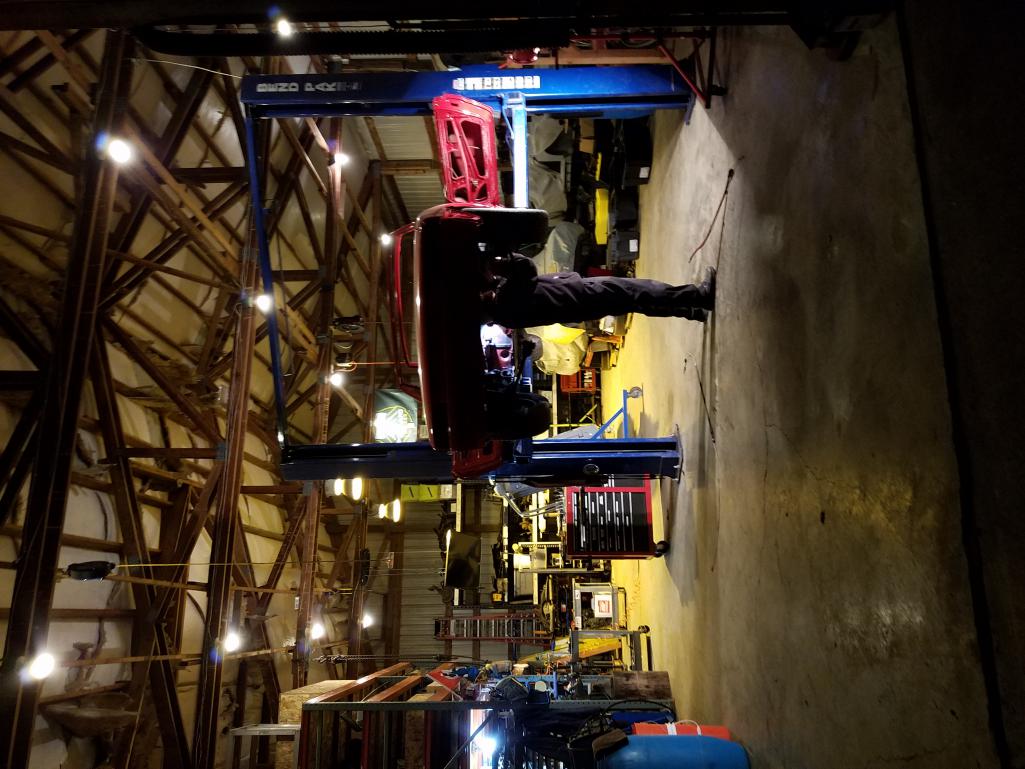
Posted by: Matty900 Mar 24 2017, 01:14 AM
The car is in great shape and all of the nuts and bolts are coming right out with ease. Going to need all new bellows for all the cables in the engine bay. Anyone know where I can get some? 
Attached thumbnail(s)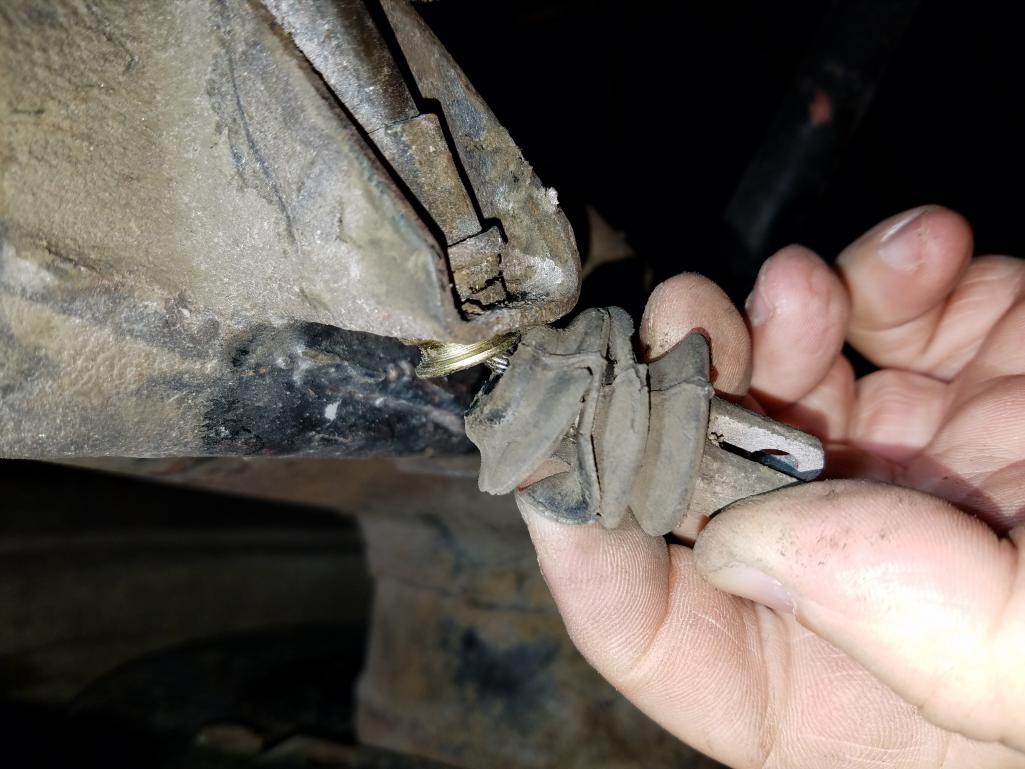
Posted by: Matty900 Mar 24 2017, 01:23 AM
Pulled the factory fuel lines to replace them with new stainless steel lines.
Attached thumbnail(s)
Posted by: Matty900 Mar 24 2017, 01:29 AM
Engine bay ready for some love. Rubberized undercoating or bedliner?
Attached thumbnail(s)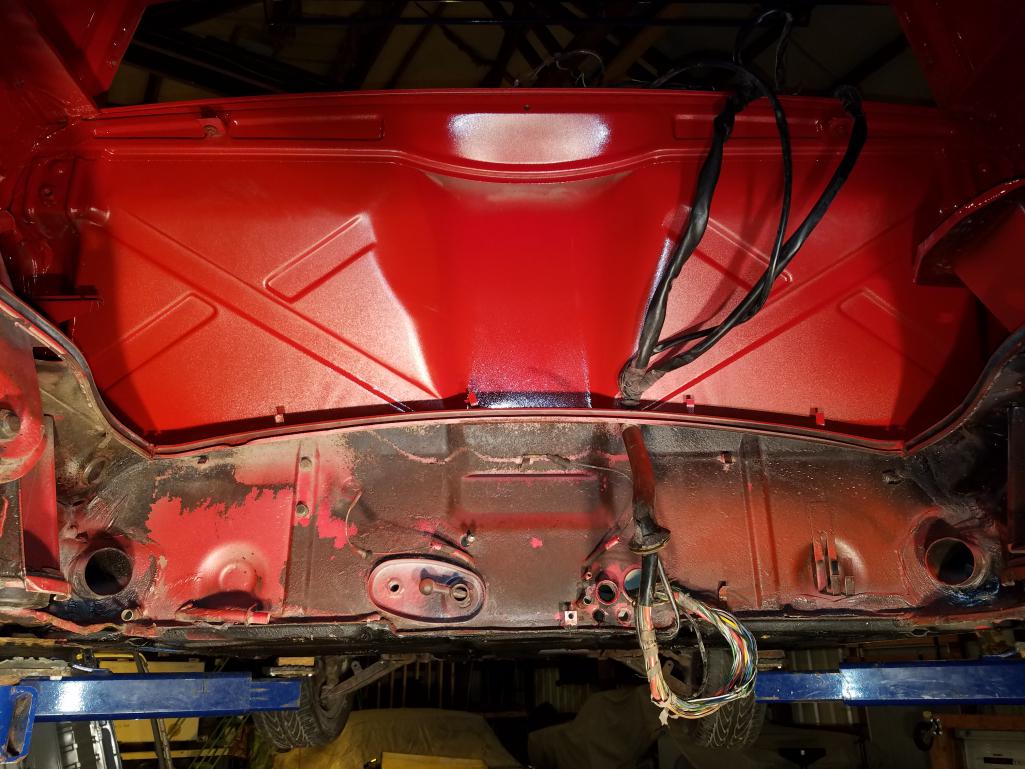
Posted by: Matty900 Apr 18 2017, 06:40 PM
Haven't updated for a little while so here's what has been going on. Found some damage to the bottom of the driver's side suspension. So we (Cary) pulled it to replace with the parts I had him clean up already. http://www.914world.com/bbs2/index.php?s=&showtopic=187546&view=findpost&p=2448492 and http://www.914world.com/bbs2/index.php?s=&showtopic=187546&view=findpost&p=2450682
Attached thumbnail(s)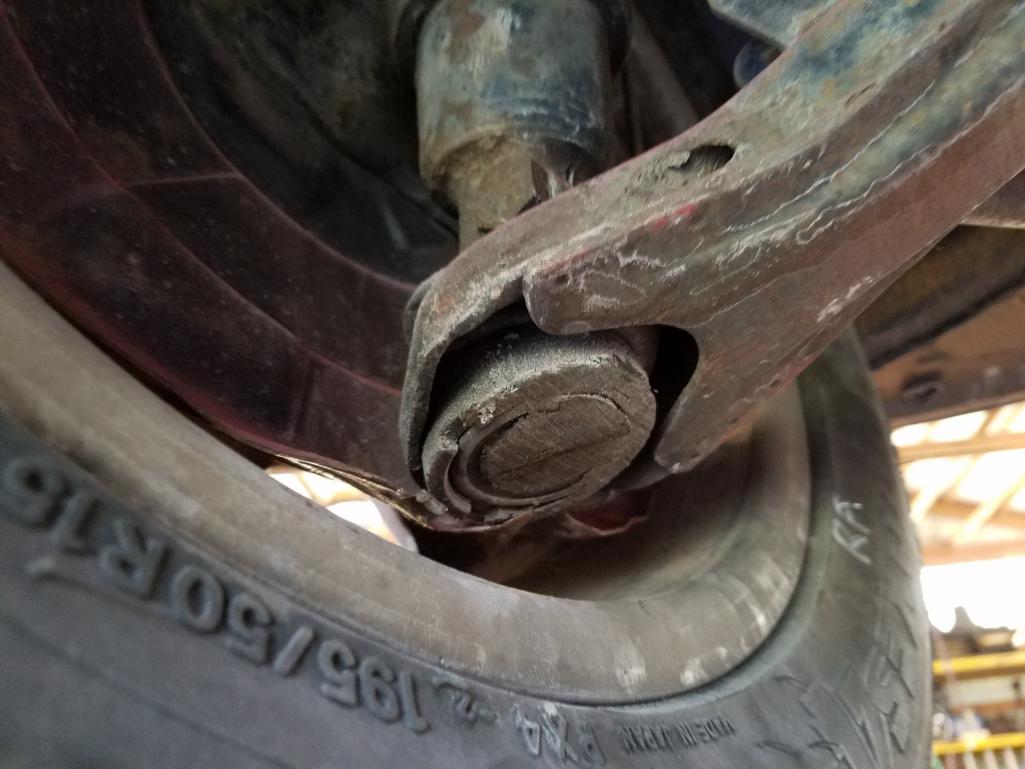
Posted by: Matty900 Apr 18 2017, 06:51 PM
With the suspension out. We will freshen everything up. I spent a lot of time in the blasting cabinet
Attached thumbnail(s)
Posted by: Matty900 Apr 18 2017, 06:55 PM
Some cleaning needed
Attached thumbnail(s)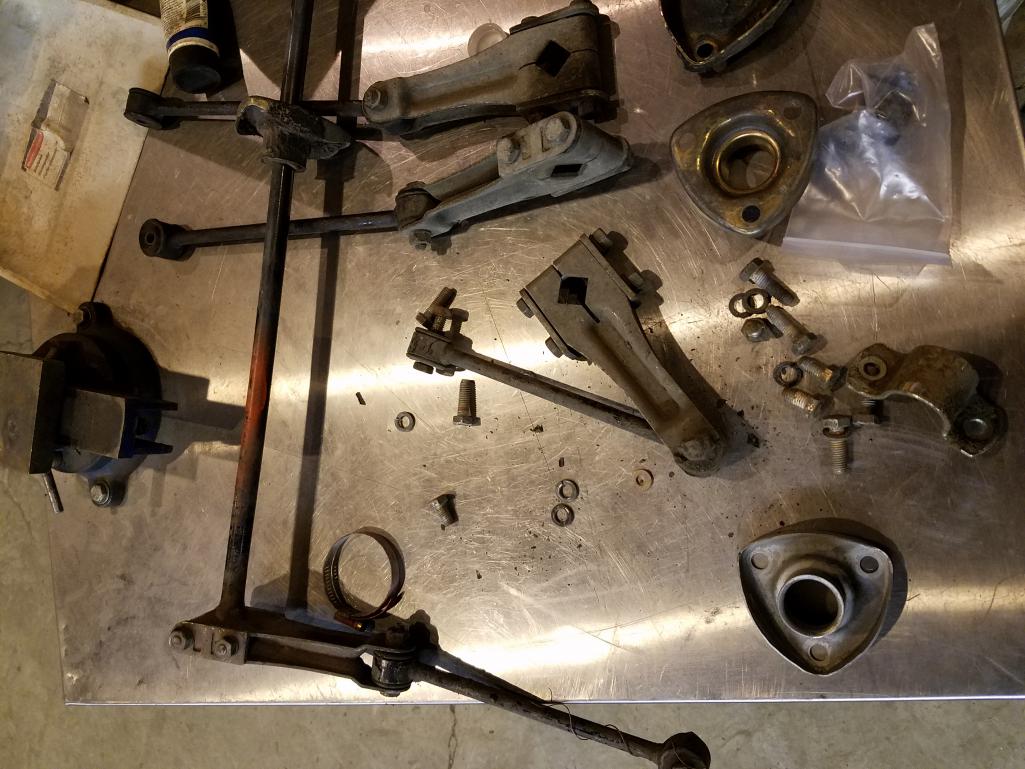
Posted by: Matty900 Apr 18 2017, 07:08 PM
Blasting work
Attached thumbnail(s)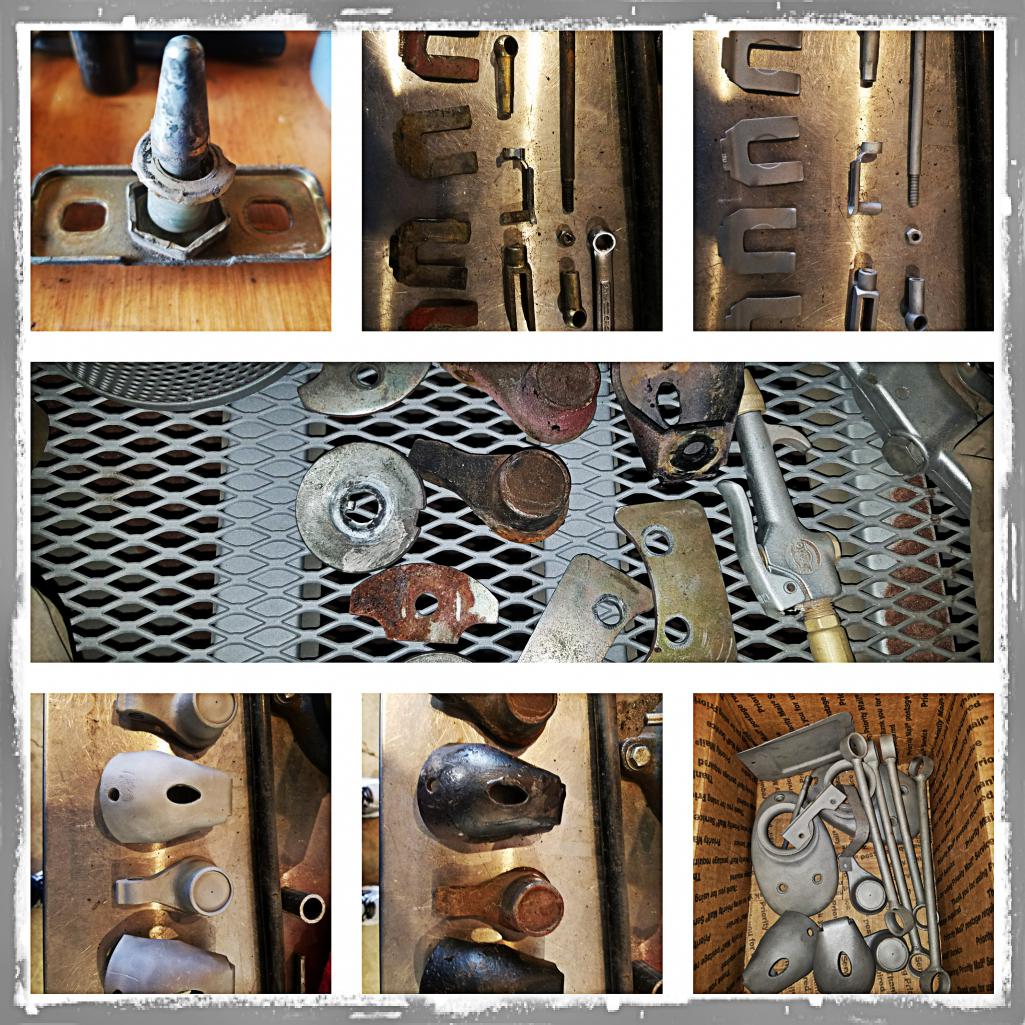
Posted by: Matty900 Apr 18 2017, 07:11 PM
Some parts ready for powder coating
Attached thumbnail(s)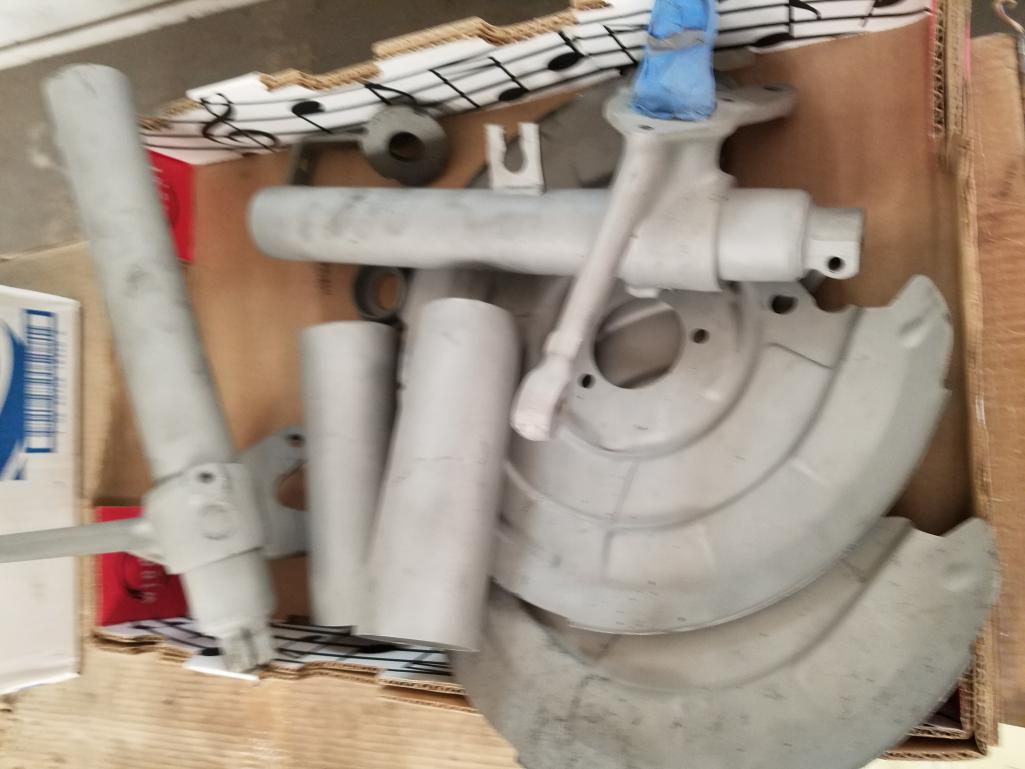
Posted by: Matty900 Apr 18 2017, 07:13 PM
Got the rear trailing arms and suspension off
Attached thumbnail(s)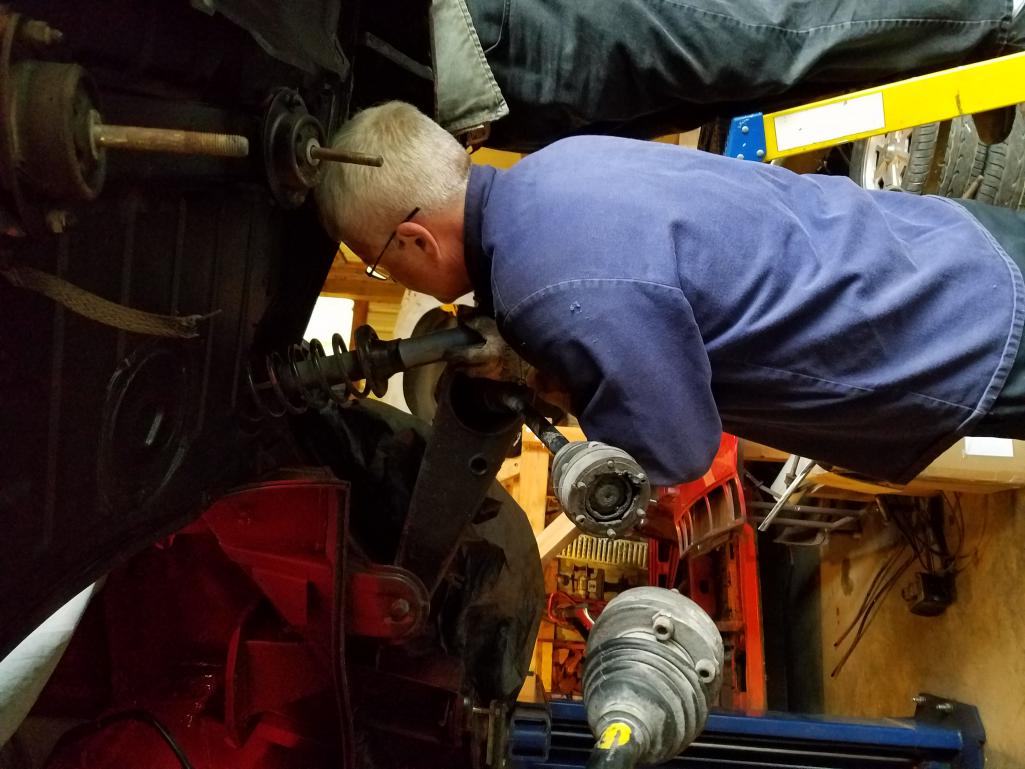
Posted by: Matty900 Apr 18 2017, 07:17 PM
Everything comes apart so easily on this car. Hopefully it will all go back together as easily.
Attached thumbnail(s)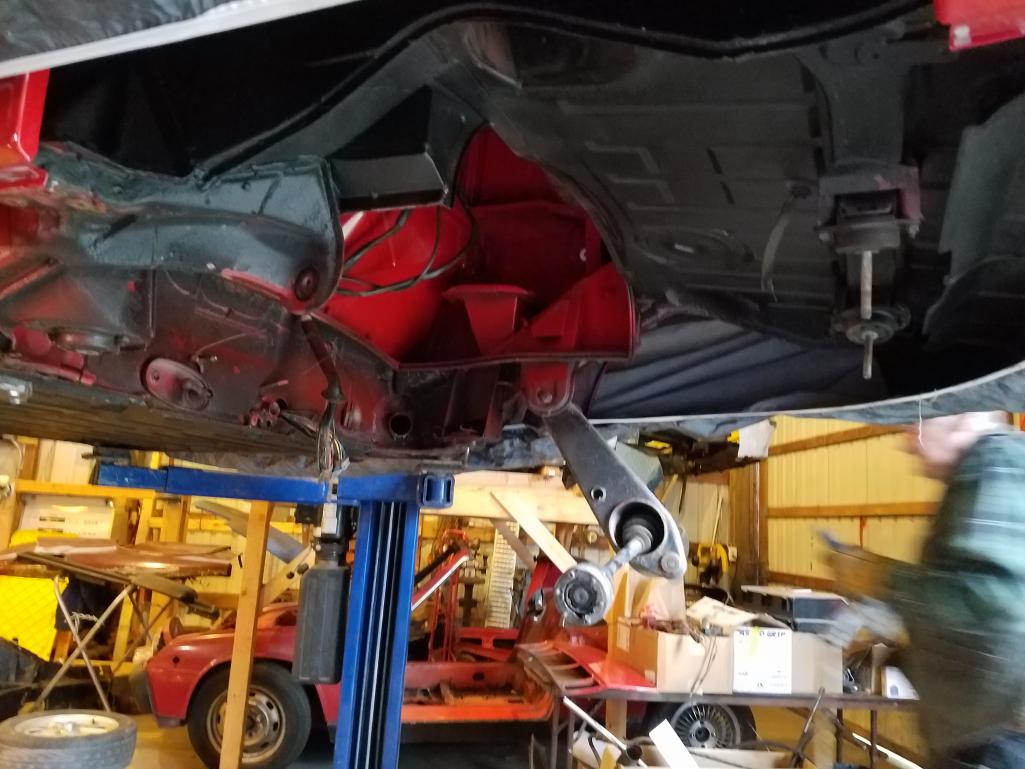
Posted by: Matty900 Apr 18 2017, 07:21 PM
Bearings and bushings are out thanks to a super in-laws jig http://www.914world.com/bbs2/index.php?s=&showtopic=187546&view=findpost&p=2475422
Attached thumbnail(s)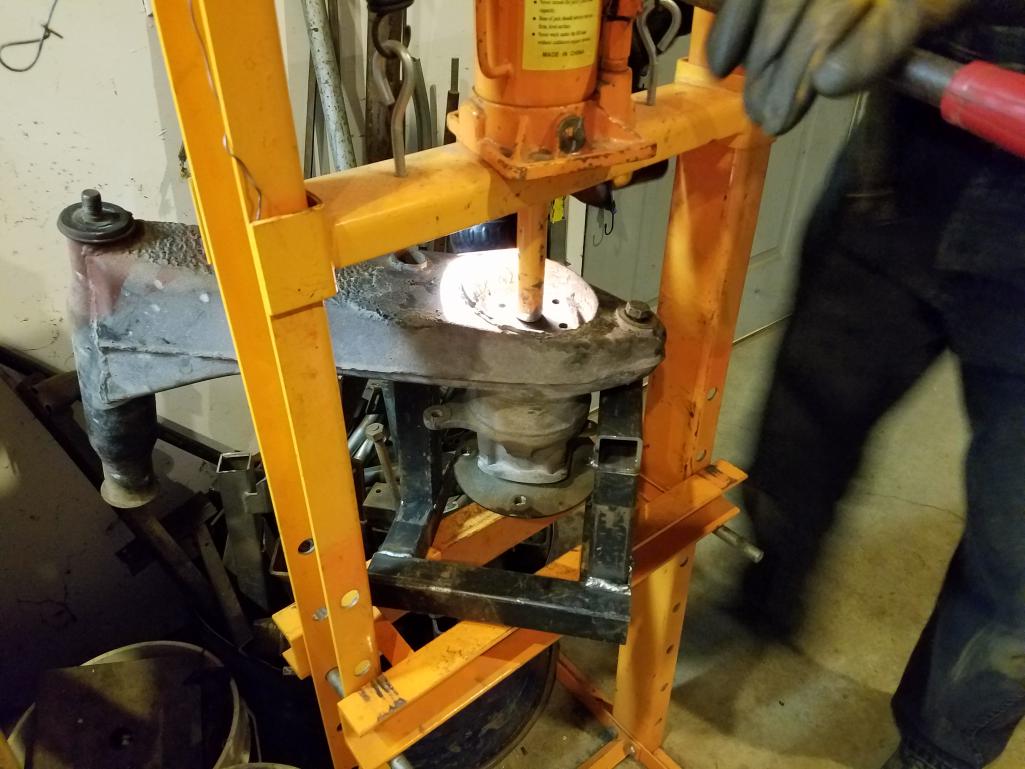
Posted by: Matty900 Apr 18 2017, 07:48 PM
Chance to test fit new parts
Attached thumbnail(s)
Posted by: Matty900 May 5 2017, 01:33 AM
Cleaning up more parts
Attached thumbnail(s)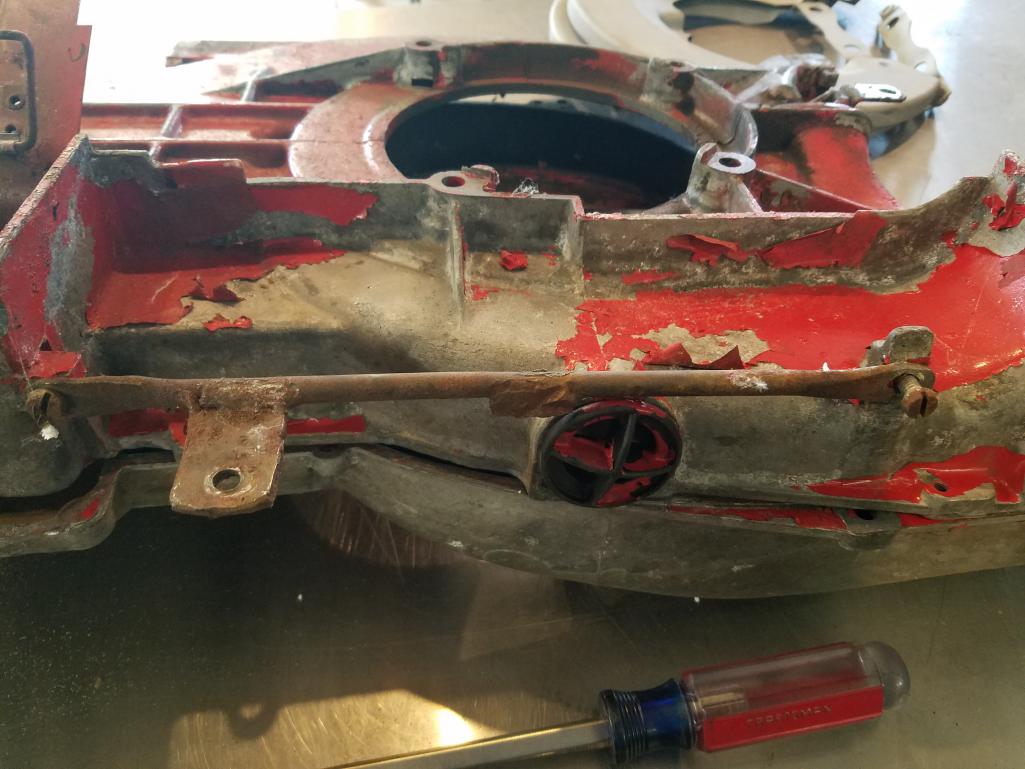
Posted by: Matty900 May 5 2017, 01:39 AM
Time for some fresh paint
Attached thumbnail(s)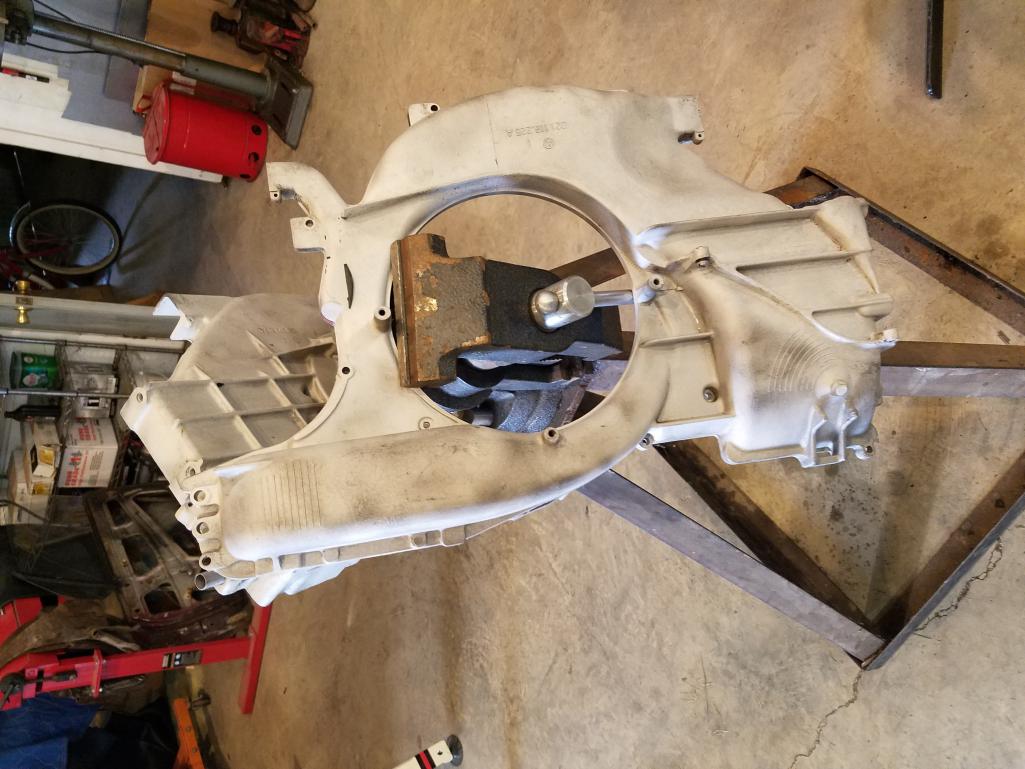
Posted by: Matty900 May 5 2017, 01:44 AM
Cleaning up the trailing arms and associated parts
Attached thumbnail(s)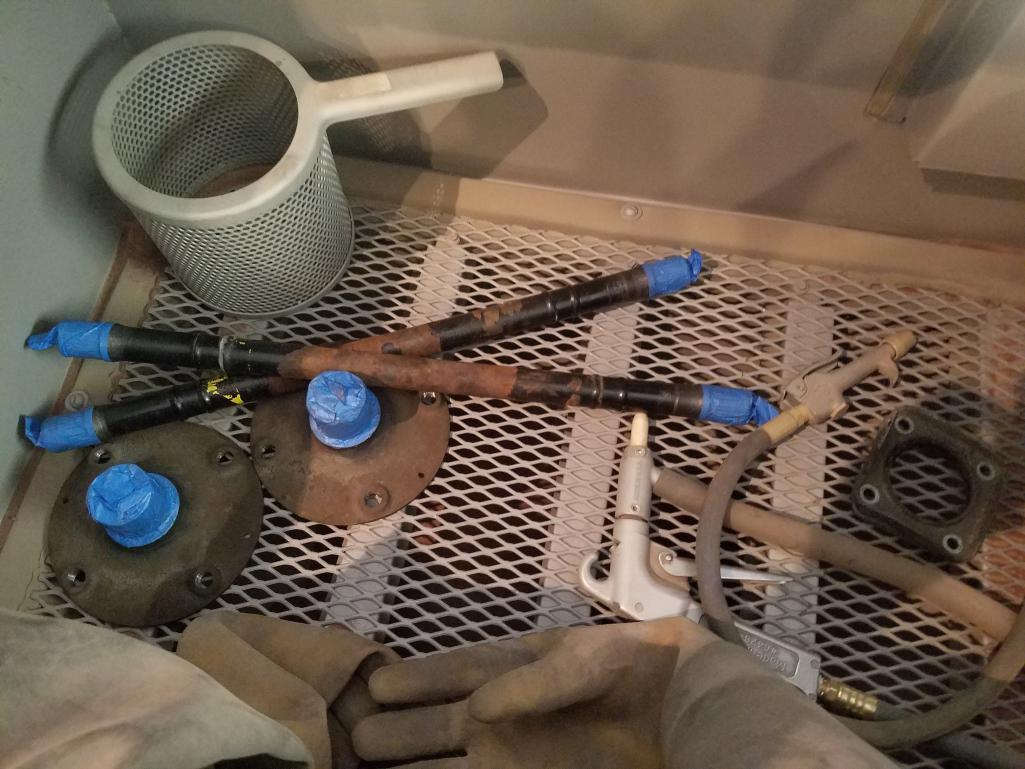
Posted by: Matty900 May 5 2017, 01:45 AM
More parts ready for powder
Attached thumbnail(s)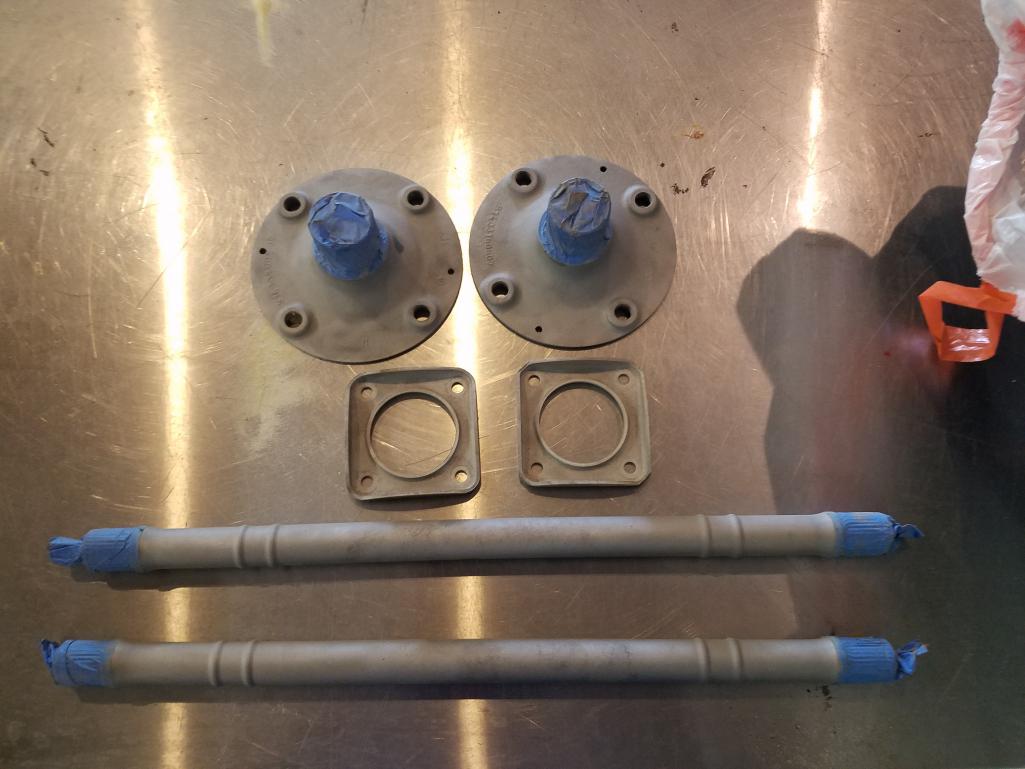
Posted by: Matty900 May 5 2017, 01:48 AM
Should look like new next week
Attached thumbnail(s)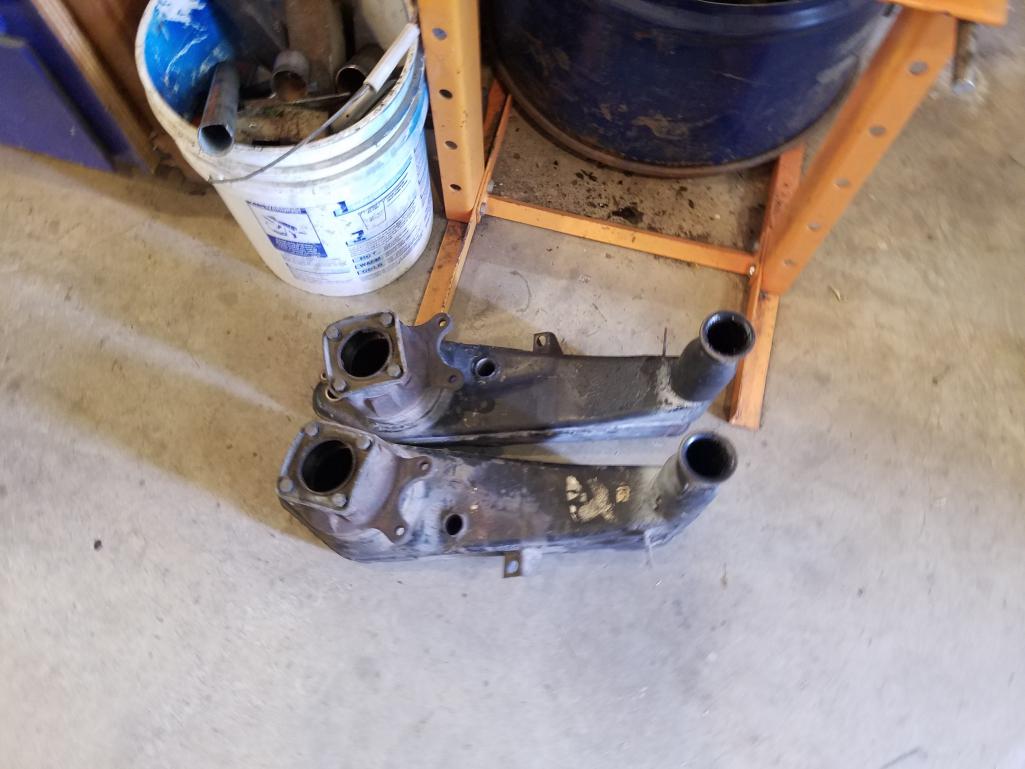
Posted by: Matty900 May 5 2017, 06:02 PM
Heat exchangers ready for ceramic coating
http://www.914world.com/bbs2/index.php?s=&showtopic=187546&view=findpost&p=2482838
Attached thumbnail(s)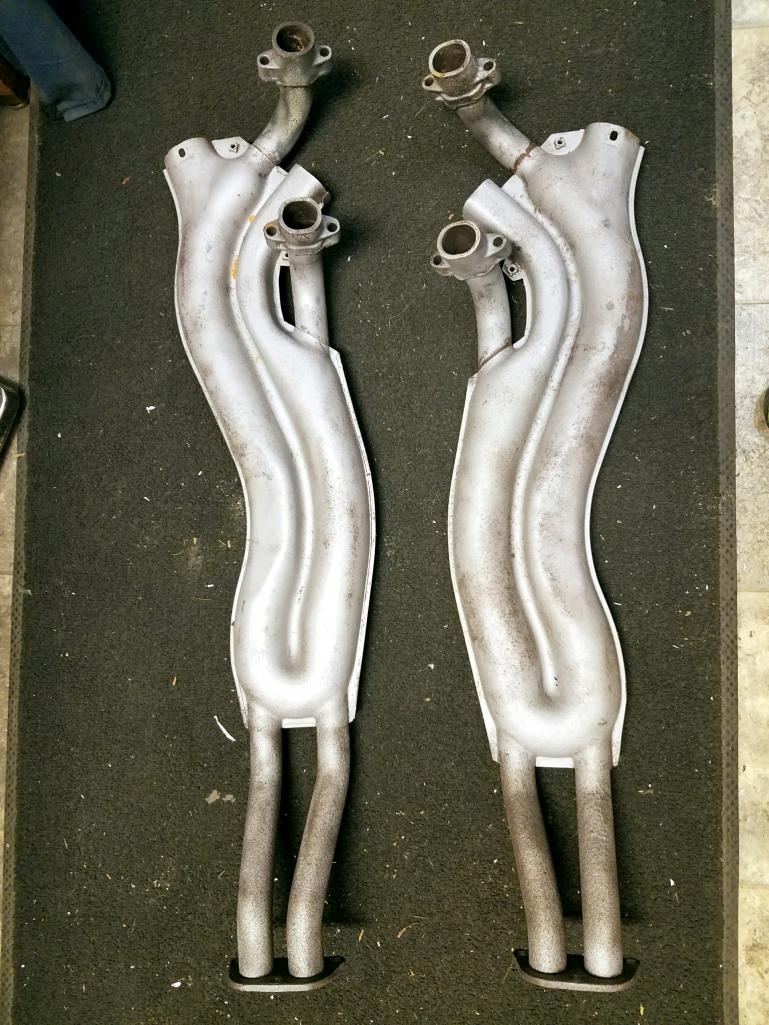
Posted by: Matty900 May 5 2017, 06:04 PM
More parts ready for powder coating
Attached thumbnail(s)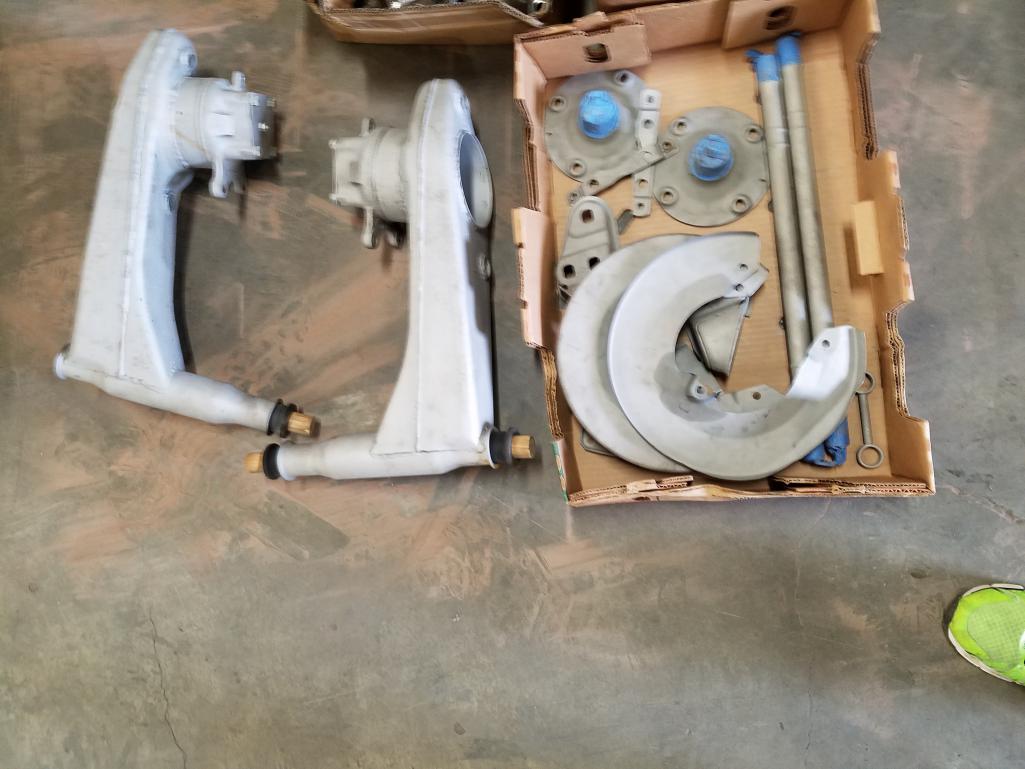
Posted by: Matty900 May 31 2017, 01:49 AM
Haven't updated for a while as there has not been too much exciting happening. Just lots of time in the blasting cabinet and taking things in for fresh powder coating and zinc plating. Until today. I picked up the exhaust from the ceramic coater and they turned out awesome.
Attached thumbnail(s)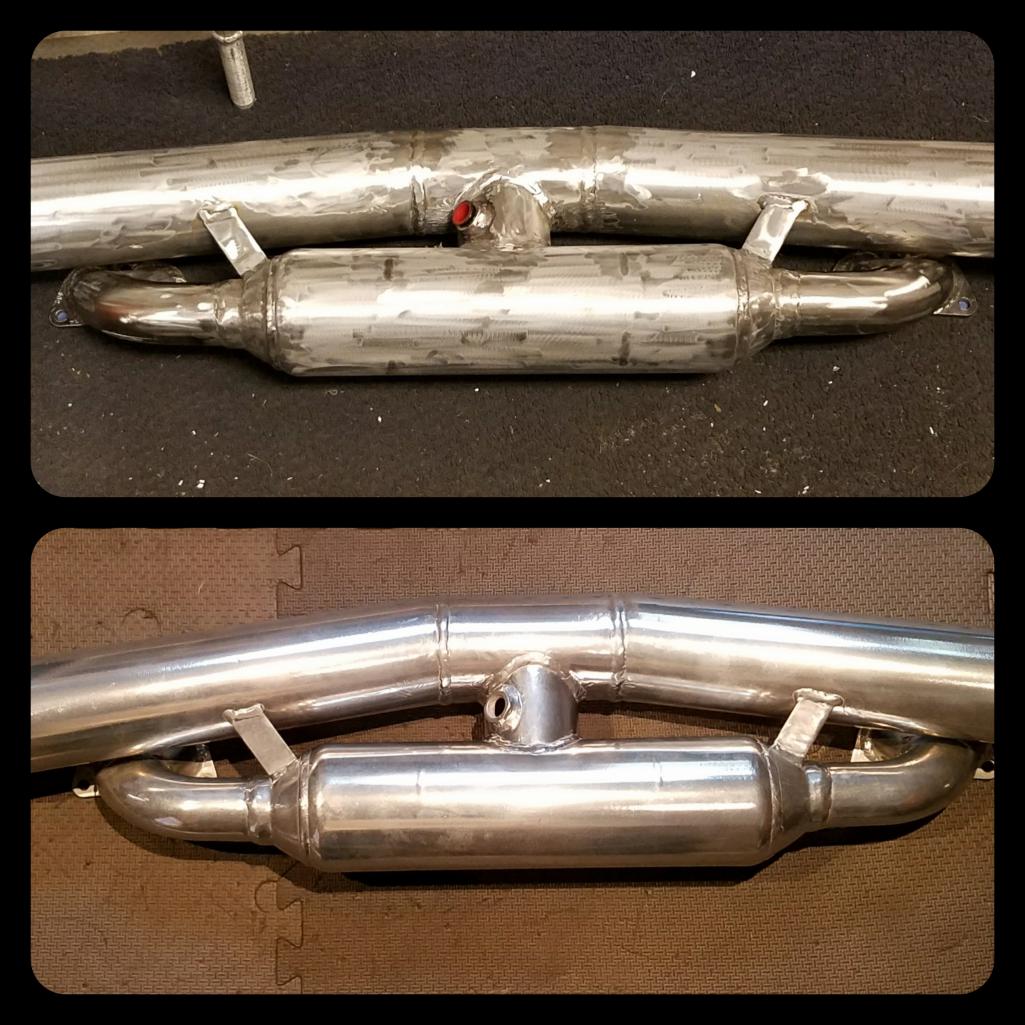
Attached image(s)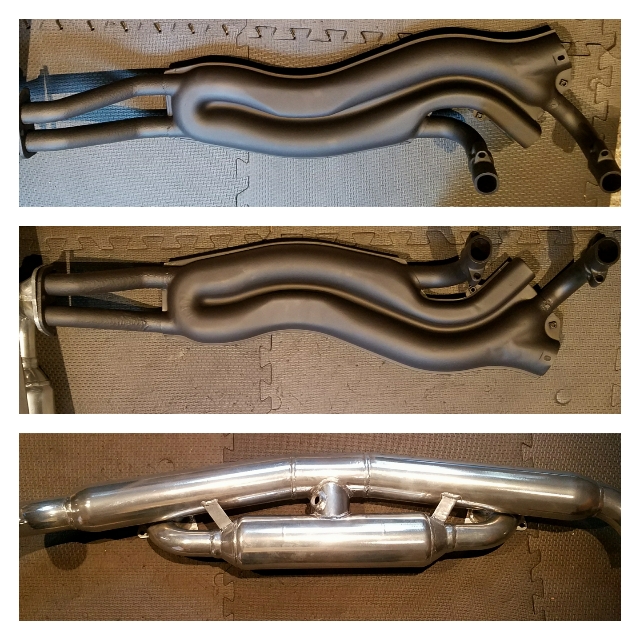
Posted by: Matty900 May 31 2017, 01:58 AM
After the Kent in the body shop told me that none of the tubings that you can get to cover the wiring harness tabs on the body are correct like the factory ones coming off. We decided to make the tubing to match the appearance of the factory ones with the correct shine. I got the chance to put them on the car and I really like how they went on and looked. They slide right on but have just enough grab to them to stay on well.
Attached thumbnail(s)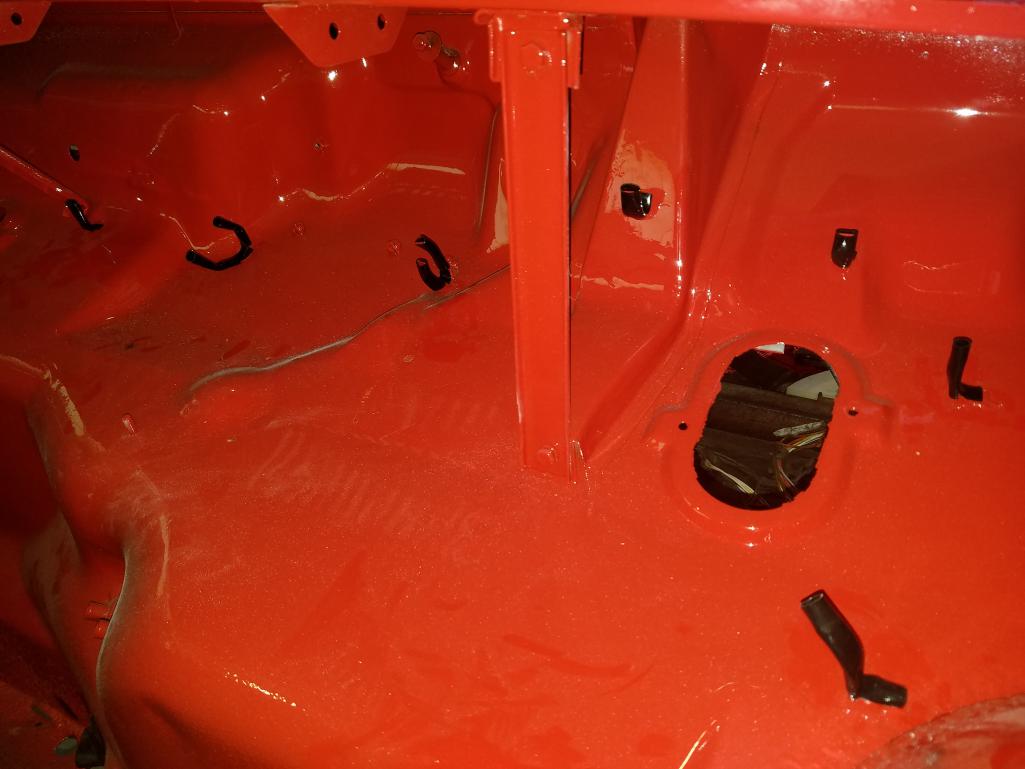
Posted by: Matty900 May 31 2017, 02:10 AM
Started to clean up the blower fan
Attached thumbnail(s)
Posted by: Matty900 May 31 2017, 02:11 AM
down to bare metal
Attached thumbnail(s)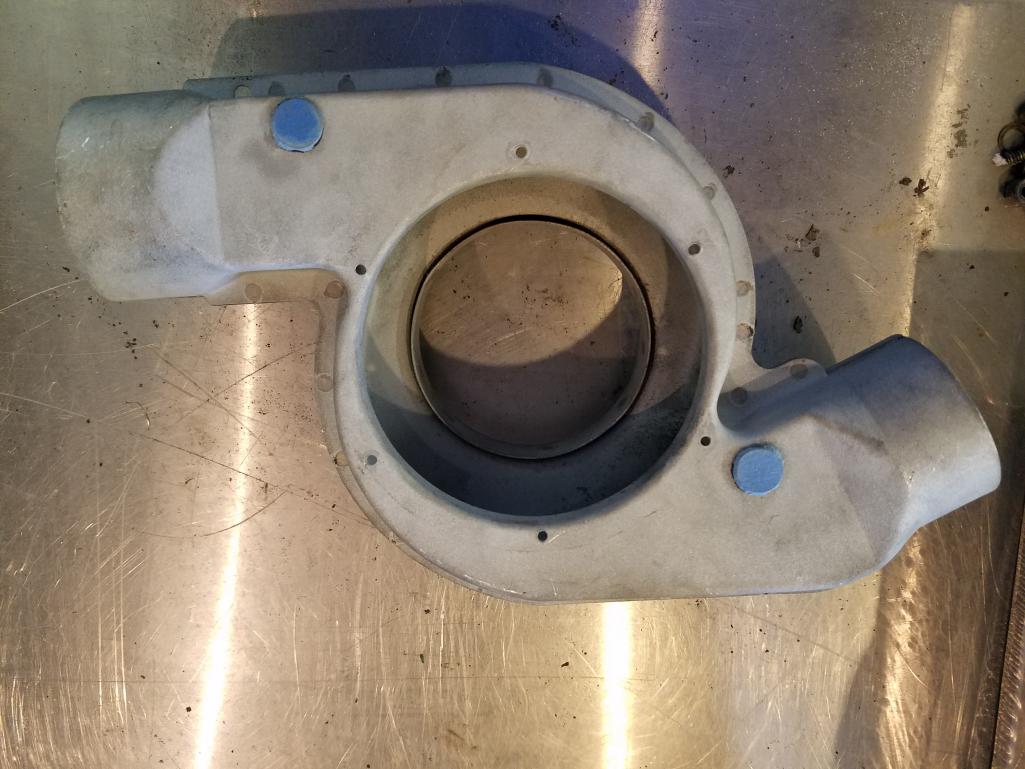
Posted by: Matty900 May 31 2017, 02:11 AM
blower mount
Attached thumbnail(s)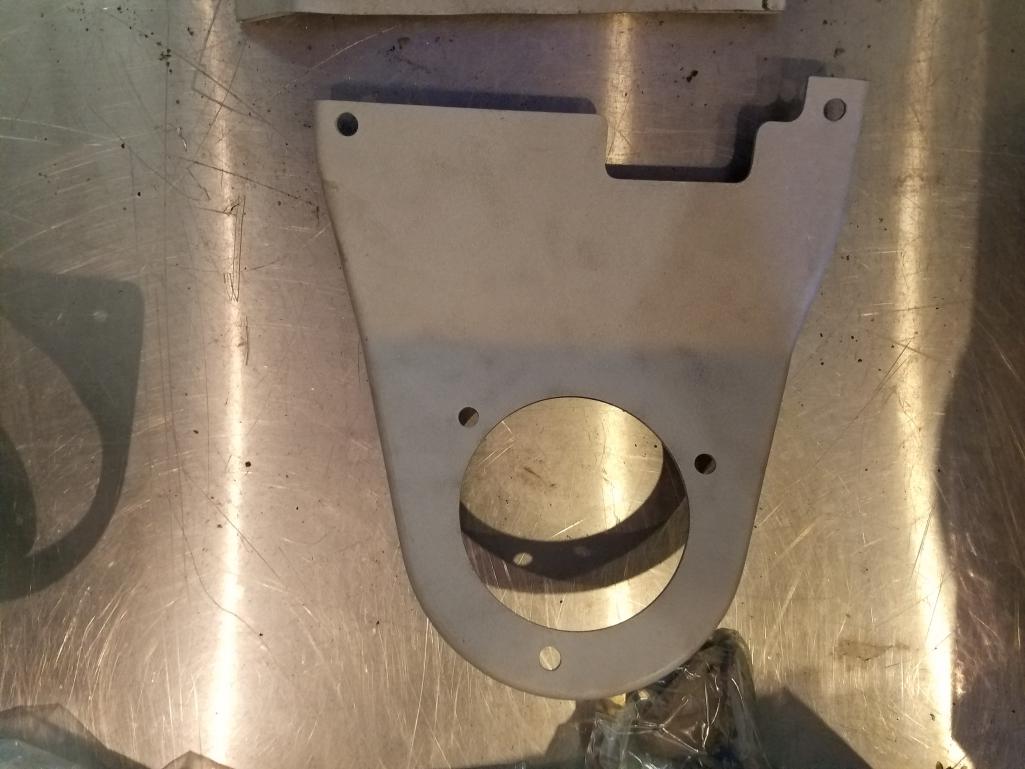
Posted by: Matty900 May 31 2017, 02:12 AM
Even the fan
Attached thumbnail(s)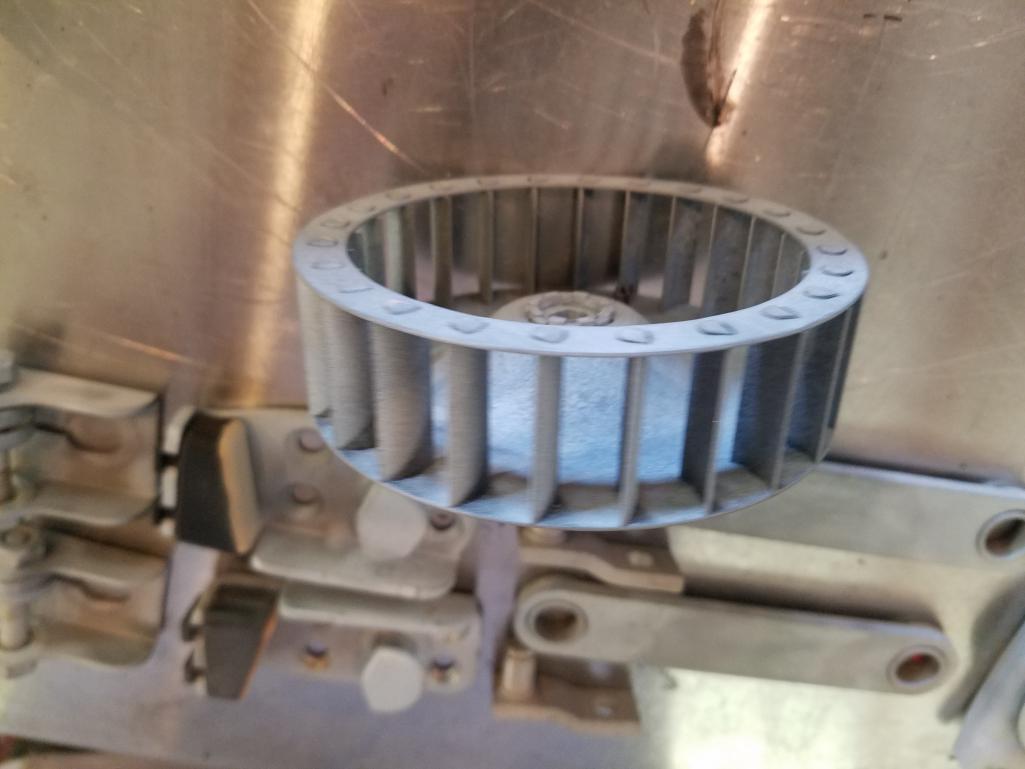
Posted by: Matty900 May 31 2017, 02:17 AM
Cleaned up the head light assemblies and found a pretty cool light that Bruse Stone said was pretty rare.
Attached thumbnail(s)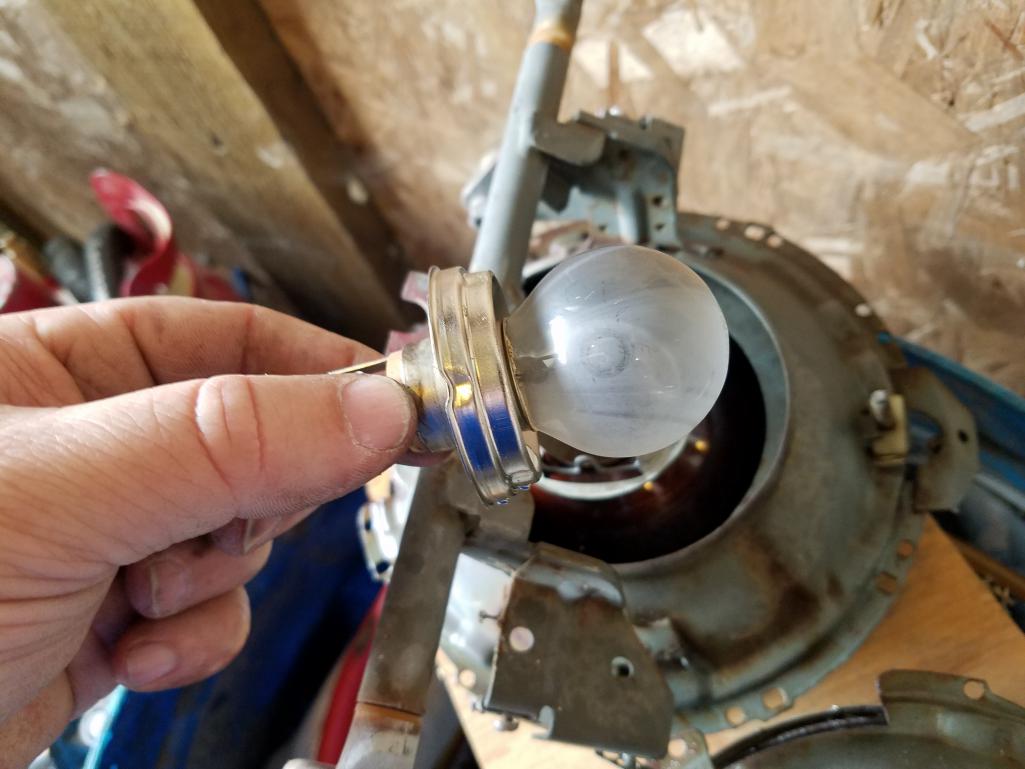
Posted by: Matty900 Jun 8 2017, 09:54 PM
Getting lots of nice looking parts. Getting closer to assembly
Attached thumbnail(s)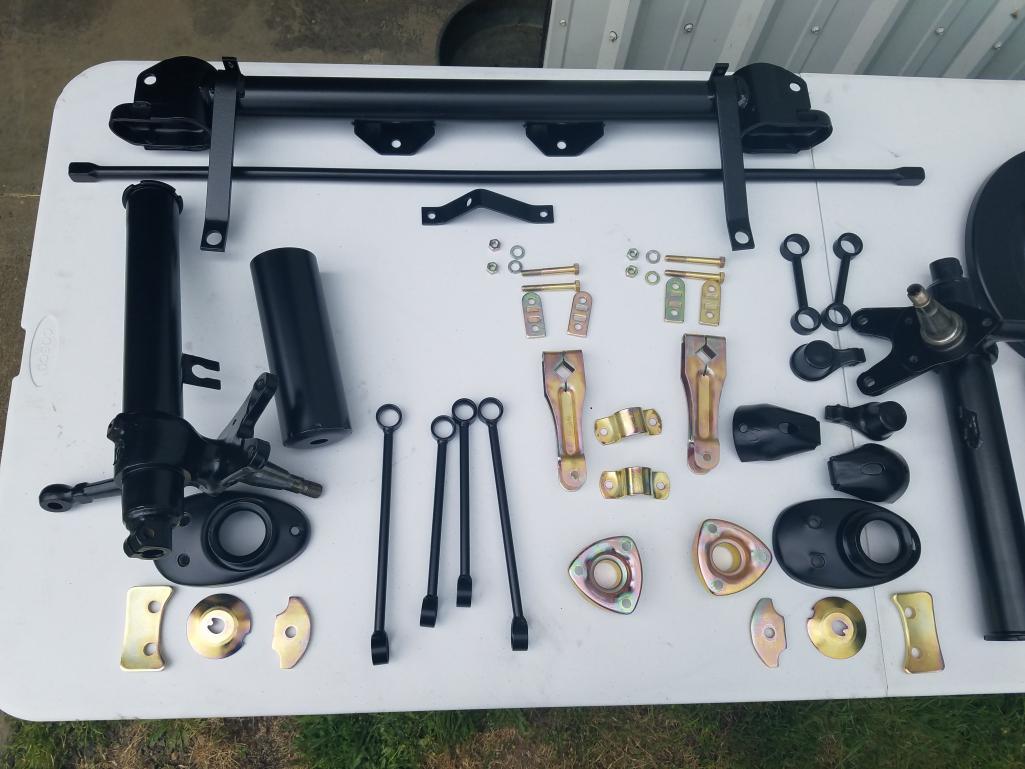
Posted by: Matty900 Jun 8 2017, 09:56 PM
Attached thumbnail(s)
Posted by: Matty900 Jun 8 2017, 09:57 PM
Attached thumbnail(s)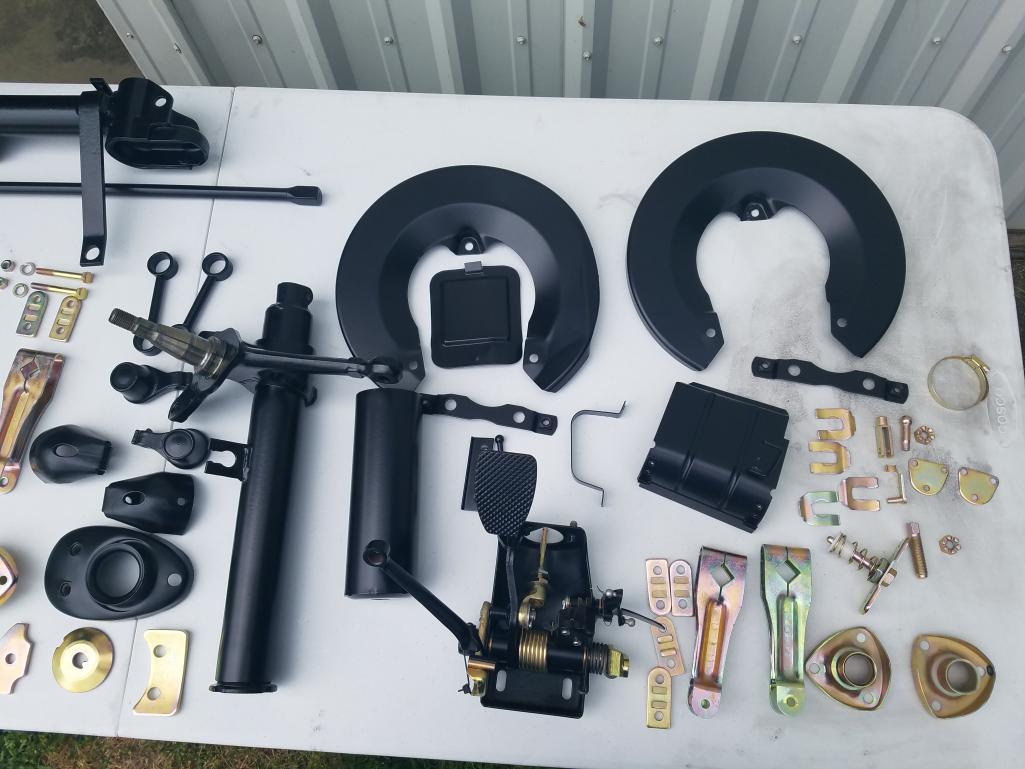
Posted by: Matty900 Jun 8 2017, 10:00 PM
One of these is a new 914Rubber part comming soon
Attached thumbnail(s)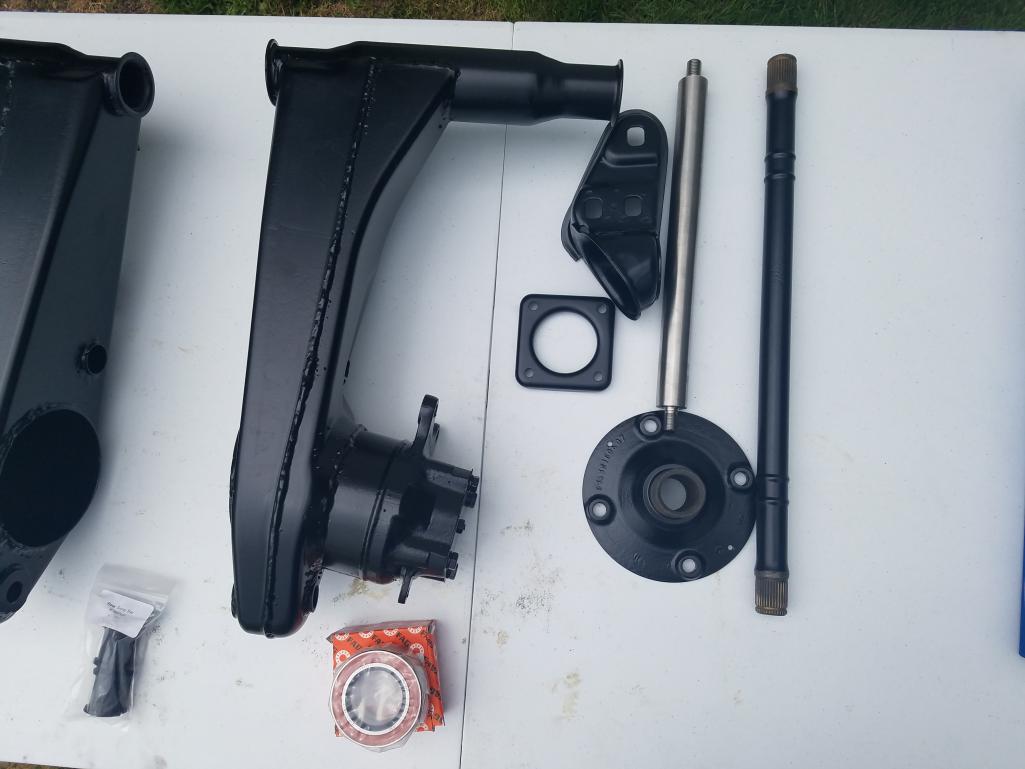
Posted by: Matty900 Jun 8 2017, 10:01 PM
Attached thumbnail(s)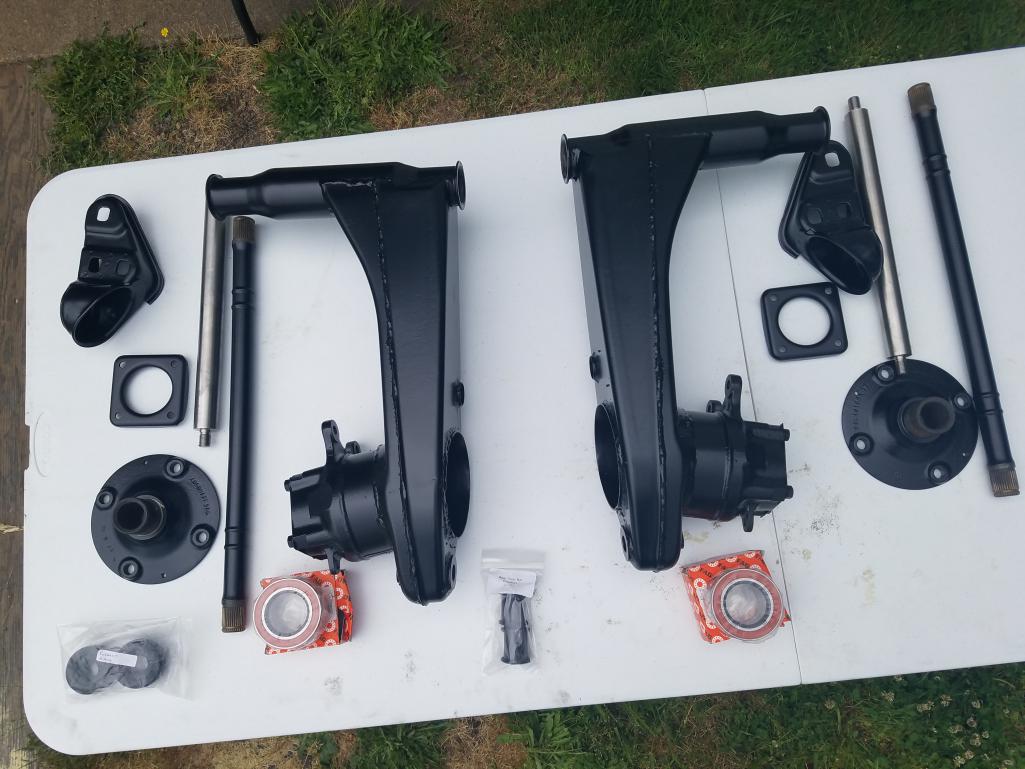
Posted by: Matty900 Jun 8 2017, 10:02 PM
A few schnoor washers got in to the batch that got replated. These will be thrown out and replaced with new ones. They are one time use.
Attached thumbnail(s)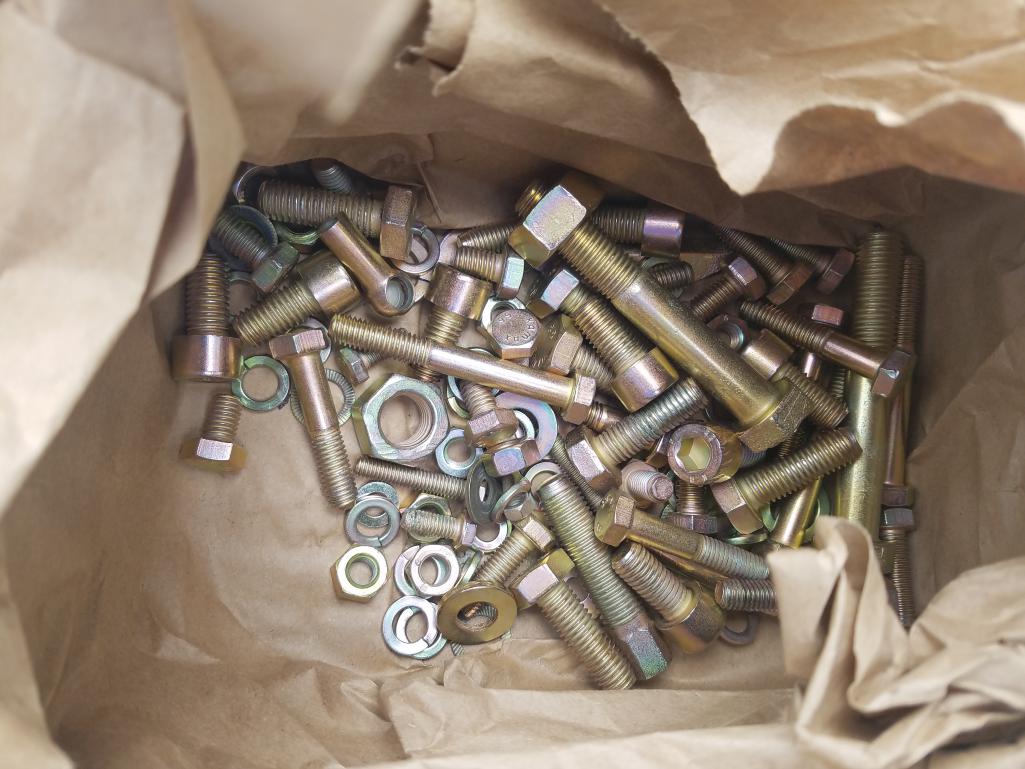
Posted by: Matty900 Jun 8 2017, 10:12 PM
Old part vs new part. 914Rubber percision Stainless Steel pivot shafts
Attached thumbnail(s)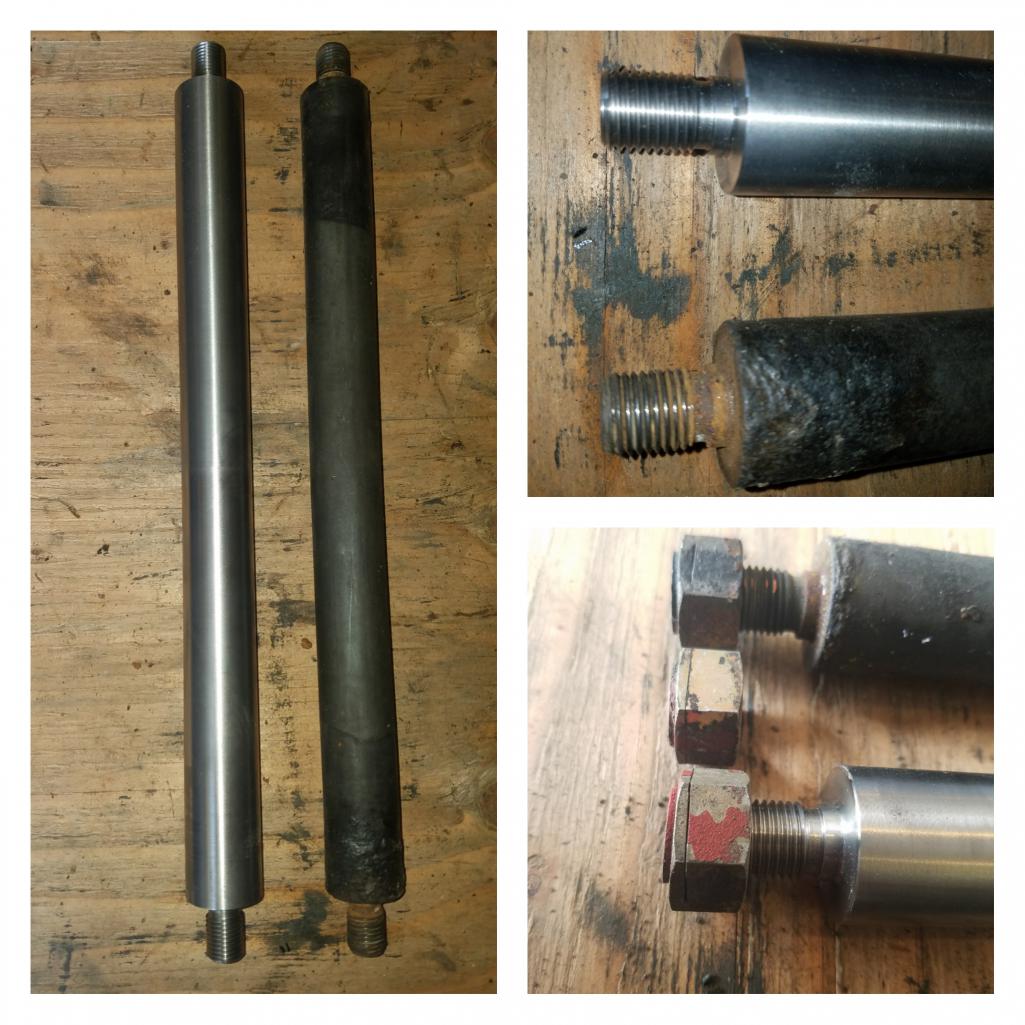
Posted by: Matty900 Jun 8 2017, 10:14 PM
Attached thumbnail(s)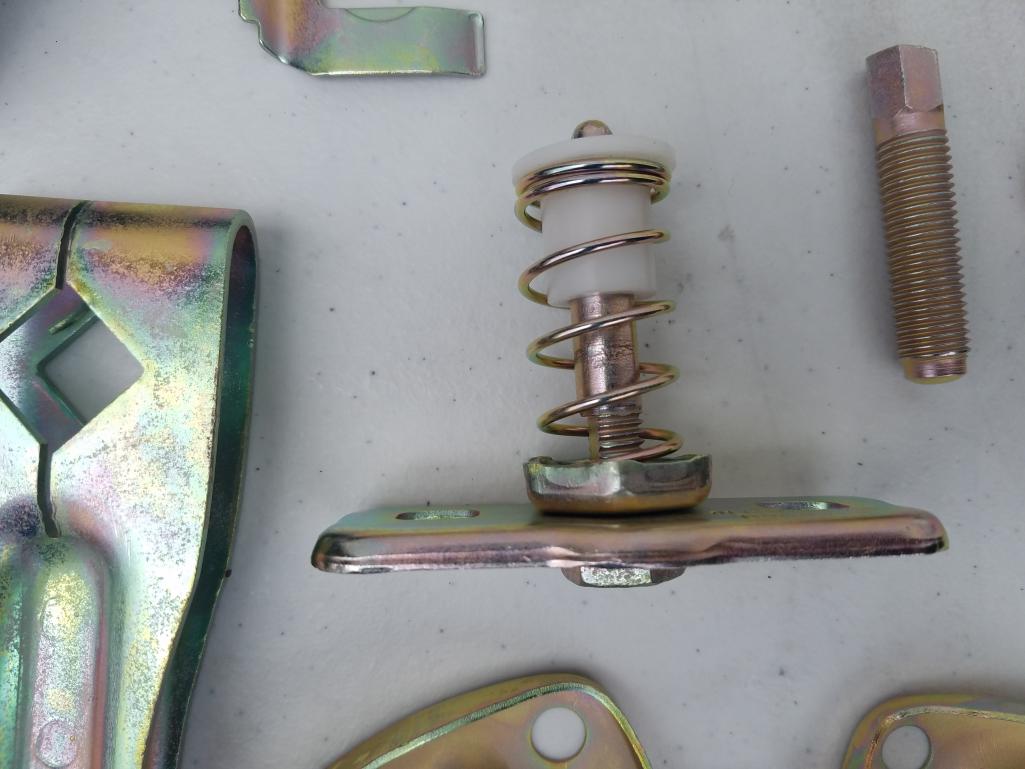
Posted by: Matty900 Jun 8 2017, 10:16 PM
Thank you Bruce Stone, very nice work
Attached thumbnail(s)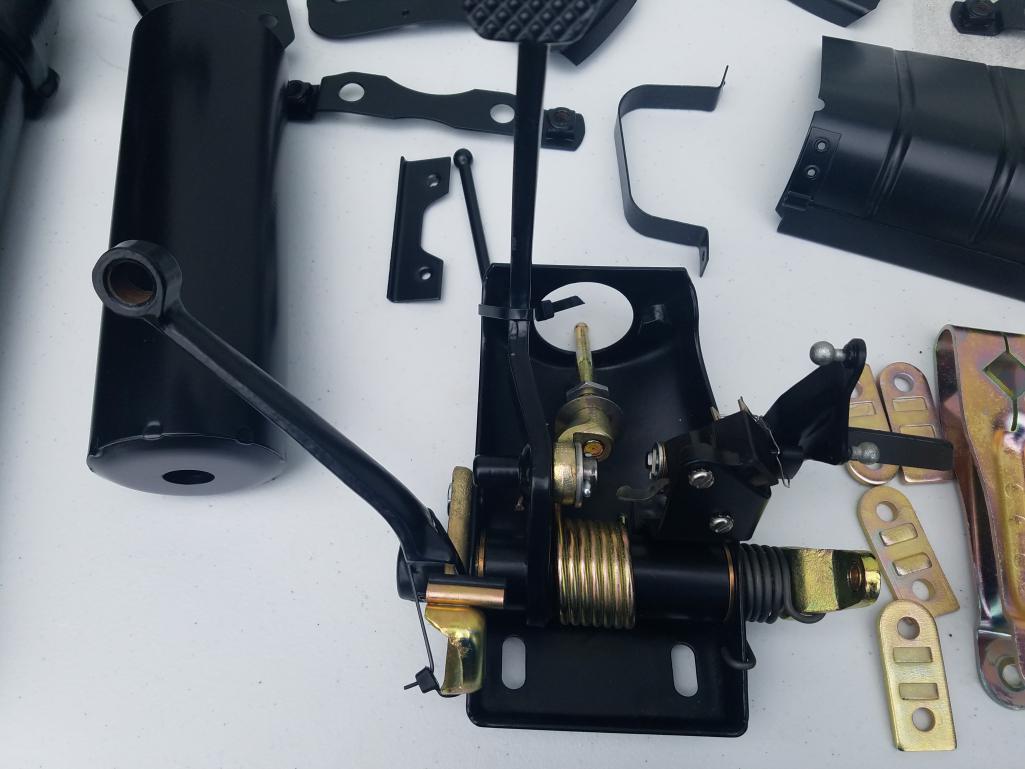
Posted by: Matty900 Jun 8 2017, 10:17 PM
Attached thumbnail(s)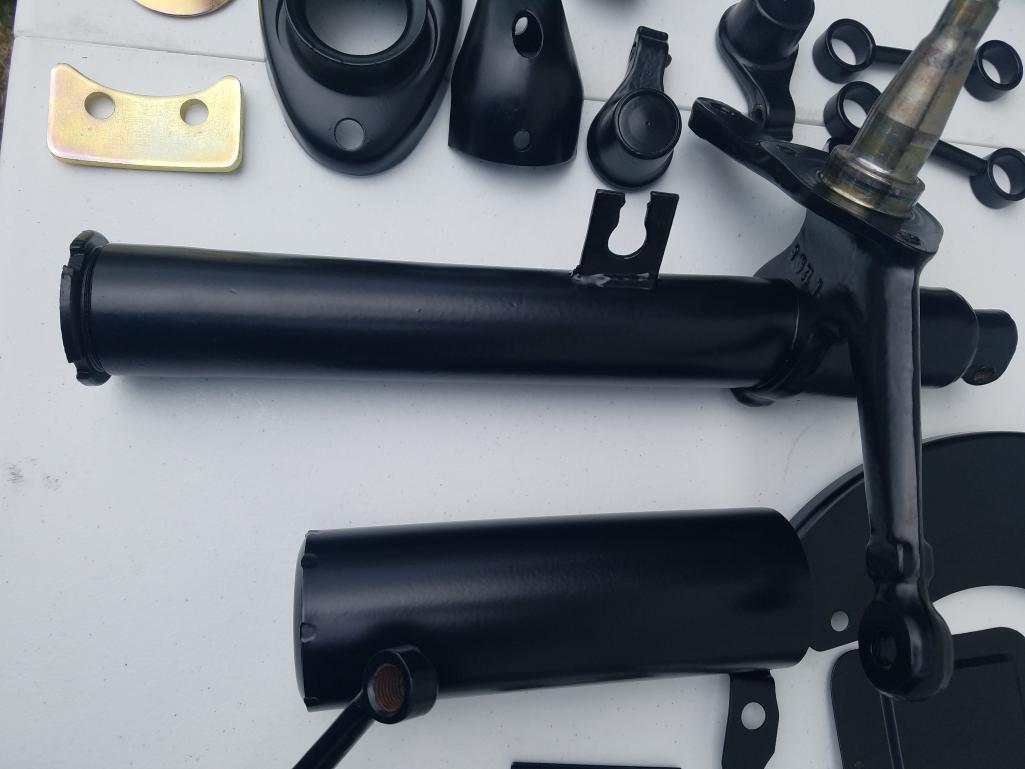
Posted by: Matty900 Jun 8 2017, 10:24 PM
Ran the wiring harness back into the front trunk.
Attached thumbnail(s)
Posted by: porschetub Jun 8 2017, 11:42 PM
Attention to detail ,appears you have some contacts  ,well done looks great .
Posted by: Matty900 Jun 9 2017, 03:07 AM
Attention to detail ,appears you have some contacts
,well done looks great .Bruce Stone did the Pedal Cluster for me. But the rest was all me and lot's of hours in Cary's blasting cabinet.
(OK I may have sent them out to a powder coater and a zinc plating company along with some 914rubber parts
)
Posted by: 76-914 Jun 9 2017, 08:18 AM
That is some nice 914 Porn. 
Posted by: rgalla9146 Jun 9 2017, 09:36 AM
Old part vs new part. 914Rubber percision Stainless Steel pivot shafts
Do the new pivot shafts have a correct diameter shoulder and serrations on the ends ?
Posted by: Mikey914 Jun 9 2017, 12:07 PM
You mean the nut?
Attached image(s)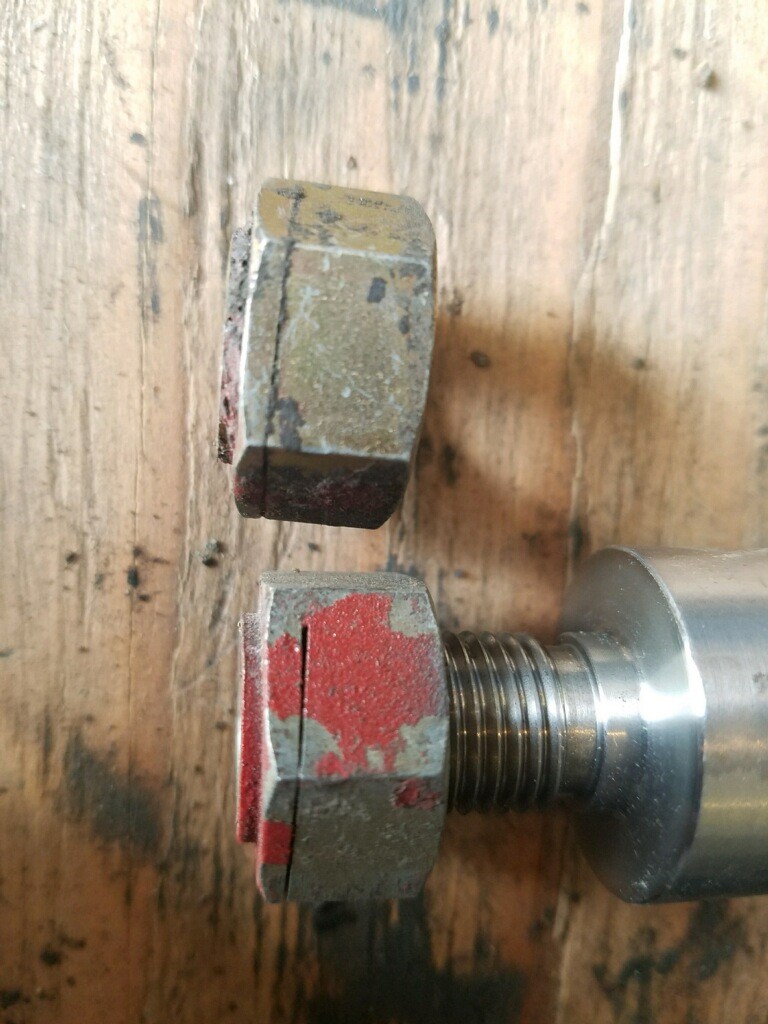
Posted by: rgalla9146 Jun 9 2017, 12:26 PM
No, not the nut.
The picture answers the question.
The original shafts have a collar or shoulder that is a perfect fit into the inner
chassis ear and the outside alignment bracket. It acts to locate the shaft with no play.
The shoulder is visible, is it a tight fit into the chassis features ?
The shafts also have serrations that (when tight) prevent rotation of the shafts with suspension movement.
Both features are important. The mating surface in the photo is smooth.
Posted by: forrestkhaag Jun 9 2017, 01:55 PM
Gotta love an unlimited budget project that will exceed its' budget.
Nice ork!
Posted by: Mikey914 Jun 9 2017, 08:58 PM
What you can't see yet is what we are doing with the rubber.
These are in testing right now.
Posted by: boxstr Jun 9 2017, 09:12 PM
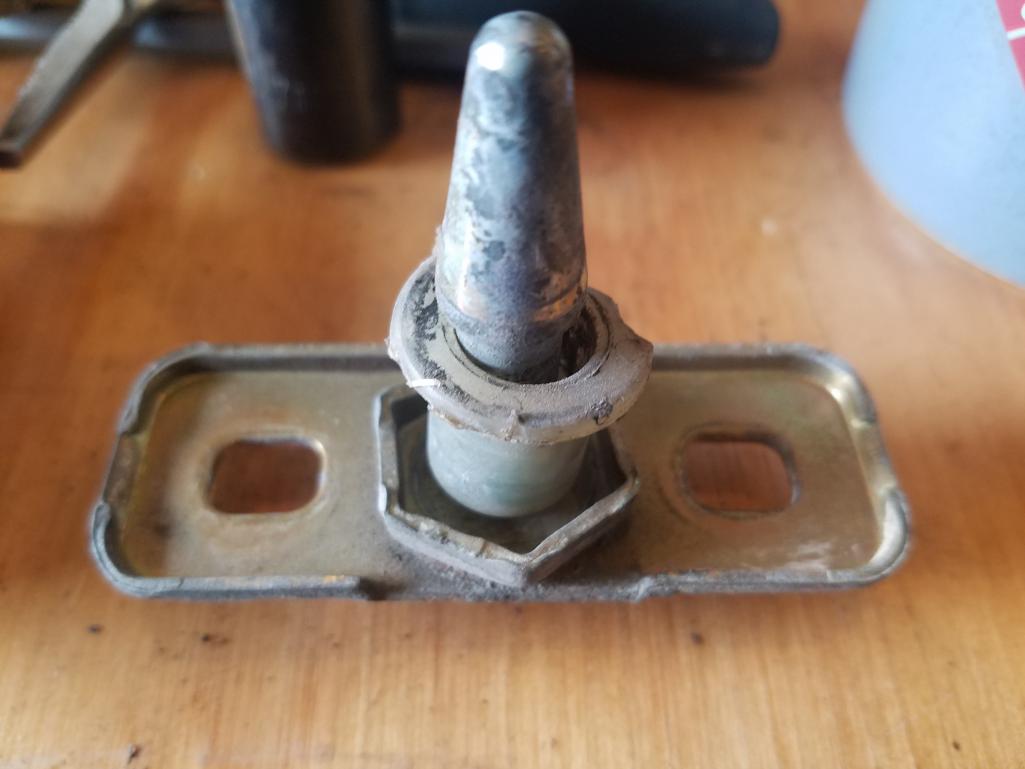
Matt, Your upper rear latch trunk assembly needs to have the plate flipped around.
Craig at CAMP
Posted by: Matty900 Jun 9 2017, 11:13 PM
Matt, Your upper rear latch trunk assembly needs to have the plate flipped around.
Craig at CAMP
Thank you, Craig. I got excited with the pretty, shiny parts and did not look at my photos. This really shows why you need the new bushing.
Attached thumbnail(s)
Posted by: 914_teener Jun 10 2017, 12:00 AM
No, not the nut.
The picture answers the question.
The original shafts have a collar or shoulder that is a perfect fit into the inner
chassis ear and the outside alignment bracket. It acts to locate the shaft with no play.
The shoulder is visible, is it a tight fit into the chassis features ?
The shafts also have serrations that (when tight) prevent rotation of the shafts with suspension movement.
Both features are important. The mating surface in the photo is smooth.
This is a great thread....and nice work.
The shaft ends should look like this though:
Posted by: Matty900 Jun 10 2017, 11:11 AM
I grabbed the sample from the shop before they were done. They will have the correct ends when were done. Thanks for the heads up.
Update: After lots of trial and error we found it best to use an aggressive locking washer rather than trying to machine the ridges in to the shafts.
Attached thumbnail(s)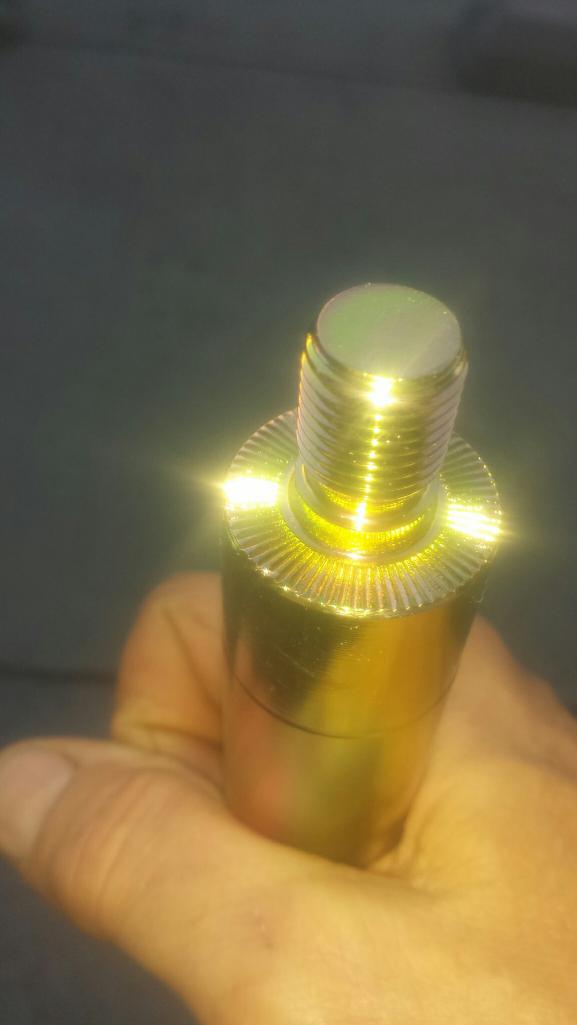
Posted by: Matty900 Jun 10 2017, 11:14 AM
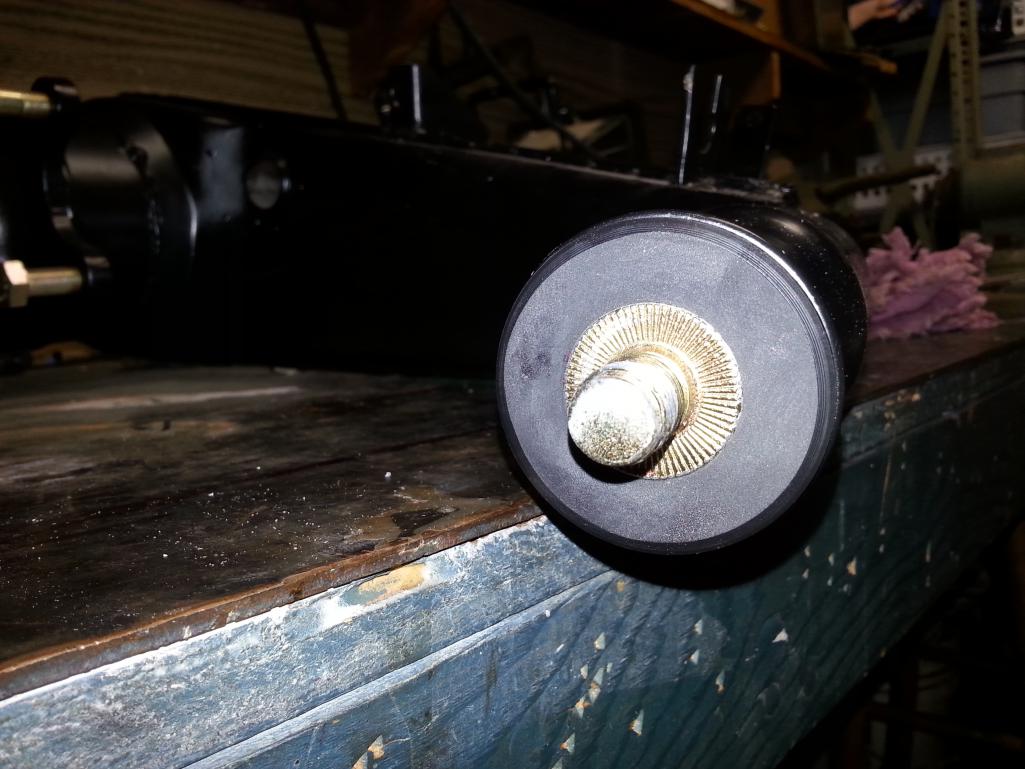
Worked on the wiper mechanism yesterday
Attached thumbnail(s)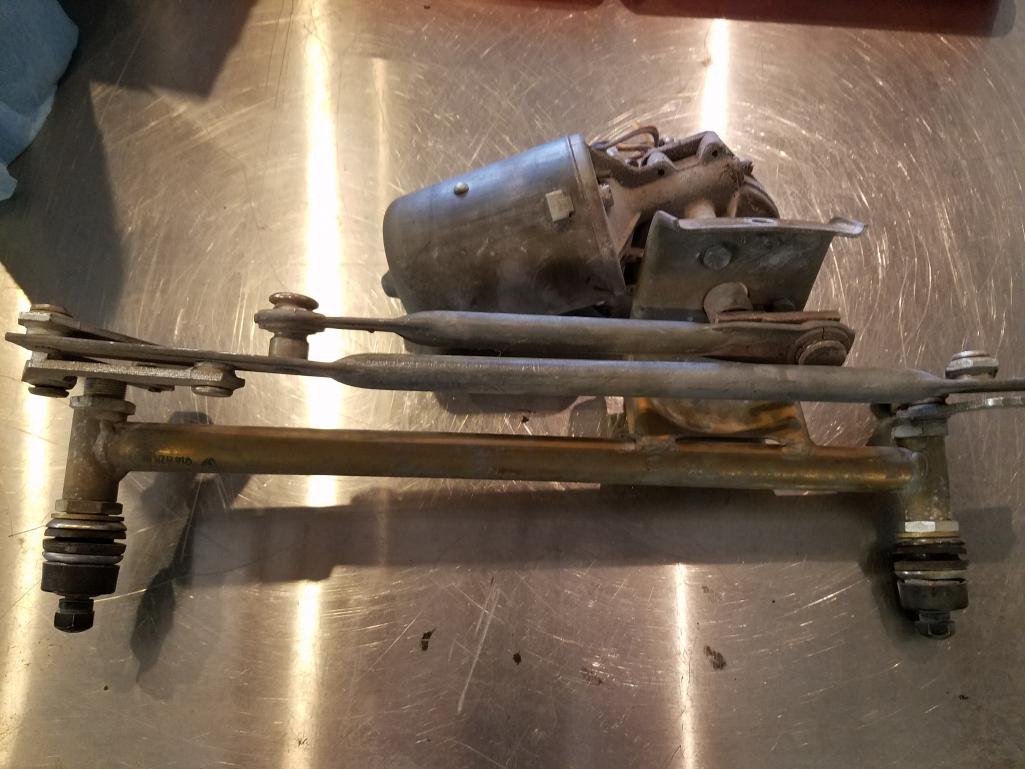
Posted by: Matty900 Jun 10 2017, 11:17 AM
We make all of the bushings to rebuild these on the 911. But on the 914 they are pressed together and would have to be drilled out. Luckily all if the bushings were in great shape on my assembly.
Attached thumbnail(s)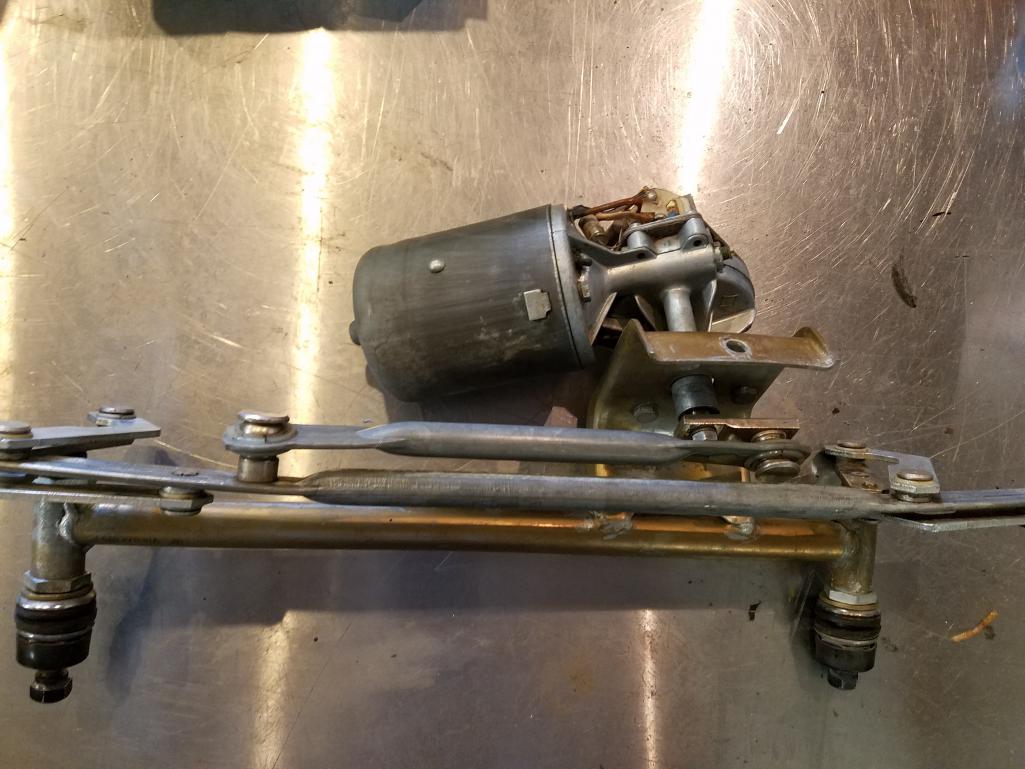
Posted by: Matty900 Jun 10 2017, 11:22 AM
Replaced all of the parts that wear out with new ones we make.
Attached thumbnail(s)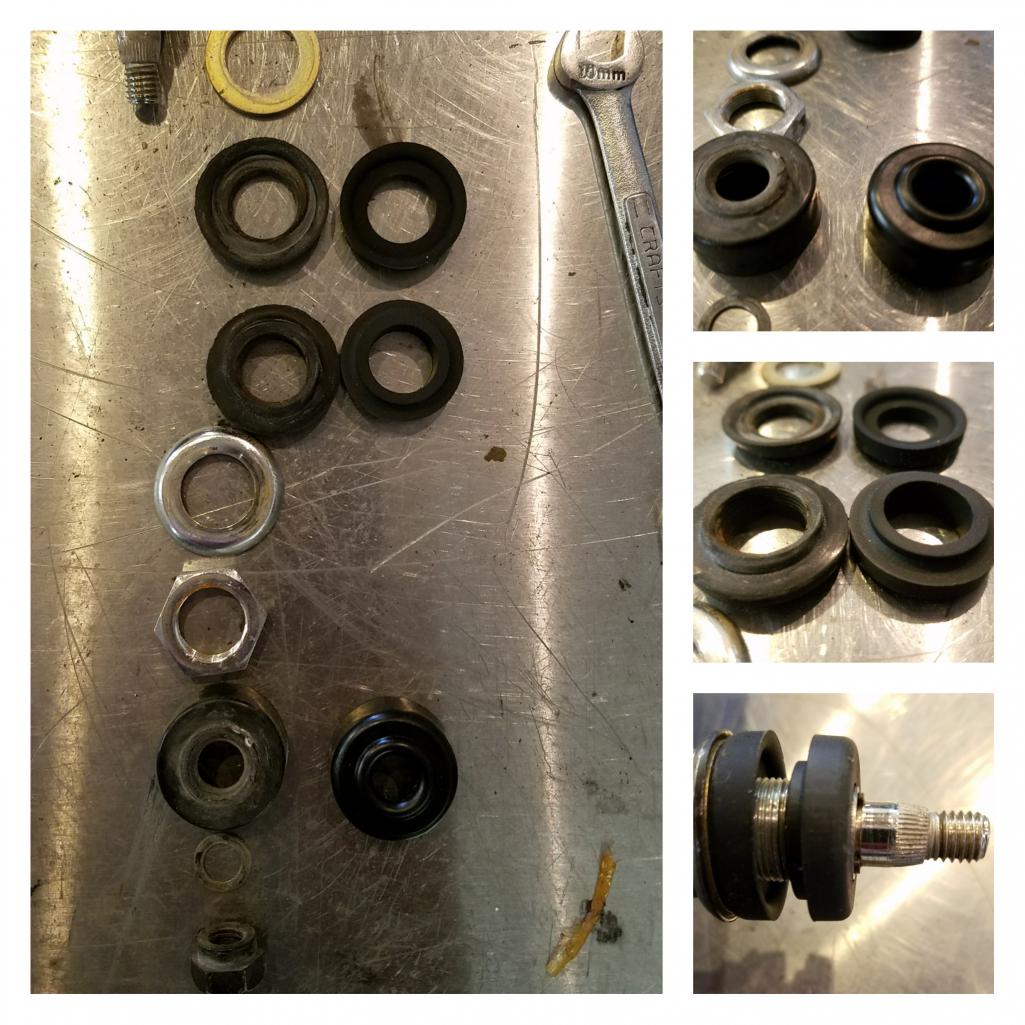
Posted by: Matty900 Jun 10 2017, 11:23 AM
Getting closer
Attached thumbnail(s)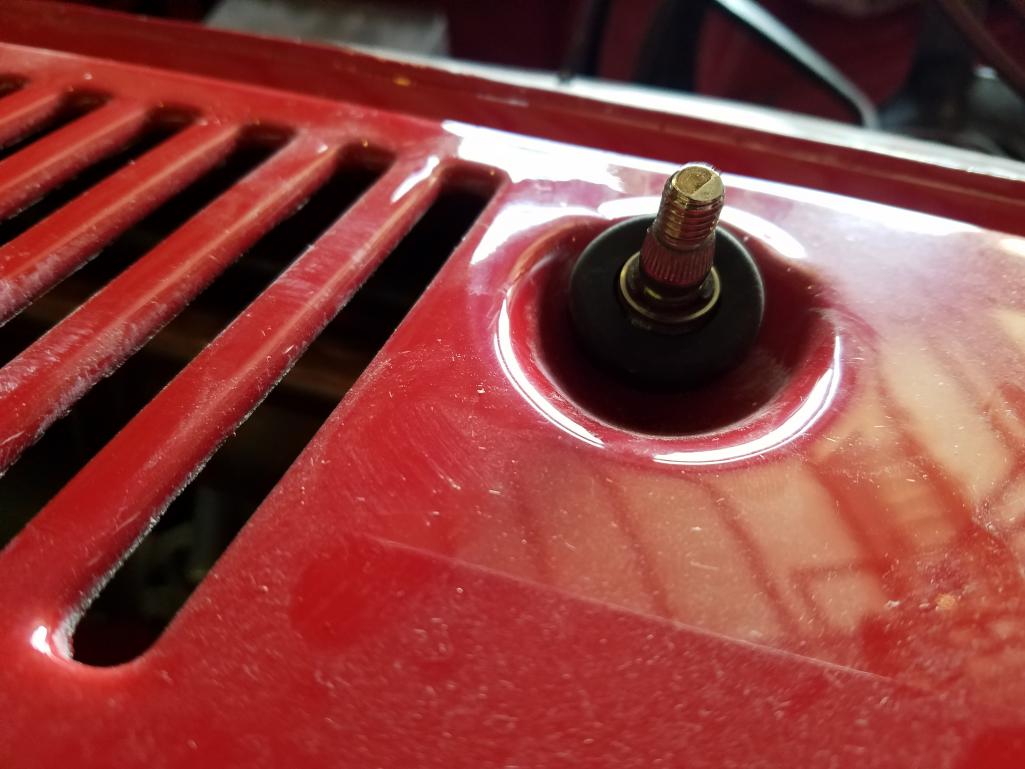
Posted by: Matty900 Jun 11 2017, 01:35 PM
Worked on the wiring harness for the front trunk. It needed some cleaning and to be re wrapped but it was in pretty good shape
Attached thumbnail(s)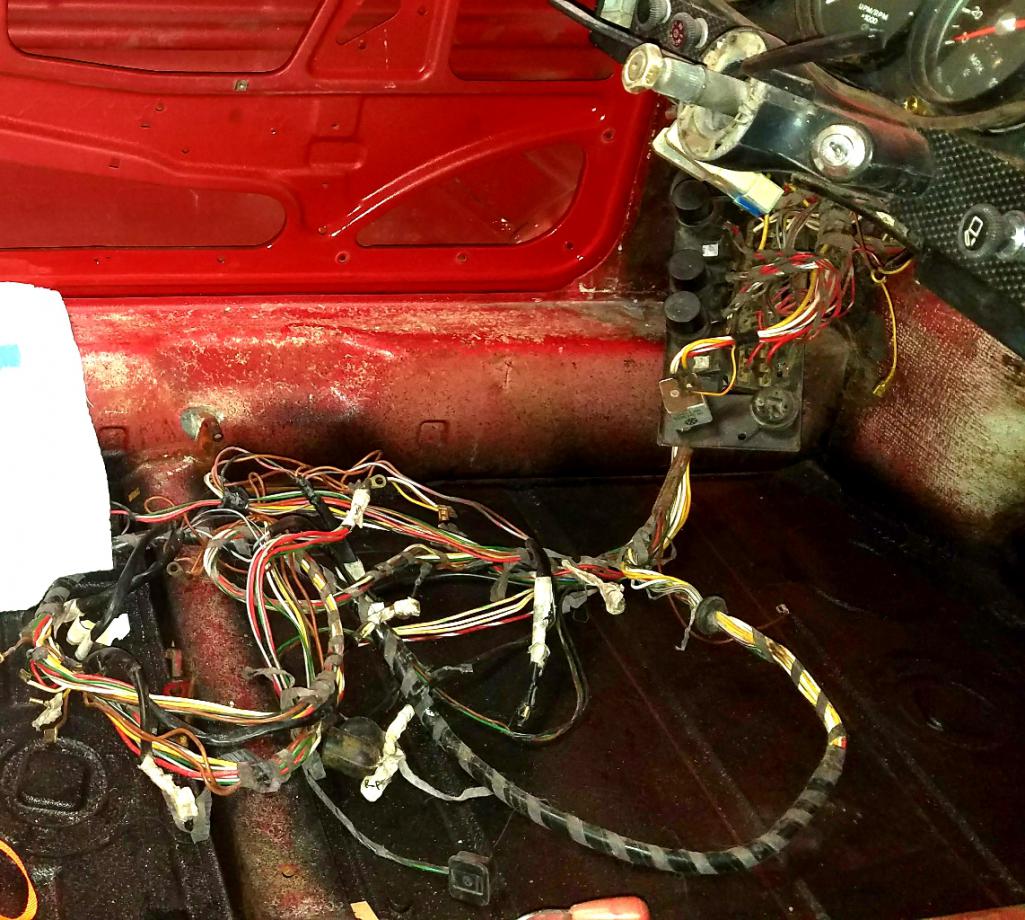
Posted by: Matty900 Jun 11 2017, 01:43 PM
Cleaned wires and taped with the cloth tape
Attached thumbnail(s)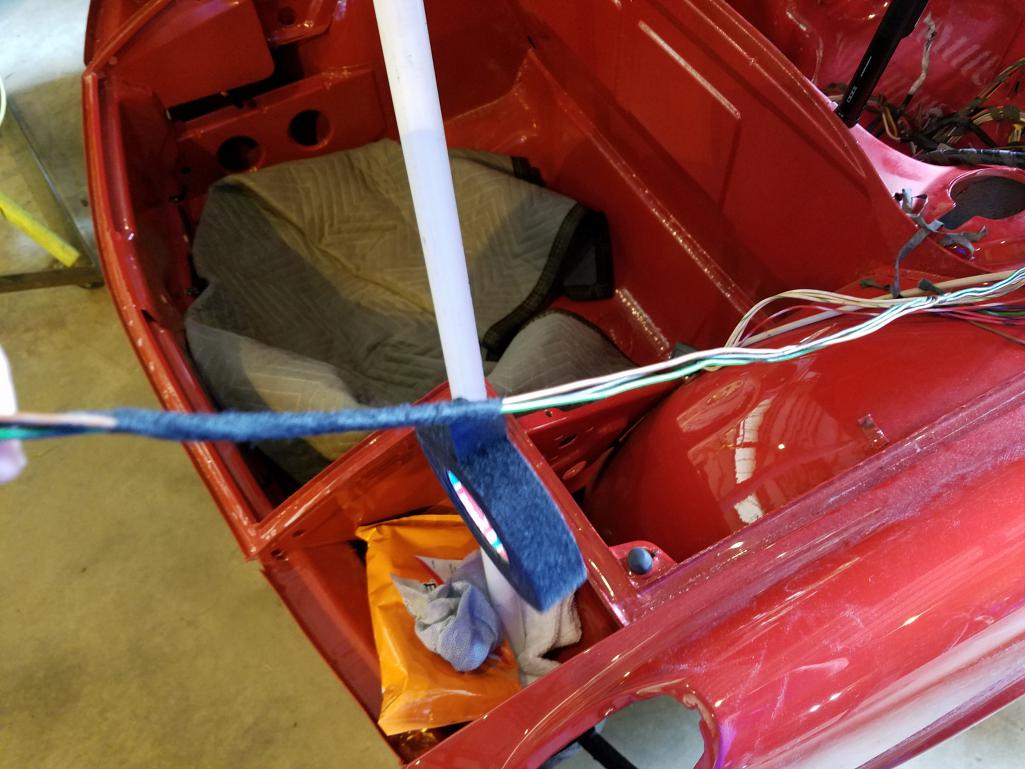
Posted by: Matty900 Jun 11 2017, 01:47 PM
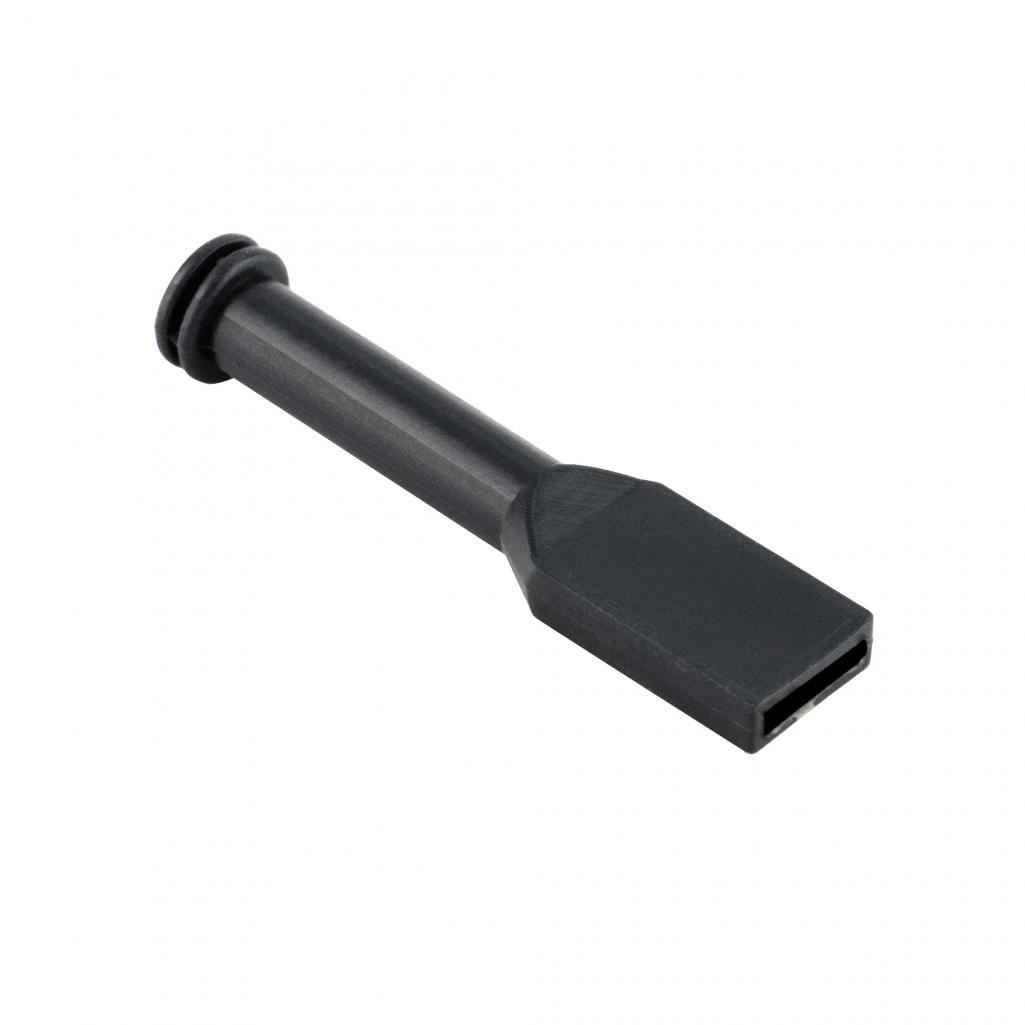
Replacing all grommets and boots with new ones we make. We are now working on the round one shown here.
Attached thumbnail(s)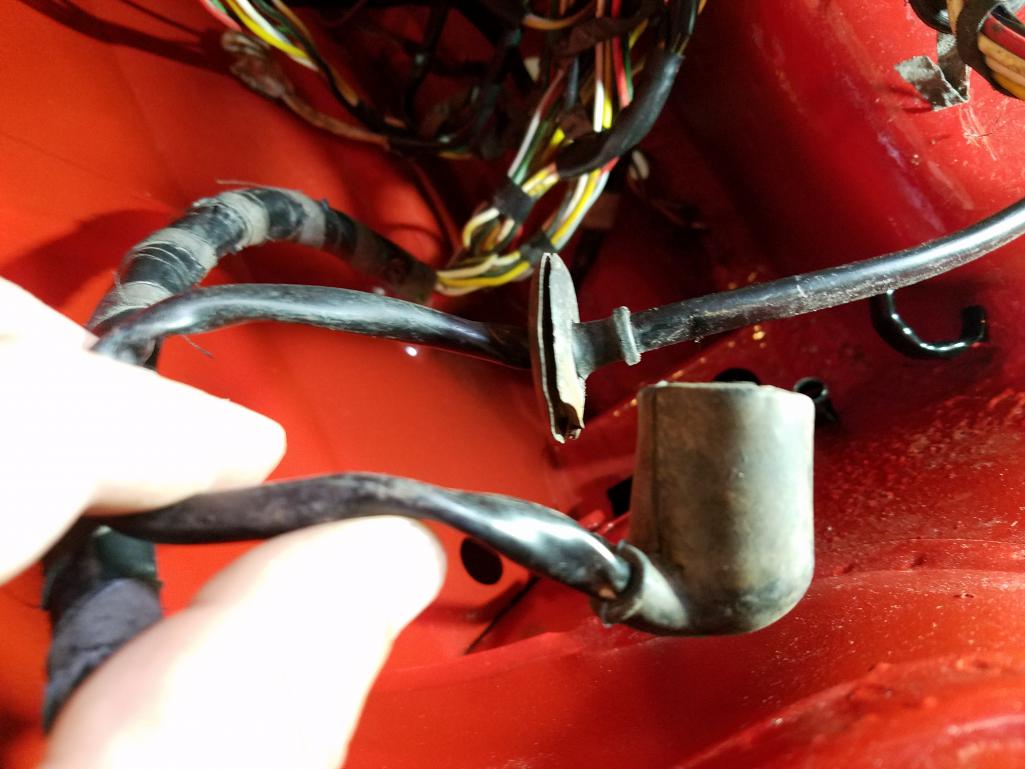
Posted by: Matty900 Jun 11 2017, 01:58 PM
The old boot was not in too bad of shape but was starting to crack so I replaced it. Tip for instilling the wires. Put the boot in hot water for a minute to soften it up. Us a little wire lube. Work the 1st connector in and then push it in with next one so they are both sliding in at the same time. Push the rest of the way in using needle nose pliers.
Attached thumbnail(s)
Posted by: Matty900 Jun 11 2017, 02:00 PM
Attached thumbnail(s)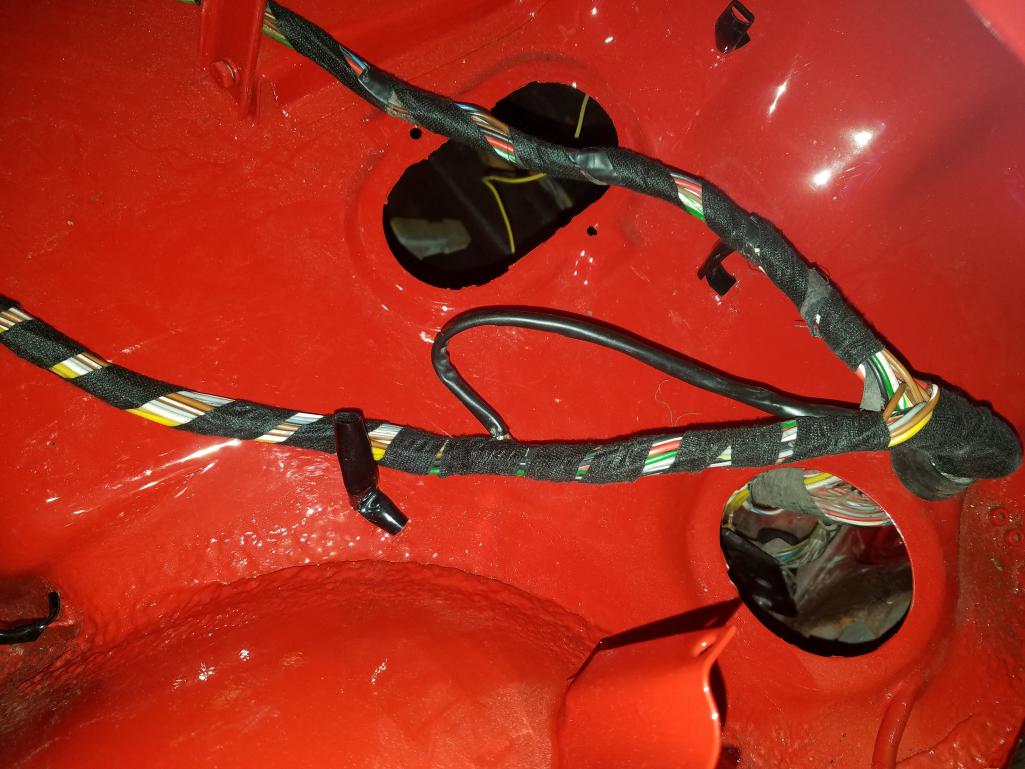
Posted by: Matty900 Jun 11 2017, 02:05 PM
New grommet, tape and our new wiring harness tab covers.
Attached thumbnail(s)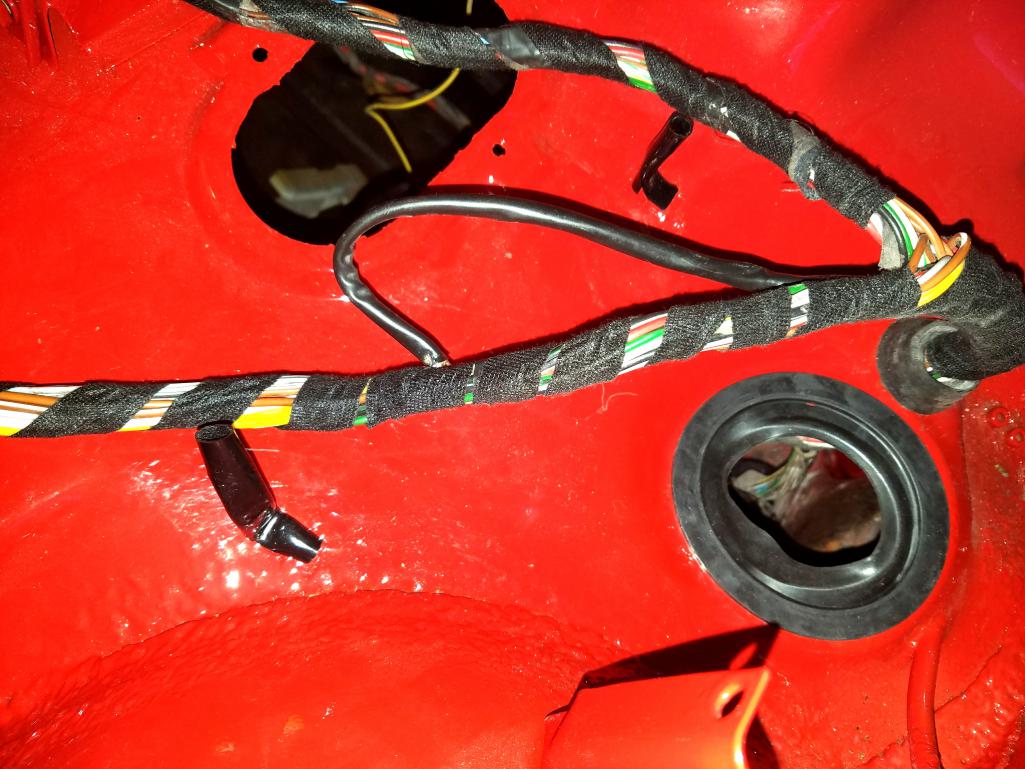
Posted by: Matty900 Jun 11 2017, 02:09 PM
Wiring in tank area done
Attached thumbnail(s)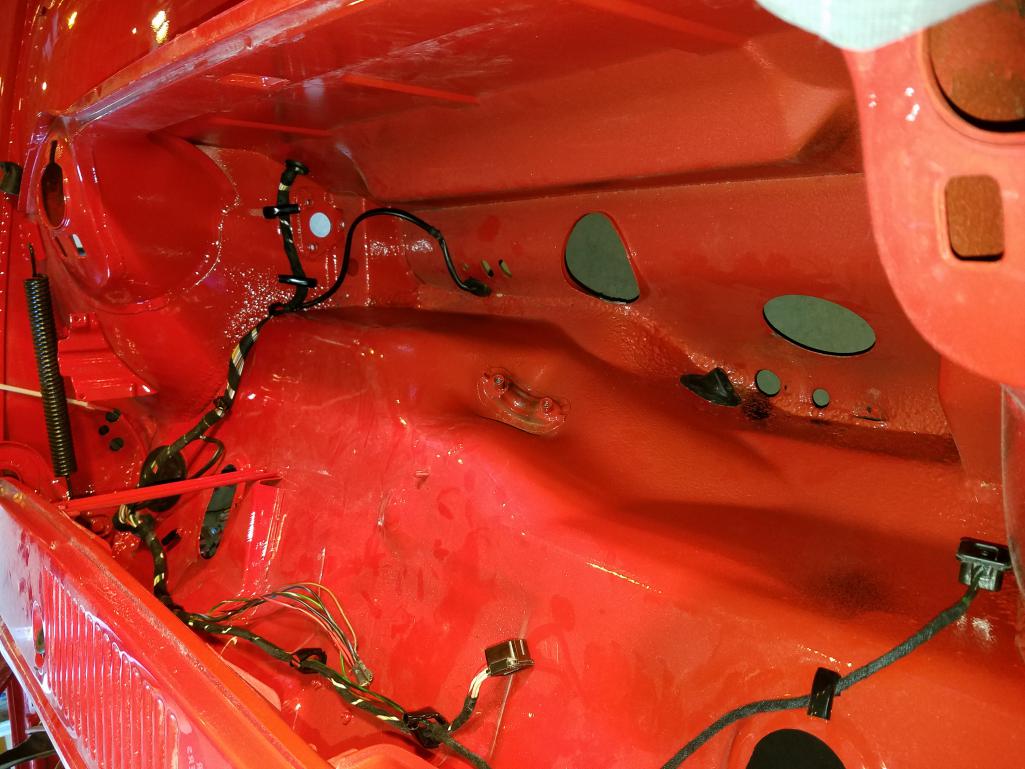
Posted by: Matty900 Jun 11 2017, 02:10 PM
Wiring haness in front trunk done
Attached thumbnail(s)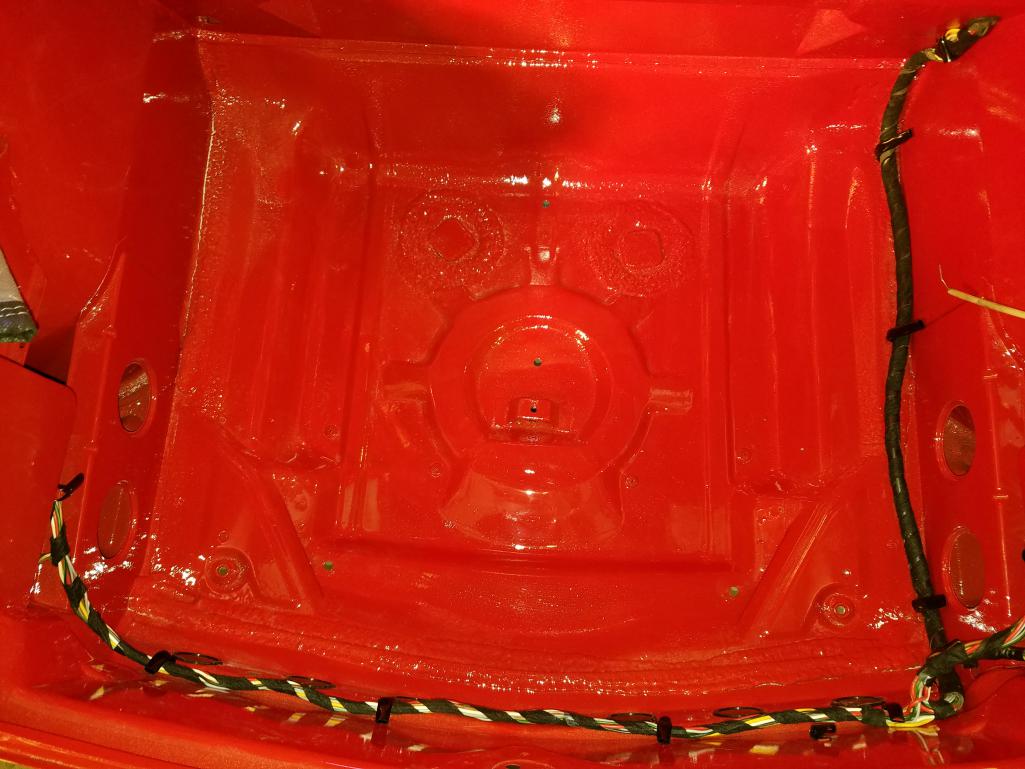
Posted by: Matty900 Jun 11 2017, 02:24 PM
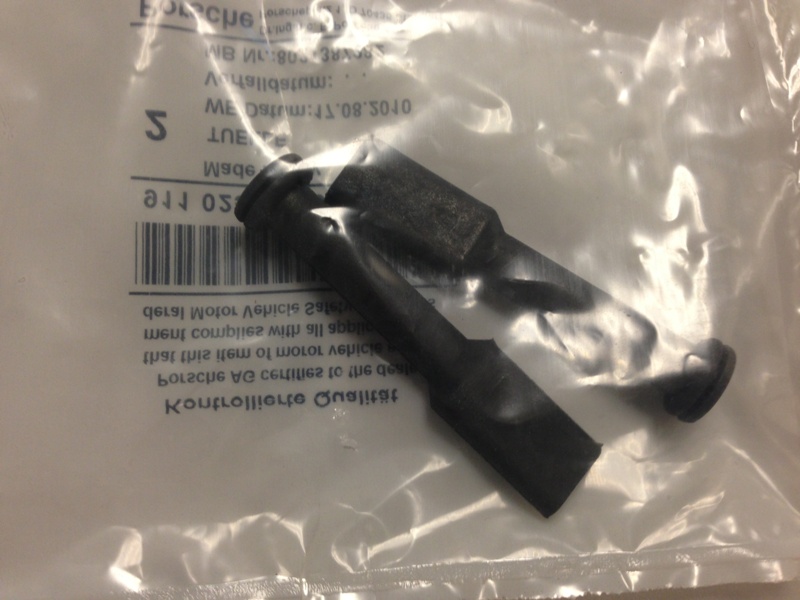
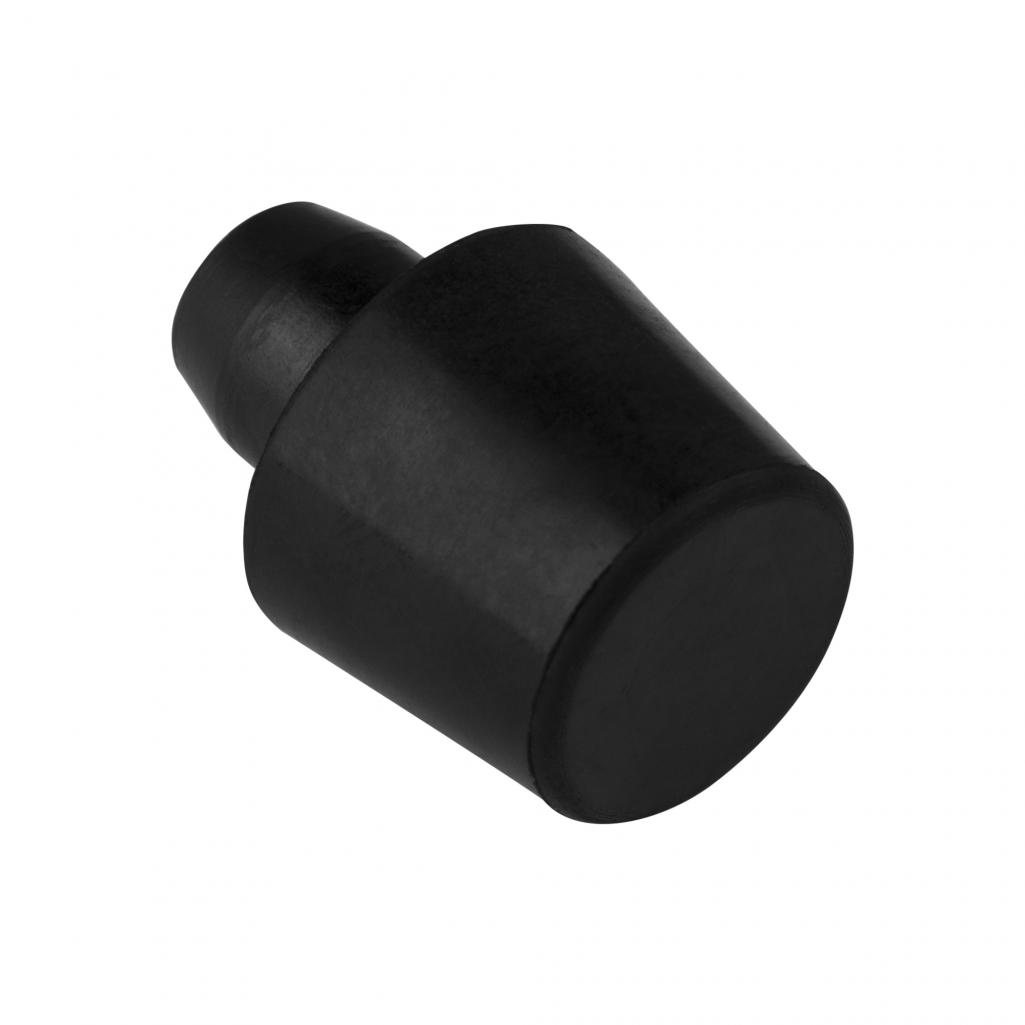
Learned that the "Engine Deck Lid Bumper" is actualy used in 2 places. The other is in the front trunk to keep water out in these 2 holes
Attached thumbnail(s)
Posted by: Matty900 Jun 11 2017, 02:43 PM
New part preview
Attached thumbnail(s)
Posted by: SirAndy Jun 11 2017, 02:44 PM
Actually, that is incorrect!
The holes in the front trunk are supposed to have longer rubber tubes in them that allow water to flow out of the trunk.
Posted by: Matty900 Jun 11 2017, 02:46 PM
Got the fan schroud painted
Attached thumbnail(s)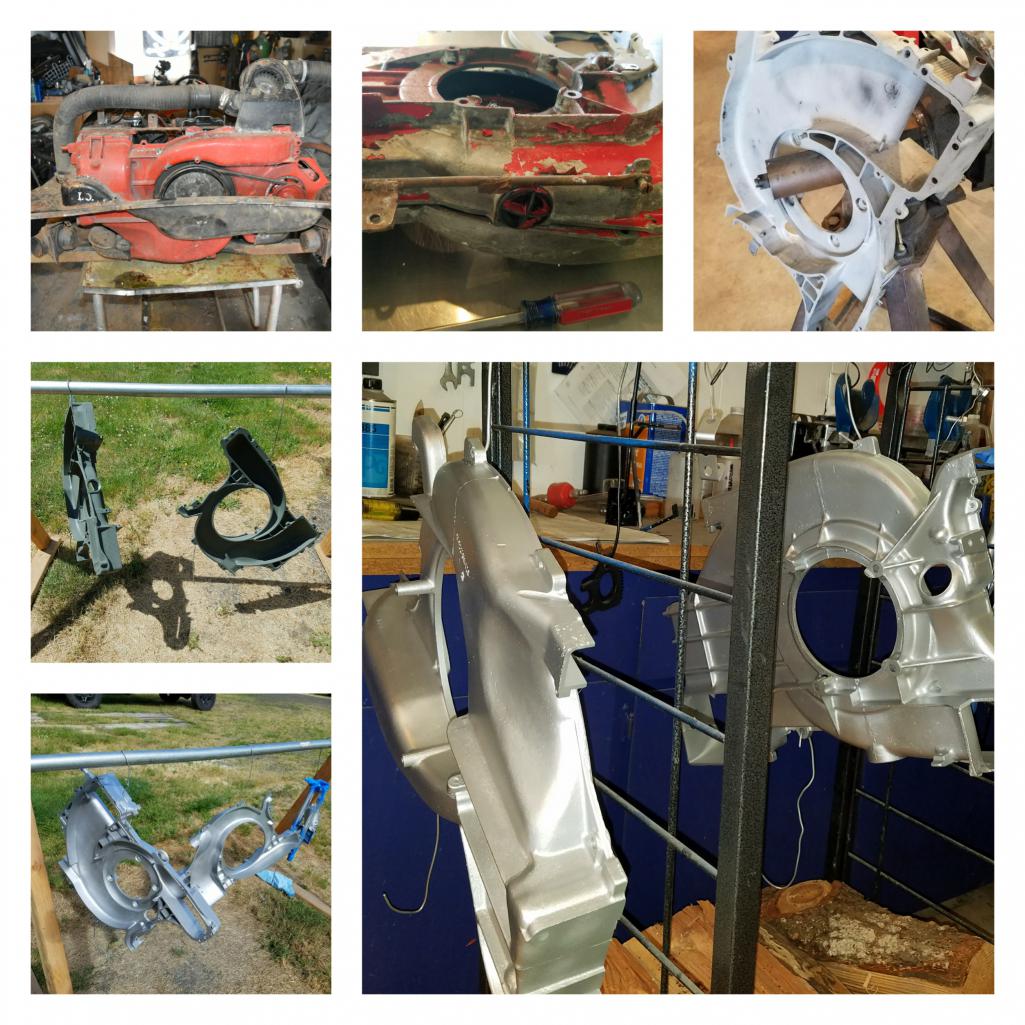
Posted by: SirAndy Jun 11 2017, 02:46 PM
Part # 911.025.612.00
Posted by: Matty900 Jun 11 2017, 03:22 PM
Actually, that is incorrect!
The holes in the front trunk are supposed to have longer rubber tubes in them that allow water to flow out of the trunk.
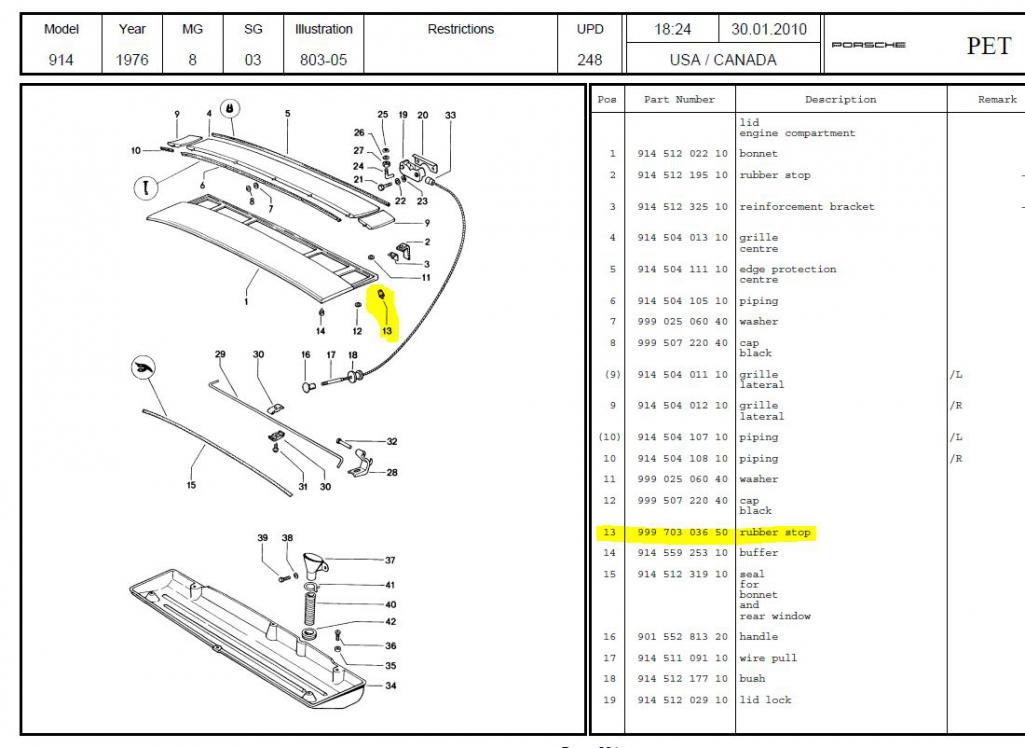
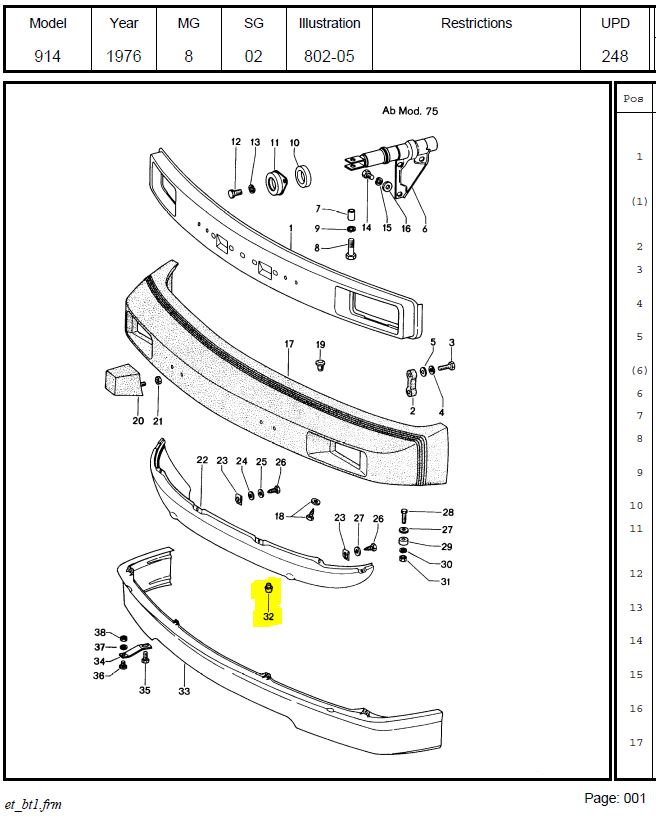
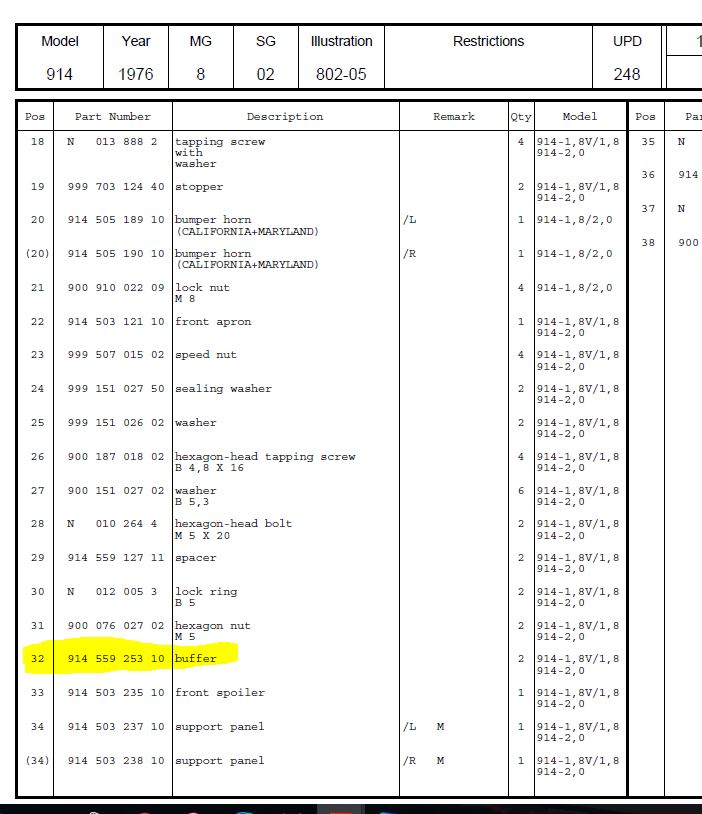
I removed the same part from the holes to take these photos. It came up while I was working on the parts list for the new website with Bruce Stone. The PET shows the same part number in 2 applications. One to stop the upward travel on the engine deck lid and the other in this location. I have yet to find where the drain tubes are in the PET. Is there possibly a variation in years?
Posted by: Matty900 Jun 11 2017, 03:32 PM
Actually, that is incorrect!
The holes in the front trunk are supposed to have longer rubber tubes in them that allow water to flow out of the trunk.
I removed the same part from the holes to take these photos. It came up while I was working on the parts list for the new website with Bruce Stone. The PET shows the same part number in 2 applications. One to stop the upward travel on the engine deck lid and the other in this location. I have yet to find where the drain tubes are in the PET. Is there possibly a variation in years?
We make that part too but this is what I was finding in the PET. Any help in getting this figured out is greatly appreciated.
Attached thumbnail(s)
Attached image(s)
Posted by: Matty900 Jun 16 2017, 03:10 AM
Got the wiper assembly mounted. Figured out the order to do thing's in. 1st step Attached the windshield wiper Isolator to the assembly.
Attached thumbnail(s)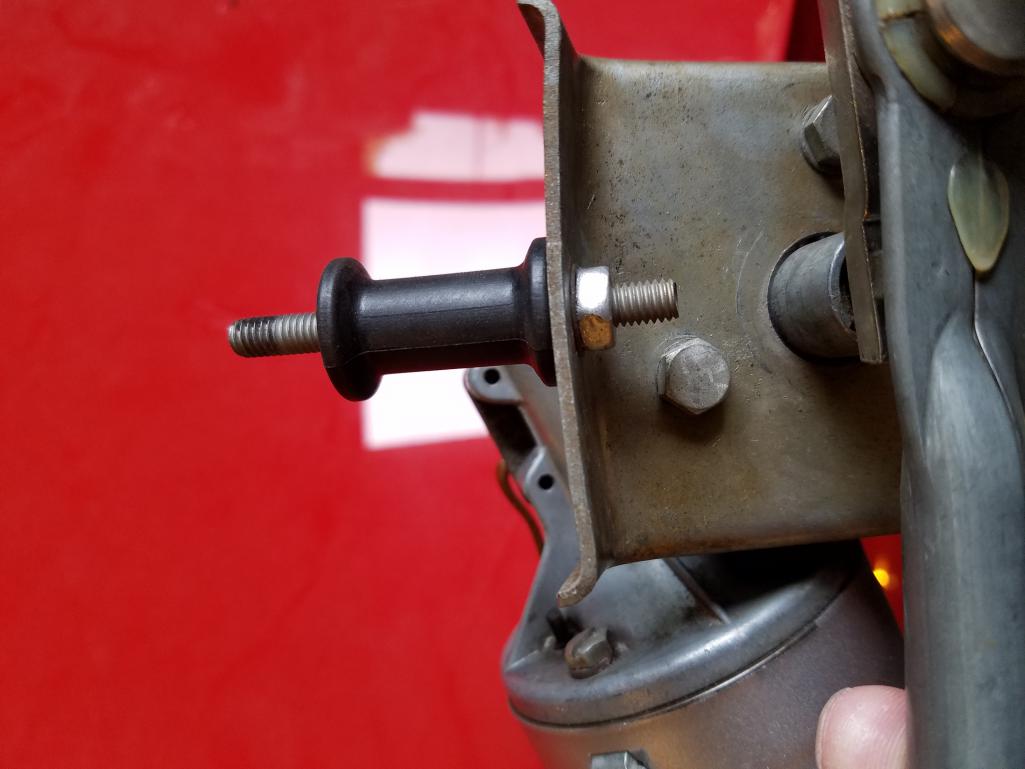
Posted by: Matty900 Jun 16 2017, 03:12 AM
Step 2 put on everything up to the lower "femail" wiper grommets and then get them seated as low as possible so the posts can come through the holes far enough for the nut to thread.
Attached thumbnail(s)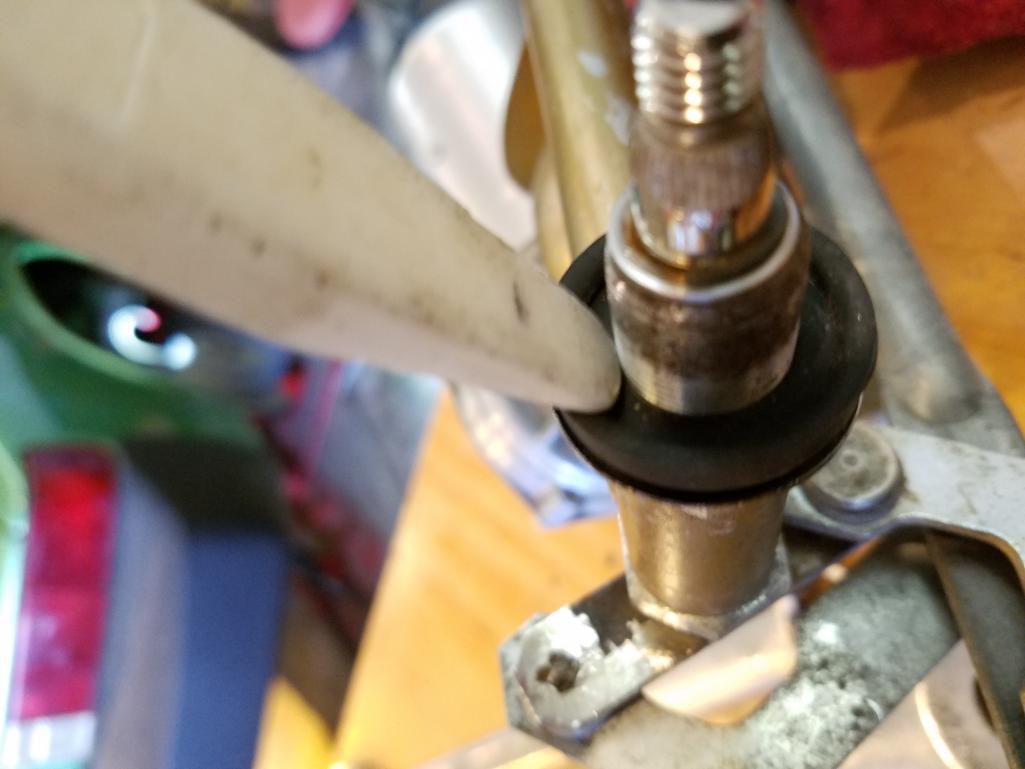
Posted by: Matty900 Jun 16 2017, 03:21 AM
Put the other end of the isolator through the firewall. (Photo is upside down for some reason.)
Attached thumbnail(s)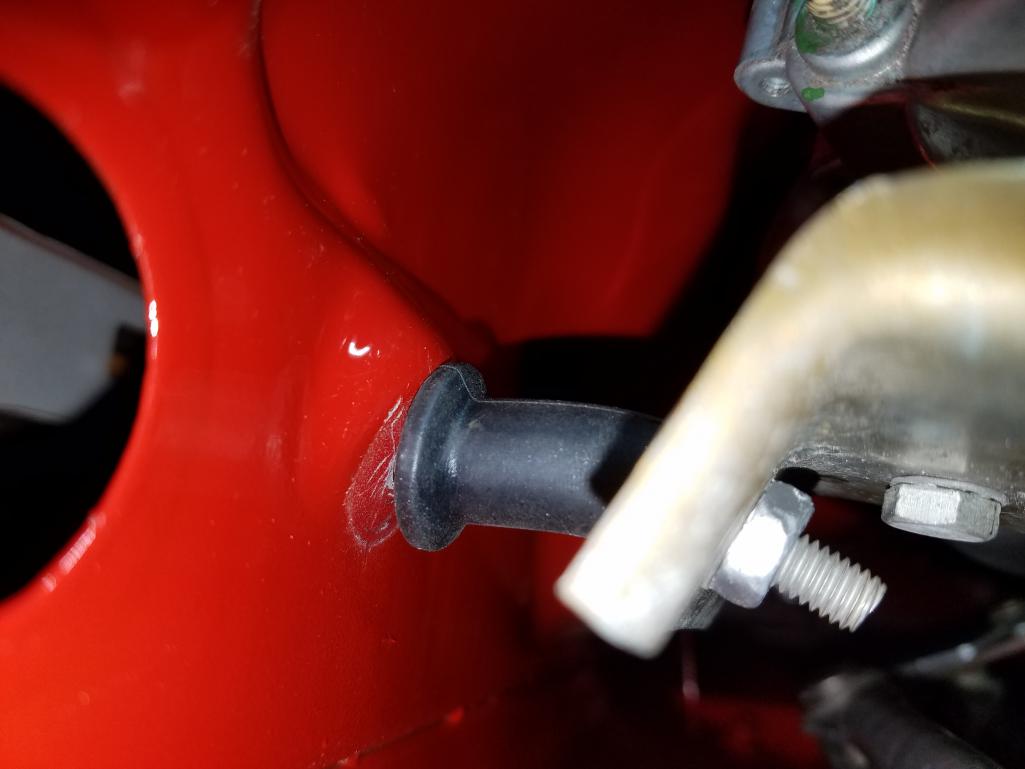
Posted by: Matty900 Jun 16 2017, 03:25 AM
Stick the wiper posts through the holes. Marke suret that they are centered and pull the posts through as far as you can.
Attached thumbnail(s)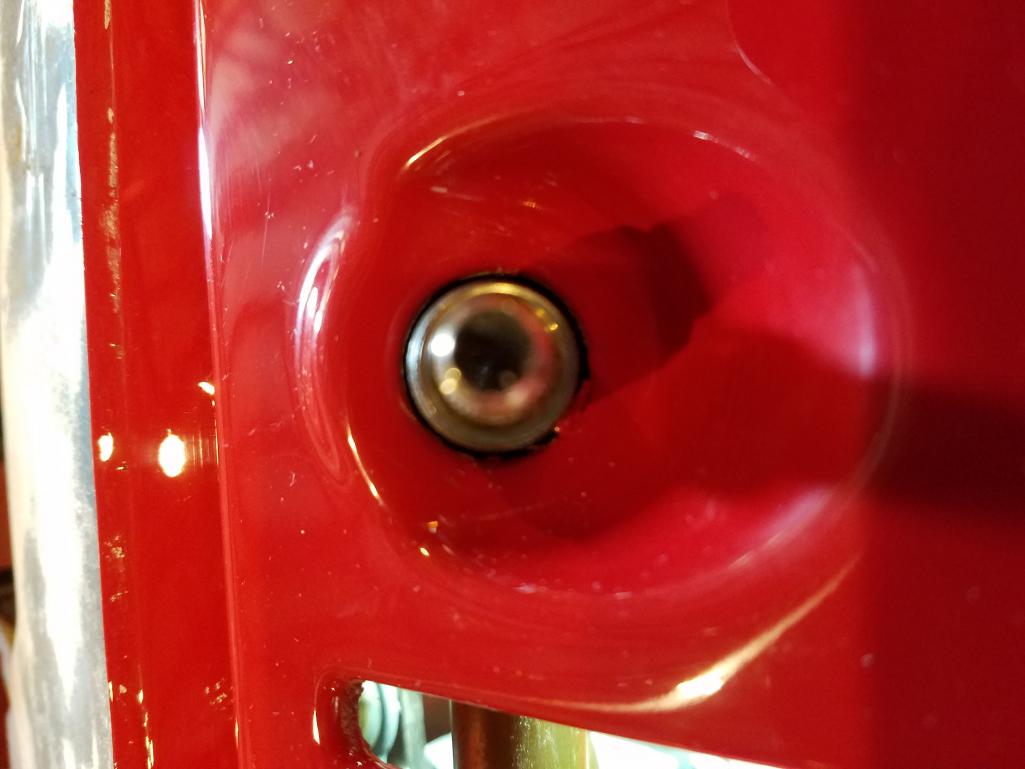
Posted by: Matty900 Jun 16 2017, 03:28 AM
Add "male" wiper grommets and push the down as far as you can go. Ad metal cap washer and then the nut to tighten it all down.
Attached thumbnail(s)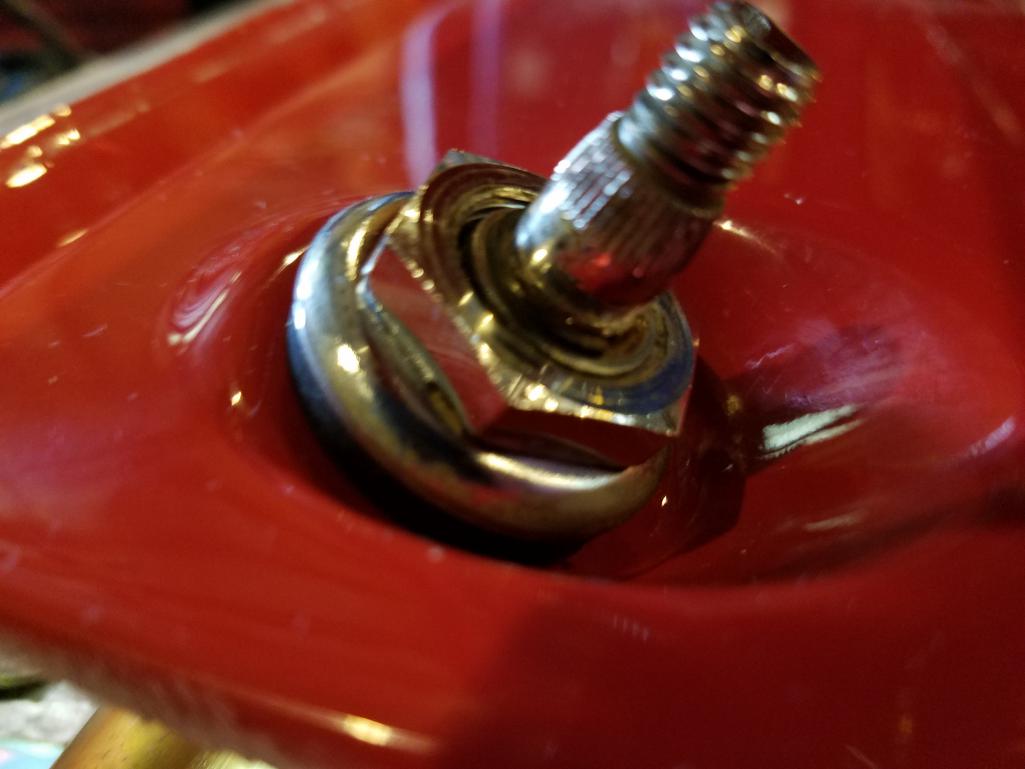
Posted by: Matty900 Jun 16 2017, 03:30 AM
Tighten nut on the isolator
Posted by: Mikey914 Jun 16 2017, 09:56 AM
Actually, that is incorrect!
The holes in the front trunk are supposed to have longer rubber tubes in them that allow water to flow out of the trunk.
Really curious. I think the drain tubes are under the spare tire. At least that's where I put mine.
Posted by: Matty900 Jun 24 2017, 02:01 AM
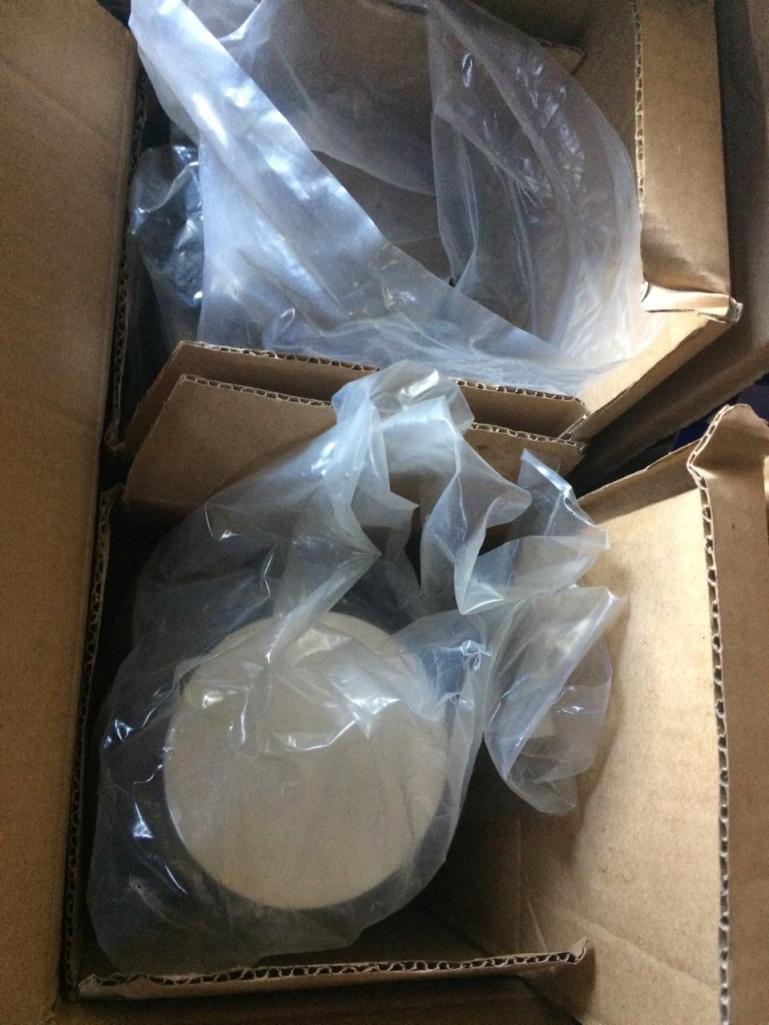
Got more parts back from plating this week.
Attached thumbnail(s)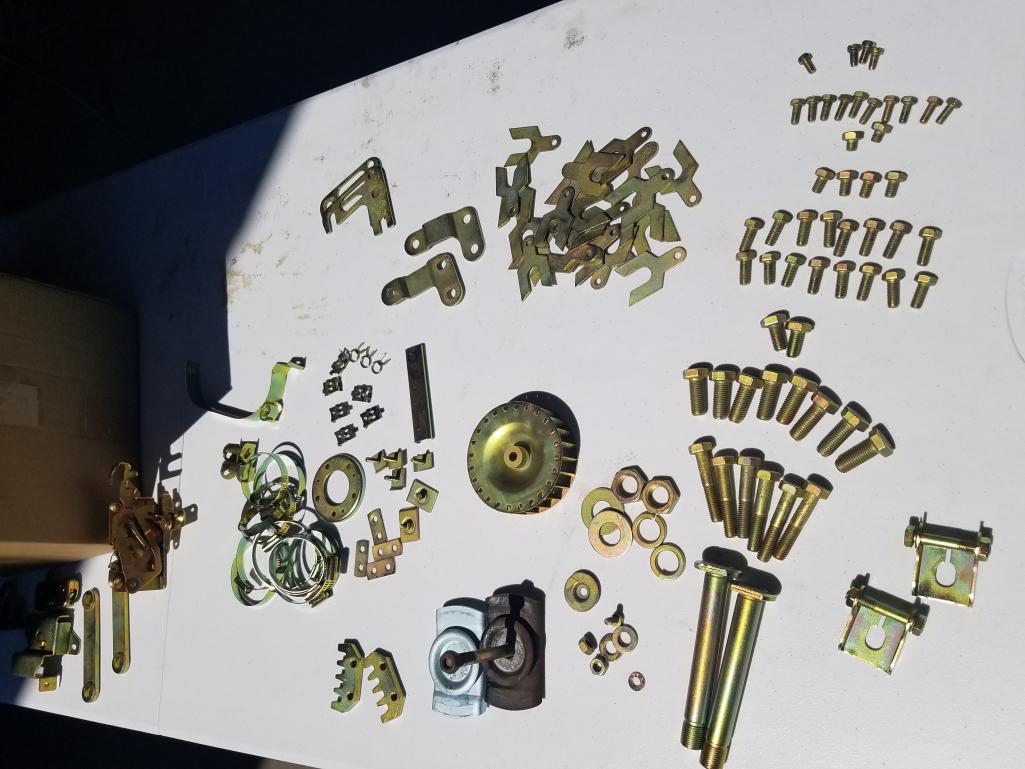
Posted by: Matty900 Jun 24 2017, 02:15 AM
Fresh door striker plates
Attached thumbnail(s)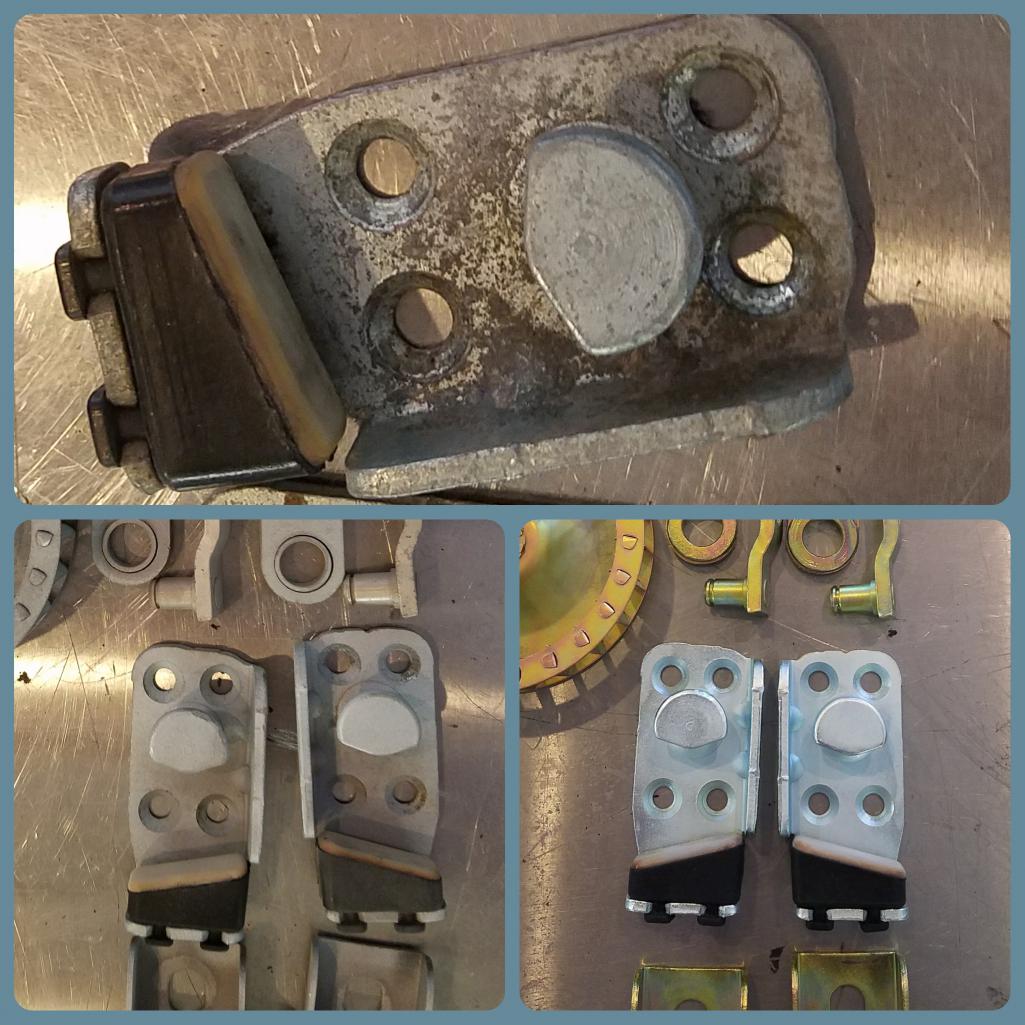
Posted by: Matty900 Jun 24 2017, 02:22 AM
The blower fan is all cleaned up and ready to go back in
Attached thumbnail(s)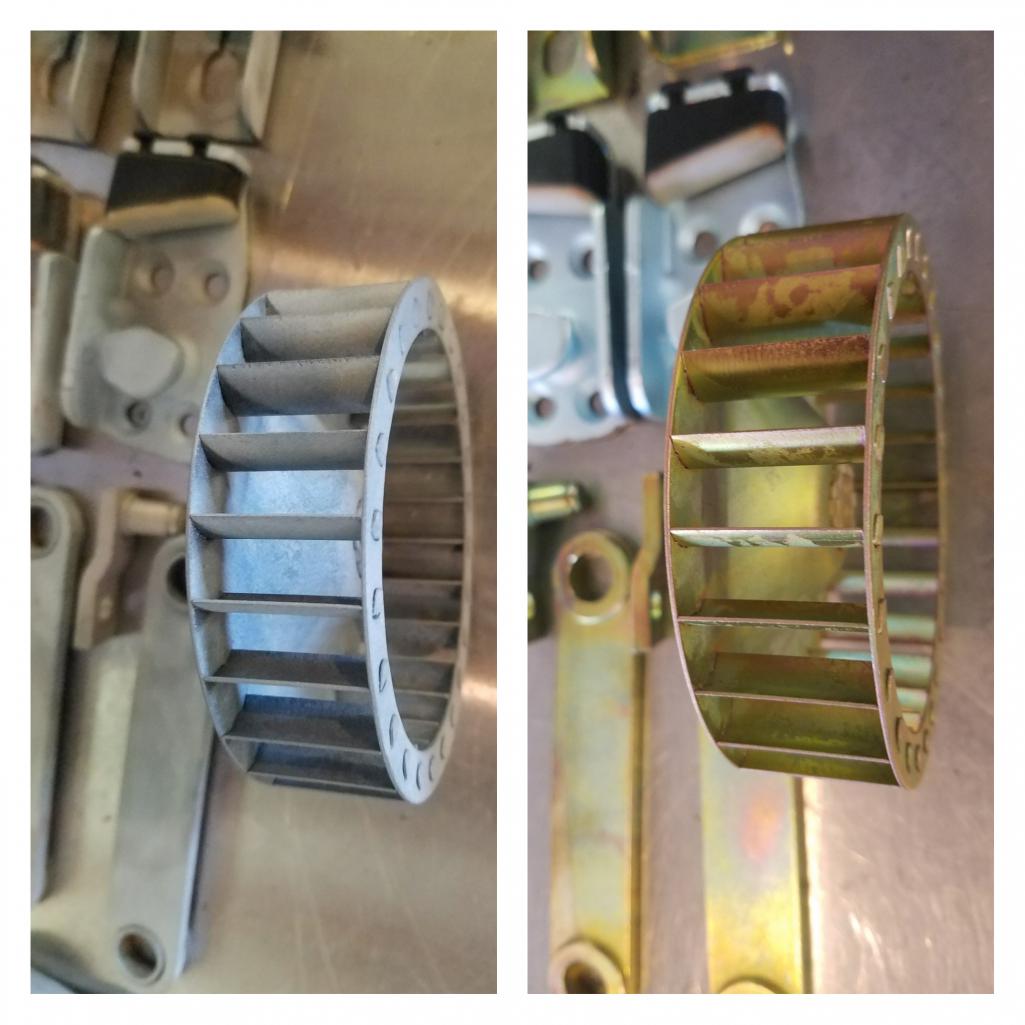
Posted by: Matty900 Jun 24 2017, 02:26 AM
Got the pressure regulator rebuilt by Eric Shae at PMB and ordered all new hard lines. So I had to clean up the engine bay to be able to start putting parts on. Metal was in great shape underneath the paint and all the seam sealer.
Attached thumbnail(s)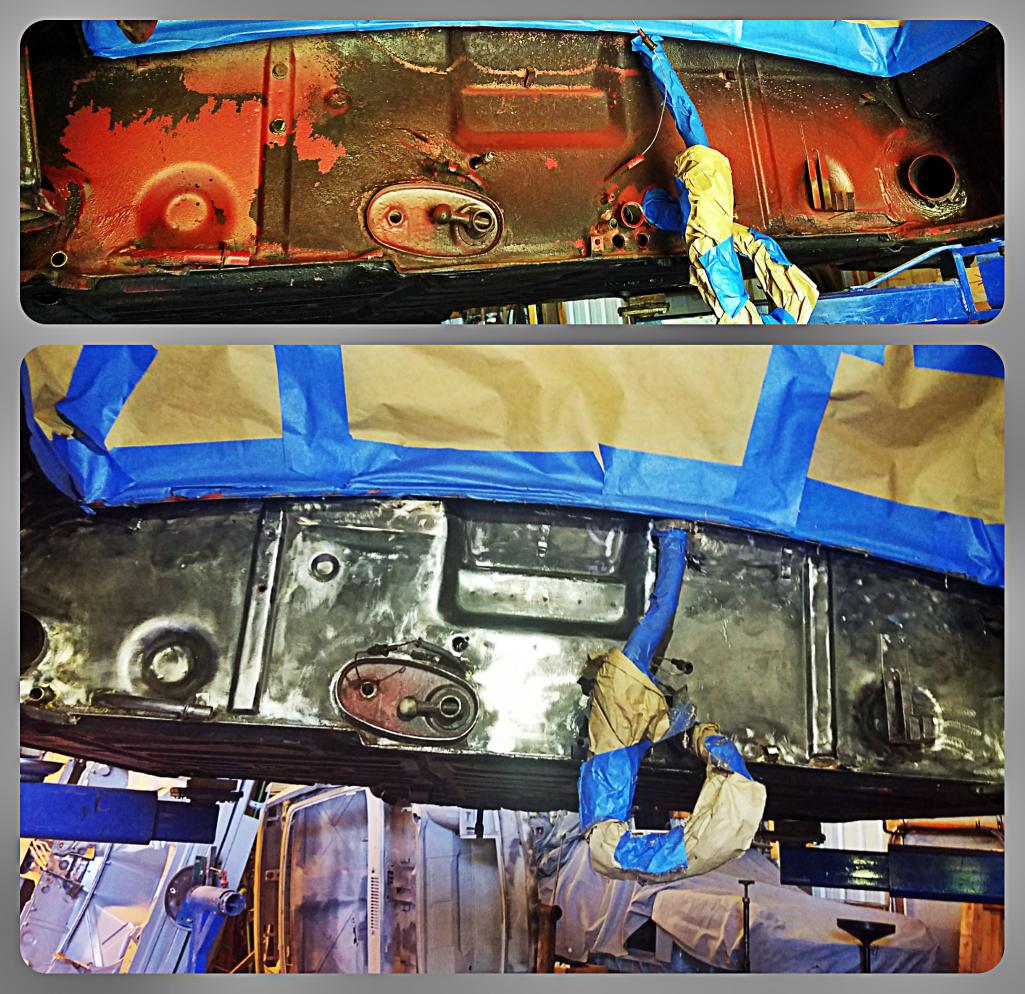
Posted by: cary Jun 24 2017, 06:53 AM
The boy is busy ...........
He got pretty dirty yesterday. But it look great.
Posted by: Matty900 Jul 2 2017, 12:09 AM
 1st attempt at seam sealer. FAIL
Attached thumbnail(s)
Posted by: Matty900 Jul 2 2017, 12:11 AM
Attached thumbnail(s)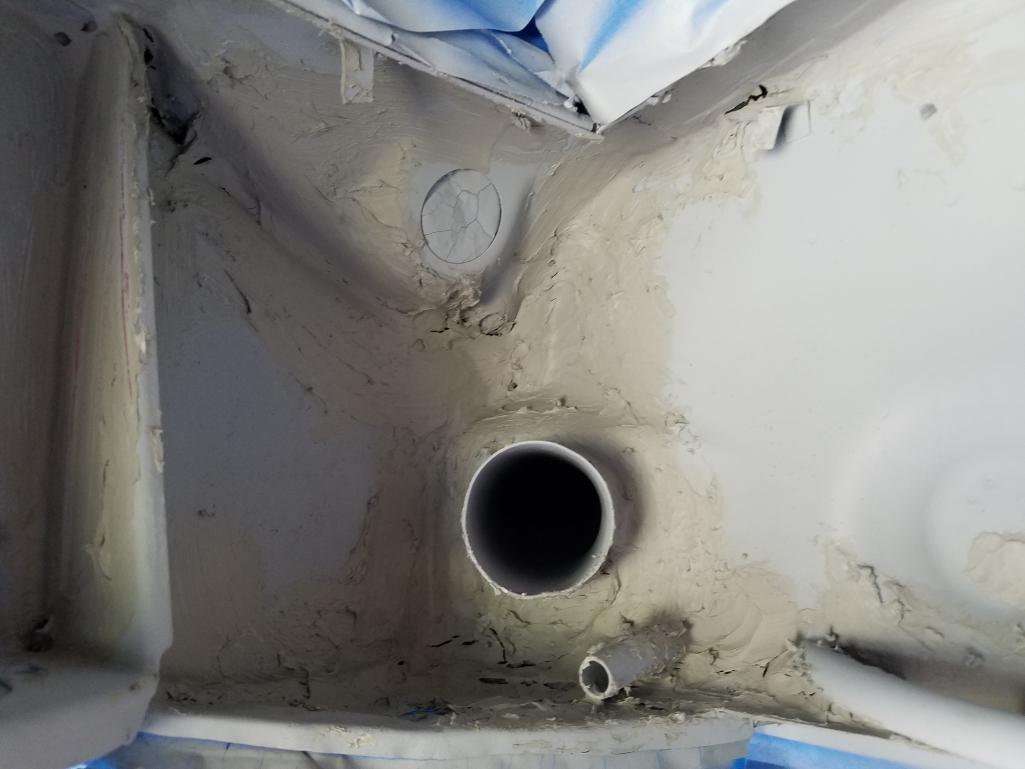
Posted by: Matty900 Jul 2 2017, 12:16 AM
Reassembled the fresh air mixing box and put on new drain hoses.
Attached thumbnail(s)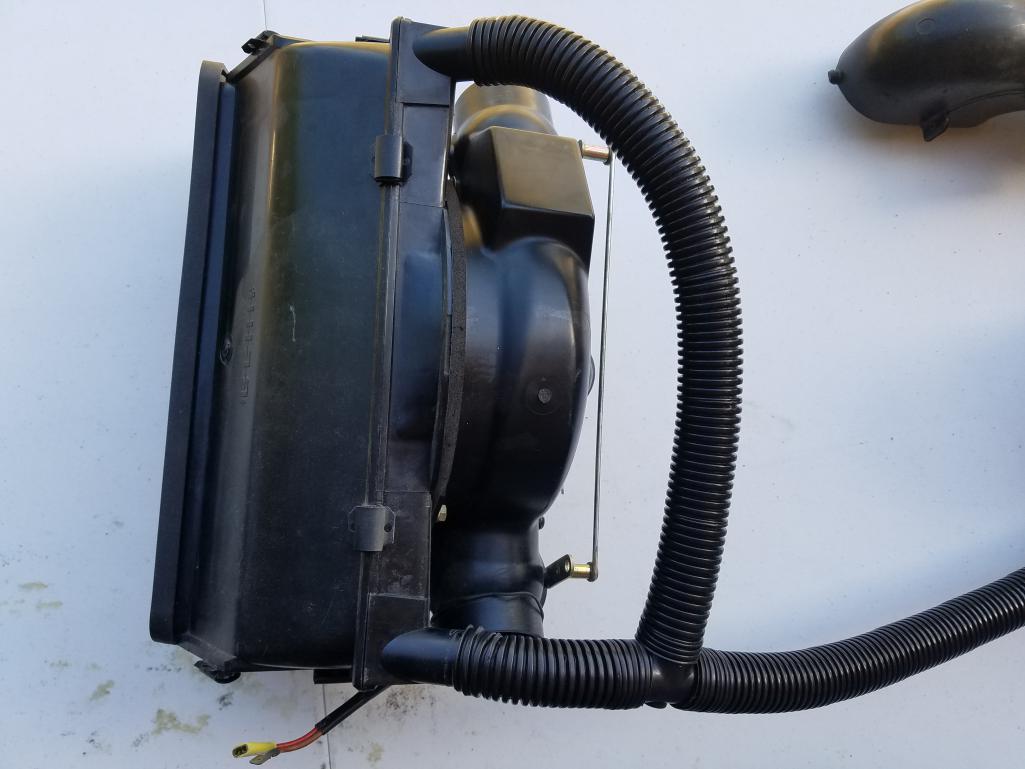
Posted by: Matty900 Jul 2 2017, 12:18 AM
Took the controls apart to clean up before reinstalling them.
Attached thumbnail(s)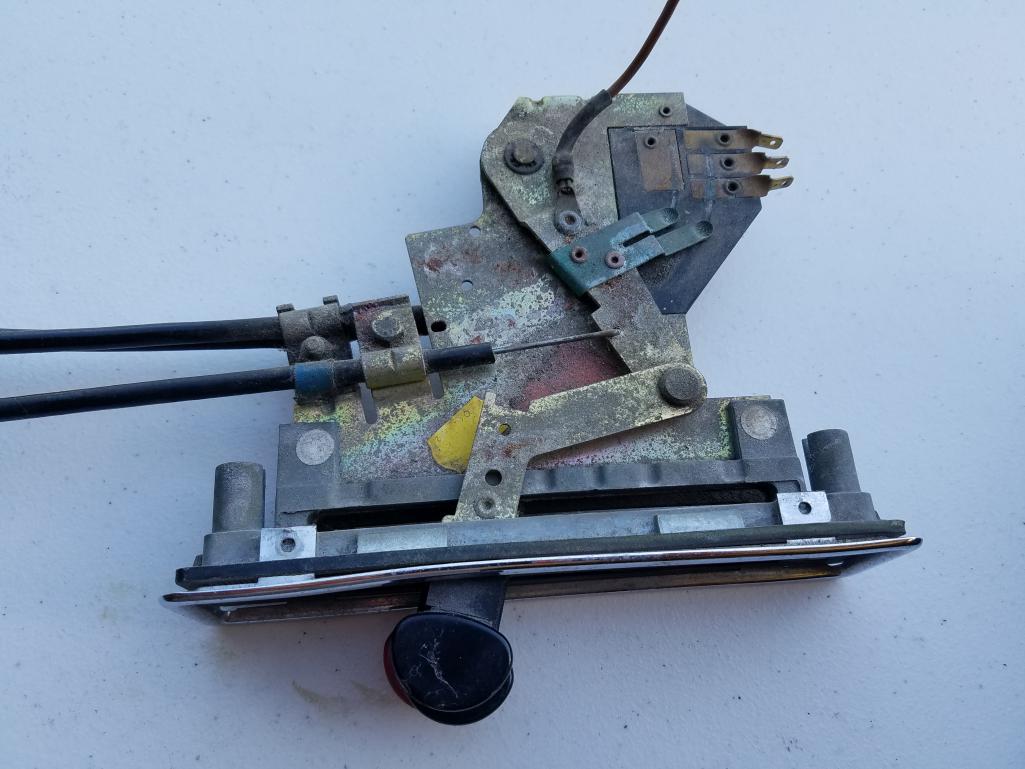
Posted by: Matty900 Jul 2 2017, 12:20 AM
Blower for the heater is ready to go back in.
Attached thumbnail(s)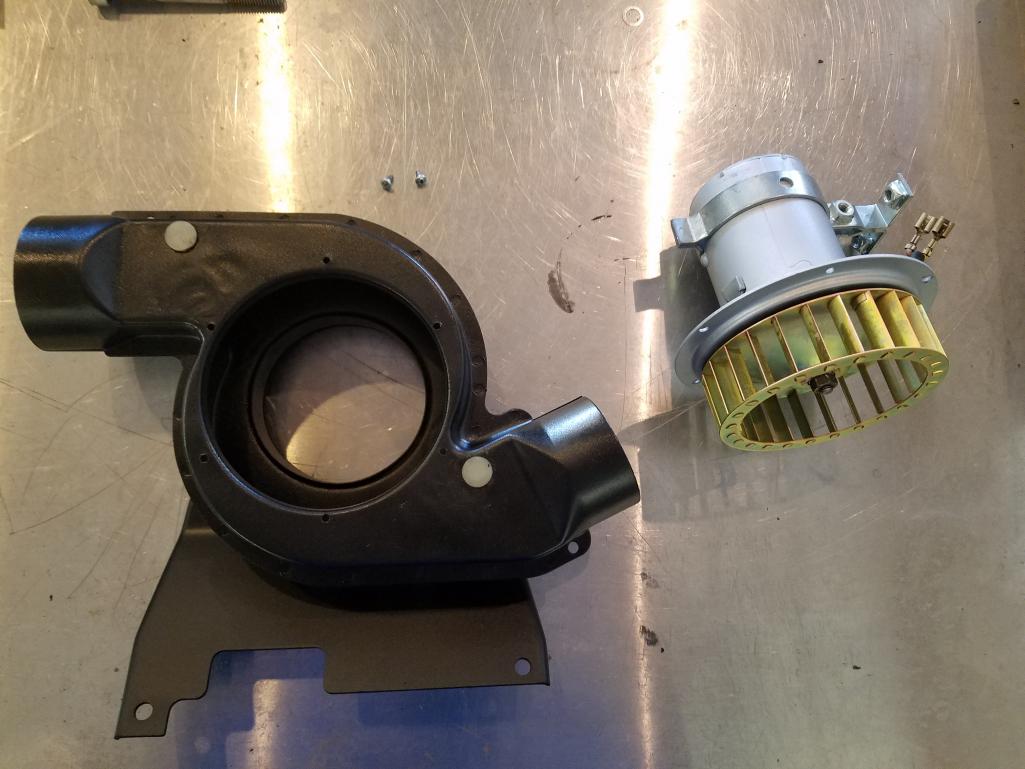
Posted by: Matty900 Jul 2 2017, 12:24 AM
Stripped and re plated and painted headlights. Then put in all new bushings and lights.
Attached thumbnail(s)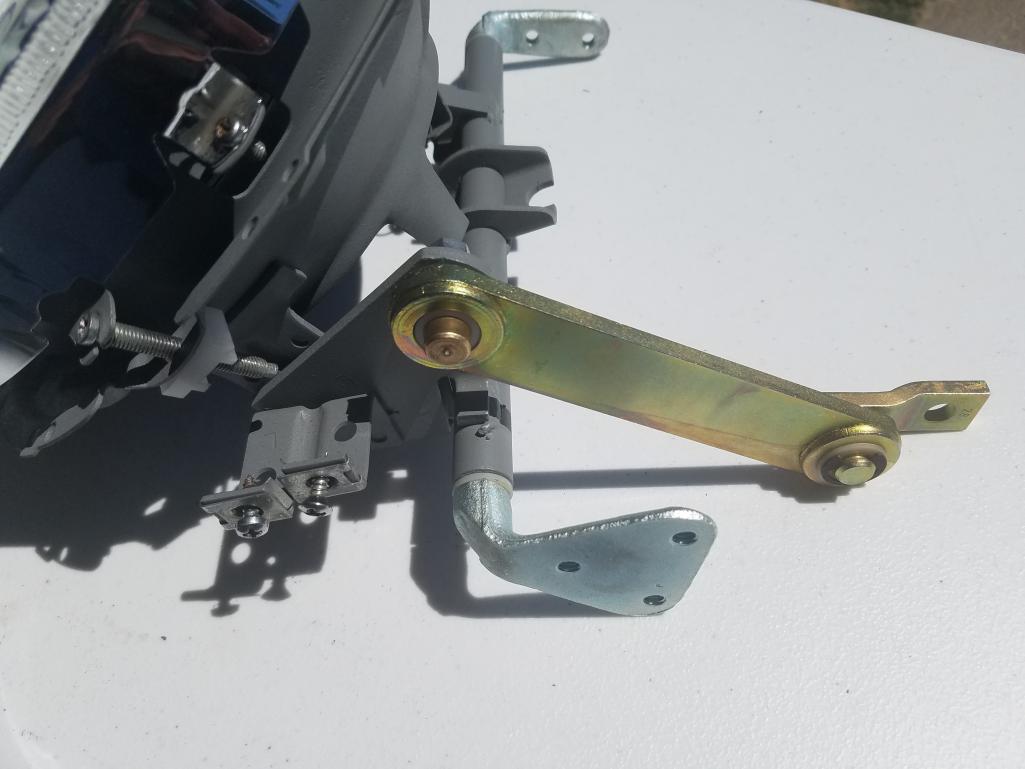
Posted by: Matty900 Jul 2 2017, 01:05 AM
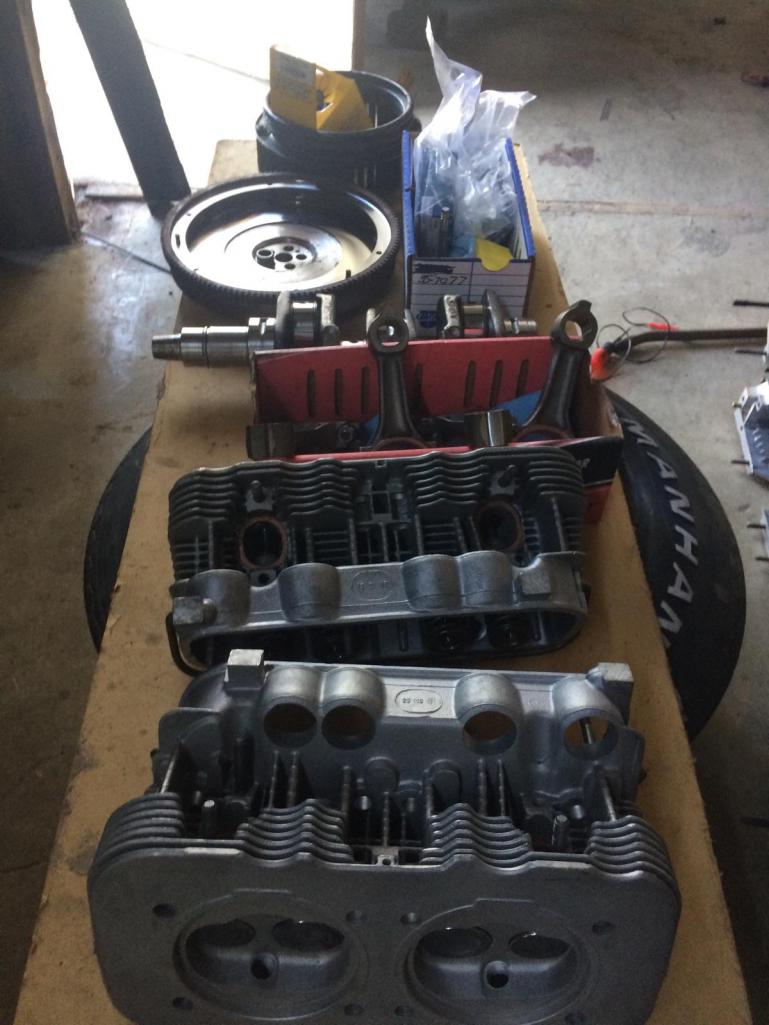
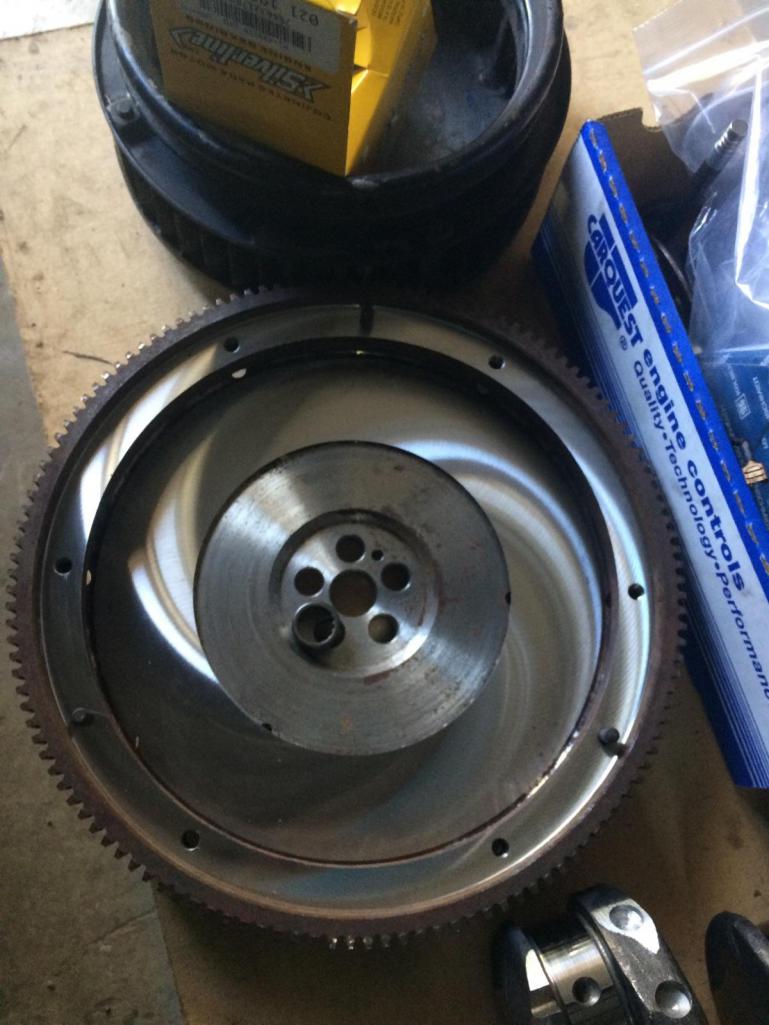
Engine back from machine shop so we start with new heads, valves, springs, keepers, guides all rebuilt and ready to go. The block is cleaned and deburred. Crank shaft is balanced and polished. Brand new pistons, rings, barrels. Connecting rods preend, balanced, checked and resleaved. Cam work done. 1911 striker assembly starting next week.
Attached thumbnail(s)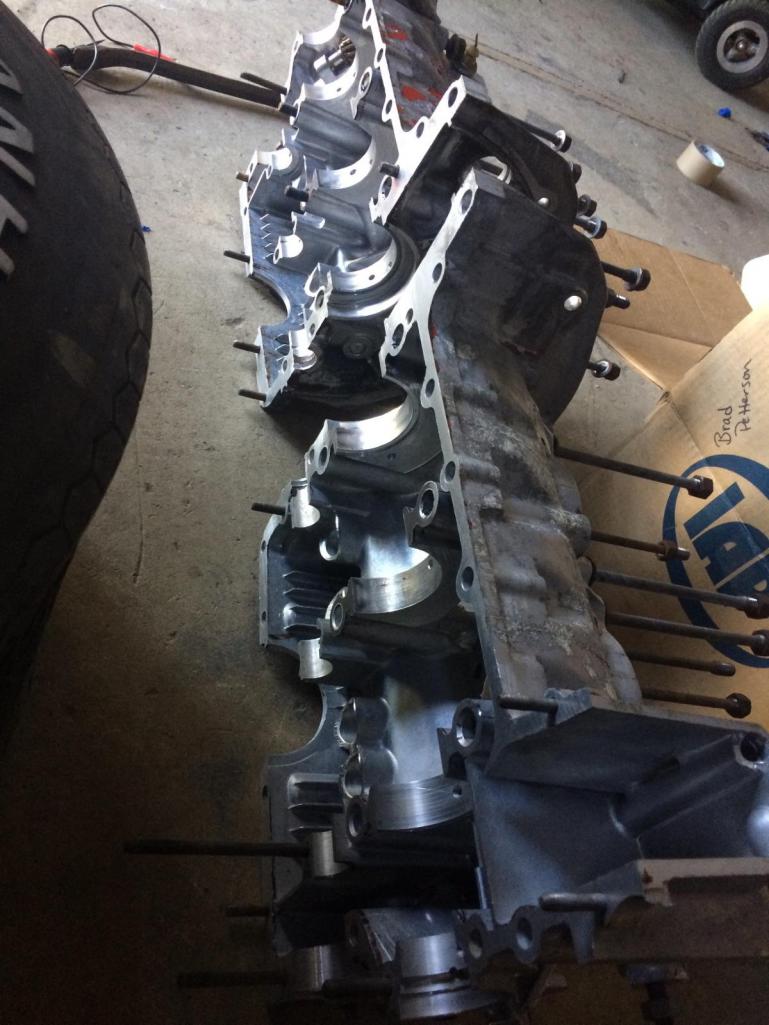
Posted by: Matty900 Jul 2 2017, 01:16 AM
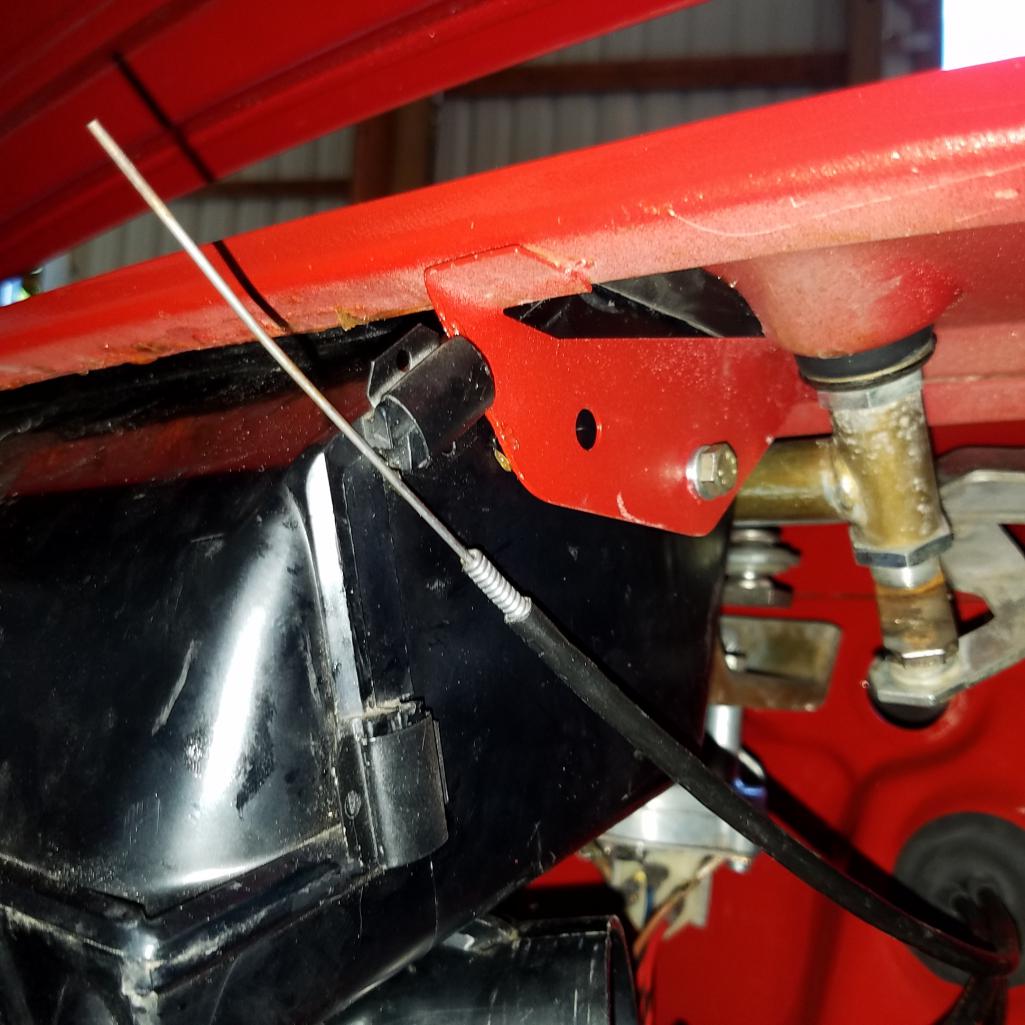
Cary fixed a loose tube for the accelerator cable. That should make the car go faster right?
Attached thumbnail(s)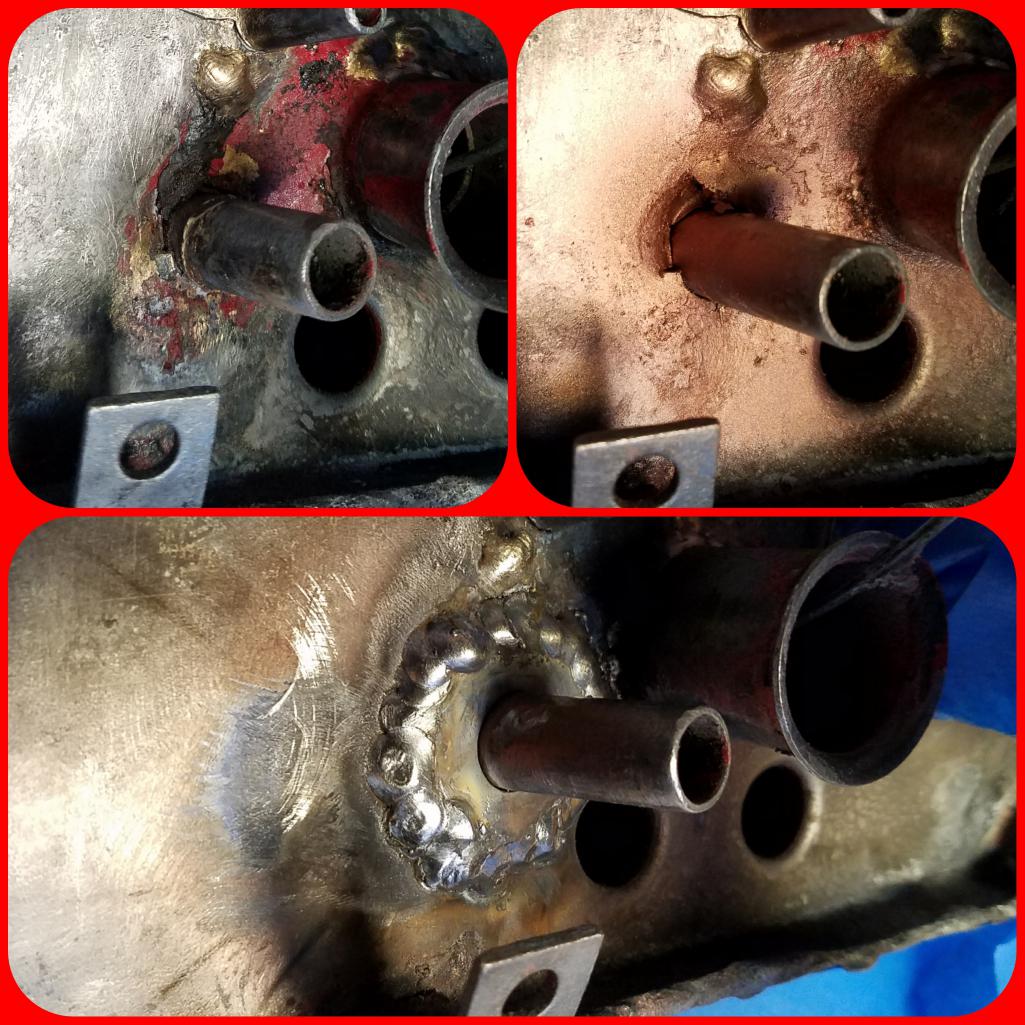
Posted by: turk22 Jul 2 2017, 03:19 PM
A lot of good work happening in this thread, keep it up!
Posted by: Matty900 Jul 2 2017, 09:09 PM
A lot of good work happening in this thread, keep it up!
Thank you.
Posted by: Matty900 Jul 2 2017, 09:16 PM
Took the engine bay back down to metal and got it primed today. Etching primer followed by sandable primer and sanded with 320 between coats. Drying until Tuesday then we will get seam sealer back on from a calling gun and then sprayer before laying down color and clear.
Attached thumbnail(s)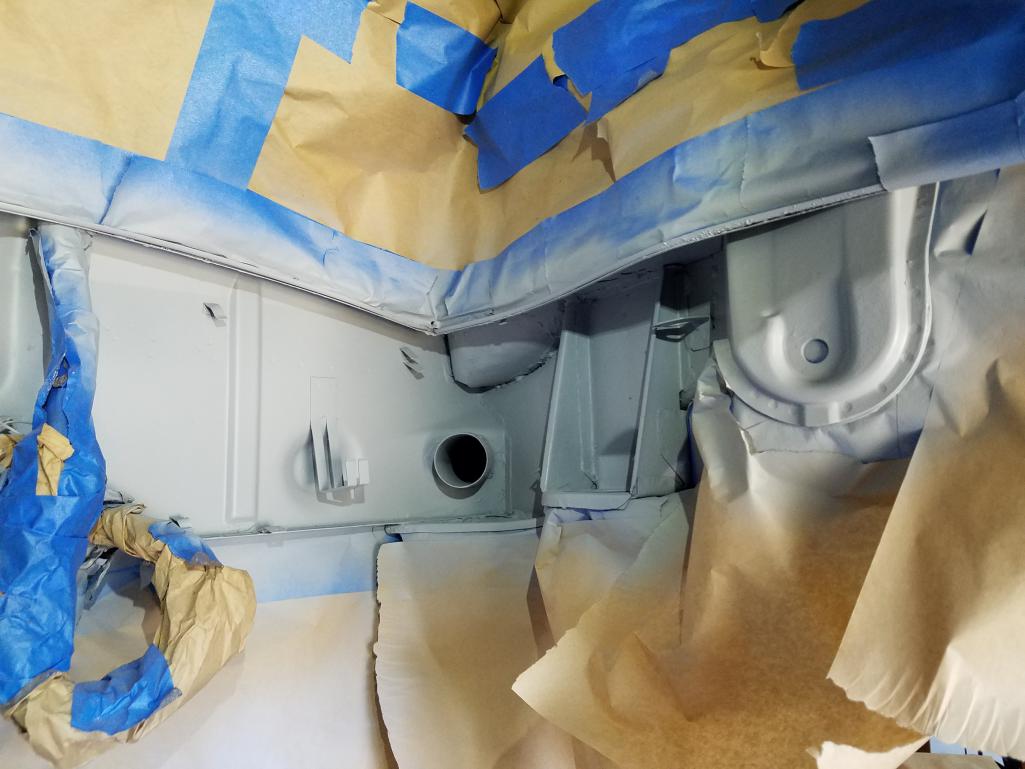
Posted by: Matty900 Jul 2 2017, 09:17 PM
Another angle.
Attached thumbnail(s)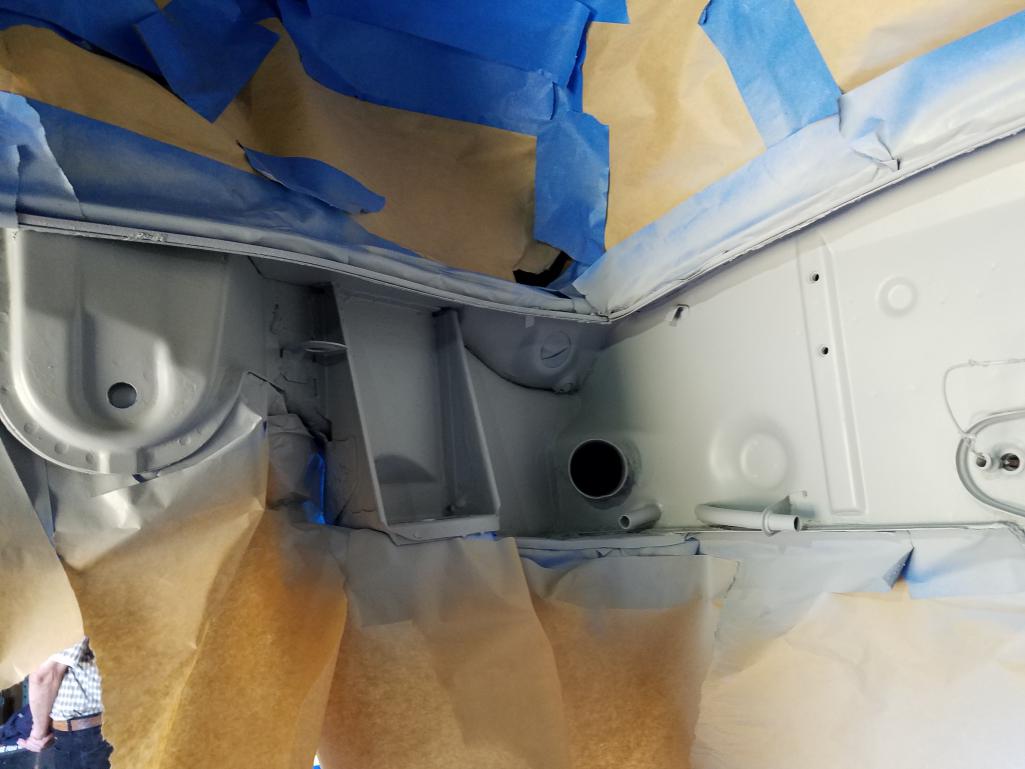
Posted by: Matty900 Jul 5 2017, 01:16 AM
Much happier with this attempt.
Attached thumbnail(s)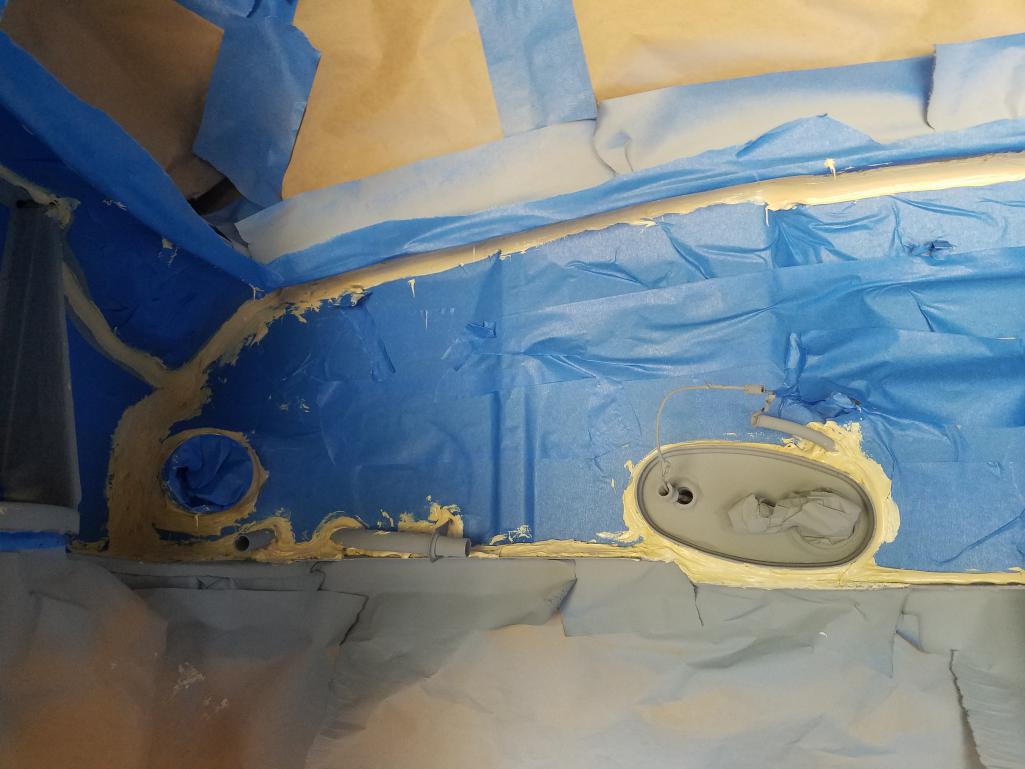
Posted by: Matty900 Jul 5 2017, 01:19 AM
This will cure until Thursday and then we'll hit the corners at least with Wurth.
Attached thumbnail(s)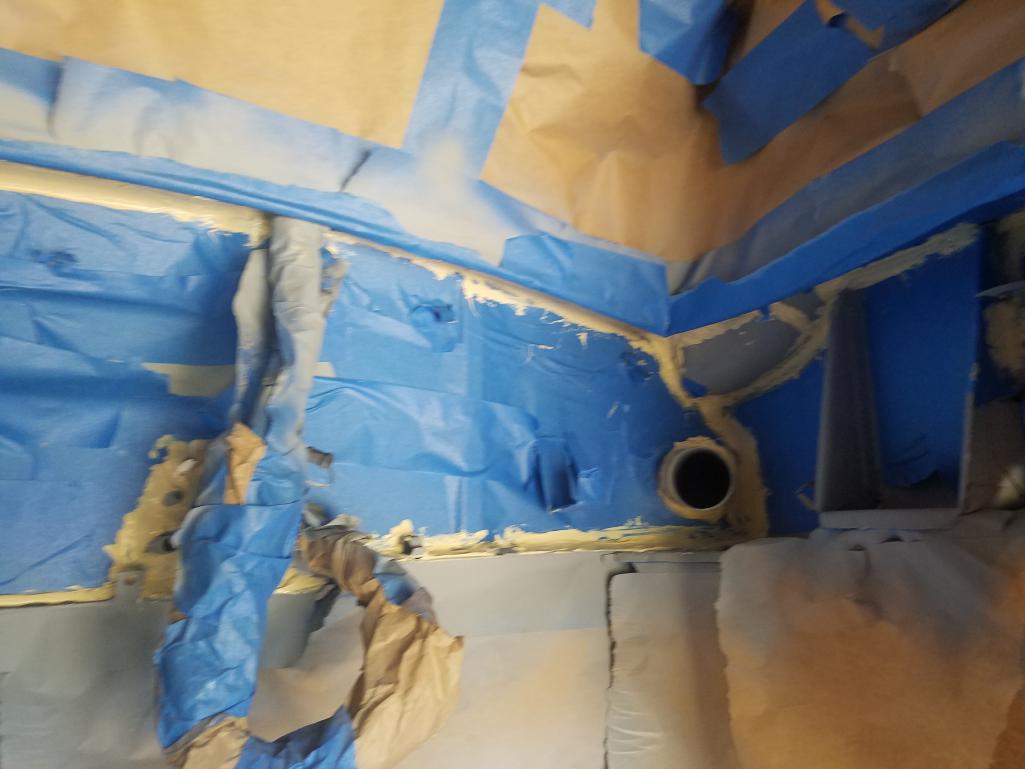
Posted by: Matty900 Jul 5 2017, 01:22 AM
Took apart the airbox controls, cleaned and reassembled.
Attached thumbnail(s)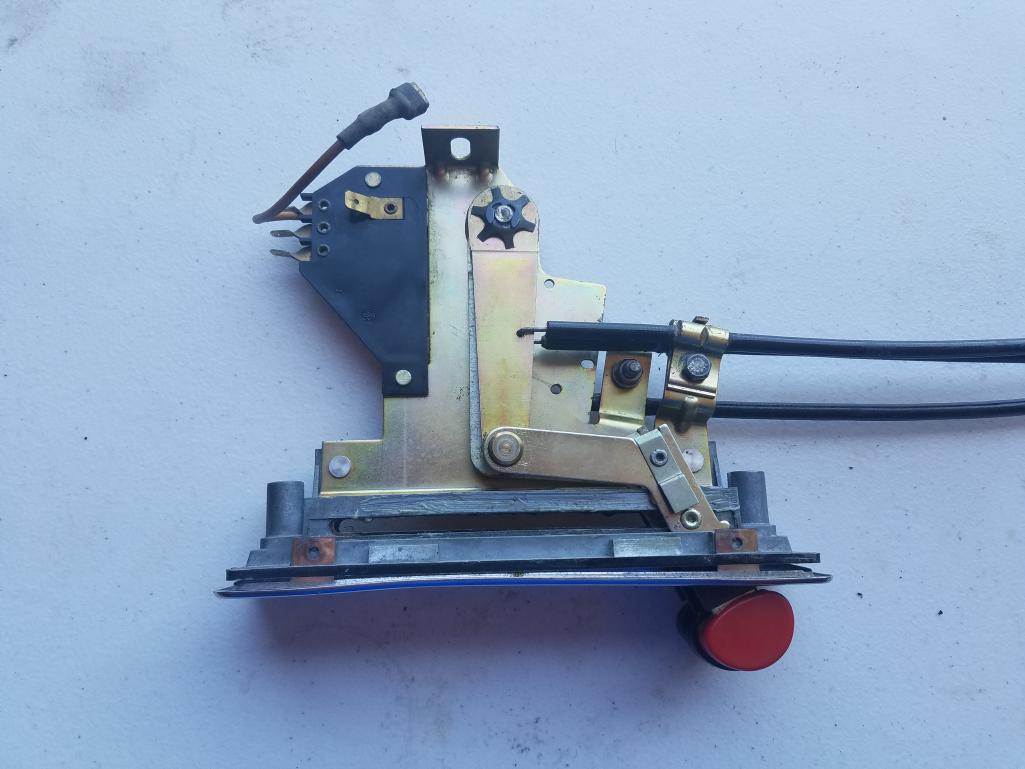
Posted by: Matty900 Jul 5 2017, 01:27 AM
Cleaned up the defrost vents and control boxes. Hope to install all of this Thursday.
Attached thumbnail(s)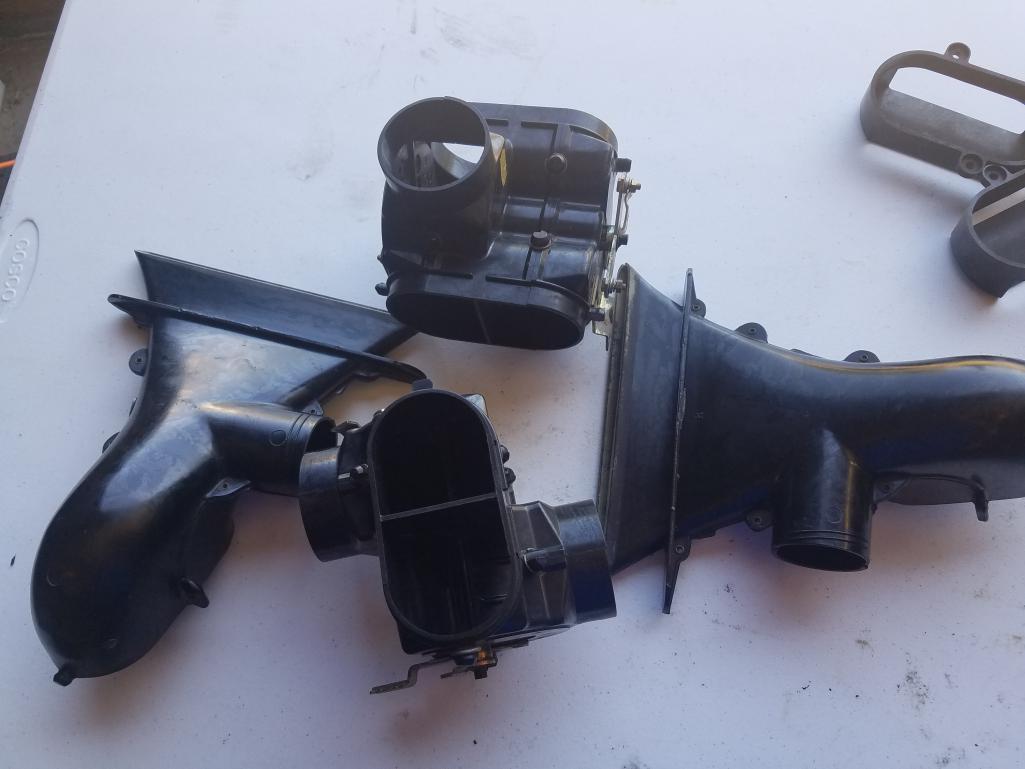
Posted by: raynekat Jul 5 2017, 07:15 AM
Actually, that is incorrect!
The holes in the front trunk are supposed to have longer rubber tubes in them that allow water to flow out of the trunk.
My 1971 914-4 has the same engine deck lid bumpers in the those 2 holes....not the any kind of longer drain tubes. So Porsche must have been doing this on many of the cars.
Posted by: Matty900 Jul 11 2017, 12:47 AM
Reapplied seam sealer from gun. Much better result
Attached thumbnail(s)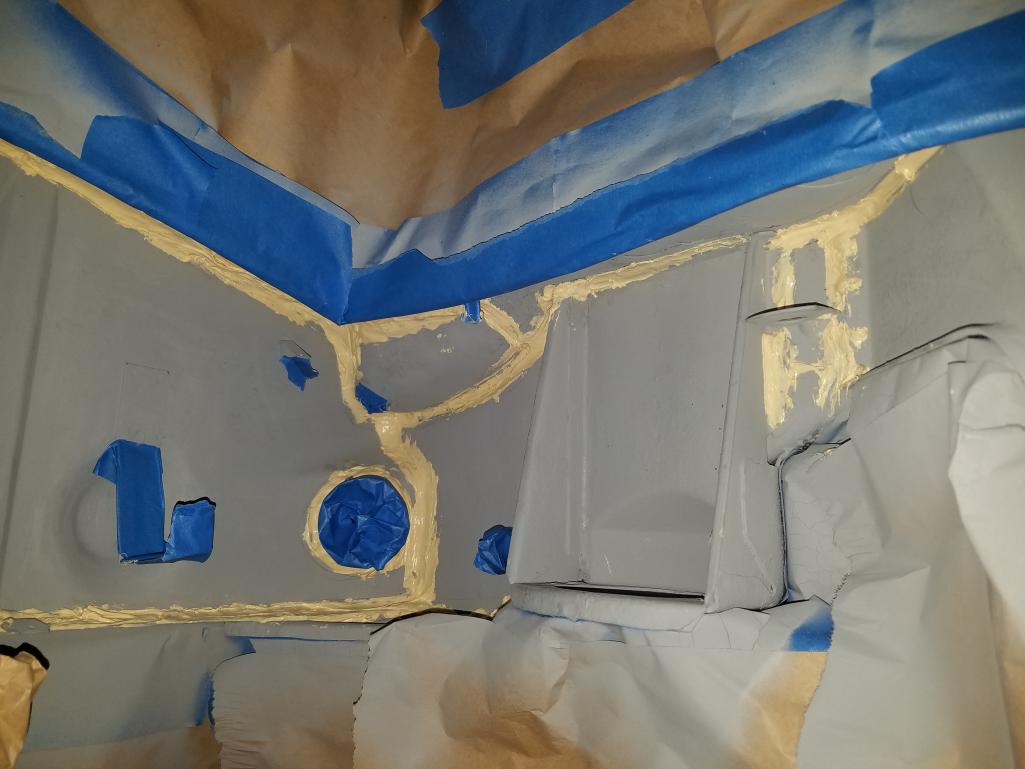
Posted by: Matty900 Jul 23 2017, 12:02 AM
Haven't uploaded any progress for a while so here's a few more photos. We got the spray in seam sealer, wurth undercoat and paint in the engine bay.
Attached thumbnail(s)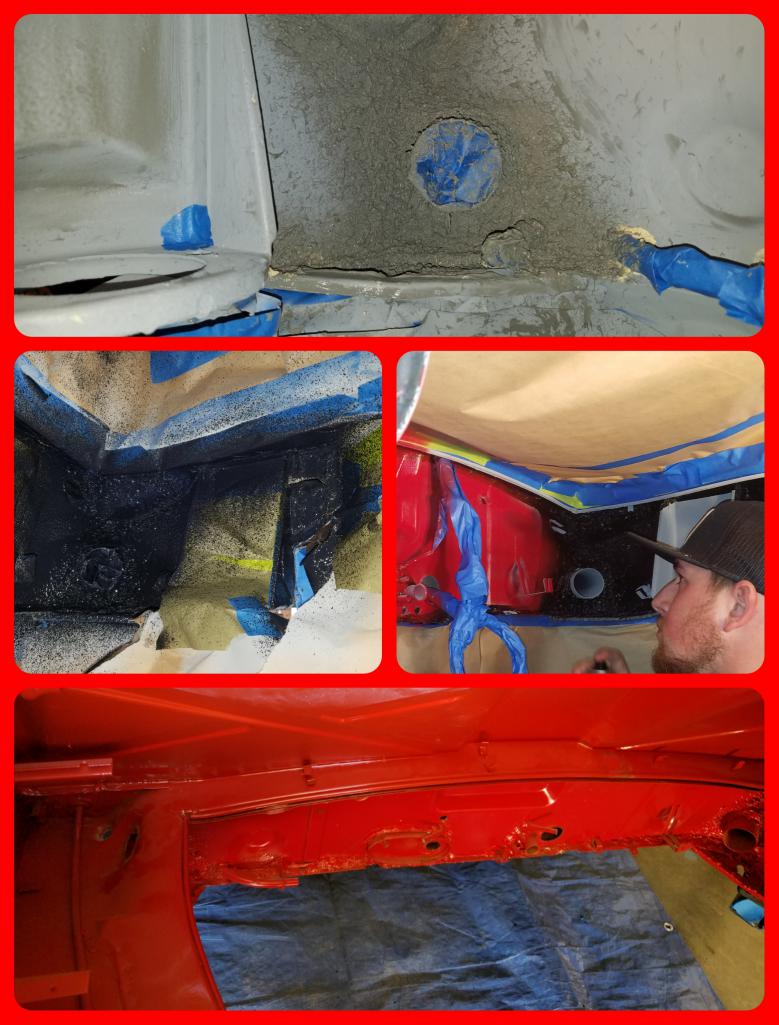
Posted by: Matty900 Jul 23 2017, 12:08 AM
Took seats to an awesome 3rd generation upholstery wizard. Brought Justice along with me from the shop so he can get trained by him to recover seats. Thanks to people like Jamie rust we have about 15 - 20 sets of seats that can be used as a core Exchange program so that will be able to do completed seats in the future. He's also working on improving our patterns for installation by the Layman so it should make it easier on everyone that wants to do it themselves.
Attached thumbnail(s)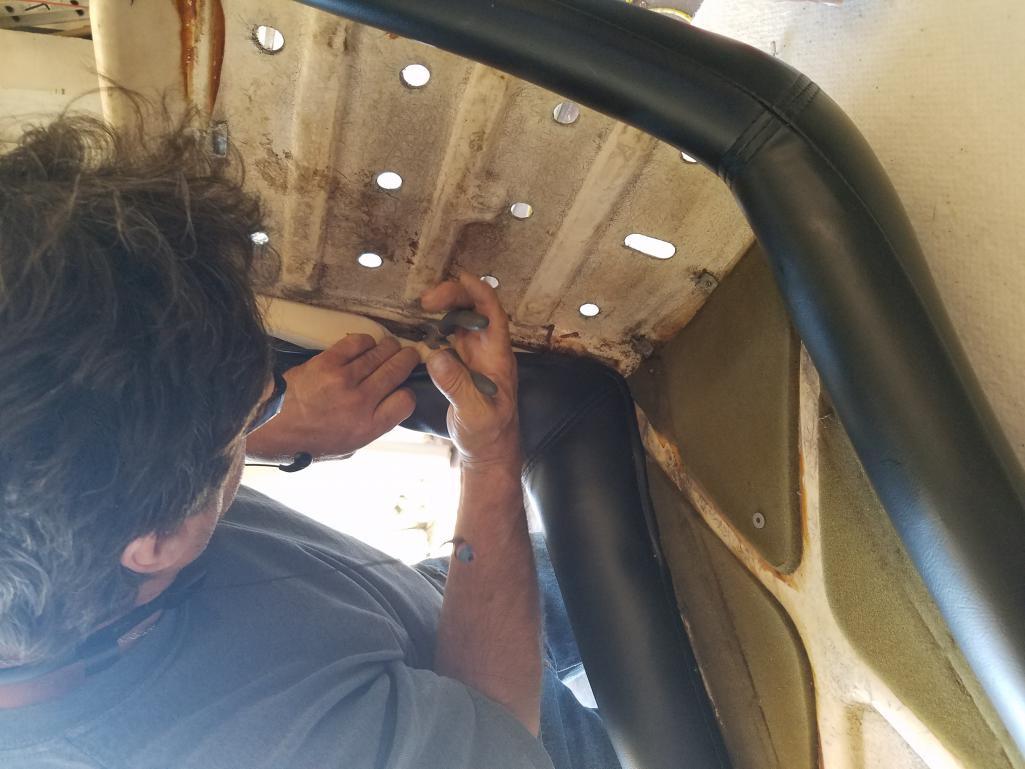
Posted by: Matty900 Jul 23 2017, 12:10 AM
Cleaned up the mixing boxes and put on re plated clips
Attached thumbnail(s)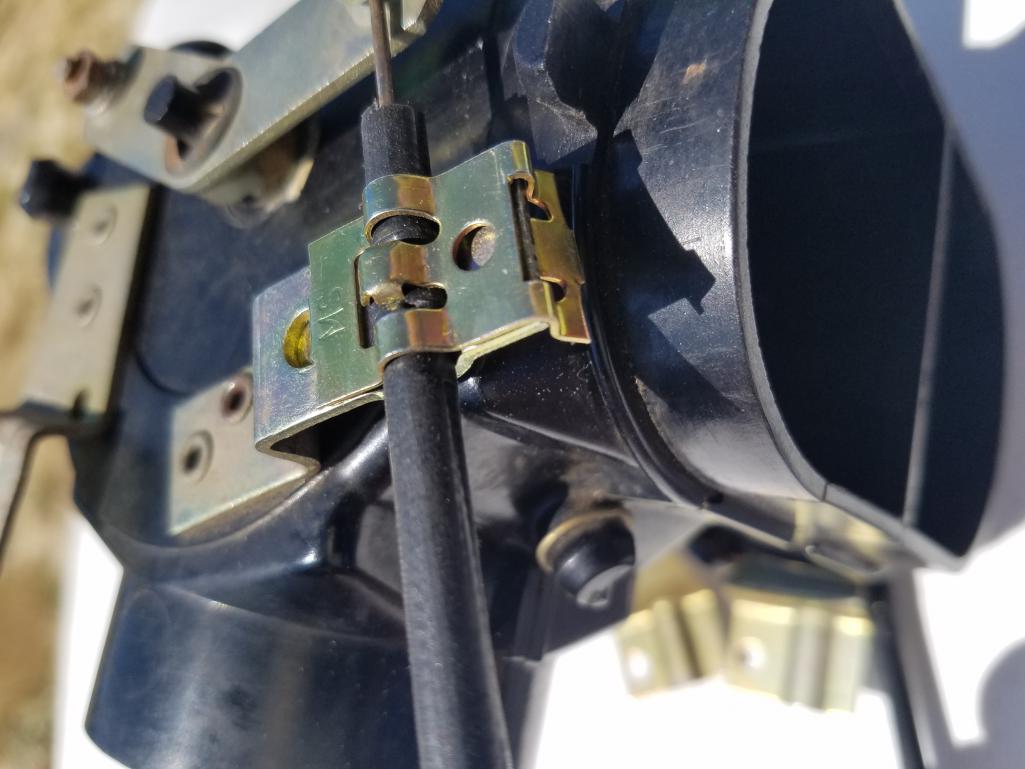
Posted by: Matty900 Jul 23 2017, 12:13 AM
Cleaned up the defroster vents and replaced the seals. The old ones had degraded in to a sticky mess.
Attached thumbnail(s)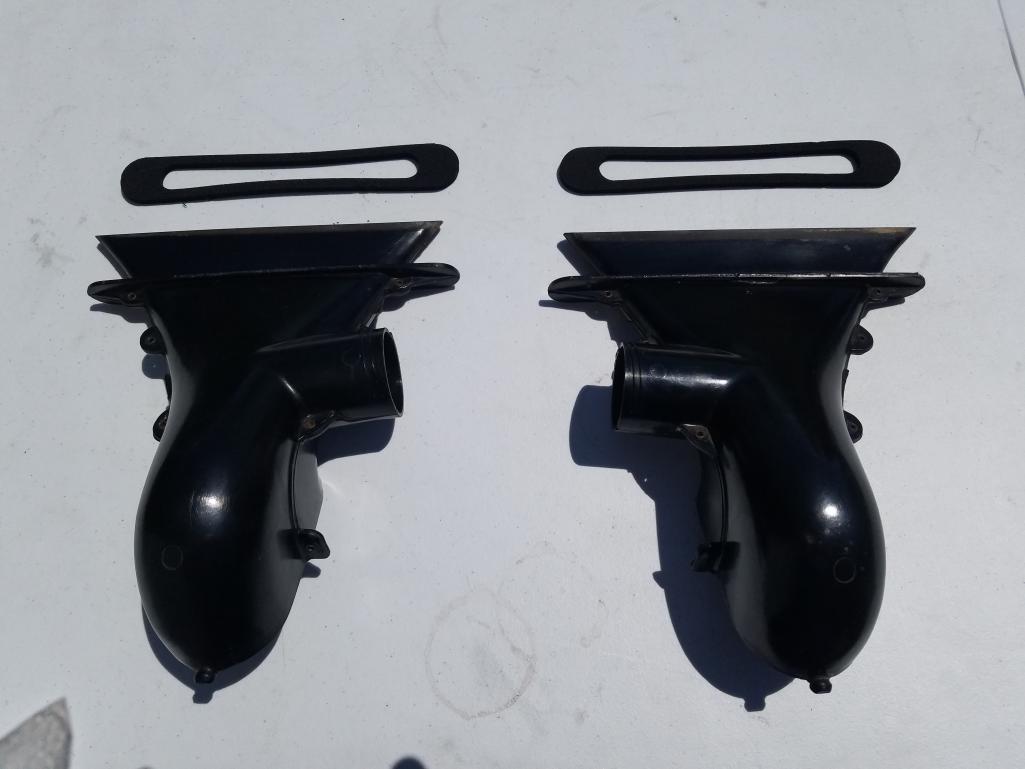
Posted by: Matty900 Jul 23 2017, 12:16 AM
Installed new washers, check valves and lines.
Attached thumbnail(s)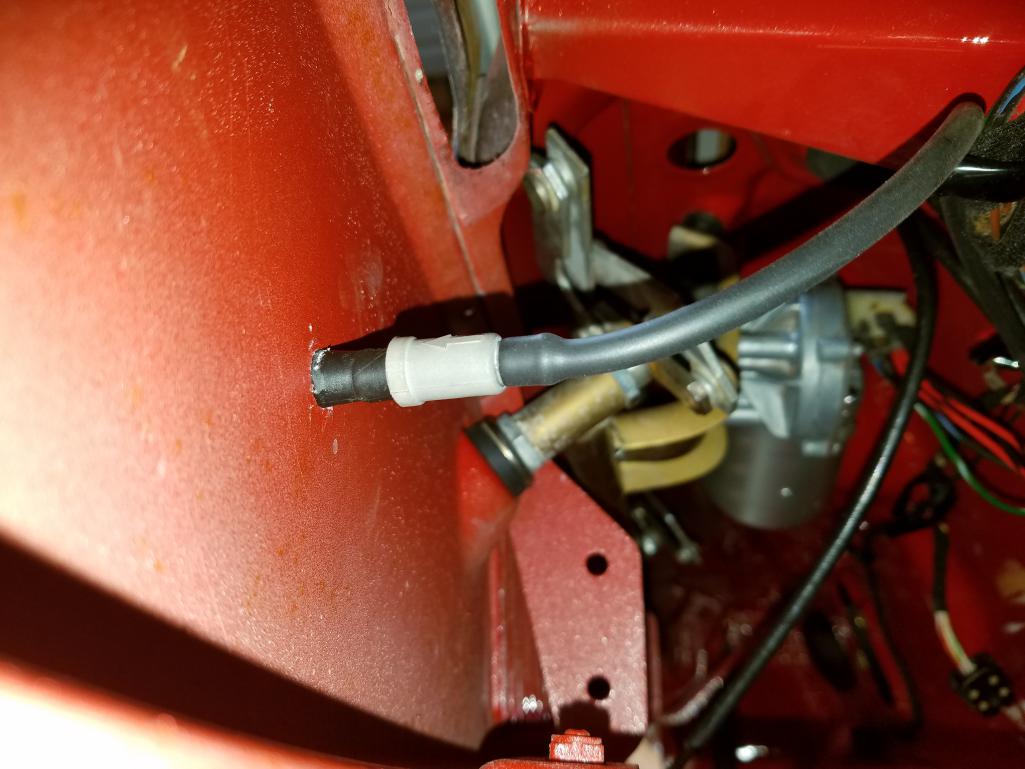
Posted by: Matty900 Jul 23 2017, 12:22 AM
Cary figured out the best way to install the fresh air mixing box in the car.
Attached thumbnail(s)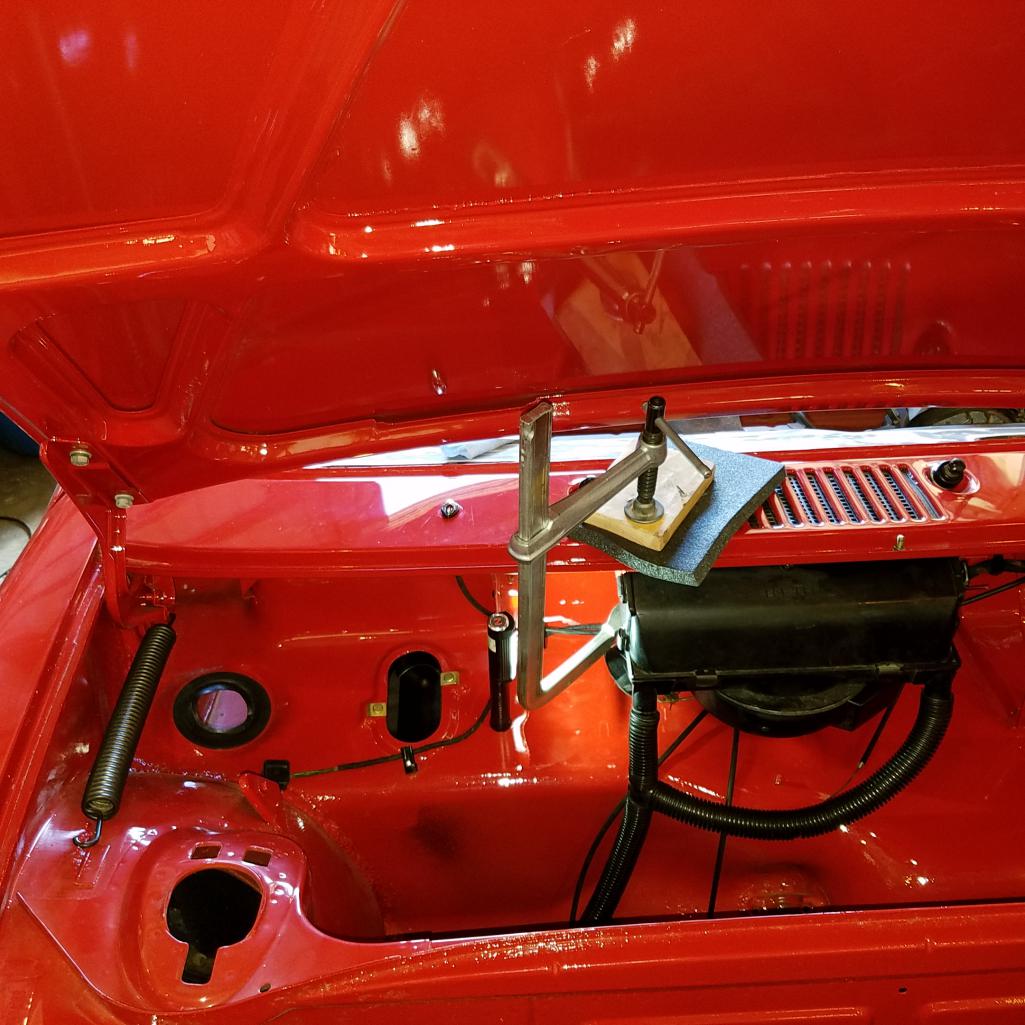
Posted by: Matty900 Jul 23 2017, 12:27 AM
This makes the installation easier.
Attached thumbnail(s)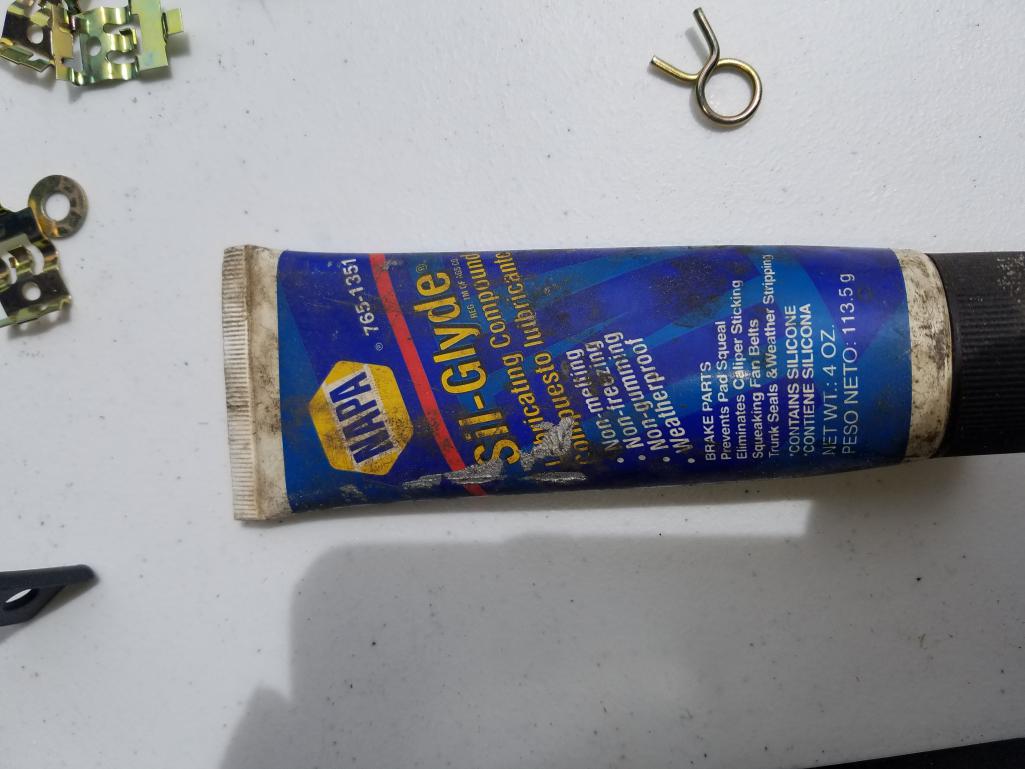
Posted by: Matty900 Jul 23 2017, 12:33 AM
I upgraded to the late style grill and seal for the air box. The key to this is superglue and patience. The factory seals were glued to the grills. I superglued the grill into the seal and let it set up for the night. Then I glued the sill to the Box halfway around and let it set. Then I came back and glued it to the other side so that it was completely glued to the Box. When I went to install I used the Sil Glide liberally all the way around so that the new rubber didn't stick to the new paint and make it come off the Box.
Attached thumbnail(s)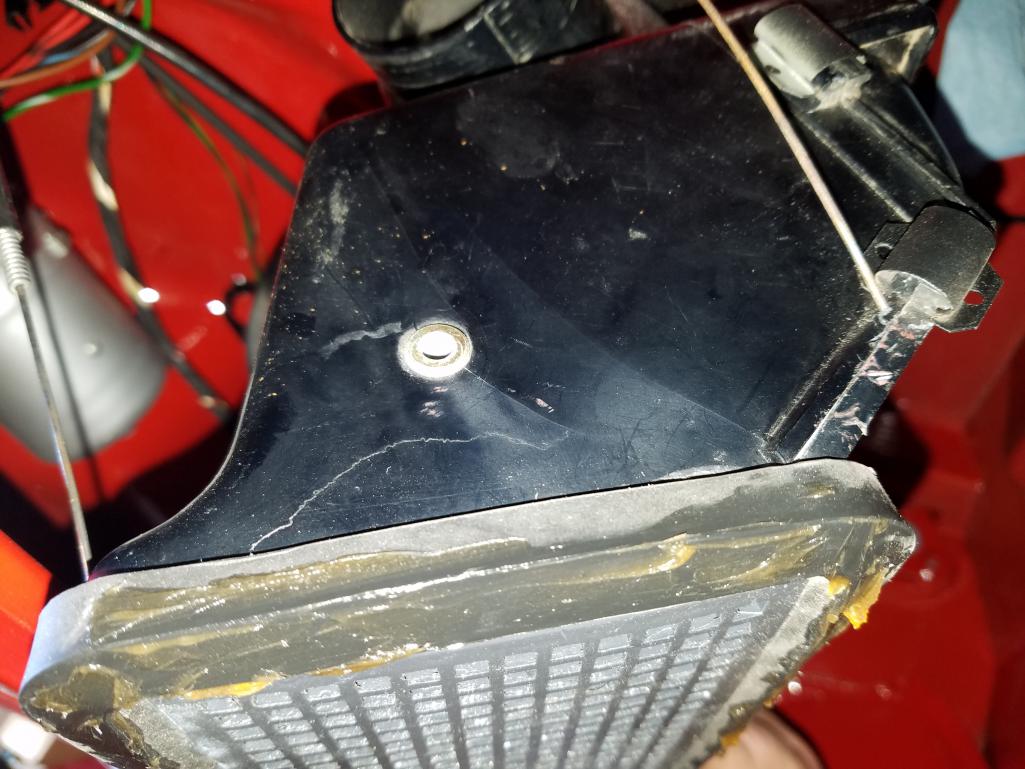
Posted by: Matty900 Jul 23 2017, 12:38 AM
This is Carys magic wand for installing the fresh air mixing box 
Attached thumbnail(s)
Posted by: Matty900 Jul 23 2017, 12:41 AM
Stripped and repainted the fog light housings
Attached thumbnail(s)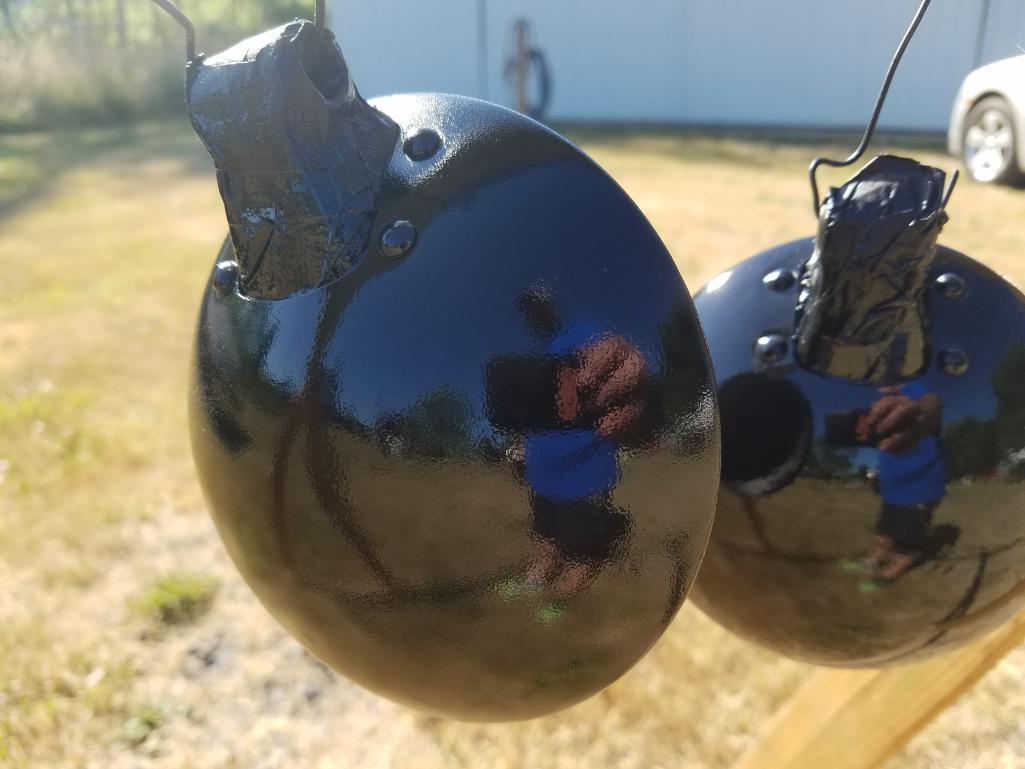
Posted by: Matty900 Jul 23 2017, 12:46 AM
I realized that I had wrapped the wiring harness with the wrong width of tape. So I pulled it and redid it with the correct width.
Attached thumbnail(s)
Posted by: Matty900 Jul 23 2017, 12:50 AM
Got in some new grommets for the headlight and fog light wires.
Attached thumbnail(s)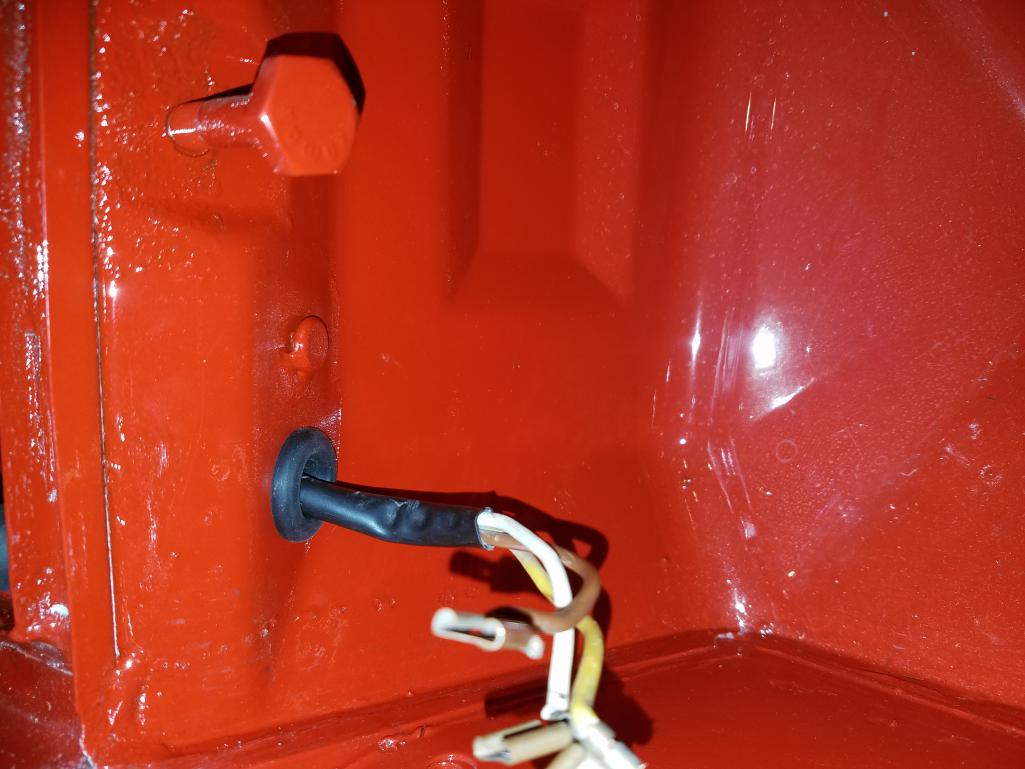
Posted by: Matty900 Jul 23 2017, 12:52 AM
Got the mixing boxes installed
Attached thumbnail(s)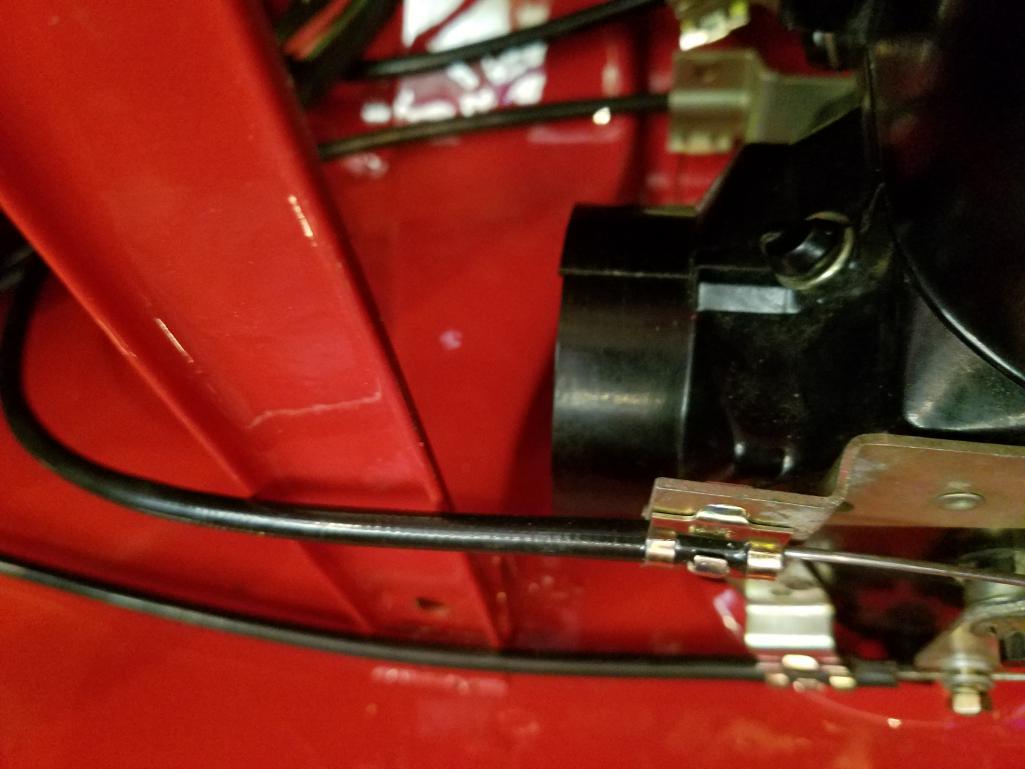
Posted by: Matty900 Jul 23 2017, 12:55 AM
Put new seals on the long to mixing box hoses and installed them with the re plated hose clamps
Attached thumbnail(s)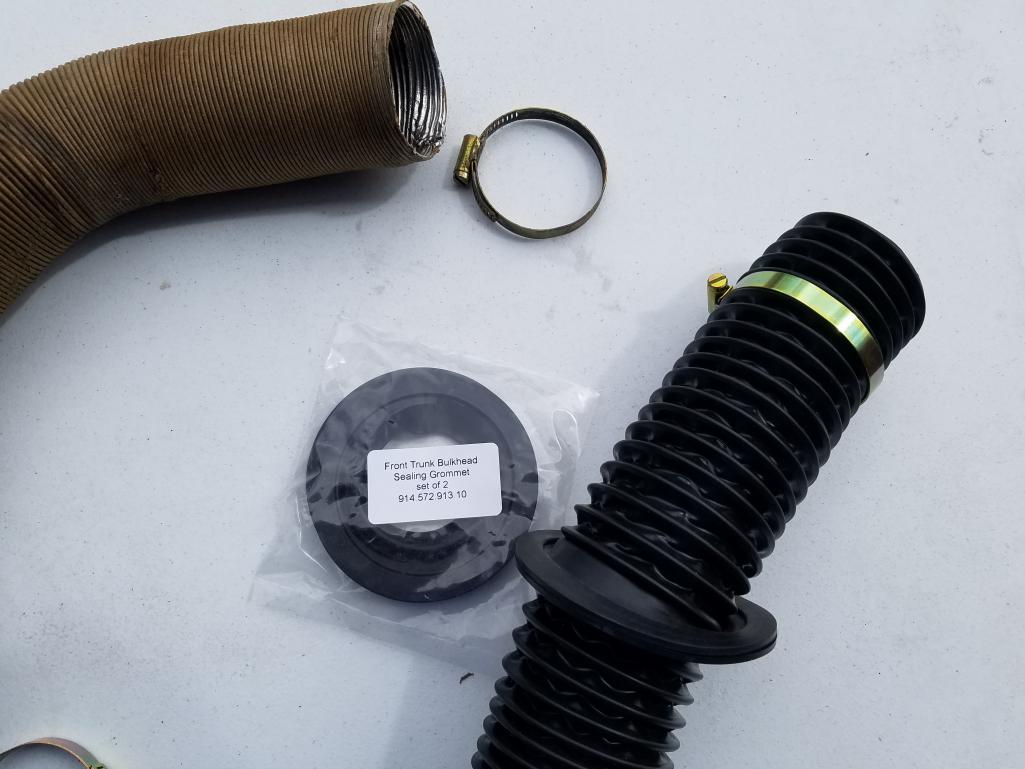
Posted by: Matty900 Jul 23 2017, 12:56 AM
Attached thumbnail(s)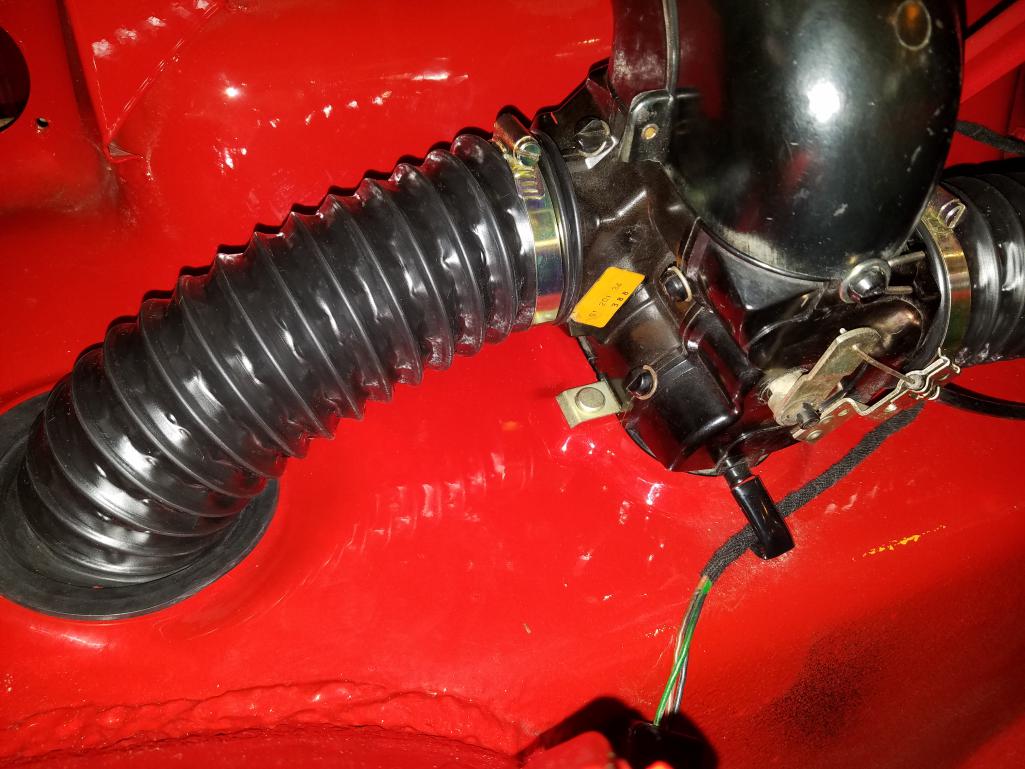
Posted by: Matty900 Jul 23 2017, 12:58 AM
Attached thumbnail(s)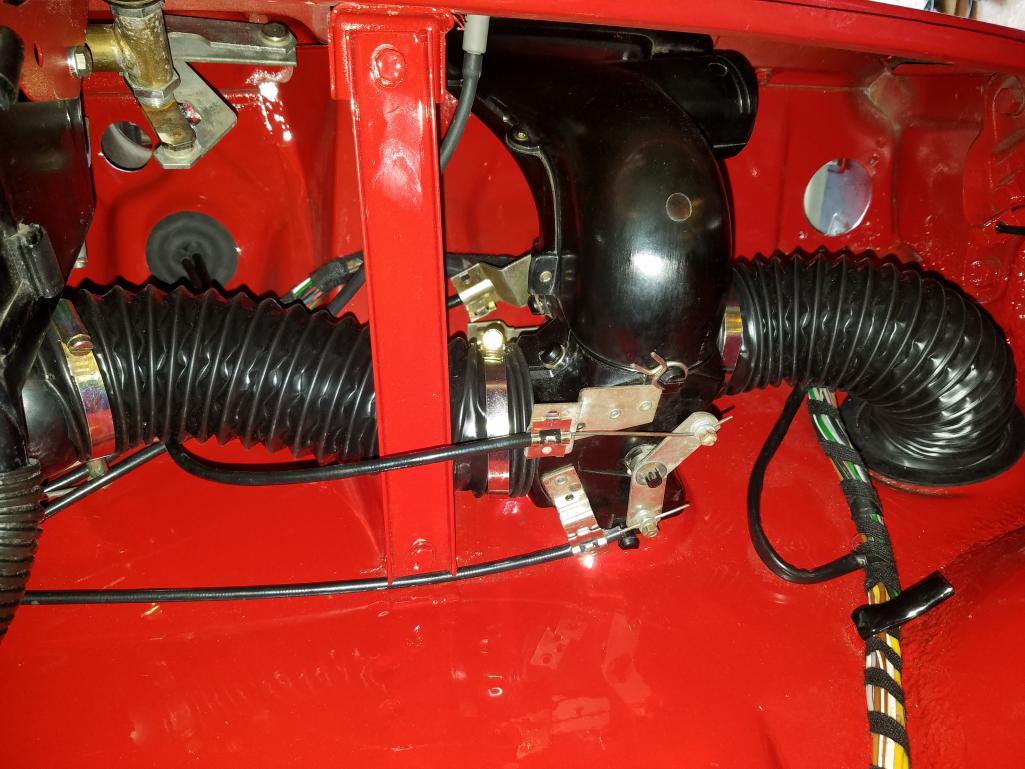
Posted by: Matty900 Jul 23 2017, 01:01 AM
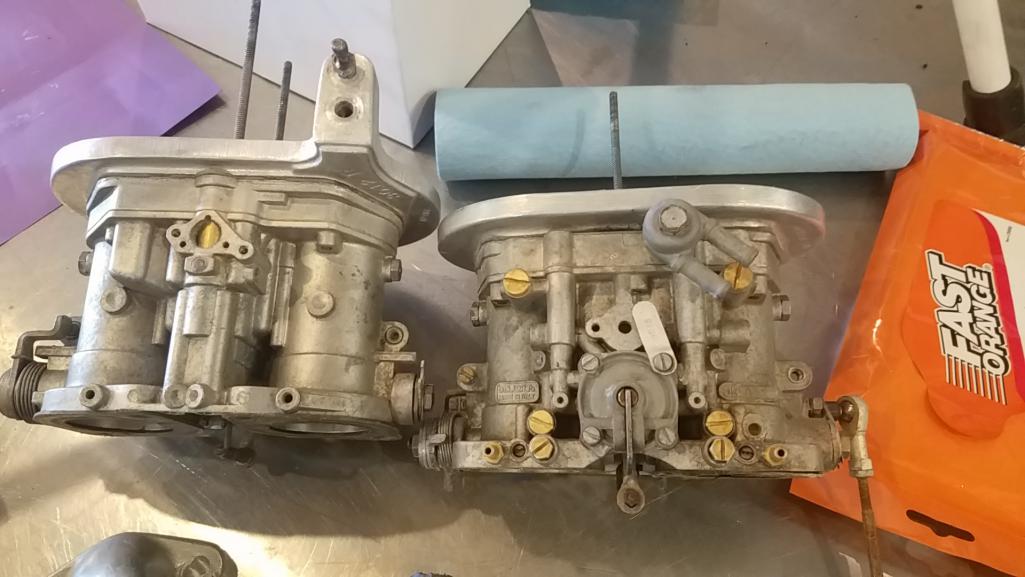
Time to clean up the carbs
Attached thumbnail(s)
Posted by: Matty900 Jul 23 2017, 01:06 AM
The tunnel is the last part of the car needing some love.
Attached thumbnail(s)
Posted by: Matty900 Jul 23 2017, 01:09 AM
We pulled out the wiring harness to clean out the tunnel and sort out a few wires that had shorted and melted together.
Attached thumbnail(s)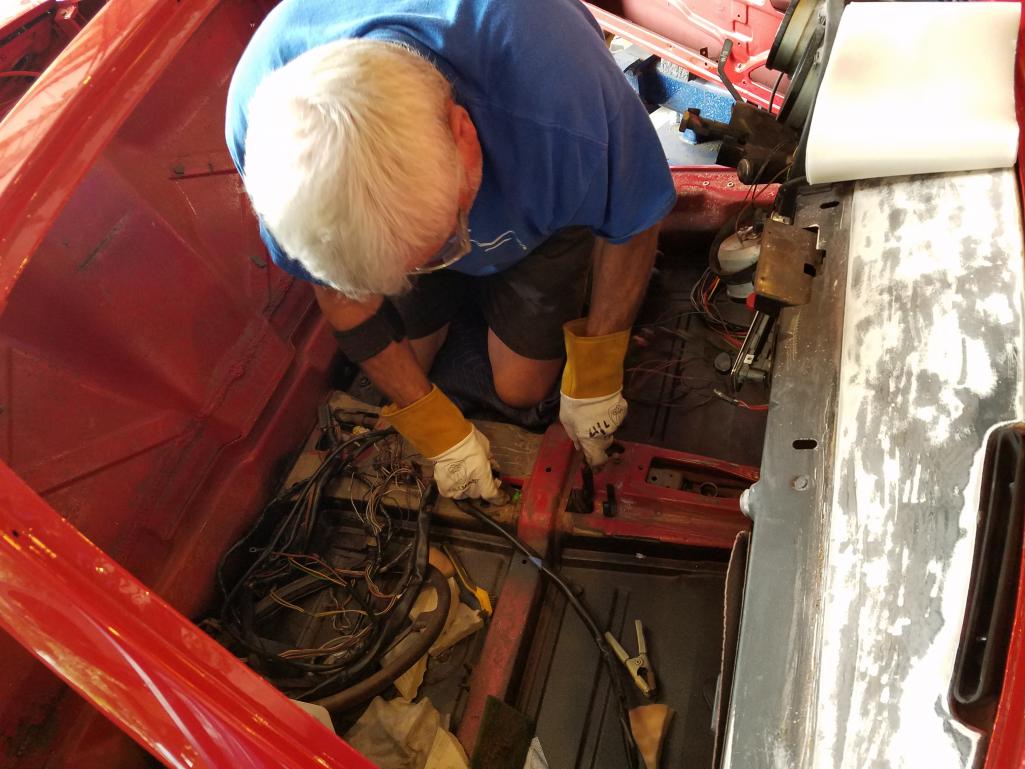
Posted by: Matty900 Jul 23 2017, 01:13 AM
One of the cleaning tools used
Attached thumbnail(s)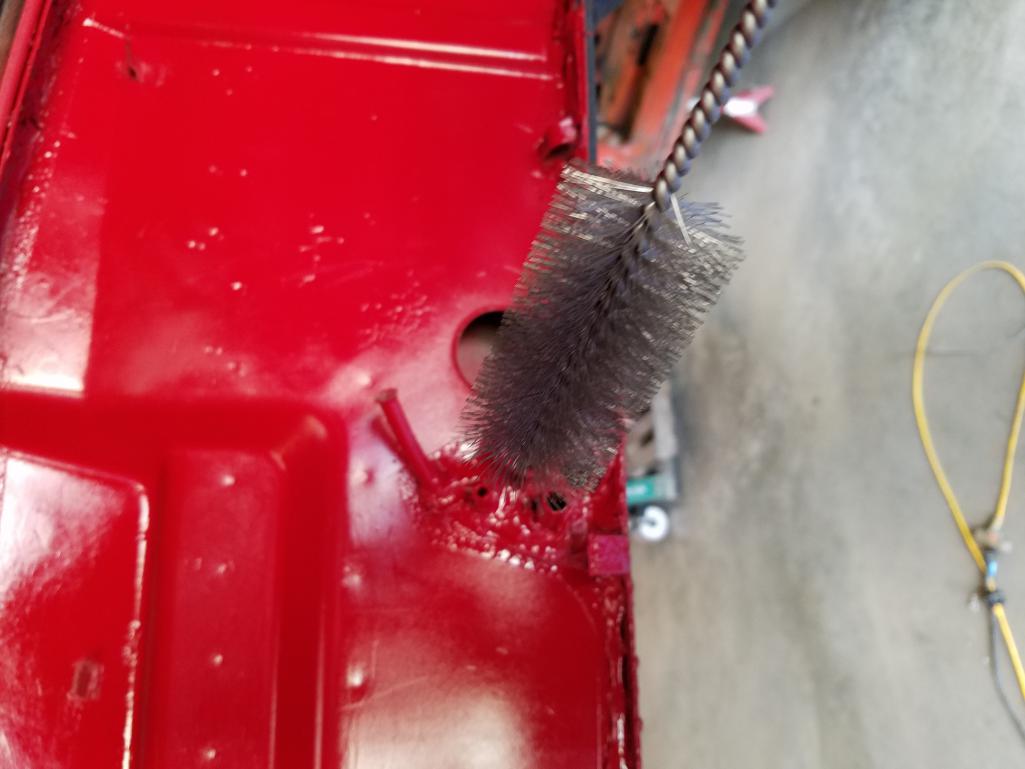
Posted by: Matty900 Jul 23 2017, 01:15 AM
Dremel tool on a wand and lots of wire brushes helped to clean out a lot of the areas
Attached thumbnail(s)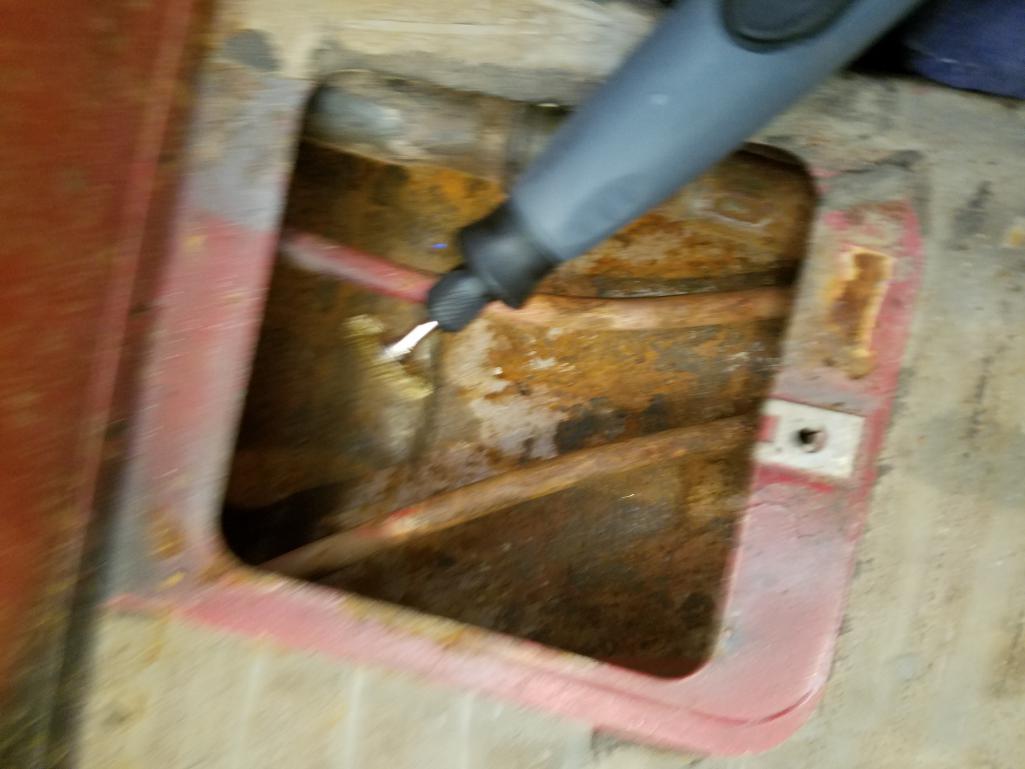
Posted by: Matty900 Jul 23 2017, 01:17 AM
As clean as I could get it.
Attached thumbnail(s)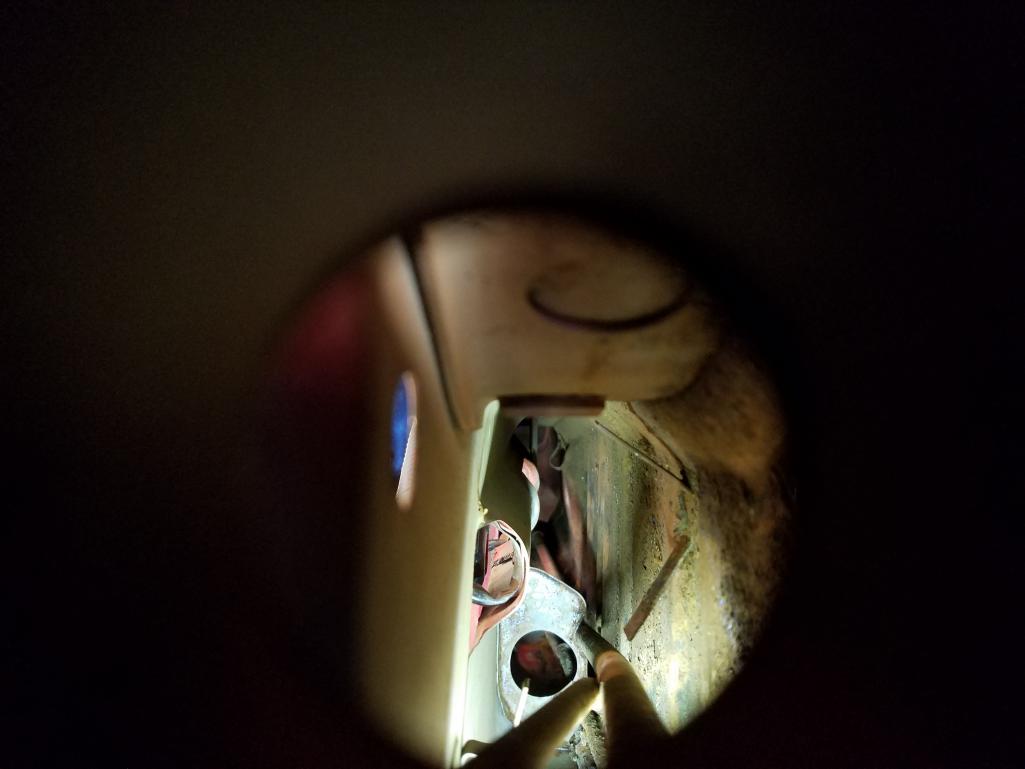
Posted by: Matty900 Jul 23 2017, 01:18 AM
Rust conversation applicator
Attached thumbnail(s)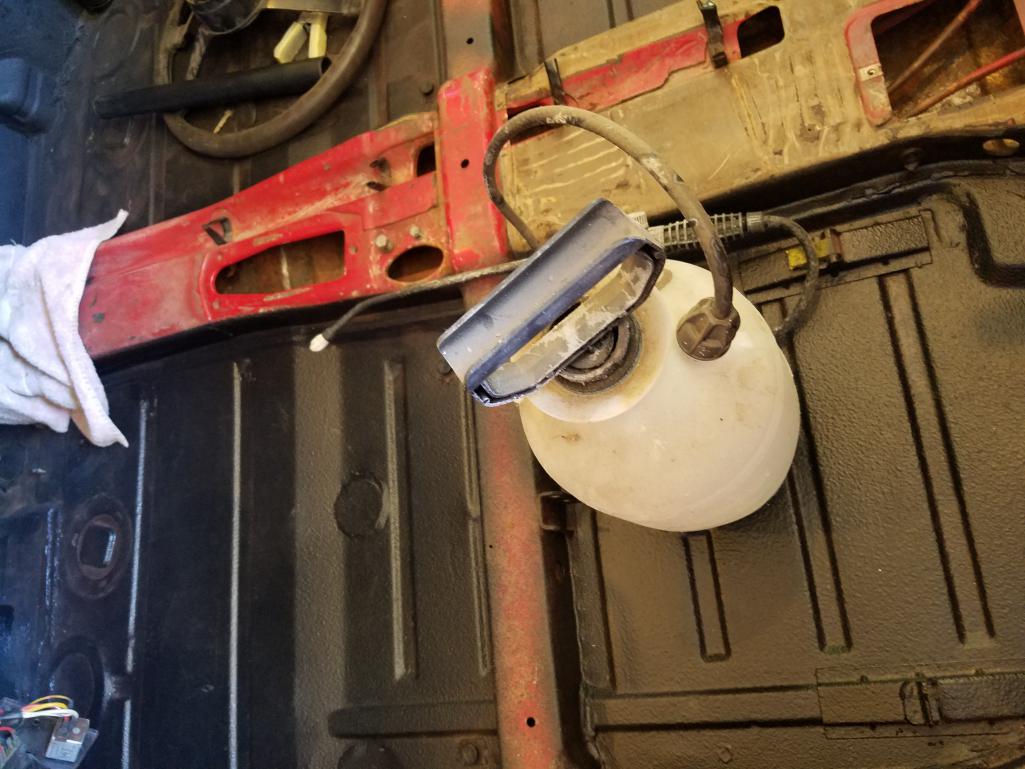
Posted by: Matty900 Jul 23 2017, 01:21 AM
Cleaned up shifter linkage from the tunnel
Attached thumbnail(s)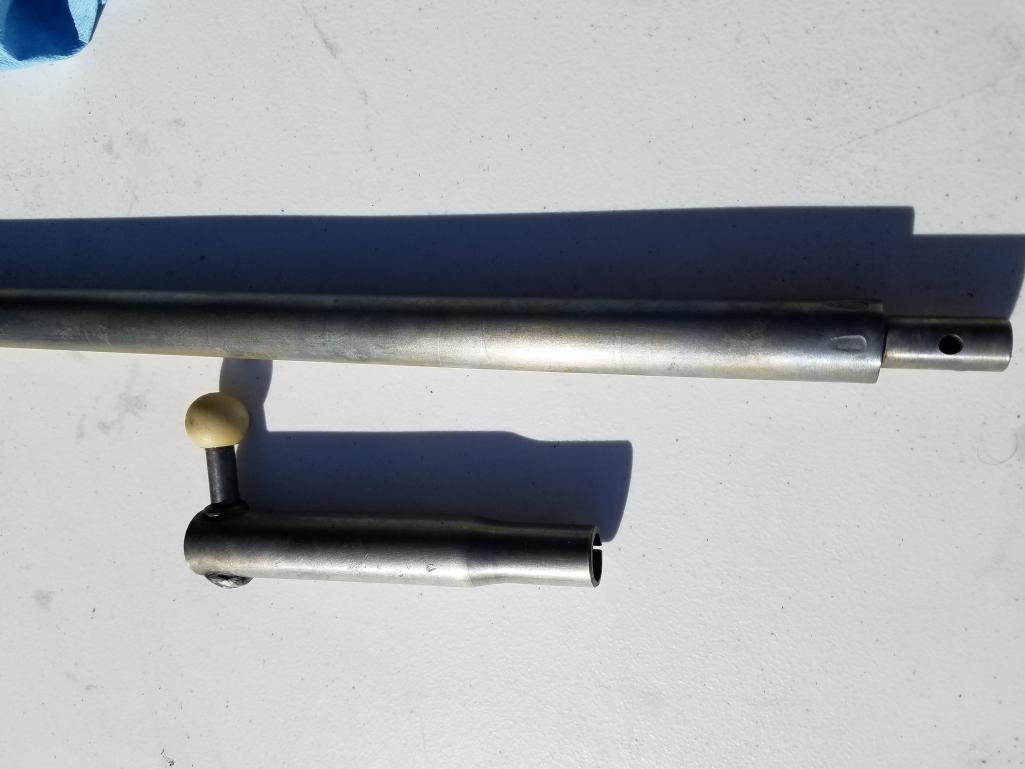
Posted by: Matty900 Jul 23 2017, 02:15 AM
Found the other door latch to get cleaned up
Attached thumbnail(s)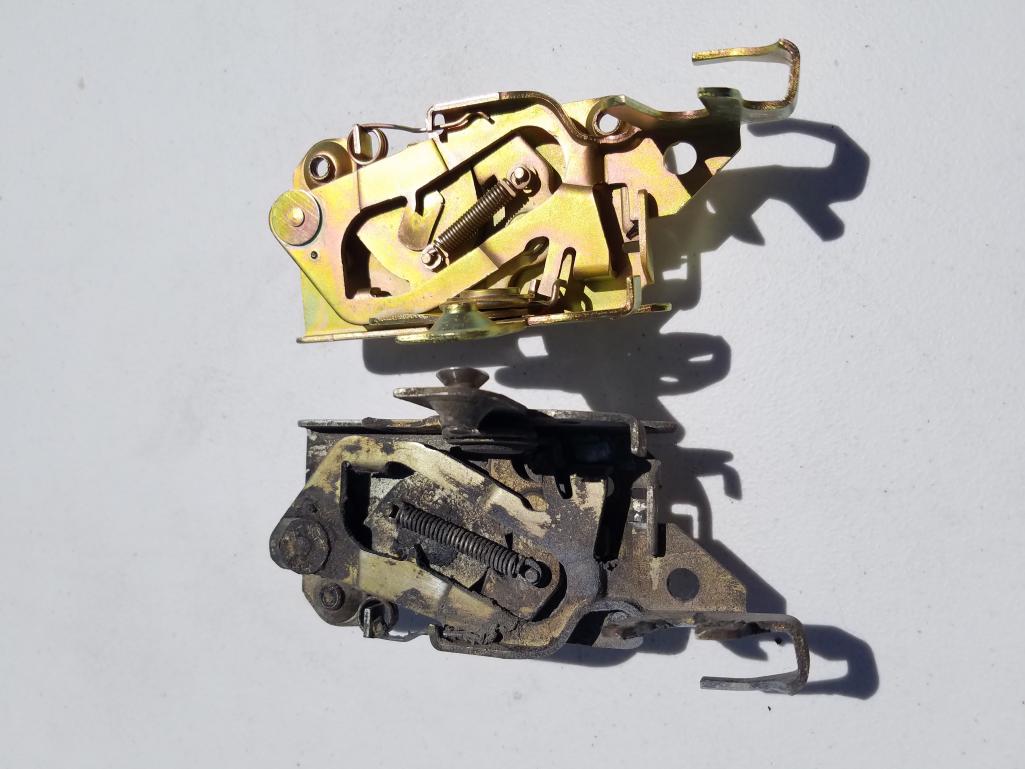
Posted by: Matty900 Jul 23 2017, 02:18 AM
Cleaned up the tail light housings
Attached thumbnail(s)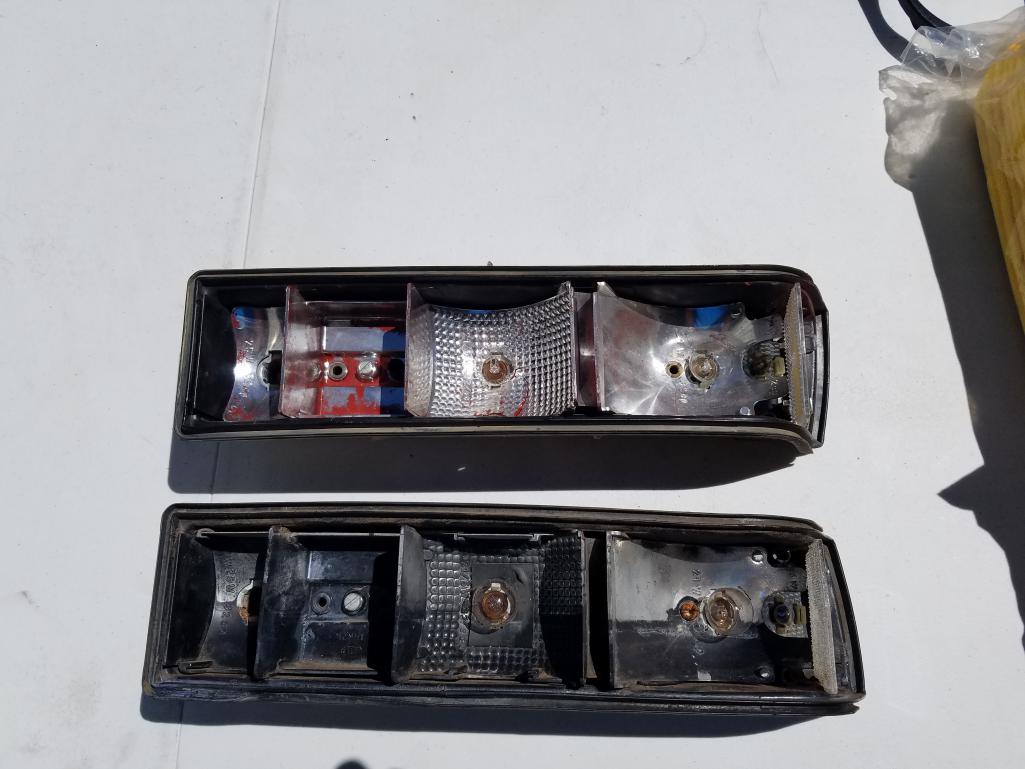
Posted by: Matty900 Jul 23 2017, 02:20 AM
Added new seals
Attached thumbnail(s)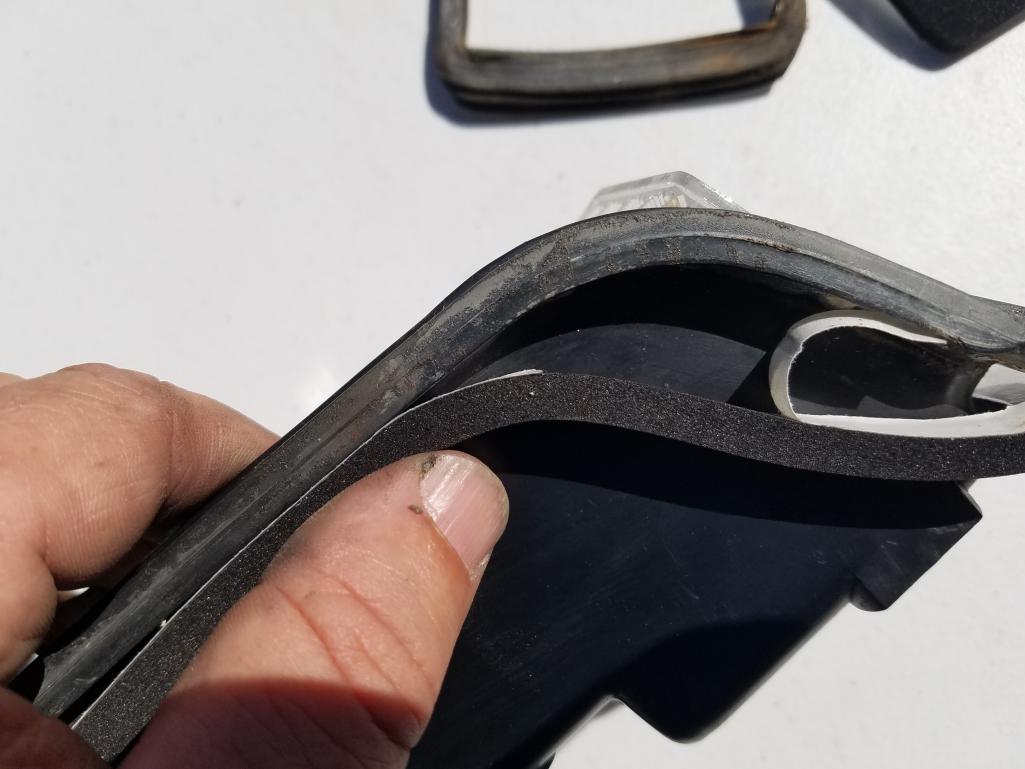
Posted by: Matty900 Jul 23 2017, 02:22 AM
Test fitted some new taillight lenses
Attached thumbnail(s)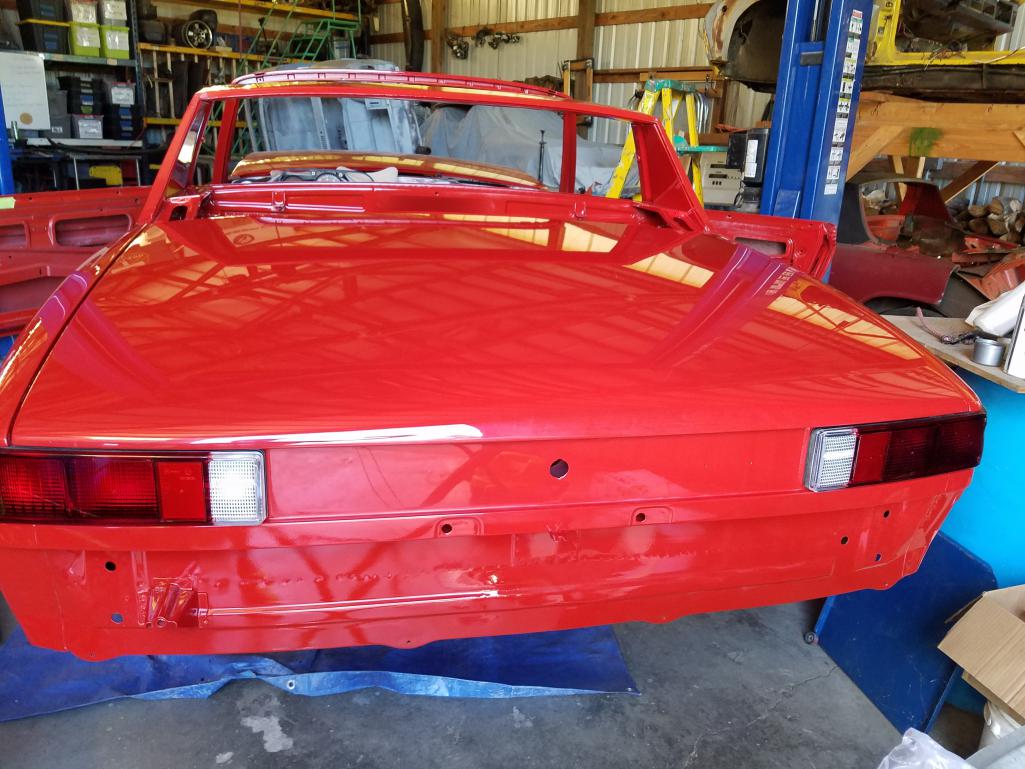
Posted by: Matty900 Jul 23 2017, 12:00 PM
Found a very small hole through the bottom of the tunnel that needed welding. Easy fix.
Attached thumbnail(s)
Posted by: Matty900 Jul 25 2017, 08:02 PM
The carbs cleaned up nicely. There a few thing's that are broken and need to be replaced.
Attached thumbnail(s)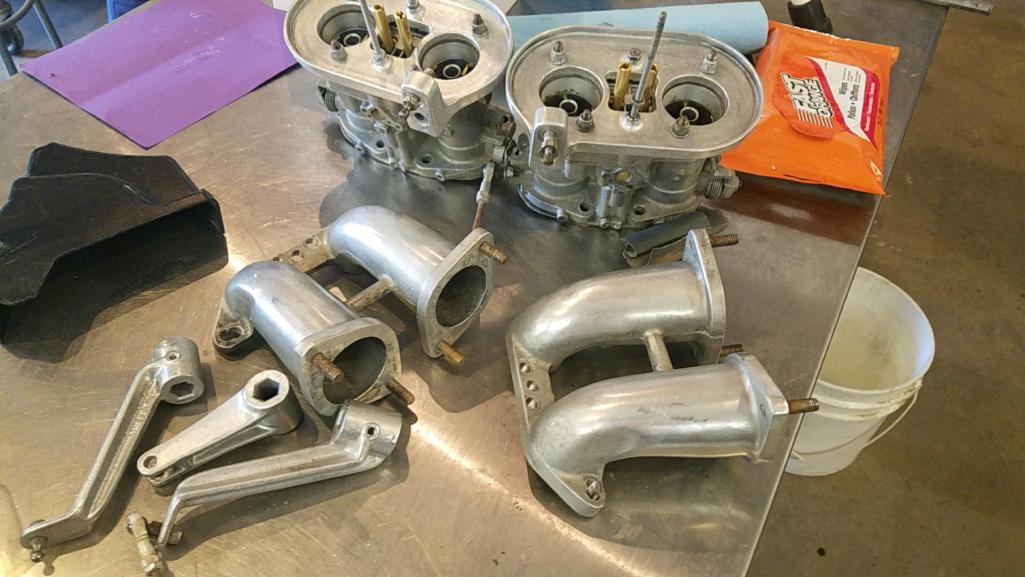
Posted by: Matty900 Jul 25 2017, 08:05 PM
Today's fun was cleaning up the wiring harness and figuring out where to start repairing it.
Attached thumbnail(s)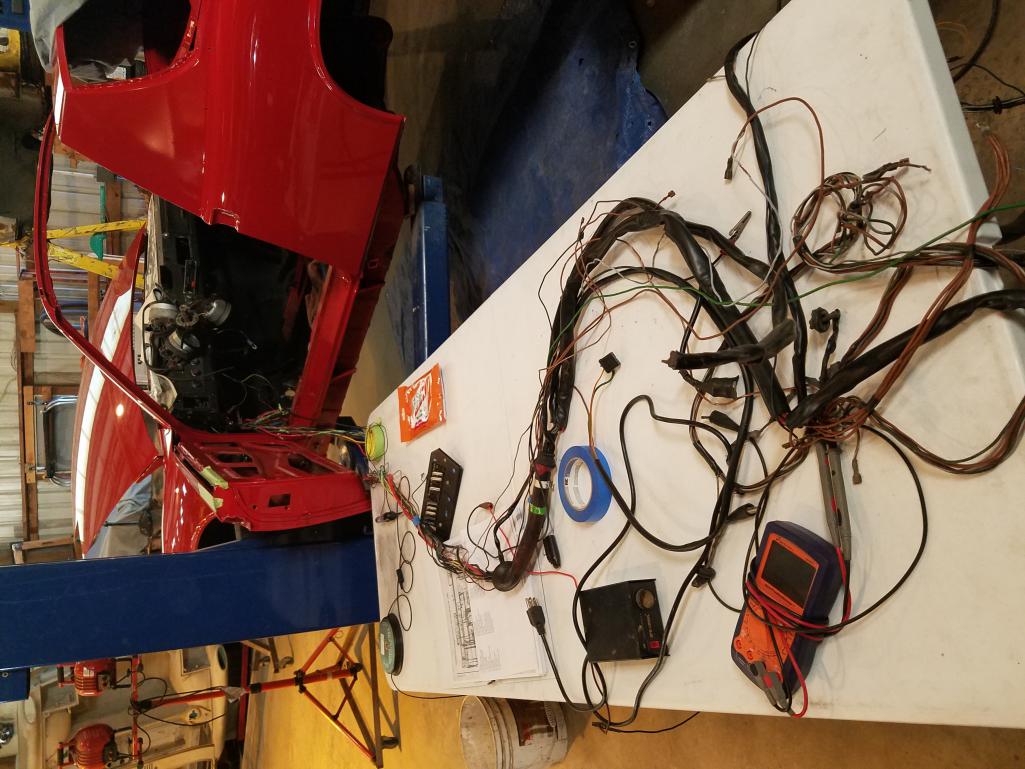
Posted by: Matty900 Jul 25 2017, 08:09 PM

Attached thumbnail(s)
Posted by: Matty900 Jul 25 2017, 08:11 PM
Everywhere the green tape is at is where a wire was melted to nearby wires.
Attached thumbnail(s)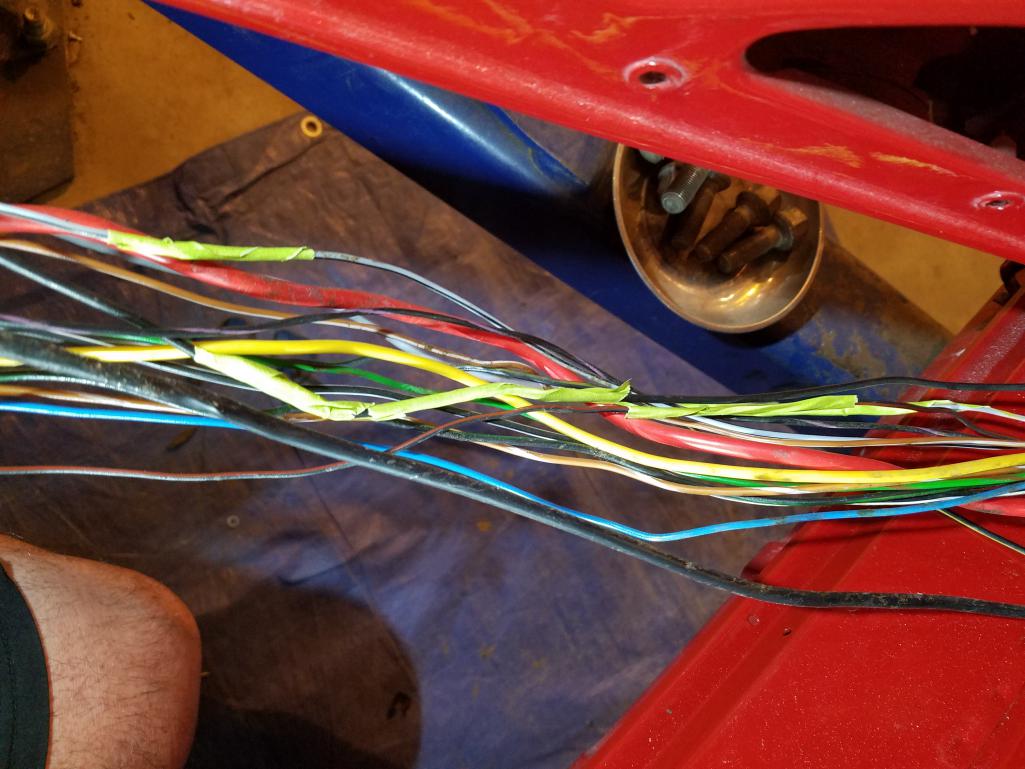
Posted by: Matty900 Jul 25 2017, 08:13 PM
This little bastard was the issue.
Attached thumbnail(s)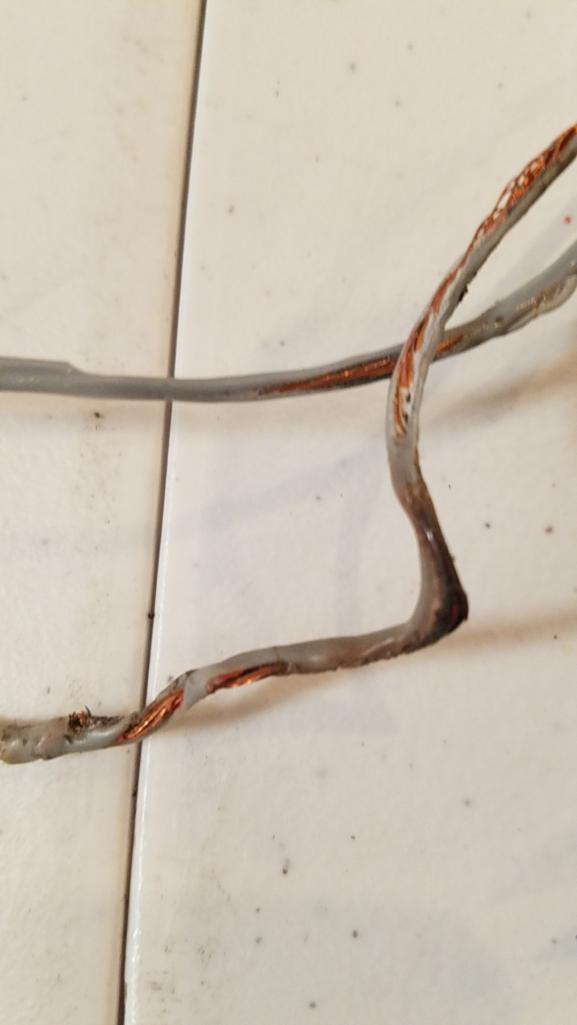
Posted by: Matty900 Jul 25 2017, 08:20 PM
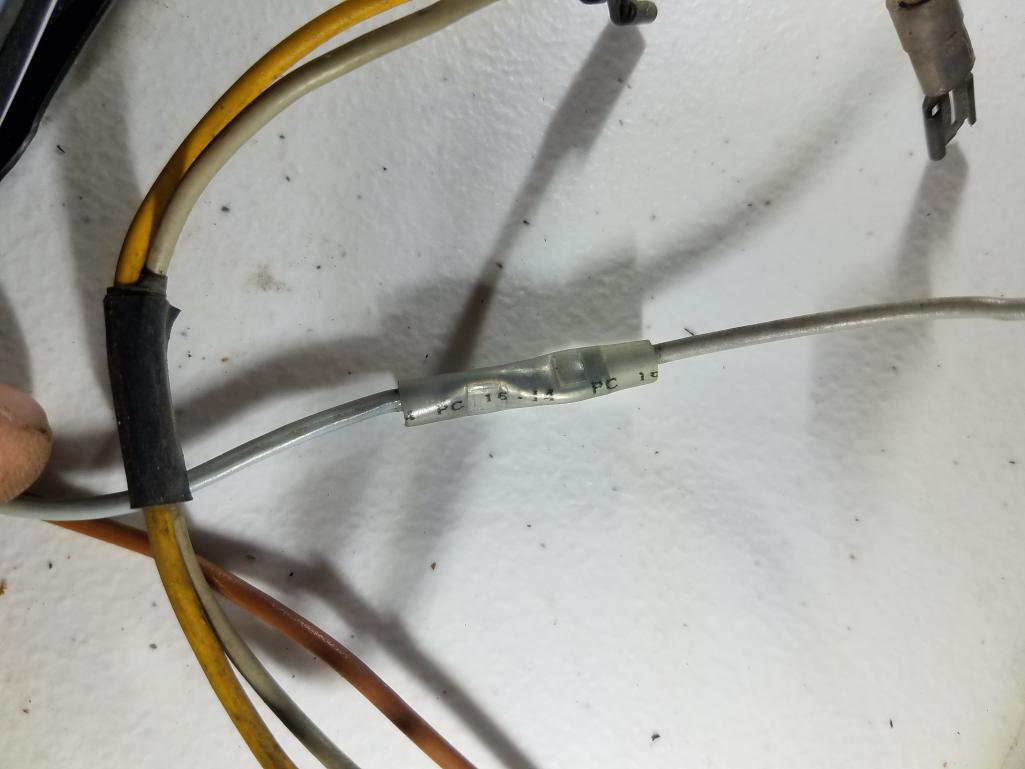
A previous owner cut the gray wire here and spliced in something. Does anyone have any ideas on This?
I have cut the wire between the fuse panel in the car and the snorkel but everything after that is encased and I am hoping not to have to cut in to it to repair things. I will be running carbs but was hoping some day to put the FI back one day.
Attached thumbnail(s)
Posted by: Matty900 Aug 3 2017, 12:06 AM
Test fitting some new parts in the car.
Attached thumbnail(s)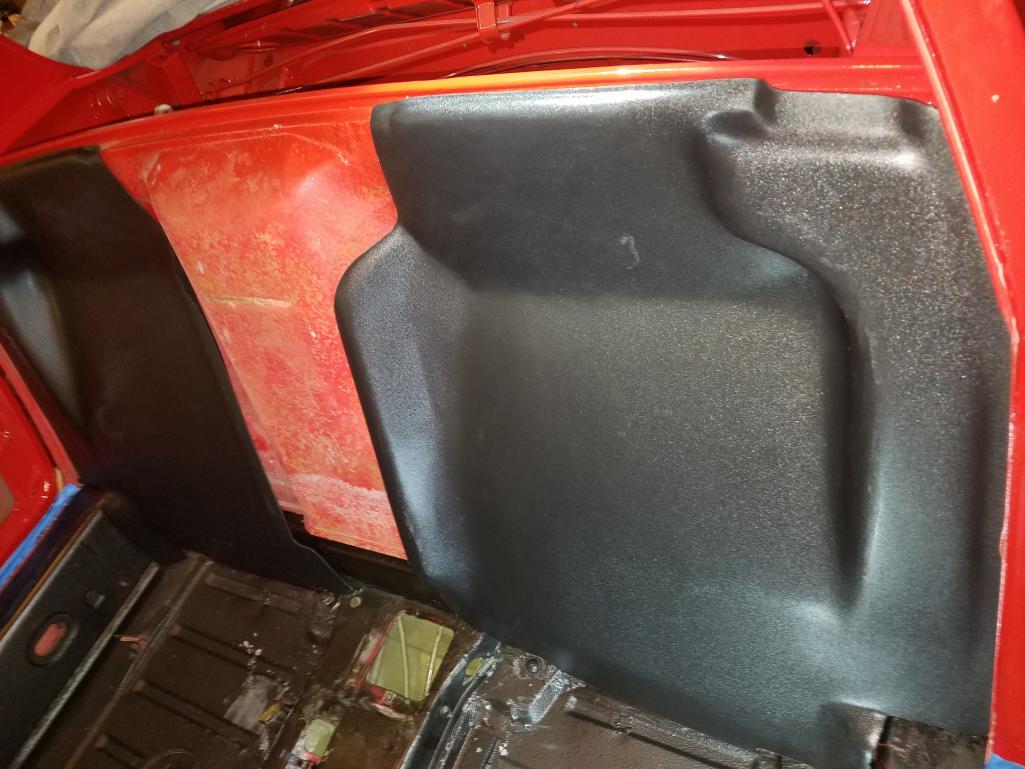
Posted by: Matty900 Aug 3 2017, 12:14 AM
Got the Eastwood treatment in the tunnel (you can kind of see the green in the tunnel in the picture above) I treated all the other surfaces inside the car that were not treated. Now waiting for it to dry completely. The high temps this week should help. I have been keeping a fan running to help the drying
Attached thumbnail(s)
Posted by: Matty900 Aug 3 2017, 12:16 AM
Got some help from my big brother Mark (Mikey914)
Attached thumbnail(s)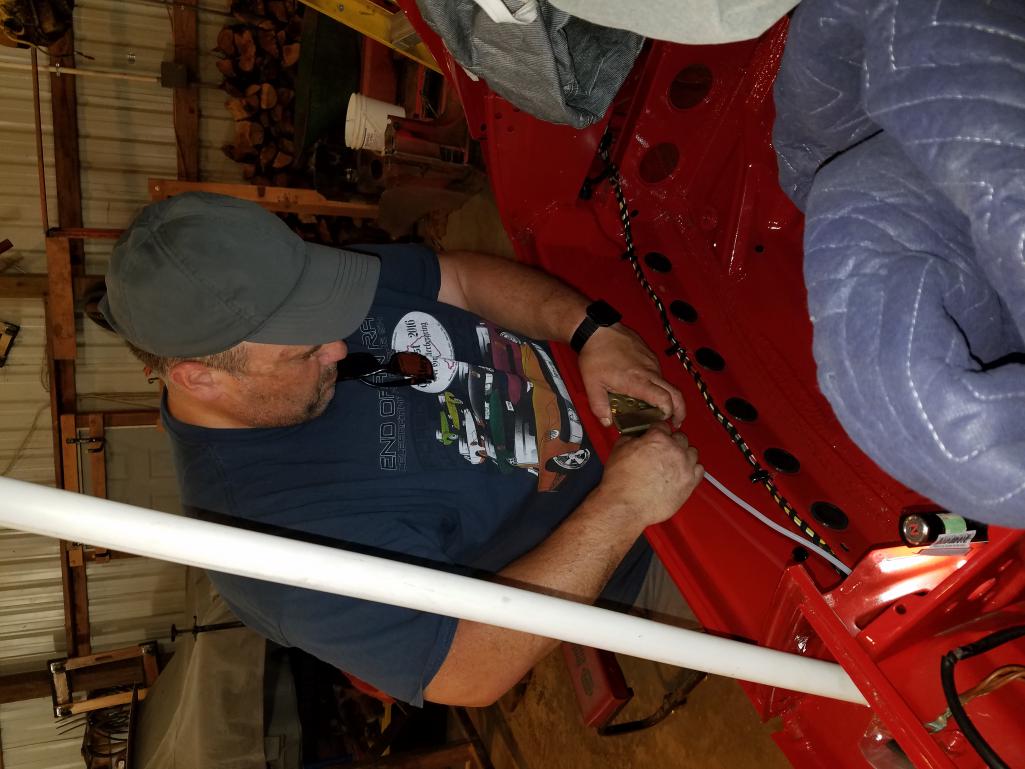
Posted by: Matty900 Aug 3 2017, 12:19 AM
Got some new 914 Rubber seals in the trunk
Attached thumbnail(s)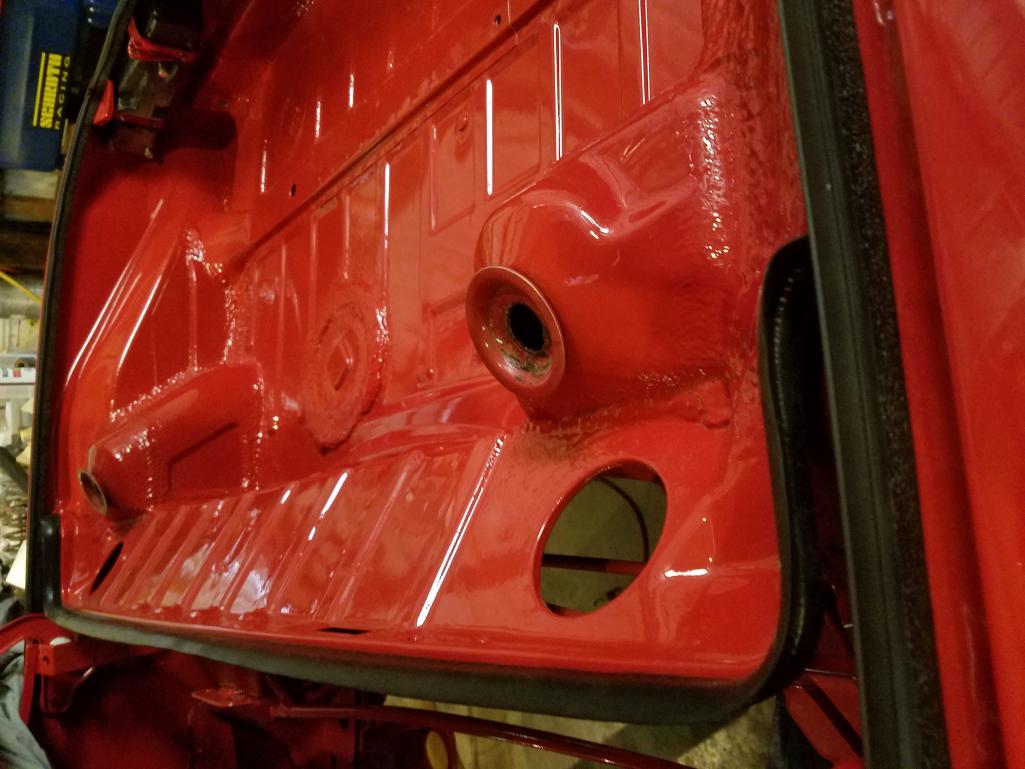
Posted by: Matty900 Aug 3 2017, 12:22 AM
Got the new wiring harness insulating sleeves on all of the tabs now
Attached thumbnail(s)
Posted by: Matty900 Aug 3 2017, 12:25 AM
Got the new vent filters in and the re plated door striker plates on the car
Attached thumbnail(s)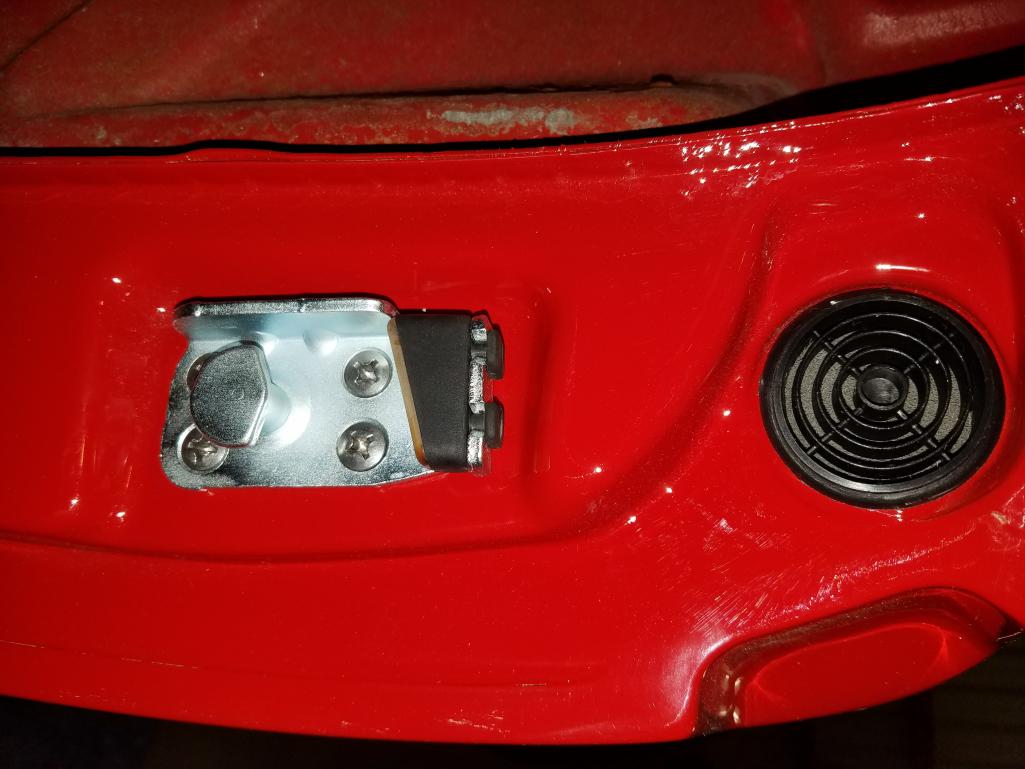
Posted by: Matty900 Aug 3 2017, 12:32 AM
Picked up a new wiring harness in great shape to replace my melted harness. I will be working on it tomorrow but the forecast is calling for a high of 107. Hopefully I won't melt working in it. 
Attached thumbnail(s)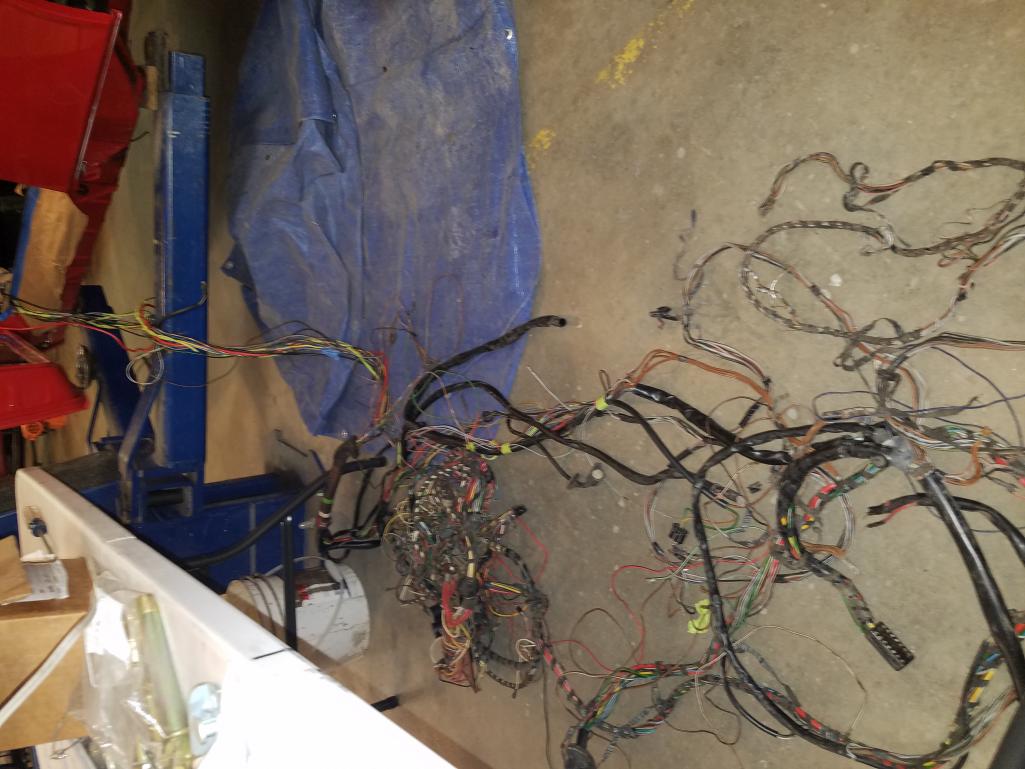
Posted by: Matty900 Aug 5 2017, 02:01 AM
Ended up pulling the entire harness out
Attached thumbnail(s)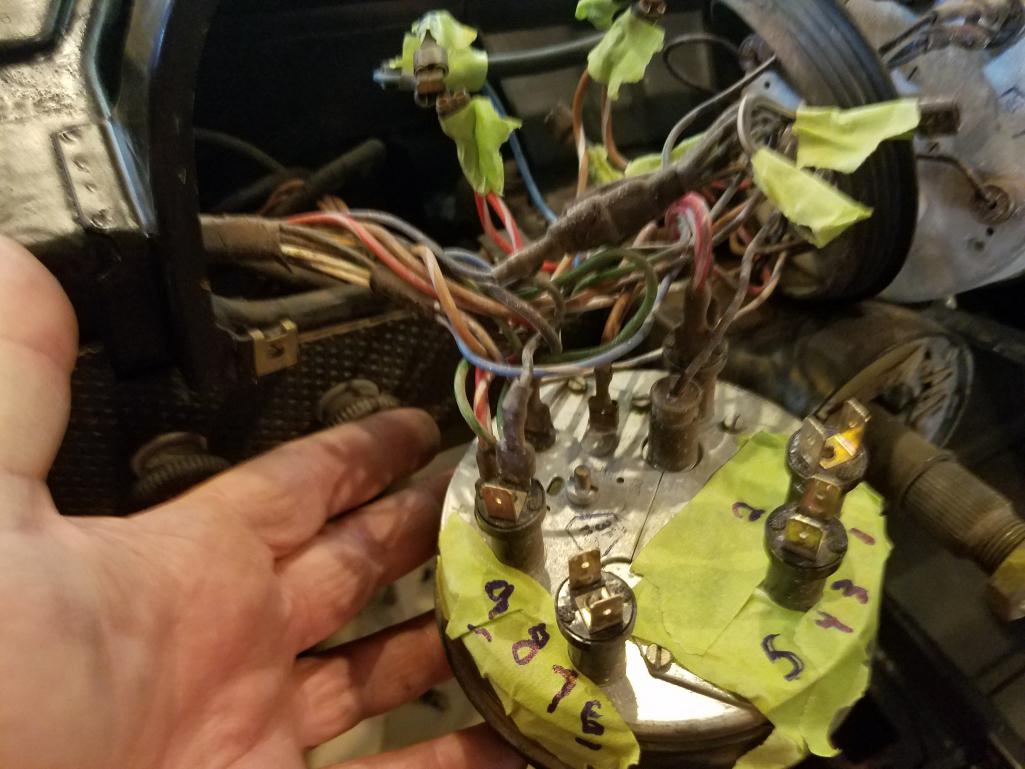
Posted by: Matty900 Aug 5 2017, 02:03 AM
Attached thumbnail(s)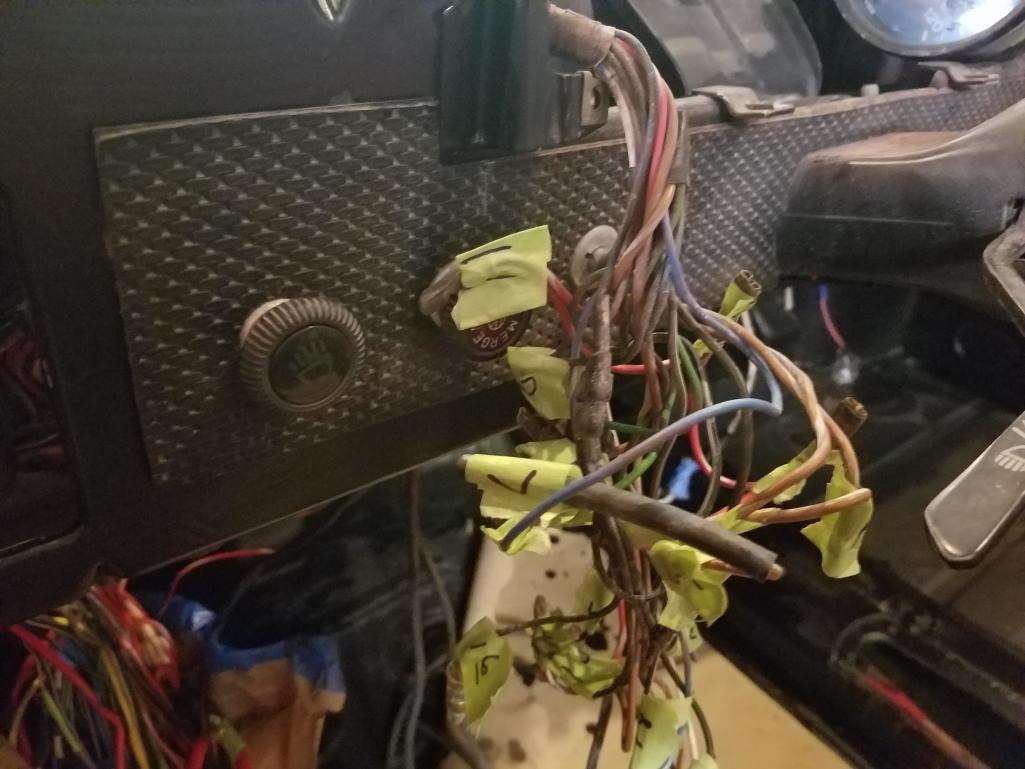
Posted by: Matty900 Aug 5 2017, 02:05 AM
While I'm in there
Attached thumbnail(s)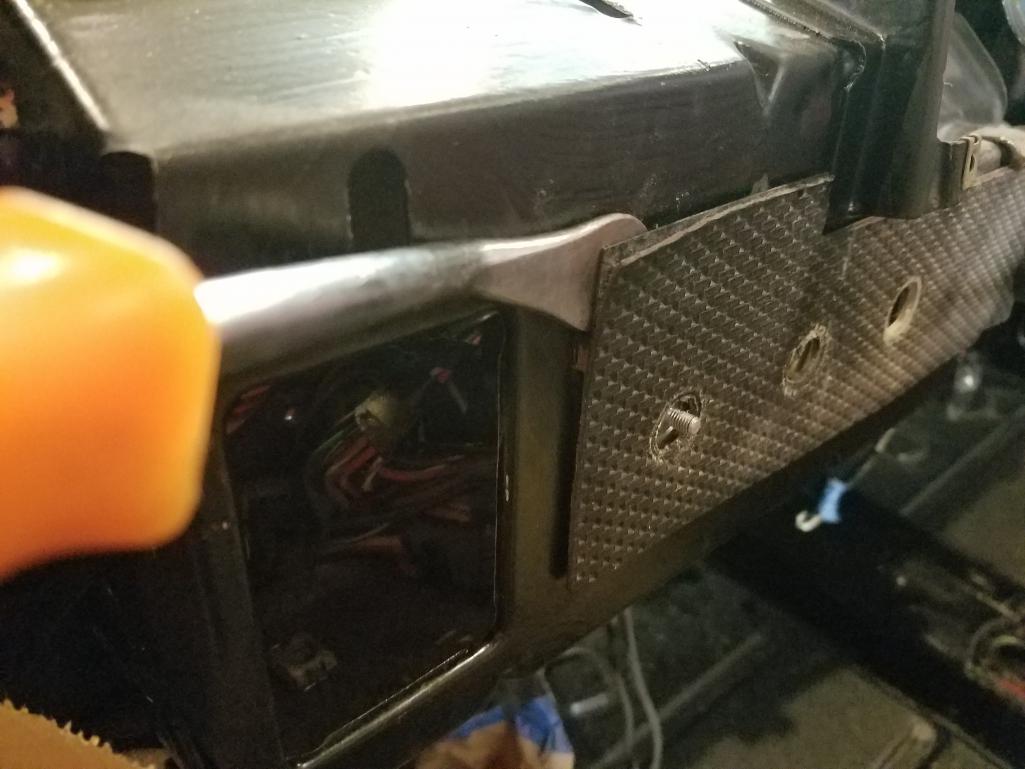
Posted by: Matty900 Aug 5 2017, 02:07 AM
I will replace the dash face with new metal and vinyl.
Attached thumbnail(s)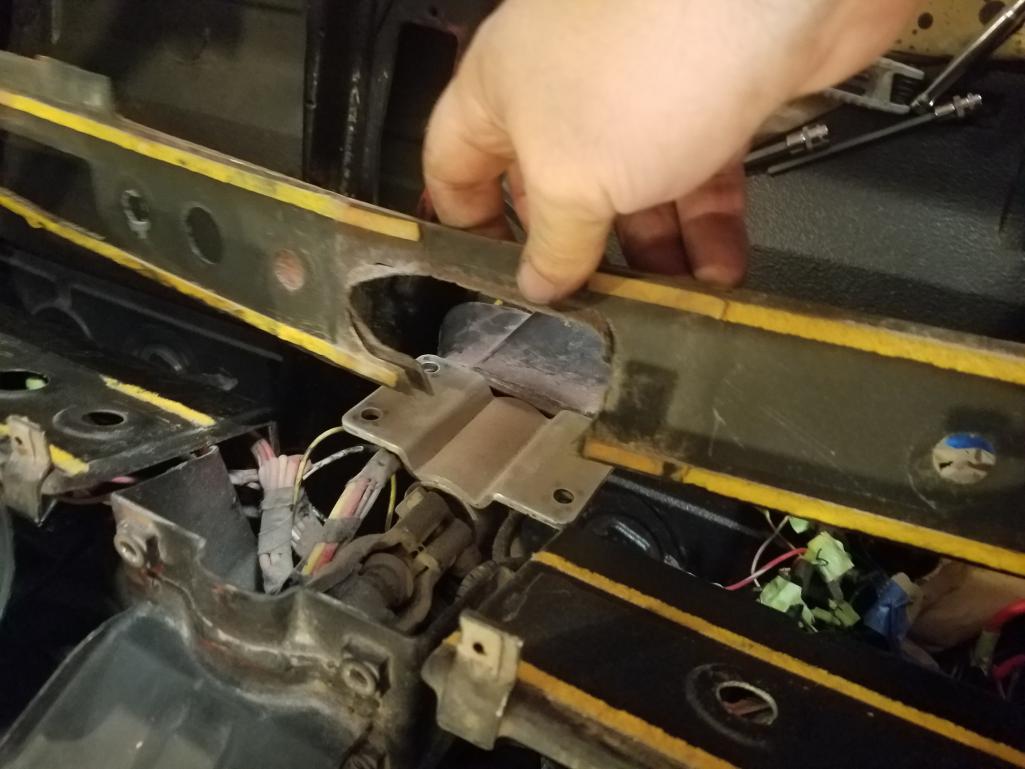
Posted by: Matty900 Aug 5 2017, 02:15 AM
Got the old harness out and compared it to the 2 I picked up hoping for a miracle. Unfortunately they did not match up but it did have the needed wires all intact.
Attached thumbnail(s)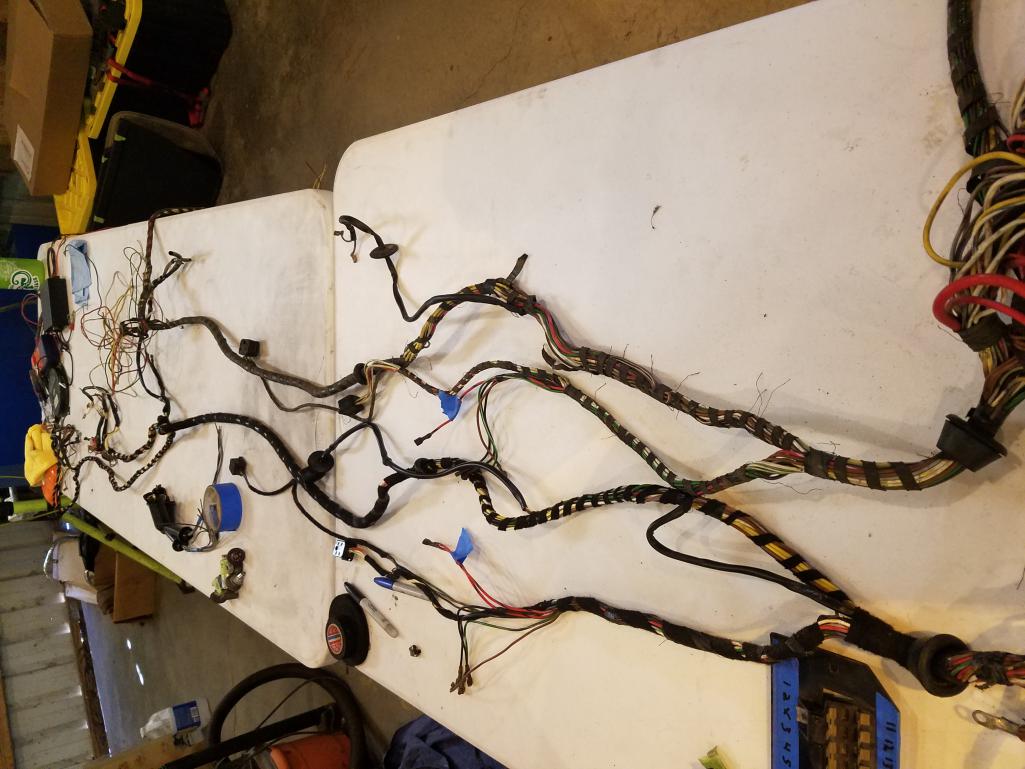
Posted by: Matty900 Aug 5 2017, 02:18 AM
tedious work but I was able to get the donor wiring harness broke down
Attached thumbnail(s)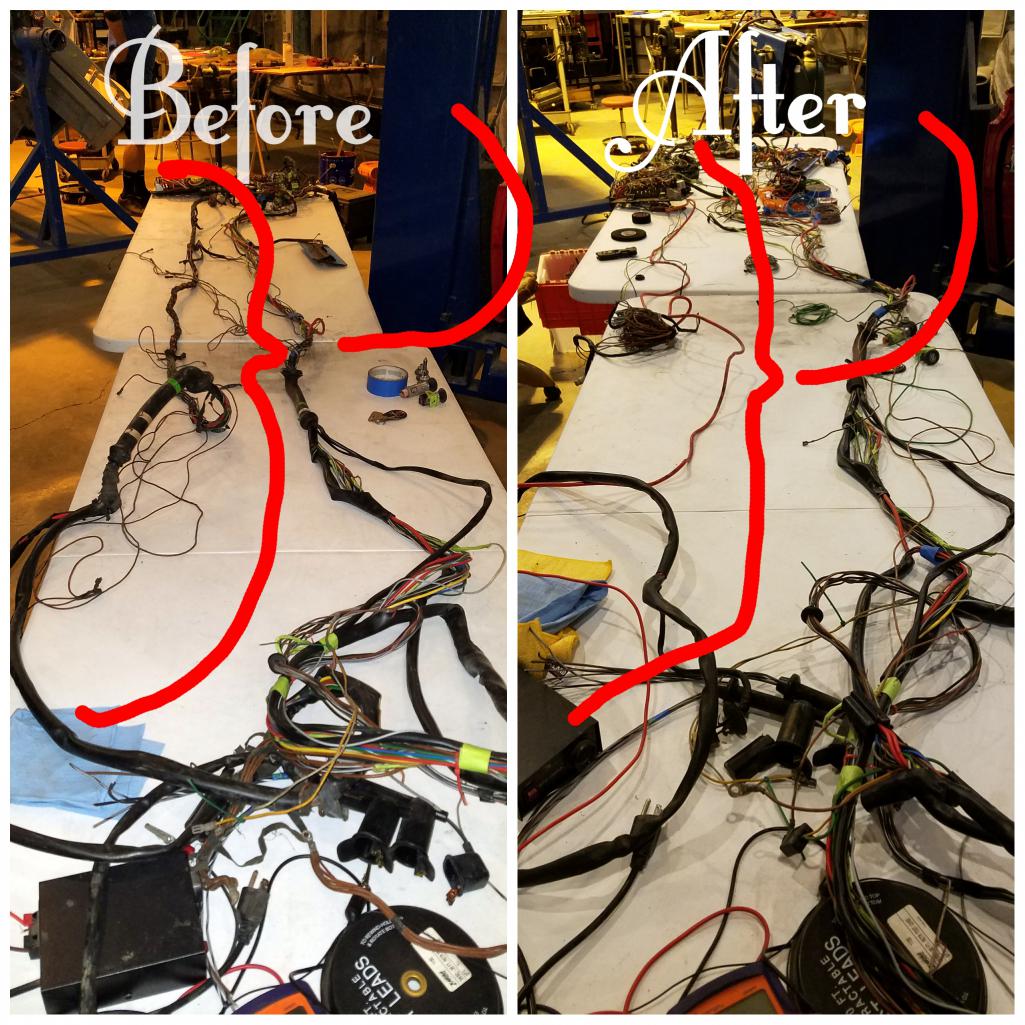
Posted by: Matty900 Aug 5 2017, 08:50 PM
Made some progress today. Went through every wire in the harness pulled the wires that I needed from the donor harness and started putting them in my harness to replace the damaged ones.
Attached thumbnail(s)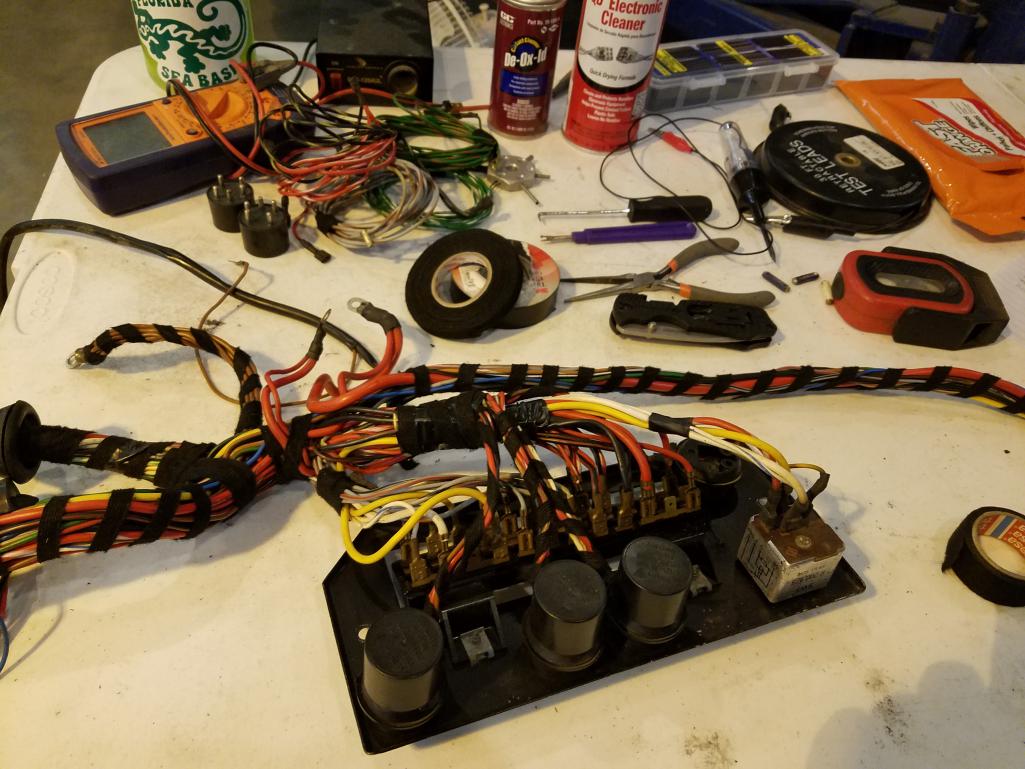
Posted by: Matty900 Aug 6 2017, 01:42 AM
Engine is getting closer to being done. Now I need to figure out what transmission to use. I have the one from the 73 that I think will be the upgrade. I will be asking for advice on this swap in a separate thread.
Attached thumbnail(s)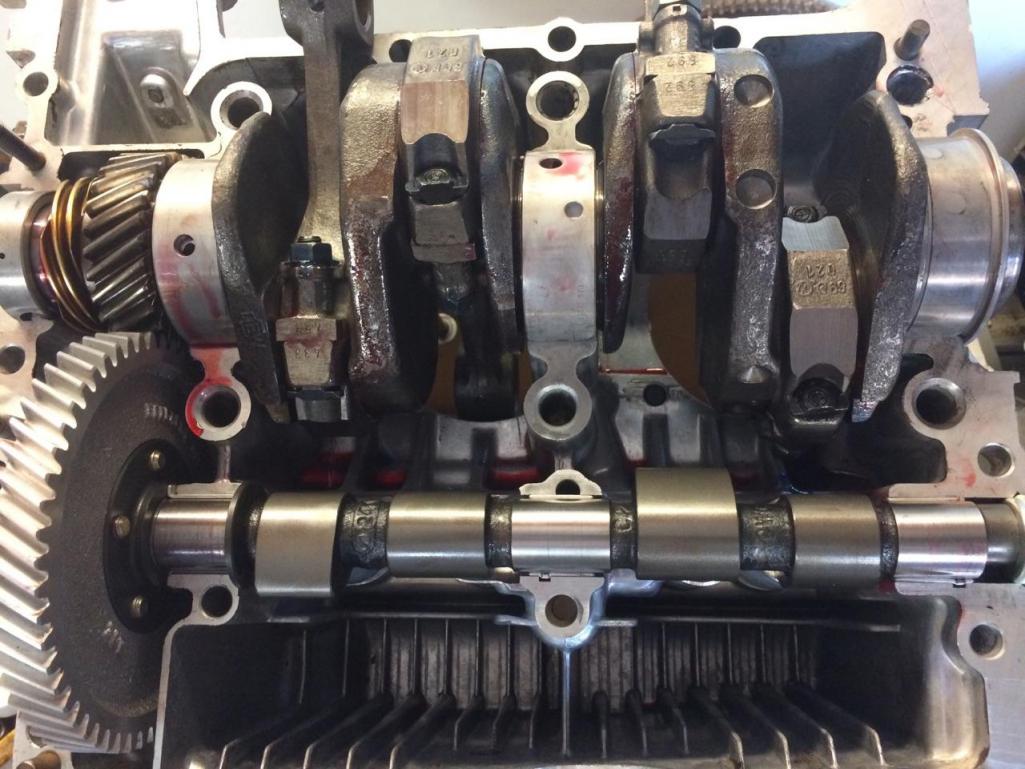
Posted by: Matty900 Aug 9 2017, 11:33 PM
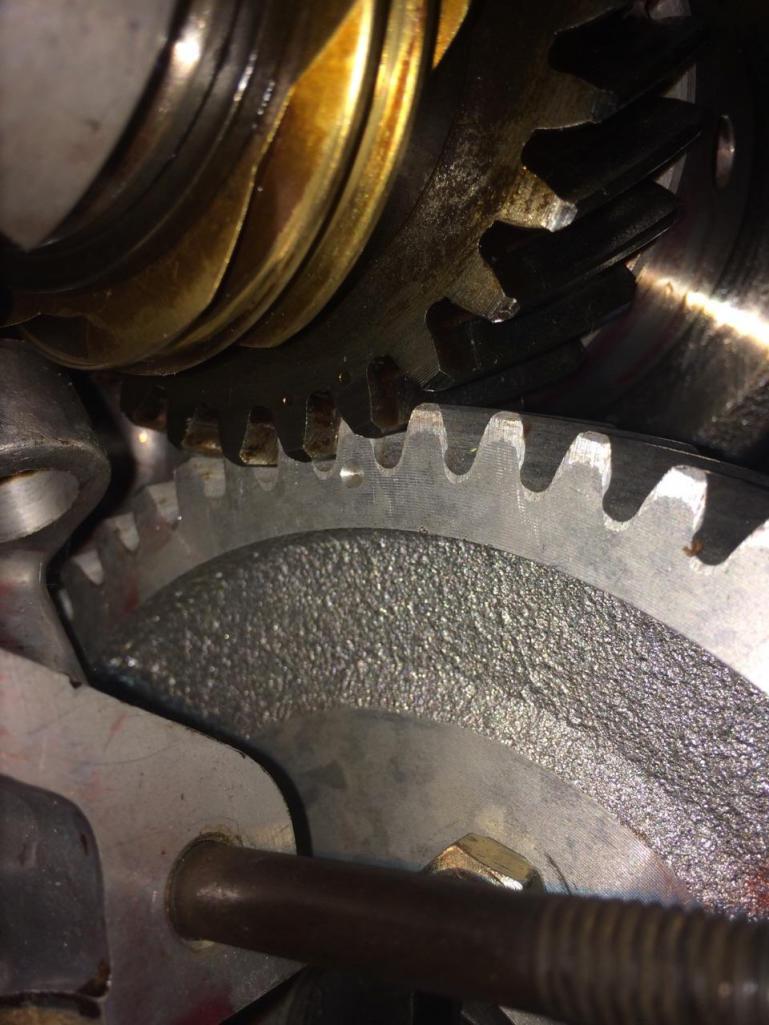
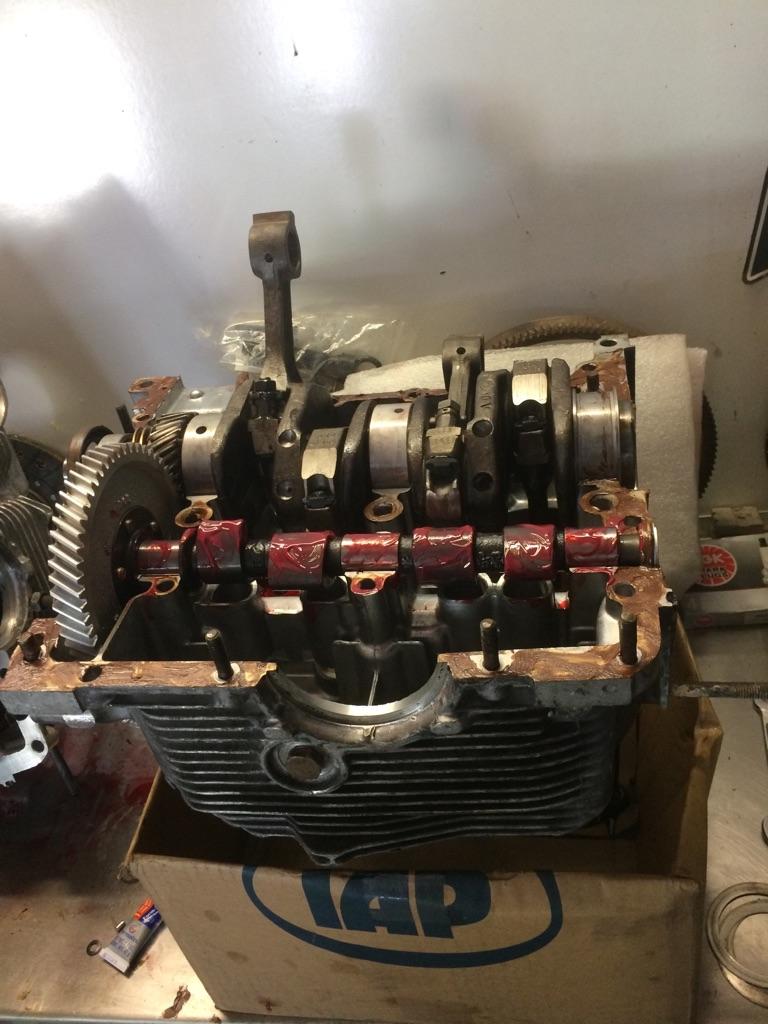
Engine build is progressing along nicely. Case is now closed.
Attached thumbnail(s)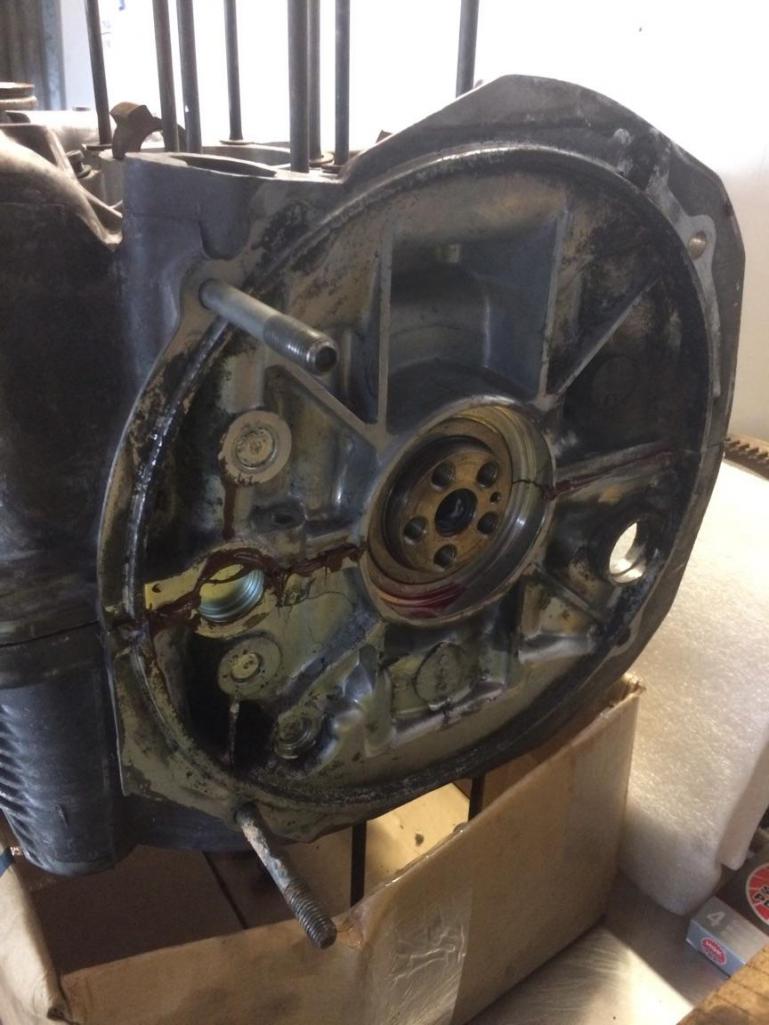
Attached image(s)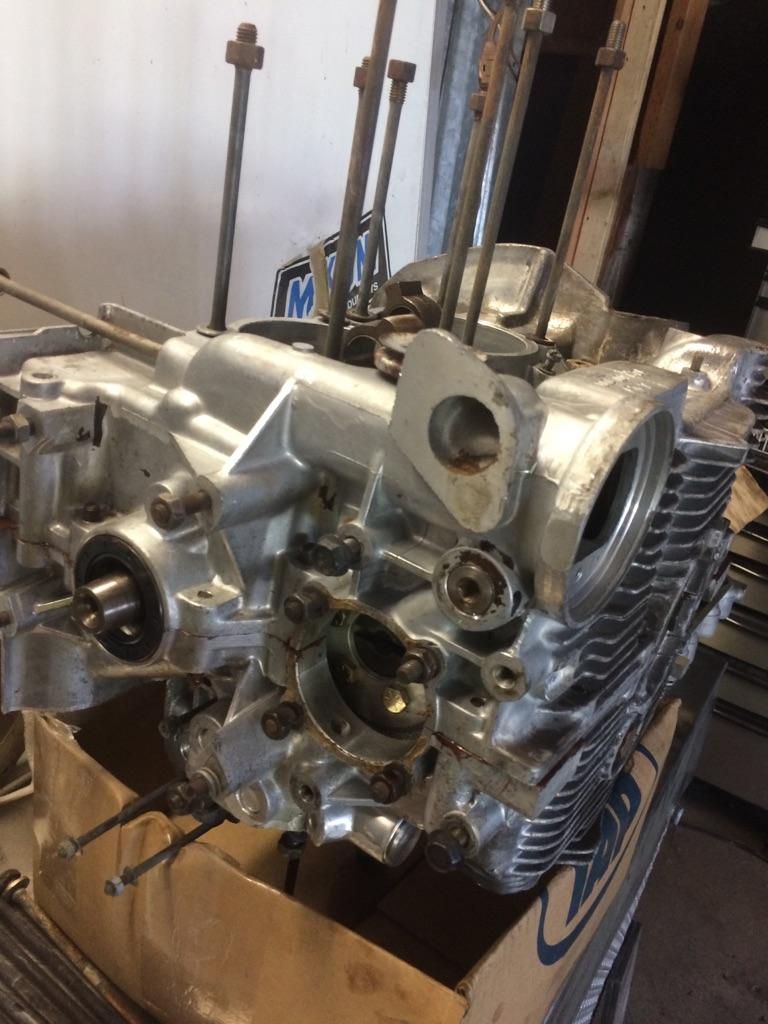
Posted by: Matty900 Aug 9 2017, 11:37 PM
Scott rebuilt the steering rack for me with new bushings and bearings. We will be putting turbo tie rods on next
Attached thumbnail(s)
Posted by: Matty900 Aug 9 2017, 11:41 PM
Added front sway bar with new 914Rubber sway bar bushings.
Attached thumbnail(s)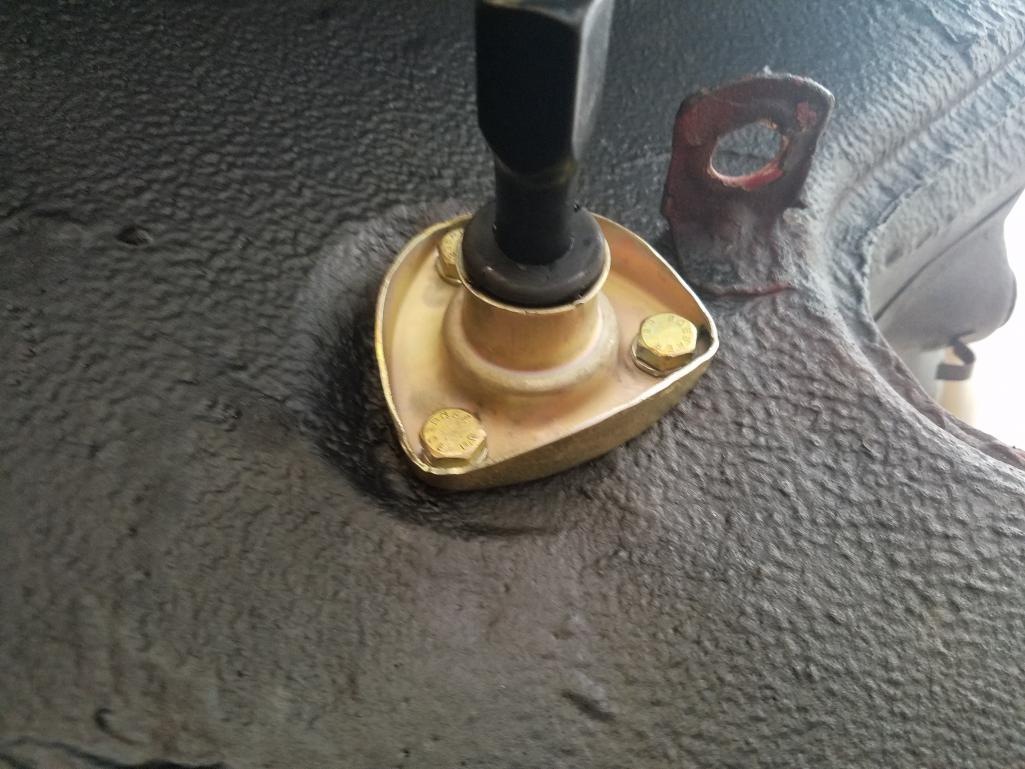
Posted by: Matty900 Aug 9 2017, 11:43 PM
Cleaning up and replacing everything possible on the suspension.
Attached thumbnail(s)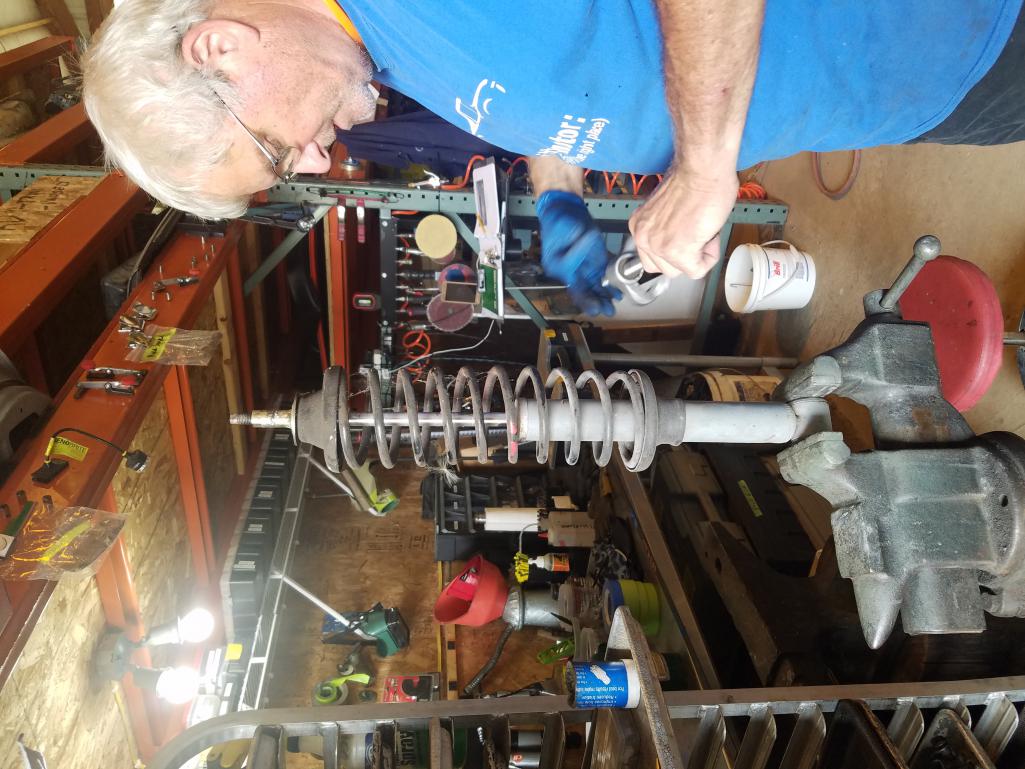
Posted by: Matty900 Aug 9 2017, 11:47 PM
New struts/shocks from PMB that I bought right after getting the car. Thought I was going to be driving it with just a few tune up items. 
Attached thumbnail(s)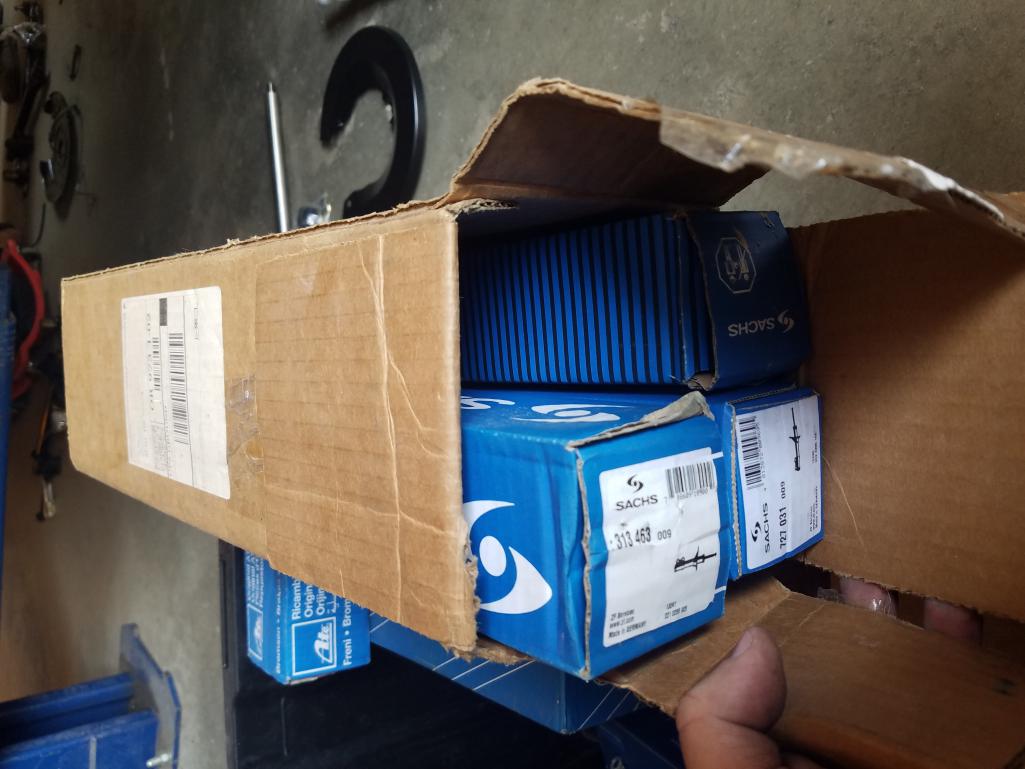
Posted by: Matty900 Aug 9 2017, 11:49 PM
Had to figure out how to get the spring purch off. (Thank you Cary)
Attached thumbnail(s)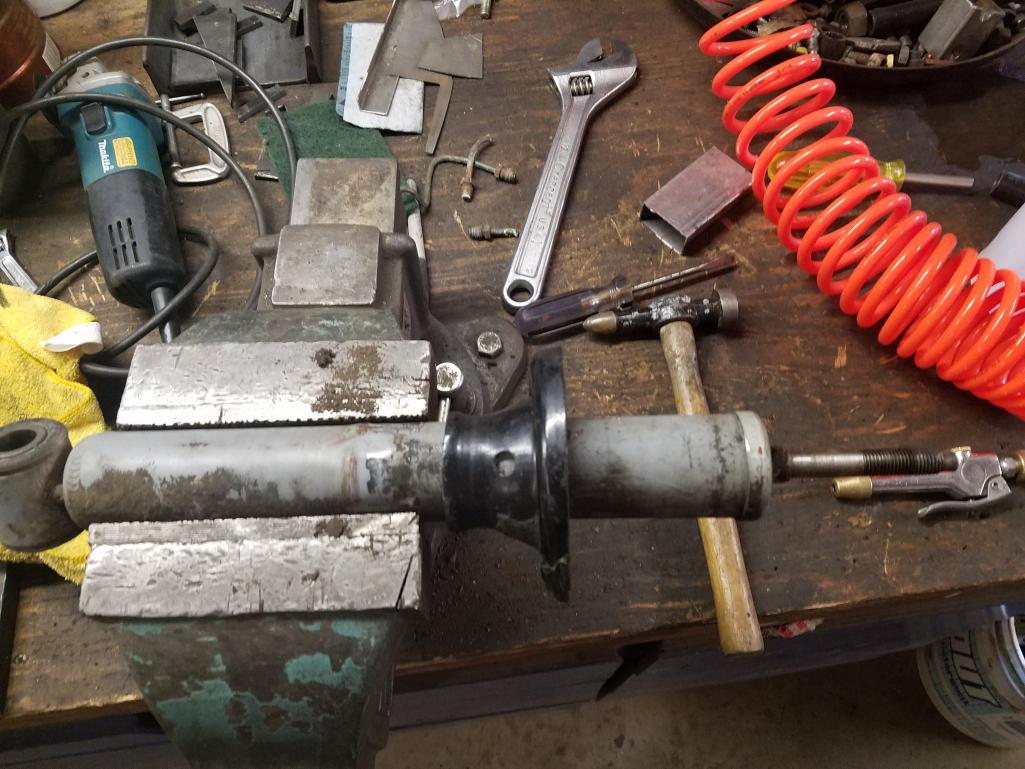
Posted by: Matty900 Aug 9 2017, 11:51 PM
Cap and purch cleaned up and on the new shock
Attached thumbnail(s)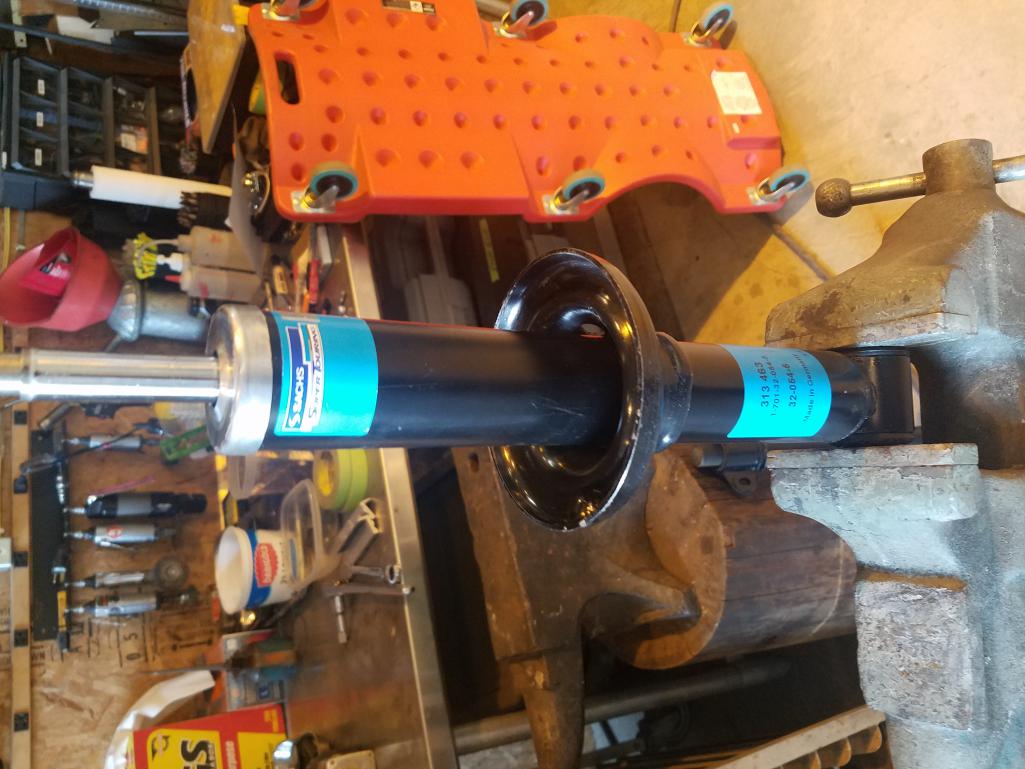
Posted by: Matty900 Aug 9 2017, 11:53 PM
Rebuild steering rack back in with powder coated parts.
Attached thumbnail(s)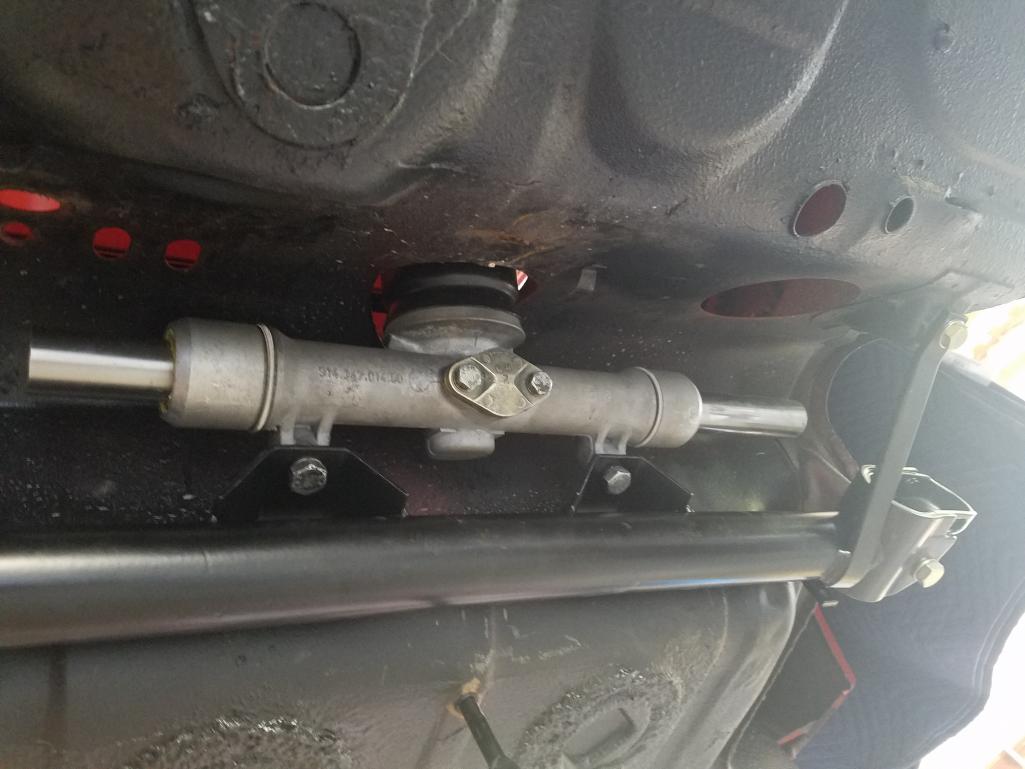
Posted by: Matty900 Aug 10 2017, 12:02 AM
I will be upgrading to a side shift transmission. Getting the already powder coated kit from Bruce Stone.
Attached thumbnail(s)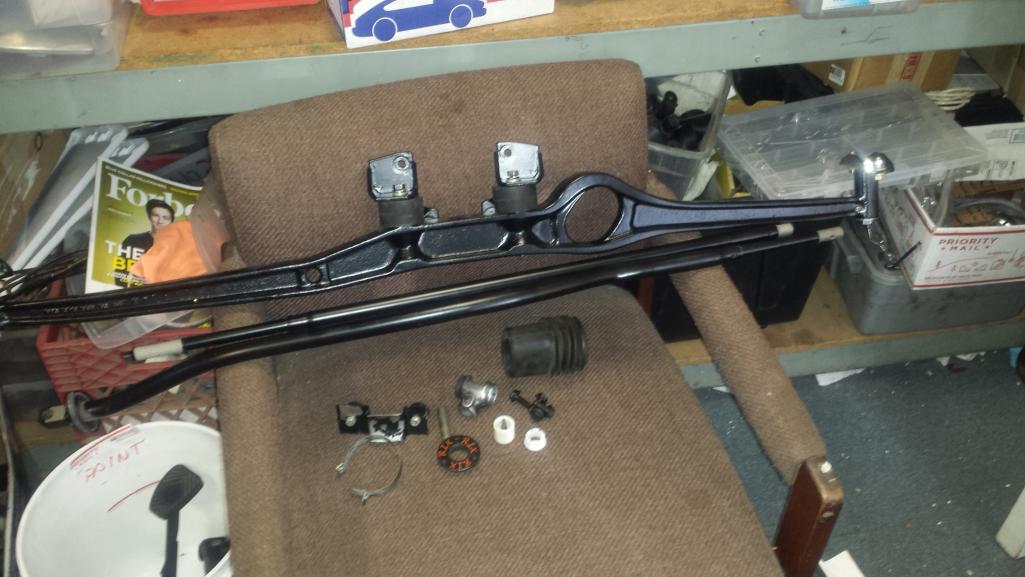
Posted by: Matty900 Aug 10 2017, 12:05 AM
Adding new 914Rubber control arm bushings.
Attached thumbnail(s)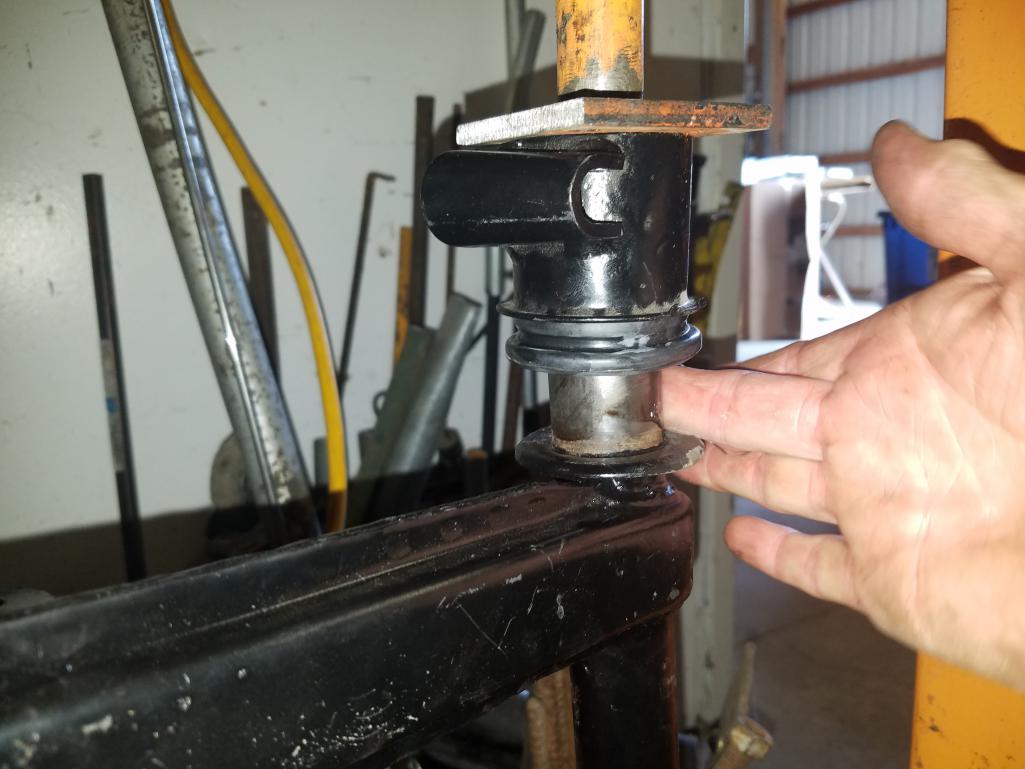
Posted by: Matty900 Aug 10 2017, 12:10 AM
Been a little warm in the shop the past week.
Attached thumbnail(s)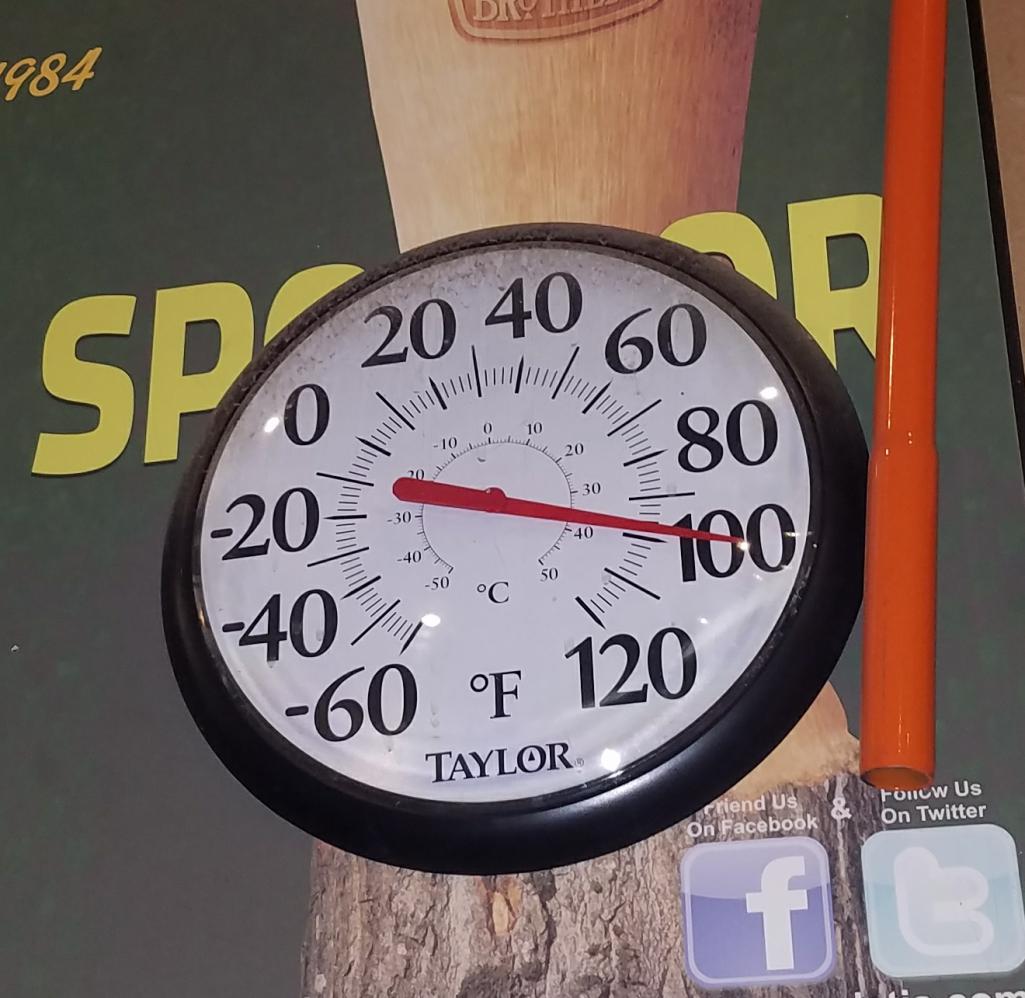
Posted by: Matty900 Aug 10 2017, 09:41 PM
We pulled out the parts for under the car today and started getting them on the car.
Attached thumbnail(s)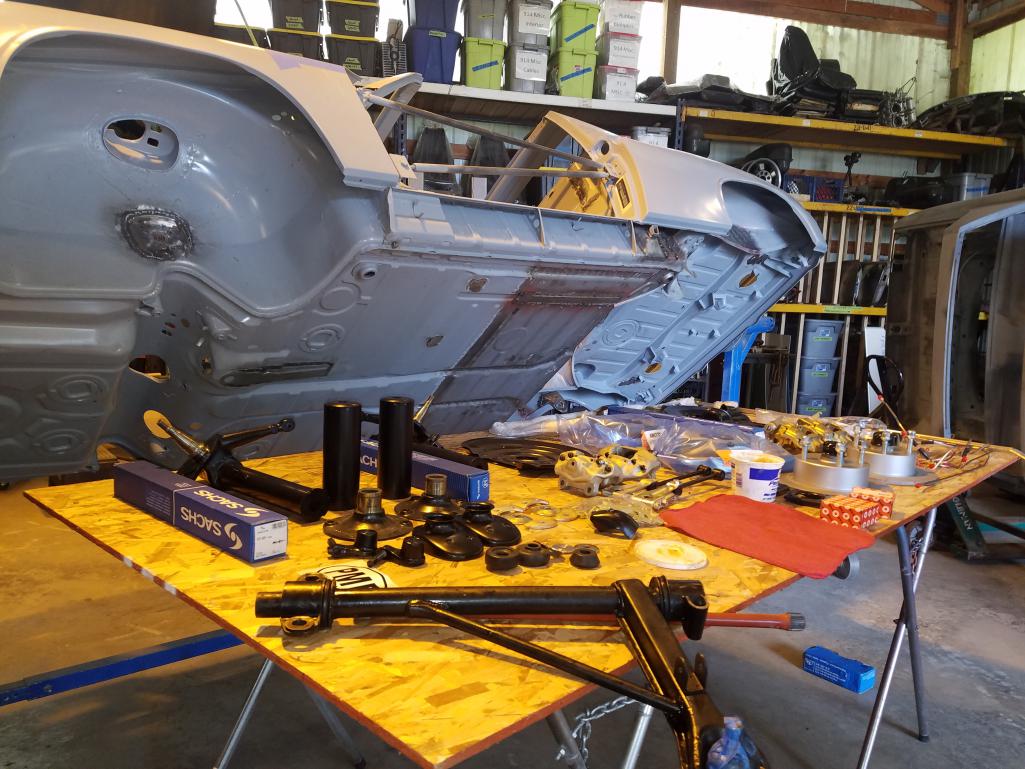
Posted by: Matty900 Aug 10 2017, 09:45 PM
Cary made lots of progress today. Got new 914Rubber bushings and bearings pressed on to the control arms and trailing arms.
Attached thumbnail(s)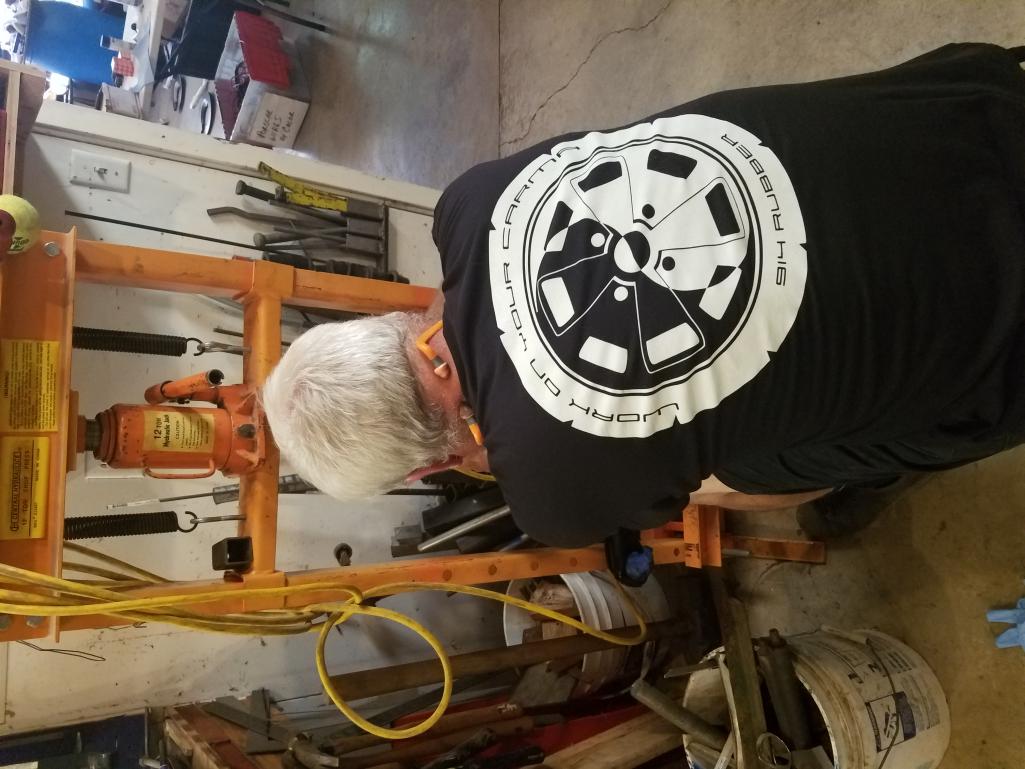
Posted by: Matty900 Aug 10 2017, 09:46 PM
New bearings in.
Attached thumbnail(s)
Posted by: Matty900 Aug 10 2017, 09:48 PM
New shocks on cleaned parts. Ready to go back on the car.
Attached thumbnail(s)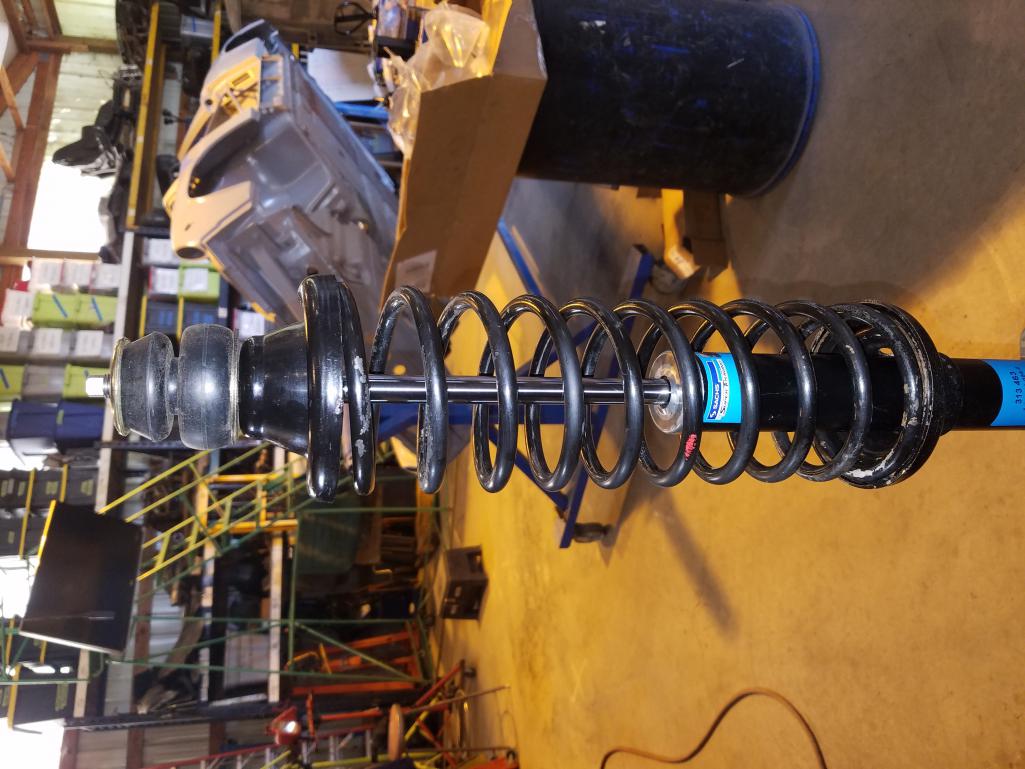
Posted by: Garland Aug 10 2017, 11:13 PM
Looking great, time well spent.
Posted by: Matty900 Aug 10 2017, 11:44 PM
Looking great, time well spent.
Thank you. Thats a pretty big complement from the build off winner
 . Will you be at Okteenerfest again this year?
Posted by: Matty900 Aug 11 2017, 10:53 PM
Lost a few wields on the nuts for the sway bar. Cary got them fixed and I touched up the paint.
Attached thumbnail(s)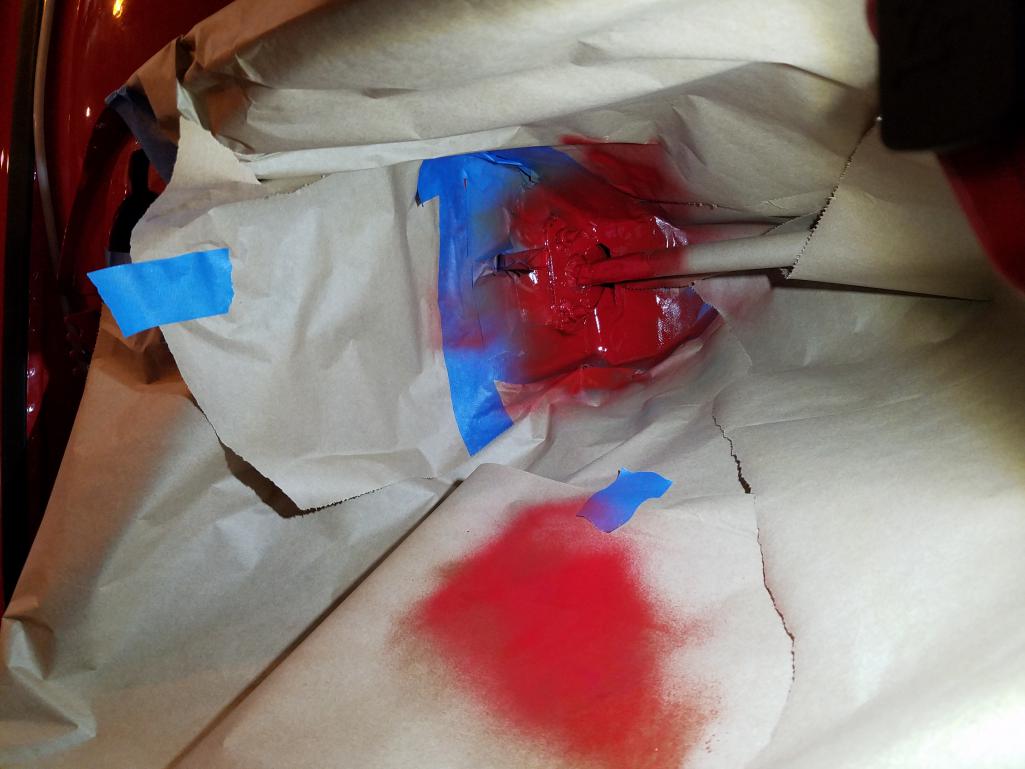
Posted by: Matty900 Aug 11 2017, 10:56 PM
Had to fix one of the taillight housings to keep moisture out in the future.
Attached thumbnail(s)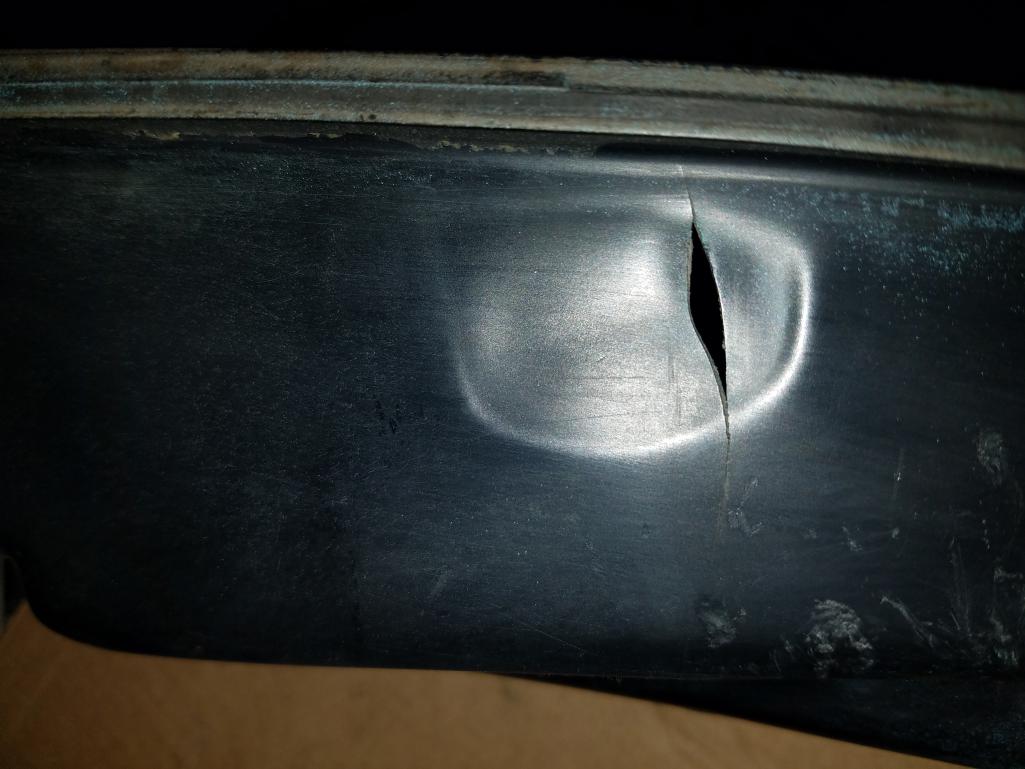
Posted by: Matty900 Aug 11 2017, 10:57 PM
Cary mixed up some fuser to patch it.
Attached thumbnail(s)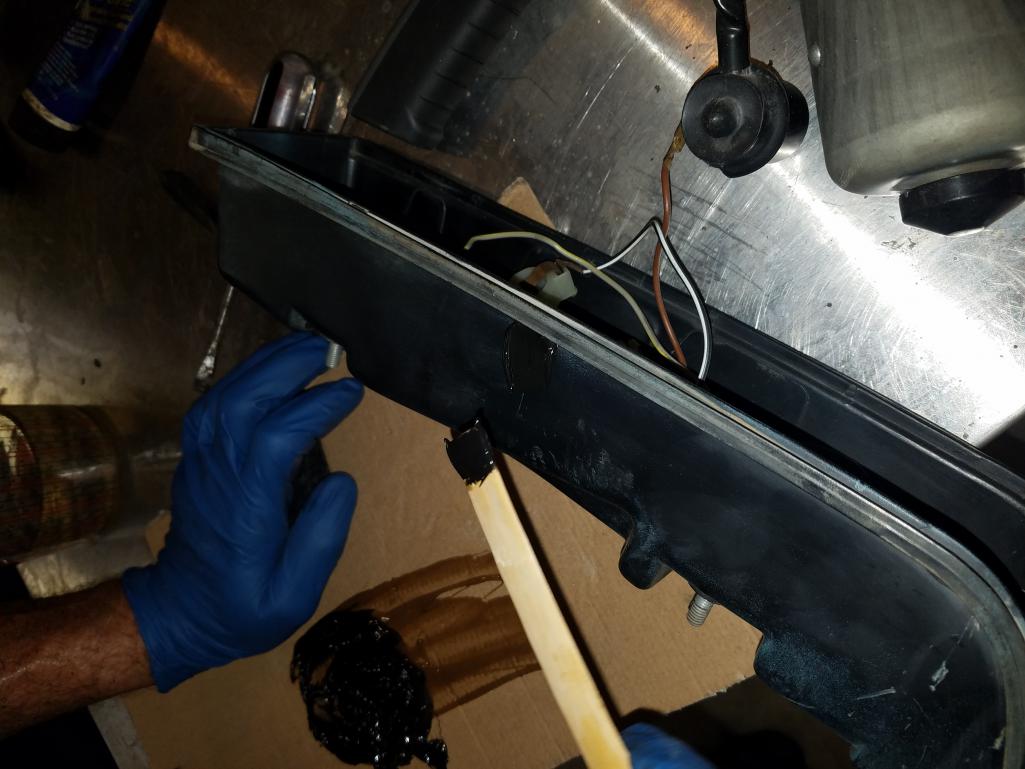
Posted by: Matty900 Aug 11 2017, 11:08 PM
I had treated (painted) under the dash, the longs and the top of the tunnel with "rust treatment" After a week of it still not drying I went back to read the can to find out what was up. I had painted it with Eastwood frame sealer. It's finish is a tacky / oily finish to keep moisture out Under the car
Attached thumbnail(s)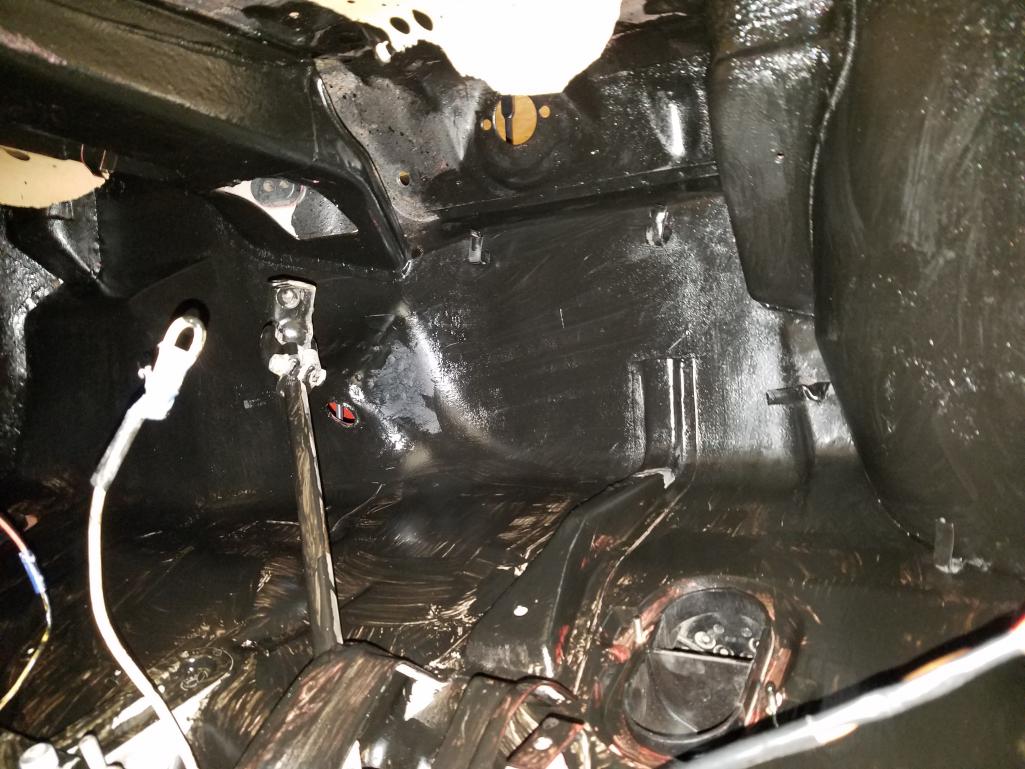
Posted by: Matty900 Aug 11 2017, 11:10 PM
Attached thumbnail(s)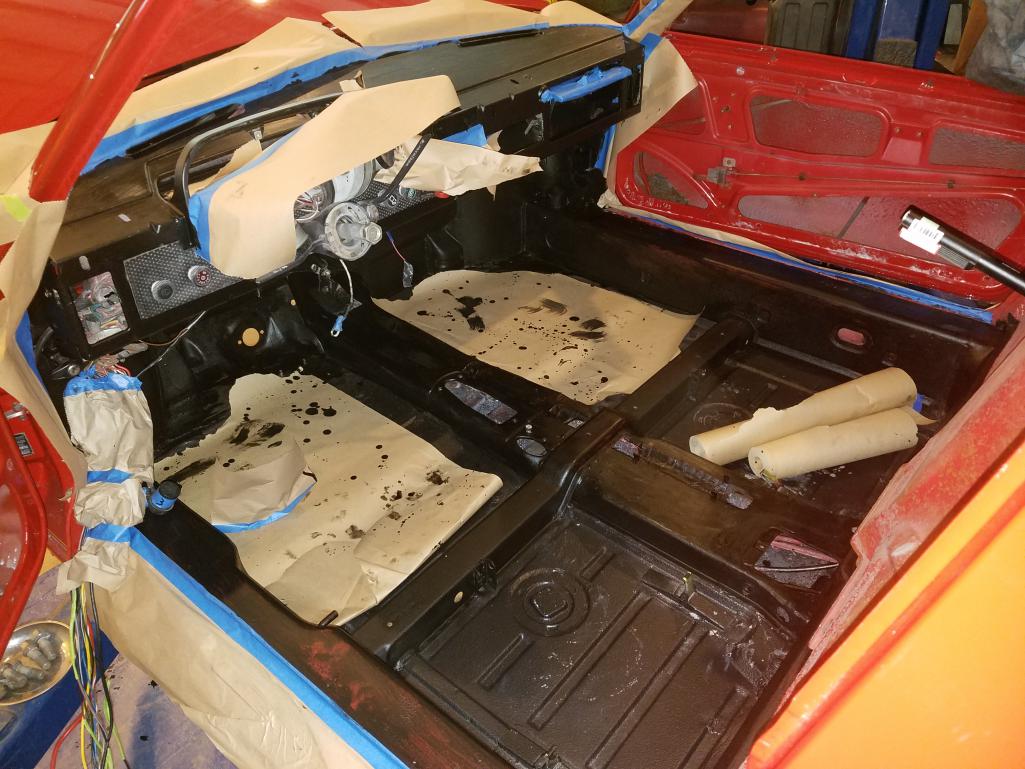
Posted by: Matty900 Aug 11 2017, 11:13 PM
Today I worked on my yoga stretching reaching all the hard to reach places with a rear and mineral spirits, wiping off my mistake
Attached thumbnail(s)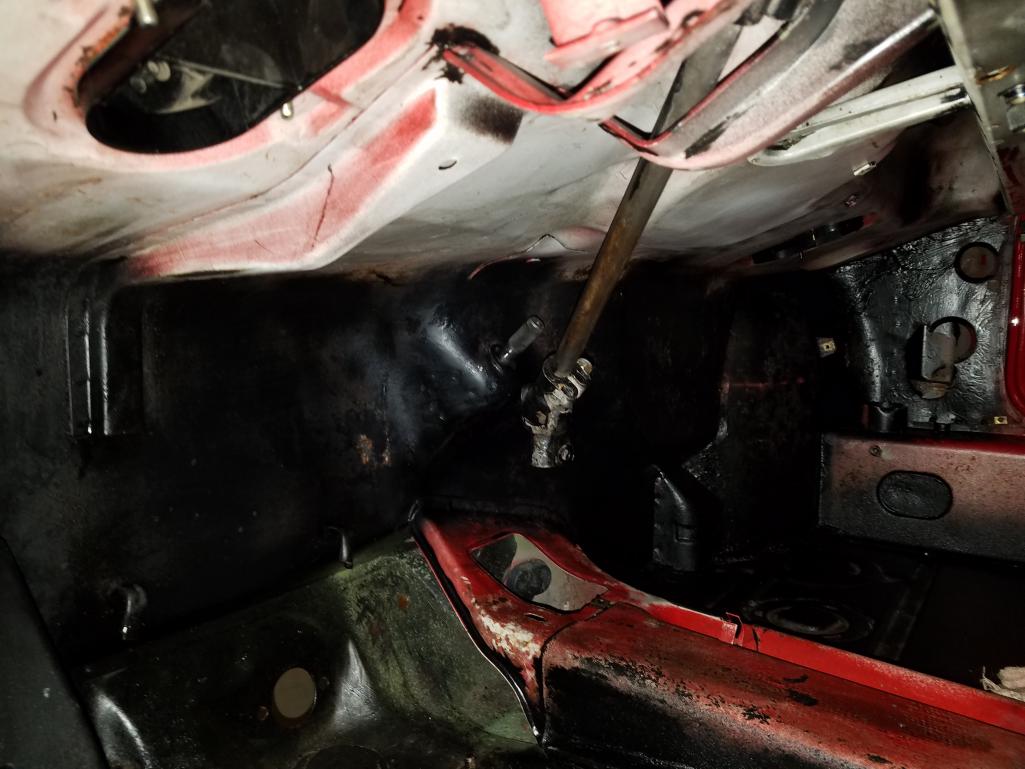
Posted by: Matty900 Aug 11 2017, 11:15 PM
Got it all cleaned up. Tomorrow I will treat it with Por15 and then paint over it.
Attached thumbnail(s)
Posted by: Rleog Aug 12 2017, 04:51 AM
I feel your pain. I've likewise made errors that required significant back tracking.
Beautiful project.
Posted by: Cairo94507 Aug 12 2017, 05:57 AM
Believe me, we all have.  I feel your pain.
Posted by: Matty900 Aug 12 2017, 10:07 PM
Preparing to treat with Por15 top coat
Attached thumbnail(s)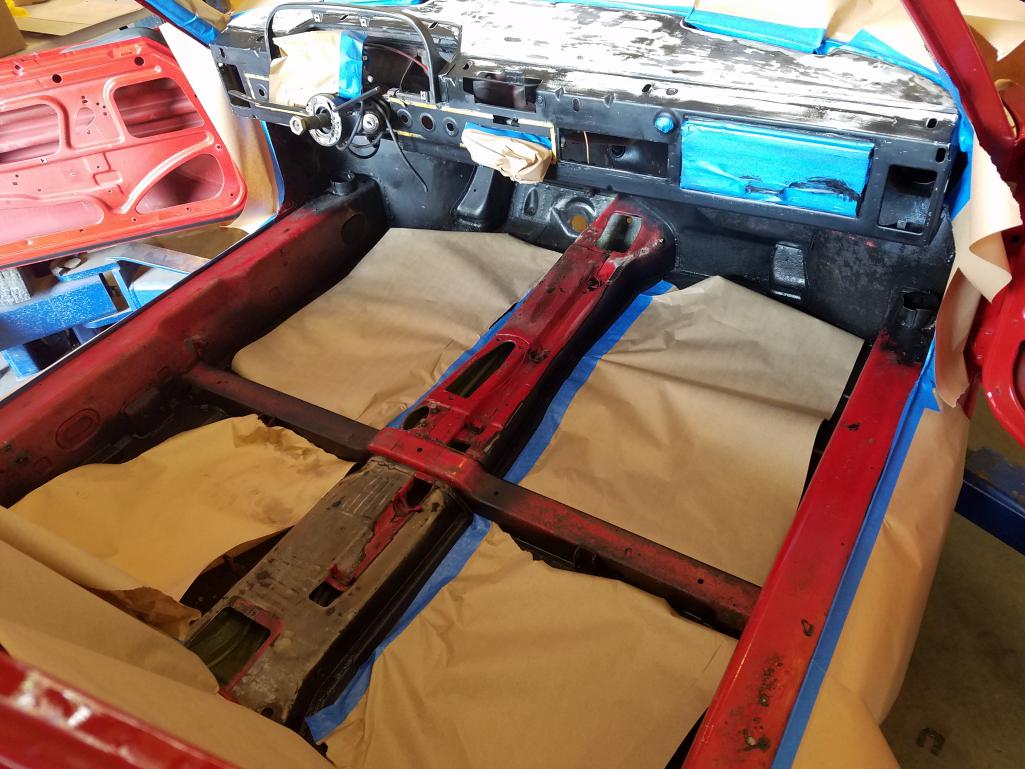
Posted by: Matty900 Aug 12 2017, 10:08 PM
Before
Attached thumbnail(s)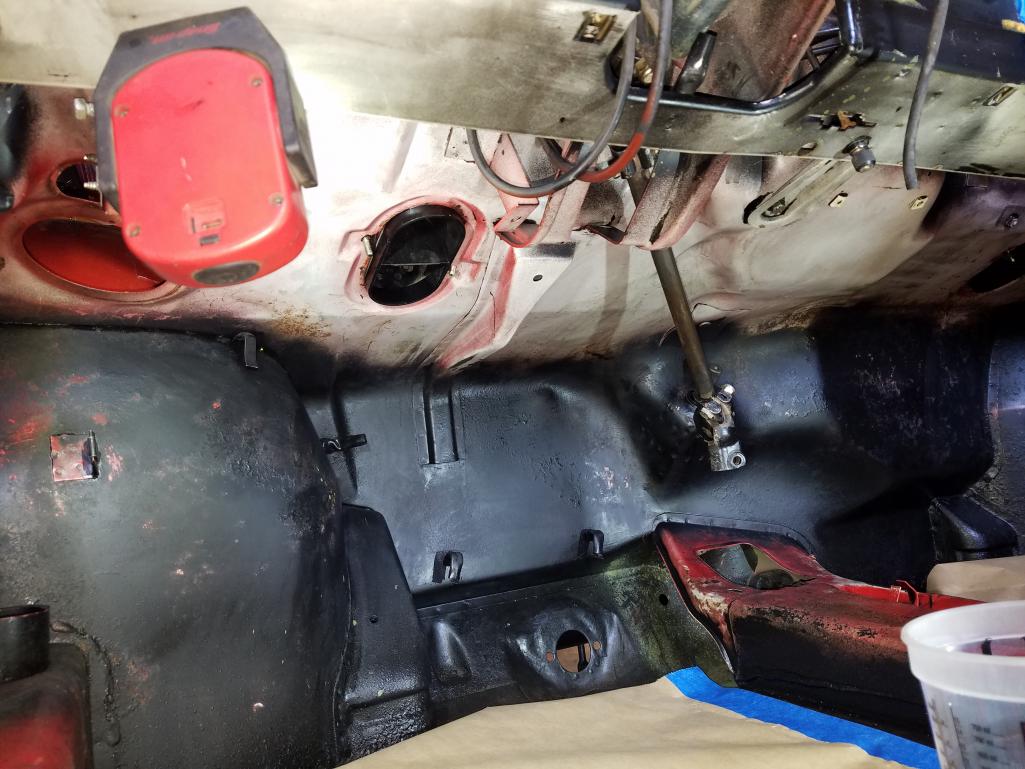
Posted by: Matty900 Aug 12 2017, 10:09 PM
After
Attached thumbnail(s)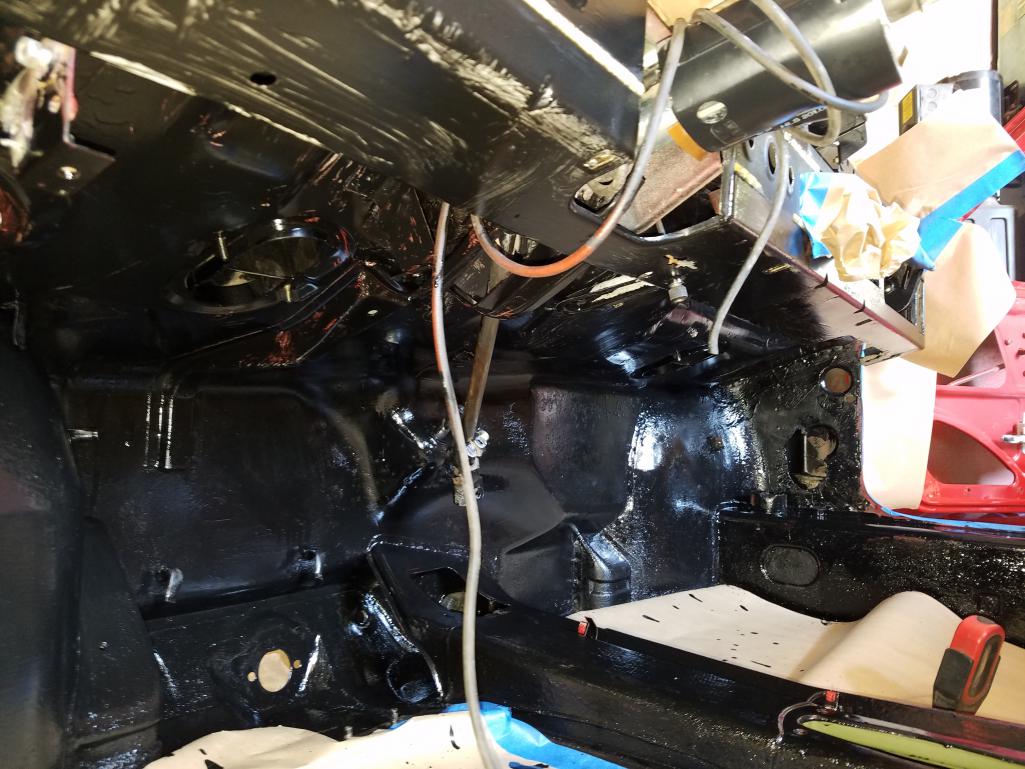
Posted by: Matty900 Aug 12 2017, 10:13 PM
Next question, do I paint this red now, or leave it be? I will be putting down a fatmat type material.
Attached thumbnail(s)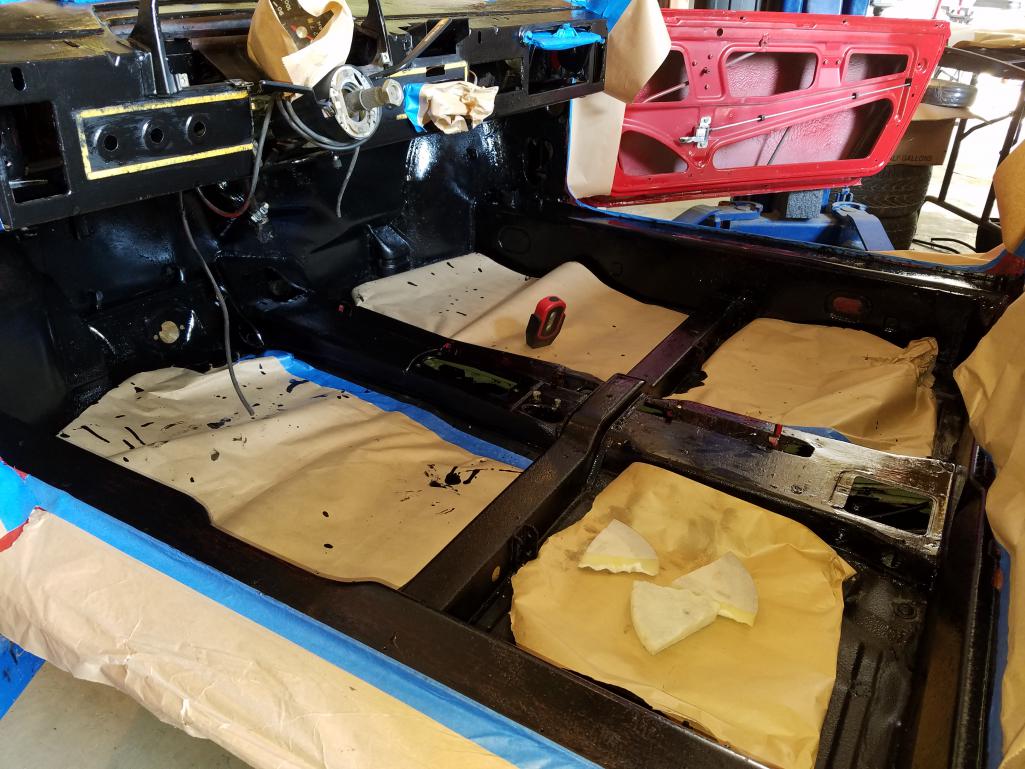
Posted by: Matty900 Aug 12 2017, 10:16 PM
After I cleaned up the brush from painting the Por15, I noticed rust in the door. How dis I miss this before?
Attached thumbnail(s)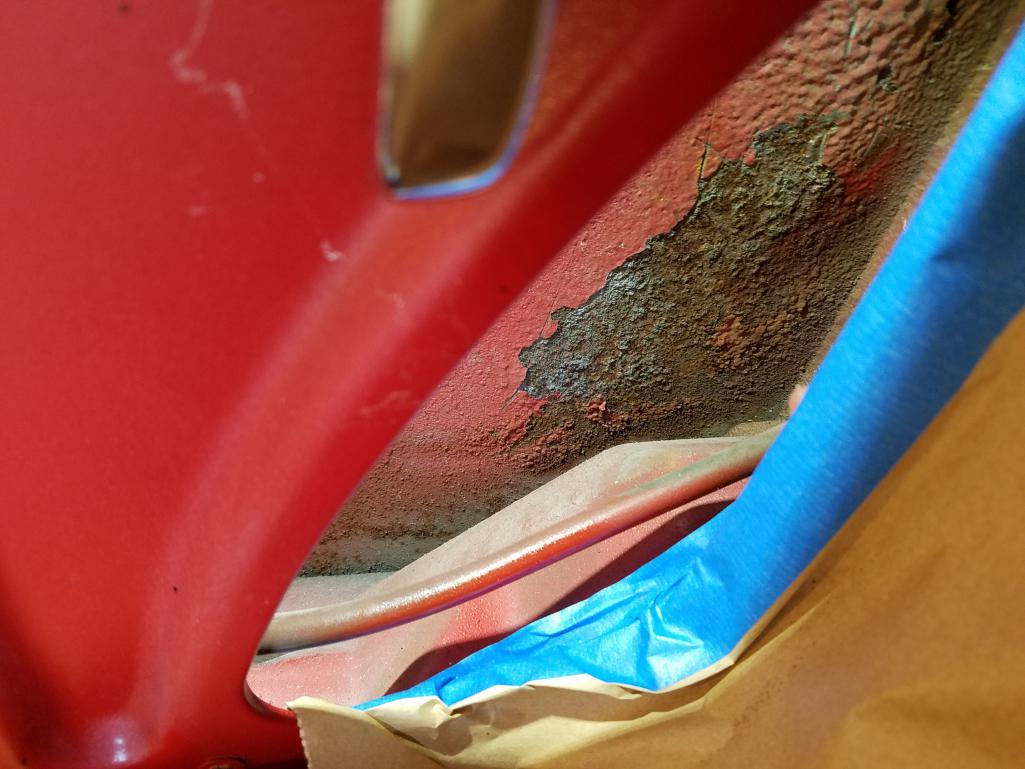
Posted by: Matty900 Aug 12 2017, 10:33 PM
Uses wire brushes and dremmel tool with a wand to get the rust off. Then vacuumed it out, wiped it all down with acitone. After it was dry, I acid treated the rust. After that was dry, I wiped it down again, I painted the entire inside of the door skin with Por15. I will be putting the fatmat type material in here as well.
Attached thumbnail(s)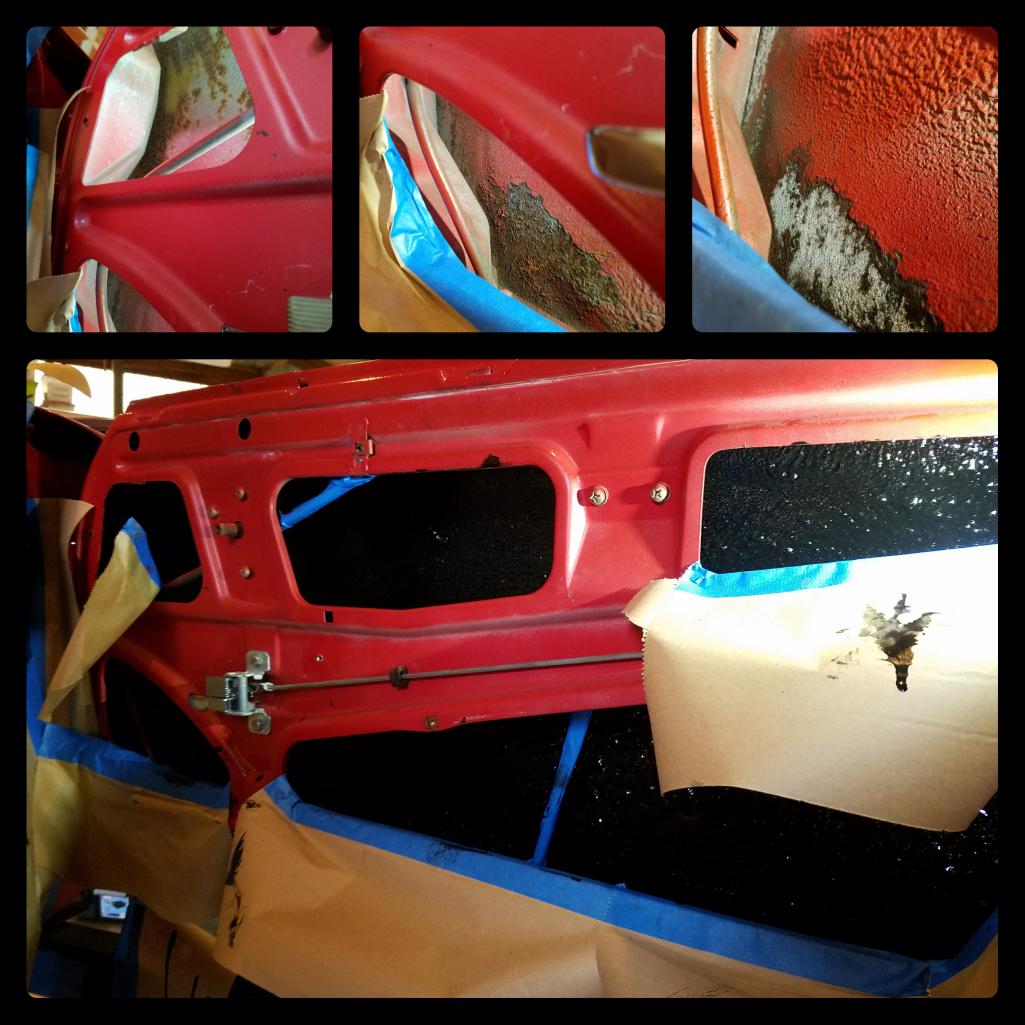
Posted by: Larmo63 Aug 12 2017, 10:55 PM
Looks good, Matt. This car looks like a labor of love. Some day we will BOTH be done, driving, hanging out with cool cars and this will all be worth it. Right?
Posted by: Matty900 Aug 13 2017, 10:54 PM
Looks good, Matt. This car looks like a labor of love. Some day we will BOTH be done, driving, hanging out with cool cars and this will all be worth it. Right?
Absolutely, get yours done so we can tour the rallies together
Posted by: Matty900 Aug 15 2017, 12:23 AM
Spent some time sorting through the parts I have left to put on the car today. I did get the new stainless steel pivot shaft and new polygraphite bushings pressed into the trailing arm. (914Rubber parts preview)
Attached thumbnail(s)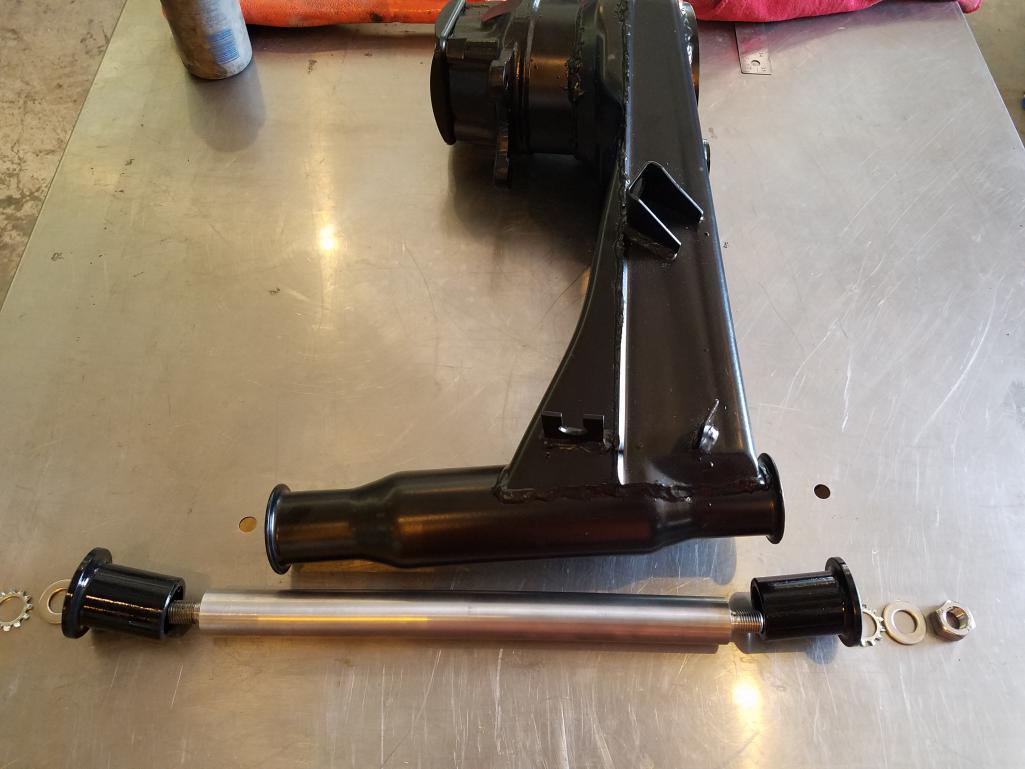
Posted by: Matty900 Aug 15 2017, 12:25 AM
I really like how well this went together. Good job on these Mark!
Attached thumbnail(s)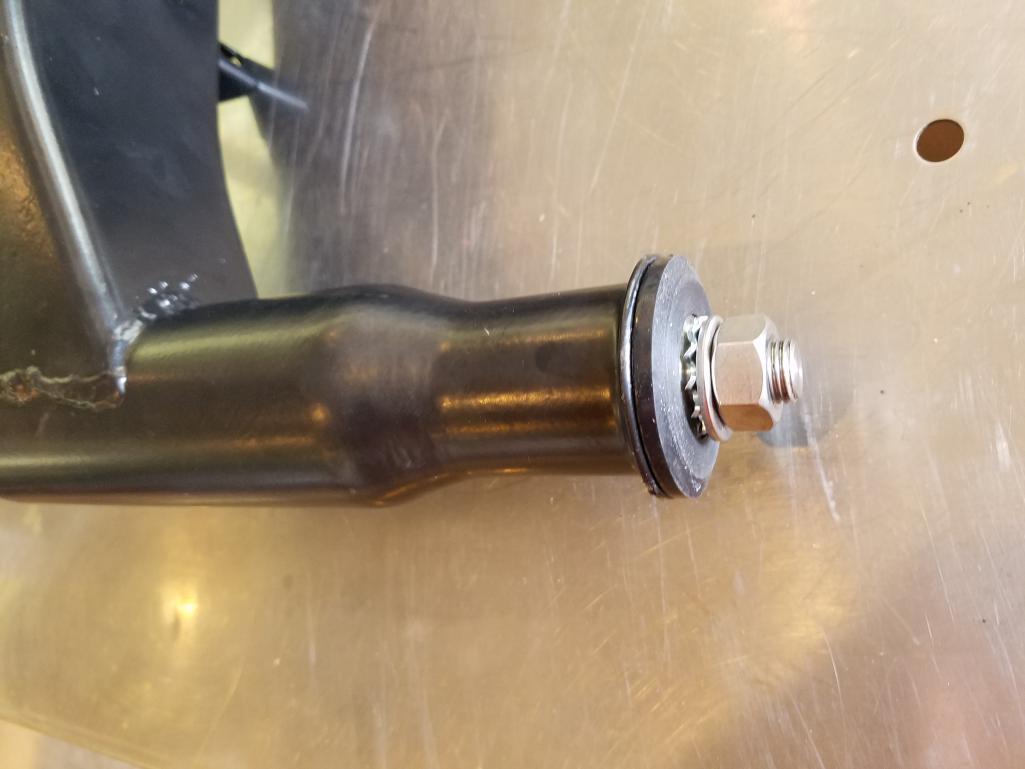
Posted by: Matty900 Aug 15 2017, 12:27 AM
Got the headlight motors cleaned up and installed.
Attached thumbnail(s)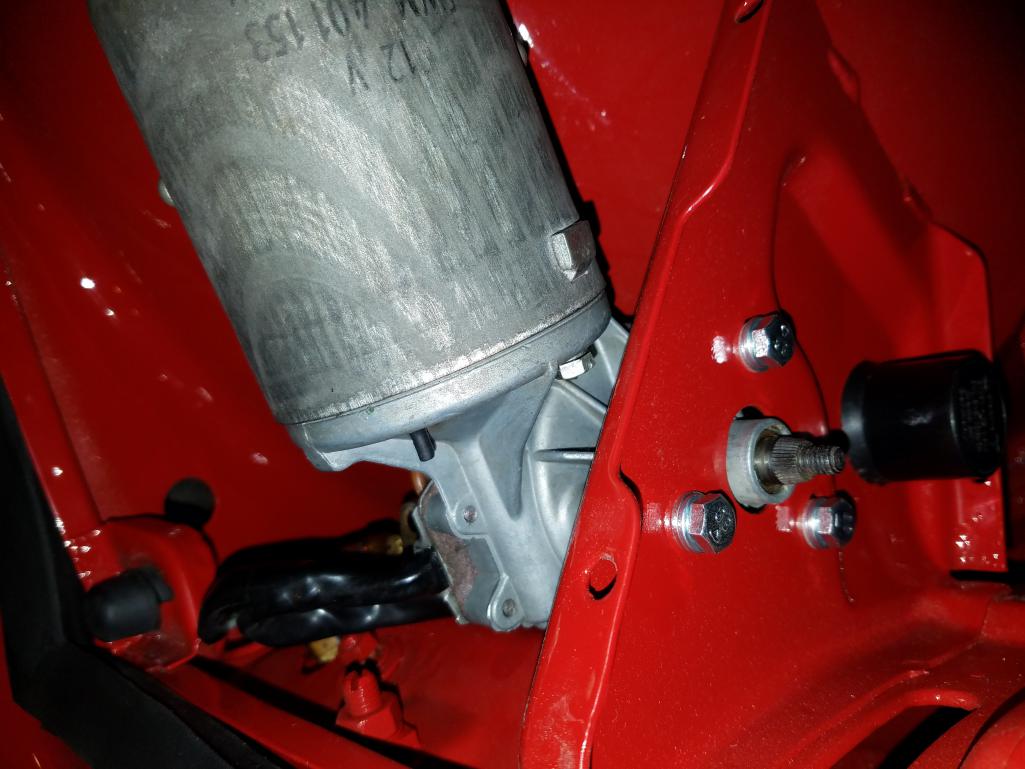
Posted by: Matty900 Aug 16 2017, 12:19 AM
Preview of new parts comming out from 914Rubber
Attached thumbnail(s)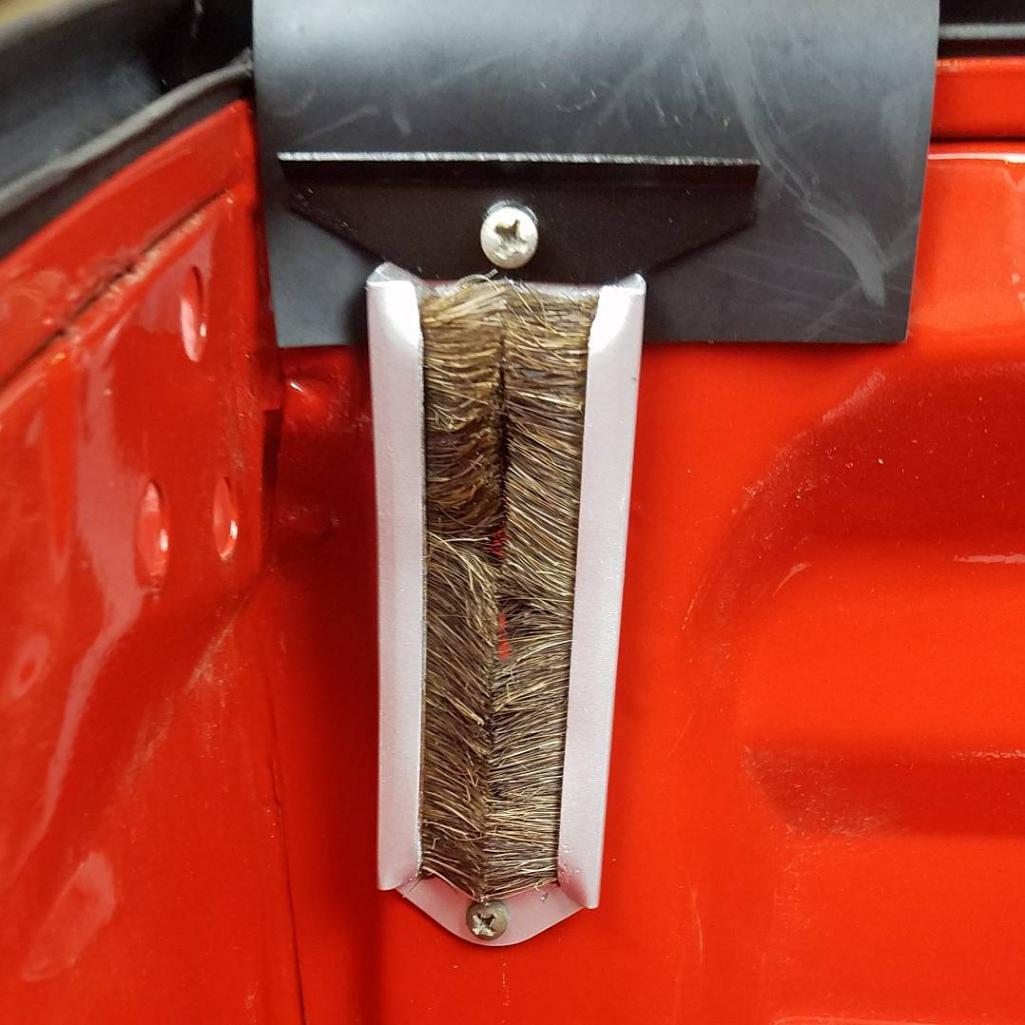
Posted by: Matty900 Aug 16 2017, 12:22 AM
Got the color and clear down in the car today
Attached thumbnail(s)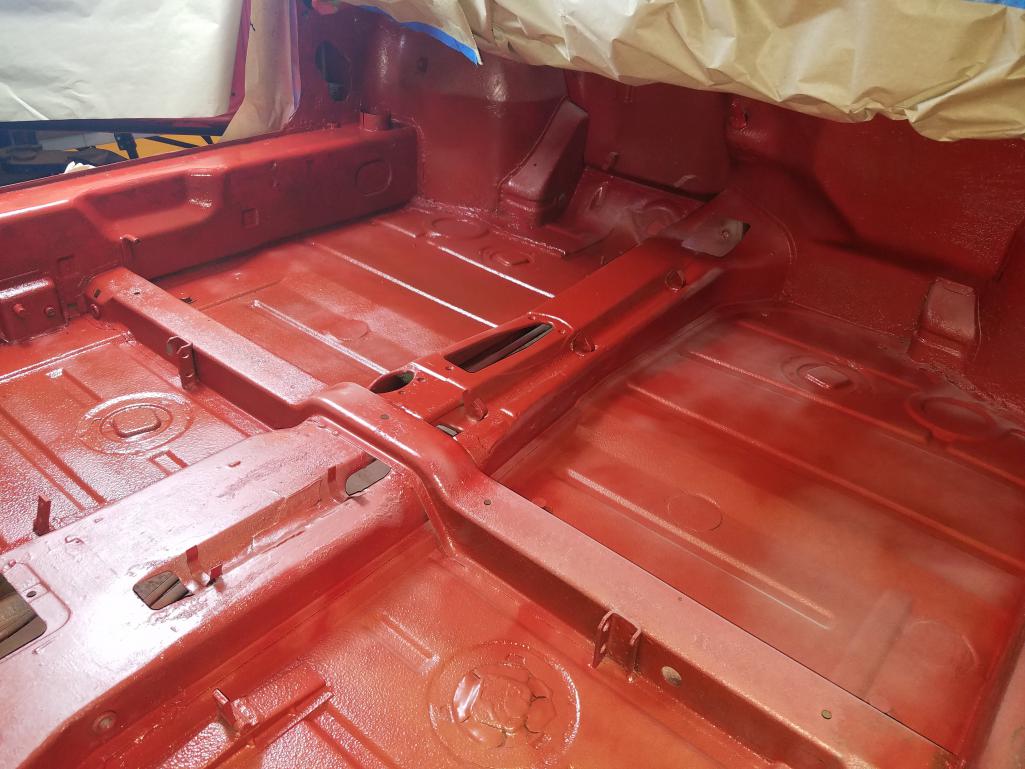
Posted by: Matty900 Aug 16 2017, 12:28 AM
Body shop took off my vin plate. Anyone have any suggestions on where to get the correct rivits to put this back on?
Attached thumbnail(s)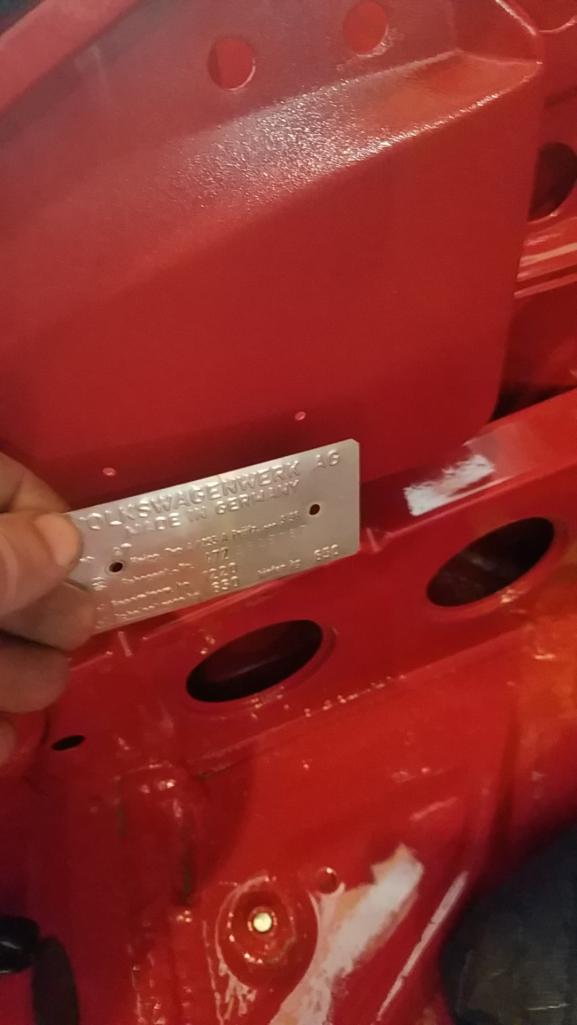
Posted by: bbrock Aug 16 2017, 07:54 AM
Preview of new parts comming out from 914Rubber
I'm gonna need those.I'm really enjoying your thread. It gives me inspiration to keep going on my project. Keep the pics coming!
Posted by: Matty900 Aug 18 2017, 12:13 AM
Preview of new parts comming out from 914Rubber
I'm gonna need those.I'm really enjoying your thread. It gives me inspiration to keep going on my project. Keep the pics coming!
I just want to work on it every day. Lots of time working on things and then re doing them when it's not quite right. Like the paint reacting with residue from the undercoating that I accidentally put in and had to take back out frustrating but satisfying when it's done.
Attached thumbnail(s)
Posted by: Matty900 Aug 18 2017, 12:26 AM
I know this will all be under the carpet and it won't really matter, but I want it right.
Attached thumbnail(s)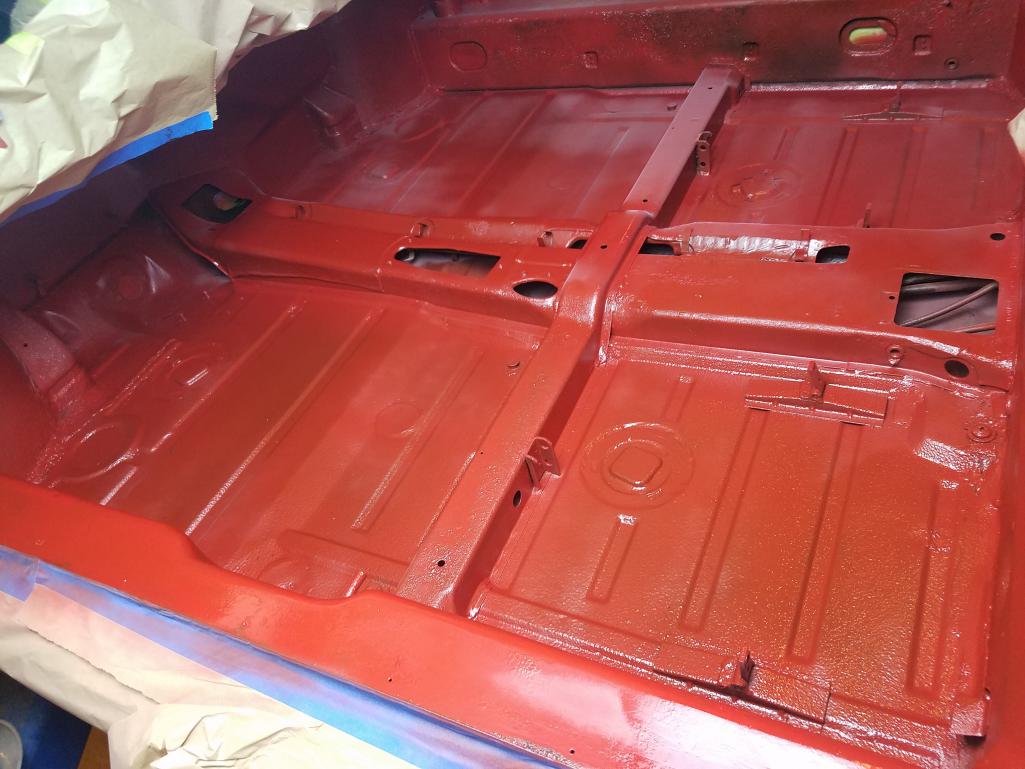
Posted by: Matty900 Aug 18 2017, 12:29 AM
More of the color
Attached thumbnail(s)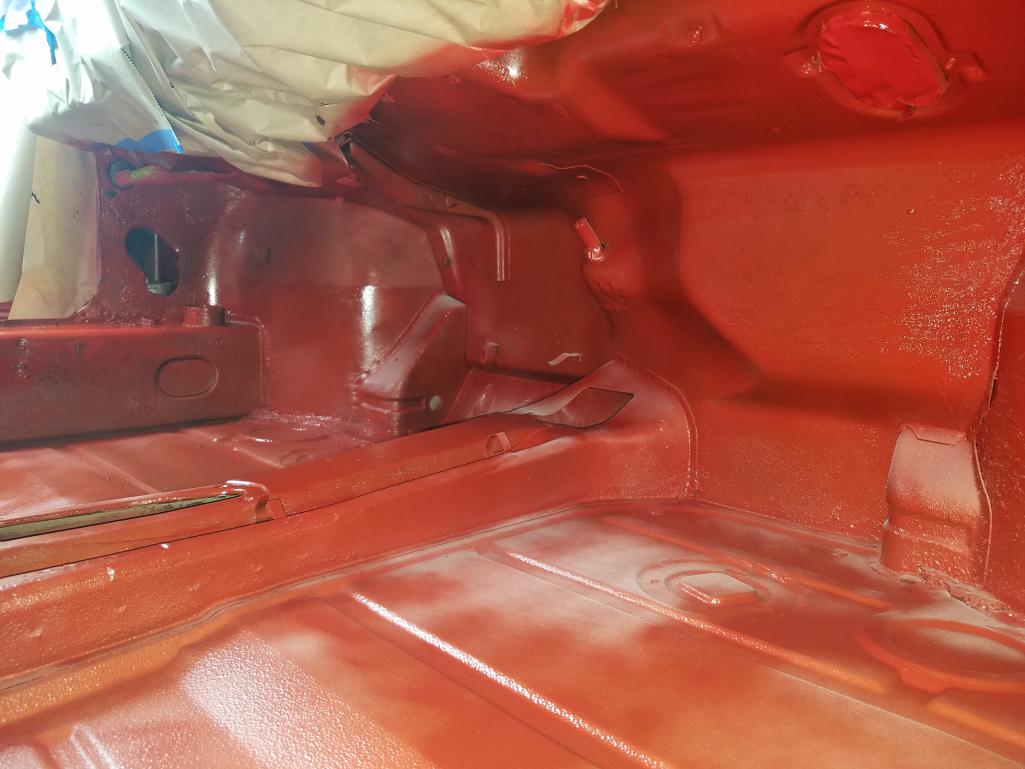
Posted by: Matty900 Aug 18 2017, 12:33 AM
Shiny parts and new bushings
Attached thumbnail(s)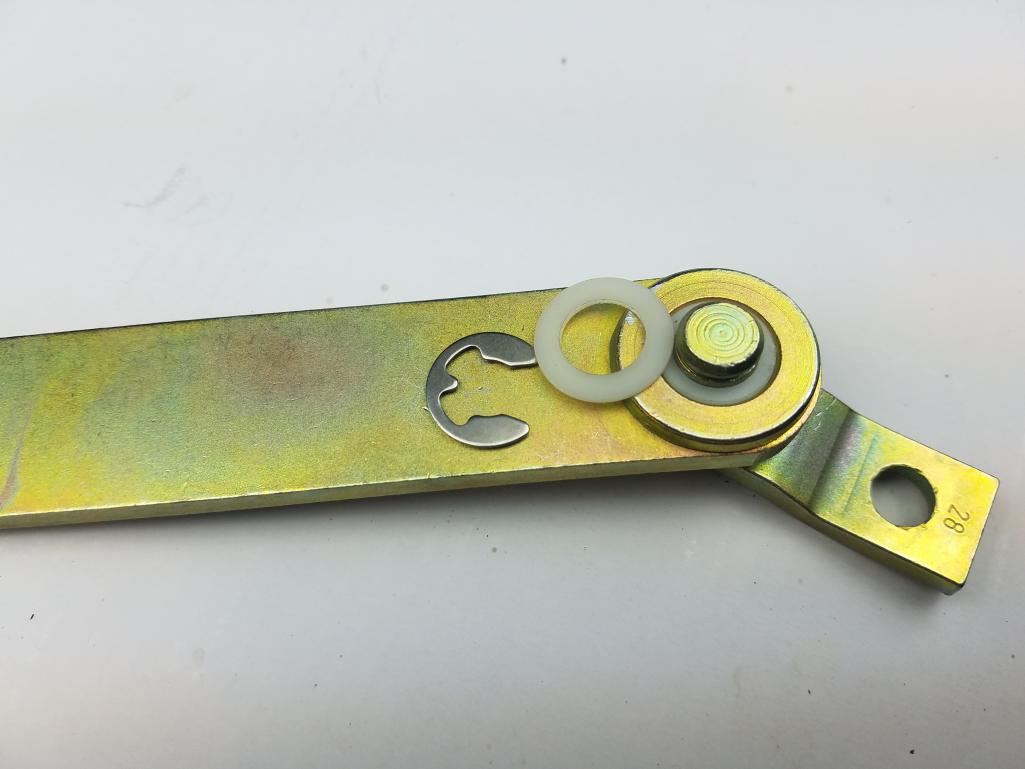
Posted by: Matty900 Aug 18 2017, 12:35 AM
Attached thumbnail(s)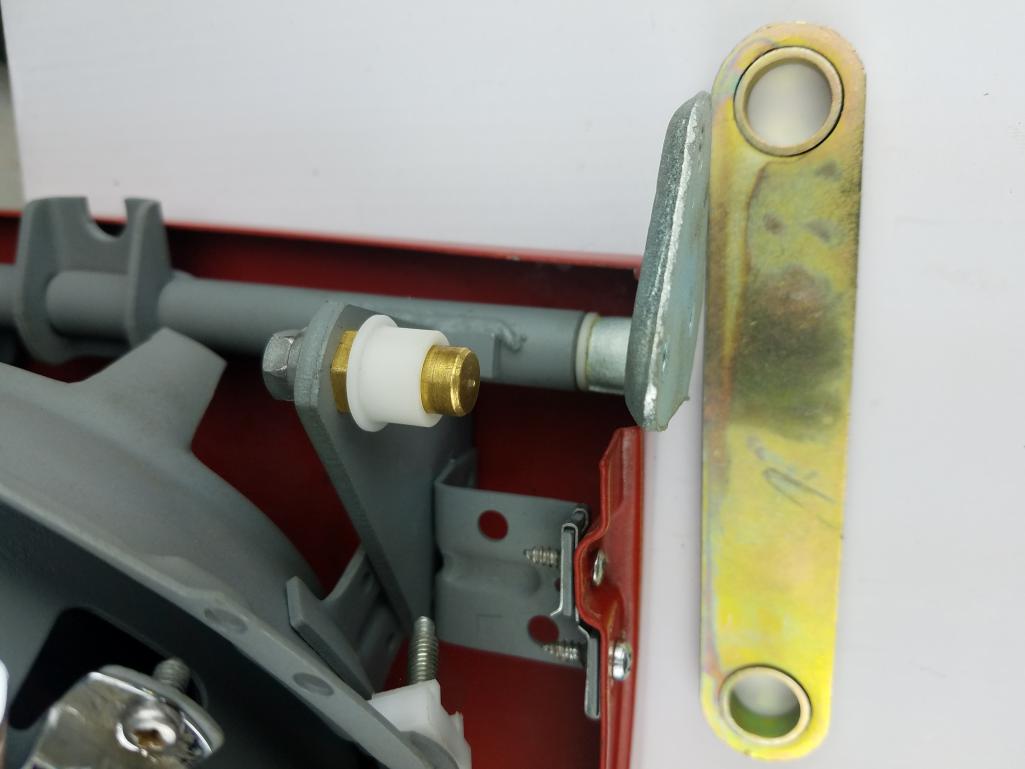
Posted by: Matty900 Aug 18 2017, 12:38 AM
Had to think about how to get this back in without scraching things up
Attached thumbnail(s)
Posted by: Matty900 Aug 18 2017, 12:41 AM
Took the painted headlight covers off and then removed the stop/ adjuster bolt
Attached thumbnail(s)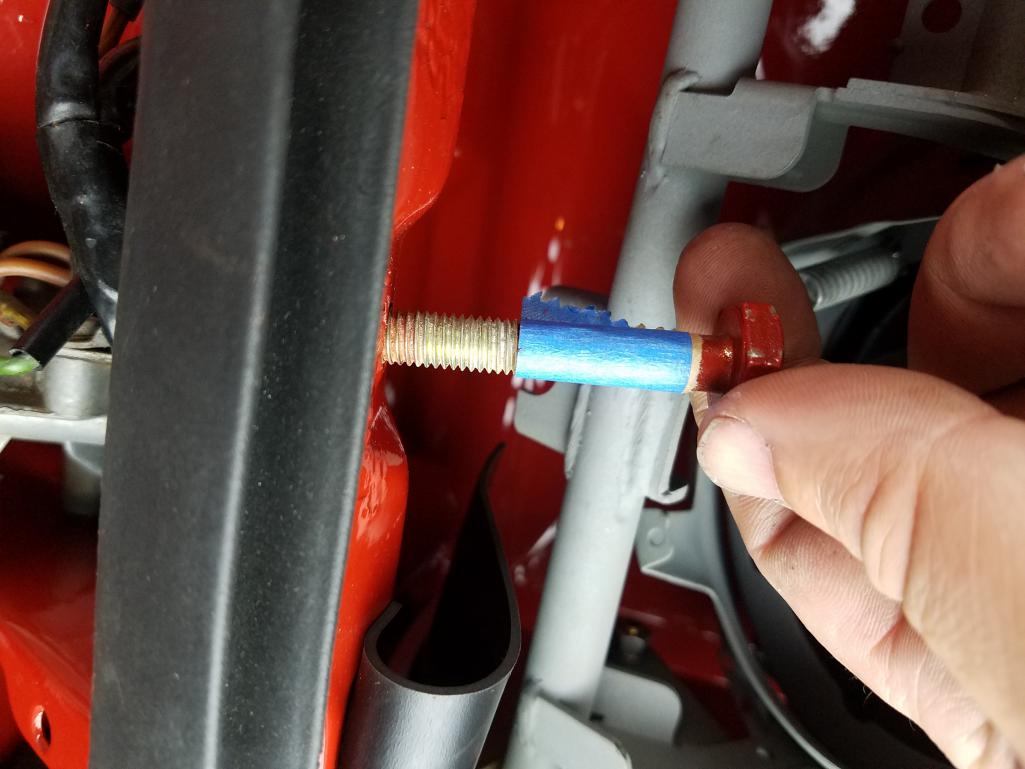
Posted by: Matty900 Aug 18 2017, 12:43 AM
Then attached the pivots
Attached thumbnail(s)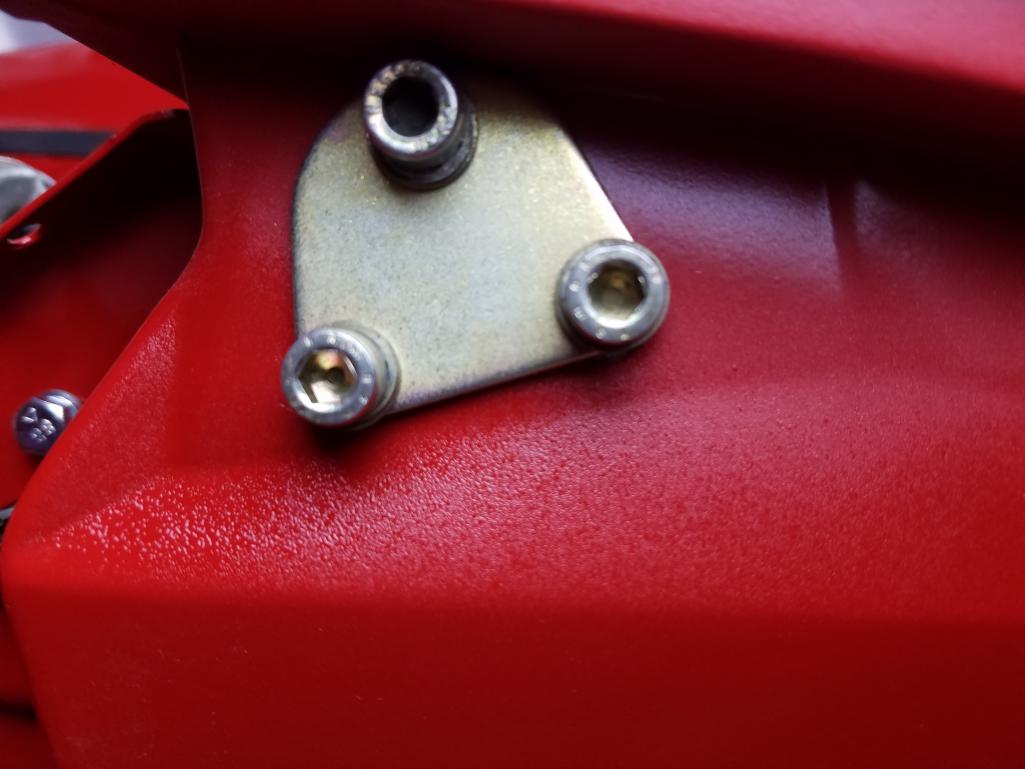
Posted by: Matty900 Aug 18 2017, 12:45 AM
In the fender well
Attached thumbnail(s)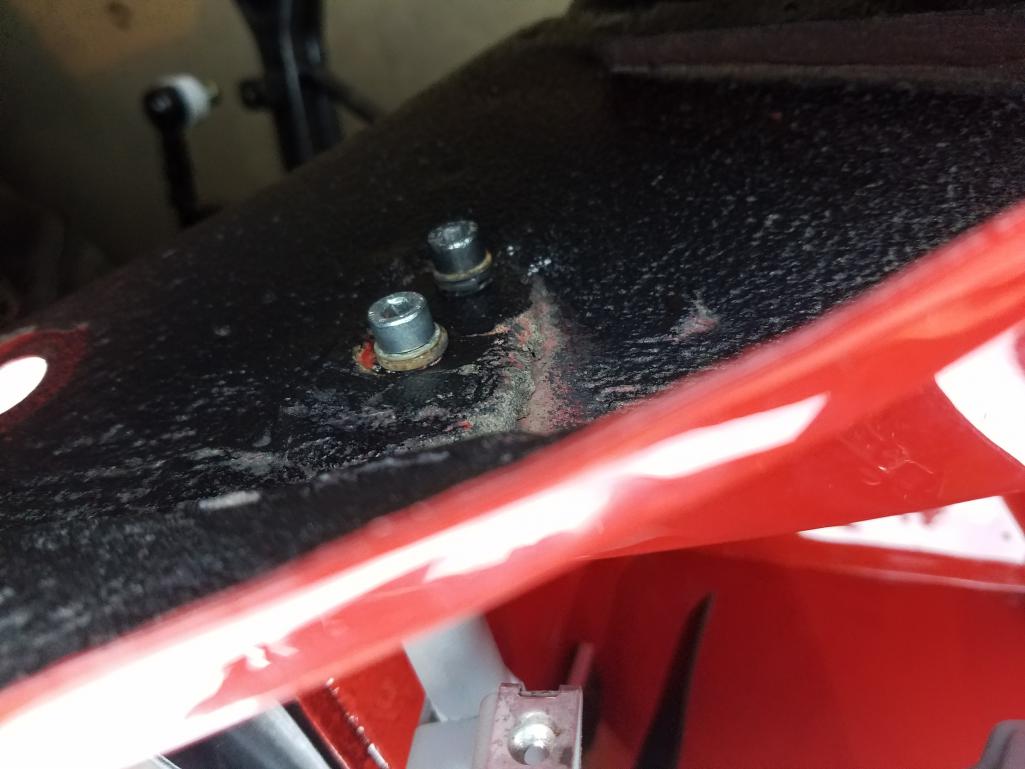
Posted by: Matty900 Aug 18 2017, 12:47 AM
Then replaced the adjustment stop bolt after running a thread cleaner over it and through the nut.
Attached thumbnail(s)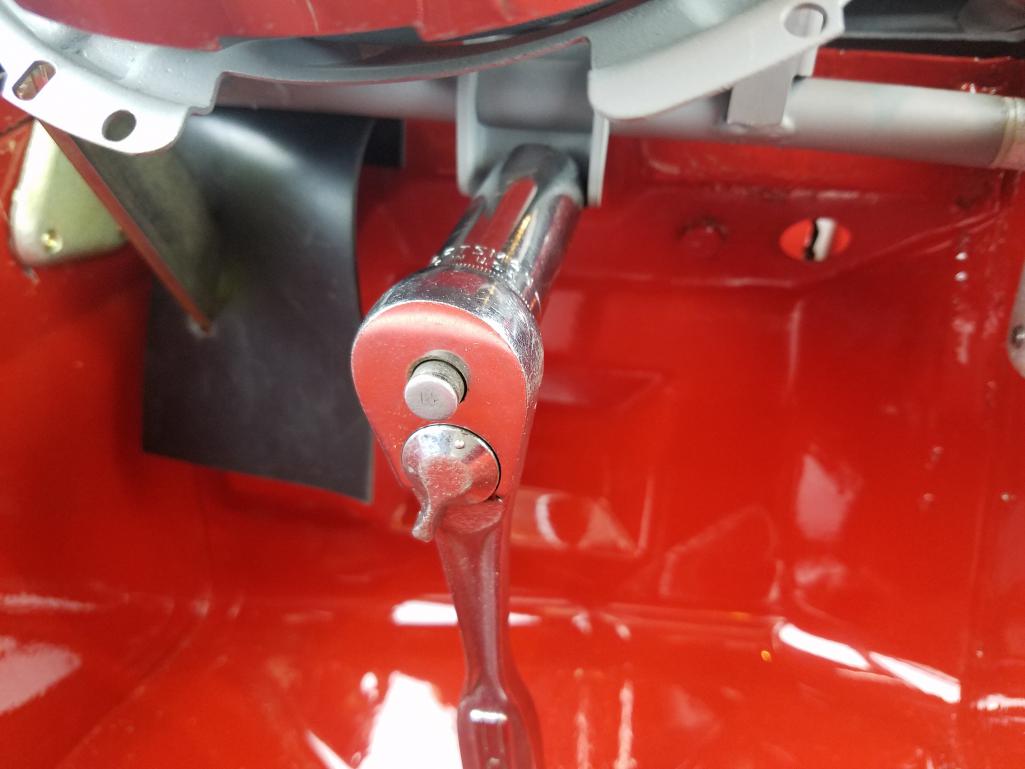
Posted by: Matty900 Aug 18 2017, 12:51 AM
Attached the push arm to the armature and the armature to the motor. Kept everything loose to give me wiggle room to get everything connected.
Attached thumbnail(s)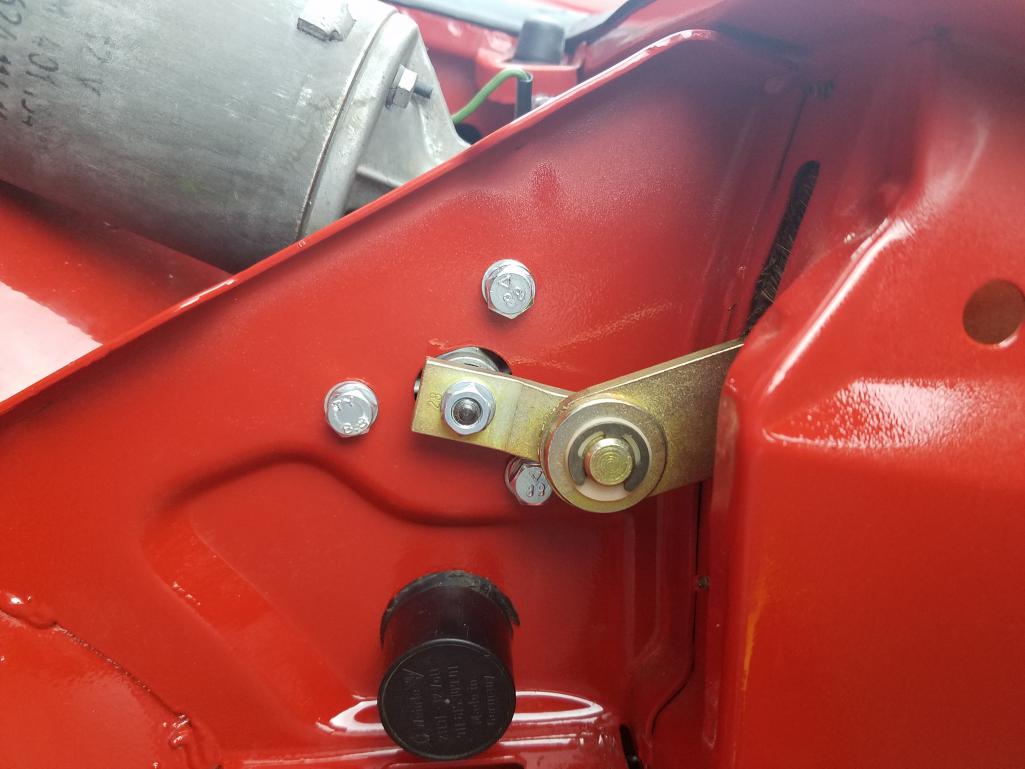
Posted by: Matty900 Aug 18 2017, 12:54 AM
Attached the push arm to the housing assembly. Then tightened up everything.
Attached thumbnail(s)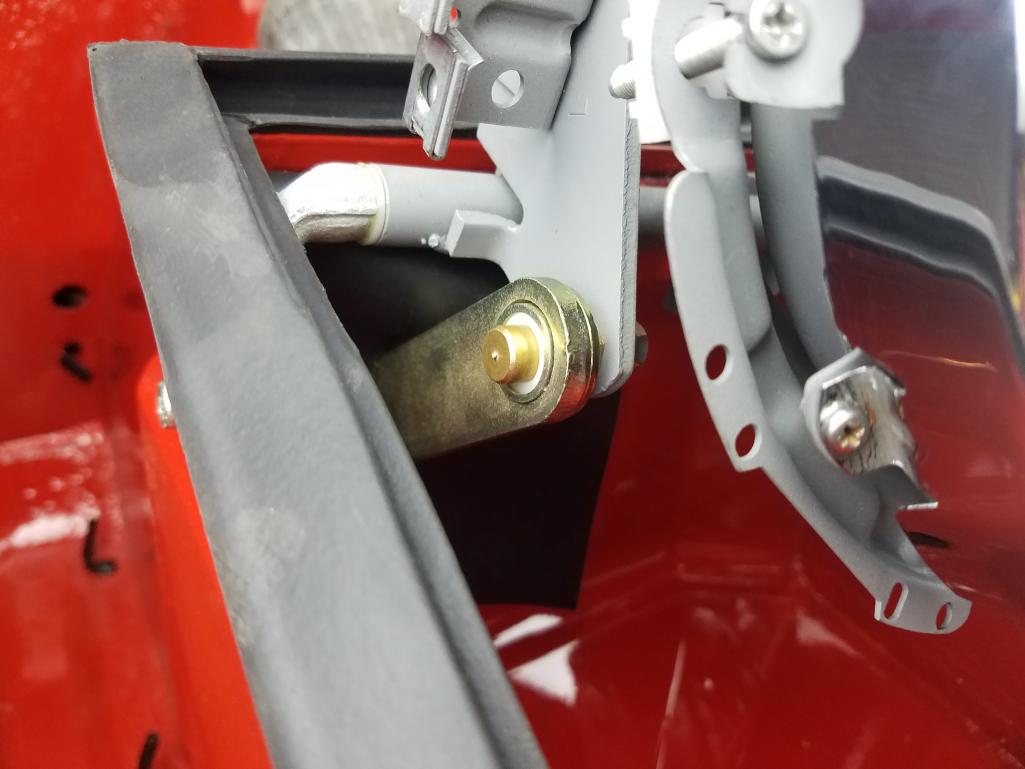
Posted by: Matty900 Aug 18 2017, 01:00 AM
This is when the wires and new grommets should be in place
Attached thumbnail(s)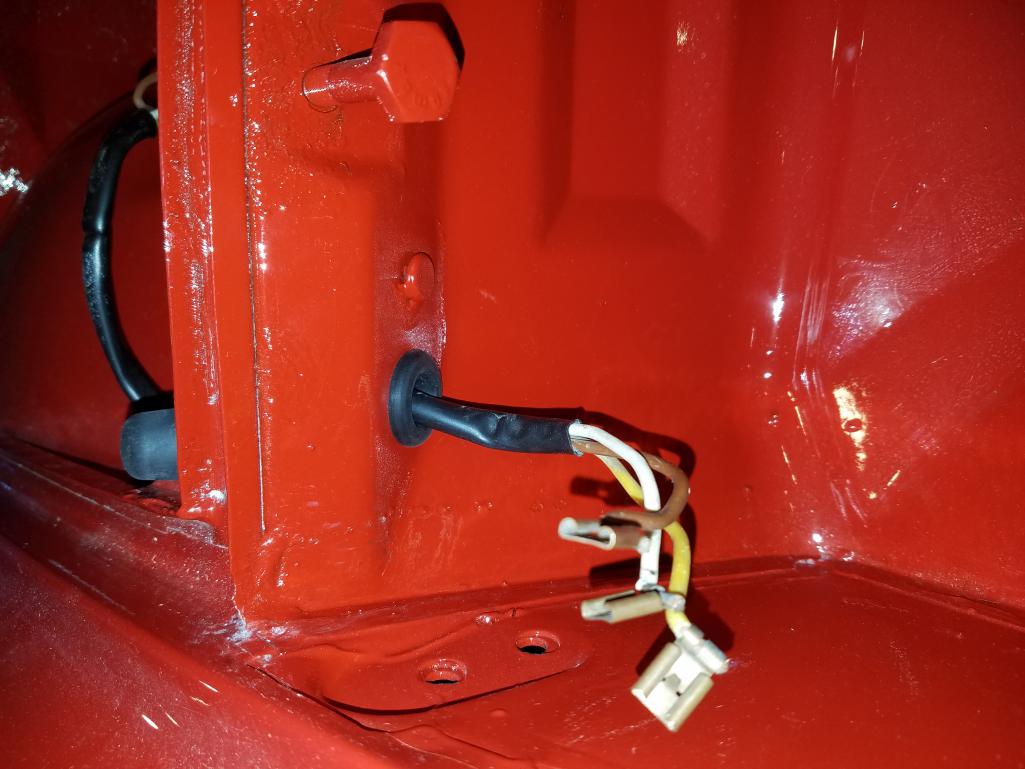
Posted by: Matty900 Aug 18 2017, 01:04 AM
Screw on cover. (Photo is showing the wrong screw location. It is actually the ones be hind this that are recessed. Screws do go in this location, but go through the cover 1st.
Attached thumbnail(s)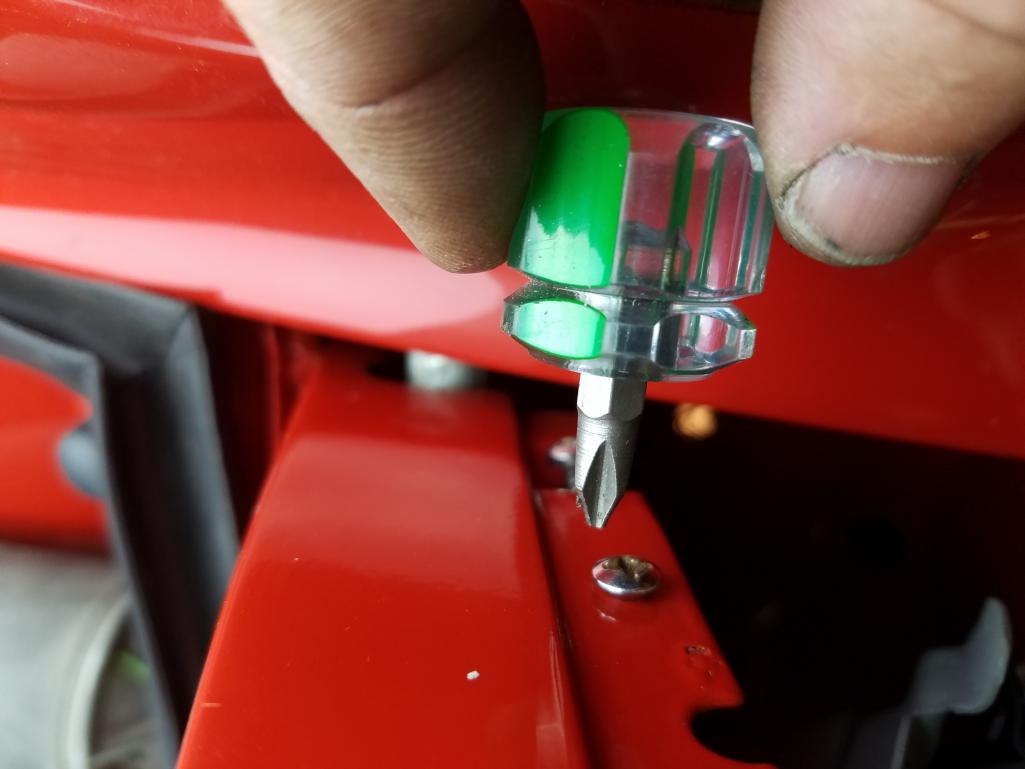
Posted by: Matty900 Aug 18 2017, 01:05 AM
Attached thumbnail(s)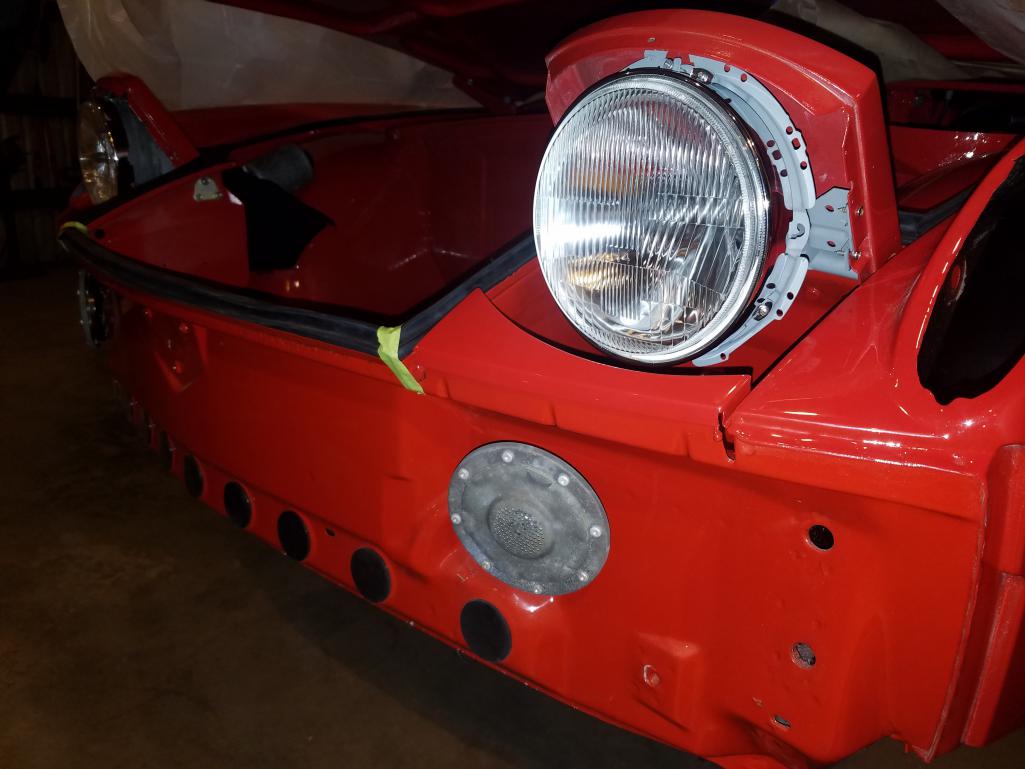
Posted by: Matty900 Aug 18 2017, 01:06 AM
New eyebrow grommets
Attached thumbnail(s)
Posted by: Matty900 Aug 18 2017, 01:08 AM
Painted the dash
Attached thumbnail(s)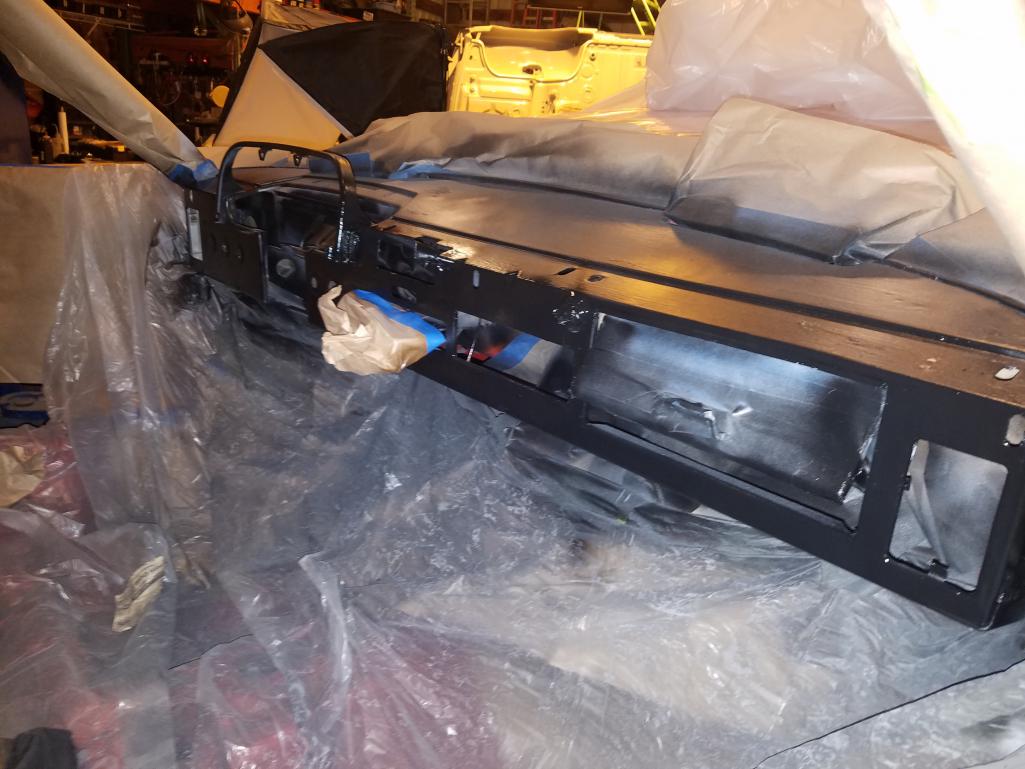
Posted by: Matty900 Aug 18 2017, 01:14 AM
Ready for parts!
Attached thumbnail(s)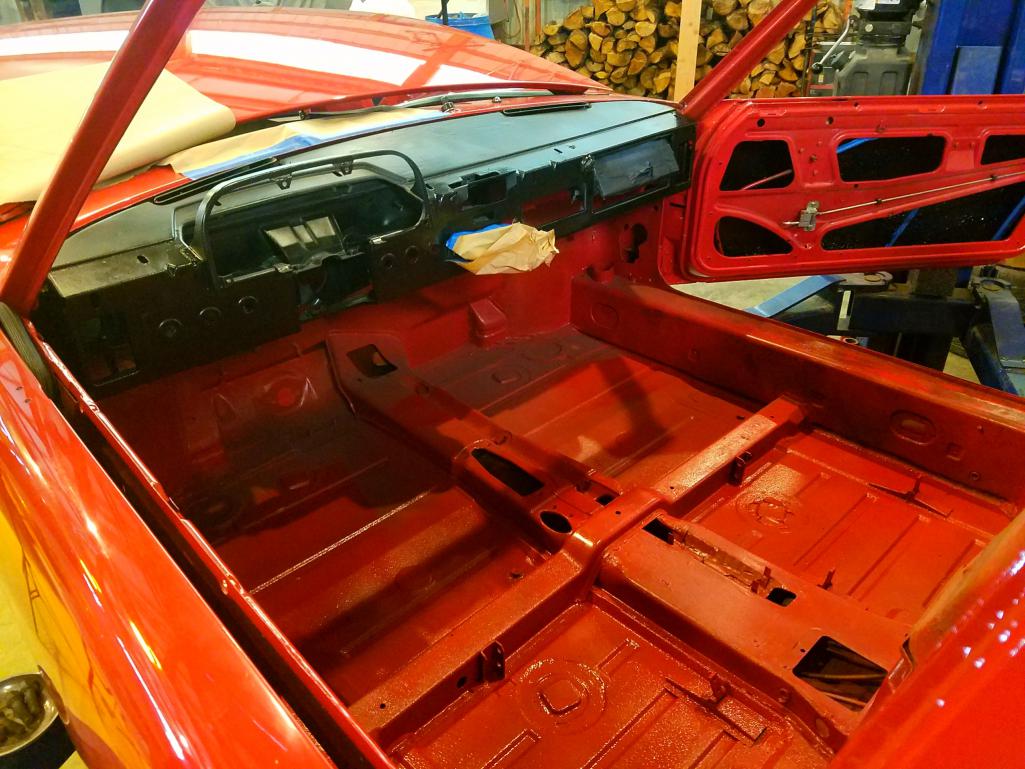
Posted by: Matty900 Aug 18 2017, 01:20 AM
I will be taking a few days off for my son's wedding. 1st boy getting Married. Lots of logistics to take care of for the wedding this Saturday. Lots of complications with all of the traffic that is in the state for the eclipse. They were not aware of it when they set their wedding date and they just so happen to plan it right in the path of totality. Already stories on the news of gas stations running out of gas and roads being completely plugged. So that's adding to the stress. Wish us luck. I'll be back to work on the car next week. In the meantime Cary's making progress with getting suspension components back on the vehicle.
Posted by: Matty900 Aug 22 2017, 12:24 AM
Cary was busy
Attached thumbnail(s)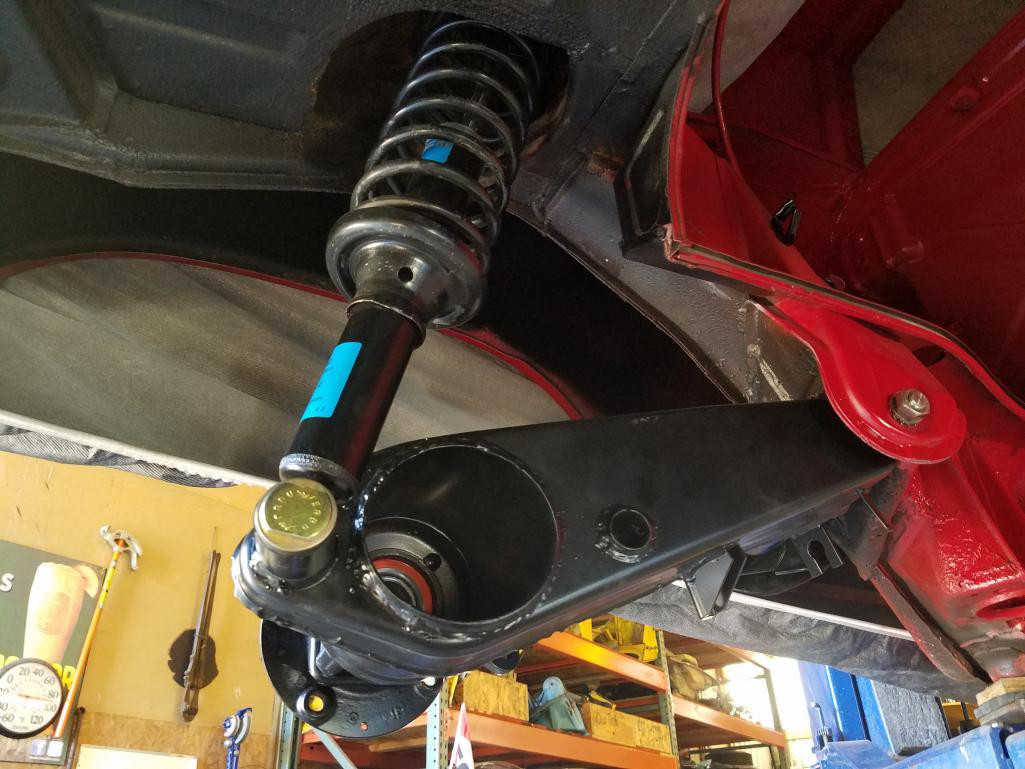
Posted by: Matty900 Aug 22 2017, 12:25 AM
Harvested the rear sway bar off of my 73 but now I need to track down the bolt for the suspension on the trailing arm that has the cup for the drop link before I can add the sway bar
Attached thumbnail(s)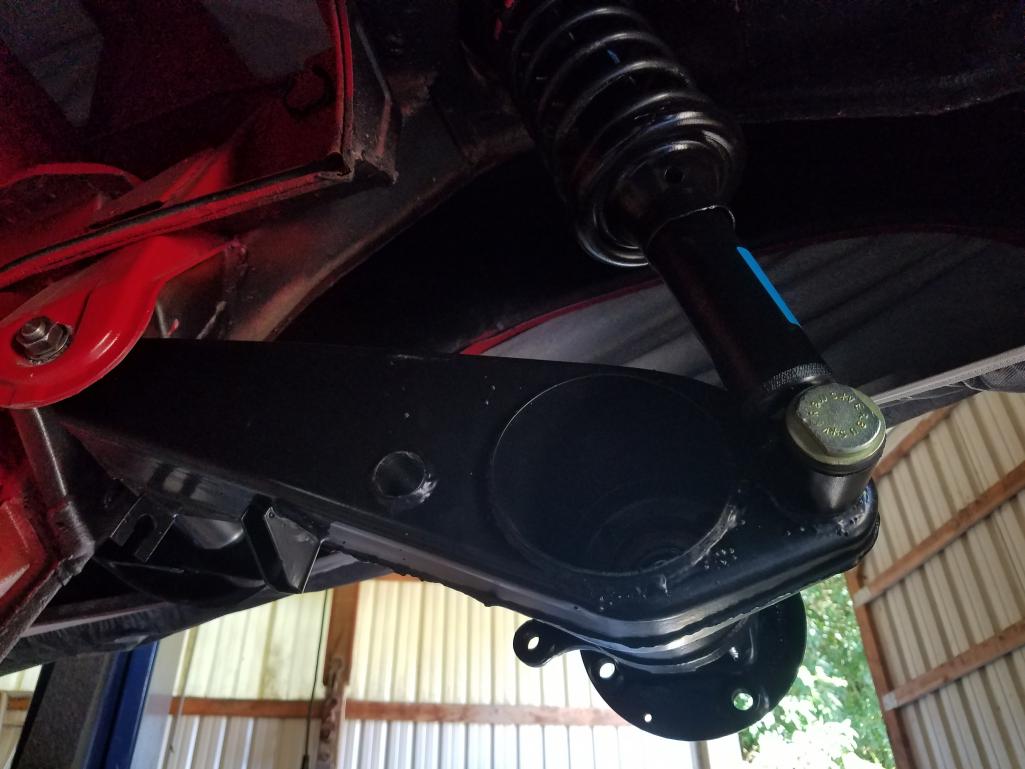
Posted by: mb911 Aug 22 2017, 07:12 AM
Matt,
Looks great . in another thread folks are looking to get rear shocks just like yours. Where did you source them?
Posted by: Matty900 Aug 22 2017, 10:12 PM
Matt,
Looks great . in another thread folks are looking to get rear shocks just like yours. Where did you source them?
Eric at PMB Performance
Posted by: Matty900 Aug 22 2017, 10:19 PM
Need to get the gas tank cleaned up next. The outside was painted and I thought it was treated. Looking inside, I think it needs a little more love.
Attached thumbnail(s)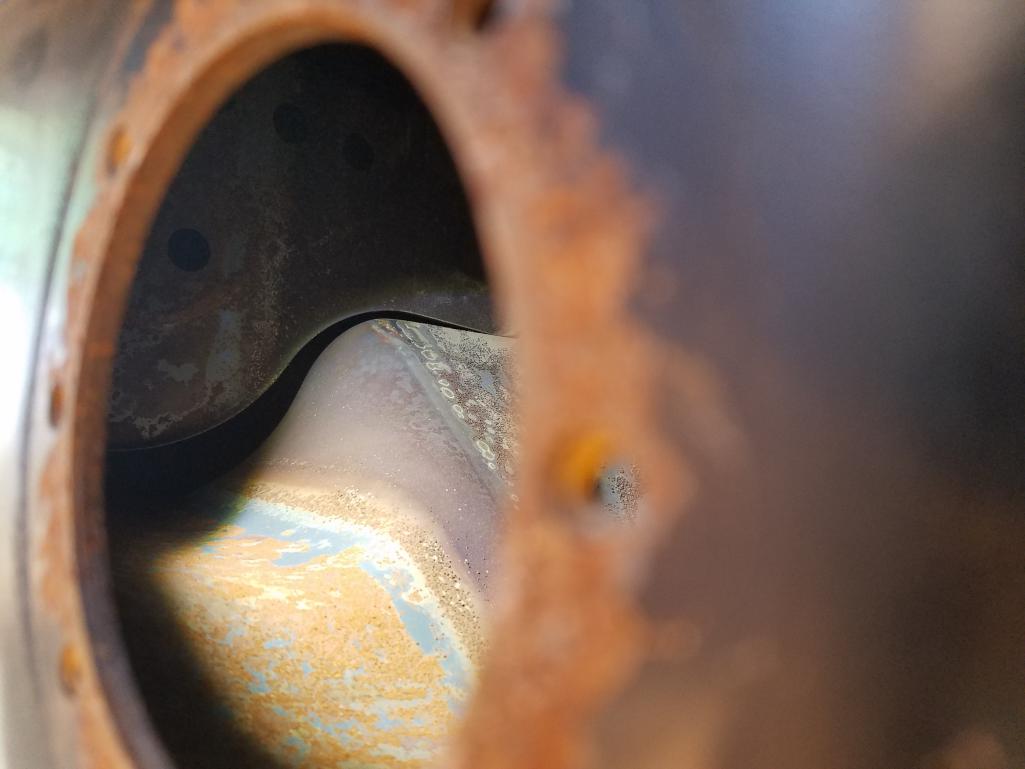
Posted by: Matty900 Aug 22 2017, 10:20 PM
Put some apple cider vinegar and ball bearings in the tank for the night. Worked it around inside pretty good to get every angle.
Attached thumbnail(s)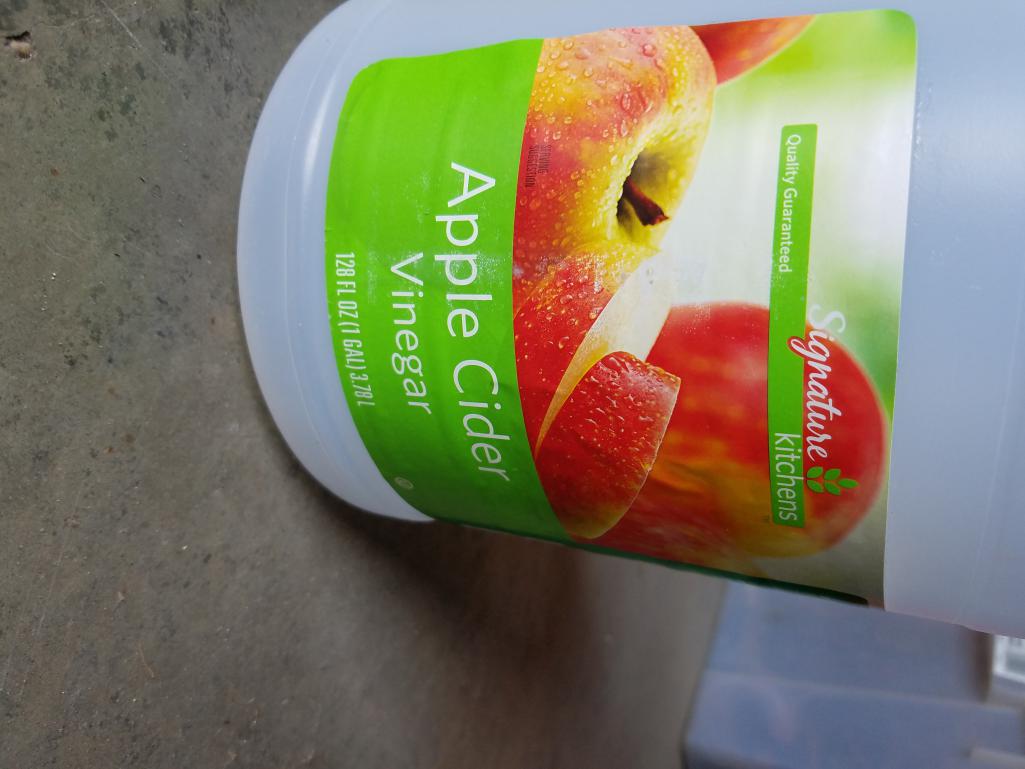
Posted by: Matty900 Aug 22 2017, 10:22 PM
Sealed up so I could work the ball bearings and vinegar all around
Attached thumbnail(s)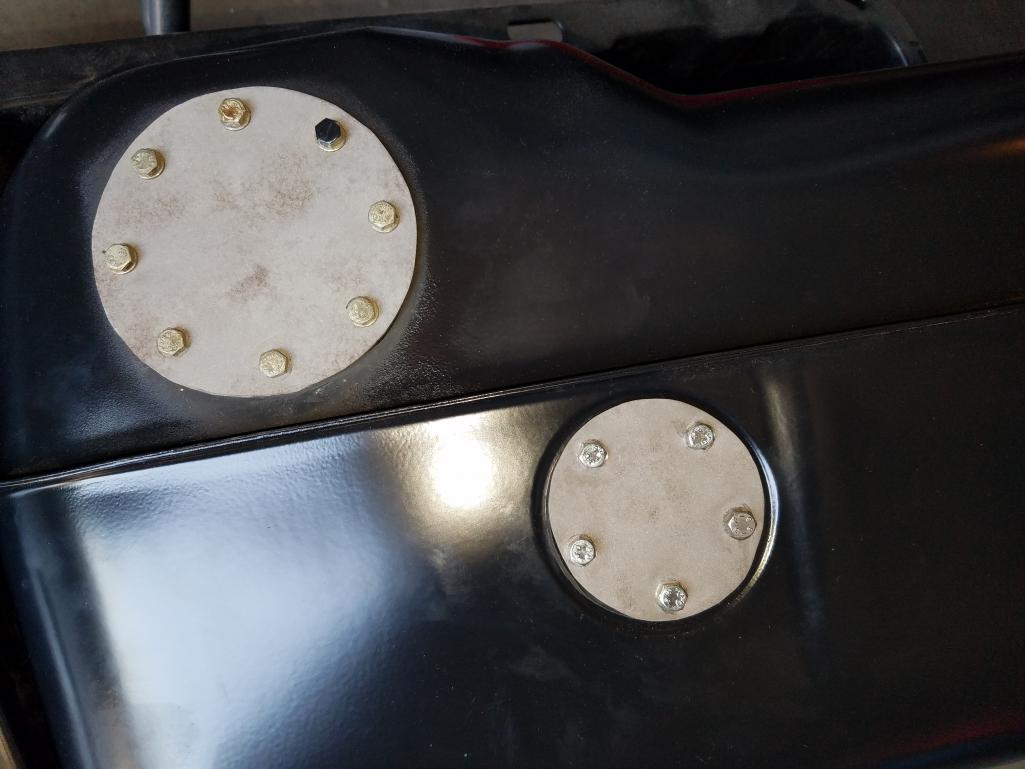
Posted by: Matty900 Aug 22 2017, 10:24 PM
Had to get a few photos of some of our new parts.
Attached thumbnail(s)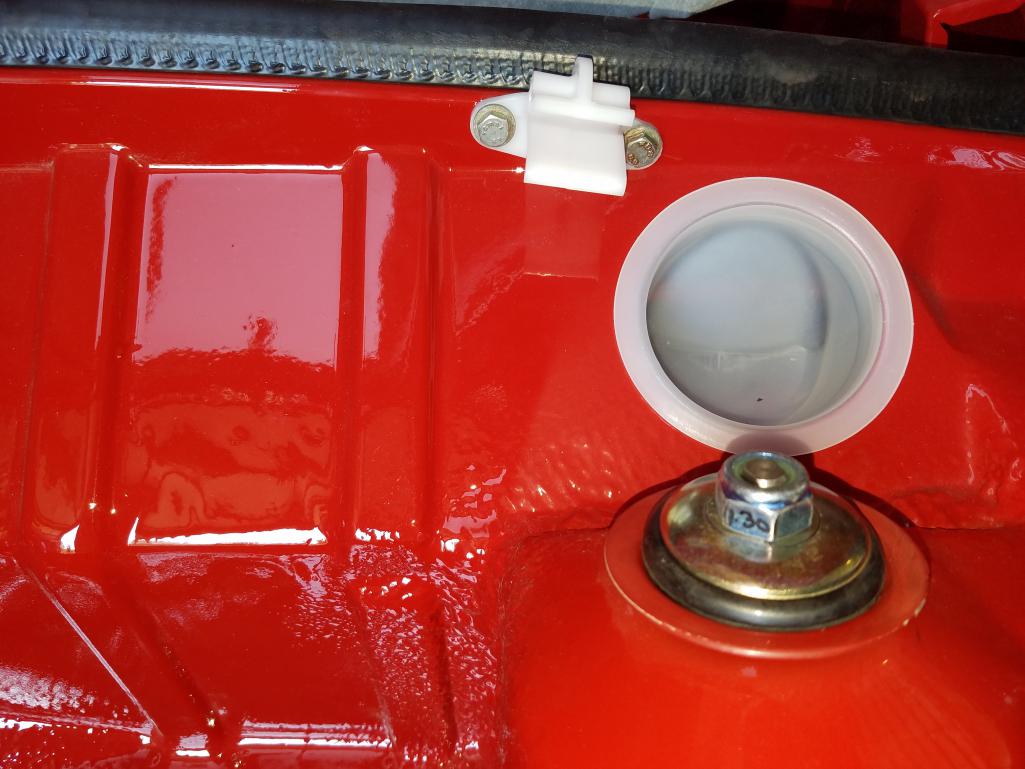
Posted by: Matty900 Aug 22 2017, 10:25 PM
Attached thumbnail(s)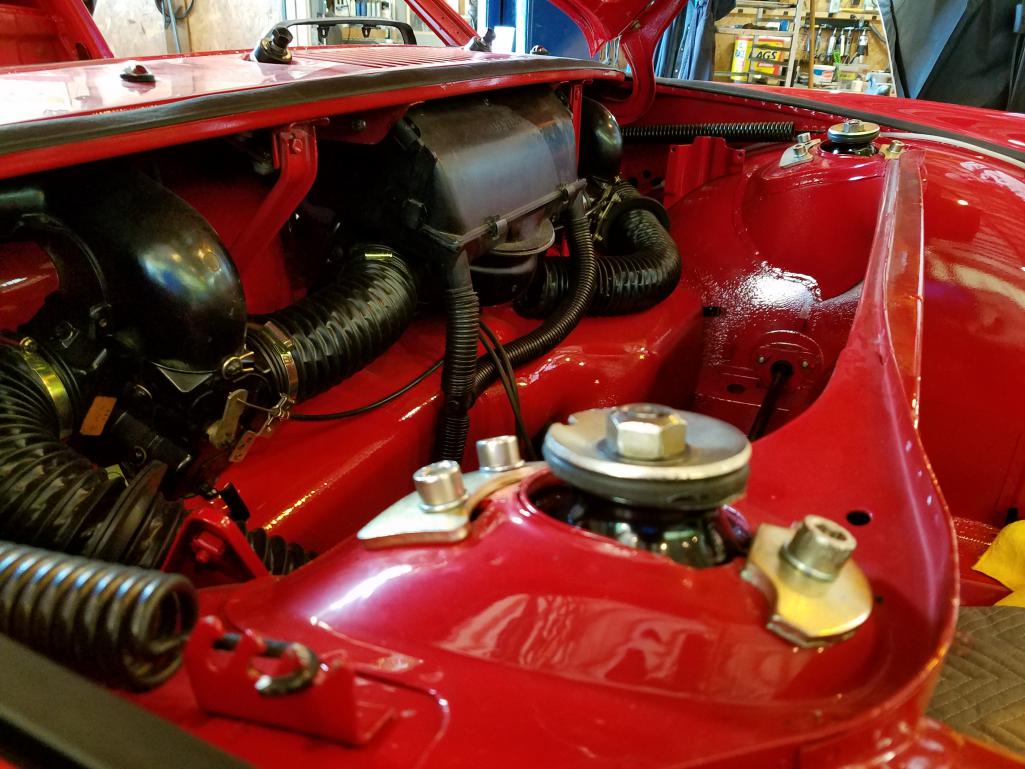
Posted by: Matty900 Aug 22 2017, 10:27 PM
With the suspension in we could tighten the spring up front
Attached thumbnail(s)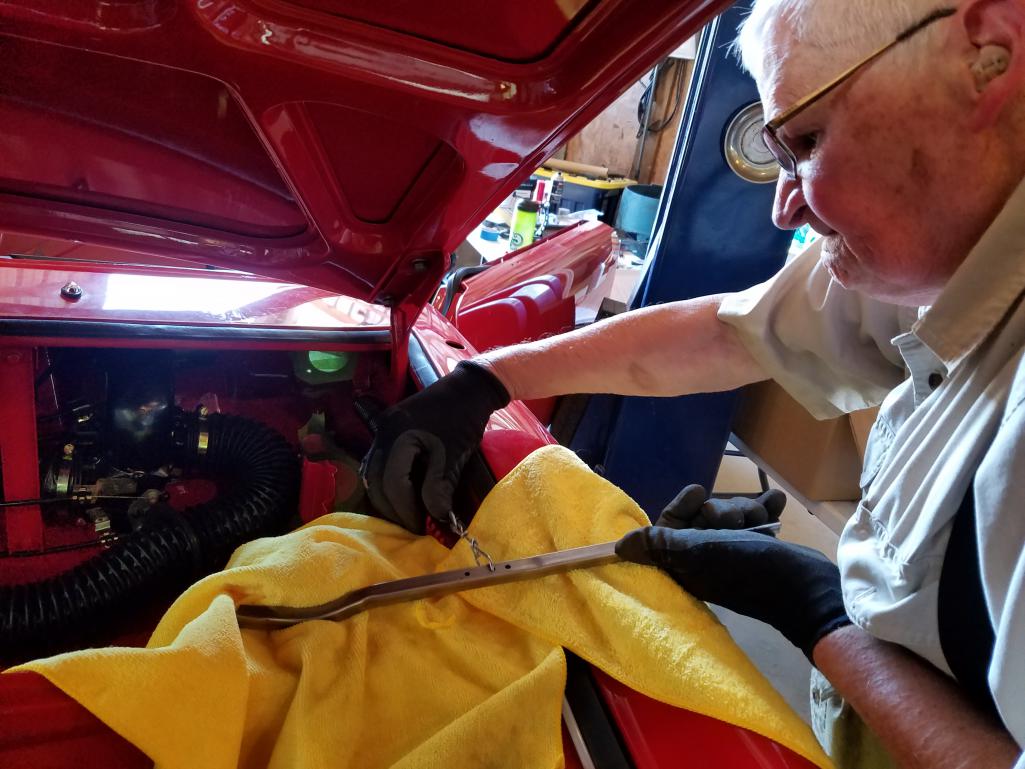
Posted by: Matty900 Aug 22 2017, 10:38 PM
Starting to look like a car again.
Attached thumbnail(s)
Posted by: Matty900 Aug 22 2017, 11:13 PM
Installed new stainless steel lines in the tunnel
Attached thumbnail(s)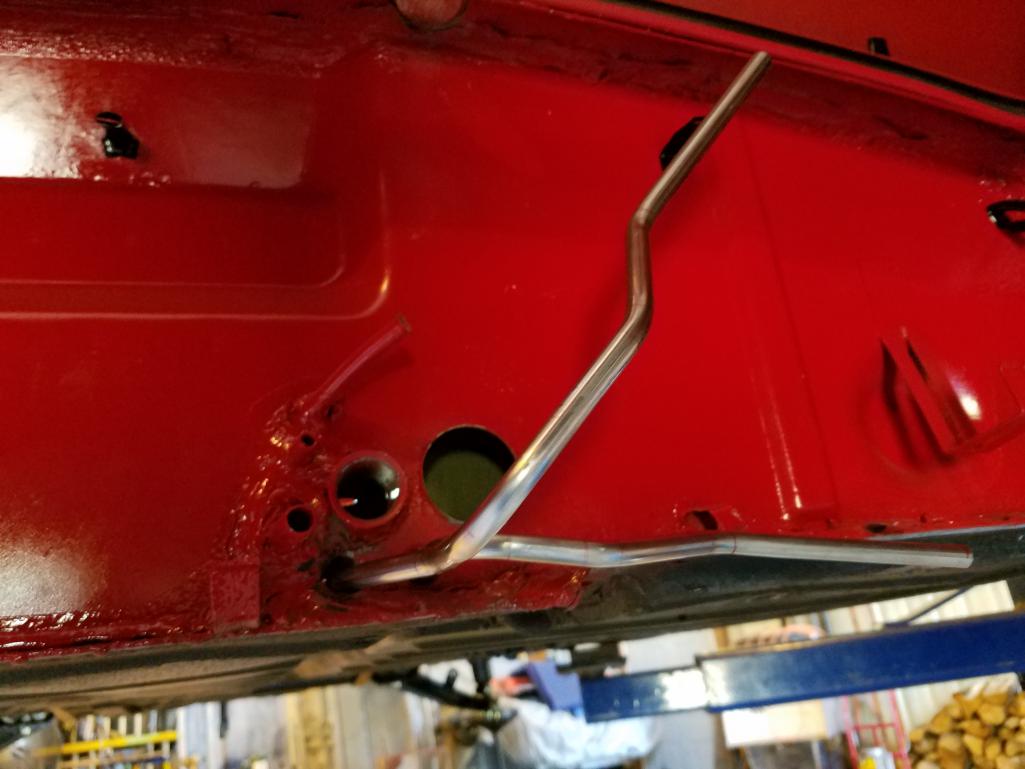
Posted by: Matty900 Aug 22 2017, 11:14 PM
So far I've only been able to get one through the grommet. I'll continue trying tomorrow
Attached thumbnail(s)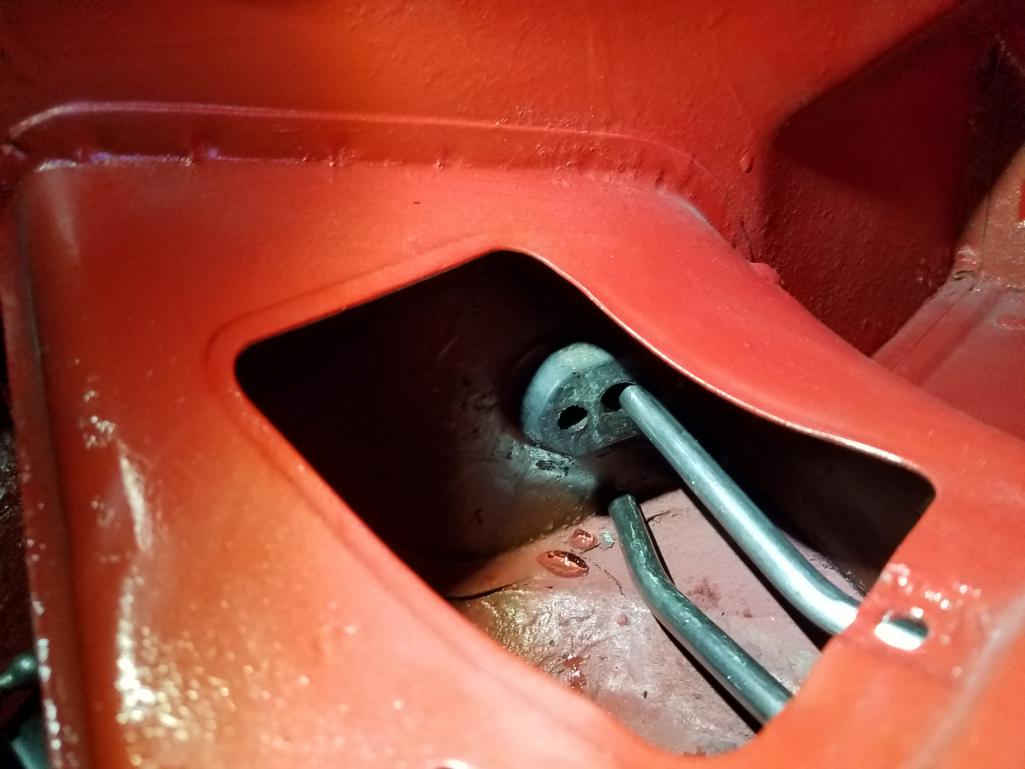
Posted by: Matty900 Aug 22 2017, 11:16 PM
Need to figure out which Tabs are used for holding the lines and place in the tunnel.
Attached thumbnail(s)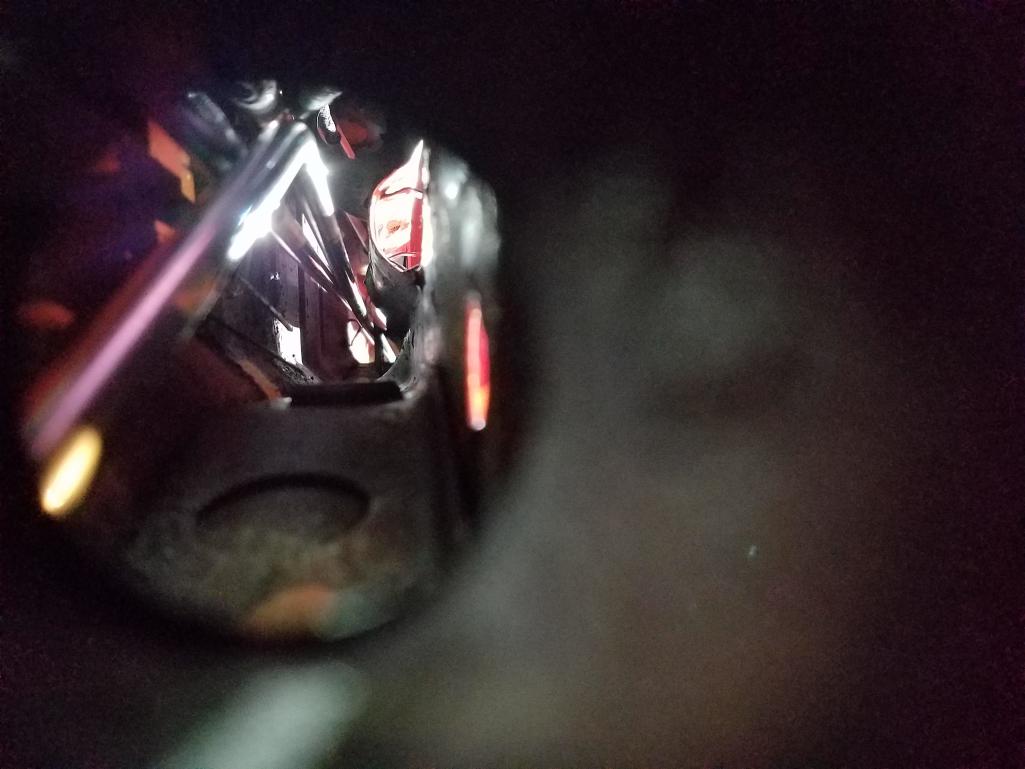
Posted by: Matty900 Aug 22 2017, 11:18 PM
Got the new pedal cluster in that Bruce Stone restored for me and added a plate for hand throttle since I'll be using carbs.
Attached thumbnail(s)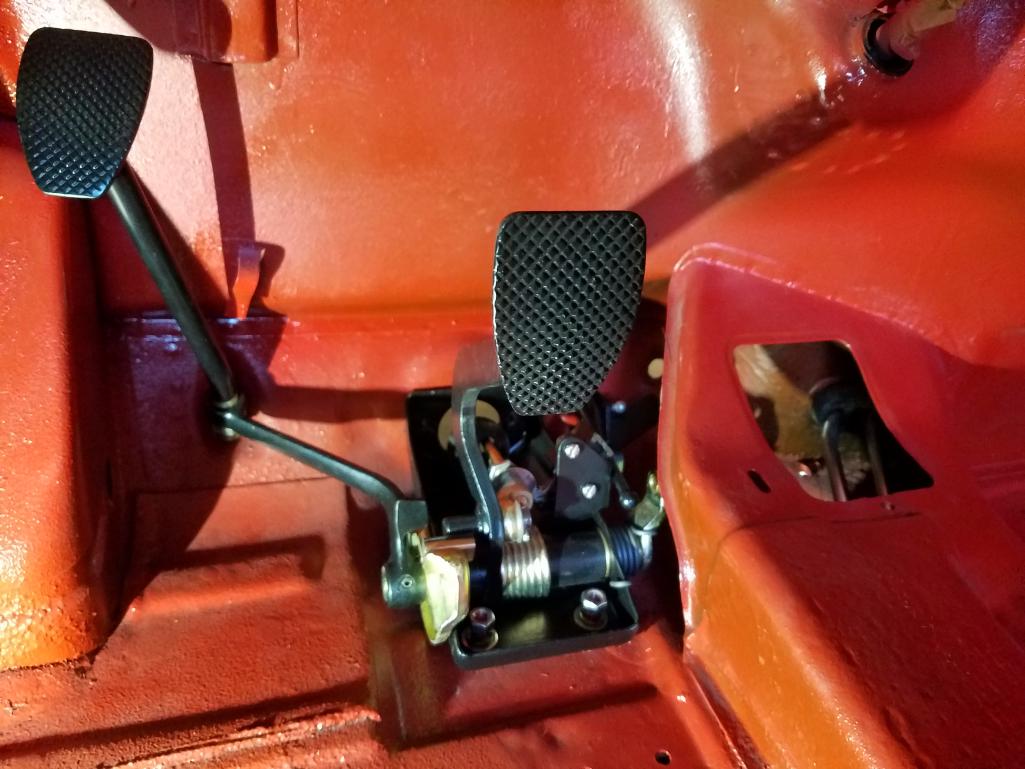
Posted by: Matty900 Aug 22 2017, 11:21 PM
Everything but the wiring harness and carpet is now in the rrar trunk
Attached thumbnail(s)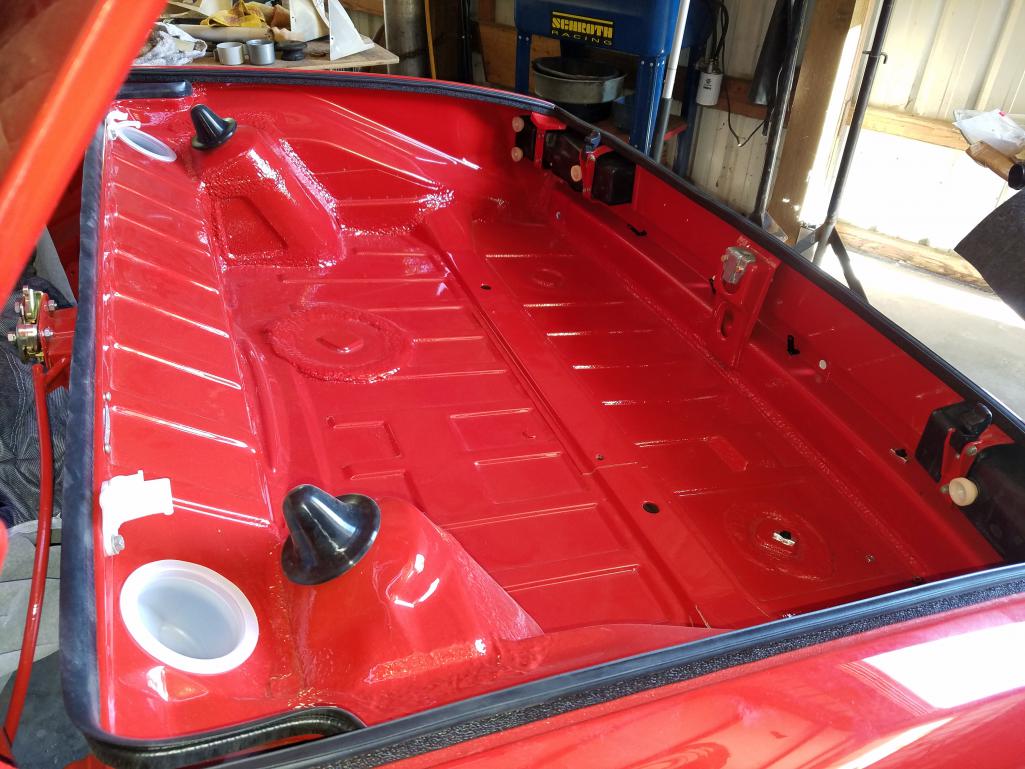
Posted by: Matty900 Aug 22 2017, 11:23 PM
Replaced the grounding strap for the transmission.
Attached thumbnail(s)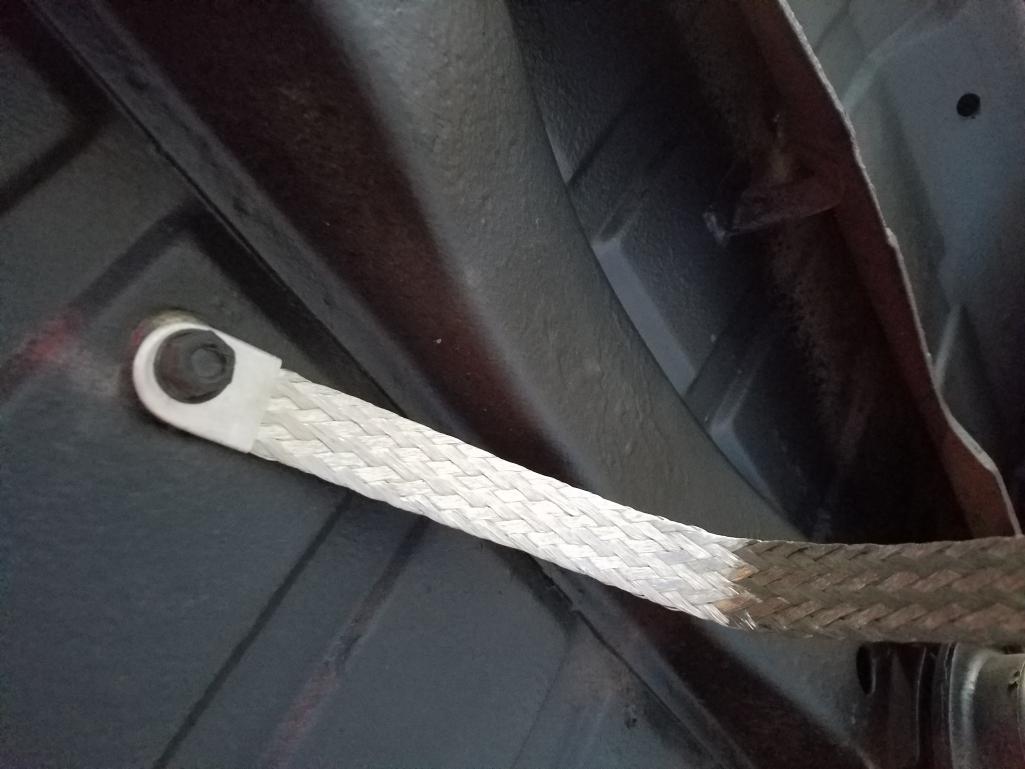
Posted by: Matty900 Aug 22 2017, 11:26 PM
Added new engine Bay liner with water proofing.
Attached thumbnail(s)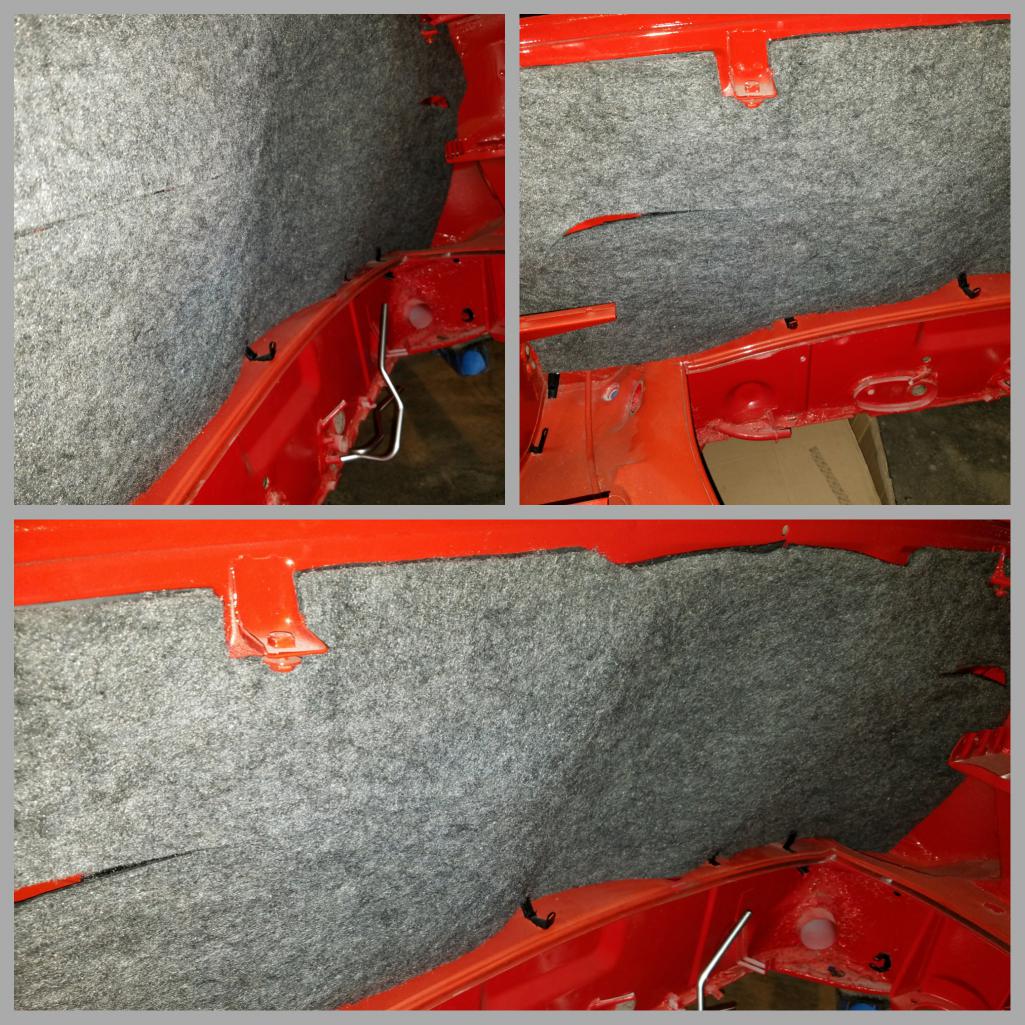
Posted by: Matty900 Aug 22 2017, 11:31 PM
New Dash face metal and vinyl ready to install tomorrow.
Attached thumbnail(s)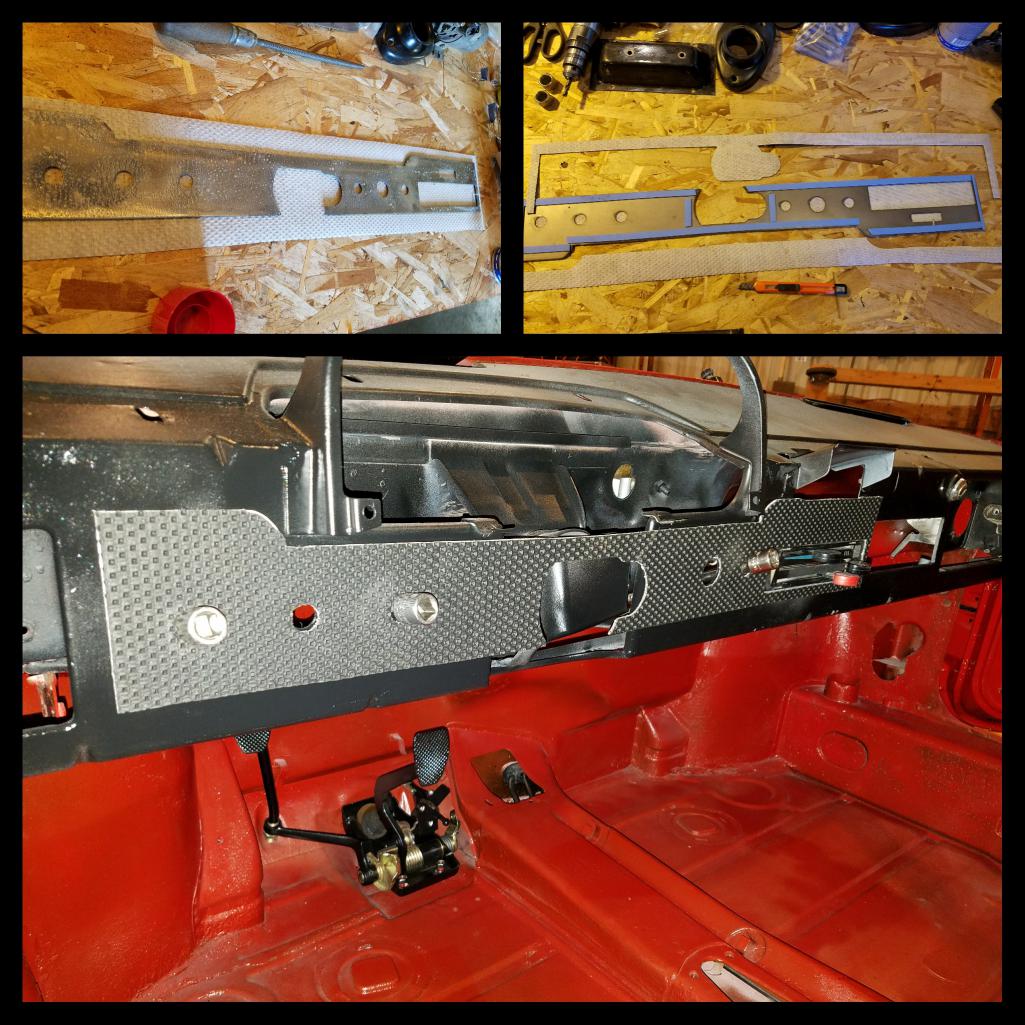
Posted by: Matty900 Aug 22 2017, 11:34 PM
Got the headlight surrounds all cleaned up. Love the look of the white on there with the red.
Attached thumbnail(s)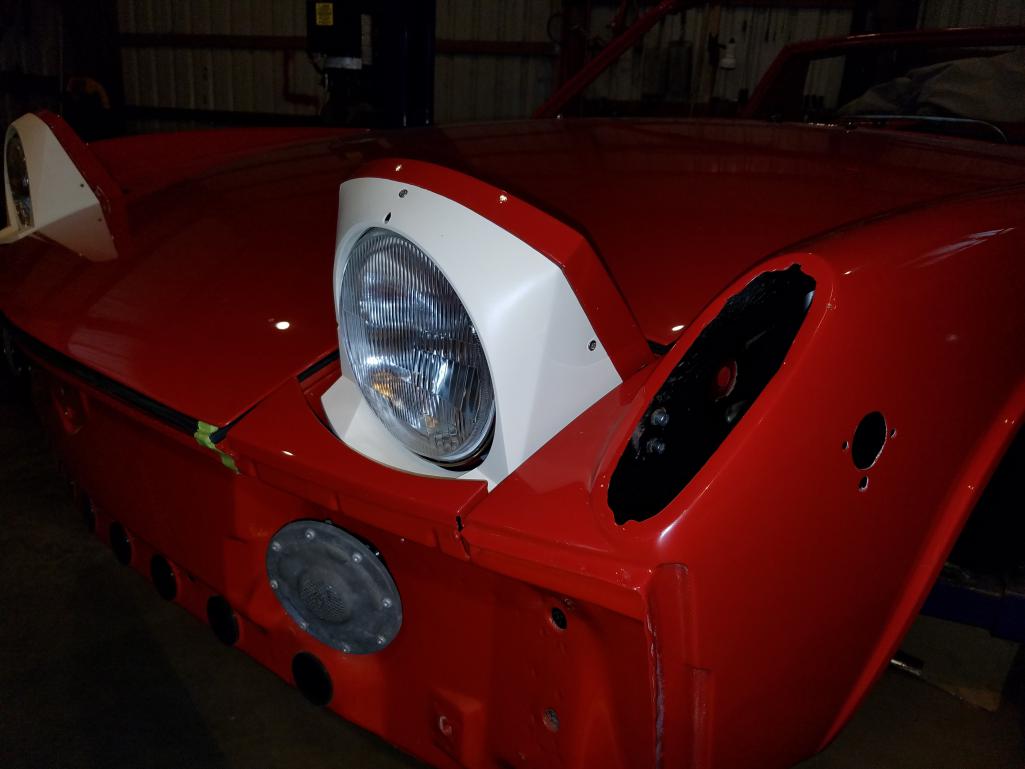
Posted by: tygaboy Aug 23 2017, 08:03 AM


Awesomeness!
Every time I see these restorations I get a little overwhelmed thinking about all the work ahead of me.
But as I follow along with your build, I can see that chipping away at it will get it done.
(though it's a bit unfair that you get Super In-Law help! Does he make house calls? )
Thanks for the entertainment and encouragement to soldier on!
Can't wait for the post when you fire it up and do the first drive. Soon?
Posted by: cary Aug 23 2017, 08:11 AM
Looks like you were busy after we left ................
Posted by: bbrock Aug 23 2017, 08:15 AM
Awesomeness!
Every time I see these restorations I get a little overwhelmed thinking about all the work ahead of me.

Ditto. Your work is inspiring while also making me want to
 myself a little over the amount of work ahead. Keep the posts coming!
Posted by: mb911 Aug 23 2017, 08:50 AM
Matt,
Looks great . in another thread folks are looking to get rear shocks just like yours. Where did you source them?
Eric at PMB Performance
Looks like those are now nla.. Asked Eric today.
Posted by: Matty900 Aug 23 2017, 10:16 PM
Awesomeness!
Every time I see these restorations I get a little overwhelmed thinking about all the work ahead of me.
But as I follow along with your build, I can see that chipping away at it will get it done.
(though it's a bit unfair that you get Super In-Law help! Does he make house calls?
)Thanks for the entertainment and encouragement to soldier on!
Can't wait for the post when you fire it up and do the first drive. Soon?
Thank you sir. Your project is very inspiring. I have not done much in the fabricating side on this build but I will do an outlaw next.Super in law is awesome! Very inspiring to work with him.
Hopefully the engine will be done next week.
Posted by: Matty900 Aug 23 2017, 10:18 PM
Looks like you were busy after we left ................
Got more done last night than tonight. Decided to take the entire tail end of the one of the wiring harnesses that I picked up and use it to replace the damaged section on my old one.
Posted by: Matty900 Aug 23 2017, 10:21 PM
Awesomeness!
Every time I see these restorations I get a little overwhelmed thinking about all the work ahead of me.
Ditto. Your work is inspiring while also making me want to
myself a little over the amount of work ahead. Keep the posts coming! Don't worry about the end and just enjoy the journey. I am loving just working on each detail and really learning the car and our parts.
Posted by: Matty900 Aug 23 2017, 10:24 PM
Matt,
Looks great . in another thread folks are looking to get rear shocks just like yours. Where did you source them?
Eric at PMB Performance
Looks like those are now nla.. Asked Eric today.
I bought them from him right after I bought the car thinking that I was just going to freshen it up and drive it. We will start to carry things like listen to Future once we get our website done. In the meantime we'll keep making more parts for you.
Posted by: Matty900 Aug 23 2017, 10:26 PM
Continued getting the dash ready today. Put the new vinyl on the glove box door.
Attached thumbnail(s)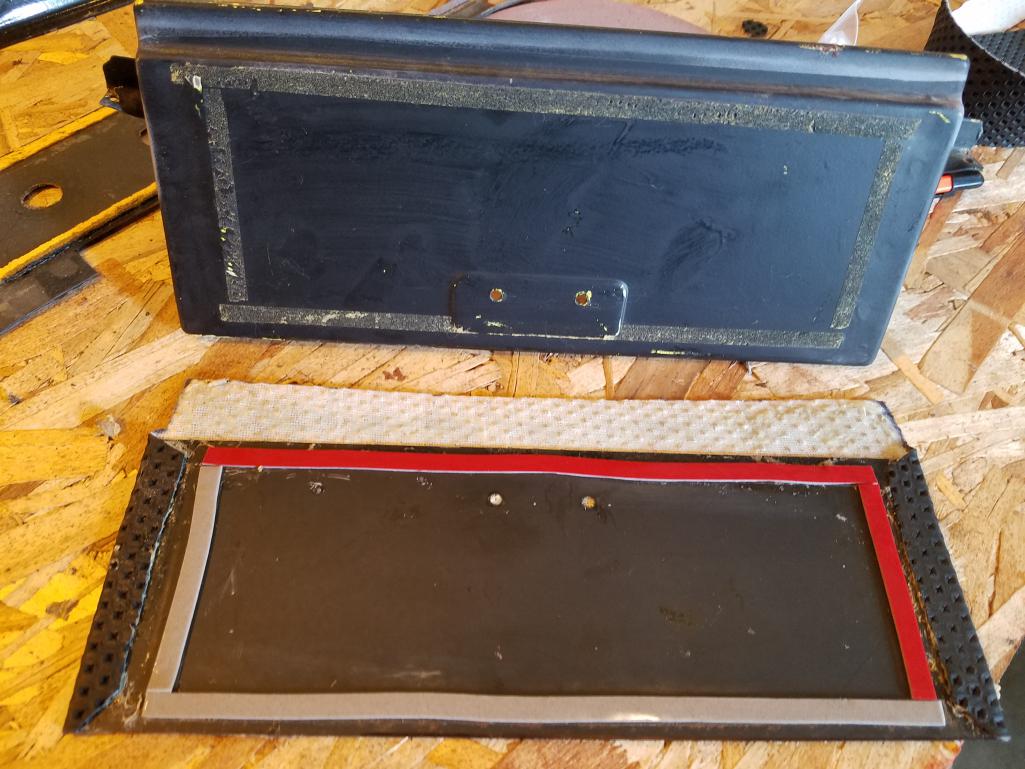
Posted by: Matty900 Aug 23 2017, 10:27 PM
Wrapped the vinyl around the base of the door like the Factory did and clamped it to let it set up for the night
Attached thumbnail(s)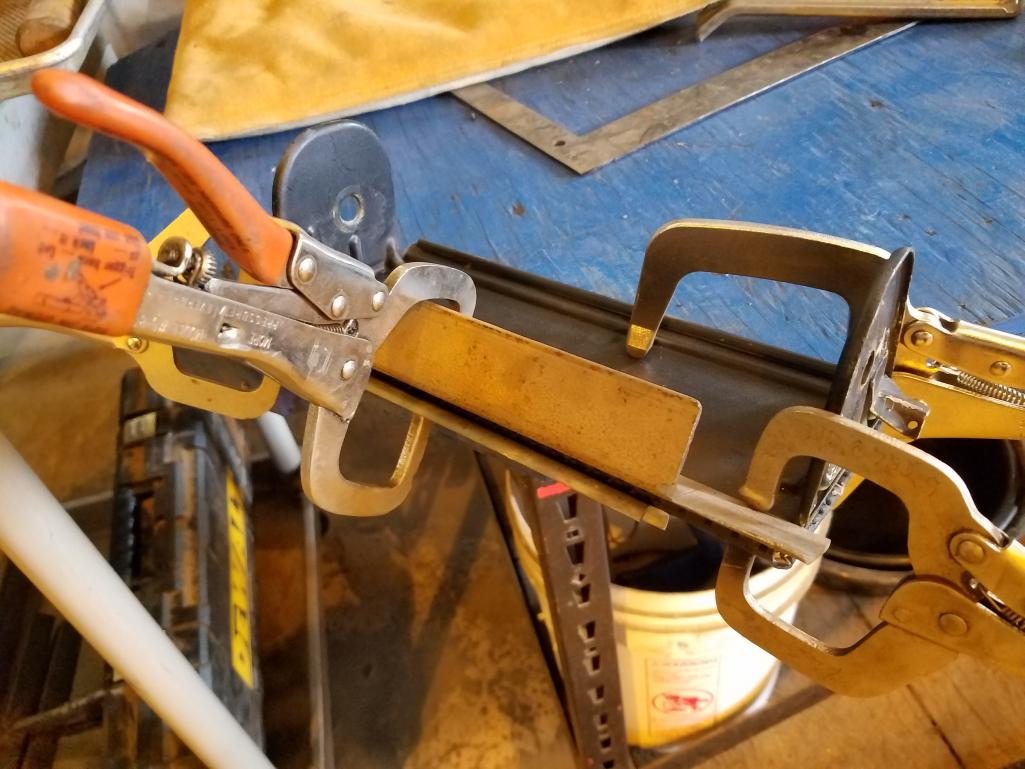
Posted by: Matty900 Aug 23 2017, 10:29 PM
Cleaned up the heater control lever and got it put back together I'm ready to go in
Attached thumbnail(s)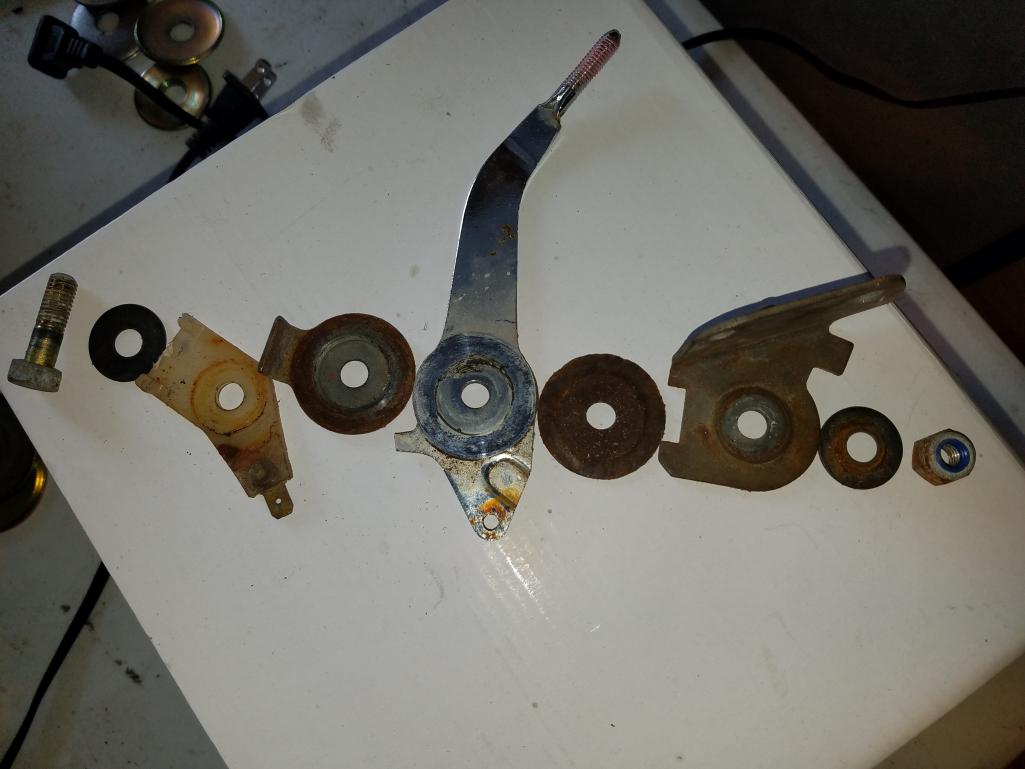
Posted by: Matty900 Aug 23 2017, 10:32 PM
Hope to get the hand throttle, heater control, linkage and wiring harness into the tunnel tomorrow.
Attached thumbnail(s)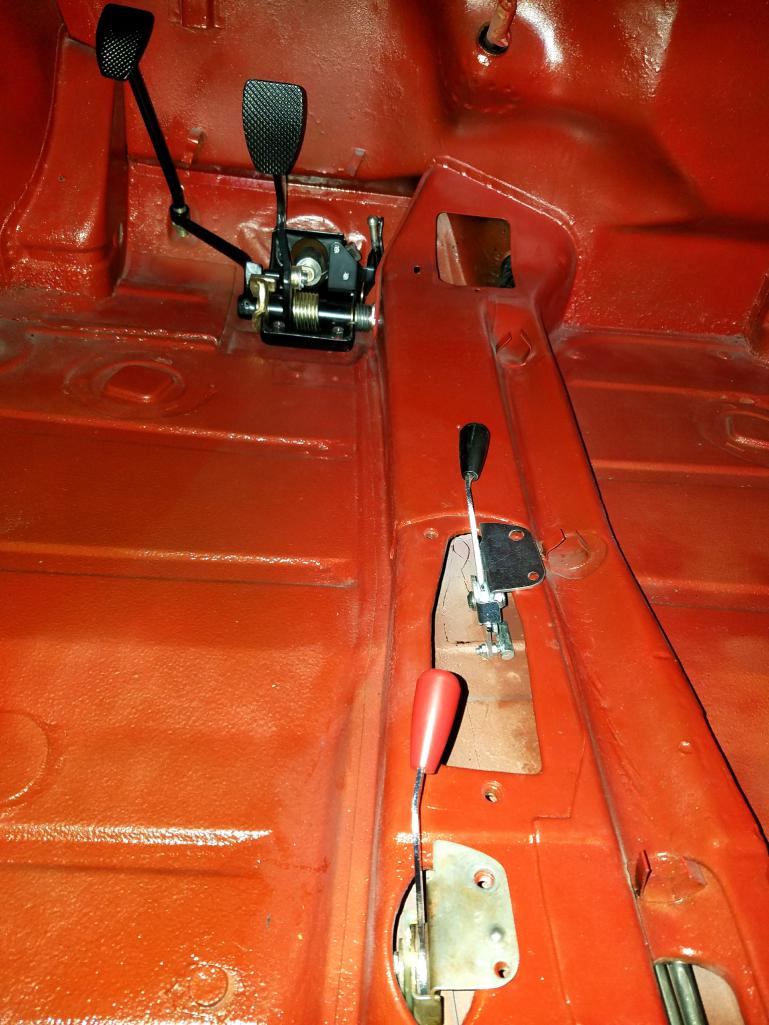
Posted by: Matty900 Aug 23 2017, 10:36 PM
Got the vent hose and the hose from the passenger side long to the mixing box installed. Had to get the mixing boxes and the interior vents screwed back in after painting the interior.
Attached thumbnail(s)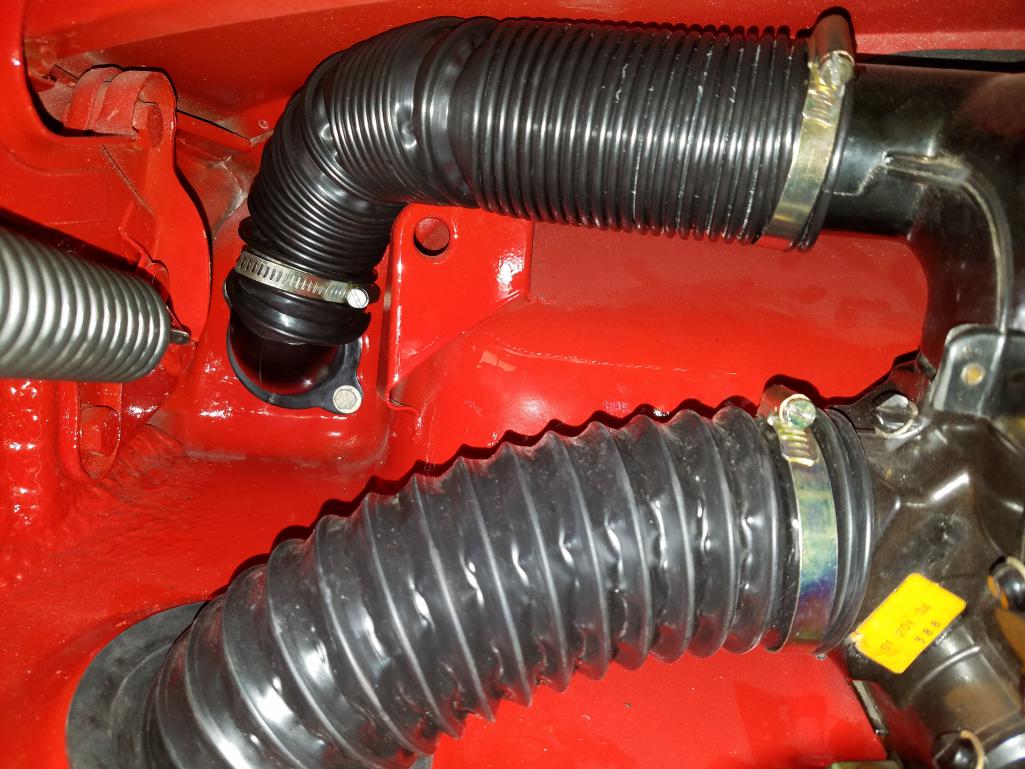
Posted by: Matty900 Aug 23 2017, 10:39 PM
On the drivers side I mocked up and alternative hose that we sell too, to try and figure out what one I like better. What do you think?
Attached thumbnail(s)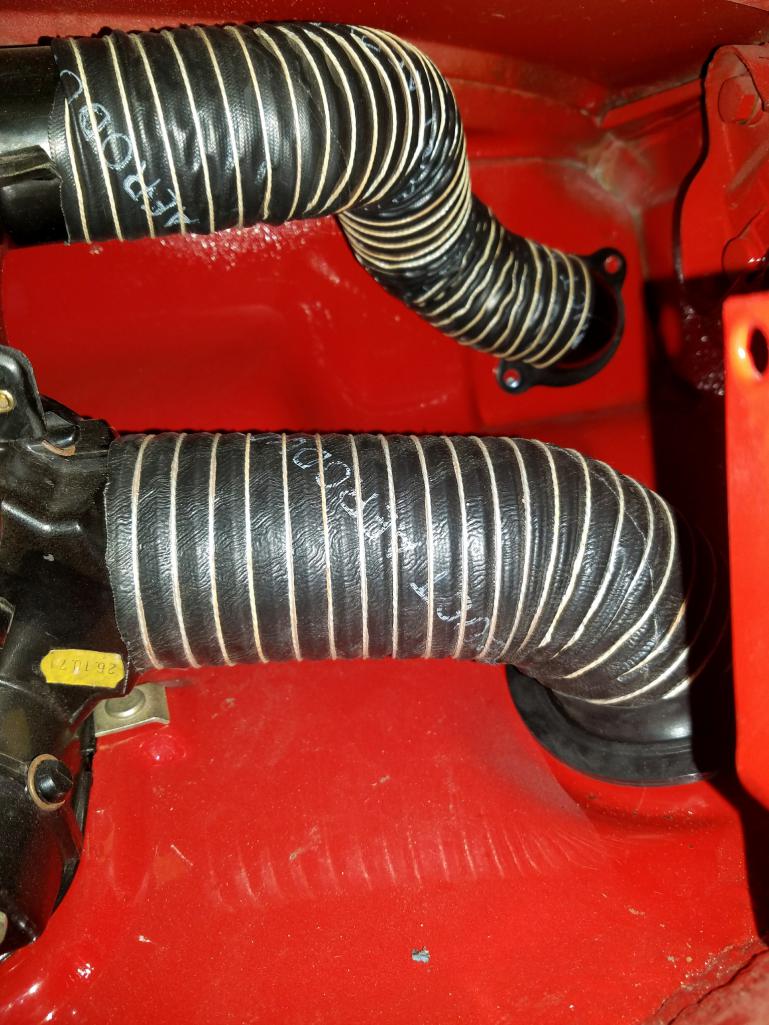
Posted by: Matty900 Aug 25 2017, 12:46 AM
Got the wiring harness finished today
Attached thumbnail(s)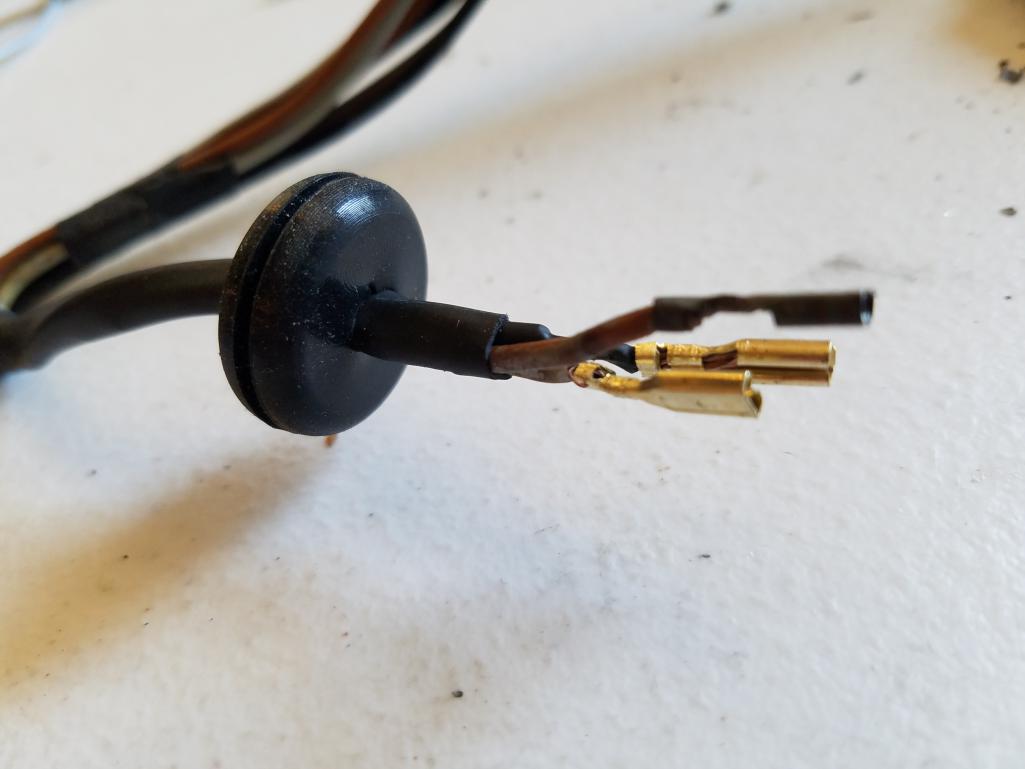
Posted by: Matty900 Aug 25 2017, 01:05 AM
Got the harness fished in to the front trunk (again)
Attached thumbnail(s)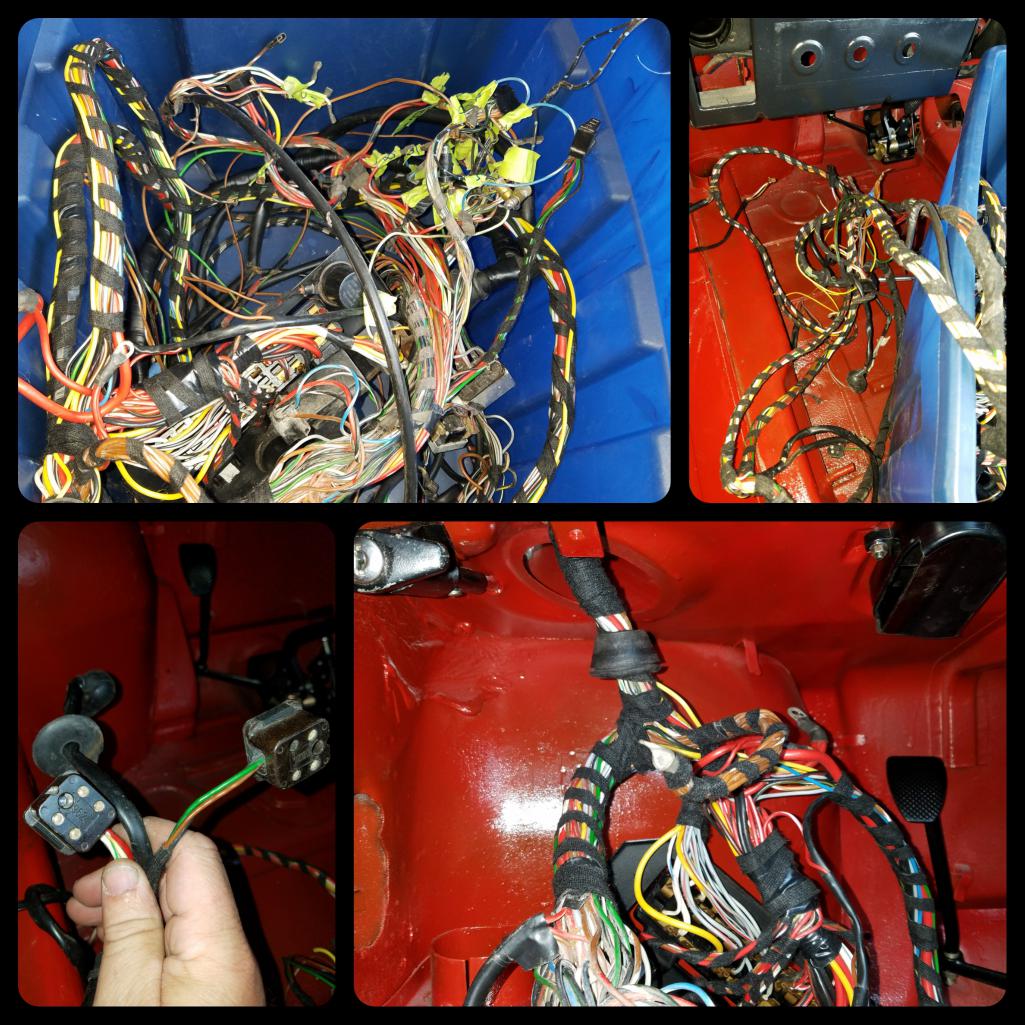
Posted by: Matty900 Aug 25 2017, 01:13 AM
Got the hand throttle figured out and will be completing the installation tomorrow.
Attached thumbnail(s)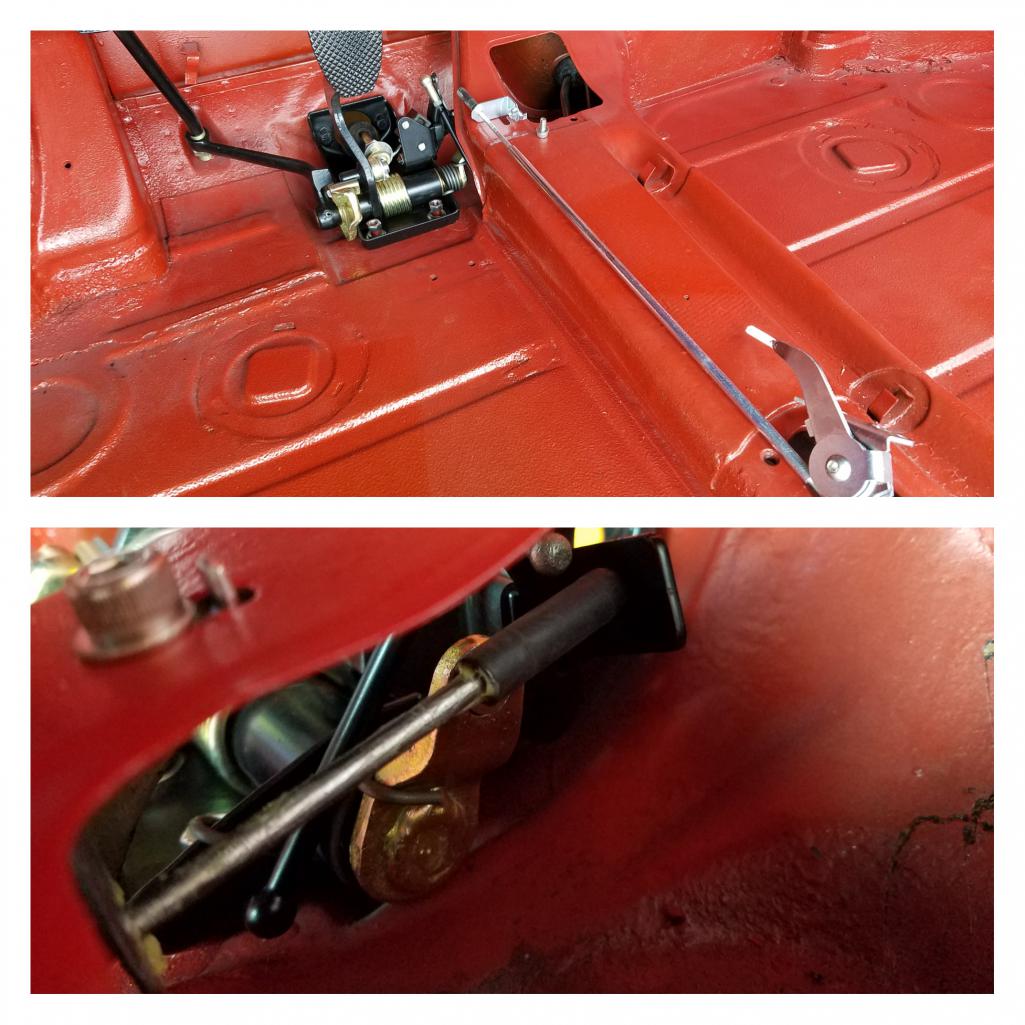
Posted by: Matty900 Aug 25 2017, 01:18 AM
Got the shifter out of the 73 to go with the hand throttle and the restored sideshift linkage that I got from Bruce stone.
Attached thumbnail(s)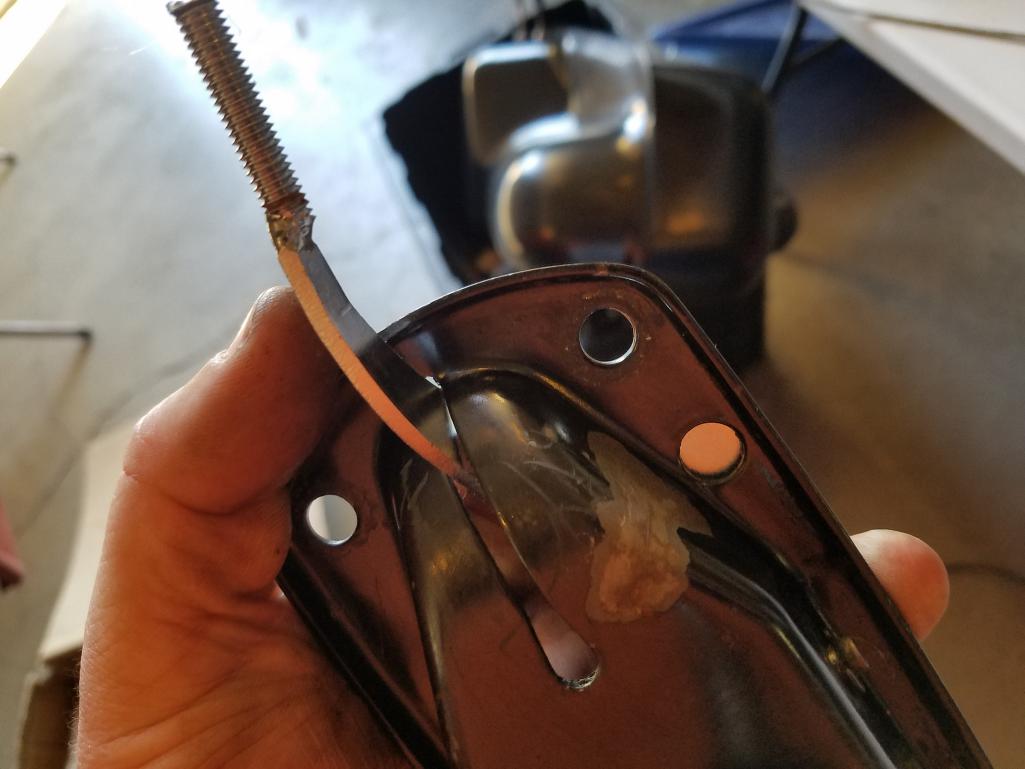
Posted by: Jamie Aug 25 2017, 01:19 PM
Aside from presenting an epic rebuild, I compliment you for the excellent photography that has brought this work up close and well documented. As a retired photographer, I'm curious about the camera equipment used to make these images? You were often working in some very confined spaces!
Posted by: 76-914 Aug 25 2017, 04:11 PM
On the drivers side I mocked up and alternative hose that we sell too, to try and figure out what one I like better. What do you think?
I ike the Aeroduct. It's a better product but it isn't original in appearance like the first.
Posted by: Matty900 Aug 25 2017, 10:39 PM
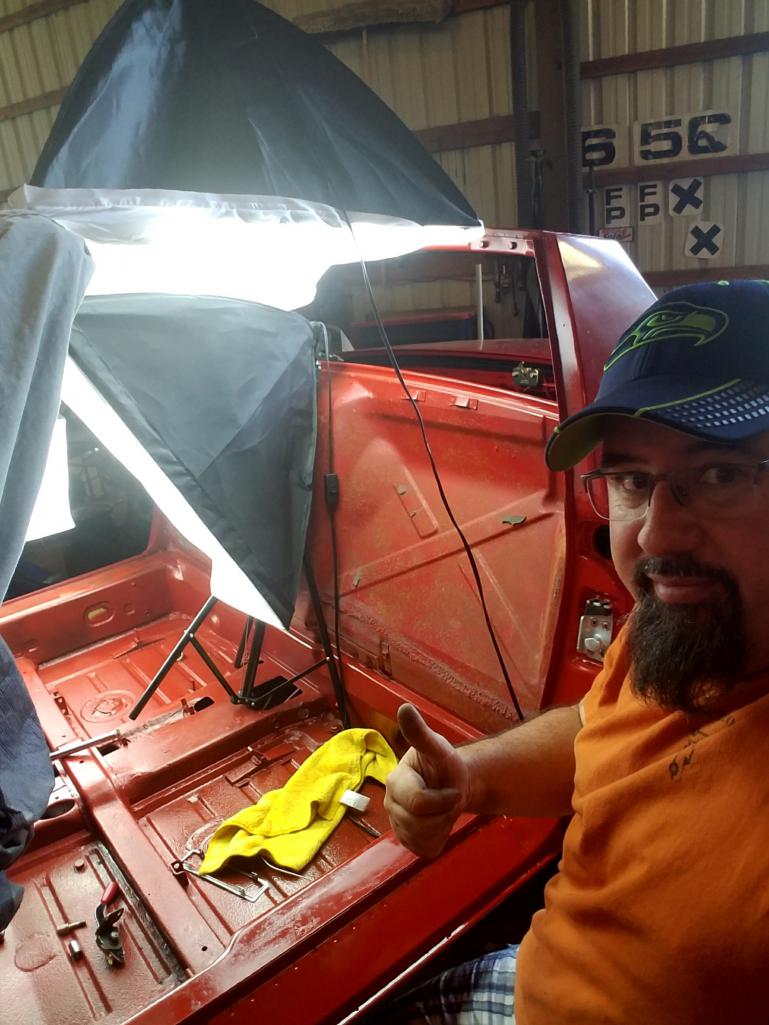
Aside from presenting an epic rebuild, I compliment you for the excellent photography that has brought this work up close and well documented. As a retired photographer, I'm curious about the camera equipment used to make these images? You were often working in some very confined spaces!
Thank you
Believe it or not, these are just on my phone. Although I did bring some lighting in because it was hard to see some of the stuff and I'm trying to take pictures of our parts and installation information to eventually make it on our website (914Rubber.con)
Attached thumbnail(s)
Posted by: Matty900 Aug 25 2017, 10:43 PM
On the drivers side I mocked up and alternative hose that we sell too, to try and figure out what one I like better. What do you think?
I ike the Aeroduct. It's a better product but it isn't original in appearance like the first.
They are both nice, but I will be going with the Areoduct hose after I get the wiring harness back in.
Posted by: Matty900 Aug 25 2017, 10:51 PM
Another long day today. We (Cary) got the the fuel pump inspection door cut out and got the panel blasted, polished and painted. I ran the wires the the harness already so now I just need to work in the ground back to the main grounding post buy the fuse box.
Attached thumbnail(s)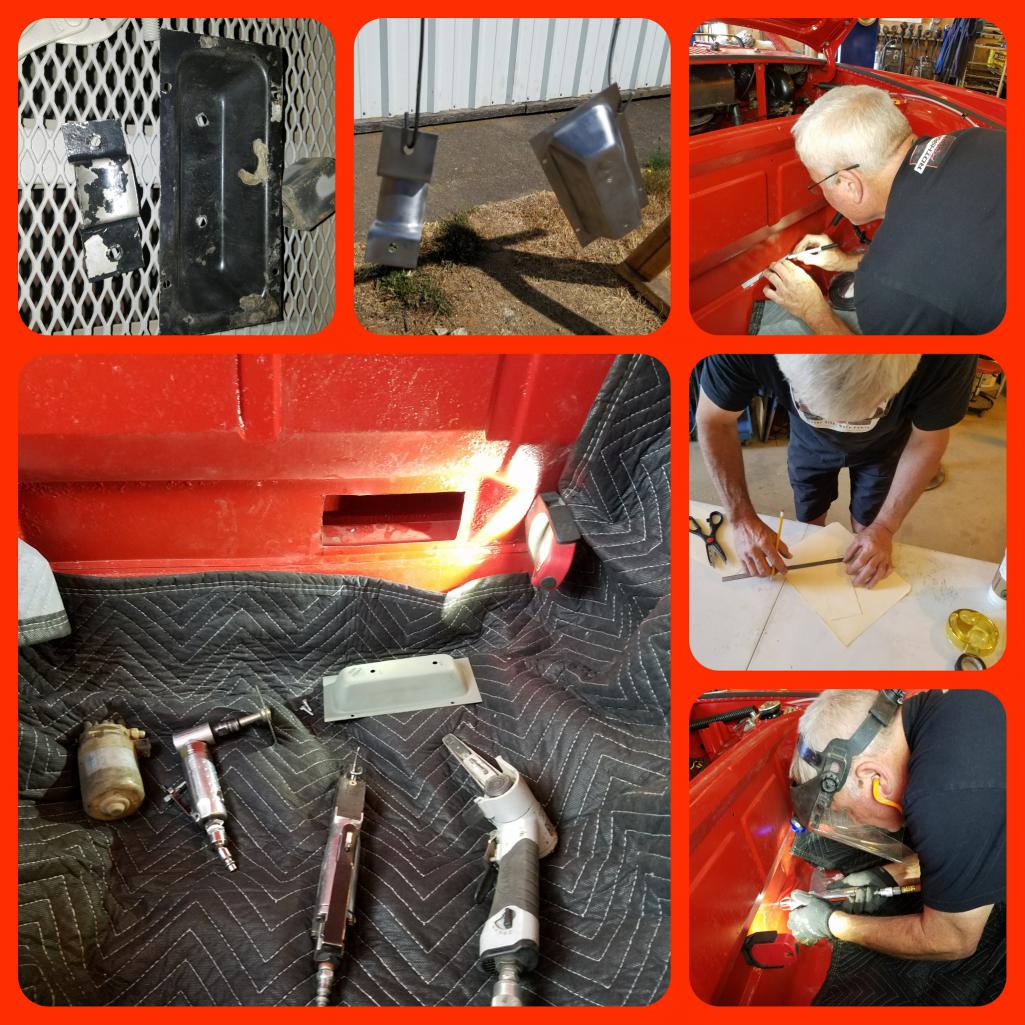
Posted by: Matty900 Aug 25 2017, 10:55 PM
Super-in-law was busy cutting up another car, but posed for a photo. I told him we needed one for a t-shirt that we can put him in a cape. "Super-in-law... Jack of all trades"
He is my hero
Attached thumbnail(s)
Posted by: Matty900 Aug 25 2017, 10:56 PM
This is the rebuilt steering rack that I neglected to get a picture of earlier
Attached thumbnail(s)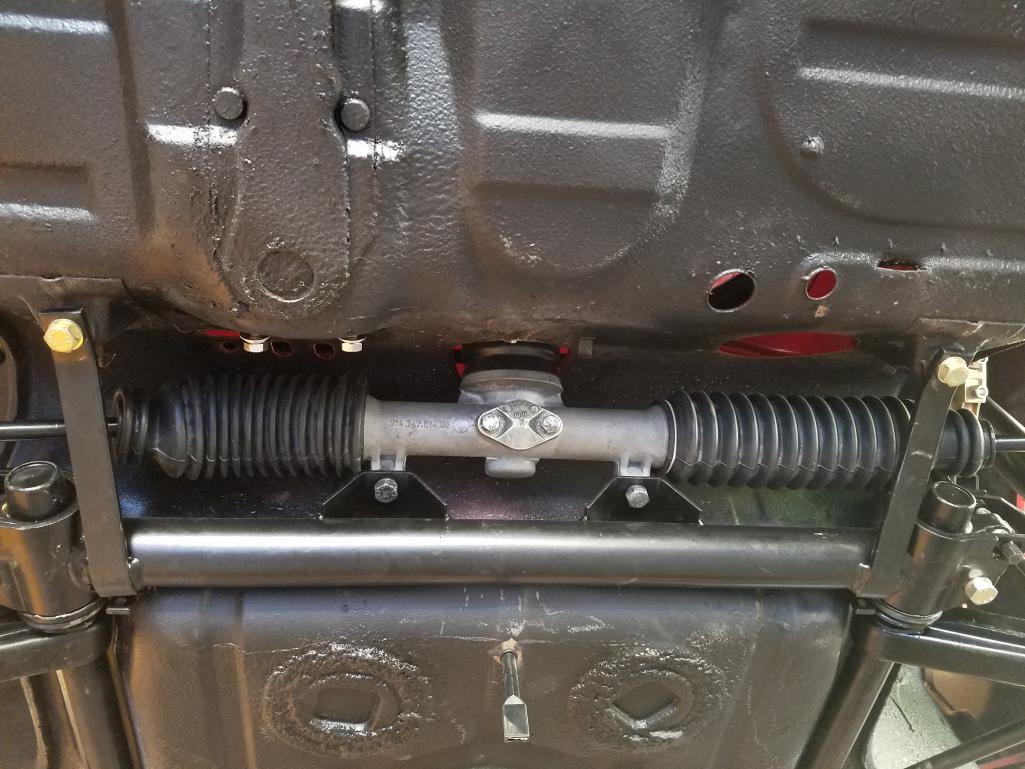
Posted by: Matty900 Aug 25 2017, 11:02 PM
Got the new LED lights in and took plenty of pictures for installation instructions.
Attached thumbnail(s)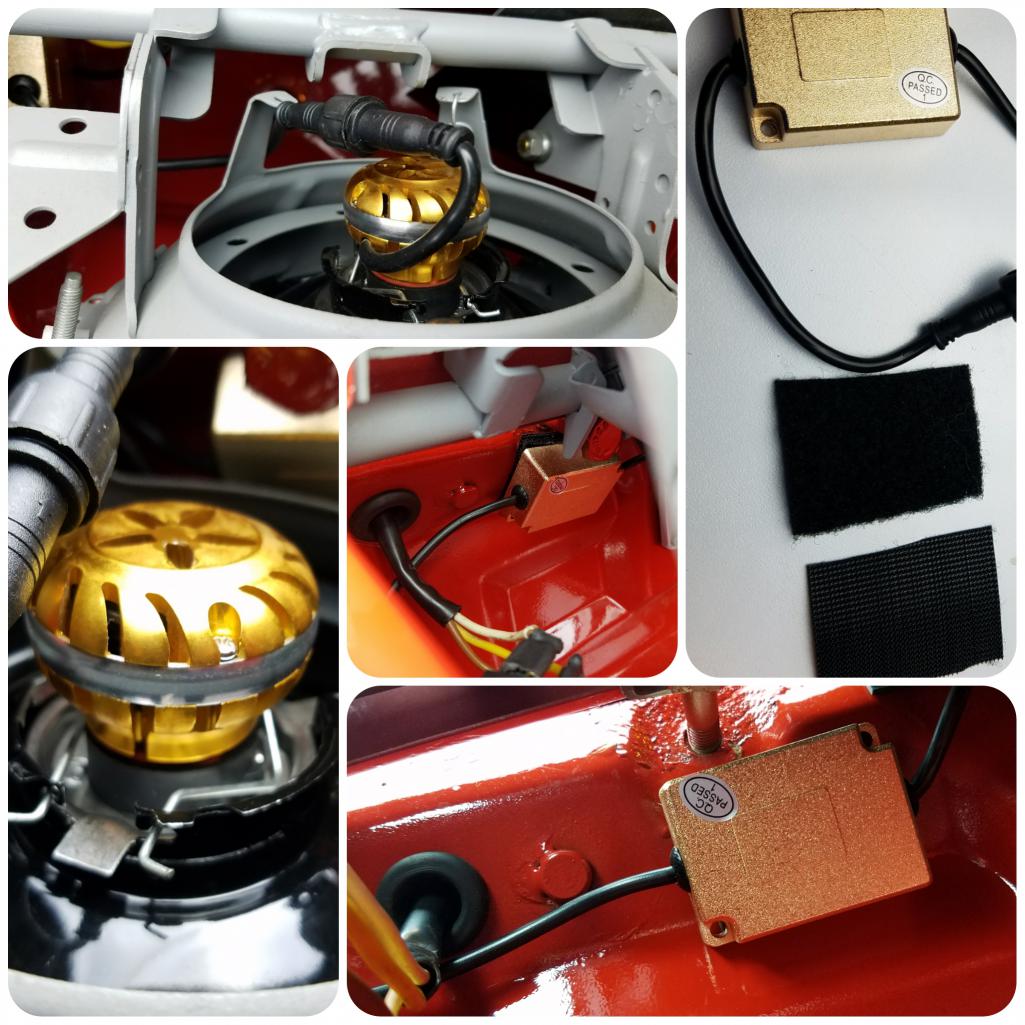
Posted by: Matty900 Aug 25 2017, 11:06 PM
Got the Dremel tool with the wand out and clean the paint off of all of the ground Post terminals
Attached thumbnail(s)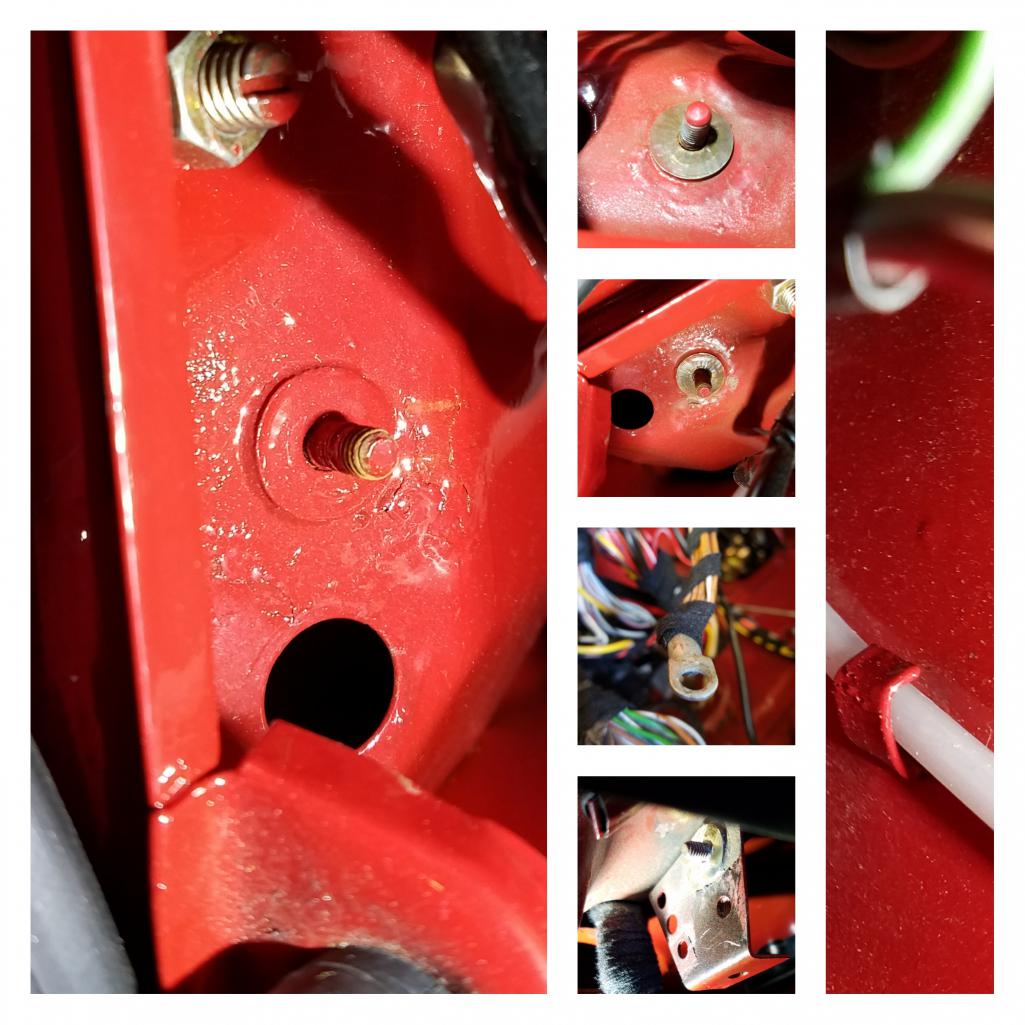
Posted by: Matty900 Aug 25 2017, 11:12 PM
Got the wires in to new boots for one side. What a pain in the assembly! I now understand why we started making pre-wired boots. Way easier to cut out the old dad wires and Boots and just add fresh new ones.. but after working so hard to preserve this harness I'll probably do it the hard way on the other side too.
Attached thumbnail(s)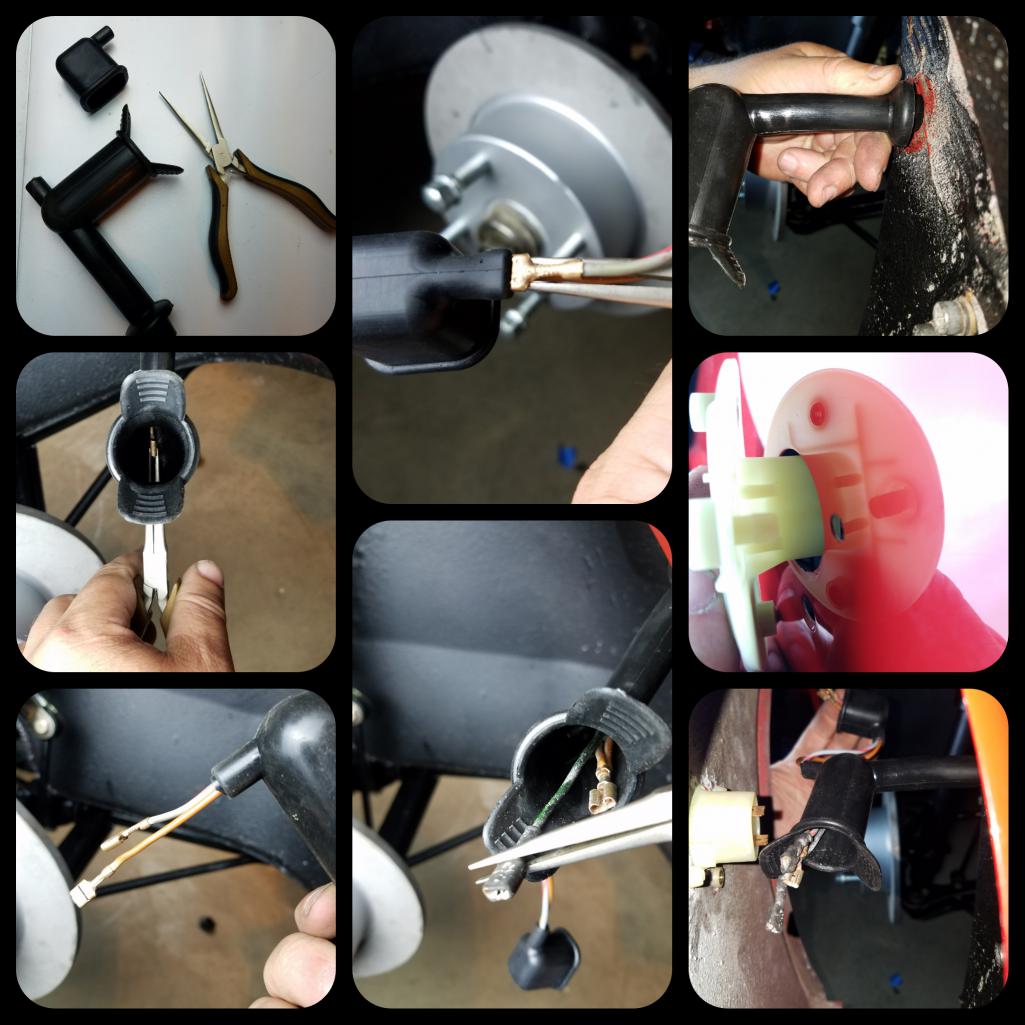
Posted by: Matty900 Aug 25 2017, 11:14 PM
Cary got these on today too
Attached thumbnail(s)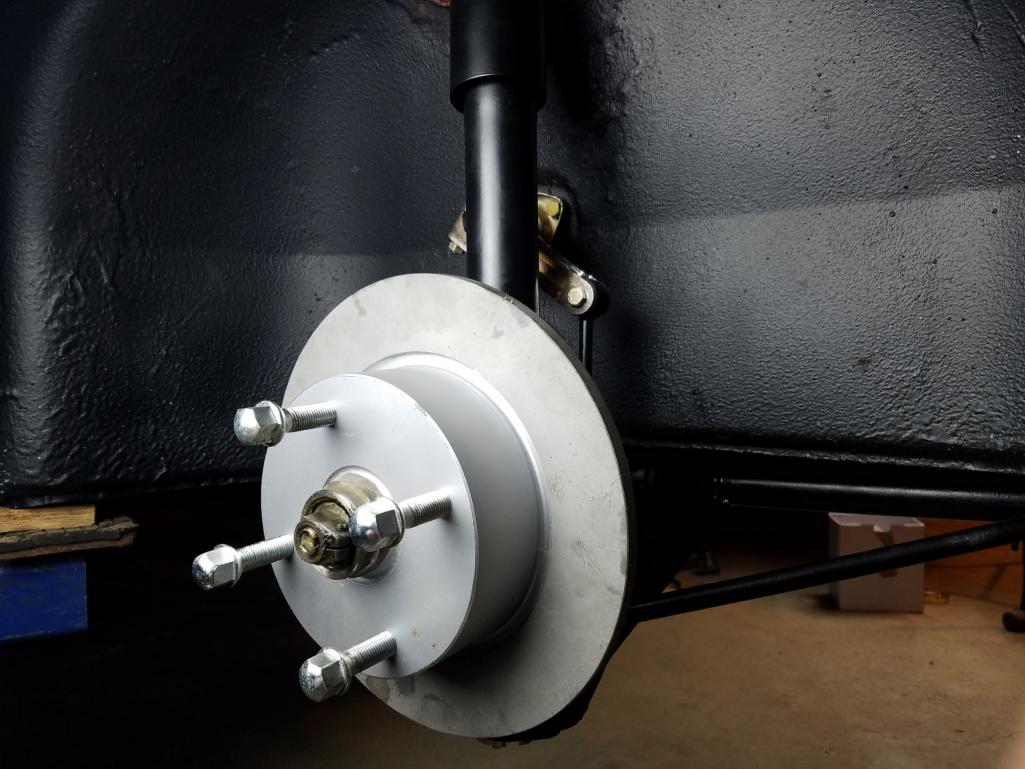
Posted by: Matty900 Aug 27 2017, 01:57 AM
Got all the turn signals wired and installed with new boots and seals
Attached thumbnail(s)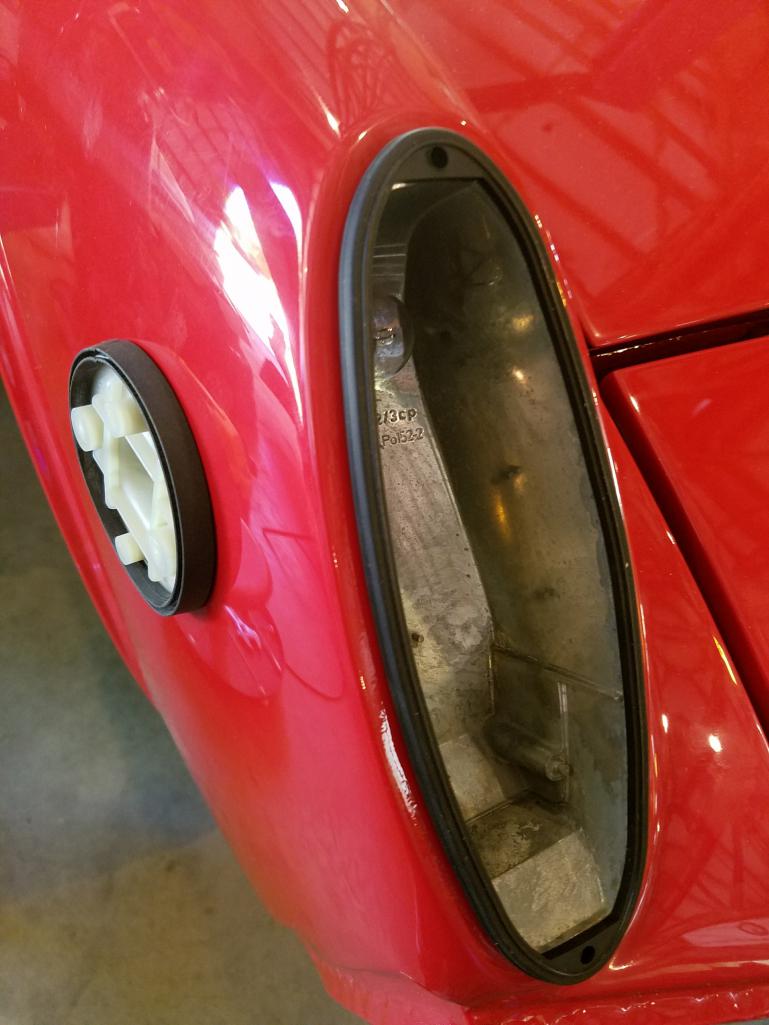
Posted by: Matty900 Aug 27 2017, 01:58 AM
Now to choose what lenses to use
Attached thumbnail(s)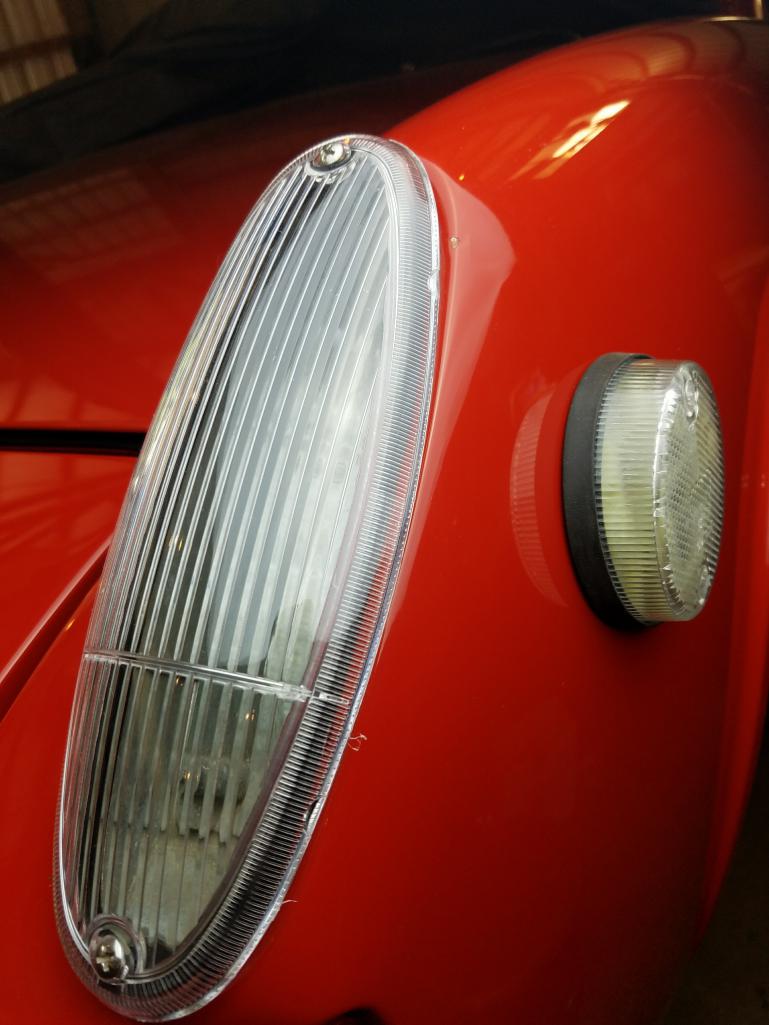
Posted by: Matty900 Aug 27 2017, 01:59 AM
European?
Attached thumbnail(s)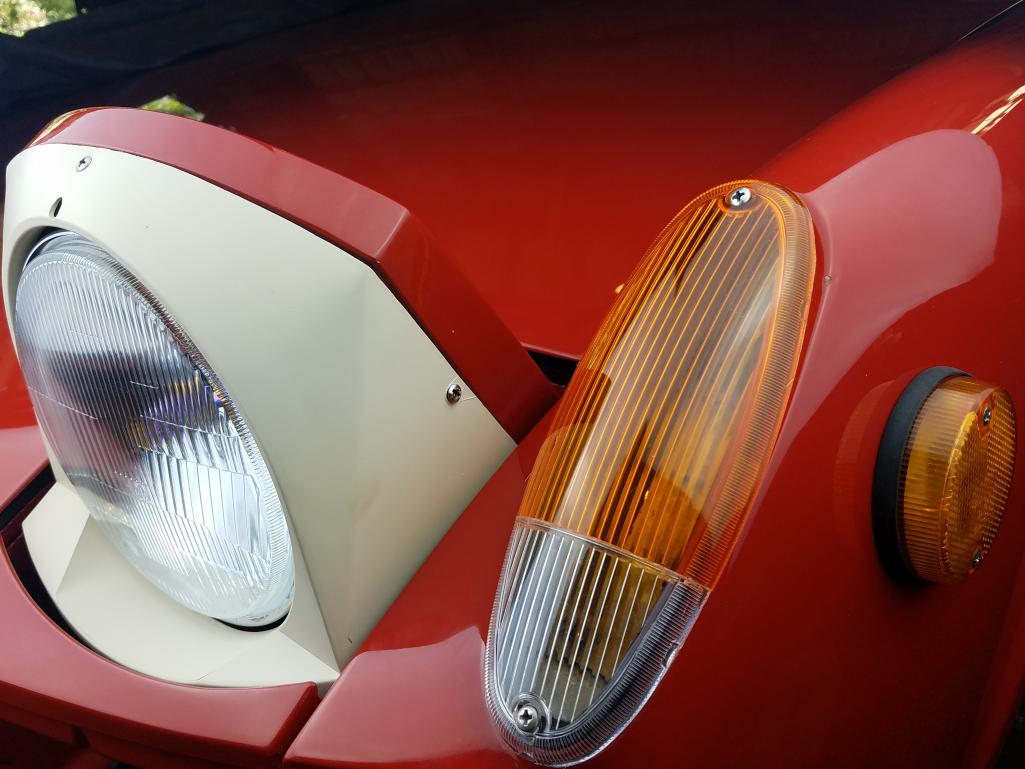
Posted by: Matty900 Aug 27 2017, 02:01 AM
U.S. spec
Attached thumbnail(s)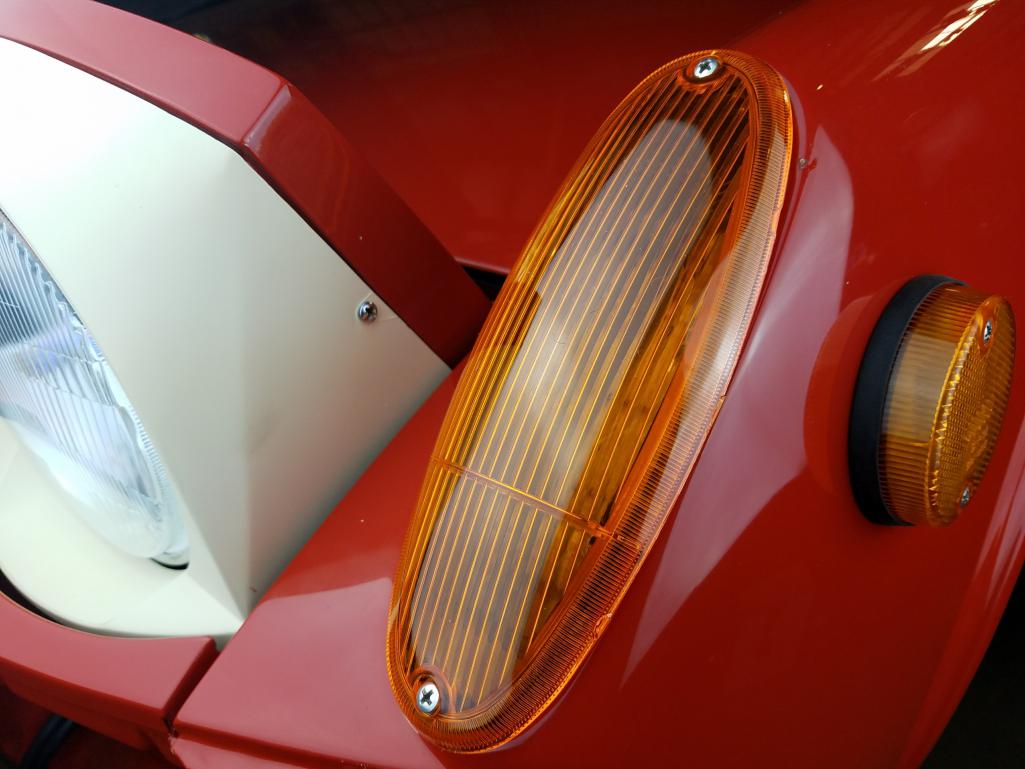
Posted by: Matty900 Aug 27 2017, 02:17 AM
Got the parts out to put the fog lights back on the car and realized I hadn't taken care of the front of them around the lenses
Attached thumbnail(s)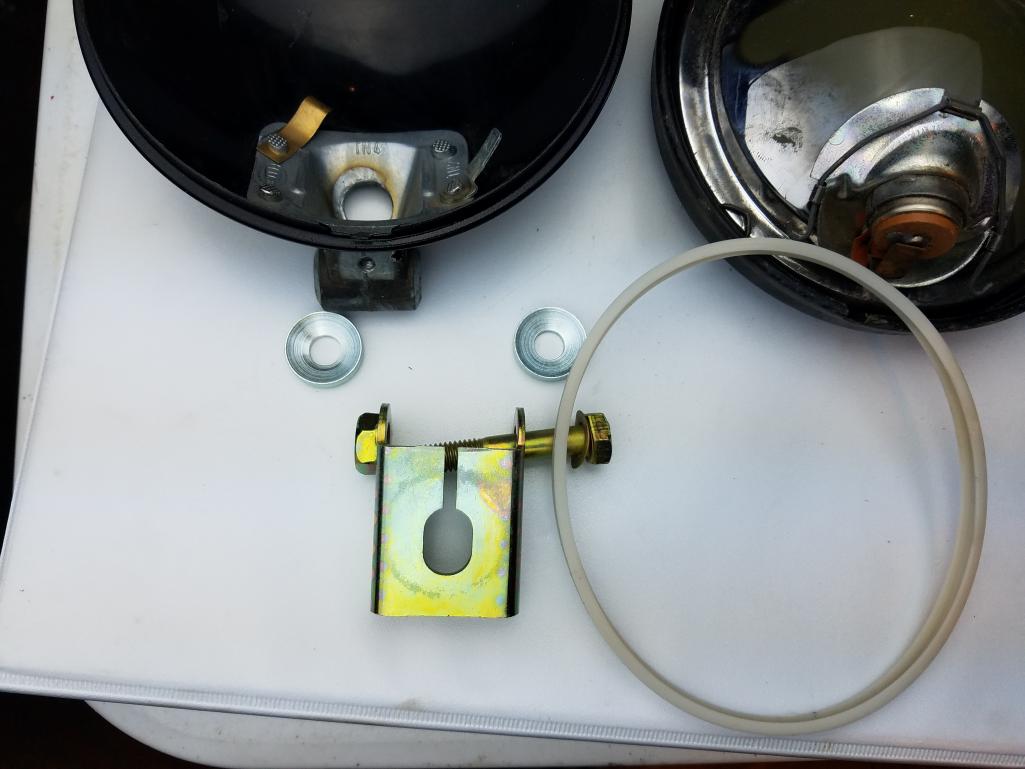
Posted by: Matty900 Aug 27 2017, 02:20 AM
Cleaned it up and realized I needed to repaint it I will be adding different lenses and lens protectors
Attached thumbnail(s)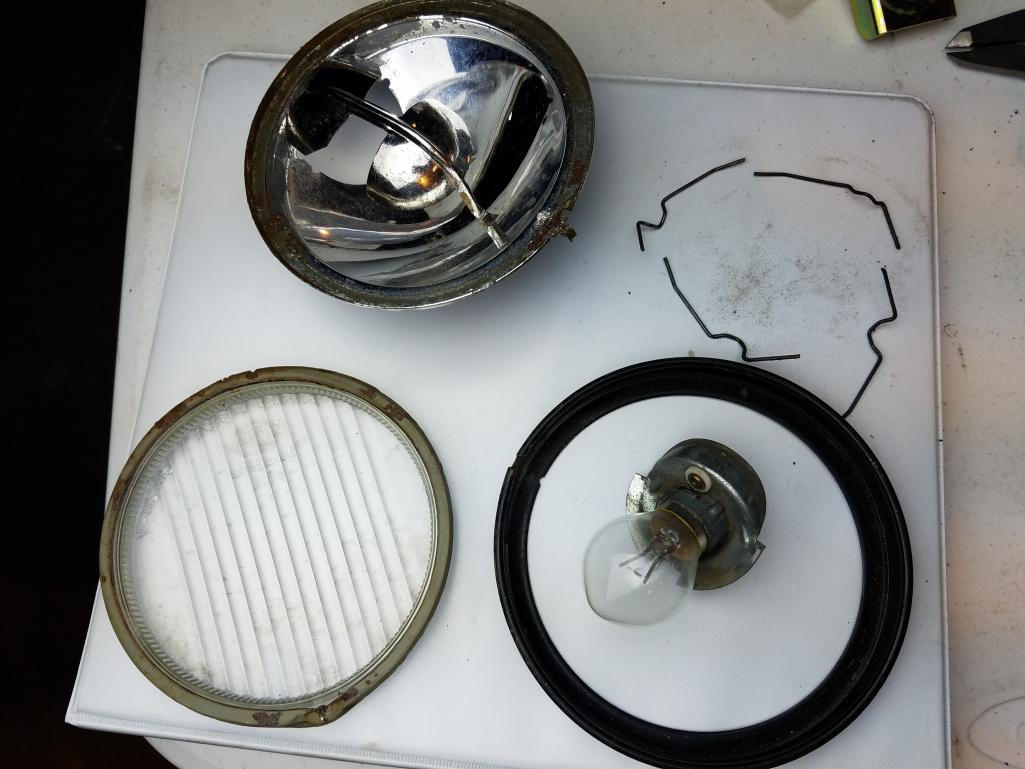
Posted by: Matty900 Aug 27 2017, 02:21 AM
Look what was under the paint
Attached thumbnail(s)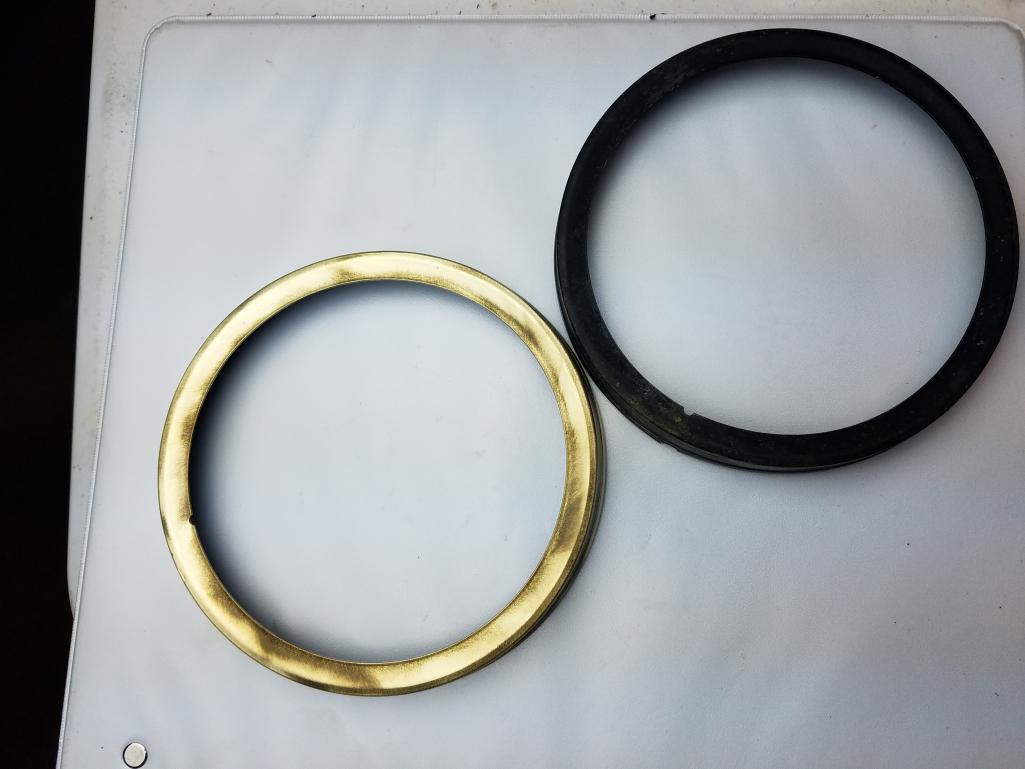
Posted by: Matty900 Aug 27 2017, 02:23 AM
Added the lens protector to the fog light lens
Attached thumbnail(s)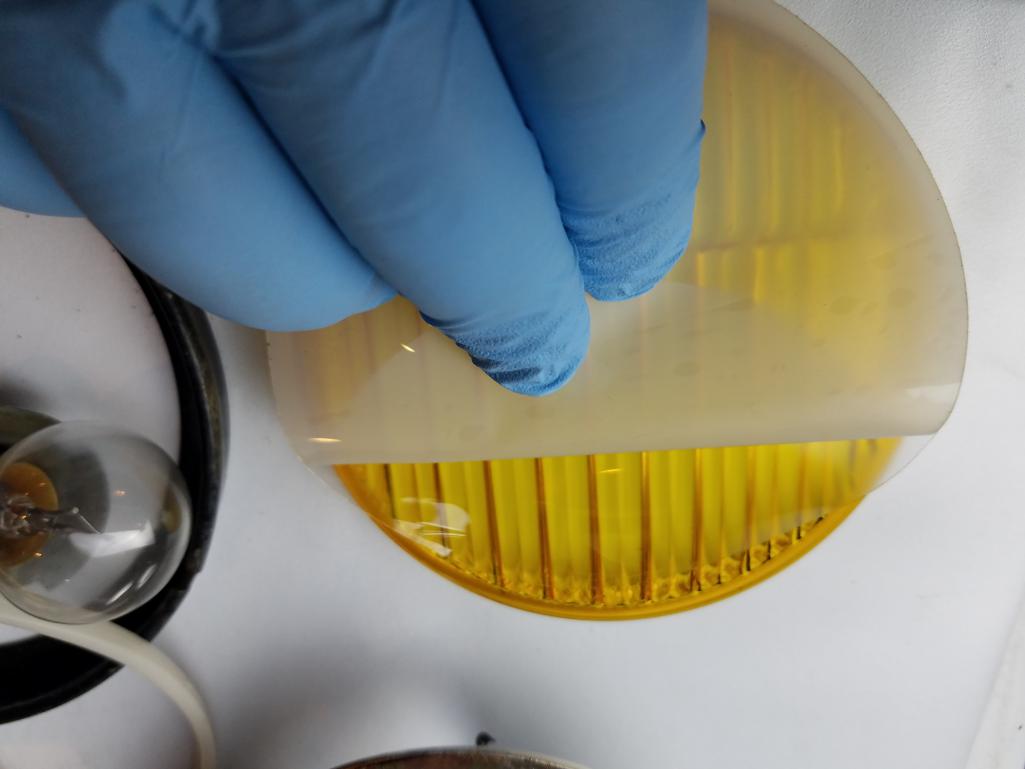
Posted by: Matty900 Aug 27 2017, 02:33 AM
Wiring harness it is all back in and completely installed in the front trunk
Attached thumbnail(s)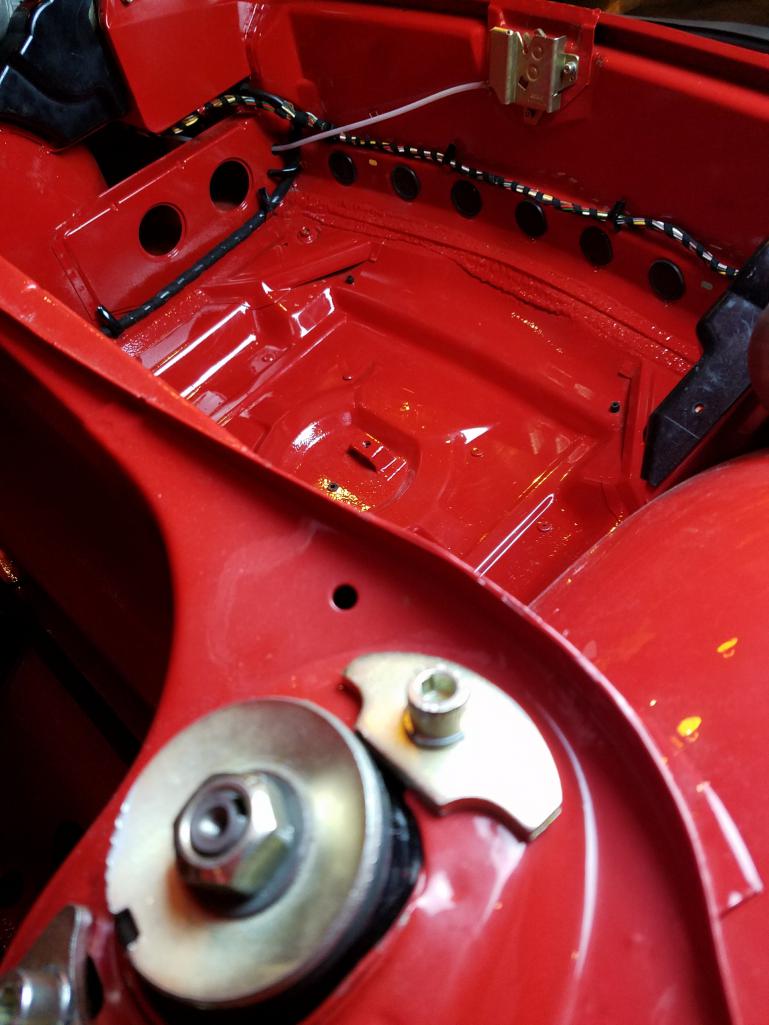
Posted by: Matty900 Aug 27 2017, 02:39 AM
Changed out the hoses to the ones of the using since I had them out for getting the wiring back in
Attached thumbnail(s)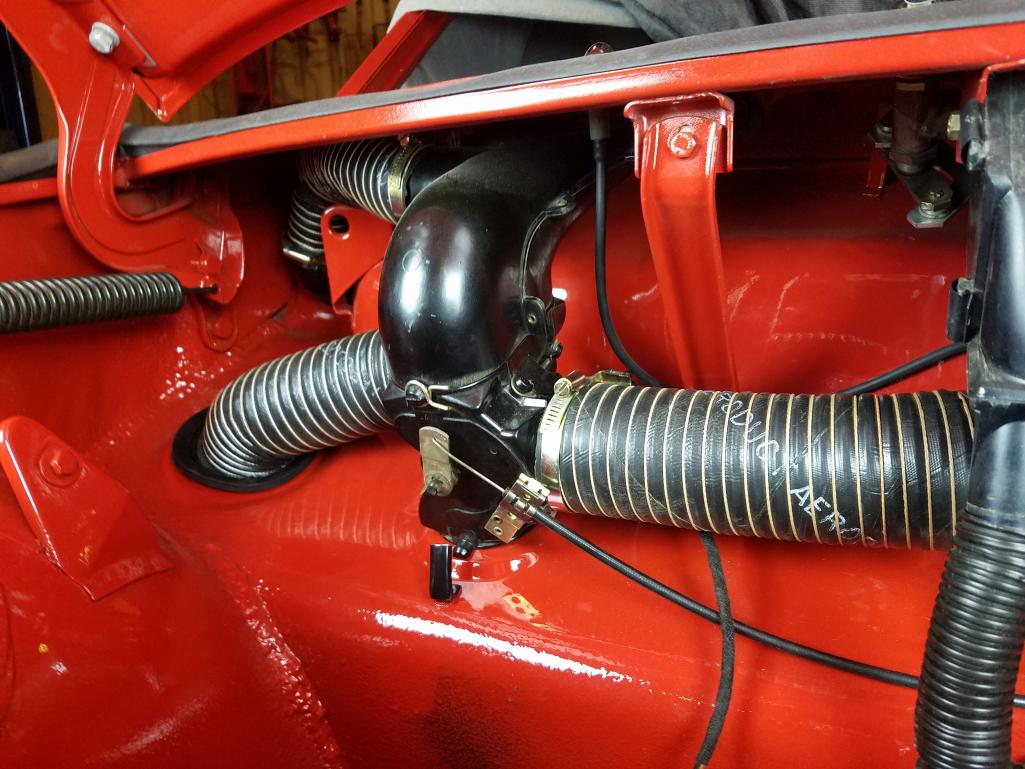
Posted by: defianty Aug 27 2017, 02:44 AM
Looking great!
Posted by: Matty900 Aug 27 2017, 03:26 AM
Looking great!
Thank you
Posted by: tygaboy Aug 27 2017, 07:38 AM
Re: the choice for turn signal lenses:
First place: European. I REALLY like the way the clear lower section echos the white of the headlight surround.
Runner Up: US spec: It almost disappears, given the color of your car. Very clean.
I've never cared for the "all clear" as, to me, it looks too modern and you lose the visual cue of how the lens carries the fender curve over to the bumper top.
But that's just me.
Matt, you're going to have one of THE cleanest cars out there. You have certainly earned the right to be very proud of your efforts!
Good on you and thanks for all the detailed pics.
(Other than the fact that now I'm going to have to up my game on all the details of my build... )
Posted by: tygaboy Aug 27 2017, 07:46 AM
Super-in-law was busy cutting up another car, but posed for a photo. I told him we needed one for a t-shirt that we can put him in a cape. "Super-in-law... Jack of all trades"
He is my hero
I've been after a Super In-Law t-shirt since I first learned about him!
And I agree, that right there would be a PERFECT pic for the shirt!
Suggestion: 914 Rubber needs to use this as the first in a series of "Caption this photo" contests.
The winning submission comment gets used on the t-shirt and the submitter wins a 914 Rubber gift certificate.
Something like:
"You need a patch panel? Hold on, I'll be right back!"
Attached image(s)

Posted by: Matty900 Aug 27 2017, 09:36 AM
He is my hero
[/quote]
I've been after a Super In-Law t-shirt since I first learned about him!
And I agree, that right there would be a PERFECT pic for the shirt!
Suggestion: 914 Rubber needs to use this as the first in a series of "Caption this photo" contests.
The winning submission comment gets used on the t-shirt and the submitter wins a 914 Rubber gift certificate.
Something like:
"You need a patch panel? Hold on, I'll be right back!"
[/quote]
It's funnier when you see what he was doing.
Caption that....and go
Attached thumbnail(s)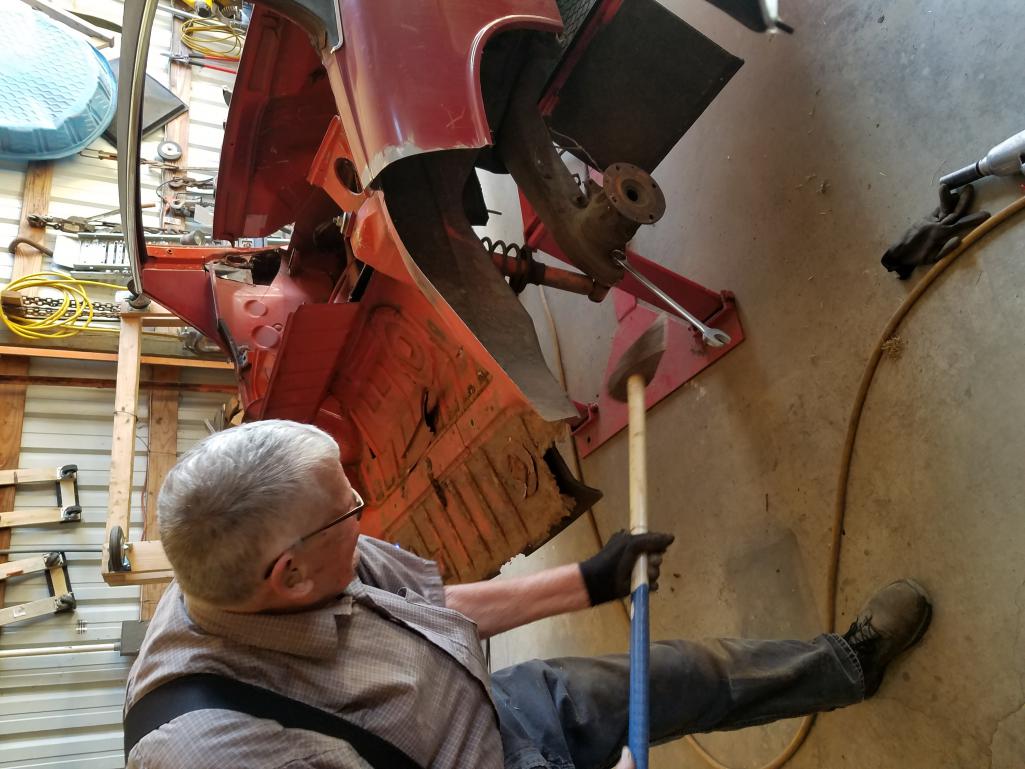
Posted by: mb911 Aug 27 2017, 09:49 AM
Euro for sure. Clear looks good on green and black cars imho.
Looks great..
Posted by: Matty900 Aug 27 2017, 03:47 PM
Some pics from the guy that's building my engine today. Looks like I will need to clean the case up a little bit when I get it back
Attached thumbnail(s)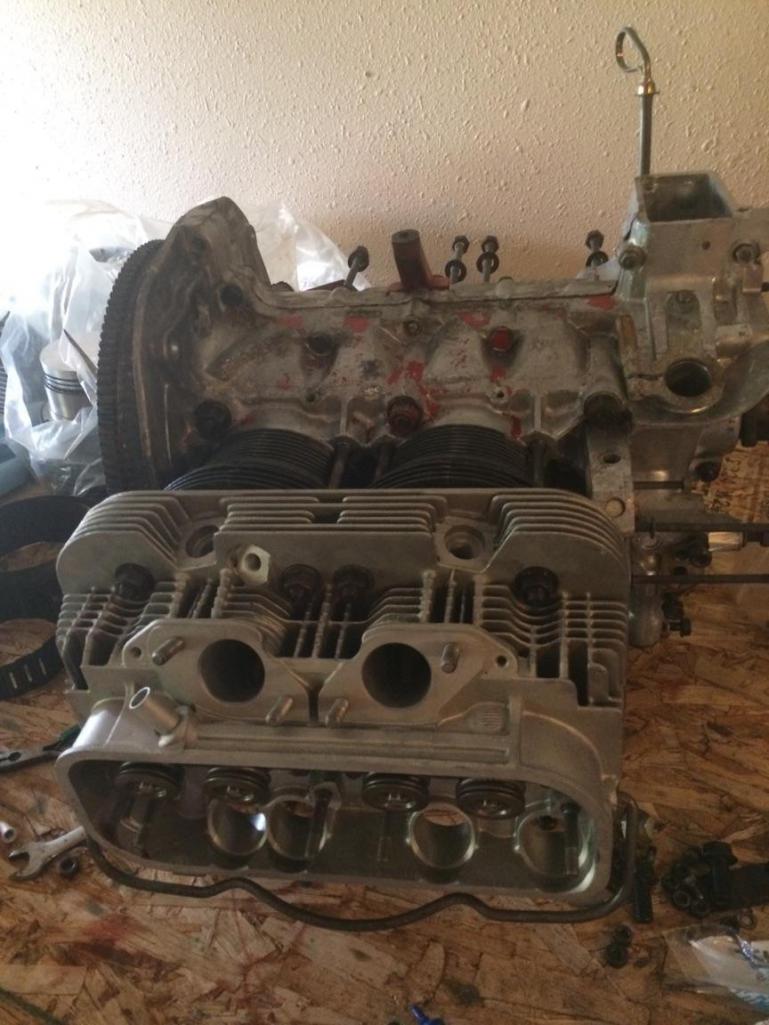
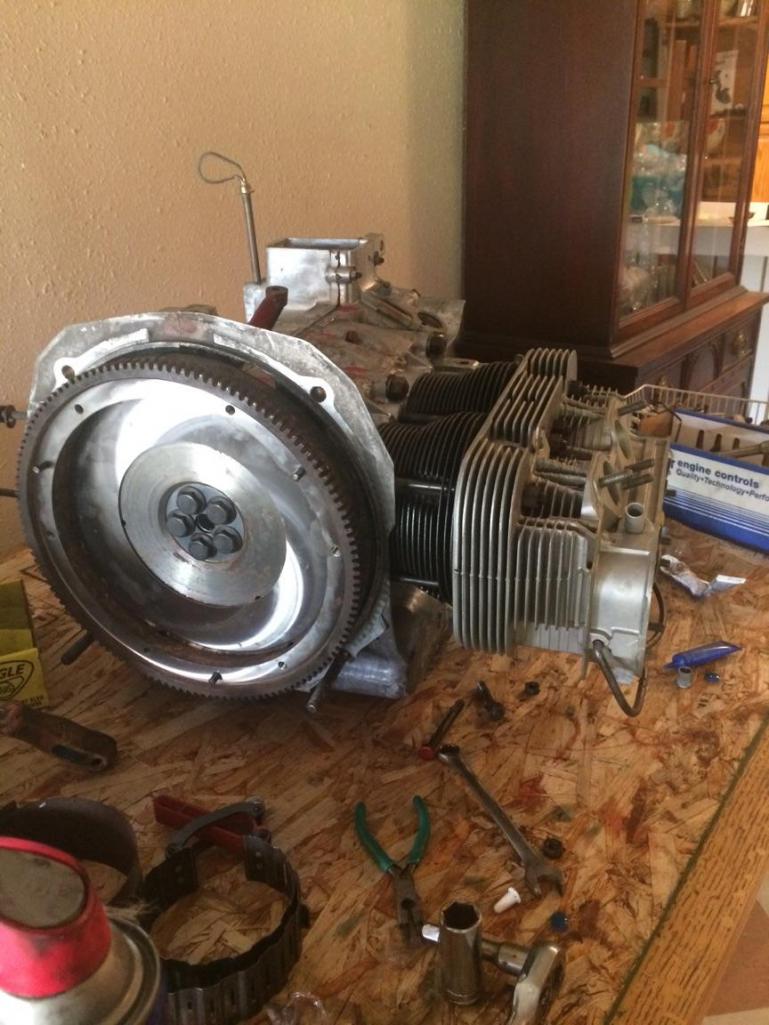
Attached image(s)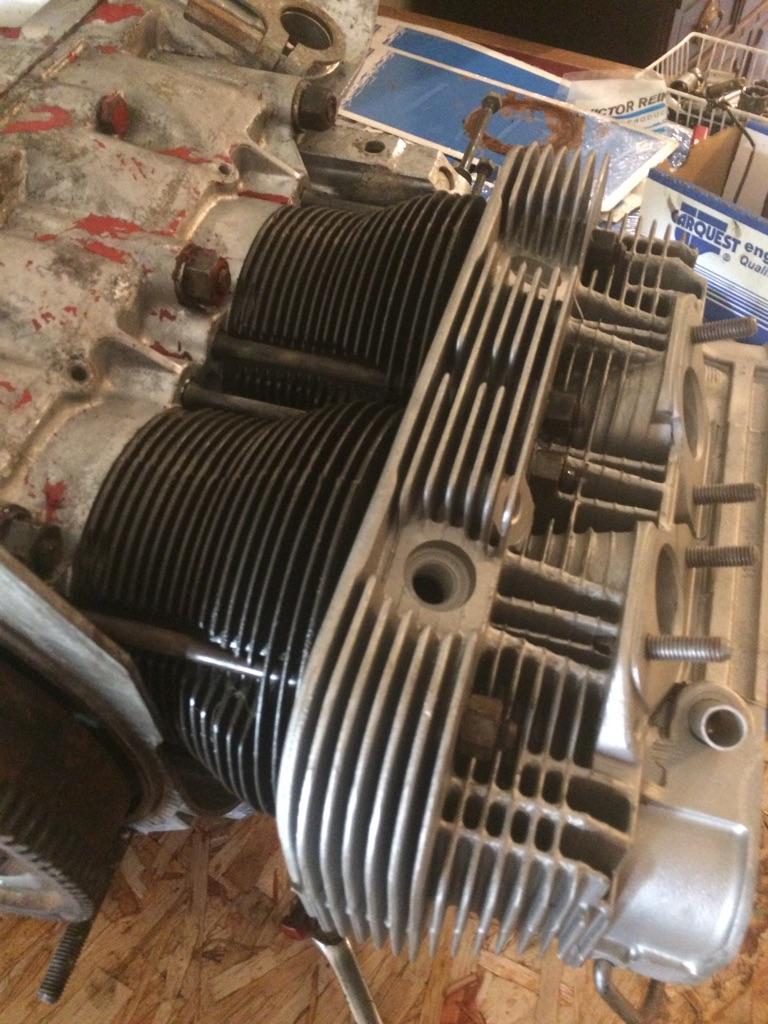
Posted by: Matty900 Aug 27 2017, 04:30 PM
Today's progress on the engine
Attached thumbnail(s)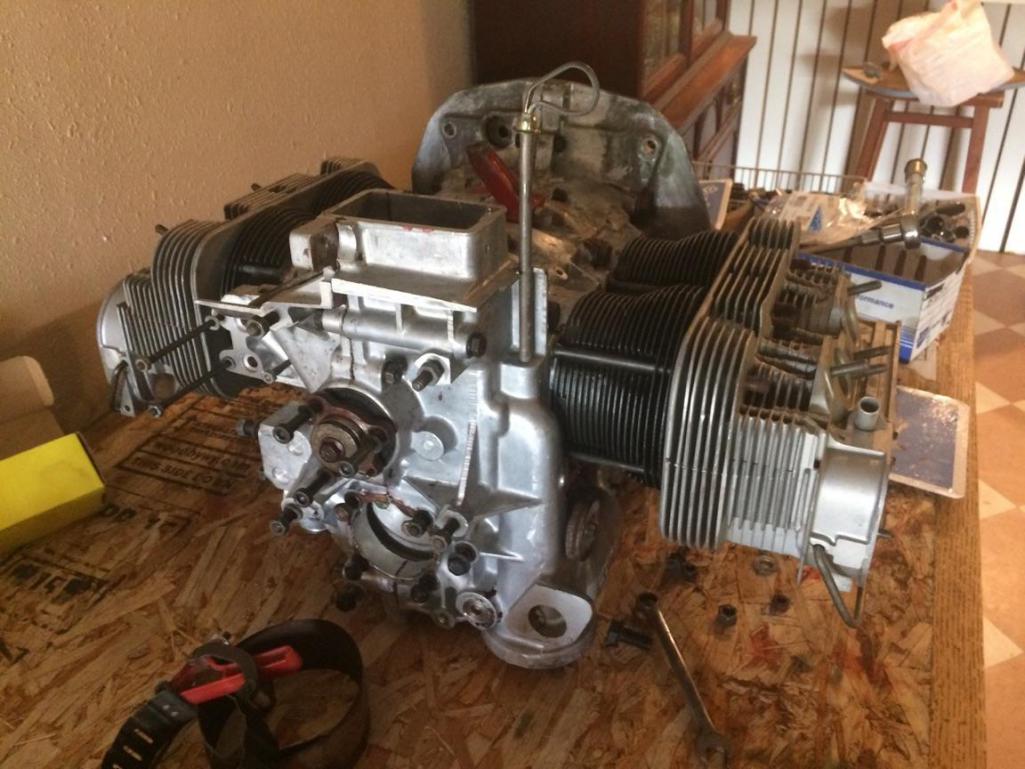
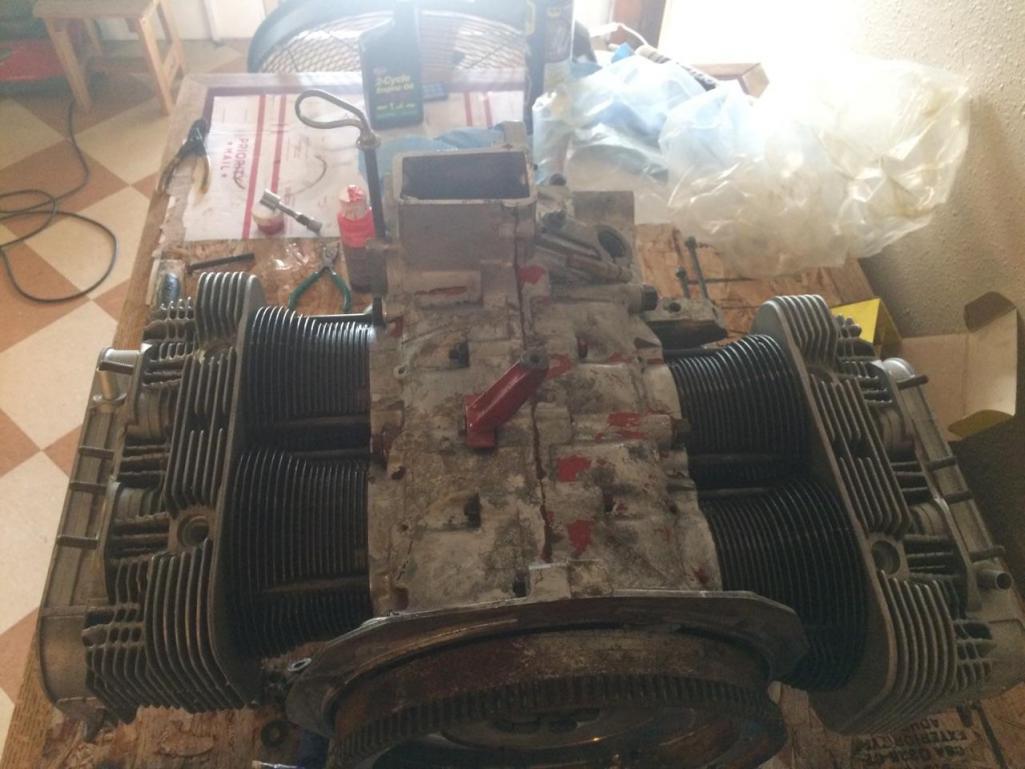
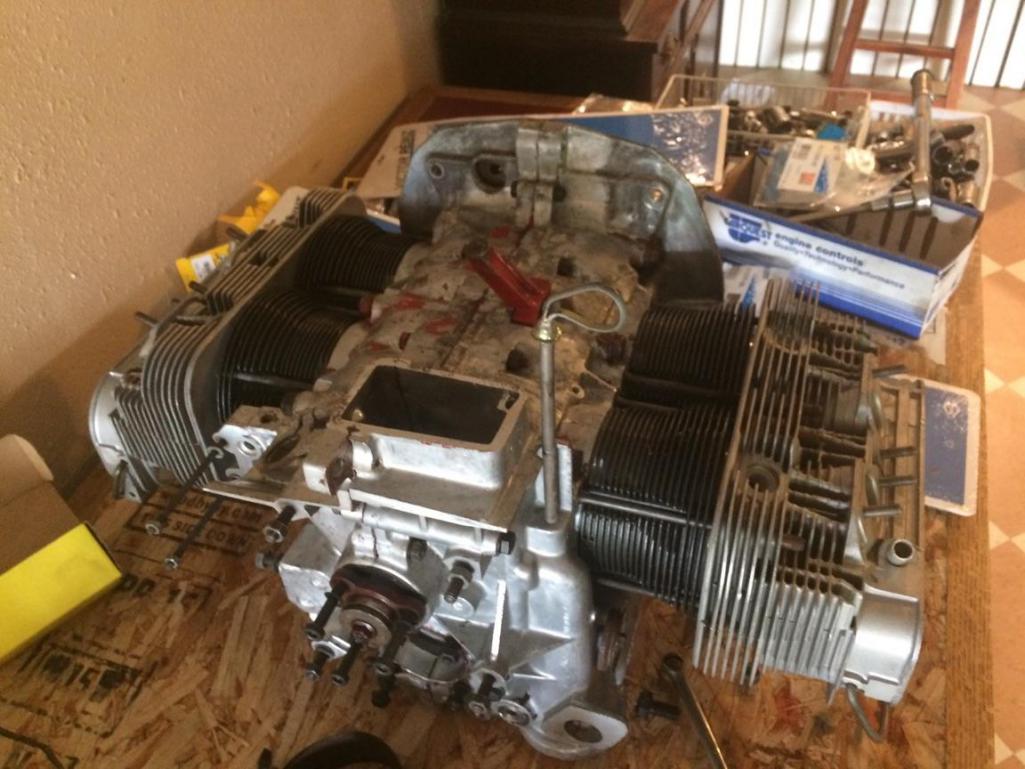
Posted by: Matty900 Aug 28 2017, 05:50 PM
Lights cleaned up nicely
Attached thumbnail(s)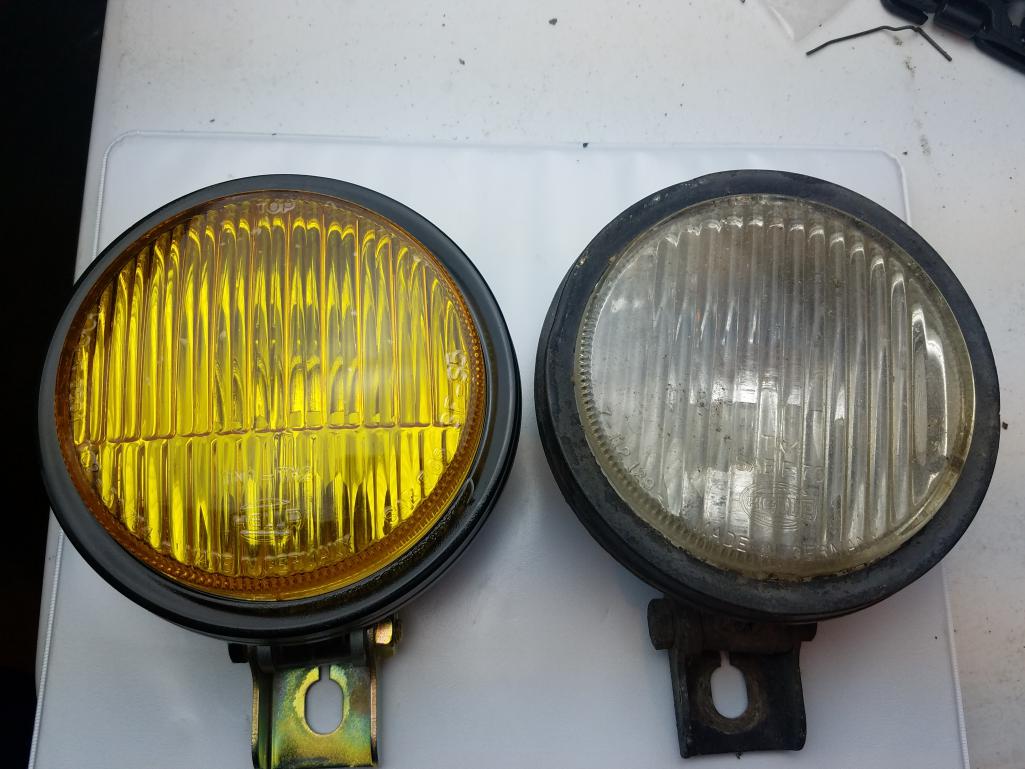
Posted by: Matty900 Aug 28 2017, 05:54 PM
Got them mounted and realized I didn't assemble it correct and had to take the first one back off the lens has a notch in it that lines up for the housing ring so that when you put the final clip in it holds the housing face on
Attached thumbnail(s)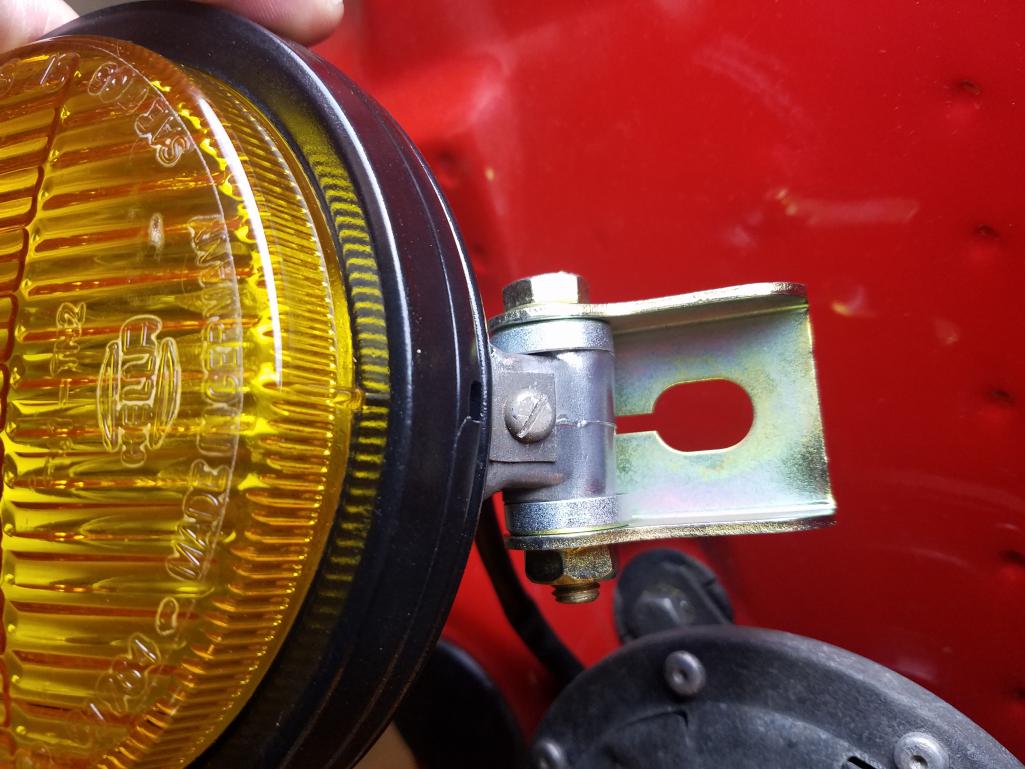
Posted by: Matty900 Aug 28 2017, 06:35 PM
All lights are now in.
Attached thumbnail(s)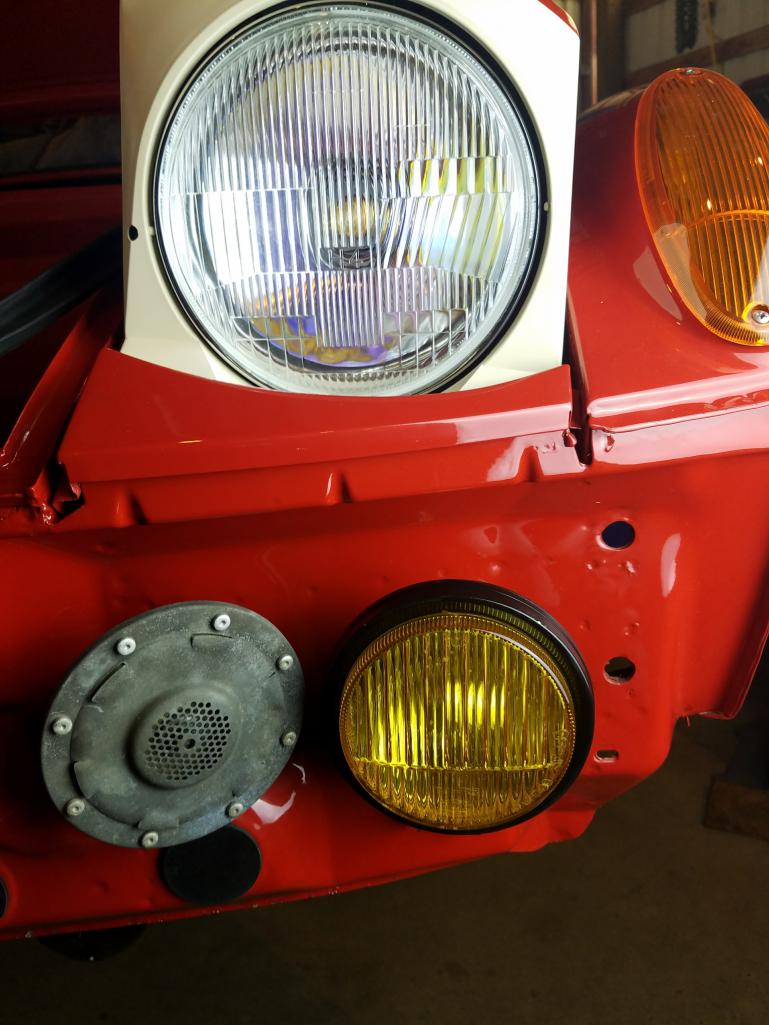
Posted by: Matty900 Aug 28 2017, 06:39 PM
Wiring harnesses all complete in the front trunk and I added in the power for the fuel pump
Attached thumbnail(s)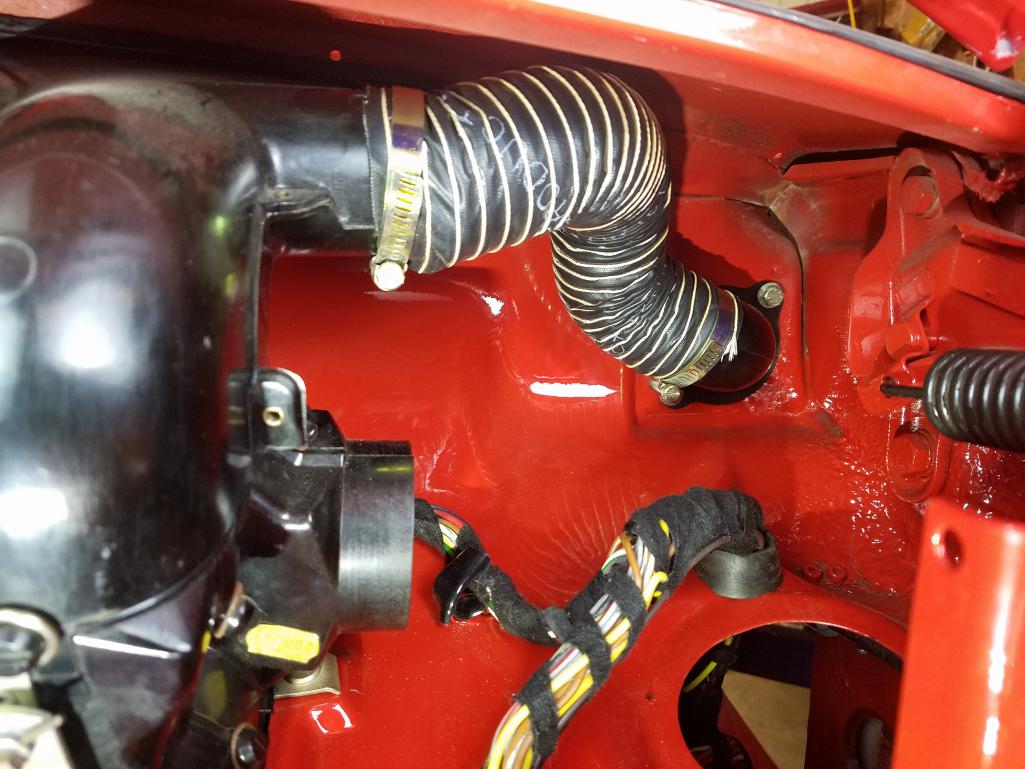
Posted by: Matty900 Aug 28 2017, 06:41 PM
Got the new washer lines in place and The Grommet back in to hold them. I still will be doing an electric pump but for now this will have to do
Attached thumbnail(s)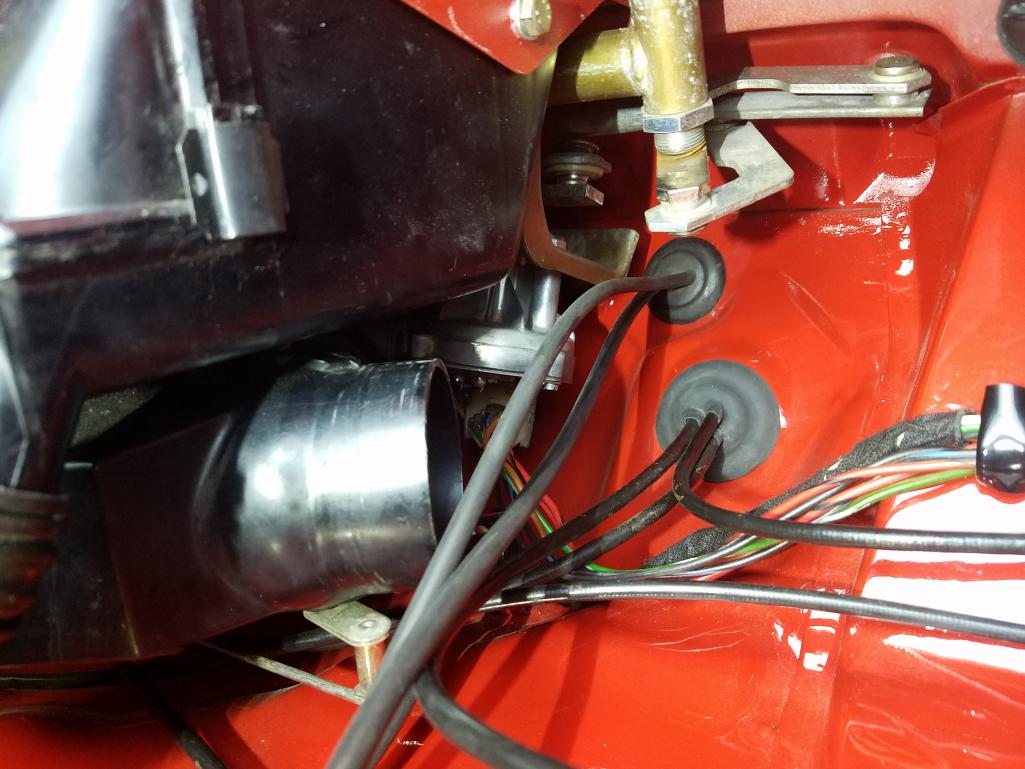
Posted by: Matty900 Sep 1 2017, 03:54 AM
Haven't had any time to post any updates since I'm pretty much been working on the car around the clock trying to get ready for Okteenerfest
Got the new dash face metal and vinyl (914Rubber) on the car
Attached thumbnail(s)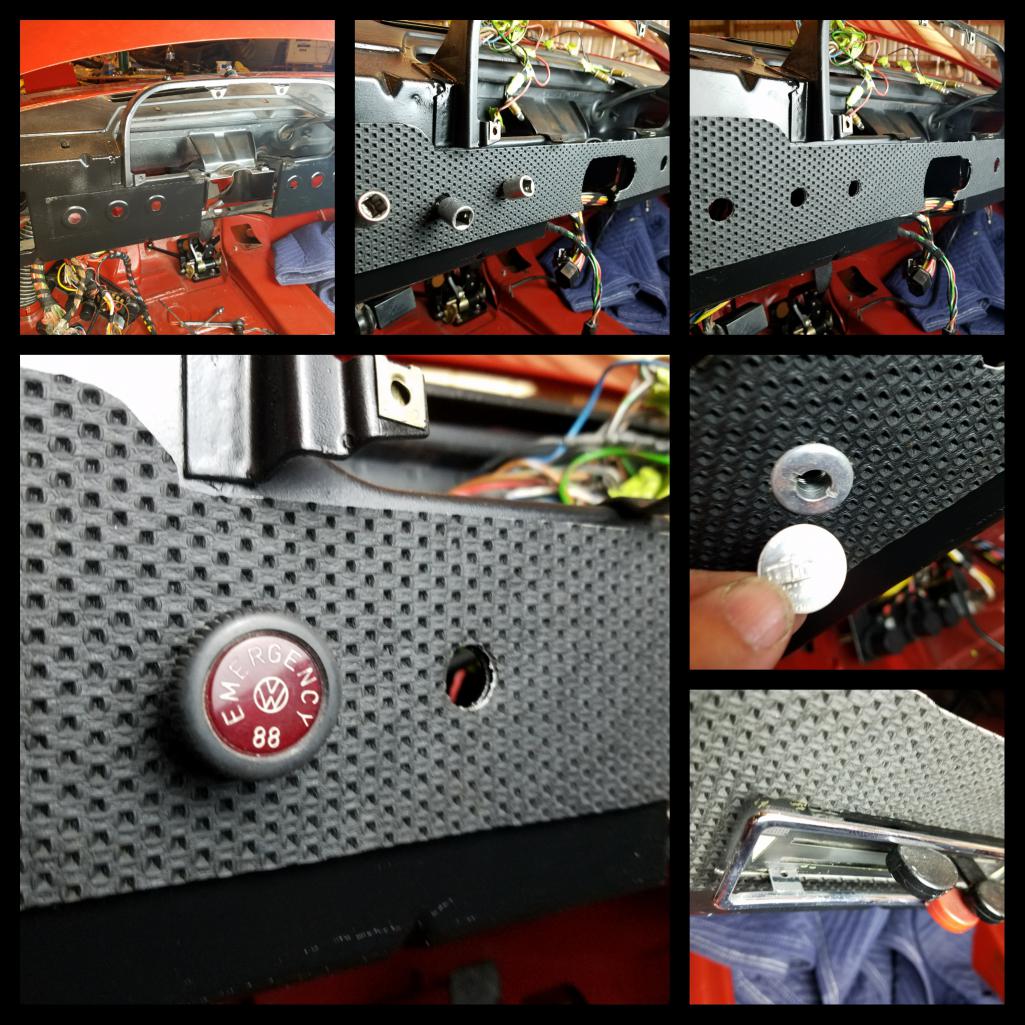
Posted by: Matty900 Sep 1 2017, 04:00 AM
Swapped out all the lights except for the generator light with LEDs
Attached thumbnail(s)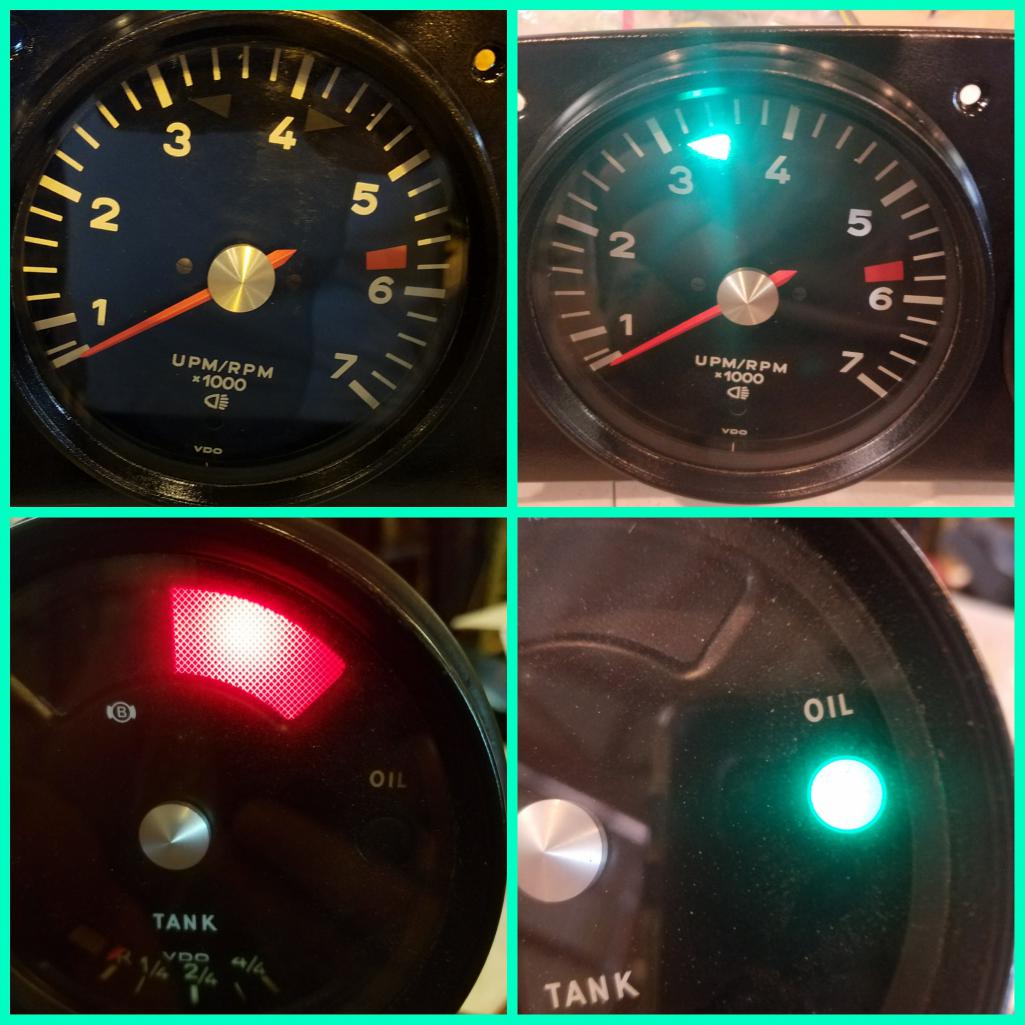
Posted by: Matty900 Sep 1 2017, 04:04 AM
Got a few more things cleaned up and installed back in the front trunk area
Attached thumbnail(s)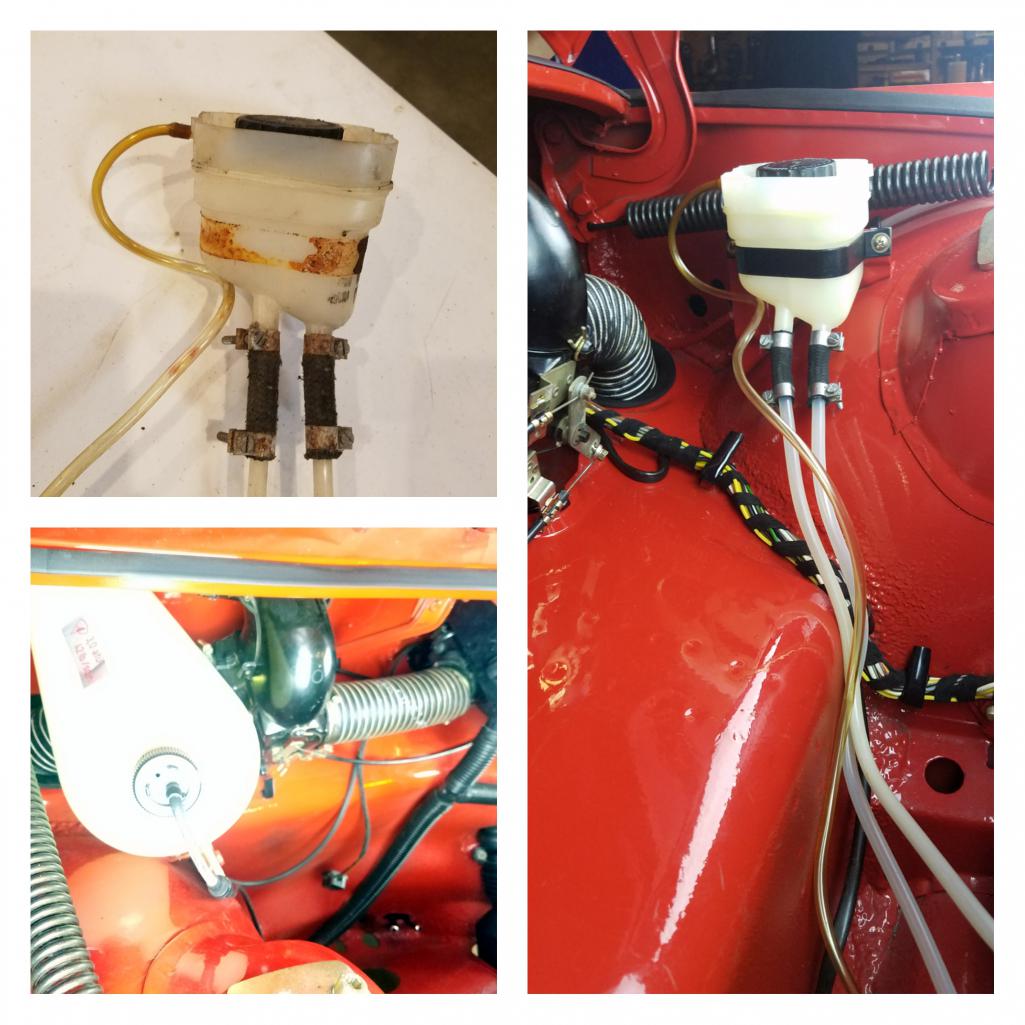
Posted by: Matty900 Sep 1 2017, 04:07 AM
Tried and failed at installing the dash top vinyl. I didn't stretch it out as I was installing it and tried to do it by myself. Turned out very lumpy and I pulled it all out to start over
I guess it's a good learning experience right?
Attached thumbnail(s)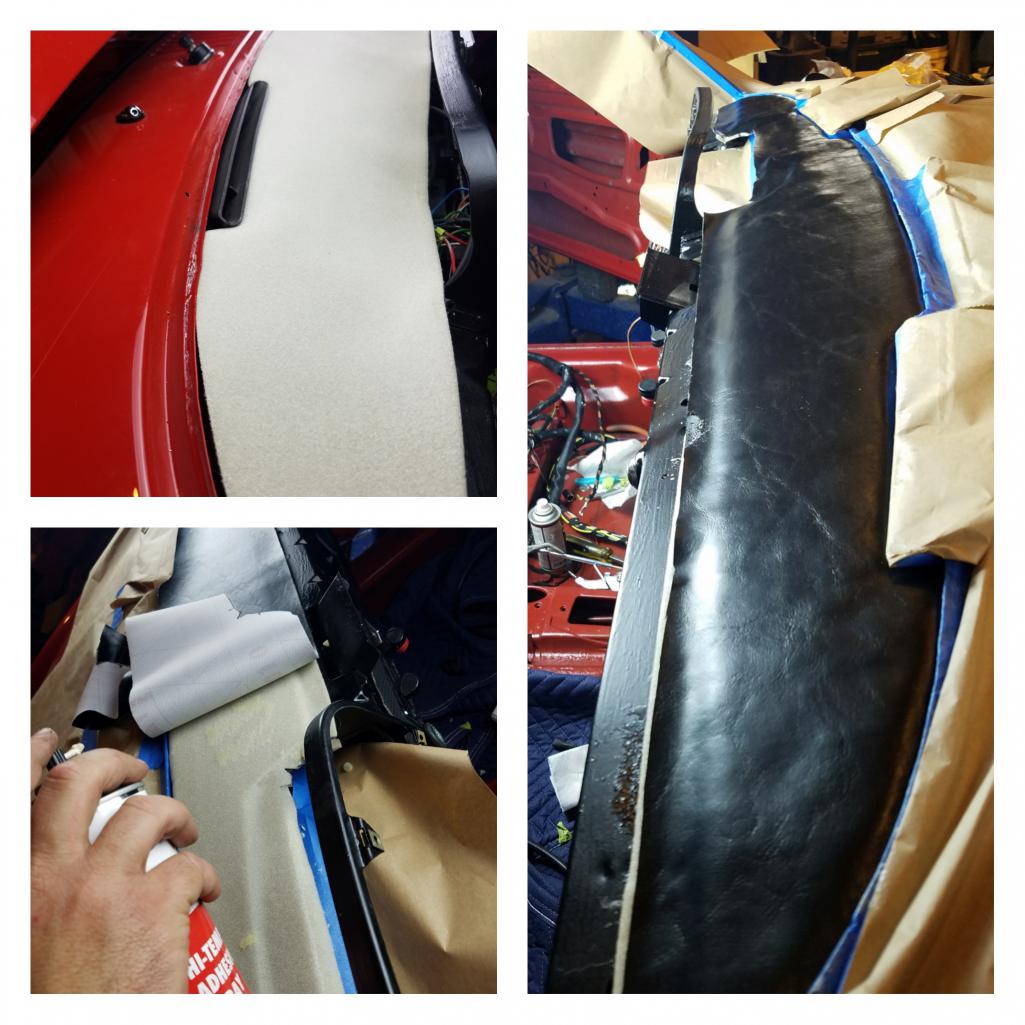
Posted by: Matty900 Sep 1 2017, 04:11 AM
Got all the wiring harness installed and hooked up all the way to the tunnel. Need to get the stainless steel fuel lines finalized before I can put everything else through it
Attached thumbnail(s)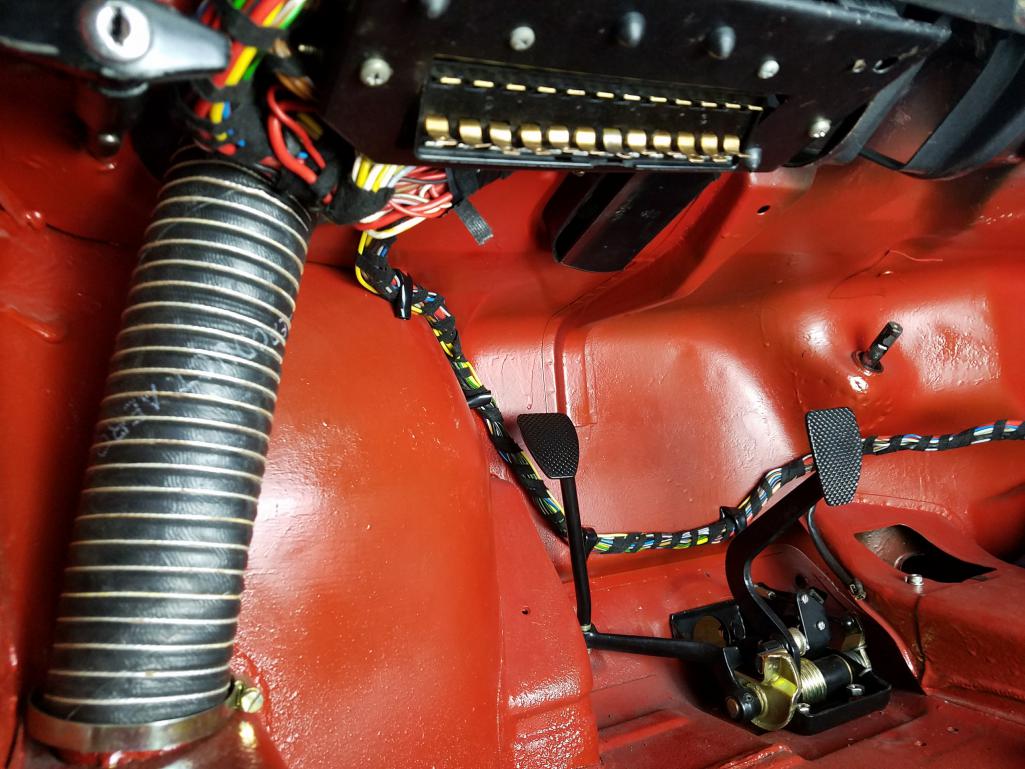
Posted by: Mikey914 Sep 1 2017, 10:23 AM
Swapped out all the lights except for the generator light with LEDs
Don't be surprised if you see the oil light come on when hot and at idle. The Threashold for voltage is much lower. It's not uncommon to see it flicker a little at idle on motors that are well used.
Posted by: Matty900 Sep 1 2017, 10:36 AM
War-pig (Mike) worked up some stainless steel fuel lines but I needed to make some modifications to my fuel line grommet on the tank side
Attached thumbnail(s)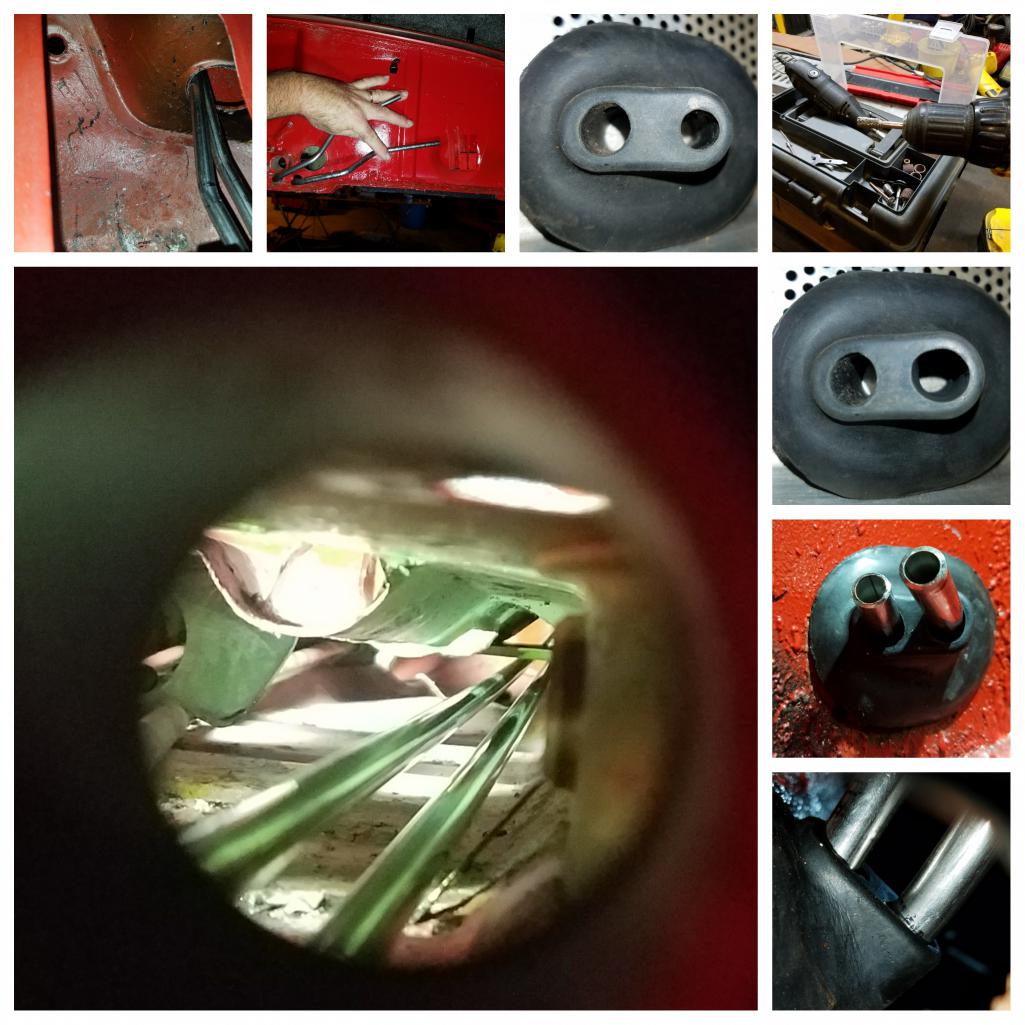
Posted by: Matty900 Sep 1 2017, 10:52 AM
Replaced all of the old rubber hoses on the return lines to the charcoal canister
Attached thumbnail(s)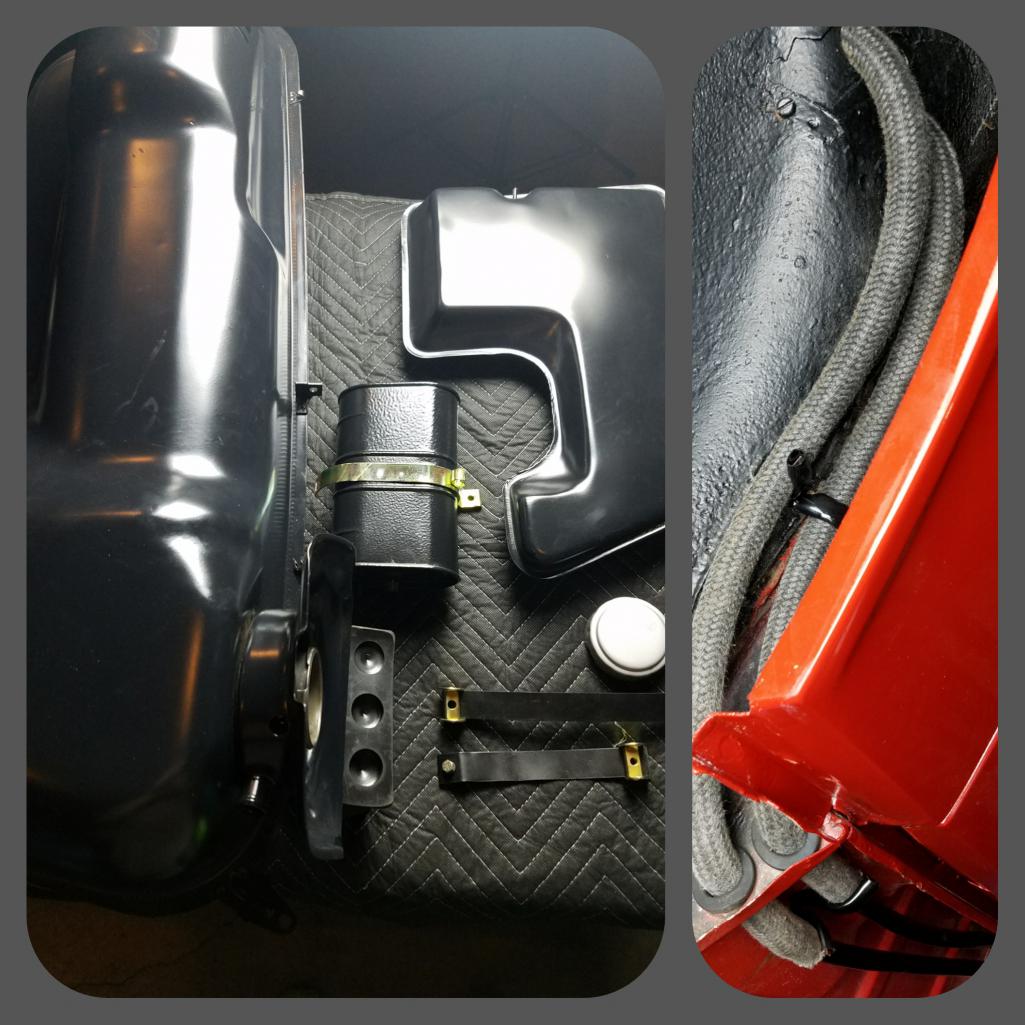
Posted by: Matty900 Sep 1 2017, 11:05 AM
Got a Little Help from 914rubber boys yesterday. My brother Mark, shop manager Scott and interior artiste Justice came out for the day to try and help me get some things done.
Previous owner thought dual exhaust would look better. So he removed the stock lower Valance and put a dual tip exhaust on the car. The heat from that destroyed the Chrome on the bottom lip of the bumper. Scott took a sander and a die grinder tipped off in Edge and knock down all of the flaking Chrome. Then primed it with acid etch primer, lots of filler primer, sealer, high temp chrome paint, High reflective mirror chrome paint, and clear. Turned out pretty decent compared to what it was.
Justice helped with the door and reinstalled the steering column. Within realized that the new Dash face metal was in the way and had to take it back off to get the column on first
Attached thumbnail(s)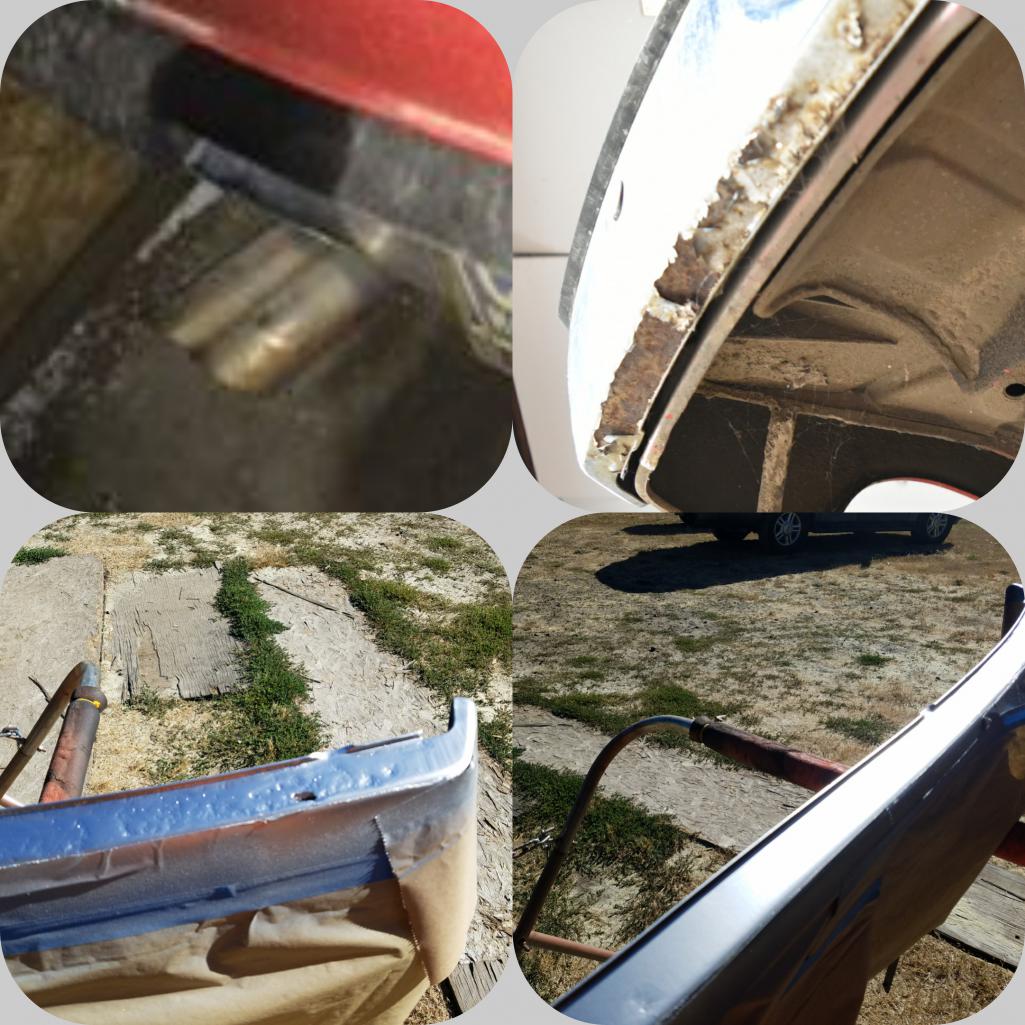
Posted by: Matty900 Sep 1 2017, 11:25 AM
Mark (Mikey914) did the passenger door For me and found some variations to the early door that adjustments needed to be made tou the parts going on the car, that I would have not figured out. you rock thank you for the help Big Brother
Attached thumbnail(s)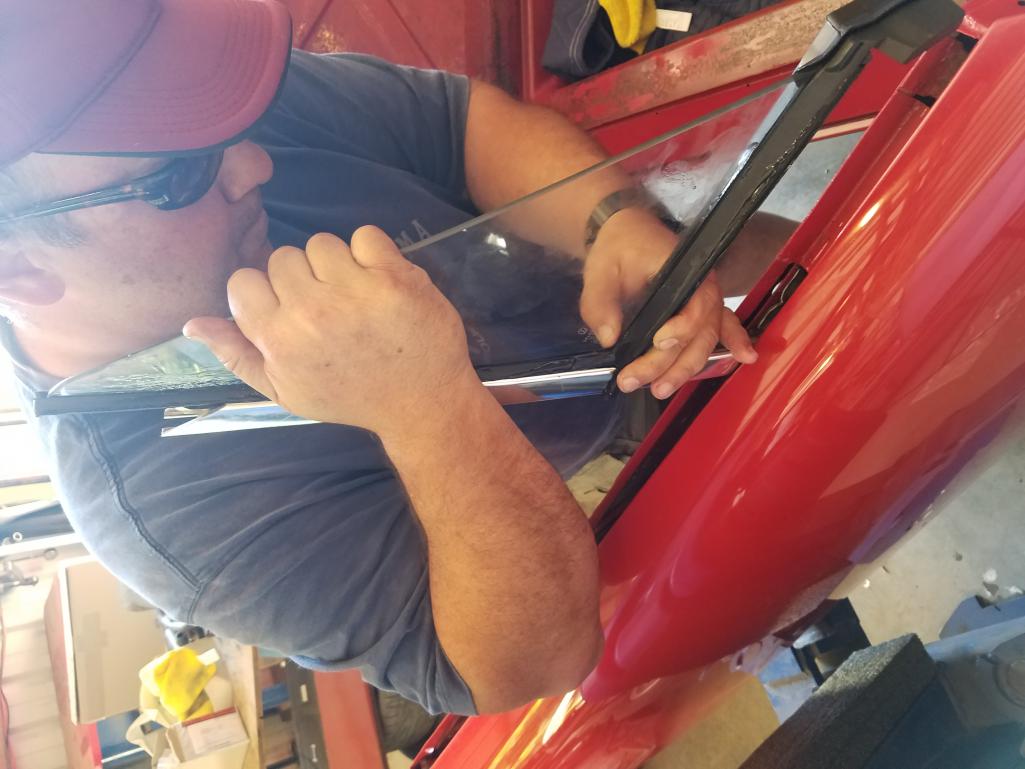
Posted by: Matty900 Sep 1 2017, 11:38 AM
All new 914rubber parts on the door. Door stays rebuilt, the door handle didn't need to be rebuilt but I put new rubber seals in. Cleaned up the door switch and put on a new rubber piece. New door card clips and plugs. New triangle window seal, new aluminum track with fuzzy and outer scraper new inner fuzzy .....  you get the idea. Zinc plated the door mechanism
Attached thumbnail(s)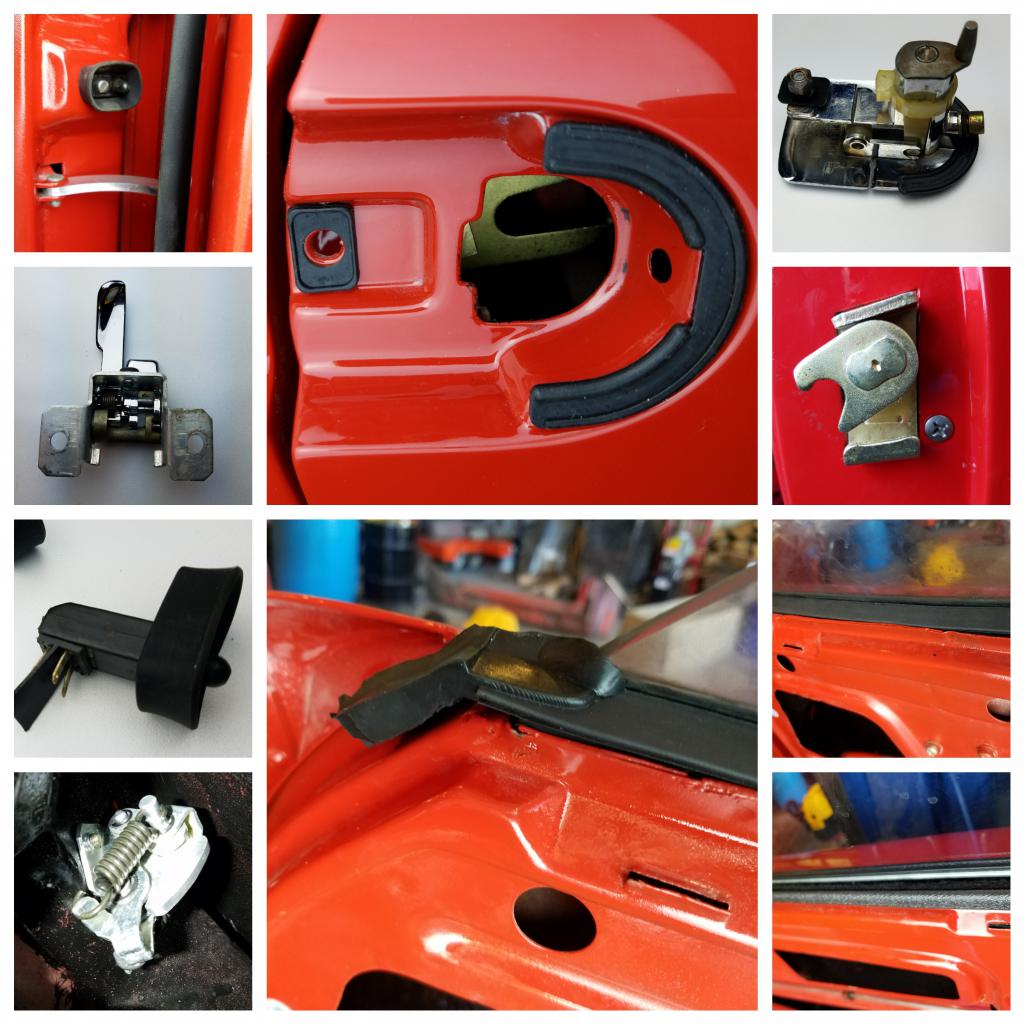
Posted by: Matty900 Sep 1 2017, 11:43 AM
One door down one to go
Attached thumbnail(s)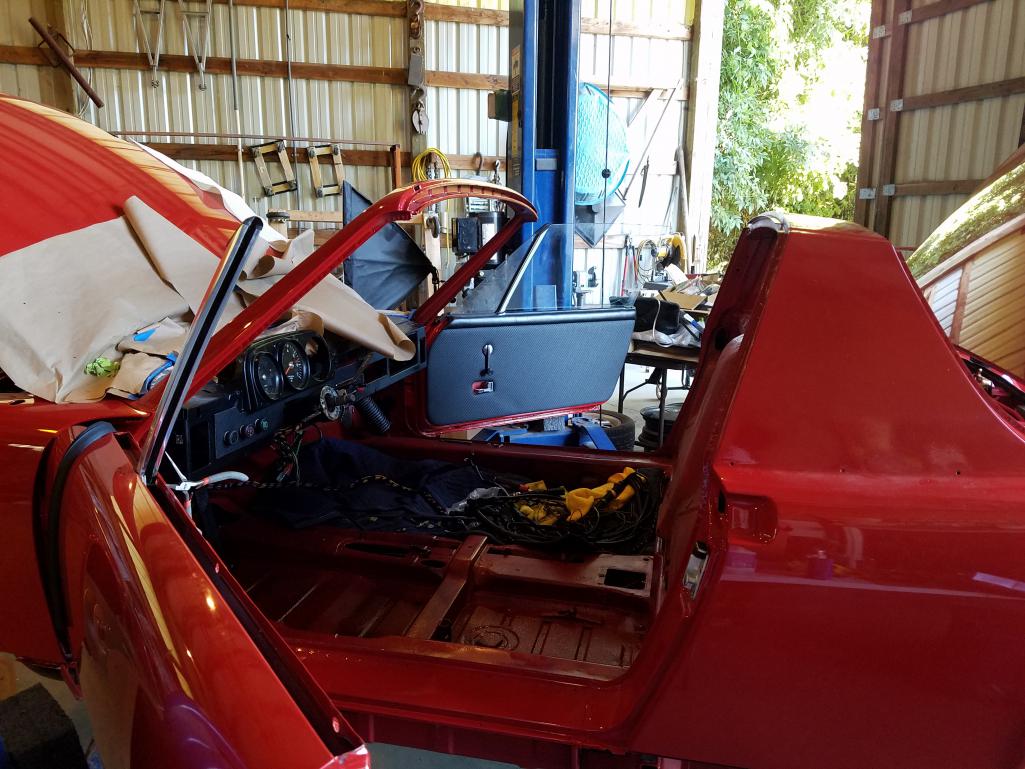
Posted by: Matty900 Sep 1 2017, 11:51 AM
Eric at PMB, rebuilt my brake balancer. Got that on last night at about 2 in the morning with some of the brake lines before I finally called it quits
Attached thumbnail(s)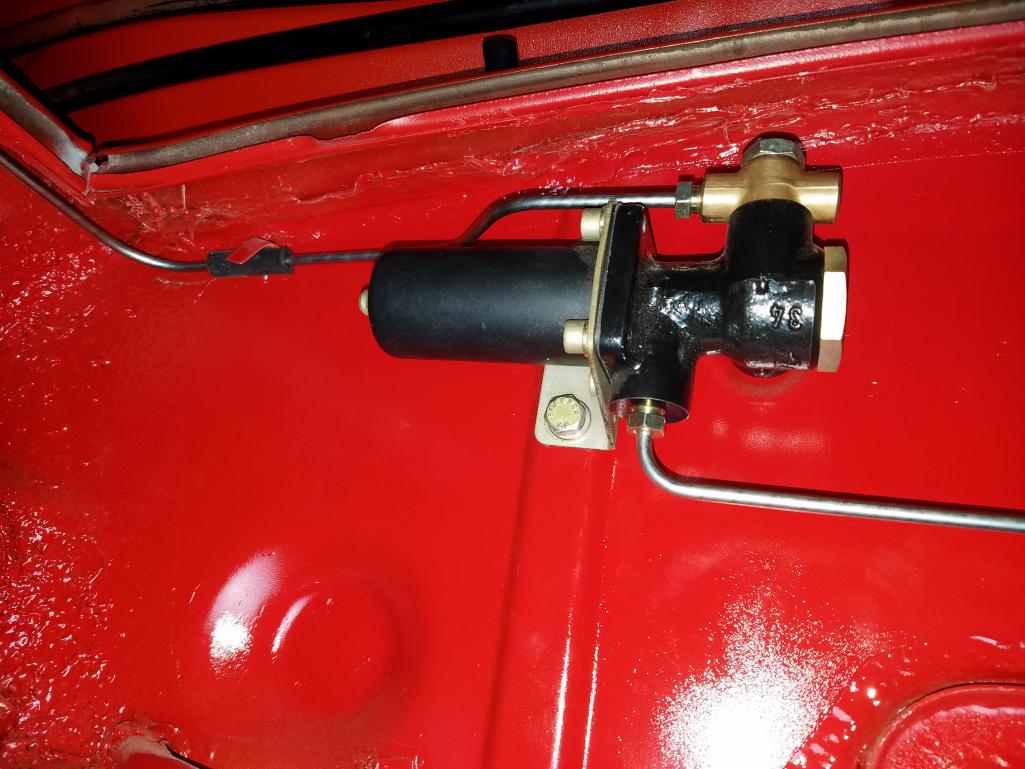
Posted by: Matty900 Sep 1 2017, 12:19 PM
Engine should be done on Saturday. Carb still need to be rebuilt working on transmission swap to the side shift now and mating it it to the engine block
Attached thumbnail(s)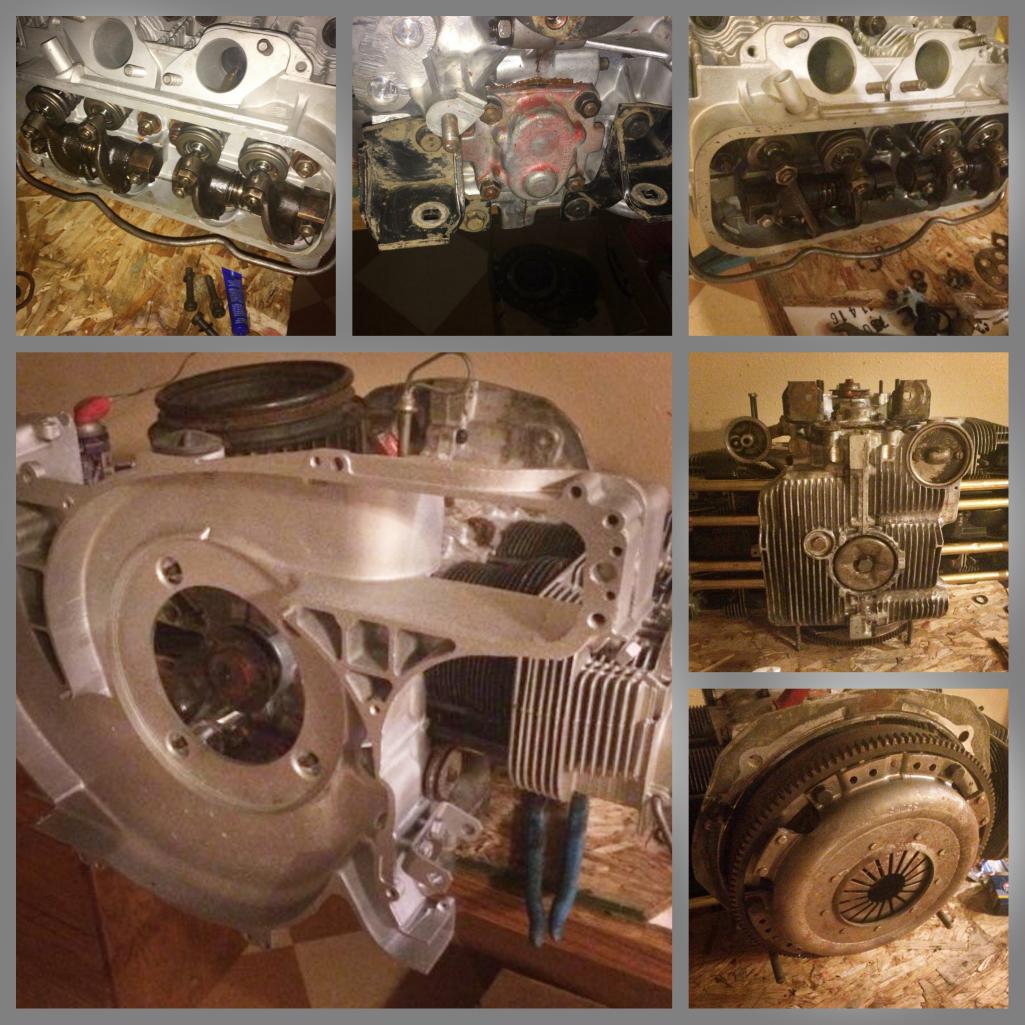
Posted by: raynekat Sep 1 2017, 02:50 PM
OK....I'll bite.
What "adjustments" needed to be made to what parts for your door assembly?
Is there a difference in this between early and late cars?
Also did you test your door contact switch (the one with the 4 small male prongs) to see if it works?
On mine, both door contact switches were shot.
If they don't work, they are a "bear" to find in working condition.
I finally found a couple of old VW bus switches to do the job.
These 4 contact switches are only needed if you want the buzzer to sound if you've left your keys in the ignition switch with the door open.
Otherwise, a simpler and easier to find 2 prong door switch will work....plus some studying of the wiring harness to see which wires aren't needed anymore and can be taped up.
Mark (Mikey914) did the passenger door For me and found some variations to the early door that adjustments needed to be made tou the parts going on the car, that I would have not figured out.
you rock thank you for the help Big BrotherPosted by: raynekat Sep 1 2017, 11:28 PM
Plus....how are you posting these "collage of pics" pictures?
What software package are you using?
They're great and allow for many more pics in a small amount of space.
Posted by: Matty900 Sep 2 2017, 04:36 AM
Another very late night. Today we got the wiring harness all back in place.
Attached thumbnail(s)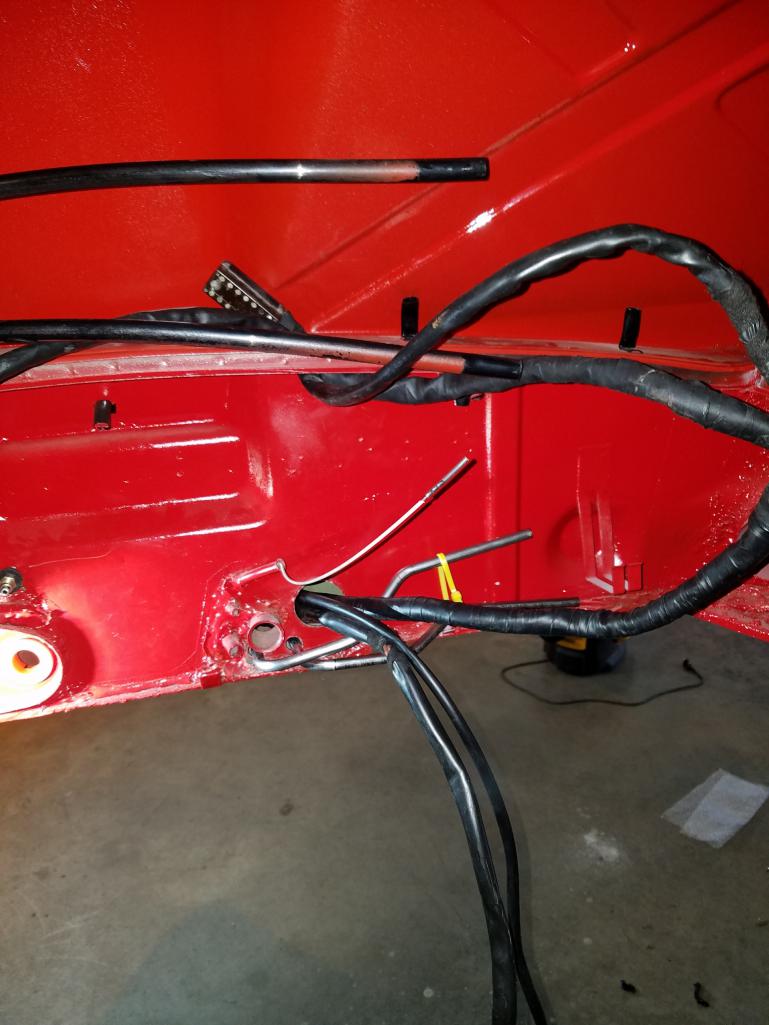
Posted by: Matty900 Sep 2 2017, 04:39 AM
A buddy of mine was able to get me some hushmat at the last minute. So today I went and pick that up head got it installed in the passenger door and the passenger floor pan. It takes a little time but it goes in nice. I'll be interested to see if I can tell the difference between noise and this car and others.
Attached thumbnail(s)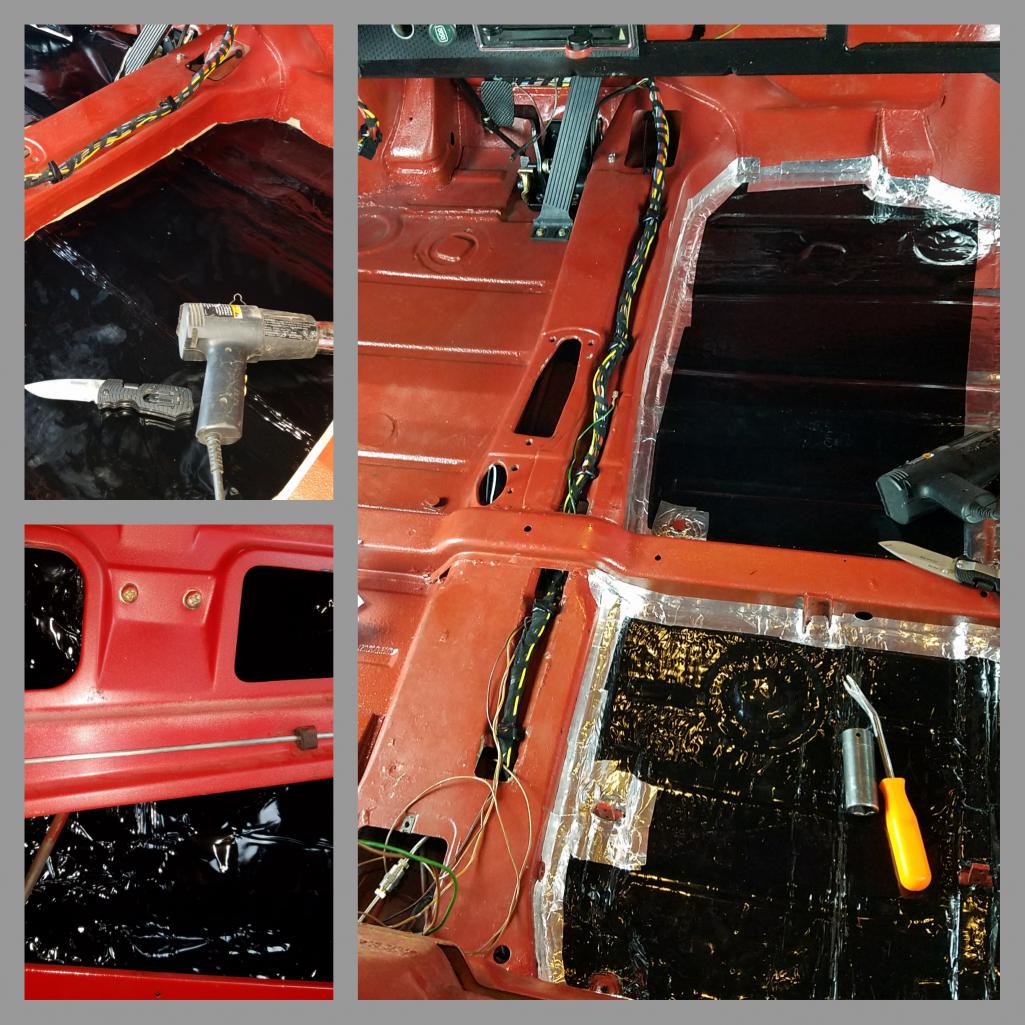
Posted by: Matty900 Sep 2 2017, 04:48 AM
OK....I'll bite.
What "adjustments" needed to be made to what parts for your door assembly?
Is there a difference in this between early and late cars?
Also did you test your door contact switch (the one with the 4 small male prongs) to see if it works?
On mine, both door contact switches were shot.
If they don't work, they are a "bear" to find in working condition.
I finally found a couple of old VW bus switches to do the job.
These 4 contact switches are only needed if you want the buzzer to sound if you've left your keys in the ignition switch with the door open.
Otherwise, a simpler and easier to find 2 prong door switch will work....plus some studying of the wiring harness to see which wires aren't needed anymore and can be taped up.
Mark (Mikey914) did the passenger door For me and found some variations to the early door that adjustments needed to be made tou the parts going on the car, that I would have not figured out.
you rock thank you for the help Big BrotherThey done well do it right up on it to explain it more but basically there's an extra tab of metal internally that needs to be shaved off and the front of the window channel has metal protruding into it that is not there in later doors so the triangle window seals that are the superseded part need to be knocked out to accommodate that piece of metal
As far as the door switches go I got them very clean and added a new Rubber seal to them and that's as far as I got. The car was maintained and stored so well I'm hoping they will work just fine.
Attached thumbnail(s)
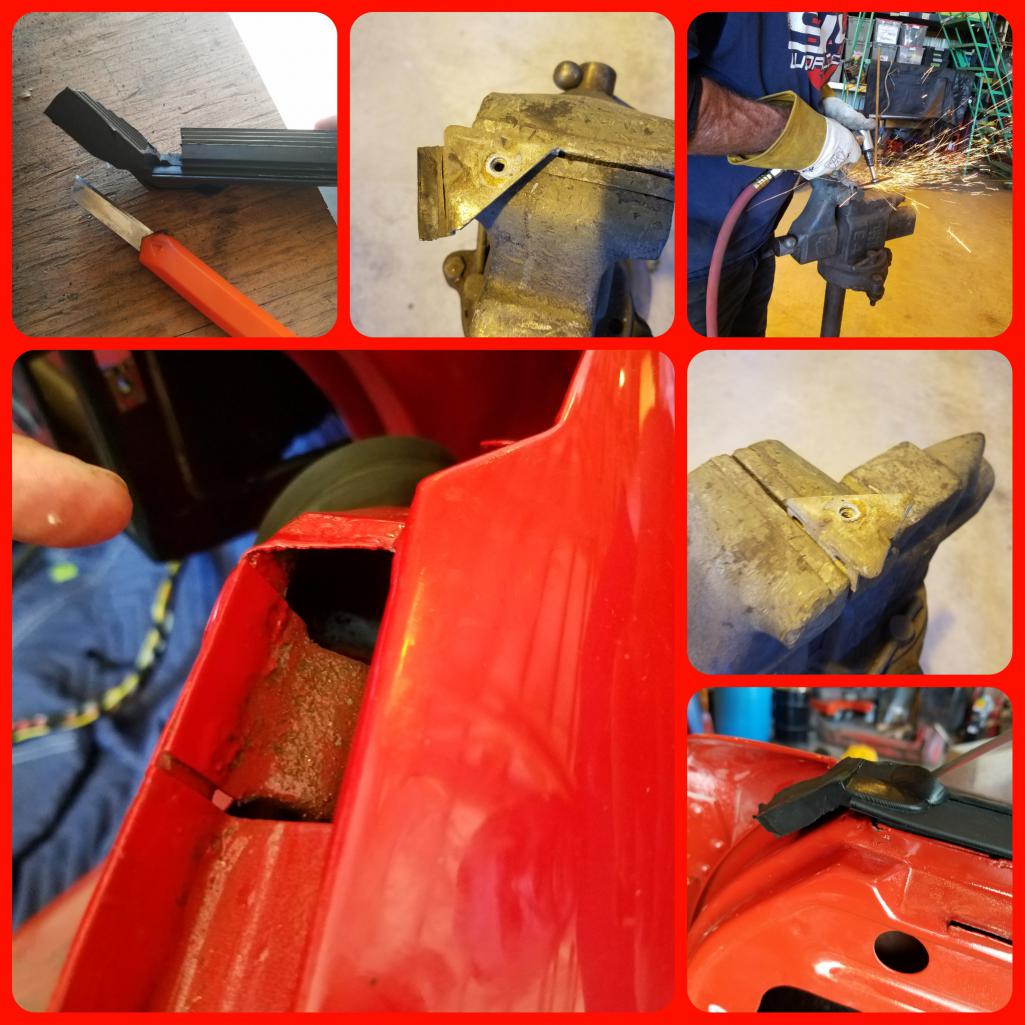
Posted by: Matty900 Sep 2 2017, 04:49 AM
Plus....how are you posting these "collage of pics" pictures?
What software package are you using?
They're great and allow for many more pics in a small amount of space.
I'm just using an app called Pixlr that edits photos
Posted by: Matty900 Sep 2 2017, 04:54 AM
Motor is now almost completely built and mounted to a 73 side shift transmission. Not enough time to clean it up at this point I'll have to come back out and get rebuilt later. They are ready for me to pick it up in the morning which is now only a few hours away so I better get to sleep ![yellowsleep[1].gif](style_emoticons/default/yellowsleep[1].gif)
Attached thumbnail(s)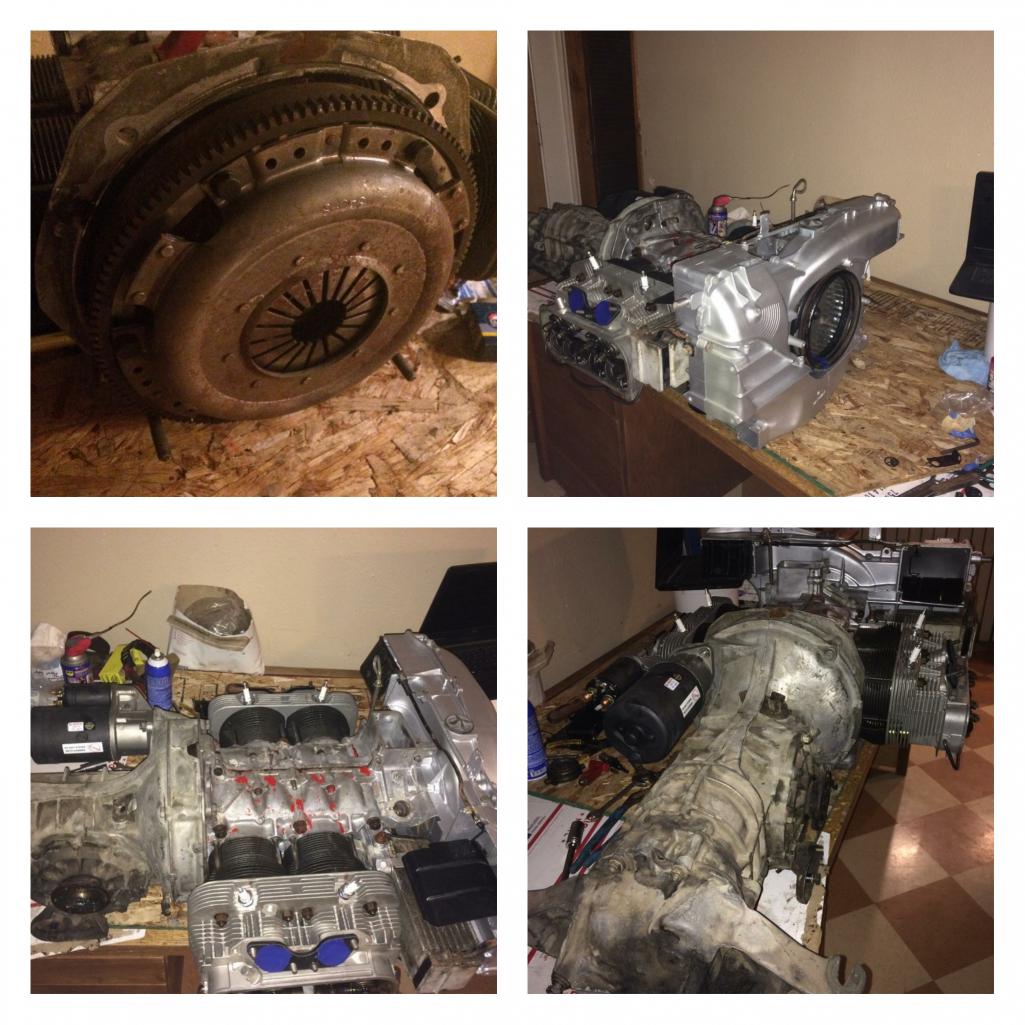
Posted by: tygaboy Sep 2 2017, 07:49 AM
I ran a marathon back in 1985. Watching the amount of work that's evidenced by all the pics that are flying out of Matty's camera reminds me of the last 4 miles of my race and how important the crowd's cheering was and how it buoyed me when I just wanted to be done, to sit down, to do anything but use my legs.
Come one everyone! Let's help him across the finish!
Matty, we're here for you! You can do it! WOOP, WOOP, GO Matty! 
Posted by: cary Sep 2 2017, 08:43 AM
Super-in-law was busy cutting up another car, but posed for a photo. I told him we needed one for a t-shirt that we can put him in a cape. "Super-in-law... Jack of all trades"
He is my hero
I've been after a Super In-Law t-shirt since I first learned about him!
And I agree, that right there would be a PERFECT pic for the shirt!
Suggestion: 914 Rubber needs to use this as the first in a series of "Caption this photo" contests.
The winning submission comment gets used on the t-shirt and the submitter wins a 914 Rubber gift certificate.
Something like:
"You need a patch panel? Hold on, I'll be right back!"
I've been meaning to let everyone know Matt and Jack (Super In Law) have been going six days per week for 4 weeks. Jack opens up the shop between 9 and 10, Matt shows up after 10. Jack heads home between 4 and 6. Matt locks up when he heads home.
We're making every attempt to get it finished and on its way to Okteenerfest.
Posted by: Matty900 Sep 2 2017, 10:02 AM
I ran a marathon back in 1985. Watching the amount of work that's evidenced by all the pics that are flying out of Matty's camera reminds me of the last 4 miles of my race and how important the crowd's cheering was and how it buoyed me when I just wanted to be done, to sit down, to do anything but use my legs.
Come one everyone! Let's help him across the finish!
Matty, we're here for you! You can do it! WOOP, WOOP, GO Matty!
Thank you Chris. Today is the big day I just got the text that my motor will be in Wilsonville at 9:30 ( about 45 minutes away) and I need to pick up the engine tins that the painter has been keeping safe for me all this time in Oregon City (+ 25 minutes) then it's back to Cary's for more fun!
For a guy that's never really even worked on cars, this has been an incredible learning experience and a lot of fun. I cannot express how much I appreciate this support of everyone but especially Cary and Super-in-law
without him this simply would not have even been a possibility for me! I mean seriously who lets you Bogart their lift for five and a half months and use all their tools and has the patience to teach you without laughing at you while you make stupid mistakes. I'm clearly sleep deprived at this point but better go get that engine.
Posted by: ConeDodger Sep 2 2017, 10:17 AM
Matt, mine is a late jack (I believe). Yours is a '72? Will that work for you?
Am I late? I just realized you're on a deadline...
Posted by: Mikey914 Sep 2 2017, 10:19 AM
I think we need a super-in-law T shirt!
Posted by: ConeDodger Sep 2 2017, 10:36 AM
I think we need a super-in-law T shirt!
YES!

Posted by: Matty900 Sep 2 2017, 02:03 PM
Delivered to your door? Apparently if you set the engine and transmission on a hollow-core door breaks through it and just sits in there nice and snug and doesn't move for transport
Attached thumbnail(s)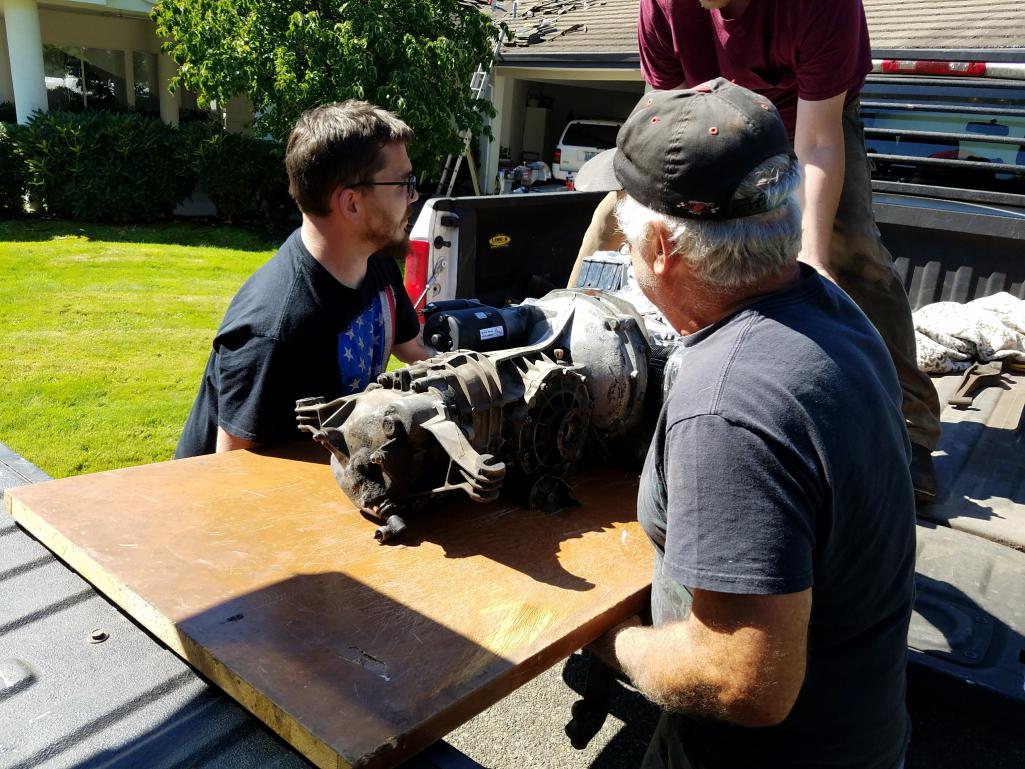
Posted by: Matty900 Sep 3 2017, 01:02 PM
Motor and engine tins made it to the shop. As soon as I pulled in super a law was waiting like a pit crew to try and pull it out of the truck. My very lifted truck . He grabbed my step ladder and jumped into the back to hook the motor to the cherry picker. At this point has daughter and granddaughter came to pick him up and take him home and get him out of the Heat. He didn't really want to go but they took him. "Why do I have to go?" "Because you're 87 years old and it's too hot."
Attached thumbnail(s)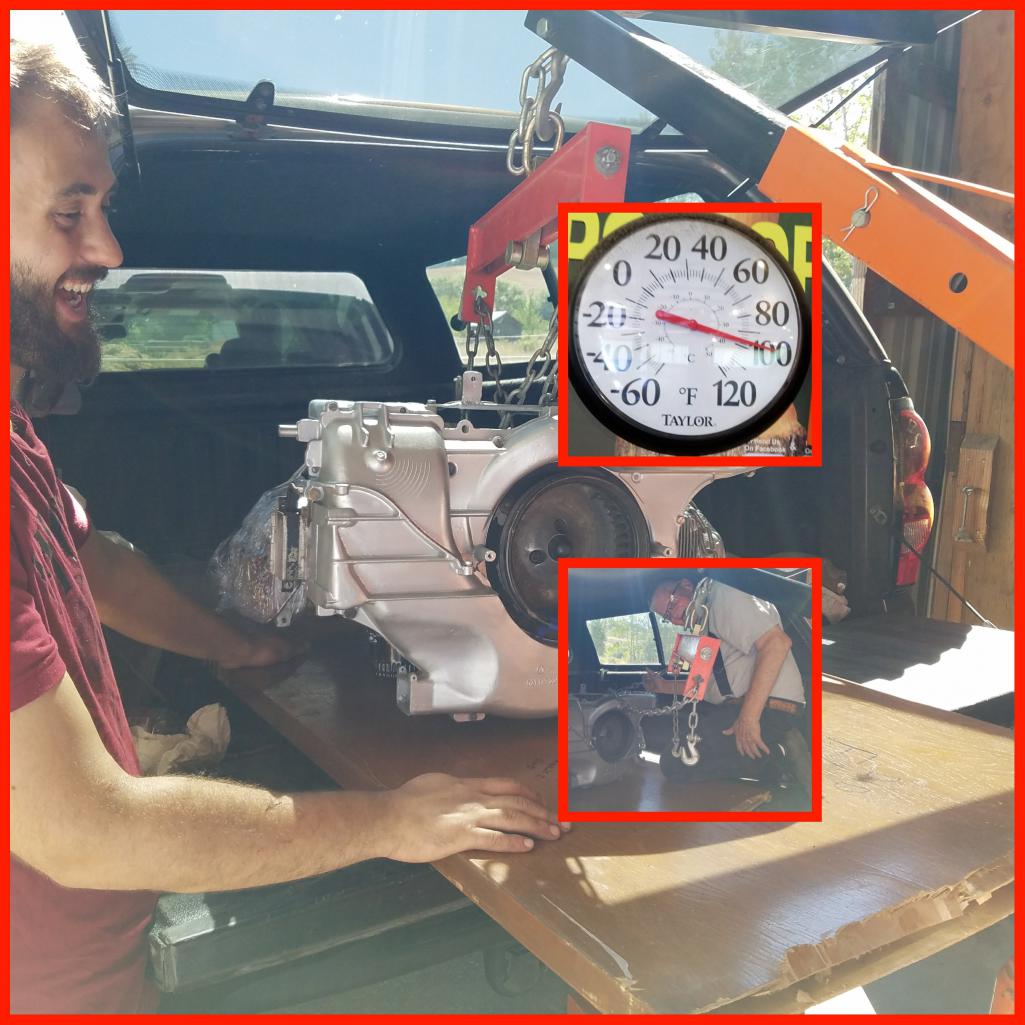
Posted by: Matty900 Sep 3 2017, 01:03 PM
Took another shot at the dash top vinyl. This time I'll let the edge set up really good so I can pull against it and stretch as I put the rest of it down. I'll let this drive for a day and then finish it.
Attached thumbnail(s)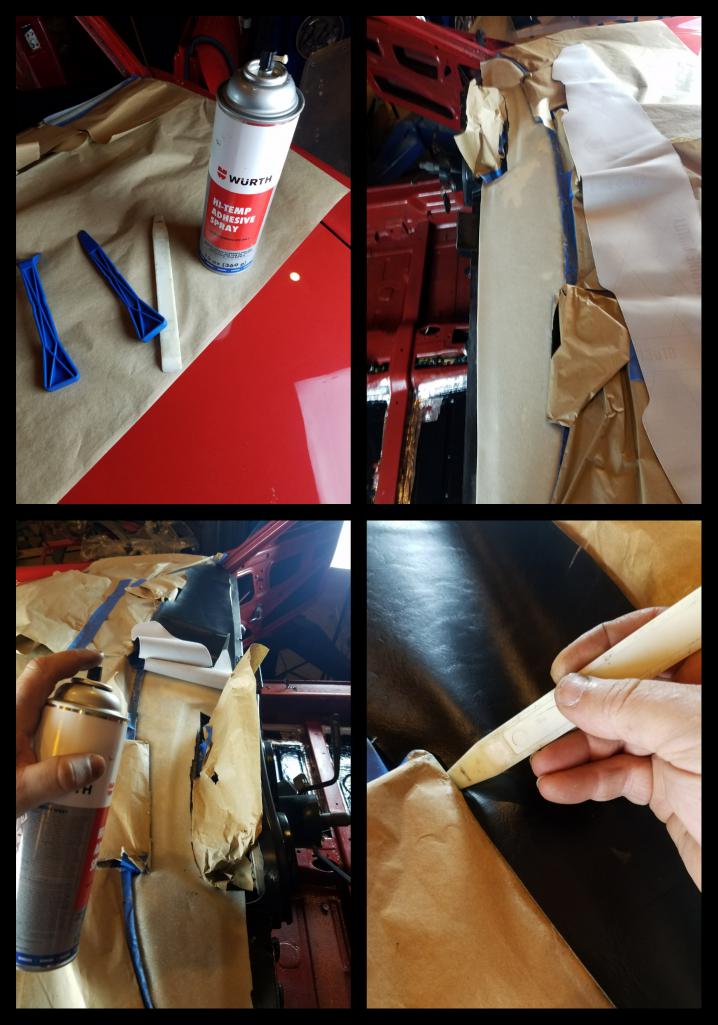
Posted by: Matty900 Sep 3 2017, 01:06 PM
Got all the rest of the hushmat sound deadening installed. So the passenger side has the original early door. The driver side at some point received a late door and still had the dealer part sticker on it. Let me just say the early door is the easy one to put the sound deadening in. The late door sucked I'm glad that's all done but it took forever. What a P.i.t.a.
Attached thumbnail(s)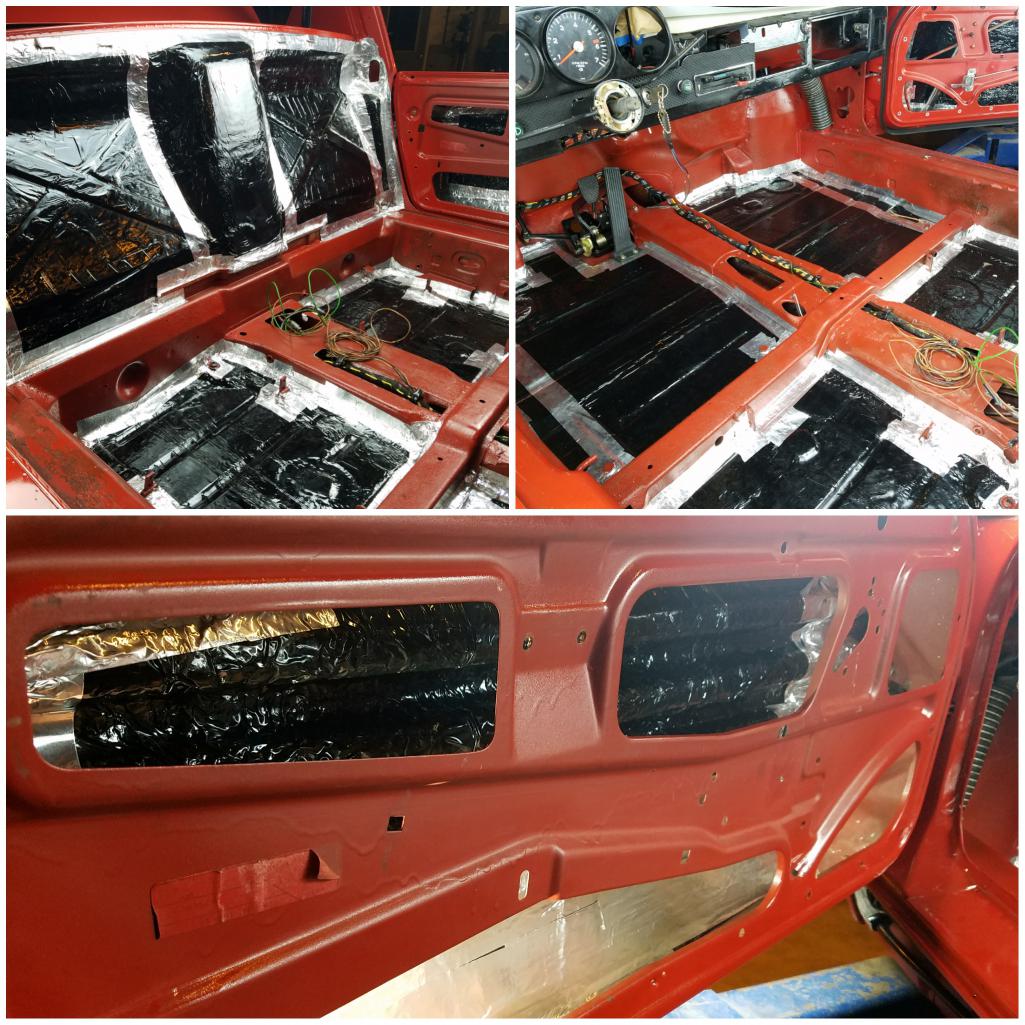
Posted by: cary Sep 3 2017, 04:06 PM
Got all the rest of the hushmat sound deadening installed. So the passenger side has the original early door. The driver side at some point received a late door and still had the dealer part sticker on it. Let me just say the early door is the easy one to put the sound deadening in. The late door sucked
I'm glad that's all done but it took forever. What a P.i.t.a.Nice work ................. see you tomorrow.
Posted by: Matty900 Sep 3 2017, 07:45 PM
Got all the rest of the hushmat sound deadening installed. So the passenger side has the original early door. The driver side at some point received a late door and still had the dealer part sticker on it. Let me just say the early door is the easy one to put the sound deadening in. The late door sucked
I'm glad that's all done but it took forever. What a P.i.t.a.Nice work ................. see you tomorrow.
Going to need lots of help from you to get this done
Carbs will be here wednes day and he said he can put them on with the engine installed allready.
Posted by: raynekat Sep 3 2017, 08:32 PM
Going to need lots of help from you to get this done
Carbs will be here wednes day and he said he can put them on witg the engine installed allready.
Matt, maybe I better get out there and help you too?
The faster we get your car done and outta there....the quicker Cary can get back to working on mine.
hehehePosted by: cary Sep 3 2017, 09:07 PM
Moonlighting starts tomorrow. Starting at 9am Working till 9 or
10 pm. Tuesday & Wednesday, Rothsport till 5pm. MiddleMotors from 6pm till 9 or 10 pm.
Jack will come out at 9am and head home around 4 pm. during the 100 degree stuff.
Posted by: Matty900 Sep 3 2017, 11:59 PM
Going to need lots of help from you to get this done
Carbs will be here wednes day and he said he can put them on witg the engine installed allready.
Matt, maybe I better get out there and help you too?
The faster we get your car done and outta there....the quicker Cary can get back to working on mine.
heheheDoug,
I welcome the help and will return the favor when needed
Posted by: raynekat Sep 4 2017, 07:17 AM
Doug,
I welcome the help and will return the favor when needed
Sounds like a great offer.
In reality, I have a big "project" already on my plate.
It's called raising a set of 3 month old twins.
Unfortunately I don't get out much ttese days.
I'll just have to cheer for you from the sidelines.
Good luck.
You got great help with both Jack and Cary.
Posted by: Matty900 Sep 4 2017, 05:20 PM
Lots getting done today. Taylor's helping out too
Attached thumbnail(s)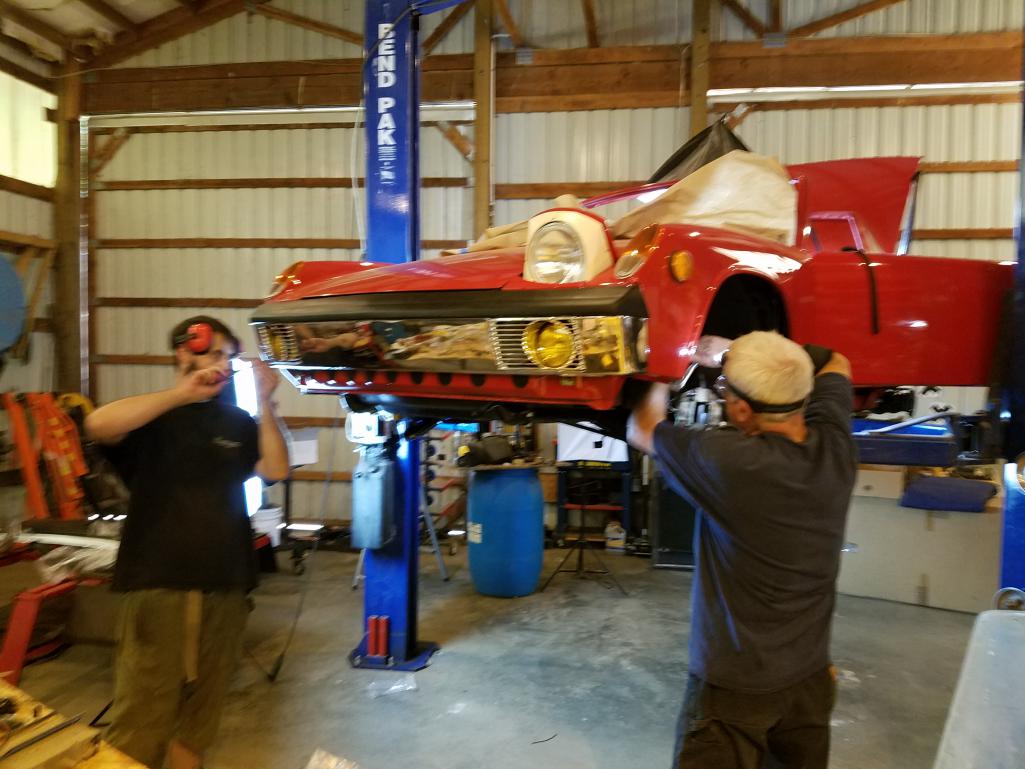
Posted by: Matty900 Sep 5 2017, 01:28 AM
Cary busted ass today on the breaks!!
Attached thumbnail(s)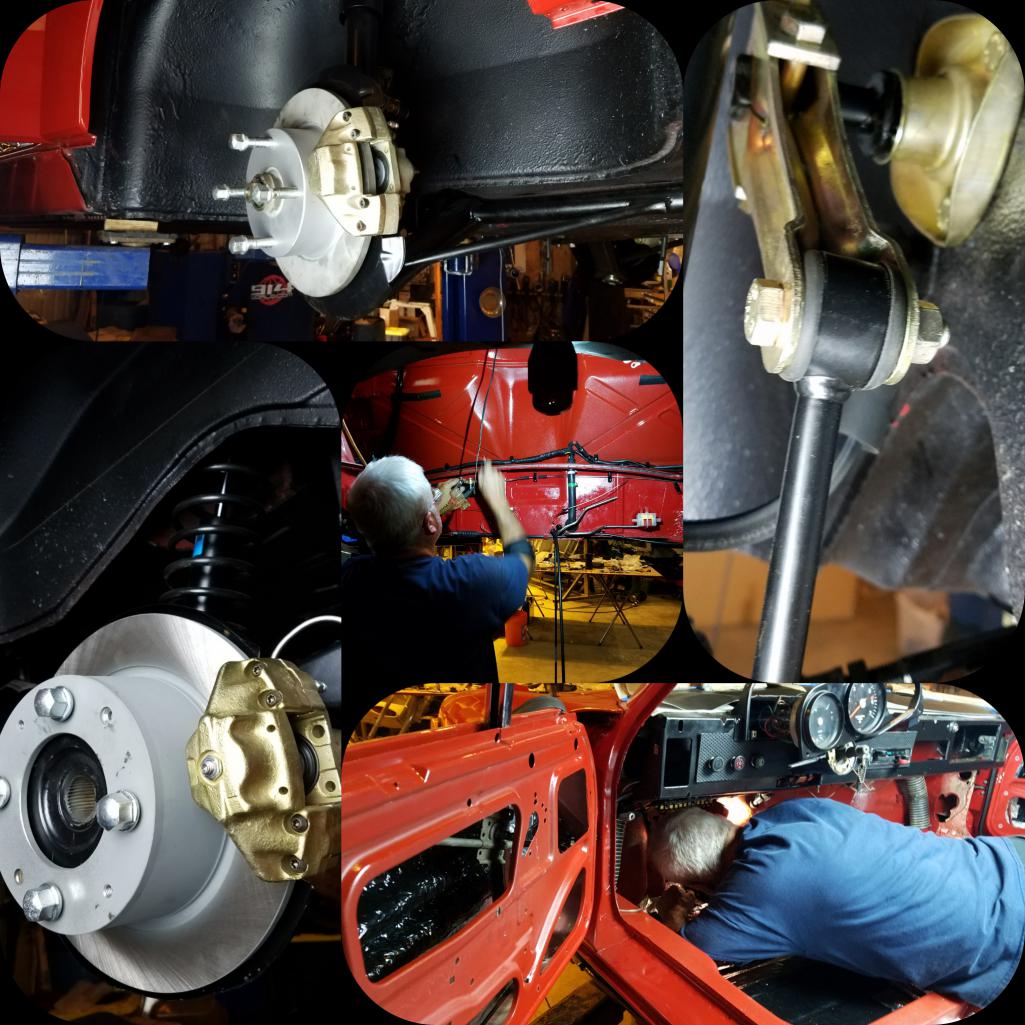
Posted by: Matty900 Sep 5 2017, 01:29 AM
Carbs got rebuilt and are ready to go on the car
Attached thumbnail(s)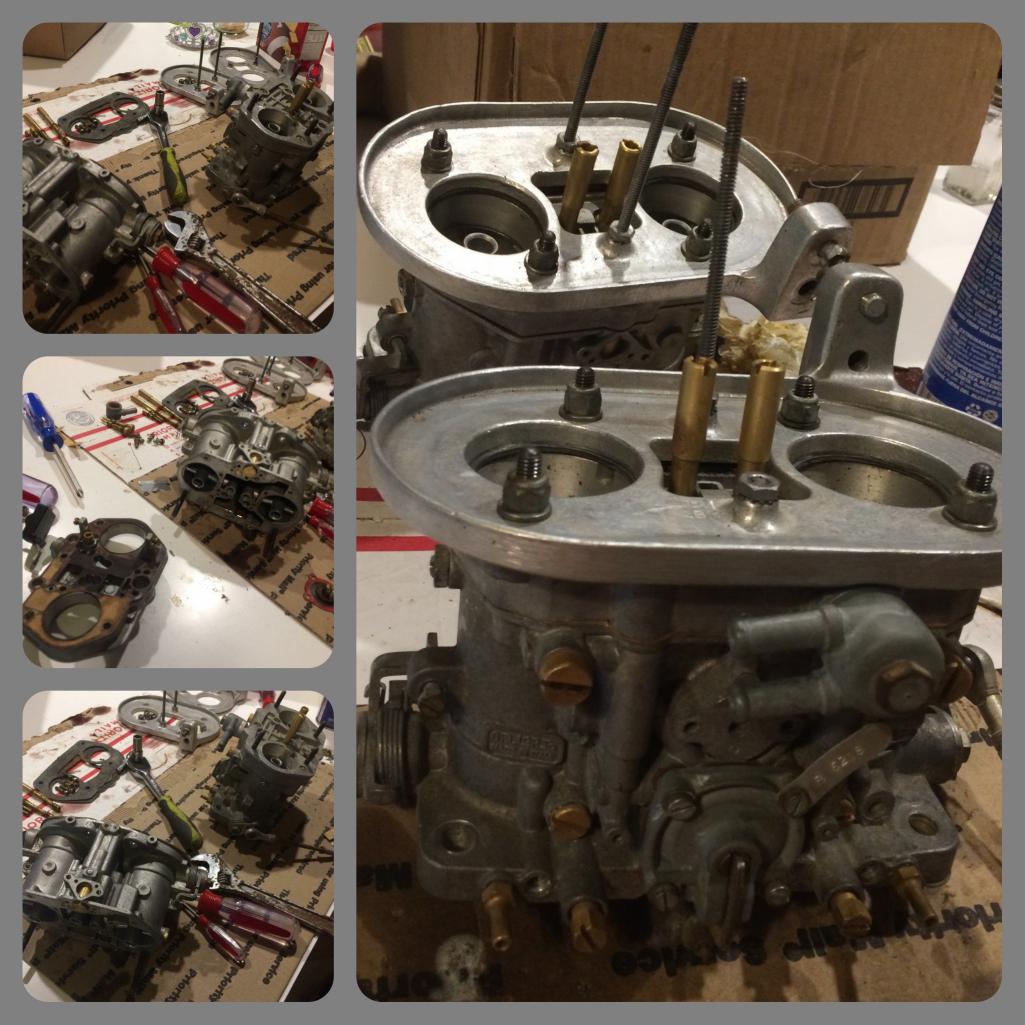
Posted by: Matty900 Sep 5 2017, 01:34 AM
One bumper down one to go.
Attached thumbnail(s)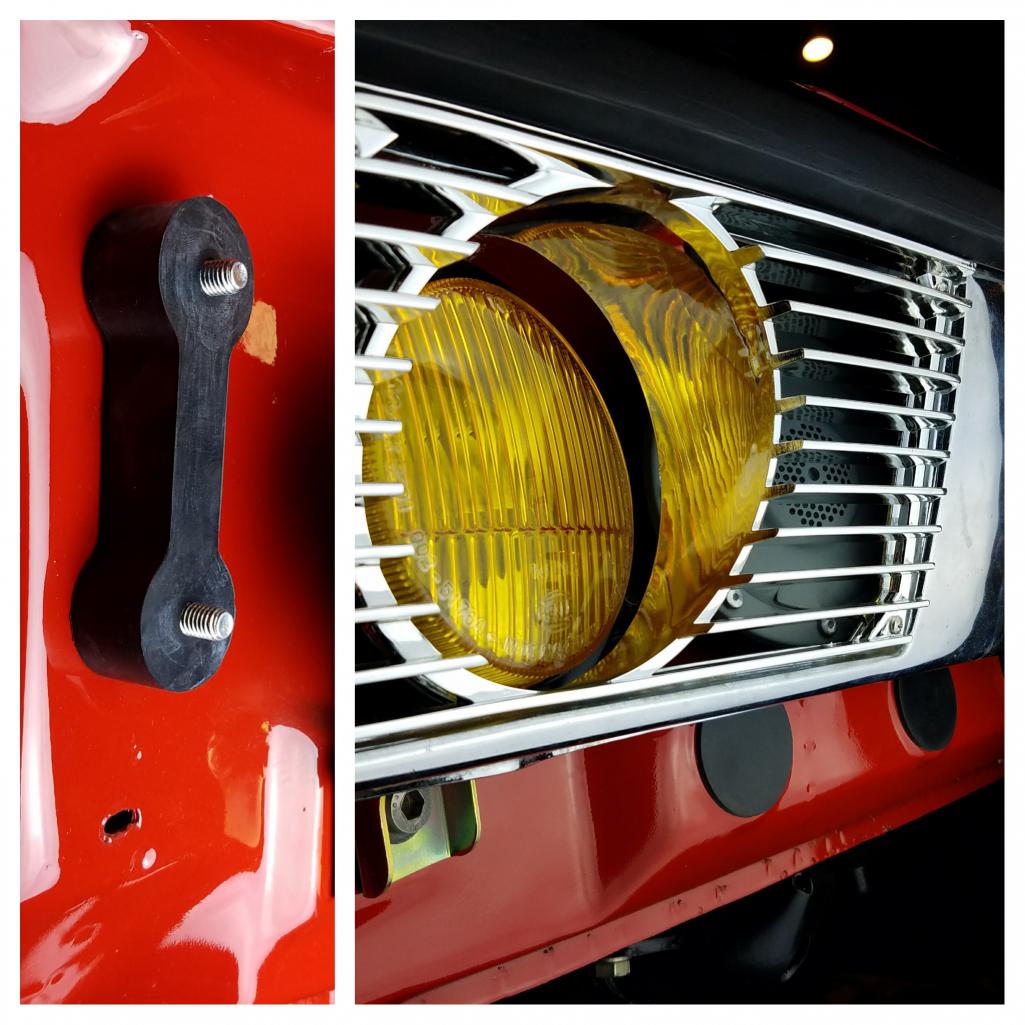
Posted by: Matty900 Sep 5 2017, 03:27 AM
Got the antenna installed. Finished getting the dash top vinyl down and then put the dash top in. When I went to hook up the speedometer I realized something was missing. I found it all the way at the other end of the tunnel
Attached thumbnail(s)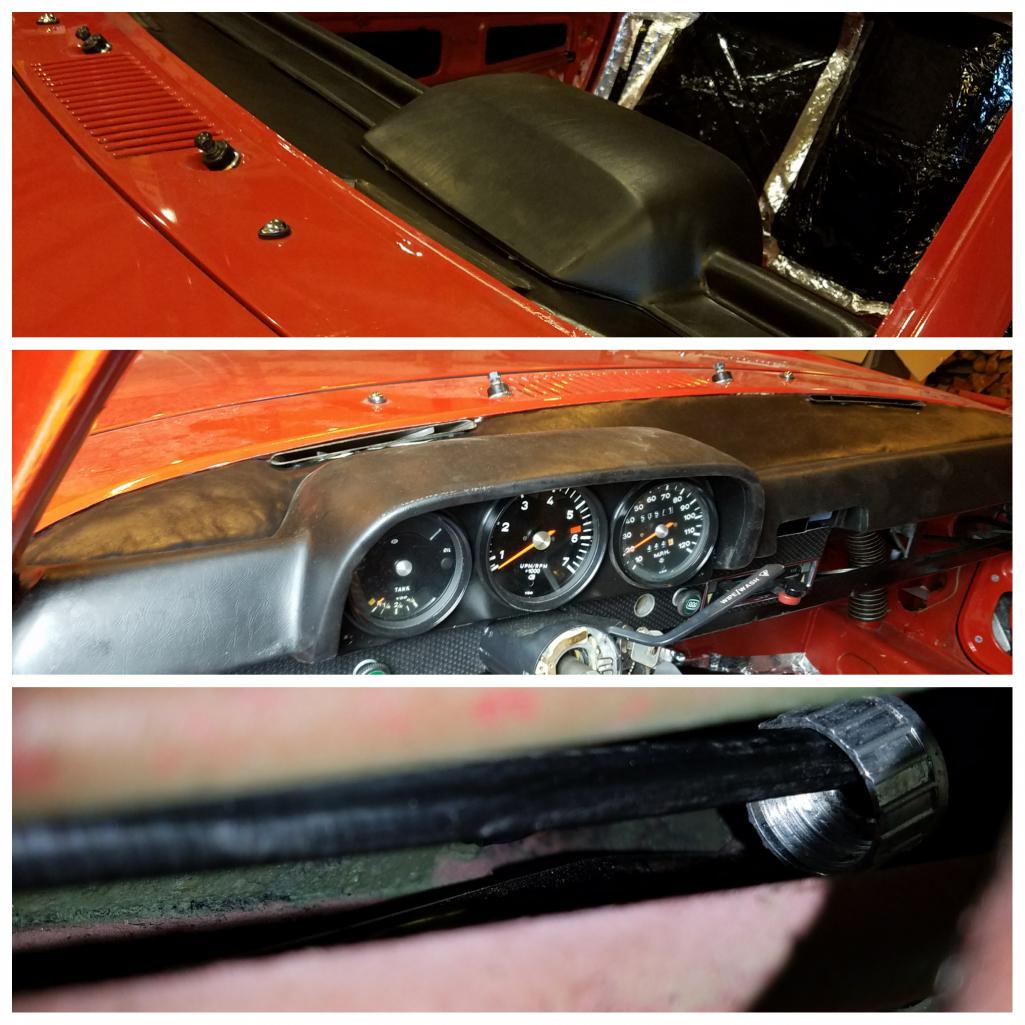
Posted by: tygaboy Sep 5 2017, 07:11 AM
Ugh.. I hate it when that happens.
I recently made a couple of sizeable fabrication mistakes on my build and had to remind myself that this is fun, I'm enjoying the process, it'll be so cool when it's done...
So... remember all that and know that when everyone is drooling over your fabulous car, this is one of the stories you'll be telling them and laughing about.
Hang tough, Matty! You're almost there!
Posted by: Matty900 Sep 5 2017, 11:01 AM
Ugh.. I hate it when that happens.
I recently made a couple of sizeable fabrication mistakes on my build and had to remind myself that this is fun, I'm enjoying the process, it'll be so cool when it's done...
So... remember all that and know that when everyone is drooling over your fabulous car, this is one of the stories you'll be telling them and laughing about.
Hang tough, Matty! You're almost there!
Thank you Chris! These 16 hours days in 100 degree days are taking their toll on me. I am doing my best to get this done so I can make it to Okteenerfest. 2500 miles from here. It occurs to me that the trip is so long that I will actually need an oil change, on the trip.
Am I nuts? But this sleep deprivation is having funny side effects on me. Think it's stupid song stuck in my head. For some reason the Smokey and the Bandit song every time I wake up in the morning. We got a long way to go and a short time to get there......
Posted by: tygaboy Sep 5 2017, 11:52 AM
Yes, you are nuts. And that's why we love you and can't wait for your next update!
![popcorn[1].gif](style_emoticons/default/popcorn[1].gif)
And yes, I expect live, streaming video of your Octeenerfest road trip.
Posted by: Matty900 Sep 6 2017, 04:59 AM
Cleaned up the alternatora little.
Attached thumbnail(s)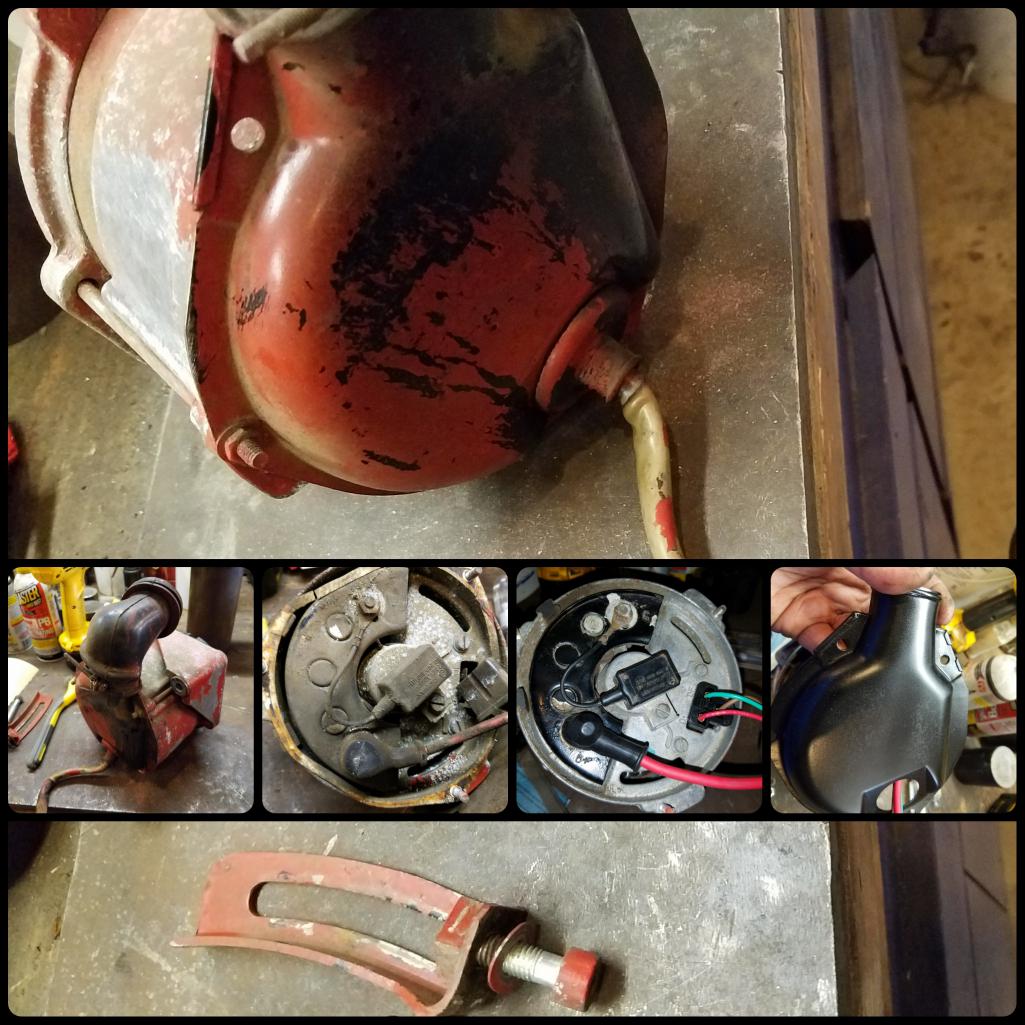
Posted by: Matty900 Sep 6 2017, 05:01 AM
Got the dash top finalized and ready for the windshield to go in. Scheduled it for tomorrow.
Attached thumbnail(s)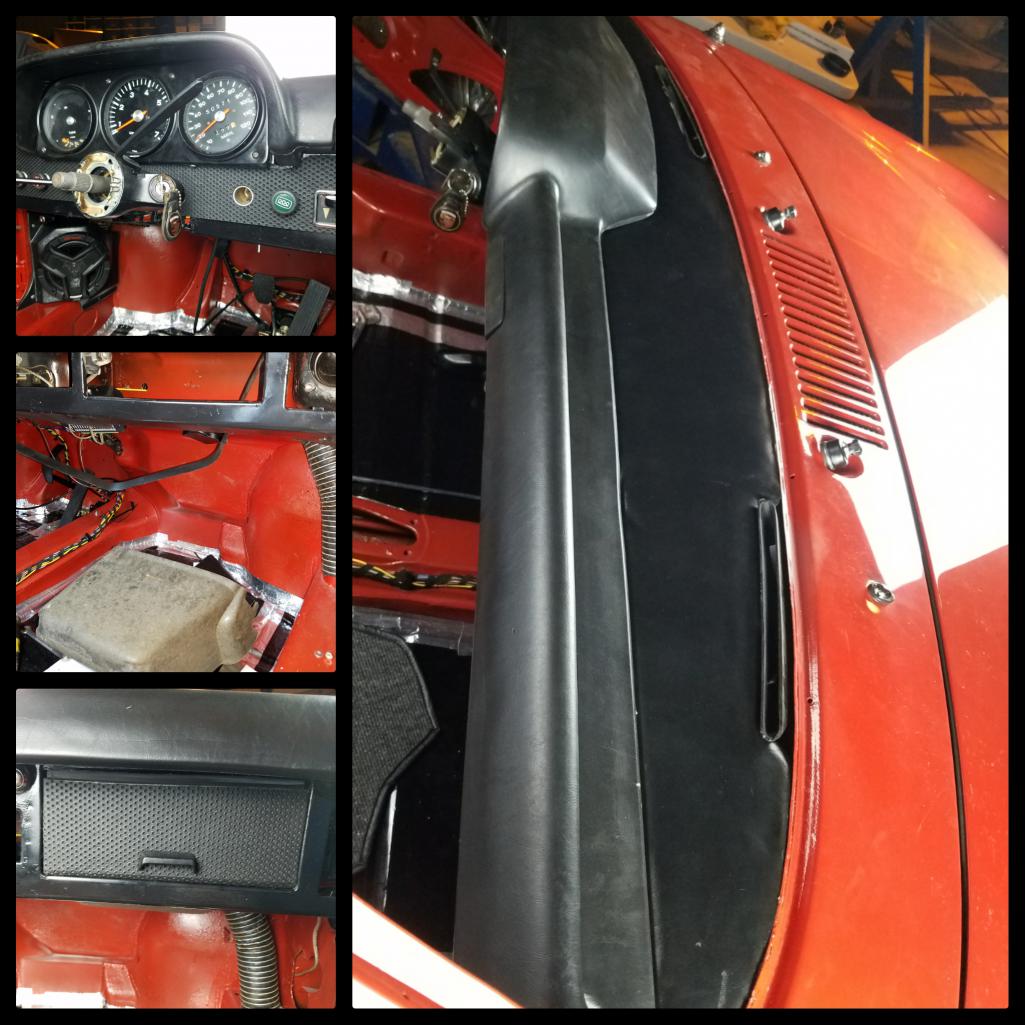
Posted by: Matty900 Sep 6 2017, 05:03 AM
Cary got the hard lines of finalized on the brakes so I believe all we have left is to hook it up to the reservoir and add fluid and Bleed It
Attached thumbnail(s)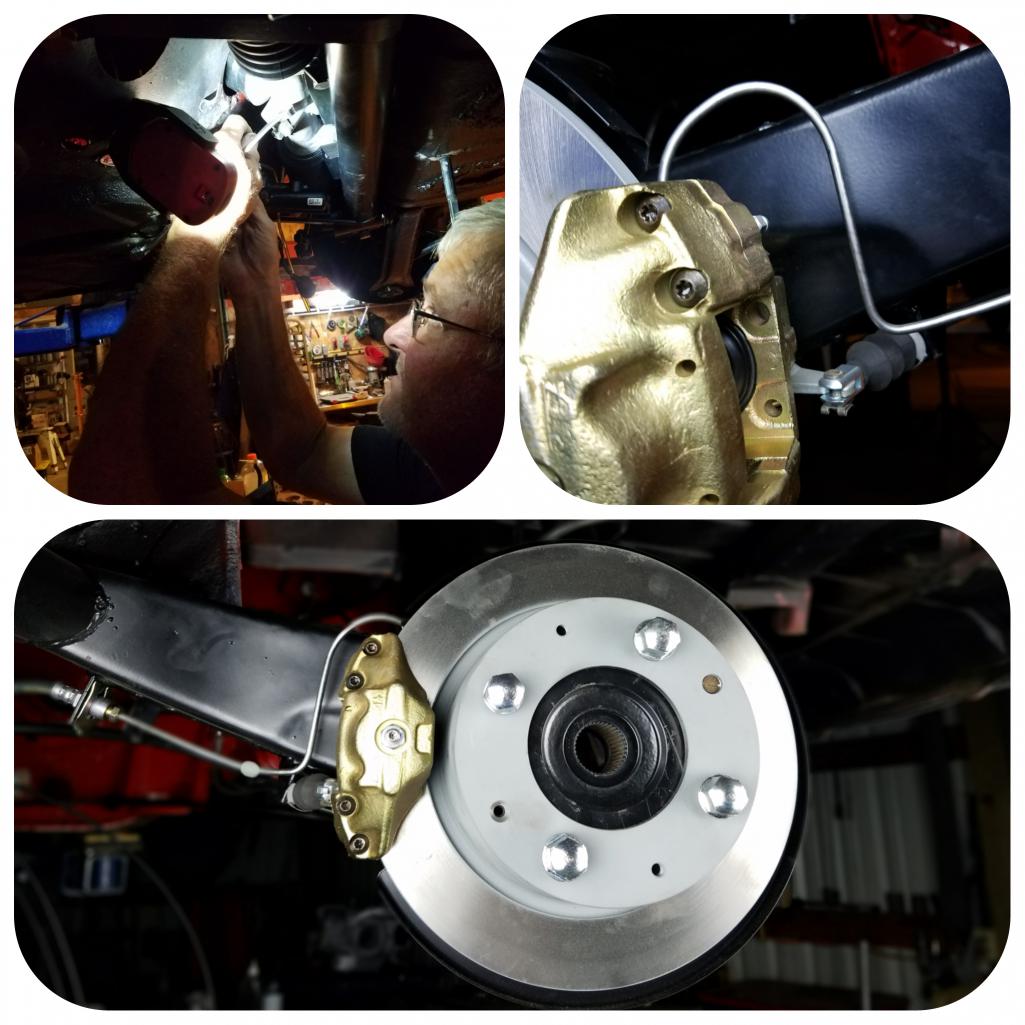
Posted by: Matty900 Sep 6 2017, 05:32 AM
Got the bumpers on
Attached thumbnail(s)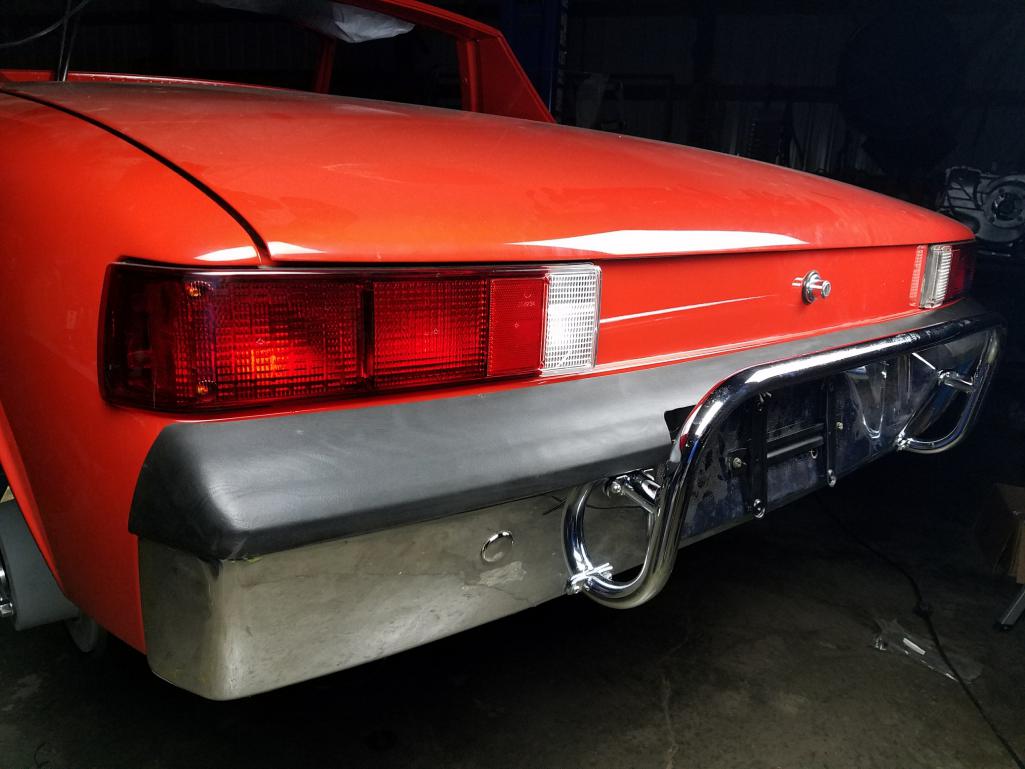
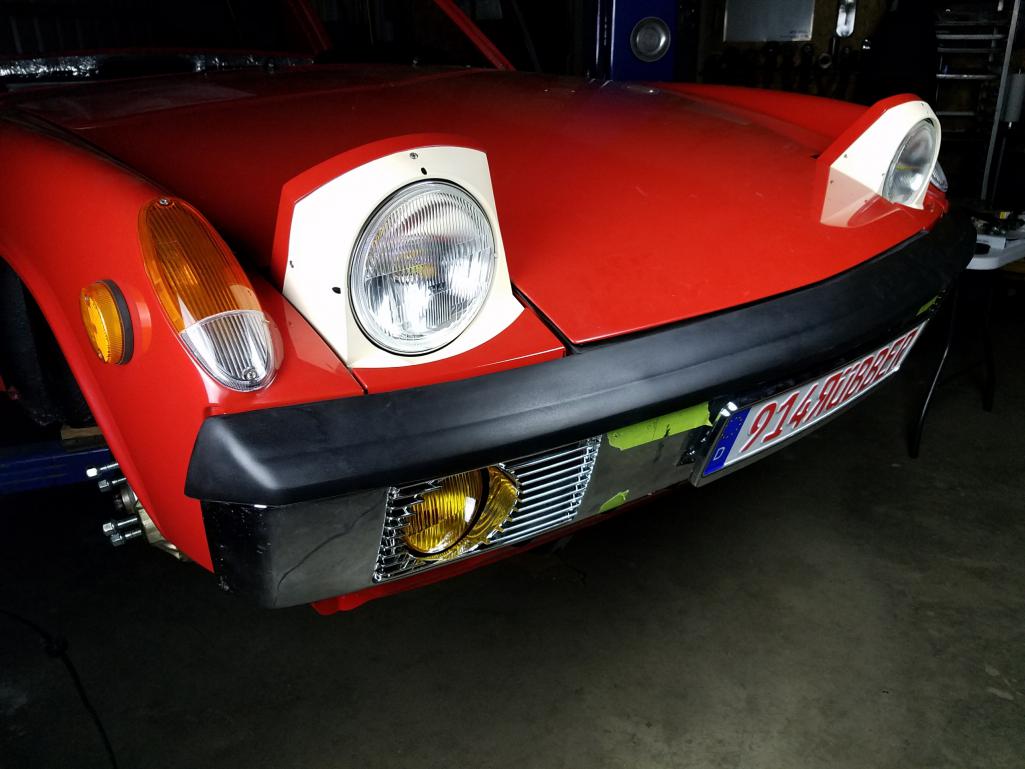
Posted by: mepstein Sep 6 2017, 05:36 AM
It's going to look like a new car. Can't wait to see it.
Posted by: Cairo94507 Sep 6 2017, 06:29 AM
Very nice looking.
Posted by: Matty900 Sep 6 2017, 11:27 AM
After about 16 hours on the car yesterday I finally started making too many stupid mistakes and had to call it a night about 2:30 a.m.
This was right after I had went to put the heater leveler in and realized I put the cables in without it. So I pulled the cable out hooked it up to the heater put them back in and then realized I had the heater lever backwards
Attached thumbnail(s)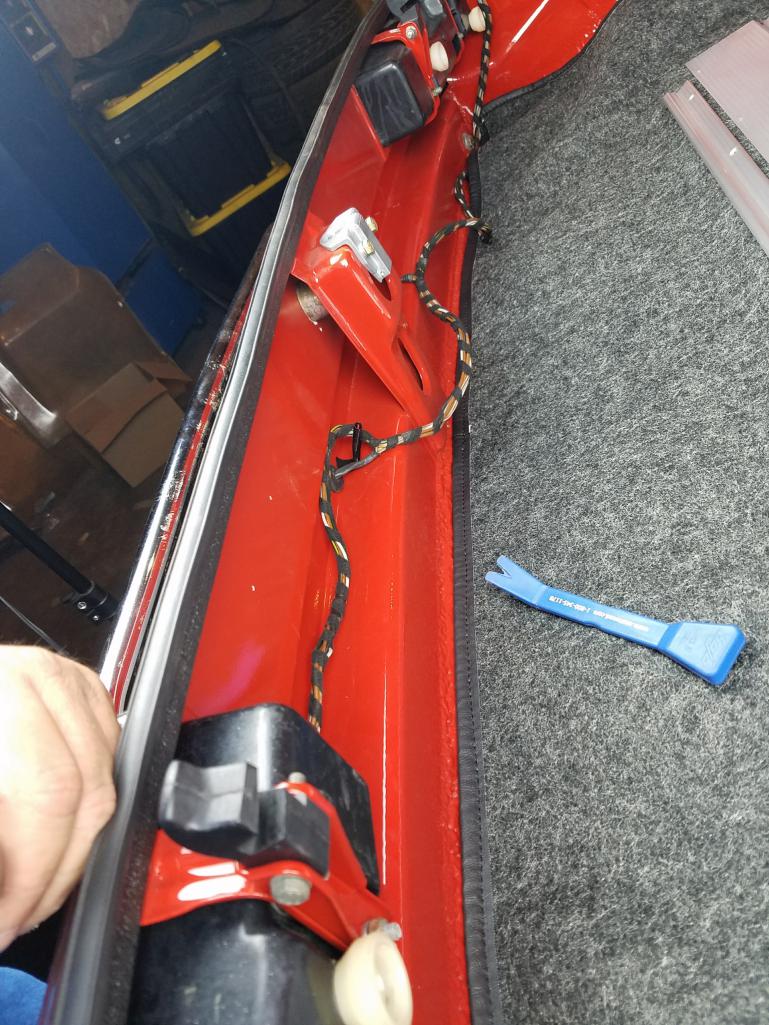
Posted by: Matty900 Sep 6 2017, 11:52 AM
Trunk is done!!
Attached thumbnail(s)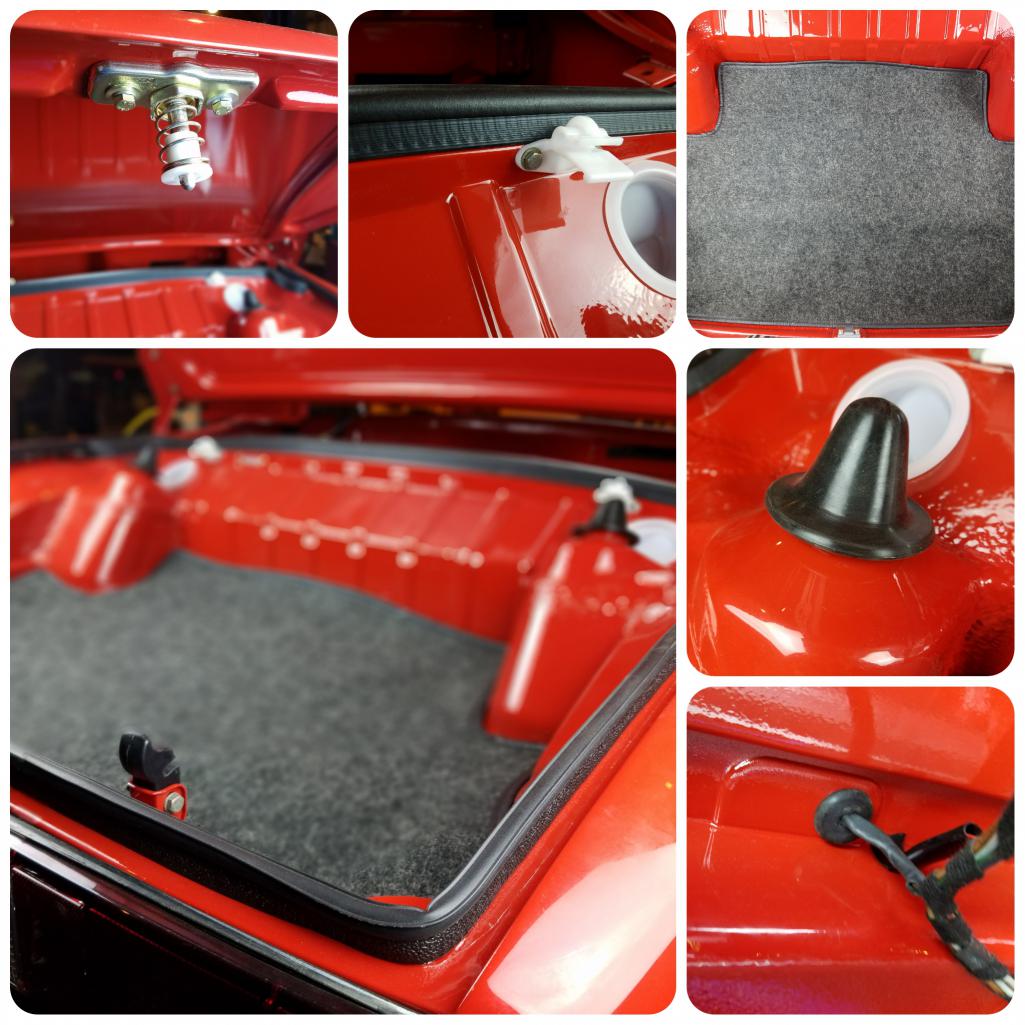
Posted by: tygaboy Sep 6 2017, 12:21 PM
Almost there! Go Matty!
Oh, and as always
Posted by: mepstein Sep 6 2017, 12:28 PM
After about 16 hours on the car yesterday I finally started making too many stupid mistakes and had to call it a night about 2:30 a.m.
This was right after I had went to put the heater leveler in and realized I put the cables in without it. So I pulled the cable out hooked it up to the heater put them back in and then realized I had the heater lever backwards
Fast is slow, slow is fast.
Posted by: Atech Sep 6 2017, 03:39 PM
Just finished reading the whole thread, awesome work! 
Posted by: Matty900 Sep 7 2017, 11:31 PM
Stoped at 5:00 am yesterday/this morning. Made lots of progress but I am getting very tummy.
Attached thumbnail(s)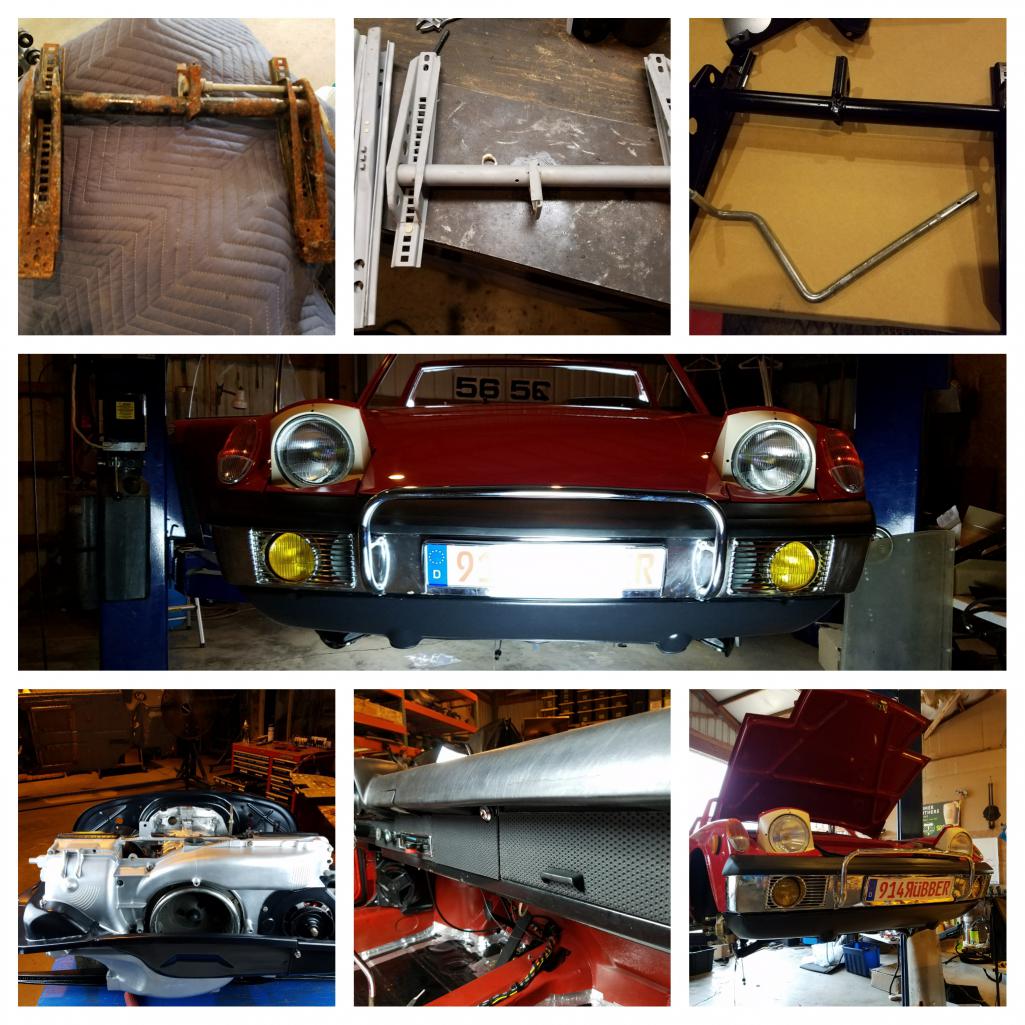
Posted by: Matty900 Sep 7 2017, 11:33 PM
So the normal fuel pump on this carbureted engine has too much pressure. The pump that works best for it is not plumbed to work correctly with the access door that we put in for under the tank. So super in law went to town and fabricated me up a bracket. This guy is awesome
Attached thumbnail(s)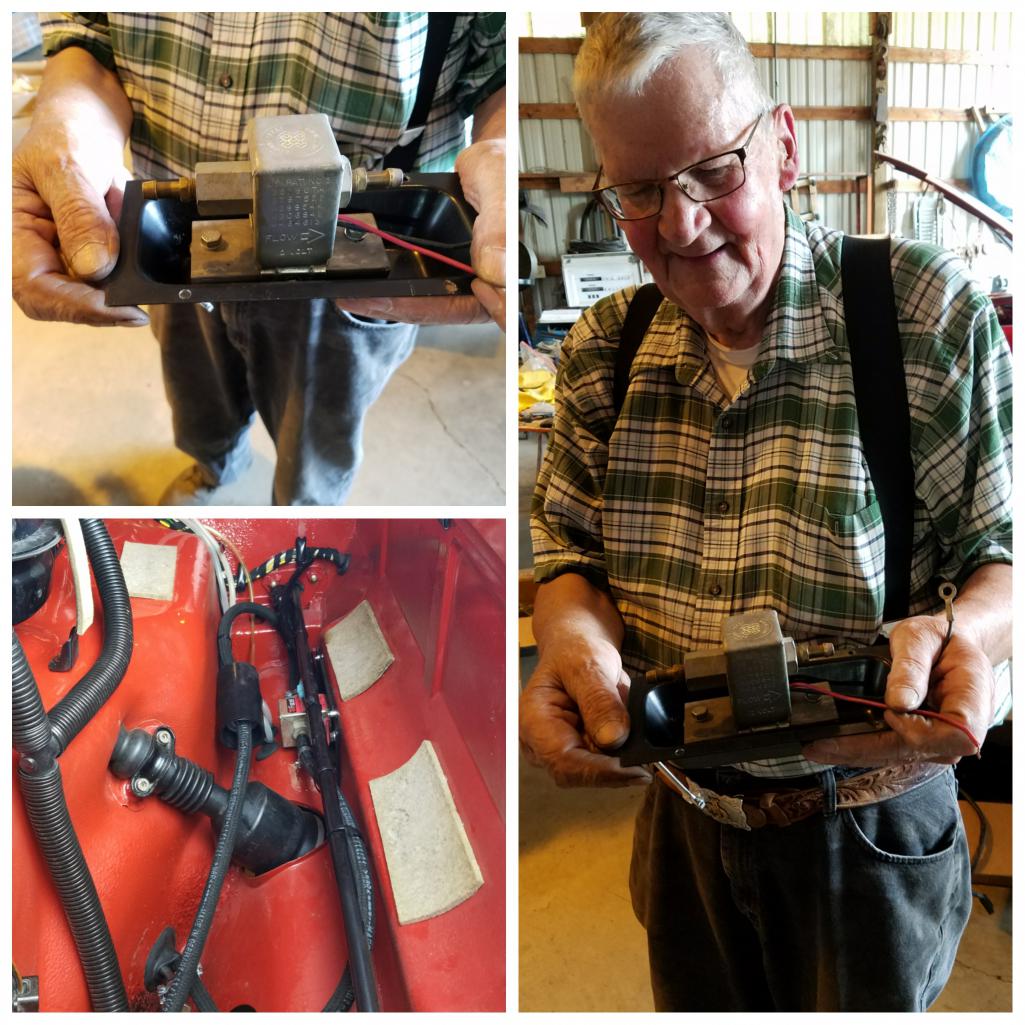
Posted by: Matty900 Sep 7 2017, 11:36 PM
Lots of help today. Mark came by and helped and getting seals done and Scott was running parts for us. thank you guys! You rock
Attached thumbnail(s)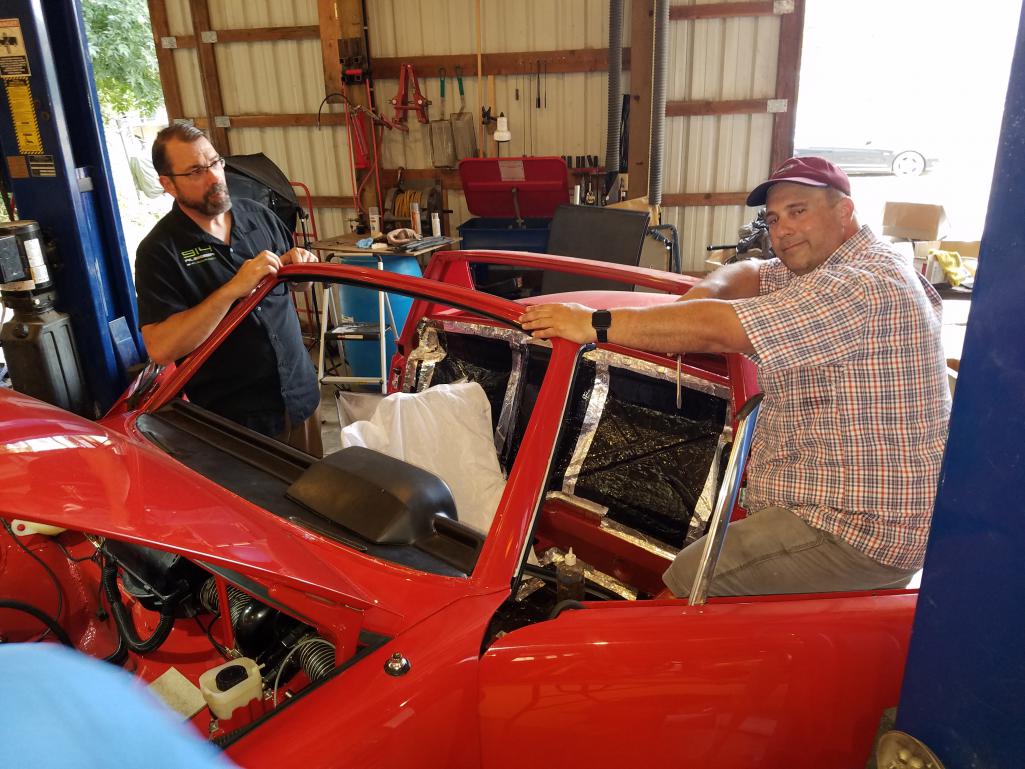
Posted by: Matty900 Sep 7 2017, 11:39 PM
Engine builder came up today with the carbs and everybody helped to get the engine together and in the car
Attached thumbnail(s)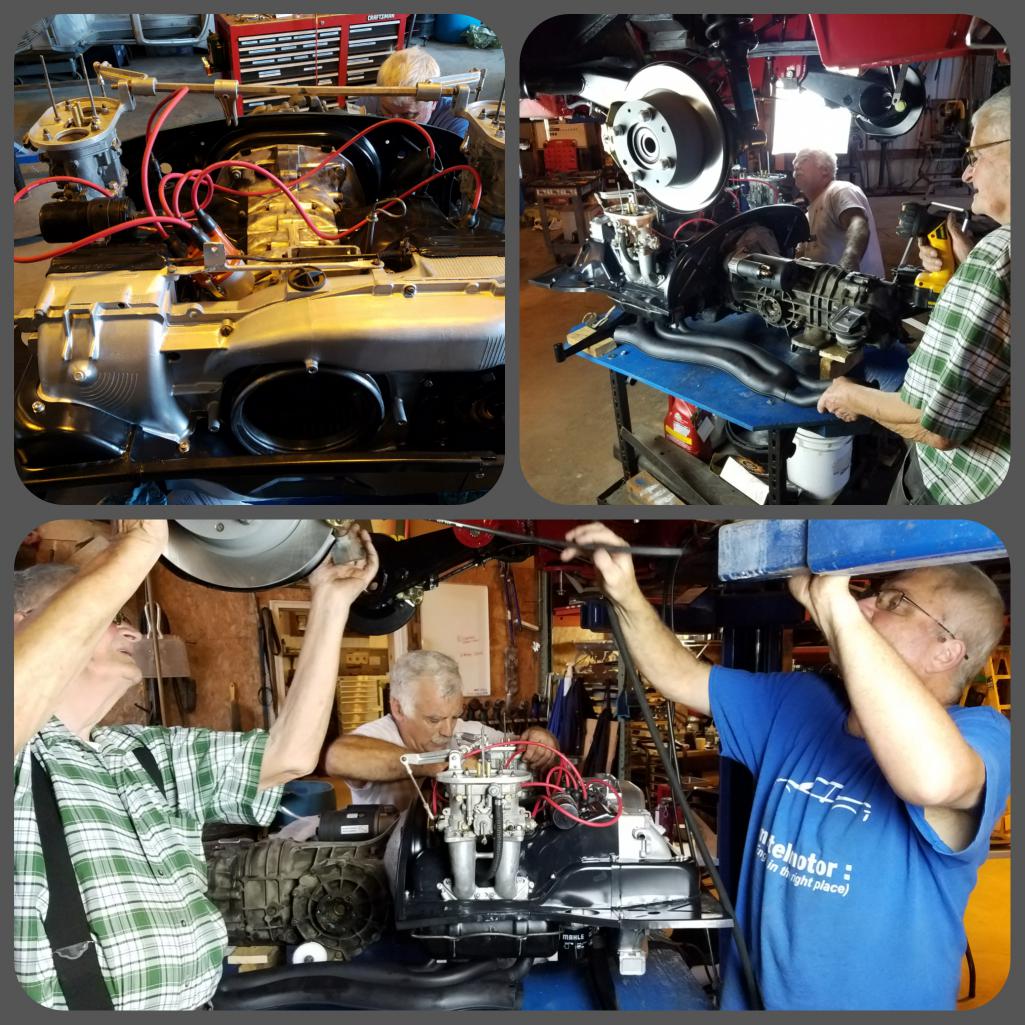
Posted by: Matty900 Sep 7 2017, 11:42 PM
Everything's ready for the tank
Attached thumbnail(s)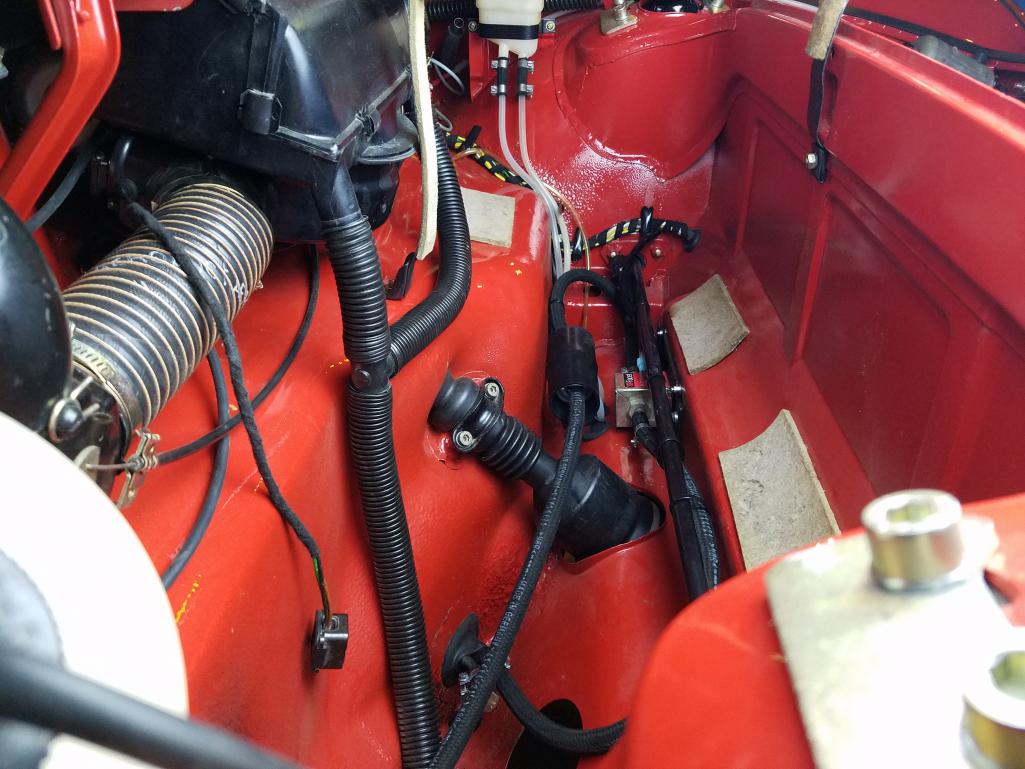
Posted by: Matty900 Sep 7 2017, 11:47 PM
Fuel tank is in but isn't quite sitting down far enough to where I can get the straps together think I got a fiddle with the position of the blocks to get it down all the way.
Anyway at this point everybody's gone home for the night I came home to actually eat some dinner with Shannon so she can remember who I am. None of this would be possible for me without her support
Now I'm going to head back over and work into the wee hours of the morning again trying to get this thing wrapped up hopefully in the morning we can track down why the lights are not coming on on the dash and or not getting power to important things like the fuel pump. Wish me luck.
Attached thumbnail(s)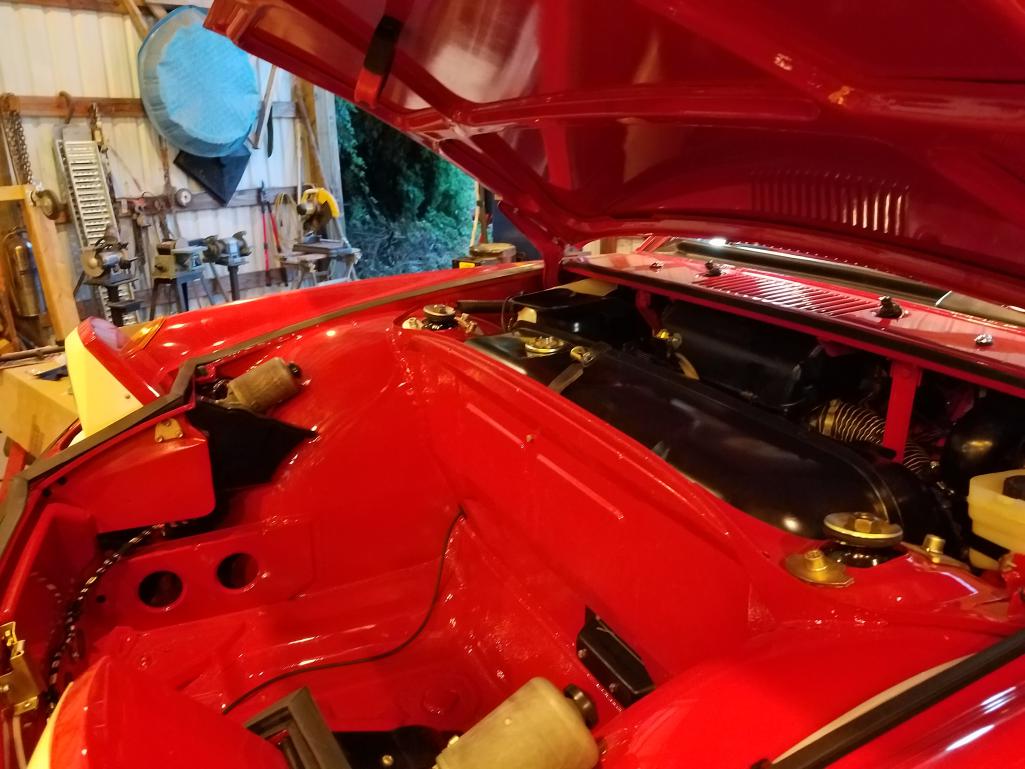
Posted by: Matty900 Sep 8 2017, 01:50 AM
Sweet I love multiple choice why are there three wires for two plugs on the driver side license plate light?
Attached thumbnail(s)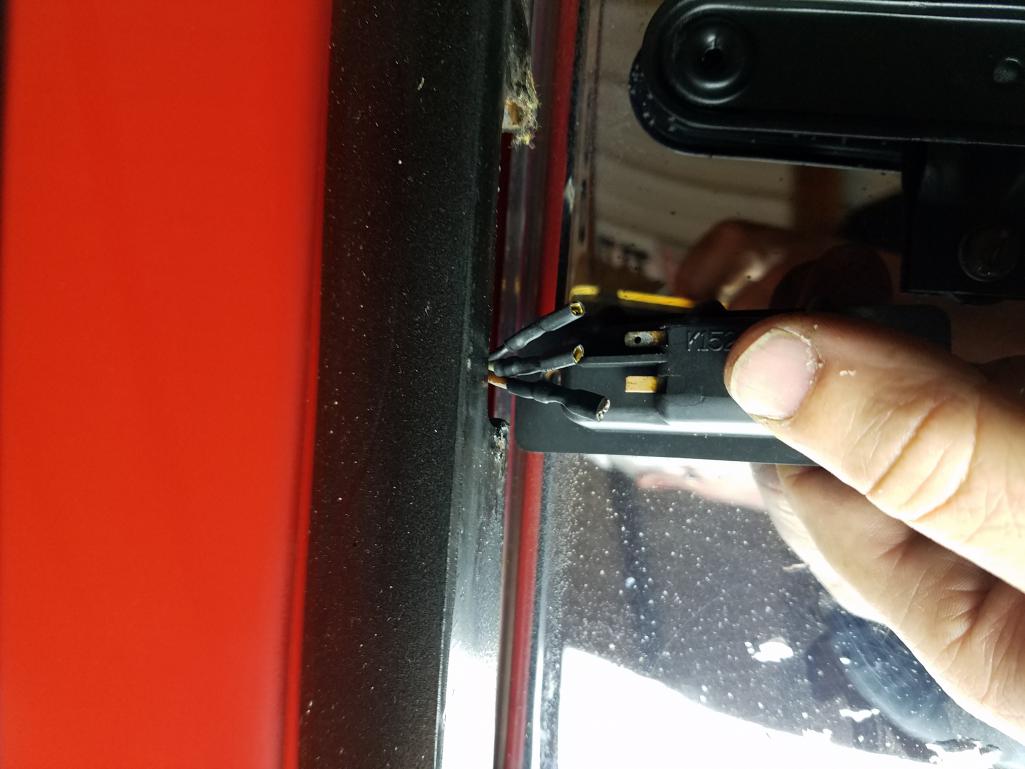
Posted by: raynekat Sep 8 2017, 01:02 PM
Matt: You should have one brown wire (ground) and one grey with a brown stripe wire at each light.
So your situation is pretty wack.
The power is coming in on the gray wires, so tape off if you have an extra one.
I found some weird things on my NOS 71 wiring harness when I went through it.
I think Hans had a few too many Warsteiner's when he assembled my harness the next day at the Porsche electrical department.
A few of the wires were mis-located in my ignition/steering wheel 14 pin connector and he had forgotten to run a ground wire to the gauges. It was added on on top of the wire wrapping of the main harness.
Looks like anything is possible.
As to your starting issue.
Make sure the black wire in the 14 pin connector at the engine relay panel is getting power when your key is in the run position.
On my car it's pin #8...not sure about yours.
If no power, work your way back to your ignition switch.
There is another 14 pin connector under the dash that the ignition switch/steering column hooks into.
The pin that supplies this black wire should be getting power with the key in the run position.
Obviously the ignition switch itself is getting power as your starter cranks.
Could be a bad ignition switch if the switch isn't delivering power out to the run circuit.
Posted by: Matty900 Sep 8 2017, 04:16 PM
New windshield and chrome in!!
Attached thumbnail(s)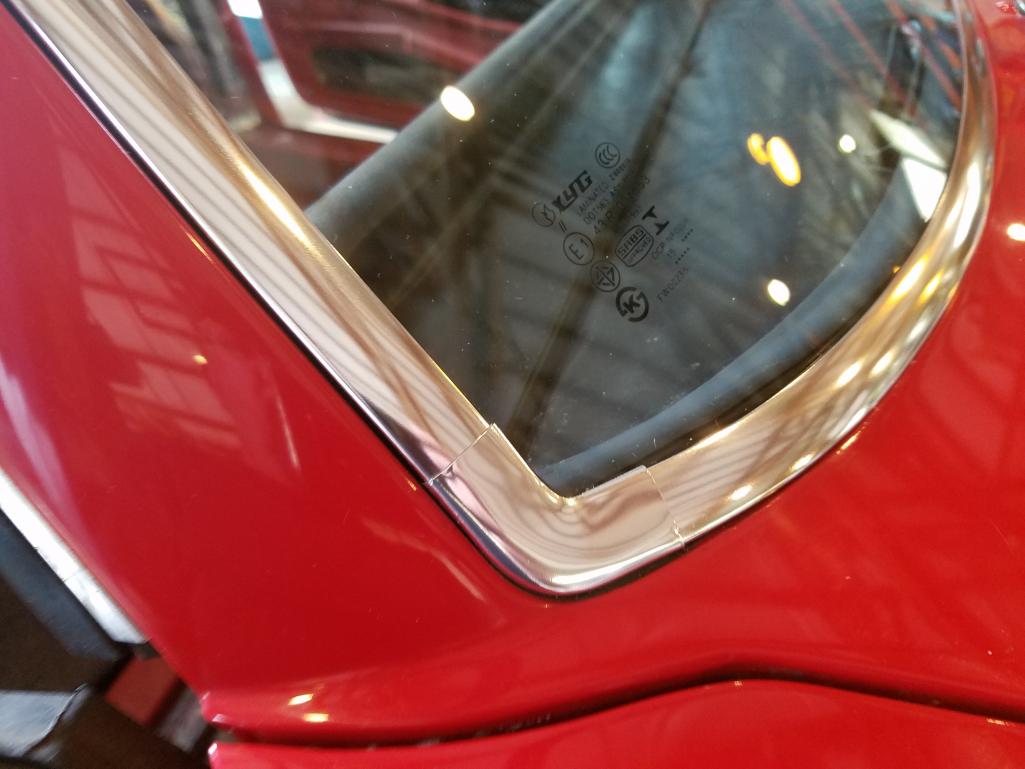
Posted by: Matty900 Sep 8 2017, 07:45 PM
Figured out why the oil light wouldn't come on bulb was out even though it didn't look like it. Still can't get the fuel pump to come on with the key. Replaced the three bad relays on the board. Jumped power to the pump so we know it works. Now we're looking into the relay board itself even though it looks perfect. Any suggestions?
Posted by: raynekat Sep 8 2017, 10:14 PM
You could have a break in one (or more) of the copper traces on the backside of the board.
Or a problem with one of the wires coming into relay board via the 14 pin connector.
Sounds like you've ruled out the relays.
How do you know if your replacement relays are any good?
Did you pull one from a headlight motor that you know is working?
See attached diagram.
When you turn the key, you should get power at pin 86...and better have power at pin 30 as well.
A functioning relay will send the power from pin 30 out pin 87 to your fuel pump.
Some things you can check.
1) You should always have continuity from pin 87 to your fuel pump.
If not, there is something wrong with either the trace on the backside of the board from pin 87 to the 14 pin connector (possible) or a problem with the wire from the 14 pin connector to the fuel pump (unlikely).
2) You might not be getting power to pin 86.
Either a problem again with a broken trace on the backside of the board from pin 86 to the 14 pin connector or a problem from the 14 pin connector back to your ignition switch, the black wire.
Again with the key in the run position, you better have power at both pin 86 and pin 30 in the fuel relay socket.
If you do, you can narrow it down to either still a bad relay or a problem with the current path to the fuel pump (either a trace on the backside of the relay board or the wiring from the 14 pin connector to the fuel pump).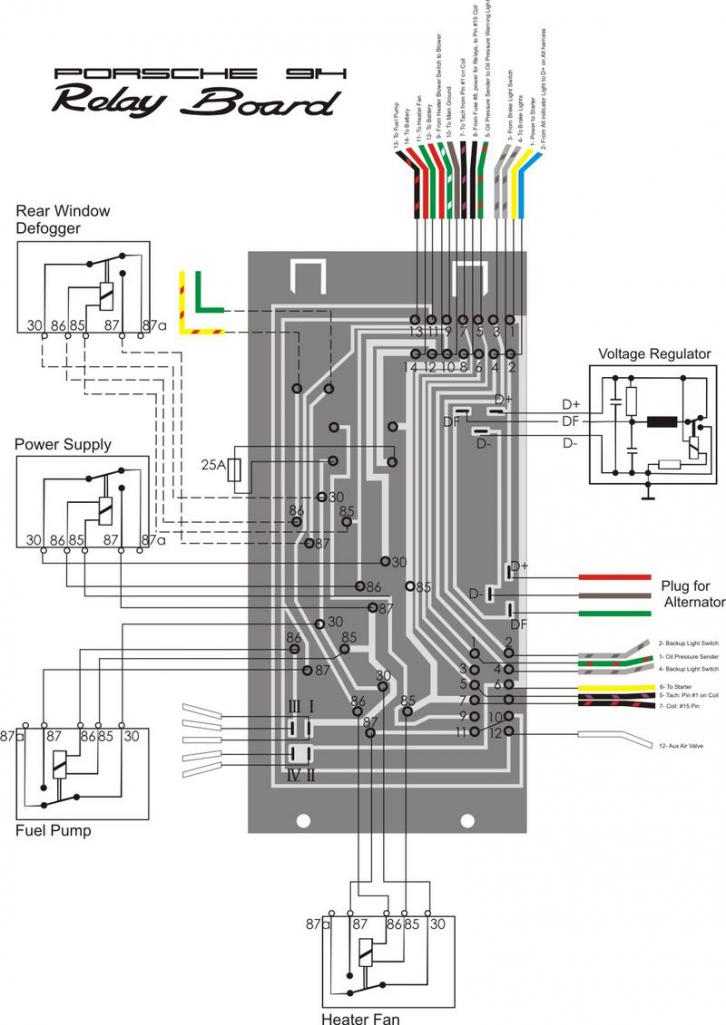
Posted by: raynekat Sep 8 2017, 10:17 PM
To check out the relay board you need a multimeter and the wiring/circuit diagram for the board.
Not sure if the above is good for your board? but it might be.
You go check every pin on both the 14 and 12 pin connectors with their "destinations."
You should have good continuity on everyone.
If you don't, you likely have a broken connection between a trace and a pin on the backside of the board.
This will require removing the potting, re-soldering the break and then re-potting the entire backside when complete.
I had 2 such issues on my 914-6 relay board.
Posted by: cary Sep 8 2017, 11:14 PM
To check out the relay board you need a multimeter and the wiring/circuit diagram for the board.
Not sure if the above is good for your board? but it might be.
You go check every pin on both the 14 and 12 pin connectors with their "destinations."
You should have good continuity on everyone.
If you don't, you likely have a broken connection between a trace and a pin on the backside of the board.
This will require removing the potting, re-soldering the break and then re-potting the entire backside when complete.
I had 2 such issues on my 914-6 relay board.
We had no switch power to pin 85 on the power supply relay. Which would have feed the 85 pin on the fuel pump relay.
Plus we need a jumper from ground III. Heading to bed right now. Next time I go to bed the car will be in the trailer ready to head to Atlanta. Matt's out picking up the seats and a new engine wiring harness.Posted by: Matty900 Sep 9 2017, 05:55 AM
Almost 5 a.m. just made it home to bed if you are asleep and then back at it to try and get it wrapped up. Still a lot to go.
Got the wiring harness done and the jumper is installed for grounding the fuel pump
Attached thumbnail(s)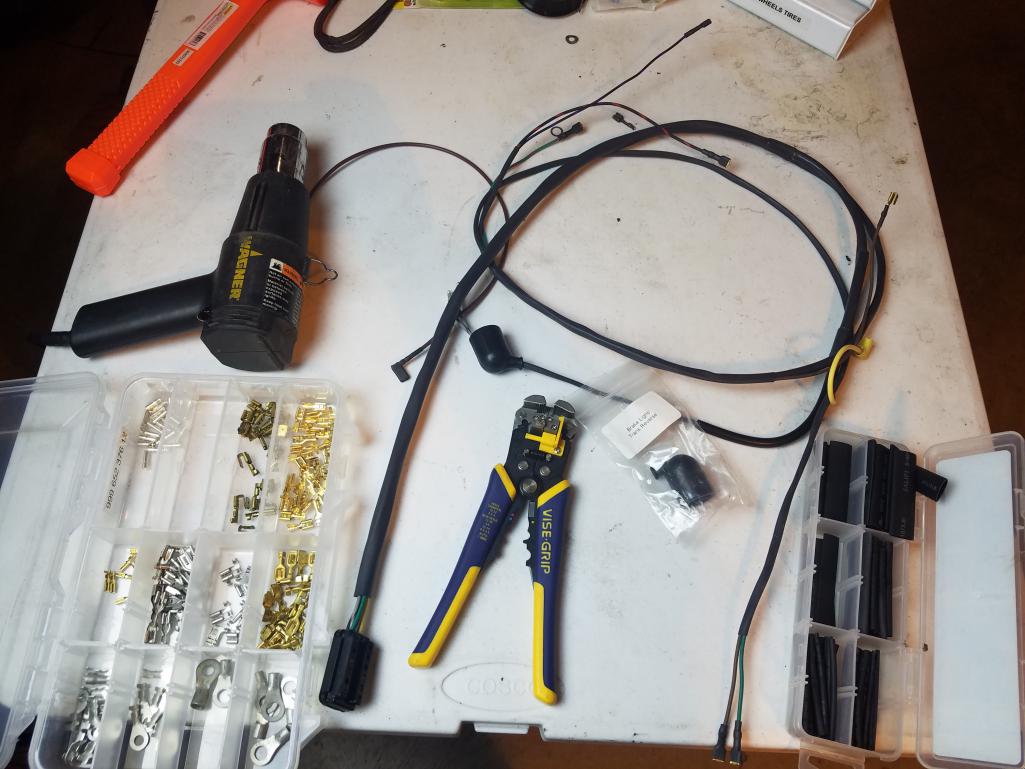
Posted by: Matty900 Sep 9 2017, 06:04 AM
Got the seats picked up and they turned out beautiful
Attached thumbnail(s)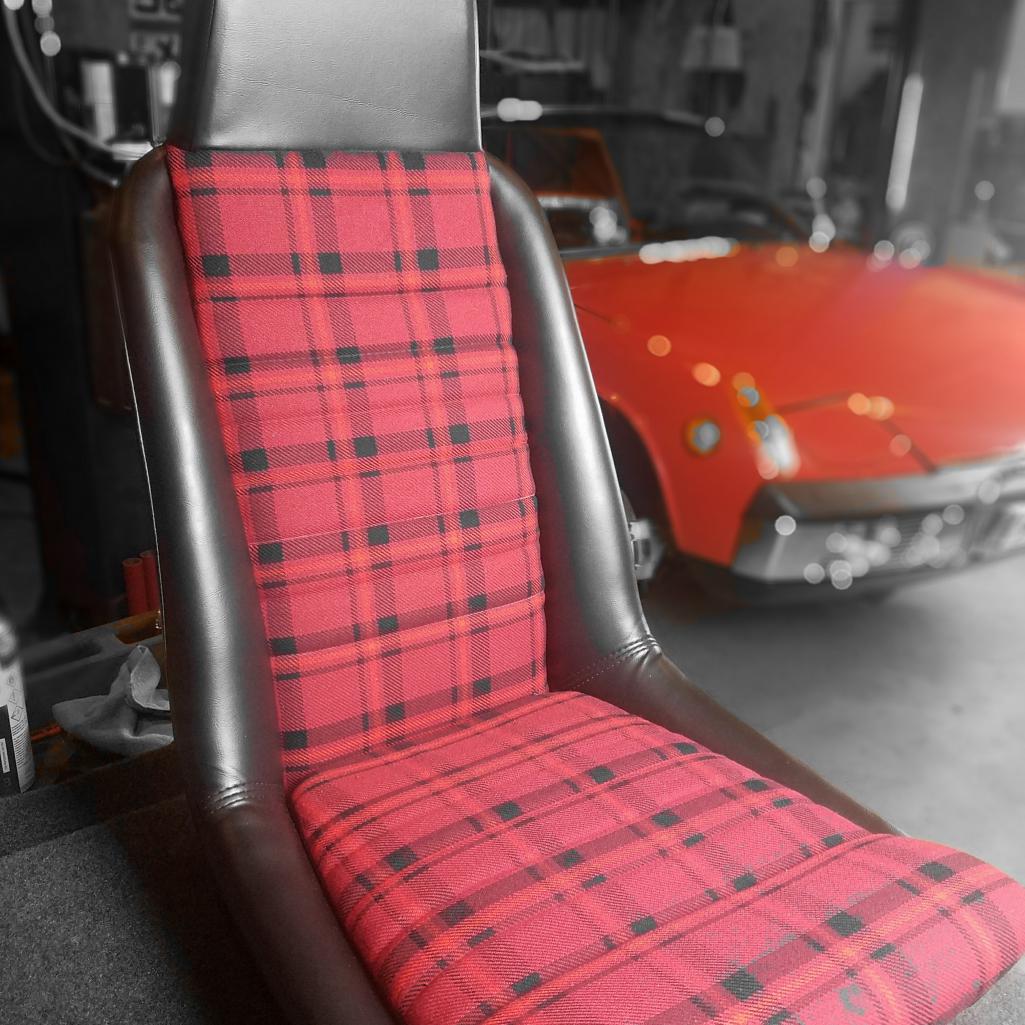
Posted by: Matty900 Sep 9 2017, 06:07 AM
Got the seat bases and Adjusters all restored with new bushings and fresh paint after sandblasting. One had a broken seat adjuster handle so I drilled that out and put in a new handle that we make
Attached thumbnail(s)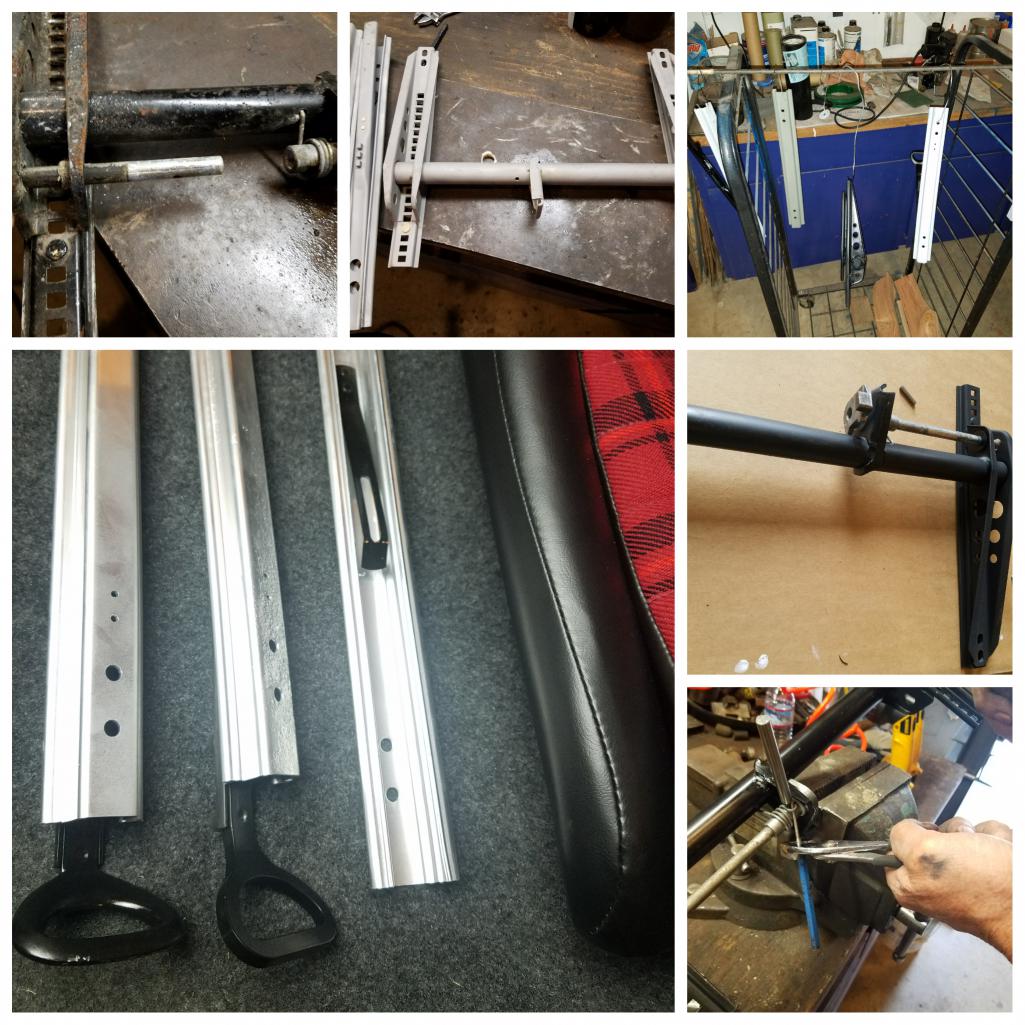
Posted by: cary Sep 9 2017, 06:43 AM
Almost 5 a.m. just made it home to bed if you are asleep and then back at it to try and get it wrapped up. Still a lot to go.
Got the wiring harness done and the jumper is installed for grounding the fuel pump
Hmmm. Funny you should mention it. I'm up coffee #1.
Time to start looking for the info I was talking about last night. Color pictures.
I didn't see the brake fluid ? I'll stop and get a quart of DOT 4.
I'll find something to do .............
Bleed brakes
Adjust e brakes and set air gap
Install and torque in half shafts. No safety wire. We'll wait for the new ones.
Lower of ground and set front ride height.
Hillbilly front and rear alignment. To be done on Monday at PMB
Don't plan on going home till we load it in the trailer ..................
Time for coffee #2..............
Oh yeah forgot, dial in shift linkage conversion.
Posted by: Matty900 Sep 10 2017, 04:04 AM
Had lots of help "today" meeting yesterday. It's now 3 a.m. I'm just getting to bed again.
Taylor showed up to work on his car and ended up helping out on my car for the day really appreciate the help from him!
Attached thumbnail(s)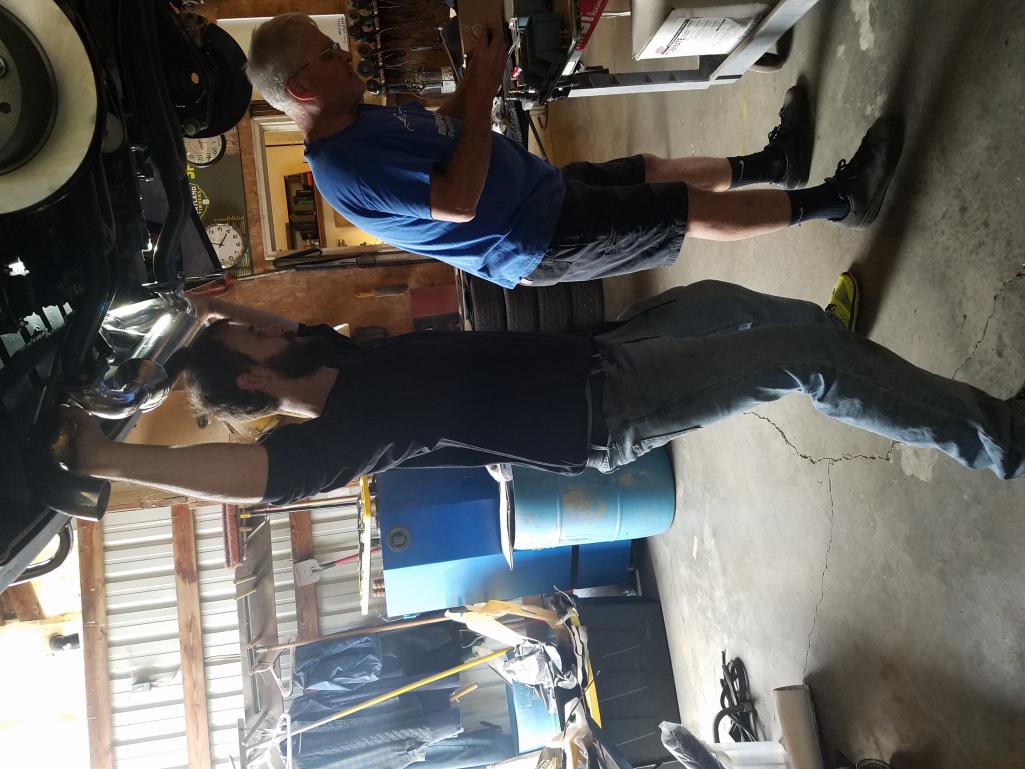
Posted by: Matty900 Sep 10 2017, 04:06 AM
I'll try to post as much as I can but I keep nodding off. As usual Jack was incredible help today. Here is Fab tap a tool to hold the wheel in place while you're trying to tighten up half shafts.
Attached thumbnail(s)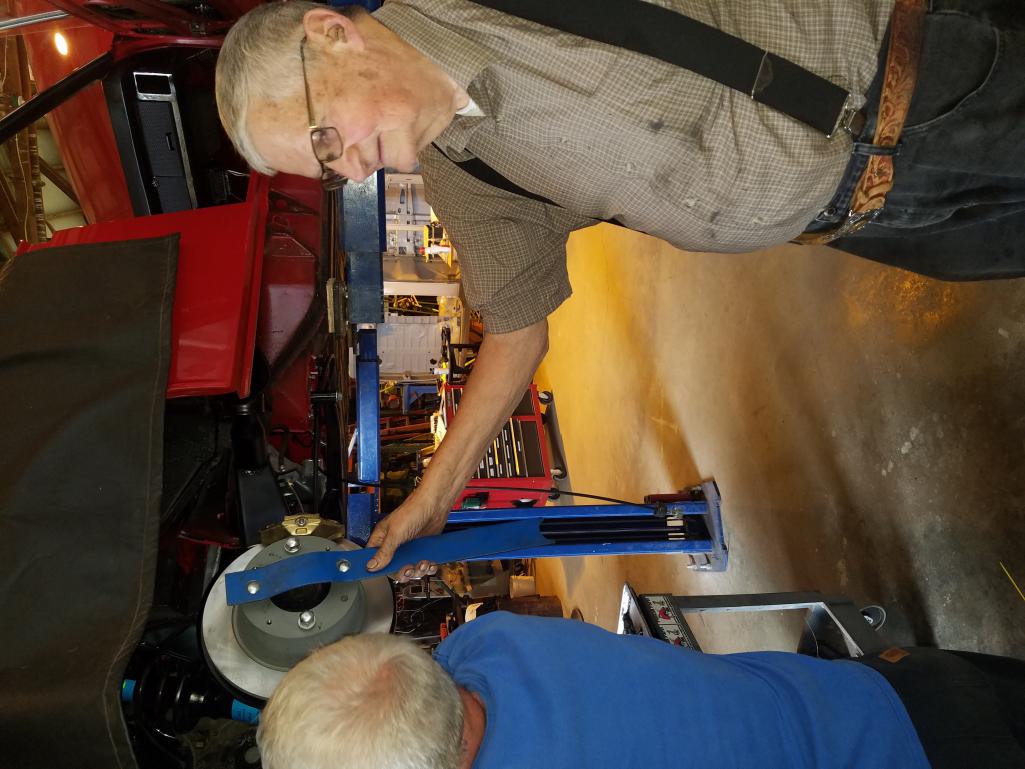
Posted by: cary Sep 10 2017, 08:50 AM
Long day. As usual didn't quite go as planned. 
Super In Law was with us the entire day and evening ................ Amazing
I'll let Matt give you the blow by blow.
Cary's short list :Adjust e- brakes
Torque rear axle castle nuts
Install and adjust shift linkage
Adjust brake pedal push rod
Re-bleed brakes after sitting all night
Get Matt loaded and on his way to Salt Lake City
Too tired to remember the rest
Engine builder is coming back to give the engine and carbs a little tune .............
I don't really dig the carbs too much. But the cam is pretty impressive.
Posted by: cary Sep 10 2017, 08:57 AM
I'll try to post as much as I can but I keep nodding off. As usual Jack was incredible help today. Here is Fab tap a tool to hold the wheel in place while you're trying to tighten up half shafts.
On a non pretty car the bar tucks under the suspension mount to let you torque the axles. Last night Jack just held it.
Posted by: cary Sep 11 2017, 08:33 AM
1:15 am and she's loaded in the car ................
Ran into more issues. I'll let Matt elaborate.
Left Matt at the shop to load up what's left for the car. For safety's sake I suggested Matt have his son drive him to Salt Lake City and fly him home. That way Matt can unwind and sleep.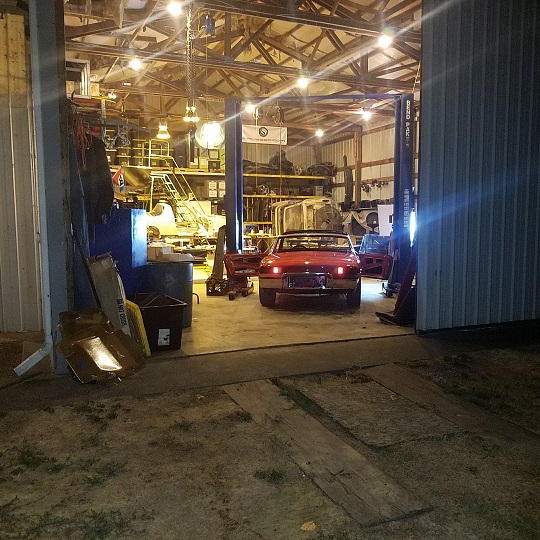
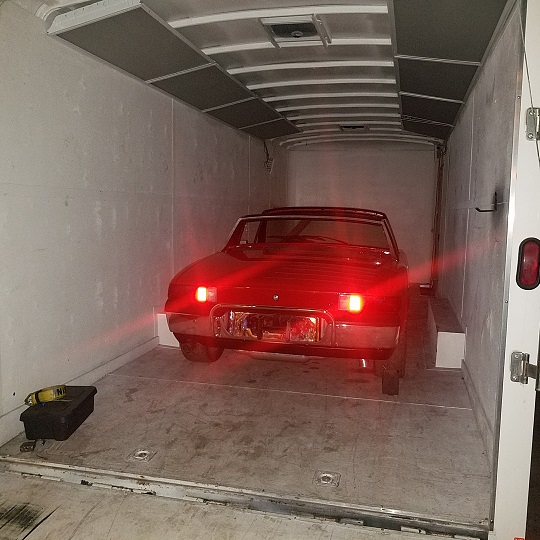
Posted by: cary Sep 11 2017, 08:40 AM
1:15 am and she's loaded in the trailer ................
Ran into more issues. I'll let Matt elaborate.
Left Matt at the shop to load up what's left for the car. For safety's sake I suggested Matt have his son drive him to Salt Lake City and fly him home. That way Matt can unwind and sleep.
Posted by: cary Sep 12 2017, 08:32 AM
Long trip to Atlanta was cancelled because of hurricane. New destination Red Rocks, so the car came out of trailer for another day of interior work.
We left at 7pm and he still needed carpet and seats. No posts, maybe he got it done.
I went back yesterday afternoon to re engineer the 4 barrel throttle. That's covered in Matt's other thread. http://www.914world.com/bbs2/index.php?s=&showtopic=316276&view=findpost&p=2526840
Car has a 1pm appointment at Rothsport for a ride height, alignment/counterbalance.
Posted by: bbrock Sep 12 2017, 10:44 AM
Man, I hope you all got some sleep. But this sure is exciting to watch from this end!
Posted by: Matty900 Sep 12 2017, 08:02 PM
Starting to forget what day it is and my name and... what were we talking about.
A lot has happened in the last 48 hours I worked on a car from most of those hours. In the wee hours of the morning trying to get packed up for the trip to Atlanta with a car that was not running because of linkage issues and still so much still to be done with the car it occurred to me that as much as I wanted to make it there it was not going to happen and it would make a lot more sense to take a running driving car to an event. Red Rocks is a lot closer and I had a blast last year so altered plans with the car back off the trailer I went to work overtime if that's possible. What's over time to 3 o'clock in the morning well I stayed up all night last night working on the car. Yes that's right zombie mechanic. It was a very surreal thing no music playing like I usually have for motivation, no two liter of Mountain Dew just working through the parts sorting things out figuring okay this goes here and seeing something else okay that goes there but I have to do it in this order and spending a buttload of time on that damn window. That is still not done
I always try and keep in mind that things happen for a reason and this is not in sequence for everything that's happened but is too cool not to share. We still have to figure out the alignment ride height and we're still having some brake issues carry in his awesomeness hold a favor at Rothsport Racing and was able to get the guys excited about the project and wanting to help on it. He was able to get me an appointment at 1 p.m. but we still needed some brake components that we're being overnighted from Eric at PMB (thank you, you rock ) so I work on the car up to the point where I get it into the trailer and load only the car and take it out there. Pick up the brake parts and head out. I get there and I'm just overwhelmed with how cool this place is but I'm so freaking tired. Taking a nap for about an hour and a half on the couch in the employee break room. I will not make it back downstairs Jeff gamroth himself is doing the clinic with the guys on the car. Pretty freaking amazing had to share this out of order. As soon as I have the time I will get more sequential build information for you.
Attached thumbnail(s)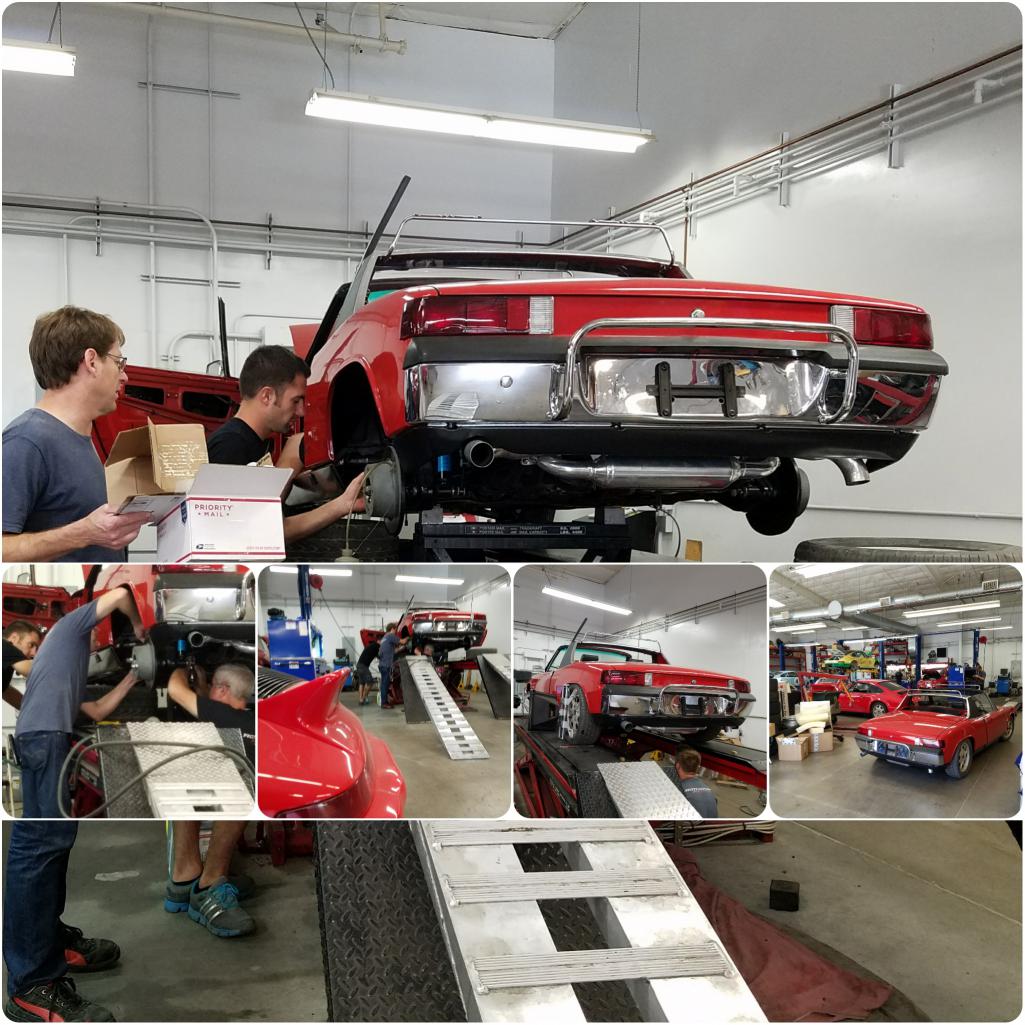
Posted by: Matty900 Sep 12 2017, 08:06 PM
This is what my car was surrounded by. Place is truly amazing. Very I don't know how you get any work done at all I'd be drooling all day long. Thank you thank you thank you you are awesome and it goes without saying my project would be nowhere near the caliber it is without your guidance and assistance
Attached thumbnail(s)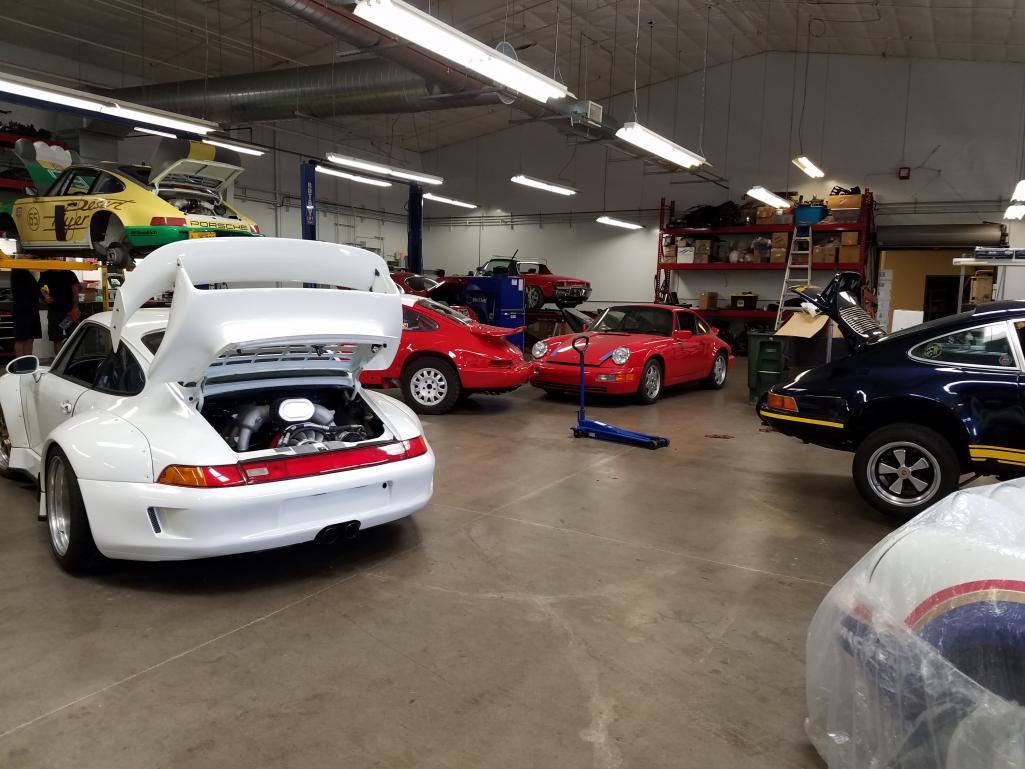
Posted by: Matty900 Sep 12 2017, 08:08 PM
Car porn
Attached thumbnail(s)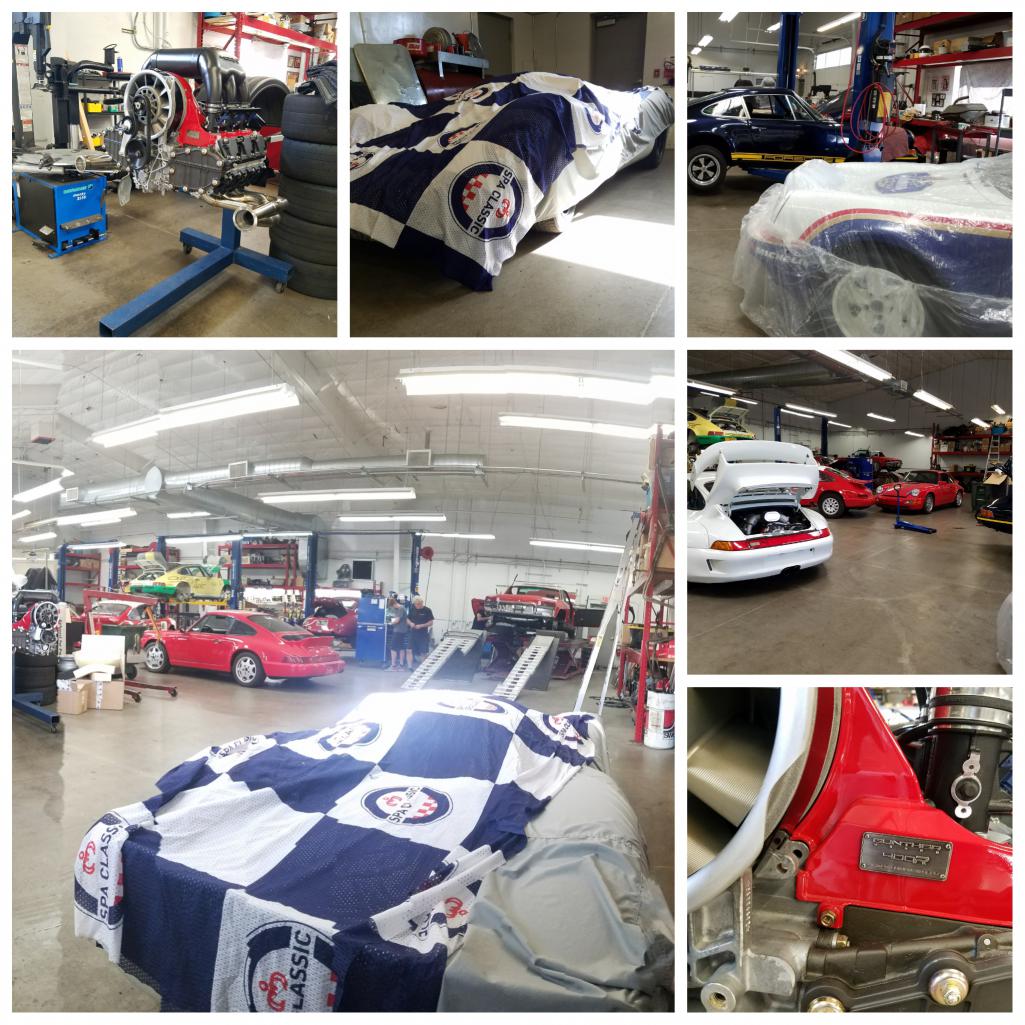
Posted by: Matty900 Sep 12 2017, 08:19 PM
Well I need to quit screwing around and get back out to the barn and get my stuff for the car packed up so I can get on the road early in the morning 4 Red Rocks after some good sleep
Attached thumbnail(s)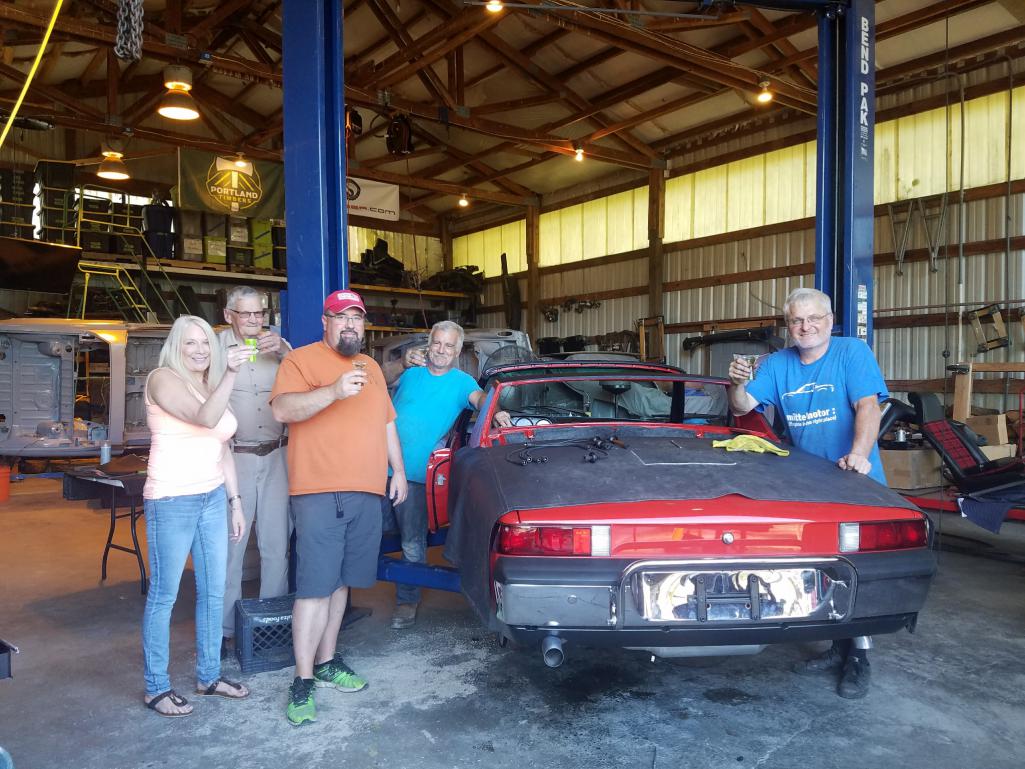
Posted by: raynekat Sep 12 2017, 11:57 PM
Well I need to quit screwing around and get back out to the barn and get my stuff for the car packed up so I can get on the road early in the morning 4 Red Rocks after some good sleep
For some reason, this song comes to mind.....
https://www.youtube.com/watch?v=v_sB6gFenUg
East bound and down, loaded up and truckin'
We're gonna do what they say can't be done
We've got a long way to go, and a short time to get there
I'm east bound, just watch ole bandit run
Good luck and God's speed Matt.
Posted by: cary Sep 13 2017, 11:14 PM
They didn't get away too early, but Matt and Shannon are on their way. They were in the Dalles at 7pm. He sounded a little more rested.
East bound and truck n.
Posted by: Larmo63 Sep 13 2017, 11:52 PM
Car looks really nice, you guys!!!!
Are you sure this isn't a reality show and we don't realize it??
Posted by: Matty900 Sep 14 2017, 04:00 AM
Car looks really nice, you guys!!!!
Are you sure this isn't a reality show and we don't realize it??
More like altered reality.
The drive so far had a few thing's of interest. The highway on the Oregon side of the Columbia Gorge was closed due to a forest fire. We crossed back on to Oregon in Hood River over a narrow toll bridge that was a white knuckle test of skill with the trailer behind me. I posted a cool timelapse of that drive on Facebook.
Comming out of Boise they was a pretty cool lighting storm.
Going to catch a few zzz's in twin falls and then try and meet up with the group at PMB. Probably going to miss tgem but well see how it goes.
Attached thumbnail(s)
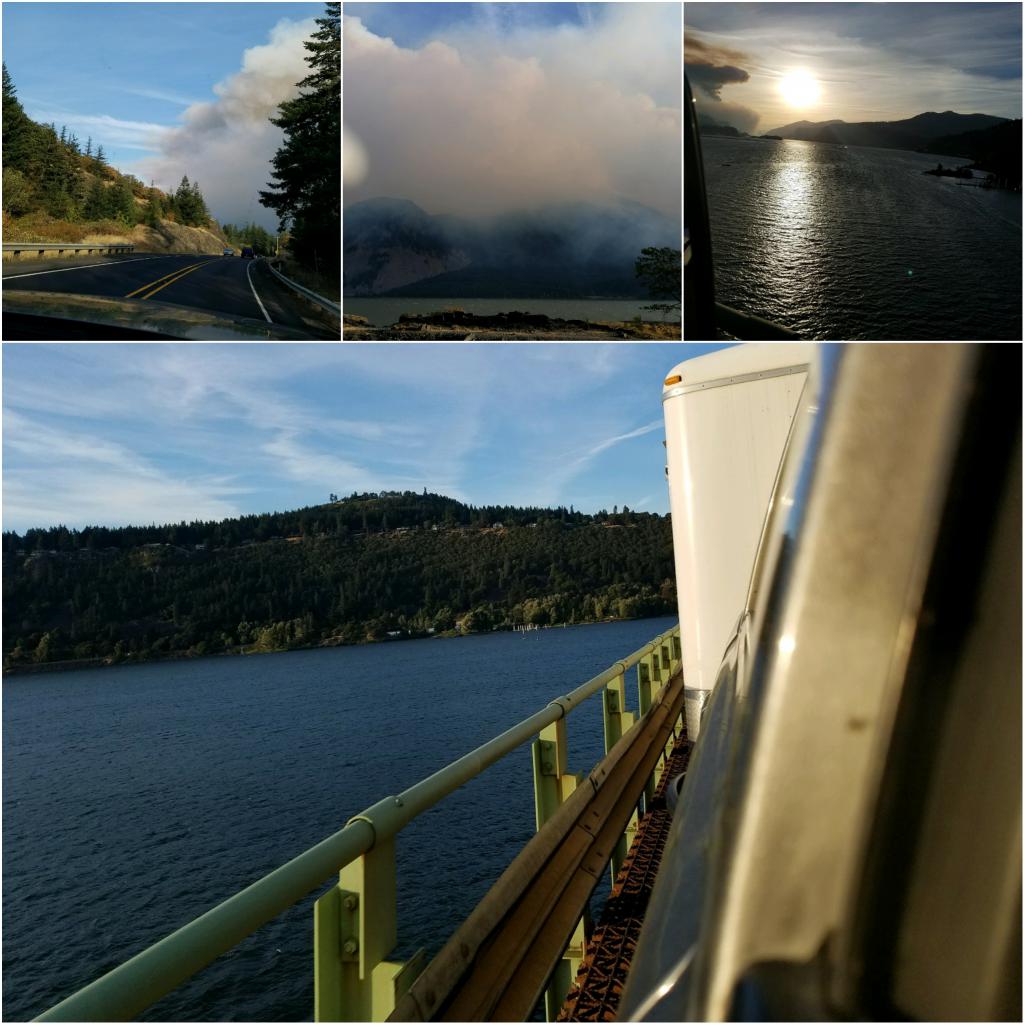
Posted by: Matty900 Sep 14 2017, 01:58 PM
Made it in to Utah and had and engine light come on in the truck and started loosing power. Limped into an auto parts store and pulled the codes. I replaced the Map sensor and the Mass Airflow sensor and reset the codes. Pulled out, still dogging out. Turned around and went to a dealership to have them check it out. 
Attached thumbnail(s)
Posted by: Matty900 Sep 14 2017, 03:05 PM
Dealership ran Diagnostics found that the map sensor I just bought from O'Reilly was bad. Put the original one back in it reset all the codes and went and drove it out runs fine now to hook the trailer back up and get the Colorado
Attached thumbnail(s)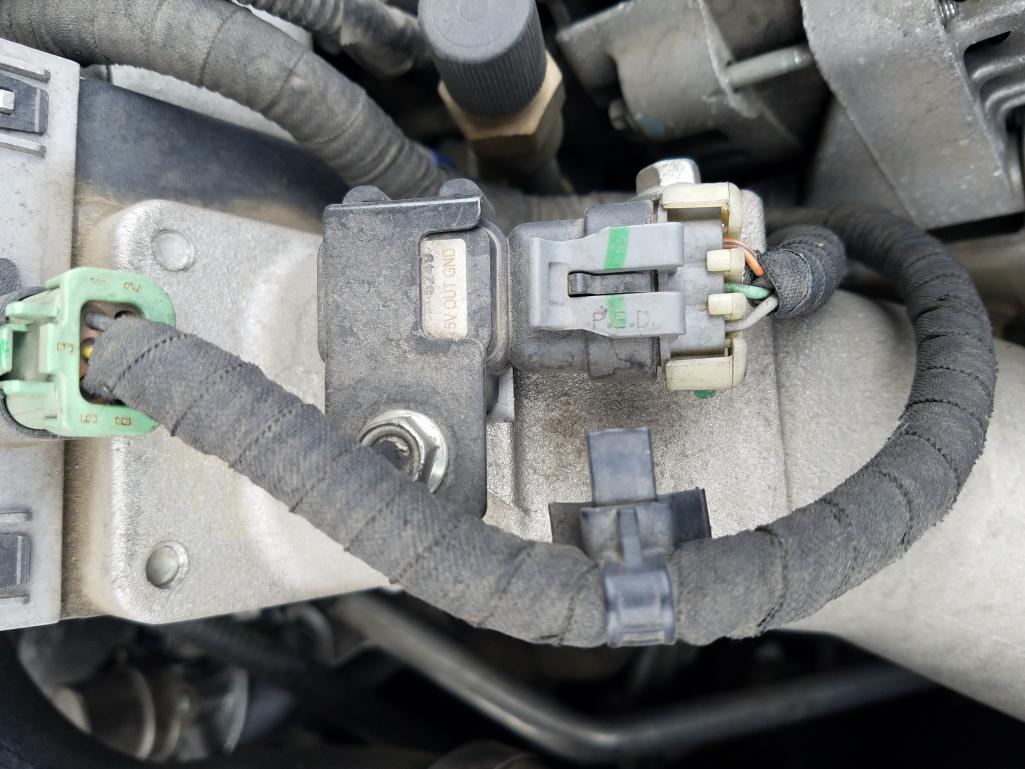
Posted by: raynekat Sep 14 2017, 05:32 PM
Nice Dude...that's great news. Weird for sure.
Hope the rest of your trip is uneventful.
Enjoy this weekend.
Posted by: Matty900 Sep 15 2017, 03:03 PM
Made it to Red Rocks!!
Attached thumbnail(s)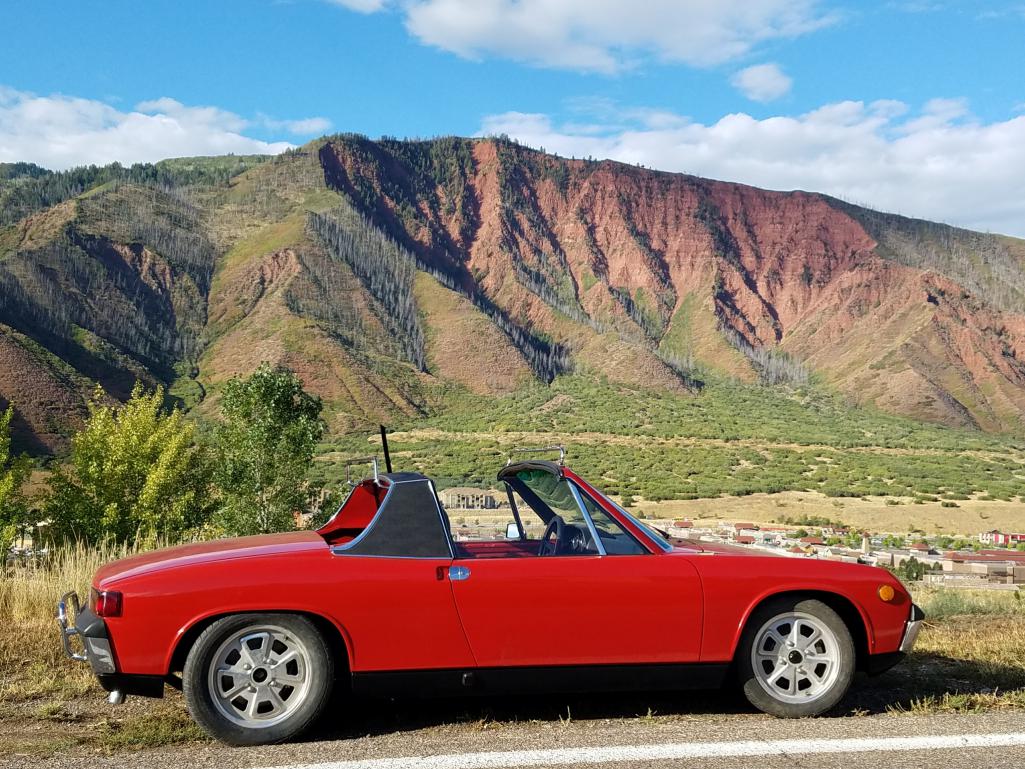
Posted by: ConeDodger Sep 15 2017, 03:58 PM
Posted by: Matty900 Sep 18 2017, 09:40 AM
Well we got the car together and running by 9/14. Made it all the way to Red Rocks classic from Oregon and the car was well received by all. As I head back to Oregon I'm going to play all the things that I still need to do the first on the list will be pulling the temporary carburetor off and going to a microsort set up.
Attached thumbnail(s)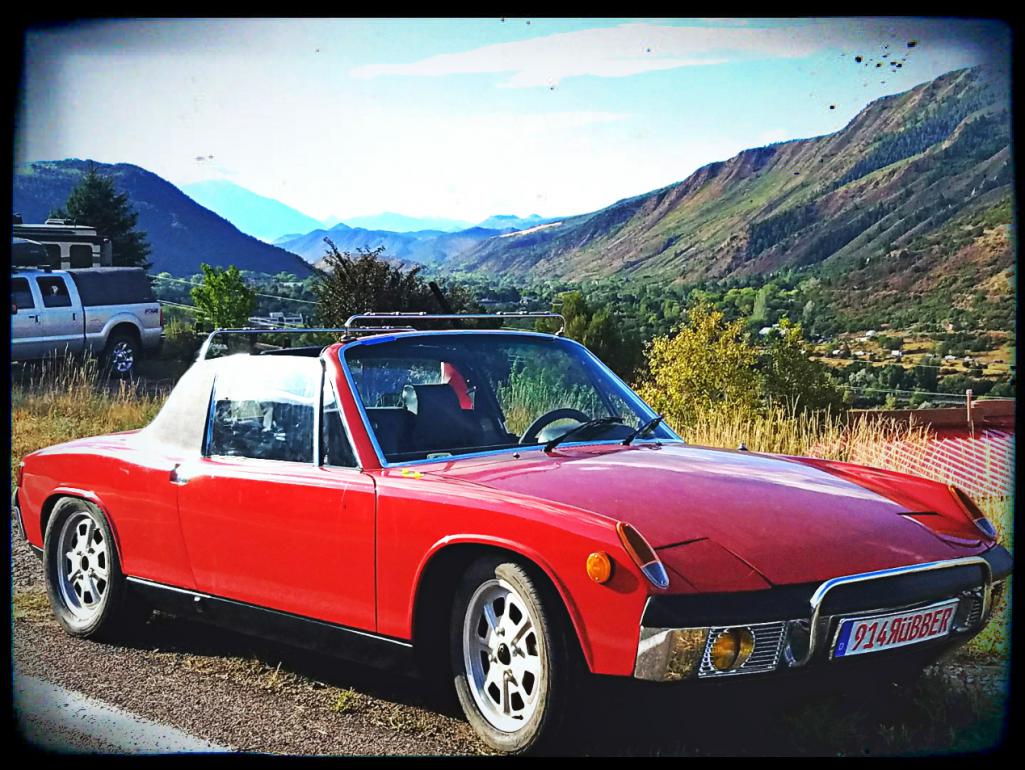
Posted by: Matty900 Sep 18 2017, 09:44 AM
While we were at the hotel in Glenwood Springs a German tourist came through the parking lot and was looking at the cars. He really liked everything that was done on this car and I got to talking with him. He also has a 914 in Germany. Turns out he lives in Stuttgart and worked for Porsche for 15 years as an engineer. He wanted pictures with the car and loved the German front license plate.
Posted by: Matty900 Sep 24 2017, 07:14 PM
So now that I have had a chance to make it back in town and get caught up on a few things I'll go ahead and get some of my backlog of postings on this build out of the way. But towards the end it got pretty crazy and a lot of things happened. So the first big thing was the engine. The engine builder got it set up with dual dellorto carbs.
But when we went to start it we still had some Gremlins to work out and he was not able to be there for the initial start.
Attached thumbnail(s)
Posted by: Matty900 Sep 24 2017, 08:44 PM
When we did finally get ready to start the engine we had some very unwanted excitement.
https://youtu.be/K3btzJtjZrs


Posted by: Matty900 Sep 24 2017, 09:03 PM
Thankfully we got the fire out in seconds and there was no damage done to the shop or the car. We were able to get everything secure and get the engine running for breaking it in. Granite for about a half an hour at over 2,000 RPM. At idle it had a mechanical noise we didn't like. So we call the engine builder and had him, come back up to sort it out. At this point we were still trying to get it running for making it to Okteenerfest.
Attached thumbnail(s)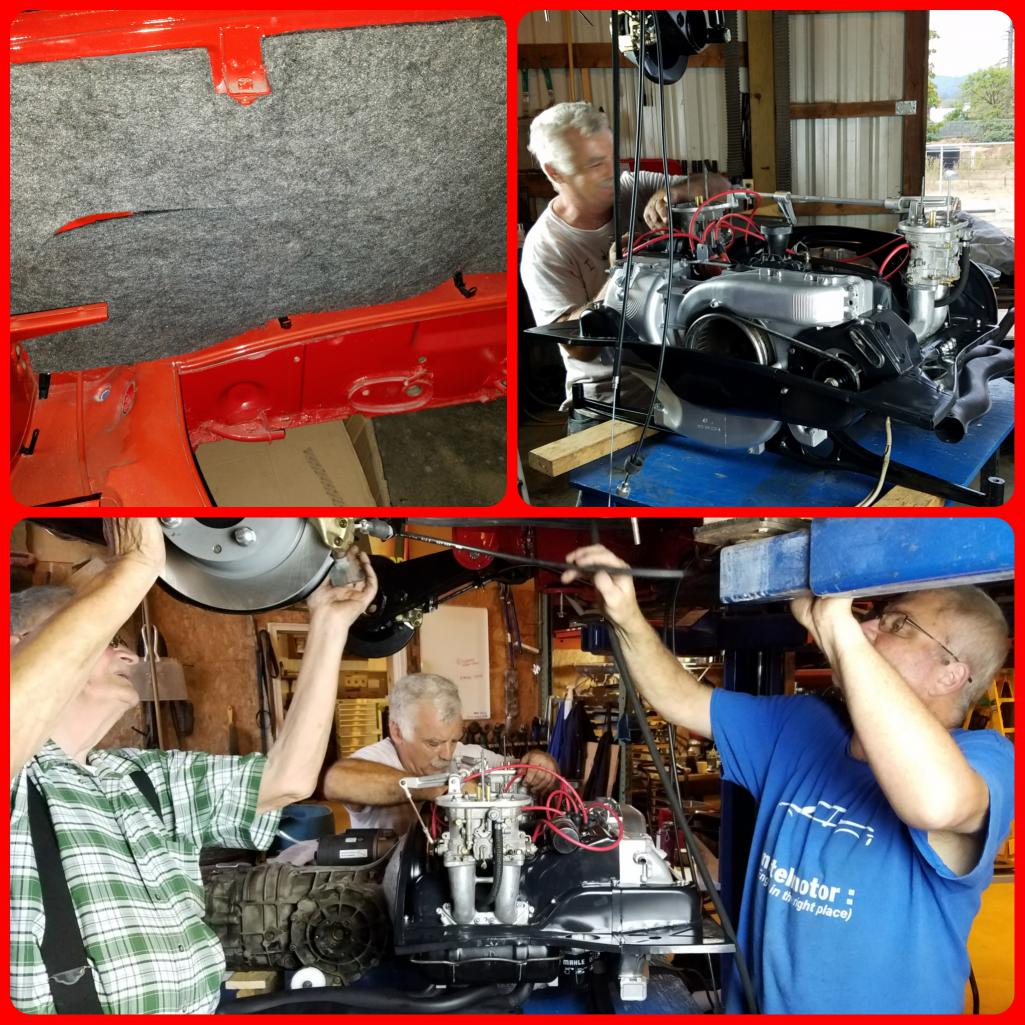
Posted by: Matty900 Sep 24 2017, 09:15 PM
Next morning we pulled the engine. Cary had it out in record time like 32 minutes. And they went to work operating on it trying to figure out what the noise was. They quickly figured out that only one of the flywheel bolts had been tightened. So they went to work operating on it. Given the time we had to try and have the car running he brought a backup option for induction. We pulled off the dellortos and put on his favorite option when running on sand rails. A Corvair face to mix and a large Holley 4-barrel carb.
Attached thumbnail(s)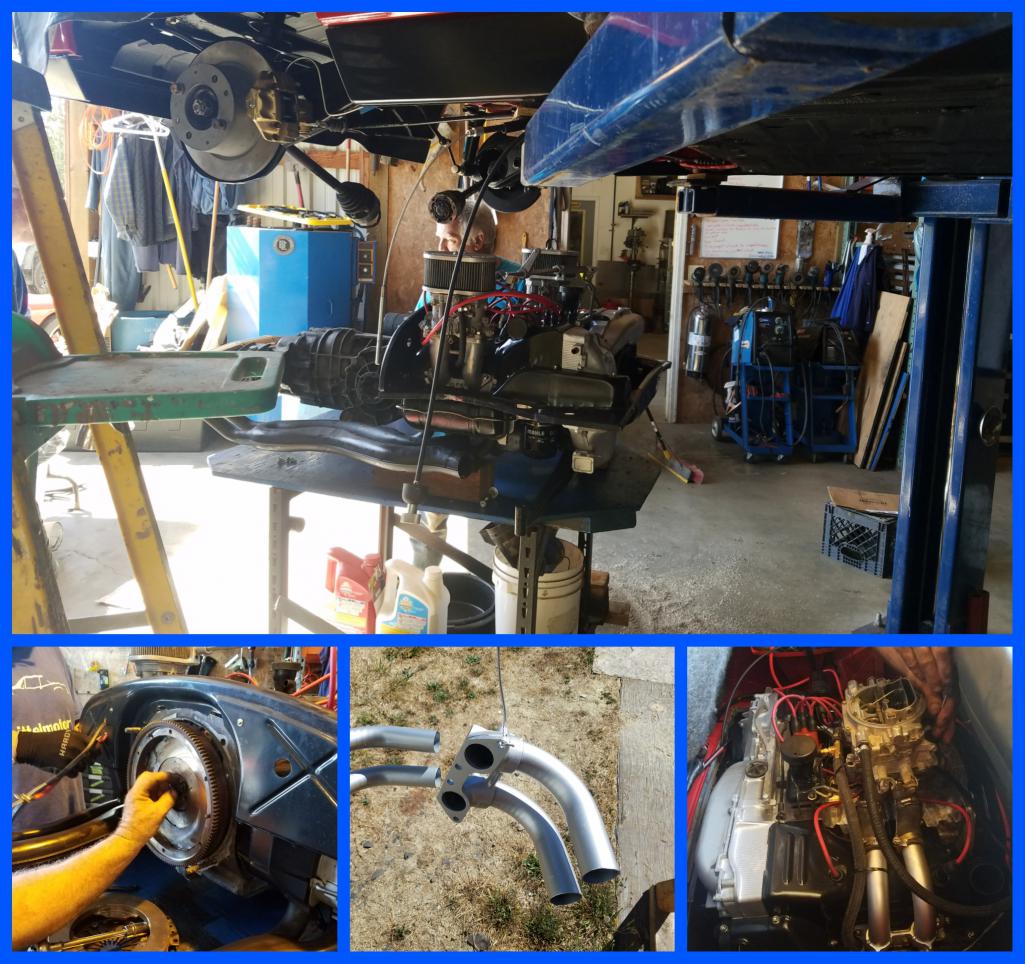
Posted by: Matty900 Sep 24 2017, 10:43 PM
With the new carburetor setup on I got the engine back in the car and got it tuned https://youtu.be/OIesLy0zvO0
Posted by: Matty900 Sep 24 2017, 10:44 PM
With the new carb setup I still needed to have linkage that would work correctly. Like Cary mentioned earlier in this thread
Attached thumbnail(s)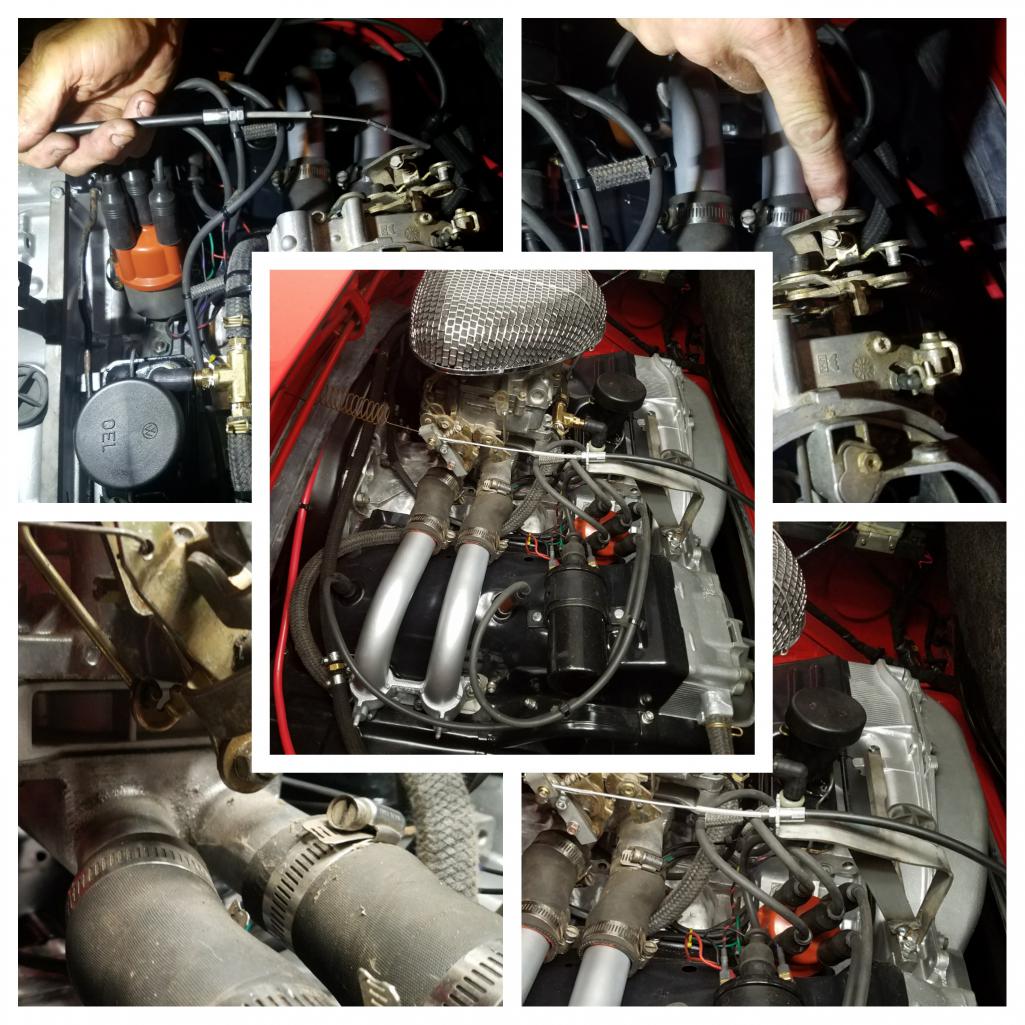
Posted by: Matty900 Sep 24 2017, 10:51 PM
The ceramic-coated exhaust looks awesome and the car sounds great with the cam and the Triad exhaust
Attached thumbnail(s)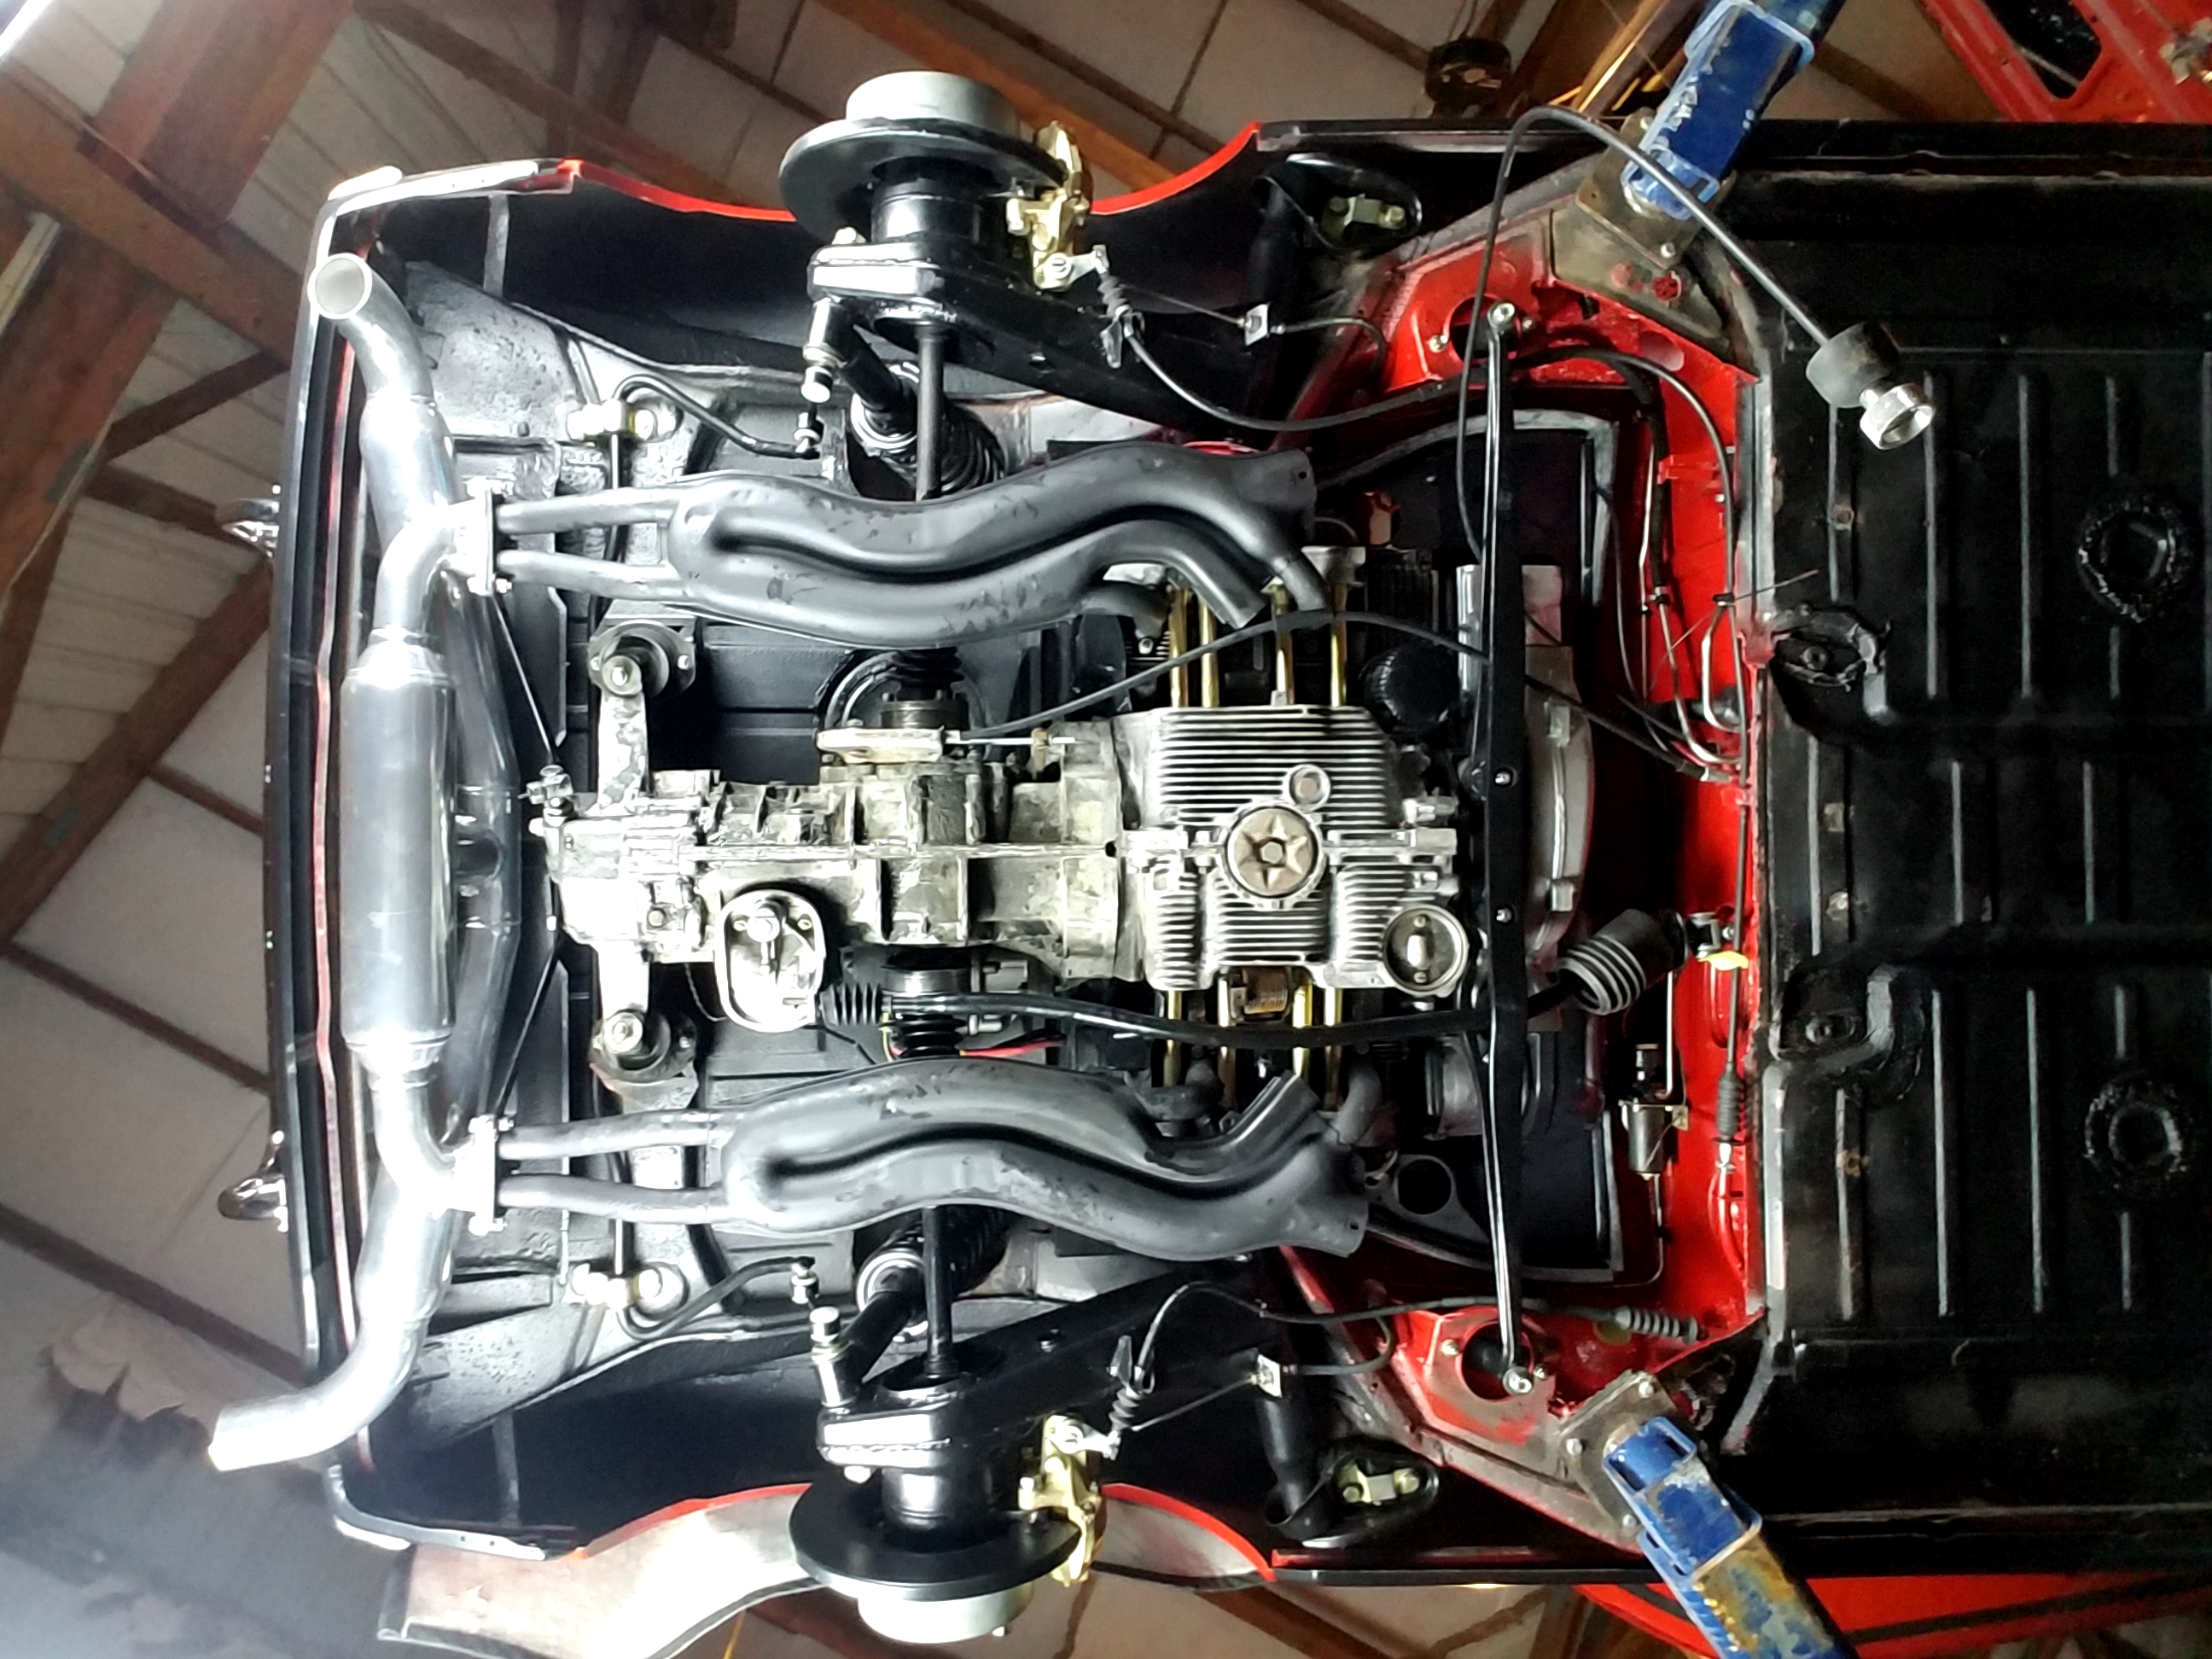
Posted by: Matty900 Sep 24 2017, 10:56 PM
Installed new bushings and shifter ball cup for the side shift transmission.
Attached thumbnail(s)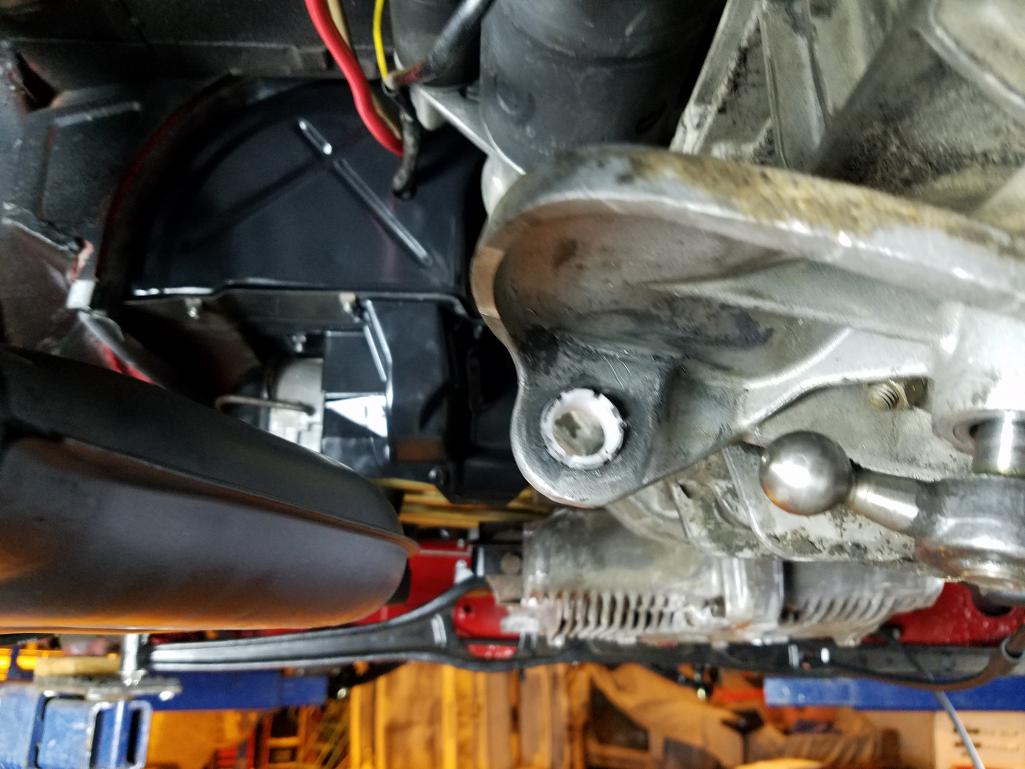
Posted by: Matty900 Sep 24 2017, 11:03 PM
Installed an out of sight Bluetooth recover/amp 75 watts per channel. Used leftover hushmat to line the speaker pods for Better Sound. Installed a radio delete plate with a strong magnet for holding the phone and put some remaining Dash face vinyl on it to hide it from first glance so you don't notice it at first and it can be removed.
Update 2/6/19 we not carry the out-of-sight Bluetooth units https://900designs-container.zoeysite.com/out-of-sight-audio-hidden-bluetooth-receiver
Attached thumbnail(s)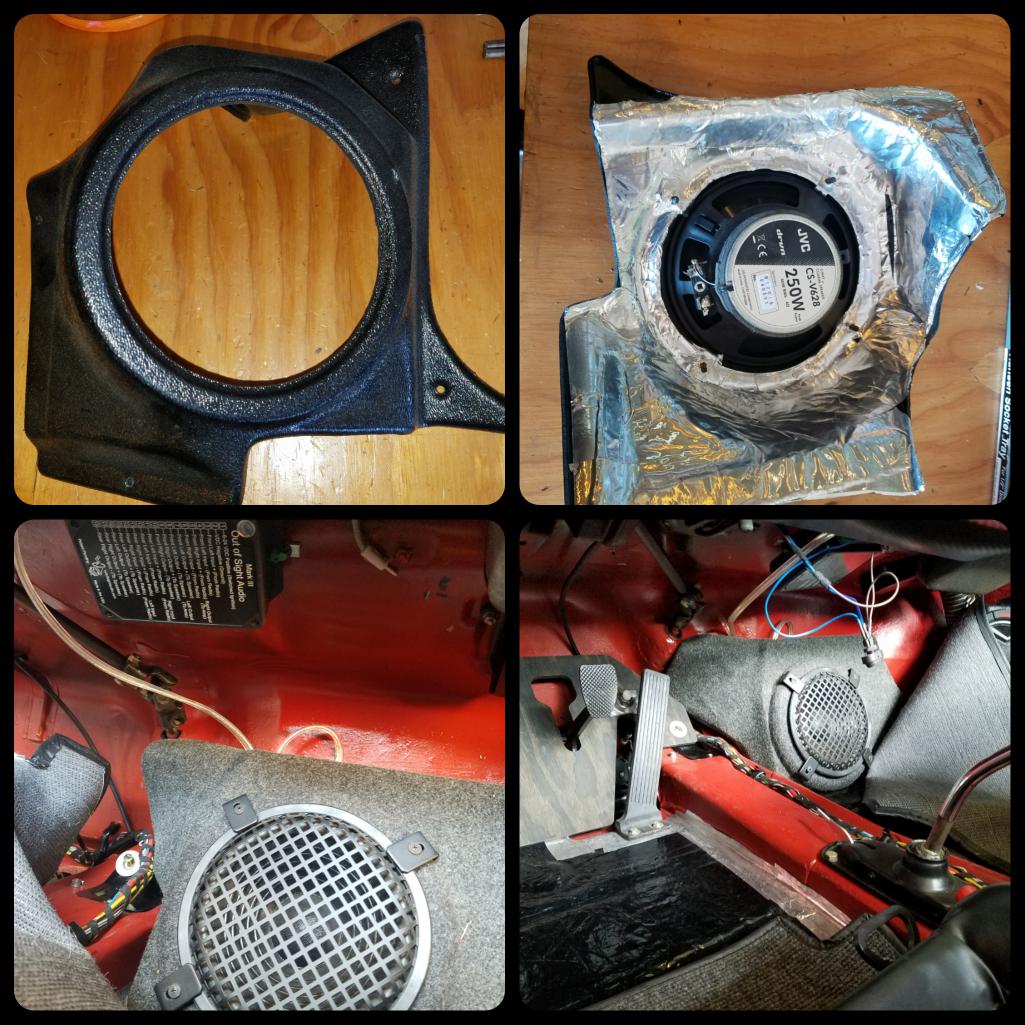
Posted by: Dave_Darling Sep 25 2017, 11:35 AM
Magnet for the phone? That may have some unwanted side-effects. I don't know how it will affect the phone's circuitry and memory, for instance, and a friend of mine found that putting her phone down upside-down on an external phone battery caused it to register a bunch of "phantom taps". She believes it's due to the EMI from the battery.
So use caution when putting phones on large magnets.
--DD
Posted by: Matty900 Sep 26 2017, 01:06 AM
Thanks Dave. The set up I am using involves a metal plate that I placed inside of the case for the phone. So the magnet is attaching to it and not the phone. It is similar to the one I use in my truck and other car for the past year with no problems.
Attached thumbnail(s)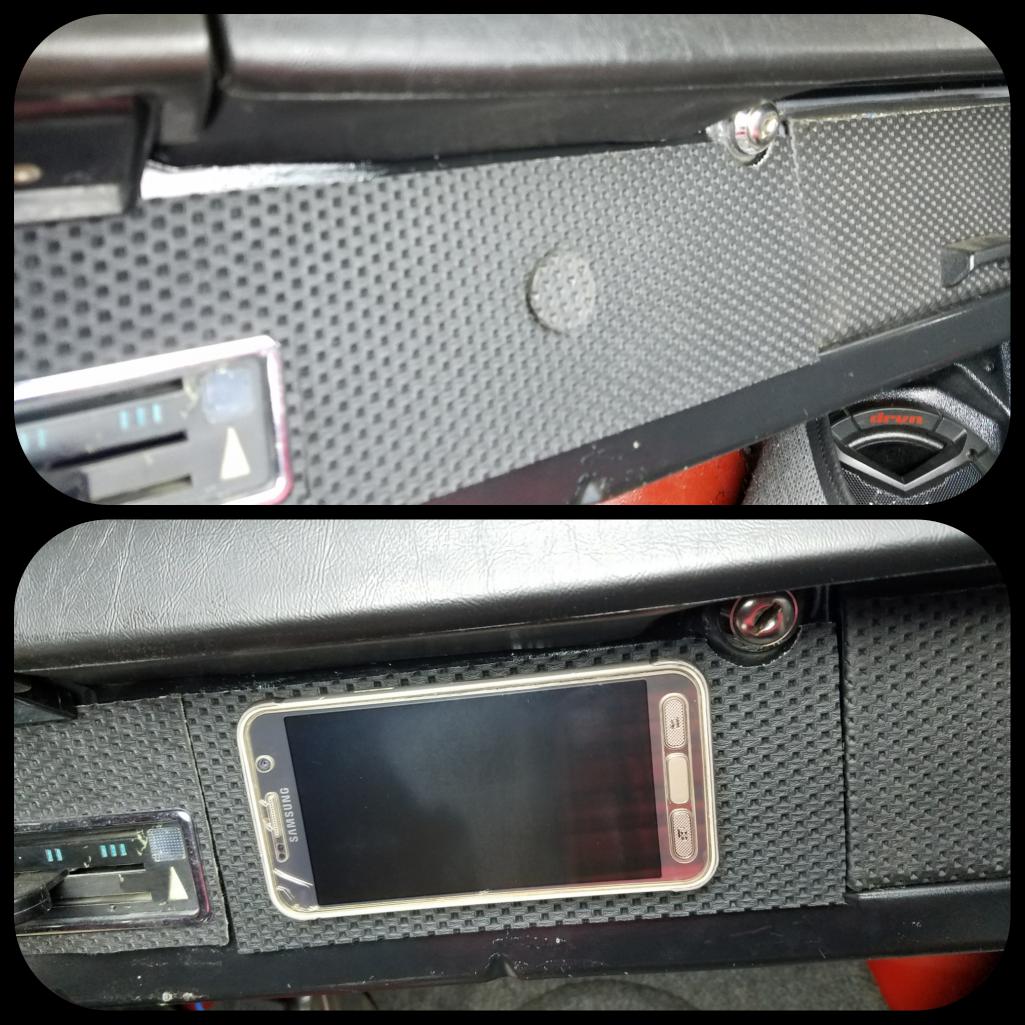
Posted by: Matty900 Sep 29 2017, 12:21 AM
Got the lower dash and vents back on today
Attached thumbnail(s)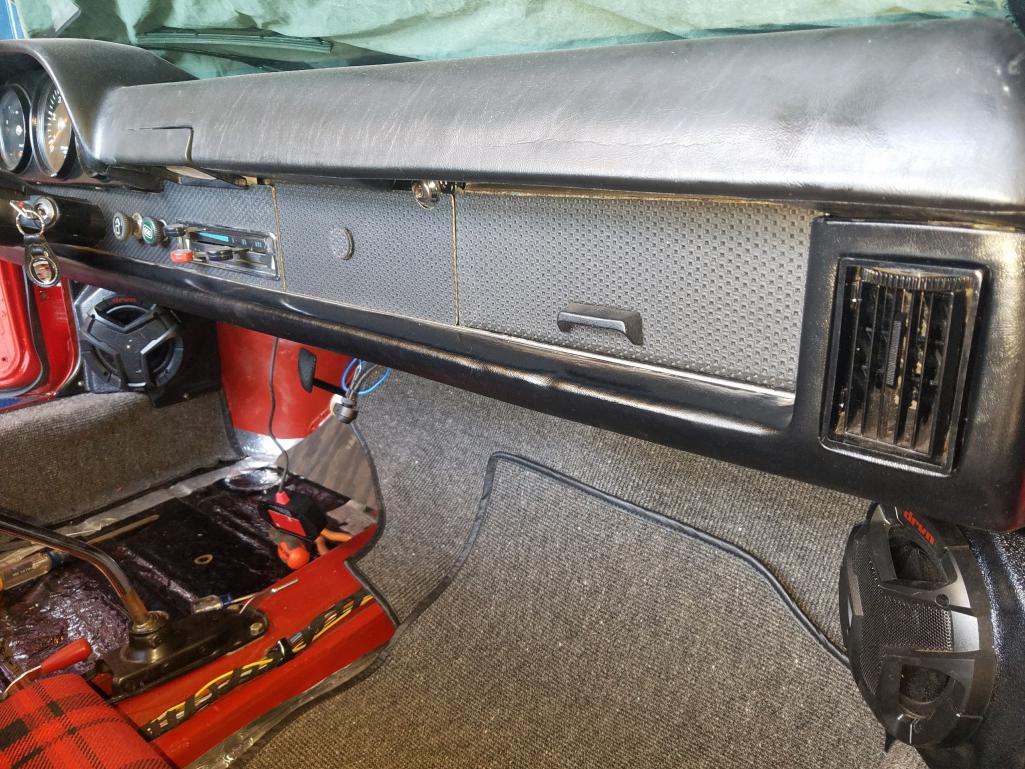
Posted by: Matty900 Sep 29 2017, 12:28 AM
Thresholds, inner door seal and carpet strips on.
Attached thumbnail(s)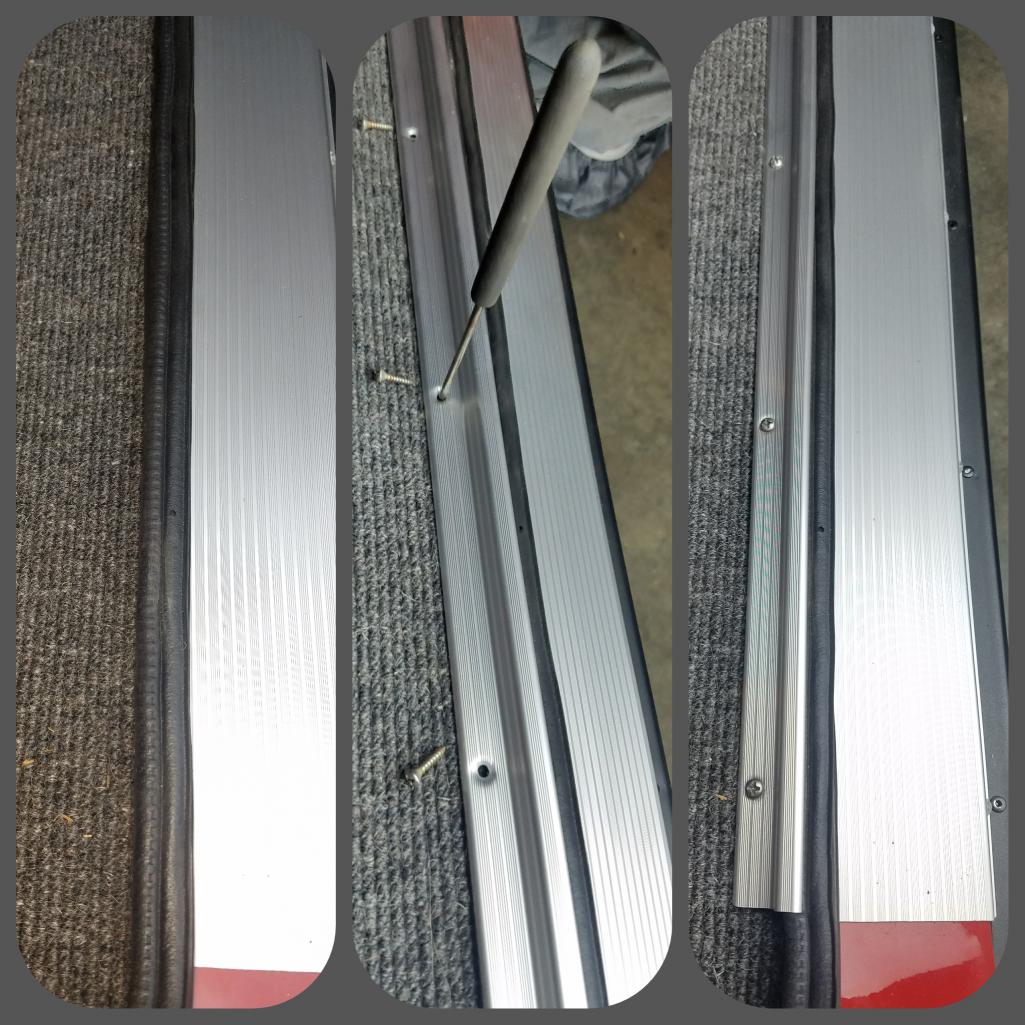
Posted by: Matty900 Sep 29 2017, 12:32 AM
After mistakenly trying to tune the car at altitude at Red Rocks, we decided to tune it back the way it was at our altitude so it can actually run today. After spending a whole bunch of time we realized that Chinese relays suck the fuel pump wasn't pumping again. Probably the crappy Chinese relay again. So we'll save this for another day.
Attached thumbnail(s)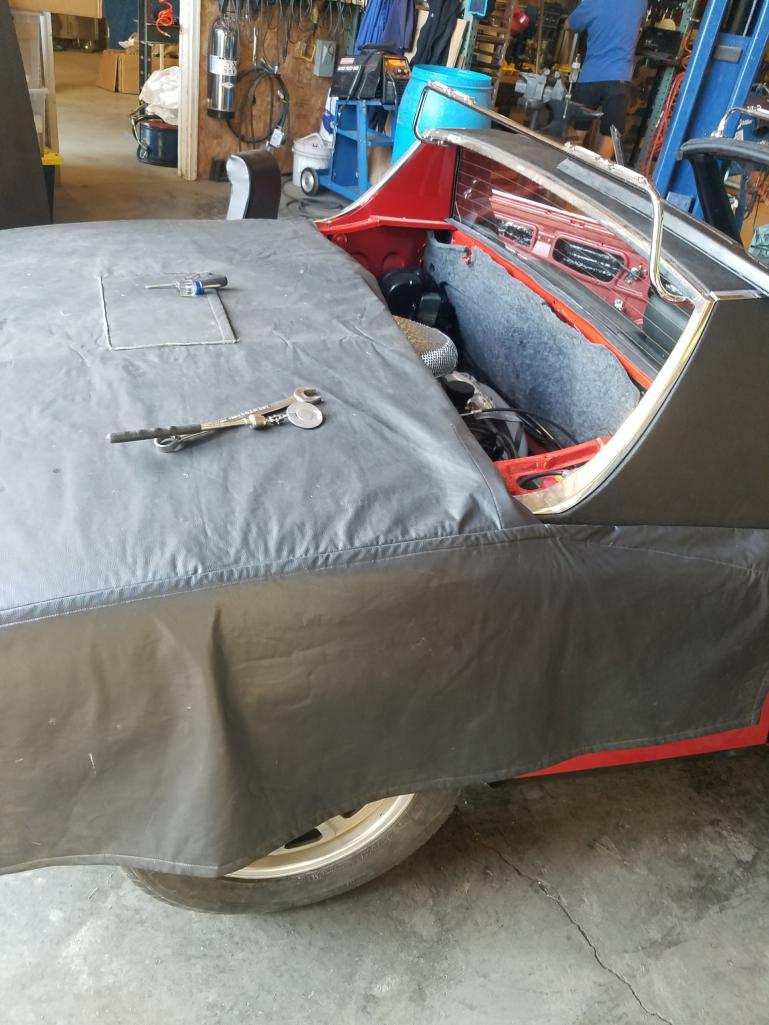
Posted by: Fatboy007 Sep 29 2017, 08:44 AM
Lookin good... sweet ride
Posted by: Matty900 Sep 29 2017, 11:11 AM
Lookin good... sweet ride
Thank you
Posted by: cary Sep 30 2017, 08:35 AM
Another (next) day. Relays checked out ok. We're going to build a tester. KISS
The problem was in the female sockets on the relay board. I'd forgot about the wiring cleanup tool I'd bought at Automotion many years ago.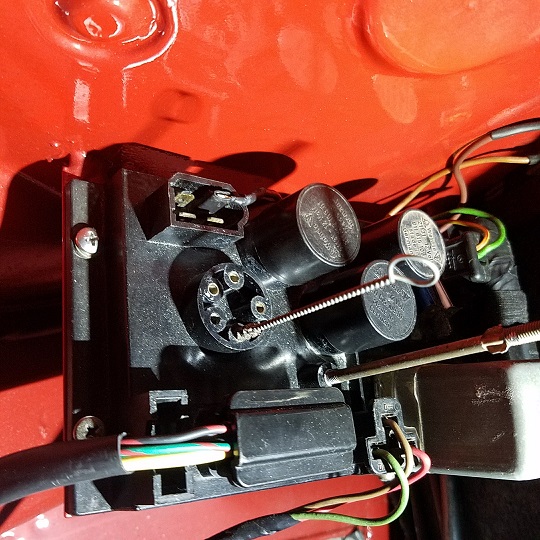
Used the fan socket for an example.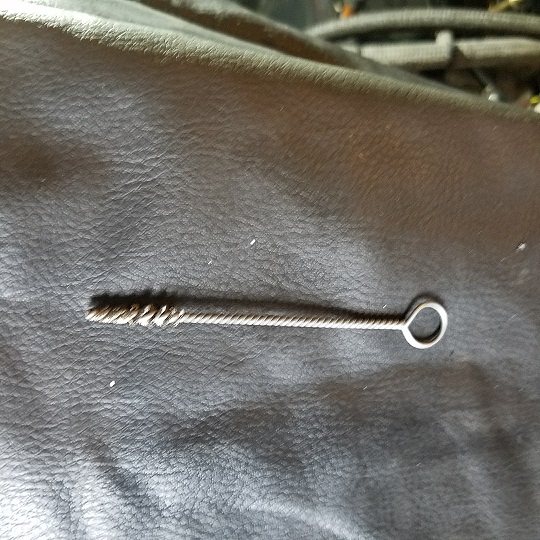
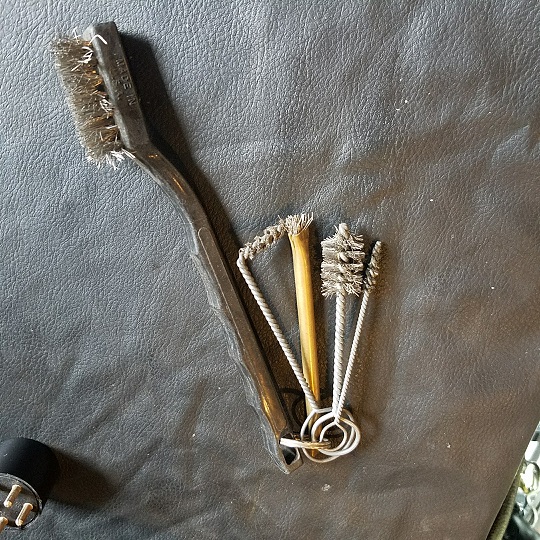
But the gremlins returned, now no spark. Super In Law and Matt can dig into that.
Ignition power to the coil. No spark coming out the plug wire. Old School stuff for them to play with.
Posted by: Matty900 Oct 7 2017, 11:23 AM
My multi gauge in my 72 will not stop flashing chair.gif
First thought was that I needed to reset the master cylinder after the breaks were done. I did that - Still flashing
I checked the switch on the emergency brake. I had connected one of the wires for the back pad light to it headbang.gif Fixed that
- Still flashing
I was blowing a fuse for the drivers side signals. After reading posts I thought this could be indicating I had an issue with lights. I tracked down the ground, fixed the problem - Still flashing
I had replaced almost all of the lights in the dash with LEDs. So after reading posts about how the flasher relay works, I swapped these 2 lights and the turn signal lights in the tac back to regular bulbs - Still flashing
Any ideas?
Posted by: Matty900 Feb 18 2018, 10:53 PM
Have an updated in awhile but it's time to get back to work on the car. Had a issue with the paint after trying to get the car done for the Build-Off Challenge and put in a big nasty scratch on the door. Took the car back to the paint shop and Kent was gracious enough take care off all it for me. I had a couple of bubbles that started showing up in the paint as well as my scratch. Turns out they were rust bubbles coming from behind  2 were on the hood so there was some rust happening inside of the space between the inner hood and the support. The other was on the fender where the repair had been made and not properly treated inside the fender well.
Attached thumbnail(s)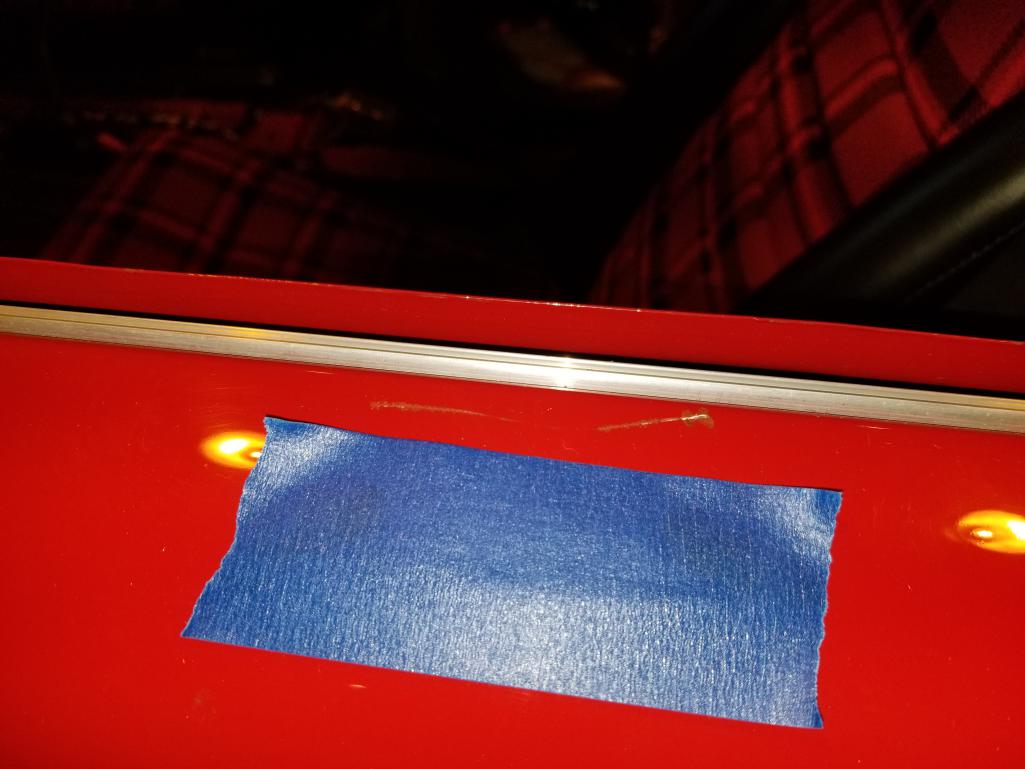
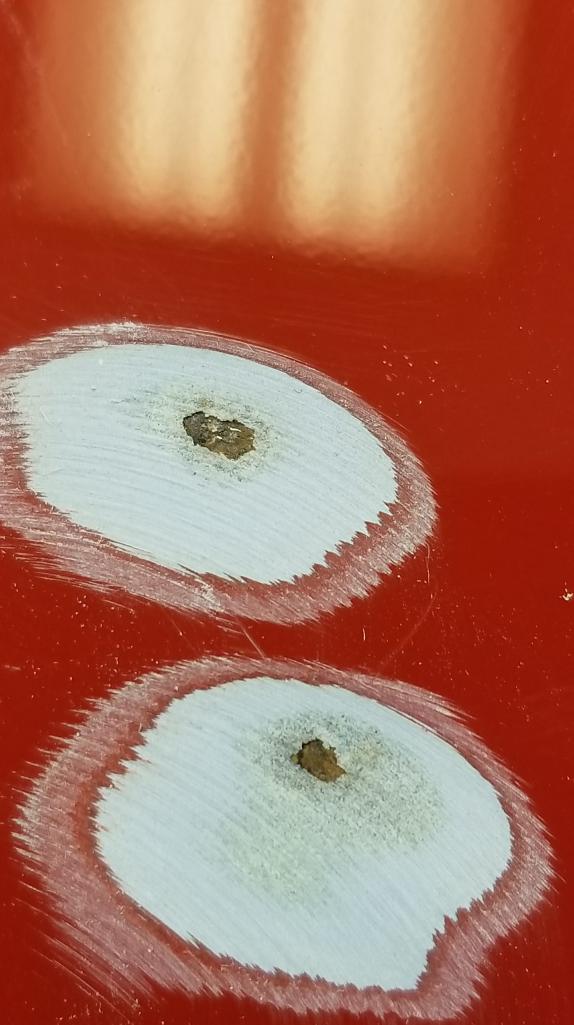
Posted by: Matty900 Feb 18 2018, 10:54 PM

Attached thumbnail(s)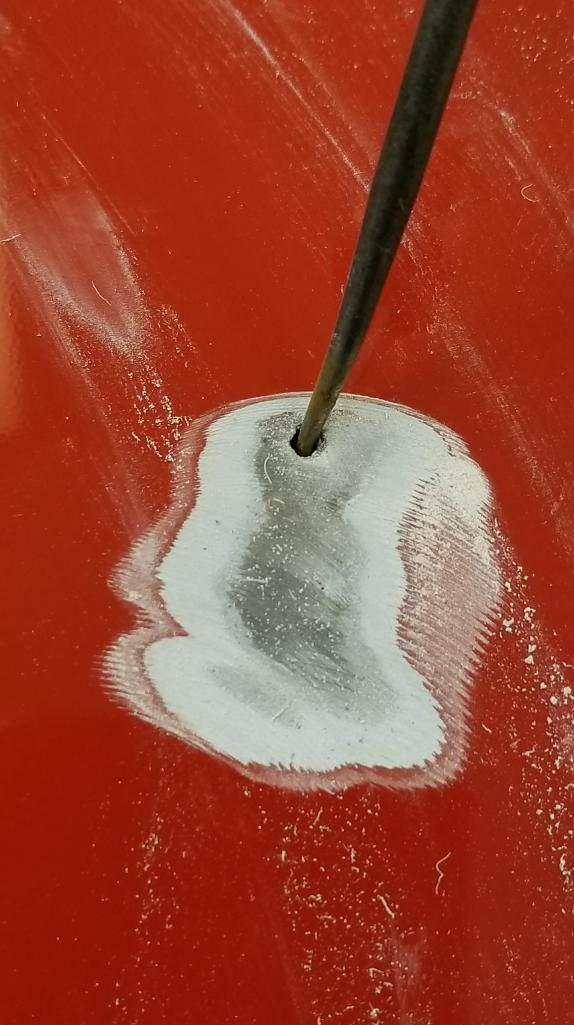
Posted by: Matty900 Feb 18 2018, 11:00 PM
Good as new
Attached thumbnail(s)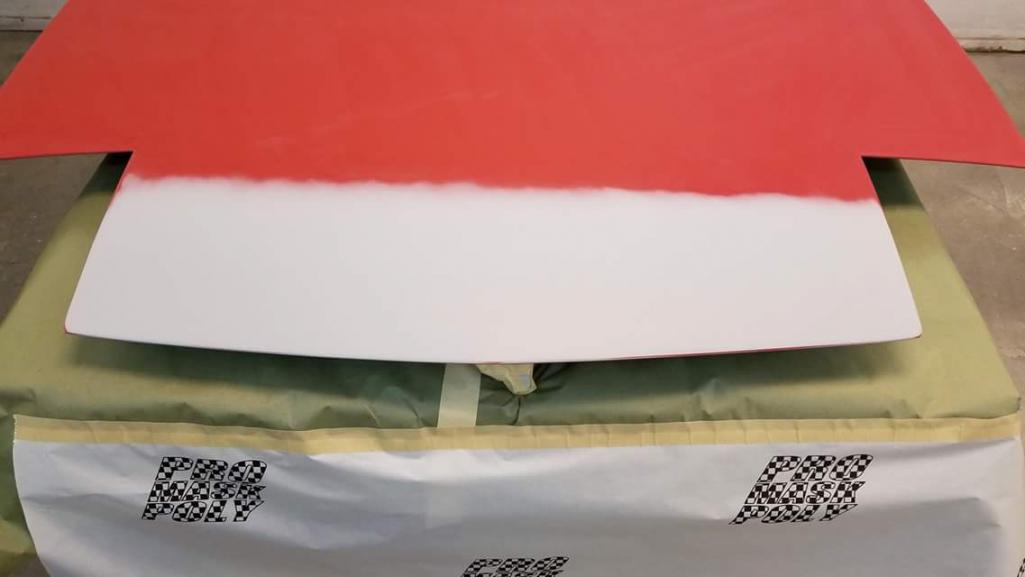
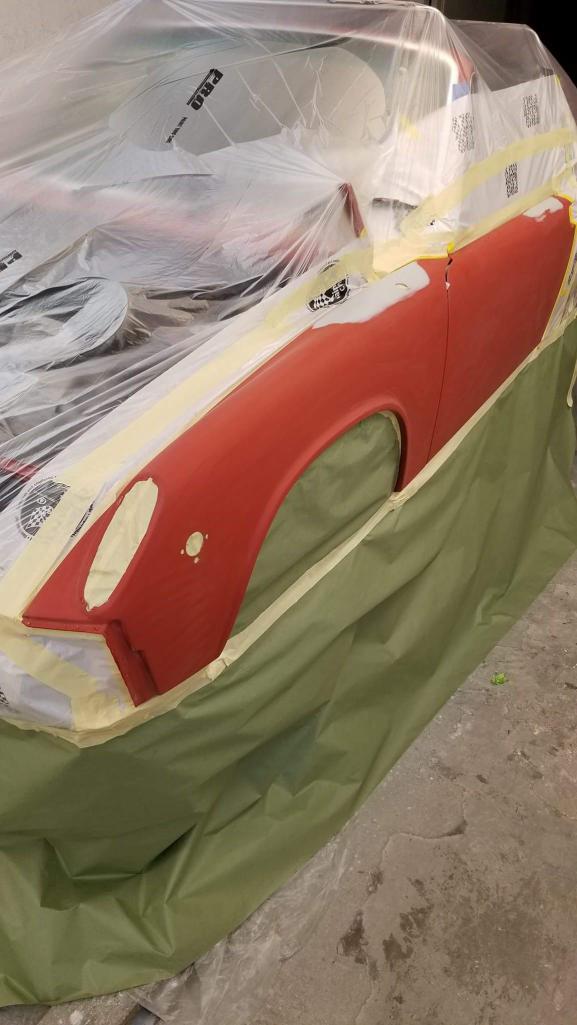
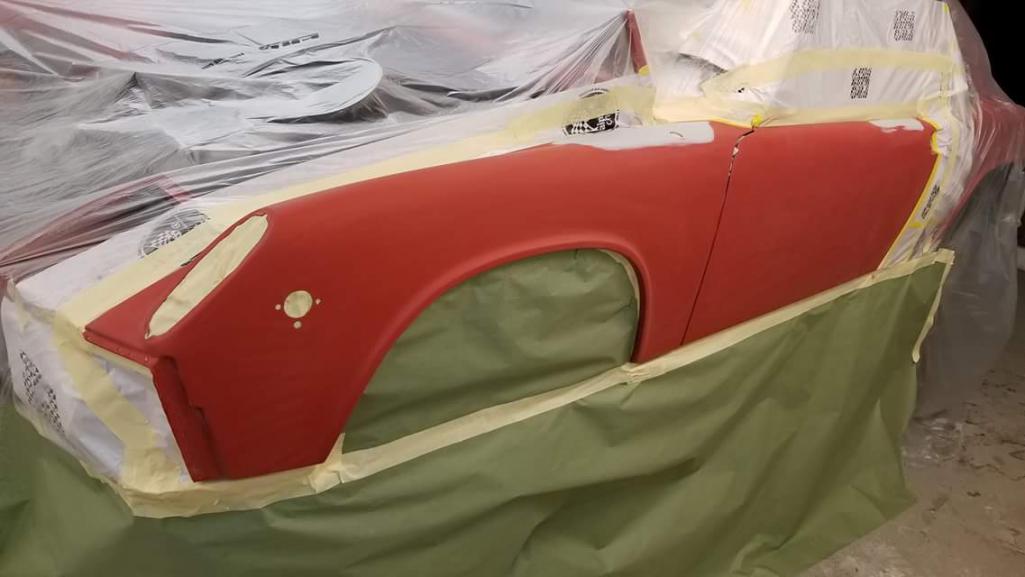
Posted by: Matty900 Feb 18 2018, 11:09 PM
Back to the Barn again. (Middle Motors) Next up we will be pulling the engine and removing the temporary carbs that we put on it to have the car running for the Build-off deadline.
Mario will be sending me this pile of "Some assembly required"
Micro Squirt
Should get interesting
Attached thumbnail(s)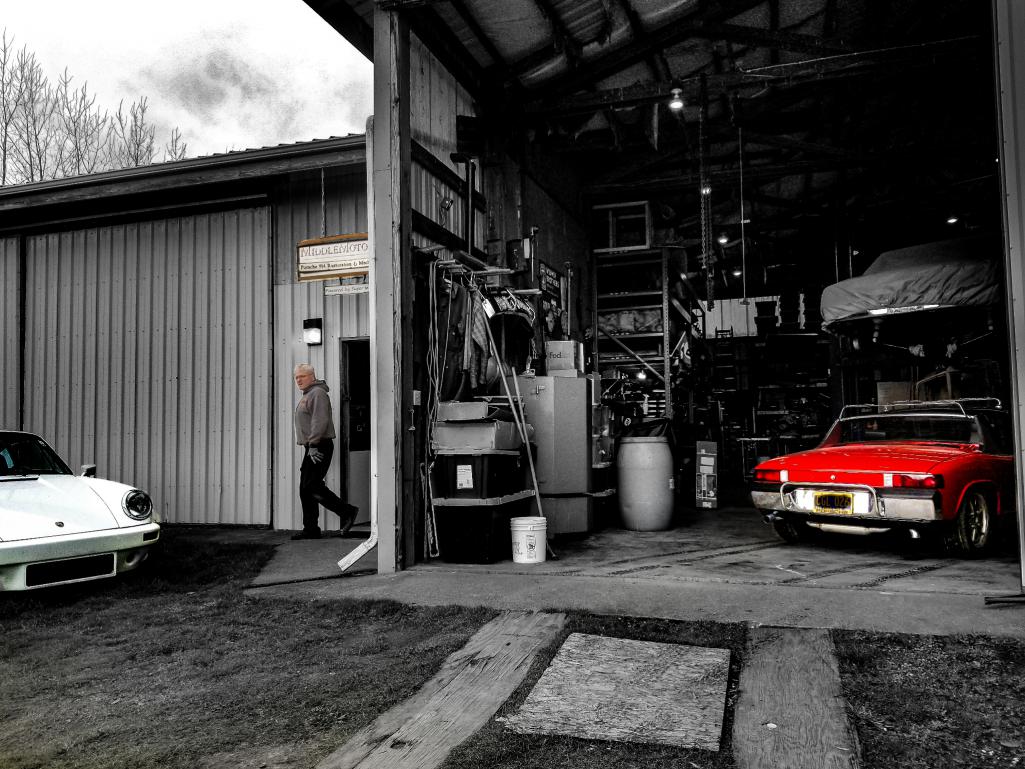
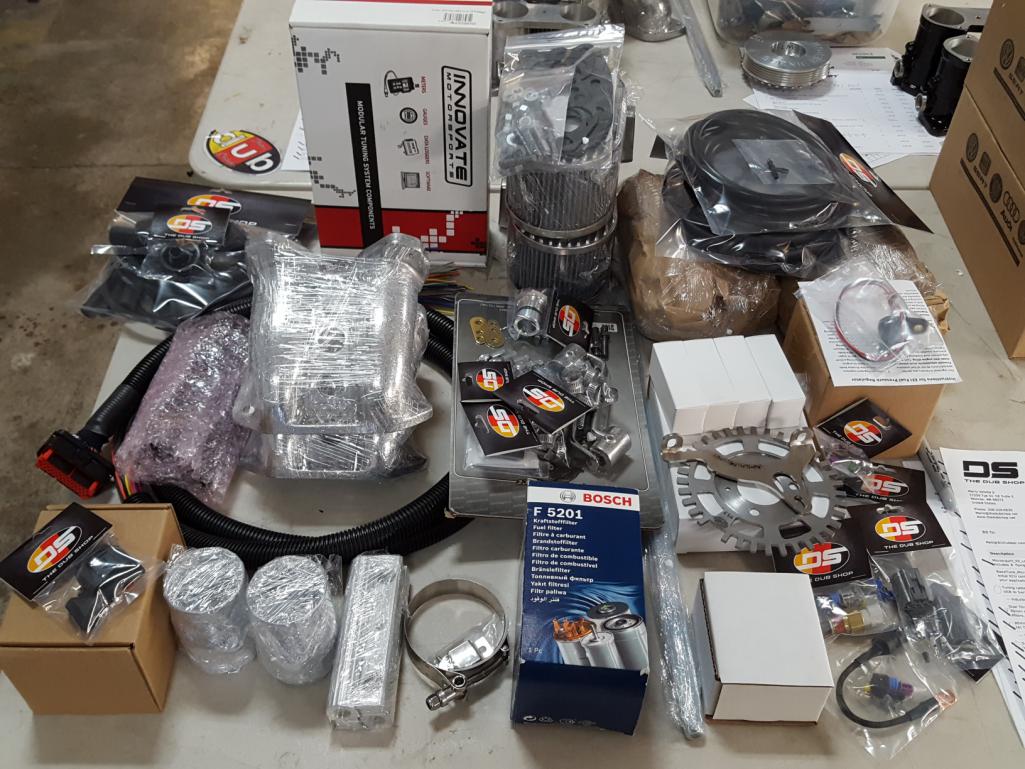
Posted by: cary Mar 4 2018, 06:51 PM
While Matt's car is here for The Dub Shop MegaSquirt install. We'll tidy up a couple loose ends so it will be ready to roll when the MegaSquirt is dialed in.
1st. order of business is tidying up a couple wiring gremlins theft from the build off.
Left turn signals and the parking brake light had issues. With Spoke's assistance we got those cleared up. Took a bit but every thing is working. Matt is getting a new front turn signal bucket from Bruce.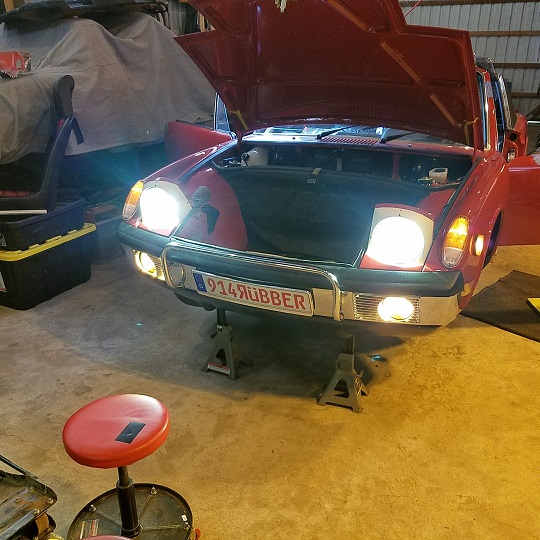
Posted by: cary Mar 4 2018, 06:58 PM
2nd item. A tiny fuel drip from the gas tank.
I found a couple left overs on the large outlet pipe. The rim of an old fuel sock and what was left of a brass washer.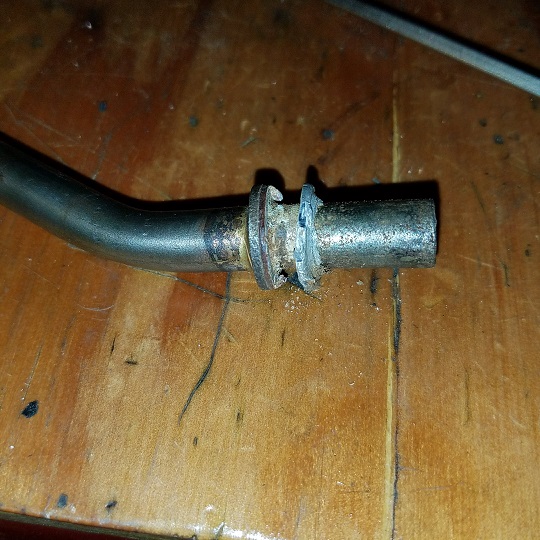
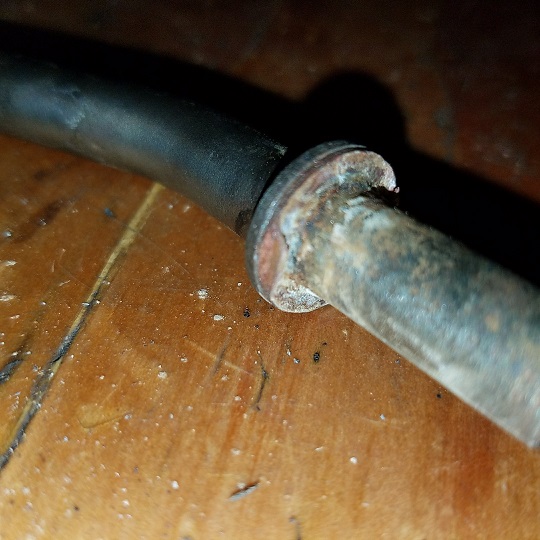
New nuts and brass seals installed . I've been doing a static test for 2 days. Dry as a bone so far. 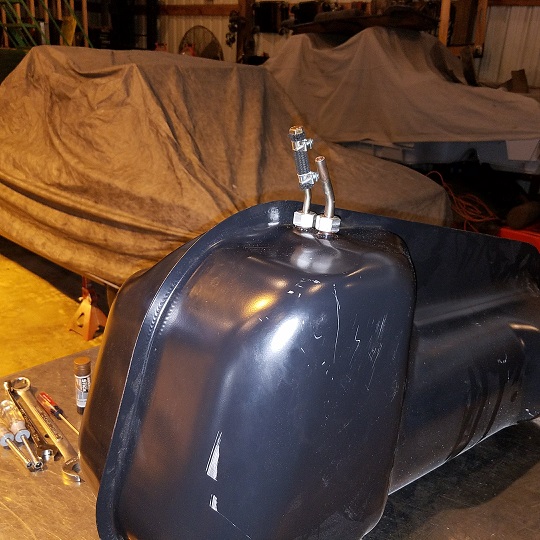
Posted by: cary Mar 4 2018, 07:12 PM
3rd. Item. Four of the 6mm threaded weld nuts on the longs that bolt up the outer rocker panels had snapped off bolts.
So the snapped off bolts where drilled out and metric nutserts installed.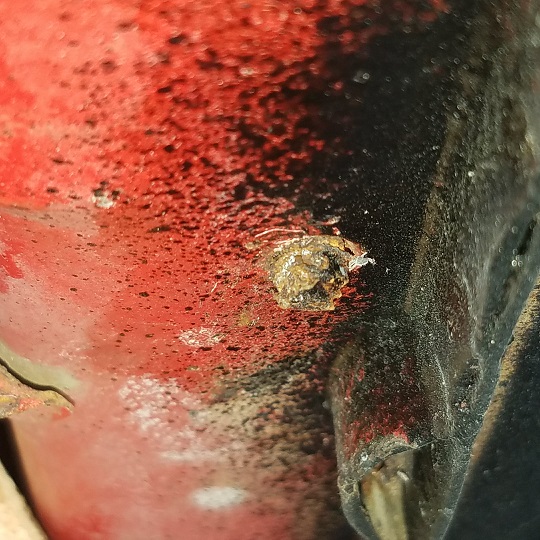
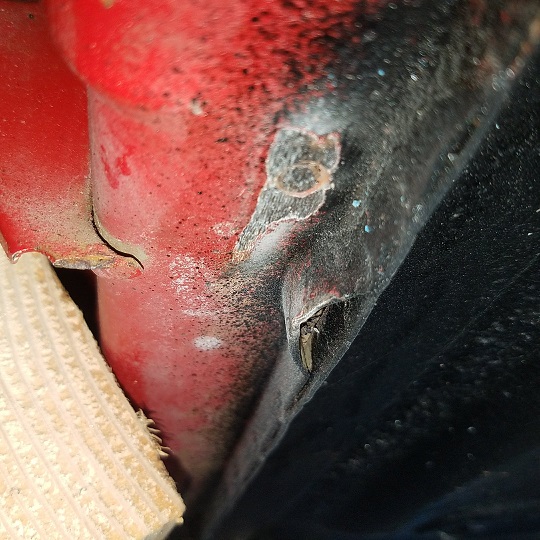
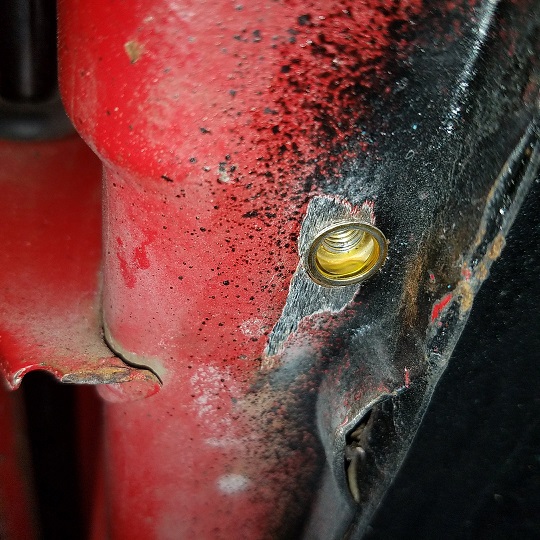
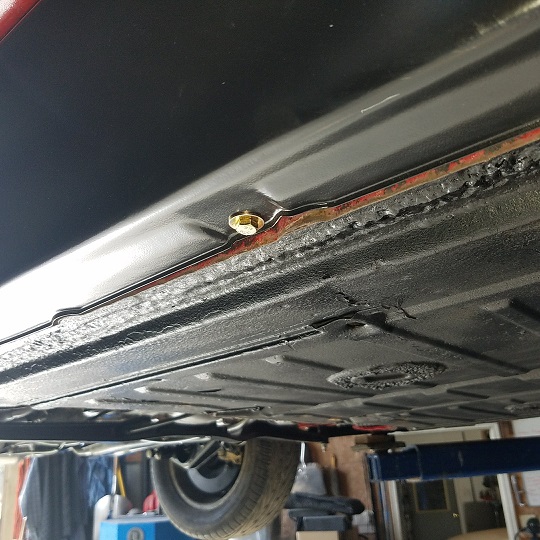
Posted by: cary Mar 4 2018, 07:18 PM
While the engine is out for the MegaSquirt install. I'll address the oil leaks on the engine rebuild. So for it looks like push rod seals and valve cover gaskets.
On my rebuild I used Permatex Teflon Sealant on the o -rings and I'm leak free. But I"ll go with the latest and greatest Best Practice. Dow 55.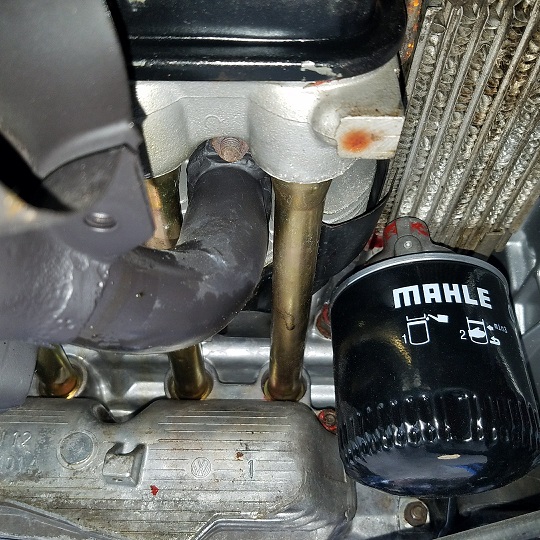
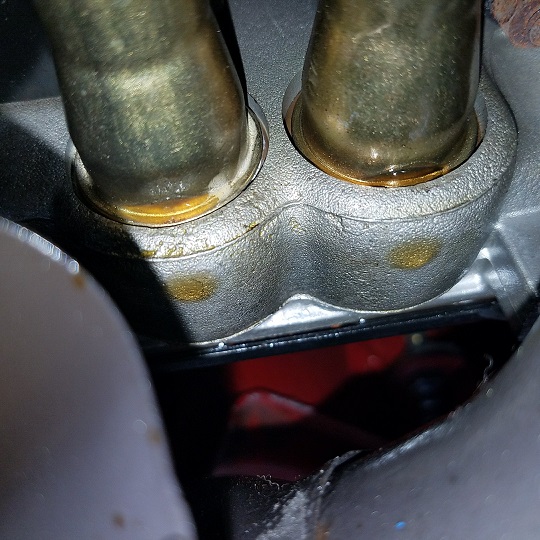
Posted by: cary Mar 4 2018, 07:23 PM
Engines on the table and ready for the MegaSquirt install. This is going to be fun .............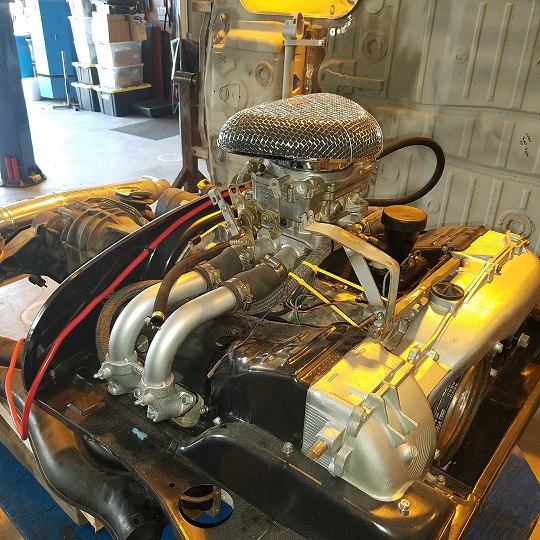
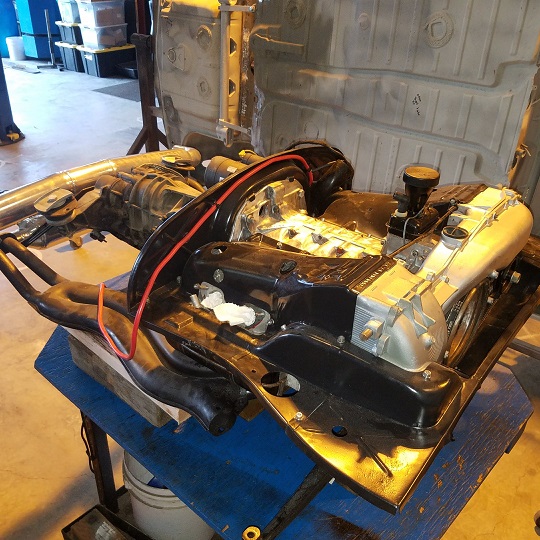

Posted by: cary Mar 15 2018, 09:04 PM
Time for Matt's 72 914 to enter the 21st Century. I'm beginning the install of
MicroSquirt V3.
Verify #1 TDC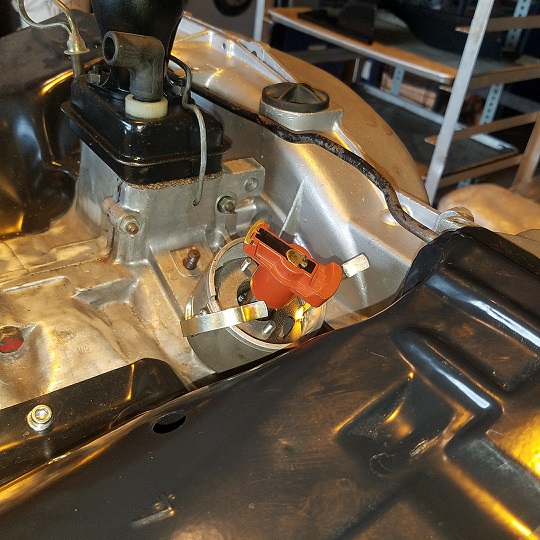
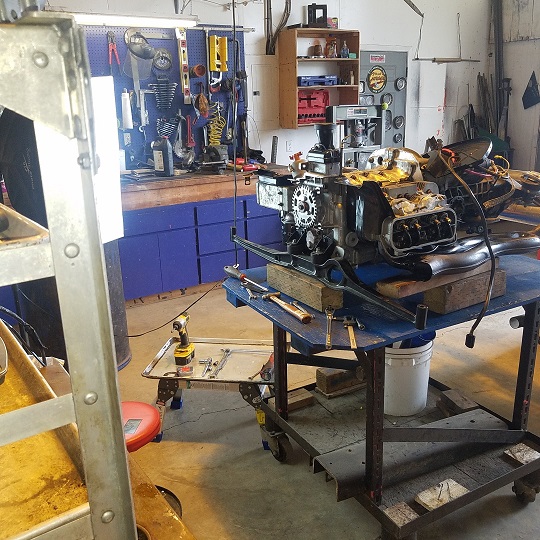
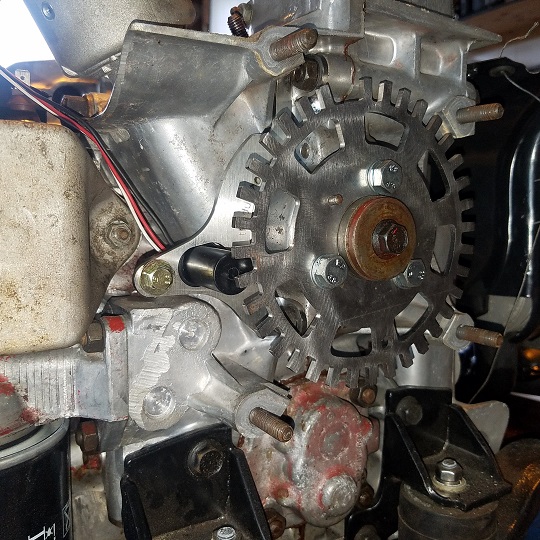
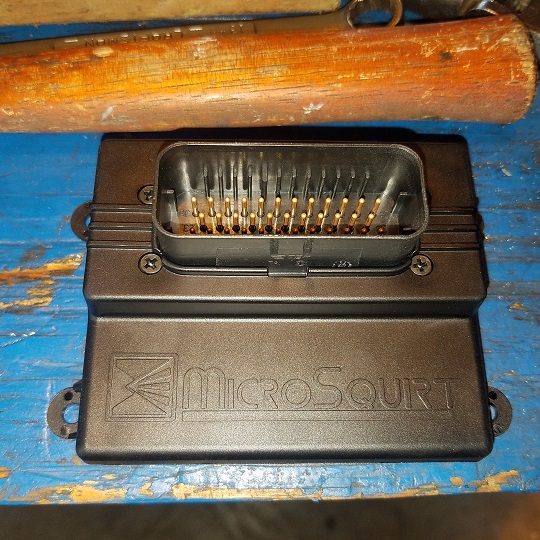
Posted by: Matty900 Mar 16 2018, 11:53 PM
Replaced the old Alternator wiring harness with a new one with new grommets.
Attached thumbnail(s)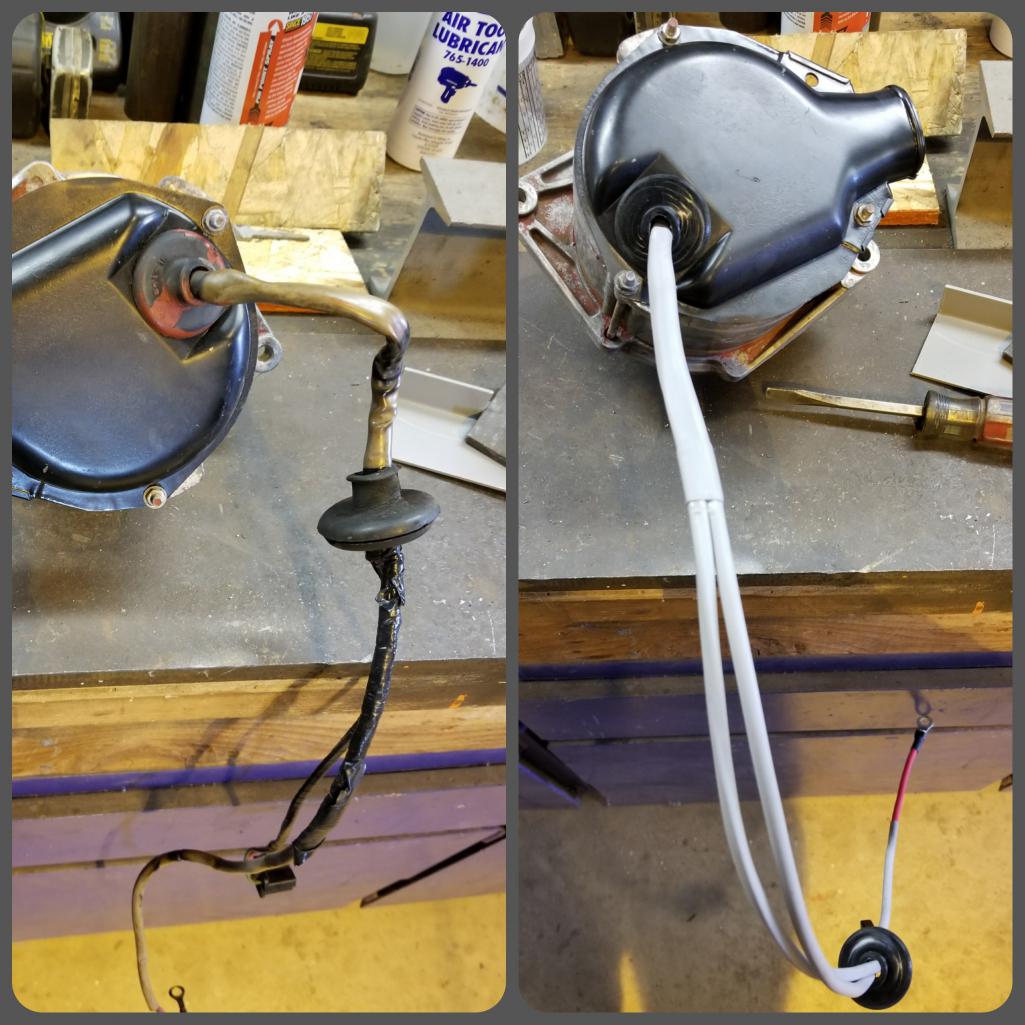
Posted by: cary Mar 17 2018, 06:19 AM
Mounted the trigger wheel and crank position sensor to get things started.
But now, off to the oil leaks.
Needless to say the valve cover gaskets were leaking.
Primary leaks are from the push rod tubes. I'll tackle the left first.
Off come the rocker arms ....................
Found a couple issues. Engine has maybe an hour of total run time.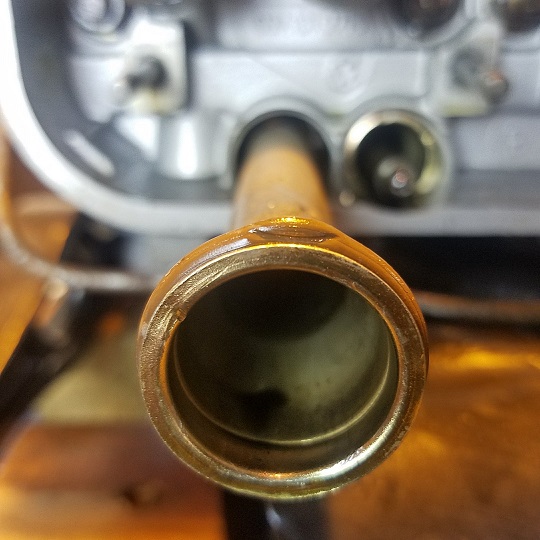
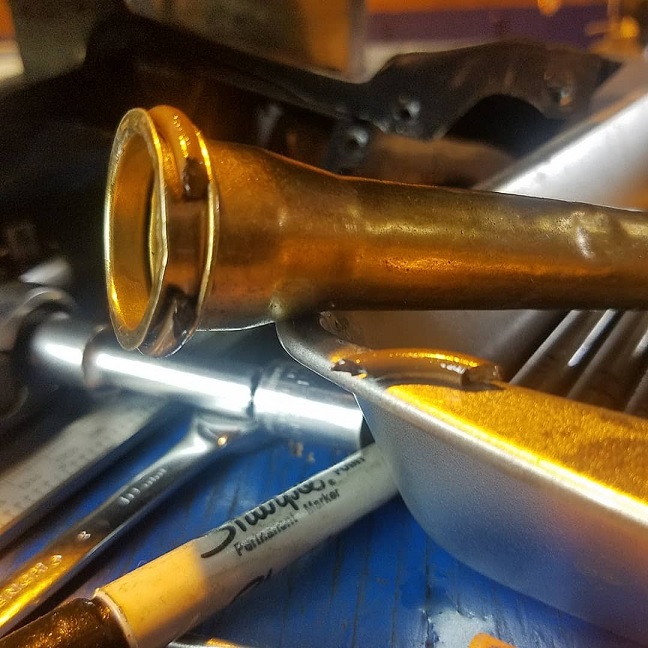
Had trouble pulling out #2 intake tube ..............
Had the same trouble putting in the #2 intake tube. The other 3 snapped right in. Then gave them a 180 degree twist.
We'll take it back out after the right side is done.
Like I've mentioned in other threads I've always used Jake's original Permatex Teflon thread sealant with no leaks. Old school guys just use engine oil. I'm not that lucky.
And I hate the old cliche air cooled engines are supposed to leak. So I'm trying DOW 55 seal lube. Looks like cold cream.
Going to be a very fast month. Get Matt ready for Route 66 and preparing the Rothsport rally cars for the Mexican 1000. Plus a Hummer service support truck, Dakar style this time. Leaving for Baja the morning of the 18th of April. The race is on ....
Posted by: Cairo94507 Mar 17 2018, 06:37 AM
Nice work.
Posted by: cary Mar 23 2018, 11:49 PM
Noisy TOP SECRET day at MiddleMotors. Took the day off from Rothsport to get all the distractions out of the way.
#1 . Mounted the XL wiring diagrams onto the foam boards.
#2 . Then all the noisy stuff is cleaning parts and hardware getting ready for plating.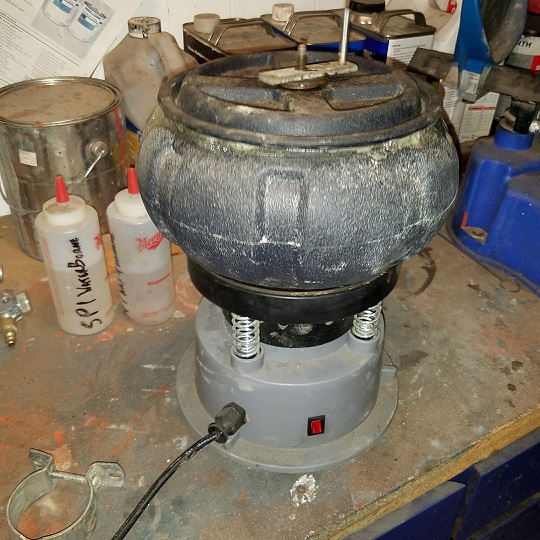
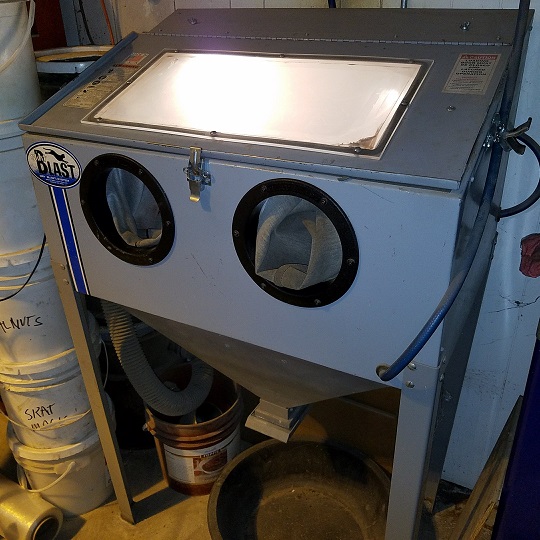
Taylor showed up around 1pm to make more racket in the other room. LOL.
Posted by: Matty900 Mar 25 2018, 10:30 PM
More work on getting the oil leaks dealt with. New viton valve cover gaskets and viton push rod seals. Along with some Gasgacinch for good measure, it really didn't want to stick on the painted valve covers so Cary blasted the paint off of where it seats and will let it set up for a few days until we get back to the shop to get some more work done.
Attached thumbnail(s)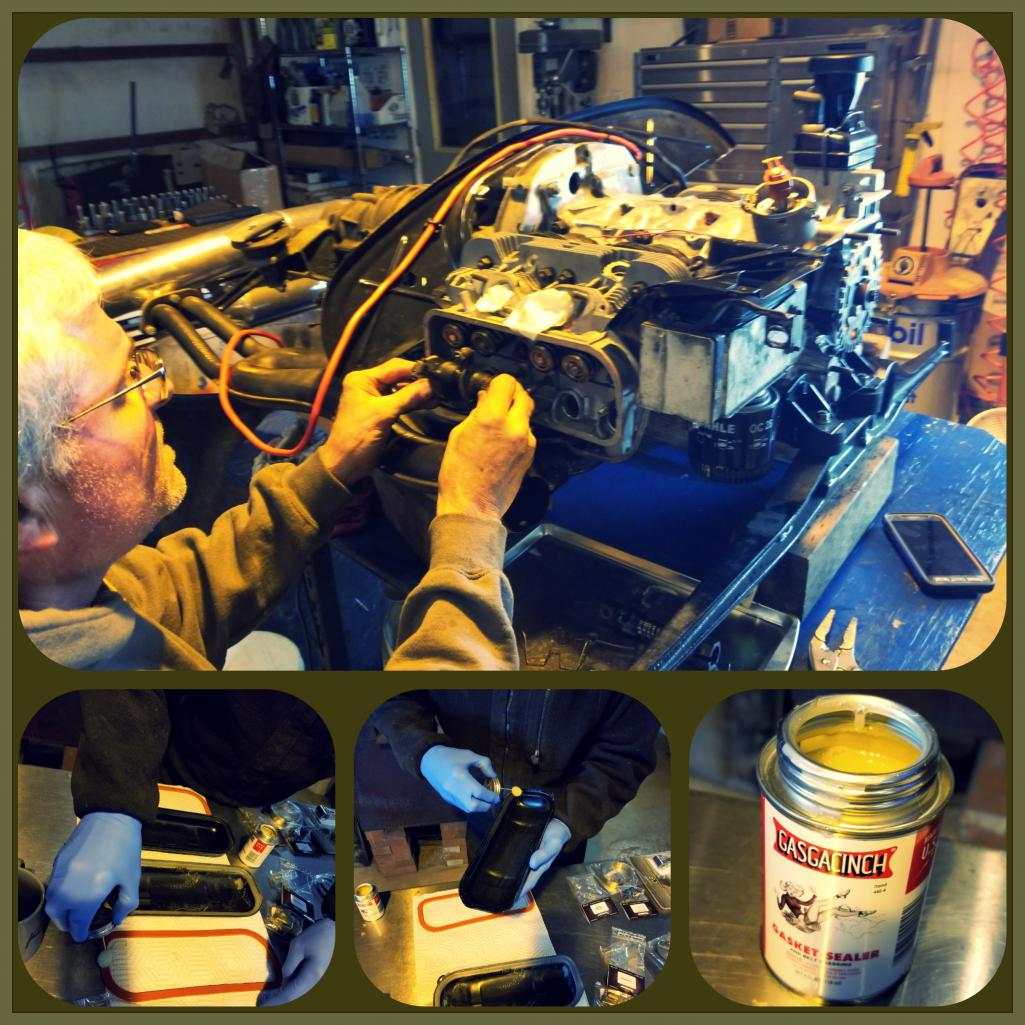
Posted by: Matty900 Mar 25 2018, 10:32 PM
Have not been able to find to many photos of the micro-squirt components installed on a 914 so I will try and get them documented here for my 1.7 engine.
Attached thumbnail(s)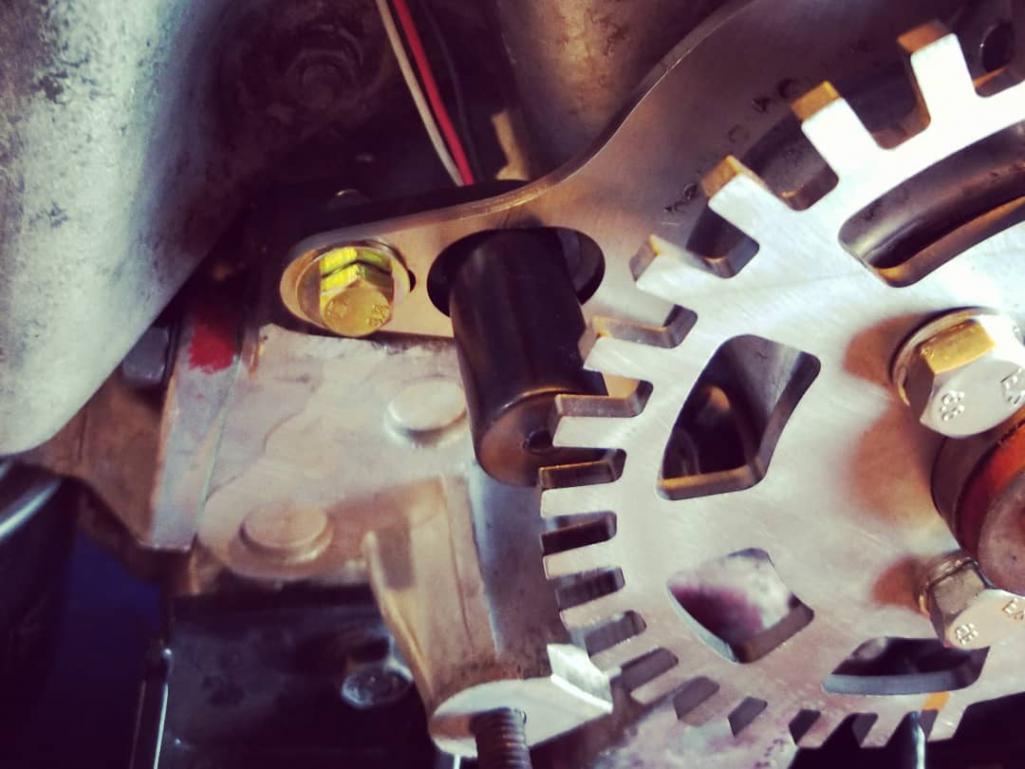
Posted by: Matty900 Mar 25 2018, 10:40 PM
I am going to do a little cutting and pasting from the Dub Shop on this rather than trying to relay the same info:
CLT sensor (Coolant temp sensor)
The reason it is called a coolant temperature sensor is that it is actually a GM sensor for measuring coolant temp on a water cooled vehicle. Since our VW’s are air cooled we will be using it for our head temp sensor. This is the sensor that will tell the computer when the engine is cold and when to activate warmup enrichments etc. It is the single Brass lug with a flying lead. I like to place this on the hot cylinder #3. The cylinder head tin bolt works great. NOTE: This is not an actual head temp sender. It will run approximately 50% less than actual head temp but will provide the temperature curve for hot and cold starts as well as the proper warmup enrichments.
Attached thumbnail(s)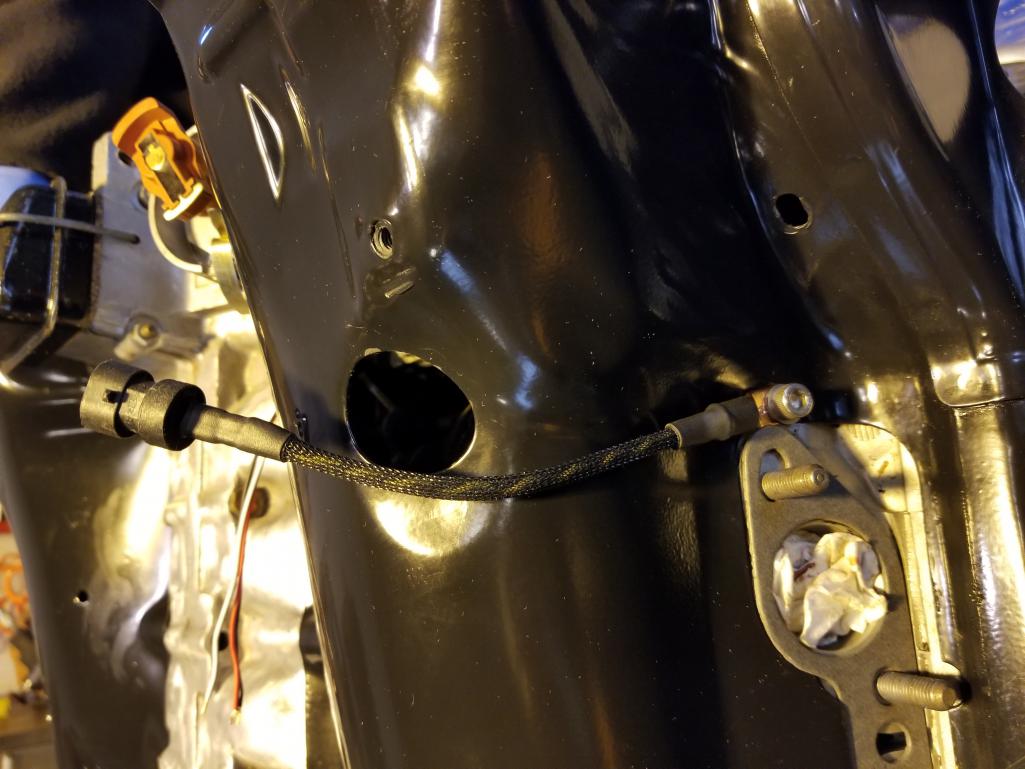
Posted by: Matty900 Mar 25 2018, 10:42 PM
We did put the stock Cylinder Head Temp Sensor in its place to plume the hole but I don't think we will be using it. Any advice you have would be appreciated
Posted by: Matty900 Mar 25 2018, 10:46 PM
We started mocking everything up so we can get the wiring, fuel lines and vacuum lines set up. We will have to take the throttle bodies off to put the engine back in the car.
Attached thumbnail(s)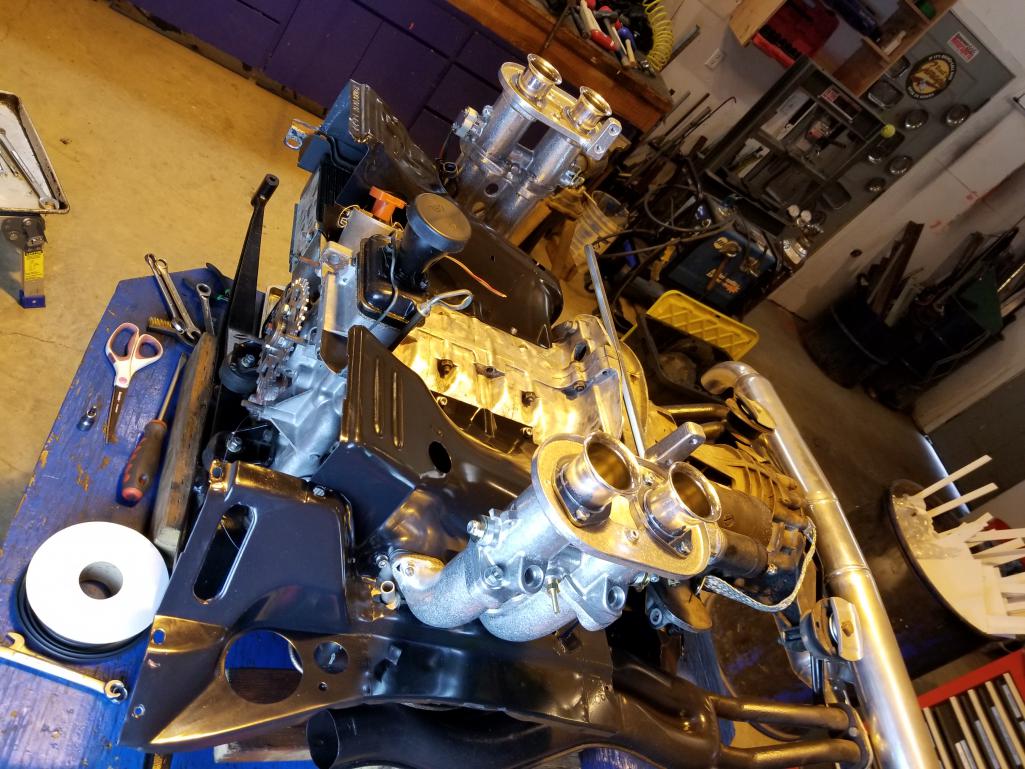
Posted by: Matty900 Mar 25 2018, 11:09 PM
Fuel Rail on the Injectors in the Throttle Body on the Intake Manifold
Attached thumbnail(s)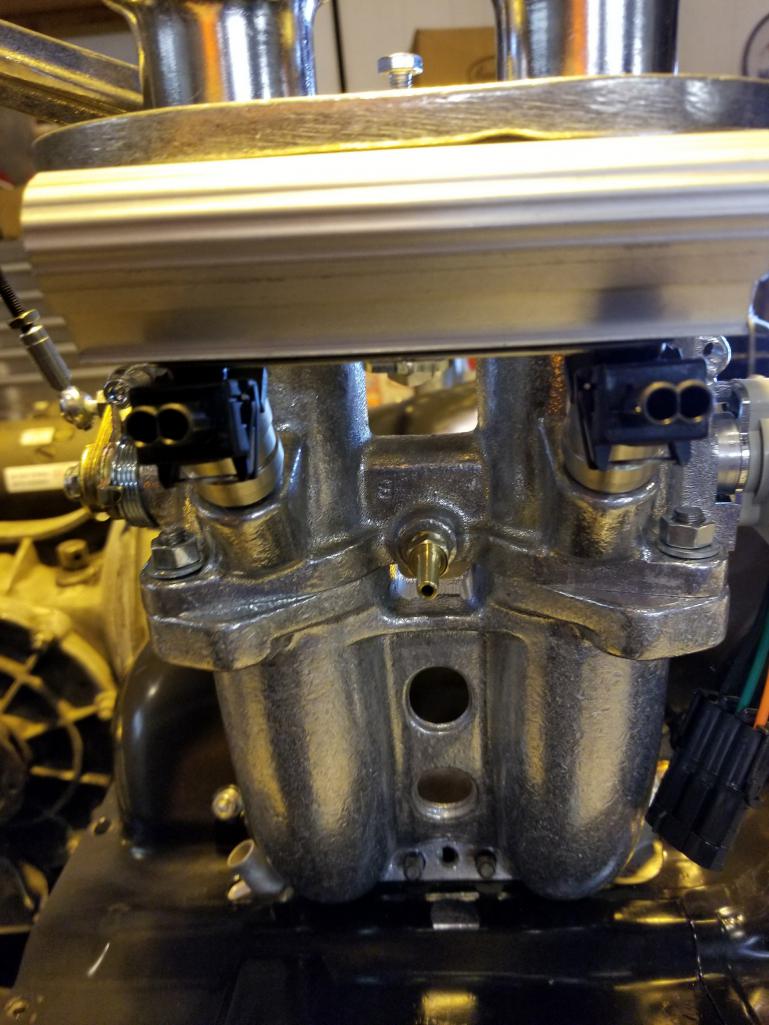
Posted by: Matty900 Mar 25 2018, 11:35 PM
There is a retainer for the injectors that all slides in to a groove at the top of the injector and bolts on to the bottom of the Fuel Rail. It took a little work with the dremmel tool to get them all the way on without forcing them out where they would not line up with the holes in the Throttle Body, but it was pretty close.
There is a throttle body fuel rail bracket that still needs to go on but I need to drill a hole for the bolt where it mounts into the intake manifold
Attached thumbnail(s)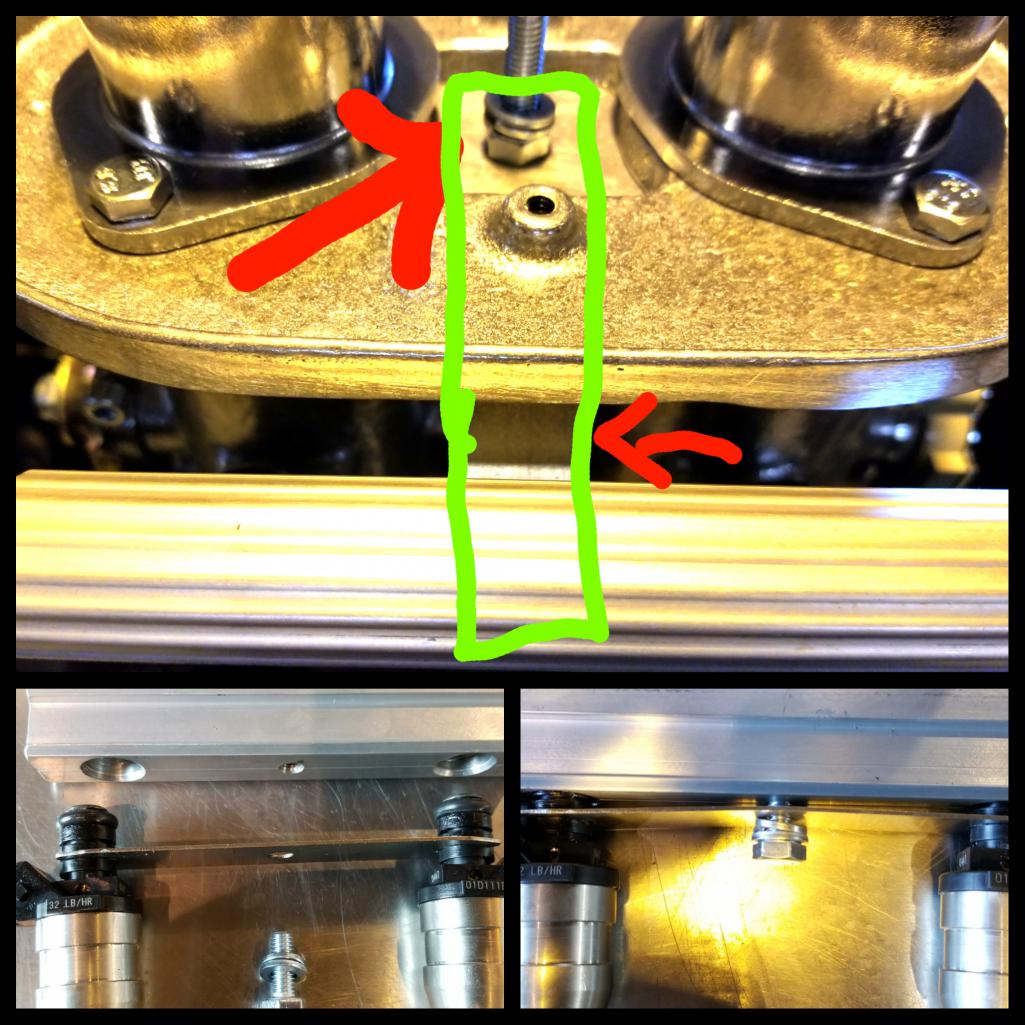
Posted by: Matty900 Mar 25 2018, 11:41 PM
O2 sensor installed in Triad Exhaust.
Dub shop:
Bosch LSU4.9 Lambda Sensor
Description
The newest generation of oxygen sensors are called wideband oxygen sensors. They provide a precise indication of the exact air/fuel ratio, and over the broadest range of mixtures. The Bosch LSU 4.9 wideband oxygen sensor is a 5-wire sensor that reads oxygen in much the same way as a traditional oxygen sensor. but it uses the latest "planar" construction with a special two-part sensing element to measure how much oxygen is in the exhaust. The Bosch LSU 4.9 wideband oxygen sensor has a response time of less than 100 milliseconds to changes in the air/fuel mixture, and reaches operating temperature of 700 to 800 degree Centigrade (1,400 degree F) within 20 seconds or less using its internal heater. This is nearly twice the operating temperature of a conventional oxygen sensor.
Attached thumbnail(s)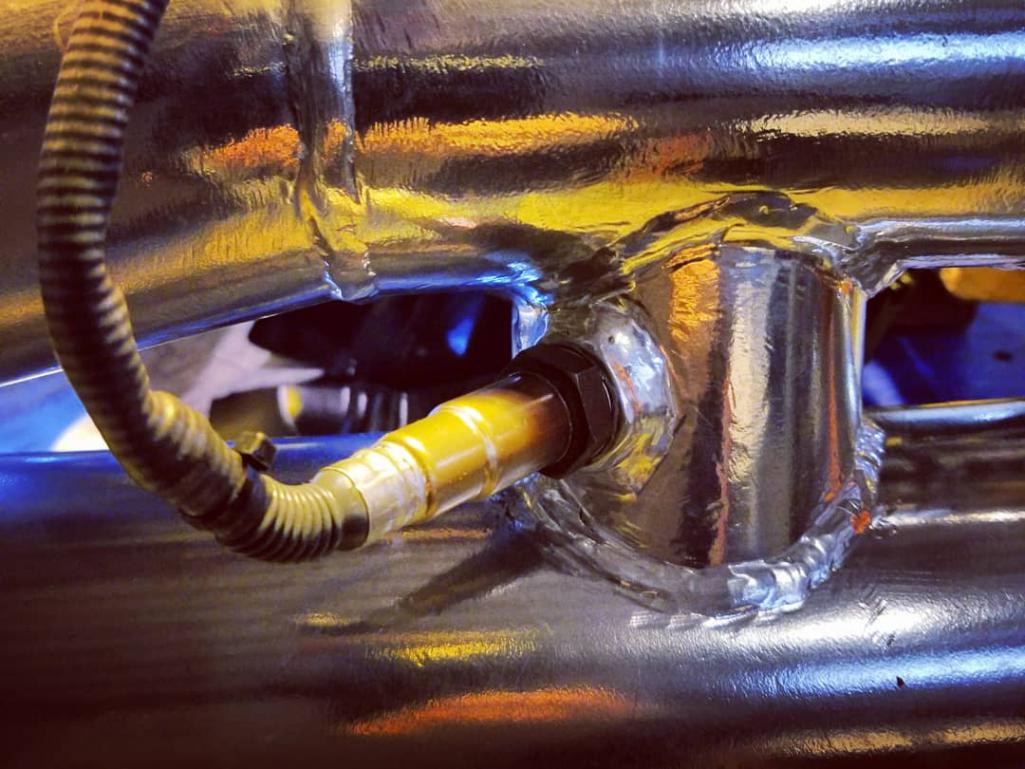
Posted by: Matty900 Mar 25 2018, 11:53 PM
We started working on a mount for the Wasted Spark Coil Pack and the Map Sensor. We will get more of this figured out Tuesday night along with the position of the arm for the Throttle Cable.
Attached thumbnail(s)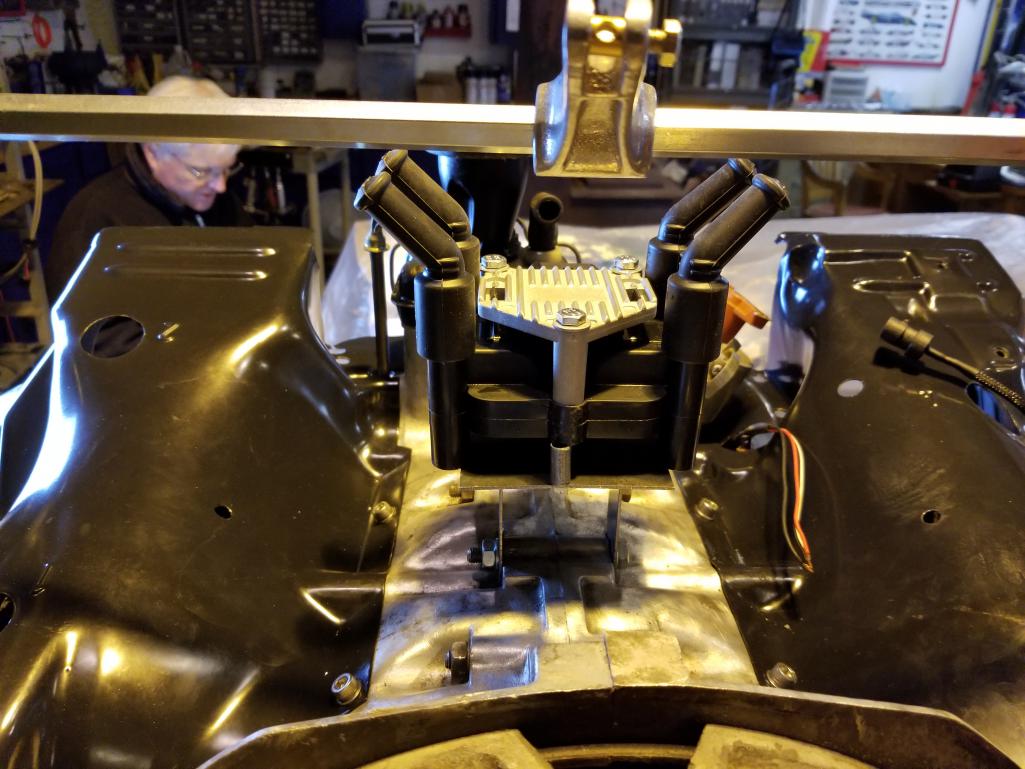
Posted by: Cairo94507 Mar 26 2018, 06:55 AM
Very cool set-up and work.
Posted by: Mblizzard Mar 26 2018, 09:19 AM
Enjoyed chatting with you this weekend. Let me know if you have any other questions.
Posted by: Matty900 Mar 27 2018, 12:22 AM
Very cool set-up and work.
Thank you. Cary has been doing the heavy lifting on the engine. I'm enjoying learning as we go.
Posted by: Matty900 Mar 27 2018, 12:27 AM
Enjoyed chatting with you this weekend. Let me know if you have any other questions.
Thanks Mike, you too. I can see more people wanting to go the Micro Squirt route but there is not a lot of info on installing it in a 914, so I started a thread to try and get some more install info collected for anyone else that wants to try it. If you want to add some of your installing info to that thread it may help. http://www.914world.com/bbs2/index.php?s=&showtopic=326540&view=findpost&p=2592977
Posted by: cary Mar 28 2018, 07:38 PM
After taking a few days to absorb the work we did last week I'm trying not to over think this deal. At times one feels there isn't enough info. But the more I read less is more. This Dub Shop kit seems to be Plug & Play, other than power to the Ecu and the fuel pump. In my mind I've been trying to run the fuel pump off the relay board. I'd like to keep the fuel pump on a relay and fuse. But with all the problems we've had with poor quality round relays I think I'll pass. 
At the same time I'd like to fuse or circuit breaker the power wires off the battery. I love the circuit breakers we've got from Tuthill for the rally cars, but they're a little a little to big. I'm still surfing the web. I want a unit that I can put in all cars. But it has to be sanitary.....................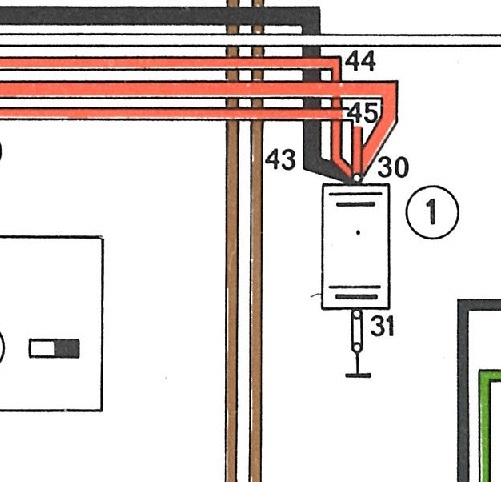
Short term I'll use inline ATC fuse holes.
Posted by: 914_teener Mar 28 2018, 07:53 PM
O2 sensor installed in Triad Exhaust.
Dub shop:
Bosch LSU4.9 Lambda Sensor
Description
The newest generation of oxygen sensors are called wideband oxygen sensors. They provide a precise indication of the exact air/fuel ratio, and over the broadest range of mixtures. The Bosch LSU 4.9 wideband oxygen sensor is a 5-wire sensor that reads oxygen in much the same way as a traditional oxygen sensor. but it uses the latest "planar" construction with a special two-part sensing element to measure how much oxygen is in the exhaust. The Bosch LSU 4.9 wideband oxygen sensor has a response time of less than 100 milliseconds to changes in the air/fuel mixture, and reaches operating temperature of 700 to 800 degree Centigrade (1,400 degree F) within 20 seconds or less using its internal heater. This is nearly twice the operating temperature of a conventional oxygen sensor.
Love this thread and FI set up.
Did you ceramic coat the Triad after welding on the bung?
Posted by: Matty900 Mar 28 2018, 10:37 PM
Love this thread and FI set up.
Did you ceramic coat the Triad after welding on the bung?
Thank you
I had the Triad built with the O2 bung in case I ended up going this way. While you're in there right?
Posted by: cary Mar 30 2018, 12:52 AM
Spoke to soon ................
We'll need to install two relays, power and fuel pump. Plus build a ground and 12v harness. The MicroSquirt harness is primarily signal and control wiring.
Posted by: Matty900 Mar 30 2018, 10:37 PM
Getting closer
Attached thumbnail(s)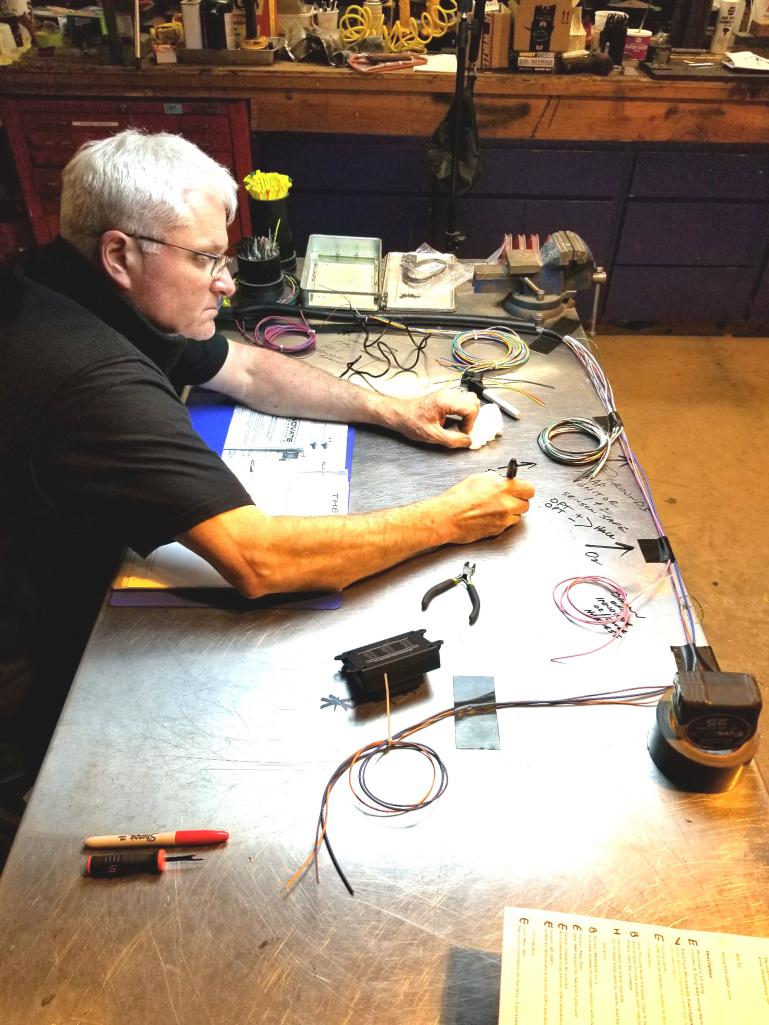
Posted by: raynekat Mar 30 2018, 11:38 PM
OK....this looks "dangerous." 
Getting closer
Posted by: cary Mar 31 2018, 08:29 AM
Onto to blending the 914 ignition cable into the MicroSquirt cable.
The Microsquirt cable is taped to the table at the approximate lengths. Struggling a bit with TMI. Some data says power the Hall trigger with 5 volts. Others say TPS and Map only get 5 volts. Then which sensor wire do I use. It give me 4 to 6 choices.
We're going with 12 volts. The Dub Shop says his is 12volt. As for the signal, we're going with the VR1+, pin #32. Still reading .......
Posted by: cary Apr 1 2018, 09:29 AM
Here's the final layout with the chassis ignition integrated on the right.
Waiting for the relays and new fuse panel to arrive Monday. Then onto 12 volt supply for the injectors and added grounds.
Note : Not using OPT 1 & 2, VR1 only for Hall. 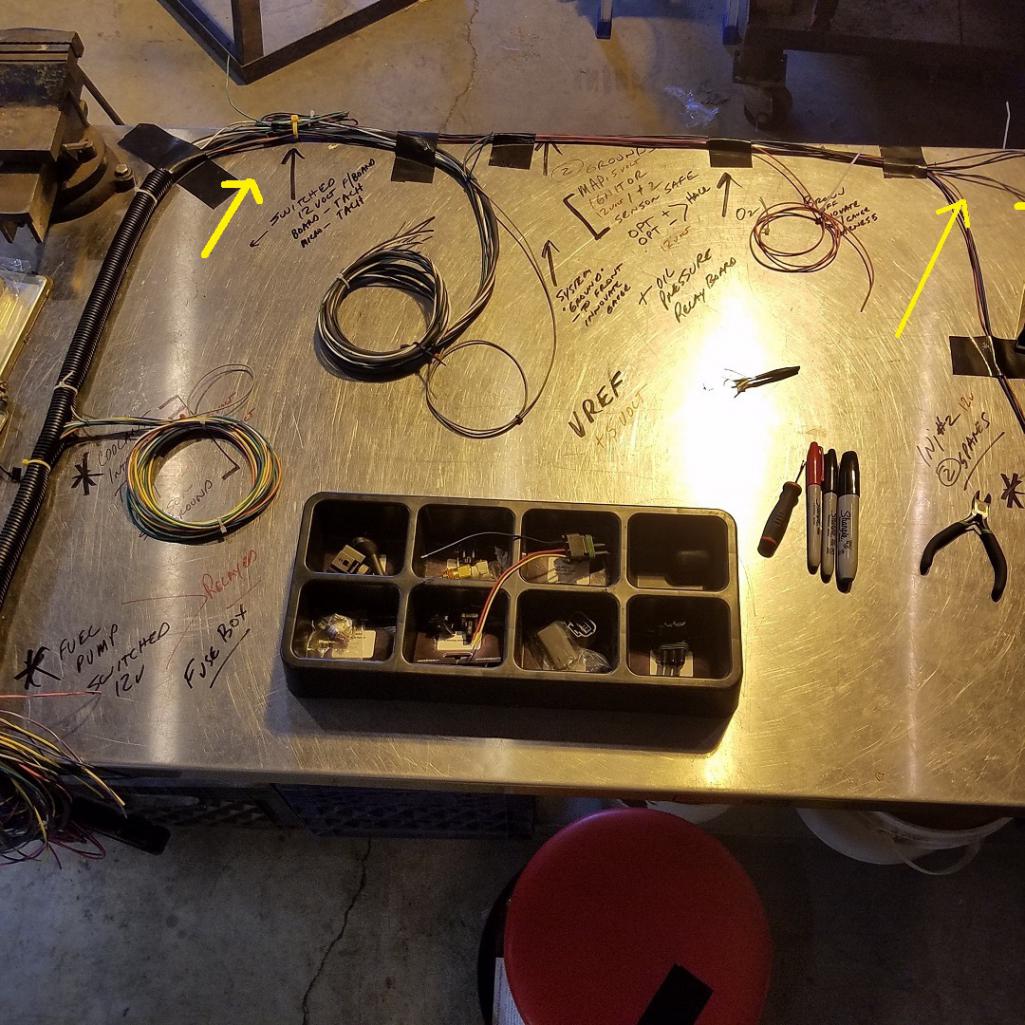
Next onto the crankcase and fuel line venting design. This is a head vented 72 1.7.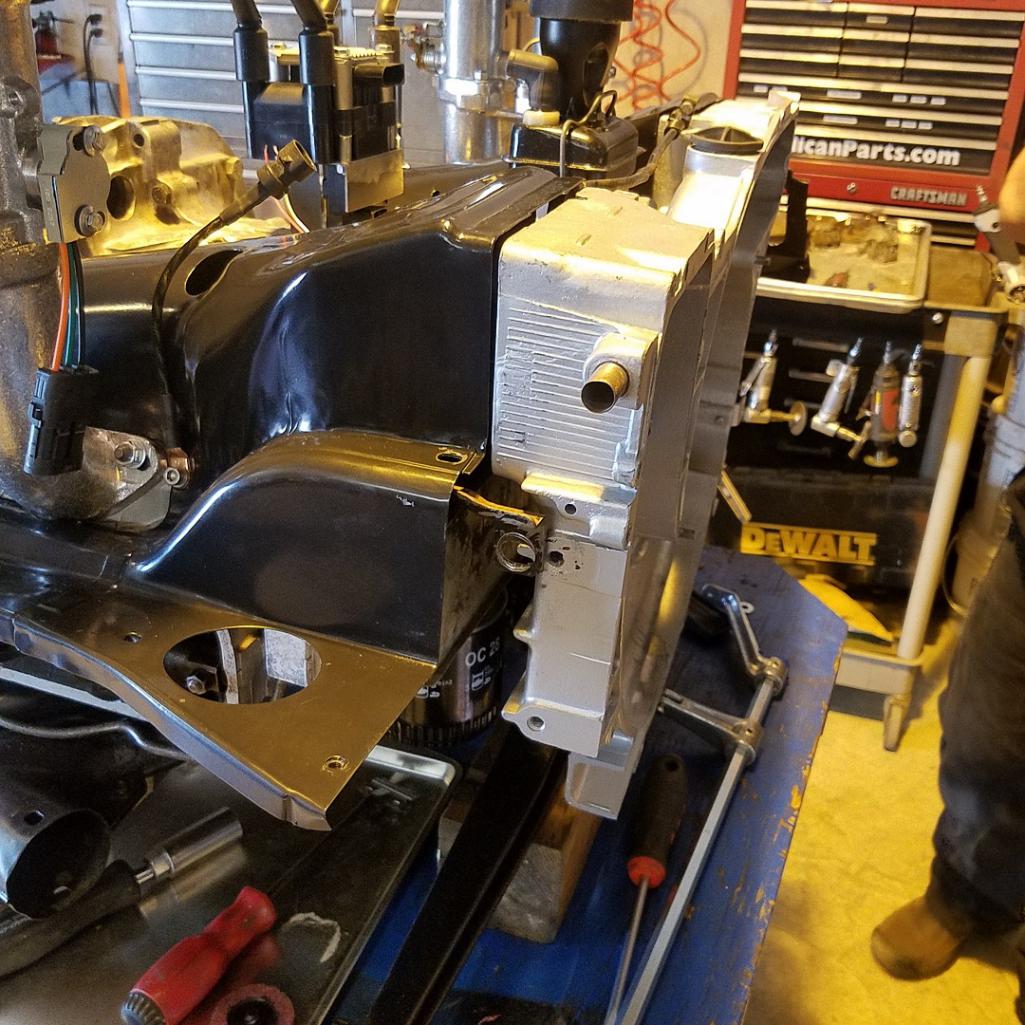
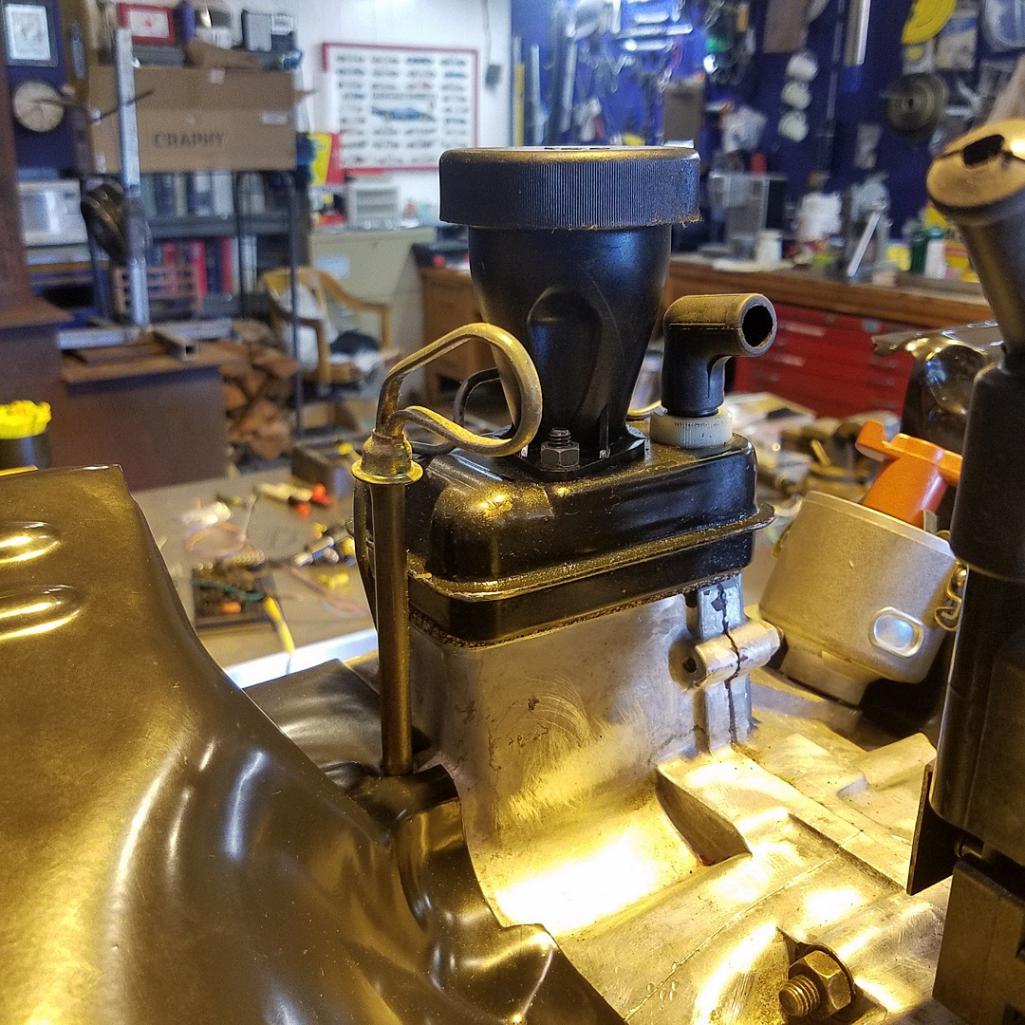
Posted by: cary Apr 1 2018, 09:50 AM
I surely don't want it to look like an Octopus. LOL.
I'm thinking maybe a Tangerine catch can. With only the evap going to one of the air cleaners.
Posted by: mepstein Apr 11 2018, 07:28 AM
Posted by: cary May 3 2018, 07:56 AM
Time to get Matt on the road. I'm back from Baja with a 1st Place trophy. Mission accomplished. On leaving yesterday I had Scotty install the new ends on the spark plug wires.
Here he is prepping the connector prior to crimping.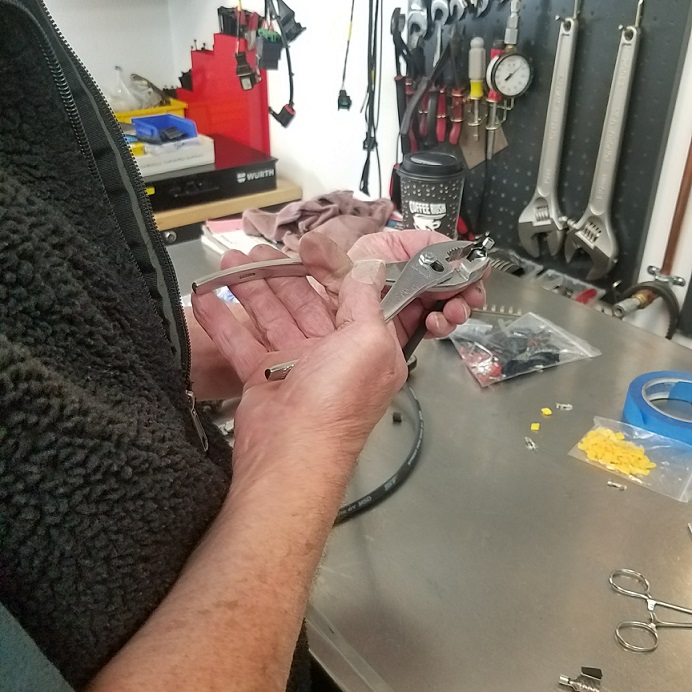
He uses old school MSD crimpers, non ratcheting.
https://www.summitracing.com/parts/acc-170037/overview/
Posted by: cary May 3 2018, 08:23 PM
For the most part the day was a big turd. NAPA couldn't come up with the right front rotors for my Powerstroke.
But I did get my order of terminal blocks into their storage location.
Here is the one we'll use inside the D-Jet ECU box.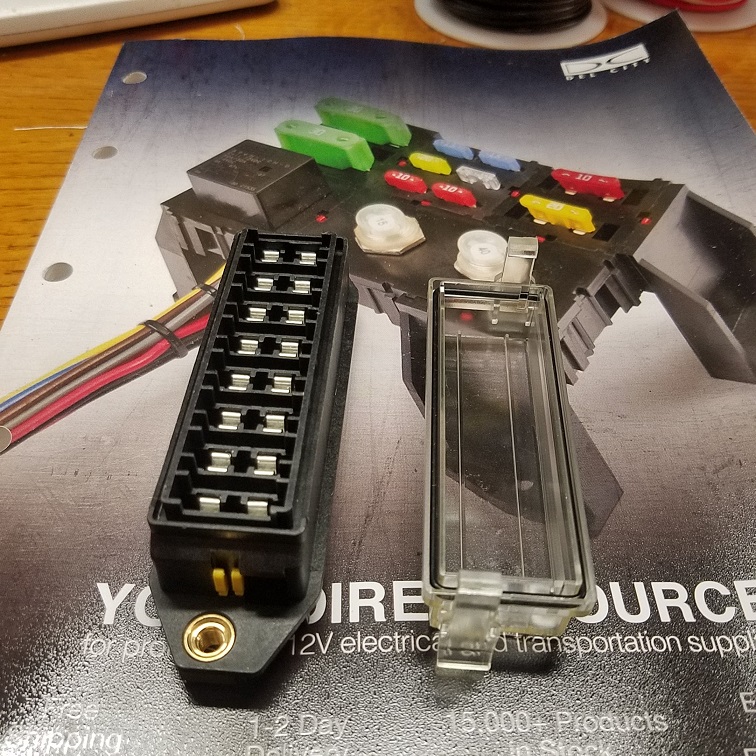
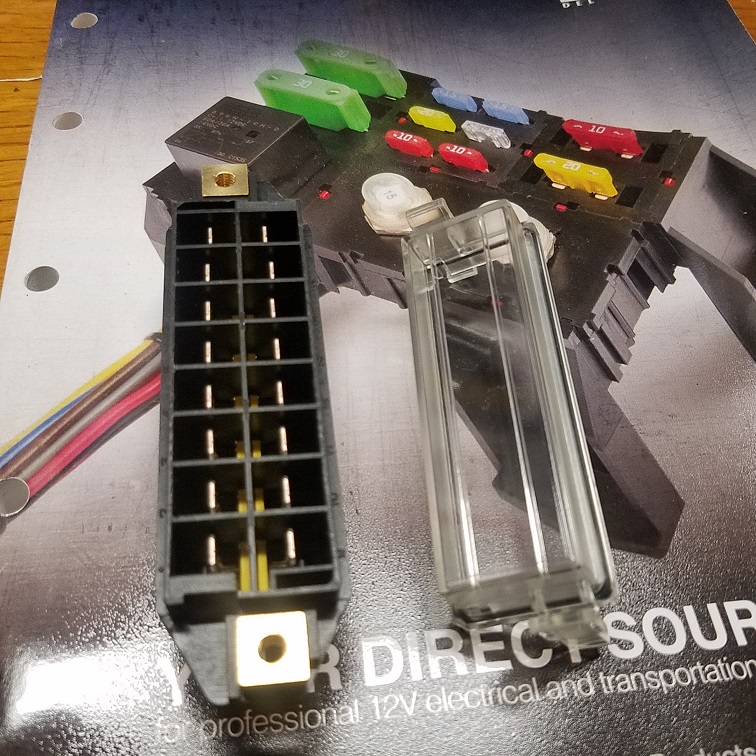
Posted by: cary May 5 2018, 06:48 AM
After a 30+ day break I'm back to Matt's MicroSquirt install. We're making an attempt to kind of hide the 21st century components to some degree. At least the mondo wiring harness. So must of the wiring connections will be hidden in the old D-Jet ECU box.
The wiring of the box has begun. All individual components will be fused.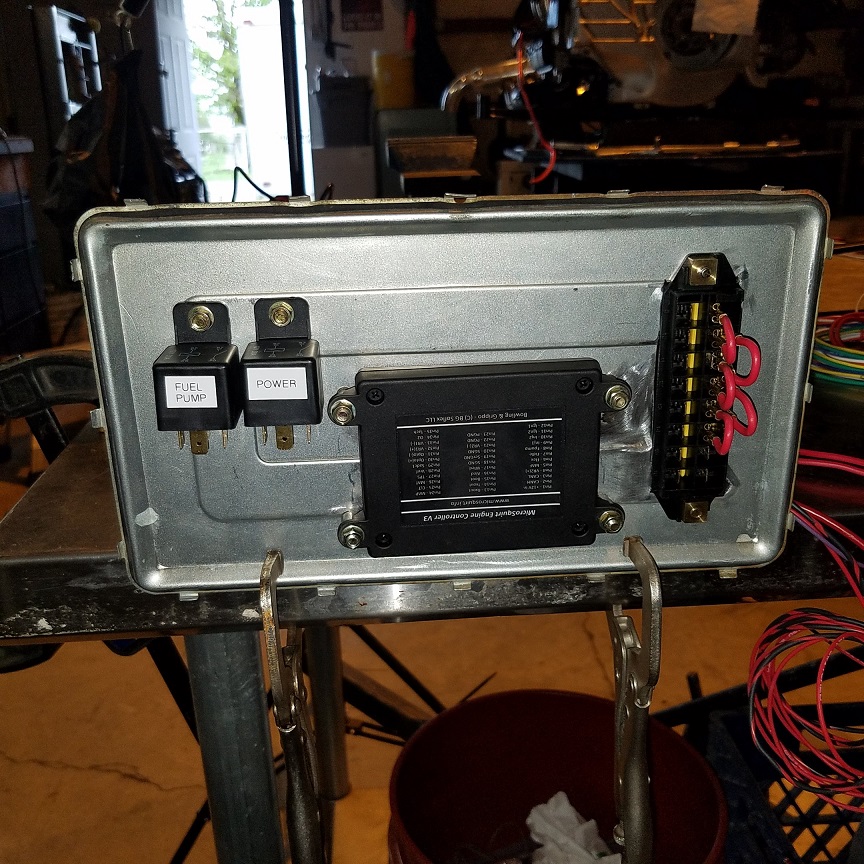
We found one terminal block that would have eliminated the jumpers. But it wasn't robust enough.
Still working thru my sleep deprivation from the Mexican 1000 Rally, but it's getting better day by day. Up at 5am and can't wait to get back at it. I think I've been wiring since 3am in my dreams.
Posted by: bbrock May 5 2018, 09:29 AM
After a 30+ day break I'm back to Matt's MicroSquirt install. We're making an attempt to kind of hide the 21st century components to some degree. At least the mondo wiring harness. So must of the wiring connections will be hidden in the old D-Jet ECU box.
Nice touch
Posted by: cary May 6 2018, 09:18 AM
Here it is wired up ..............
The box is tall enough to allow for the wires to arc and dress out real nice.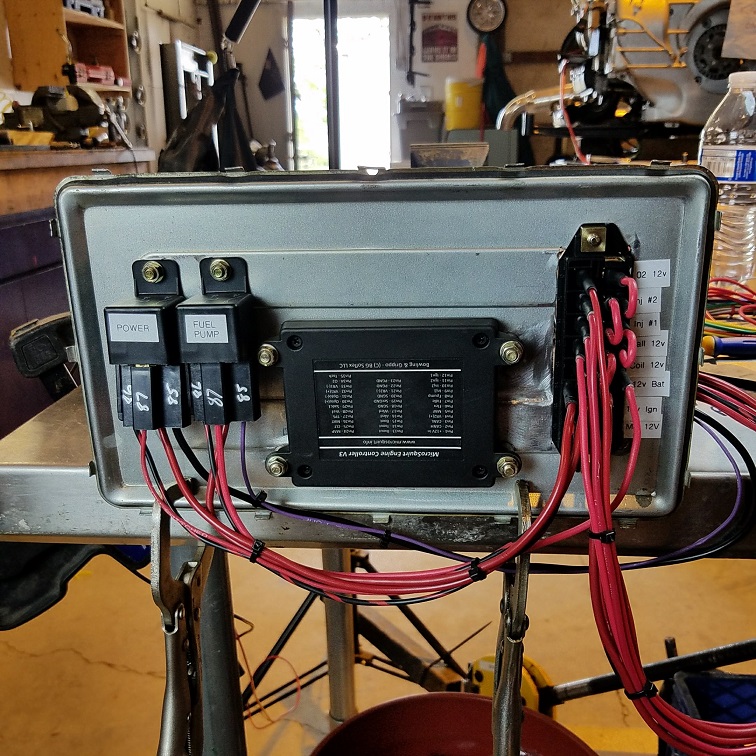
If we do a few more of these we'll have some stickers made to call out the fuses. Both inside and out.
Posted by: cary May 6 2018, 09:23 AM
After lunch we went after the prepping the engine for re-installation.

Gave the fan a good cleaning at Rothsport with the soda blaster. Then Matt gave it a couple coats of clear. But don't forget the replace the timing marks. Both factory and the outside rim.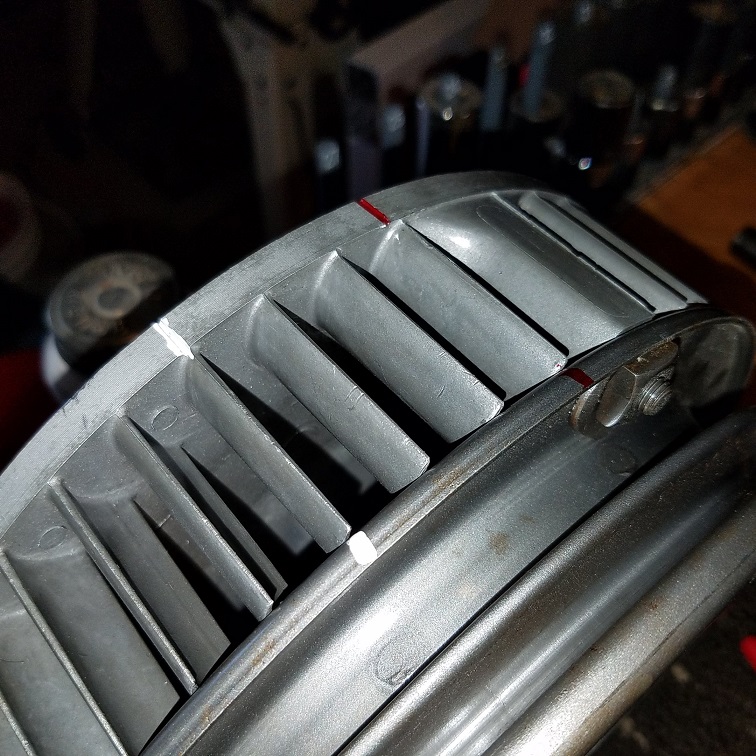
Posted by: Matty900 May 7 2018, 03:00 AM
After the mock-up was done I put some work into the ECU boxes. Painted it and then insulated the inside then added a rubber sheathing to help keep any water out of the box.
Starting to look like a V2 rocket (Mark )
Attached thumbnail(s)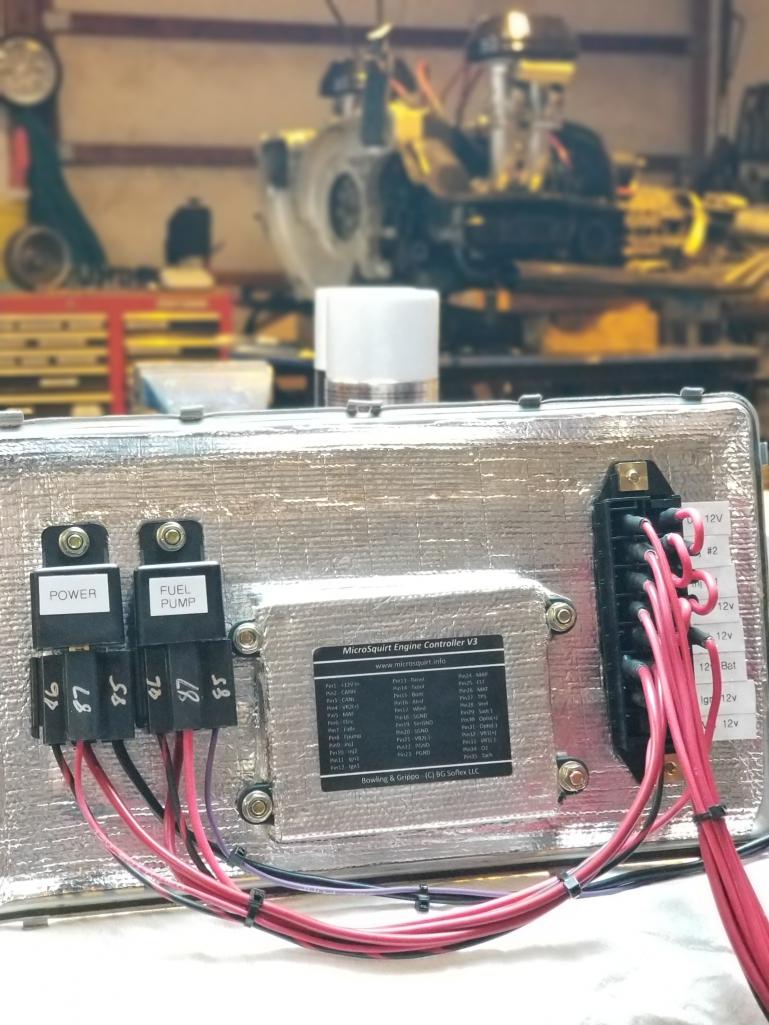
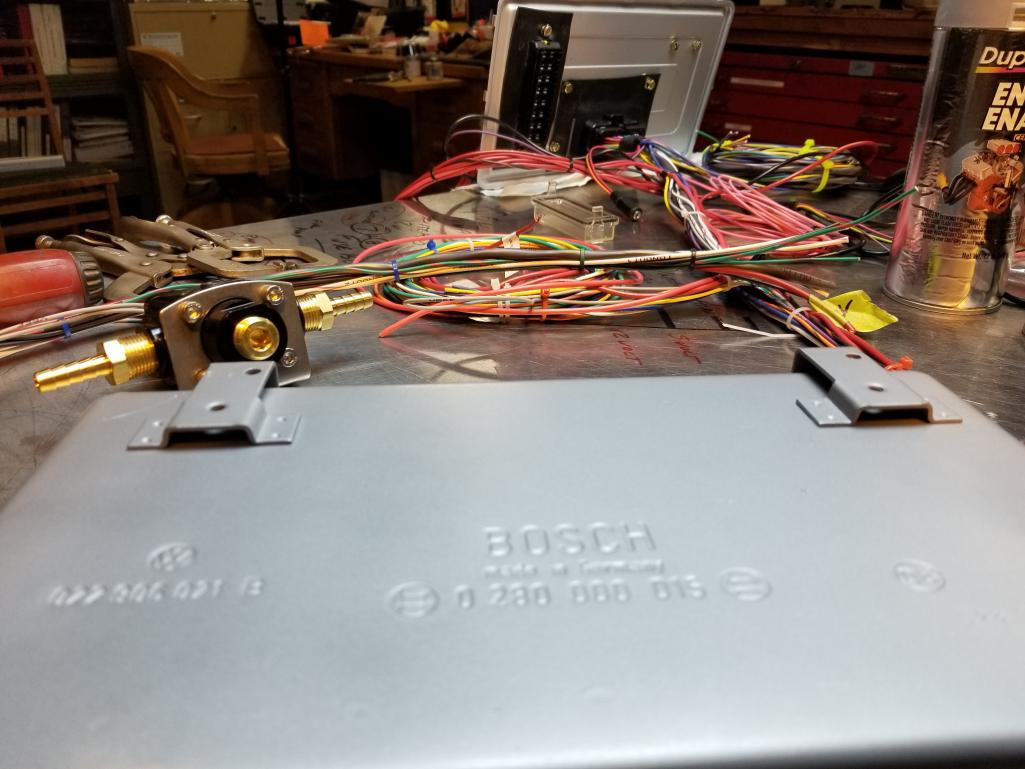
Posted by: Matty900 May 7 2018, 07:43 AM
Pulled the tachometer and sent it off to Palo Alto Speedometer (thanks Eric Shae for the advice) to get an upgrade so that it will be able to use the signal from the microsquirt. Now if I could remember what he said about needing a diode somewhere for some resistance Eric 
Attached thumbnail(s)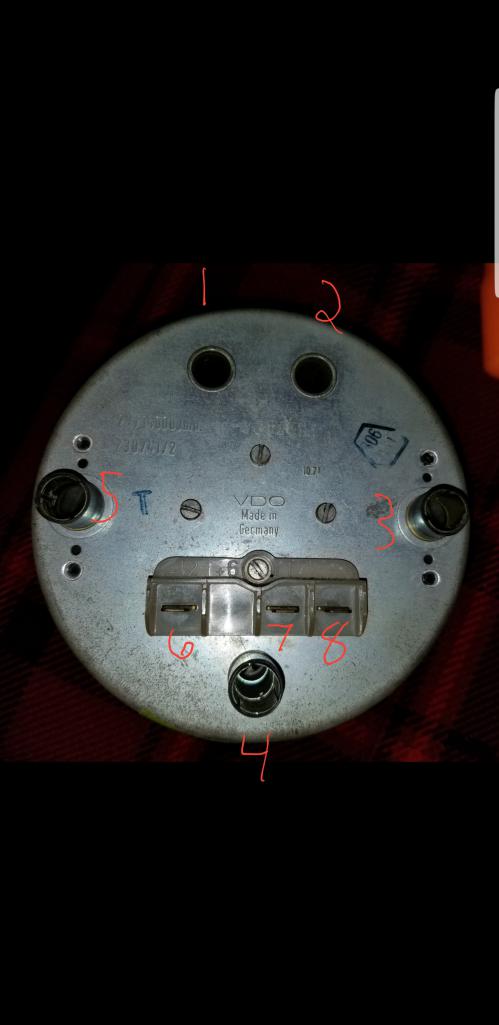
Posted by: cary May 7 2018, 11:11 PM
The work continues. Installing fuel lines and fuel pressure regulator.
Lots of engineering along the way. We want to be able to replicate what we've created.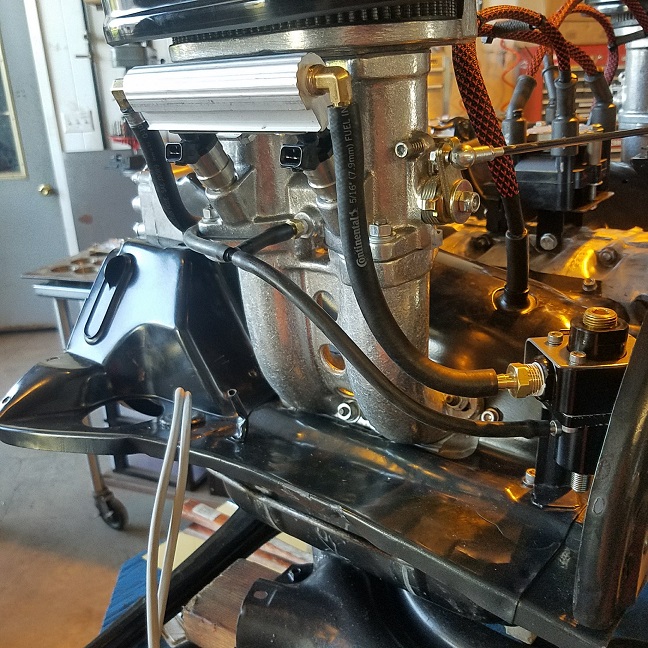
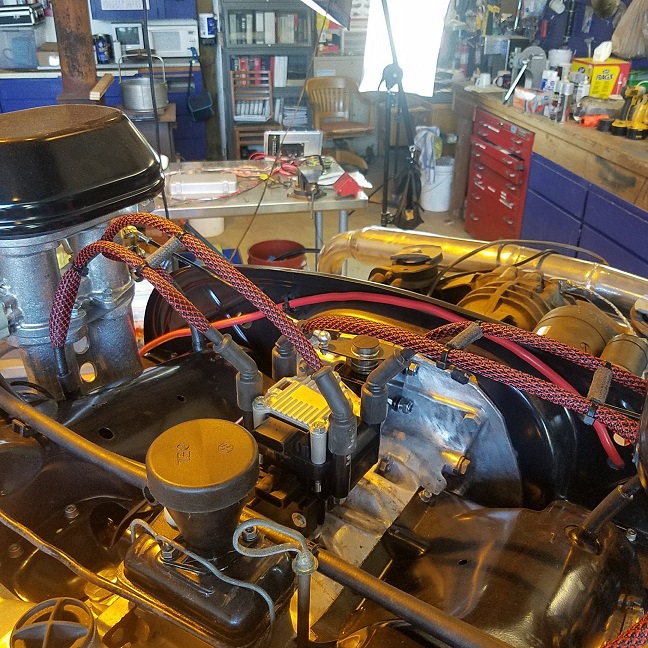
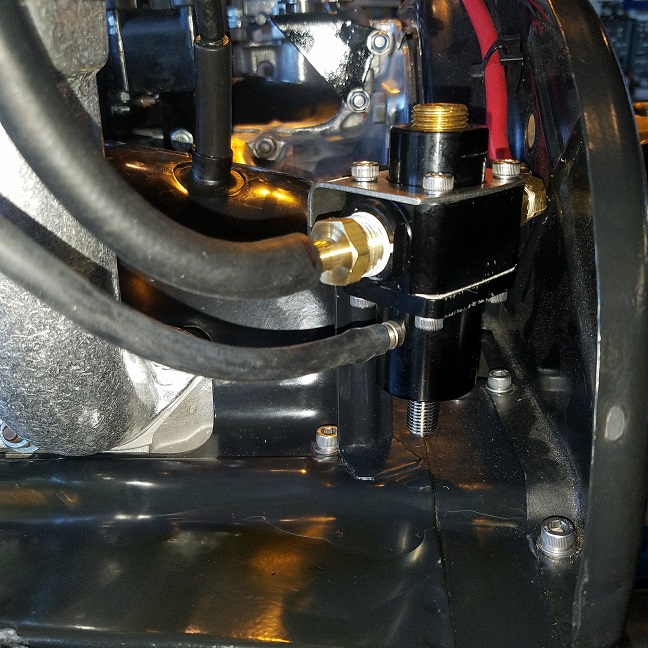
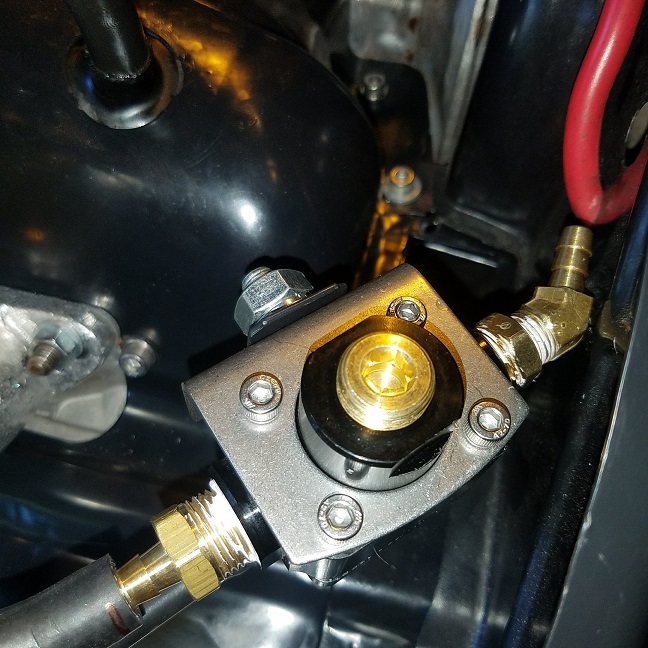
Posted by: Philip W. May 8 2018, 10:23 AM
nice, very clean and neat! Cary what kind of coating is on the Triad exhaust in the background? I was considering a ceramic coating of some kind to put on mine as well.
Phil.
Posted by: cary May 9 2018, 07:39 AM
I believe it's ceramic. We'll have to wait for Matt to chime in. Both he and Doug outsourced some items for ceramic coating.
Posted by: cary May 9 2018, 08:09 AM
Tuesday was going over the harness one more time before it goes into the engine bay for harness mock up. I'm making sure I have all the wiring I need to integrate the Innovate LC-2 into the harness, it too is going into the ECU box. This is definitely not plug and play. While I was doing that Matt was upgrading the fuel lines to SS and AN fittings.
I climbed up on the engine rack and extracted an engine ground off one of my engines.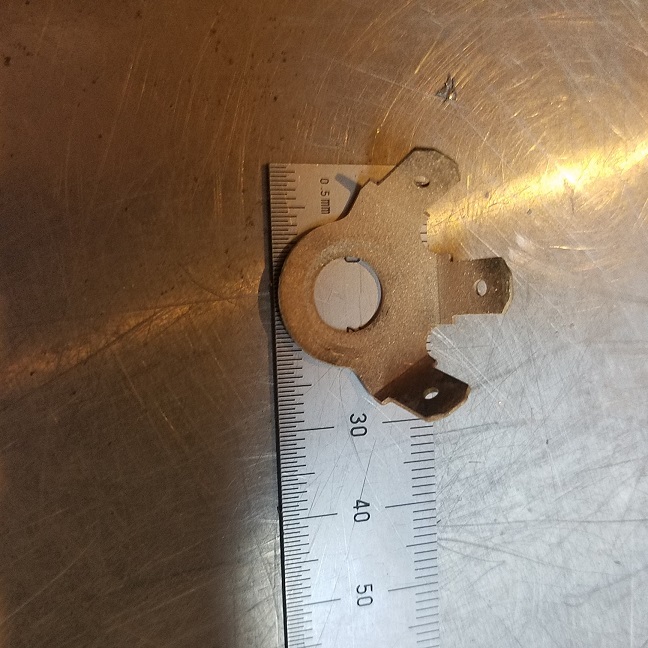
I'd like to find find/purchase 5 more to send out for plating.
Then I'm not real crazy about the evap lines going into the throttle body top. So I had Matt pick up some pipe thread taps so I could tap a hole in the stack plate. Should be Tight & Tidy.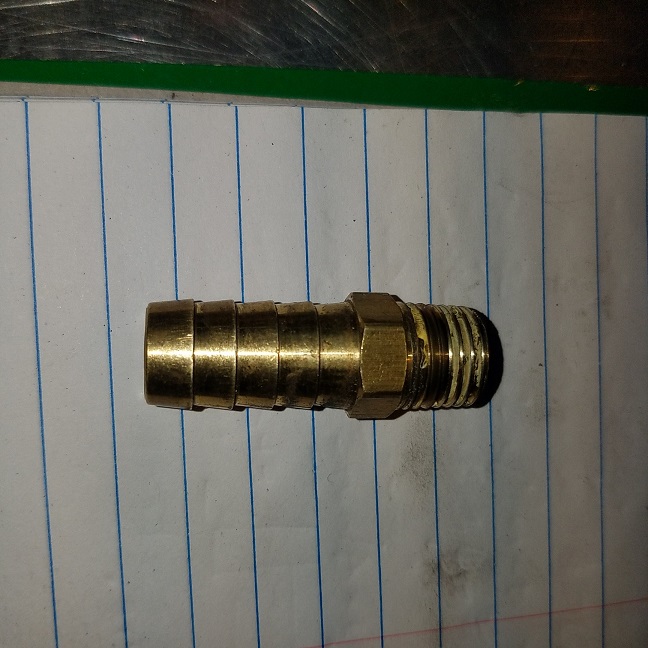
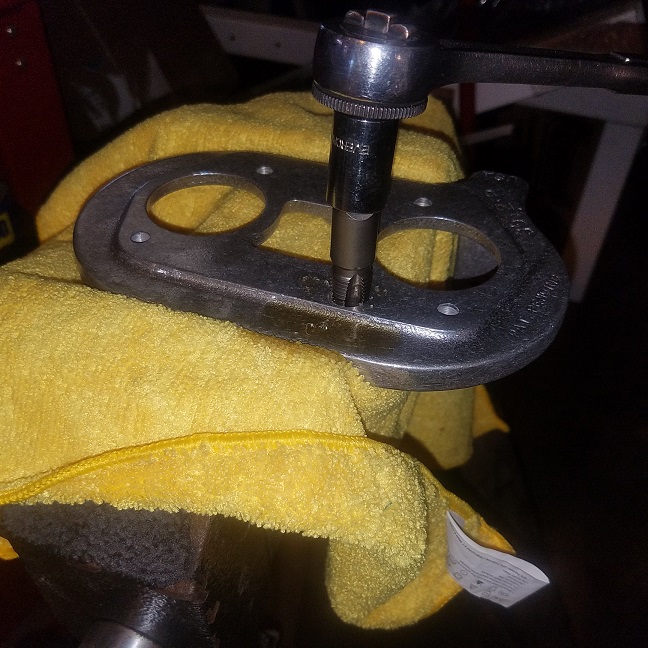
Then onto NEW parts. Matt bought a set of NEW Porsche Classic half shafts.
Installed the outer hubs and torqued them down so we can safety wire them today.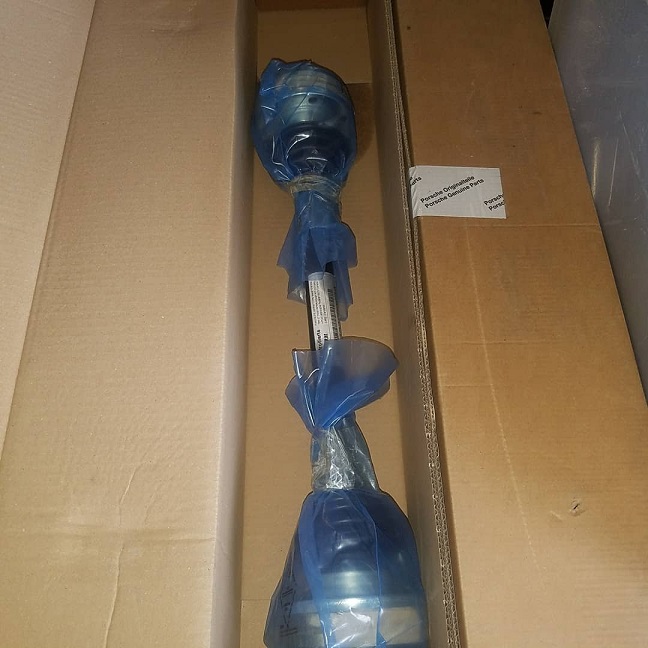
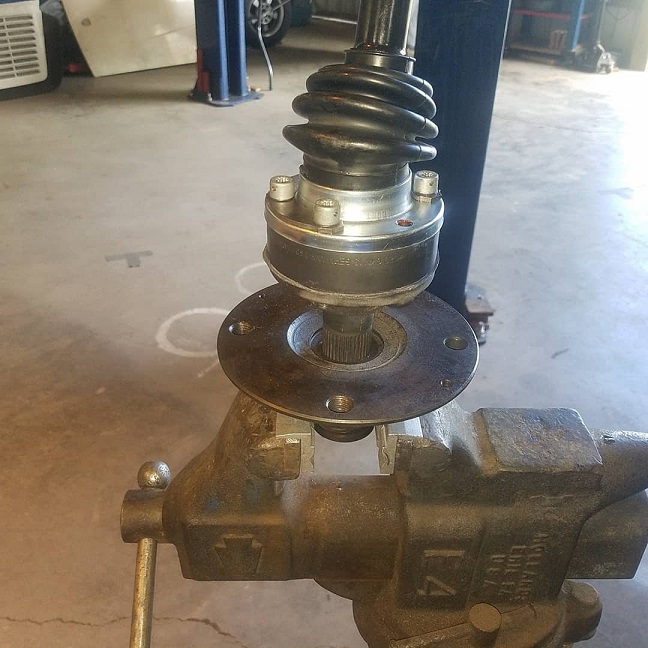
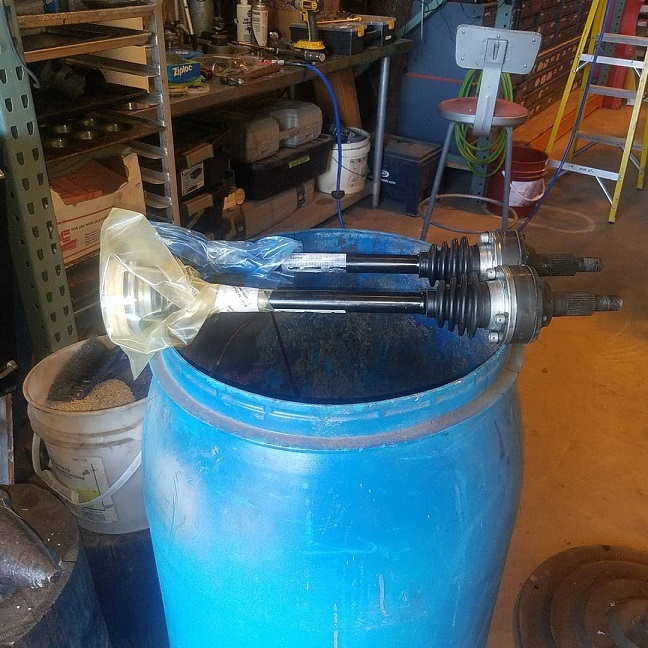
That hub will be painted blue and added to the fixture bin. Got lots ........
Fuel line didn't arrive last night. So theres a change in plans. After a little shop housekeeping the engine is going in without half shaft and fuel lines so I can mock up the harness break outs and shrink tubing. I'm going to time it. LOL.
Posted by: Matty900 May 9 2018, 11:53 PM
Few more of our new parts going onto the engine
Attached thumbnail(s)
Posted by: Matty900 May 9 2018, 11:55 PM
Alternator and belt installed and adjusted. New alternator inspection covers back on.
Attached thumbnail(s)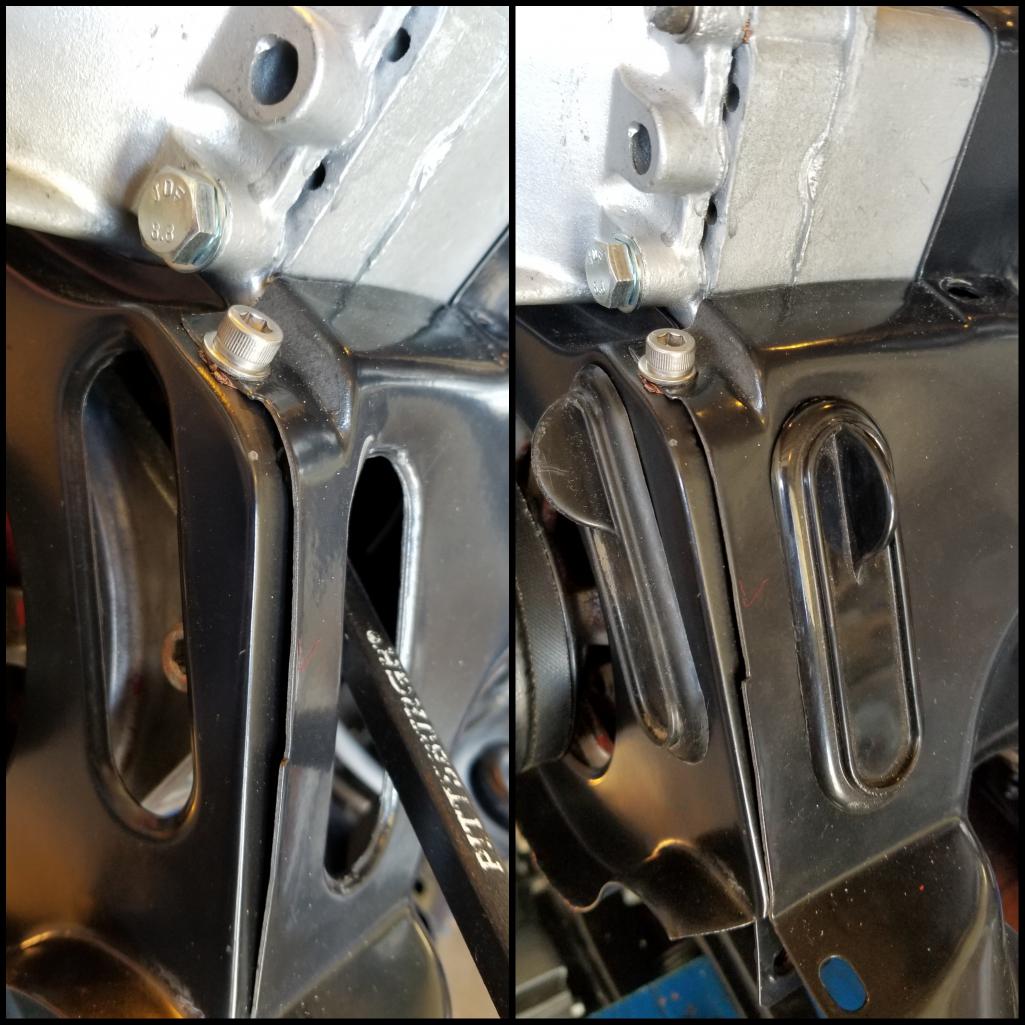
Posted by: Matty900 May 10 2018, 12:04 AM
Cary's handiwork on the evaporation line fitting and the dressed vacuum line for the throttle body
Attached thumbnail(s)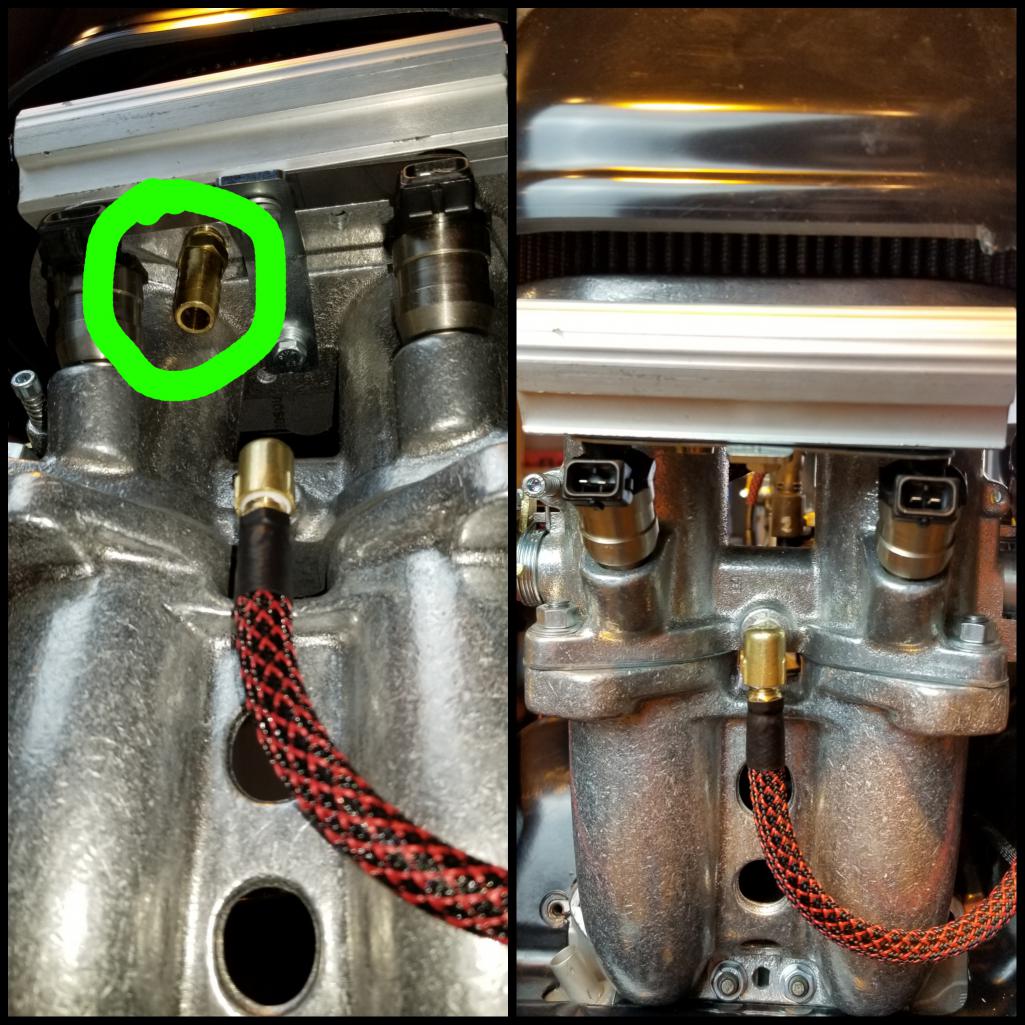
Posted by: Matty900 May 10 2018, 12:06 AM
Engine in the car for harness mockup.
Attached thumbnail(s)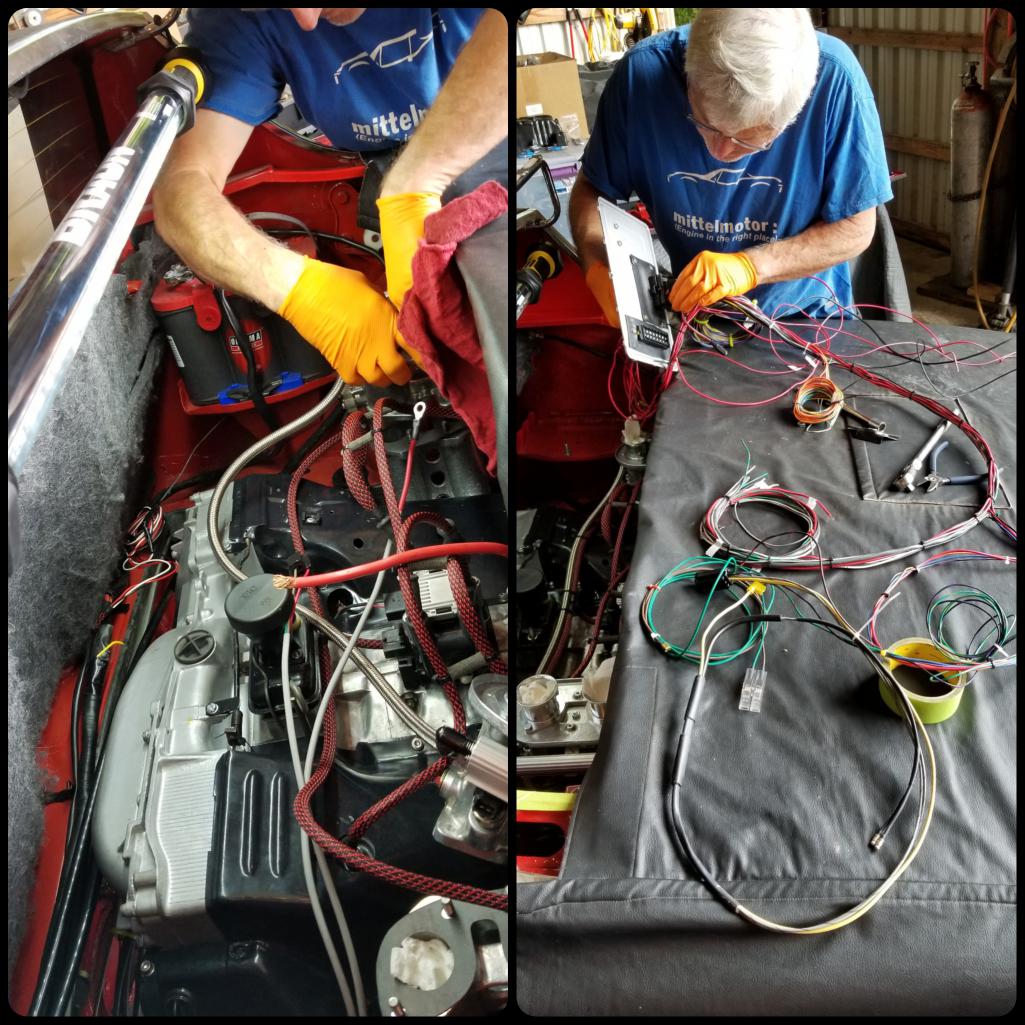
Posted by: Matty900 May 10 2018, 12:13 AM
Fitting the air/fuel monitor/controller in to the original ECU box along with everything else. Ready with a plan for tomorrow. Adjust the wiring harness with today's fitment info
Attached thumbnail(s)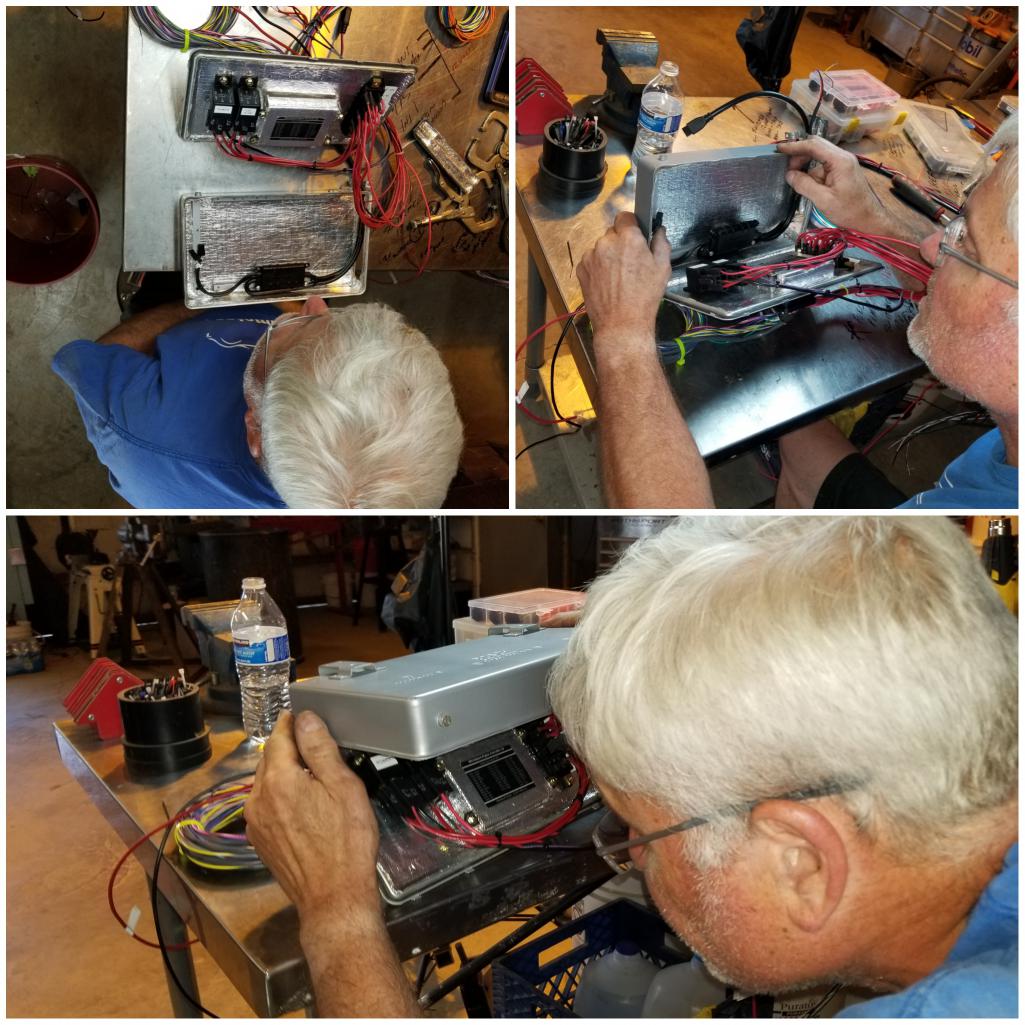
Posted by: tygaboy May 10 2018, 06:52 AM
Love it! Going to be very tidy and stealthy all hidden in the stock cover. Great work, as always.
Posted by: defianty May 10 2018, 08:10 AM
Really enjoying following this build. Great work!
Posted by: cary May 10 2018, 08:47 AM
My only addition for yesterday .............
914 Rubber's pre drilled CV bolts safety wired. Outer on the bench.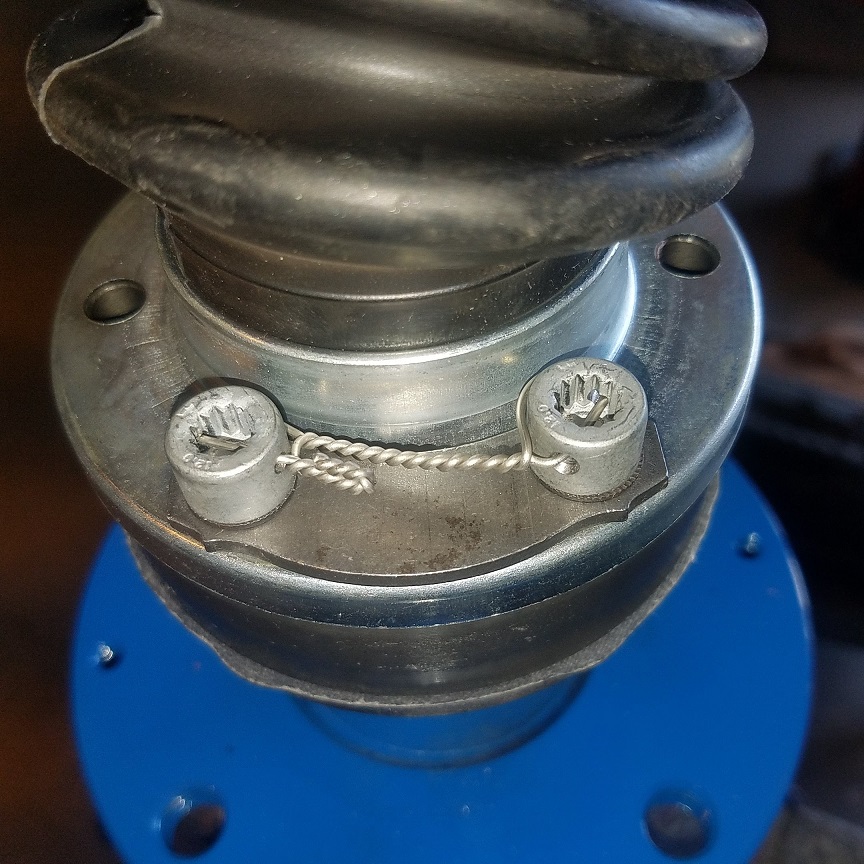
I feel like I've wiring in my sleep since about 4am. Going over my connection and shrink wrapping plan. Over and over and over.
Posted by: Matty900 May 10 2018, 09:24 AM
nice, very clean and neat! Cary what kind of coating is on the Triad exhaust in the background? I was considering a ceramic coating of some kind to put on mine as well.
Phil.
Earlier in this thread I have the before and after http://www.914world.com/bbs2/index.php?s=&showtopic=275587&view=findpost&p=2491424
Here are some installed photos. I did black ceramic on the heat exchangers for maximum heat insulation and "chrome" ceramic on the Triad
Attached thumbnail(s)
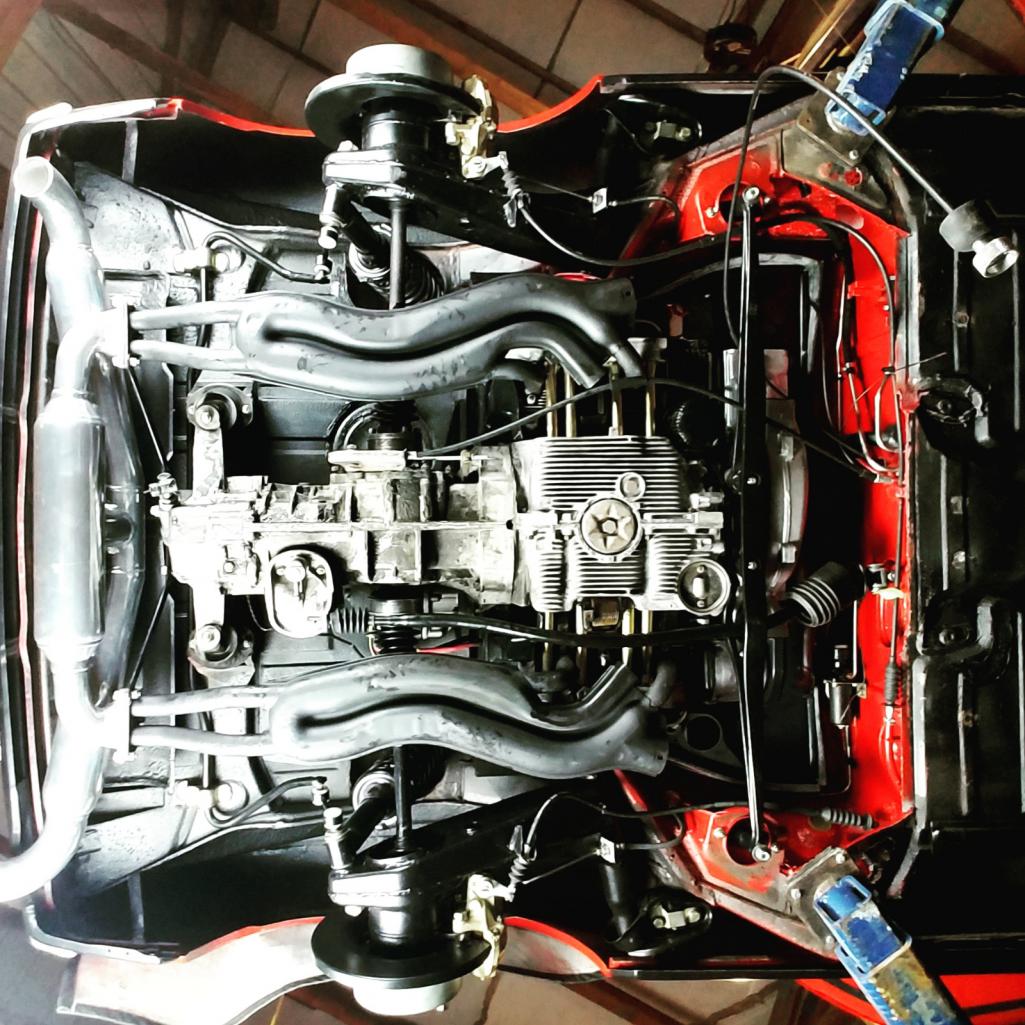
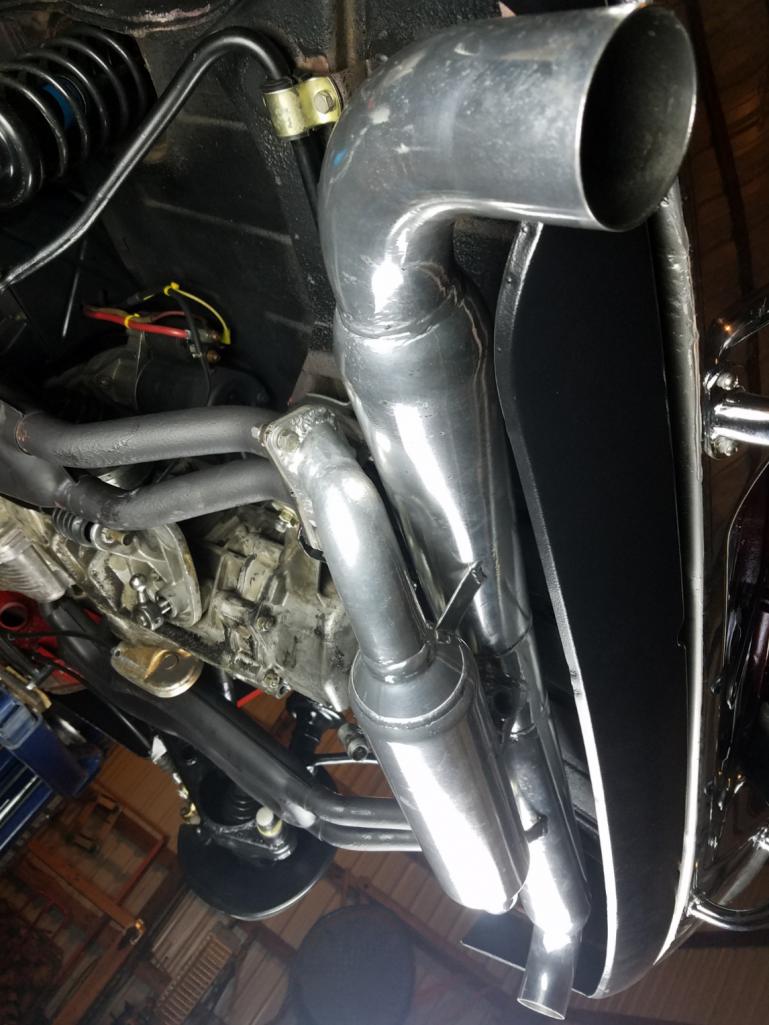
Posted by: Dave_Darling May 11 2018, 11:08 AM
Gave the fan a good cleaning at Rothsport with the soda blaster. Then Matt gave it a couple coats of clear. But don't forget the replace the timing marks. Both factory and the outside rim.
I strongly recommend a dab of paint on the pulley part on the front and/or painting the top of the closest fan blade to the timing mark. Paint is cheap and weighs very little (in small dabs!), and having a timing mark that you can see even when the timing is off (e.g., the blade top) can make setting the timing easier by showing you how far away you are.
After the mock-up was done I put some work into the ECU boxes. Painted it and then insulated the inside then added a rubber sheathing to help keep any water out of the box.
Why the insulation? Don't you want heat dissipation from the ECU in particular?
--DD
Posted by: cary May 12 2018, 07:51 AM
I strongly recommend a dab of paint on the pulley part on the front and/or painting the top of the closest fan blade to the timing mark. Paint is cheap and weighs very little (in small dabs!), and having a timing mark that you can see even when the timing is off (e.g., the blade top) can make setting the timing easier by showing you how far away you are.
I like it. I actually have a white welding felt pin to do the blade with.
Posted by: 76-914 May 12 2018, 08:21 AM
My only addition for yesterday .............
914 Rubber's pre drilled CV bolts safety wired. Outer on the bench.
I feel like I've wiring in my sleep since about 4am. Going over my connection and shrink wrapping plan. Over and over and over.
Do those new CV's have a gasket? If so, where did you find them? Tangerine was out the last time I checked.
Posted by: Matty900 May 13 2018, 12:07 AM
Gave the fan a good cleaning at Rothsport with the soda blaster. Then Matt gave it a couple coats of clear. But don't forget the replace the timing marks. Both factory and the outside rim.
I strongly recommend a dab of paint on the pulley part on the front and/or painting the top of the closest fan blade to the timing mark. Paint is cheap and weighs very little (in small dabs!), and having a timing mark that you can see even when the timing is off (e.g., the blade top) can make setting the timing easier by showing you how far away you are.
After the mock-up was done I put some work into the ECU boxes. Painted it and then insulated the inside then added a rubber sheathing to help keep any water out of the box.
Why the insulation? Don't you want heat dissipation from the ECU in particular?
--DD
Thanks Dave. Great idea on the paint.
The insulation was to create a better home for the components. The recommended location is not in the engine bay.one of the reasons given was because of the heat. The insulation is more to keep that heat out. I did preserve the vents on the bottom of the box though.
Attached thumbnail(s)
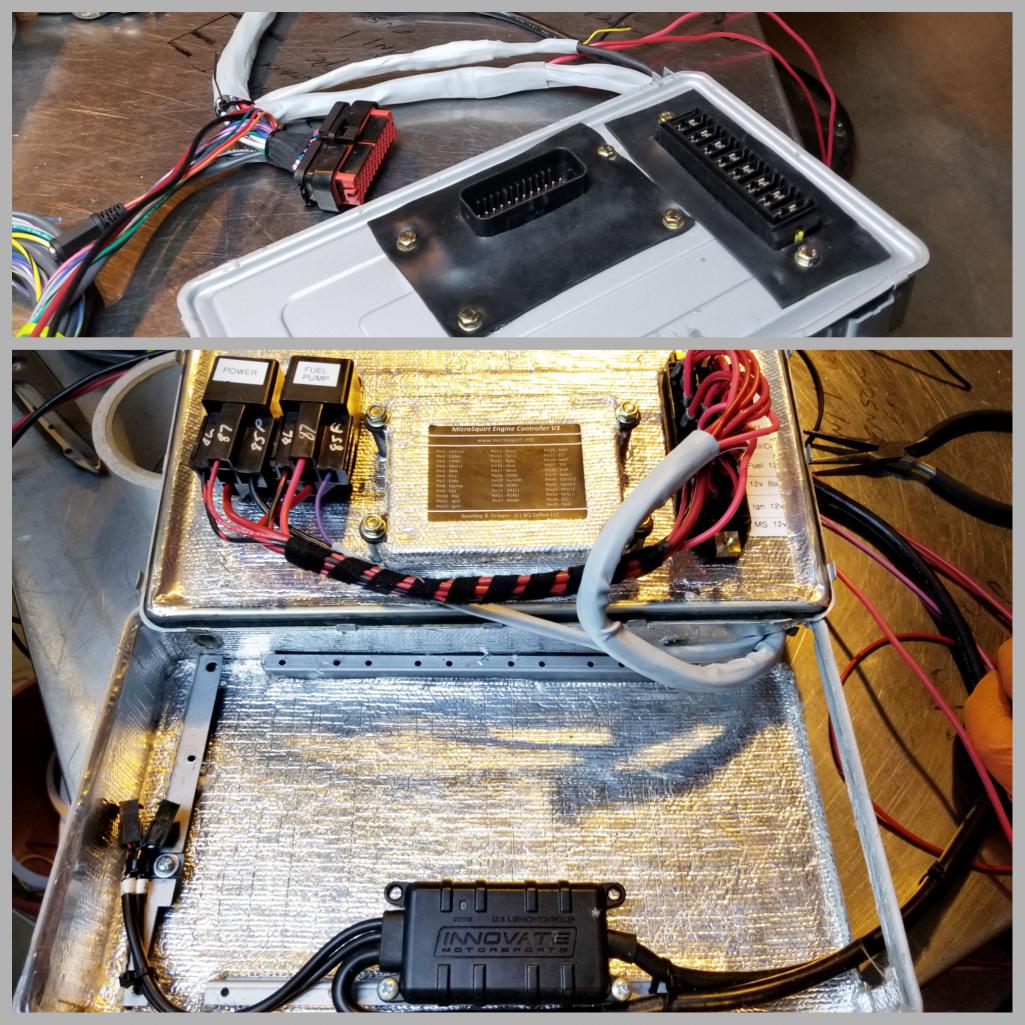
Posted by: Matty900 May 13 2018, 12:15 AM
Got the tach back from Palo Alto speedometer yesterday with the upgraded chip to handle the signal from the Microsquirt. Beautiful job. And a new bezel on the front. Awesome. Now I am going to have to send them the other gauges to make them look as good.
On the back there is now an extra Input for a signal. I am told that the new chip allows for 2 different inputs so one is a backup. Now I just need to see what one will work for my new system.
Attached thumbnail(s)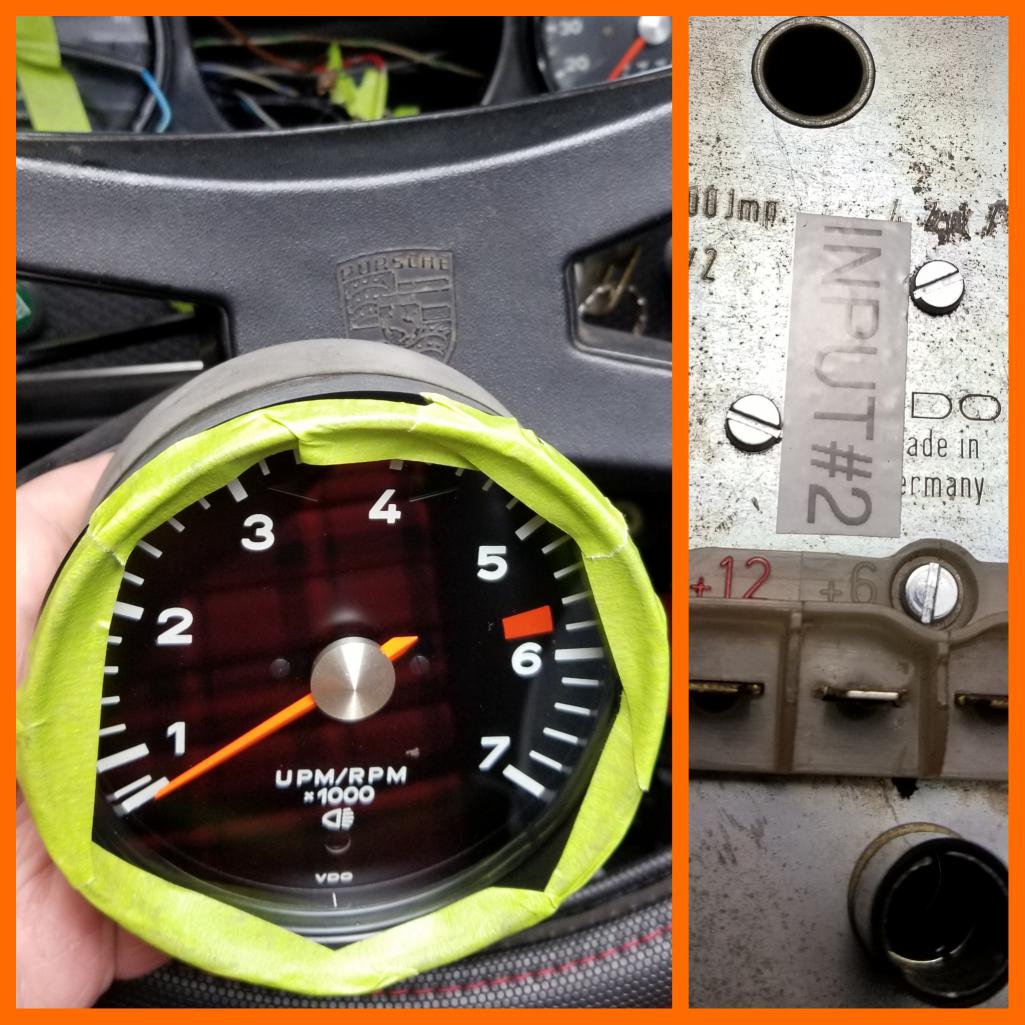
Posted by: Matty900 May 13 2018, 12:37 AM
Replaced the chrome trim on top of the roll bar that was scratched up by the worn out rear roof seal. The news strips went on easy and great.
Nice job on the part Mark I know that they were a pain to get perfect, but the effort was worth it in the end!
Attached thumbnail(s)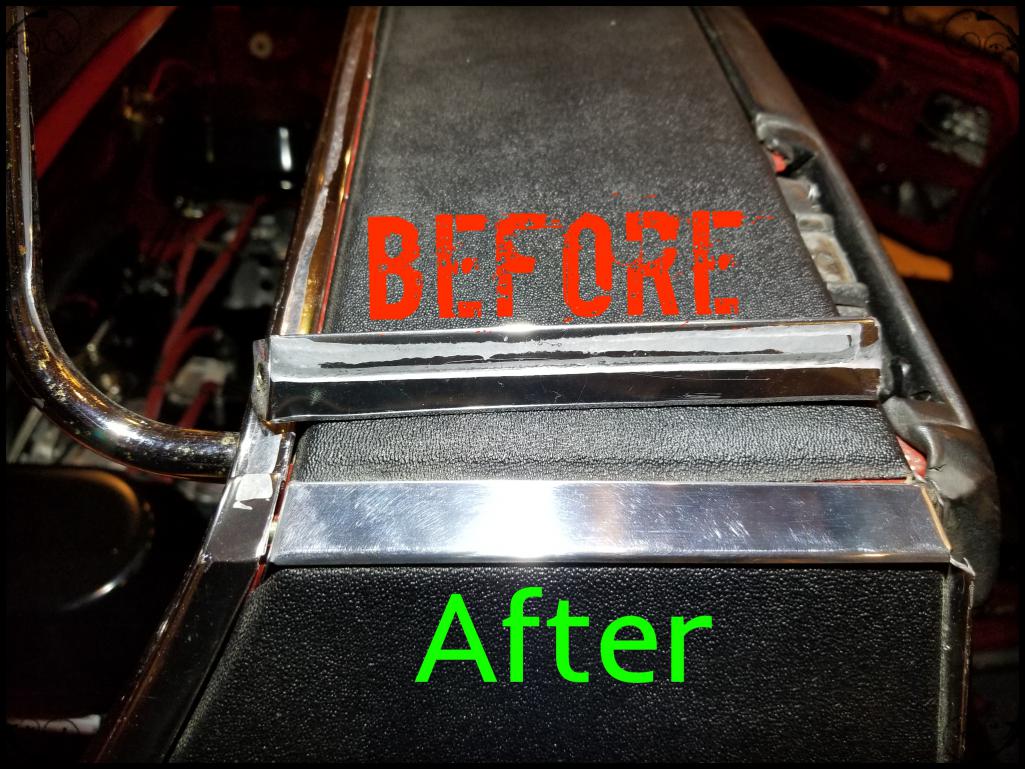
Posted by: Matty900 May 13 2018, 12:49 AM
This is what was scratching up the trim. The rubber is flattened out and broken down. Got it almost off but got stopped by a couple ove very soft striped out screws.
Attached thumbnail(s)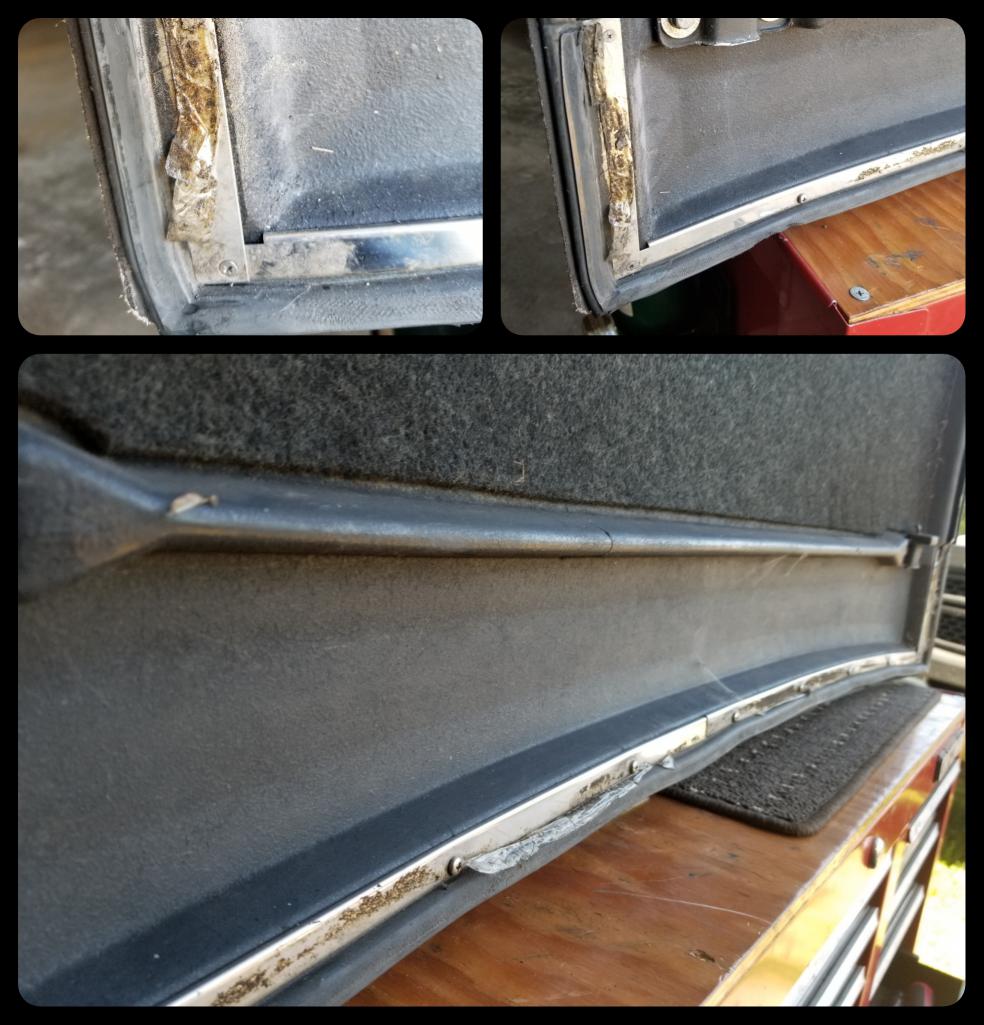
Posted by: Matty900 May 15 2018, 12:29 PM
Started working on the roof.
Attached thumbnail(s)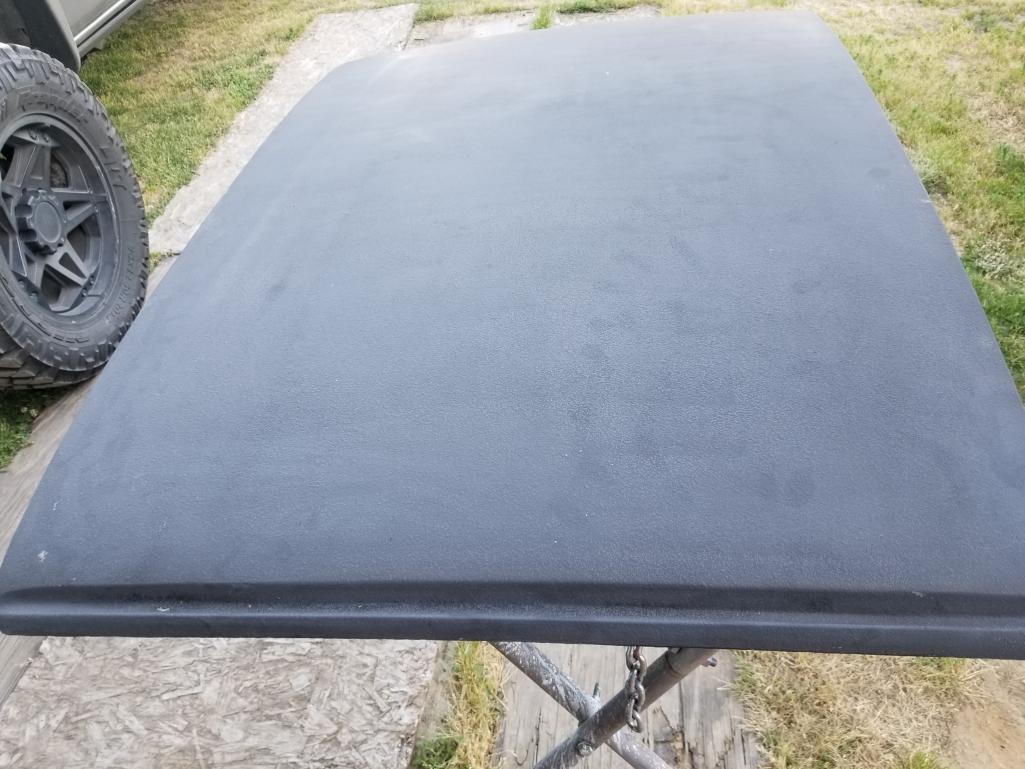
Posted by: Matty900 May 15 2018, 12:30 PM
Decided to try Plasti-dip
Attached thumbnail(s)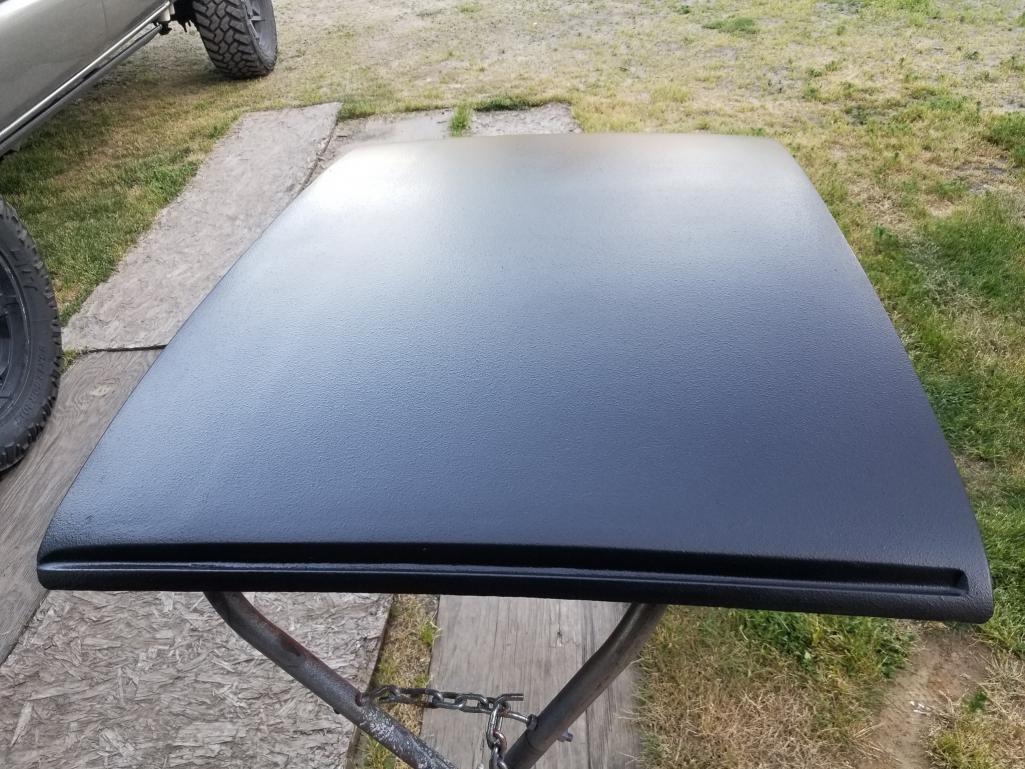
Posted by: Matty900 May 15 2018, 12:31 PM
Realized that it would not look good for very long. So I decided to take it off and start over
Attached thumbnail(s)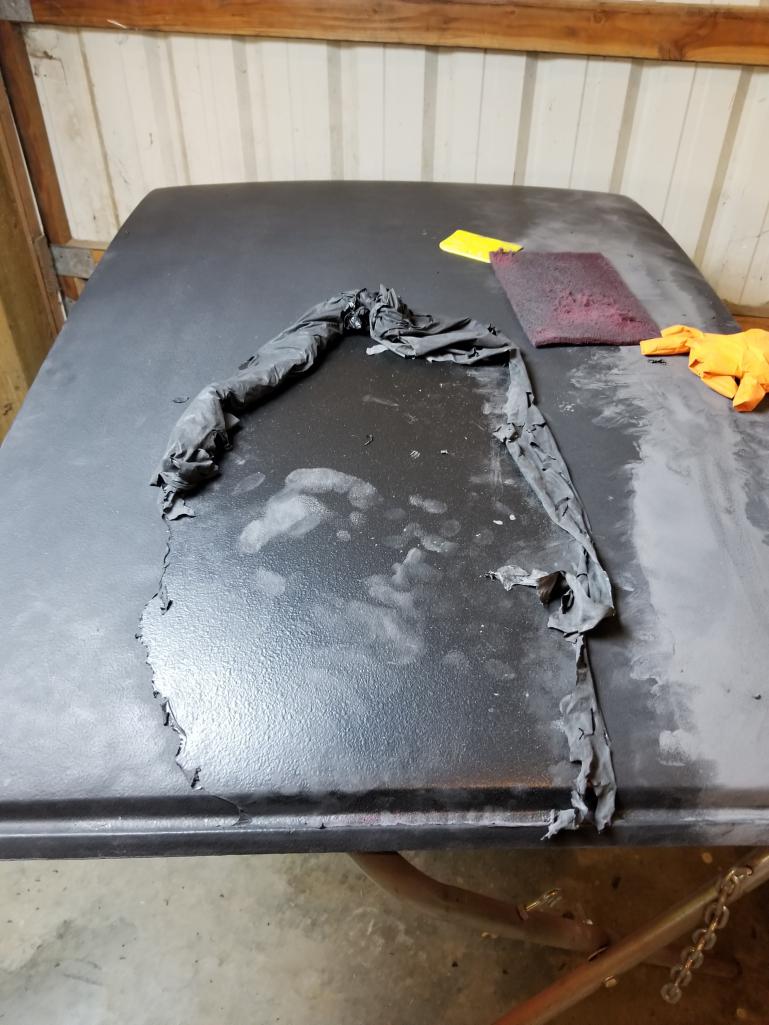
Posted by: Matty900 May 15 2018, 12:33 PM
Got some resin to fix the fiberglass issues and hope to have it primed and painted with Ryno liner today
Attached thumbnail(s)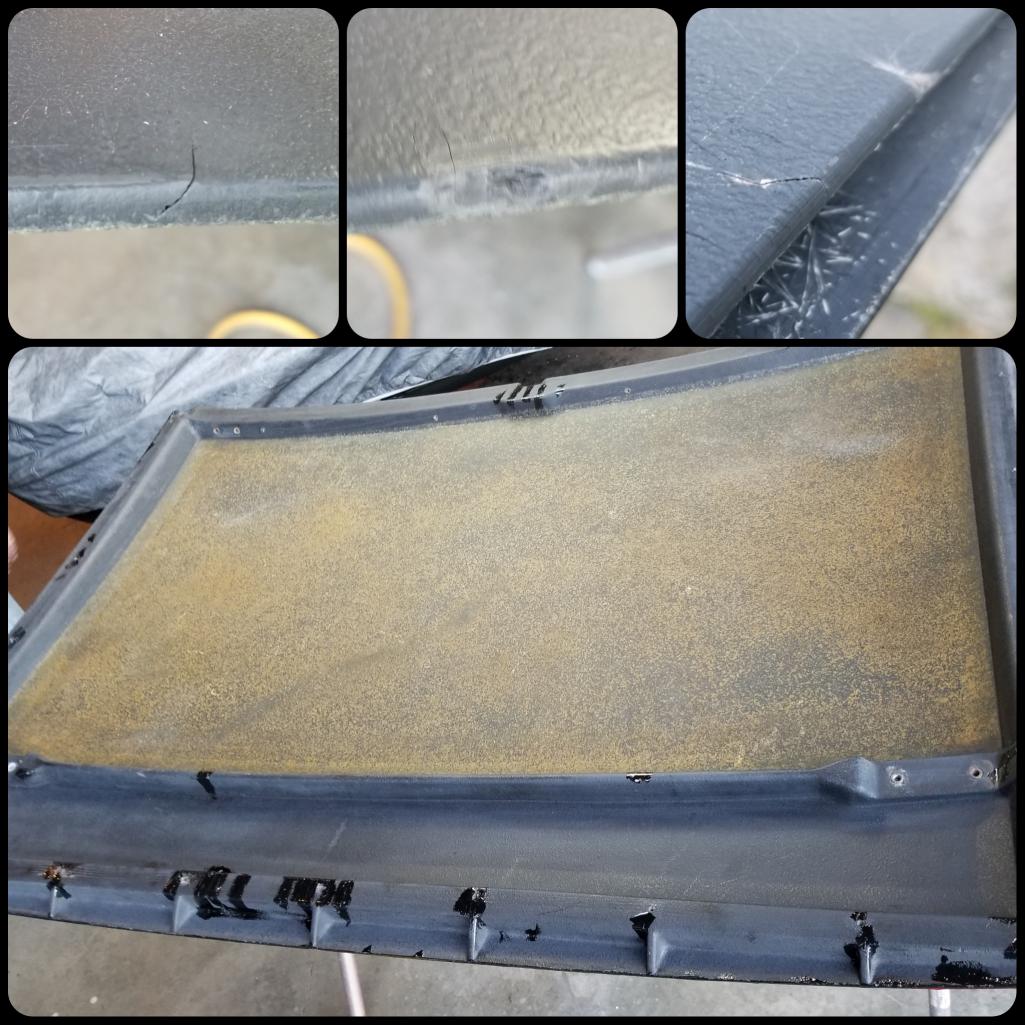
Posted by: Matty900 May 17 2018, 01:36 AM
Shot a few coats of Raptor on the roof. I am pretty happy with how it turned out. The roof was in rough shape with lots of cracks and chips. This coating is a bed liner application that is probably stronger than the original roof.
Attached thumbnail(s)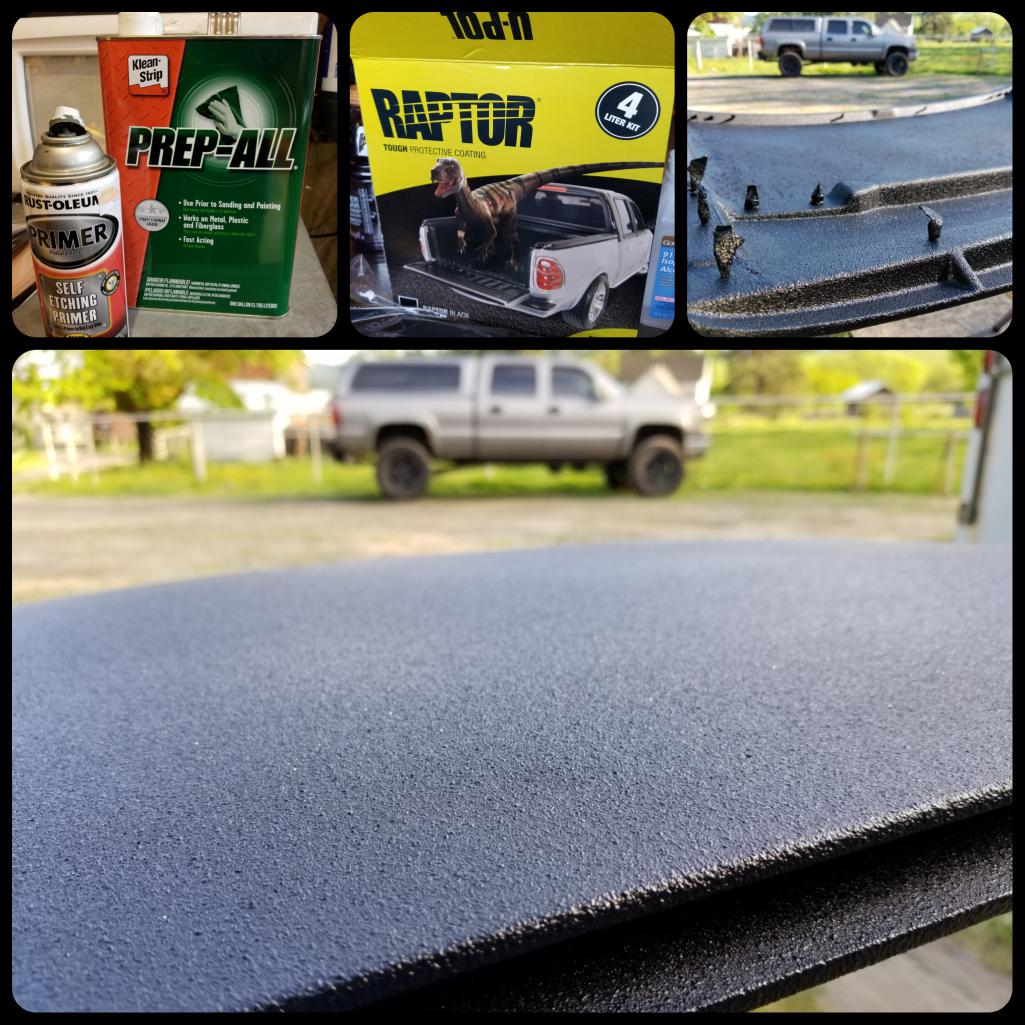
Posted by: Matty900 May 17 2018, 01:44 AM
Got the passenger side door competed with new seals and a new door card
Attached thumbnail(s)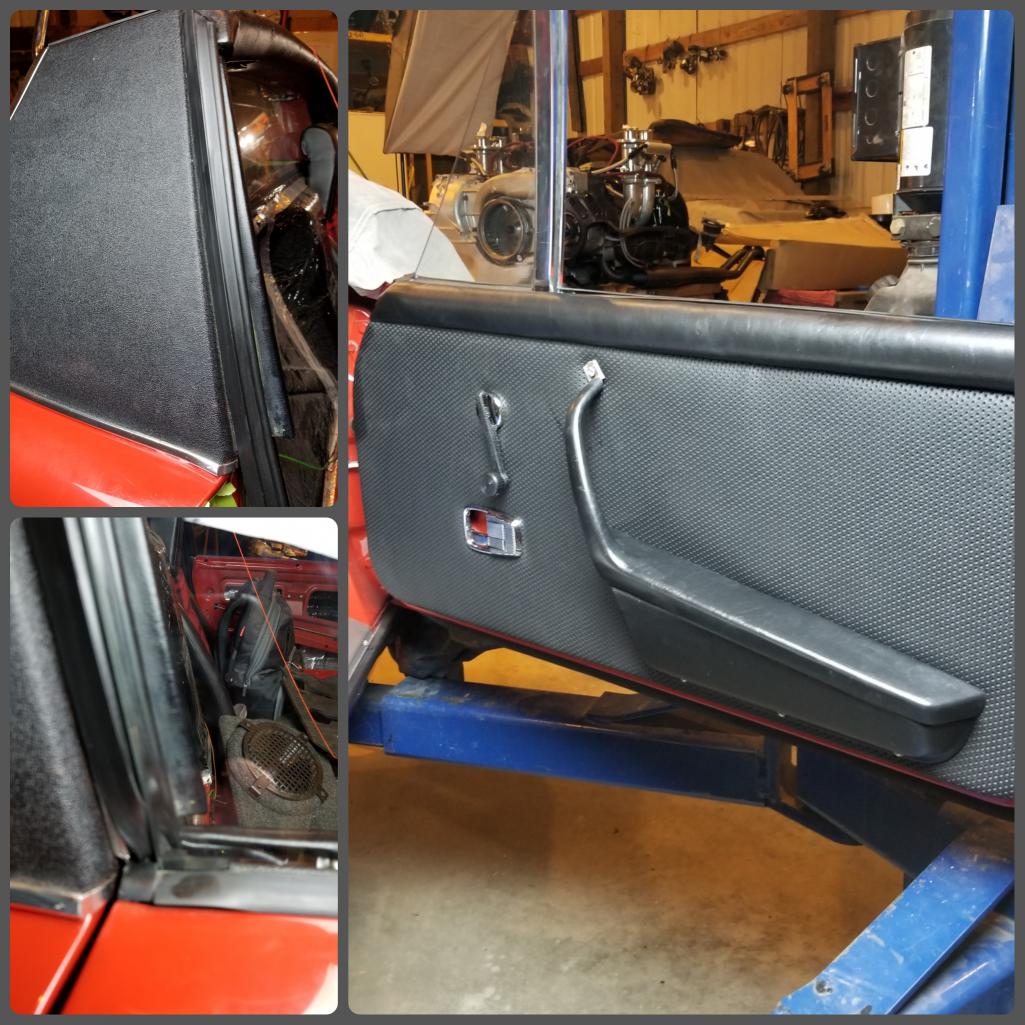
Posted by: Matty900 May 17 2018, 01:46 AM
Added new air deflectors to help cool the motor.
Attached thumbnail(s)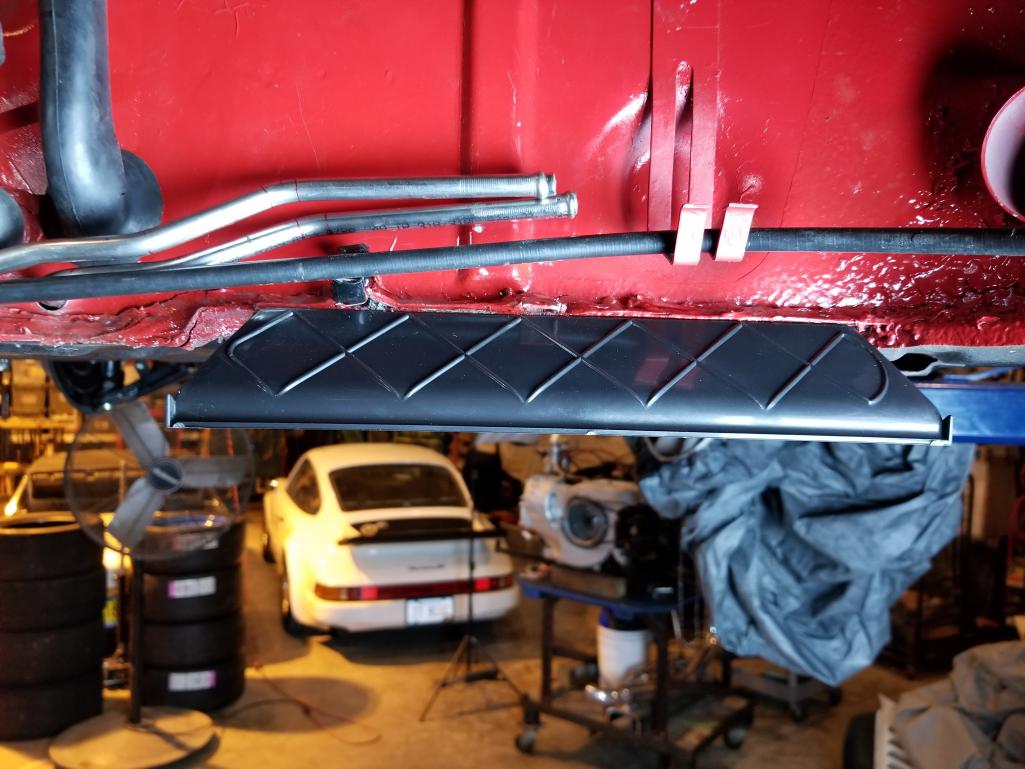
Posted by: Larmo63 May 17 2018, 07:25 AM
Looks good, Matt. Well worth the extra effort and time/money.
I'll bet you can't wait to drive it.....?
Posted by: Matty900 May 19 2018, 03:22 PM
Looks good, Matt. Well worth the extra effort and time/money.
I'll bet you can't wait to drive it.....?
It's killing me. I think I will have everything done and ready for the engine to go back in Tuesday night when Cary gets back. It should be good for WCR, so maybe you can borrow a certain Rt66 trailer and tow your car up to drive with me
Posted by: Matty900 May 19 2018, 03:26 PM
Got the new SS fuel lines in. Yes I already had them in but these are high pressure lines for Fuel Injection. Thanks Mike Warhurst
Attached thumbnail(s)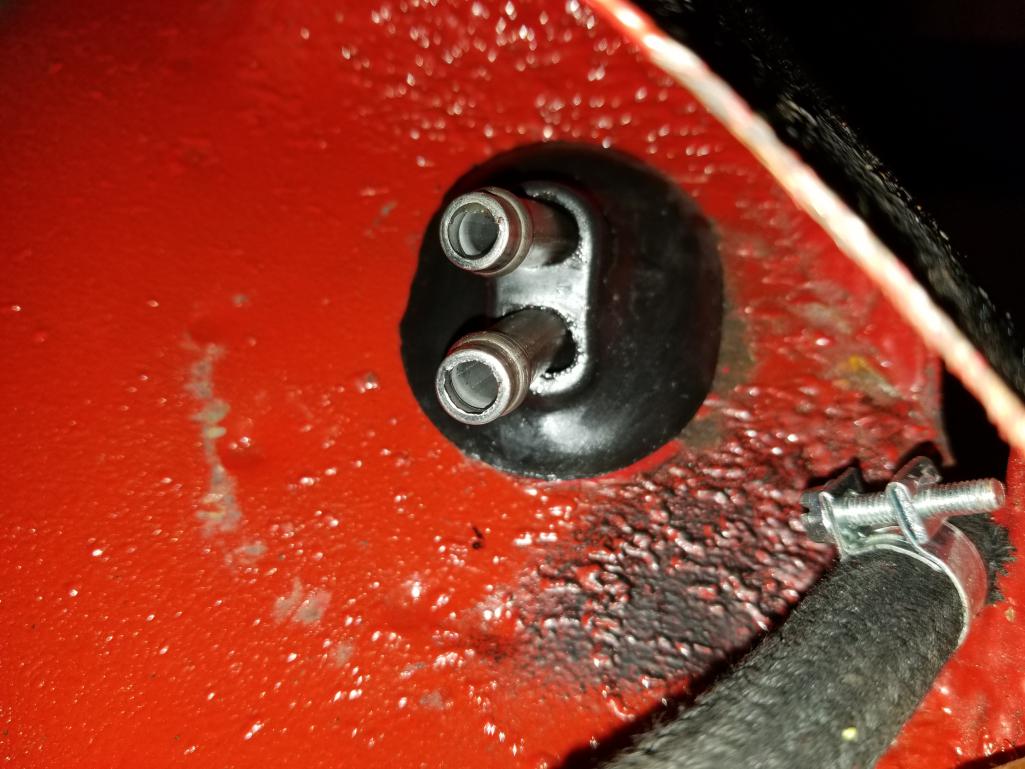
Posted by: Matty900 May 19 2018, 03:27 PM
New lines in the engine bay as well.
Attached thumbnail(s)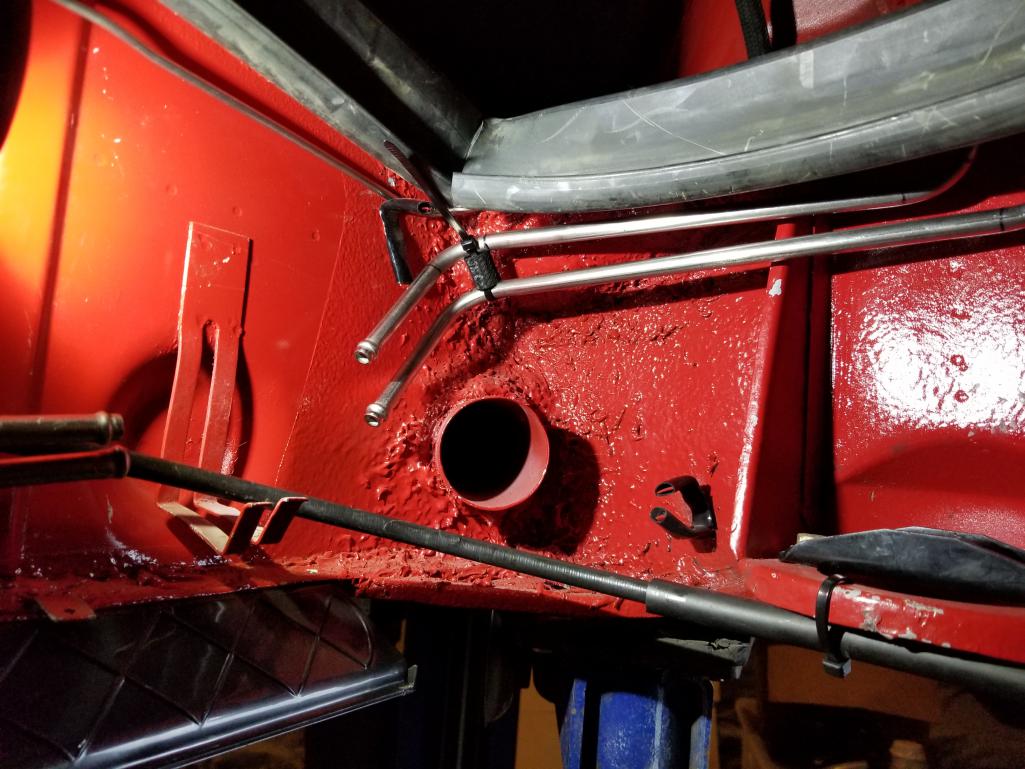
Posted by: Matty900 May 19 2018, 03:29 PM
Cleaned up and reinstalled the rain tray drains
Attached thumbnail(s)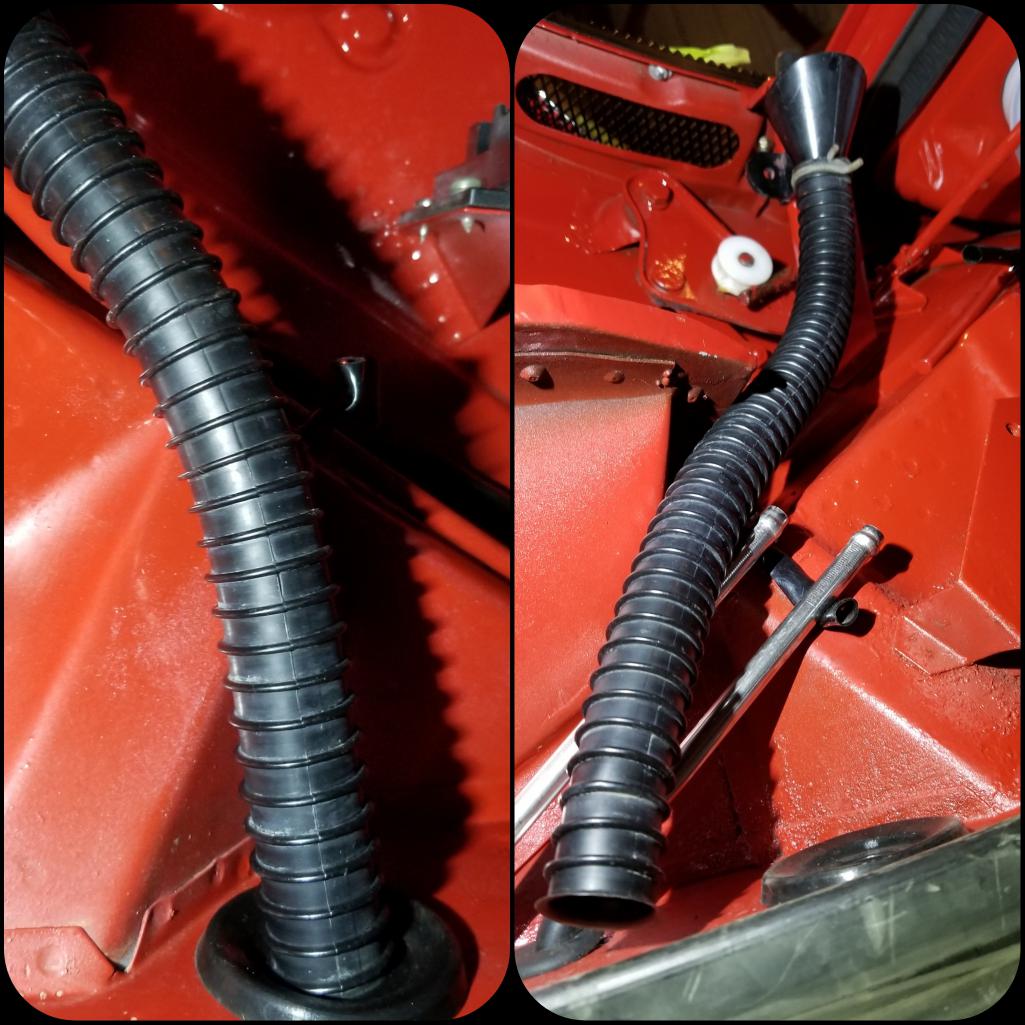
Posted by: Matty900 May 19 2018, 03:38 PM
Restored the grills with 914rubber paint and rubber trim
Attached thumbnail(s)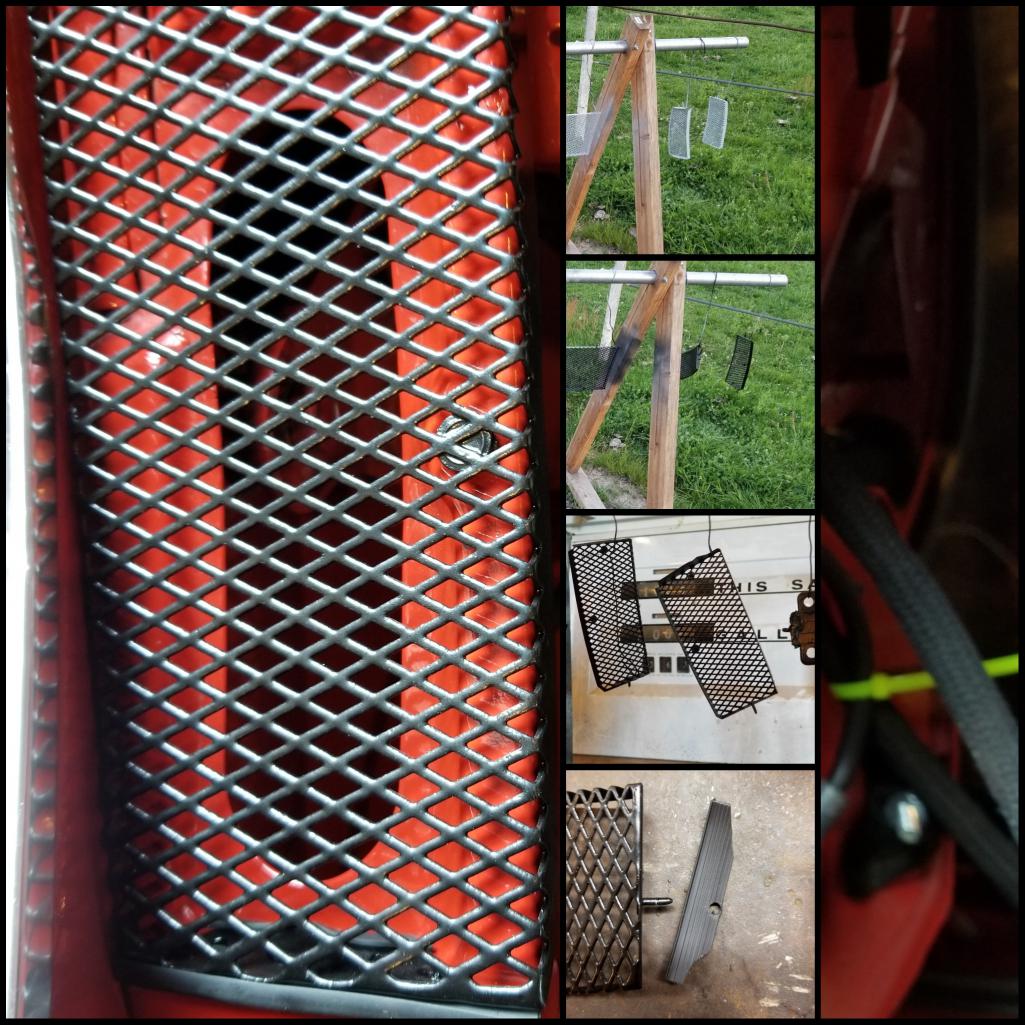
Posted by: cary May 19 2018, 03:39 PM
New lines in the engine bay as well.
I like. Nice and tidy.
Wedding is in an hour.
Posted by: Matty900 May 19 2018, 03:43 PM
Finished restoration of the roof and added all new seals
Attached thumbnail(s)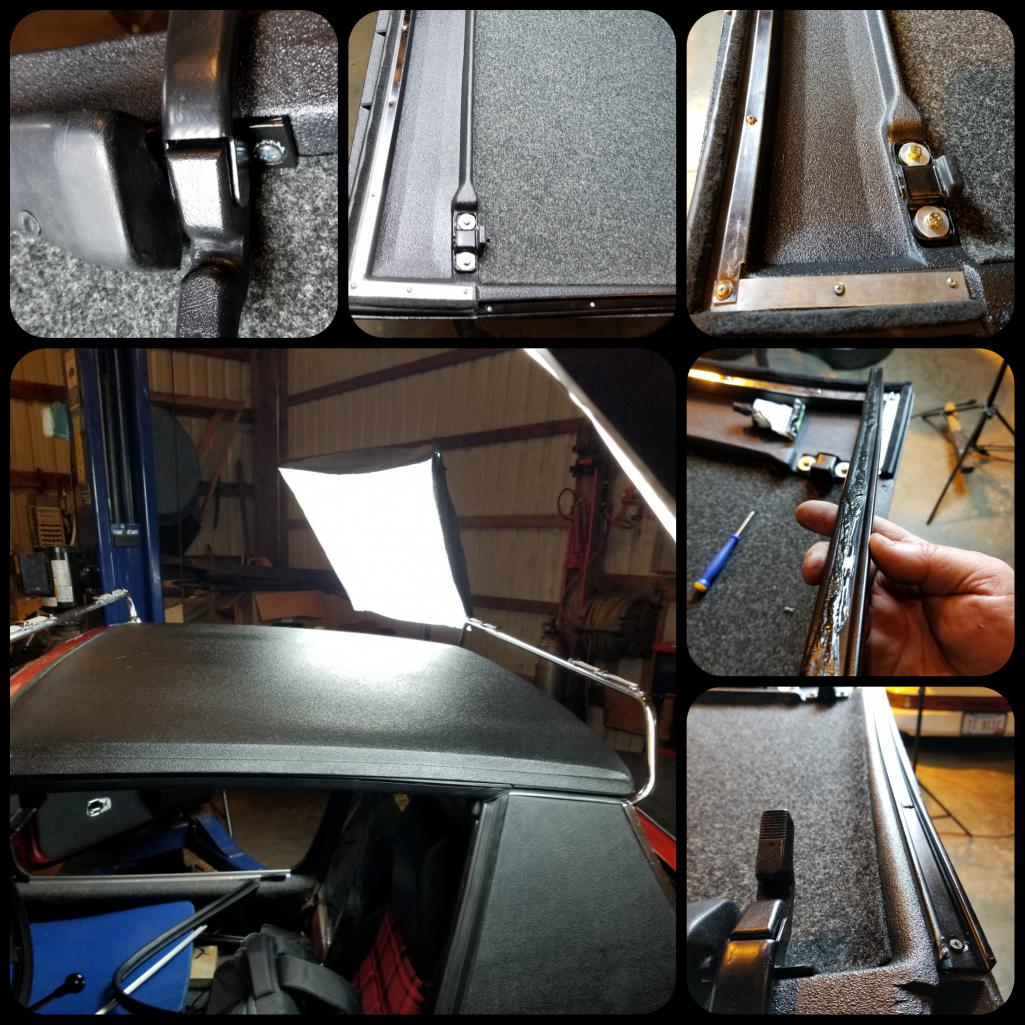
Posted by: Matty900 May 19 2018, 03:49 PM
Got some work done on the engine deck kid. Modified the hinges to make it easier to get it on and off the car
Attached thumbnail(s)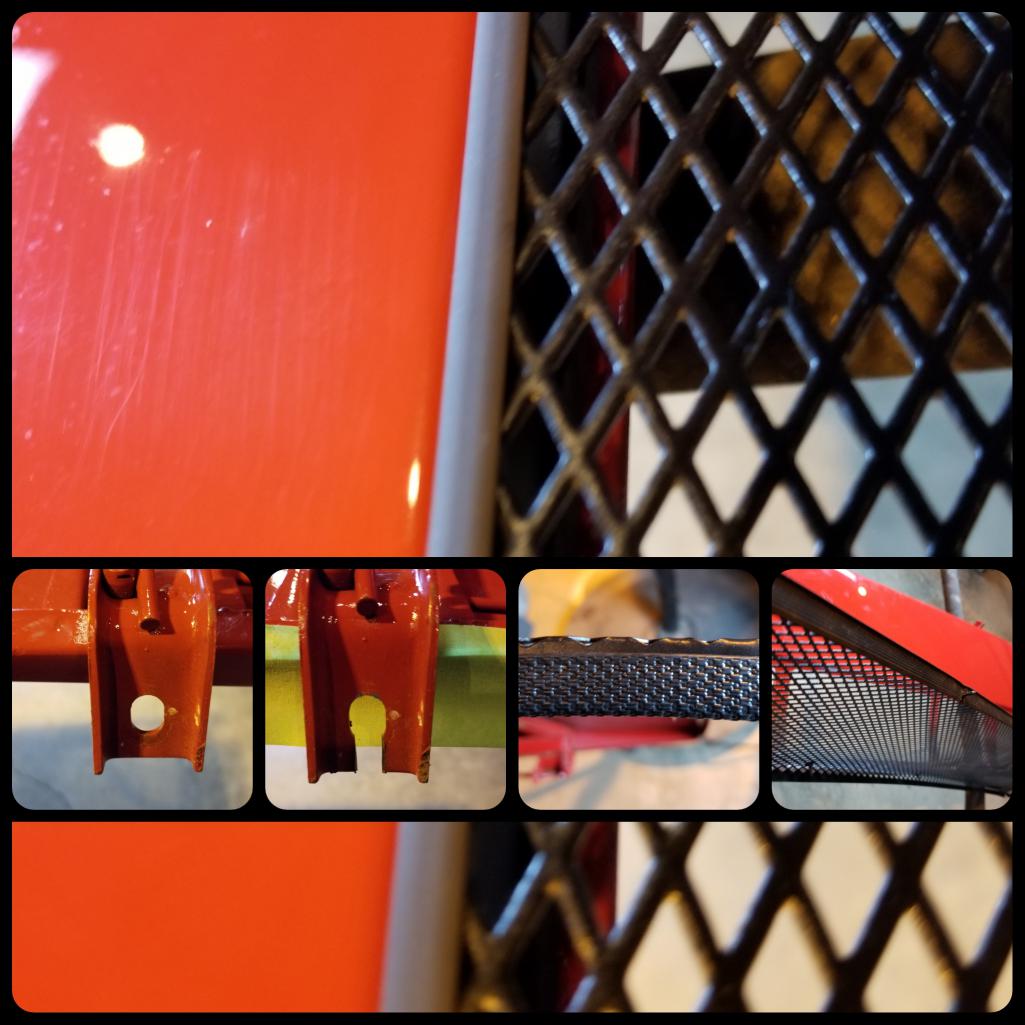
Posted by: Matty900 May 19 2018, 03:52 PM
Went to install the threaded rod for the rain hats and found that the bracket that holds the air temp sensor is not positioned quite right and I broke th je tip of the sensor
Attached thumbnail(s)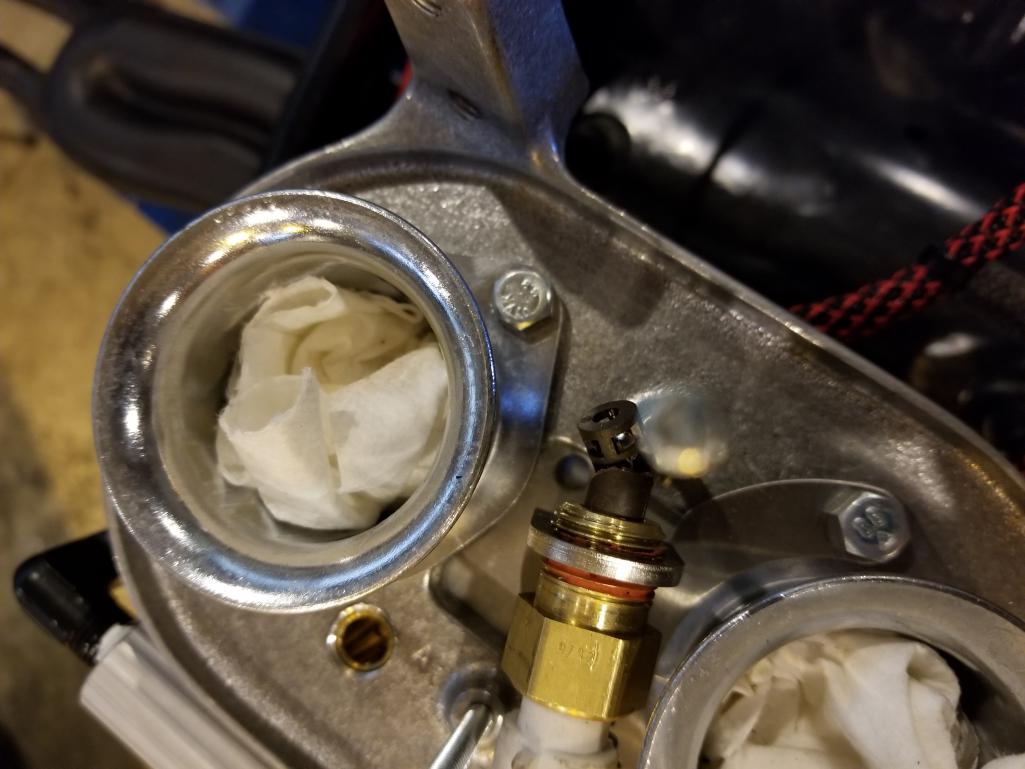
Posted by: cary May 19 2018, 03:55 PM
How about the left front turn signal bucket ?
Posted by: Matty900 May 19 2018, 03:58 PM
Got the new tires in and on the wheels. Now I need to polish them up and get the fender liners installed so they can go back on. Debating if I want to have the black on the wheels but I am considering doing it in plasti dip so I can remove it if I change my mind.
Attached thumbnail(s)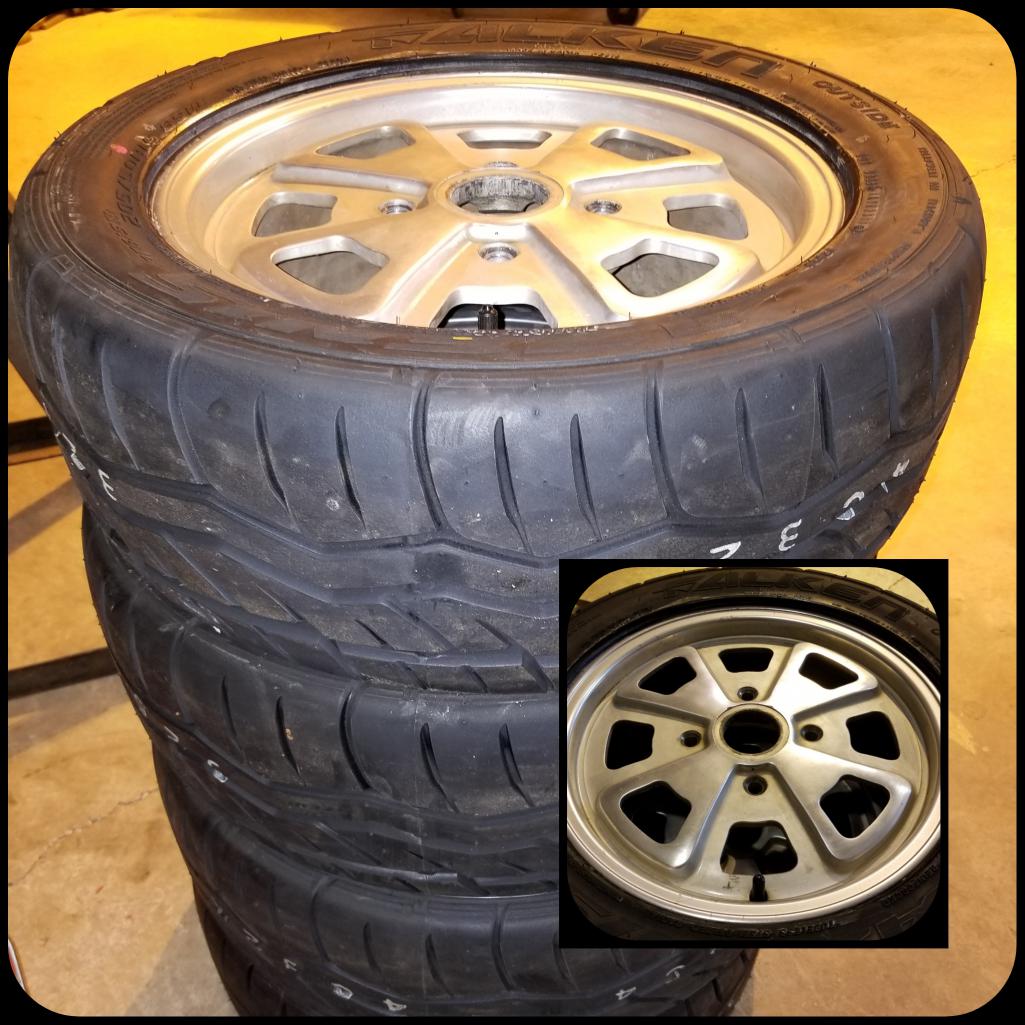
Posted by: Matty900 May 19 2018, 04:01 PM
How about the left front turn signal bucket ?
Got it. Though it would be a good idea to start to clean it in the small parts washer. Took it out to find that it had snapped off one of the 3 connectors on the back
Attached thumbnail(s)
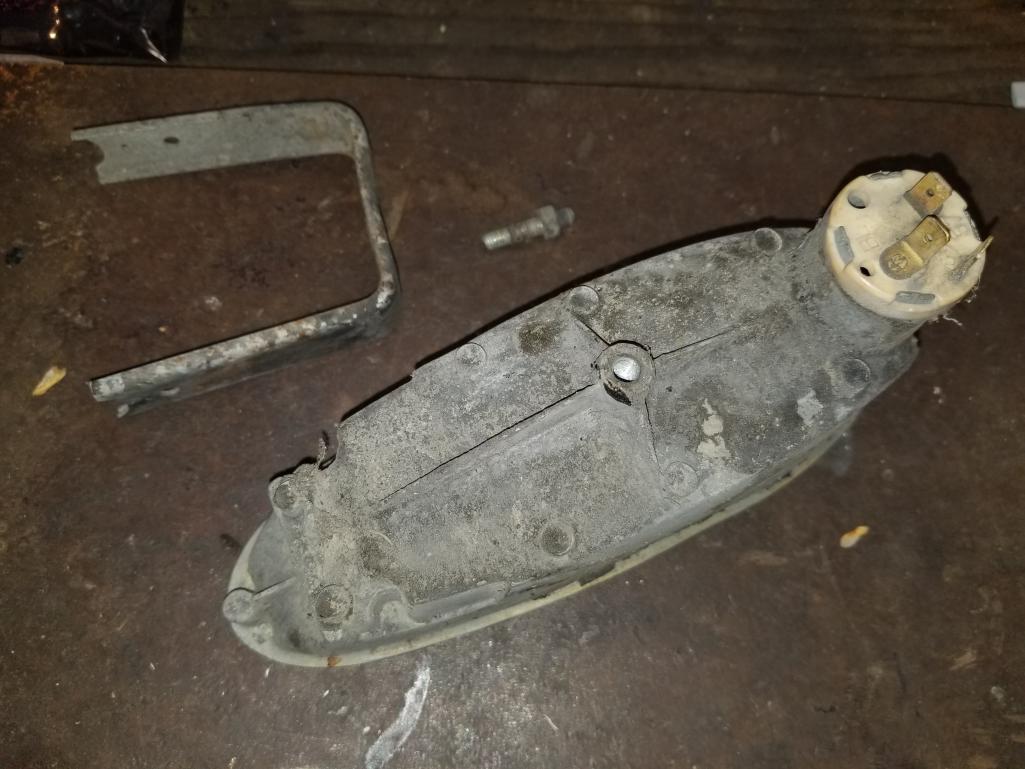
Posted by: Matty900 May 19 2018, 04:02 PM
New lines in the engine bay as well.
I like. Nice and tidy.
Wedding is in an hour.
Congratulations. Hope everyone is having a wonderful time together.
Posted by: Dave_Darling May 20 2018, 12:36 PM
If I get a vote, I way no black on the wheels!! It looks cheap to me.
--DD
Posted by: Matty900 May 21 2018, 02:56 AM
If I get a vote, I way no black on the wheels!! It looks cheap to me.
--DD
Spent about 4 hours polishing the 1st of the 4 wheels and I am still not quite happy with the would be black area looks. I can see one of the appeals of painting them.
Attached thumbnail(s)

Posted by: Matty900 May 22 2018, 01:54 AM
Cleaned the rest of the wheels today but haven't polished them yet.
Attached thumbnail(s)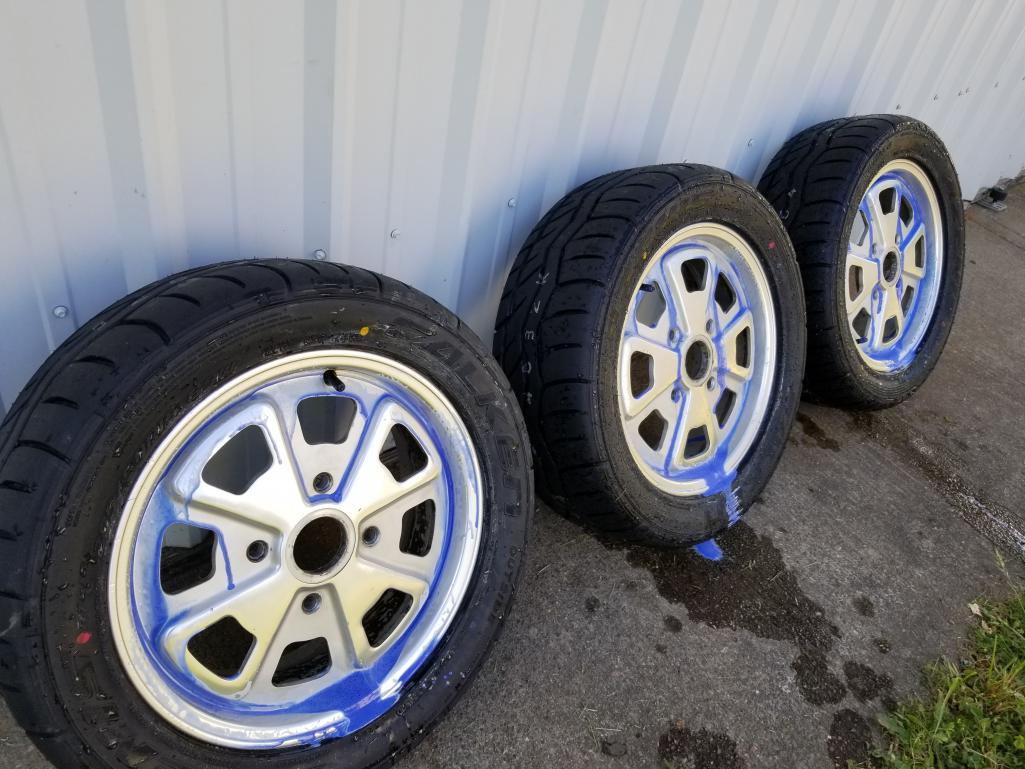
Posted by: Matty900 May 22 2018, 01:55 AM
Took the grills back off to paint underneath them.
Attached thumbnail(s)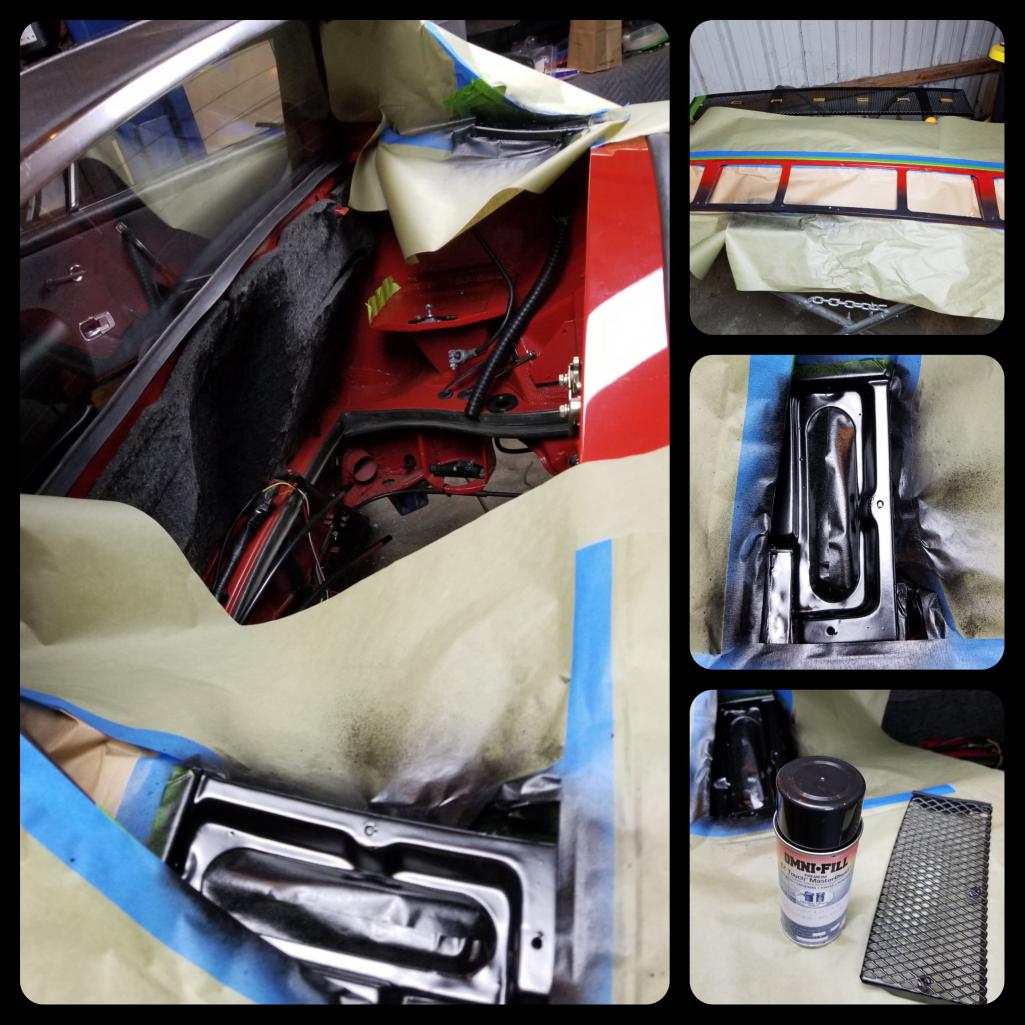
Posted by: Larmo63 May 22 2018, 06:47 AM
NO on the black background wheels.
I agree with DD. don't do it.
Posted by: Matty900 May 25 2018, 12:35 PM
Got the Drivers side door all done with a freshening up the door panel and arm rests. So now everything has been replaced, rebuilt and restored.
Attached thumbnail(s)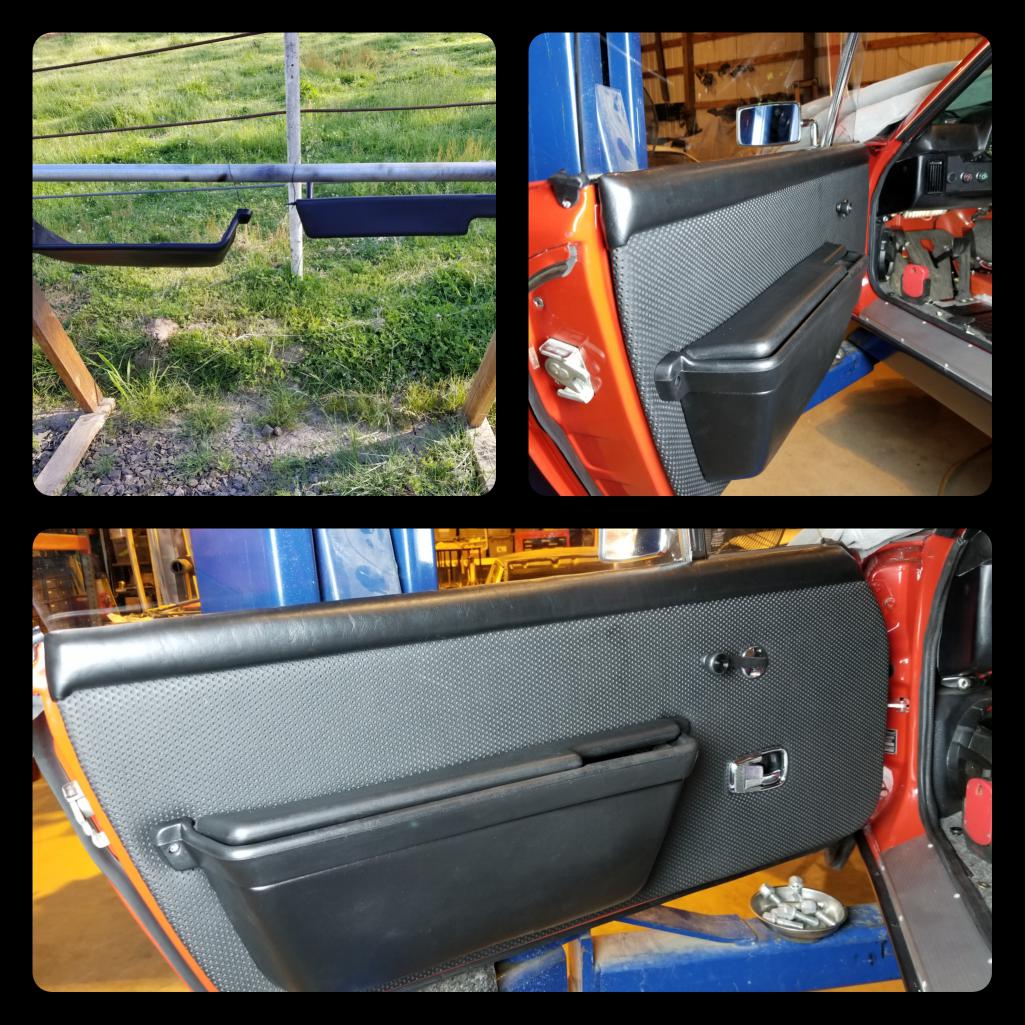
Posted by: Matty900 May 25 2018, 12:42 PM
Open the pod bay door HAL
Built a gauge mount for the Air Fuel Gauge for the Mega squirt set up. I built this to be able to fit into the deposit box. (I will rebuild that later)
Attached thumbnail(s)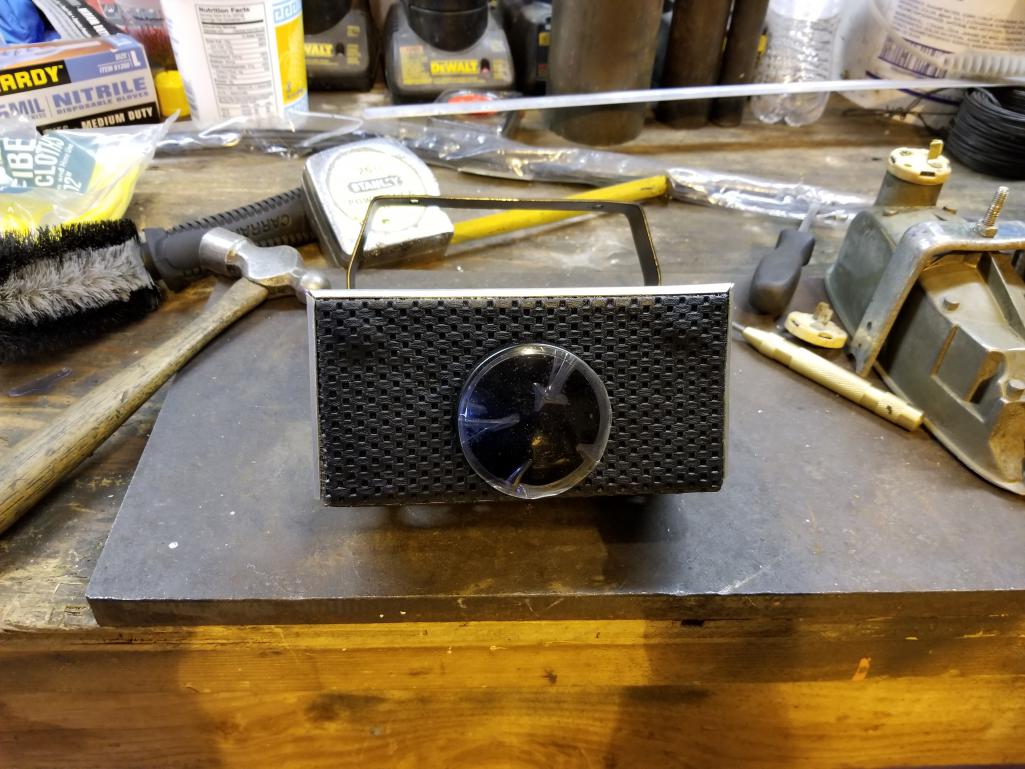
Posted by: mepstein May 25 2018, 12:50 PM
NO on the black background wheels.
I agree with DD. don't do it.
That was one of those mods that guys did in the 70's-80's to make them look like 911 wheels. Original finish is sublime. Your car looks Awesome
Posted by: Matty900 May 26 2018, 12:02 AM
NO on the black background wheels.
I agree with DD. don't do it.
That was one of those mods that guys did in the 70's-80's to make them look like 911 wheels. Original finish is sublime. Your car looks Awesome
Thanks Mike. It's almost ready to drive again. Going to be a busy day tomorrow.
Posted by: Matty900 May 26 2018, 12:05 AM
Made a little progress today. Got the gauge I stalled along with a switch for the hidden radio and an auxiliary charging port
Attached thumbnail(s)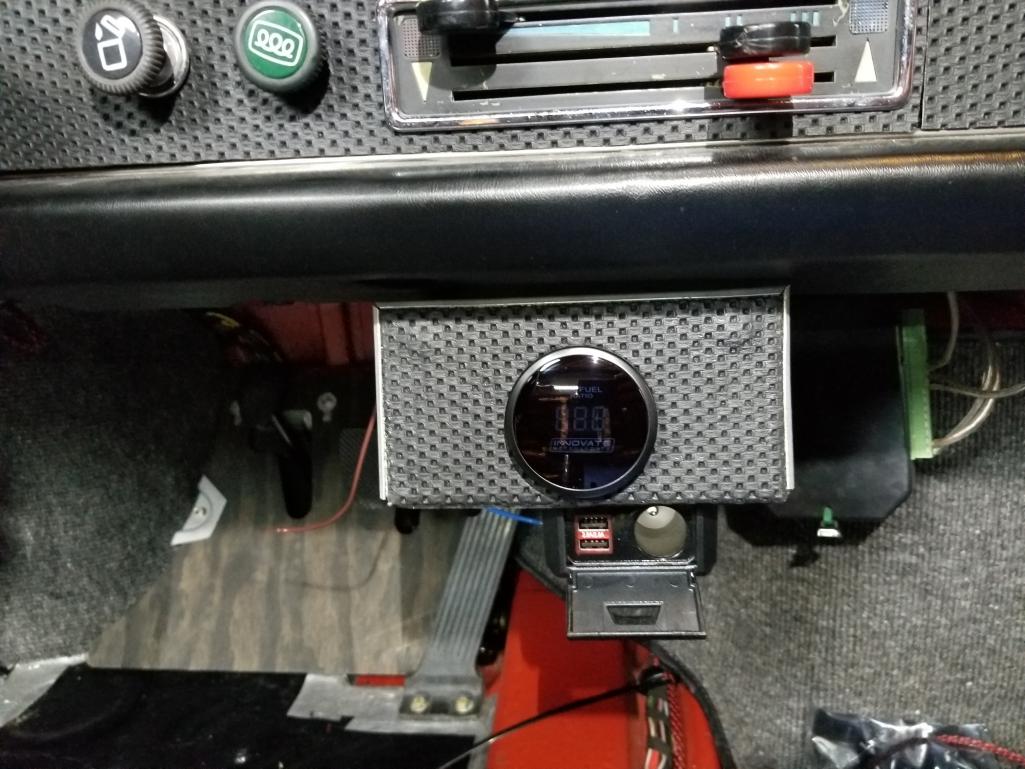
Posted by: Matty900 May 26 2018, 12:08 AM
Getting closer
Attached thumbnail(s)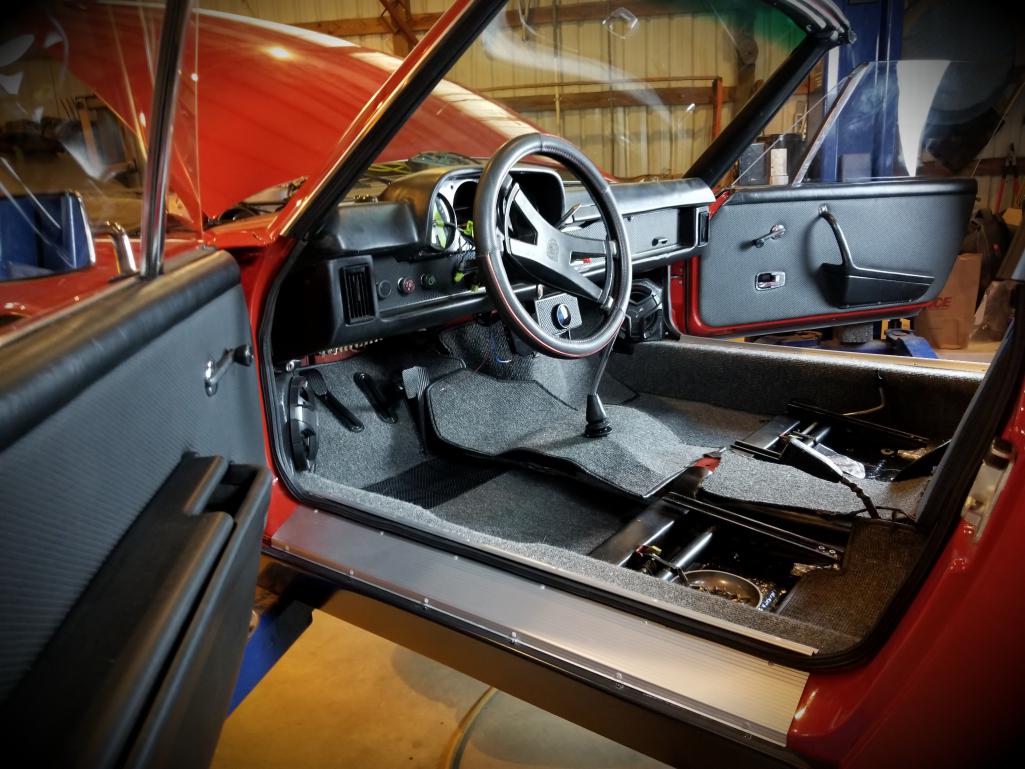
Posted by: Matty900 May 26 2018, 02:40 AM
The original visors were in really good shape except for the missing flap to cover the mirror. Use a little vinyl dye to freshen them up.
Attached thumbnail(s)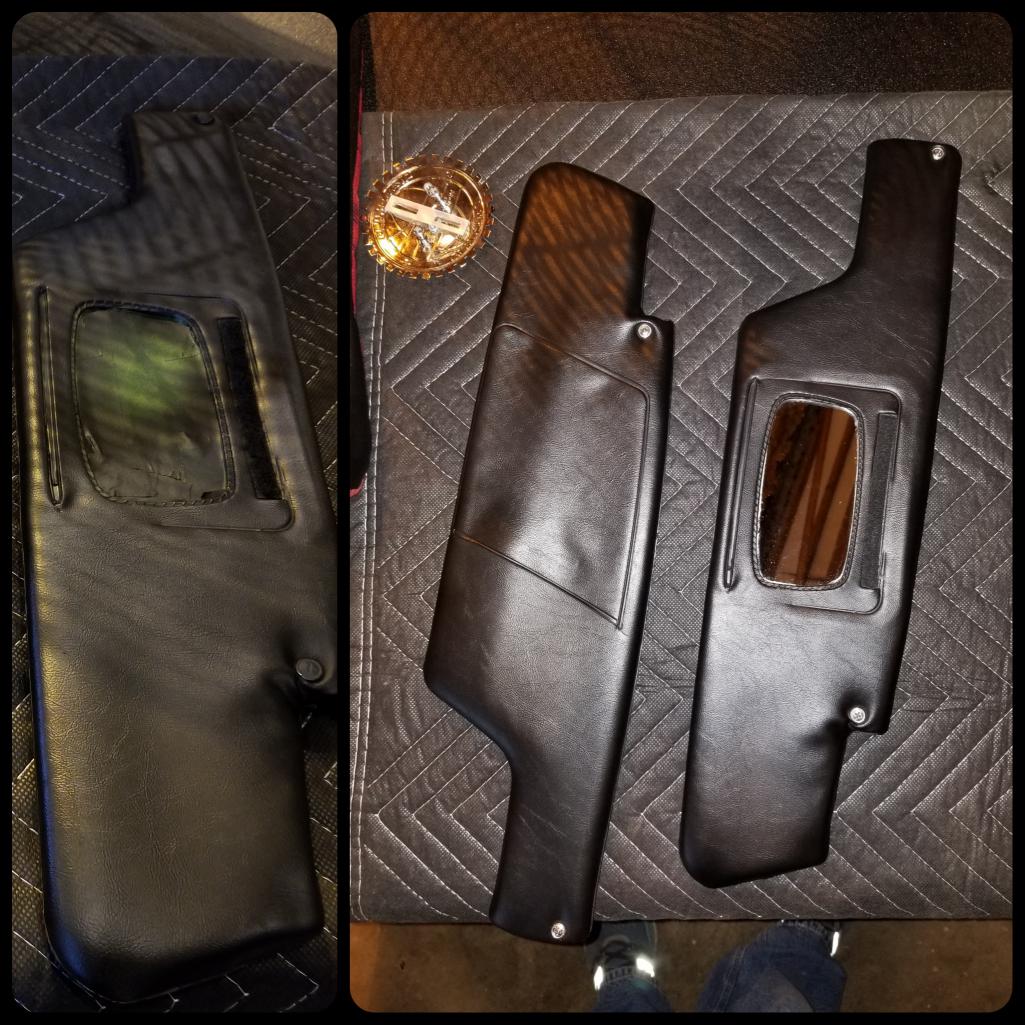
Posted by: cary May 26 2018, 07:23 AM
Today begins the throw down ...............
* Fuel supply. Plumb in the tank, pump and filter up front.
* Matt finishes up the cockpit
* Fuel supply engine end. Get the removal connections in a nice functional location.
* Finish up the final WeatherPack connections in the harness.
* Then the easy part, install the engine, half shafts and muffler.
* Oh yeah. figure out where to route the O2 wire so engine drops are simple.
Added cable wrap straps to trunk firewall to keep the harness up and out of the way. Makes it easy to drop the engine. They'll be trimmed to fit after final harness fitting ...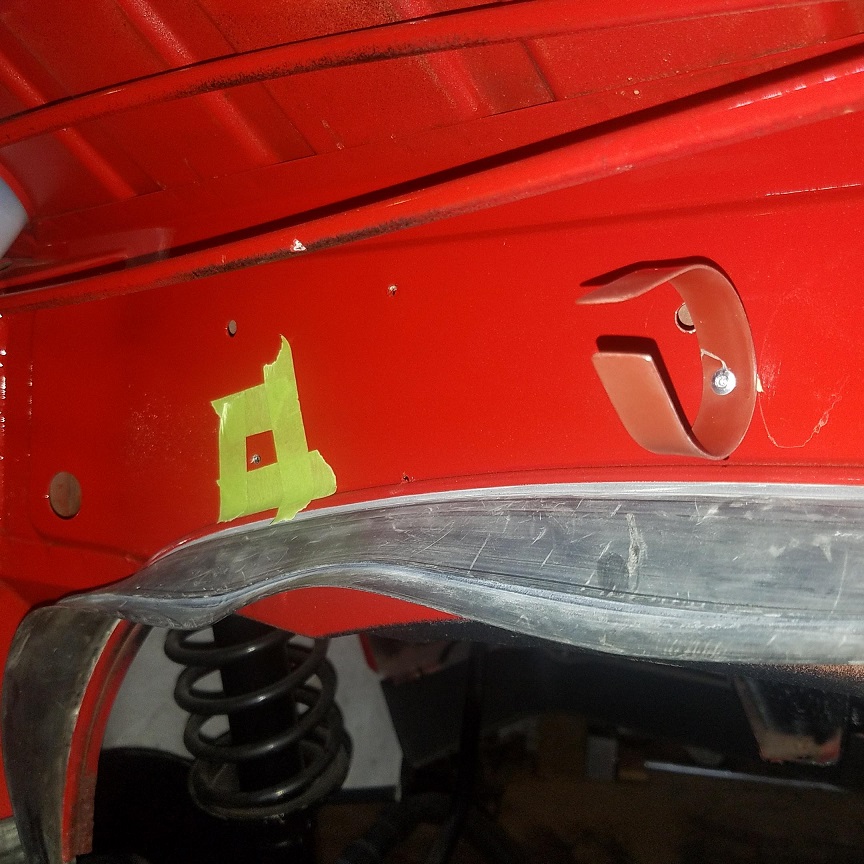
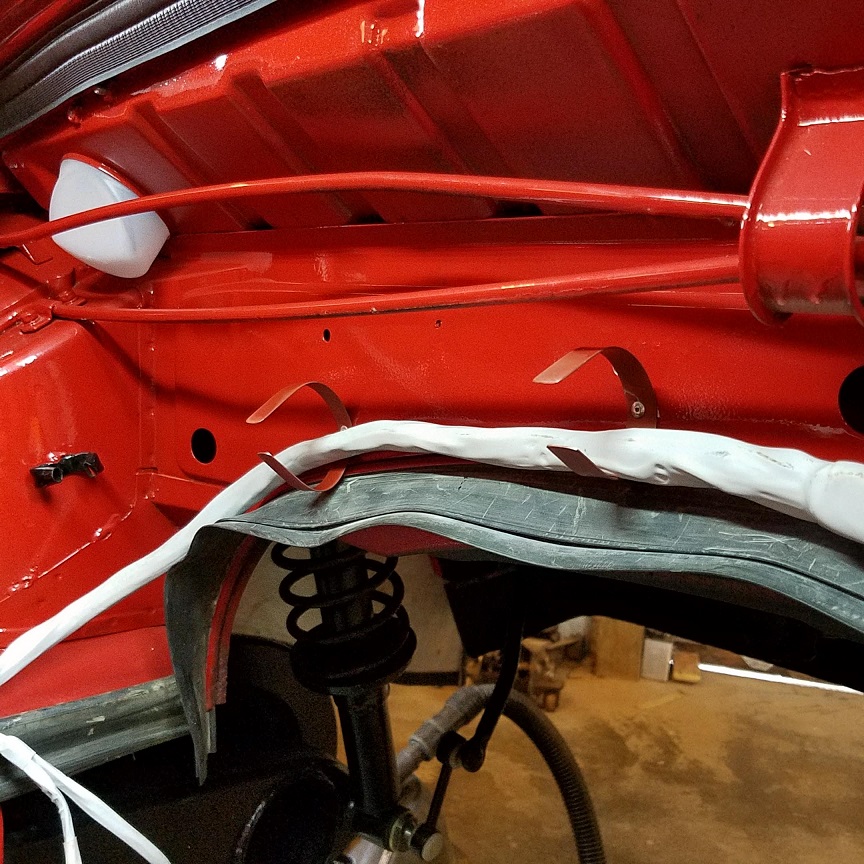
Mocking up ECU mounting and cable dress out ..............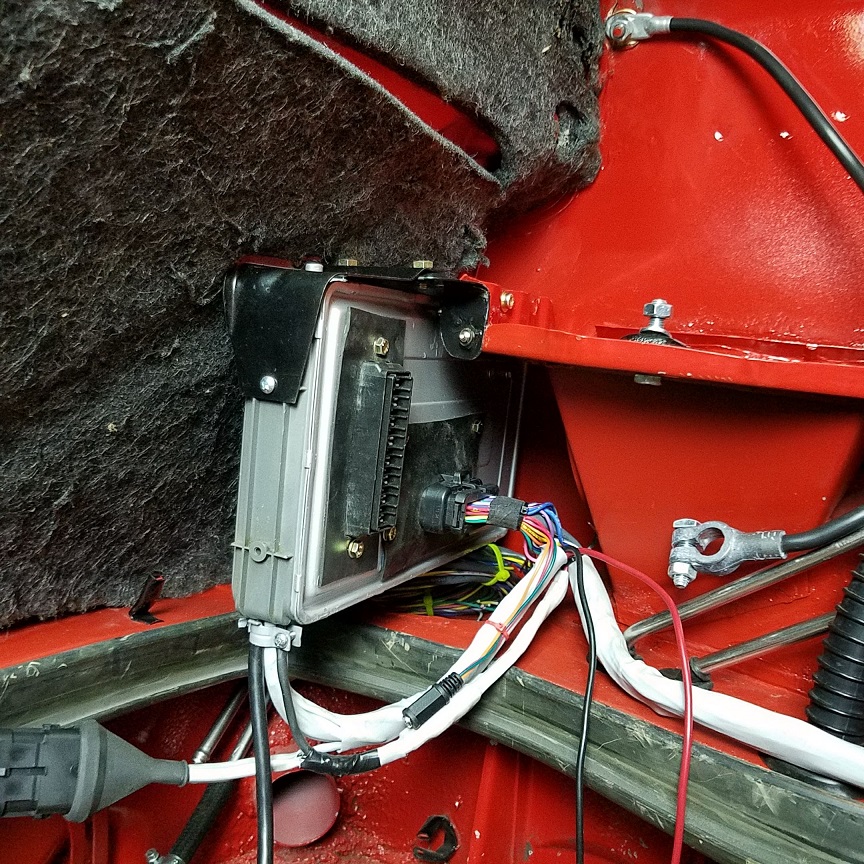
The exposed wires at the connector will get wrapped in cloth tape as a final step. Porsche style.
Posted by: Matty900 May 27 2018, 04:32 PM
New high pressure fuel pump installed in the high pressure SS fuel lines. Tank back in with all new German lines for the vent lines and charcoal filter.
.
Attached thumbnail(s)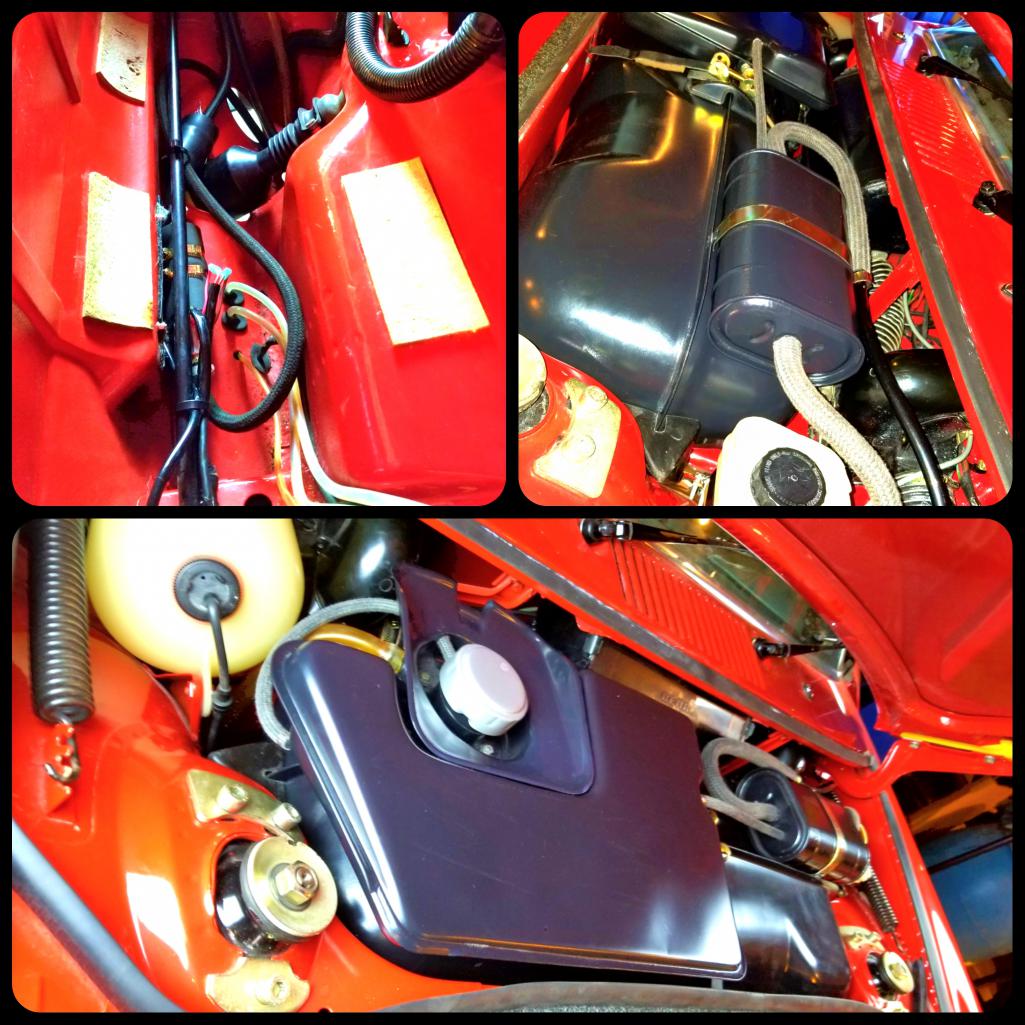
Posted by: Matty900 May 27 2018, 04:34 PM
Here's some more of Cary's handiwork on the harness prototype.
Attached thumbnail(s)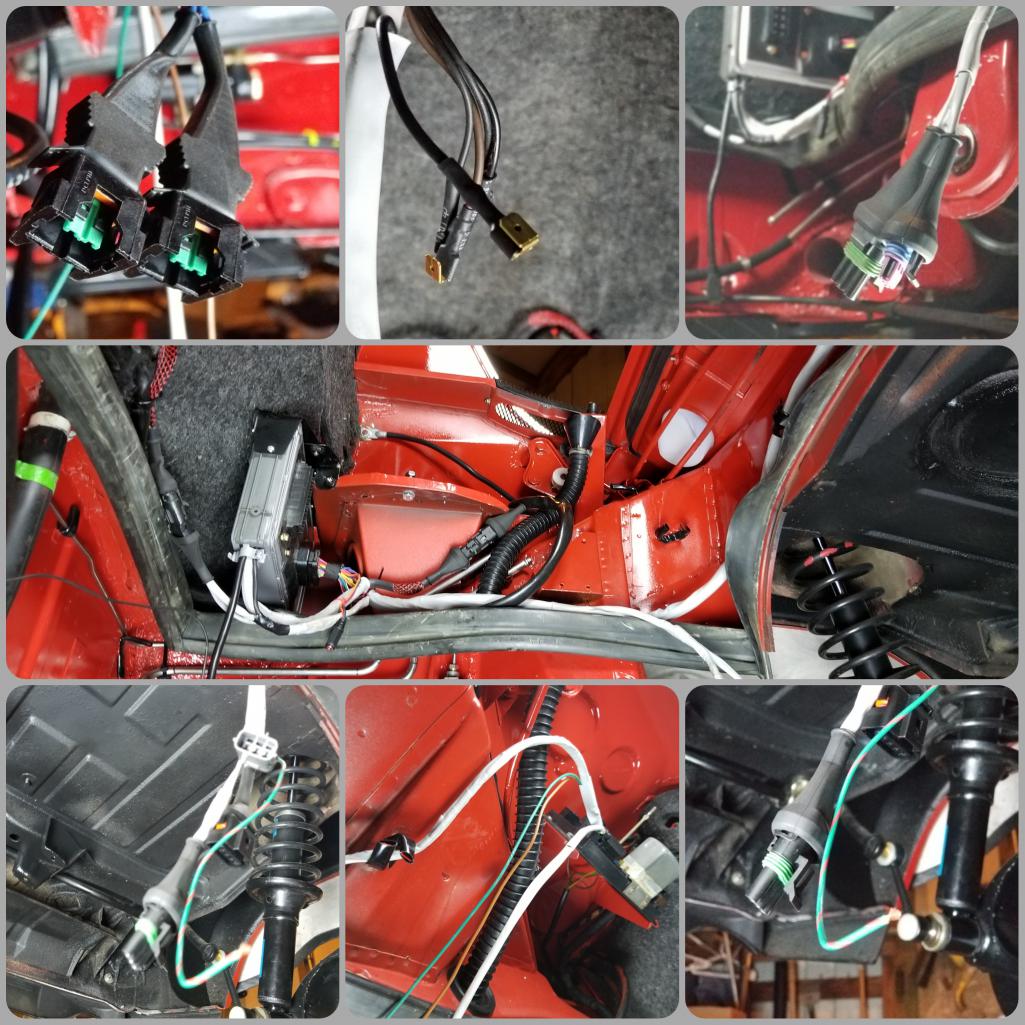
Posted by: Matty900 May 27 2018, 04:36 PM
Got the lug nuts polished and ready to go back on
Attached thumbnail(s)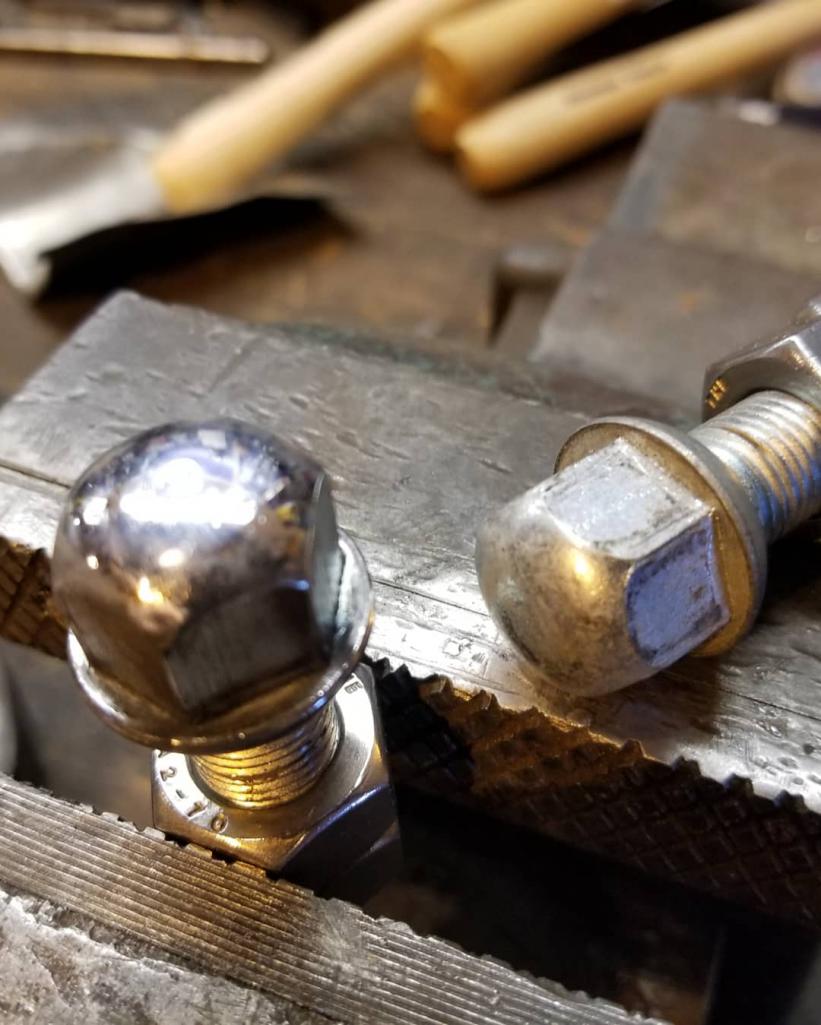
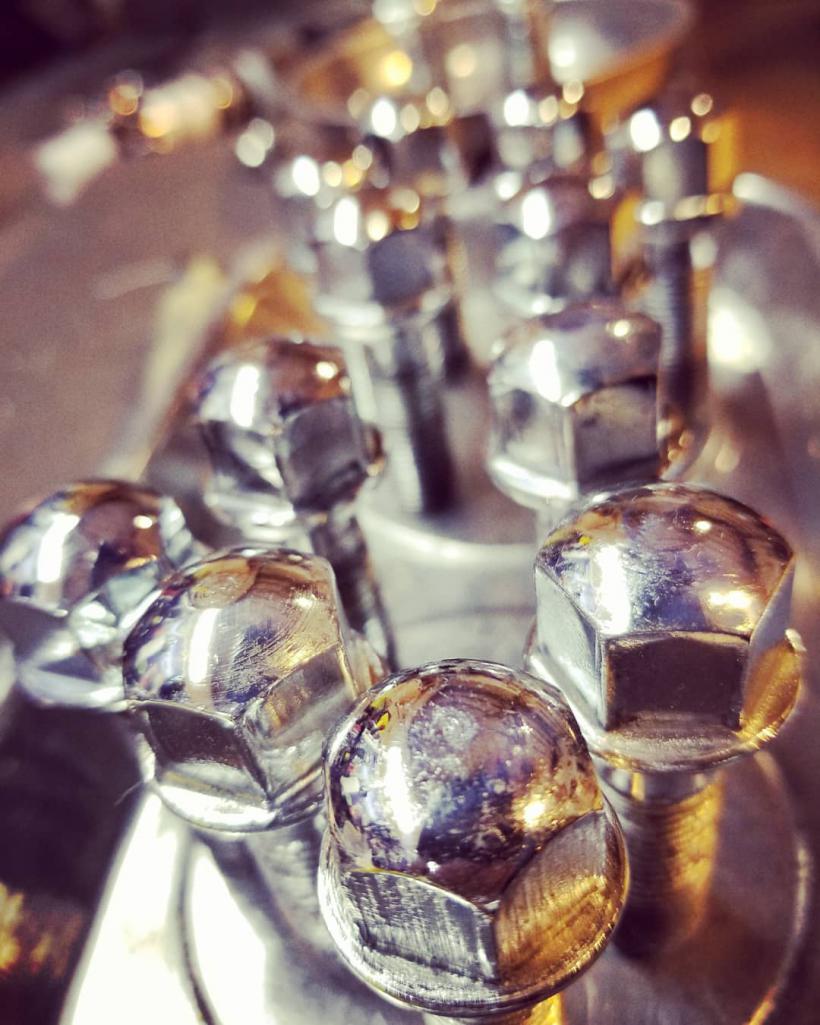
Posted by: Larmo63 May 28 2018, 12:18 PM
Everything is looking great! You should try to attend that 914 show thingie that they are having next
week up in northwest Oregon, I'm sure they'd like to see this car?

Posted by: Matty900 May 29 2018, 03:17 AM
Everything is looking great! You should try to attend that 914 show thingie that they are having next
week up in northwest Oregon, I'm sure they'd like to see this car?
Don't make me paint the wheels black
Attached thumbnail(s)
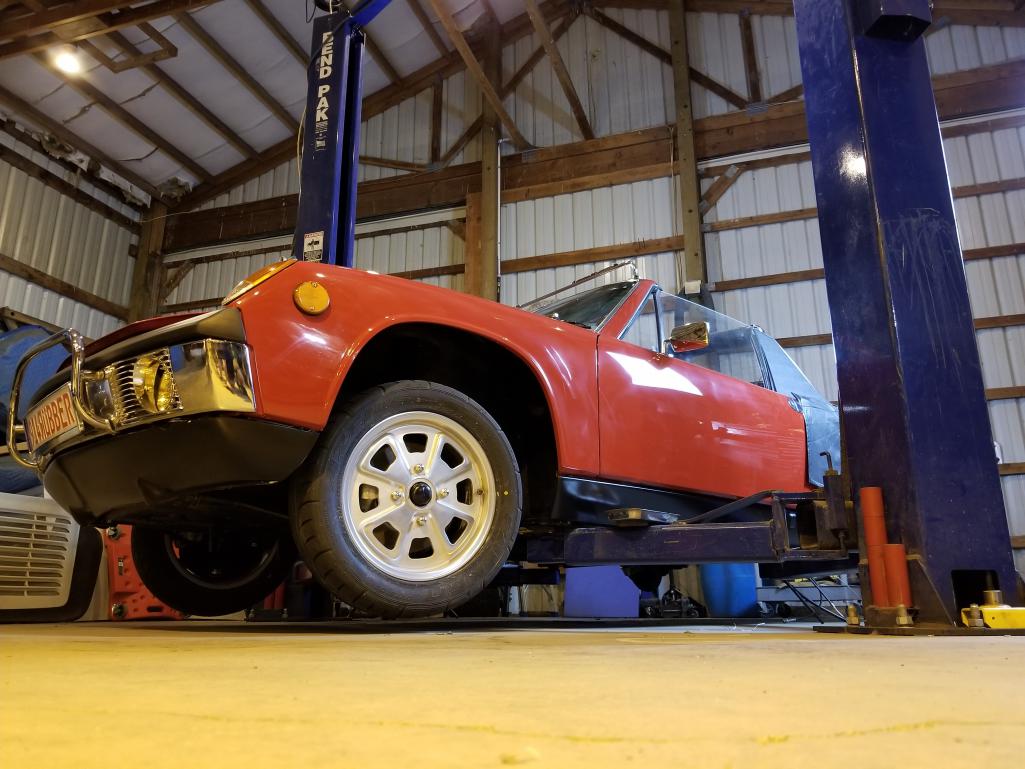
Posted by: Matty900 May 30 2018, 05:27 AM
Got fender liners installed in the car so the wheels can go back on
Attached thumbnail(s)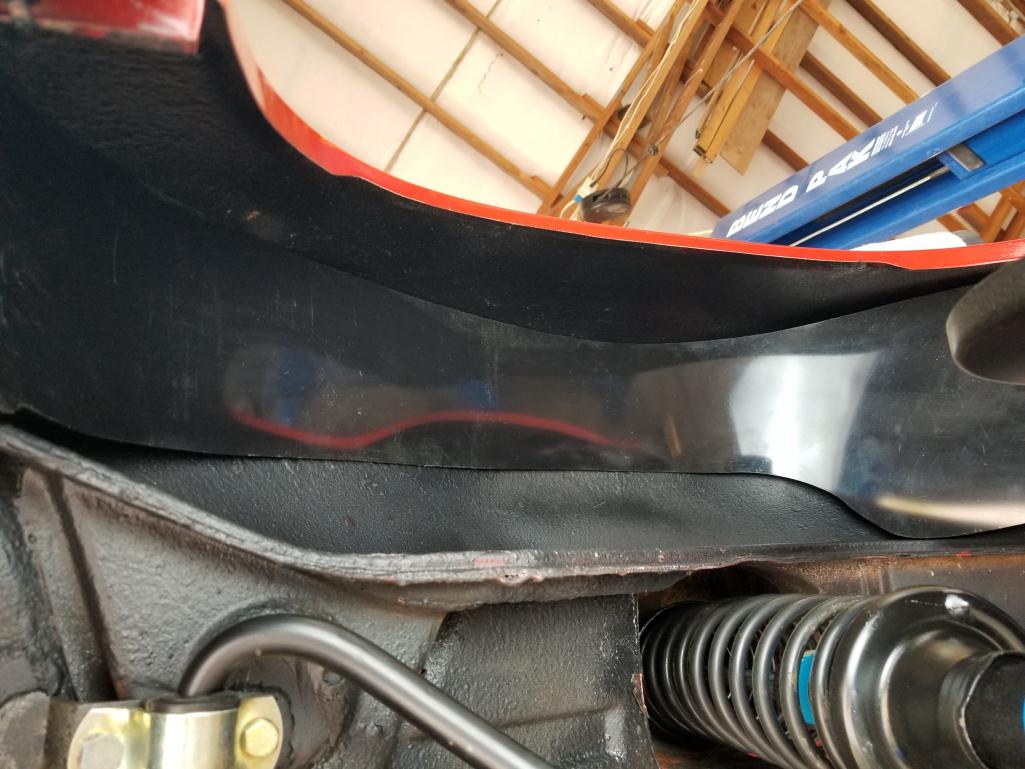
Posted by: Matty900 May 30 2018, 05:30 AM
Got the wheels polished but there are still a few blemishes that could be covered up with some black paint.
Attached thumbnail(s)
Posted by: Matty900 May 30 2018, 05:40 AM
Finished restoration of the engine deck lid and installed the Rain tray. Now I will need to find a shorter air filter so the lid will have clearance to actually close
Attached thumbnail(s)
Posted by: bbrock May 30 2018, 07:58 AM
Got the wheels polished but there are still a few blemishes that could be covered up with some black paint.
But then you'd have big black blemishes.
I think they look nice as they are.Posted by: Matty900 Jun 6 2018, 02:31 AM
So much has happened recently that I have not had enough time to post all of the updates. I was talking with Cary and I have put in over 200 hrs this last month. Cary has been awesome and put in a ton of hours even staying at the some with me until 3 in the morning over the weekend. Here are some more updates
Attached thumbnail(s)
Posted by: Matty900 Jun 6 2018, 02:36 AM
Went to go find my awesome original back pad to put back in the car and discovered that my brother had used it for making pattern updates and working of the foam for the back pad base that we are currently making. So I decided to just use the bases and put on some perlon and see how they would look
Attached thumbnail(s)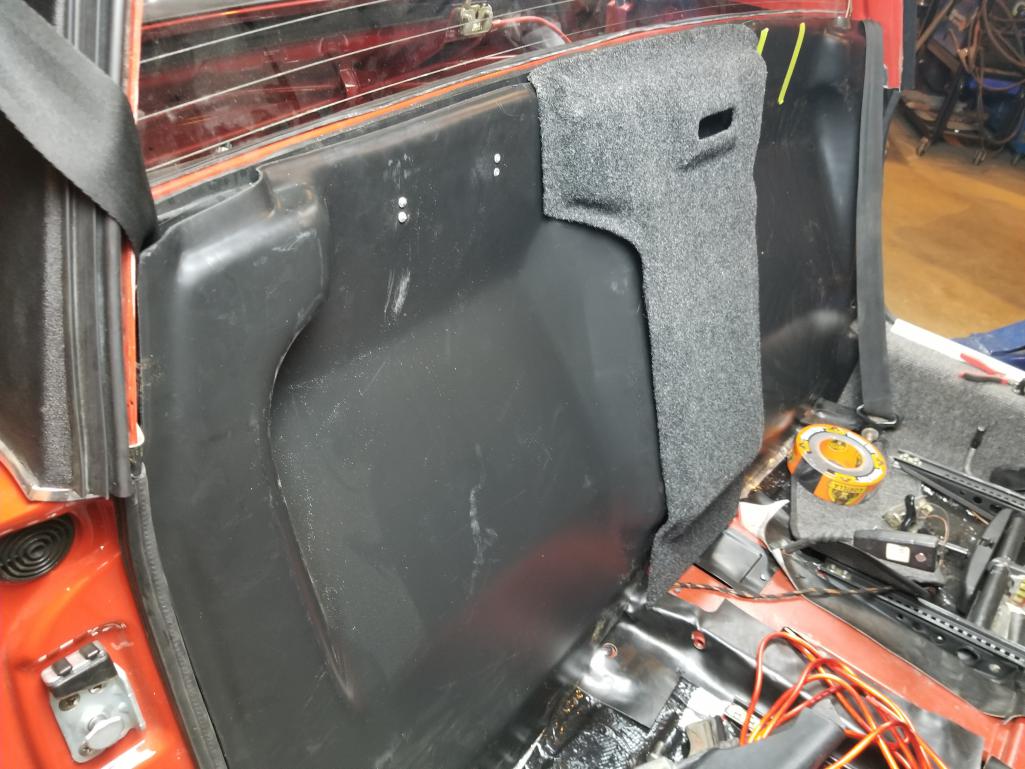
Posted by: Matty900 Jun 6 2018, 02:42 AM
They actually turned out better than I thought they would.
Attached thumbnail(s)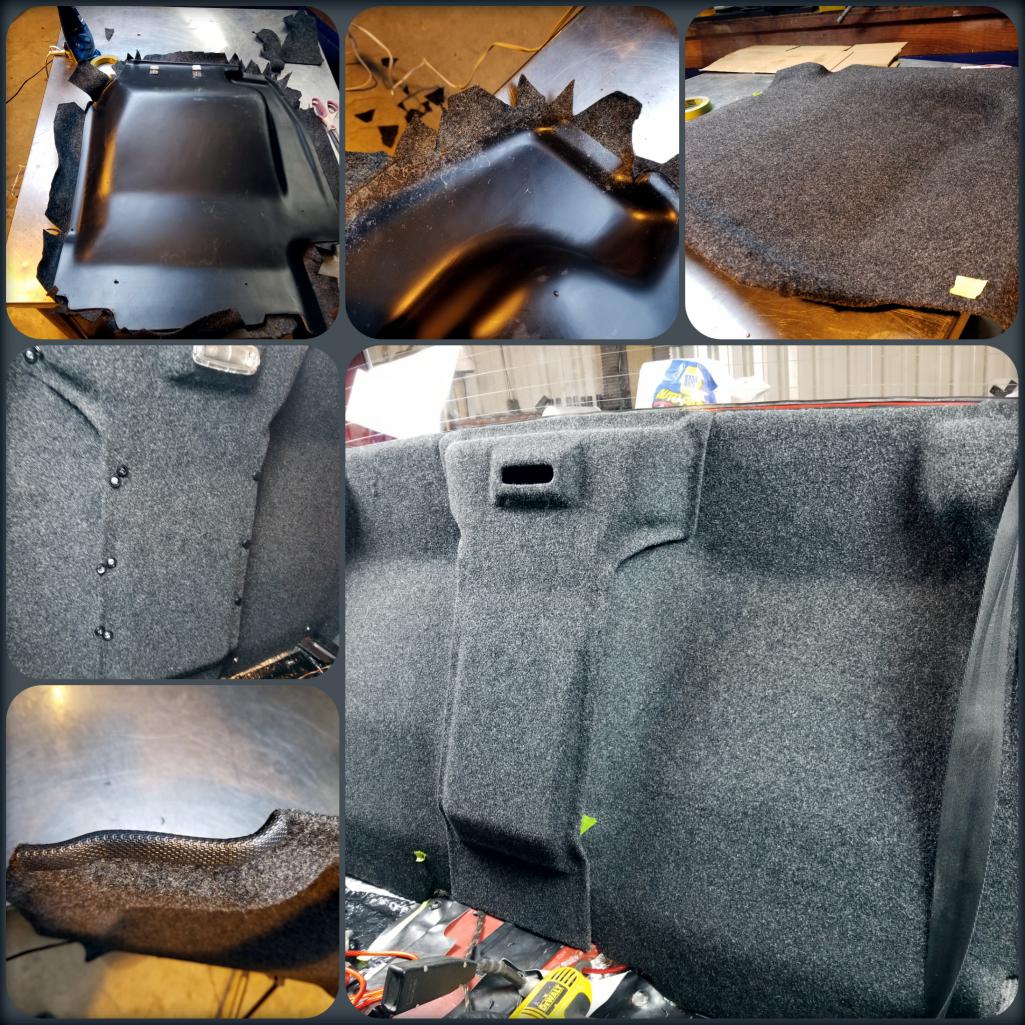
Posted by: raynekat Jun 7 2018, 12:39 AM
Yes, the perlon does look good. Nice job.
Posted by: Matty900 Jun 13 2018, 08:59 PM
Sorry I have not finished posting on the progress but Iit was another big press to get the car done in time for a Rally.
Let's see where I left off
Oh that's right, lots of late nights
Attached thumbnail(s)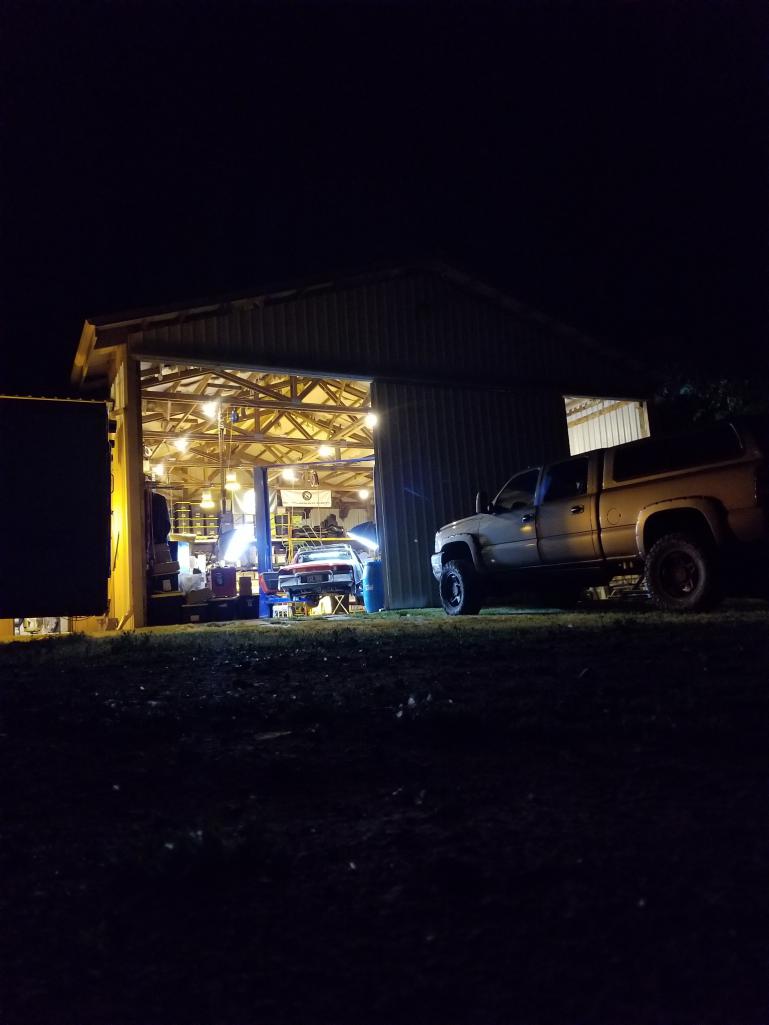
Posted by: Matty900 Jun 13 2018, 09:05 PM
Got the interior finished up and added an amp for the sub.
Attached thumbnail(s)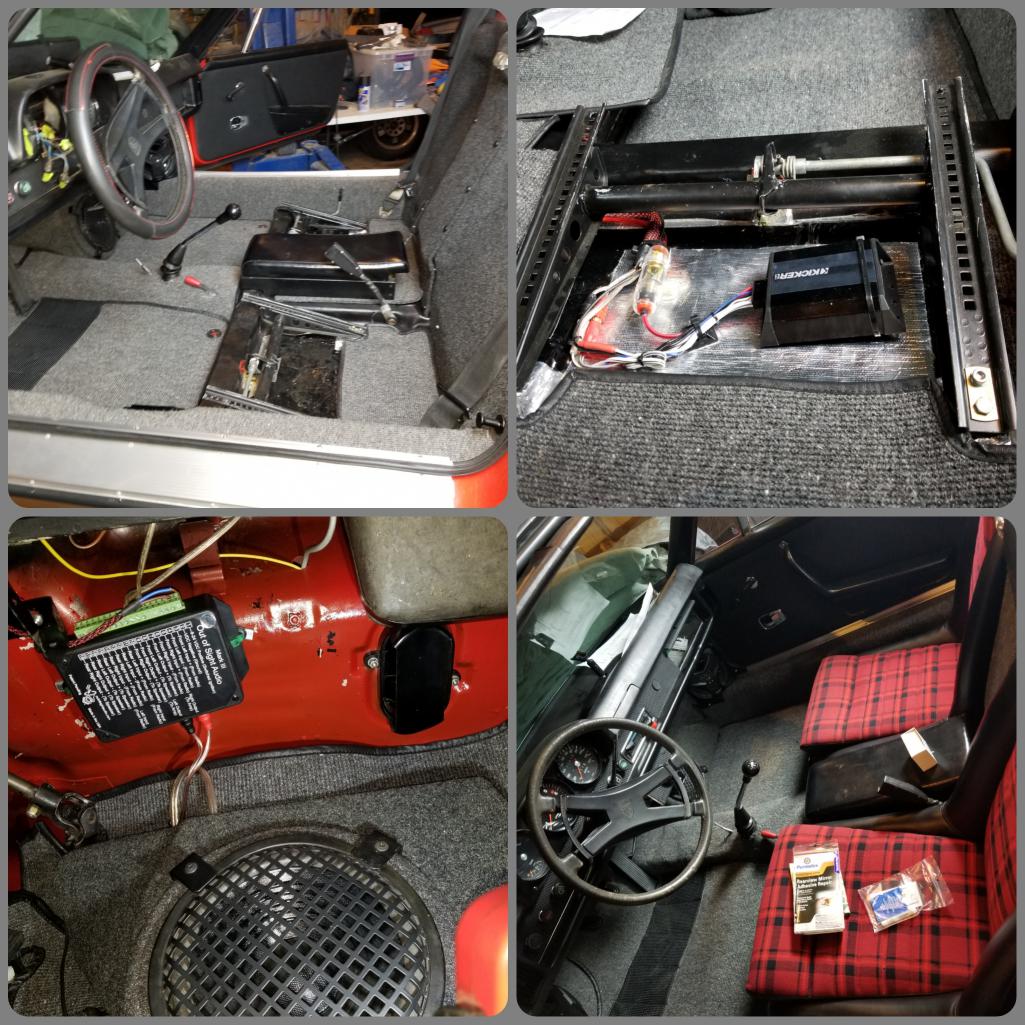
Posted by: Matty900 Jun 13 2018, 09:13 PM
Replaced the firewall pad with a rubber backed one. I had installed the other one backwards and after the little fire on the first start last September, it was not looking as good as it could have.
Also got a catch can from Tangerine Racing and installed it on the firewall. Cary put nut zerts in so we can remove it if needed in the future.
Attached thumbnail(s)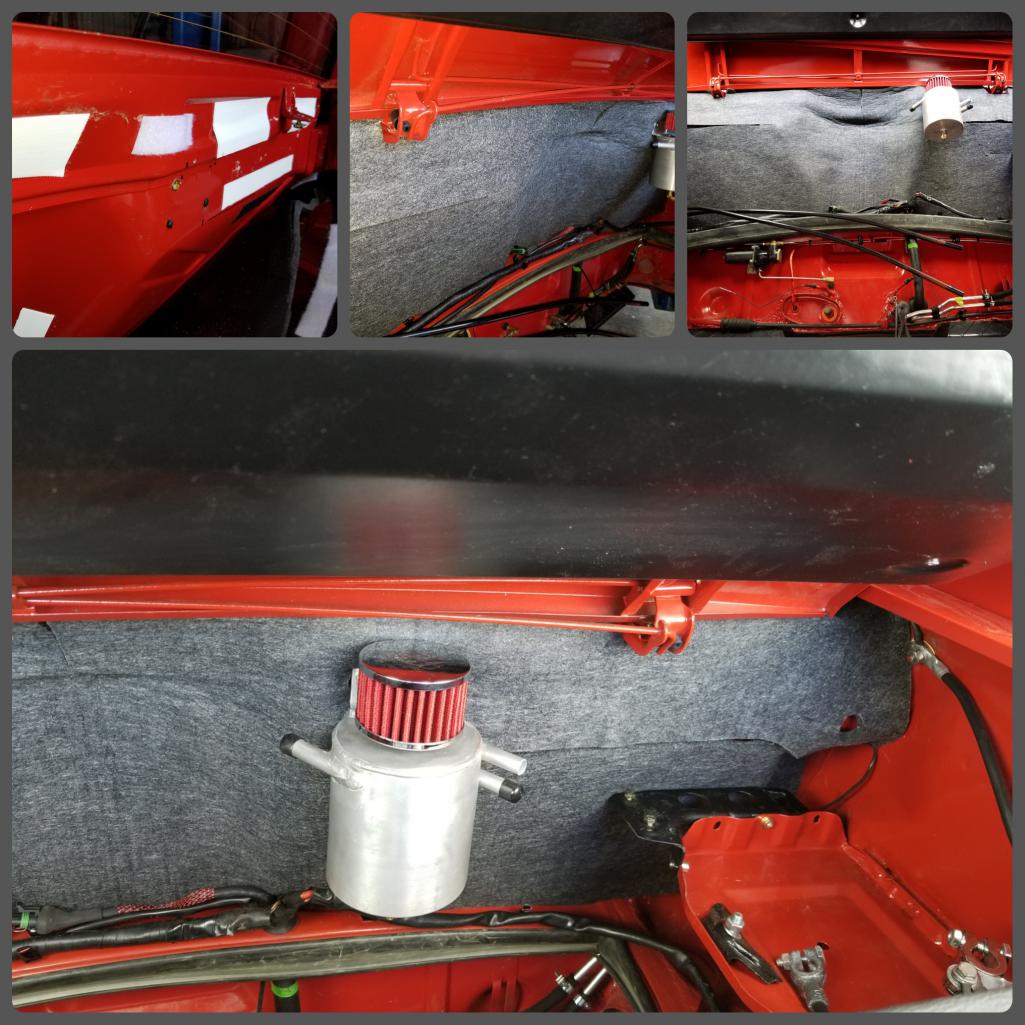
Posted by: Matty900 Jun 13 2018, 09:29 PM
Final connection checks and communication with the microsquirt before reinstalling the engine for the final time. Had a few issues with confusing info and the set up. We had to change the power routing to some of the relays but Mario walked us through it and remoted into my computer to help get the initial setup done and get things calibrated.
Attached thumbnail(s)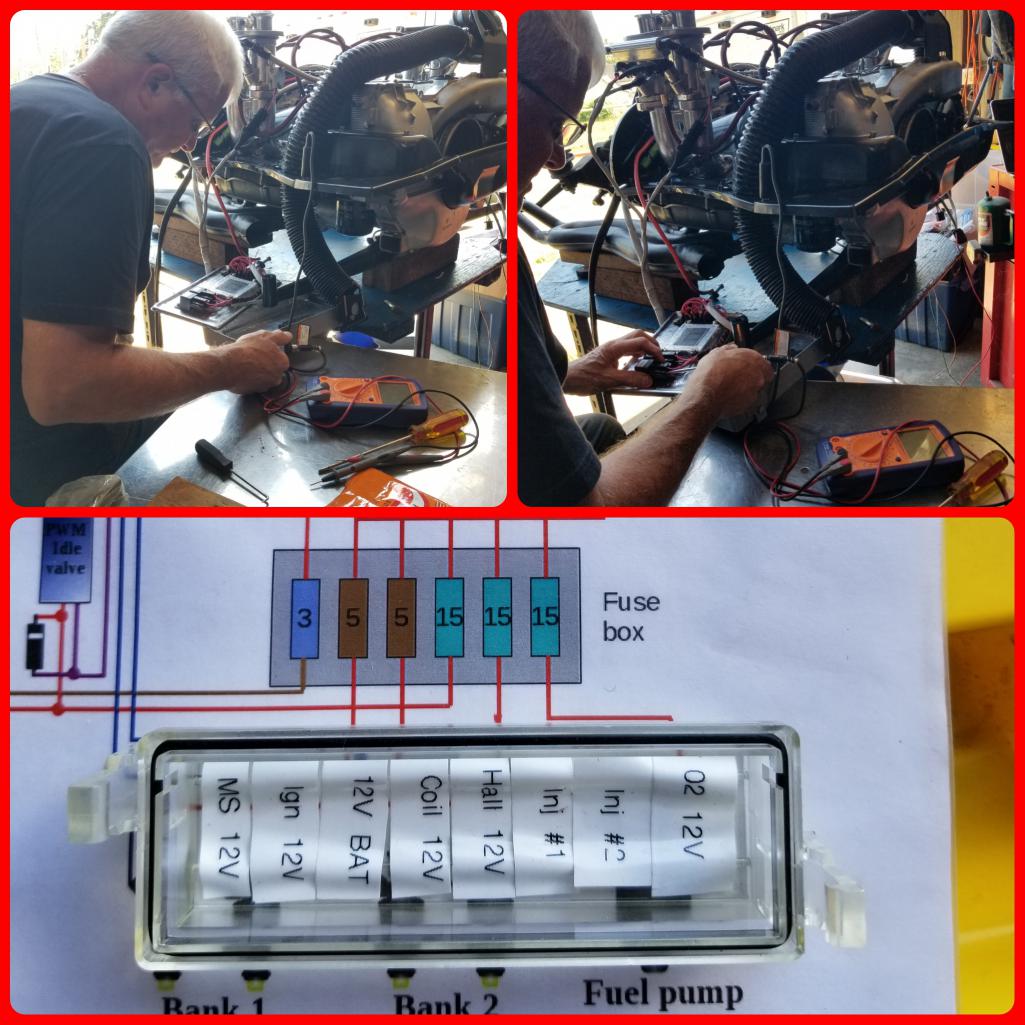
Posted by: Matty900 Jun 13 2018, 09:32 PM
2 steps forward 1 step backwards. Got everything in place, but lost power in part of the relay box. Putting everything in the original ECU box sounded like a cool idea to start with. Now it is not so cool. Big PITA to get to it when needed and when we closed it back up, on of the power jumpers came loose.
Attached thumbnail(s)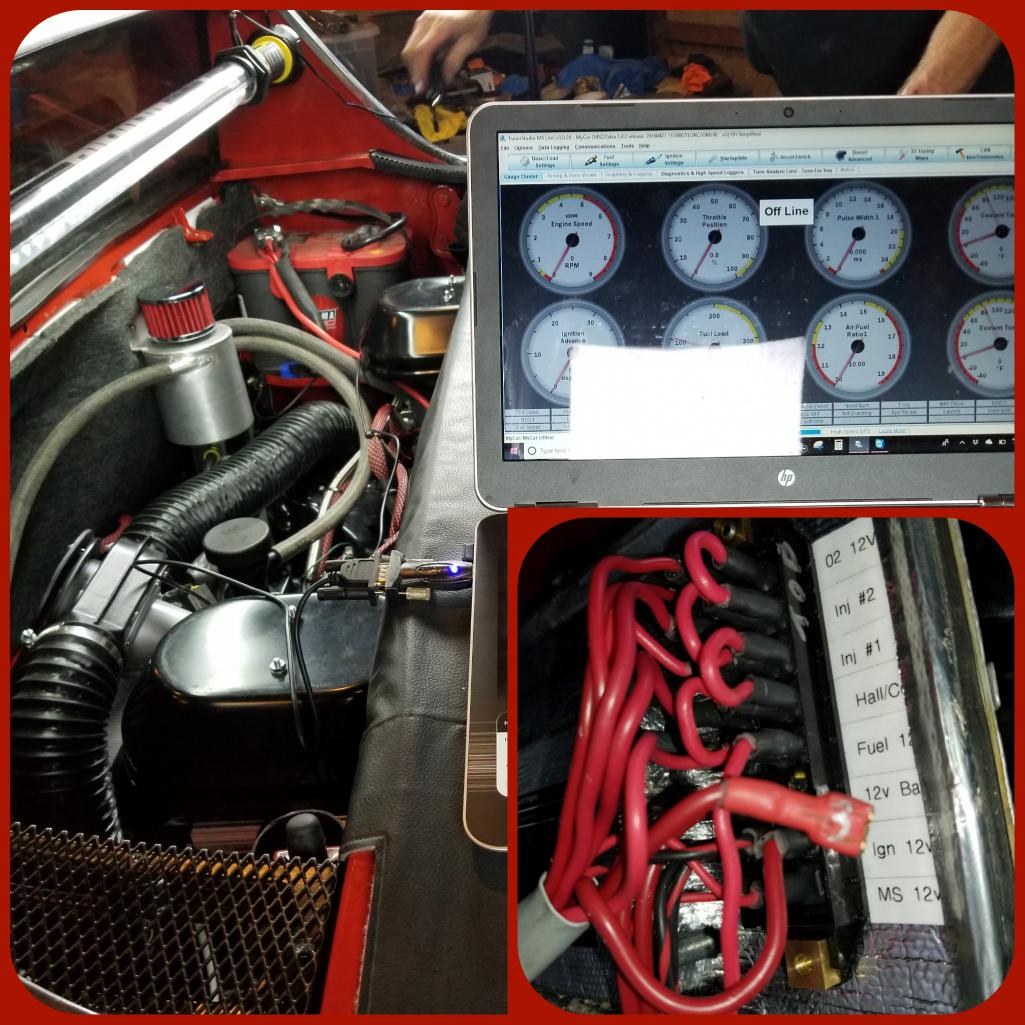
Posted by: Matty900 Jun 13 2018, 09:36 PM
Finished getting everything hooked up mechanically so that I could take the car up to Monroe Washington to see Mario in the morning at the Dub Shop. Left about 10 PM and got in to the hotel at about 3:30AM.
Attached thumbnail(s)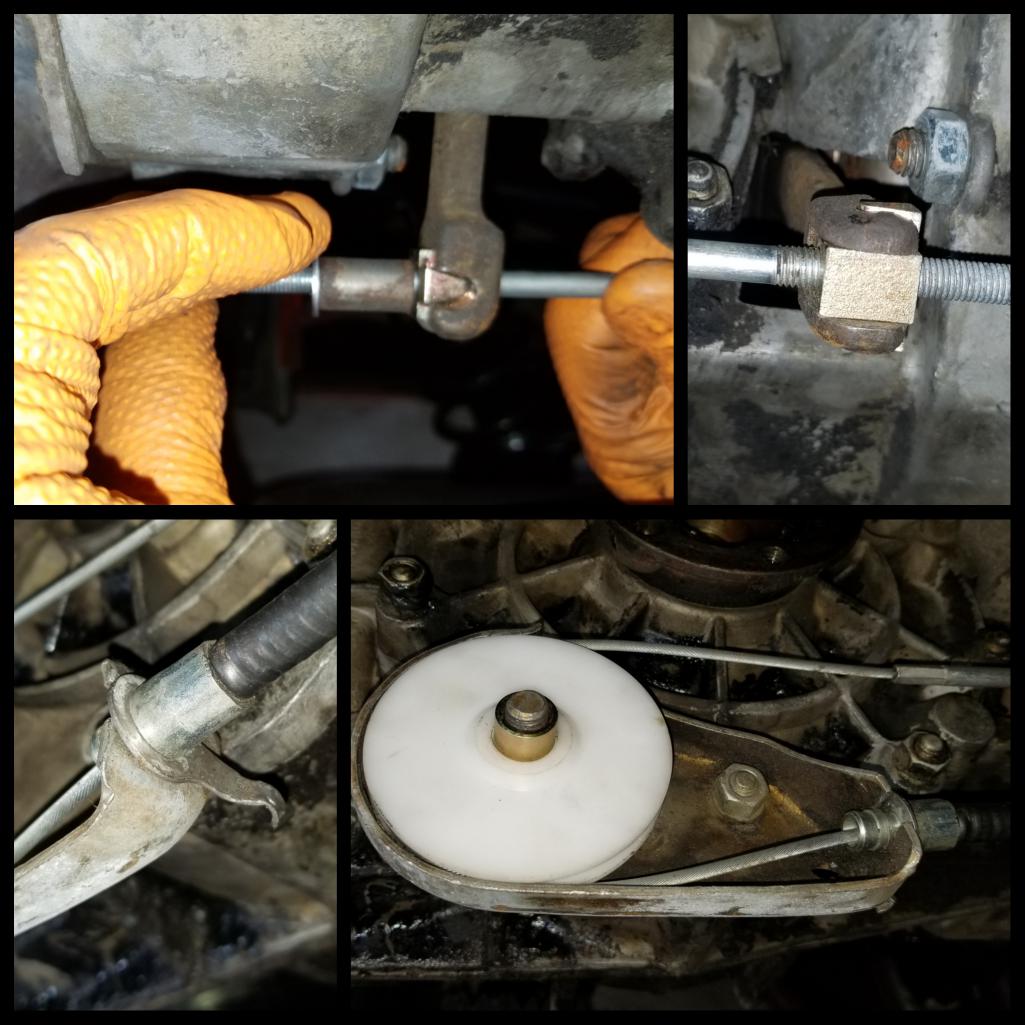
Posted by: Matty900 Jun 13 2018, 09:41 PM
Got to Mario's shop at about 8AM and got to work. He started with getting the innovate controller calibrated and then we closed up the ECU box and hung it back on the battery tray.
Attached thumbnail(s)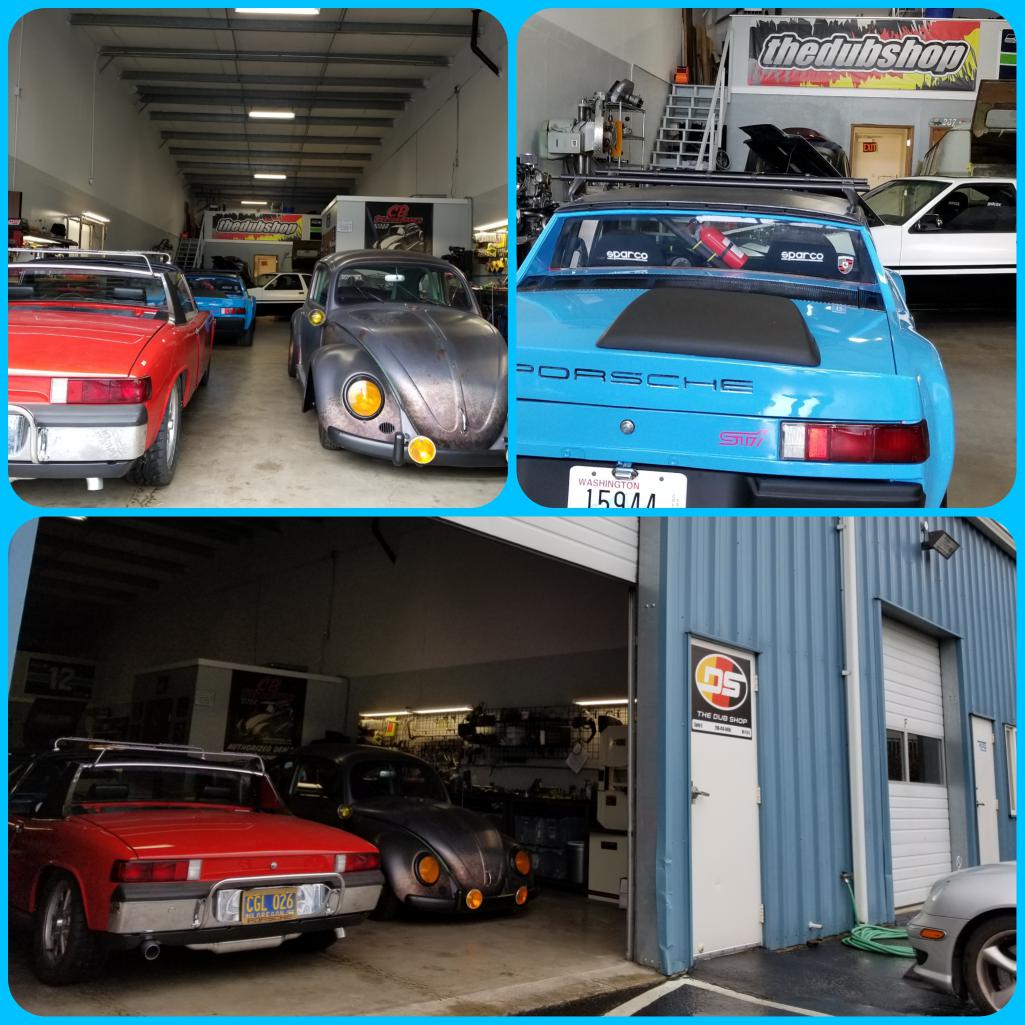
Posted by: Matty900 Jun 13 2018, 09:49 PM
Once everything was communicating properly and in place, we started pressure testing the fuel system. Pressure on the gauge was reading about 70 PSI and we had a little leak on one of the fuel rails. Got the pressure on the regulator turned down got pulled off the fuel rail to see what the issue was. The fuel injectors had a change on them where the groove that the retaining plate holds onto does not go all the way around them so is keeping them for him being able to seat all the way. We fixed that issue and they were still leaking.
Attached thumbnail(s)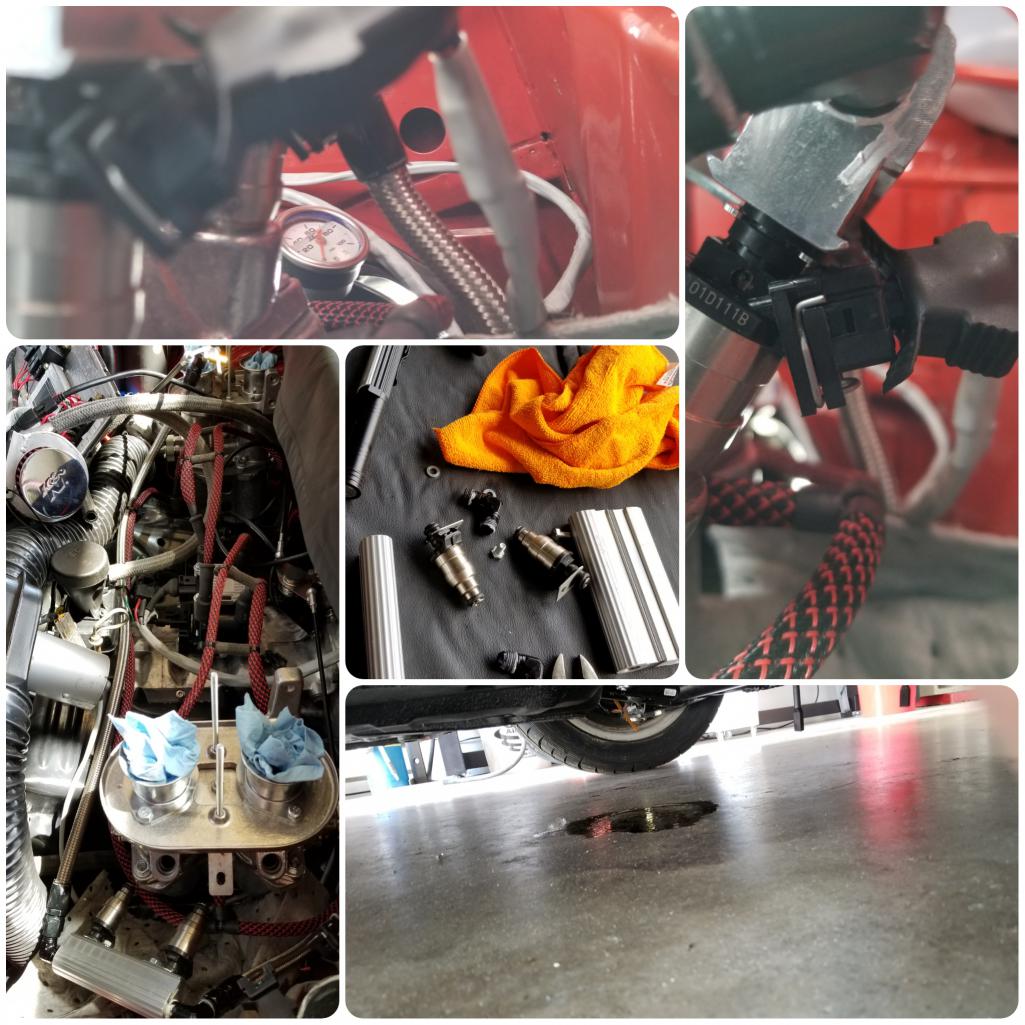
Posted by: Matty900 Jun 13 2018, 09:57 PM
To make a long story short we spent the next few hours sorting out fuel leaks and ended up replacing the fuel rail with one that Mario makes himself instead of the resold ones. His is way cooler and puts the fuel lines on the same side, making the engine bay tidy
Attached thumbnail(s)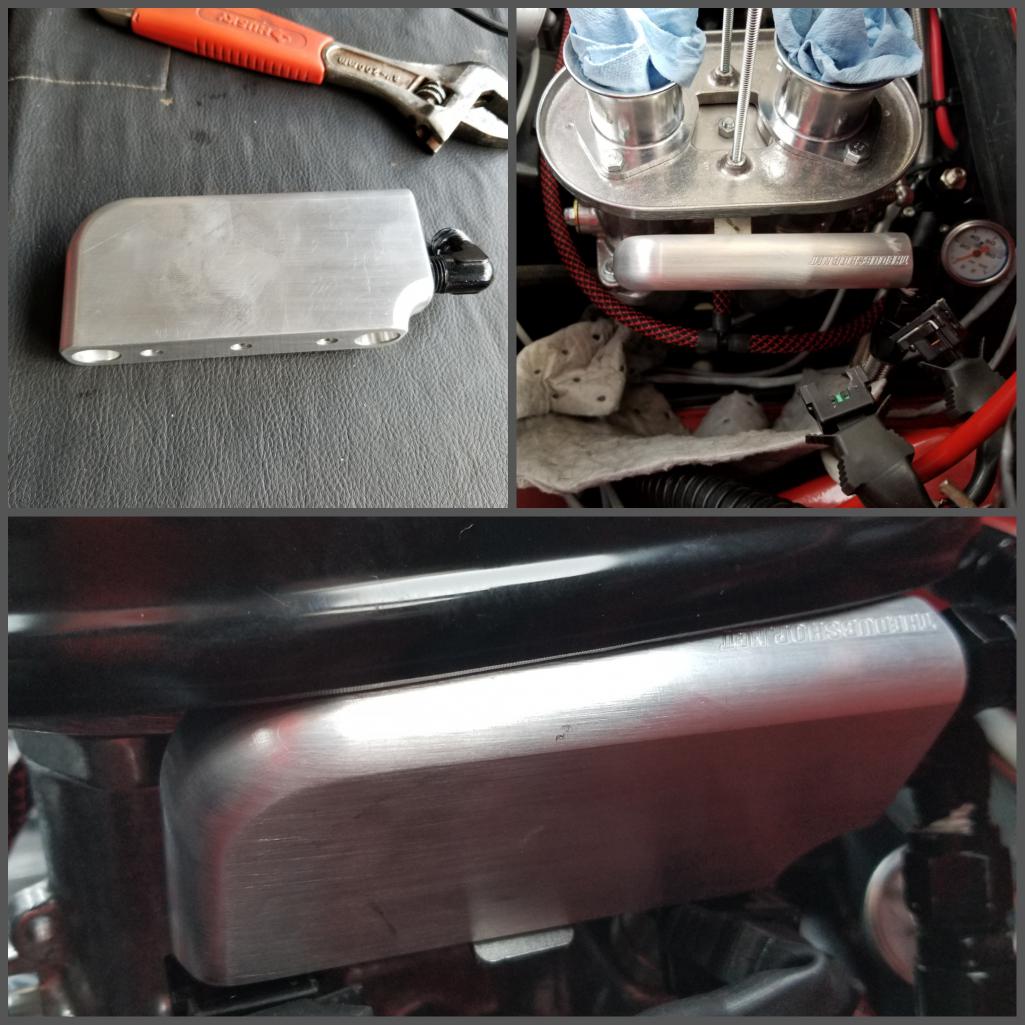
Posted by: Matty900 Jun 13 2018, 10:07 PM
Time for the 1st start.
This is how cool it was. The throttle cables was not even hooked up, but the car started and idled on the base tube that he had loaded!!! 
We did a few road tests and tunes and got the car doing well enough to be road worthy for West Coast Rally
Attached thumbnail(s)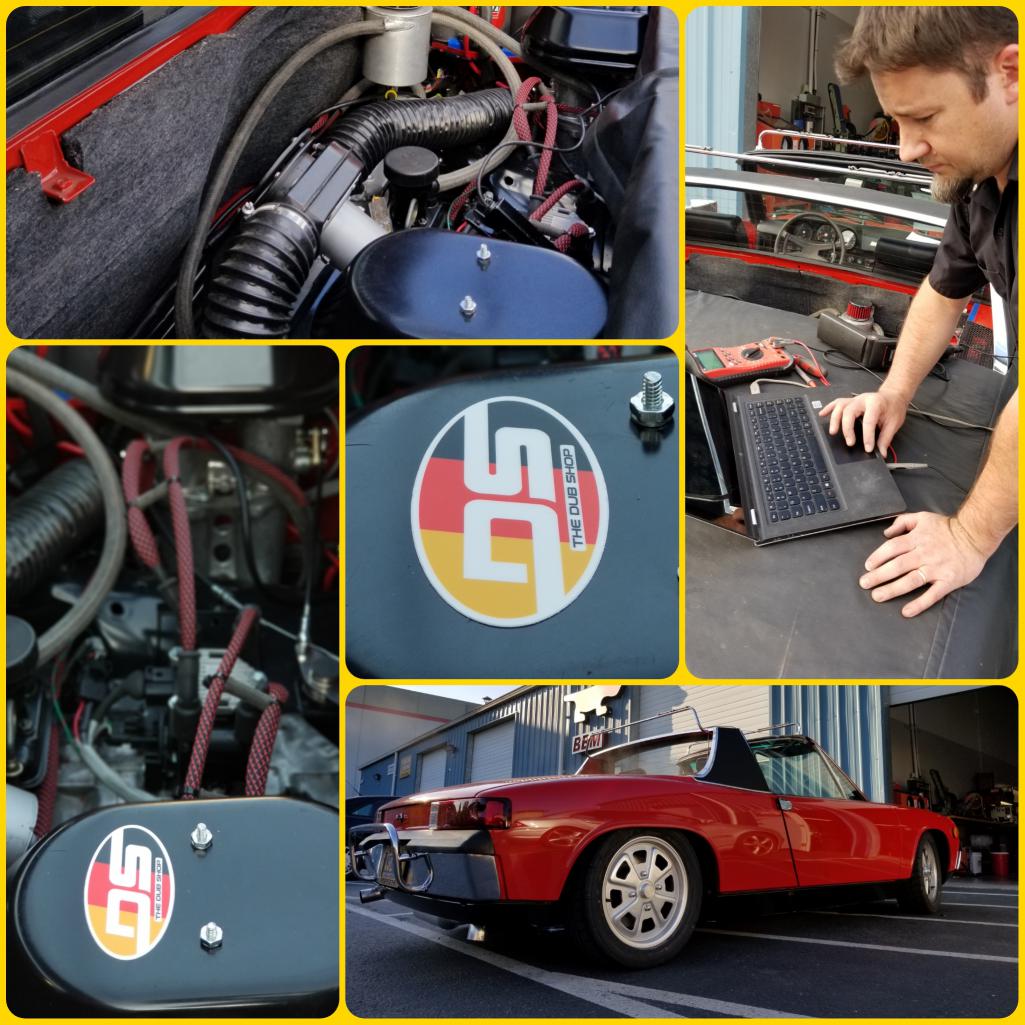
Posted by: Matty900 Jun 14 2018, 12:20 AM
Made it back to the barn to get the flapper boxes hooked up as it looks like there may be rain in the forecast.
Jack made it out to the barn! It was good to see Super in-law starting to feel better.
Attached thumbnail(s)
Posted by: Matty900 Jun 14 2018, 12:23 AM
Attached thumbnail(s)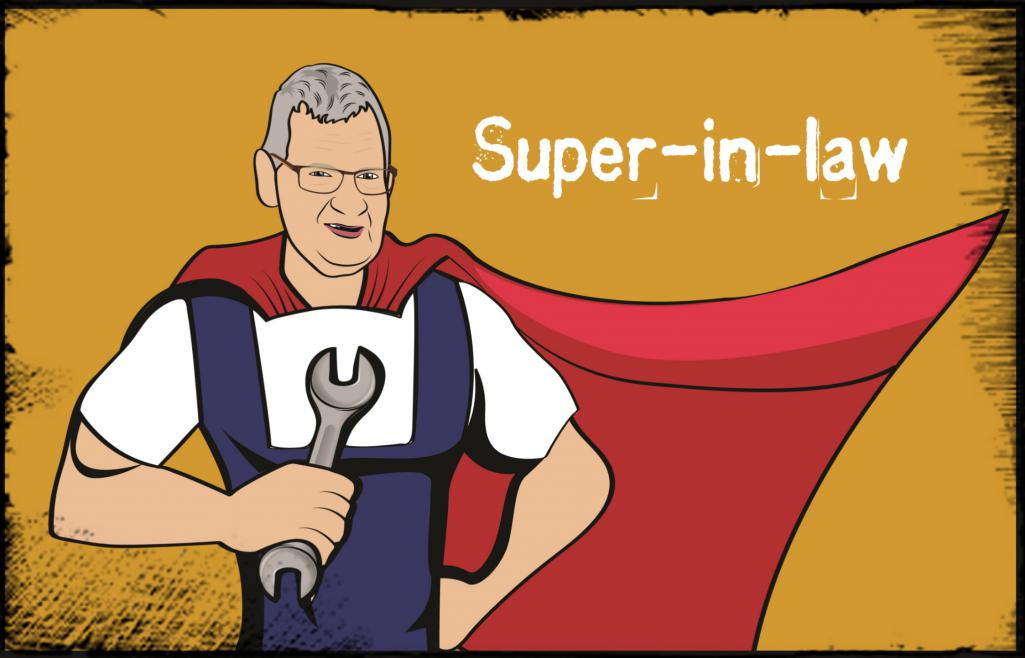
Posted by: Matty900 Aug 3 2018, 07:11 PM
Guess I haven't posted in a while on the progress. We did get the car running for West Coast Rally
Attached thumbnail(s)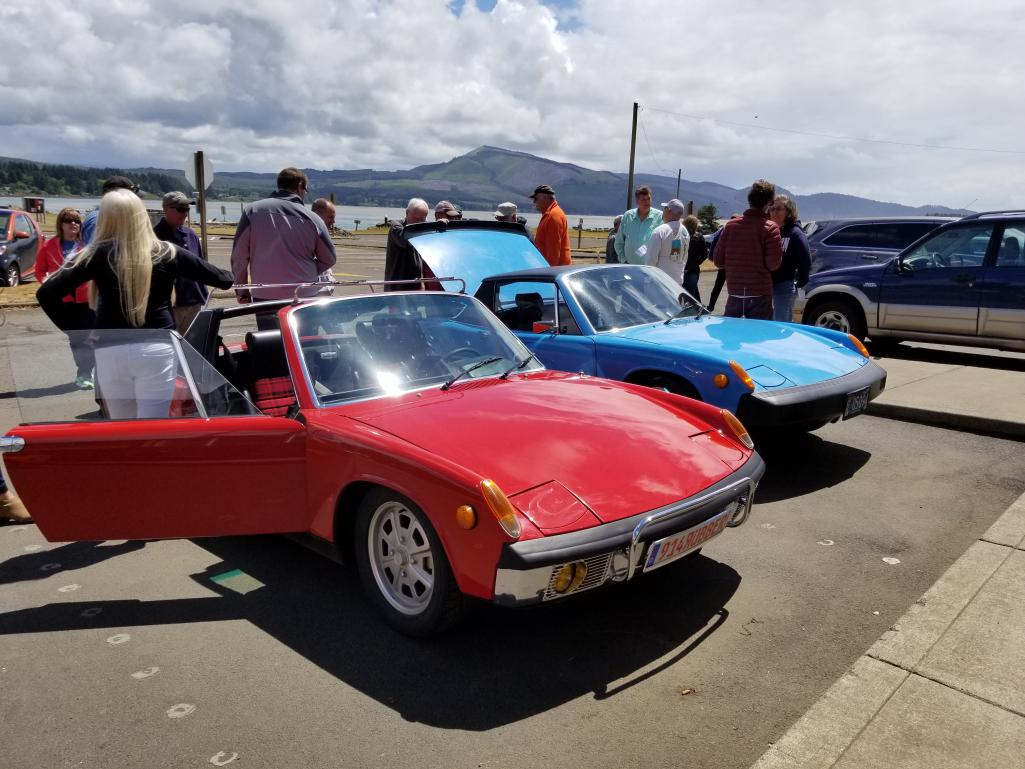
Posted by: Matty900 Aug 3 2018, 07:15 PM
Put about 1700 miles on it very quickly. Developed a fuel leak at the front.
Attached thumbnail(s)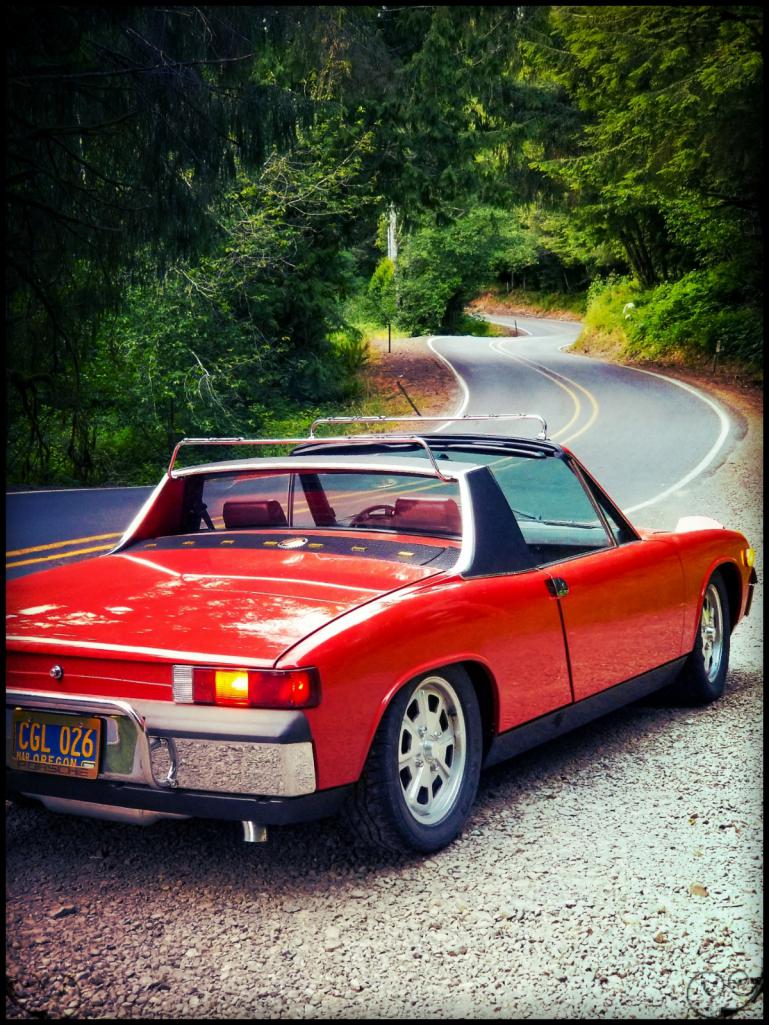
Posted by: Matty900 Aug 3 2018, 07:16 PM
We pulled the tank and had it opened and re lined.
Attached thumbnail(s)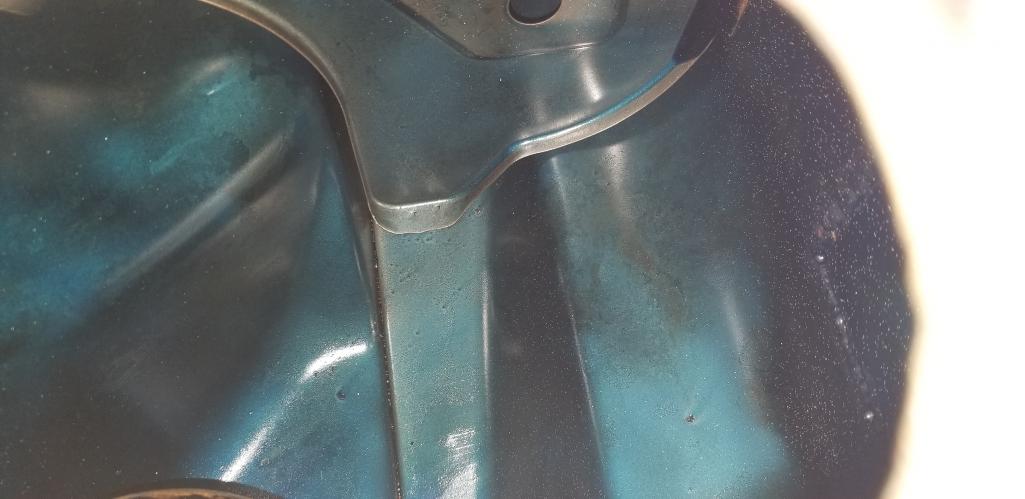
Posted by: Matty900 Aug 3 2018, 07:27 PM
Entered the car in the Forest Grove Concours de Elegance. Ended up taking a trophy home
Attached thumbnail(s)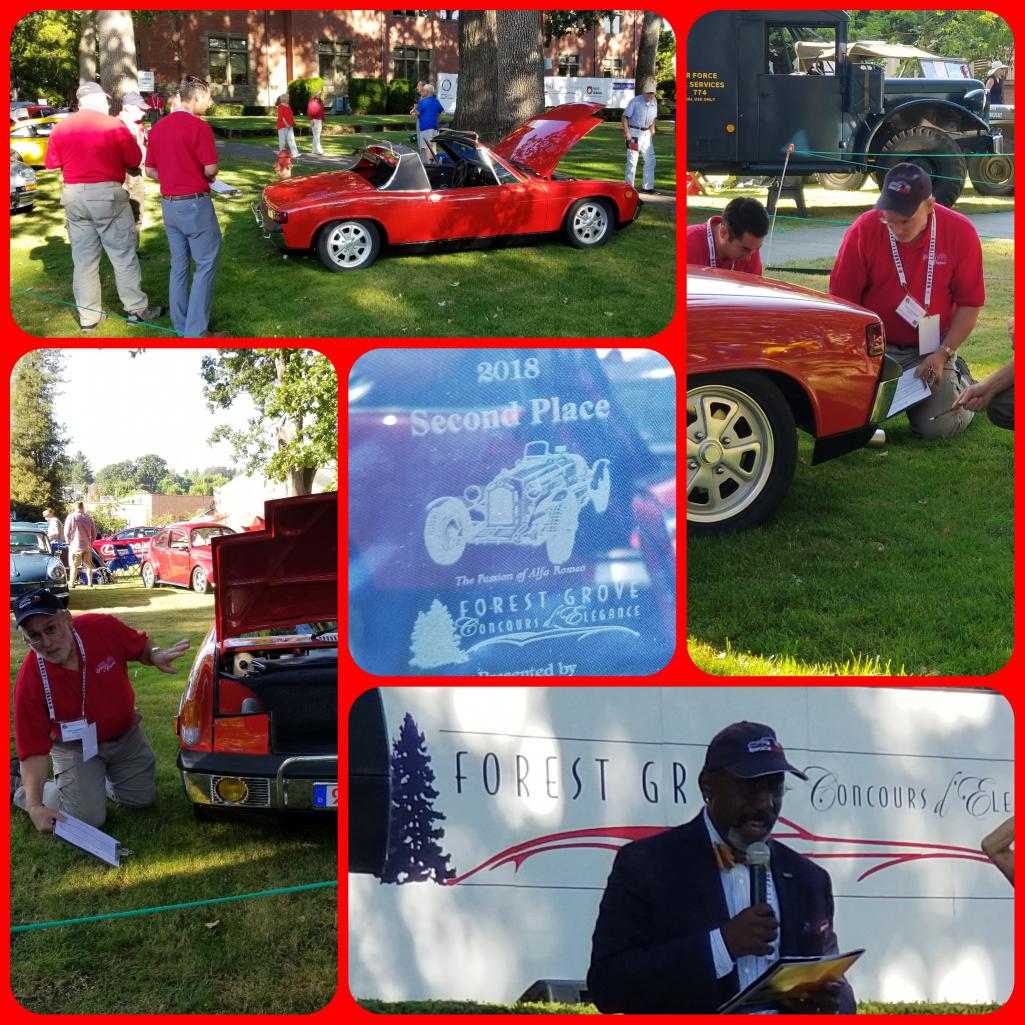
Posted by: Matty900 Aug 3 2018, 07:35 PM
Cary and I went to Seattle for the weekend to attend a vintage aircooled show
Attached thumbnail(s)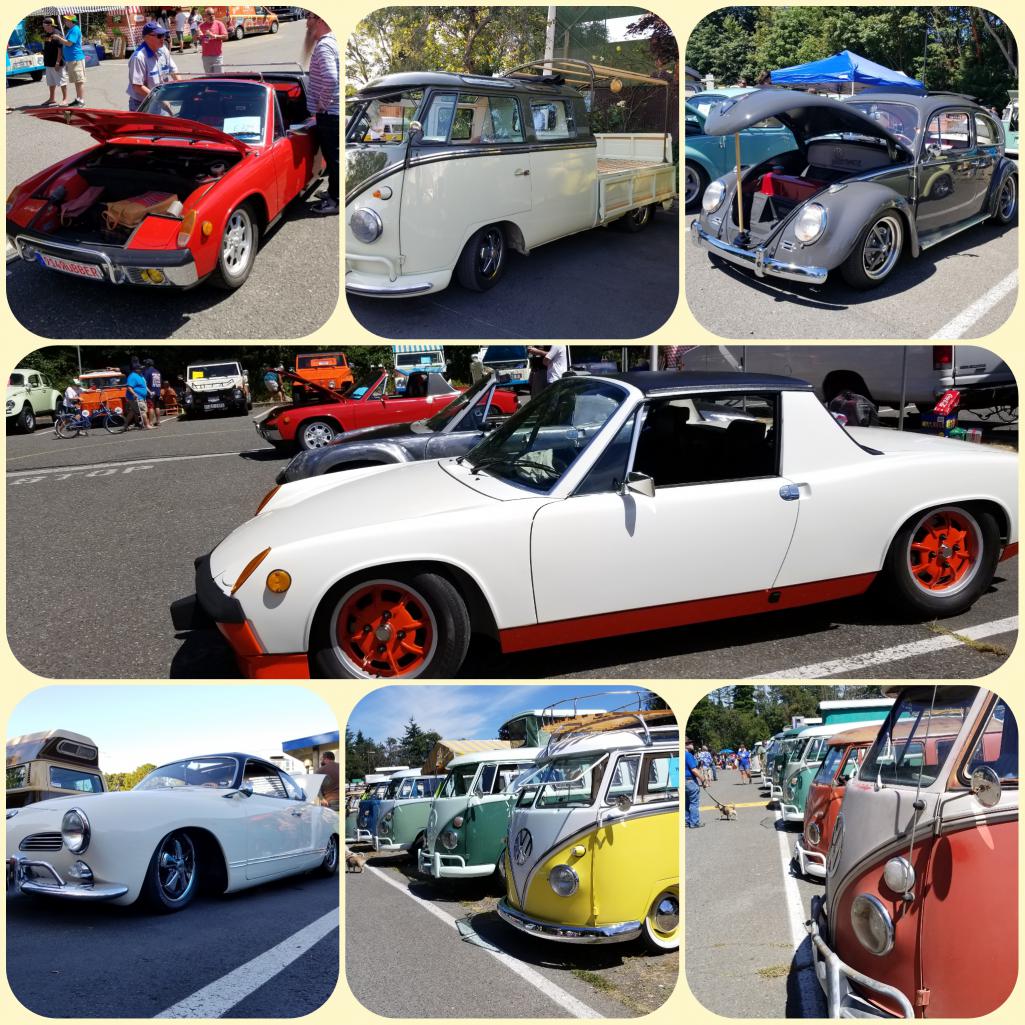
Posted by: Cairo94507 Aug 4 2018, 07:05 AM
Wow. Lots of cool cars and congratulations on the trophy.
Posted by: Matty900 Aug 6 2018, 01:17 AM
Wow. Lots of cool cars and congratulations on the trophy.
Thank you.We also took it to something called WEKFEST while we we in Seattle that was supposed to be an all makes car show at Century Field. It wes actually and major show for tuners not teeters. Lots of cool JDM stuff but not as cool as the aircooled show the day before.
Attached thumbnail(s)
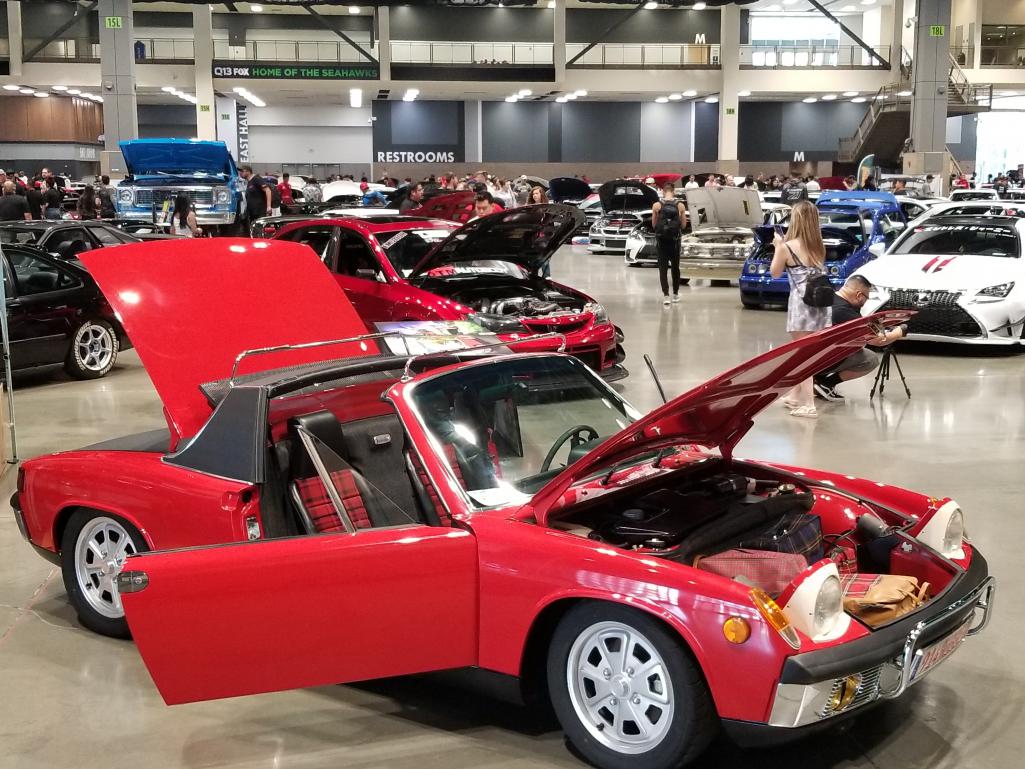
Posted by: Philip W. Aug 6 2018, 07:40 AM
man that looks awesome!! which back pad is that that you installed?
Posted by: Matty900 Aug 6 2018, 07:34 PM
man that looks awesome!! which back pad is that that you installed?
Thank you!!
The one in the car is just perlon over the thermal formed back pads that we make:
https://shop.914rubber.com/Back-pad-NEW-PLASTIC-replacements-914FG-PB.htm?categoryId=-1
The one in the engine bay is our firewall back pad:
https://shop.914rubber.com/Porsche-914-Firewall-back-pad-91455613510.htm?categoryId=-1
I have tons of photos if you need them for your install
Attached thumbnail(s)
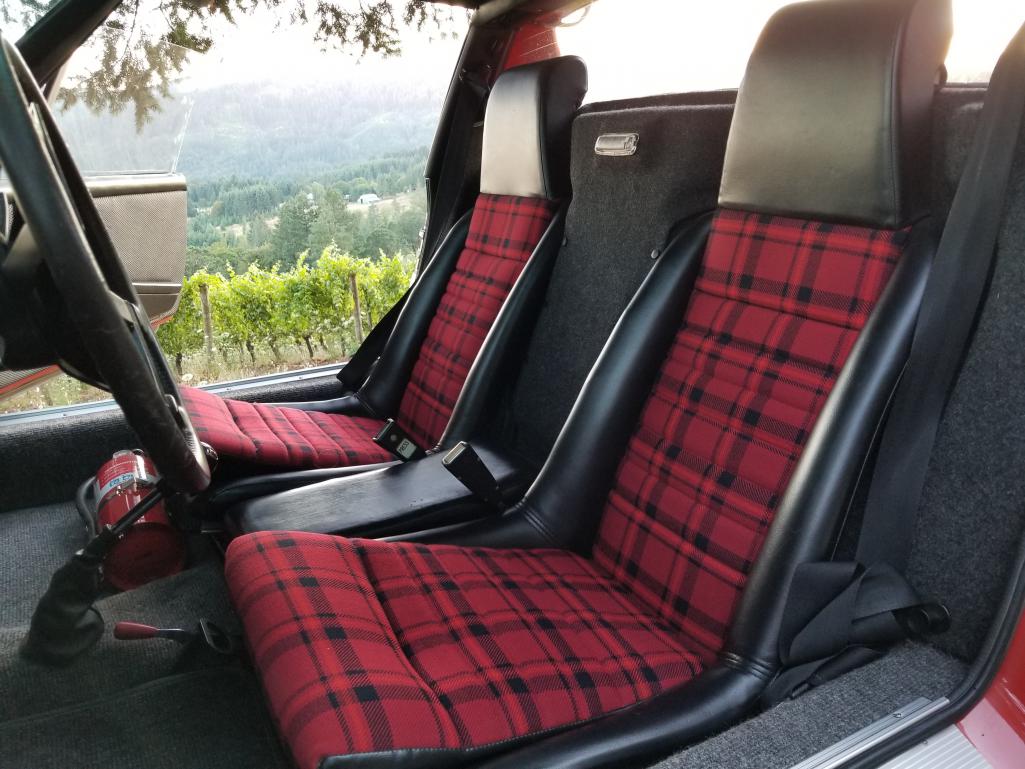
Posted by: Matty900 Aug 6 2018, 07:38 PM
Wow. Lots of cool cars and congratulations on the trophy.
Thank you sir
Posted by: Matty900 Aug 30 2018, 10:26 PM
So today was the day. We got the car on the dyno for some fine tuning. So here are the results. Not bad for a 1.7. So much fun to drive
Attached thumbnail(s)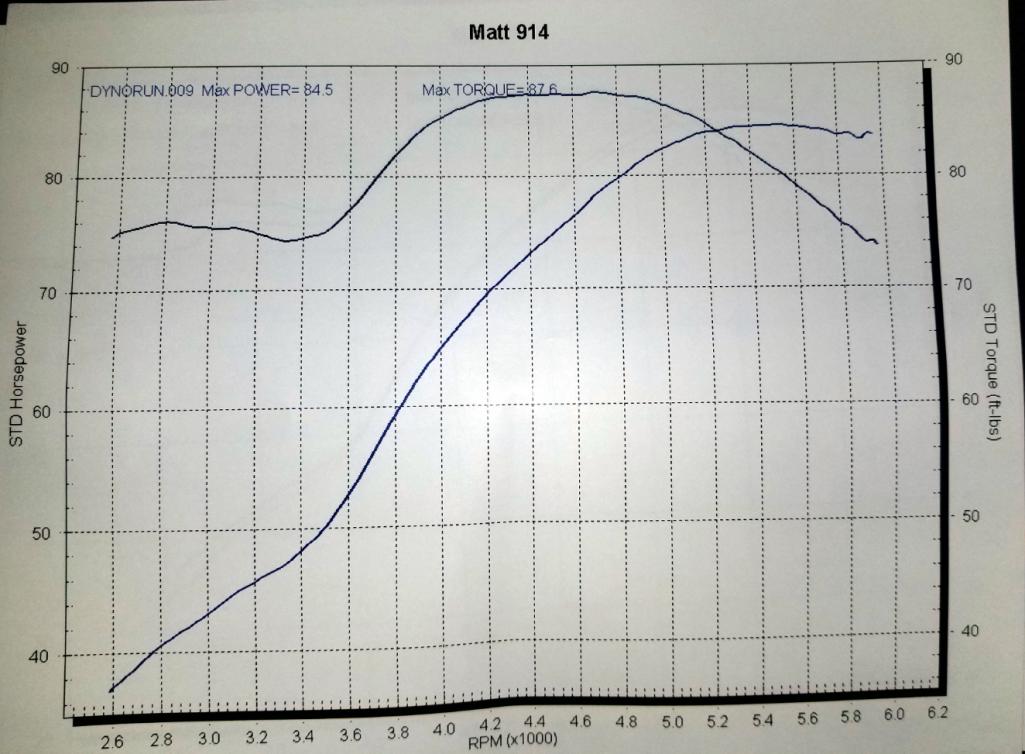
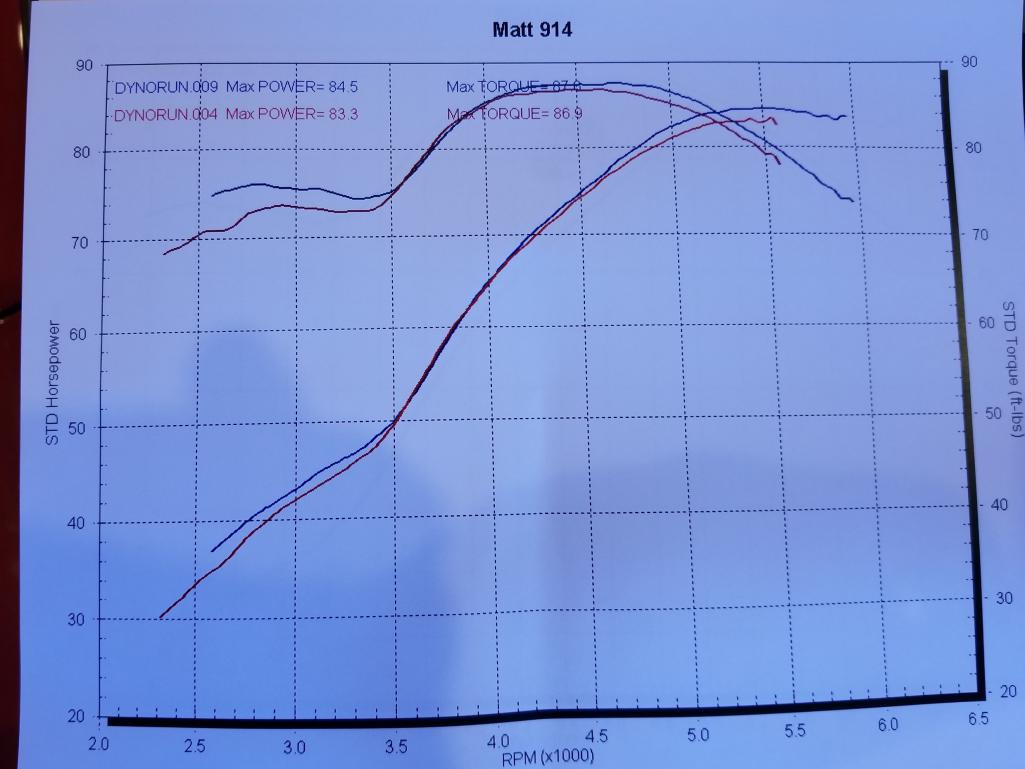
Posted by: Mblizzard Aug 31 2018, 07:51 AM
So today was the day. We got the car on the dyno for some fine tuning. So here are the results. Not bad for a 1.7. So much fun to drive
That is at the wheels! I don’t think you would see that much at the wheels for a stock 2.0.
Posted by: DRPHIL914 Aug 31 2018, 08:06 AM
Matt, what back pad material is in your car?
Posted by: cary Aug 31 2018, 09:02 PM
Mike that was at the wheels. It's a 1.7 with a crazy radical cam.
Posted by: Matty900 Sep 2 2020, 06:55 PM
I haven't given any updates on this car it a very long time so I thought I'd report in on how its doing.
This is my favorite car to dive and the most reliable with the micro squirter system. The only issues that I have had was with about 1,700 mikes on the build, the engine started having issues requiring a few tows back to the shop. It was something to do with the micro squirter system and it was difficult to figure out exactly what was going on. We ended up pulling the motor and replacing components like the hall sensor. It turned out to be the #1 pin on the plug (power) into the ecu. We did not put any service loops in the wire and it was being pulled on by the heat shrink on the harness. It was just enough to loosen the female side of the connection. All it took was a nanosecond of power drop and the system would go back into the start up sequence and kept cooking the waisted spark.
With that fixed it has been nothing but fun.
About a month ago I took the car down to LA and loaned the car to Sung Kang. Sung played Han in the Fast and the Furious movies. He has decided that he wants to build 914's at a Singer level and has lots of very cool ideas. He is interested in learning all about the 914's and the ethos of this "under dog"
He picked up a 914 to start learning about the cars. However it was a V8 swapped 914. I suggested that he should probably start to learn about them from a well sorted out car and then expand from there. The next thing I wanted was to help understand the 914 community and 914world.com. There are so many cool builds that have been done and there are some great people in the community who can help. So we took the car down to him and introduced him to a few people like Marty and Matt at MSDS @Maltesefalcon.
We then left the car with him for about a month.
Attached thumbnail(s)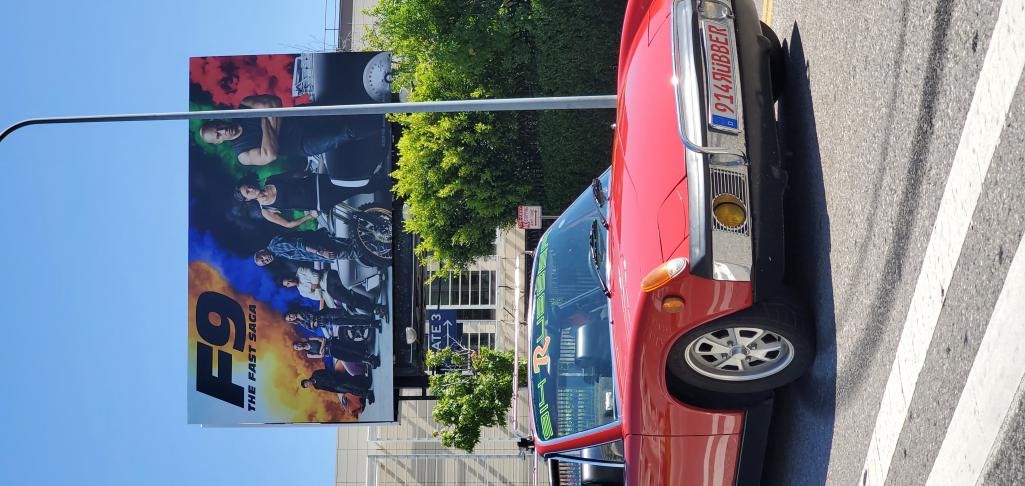
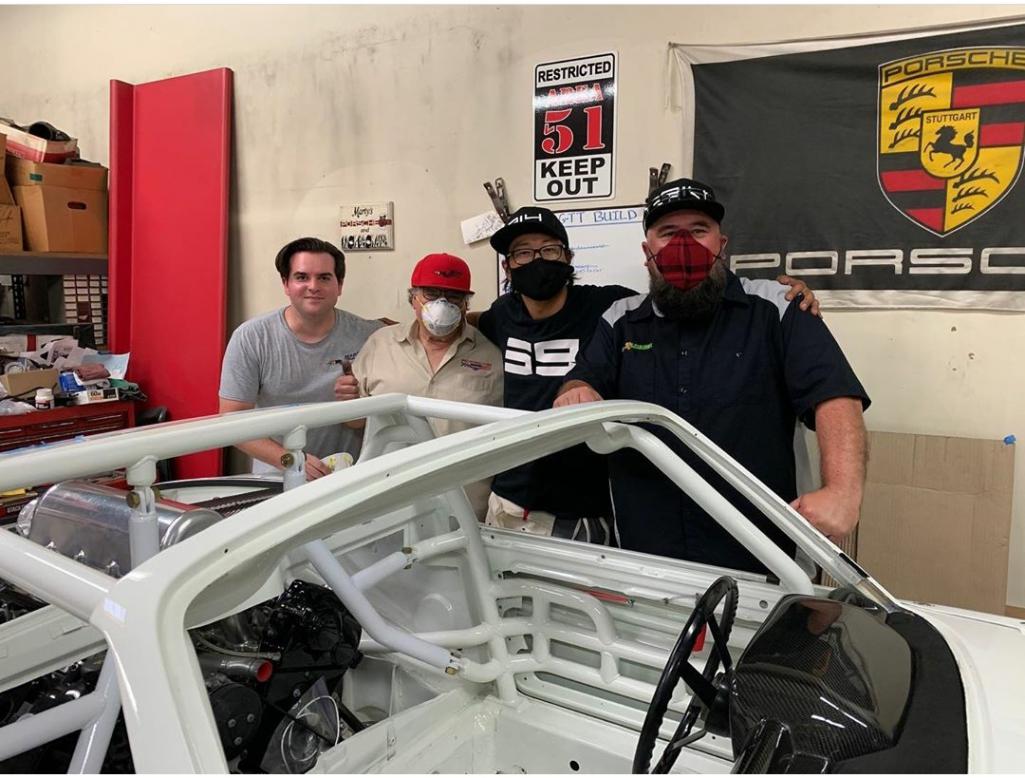
Posted by: Matty900 Sep 2 2020, 07:13 PM
Last week I got a call from my friend JP in Vegas that was getting tired of the 116 days. He needed to head up to Washington to take care of some business and he was thinking about driving up the coast. Then I spoke with Sung and he had picked up another 914 and was done with my car. So I jumped on a plane and grabbed my car to drive back up with JP.
Before getting on the road, I stopped by to see Magnus Walker and we took the car out for a hot lap around downtown LA.
Attached thumbnail(s)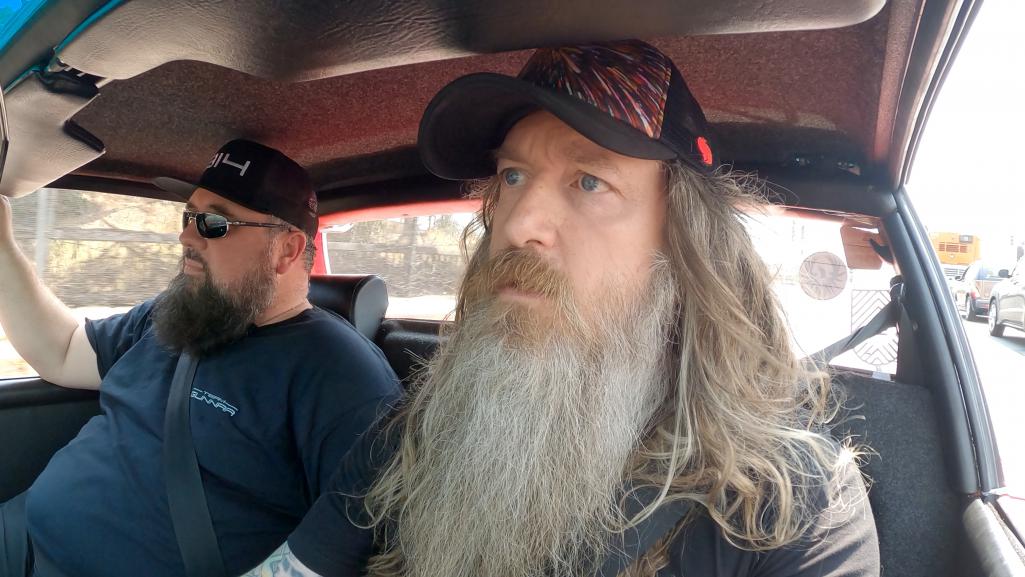
Posted by: ri914 Sep 2 2020, 07:16 PM
Last week I got a call from my friend JP in Vegas that was getting tired of the 116 days. He needed to head up to Washington to take care of some business and he was thinking about driving up the coast. Then I spoke with Sung and he had picked up another 914 and was done with my car. So I jumped on a plane and grabbed my car to drive back up with JP.
Before getting on the road, I stopped by to see Magnus Walker and we took the car out for a hot lap around downtown LA.
Awesome story. What did Magnus think?
Posted by: Matty900 Sep 2 2020, 07:30 PM
Last week I got a call from my friend JP in Vegas that was getting tired of the 116 days. He needed to head up to Washington to take care of some business and he was thinking about driving up the coast. Then I spoke with Sung and he had picked up another 914 and was done with my car. So I jumped on a plane and grabbed my car to drive back up with JP.
Before getting on the road, I stopped by to see Magnus Walker and we took the car out for a hot lap around downtown LA.
Awesome story. What did Magnus think?
He was impressed. We filmed it for a project that I am working on.
Posted by: DRPHIL914 Sep 3 2020, 08:37 AM
I haven't given any updates on this car it a very long time so I thought I'd report in on how its doing.
This is my favorite car to dive and the most reliable with the micro squirter system. The only issues that I have had was with about 1,700 mikes on the build, the engine started having issues requiring a few tows back to the shop. It was something to do with the micro squirter system and it was difficult to figure out exactly what was going on. We ended up pulling the motor and replacing components like the hall sensor. It turned out to be the #1 pin on the plug (power) into the ecu. We did not put any service loops in the wire and it was being pulled on by the heat shrink on the harness. It was just enough to loosen the female side of the connection. All it took was a nanosecond of power drop and the system would go back into the start up sequence and kept cooking the waisted spark.
With that fixed it has been nothing but fun.
About a month ago I took the car down to LA and loaned the car to Sung Kang. Sung played Han in the Fast and the Furious movies. He has decided that he wants to build 914's at a Singer level and has lots of very cool ideas. He is interested in learning all about the 914's and the ethos of this "under dog"
He picked up a 914 to start learning about the cars. However it was a V8 swapped 914. I suggested that he should probably start to learn about them from a well sorted out car and then expand from there. The next thing I wanted was to help understand the 914 community and 914world.com. There are so many cool builds that have been done and there are some great people in the community who can help. So we took the car down to him and introduced him to a few people like Marty and Matt at MSDS @Maltesefalcon.
We then left the car with him for about a month.
that is soooo cool!!!!! big fan of the F&F franchise, tell him he has fans here and stoked for his return and his character's "resurection" in #9!! hope he gets into the community here and so cool for you to help show him the ropes with his 914 adventure. I dont think he will be drifting the 914 much unless that v8 swap car is what he's driving.
so
aka Han/Sung!!!Posted by: Cairo94507 Sep 3 2020, 09:06 AM
Anytime we can raise the profile of the 914 to bring it further into the pubic eye, the better for us. I am tired of people asking, "Is that a Fiat?"
Posted by: preach Sep 3 2020, 03:52 PM
Mike I followed your whole ride on IG. So epic.
Thanks for sharing that.
Posted by: Matty900 Dec 4 2020, 01:15 PM
that is soooo cool!!!!! big fan of the F&F franchise, tell him he has fans here and stoked for his return and his character's "resurection" in #9!! hope he gets into the community here and so cool for you to help show him the ropes with his 914 adventure. I dont think he will be drifting the 914 much unless that v8 swap car is what he's driving.
so
aka Han/Sung!!!Sung did make it up to West Coast Rally with Glen Cordell and a few friends. He had a great time and enjoyed the community. It was a special event for him to bring his own 914 to an event and like many of us going to our 1st 914 rally, he was working on it right up until (past) time to leave for the event.
He was able to drive it up from LA to Santa Rosa (North of San Francisco) with no issues.
I took some drone shots, so I couldn't resist putting this together. (Just wish the hood was down)
Attached thumbnail(s)
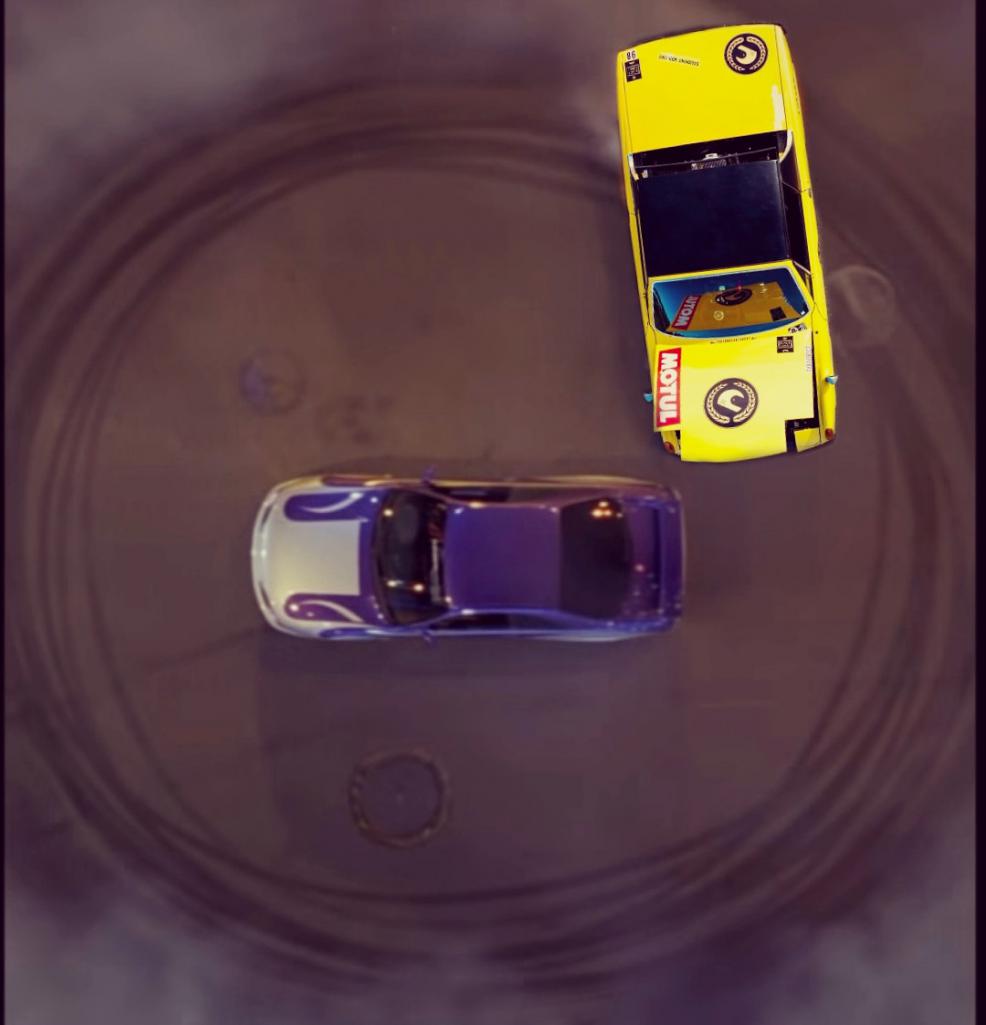
Posted by: Matty900 Dec 4 2020, 01:21 PM
Anytime we can raise the profile of the 914 to bring it further into the pubic eye, the better for us. I am tired of people asking, "Is that a Fiat?"
Well Sung will definitely be raising the profile. He has some pretty big plans for the 914's He plans on building 10 or 11 Singer level 914's that will have his own signature touch. They are going to be pretty amazing cars and will get a lot of attention, so you may want to grab another 914 while you still can because I think that things are going to get interesting.
Posted by: Matty900 Dec 4 2020, 01:26 PM
Mike I followed your whole ride on IG. So epic.
Thanks for sharing that.
Thank you brother, that actually means a lot to me. I tried to share as much as I could from the road but I got some epic gopro shots as well that I will endeavor to make a cool watchable video out of.
Powered by Invision Power Board (http://www.invisionboard.com)
© Invision Power Services (http://www.invisionpower.com)