Printable Version of Topic
Click here to view this topic in its original format
914World.com _ 914World Garage _ Oldest 914 restoration know to man
Posted by: 914forme Jan 23 2017, 08:58 PM
Well I am pretty darn excited to start this project.  It has been a long time coming.
Oldest 914-6 Restoration know to man has just gotten kicked into high gear.
The back story:
My father had owned several sports car and sporty cars in his life. His then current pride and joy was a Lotus Elan. That car gave me my first addiction into speed and driving fun. It was 1970s and I can remember sitting in the passenger seat, going down a road, top down. Wind was blowing through my blond curly locks. Yes I did have hair  And all I could see was the wood dashboard in front of me, and if I looked out the side, I could see the tops of the phone poles. If I looked to my left I could see my father grinning from ear to ear, like a cheesier cat. The other items I remember from my Lotus days was my father constantly under the hood. And the fact it was so low, that we would drive under the parking lot gates.
So it was a sad day when the lotus was sold. He did it just the same as I would have if in his shoes. He sold it to get the money to build his house. Dad by trade was an architect, I suppose he still is, he is just not practicing any more. So he built a very nice modern house for the three of use, and we moved. Boring cars filled the driveway at this point. A Ford Pinto, yes the blowy up kind. And an Audi 100, that was beige. That car was purchased wrecked. My father fixed it all up, and well we found out why it was wrecked. Every time it rained that car got hit. You would be sitting at a light and bam, rear ended. Driving down the road and get T-boned. It was crazy. Mom and Dad sold that car for all things a Triumph Stag. Really a lovely car after my father rewired the entire thing to exercise the Lucus Damons.
One day leaving his office he looked over at the repo lot next door. There sitting rather sadly at the back of the lot was a bright orange Porsche. Dad’s co worker and fellow car rebel rouser convinced him to go over and take a look. He knew it was a 914, he did not know until he got to the back of it what it really was. Sitting on two flat tires, with steel wheels and ugly hubcaps was a 914-6. Not sure how, but he got the money together and bought the -6. I can remember riding it just once. Not far from home we heard a odd sound coming from behind us, Dad shut off the engine, tossed it into neutral and we coasted home. Lucky it was a down hill run. Pushed it into the garage, and all hell cut loose.
Diagnosis from all his SCCA buds was more than likely a bad chain tensioner. Need to drop the engine and see what was up. Dad being Dad decided that was the perfect time to take it down to a almost bare chassis and start restoring the car. This was 1976 the car is only 6 years young. I spent many a day and night out in the garage with dad. He would be working on the -6 I would be playing like I was driving it.
Years past as I got older, I got into racing, my father supported me. First up was the gravity drags otherwise know as soap box derby. I ran these for three years until I got bored with it. Then cam motorcycles and motocross. We then switched to auto-x and that stuck with me for the rest of my life.
We also worked on a bunch of cars in that time frame. The first one we did together was when I was 14. It was a 1965 Jeep CJ5 he traded for some work we did on a guys basement. We got that finished and well Jeeps are not my thing. So we got Karmann Ghia, built it into a sleeper with bunch of parts we had from a 914-4 parts car. Redid the engine with a type-4 used a 911 5-speed, and all the suspension was redone. Going down one of the roads in the area, I keep hearing this loud roar of a V8 coming up onto me, we would hit the curves and it would fad away, and finally got out of the twisties, and heard it again. It was a guy in a vet, who I must have been really pissed off, as he could not keep up with my little VW in the corners. When I went to college dad drove the car to keep it “limber”.  His six sat on the side line.
I graduated, got a job with Nancy Lowe, which also meant they found out I was into 914s and well I got to know Jon also. My daughter was born, and a month latter we found my 914-4.
Dad helped us build our house, and work on various cars, and vans, keep our budget down a bit as a young family. A few years ago, I got a Miata for my wife, for our 25th anniversary. We where married in 1989. The car built in November of 1989. She wanted one back in 1990, it is like I made the dream come true, only 25 years latter. I restored that car, and took my dad for a ride, he was hooked. And Mom was hooked too, so they found a 1994 M edition they liked. We picked it up, and I restored that car for them.
Years have passed and I have become blessed enough to have a career that I can afford to give a little back to my parents.
The Plan:
Originally it was going to be how I remembered the car. It did not have the sail vinyl or the warts on the front fender. He also had a top painted to match. I would like to build it the way he had envisioned it. As of today that plan might have changed. Some where along the way, he put the warts back on, and added the sail trim and vinyl and added a stock top.
I still plan on adding the following items.
I have a bunch of vintage speed parts I have been collecting over the years and picked up a few just recently. Thank you Scott, and Kerry your parts will be going to good use. And thank all you people who sold me stuff at the swaps like it was worth nothing in the 80s and 90s.
Engine: rebuild, add pressure feed tensioners, and turbo valve covers. Other items we will see what is wrong with the engine, it has been sitting a very long time.
Transmission: Add a LSD, convert the car to a side shifter, using Tangerine Racing parts, and JWest shifter.
Suspension: Add bushings, Bilstein Shocks, H&H Swaybar up front, maybe a stock rear swaybar. I have a set of mono ball front strut supports, and rear adjustable spring perches. Will also add turbo tie rods and a rack spacer to help with bump steer.
Brakes: will be stock, if not functioning PMB will get a call, and parts shipped out to them for rebuilding. I will also add bronze bushings to the pedal cluster.
Wheels and tires: I have a set of stock Mahles, hate to drive on them. I currently have a set of fake Mahles on it. Still looking for a set of Minilites in 6.5x15”. I should have never sold them.  I purchased my first set of Jon and Nancy Lowe. They used them on Nancy’s yellow 914-6 for autocross.
Fuel: Tangerine will come to the rescue again with a set of Chris’ fuel lines.
Electrical: JWest fuse box will be added, along with Spoke LEDs. A set of Period correct Cibie Z beams will be added, and a set of Cibie fogs will be added also. Audio wise I will add a small bluetooth amp, and leave the stock radio in place, just disconnected from the speakers.
Interior: Stock, but I will add a set of seat heaters to keep cold at bay. If passenger seat is not comfy for the wife, we will convert it over to a late style seat and back pad. At that point maybe change to a set of aftermarket seats. I would love a set of GTS LeMans 
Exterior: I guessing it will be stock now. Though I am torn I liked the clean lines with out the sail panels vinyl, and warts, with the painted top. That is how Dad originally wanted it.
If the engine is not up to snuff, I will go with a small bump using Nickies, and a bump in compression. And some different cams, and a set of larger heat exchangers. Though I am really hoping to keep the costs down and live with the stock stuff it is in good working order.
Almost everything I will be doing is completely reversible, except a few exceptions and even they can be fixed if people want to drive a 914-6 with out sway bars. I would gladly do it if some one offered me stupid money for the car. As of right now it is more about the memories and giving back to my father.
So now I just need to get cracking: Wanting this done before April, would love to take Dad for a drive this spring. So what that also means, my 914 which is part of the Build Off Challenge will be resting for a little while. I had already packed up most of the part in anticipation of starting this project.
This is the garage it was stored in for 40 years.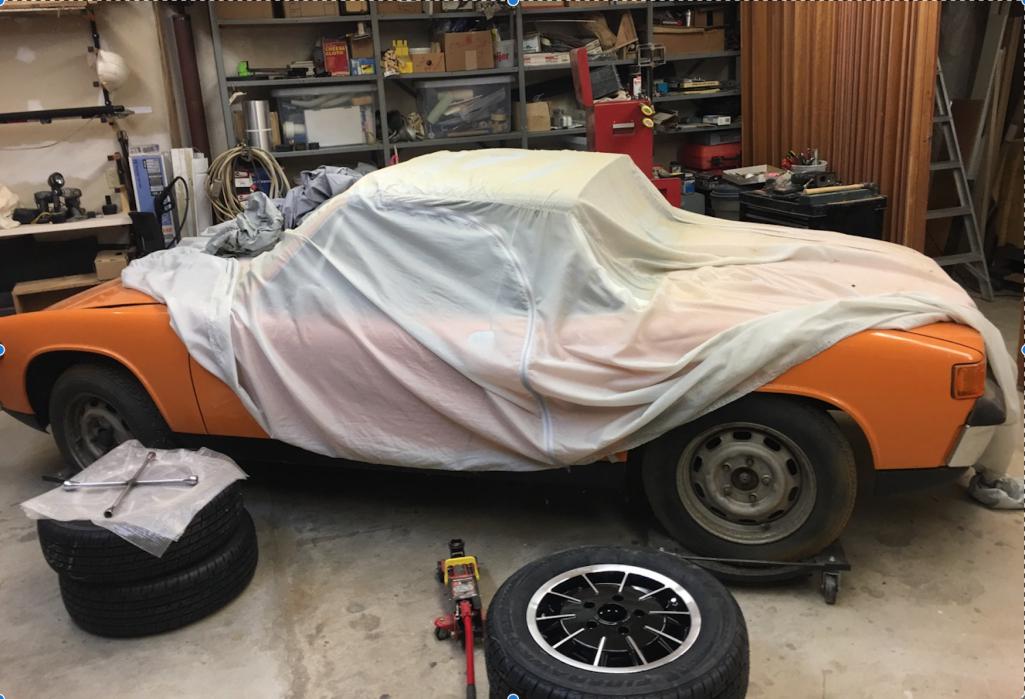
Saturday I brought it to my shop. Rented a U-haul trailer as all my trailers are up at the farm. Car has not seen the light of day in 40+ years.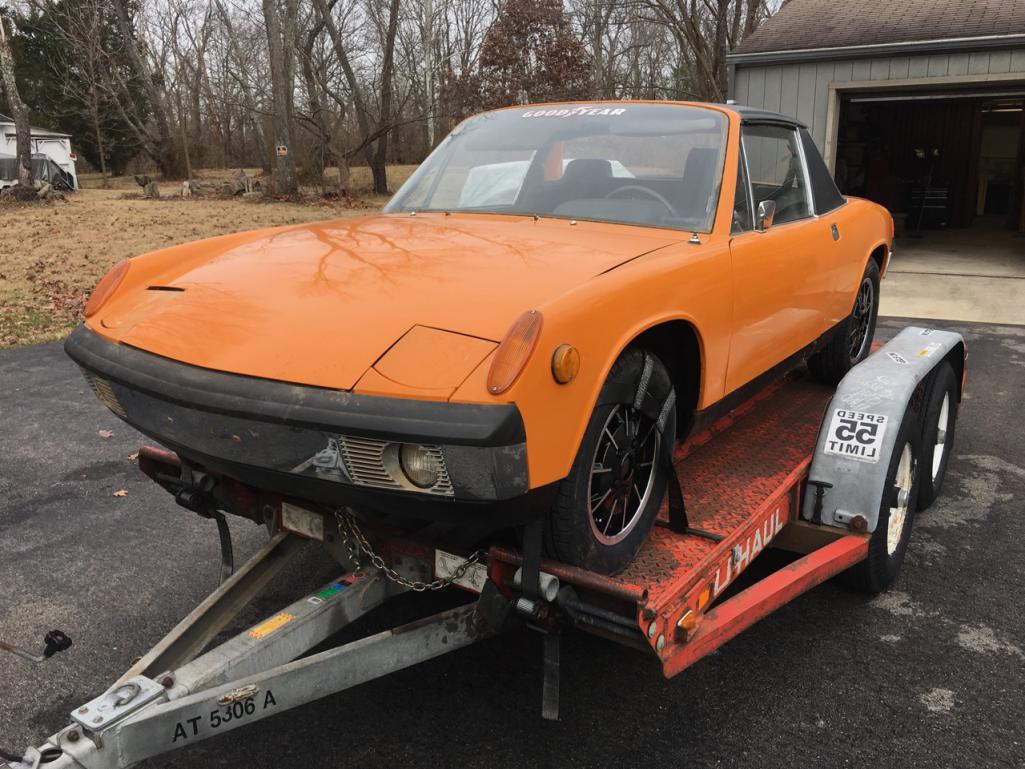
Now the for the fun part! Determining what is left todo on the car, and come up with a game plan.
Posted by: 914Sixer Jan 23 2017, 09:07 PM
We will be waiting for the progress reports ![popcorn[1].gif](style_emoticons/default/popcorn[1].gif)
Posted by: mepstein Jan 23 2017, 09:13 PM
Screw the build off challenge. This car's the prize. Congrats!
Posted by: Cracker Jan 23 2017, 09:18 PM
Stephen - I really enjoyed your read - excellent. Good for you and I am looking forward to seeing the progress. Cheers!!!
Tony
Posted by: amfab Jan 23 2017, 10:29 PM
Great story, It was my dad that got me into Porsche's as well. Looking forward to the thread.
Posted by: SKL1 Jan 23 2017, 10:50 PM
Yes this will be fun to follow- I too inherited the car gene from my dad and grandfather, and definitely passed it on to both my boys.
Got my 914 in the winter of 1970-1971. My dad liked it so much, he got one that spring. It joined the '69 912 my uncle (my dad's only brother) had.
Luckily dad was around to enjoy many of my toys (and his) and we went to many a race at various tracks around the midwest, usually in some type of Porsche until 1992 when he passed. Wish he was still around as I know he'd love a ride in the Spyder! Or either of the 914's!
Enjoy the rebuild, and enjoy taking good old dad on another ride !! My two 914's will stay in the family, one going to each boy... figure someday when I'm old and feable, they'll take me for a ride!!
Posted by: tygaboy Jan 23 2017, 11:13 PM
Awesome.
Can't hardly wait to see you achieve your vision for this very special car.
You're a good son, son. Your dad is proud.
Posted by: Coondog Jan 23 2017, 11:26 PM
A honorable project your doing for your dad....... 
Posted by: sixnotfour Jan 24 2017, 02:26 AM
 Nice, I have my Dads -6 too,
Posted by: RobW Jan 24 2017, 04:55 AM
There's something about Dad's cars.....
Enjoy the ride!
Posted by: Cairo94507 Jan 24 2017, 08:39 AM
What a terrific read. I am looking forward to seeing this Six returned to the road. 
Posted by: mb911 Jan 24 2017, 03:41 PM
Very cool how come larger heat exchangers? I would be happy to sell you a set should you need them but is it staying 2.0 or bigger?
Posted by: gms Jan 24 2017, 06:12 PM
looks like a great project, does it even need paint?
Posted by: porbmw Jan 24 2017, 07:45 PM
NICE!
Looking forward to some more pics...and progress reports!
And...good question...does it really need new paint ( I know, I know..these cars suffer from the elements...just askin')
Posted by: 914forme Jan 24 2017, 08:32 PM
Thank you all for the supportive comments.
Ben, No idea why I think I need a set of larger heat exchangers. More than likely no, as I don't plan on going large with this engine.
Glenn, no it does not need paint. I cleaned a section tonight just to check it out.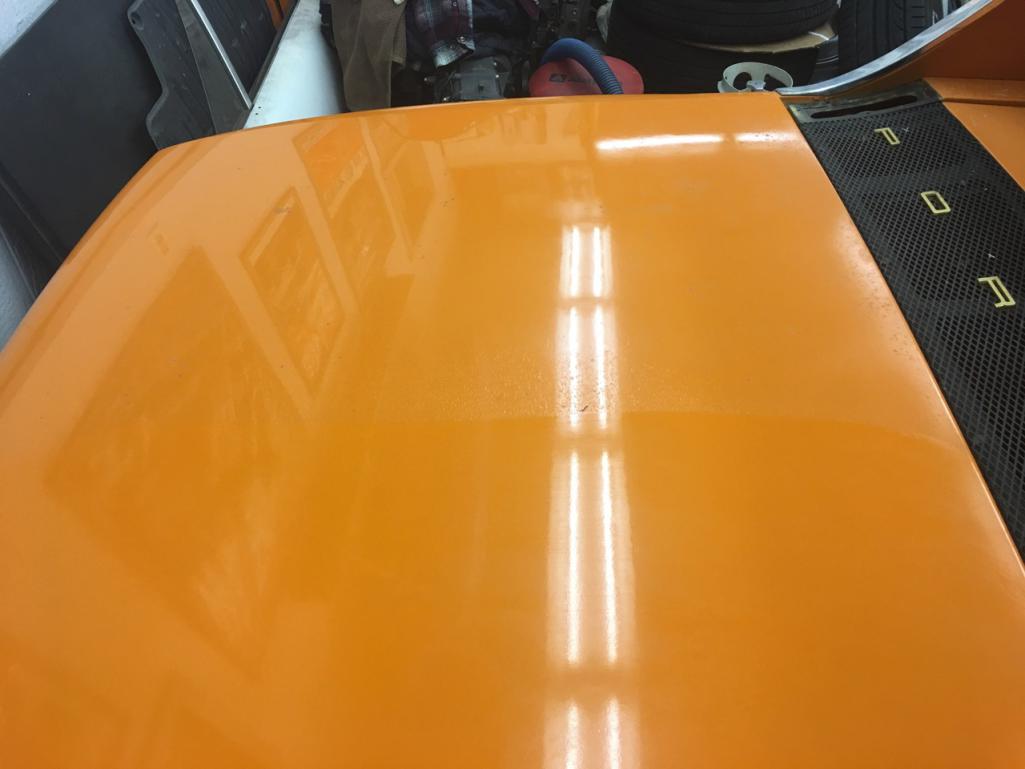
I think it will clean up very nice.
Cleaning the shop as some of the parts came to the shop with the car. And well it going through them all, as I had a bunch of -4 parts also with the parts stash. As well as me just dumping stuff in the shop, as I spent the last several weekends helping dad with projects around his house.
Last thing I did was put an ozone machine into the interior as it was a little musty. Hopefully get some time this weekend to assess the car, and see where we are at.
Posted by: Van914 Jan 25 2017, 04:35 AM
Stephen,
Can't wait to see it. Very nice!
Van
Posted by: 76-914 Jan 25 2017, 09:46 AM
Somebody, hide the welder. 
Posted by: 914forme Jan 25 2017, 08:10 PM
Kent,  that being said there will be just a bit of TIG going on with this car. Need to weld in the sway bar re-enforecement. And the rear sway bar mounts.
And thank you Van, looking forward to getting this back out on the road.
Posted by: SixerJ Jan 26 2017, 05:07 PM

Kent,
that being said there will be just a bit of TIG going on with this car. Need to weld in the sway bar re-enforecement. And the rear sway bar mounts.And thank you Van, looking forward to getting this back out on the road.
Can you document how you do the swaybar reinforcement please, mine were just bolted in without proper support and A) need to repair the bent sheet metal B) need to fabricate proper mounts
Great story and history & looking forward to the next chapter. Wish I could say the same about my Dads cars.......Austin Maxi and Morris Marina Estates were hardly setting my world alight as a kid
My mums frends 911 Targa though, now we are talking
Posted by: 914forme Feb 11 2017, 07:32 PM
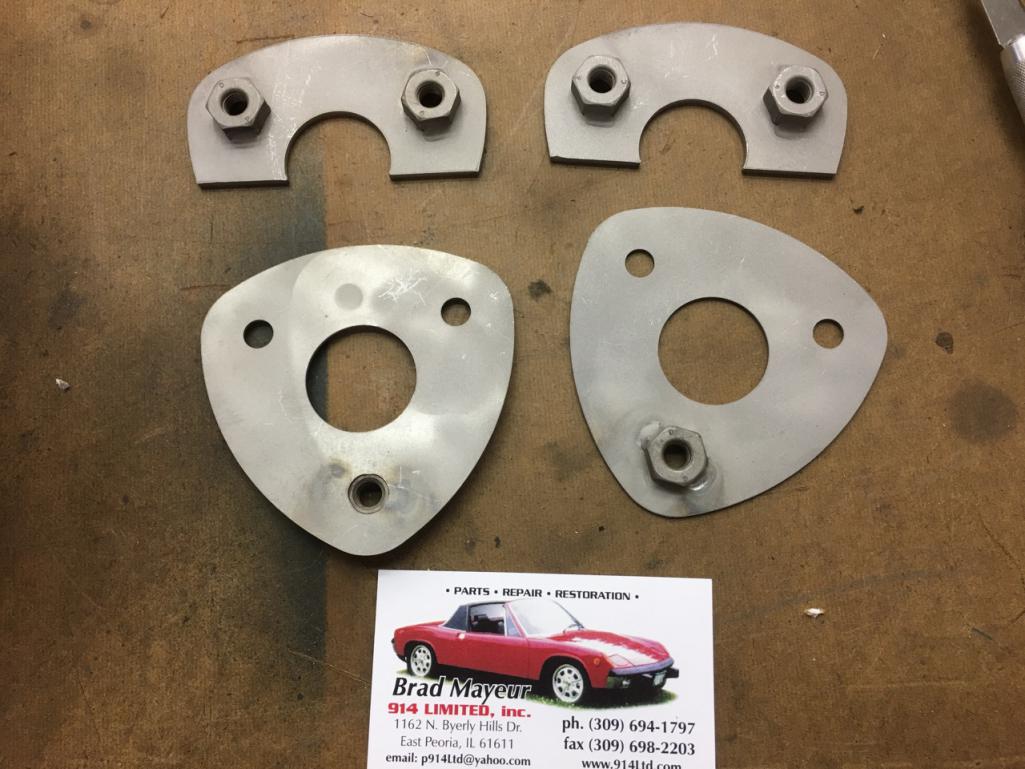
Can you document how you do the swaybar reinforcement please, mine were just bolted in without proper support and A) need to repair the bent sheet metal B) need to fabricate proper mounts
Thanks and well I originally did my own plates, but stumbled into http://www.ebay.com/itm/391693112958?_trksid=p2060353.m2749.l2649&ssPageName=STRK%3AMEBIDX%3AIT.
So I thought they where unique enough to pay for the idea. Brad did a great job on this one.
I also sourced the parts I need to install a latter style passenger seat. Thanks to Garold and his supply of parts cars, I got the front adjuster mount and a nice looking adjuster. And Stodard's came has a decent price on seat hinges and the sheet metal bases.

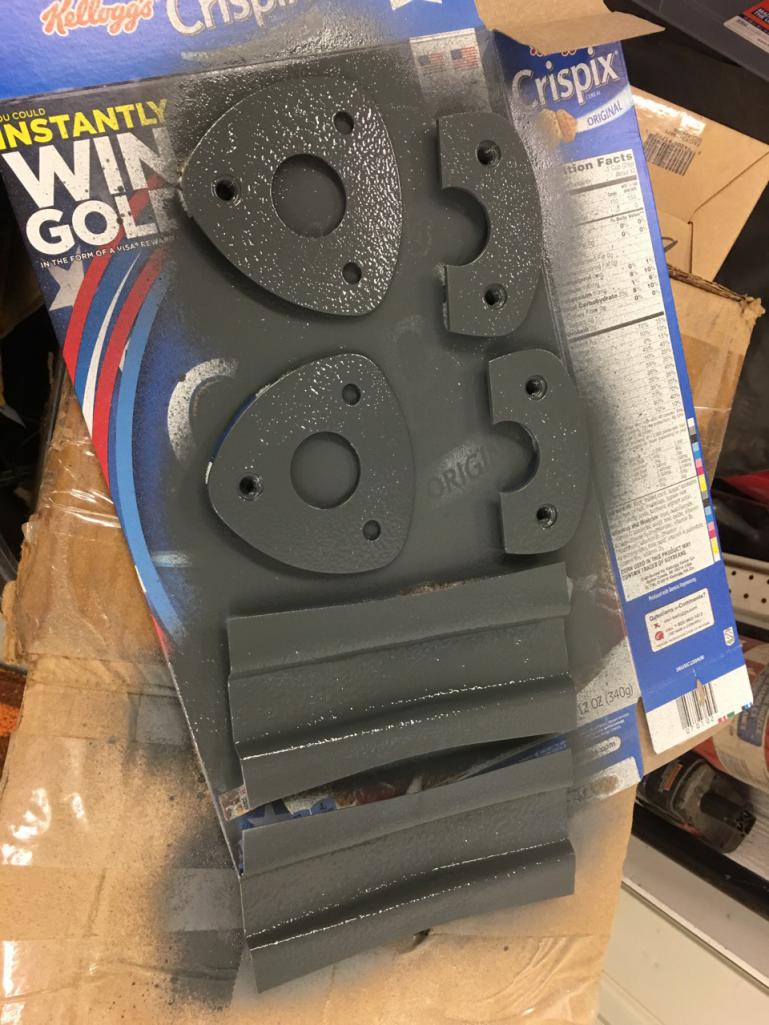
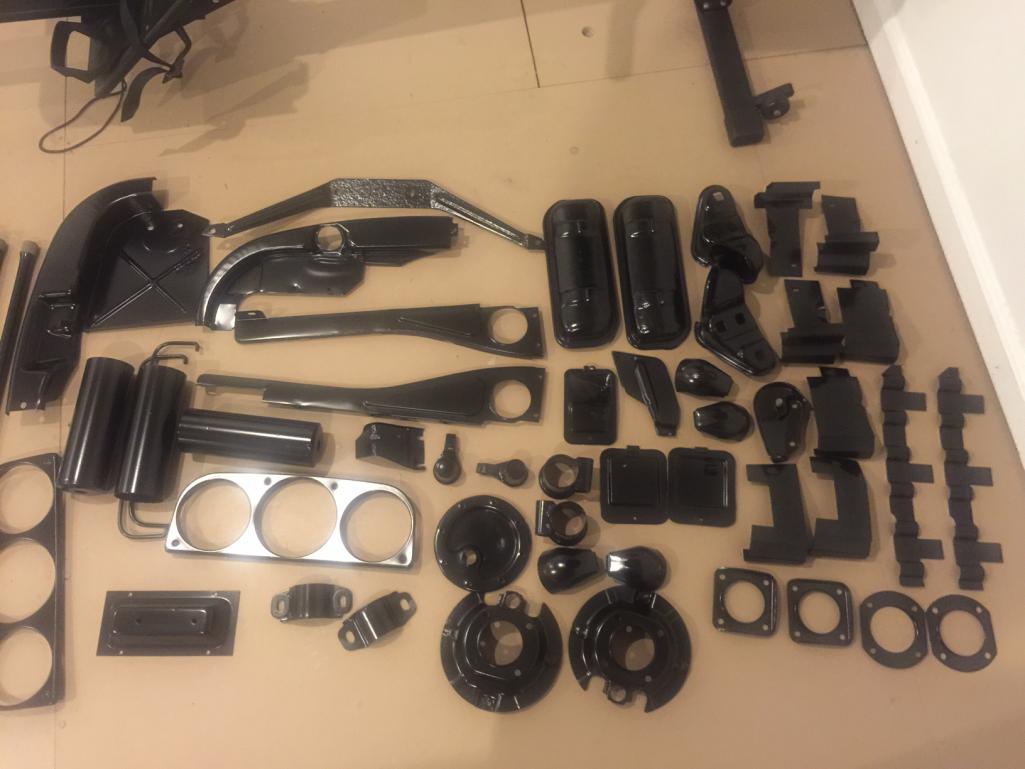
So since it was a nice day here in Ohio, I got out some zinc spray and coated the backside of these parts. That will seal them well and provide protection after I weld the pieces in.
Posted by: 914forme Feb 21 2017, 09:00 PM
Well I continued on with my work over the weekend.
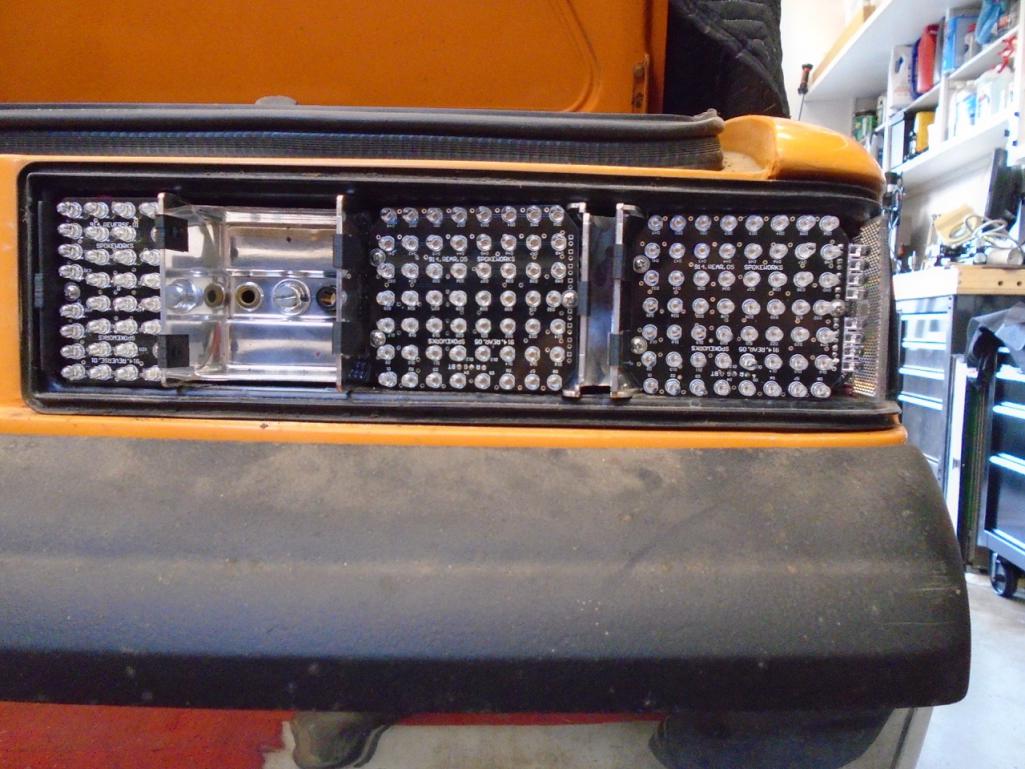
Installed a set of Spoke LEDs, and Cibie Z beams.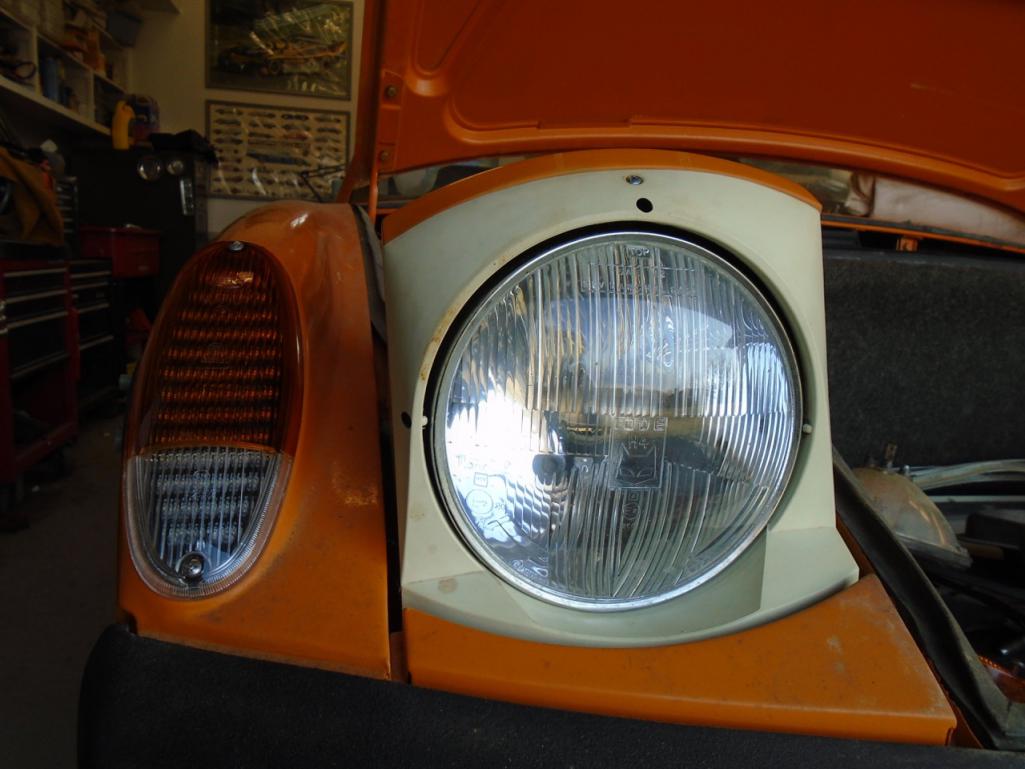
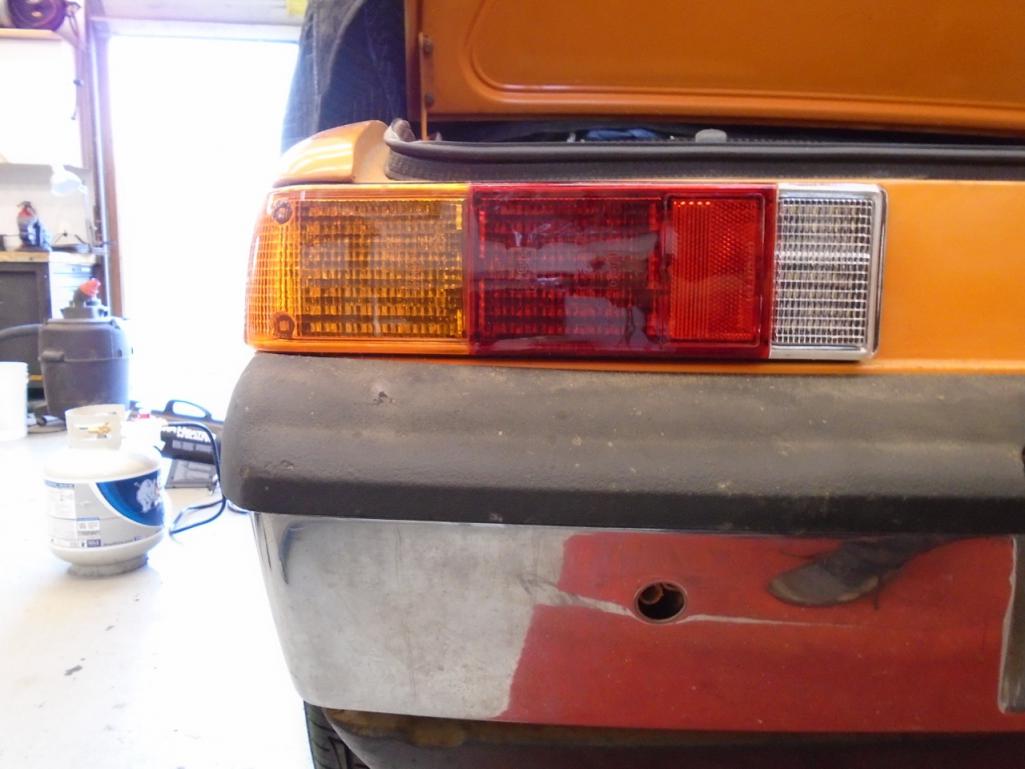
I then did the same on the rear, had to replace one of the Hella Rear lenses, thanks to Kelly white1975 I had a very nice unit to replace it with. 
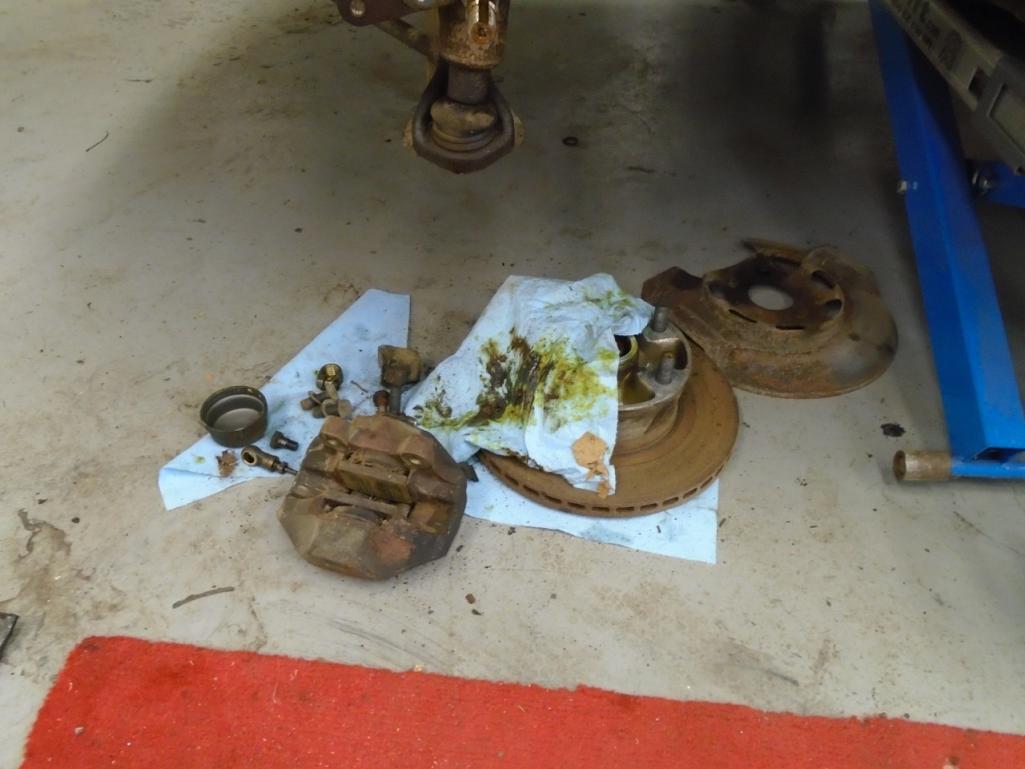
I then started working on the front suspension and have found out what happens to a car that sits around for 40 years. Everything rusts up, and all the fluids turn to a pungent nasty smelling fluid that makes gear oil smell good.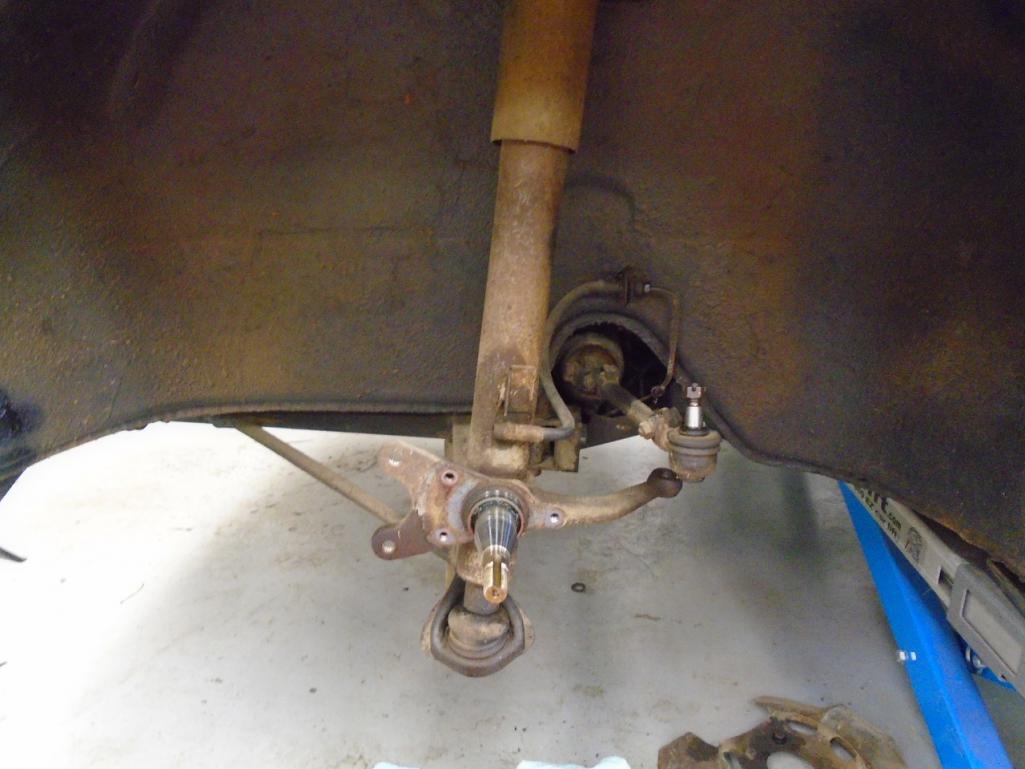

There where two trunk board in the front trunk  which made a perfect place to build a mouse condo.
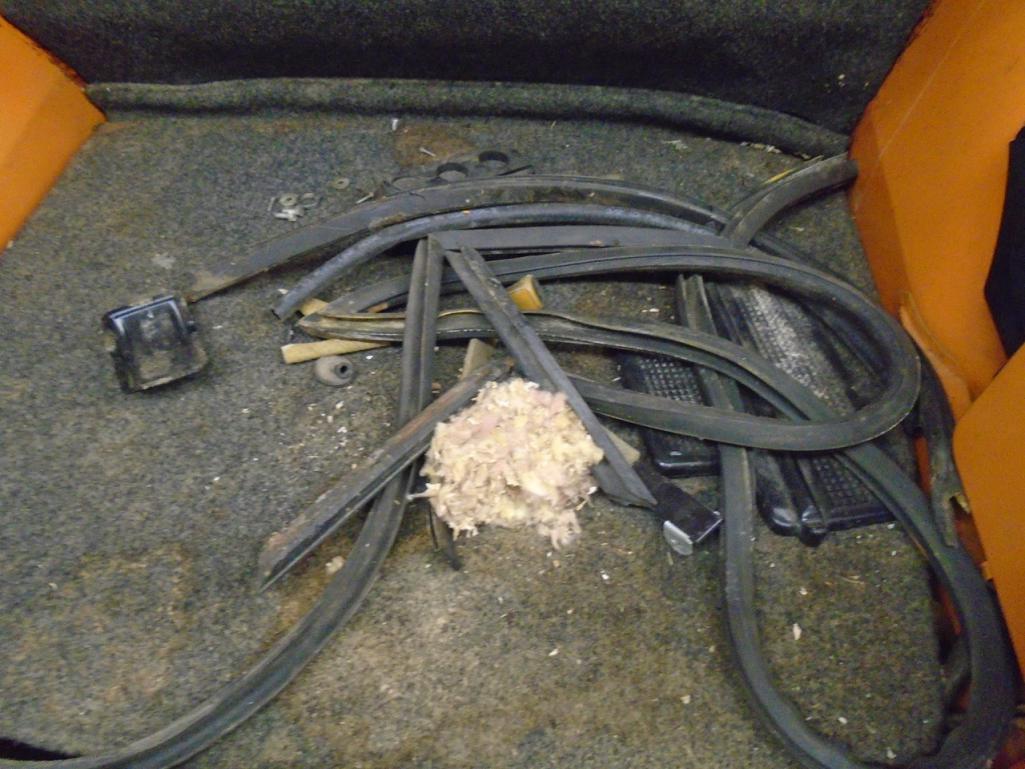
And then I found out why the brakes might not have worked as intended. 
Somebody must have pretty strong leg to pull that off.
Looks like Eric is going to get a bunch of brake parts for his crew to rebuild.
Posted by: Gcthielen Feb 27 2017, 09:18 PM
Stephen,
Great story! I too am in Dayton and just finished mechanical restoration of a long dormant -6. Please let me know if there is anything I can help you with. I am more of a vintage BMW guy (in fact, the Lowe's used to instruct for us at the BMW D/Es at mid ohio in the late 80's) but I have learned a lot going through the six.
George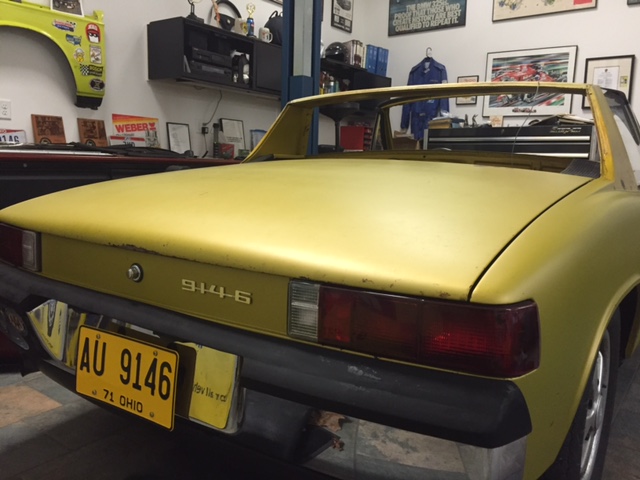
Posted by: Cairo94507 Feb 28 2017, 07:29 AM
Gcthielen - Is that a '71 Six in gold metallic? If so, if I can ask, what are the last 4 of the VIN?
Cheers, Michael
Posted by: mepstein Feb 28 2017, 08:22 AM
I know you already have the parts but if you want to keep the passenger seat original, tangerine has a bolt in kit.
Posted by: 914forme Feb 28 2017, 08:57 AM
George Cool project, we will have to get together at some point. The Lowe's where very active in anything that had to do with driving at Mid Ohio. They loved their track time.
Thank you Mark, I ws getting ready to order Chris's parts and drop these up for sale.
I do that a lot
Posted by: Gcthielen Feb 28 2017, 09:26 AM
Gcthielen - Is that a '71 Six in gold metallic? If so, if I can ask, what are the last 4 of the VIN?
Cheers,
MichaelYes sir! Just a bit before yours...0347!
Posted by: rick 918-S Feb 28 2017, 07:06 PM
Wow! Great car! Great Story! 
And a second Great Car added to your thread! Gold is Cool and rare
Posted by: 914forme Mar 3 2017, 08:57 PM
Thank you Rick it is greatly appreciated
Posted by: 914forme Mar 5 2017, 07:51 PM
So to get you caught up with my progress.
First up, rebuilt the steering rack, all cleaned up repacked, installed new turbo tie rods. All ready to go back into the car.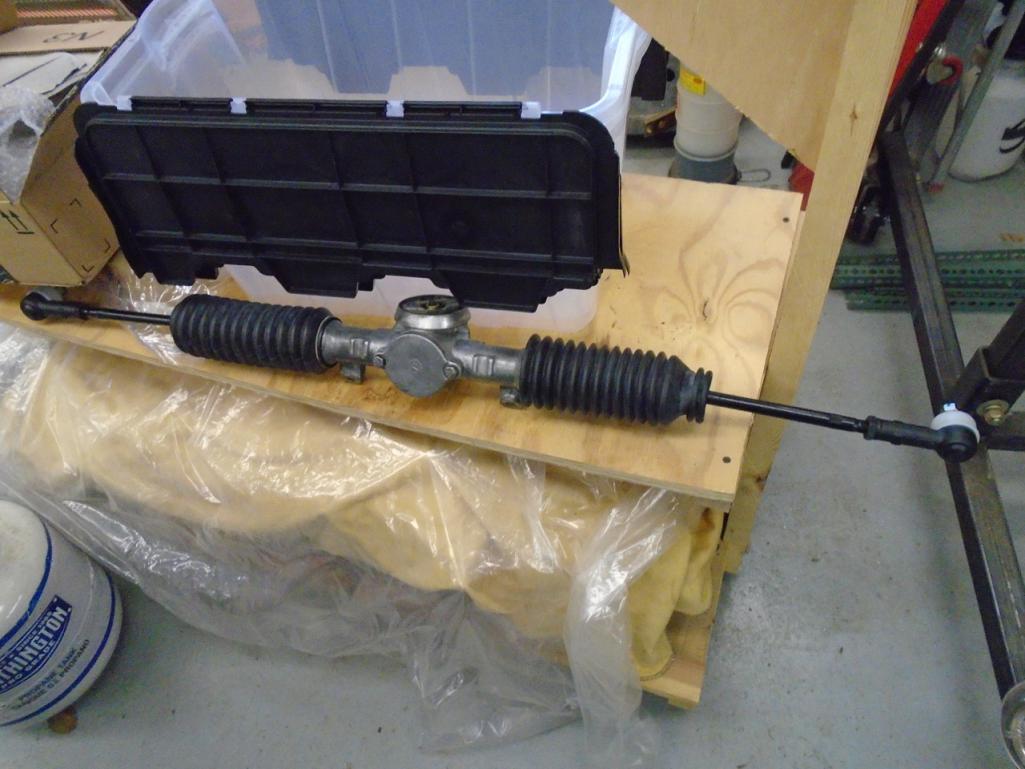
It was warm enough that I got some painting done to finish up the trans detailing Scott did.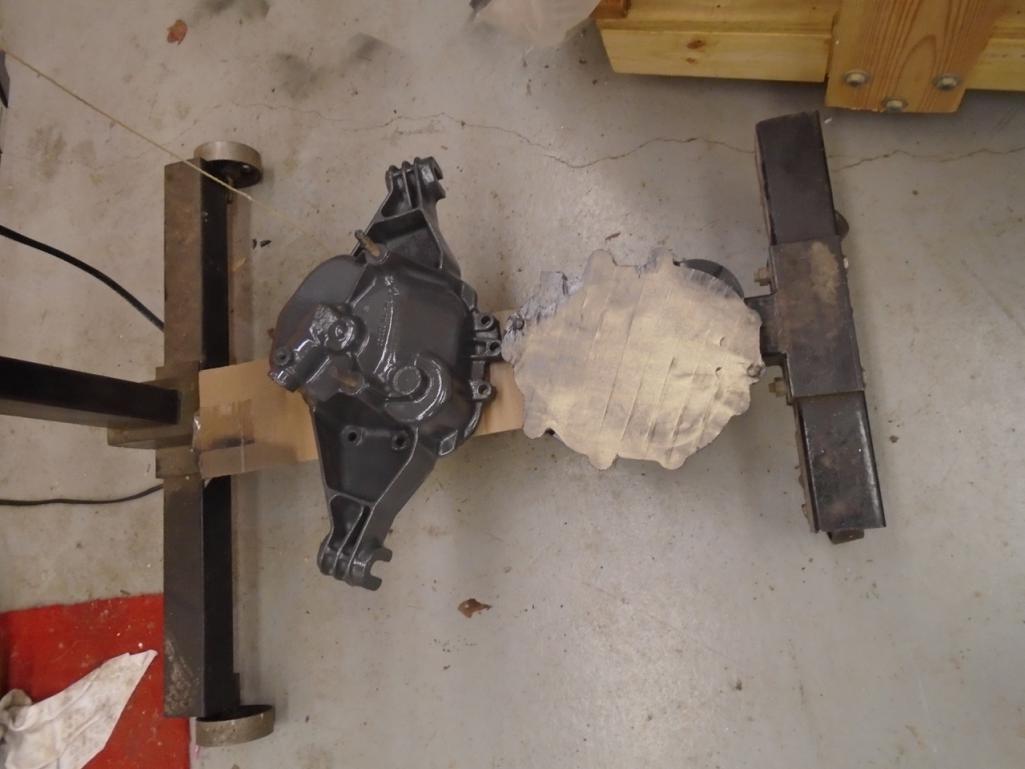
Cleaned up the intermediate plate that I got form Carr914 - This has the boss I need for the stock throttle linkage, to add to Scott's side shifter.
Next up will be installing new bearings and swapping it into the side shifter. Waiting on the LSD I picked up from sixaddict. I was going to put a ZF into the side shifter, but when a Guard TB came up, I had to jump on it.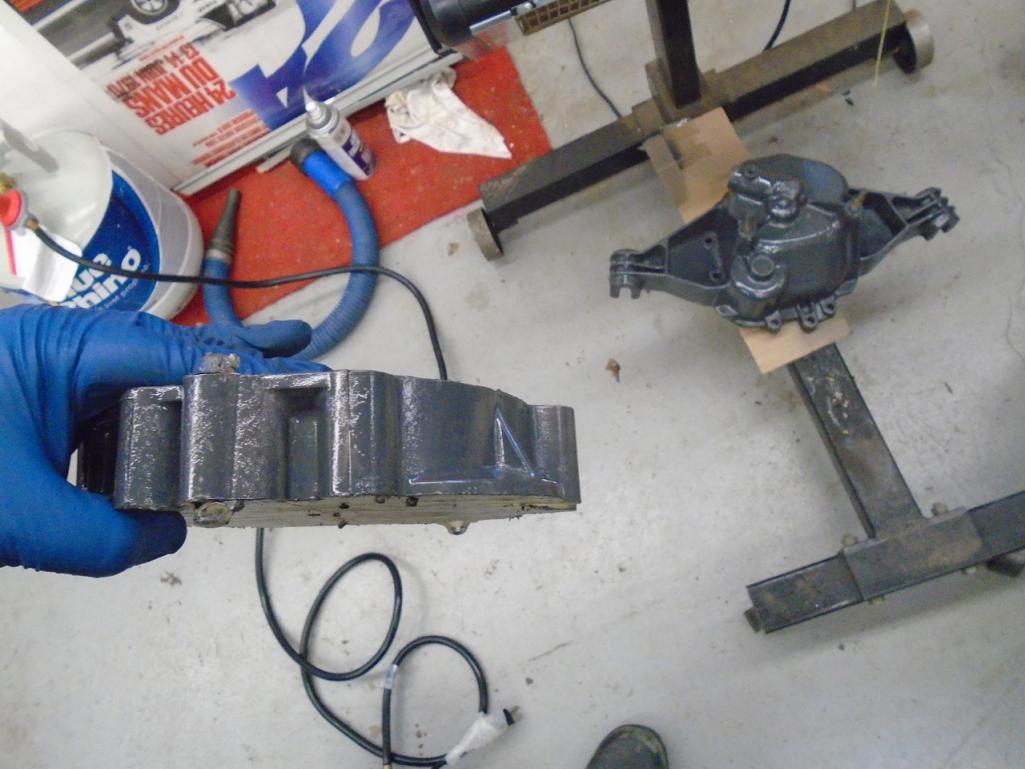
Got all the front suspension off, and all the brake stuff off. All 4 calipers I got the bleeders out with out breaking them. That just saved me a charge from Eric for EDM series, @ $80 a pop, it adds up.
I also packed up the struts to send to Chris, for a minor spindle raise.
Got the bushings off the A-arms, my 20 ton press, and a bearing race puller made short work of this.
I then test cited the Rebel Racing front bushings.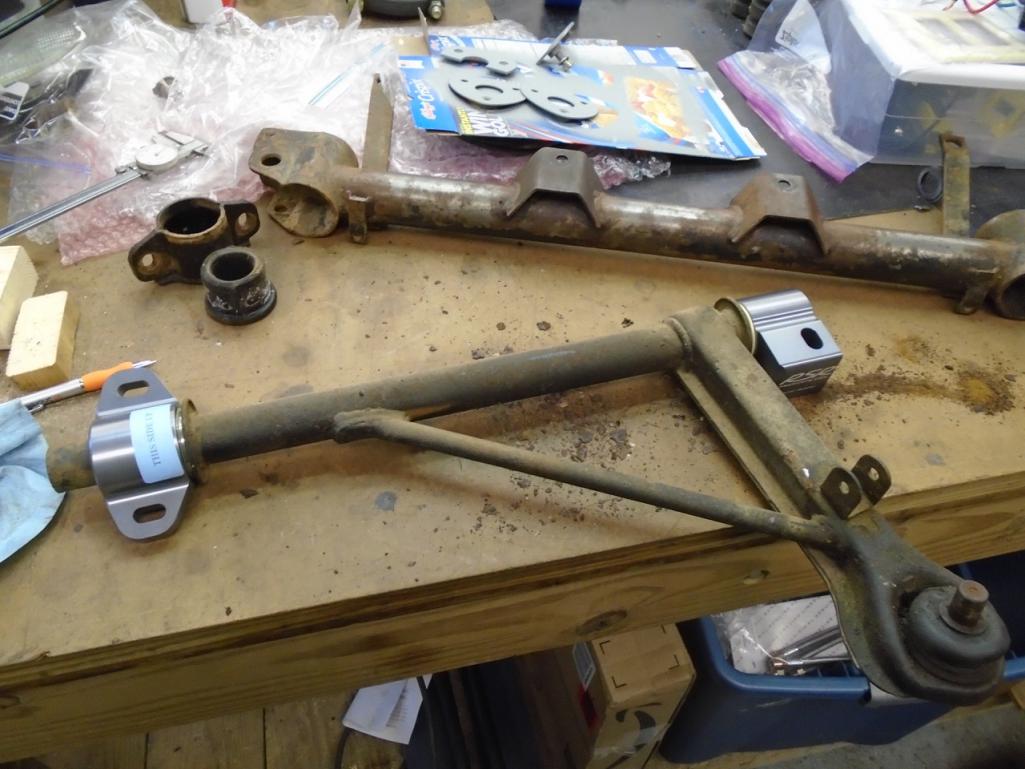
The fit fine, now the question comes down to this sleeve. Are you supposed to JB Weld it to the arm, or Locktite? It is fairly tight, but turns freely.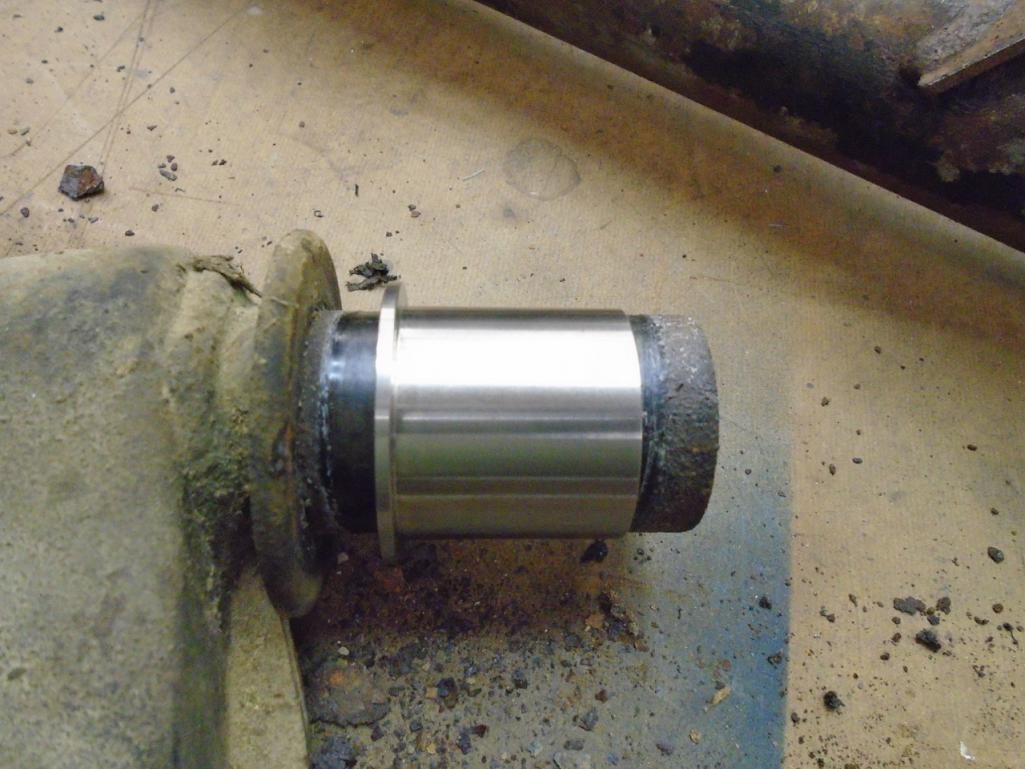
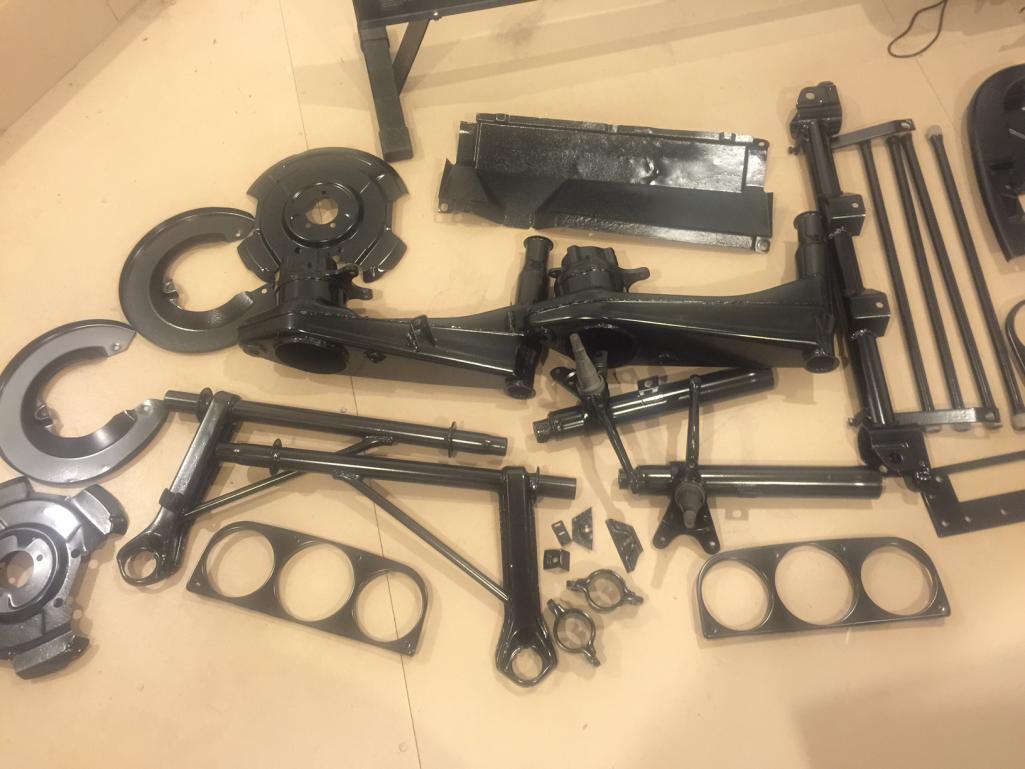
I now have to get these cleaned up, and painted or powder coated, still trying to decide that one. Mind says powder coat, pocket book says paint.
Oh and I got these in on Friday.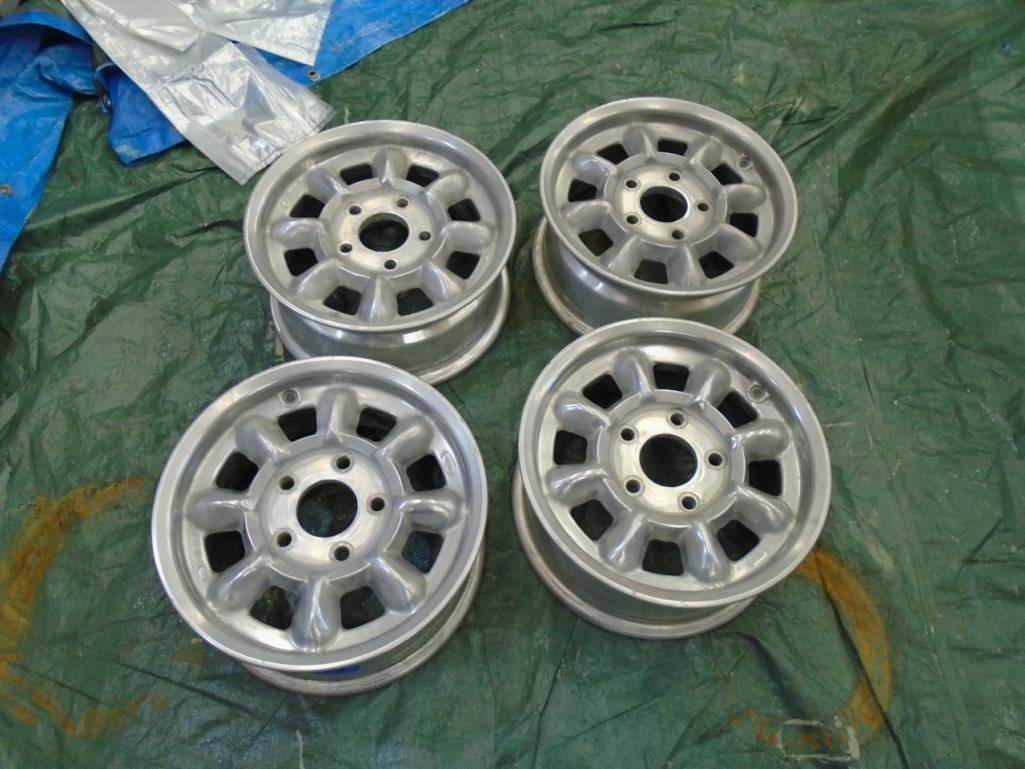
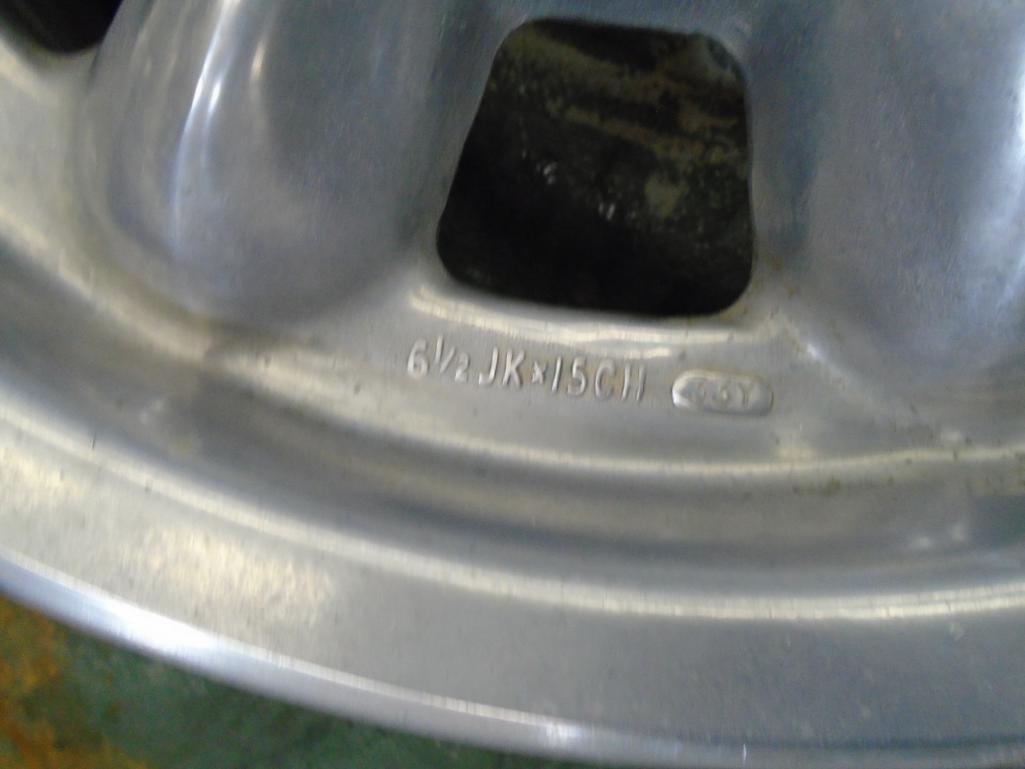
Never had a set with center caps, not sure if I like them. 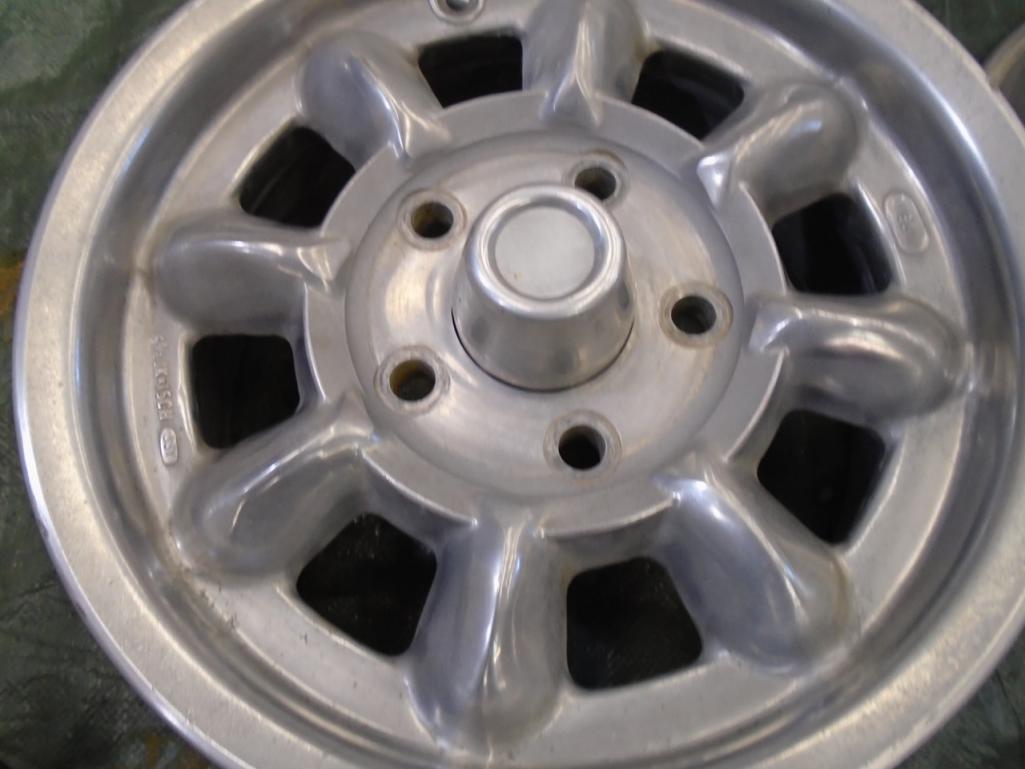
Posted by: GeorgeRud Mar 5 2017, 08:55 PM
I heard that paint my be preferable for the suspension arms as they can then be touched up. The powdercoating does get chipped I've been told. Either way, nice project and I love the Minilites.
Posted by: mepstein Mar 5 2017, 09:27 PM
Shop around on the powdercoating. Shops can really vary with pricing. Powdercoating can save so much time vs diy and when it's done right, it's super hard to scratch or chip.
I got all these parts including the 914-6 oil tank done for $275.
Attached thumbnail(s)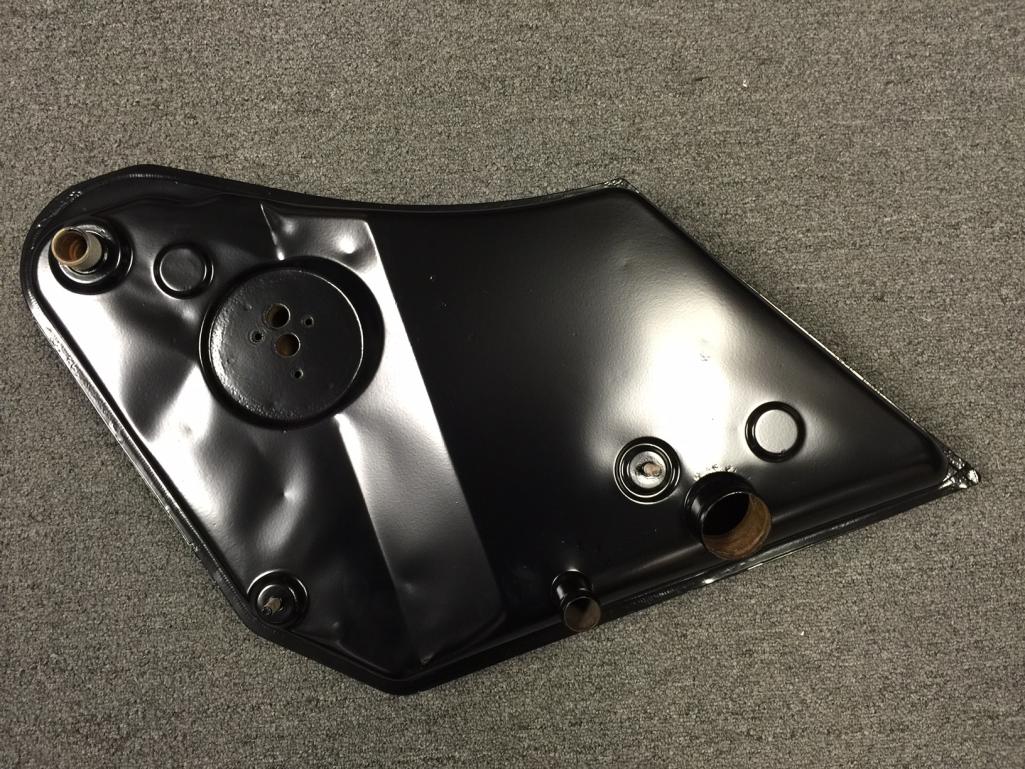
Posted by: 914forme Mar 24 2017, 08:28 PM
Yes, I am thinking I will go with paint for now. I replaced my HF Sandblaster with a Barrel Blaster, great unit, and it is big enough for the suspension cross bar, A-arms.
I put an outdoor LED Flood light in the blaster, it works great
Fixed up my parts washer while I was at it. Added a little giant parts washer pump, a remote oil filter, and a Wix filter. A little 10 gallons of new parts washer fluid from Tractor Supply and I am in business. Upgraded my washer with a new parts washer brush with flow through fluid. Cleans very nice.
Now back to the -6
So far everything has been rust fuzed together. The rear disks where no exception. So I had to get out the big guns.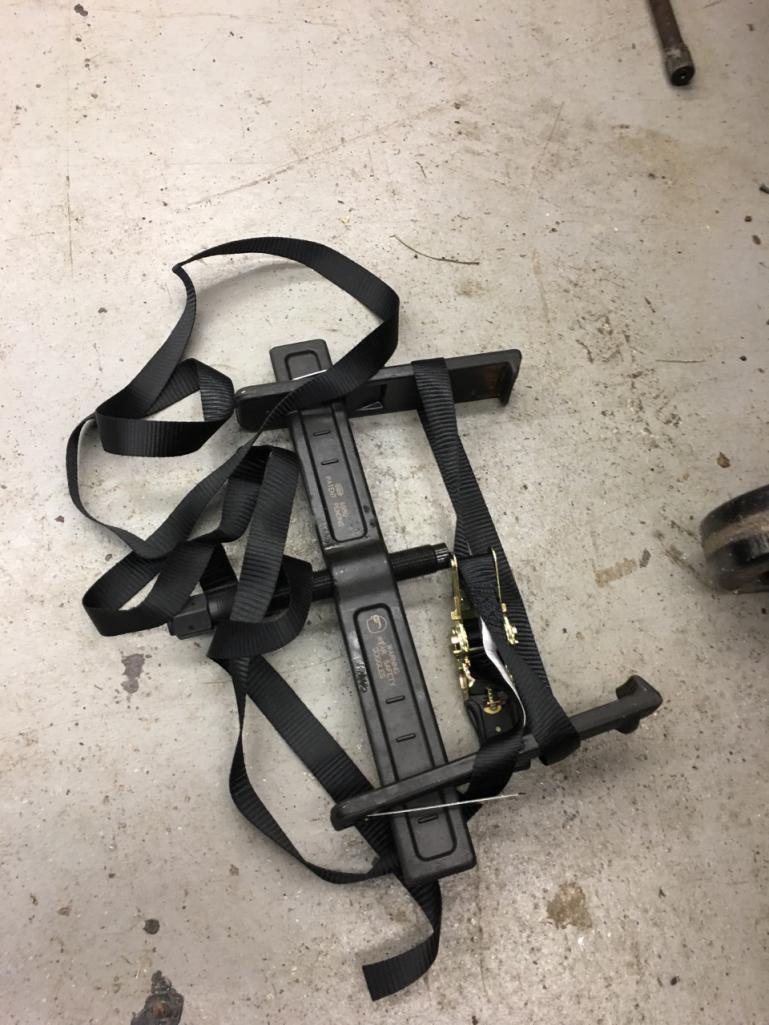
And after a lot of work, several coats of PB Blaster,  and the above puller, and finally I started a new universe with a big BANG!
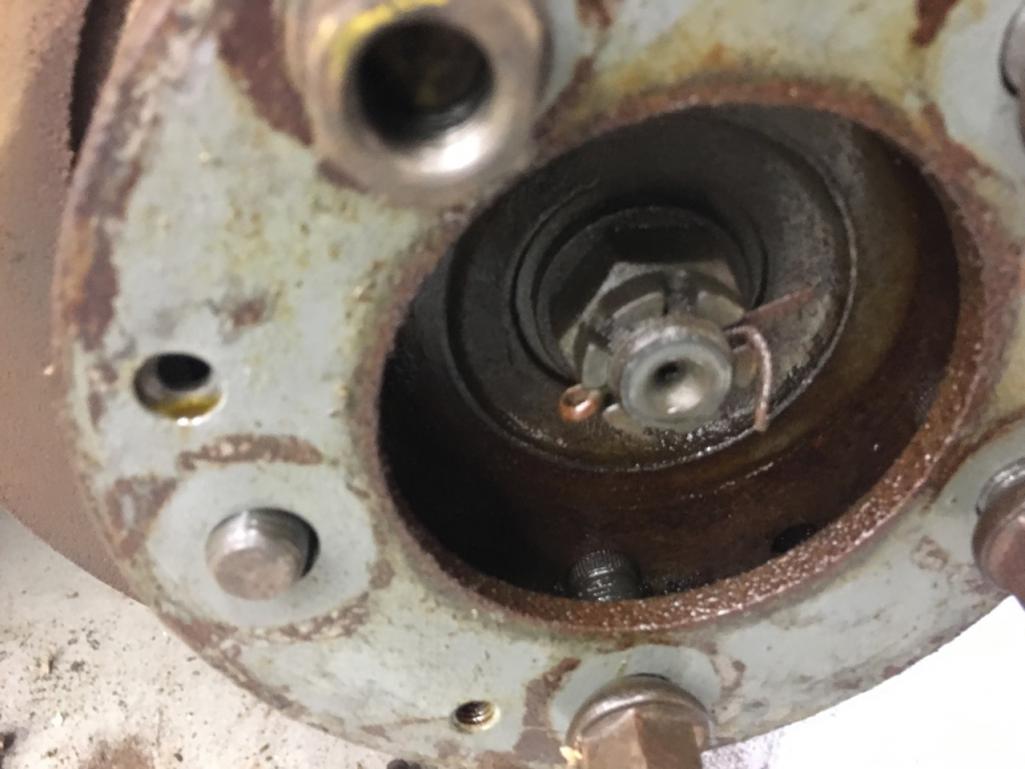
Glad I had a couple lug nuts on it, or else it would shot across the shop.
Working on getting the ball joints off the A-Arms right now, looks like I will be cutting them off Heat, PB, and a 3/4" impact wrench has not budged them. Was looking for some ATF, but found that I have none in the shop  Otherwise I would have mixed it with some acetone, and covered the ball joint nut. Worse case I will mount them in the mill and cut the flange and get new parts.
Posted by: 914forme Jun 6 2017, 08:20 PM
Not a lot of updates lately.
We have been a bit busy at work, and then I have been moving cars. VW bought back my TDI, I miss that car. Drove my truck for a bit, but it gets really old. So we went out looking for a Diesel SUV. Looking at Jeep Grand Cherokees from 2007-08. Why because they have a Merc diesel in them. The Merc will go for ever if taken care of.
And I found wahat I was looking for, started the negotiations, and thought I had it, called the dealer back, and he sold it. But said since you want the Merc engine why not buy a Merc.  The Mere had less miles, more features, and cost 2K less. We purchased the Merc.
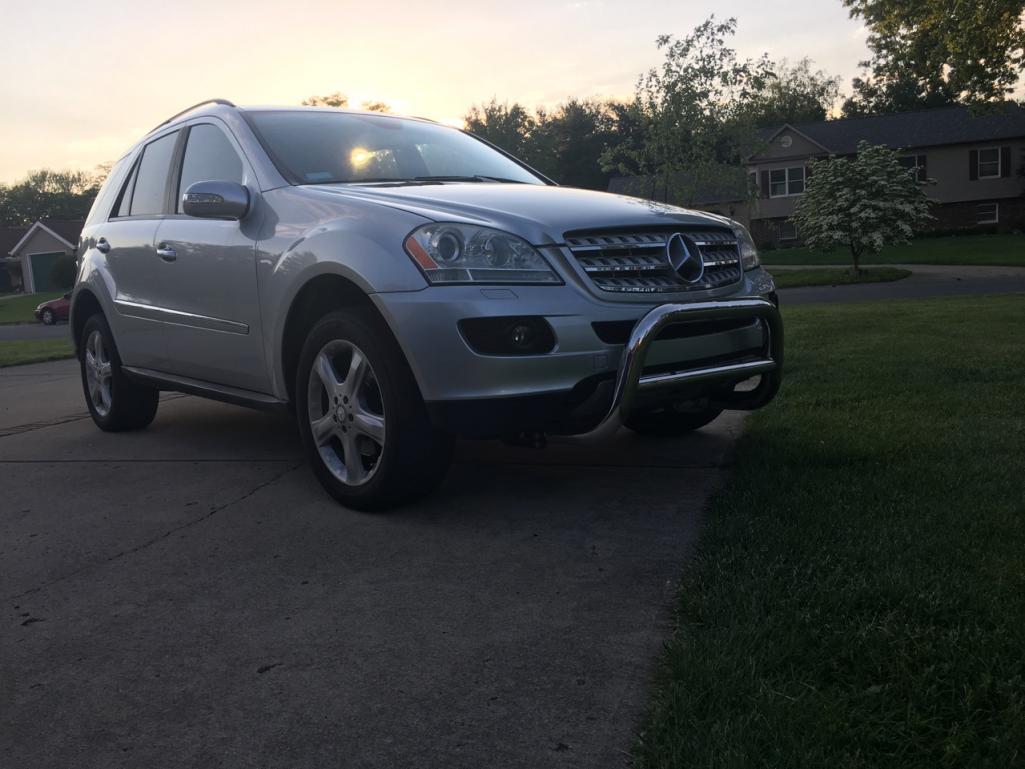
So while I was doing PM on the Merc, waiting for 10 Quarts of oil to be sucked out the top side, I did some work on the -6.
I am changing the trans out for a side shifter, TB LSD, 904 mainsheet, custom gearing, and Tangerine Racing shifter parts, and a Rennshifter. The one issue with the Rennshifter in the 914-6 is it does not have provision for a hand throttle. I thought about using one of Chris' hand throttles but in the end I have a mill so lets make some chips.
First Off I marked it all out with layout dye. Make it so easy to see with my old eyes. 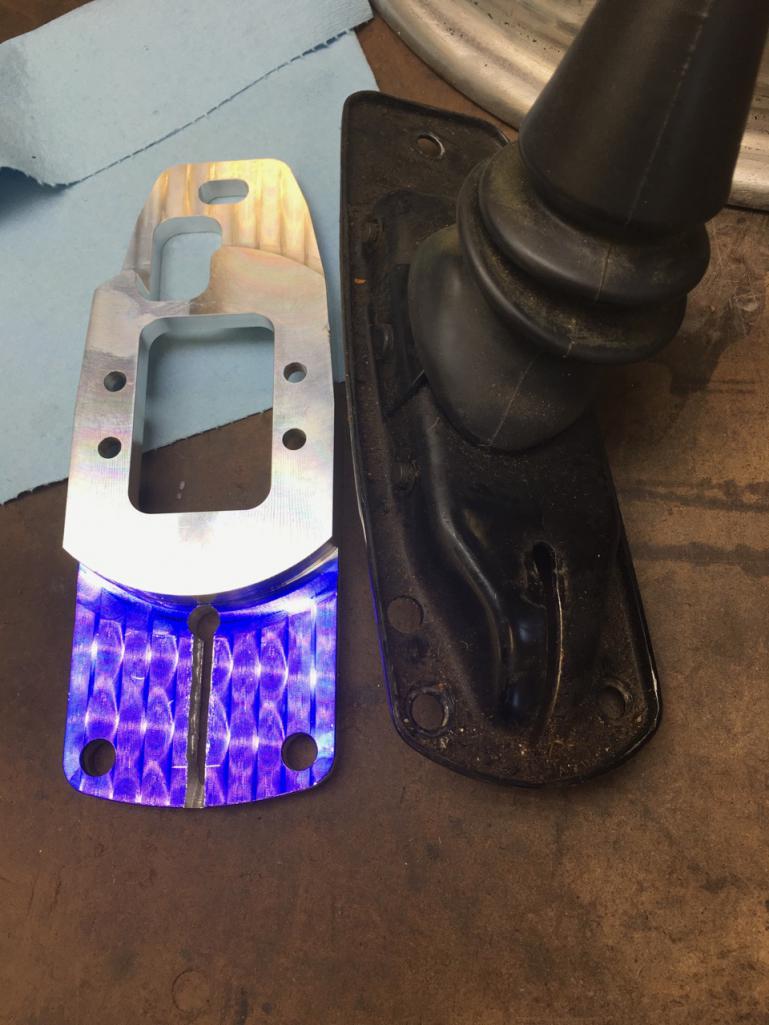
And almost all done, don't have more time tonight to work on it.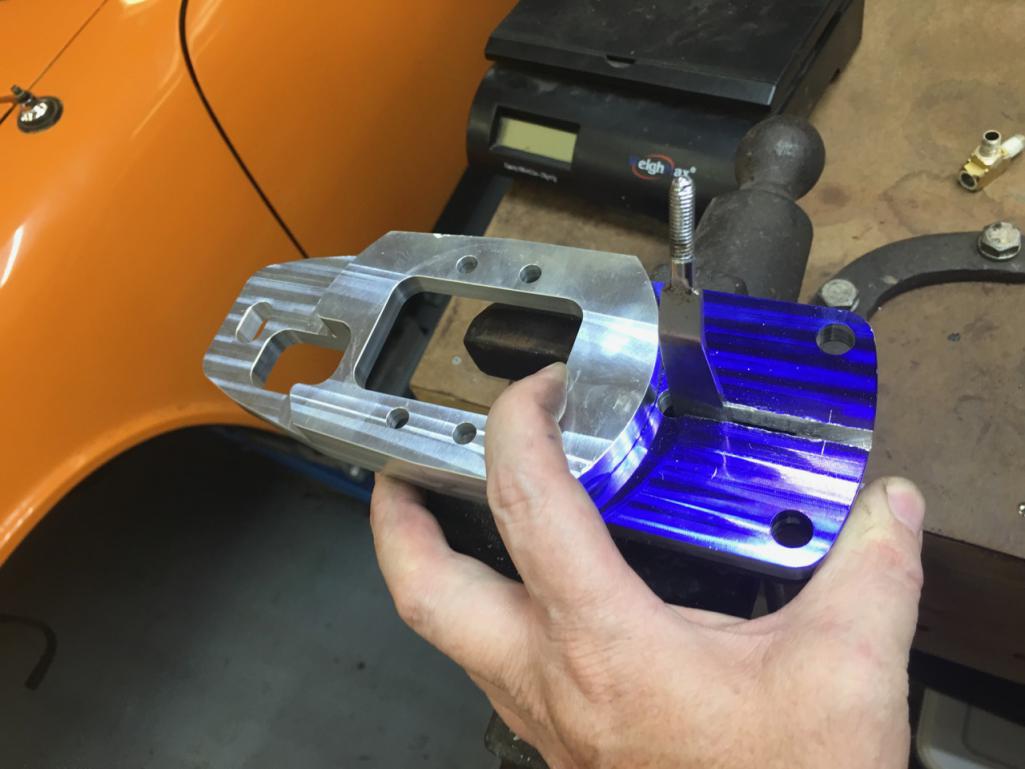
Baby steps makes progress.
Posted by: 914forme Jul 21 2017, 07:43 PM
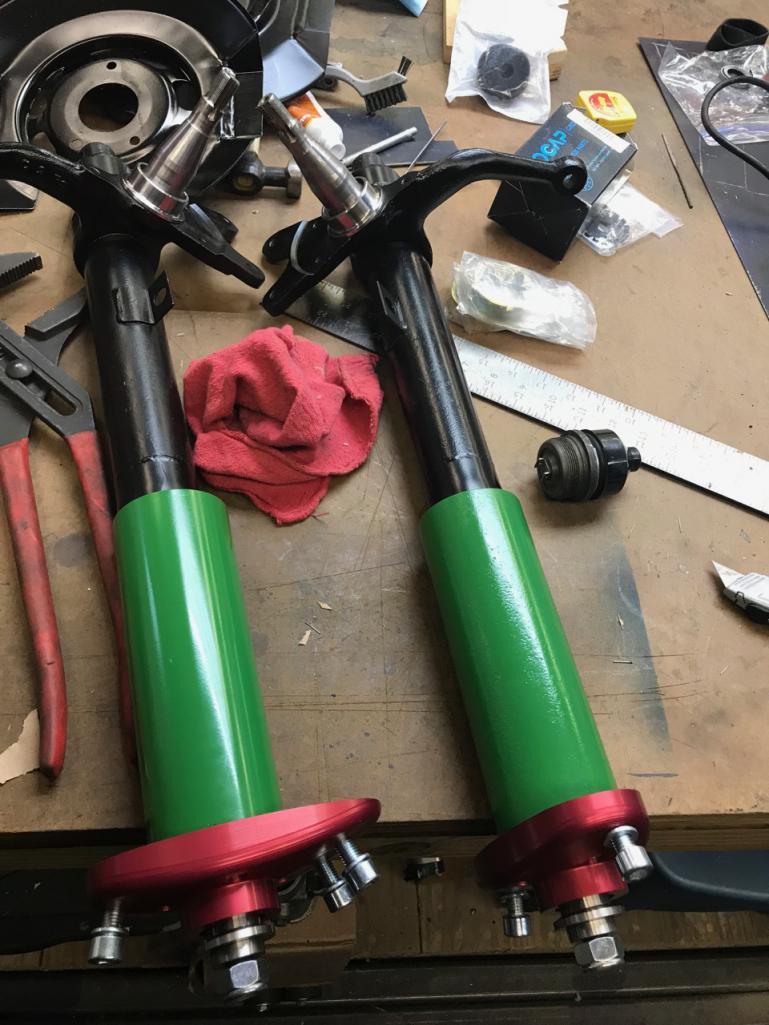
Well I have been called out as a slacker thread so here you go the update of what I got done on the -6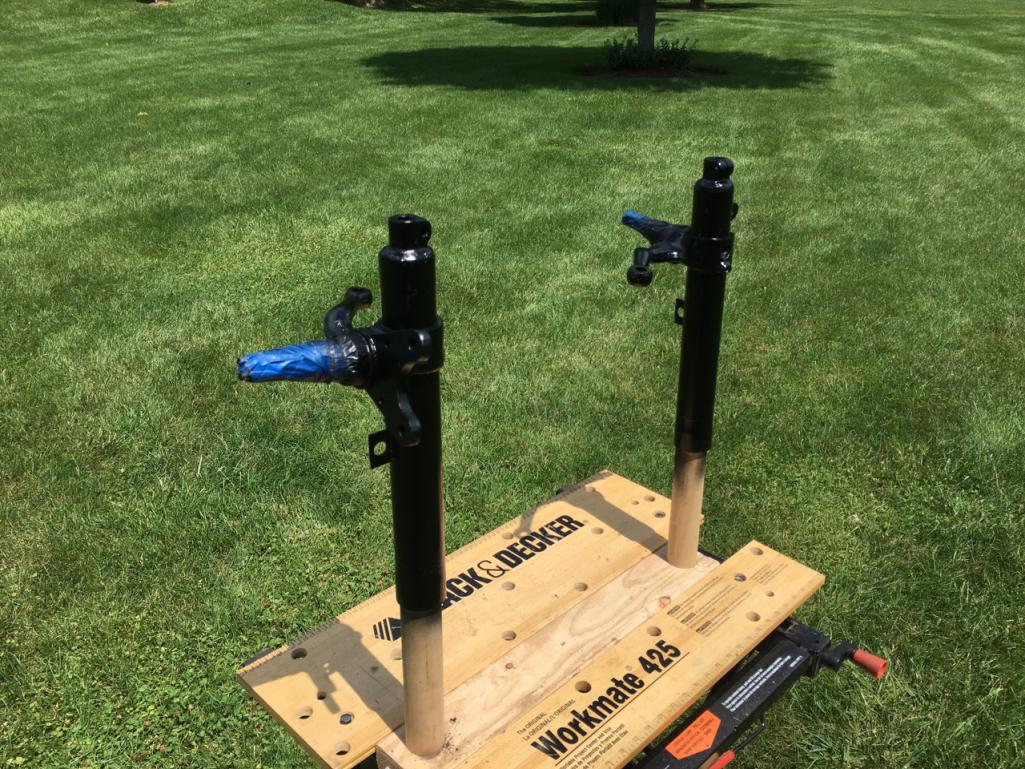
Painted just as dad would have done it. Spindles raised just as I like to do it.
Thats it, been working on a ton of other stuff, just not 914 related.
I have picked up a very nice a few parts from the 914 world members. That is forward progress.
I will be selling off a bunch of stuff shortly got 9 days to make a deal happen for a part for this car, and I need to generate some funds.
So I'll be selling off some Mahle gas burners, some Mini-lites, a Guard TB LSD, and a bunch of small parts, so I can fund something else for this car. If it does not happen it was not meant to be, but if it does, 
Posted by: Dion Jul 22 2017, 09:22 AM
Nice progress Stephen. Looking good.
I like that shifter base. I need to place a slot in my JWest
plate as well for the hand throttle.
Staying tuned...
Cheers
Posted by: 914forme Jul 24 2017, 08:24 PM
Well in the quest to get this done, I am working on incremental progress. In other word, if I have a few minutes, I'll do a little work.
So on todays agenda, I got these off Ebay, and really don't like shinny plastic, so out comes the textured paint.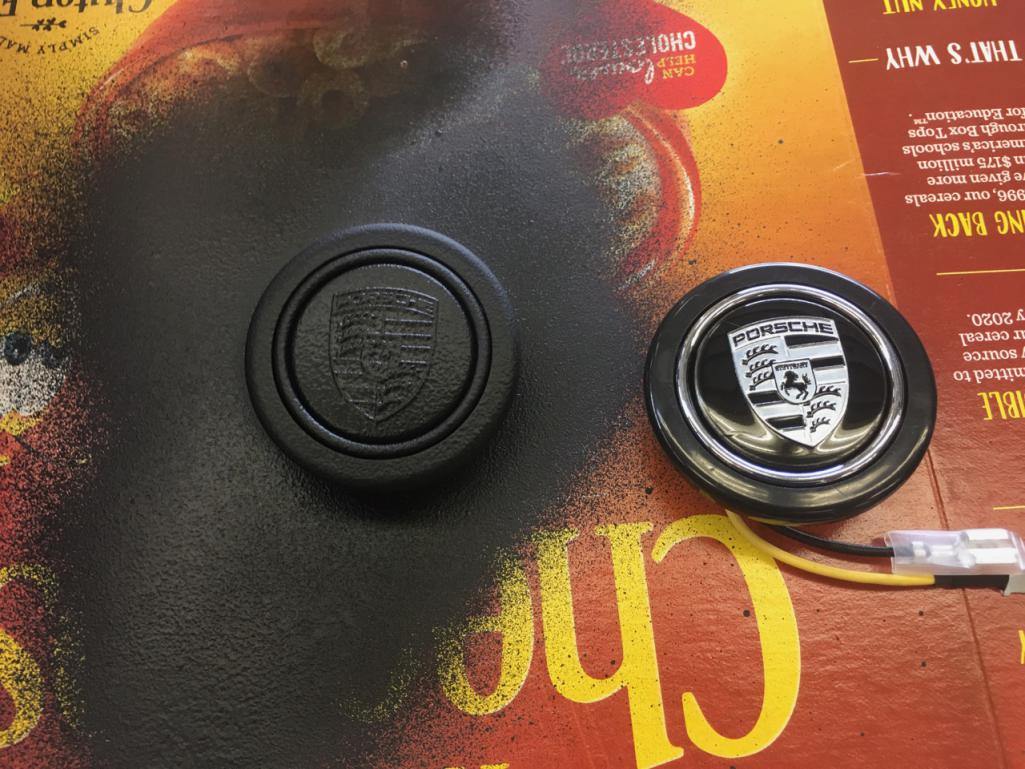
Both done with the base coat.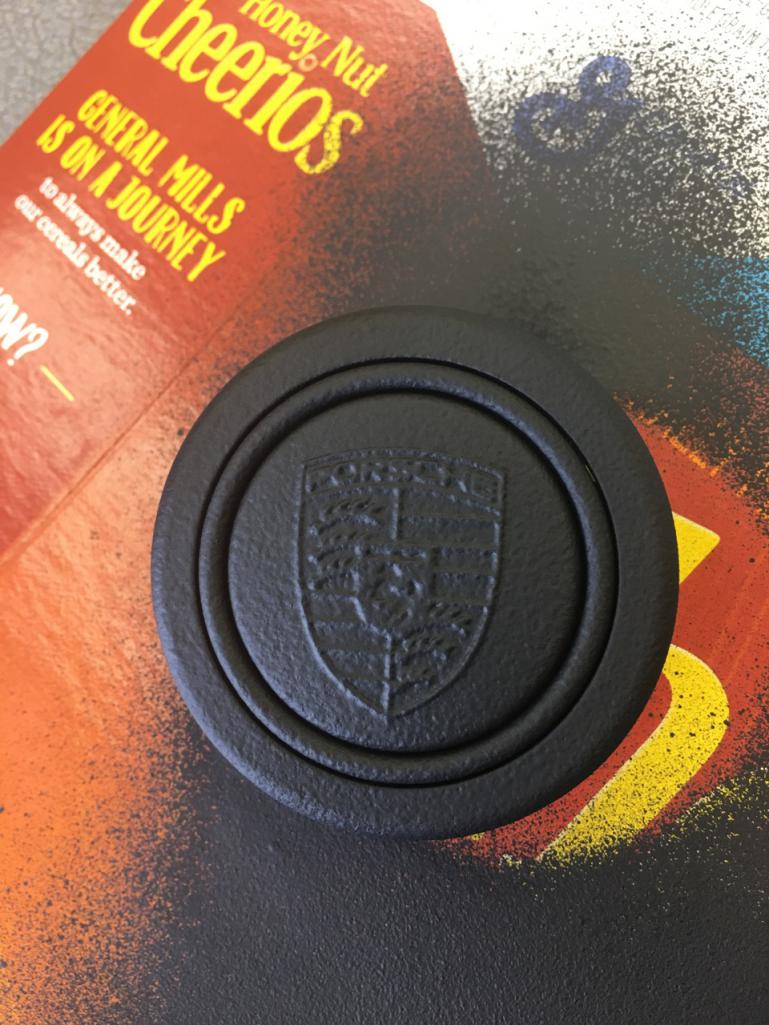
I used this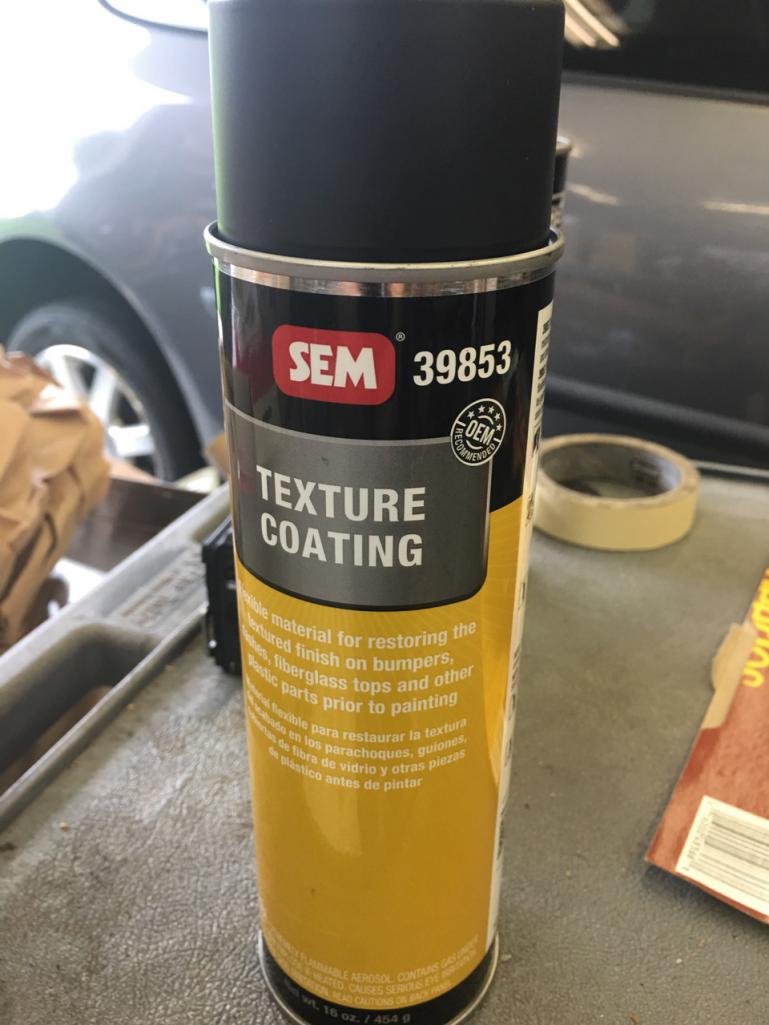
Now weather I should clear it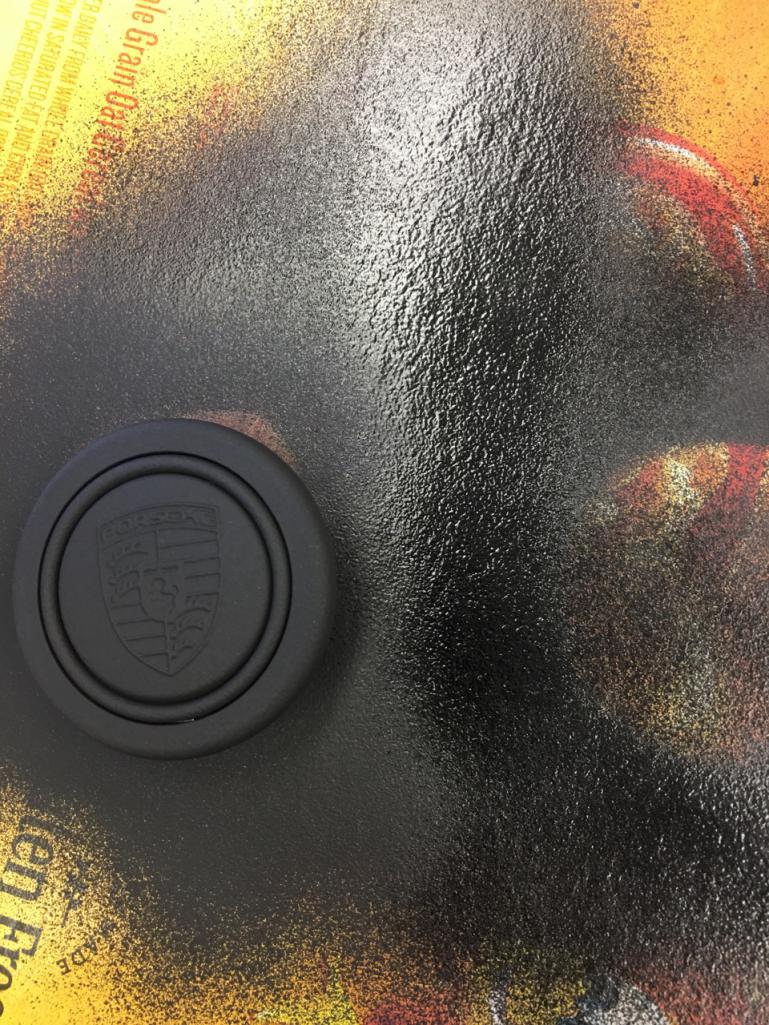
The cleared section is on the right of the horn button.
Posted by: 914forme Aug 5 2017, 06:55 PM
A bit of progress today as I finally got the front brake lines to bust loose. I bit of and lots of ATF mixed with Acetone, finally got them off both sides of the front.
That means I can start working on the front swaybar install now.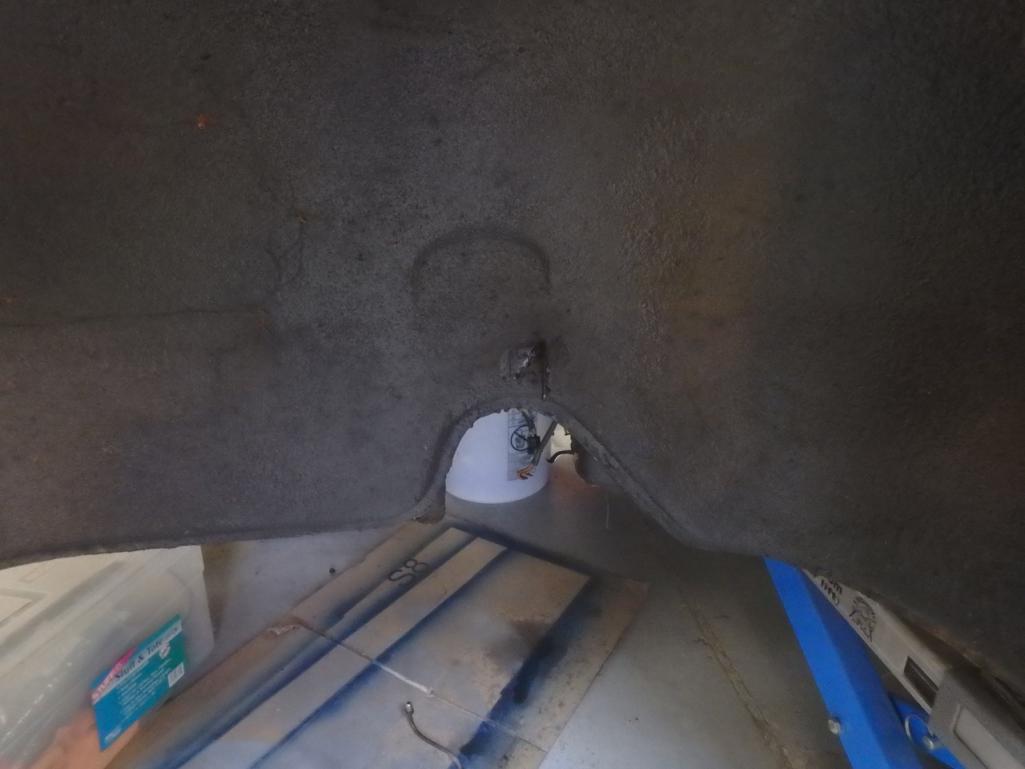
I have also decided that a none running 914-6 is a not fun 914-6. So I got a few parts in today, and will be picking up something to help move this along from Mark this week.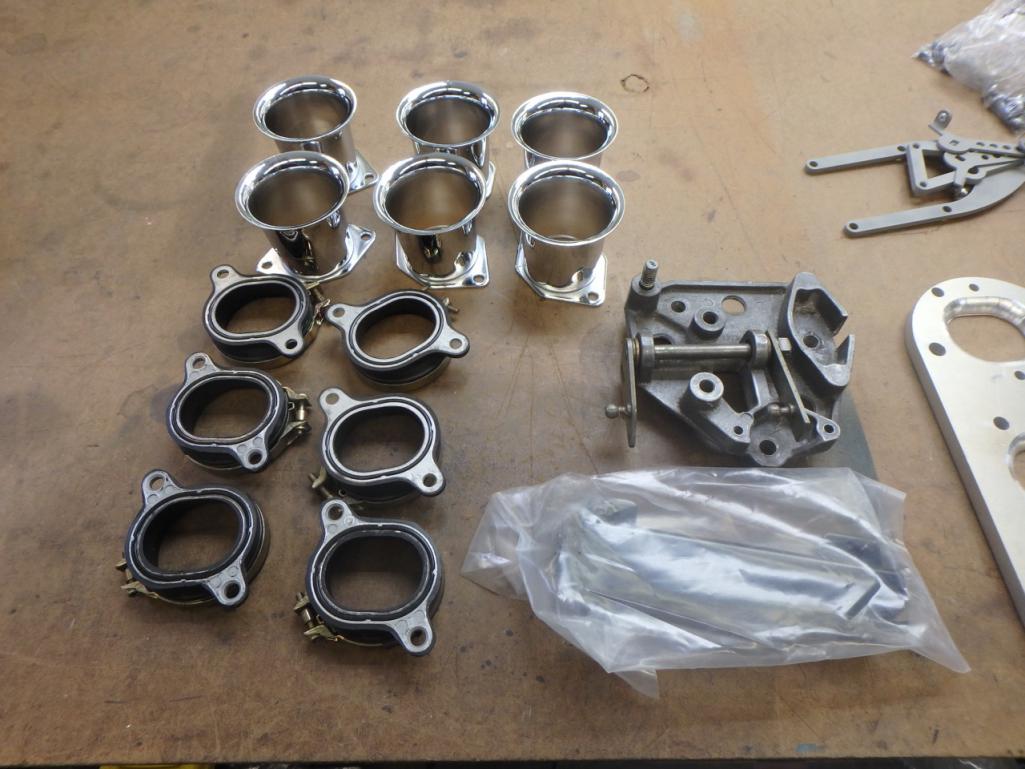
This might help you identify what I am about to do.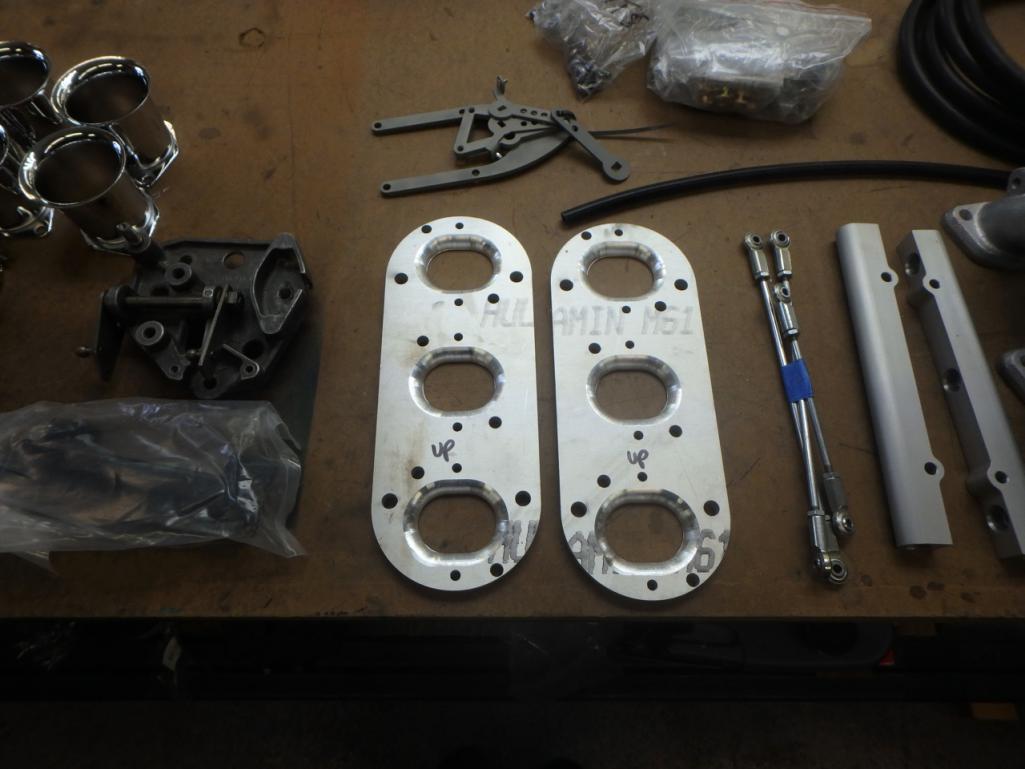
And these should help you a lot. Cats is out of the bag 
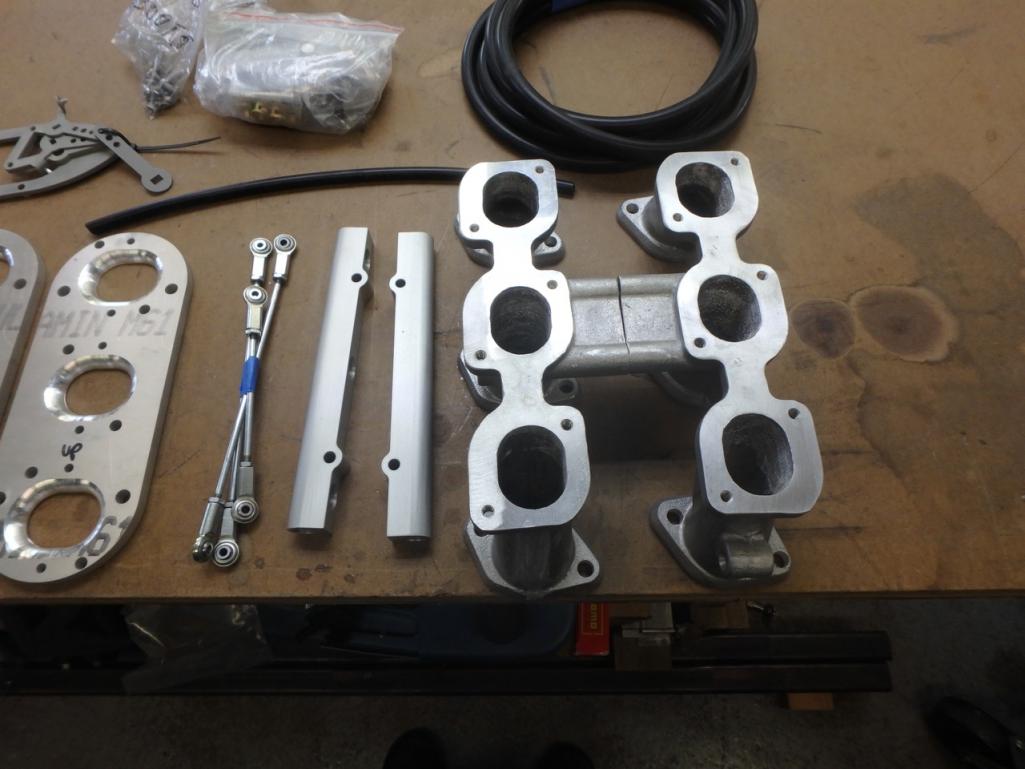
Manifold and other parts to bust on a set of Triple Speeds to a 911 engine. EFI and modern spark in a 914-6. I really hate carbs and was going to stick with them, but now the stock carbs, will stick with the original engine and trans.
No reason to screw up original parts when you can add a bit more go while in the end spending less or the same dough 
That is it for the updates, hopefully I will get to getting the front swaybar installed and some other bits done tomorrow in-between painting another project.
Posted by: mb911 Aug 5 2017, 07:46 PM
A bit of progress today as I finally got the front brake lines to bust loose. I bit of
and lots of ATF mixed with Acetone, finally got them off both sides of the front. That means I can start working on the front swaybar install now.
I have also decided that a none running 914-6 is a not fun 914-6. So I got a few parts in today, and will be picking up something to help move this along from Mark this week.
This might help you identify what I am about to do.
And these should help you a lot. Cats is out of the bag
Manifold and other parts to bust on a set of Triple Speeds to a 911 engine. EFI and modern spark in a 914-6. I really hate carbs and was going to stick with them, but now the stock carbs, will stick with the original engine and trans.
No reason to screw up original parts when you can add a bit more go while in the end spending less or the same dough
That is it for the updates, hopefully I will get to getting the front swaybar installed and some other bits done tomorrow in-between painting another project.
Very interesting.. I am considering something like this.. I want to use a stock airfilter assembly and would go with fuel injection in trade of my webers if I could..
Posted by: jd74914 Aug 5 2017, 08:27 PM
That looks like a nice piece of kit! My dad and I keep looking at if for his 911. Very jealous! Are you planning on using the AEM Infinity ecu a bunch of people on pelican have used with that setup?
Posted by: 914forme Aug 6 2017, 06:23 AM
Ben,
My stock Air filter as the I got a bit of fuel spray and got a bit to hot syndrome. So I picked up a metal housing off a 911, will have to do a bit of work on it to clean it up, I would love to use it thou, as it keeps a nice sleeper look.
If not I will go with filters and run 906ish Rain Shields , with a bit of a twist, I would like to have cones on the bottom side over the velocity stacks to divert the air pulses instead of blasting it back down the intake. I would have to have a huge runner to make intake pulse running work at the desired RPM. As this will be mainly a street car, I will say the RPMs will be limited except when I need to hear the Revs. Most likely every time I leave in 1st. Im getting older and lets face it, reaction times slow down.
Jim,
As far as fuel injection controller, it will be SDS, as I have one here sitting in the bin ready to go onto something. It might as well be this six. Which means the EG33 swap car will go with MS3 Pro. I will be able to rev it up on the start line, engine pumping and thumping in time. And use that launch control like the EVO and WRX guys do. Oh and any time I can work part of a Cake lyric into a post
Posted by: mb911 Aug 6 2017, 07:07 AM
Ben,
My stock Air filter as the I got a bit of fuel spray and got a bit to hot syndrome. So I picked up a metal housing off a 911, will have to do a bit of work on it to clean it up, I would love to use it thou, as it keeps a nice sleeper look.
If not I will go with filters and run 906ish Rain Shields , with a bit of a twist, I would like to have cones on the bottom side over the velocity stacks to divert the air pulses instead of blasting it back down the intake. I would have to have a huge runner to make intake pulse running work at the desired RPM. As this will be mainly a street car, I will say the RPMs will be limited except when I need to hear the Revs. Most likely every time I leave in 1st. Im getting older and lets face it, reaction times slow down.
Jim,
As far as fuel injection controller, it will be SDS, as I have one here sitting in the bin ready to go onto something. It might as well be this six. Which means the EG33 swap car will go with MS3 Pro. I will be able to rev it up on the start line, engine pumping and thumping in time. And use that launch control like the EVO and WRX guys do. Oh and any time I can work part of a Cake lyric into a post
1.5 inch heat exchangers would be perfect for you ..
Posted by: 914forme Aug 25 2017, 06:24 PM
Well after a very frustrating day at work, I got back to wrenching, always clears your mind. Some people like to golf, some ride motorcycles ( I would kill myself on a bike) and well I wrench.
So I fired up the lathe and cut down some metal inserts for a set of Minilites I have. Got thant done, need to toss them in to the freezer and they should drop in, and expand out to fully seat. Other wise you would have to press them into the mag hub. 
Next up I decided to remove the shifter lock in the trans I purchased, The lock was to keep it out of first gear.
Just a simple piece of EMT slid of the shifter rod. Okay easy enough to fix.
Okay something is missing here
Luckily we have parts
This is what it should look like.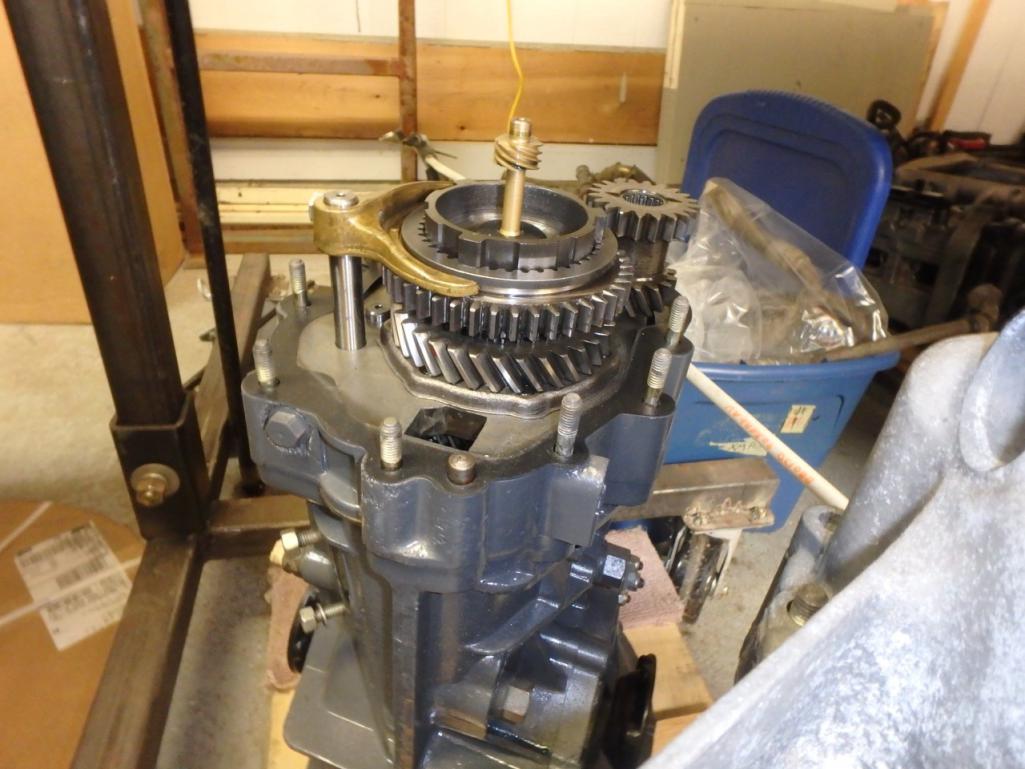
One step forward 2 steps back.
Posted by: mb911 Aug 25 2017, 07:13 PM
Keep up the good work.. I actually made a little progress today myself. Floor pan, firewall , longs almost done.
Posted by: 914forme Aug 26 2017, 06:28 PM
Ben that is great.
So I spent lots of time today with paint stripper on a different project but while I wait for paint to bubble I started looking through all my transmission parts seeing what I have and if I need anything or not.
So counting gear teeth  Eyes are all crossed, and the beagle keep barking which would distract me and make me lose count. But I got it done
No real first gear, the spare I have is a 11/32 or A needs synchro teeth looks like someone liked to grind 1st poor first gear set.
Stuff out of this trans is beautiful, so I need to find as nice of stuff to drop in for first gear.
http://www.914world.com/bbs2/index.php?act=ST&f=2&t=315463&st=0#entry2521122
Now back to the build
Tore the trans down just to make sure I knew what gears where in it.
1st gear - is missing
2nd gear - is a 15:36 C 2.4
3rd gear - is a 23:29 N 1.261
4th gear - is a 29:23 Z 0.7931
5th gear - is a 32:19 or a Flipped H at 0.5950
Wow that is a called geared trans
My plan is to put an A in for 1st gear 11:34 A 3.091 Only use it to get going like on a hill if need be.
With the C gear in 2nd place your going 12.9MPH at 2000 RPM running 23" tires. That is a 205/50-15 on a 6.5" rim.
The H gear will be used only on the freeway and above 70 MPH.
So lets see what this tranny looks like
You can see a Quaffe TBD in there such a nice sight to see 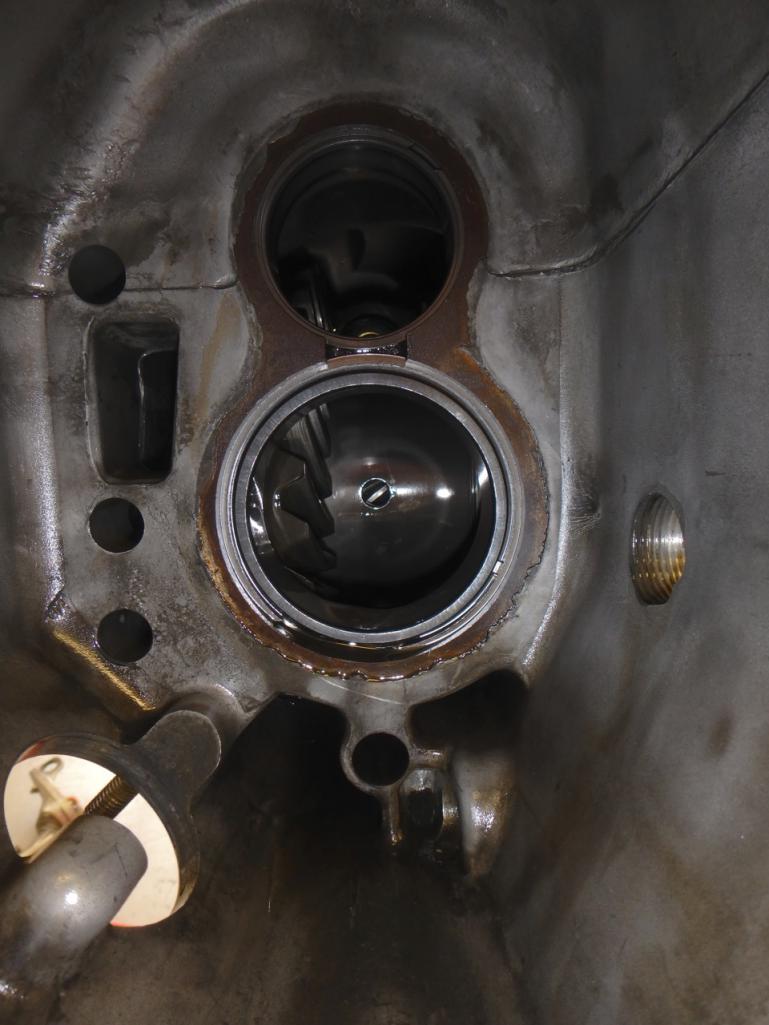
Gear Stacks look good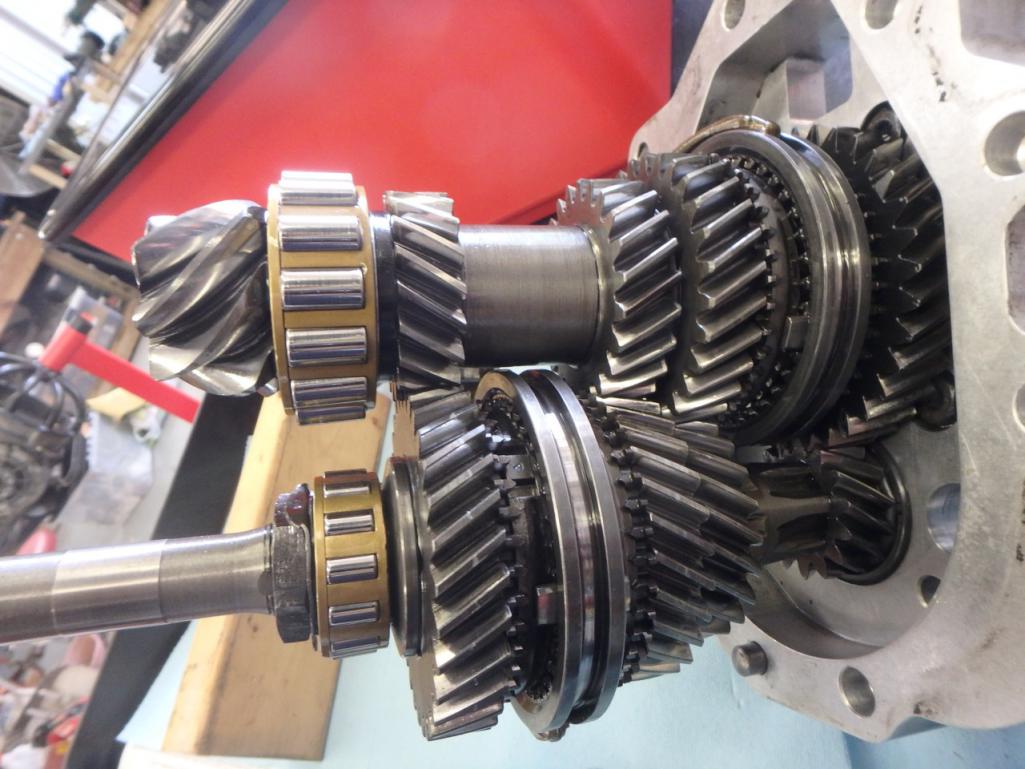
904 Main Shaft 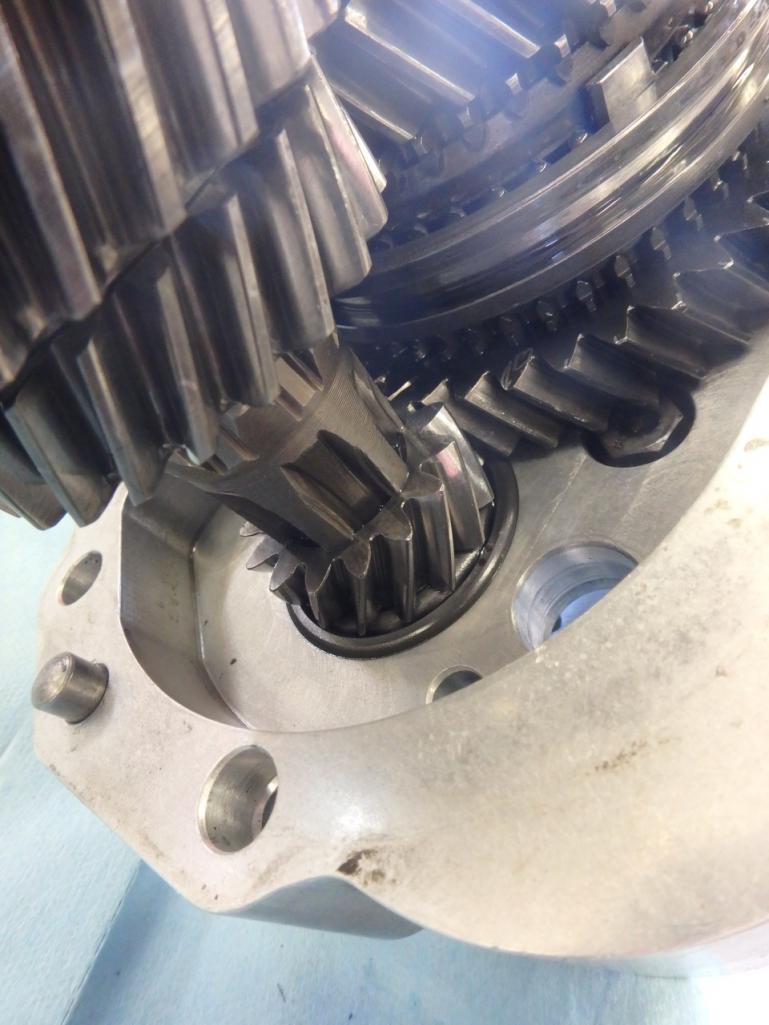
Stock Main shaft just for reference if you never seen one, 2nd gear is a fixed gear on the stock units.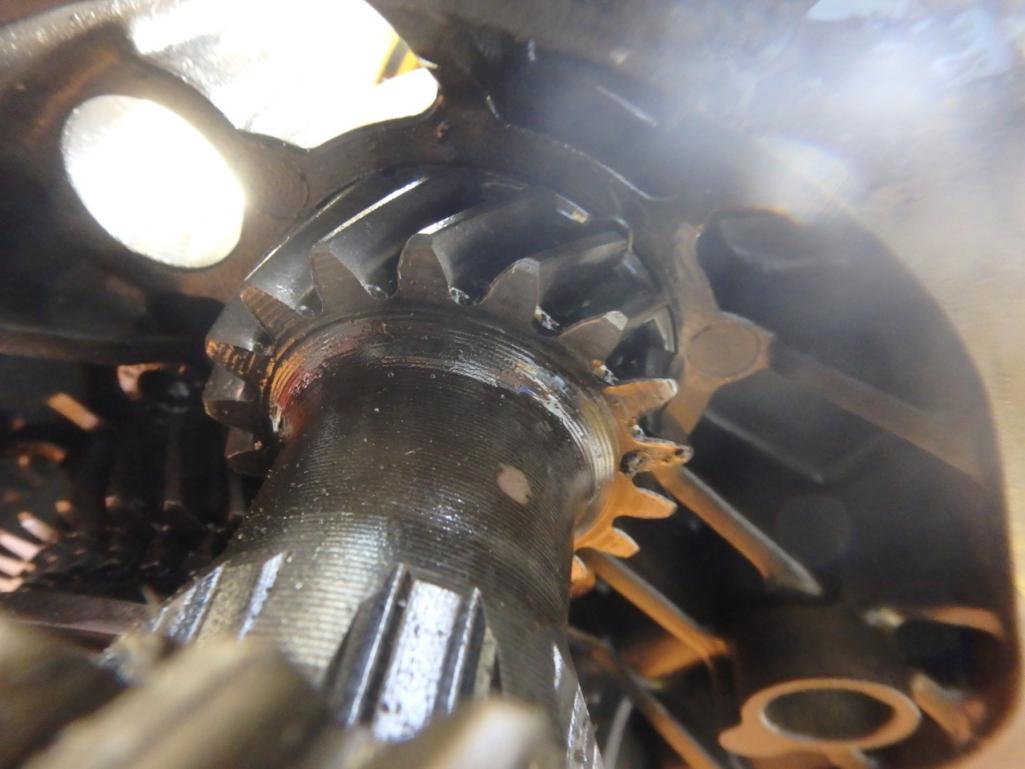
Starting to put it back together and hunting for a good 1st gear assembly.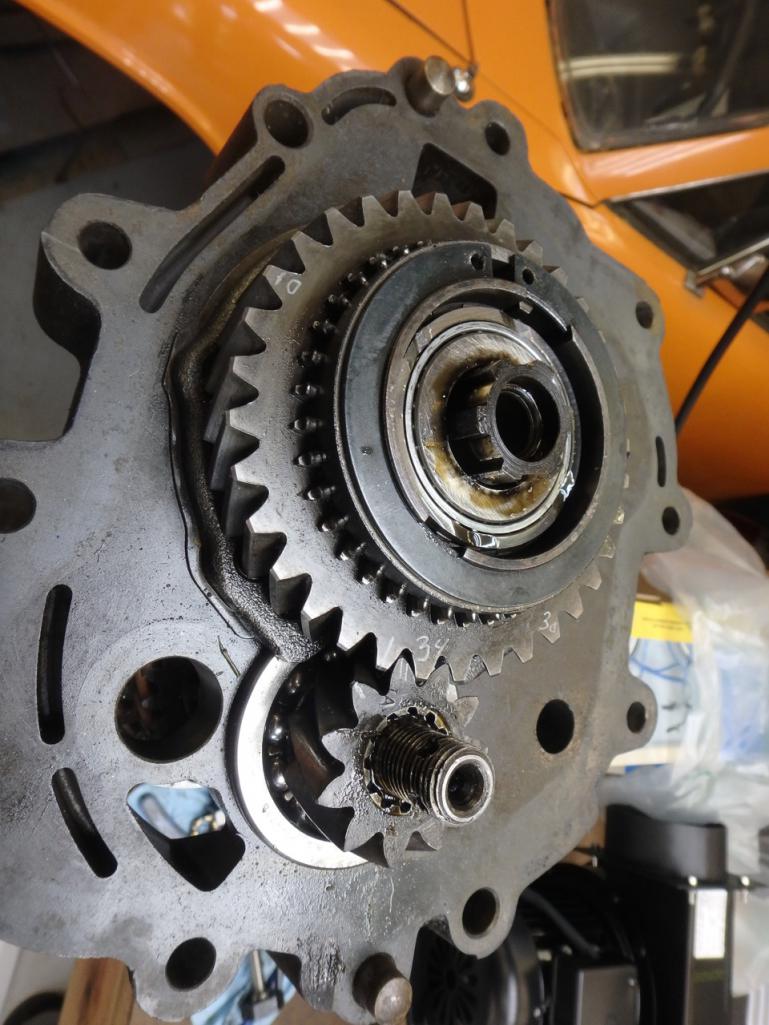
Thats not it, engagement teeth are all ground down.
Next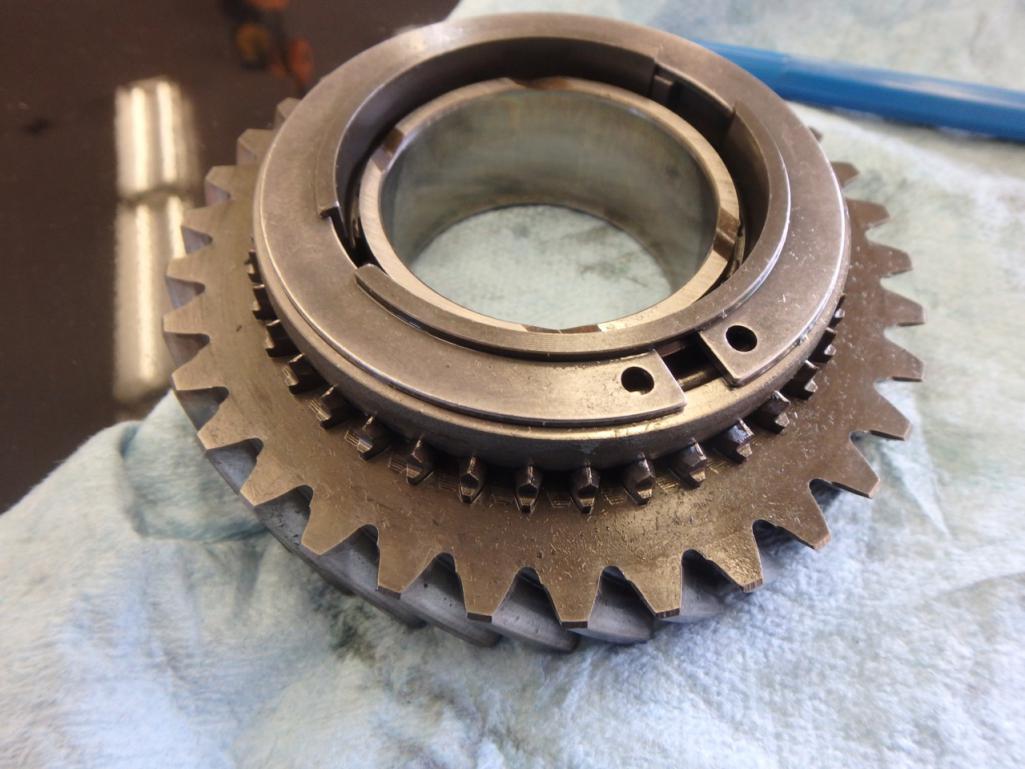
Inplace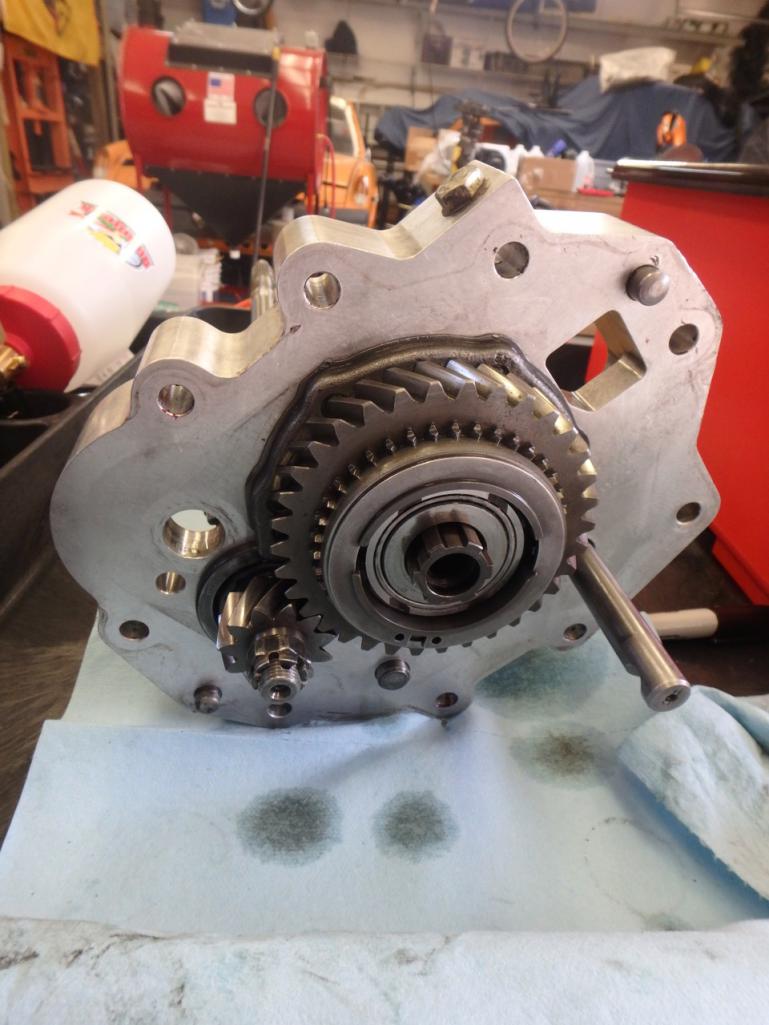
And now the slider and bolt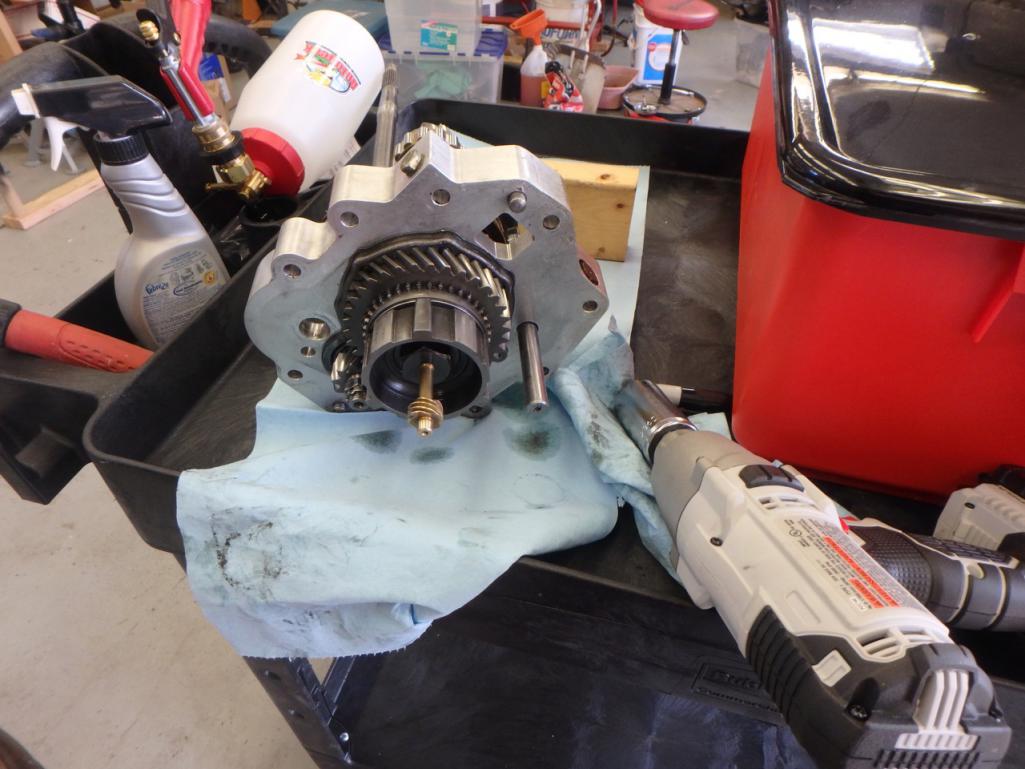
A, B, or C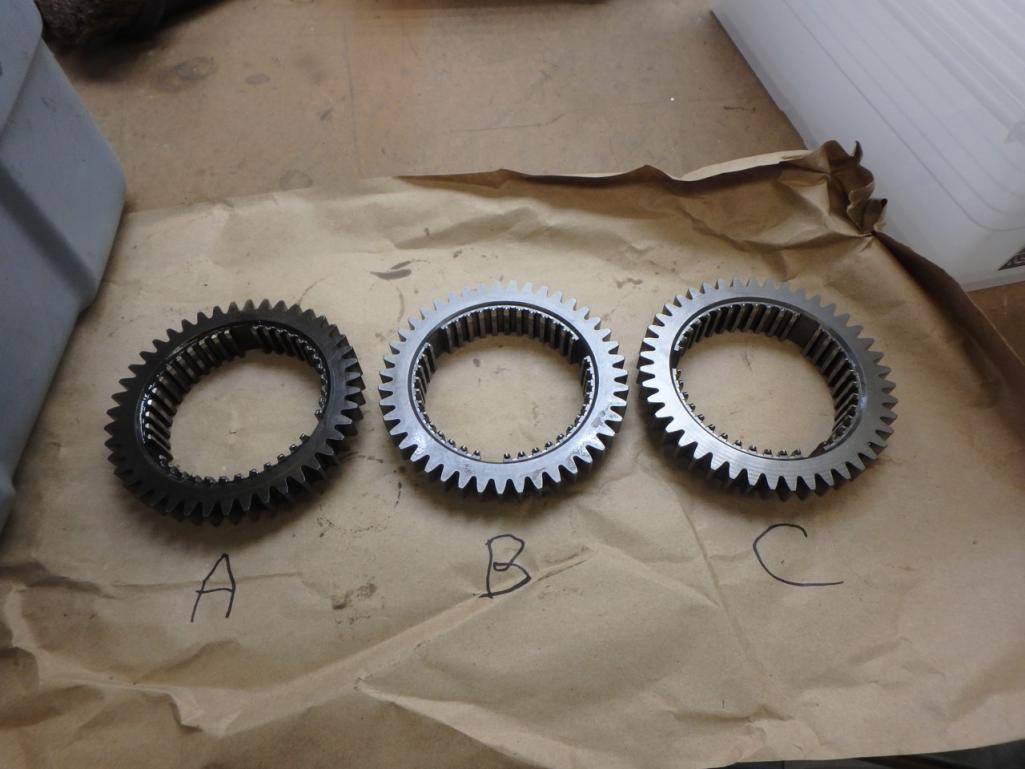
And last but not least I got these adapters knocked off the CV trans flanges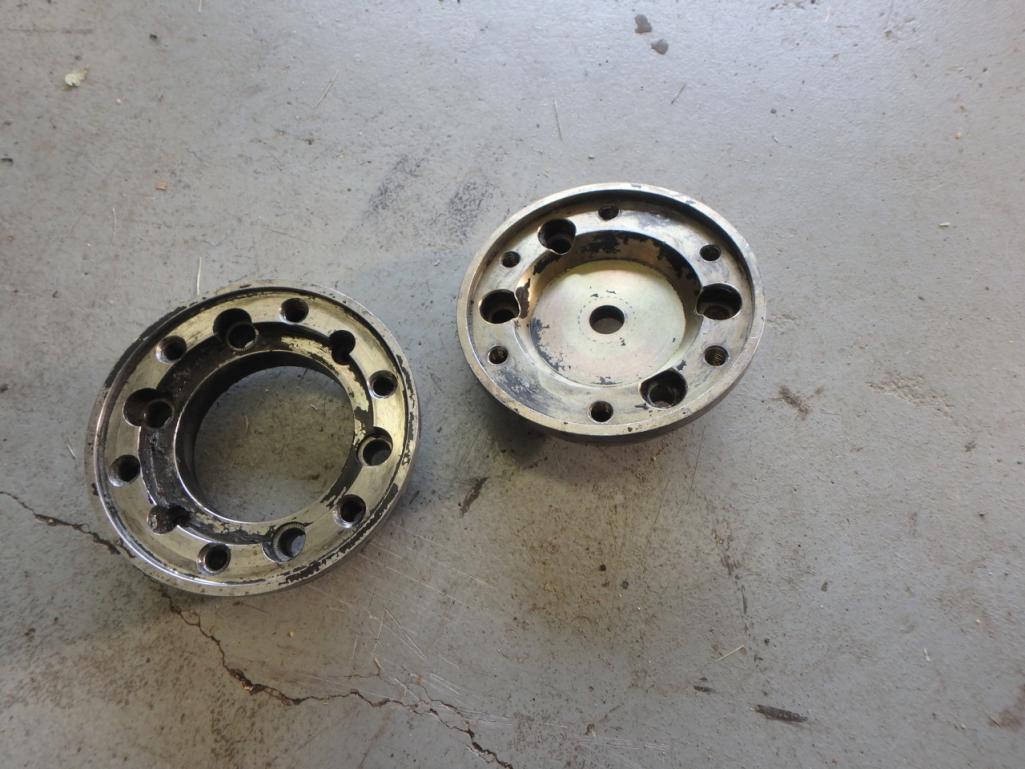
More than likely sell them, don't think I'll be making enough HP to be popping CVs all day long.

Maybe I should keep them just incase I need a set of 930 CVs
Posted by: white1975 Aug 26 2017, 09:07 PM
I have tranny tools if you need to borrow them to set it up Kerry
I have a couple of spare trannys 3 I think 1 tale and 2 side
Posted by: 914forme Aug 27 2017, 05:59 AM
Thank you for the offer, I'll let you know if I need anything.
Posted by: 914forme Oct 18 2017, 06:40 AM
So for an update.
I am officially stalled. Not do to not working on things, just do to not having time due to other priorities taking precedence.
What has been done since the last post.
I got first gear assembled and tranny back together
I got the passenger side front break line off Yes I it is the brake line, but I had to break them to get them out. Rusty as hell, I hope that is not a sign of more rust.
Sorry no pictures, I had couple of minutes, get it done, instead of wasting time on pictures.
The life items:
Buried a co-worker who was 21 years old, great kid, was great to see him becoming a man. Motorcycle, he was rear ended, waiting to make the left turn, some one did not see him stoped and hit him at 55 MPH. Not only is the lose of life bad, the other kid who hit him is now dealing with that pain also. Southwest Ohio farming community, actually near Dr. Evil's place. This was one of the hardest things I have done as a leader, lot easier when us old dogs die.
Traveling for work
Heck I have the engine for this car sitting in a warehouse right now, have not even had time to go over there and look at it. You would have thought that would have been a priority.
Farm work, and rental property work. Wife is redoing a house with my father, I am now helping get electrical work done. This will be my last weekend for that stuff 
 Been telling myself that for the last 3 weekends. See the light at the end of the tunnel, thinking I can get there, have a feeling something will pull me back in. My guess will it be plumbing. Though I would prefer it to be setting the final grade around the house.
I could use a bit of dozer and excavation time, to get some of the stress off. I have no problem digging holes and filling them back in if I get to use large pieces of equipment that have names like Cat, Deere, of Bob in their names....
Posted by: 76-914 Oct 18 2017, 07:06 PM
So for an update.
I am officially stalled. Not do to not working on things, just do to not having time due to other priorities taking precedence.
What has been done since the last post.
I got first gear assembled and tranny back together
I got the passenger side front break line off
Yes I it is the brake line, but I had to break them to get them out. Rusty as hell, I hope that is not a sign of more rust.Sorry no pictures, I had couple of minutes, get it done, instead of wasting time on pictures.
The life items:
Buried a co-worker who was 21 years old, great kid, was great to see him becoming a man.
Motorcycle, he was rear ended, waiting to make the left turn, some one did not see him stoped and hit him at 55 MPH. Not only is the lose of life bad, the other kid who hit him is now dealing with that pain also. Southwest Ohio farming community, actually near Dr. Evil's place. This was one of the hardest things I have done as a leader, lot easier when us old dogs die. Traveling for work
Heck I have the engine for this car sitting in a warehouse right now, have not even had time to go over there and look at it.
You would have thought that would have been a priority. Farm work, and rental property work. Wife is redoing a house with my father, I am now helping get electrical work done. This will be my last weekend for that stuff
Been telling myself that for the last 3 weekends. See the light at the end of the tunnel, thinking I can get there, have a feeling something will pull me back in. My guess will it be plumbing. Though I would prefer it to be setting the final grade around the house.I could use a bit of dozer and excavation time, to get some of the stress off. I have no problem digging holes and filling them back in if I get to use large pieces of equipment that have names like Cat, Deere, of Bob in their names....
You know who you can call if you have a plumbing question, Stephen.

Posted by: 914forme Oct 22 2017, 05:04 PM
Thank you Kent, still messing with electrical
Posted by: 914forme Oct 22 2017, 05:39 PM
Now to keep me off the slacker list 
Did a few things 914-6 related
First up Passenger side sway bar mount. At least Prep.
For refresher I am using Brad's mount on the 914-6 
So I signed up the backside with the notch in the wheel well and used a transfer punch to set my first screw location. Drilled it, opened it ou for the bolt, and bolted it together. Moved the transfer punch to the next hole, and got a center mark, and drilled it out. I then bolted the sway bar mount in place to give me the location of the lower hole. I marked the center, and then drilled a pilot and then used a step drill to punch it out to clear the not on he back side of the Brad's outer plate.
That all done it looks like this.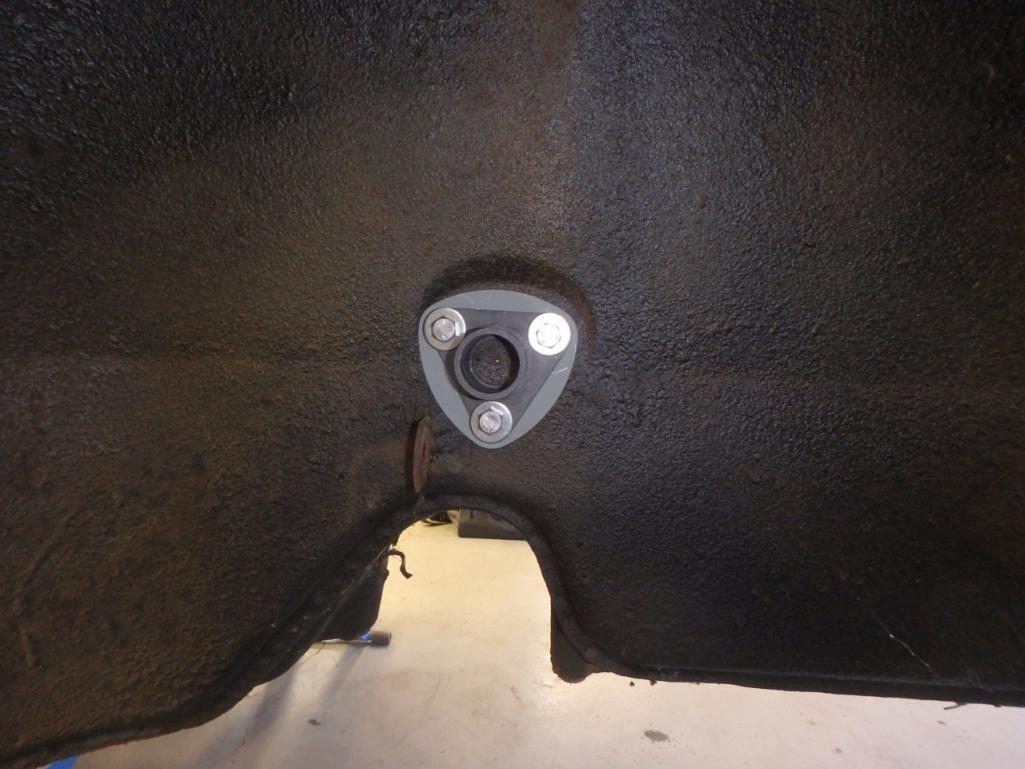 '
'
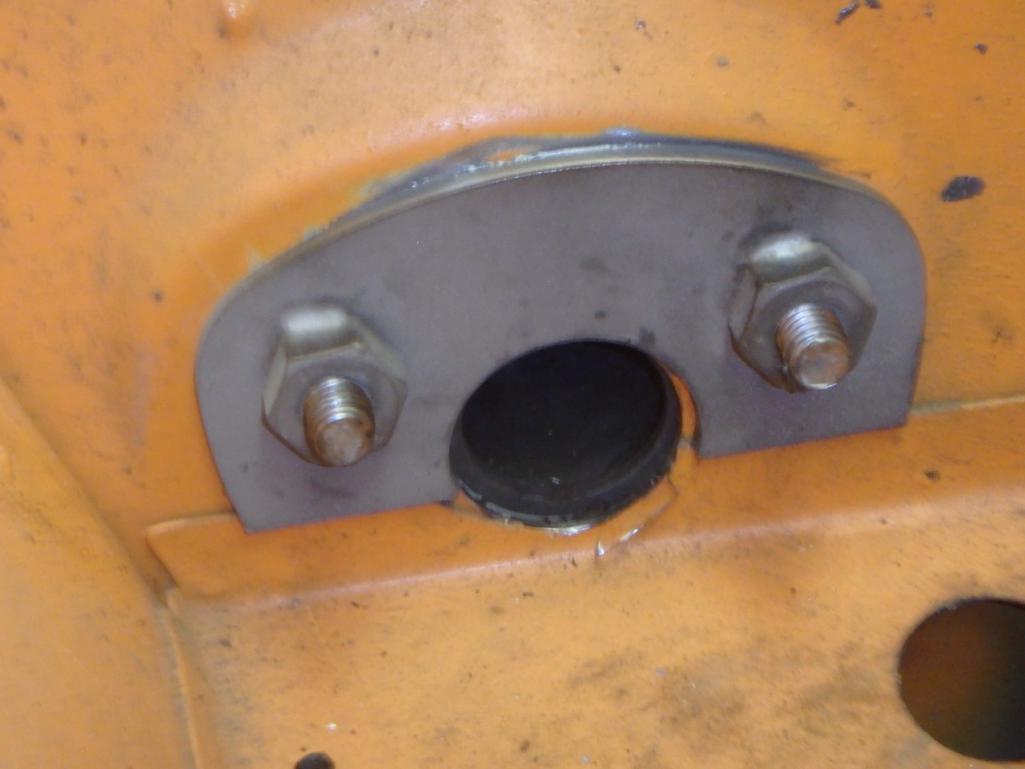
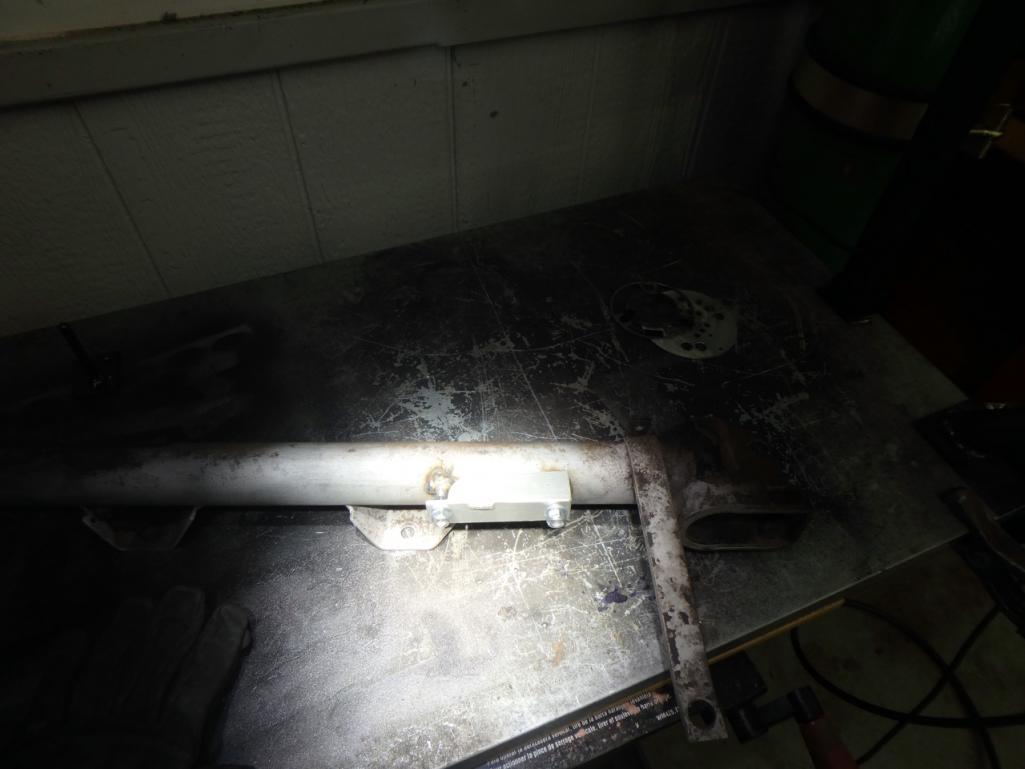
So then I need to mark the center one the swatbar location. Since I was missing time on my metal lathe, I turned a spacer down.
Fits like a precision glove, well because it is a precision fit.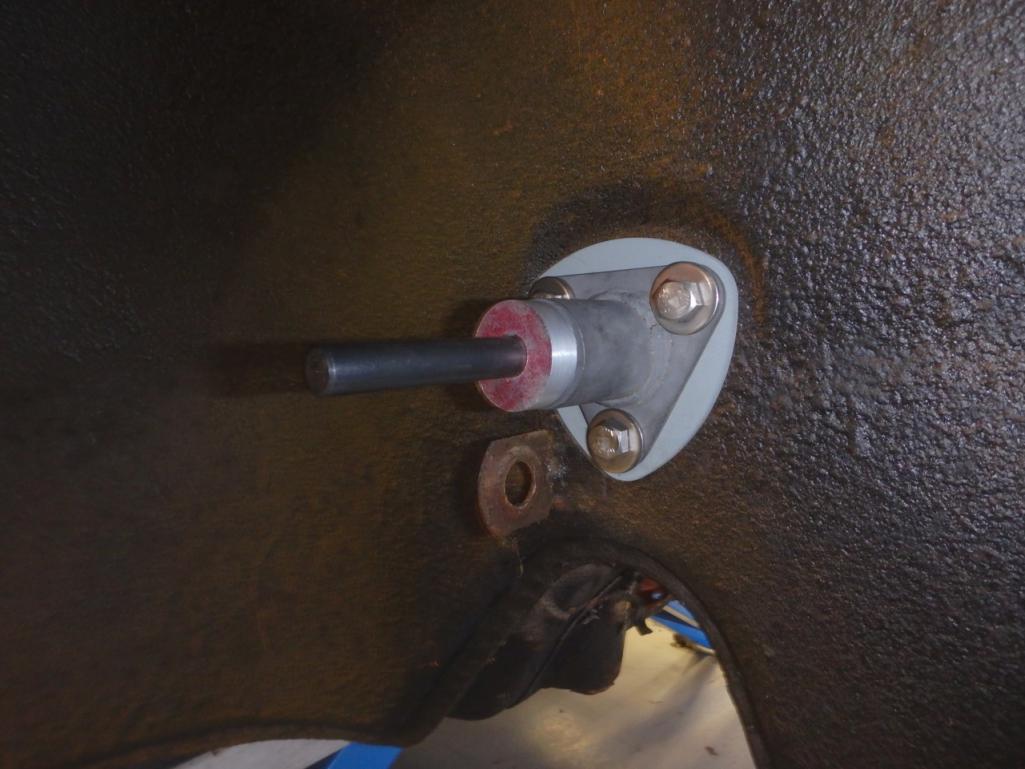
Transfer punch inserted in the last picture , give it a few hits with the hammer, and disassemble the pieces one last time. Probably not
Drill a pilot hole and then drill the hole.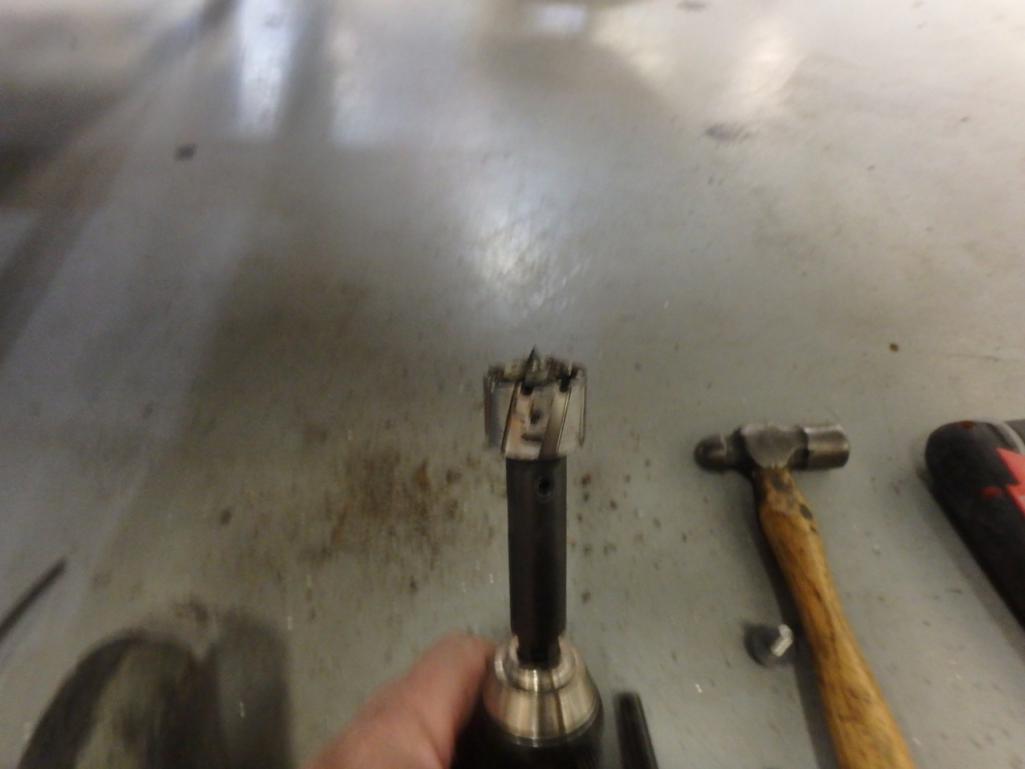
Tools of the trade to fit these, in a pile on the floor.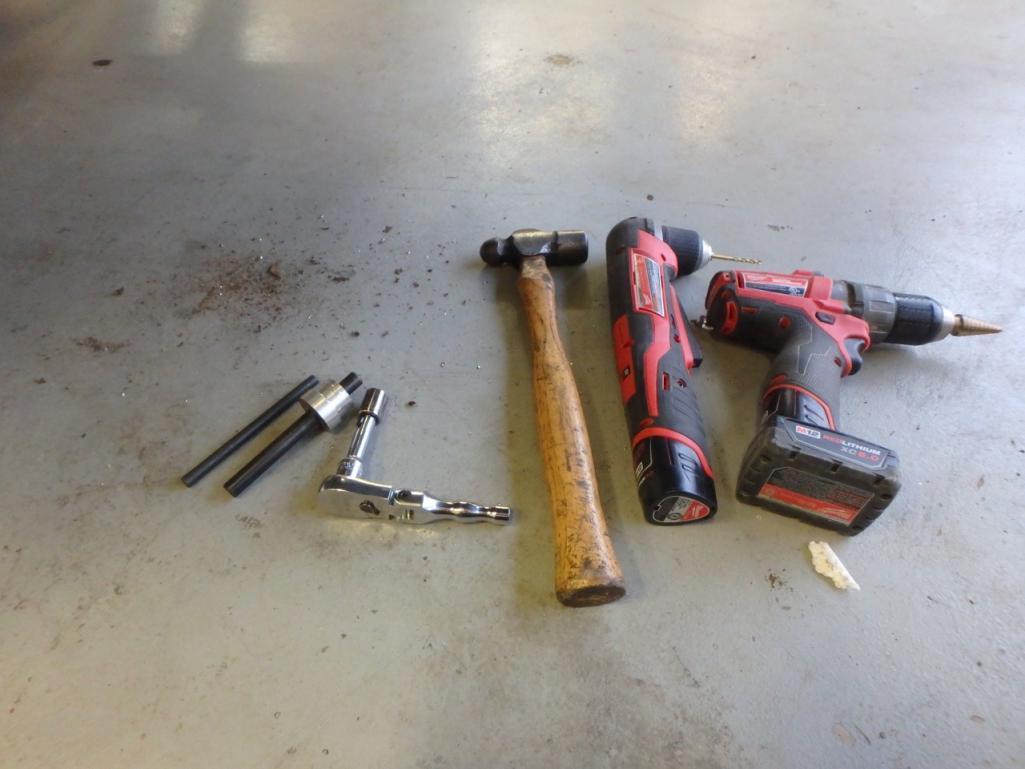
Small Ball Peen hammer
Socke wrench, extension and socket
Transfer Punches
Close Quarters drill - pilot holes
1/2 inch drill - step drill
Rotabroach to drill the big hole
Final Big hole drilled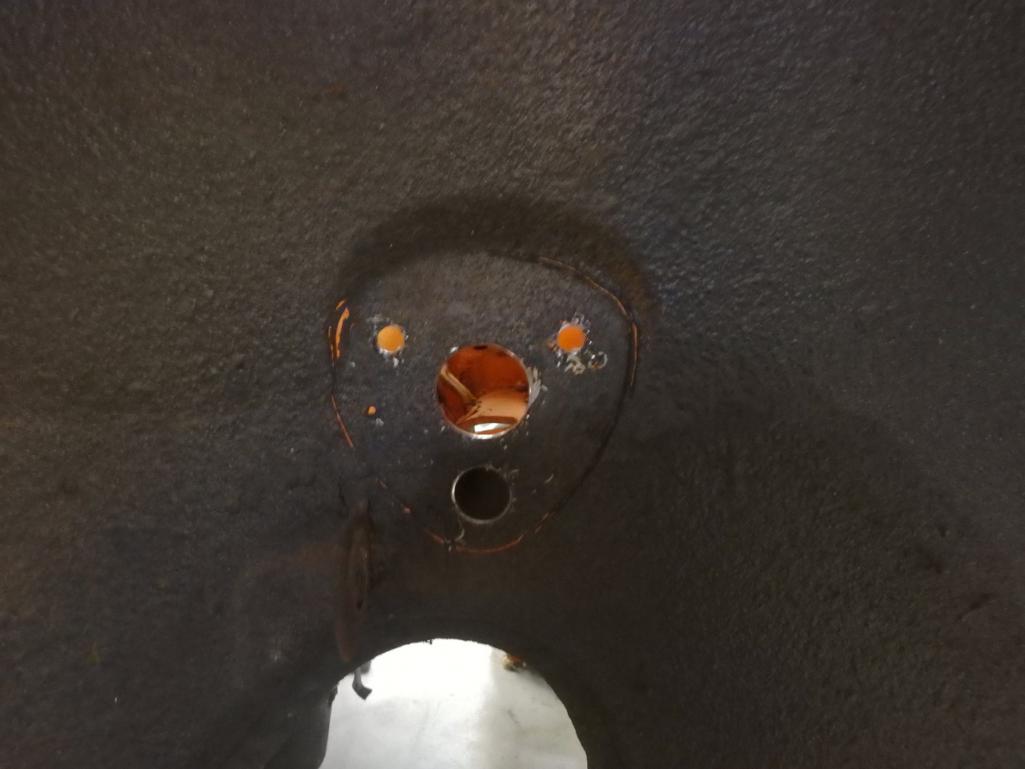
And in place, well I', holding it in place, did not feel like bolting it all together to take it apart again.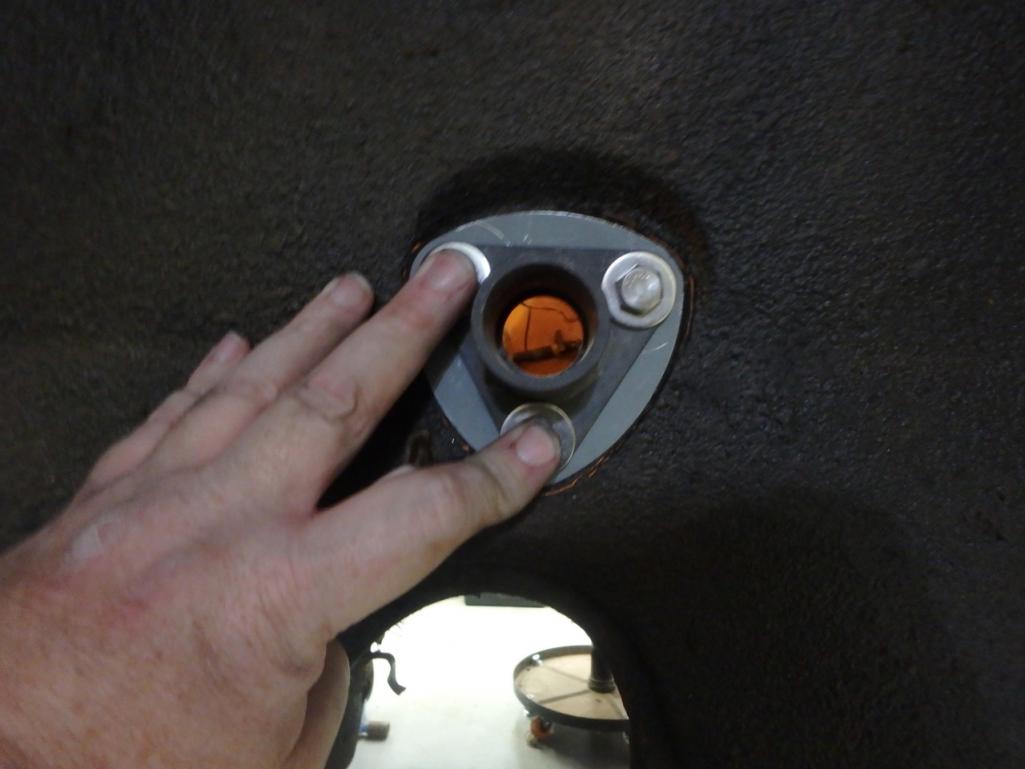
Next up for this side is clean the undercoating. Scuff up the paint, and JB weld it to the car. Yes normally I would weld, but since I don't want to repaint, where the weld would burn off paint, it will be JB Weld. Brad says it will work, and I see no reason it would not work.
I tend to measure project success and the amount of fun I have had by the number of chips, pile of metal shavings, and metal abound.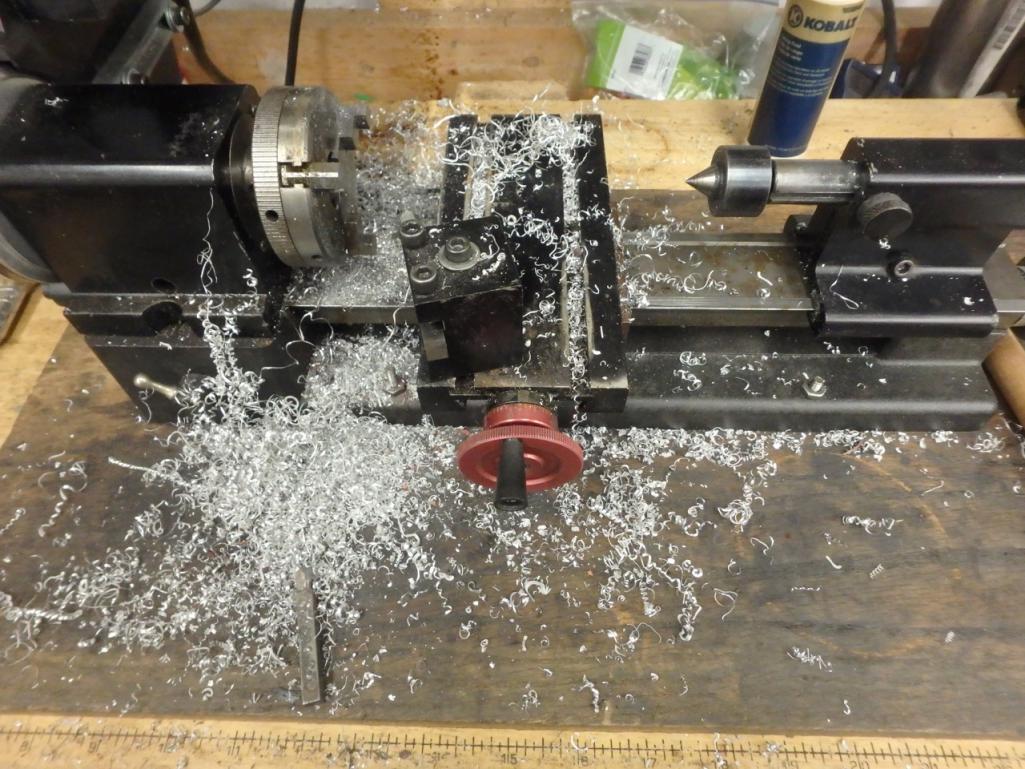
Successful and fun day
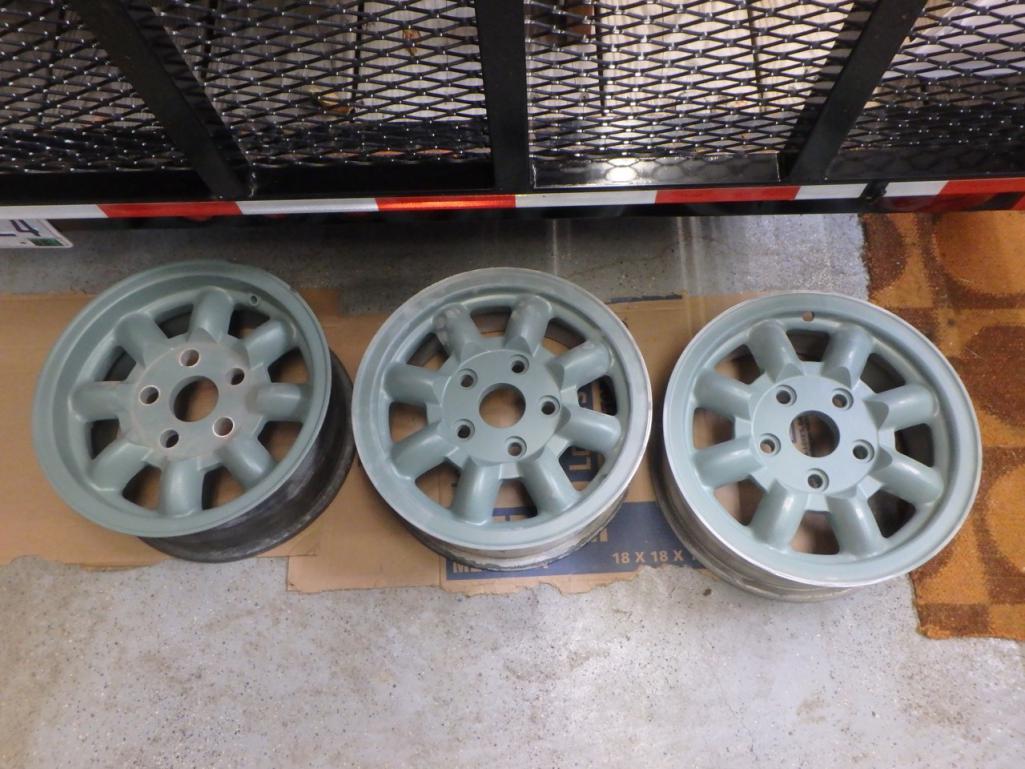
Oh the not fun part of my day, I have been working on one of the sets of MiniLites I have. Prepping for paint, as they where in good condition. But lots of small paint chips, and different colors. So following the instructions off a wheel restore that works on Ferrari Mag wheels I got to this point.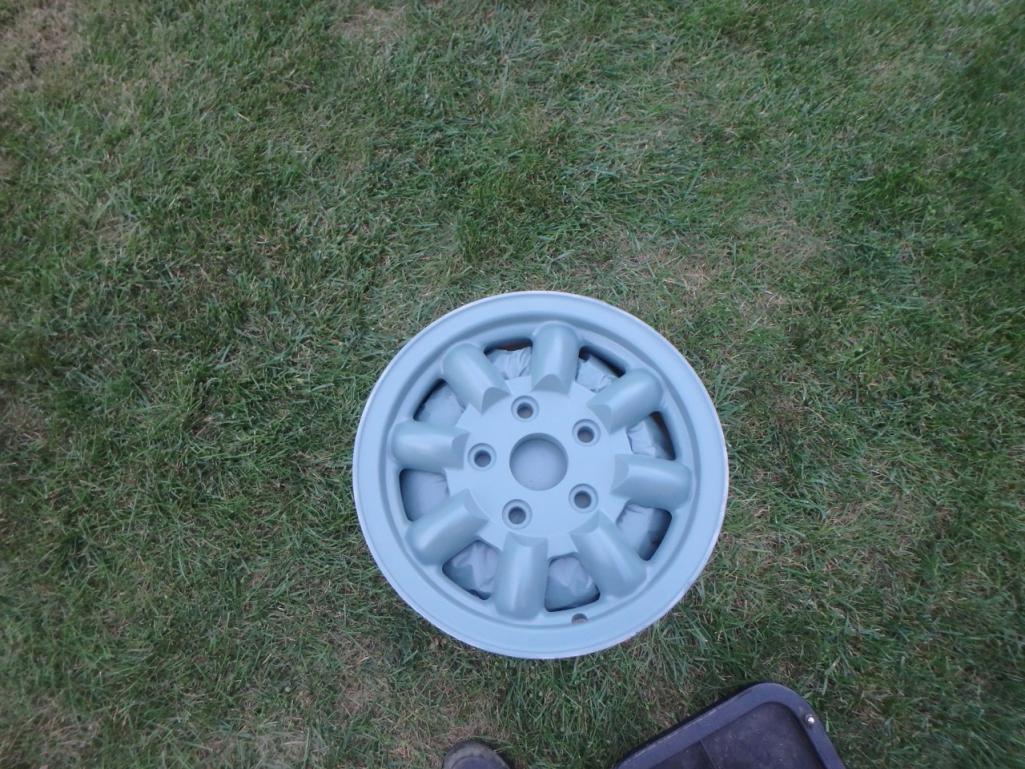
That one was sitting on my stool that turns, hate the stool, but it does a great job for painting wheels 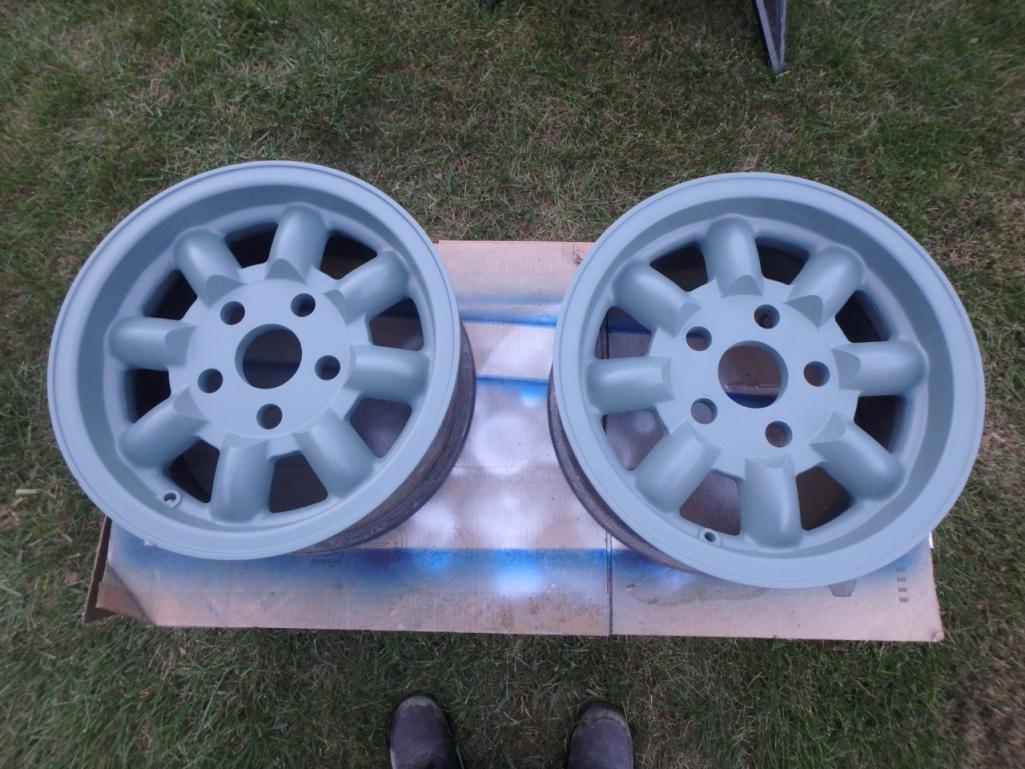
And the last one, all where baking in the afternoon sun 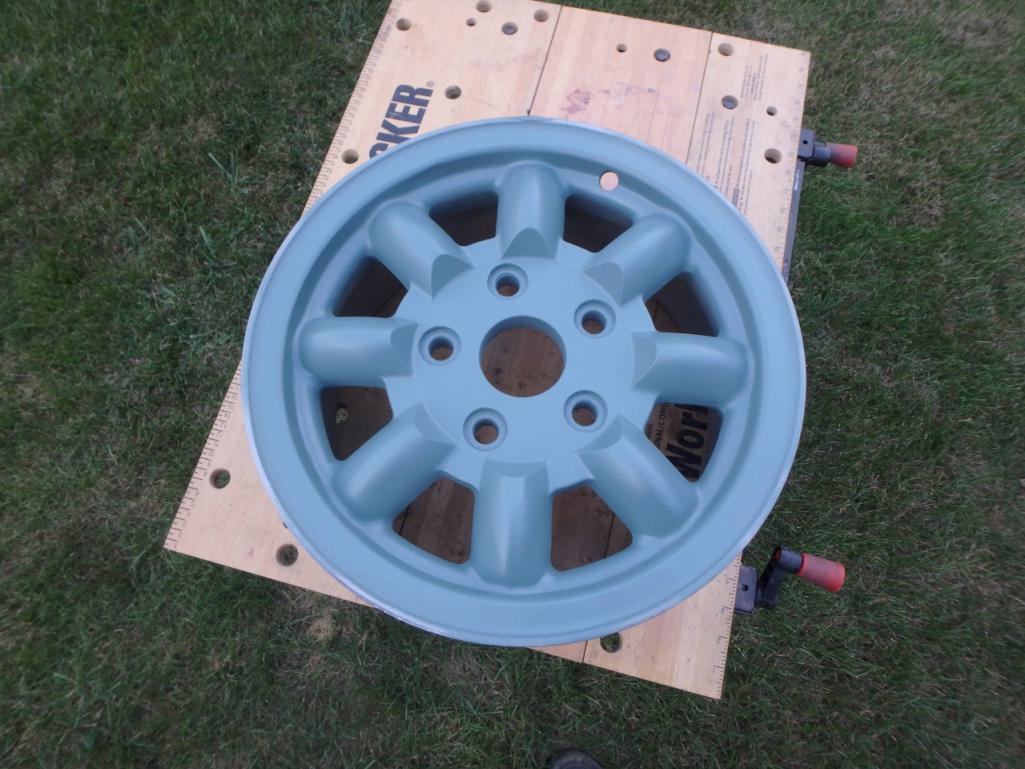
Hope to get a bit more done on the wheels over the week, but maybe I will focus on the sway bar mounts and install. Would like to start having the car go back together.
And well my plan is to put it together, as McMark says a running driving 914 beats any of them that are on jack stands any day.
Posted by: mepstein Oct 22 2017, 06:01 PM
Thanks for the “how to” on the sway bar. I need one on my conversion car. I will order a set of Brad’s mounts this week.
Posted by: 914forme Oct 23 2017, 05:29 AM
Your welcome, thank you for letting me know it was useful
I will finish it out with the JB weld and final fitting. The other side is just a rinse and repeat process. Though I have thought about building another adapter and using laser bore sight to mark the center on the other side. The might be taking this to an extreme.
Posted by: McMark Oct 23 2017, 06:08 AM
Your welcome, thank you for letting me know it was useful
I will finish it out with the JB weld and final fitting. The other side is just a rinse and repeat process. Though I have thought about building another adapter and using laser bore sight to mark the center on the other side. The might be taking this to an extreme.
Once you get both holes, slide the sway bar into place and make sure things line up nicely. You can pull the bar most of the way out one side, and then use it as a level to realign the metal. I'd add the JBWeld once everything's aligned and let the JBWeld cure with the bar in place.
Little steps will add up to the whole. Keep on those and you'll progress nicely.
Looking good!

Posted by: 914forme Oct 23 2017, 06:14 AM
Thanks for the tip Mark 
Posted by: 914forme Oct 27 2017, 07:10 PM
got in the shop tonight, and finished up the swaybar installation.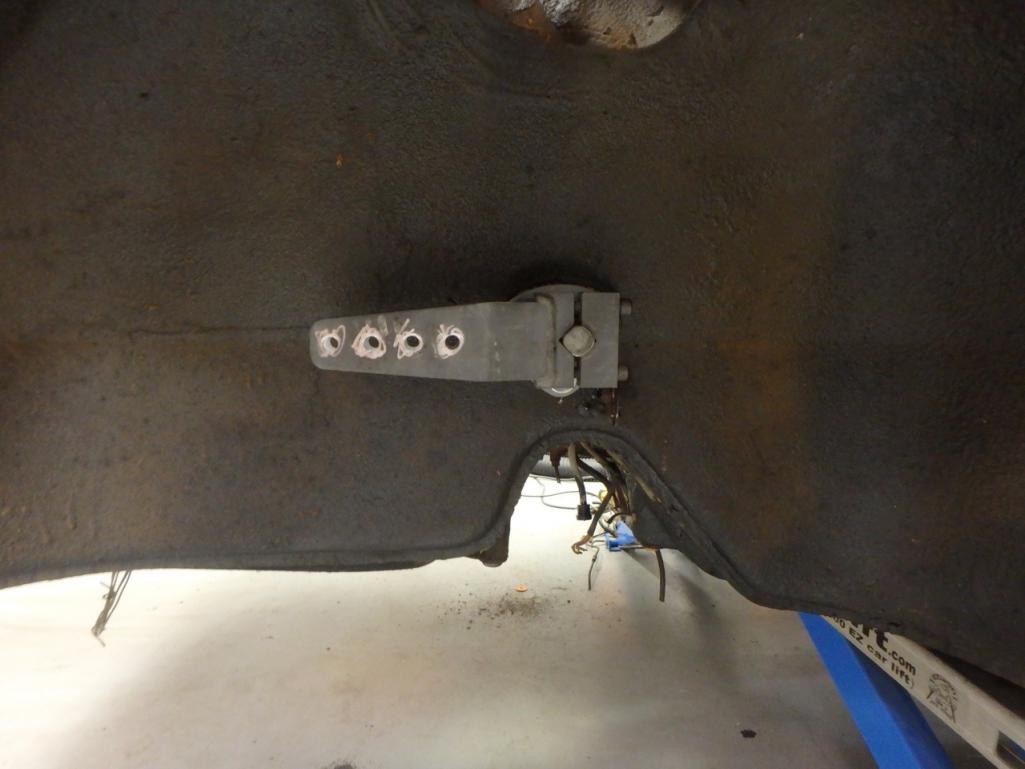
Not as smooth as my roller bearing mounted swaybar on the EG conversion, so I need to add a bit of machining and a grease fitting, to give them a little less friction. That equals more lathe and mill time.
Posted by: 914forme Nov 22 2017, 08:29 PM
Got a bit more done today, might keep me out of the slackers thread.
First up horns, each bracket needed to be clocked correctly. And the electrical posts needed to be bent from 90 degrees to 0 degrees or maybe 1-2 degrees if your wanting to be picky.
The Horns are Hella SuperTones, 130dB Might keep somebody from running over the top of the 914. 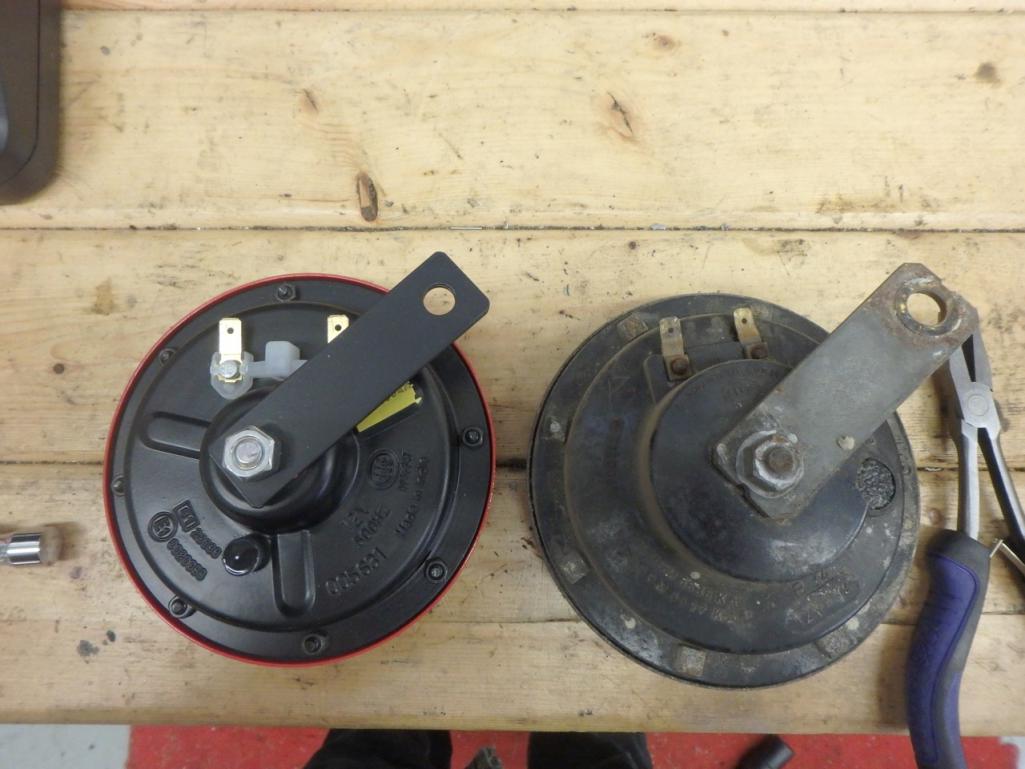
Next up cleaned up the Cibie Friving lights.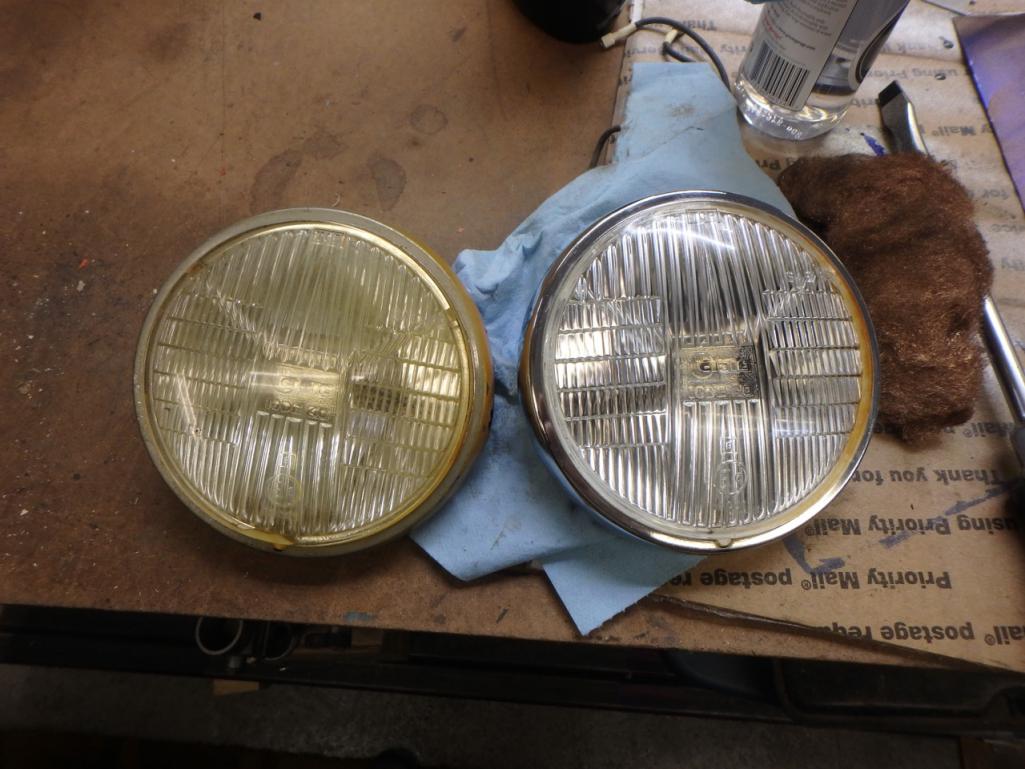
Wow they where dirty 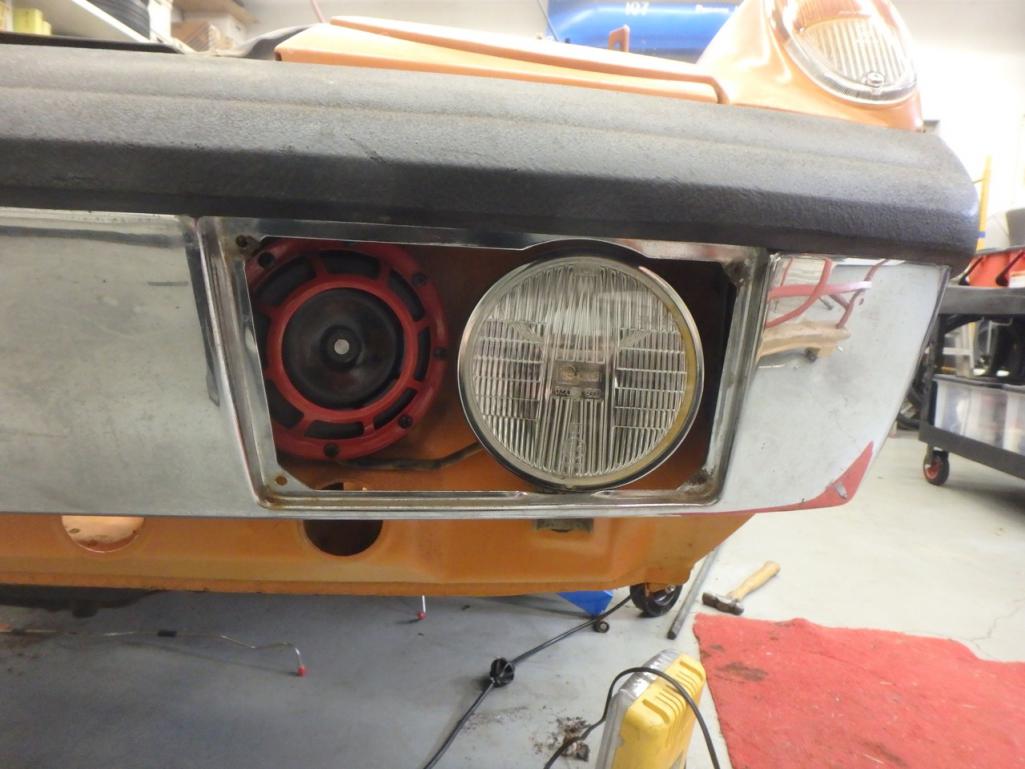
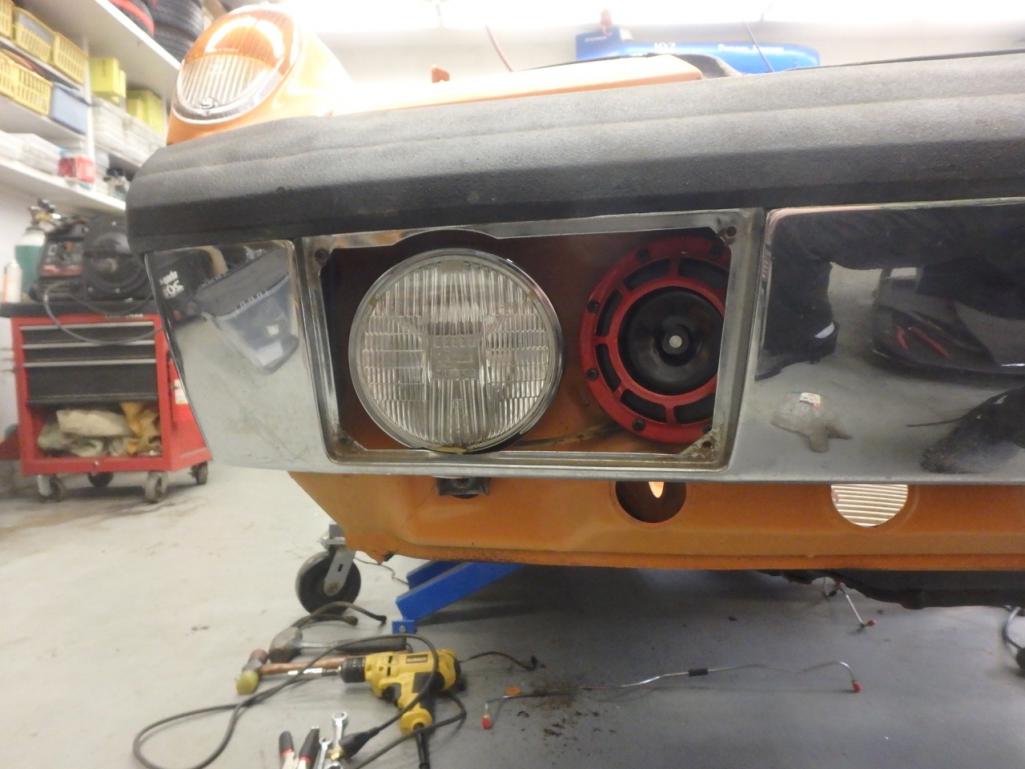
Both sides mounted up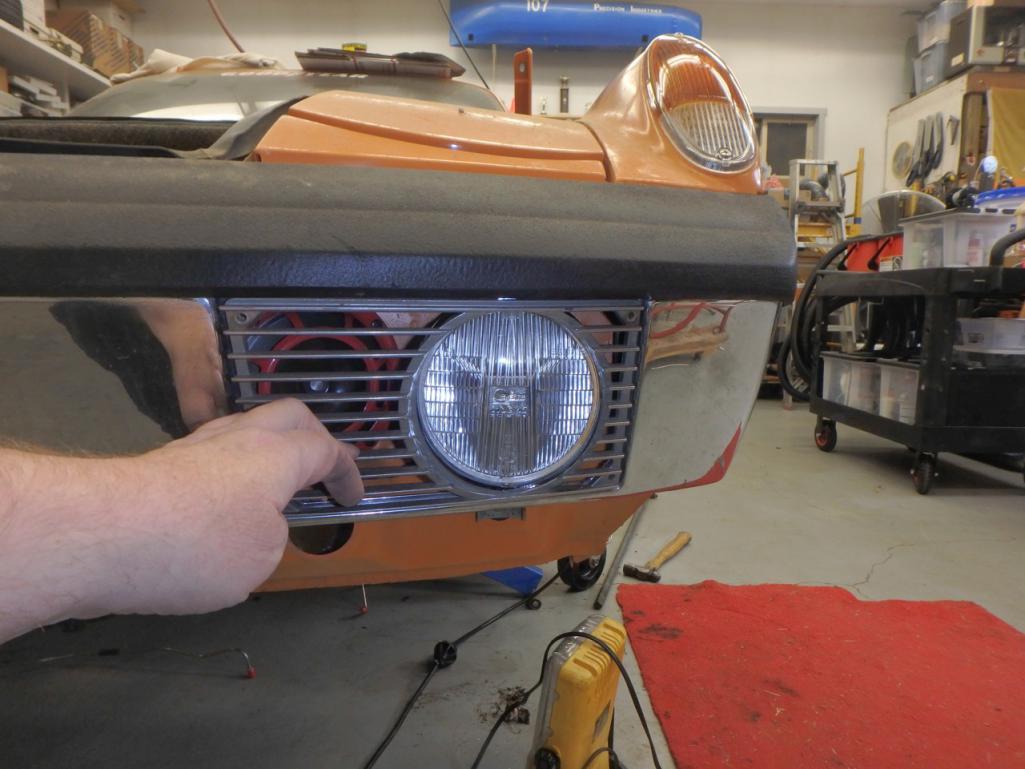
Need to find some SS screws to mount the grill covers with, anyone know the screw size off hand?
Back to the sway bar installation
JB Welded them in. Brad says that will work, and in reality your clamping these, and just keeping them from falling down behind the gas tank. That would suck.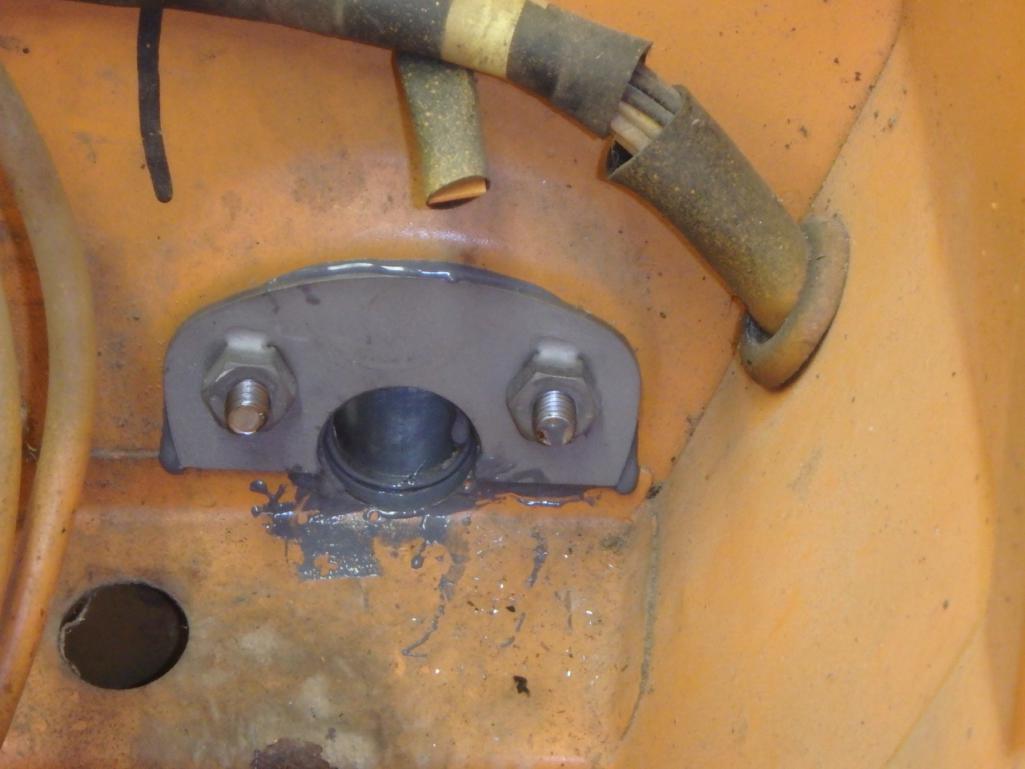
If it becomes an issue, it is not like I don't know my way around welders
In the wheel wells, once set I will hit them with a top coat and then undercoat them. Just to make it match what Dad had done.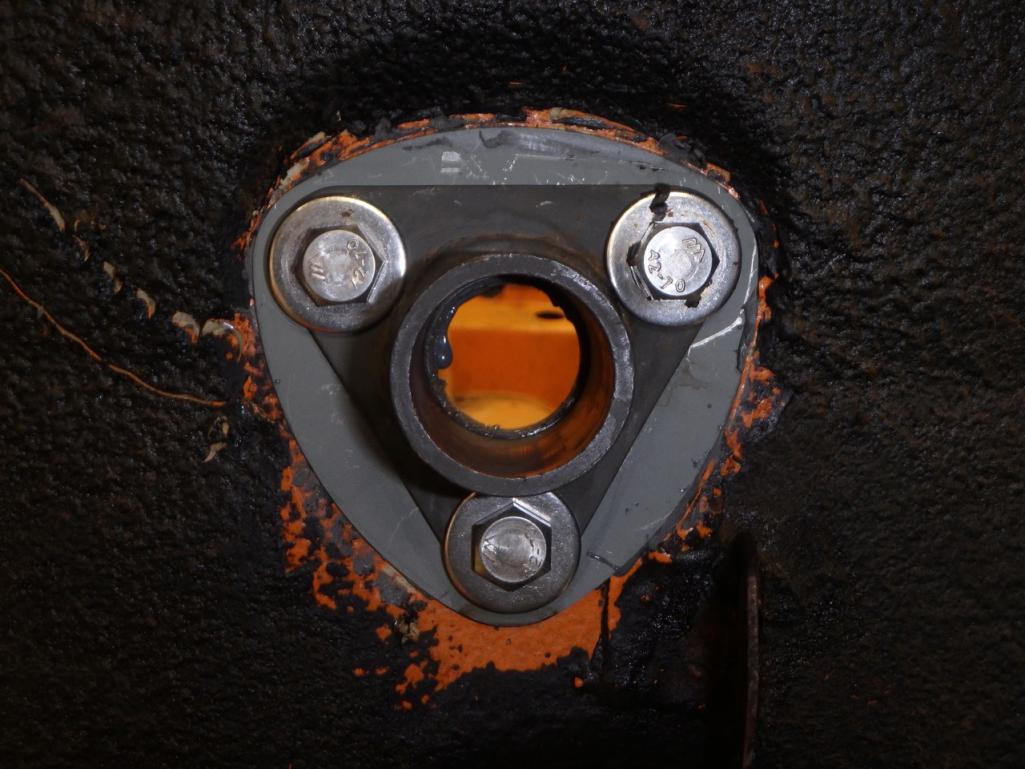
Been working on my second set of Mini-Lites the first set is going up for sale.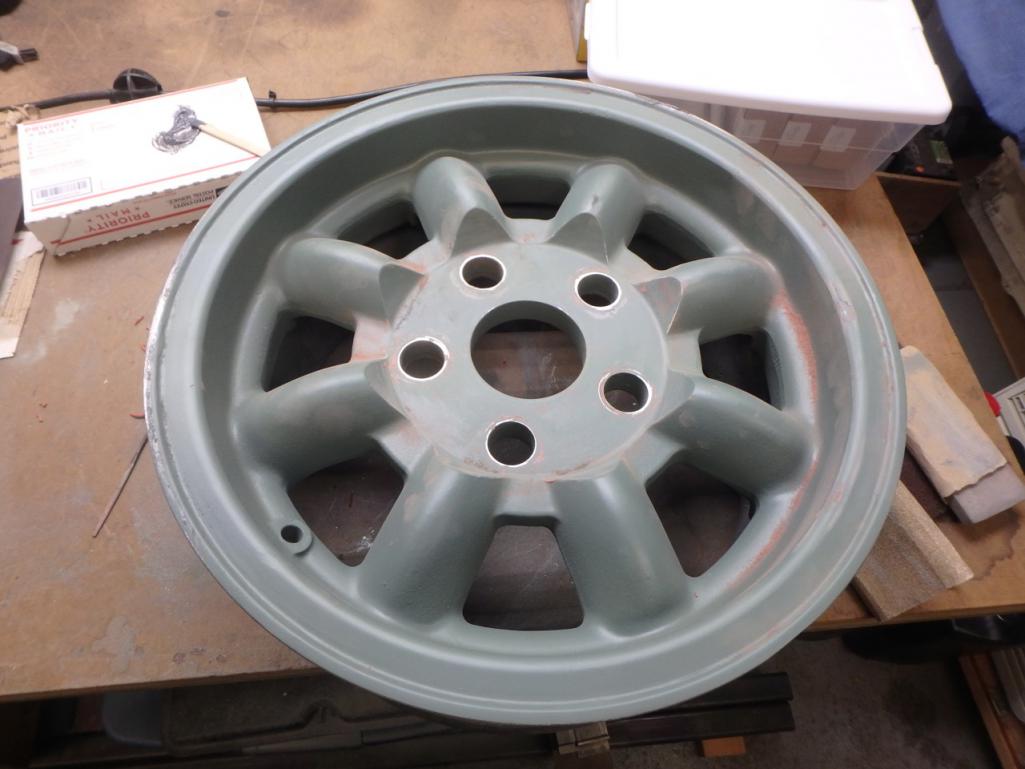
Last but not least some brake Porn PMB, a sourced set of Brembo Alpha calipers, and speed bleeders 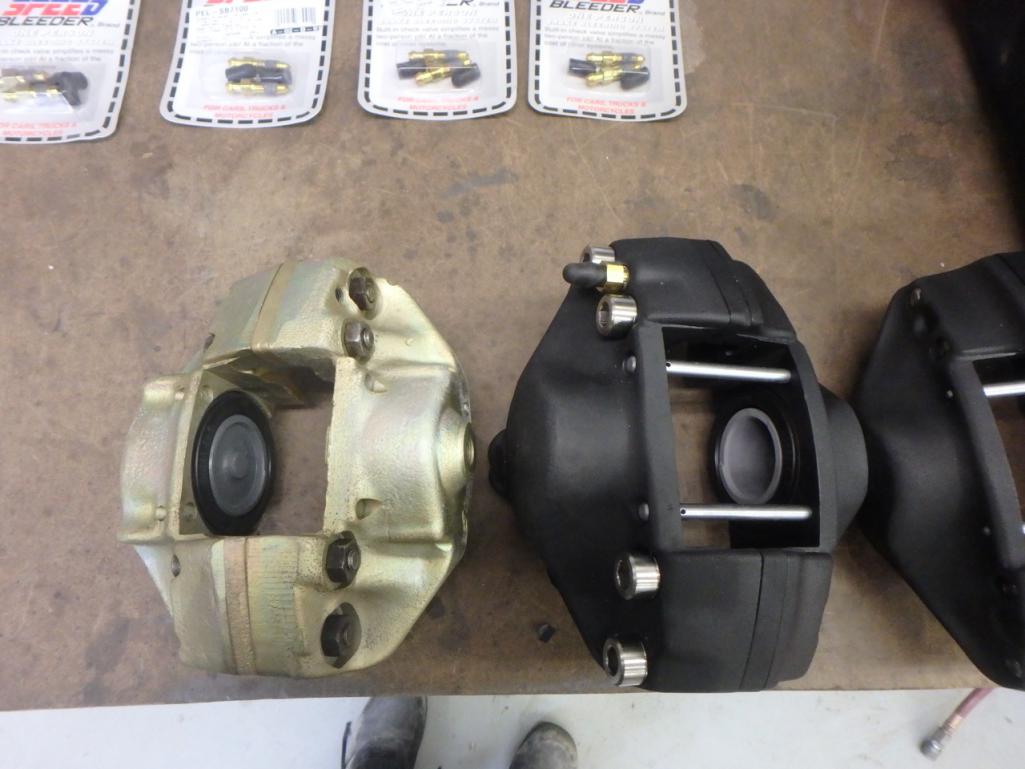
Alphas Much bigger than the 914-6 fronts And they are Aluminum Much lighter to boot
And I ordered to many speed leaders, did not realize they come in pairs. Yet it worked out because the Alpha Calipers required a M10 bleeder and I just so happened to have 4 sets for my EG build, that is using Boxster Calipers which are also M10. For once a mis-order worked for me.
Speed bleeders going into the classifieds also. At a fraction of the orginal cost
Attached thumbnail(s)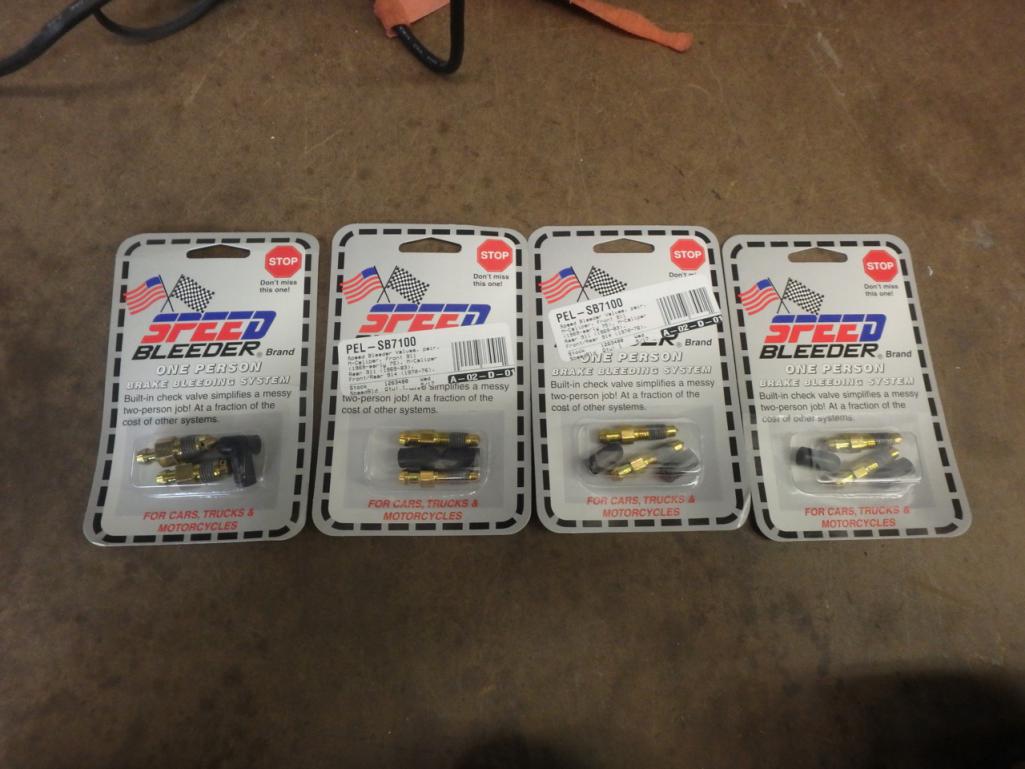
Posted by: 914forme Dec 1 2017, 08:05 PM
Been traveling for work. here is the update of what I got done while I was in town.
First up got my welding area kinda of setup. I am still looking for some steel to build a good bench, or a used one I like.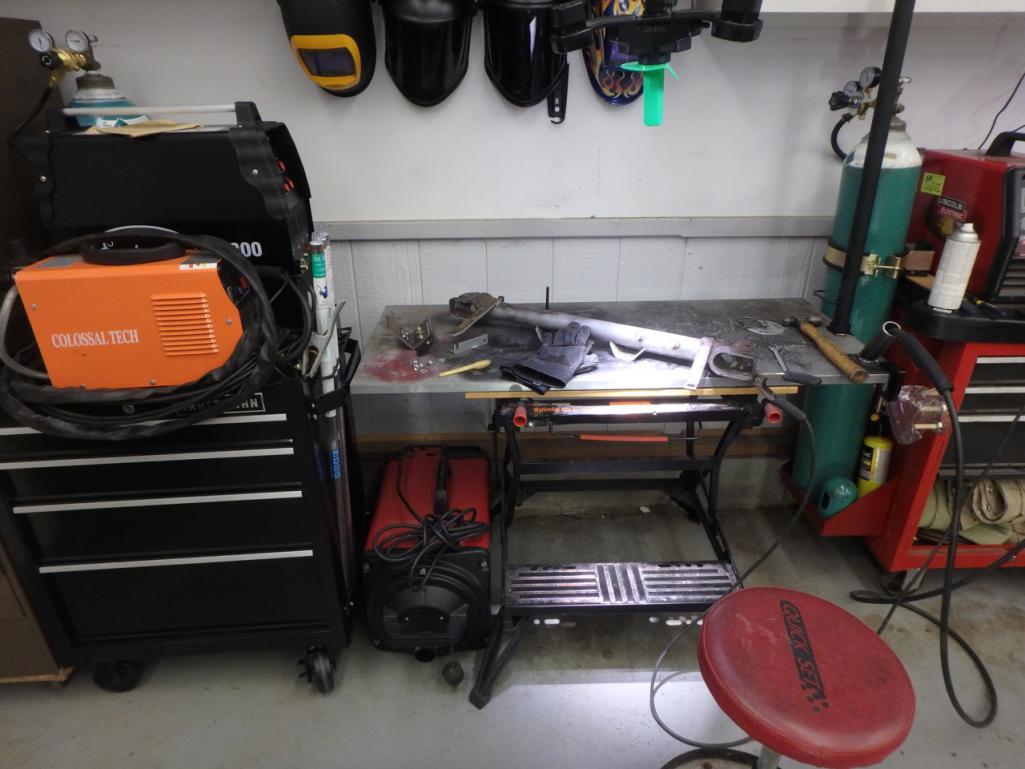
Nice to have dedicated welding space, now to get to welding. I have not been welding for about 6 months, man I am rusty, but I got back in the grove pretty quickly. I worked on some welding tank mounts, and other things to get the muscle memory back.
Then I started this.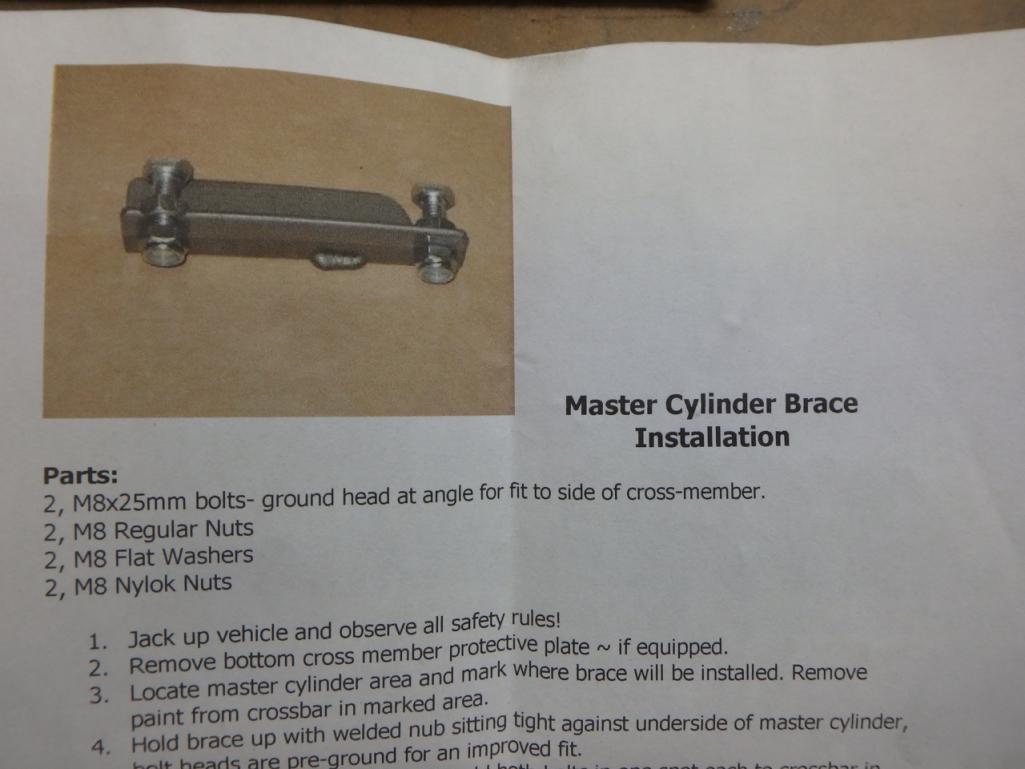
Welded up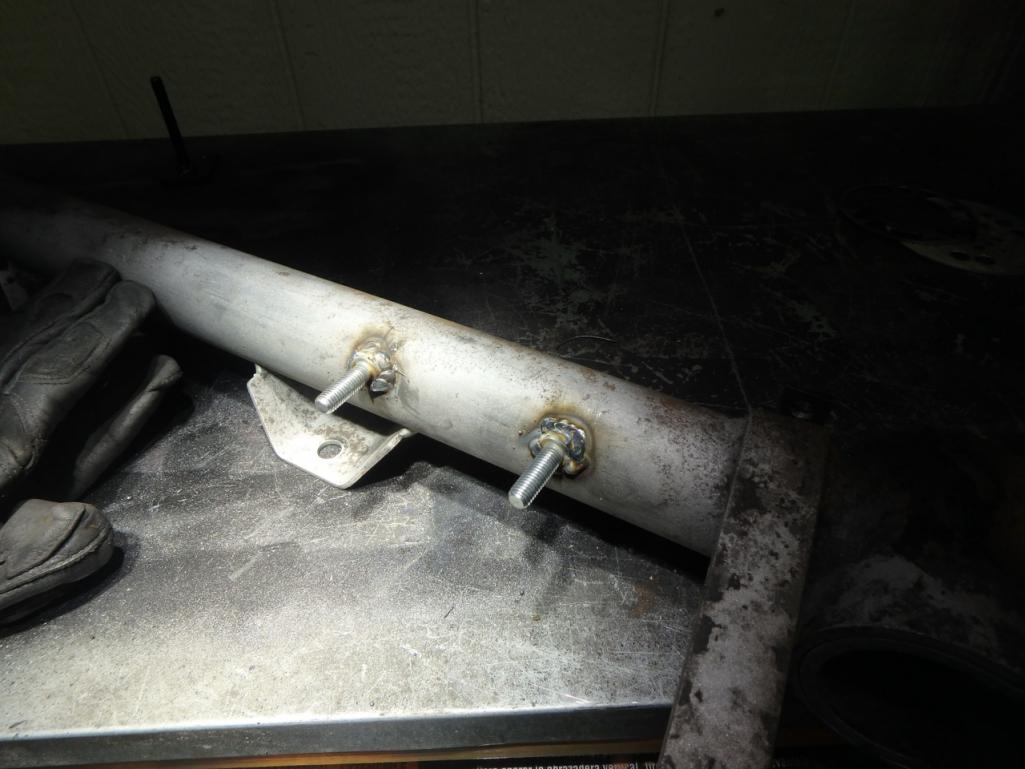
Spot on, like all of Chris' stuff, it 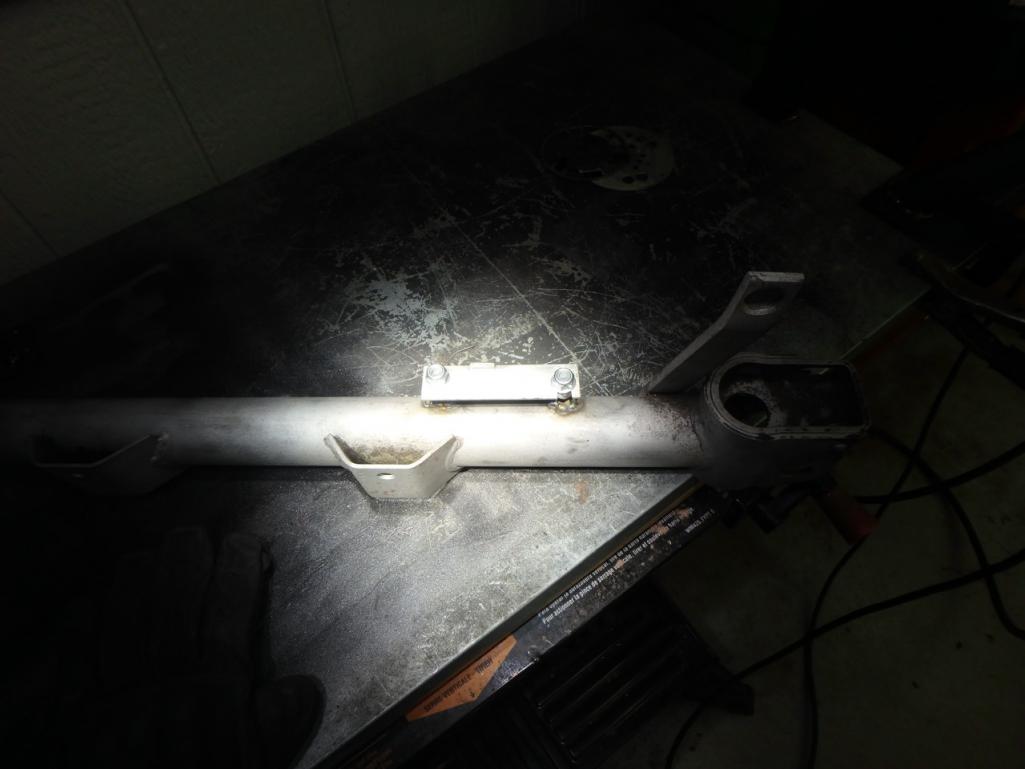
Okay no I am not welding in a dark shop, I have some strong lights, but this welding table light really screws with the digital camera. This is just turning off the light.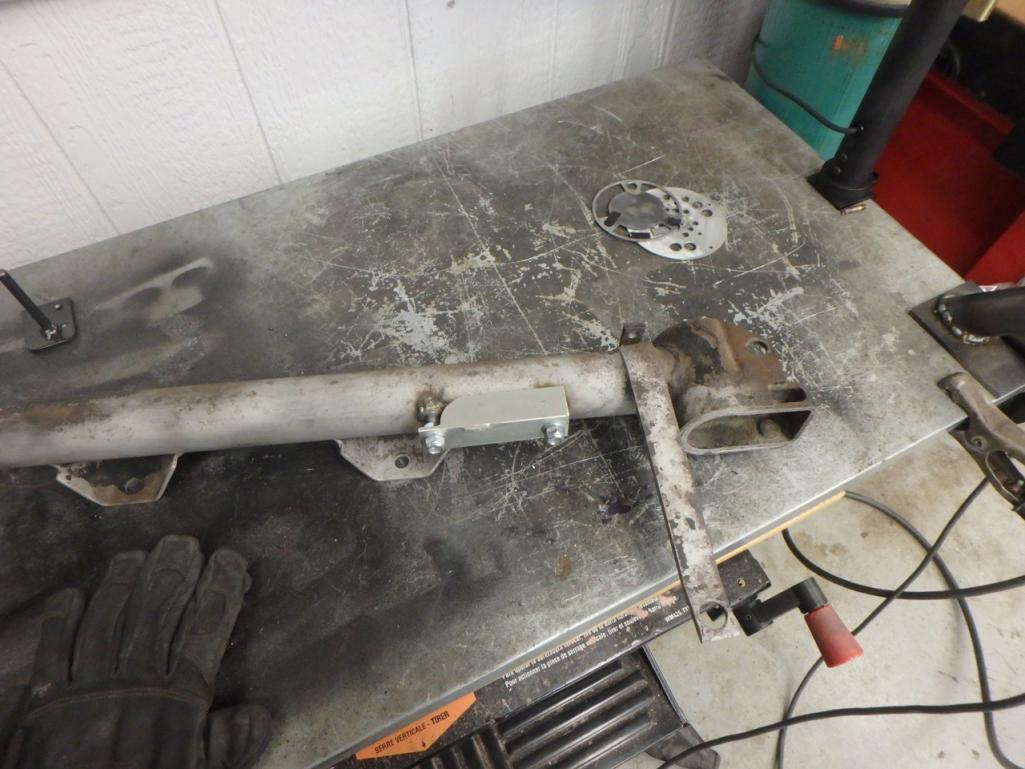
Thanks Scott
Posted by: NoEcm Dec 1 2017, 08:24 PM
I tend to measure project success and the amount of fun I have had by the number of chips, pile of metal shavings, and metal abound.
Successful and fun day
Great little 3" lathe. I have the same one myself.
Posted by: Amenson Dec 1 2017, 10:04 PM
Welded up
Did you actually use your Tig welder for part of the right bolt or is it just a really clean MIG weld?
Posted by: mb911 Dec 2 2017, 08:14 AM
Its mig.
Posted by: 914forme Dec 2 2017, 08:20 AM
Welded up
Did you actually use your Tig welder for part of the right bolt or is it just a really clean MIG weld?
Well what you see there is the difference between rusty to fluid. Both MIG'd.
TIG should be operational this week. Then lots of practice, lots and lots of practice.
Some of the TIG stuff I lined up, need to make some tooling to do them is some 901 transmission rebuilding tools. I have a clutch spline I started to make into a tool. Would like to TIG these up.

And a Long socket that has been cut and prepped , and never welded. Just waiting on me to get the nerve to grab the TIG and do it. Maybe I'll do that today. Force me to finish the TIG setup. If I wanted to get it done, I would just grab the MIG and do it.
Posted by: jd74914 Dec 2 2017, 09:09 AM
And a Long socket that has been cut and prepped , and never welded. Just waiting on me to get the nerve to grab the TIG and do it. Maybe I'll do that today. Force me to finish the TIG setup. If I wanted to get it done, I would just grab the MIG and do it.
If you want to make it a litle less threatening, you could use the Sherline to turn an aluminum or brass insert to keep its shape while welding. Then it's relatively insensitive to heat. Not to make more work for you or anything.
Posted by: 914forme Jan 16 2018, 07:48 PM
Well a bit of update.
TIG up an running, long long long road ahead on learning the skills. Currently my welds look good 2% of the time and the other 98% they look like 
I also found some parts I tucked away in the shop, and got to work.
I had a couple scratches in the seal and bearing spacers on the struts. So new ones go on. Dang they are a tad expensive.
Drove the old off, 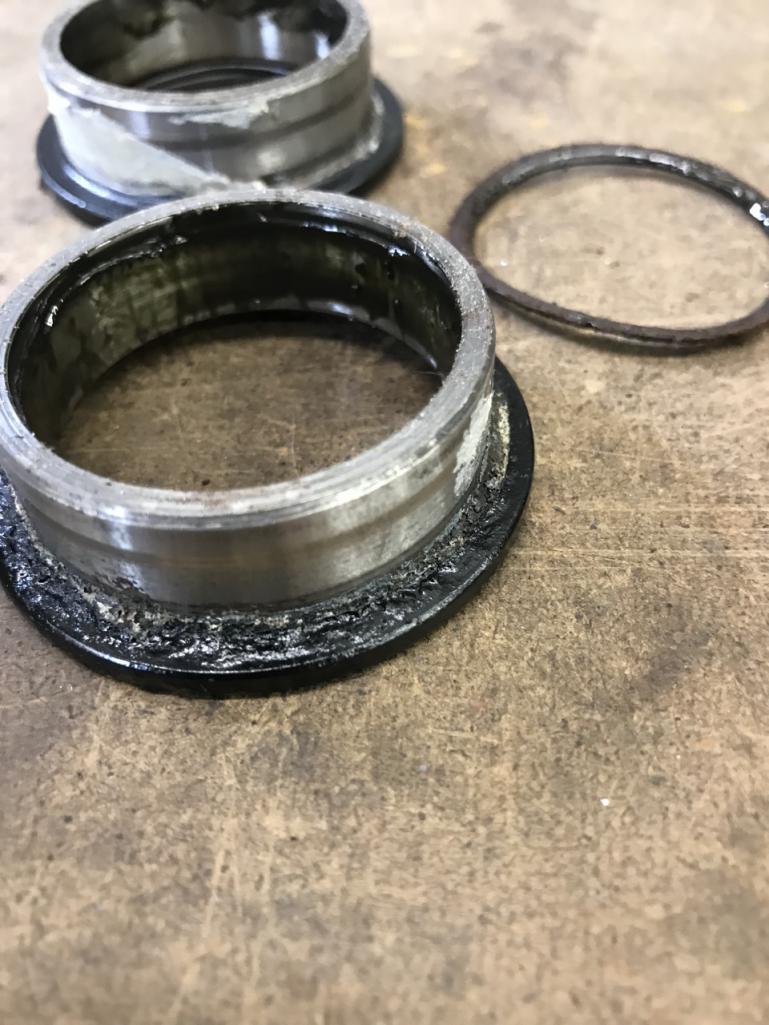
And new ones back on with new o-rings also.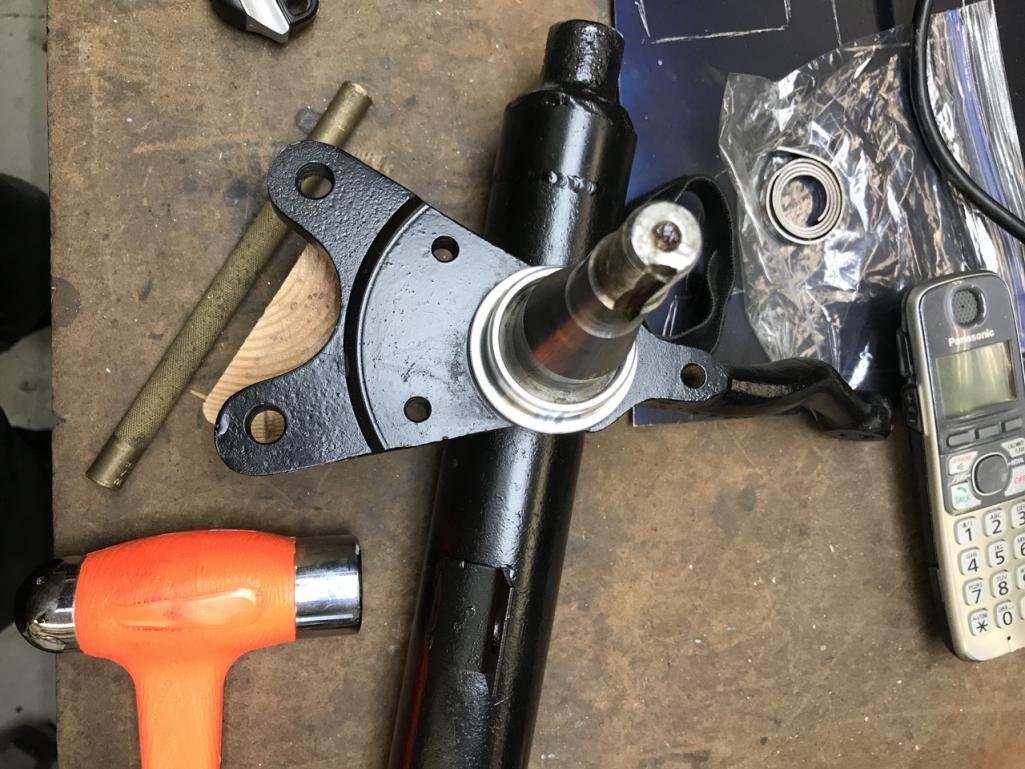
And then I ran into an odd one. One Bilstein insert fitted perfectly in one strut. the other did not fit. two threads engaged and we are tight.
So measure, everything is the same, again
Swapped inserts, and the one that did not fit now fits in strut A with inset B. Insert A gets two threads down into Strut B and stops 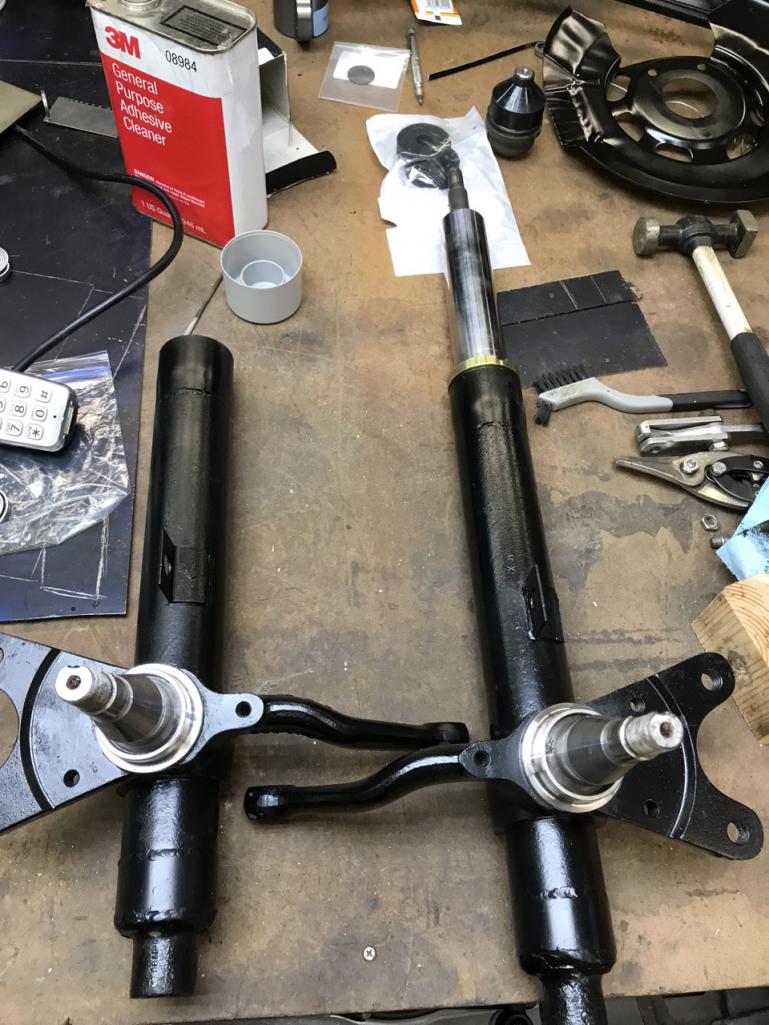
Like everything with this car one step forward 2 back. And I can not find my spanner for the insert top nut.
Oh and I also have an issue with the new ball joints locking into the arm. The ball joint key is narrower than the key that is welded onto the arm. I did find all my new ball joint hardware.
Posted by: tomeric914 Jan 18 2018, 10:30 AM
Like everything with this car one step forward 2 back. And I can not find my spanner for the insert top nut.
Meh, just use a pipe wrench...


Posted by: 76-914 Jan 18 2018, 10:44 AM
And I thought I was the only one that had days like that.
Posted by: fishgeckos Jan 18 2018, 10:59 AM
Well I am pretty darn excited to start this project.
It has been a long time coming.Oldest 914-6 Restoration know to man has just gotten kicked into high gear.
The back story:
My father had owned several sports car and sporty cars in his life. His then current pride and joy was a Lotus Elan. That car gave me my first addiction into speed and driving fun. It was 1970s and I can remember sitting in the passenger seat, going down a road, top down. Wind was blowing through my blond curly locks. Yes I did have hair
And all I could see was the wood dashboard in front of me, and if I looked out the side, I could see the tops of the phone poles. If I looked to my left I could see my father grinning from ear to ear, like a cheesier cat. The other items I remember from my Lotus days was my father constantly under the hood. And the fact it was so low, that we would drive under the parking lot gates.So it was a sad day when the lotus was sold. He did it just the same as I would have if in his shoes. He sold it to get the money to build his house. Dad by trade was an architect, I suppose he still is, he is just not practicing any more. So he built a very nice modern house for the three of use, and we moved. Boring cars filled the driveway at this point. A Ford Pinto, yes the blowy up kind. And an Audi 100, that was beige. That car was purchased wrecked. My father fixed it all up, and well we found out why it was wrecked. Every time it rained that car got hit. You would be sitting at a light and bam, rear ended. Driving down the road and get T-boned. It was crazy. Mom and Dad sold that car for all things a Triumph Stag. Really a lovely car after my father rewired the entire thing to exercise the Lucus Damons.
One day leaving his office he looked over at the repo lot next door. There sitting rather sadly at the back of the lot was a bright orange Porsche. Dad’s co worker and fellow car rebel rouser convinced him to go over and take a look. He knew it was a 914, he did not know until he got to the back of it what it really was. Sitting on two flat tires, with steel wheels and ugly hubcaps was a 914-6. Not sure how, but he got the money together and bought the -6. I can remember riding it just once. Not far from home we heard a odd sound coming from behind us, Dad shut off the engine, tossed it into neutral and we coasted home. Lucky it was a down hill run. Pushed it into the garage, and all hell cut loose.
Diagnosis from all his SCCA buds was more than likely a bad chain tensioner. Need to drop the engine and see what was up. Dad being Dad decided that was the perfect time to take it down to a almost bare chassis and start restoring the car. This was 1976 the car is only 6 years young. I spent many a day and night out in the garage with dad. He would be working on the -6 I would be playing like I was driving it.
Years past as I got older, I got into racing, my father supported me. First up was the gravity drags otherwise know as soap box derby. I ran these for three years until I got bored with it. Then cam motorcycles and motocross. We then switched to auto-x and that stuck with me for the rest of my life.
We also worked on a bunch of cars in that time frame. The first one we did together was when I was 14. It was a 1965 Jeep CJ5 he traded for some work we did on a guys basement. We got that finished and well Jeeps are not my thing. So we got Karmann Ghia, built it into a sleeper with bunch of parts we had from a 914-4 parts car. Redid the engine with a type-4 used a 911 5-speed, and all the suspension was redone. Going down one of the roads in the area, I keep hearing this loud roar of a V8 coming up onto me, we would hit the curves and it would fad away, and finally got out of the twisties, and heard it again. It was a guy in a vet, who I must have been really pissed off, as he could not keep up with my little VW in the corners. When I went to college dad drove the car to keep it “limber”.
His six sat on the side line.I graduated, got a job with Nancy Lowe, which also meant they found out I was into 914s and well I got to know Jon also. My daughter was born, and a month latter we found my 914-4.
Dad helped us build our house, and work on various cars, and vans, keep our budget down a bit as a young family. A few years ago, I got a Miata for my wife, for our 25th anniversary. We where married in 1989. The car built in November of 1989. She wanted one back in 1990, it is like I made the dream come true, only 25 years latter. I restored that car, and took my dad for a ride, he was hooked. And Mom was hooked too, so they found a 1994 M edition they liked. We picked it up, and I restored that car for them.
Years have passed and I have become blessed enough to have a career that I can afford to give a little back to my parents.
The Plan:
Originally it was going to be how I remembered the car. It did not have the sail vinyl or the warts on the front fender. He also had a top painted to match. I would like to build it the way he had envisioned it. As of today that plan might have changed. Some where along the way, he put the warts back on, and added the sail trim and vinyl and added a stock top.
I still plan on adding the following items.
I have a bunch of vintage speed parts I have been collecting over the years and picked up a few just recently. Thank you Scott, and Kerry your parts will be going to good use. And thank all you people who sold me stuff at the swaps like it was worth nothing in the 80s and 90s.
Engine: rebuild, add pressure feed tensioners, and turbo valve covers. Other items we will see what is wrong with the engine, it has been sitting a very long time.
Transmission: Add a LSD, convert the car to a side shifter, using Tangerine Racing parts, and JWest shifter.
Suspension: Add bushings, Bilstein Shocks, H&H Swaybar up front, maybe a stock rear swaybar. I have a set of mono ball front strut supports, and rear adjustable spring perches. Will also add turbo tie rods and a rack spacer to help with bump steer.
Brakes: will be stock, if not functioning PMB will get a call, and parts shipped out to them for rebuilding. I will also add bronze bushings to the pedal cluster.
Wheels and tires: I have a set of stock Mahles, hate to drive on them. I currently have a set of fake Mahles on it. Still looking for a set of Minilites in 6.5x15”. I should have never sold them.
I purchased my first set of Jon and Nancy Lowe. They used them on Nancy’s yellow 914-6 for autocross.Fuel: Tangerine will come to the rescue again with a set of Chris’ fuel lines.
Electrical: JWest fuse box will be added, along with Spoke LEDs. A set of Period correct Cibie Z beams will be added, and a set of Cibie fogs will be added also. Audio wise I will add a small bluetooth amp, and leave the stock radio in place, just disconnected from the speakers.
Interior: Stock, but I will add a set of seat heaters to keep cold at bay. If passenger seat is not comfy for the wife, we will convert it over to a late style seat and back pad. At that point maybe change to a set of aftermarket seats. I would love a set of GTS LeMans
Exterior: I guessing it will be stock now. Though I am torn I liked the clean lines with out the sail panels vinyl, and warts, with the painted top. That is how Dad originally wanted it.
If the engine is not up to snuff, I will go with a small bump using Nickies, and a bump in compression. And some different cams, and a set of larger heat exchangers. Though I am really hoping to keep the costs down and live with the stock stuff it is in good working order.
Almost everything I will be doing is completely reversible, except a few exceptions and even they can be fixed if people want to drive a 914-6 with out sway bars. I would gladly do it if some one offered me stupid money for the car. As of right now it is more about the memories and giving back to my father.
So now I just need to get cracking: Wanting this done before April, would love to take Dad for a drive this spring. So what that also means, my 914 which is part of the Build Off Challenge will be resting for a little while. I had already packed up most of the part in anticipation of starting this project.
This is the garage it was stored in for 40 years.
Saturday I brought it to my shop. Rented a U-haul trailer as all my trailers are up at the farm. Car has not seen the light of day in 40+ years.
Now the for the fun part! Determining what is left todo on the car, and come up with a game plan.
Very cool. I am doing a similar project with my Dad's old MGBGT
that has been in my family for 25+ years. From a value standpoint it's not worth restoring, but I have great memories of my Dad and that car that make the project exciting for me.
Posted by: NoEcm Jan 18 2018, 01:24 PM
From a value standpoint it's not worth restoring, but I have great memories of my Dad and that car that make the project exciting for me.
Sometimes (or oftentimes) memories are worth more than money.
Posted by: 914forme Mar 24 2018, 05:54 PM
Like everything with this car one step forward 2 back. And I can not find my spanner for the insert top nut.
Meh, just use a pipe wrench...
LOL, not a pipe wrench but I did use a set of huge slip-joint pliers and a rag and so mild invention of new word combinations I got them on. I think there was something in the threads. So I chased the threads. I spun them on a couple of times and then brought out the big gun. To get both of them on good and tight.
Both seated the same amount.
And then it was quick work to assemble everything else.
I only switch the chamber plates 3 times
First time I did it right though I did it wrong The second time I thought I did it right only to assemble them wrong
The third time I did it just like the first time only to know I am correct this time

Posted by: Amenson Mar 24 2018, 06:14 PM
Progress makes perfect. Keep it up!
Posted by: tygaboy Mar 24 2018, 06:33 PM
Yea! He's back!
We missed you...
Posted by: 914forme Mar 26 2018, 07:11 PM
Thank you both, feels good to get some stuff done on a none priority vehicle.
Tonight in this episode of parts that don't fit.
You'll see a manufacturer that says they have ISO 9001 rating.
You'll see a man void all waranties
And I invent some new words 
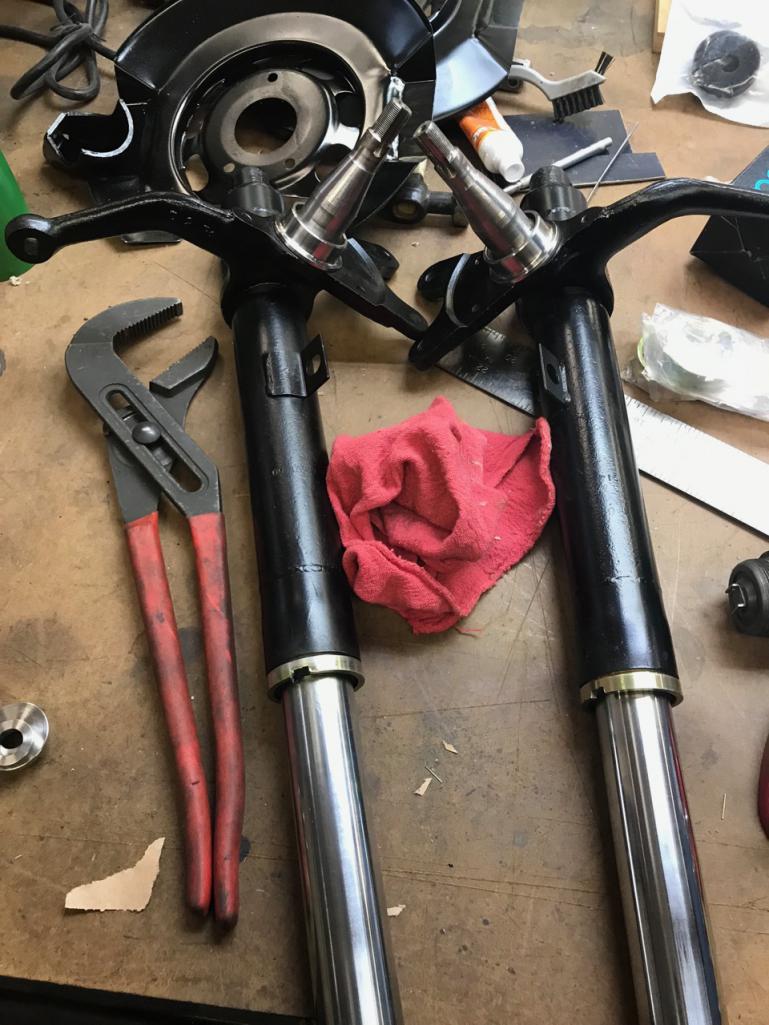
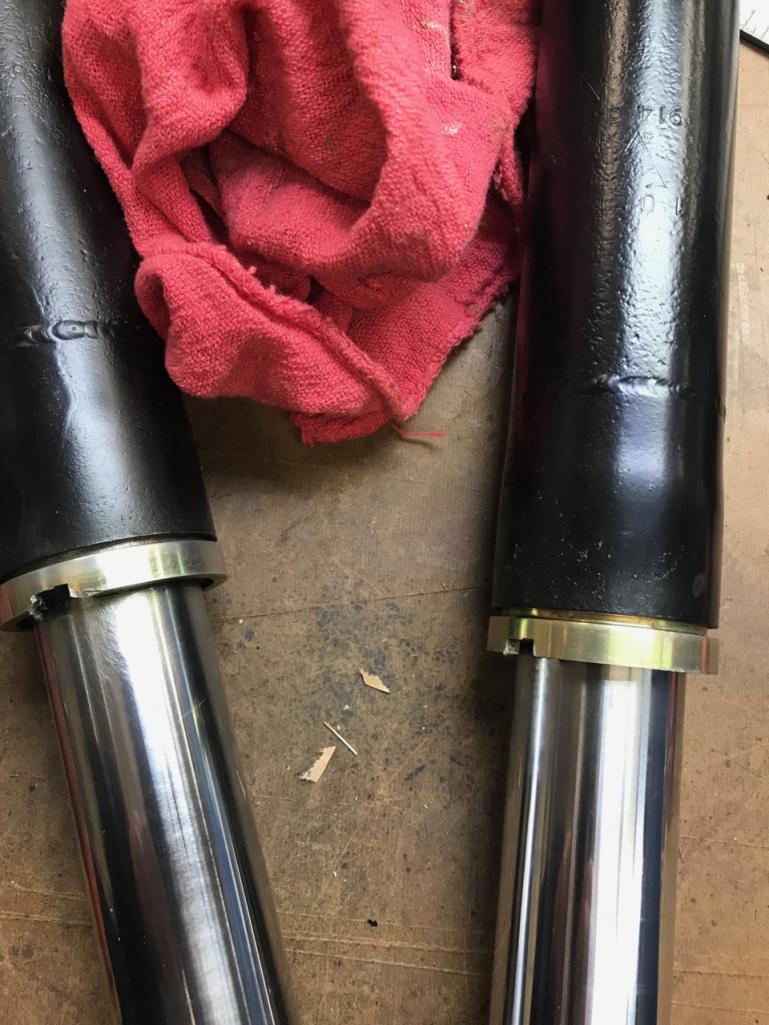
I could never get the ball joints in the arm to seat properly. Or at least to my likely. So out came the calipers.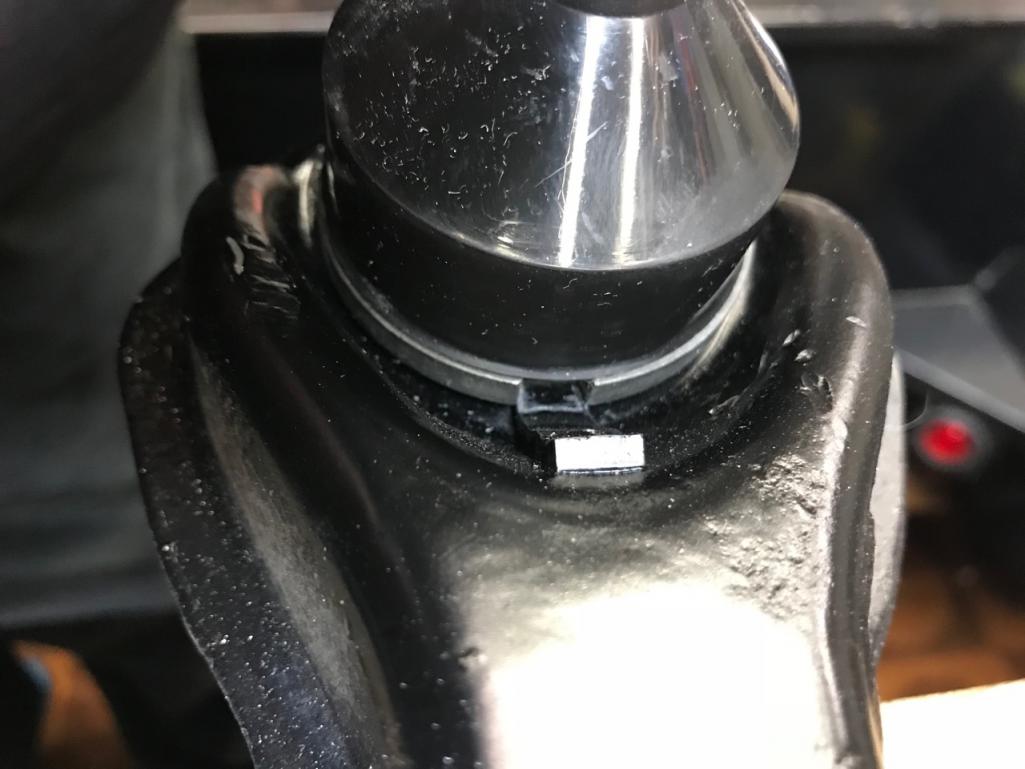
So the opening of the ball joint needed to be opened up just a tad.
A diamond wheel and a bit of grinding latter with the Dremel and Ta Da!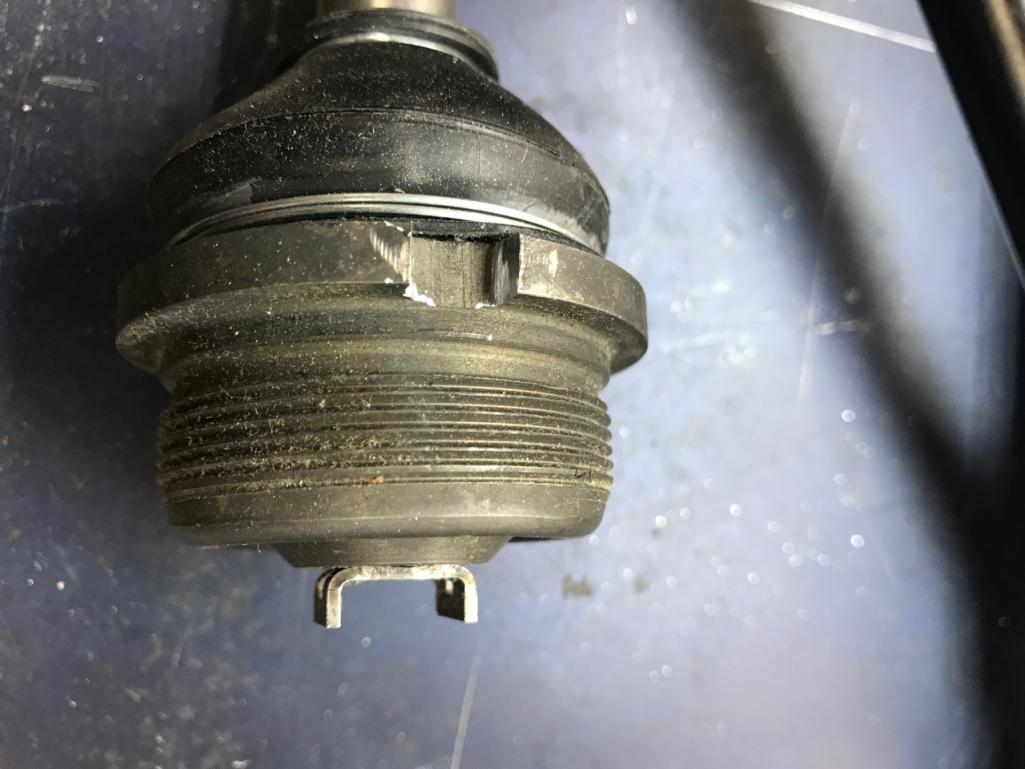
Much Better 
Little ceramic anti-seize and more brand new parts. And this side is together.
The retainer clip that keeps the ball joint nut from backing off, does not fir the tabs on the ball joint. 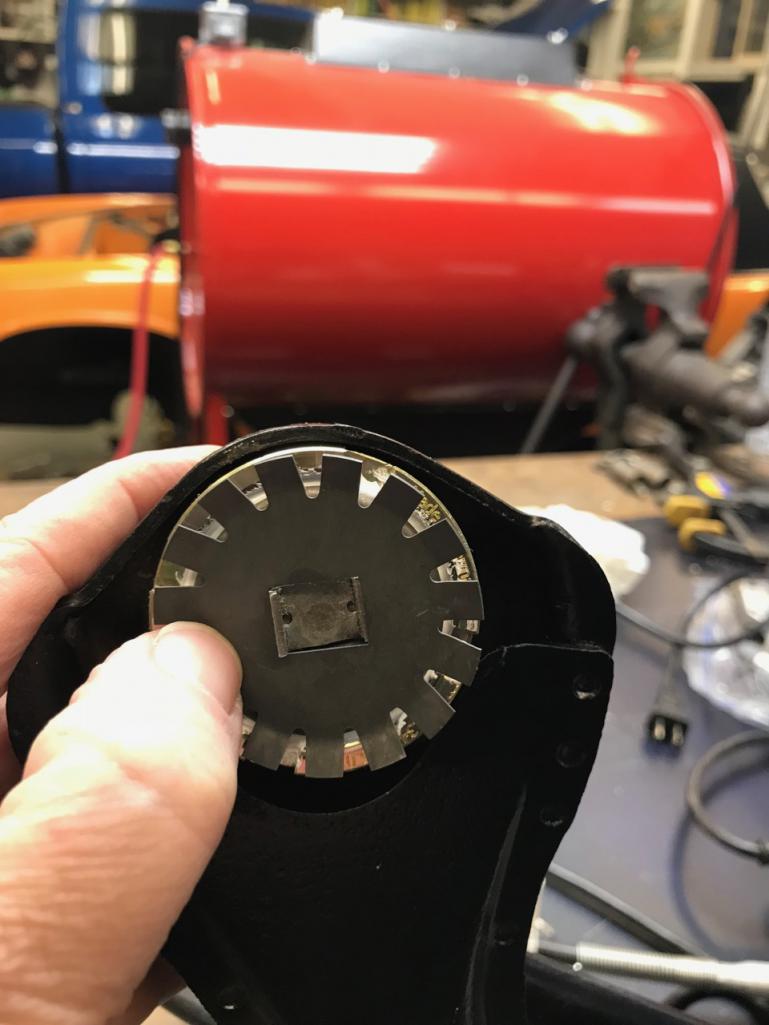
So which part to modify this time. The retainer or the ball joint. I'm pissed at the ball joint manufacturer so why not. And the both of the retainers fit the other ball joint. Crappy quality control. 
Took the big slip joint pliers and modified the retainer tabs. And one side all done.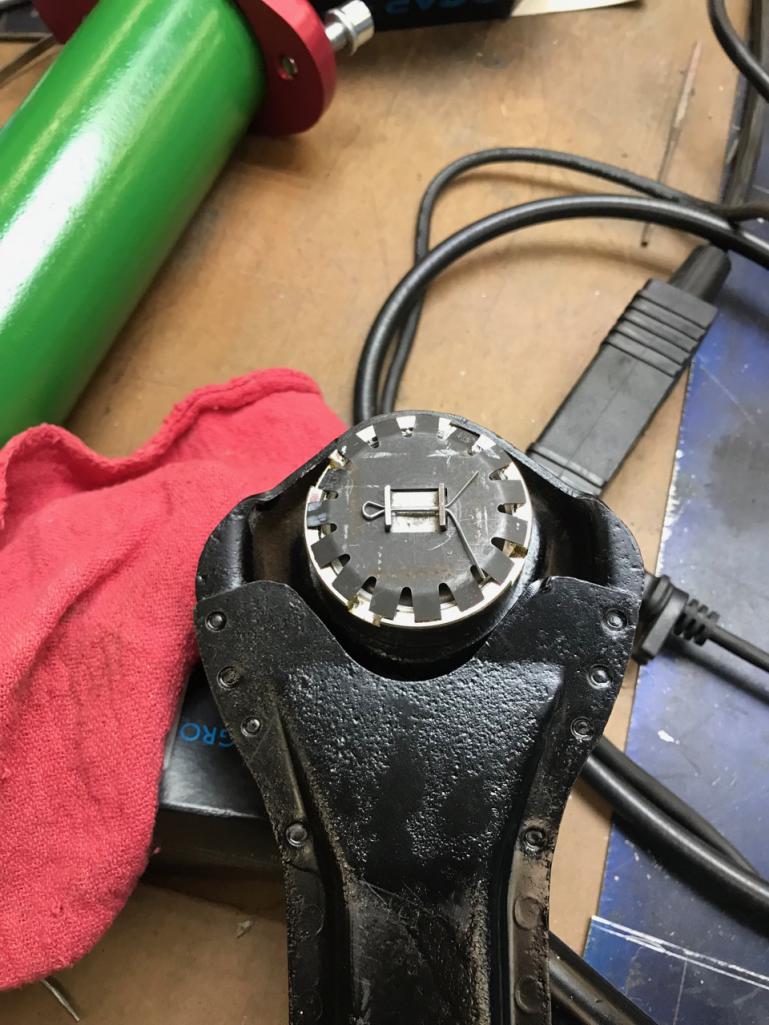
Well, the other side I had to modify the tab area of the ball joint by the same amount. And rest of the assembly went much smoother. 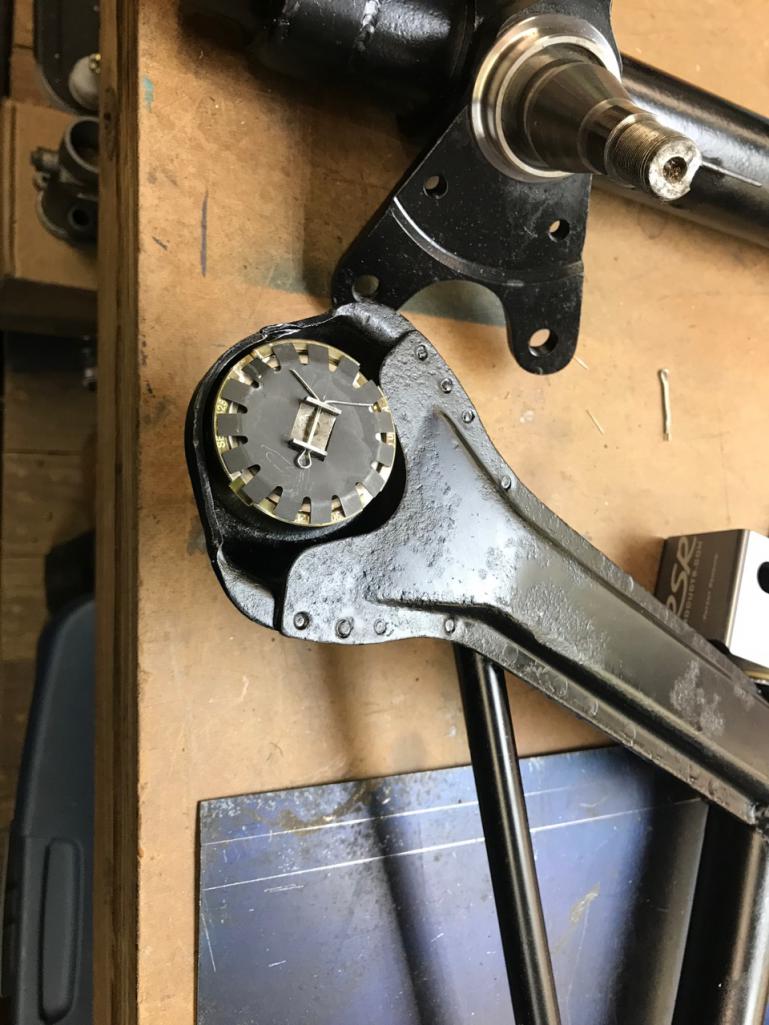
Called it a night.
Posted by: Amenson Mar 26 2018, 08:04 PM
Is it going to be together in time to caravan down to Okteenerfest?
Posted by: 76-914 Mar 26 2018, 08:51 PM
Good to see you've the time to work on your projects again Stephen. Maybe production outside of China will become a reality with the new tariffs imposed.
Posted by: 914forme Mar 27 2018, 08:28 AM
Is it going to be together in time to caravan down to Okteenerfest?
Yes, that is the plan. I want to get it up and running trailer it down to Okteenerfest, and enjoy the drive with my father. That is the reason I plan on towing down. Might have an empty trailer on the way back though if I take some side trips. The plan is to take Mom and Dad down to enjoy the drive, the scenery, and well the 914-6. And then all the great people and 914s that make Okteenerfest so enjoyable.
Kent, I just want parts that fit
I can get bogged down in the details if I let my inner German engineer take over. Hell, that guy almost cost me two fingers! Sometimes I just have to tell that guy NO, it will be fine, it is good enough, and let's get this done. I won't even tell you how much time I spent looking at these ball joints just to put them back into the box for another day. Check and re-check part numbers to make sure I have the correct parts. You can only stare at the PET for so long before you go
I had even considered cannibalizing the EG build just to get this car done. I knew its ball joints fit, lol.
Posted by: mepstein Mar 27 2018, 10:20 AM
I see the guys get out the grinder all the time to make the parts fit. Many different years of parts and many repro parts often create issues. The worst is trying to make parts fit on a freshly painted chassis. I'm a strong believer of pre assembly on a primered shell but due to the labor cost, that never gets done at the shop. But then there's always time to fix the issues
Posted by: Dion Mar 27 2018, 11:36 AM
Nice to see ya back Stephen. My lofty goal as well to head to Octeenerfest.
Incredible the fuss you had with the ball joints! My front struts are
Together but I haven’t indexed the ball joints yet. See if they fit properly.
Keep at it. Looking good
Posted by: 914forme Mar 27 2018, 02:15 PM
Mark, only people with deep pockets get to build a car the 100% correct way. If I was a betting man, I would guess even Singer has a few items that get installed after the paint has flown, and all the pre-fitting is done. I am trying this approach on the EG build, but am thinking when I get back on that one it's going to be a raw build. Not sure I can take making it too pretty without being able to
Luckily this car will have a bit of touchup to be done. And everything that I have for this car is a "bolt on" So far I have not let my welders touch the chassis. For me, that is like being a crack addict with a pipe, a bag, and a lighter, and not hitting that 
I keep looking at the swaybar re-enforcements thinking they really need to be 
Thank you, Dion, hope to see you at Okteenerfest
Posted by: mepstein Mar 27 2018, 02:18 PM
Nice to see ya back Stephen. My lofty goal as well to head to Octeenerfest.
Incredible the fuss you had with the ball joints! My front struts are
Together but I haven’t indexed the ball joints yet. See if they fit properly.
Keep at it. Looking good
At least you will have some big brakes to stop that beast.
Posted by: Amenson Mar 27 2018, 06:41 PM
Is it going to be together in time to caravan down to Okteenerfest?
Yes, that is the plan. I want to get it up and running trailer it down to Okteenerfest, and enjoy the drive with my father. That is the reason I plan on towing down. Might have an empty trailer on the way back though if I take some side trips. The plan is to take Mom and Dad down to enjoy the drive, the scenery, and well the 914-6. And then all the great people and 914s that make Okteenerfest so enjoyable.
Empty trailer on the way back....does that mean that I can turn up the boost and show everyone what the insides of a Suby 5mt look like scattered throughout the countryside and still get PorSTI back to OH!?
Posted by: 914forme Mar 28 2018, 07:09 AM
Scott that is always a choice, let's see if we make the goal. Hitting the mark will be the first thing to see if turning up the wick on that time bomb is an option. Afterall you should have enough meat under the rear now that shooting gears all over the countryside is now an option.
One item I see getting in the way of not having a driver is the engine. I have two of them both in unknown condition. Both might require machine work, and that machine work might be fast, might be slow.
I really need to get the engines on a stand and see where they stand.
But first, this chassis needs to become a roller again.
Posted by: 914forme Mar 31 2018, 07:32 AM
A bit more progress:
Worked on getting the old rotor off the passenger side rear. Like everything on this car, it rusted solid. Sitting is a real bitch on cars.
First up get the rotor off the hub. I used a couple of cap head screws I had around. Could not get the rotor keeper screw out. So I drilled it out. Remnants still need to be removed. Letting it soak in some penetrant.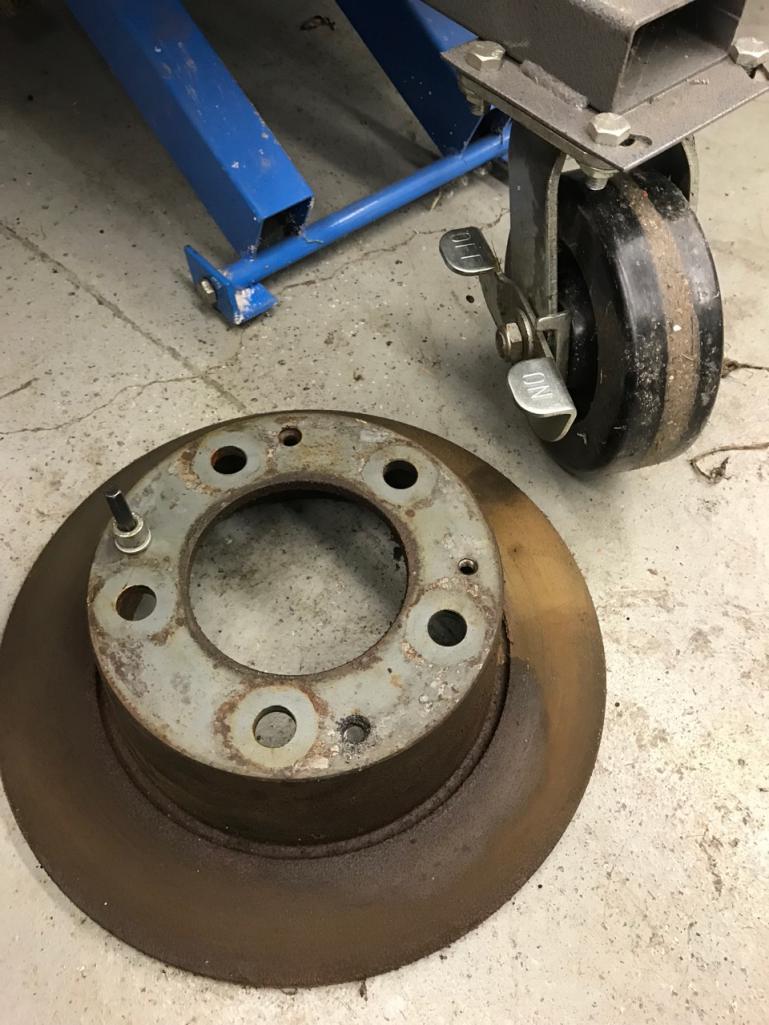
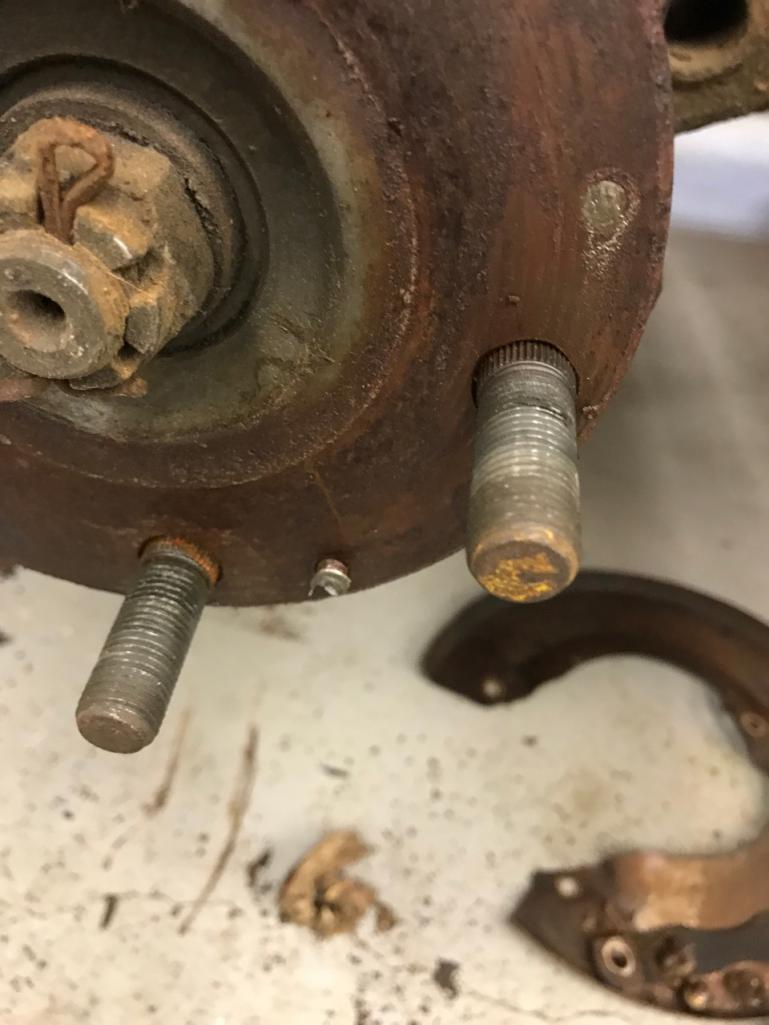
Backing plates need to be cleaned up.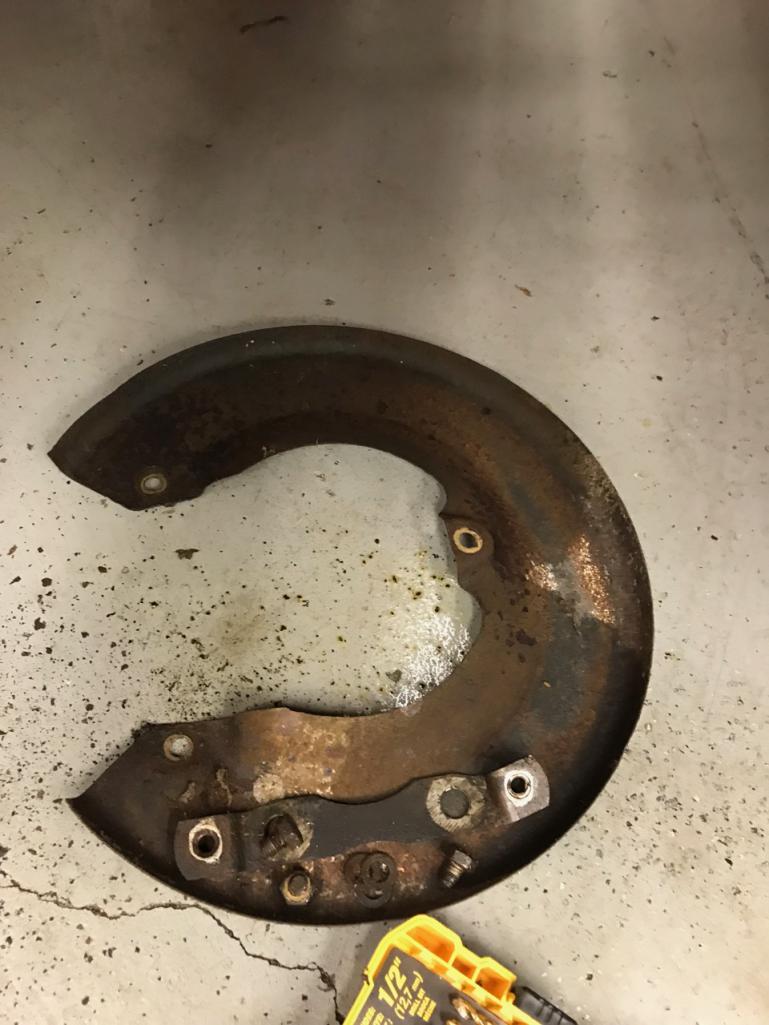
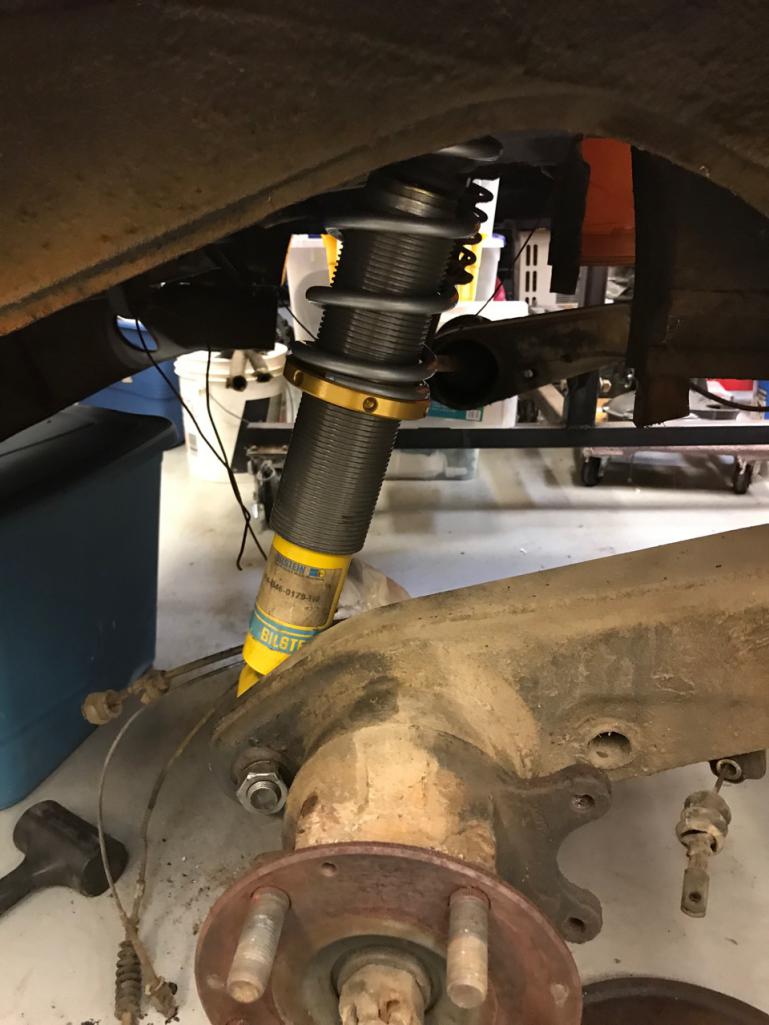
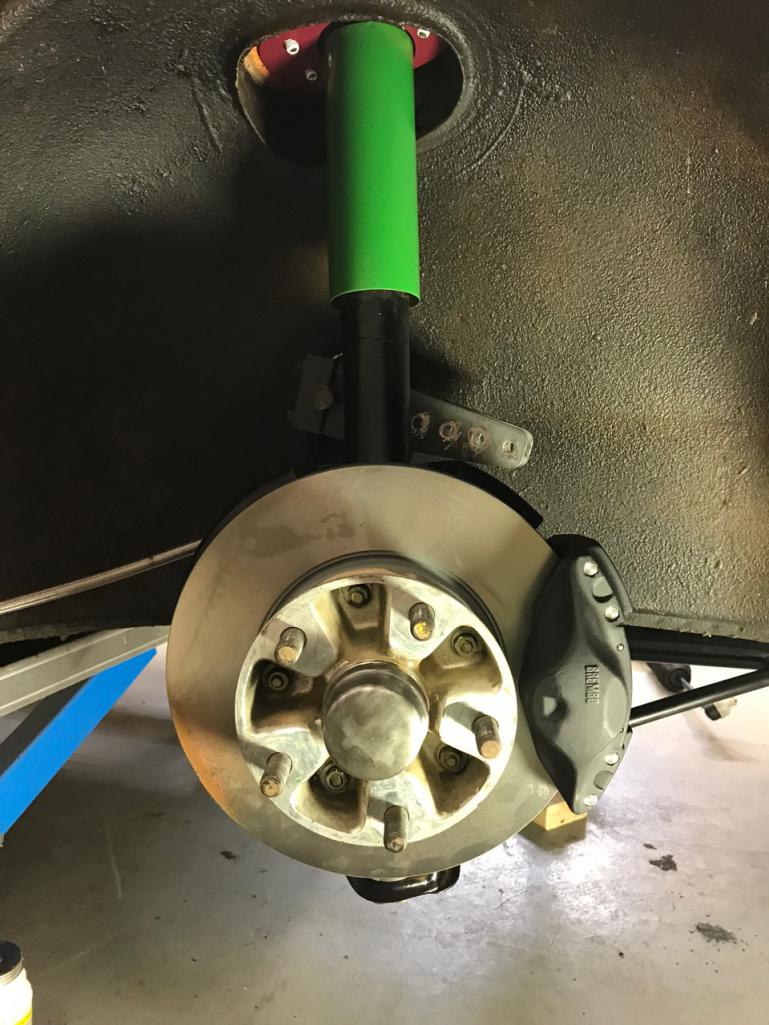
Old Shocks off and replaced with these Bilsiens. Custom valved, adjustable colors, 140lbs springs, monoball shock tops.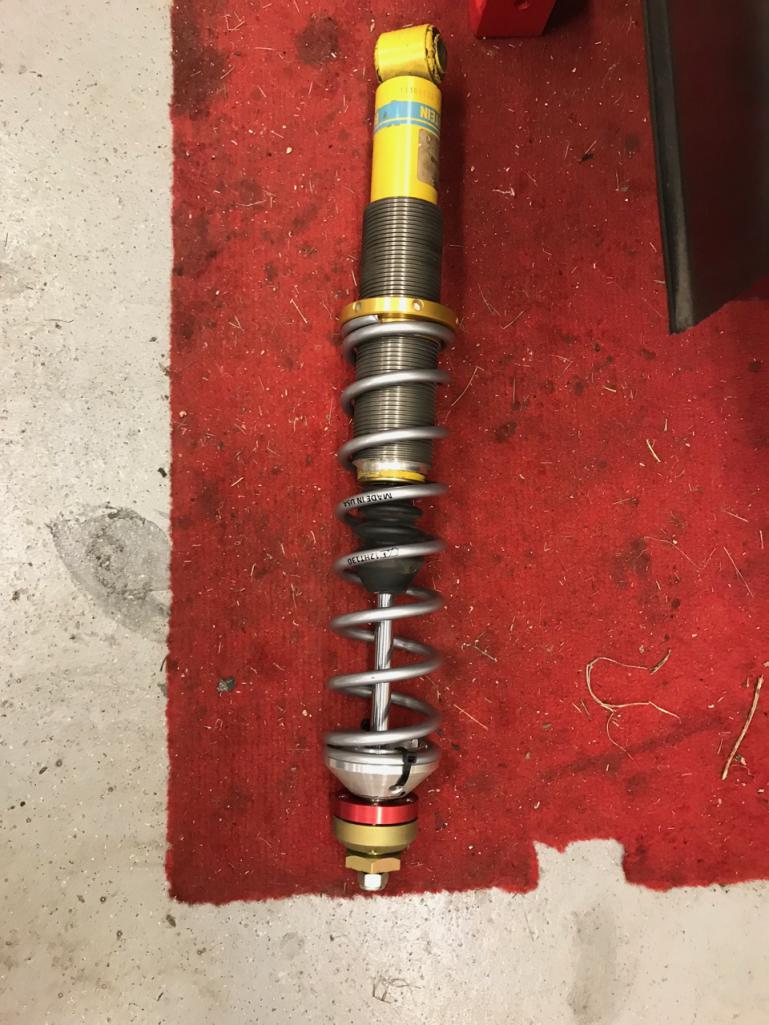
Installed - required a 38mm socket. Good thing I work on large machinery otherwise I would not have a 38mm around. Yes it is a 3/4" drive, bit over kill for a shock top nut. Never thought I would be using 3/4" stuff on a 914 
Rear Arm still has to come off get cleaned up, have the pivot arm bushings installed, and new bearings installed.
Onto the passenger front
Hub and parts all laid out.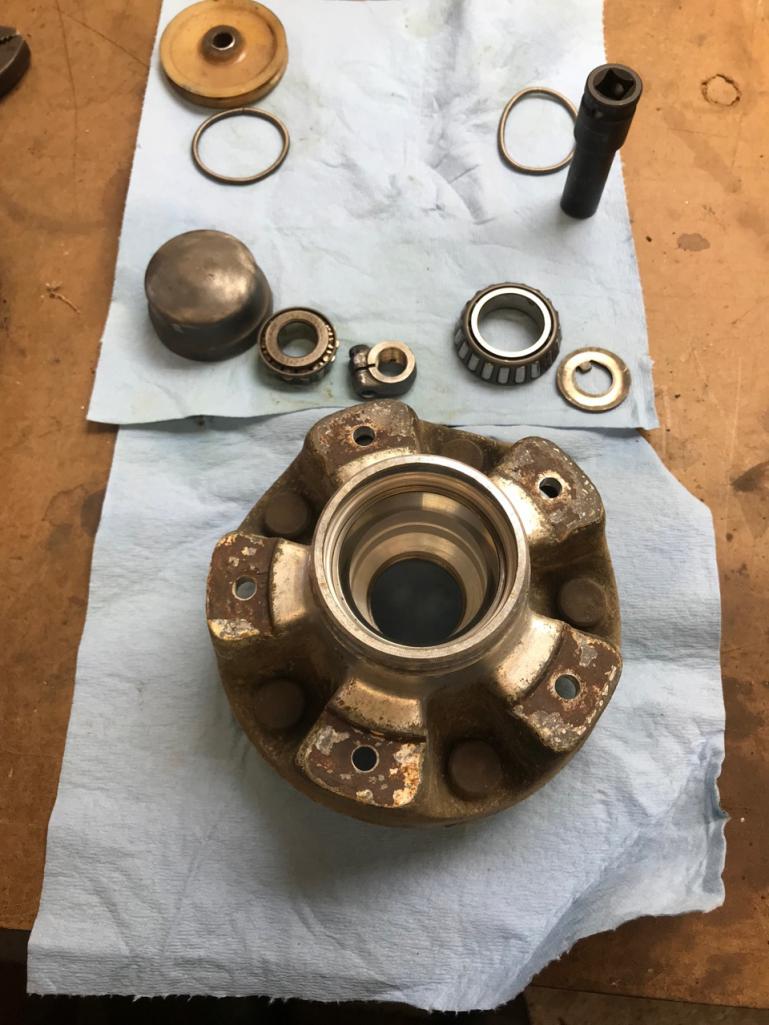
All assembled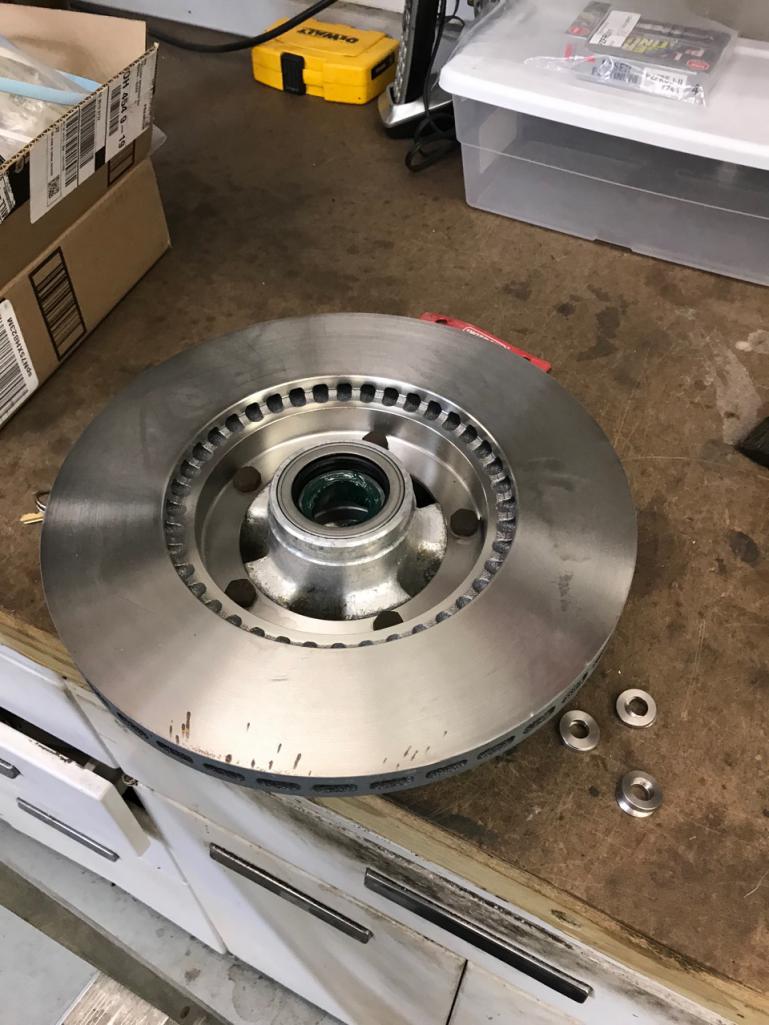
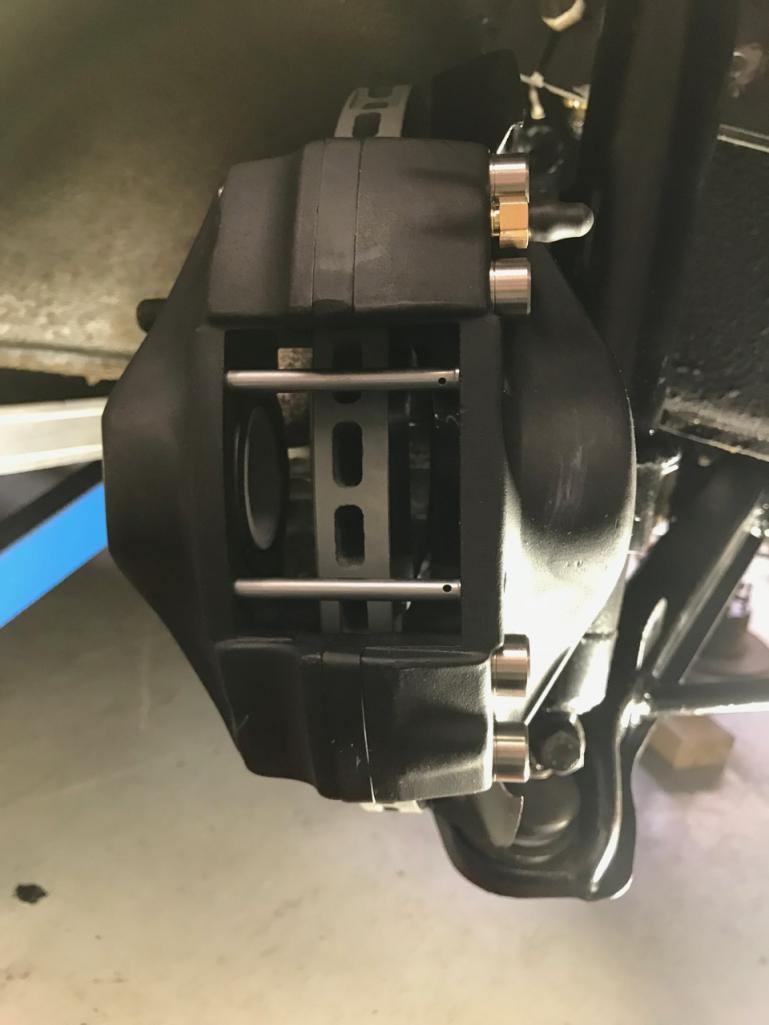
Struts and Arm in place and mocking up the brake calipers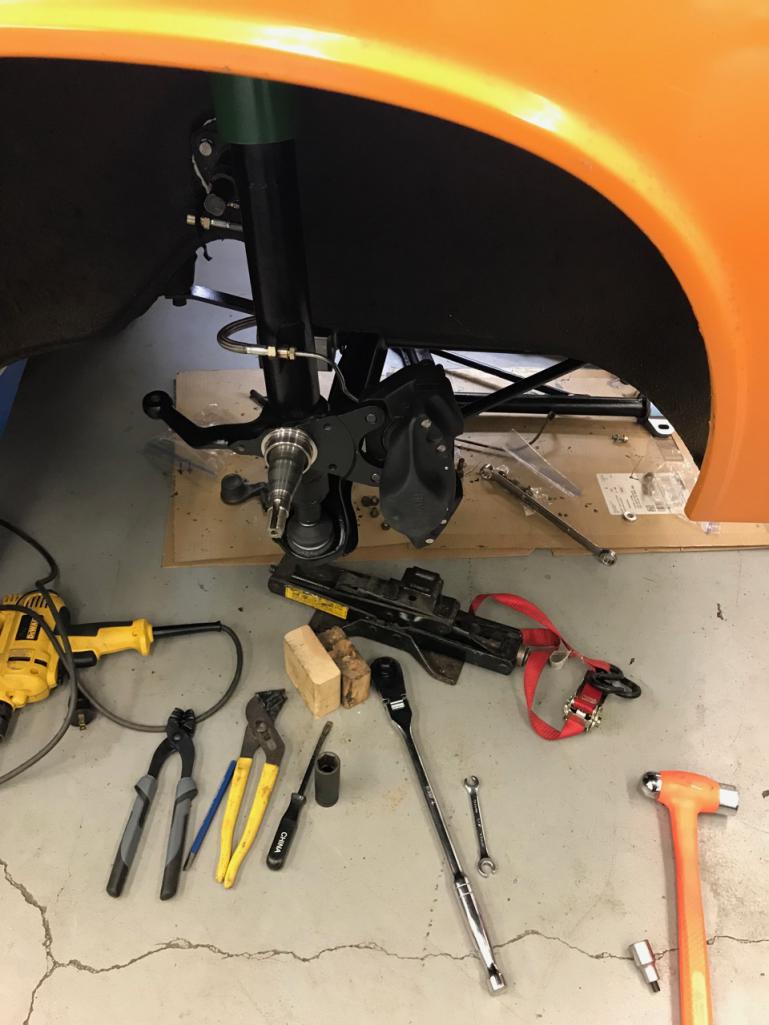
Alfa GT Brake Caliper, why you might ask. 3" caliper bolt spacing, larger pads, lighter calipers. think of them as a 911S Alloy caliper for the 3" strut. 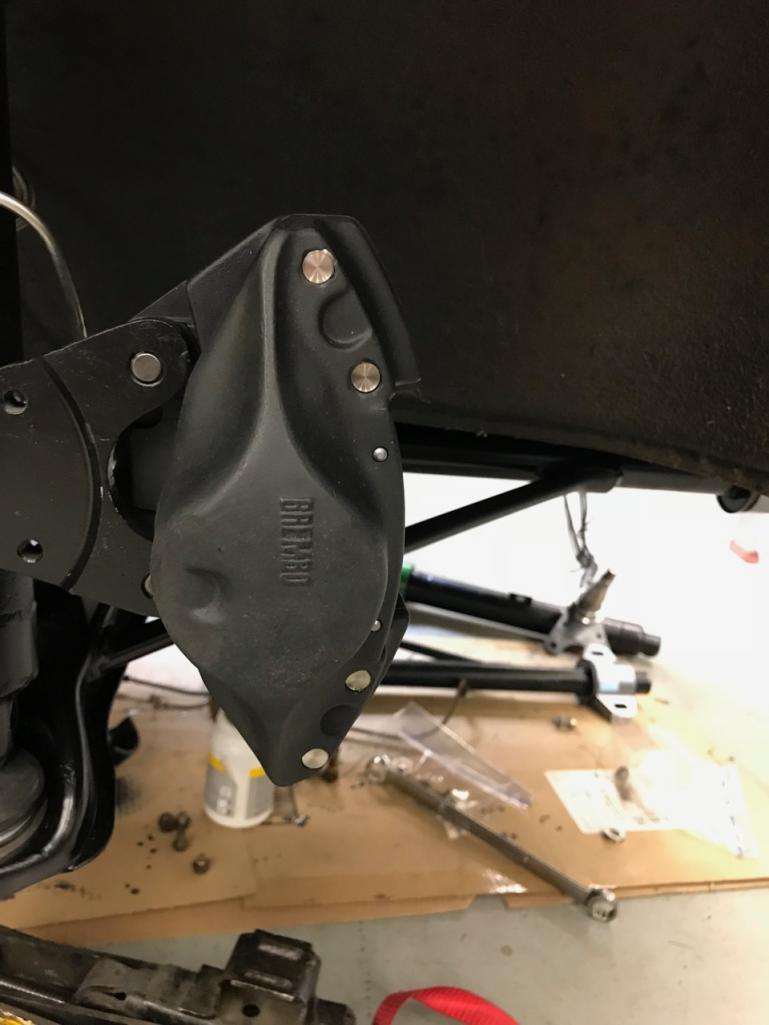
Had to remake the caliper hard line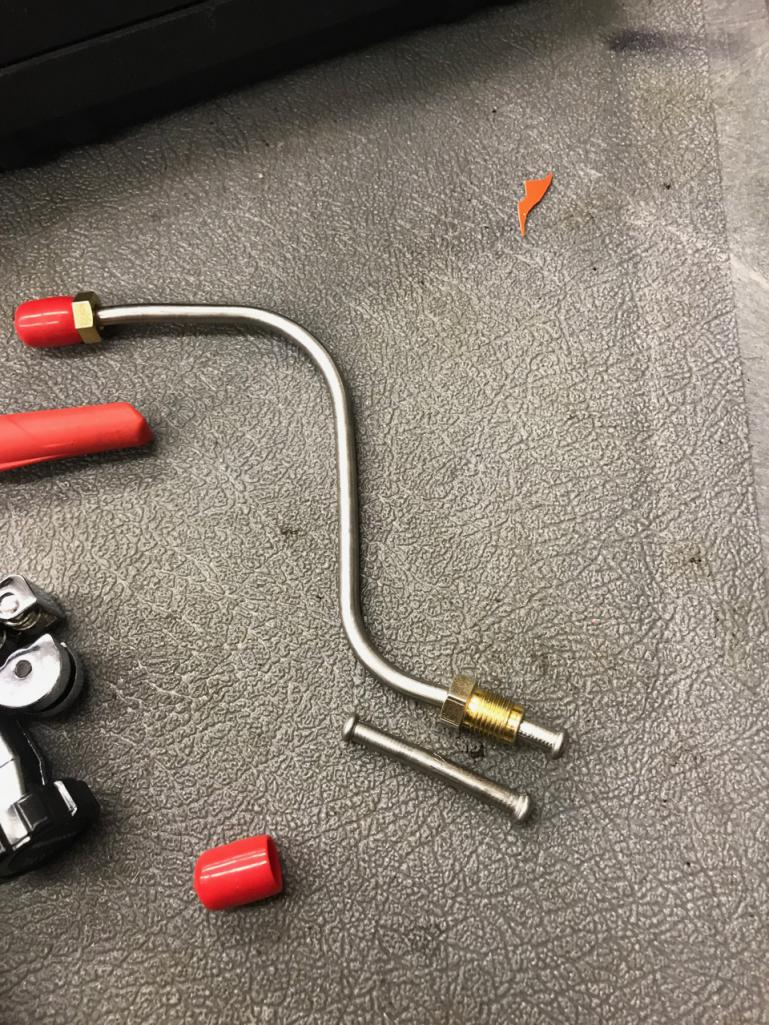
The small piece is the part I cut from the PMB original line. These SS lines are hard. Also tested the flare on the SS line using the scrap piece. Screw it up first before doing the real line. I will take a picture of the original and the modified line. Before I duplicate it for the drivers side. Luckly I have the proper tools to form them and remake the flare. But man SS is hard to work with.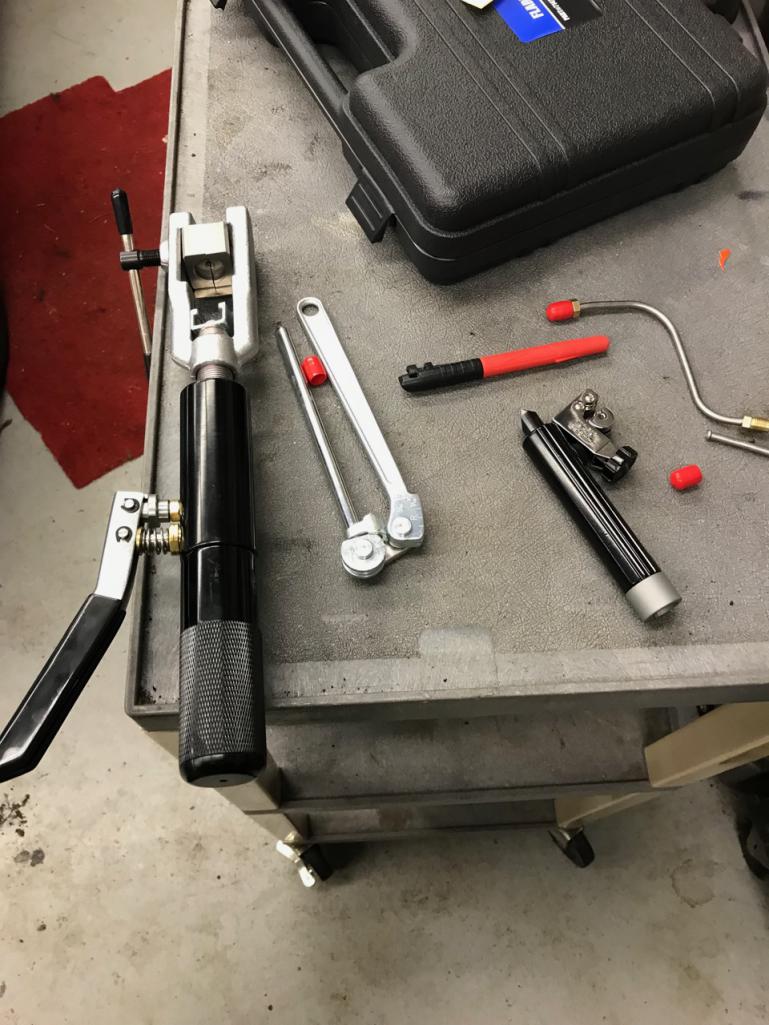
That is where I stoped late last night
All of this to get this car off the lift so I can do a timing belt on the wife's EOS, and all the other odd spring jobs that come up. I really need a couple of lifts. a 4 poster to store stuff in a vertical fashion. A couple of mid rises, as I like to move my stuff around to fit the need of the work. Bolted down 2 posts just don't work for me. I have some stuff that is over 30 feet long. Everything in the shop is on wheels, so when I need to get the big stuff in, smaller stuff just moves around.
"Times a wasting time to get wrenching"
Posted by: Lucky9146 Mar 31 2018, 07:46 AM
Looking really good, love the detail


Posted by: 914forme Mar 31 2018, 06:39 PM
I made two steps forward and the two steps back to move three steps forward in the end.
So the short of the long I got al the suspension in place on the front, and looked over to see the steering rack under the bench
Take everything back out, instal the steering rack, and put it al back in. So where I was today when I stopped to eat at 3pm is where I once again am when I stopped tonight.
Frustrating to say the least. Not sure how I forgot that piece.
First thing this morning I made the second brake line for the drivers side. And fitted it up on the bench. 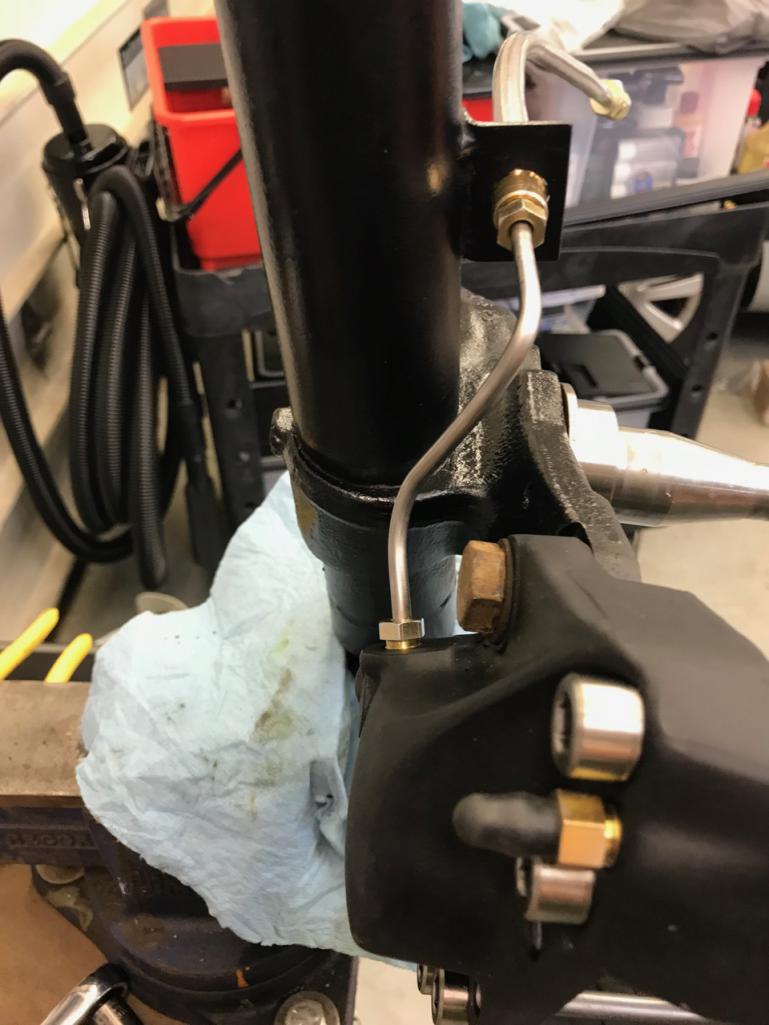
The Alfa calipers are a bit big, so the stock rain shields have to modified just a bit to make them fit.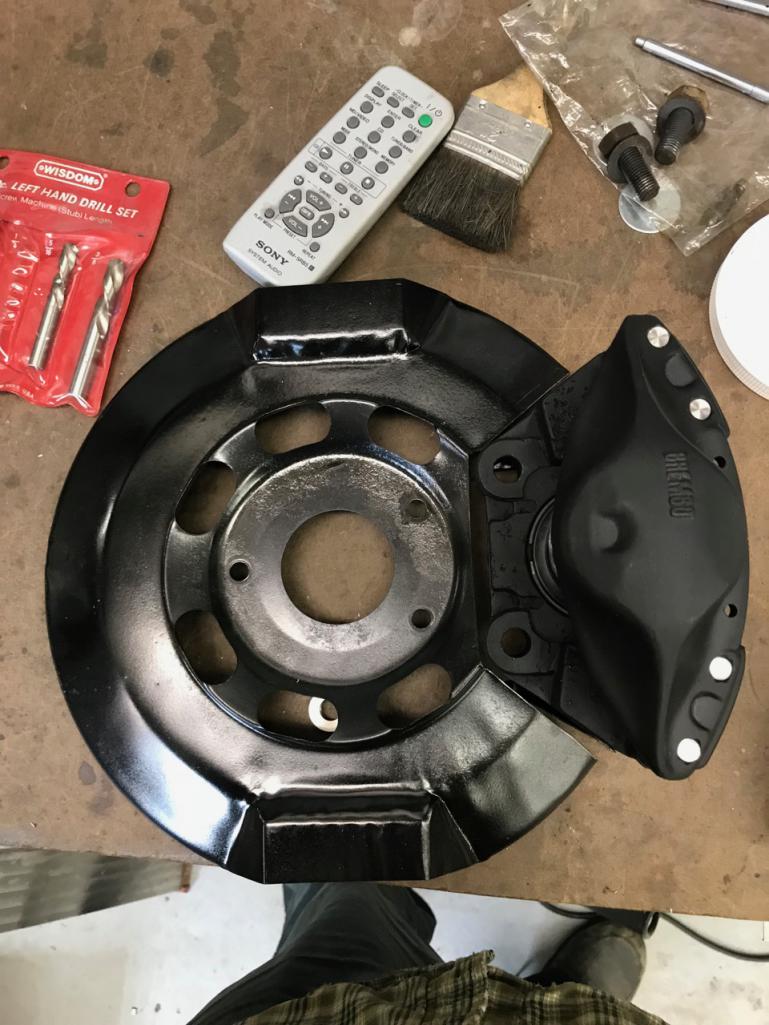
Trim a straight line from point A to B then debur.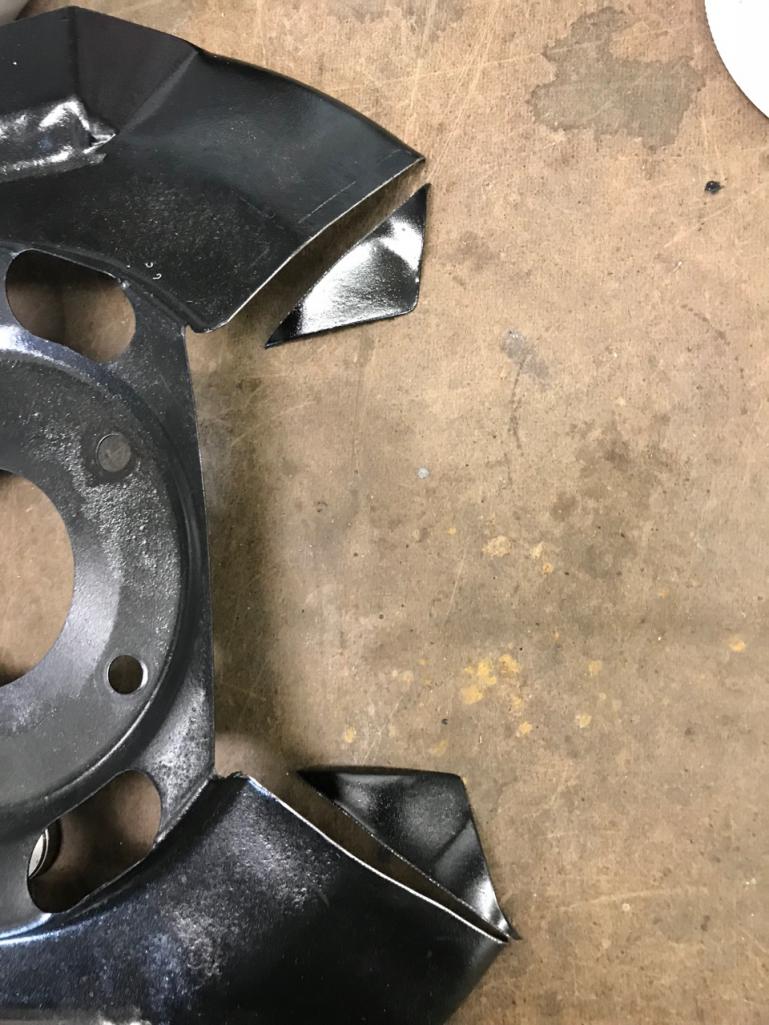
Passenger side is done, well almost I need to get a 803 615 715, not sure where that got to 
And need to build the swayer drop links, some semi joints and tube, easy enough.
Attached thumbnail(s)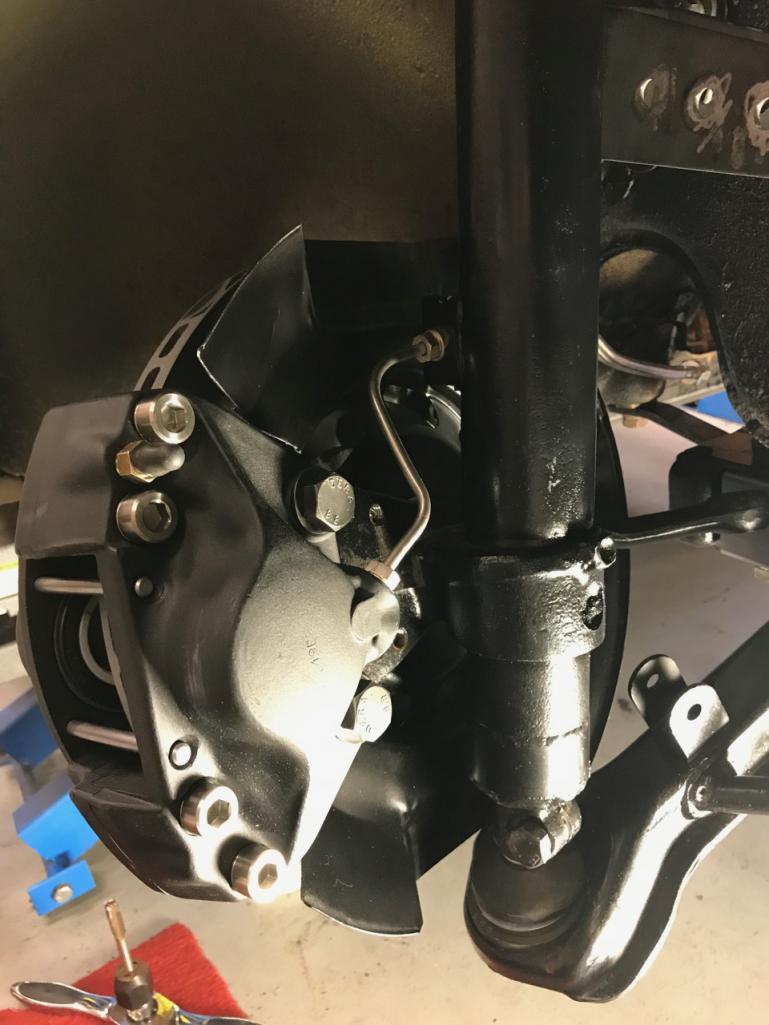
Posted by: 914forme Apr 3 2018, 08:00 AM
Sunday:
Got some time over Easter after all the festivities and people started taking naps. My wife and I went off and let the sleeping beauties sleep. She went off to work in the years, one of her favorite things to do. I went off to work in the shop, one of my favorite things to do.
Did not take any pictures so, sorry it was a productive afternoon.
Got drivers side (left) front suspension done. Installed the turbo tie rods, no issues.
Moved to the back, installed the other rear shock. Dropped the left side rear arm for cleanup. Removed all the brake lines, started installing the PMB Stainless lines. Pretty close match, I like them, a tad bit of tweaking to get them just right.
Pulled the Rear Brake Prop valve. Check PMB for rebuild if they do the -6 valve.
Pulled all the 9-14-6 shifter stuff out of the tunnel.
Installed Tangerine's racings conversion spherical ball linkage bushing on the firewall. As always stuff.
Pushed the 914-6 back over to one side of the shop. I did not drop the Passenger (right) side arm as I can get to it where it sits.
Monday:
Got my invoice from PMB for the prop valve, very reasonable. Paid for that one. They do rebuild them,
Got my shipping label printed off, and ready to make the shipment.
Searched for a supplier that has the parts I need. Spent lots of time in the PET
QTY 2 - 900-013-037-02 counter sunk screws to retain the rear brake rotors.
QTY 1 - 803-611-715 retainer spring for the brake lines on the strut, or rear arm. I lost one HTF does that happen, everything was bagged and tagged.
Swaybar drop links, I built the for my EG Build / Auto-X car, and can't find where I got them from.
SS nuts and washers for the transmission case, as I am there might as well finish it up with hardware.
Today's goals
Get the box packed with the prop valve, and ready to ship, my post office closes at 4pm  small town living at its finest right there.
Clean up the driver (right) rear arm, prep for paint. I also prep to change out the bushings with the Rebel Racing parts I have. Trying to keep the project creep from kicking in. Tangerine racing makes some real nice stuff for trailing arms.
Order the parts I need from the above list.
Drop the left side trailing arm
Install suspension cross brace on the farm truck. - if it shows up today
Install windshield wipers on wife's EOS if they show up today, Amazon  me on these.
 Eating the Elephant
Posted by: Amenson Apr 3 2018, 08:10 AM
Great progress
Those front calipers are my favorite part of the build! Will be interesting to see how many people notice that they are Brembo's when it is on the ground.
Posted by: 914forme Apr 10 2018, 01:20 PM
New Tool Tuesday
Okay so if you can't find the tool you need you make one.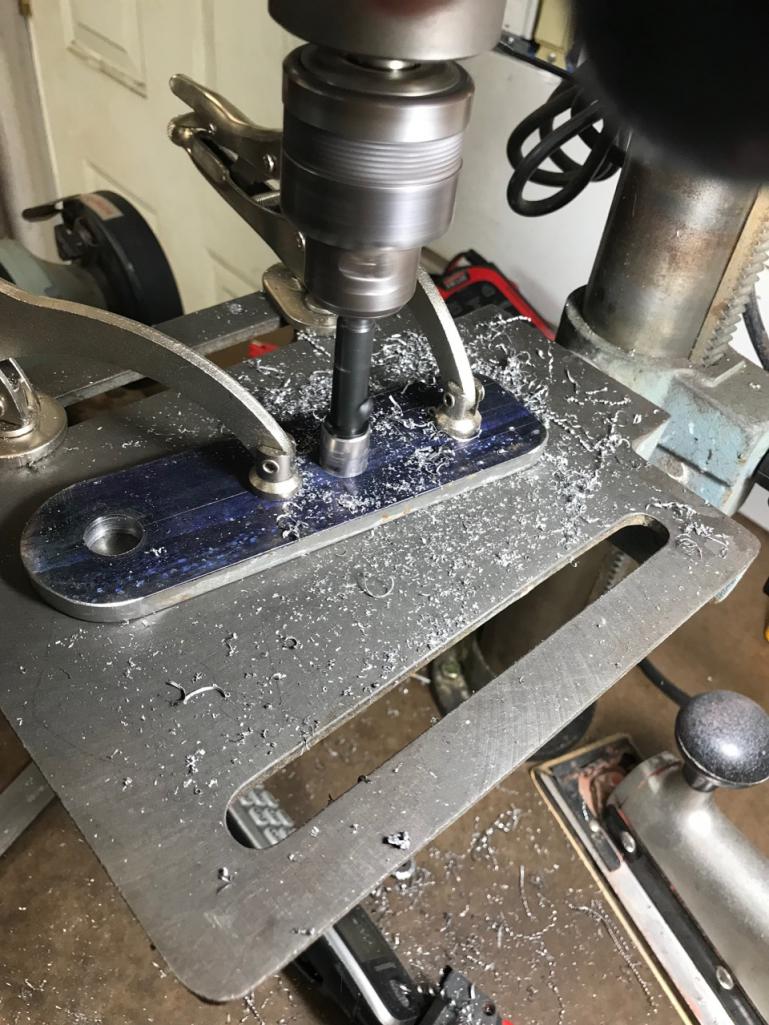
 Rotabores
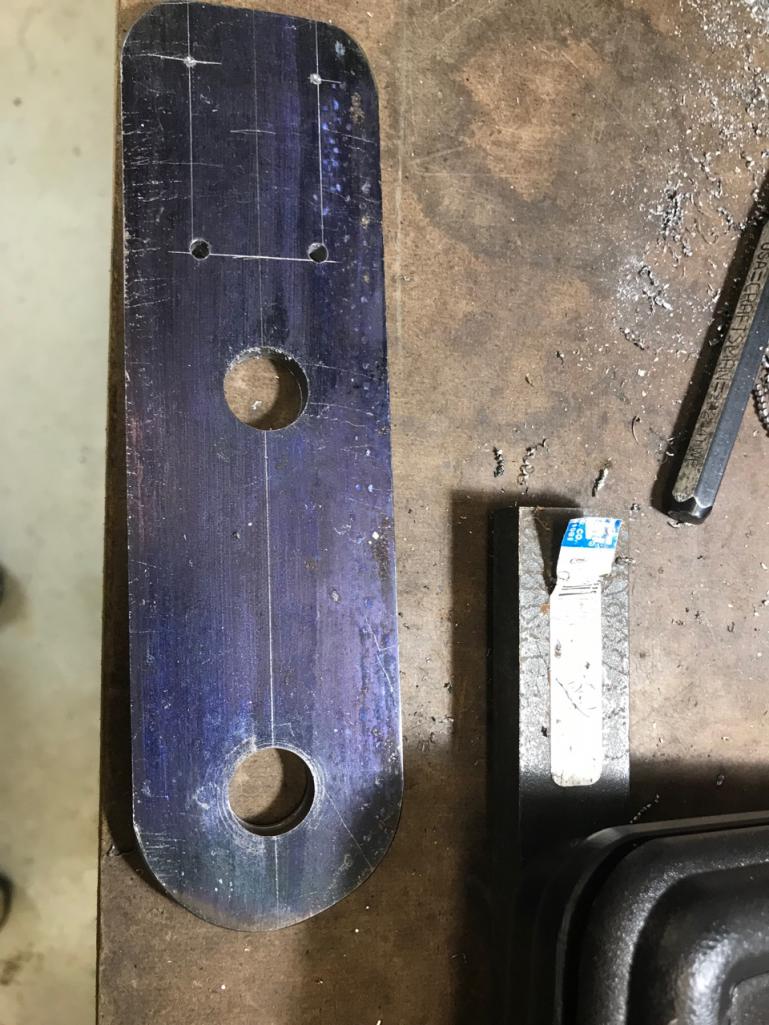
Now it becomes a bit clearer what I am doing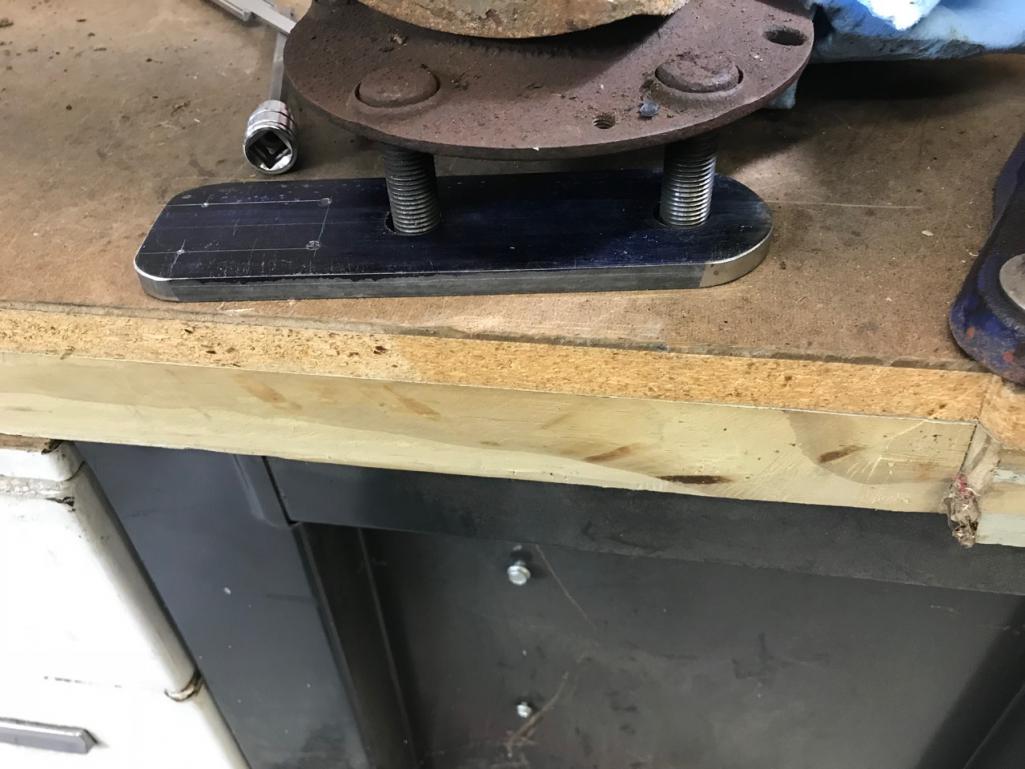
big stick driven into the flange 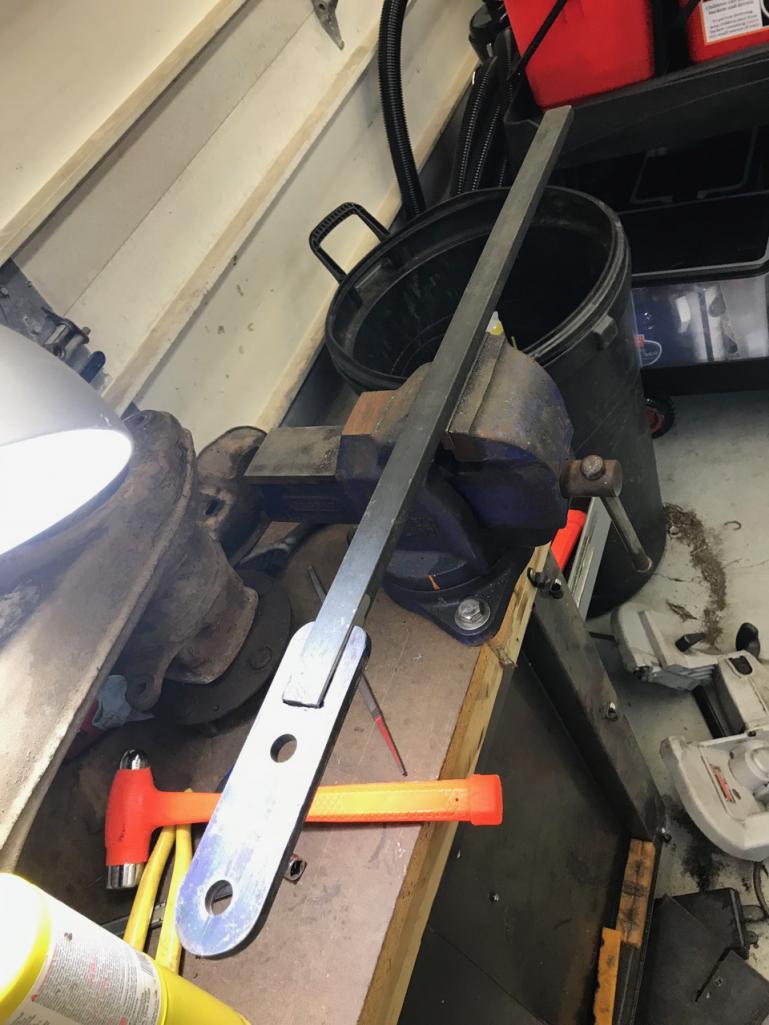
All welded up 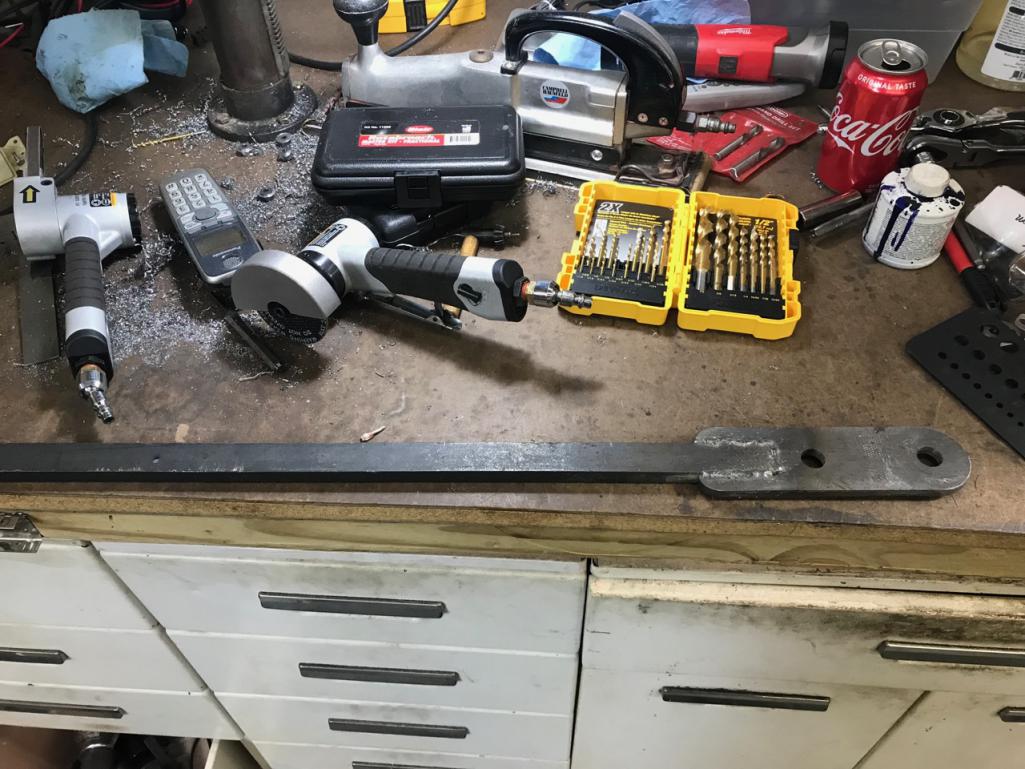
Big long handle allows it to mount in my vice, or used on the car. For now it is being used in the vice.
This is very handy for taking that nut off to remove the stub axle.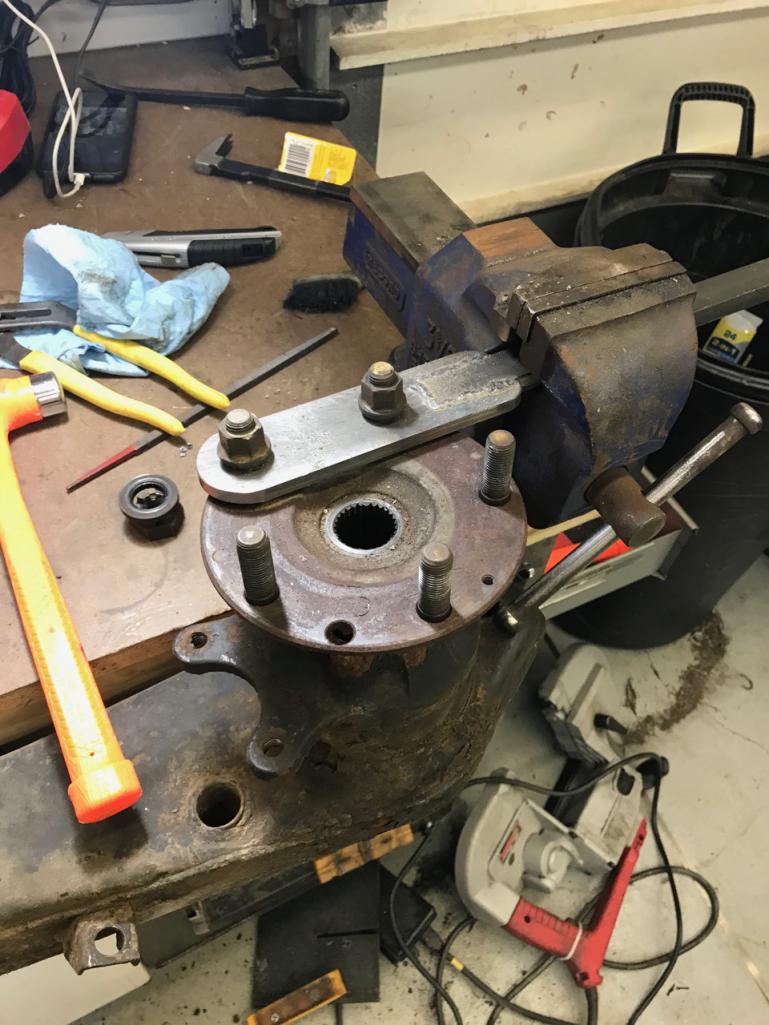
More work to come latter tonight.
On a sad note you see my Portaband on the floor. Using it and it slipped out of the vice and hit the floor. Carnage ensued! I need to make a mount for it to better support it while working with it. Or I need to pickup a larger floor standing band saw. Work has a couple 26" units coming up for auction Need to do 3 phase in the shop oh that opens a whole new can of worms.
Will also need to add a machine room to the side of the shop. Another 40 x 60 should do the trick.
Posted by: tom.esh Apr 10 2018, 04:32 PM
A converter for three phase may be worth looking into. Made one years ago with a few parts. My friend still runs a mill and a lathe with it. Found the plans online.
Posted by: raynekat Apr 10 2018, 04:51 PM
Your Alfa brakes look great. Lots of work, frustration but you'll be happy in the end.
Posted by: 914forme Apr 14 2018, 07:36 PM
Active Day working on many projects from Dad's -6 to keeping my old iPhone off the workbench.
First up working on rebuilding the rear trailing arms. Pressed out the rear pivot bushing and tube. Upgrading them to Rebel Racing parts. But as everything with this project, it did not go as planned. One of the rubber bushings got stuck in the arm. I finally got it moved to one of the ends, and drove it in so it did not moved. Grabbed a drywall saw and cut one side of the bushing. Grabbed some long needle nose pliers. And twisted the end and finally got it out. 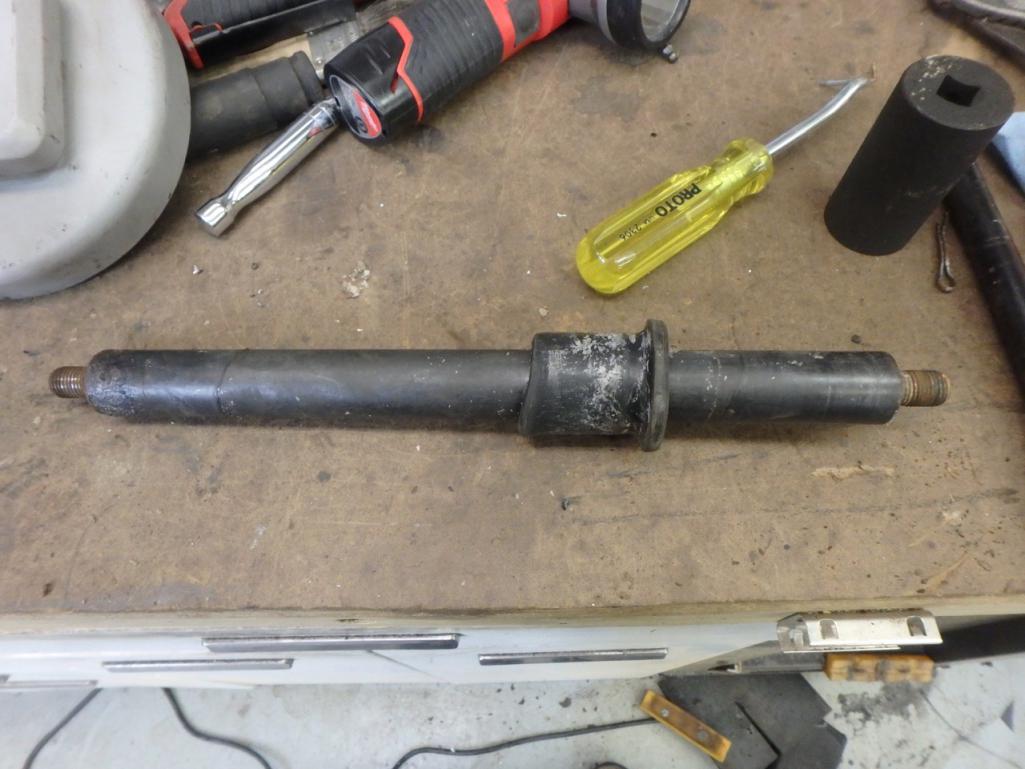
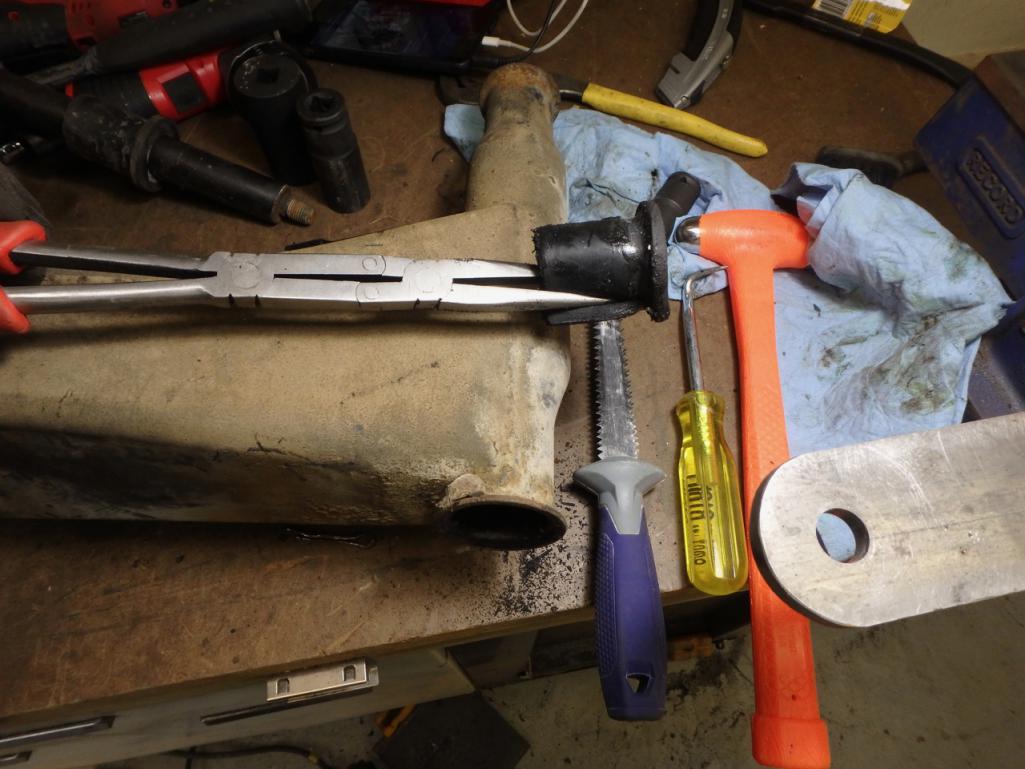
Seam welded the rear pivot cup, do this to all my 914s. Just makes me feel better. And yes it allowed me to get my on.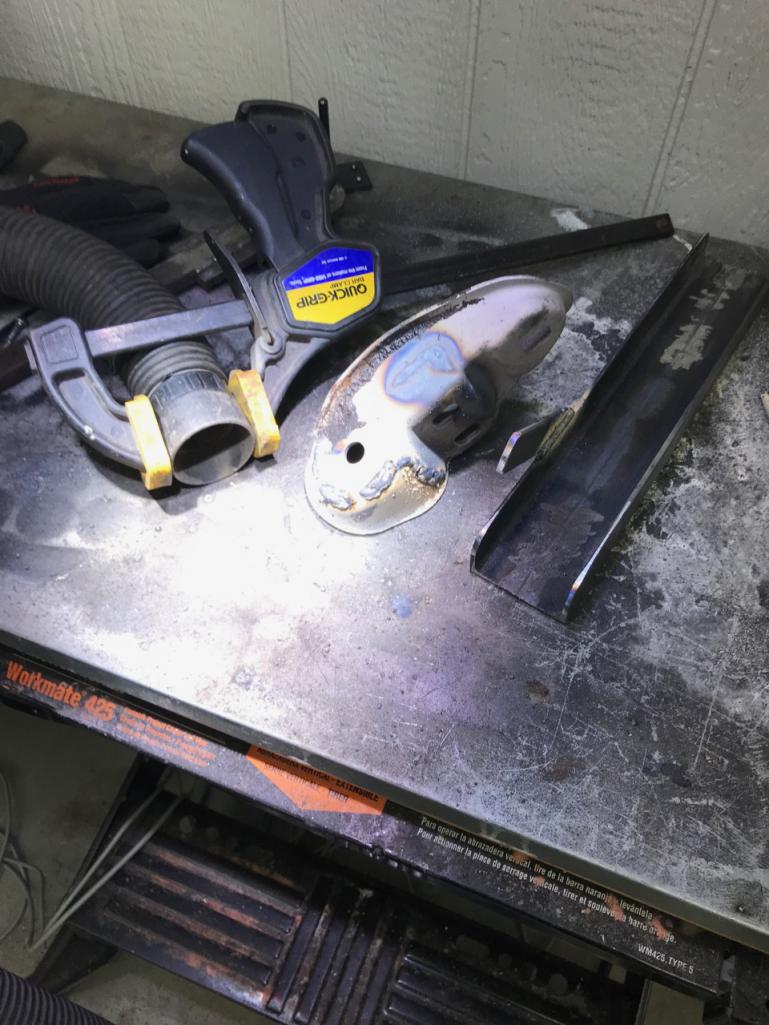
the item beside the outer cup, is a mount for my portaband. Don't want to see it fall on the floor again. You can pull one pin and use the portaband as a handheld saw. It is handy to have a portable bandsaw. 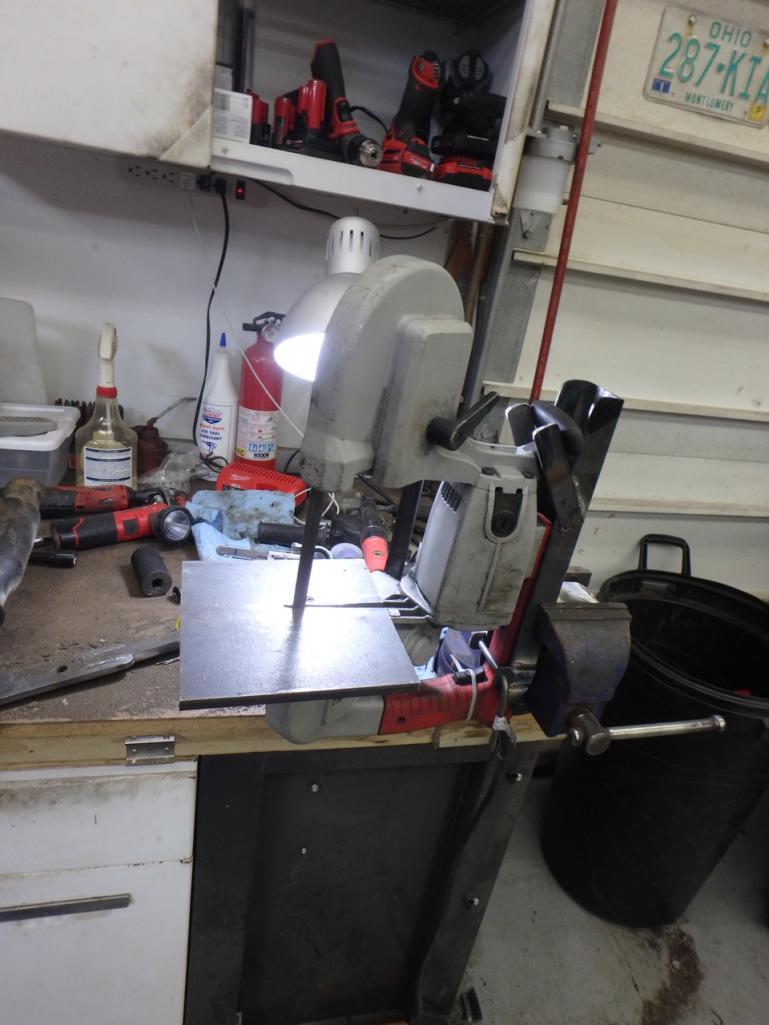
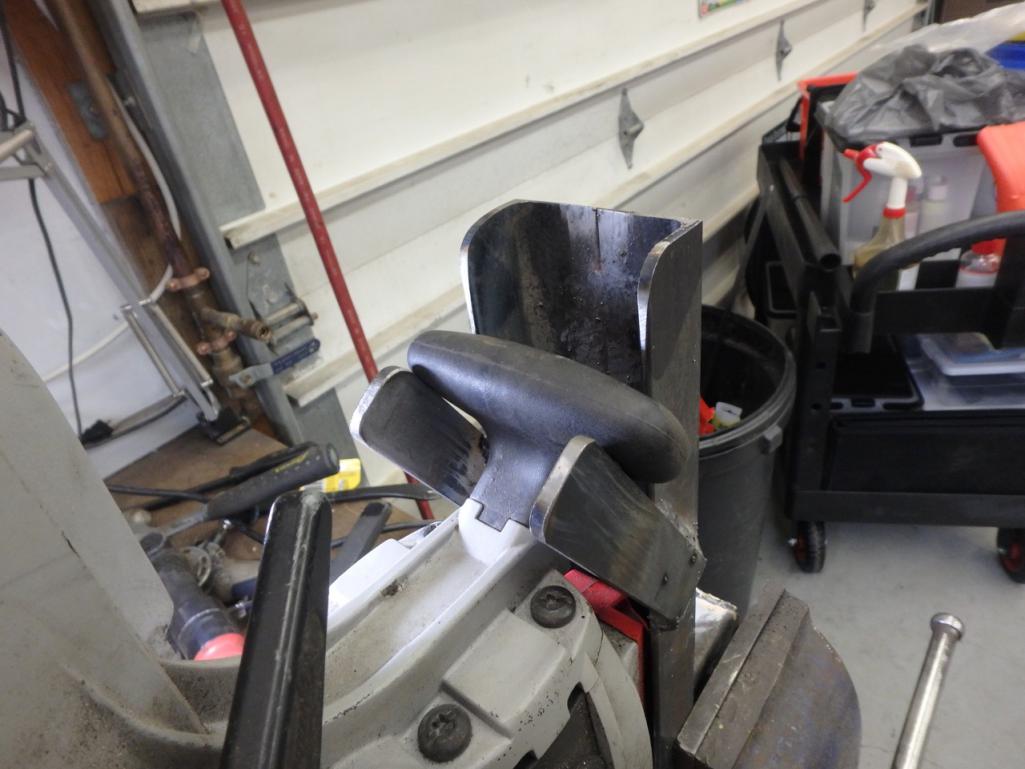
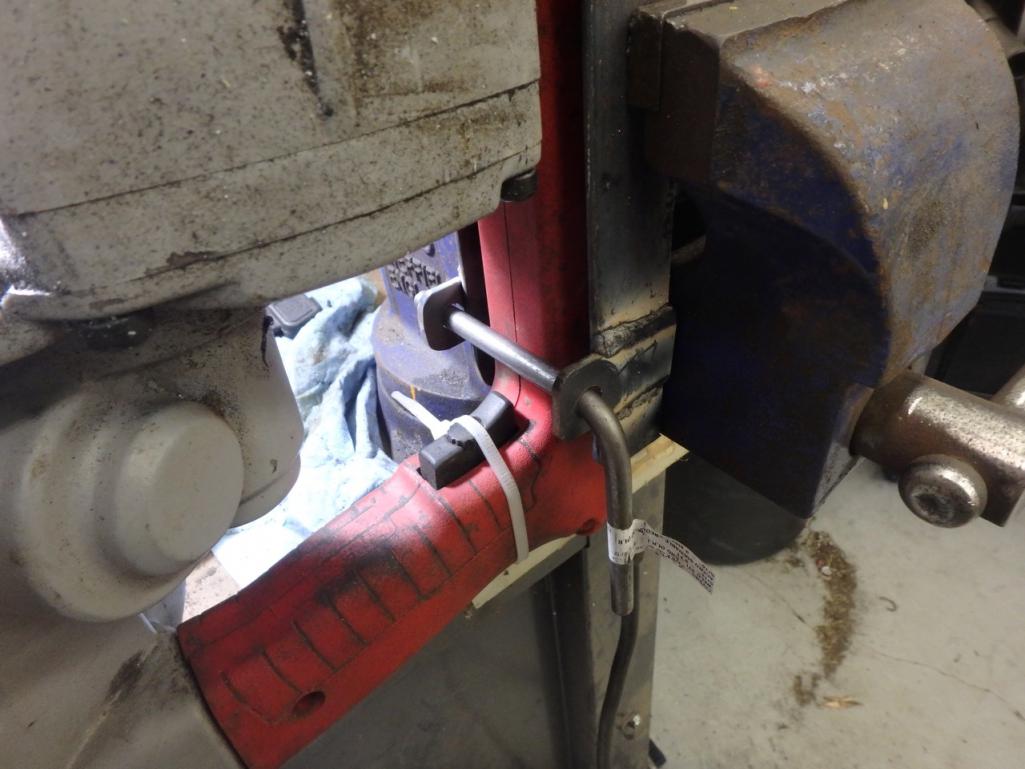
I use a foot switch to control the on off. Allows two hands on the project.
Mounts into my older Record Vice. YES I love this vice it has been with me for years. I need a few more vices in the shop.
I had to test my new stand out with the Portaband. So I mounted my old iPhone on the door of one of my cabinets. Built a a simple mount that holds the case to the door. Easy, keep it out of the dirt and grime of the work bench.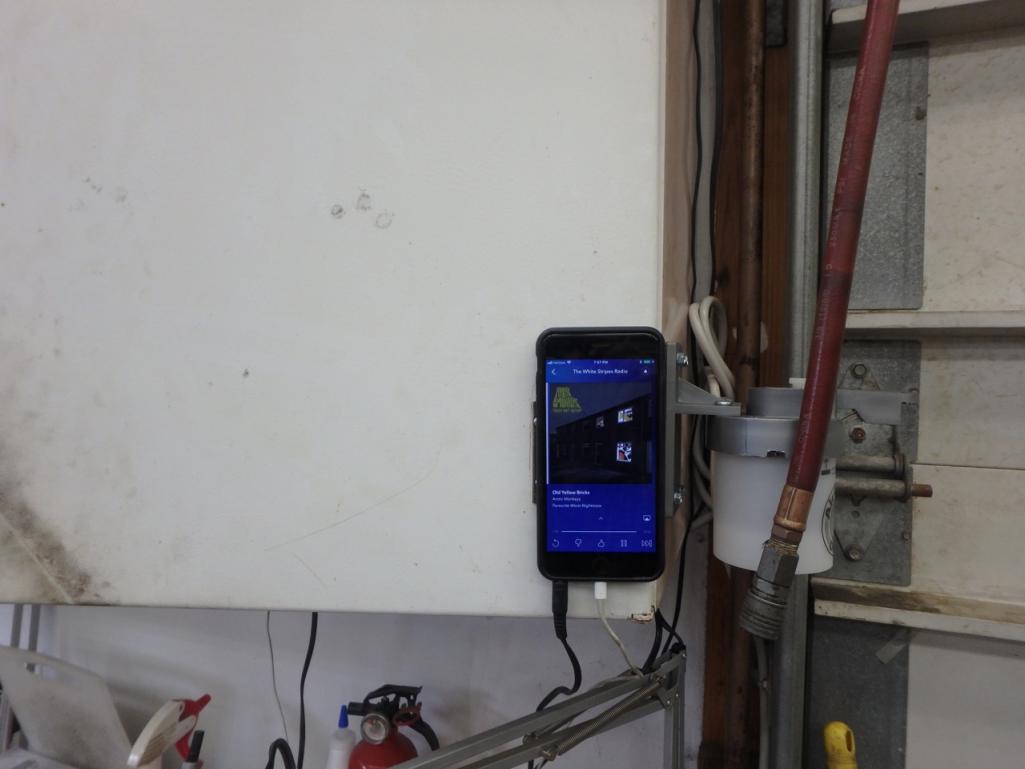
That is it for tonight, off to work on some gauges.
Attached thumbnail(s)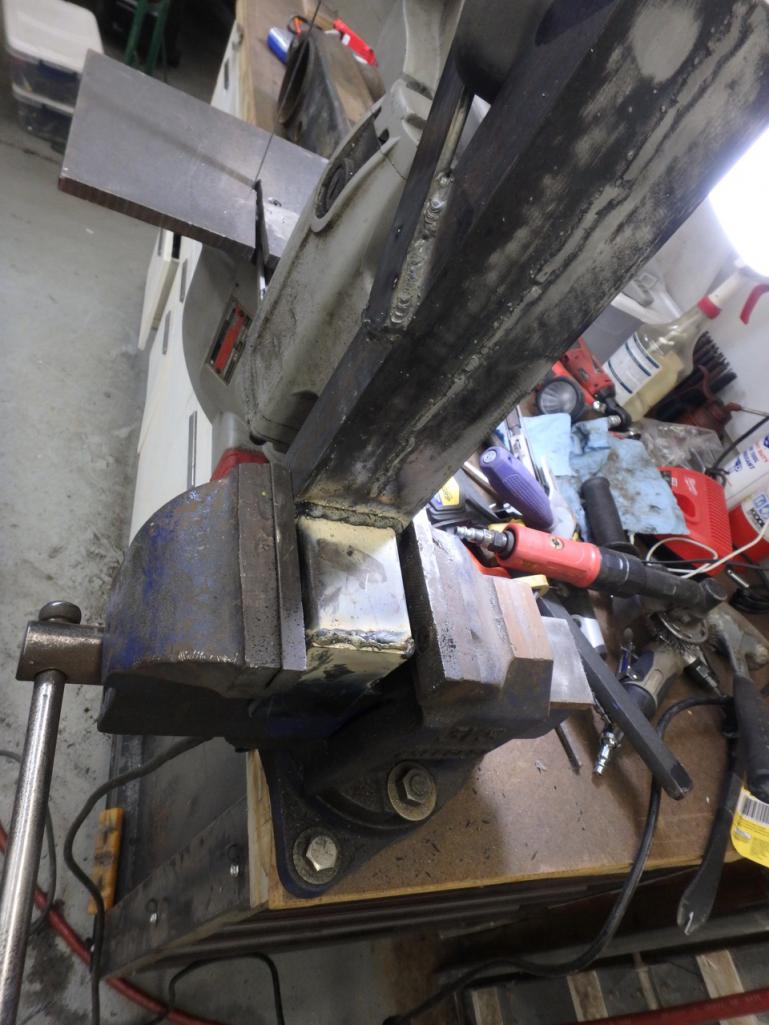
Posted by: 76-914 Apr 15 2018, 09:28 AM
I've been thinking about buying a portable band saw just for metal cutting. Any tips on building a jig w/ table?
Posted by: 914forme Apr 15 2018, 11:28 AM
I've been thinking about buying a portable band saw just for metal cutting. Any tips on building a jig w/ table?
I need to redo my table. I bought this one used from a pawn shop. Great deal, as cheap as Harbor freights better quality. The Dewalt version the top handle unscrews making it easier to bolt to a stand.
I am going to make a new blade guide to use when using it I mounted. It was broken when I picked this one up. So the blade guide will be a tad bigger than the original. But it will allow me to bolt the top plate to the saw. Will most likely make a frame out of steel. And then screw a piece of melamine to it for the top. Nice and flat, yet easily replaceable when needed.
It works well for what I do, but every time I’m in Scott’s shop I see his big band saw and I think man I need one of those. It’s eats up shop space, and I have ways of cutting bigger stuff.
I’ll detail out what I come up with.
The stand was made out of flat steel and angle . Easy enough, and cost a few bucks. Steel was out of Lowe’s clearance. Stuff was so cheap, I drove from store to store buying all the had. Idiots it was cheaper than what the scrapers where paying for used unclean steel. I bought every stick I could buy. And been using it up for years. Love getting bargins on raw materials I can use to build.
Welding wire is a Blue Demin product designed for galvanized steel. Burns a bit hotter, and sparks a bit more. I like the penatration and puddle cleaning I’m getting with it. Oh and the slag comes off in sections great product for heavier welded items. I also used I to seem weld the cups. Worked great I stand blasted the cups before. Welded them up, nice and clean puddle, containers burn off. Bit more smoke, but that hose leads to a lLicoln fume extractor. That thing is the best. Need to build an adjustable arm for the extractor.. shop stays nice and clean.
Posted by: 914forme Apr 23 2018, 06:50 AM
Got the rear suspension off the passenger side. Used the fixture from Chris' raised rear suspension pickup point. And now it is up on jack stands.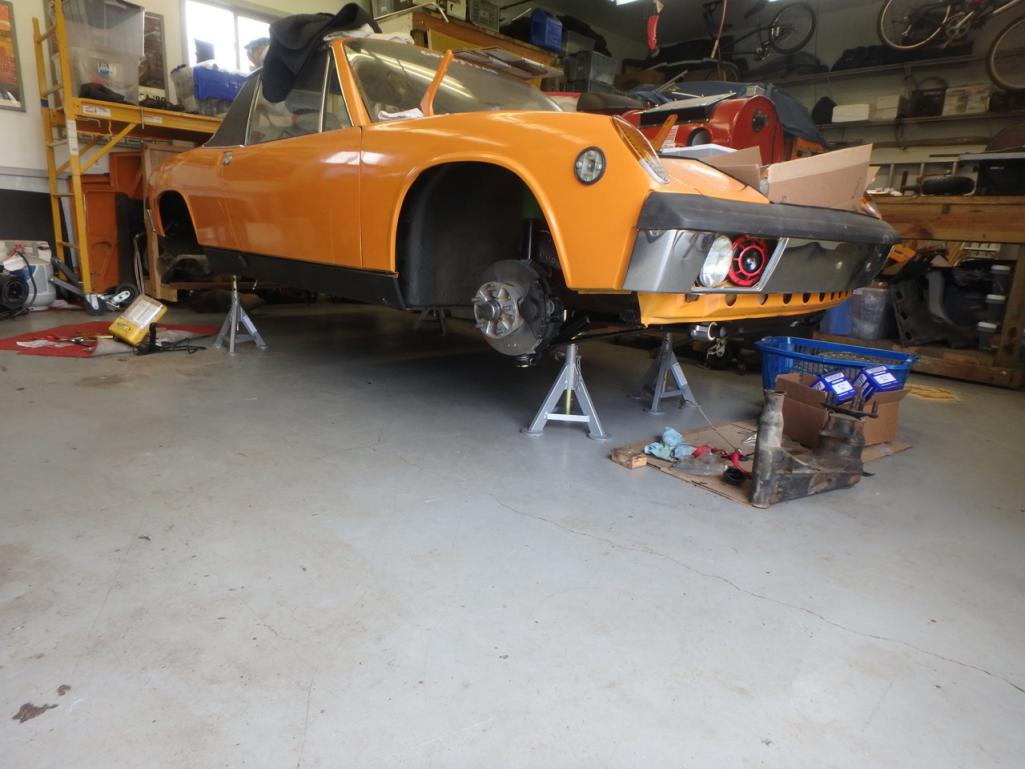
Needed it to get some work done on another car. Brother in-Law came by and needed some heat shield repair on his car. Lift made this very easy.
Just want to make it clear, life gets in the way. Work, Family, other people dropping stuff off for you to fix because your a mechanic, welder, machinist, nice person. Just go with it, carve out a bit of time to do what you want. You always have the right to say NO!
The above car, came in for one thing, change spark plugs. Left with attempting to find an oil leak, fixing a heat shield issue. That stuff is like tin foil. And cleaning up the plastic headlamps. I put so dye in the oil to see if I can locate the leak at a latter date.
What really bugged me was when I took it for the test drive before I did any work, I noticed a clunking every time I hit a bump. Most likely the strut top bushings or shock bushings. He did not want me to dig deeper into that. This to me is more important than the minor drip drip oil leak. Each their own.
After that it was working on Dad's mower, he is getting older as the reason for this thread, and well installing this muffler seemed to take for ever. When I jumped in I found out why. Threads where all buggered up. Drilled out and nut served them. Mount Bracket was screwed up also. Drilled up one size, and bolted it on. Then the it cuts an odd pattern. Started looking at it, and found a lift cable broke. Found the reviews that these cables are a notorious issue. Found some one making replacement steel lift arms, I could fabricate them myself, but at $7.50 per pair, why?
Posted by: 914forme Jul 2 2018, 02:57 PM
Let the parts gathering continue.
Some times a box full of peanuts and brown paper brings you more than drugs wrapped in coffee.
Today they brought me a different form of addiction.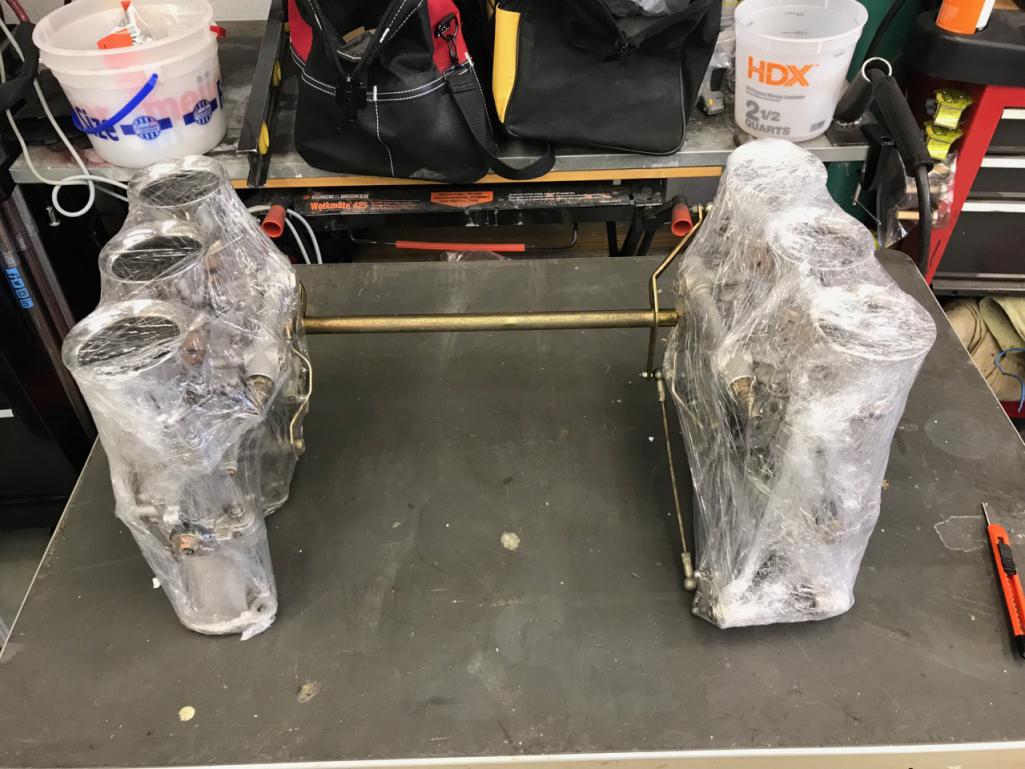
Yes PMO Carburetors, will at least make the 914-6 go. Need to check the specifications of everything and get parts on order to make them right for the engine, car and altitude.
Did not unwrap them as I was putting them into storage, along with the digital ignition system.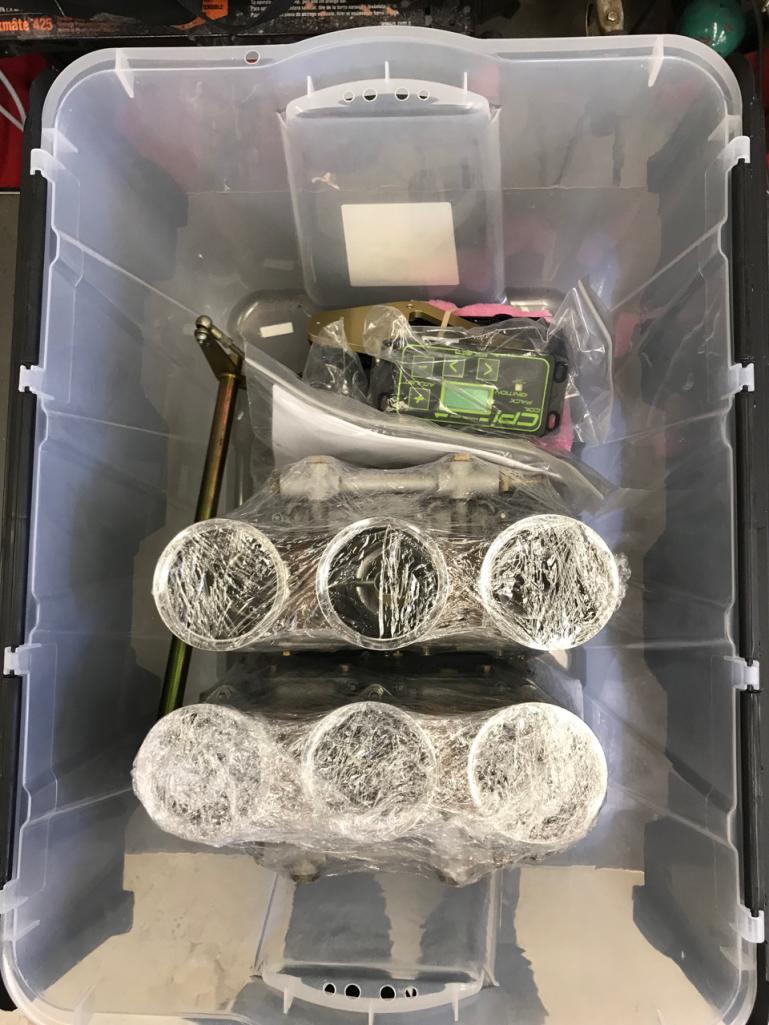
EFI will be down the road, right now I need to get this car running. Everything else can happen as smaller projects to make the car better.
Posted by: tygaboy Jul 2 2018, 03:31 PM

Posted by: Travis Neff Jul 2 2018, 04:11 PM
Can I ask where you sourced your rear shock top monoballs?
Posted by: 914forme Jul 2 2018, 06:26 PM
Can I ask where you sourced your rear shock top monoballs?
http://www.tarett.com/items/914-products/914-suspension/914-monoballs~bushings/914-rear-camber-plate-set-914rmt-detail.htm
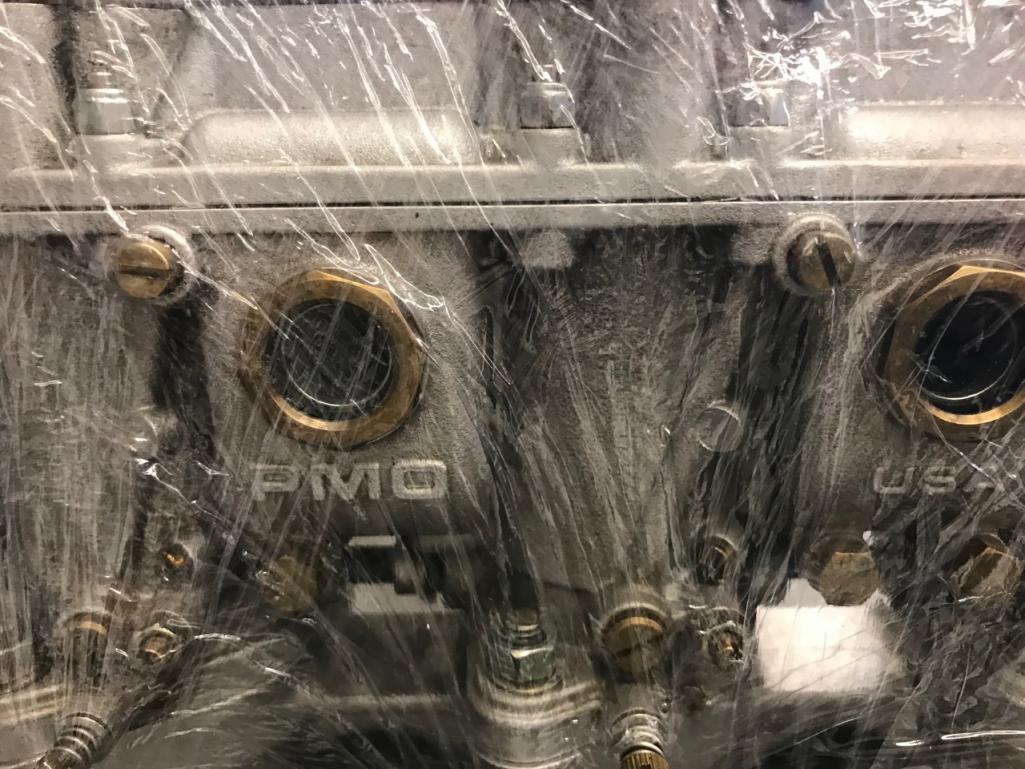
Posted by: 914forme Jul 15 2018, 09:17 AM
I have been doing a lot of gauge building for a few people, while I am waiting for a process to complete, I got back on Dad's -6 today doing a lot of the stuff that needs to be done. Prepping parts for cleaning, rust removal and paint. I am onto the rear suspension of the car.
Love getting in the shop
Up frist pulling hubs out of the arm and bearings off the backs of stubs. I mount the hub in the arm. Use my SirTools bearing puller to pull the hub out. Then go after the bearing race that always stays on the back side. These can be a bugger to get off. Mounted in my handy hub tool. I could take a cold chisel and give it a couple on each side 180 degrees apart. That made enough space to get my bearing puller onto the back side.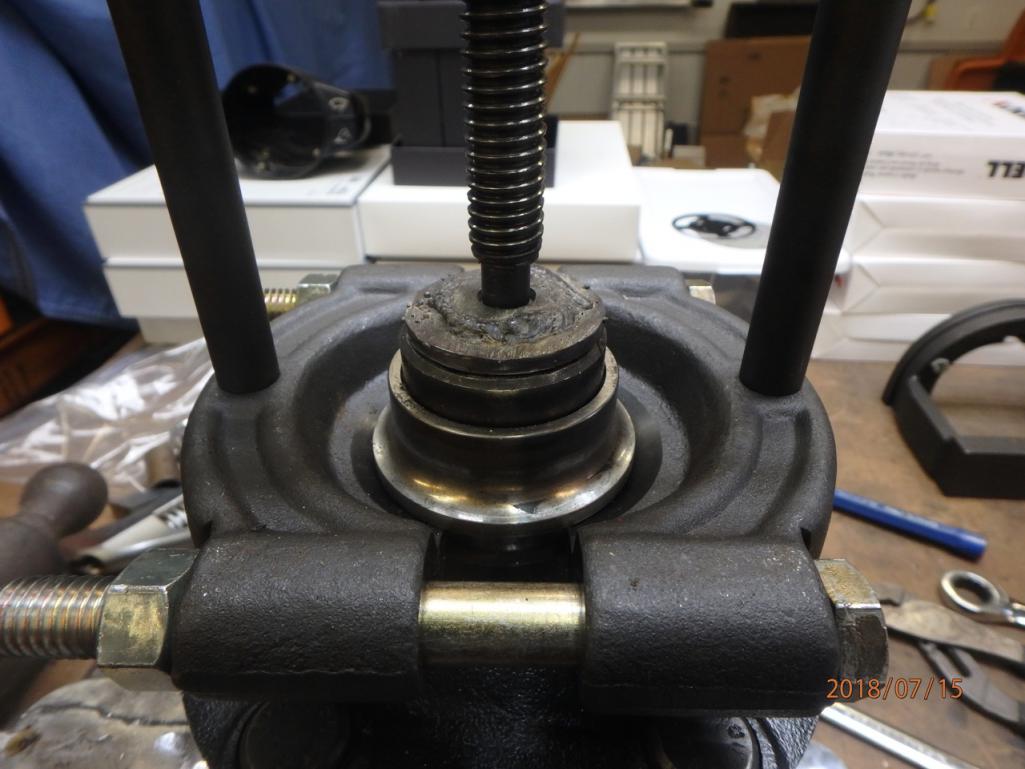
Note th homemade centering and surface the bearing puller goes against. It is designed to center in the hub, and then hold the bearing puller screw in the center also. Makes for an easy pull. Simple to make a 3/8 wash on the top of 1/4 Steel from the scrap bin and a 3/4" nut on the back side with the points rounded off. Not pretty, does a great job. 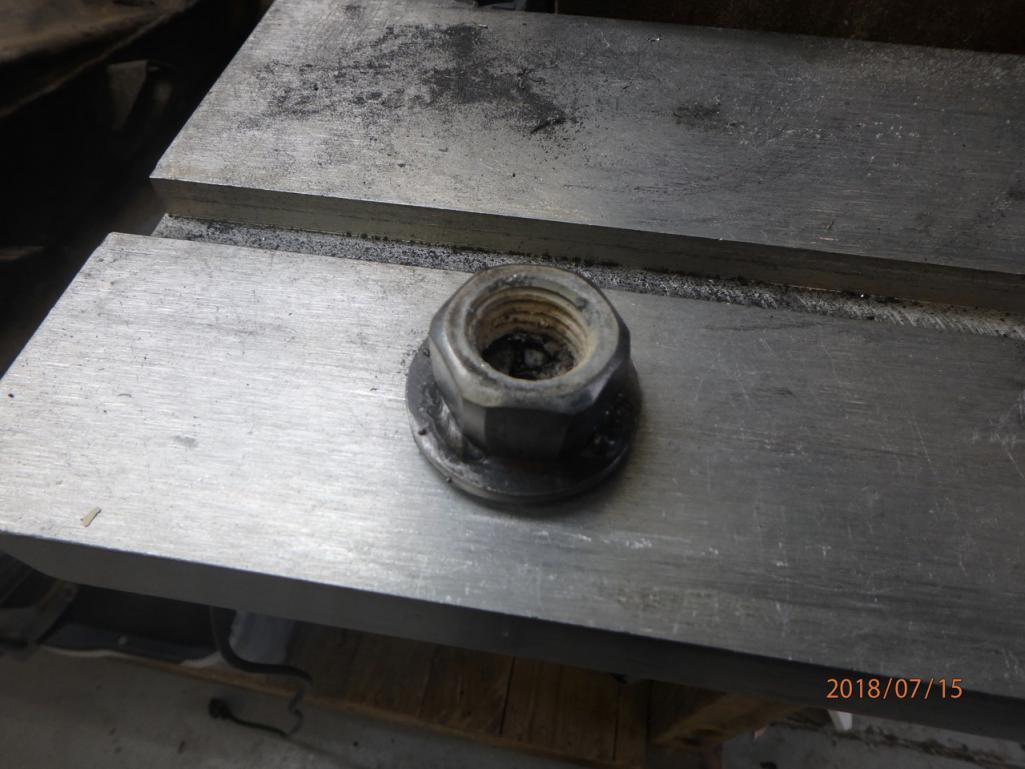
I took apart both arms, and did 6 sets of hubs off bearings.
Carnage as follows documentation makes me feel like I got something done today.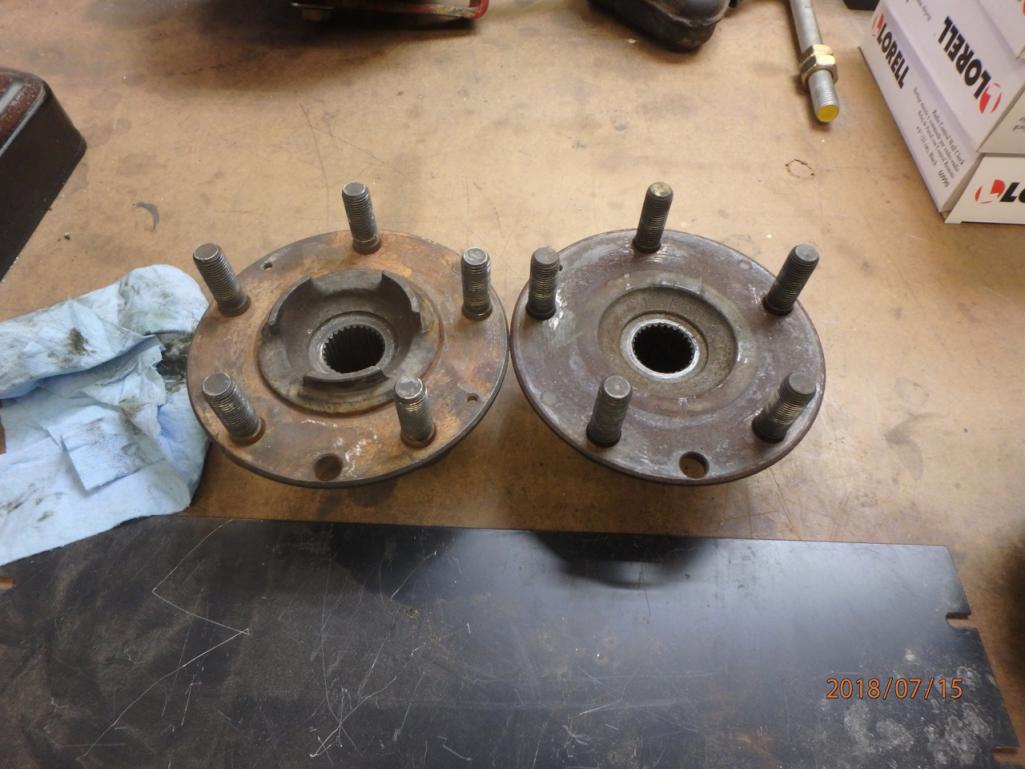
Late model 911 hub centric hubs on the left, original 914-6 hub on the right. Going hub centric - will need to machine the bearing spacer for the hub.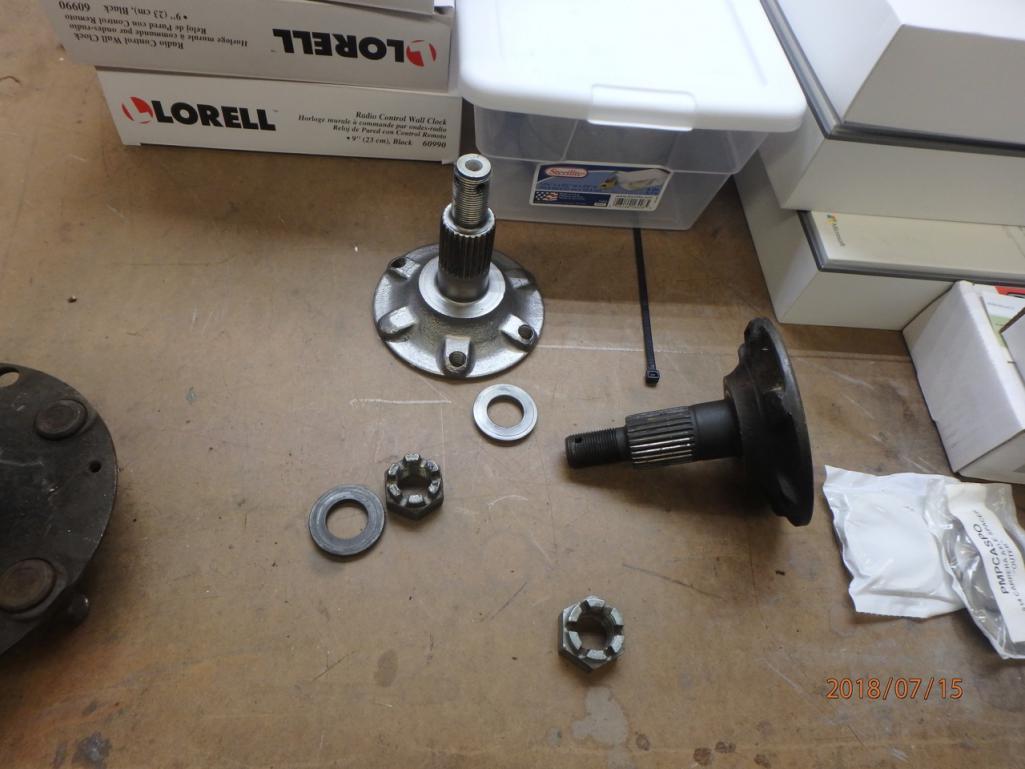
108mm stubs - 930 CVs here we come, no worries about CV joints.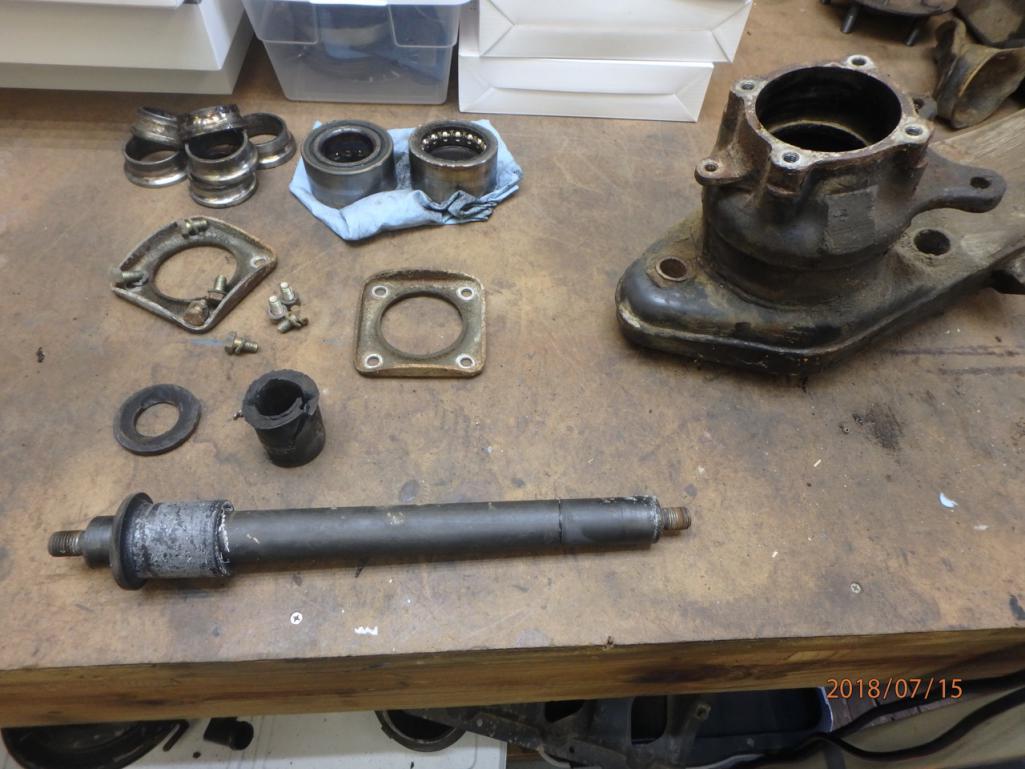
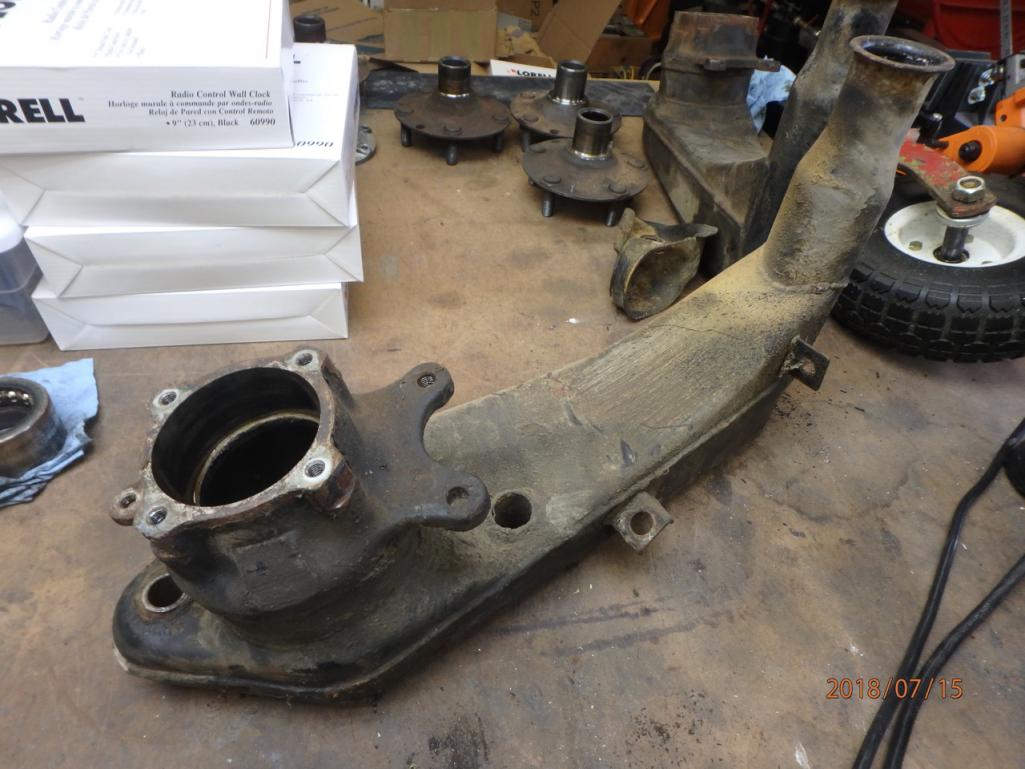
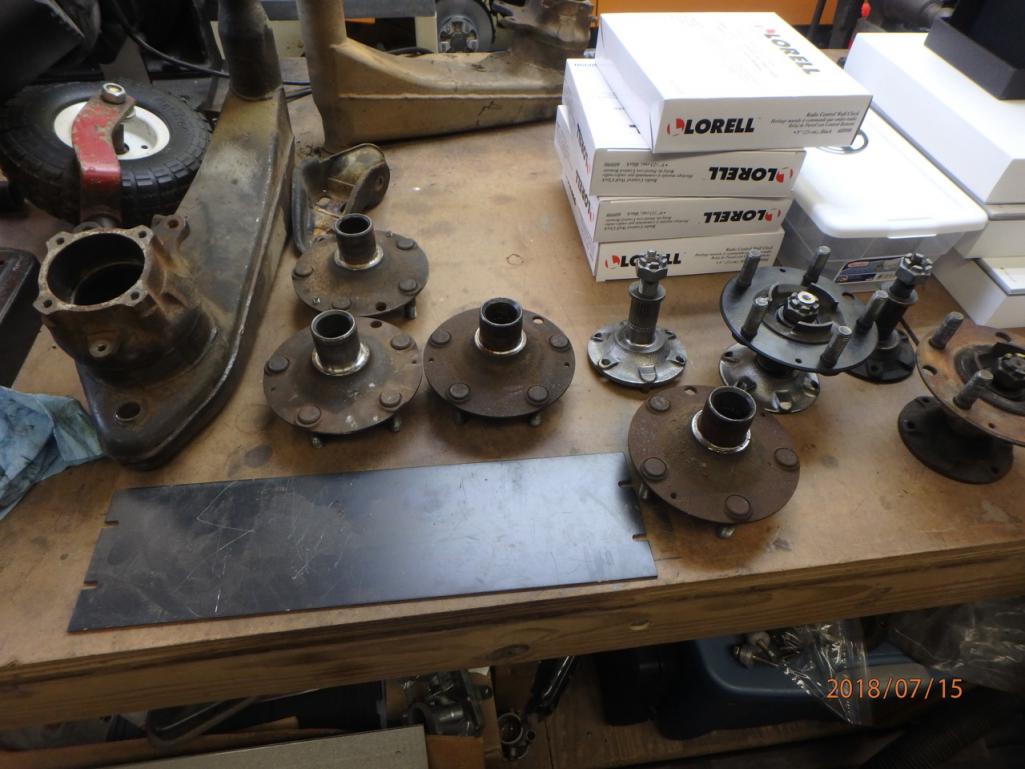
Parts broken down. And a wheel that fell of the mower deck of one of the big tractors. Solid wheel because the area it mows has Locus trees, and the thrones eat deck tires for breakfast, lunch, and dinner, with a snack in-between. I need to get that one done, have not ordered the tire yet.
Now to spend days cleaning all this up in prep for paint. And get parts ordered that are need to finish this up.
Posted by: simonjb Jul 15 2018, 10:27 AM
Now to keep me off the slacker list
Did a few things 914-6 related
First up Passenger side sway bar mount. At least Prep.
For refresher I am using Brad's mount on the 914-6
So I signed up the backside with the notch in the wheel well and used a transfer punch to set my first screw location. Drilled it, opened it ou for the bolt, and bolted it together. Moved the transfer punch to the next hole, and got a center mark, and drilled it out. I then bolted the sway bar mount in place to give me the location of the lower hole. I marked the center, and then drilled a pilot and then used a step drill to punch it out to clear the not on he back side of the Brad's outer plate.
That all done it looks like this.
'So then I need to mark the center one the swatbar location. Since I was missing time on my metal lathe, I turned a spacer down.
Fits like a precision glove, well because it is a precision fit.
Transfer punch inserted in the last picture , give it a few hits with the hammer, and disassemble the pieces one last time. Probably not
Drill a pilot hole and then drill the hole.
Tools of the trade to fit these, in a pile on the floor.
Small Ball Peen hammer
Socke wrench, extension and socket
Transfer Punches
Close Quarters drill - pilot holes
1/2 inch drill - step drill
Rotabroach to drill the big hole
Final Big hole drilled
And in place, well I', holding it in place, did not feel like bolting it all together to take it apart again.
Next up for this side is clean the undercoating. Scuff up the paint, and JB weld it to the car. Yes normally I would weld, but since I don't want to repaint, where the weld would burn off paint, it will be JB Weld. Brad says it will work, and I see no reason it would not work.
I tend to measure project success and the amount of fun I have had by the number of chips, pile of metal shavings, and metal abound.
Successful and fun day
Oh the not fun part of my day, I have been working on one of the sets of MiniLites I have. Prepping for paint, as they where in good condition. But lots of small paint chips, and different colors. So following the instructions off a wheel restore that works on Ferrari Mag wheels I got to this point.
That one was sitting on my stool that turns, hate the stool, but it does a great job for painting wheels
And the last one, all where baking in the afternoon sun
Hope to get a bit more done on the wheels over the week, but maybe I will focus on the sway bar mounts and install. Would like to start having the car go back together.
And well my plan is to put it together, as McMark says a running driving 914 beats any of them that are on jack stands any day.
Stephen, what was the step drill used for vs the Rotabroach? - and what sizes were they? Thanks !
1/2 inch drill - step drill
Rotabroach to drill the big hole
Posted by: 914forme Jul 15 2018, 07:36 PM
The Rotabroach was the size of the swayer reinforcement, can't remember the exact size. The Step drill I used to drill the bolt holes, I like using step drill because they debut the hole at the same time. The Rota's are great for drilling big in sheet metals, leave a nice clean hole. Love them.
Hope that answered the question and made it clearer.
Posted by: ctc911ctc Jul 16 2018, 09:46 PM
Since you mentioned Derby and it is Derby week I thought I would post this: 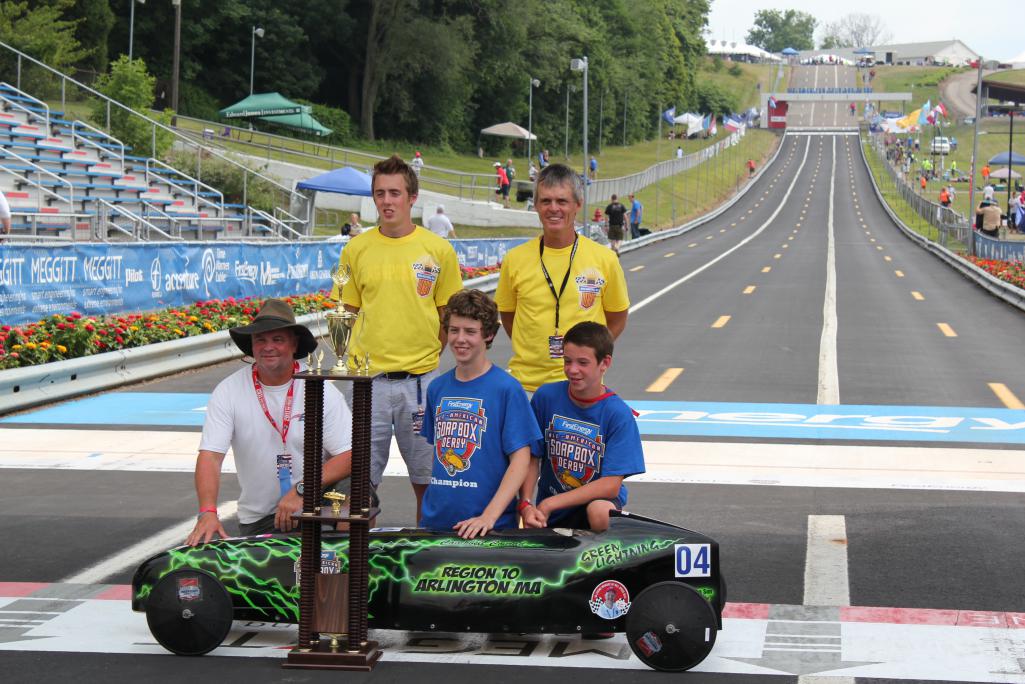
Posted by: 914forme Jul 17 2018, 01:10 PM
Thats a nice looking Derby car, anything special under that skin? Where you part of this story?
Posted by: 914forme Jul 24 2018, 08:49 PM
So more parts came in over the week.
First up new oil tank.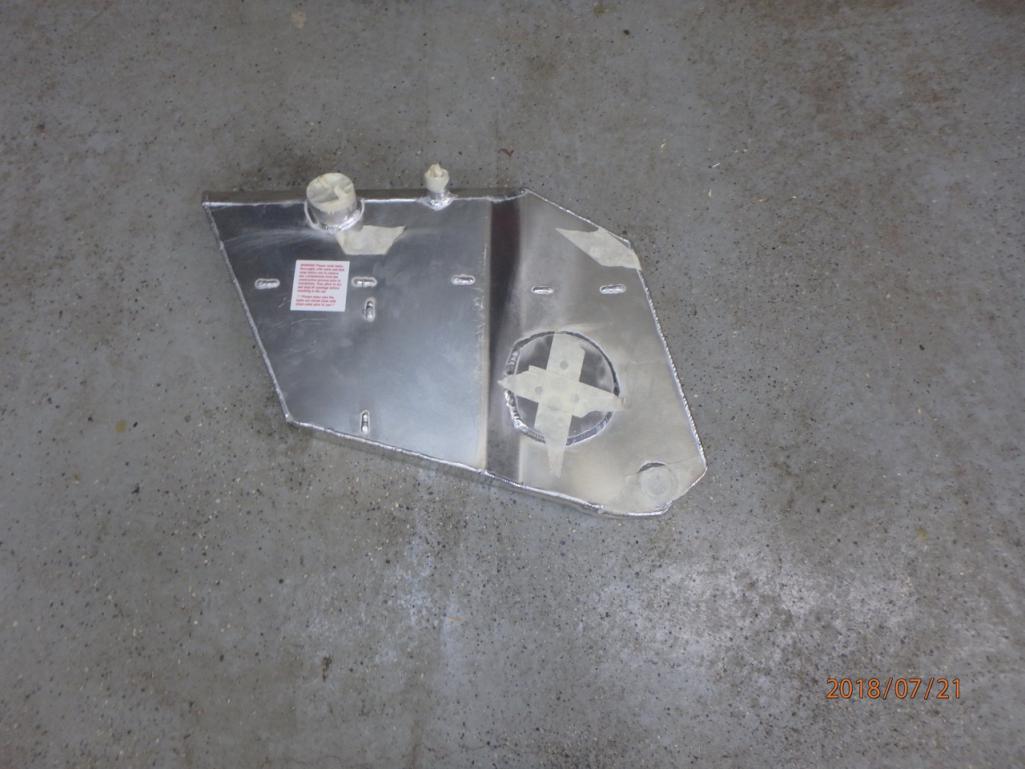
Yes thank you Ben. I do have two factory original -6 tanks that will stay on the shelf. I see no need to spend time to clean restore, patch or what ever else I have to do to make them right.
Pete and I traded some parts a while back, and I got this supper nice muffler off of him. Again have the factory stock part, but this one will work nicely.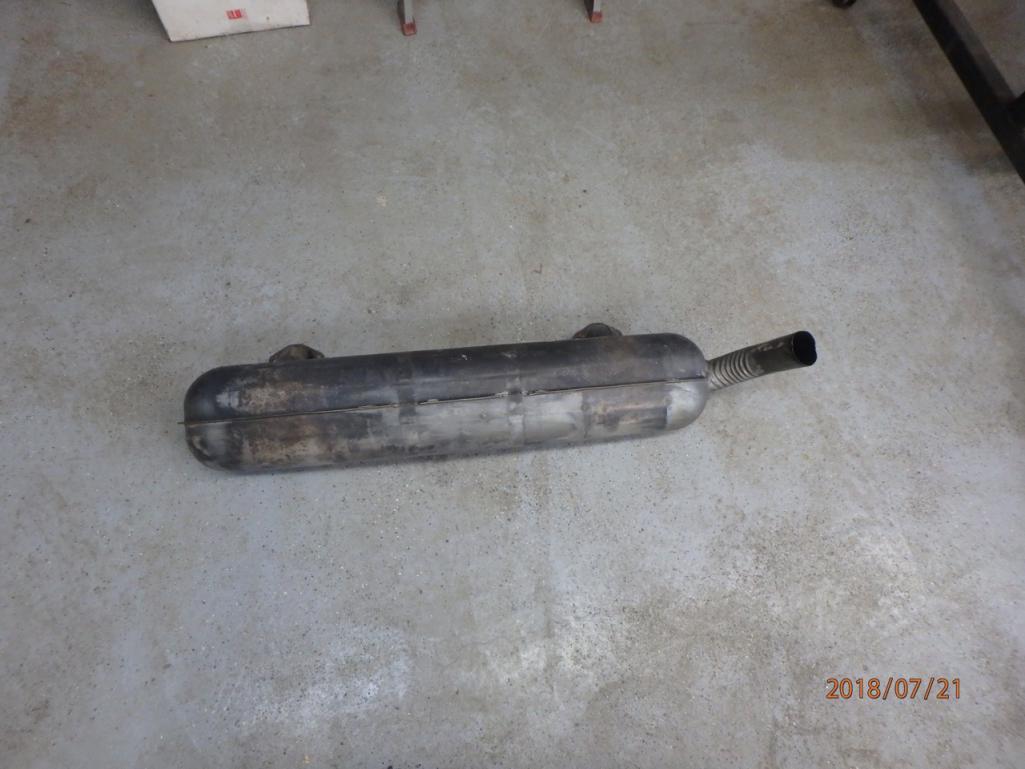
Just needs a bit of cleanup, and has a nice chrome tip
Chris came through again with these nice bearing retainers.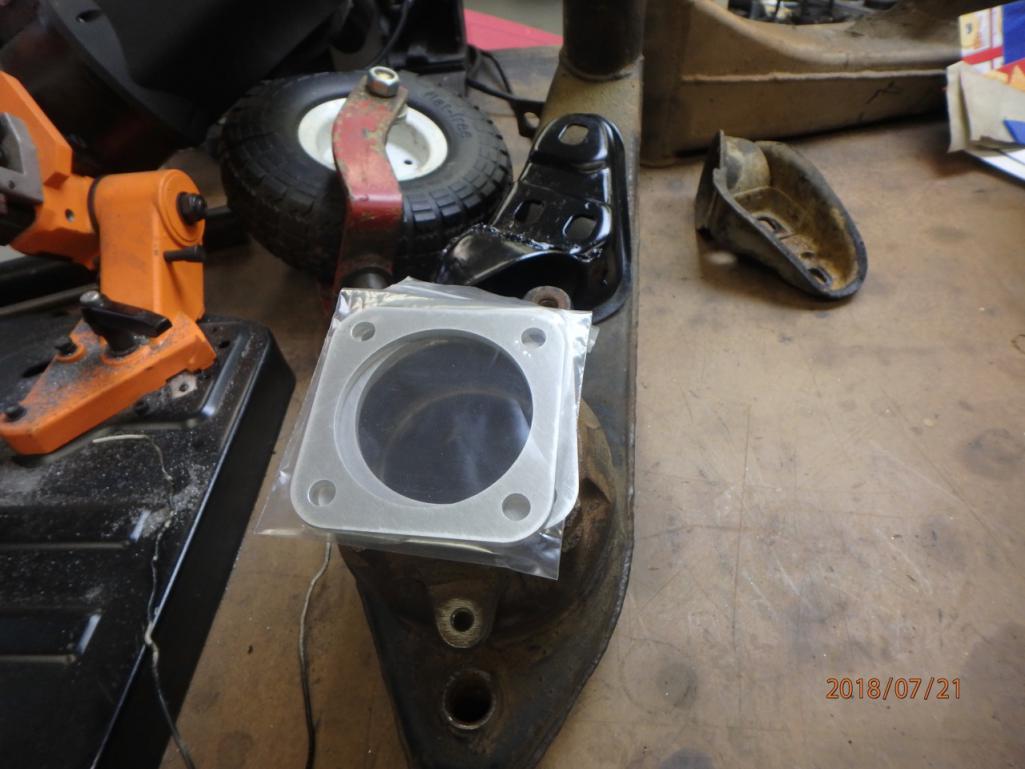
108 transmission drive flanges and bolts.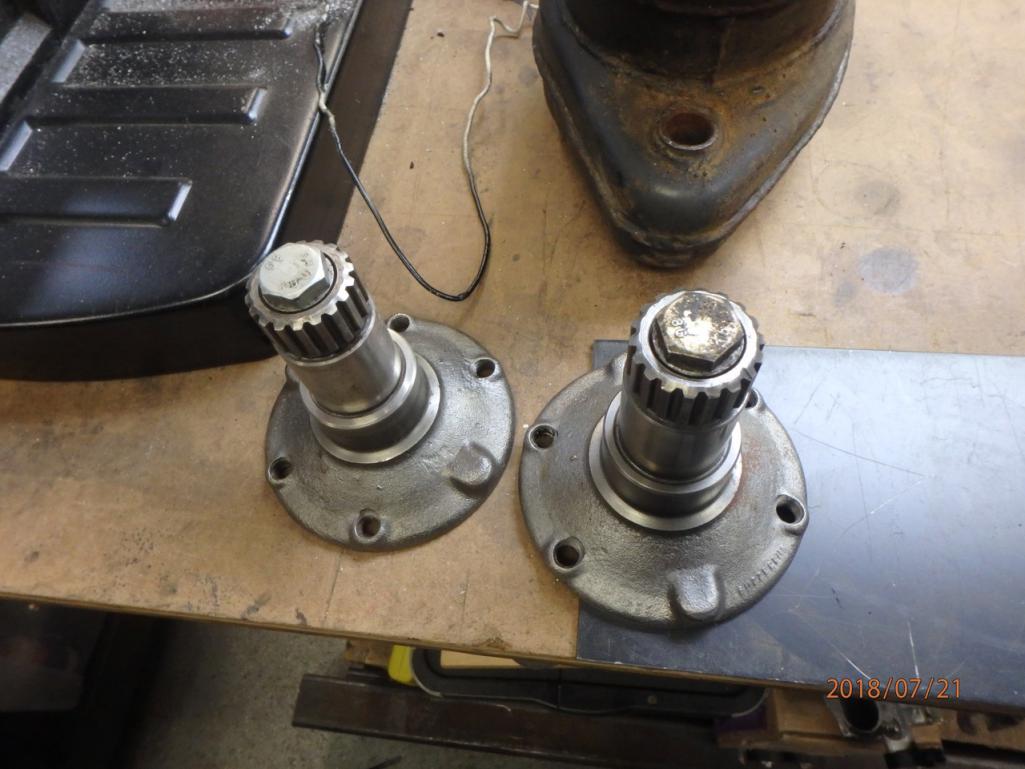
Bolts in backwards so I don't loose them
Finally got the 2.7L 911 engine home, had to unload it out of the truck. I really need a gantry, normally I have a tractor around with a front end loader for this stuff. So I had to make due with what I had.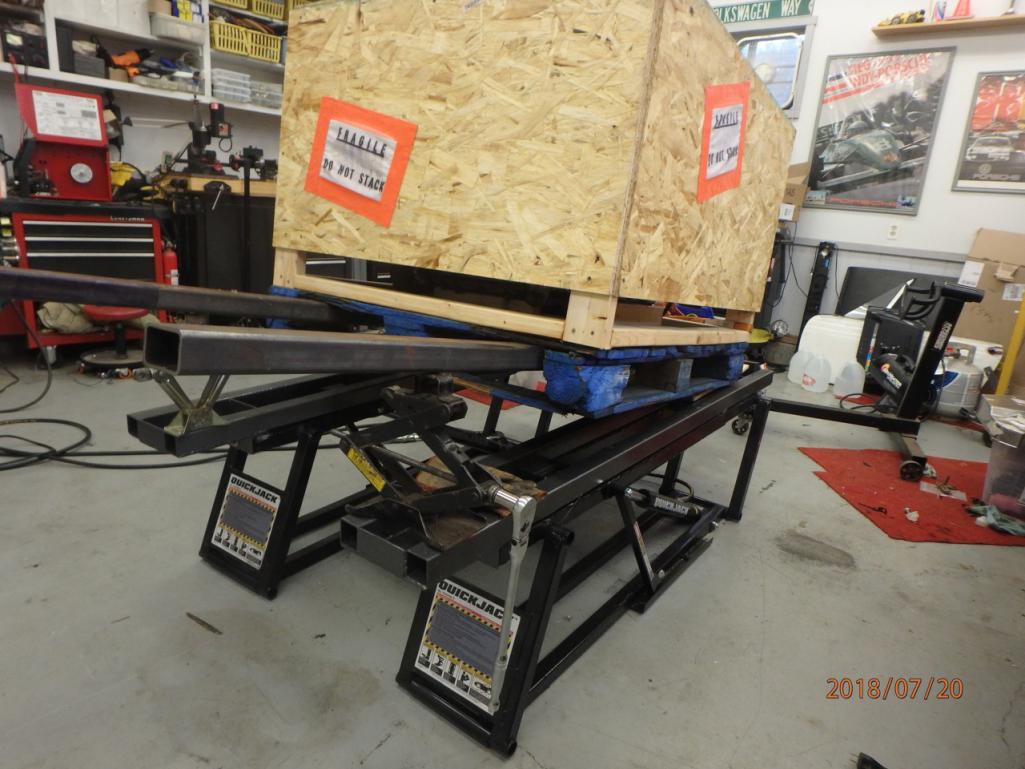
Used my Warn winch to pull it off the truck.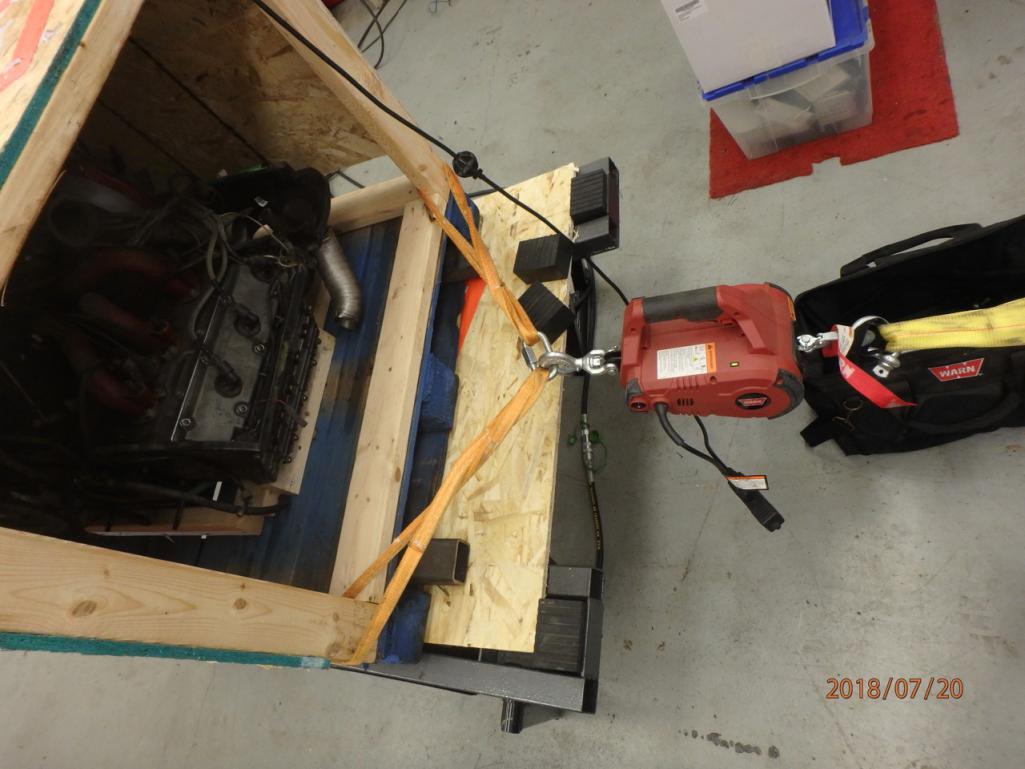
Several tense moments and it was out and flat on the lift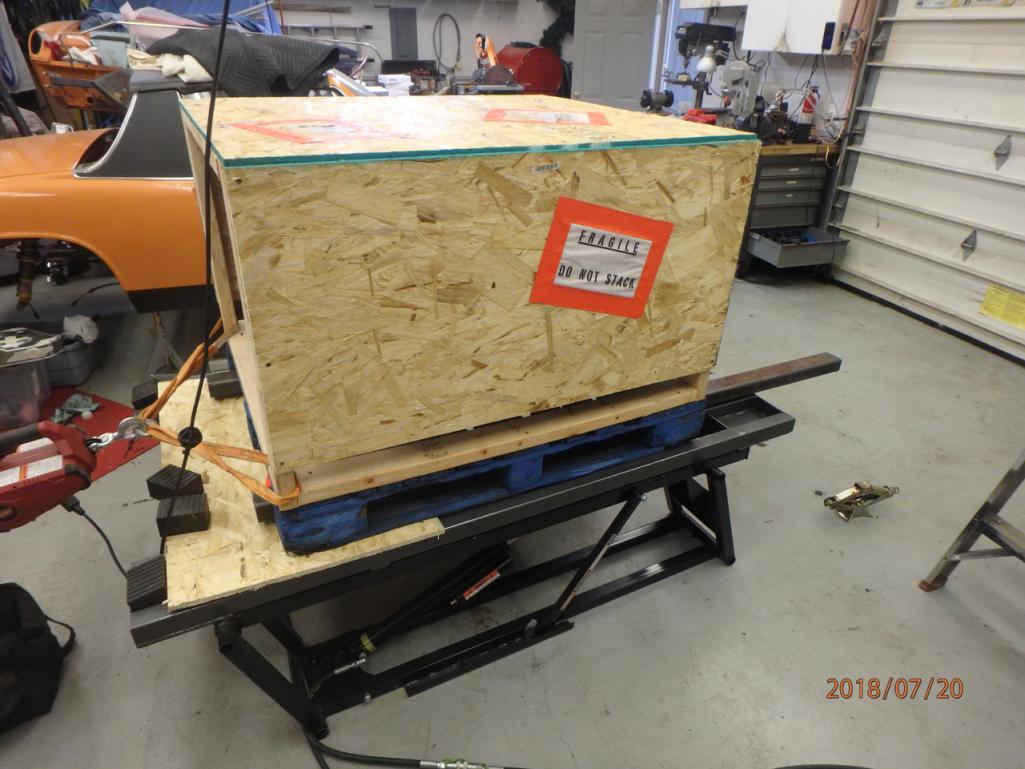
I got the engine uncrated, torn down to a long block and on the stand.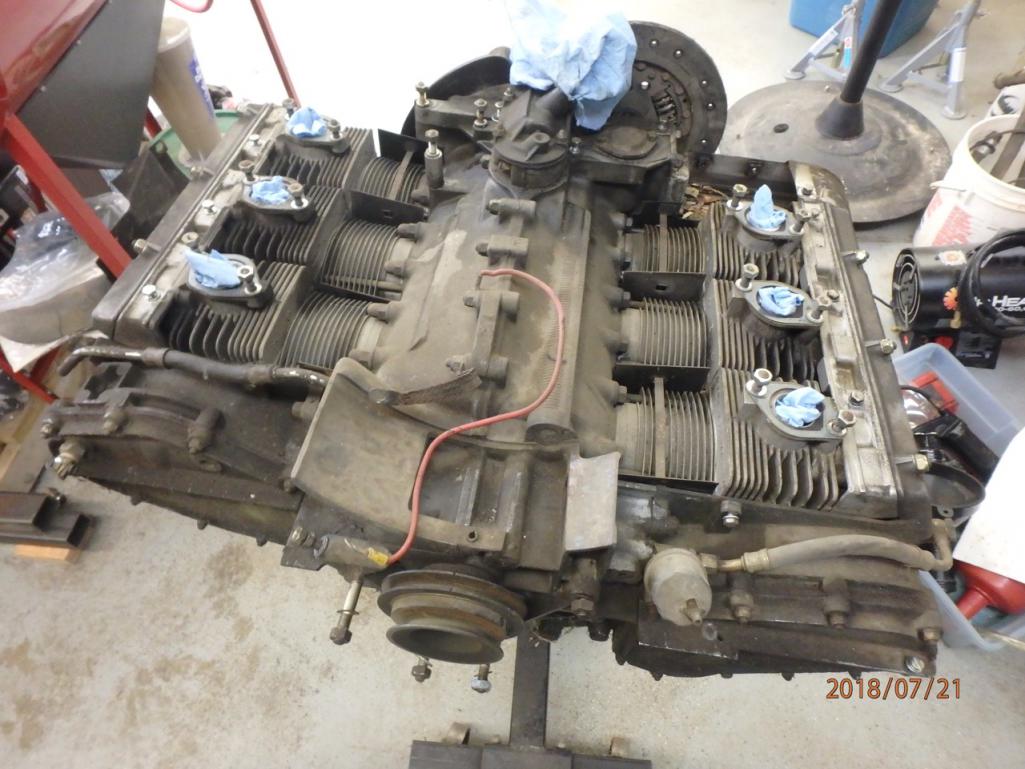
Need to spend some time cleaning it up. Looks good, add some oil, spin it around and see if it still turns over.
Fingers crossed.
Only thing out of place was these.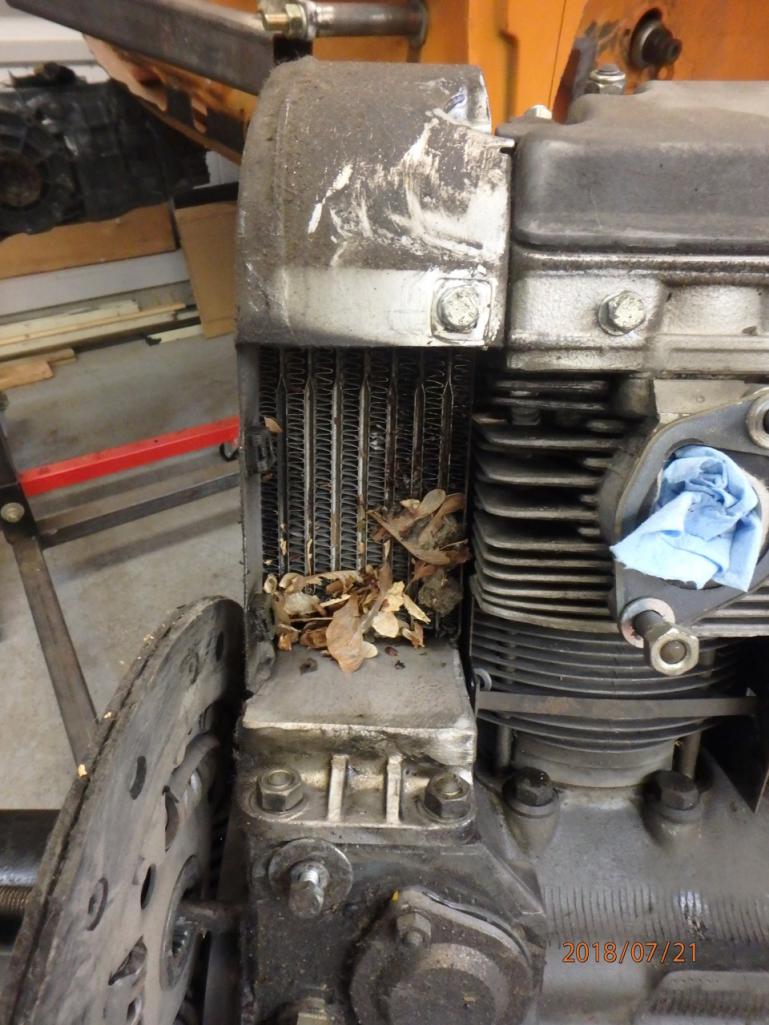
Maple seeds seem to get into everything.
Posted by: 76-914 Jul 25 2018, 09:12 AM
What are the plans for the 2.7. Complete tear down & rebuild?
Posted by: 914forme Jul 25 2018, 01:25 PM
Nope roll the dice and see what I got. I might build a test stand for it, I might not, but some how, some way that 2.7 will get fired up to see what it has.
As long as it don't smoke like a Honda and has good compression and leak down numbers I will most likely run it. If not then I will get into and most likely while I'm hereitis will kick in. Then I must do crazy things like change the displacement and compression and since I did that I'll need Nickies, and since I did that I'll need new cams, and since I did that I might as well.......
Gotta to know yourself, in this case know your tendency to overbuild and make stuff better. A 914-6 with 75-100HP bump in power will be a fun car to
A 914-6 with 150HP bump in power built out to 2.9L running dual plugs and higher compression will only be more fun 10% of the time with 400% additional costs.
Heck if it only needs a top end rebuild it will likely still cost about $2K. For that I could get a nice Subaru donor
Y'all don't get you panties bunched, I won't be doing that to a 914-6. I have come to the realization I really want to break the welder out and add a bit of to the car.
I also have to hold off on that, and just get it driving for now.
I'm not building a garage princess, cars are meant to be driven. This one proves what happens when they are not.
Posted by: 76-914 Jul 25 2018, 02:40 PM
My philosophy as well. Get 'em started as soon as possible so you know what's next up.
Posted by: worn Jul 25 2018, 05:12 PM
Nice to find a builder with a sense of proportion. Good luck. I bought a 3.2 sight unseen from a wrecked 911. A lot of drama when it was first lit, but I have gotten a lot of smiles out of it.
Posted by: 914forme Dec 31 2018, 04:36 PM
Today marks the day my life has forever changed. The great man who was my father passed away just after midnight today. In the end none of this really matters.
I am not deeply saddened by this as the man I knew was gone for the most part a while ago. Back in October Dad had surgery and while physically he made it out with a clean bill of health the anesthesia really aggravated his Alzheimer's to the point it was a struggle for him to stay in reality. As he called them the visions became more aggressive, and the worse hours where between 4:30 and dawn. These vision got worse and worse over the months.
In an instant everything has changed in my life, that is the way it works, in an instant. Once there was a man who taught me about cars, and the love of sport cars, helped me rebuild cars all my life. He taught me to be a musician to the level he could, and then supported me through my career to a professional. He supported me in my career change to computer sciences. We built houses together, and rebuilt several cars over the years. 11 of them to be exact. He never did his own stuff, started lots of projects but never got "his" done, as he said it was always more fun working on other peoples projects. He was the kind of guy that would not give you a dollar, but would be first in line to put a roof over your head. Tornados, fires, just a home repair, dad always rolled up his sleeves and jumped in to help. That is what I am going to miss, just working with him, just like his father, they taught me so much, and I doubt I can ever rise to their greatness or just general compassion for my fellow men.
Thank you, I am blessed to have called you father, to be born into such a wonderful house that taught me to be who I am. I only hope I was a good student and I make you proud.
Farewell, can't wait to see you one the flip side, where we do not hurt, or feel the pain, and sorrow of this life.
Love you, you may be gone but never forgotten.
Posted by: Dion Dec 31 2018, 04:53 PM
Stephen.... thanks for sharing that. That is beautiful.
I would have been honored to meet him. Sounds like one cool cat.
Stay strong my friend.
I hope 2019 allows you time on your project. I wish your family well in this
troubled time period.
.
Posted by: mb911 Dec 31 2018, 05:01 PM
@http://www.914world.com/bbs2/index.php?showuser=2388
I am sorry to hear your news.. I know you will push on .. Please take care.
Posted by: TravisNeff Dec 31 2018, 05:44 PM
Stephen, sorry about your loss. I appreciate you sharing the memories.
Posted by: white1975 Dec 31 2018, 05:51 PM
sorry for your loss lost my dad 4 years ago Kerry
Posted by: tygaboy Dec 31 2018, 06:22 PM
Stephen - Know that we are all thinking of you and your family.
Love and peace to you all,
Chris
Posted by: 76-914 Dec 31 2018, 06:43 PM
Posted by: Chris H. Jan 1 2019, 02:04 AM
So sorry for your loss Stephen .
Posted by: 914forme Jan 1 2019, 09:31 AM
Thank you all for thoughts prayers and sentiments, we all pass this hurdle in time. Time will heal the pain, if you have the proper mindset about it. Yes we have a lot of lows at this time, but we also have lots of highs.
"'Cause the passion and the pain
Are gonna keep you alive someday"
Posted by: Cairo94507 Jan 1 2019, 09:57 AM
Stephen - Condolences on the passing of your father. He is now resting in peace and I pray you only remember the good times.
Posted by: krazykonrad Jan 1 2019, 07:34 PM
Thoughts and prayers. We are here for you.
Konrad
Posted by: theer Jan 2 2019, 09:31 AM
Stephen,
Losing your father leaves a hole in your universe, no doubt about it.
My best to you and your family in this difficult time.
Tom
Posted by: jkb944t Jan 2 2019, 11:28 AM
Thoughts and prayers are with you during a difficult time. It sounds like you had a fantastic father and enjoyed many good times together so you can definitely be grateful for that.
Jeff B
Posted by: housepumpinpc Jan 2 2019, 11:59 AM
Stephen, I was reading through this, starting at the beginning. Then I get to this about your father passing. I understand fully, lost my dad in 2016. Was working on his dream car. Never got to finish. I realized, over time, that it was never about a car. It was about the journey, the bond that you had. I have friends whose dad died while they were young, some whose dad didn't even bother. Yours was there, that was a blessing. I'm sorry for you and your family's loss. Thank you for sharing your journey with us.
Posted by: bigkensteele Jan 2 2019, 05:14 PM
That was a beautiful memorial you wrote. You and your family are in my prayers.
Posted by: 914forme Jan 5 2019, 12:14 PM
Thank you, thank you, and thank you. It is touching to me, and even makes me more grateful for this community.
We laid dad to rest yesterday, It was a great day of fellowship, and remembrance. We had a meal for everyone that wished to attend, and I got to hear how dad touched so many lives. It was a great day I will never forget.
It has also been very nice to see Dad gave Mom one last great gift. That was the gift of finding Mom a community that she could function and thrive in. She is at a great retirement community where she is living in independent care. She goes down each day, and has here Breakfast with a gathering of friends she has made there. If we are out and about, and it is getting close to dinner she wants to know if we will make it back. If we are cutting it close, I have barely got the car stopped her door is flying open, and she is at full speed to get to the table. They are likewise happy to see here, getting her a spot at the table.
It is great seeing my mother living and getting stronger. Because of these events, people have grown closer together, and strained relations where bonded. Amazing how even in the end he was able to do great things.
From here Dad would say get on with it, we have things to do, and people to help. I am going to take a few days for my self and my family to recoup and reorganize then back at it. He is right lots of people to help become better, lots of small acts of kindness that people need everyday. Even if it is just a smile or holding a door open, making eye contact with your barista instead of staring at your phone and muttering your order and treating them like they are a machine.
That is why I will say I am grateful for all your well wishes, thoughts and prayers.
Posted by: Valy Jan 6 2019, 03:31 AM
Condolences.
Posted by: ConeDodger Jan 6 2019, 07:34 AM
Stephen,
I just read this thread front to back. Props!
Condolences on the loss of your father. But having read this front to back, I can see that he lives on in your head, your heart, and your hands. Of that, there is no doubt.
Posted by: 914forme Jan 19 2019, 10:47 PM
Thank you everyone, we are working on the estate right now, luckily we have it all planned out. So far no surprises, except one of our attorneys cancelled out meeting due to strep throat.  He can keep that crap to himself.
So what have I been working on, spent the last two weekends going and locating paperwork.
today, I took Dad's truck to the junkyard. Cost more to fix than it was worth, and it is too small for the crap I do. It would have been about 3 grand to fix, and well I would rather spend 3 grand on this car. Wife agrees so, off it went.
I made it into the shop today and actually got some stuff done on this car, but it was a filler item. I was working on a project for Mom, and for the wife.
My grand father carved this out of one solid timber way back in the 90s. 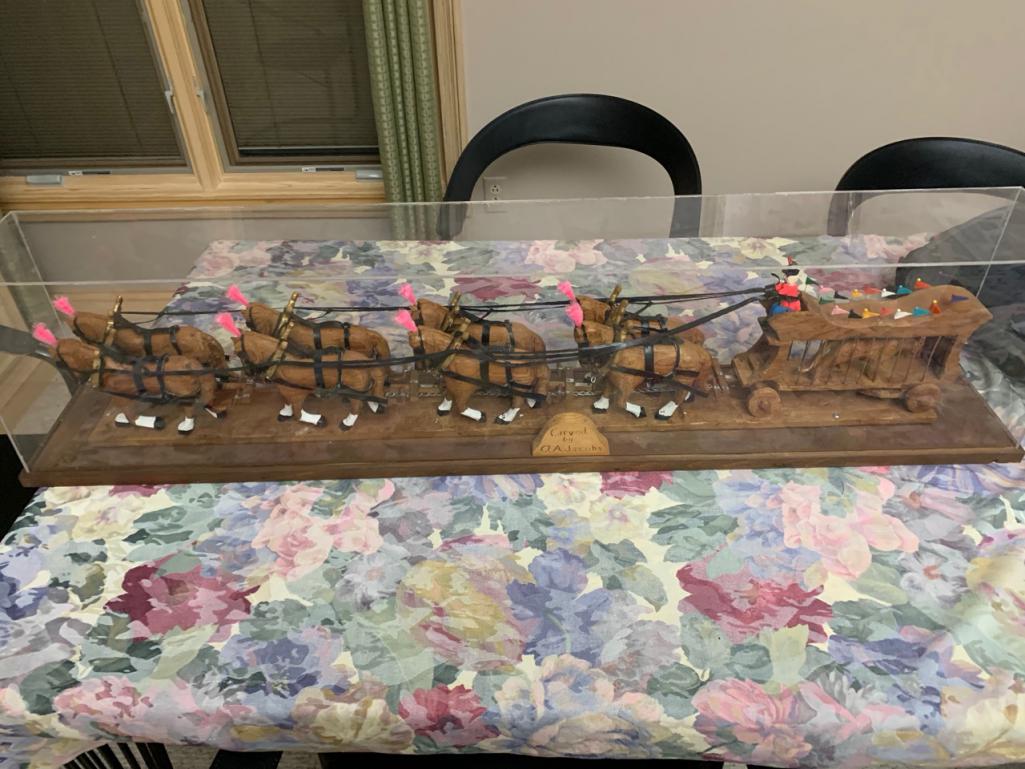
Mom wants it hung in her apartment up high above a window with a slight angle down so you can see it. So I did some testing 30 degrees, makes the cover fall off, so I stepped back, and tested out 15 degrees that worked. So I made some brackets to hang it. 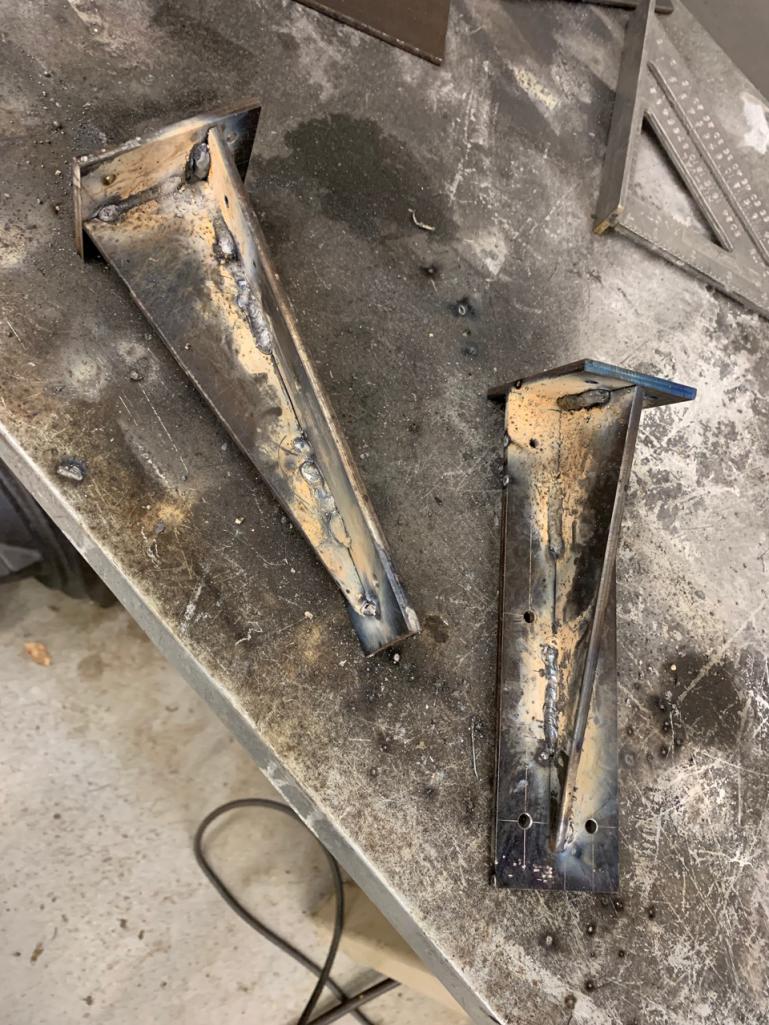
Very ugly right now, I will clean them up and get them coated.
Wife had an item on my list also. We purchased a new bed frame, the old one had an incident, that left it a bit less than desirable. So I have to make new brackets to mount the old headboard to the new frame.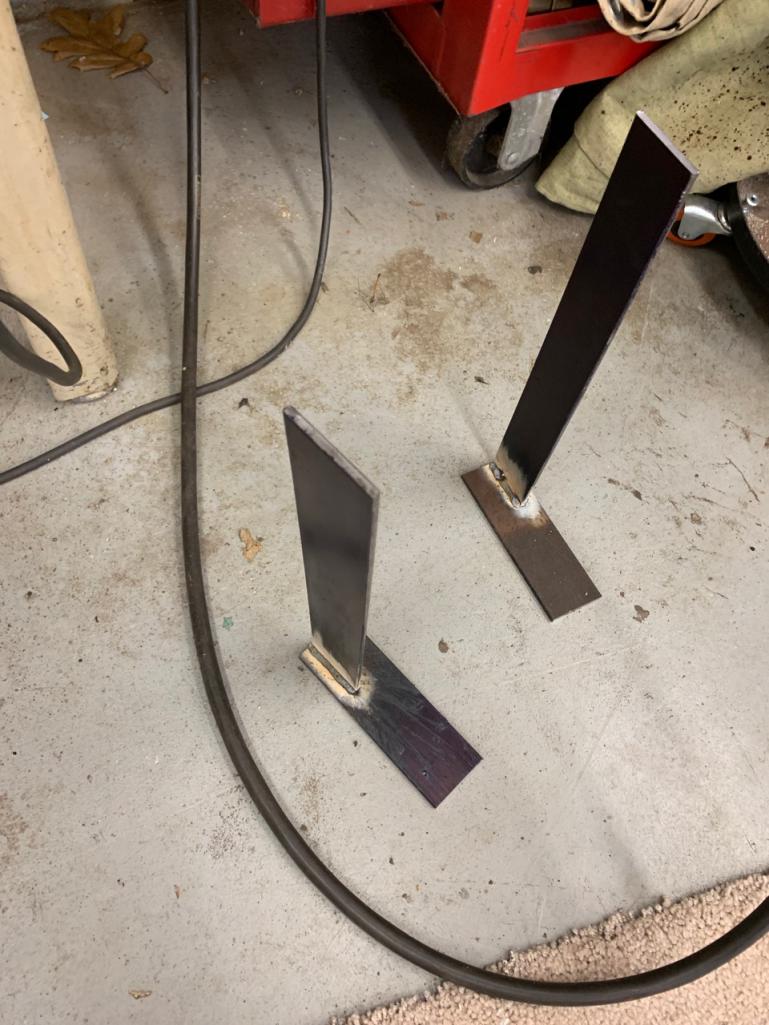
Slots where done using my Sherline Mill, fells good to make some chips fly again.
So that made we think of other things to work on. I have and I am in the process of purchasing the world supply of 914 H&H rear swaybars. I do not like the funky linkage they have on them, I can fix that.
First up get the dang things off the set of shock bolts I got with the setup. 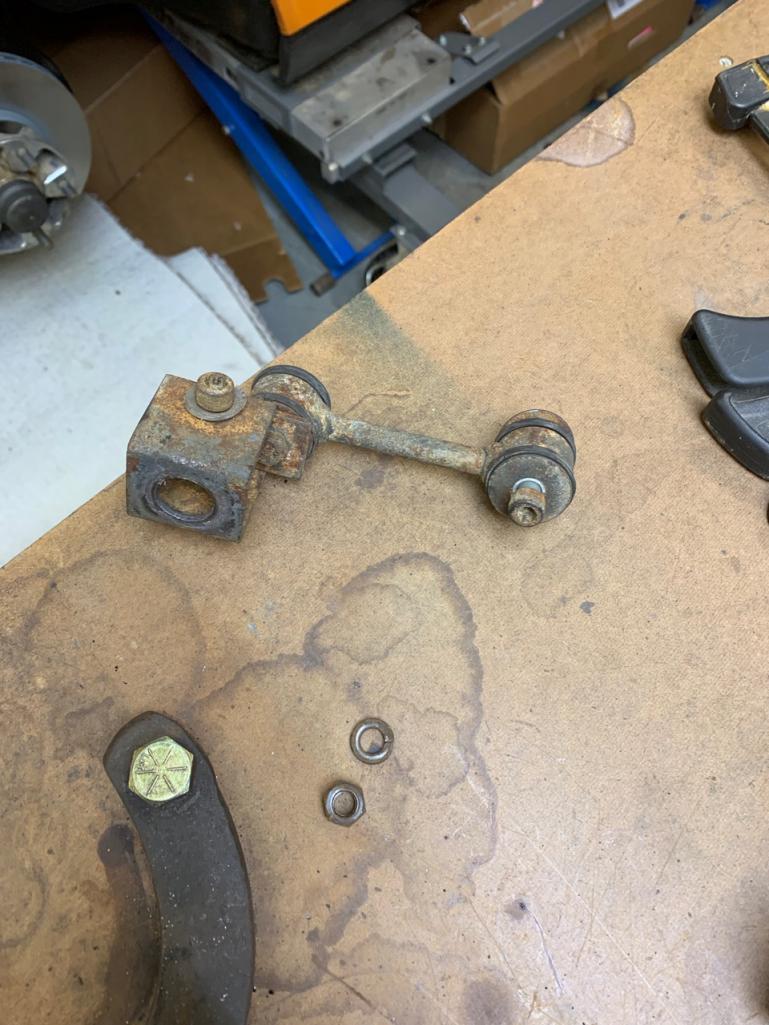
Next up take the bolt over to the metal lathe and make more chips, and curly Qs, oh this is so much fun.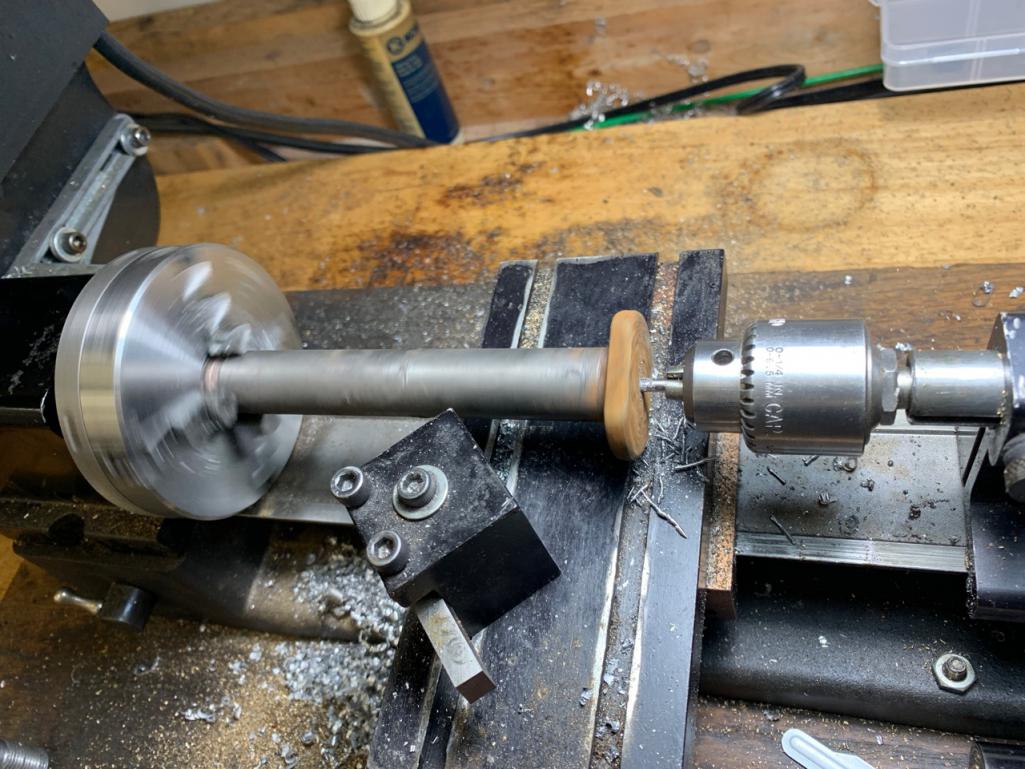
I centered it, then drilled it out to 5/16" to then tap it to 3/8-16 so I could install a bolt into the bolt.
Next up more chips flying and I had to make the spacers to get the drop links to align with the trailing arm and the swaybar arms. And this is what I came up with.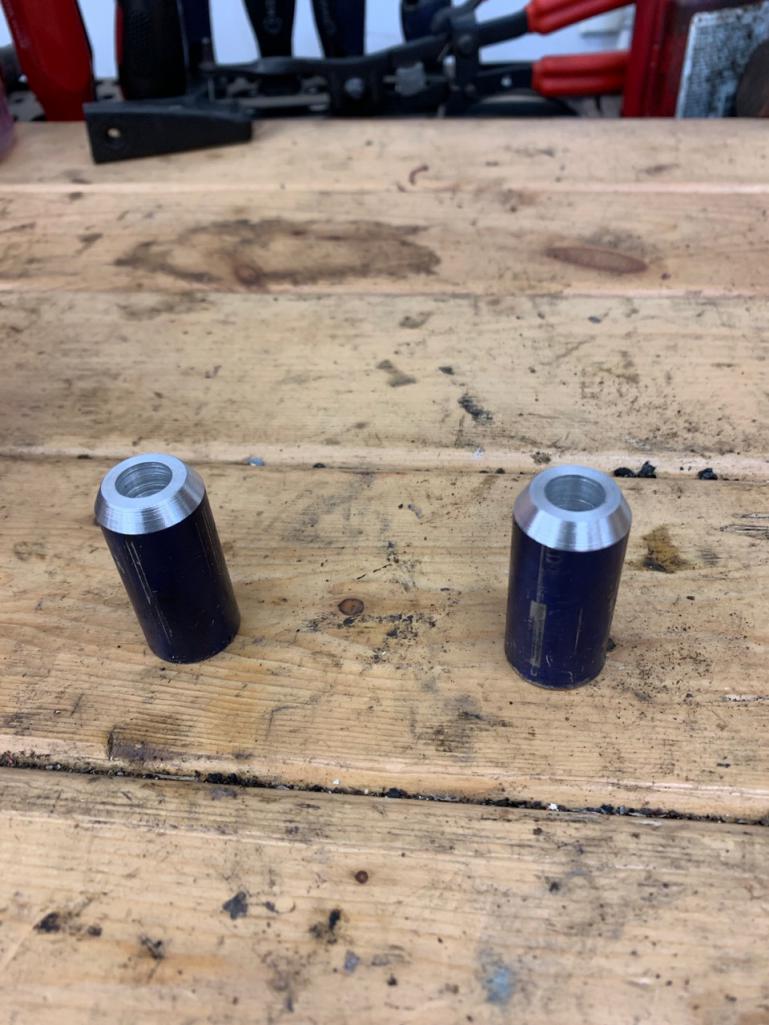
They are tapered at the end to allow the rod end room to pivot.
And all done. 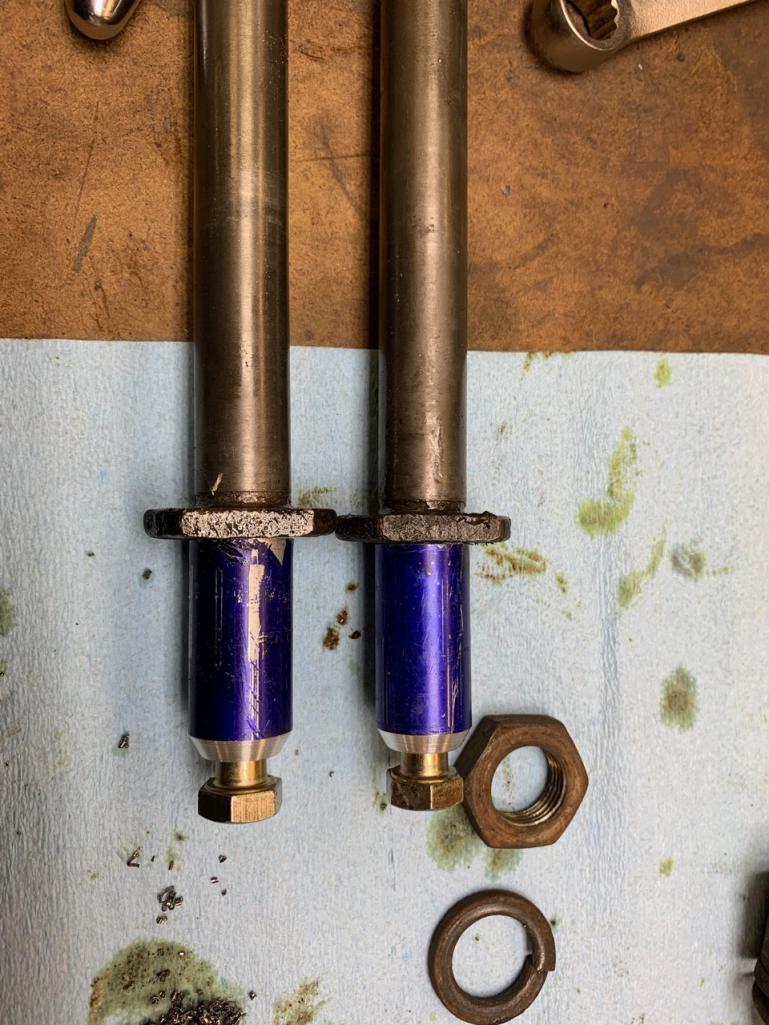
Need to clean up, and get them anodized and plated. These little projects took longer than I wanted today, but I had a lot of fun, got some machine time in, got some welding and fabrication time. I can't complain.
Posted by: ndfrigi Dec 3 2020, 12:04 AM
bump to top!
Posted by: euro911 Dec 3 2020, 03:02 AM
Sorry to hear about the loss of your dad Please accept my condolences.
Posted by: Jett Dec 3 2020, 10:22 AM
Thank you everyone, we are working on the estate right now, luckily we have it all planned out. So far no surprises, except one of our attorneys cancelled out meeting due to strep throat.
He can keep that crap to himself.So what have I been working on, spent the last two weekends going and locating paperwork.
today, I took Dad's truck to the junkyard.
Cost more to fix than it was worth, and it is too small for the crap I do. It would have been about 3 grand to fix, and well I would rather spend 3 grand on this car. Wife agrees so, off it went.I made it into the shop today and actually got some stuff done on this car, but it was a filler item. I was working on a project for Mom, and for the wife.
My grand father carved this out of one solid timber way back in the 90s.
Mom wants it hung in her apartment up high above a window with a slight angle down so you can see it. So I did some testing 30 degrees, makes the cover fall off, so I stepped back, and tested out 15 degrees that worked. So I made some brackets to hang it.
Very ugly right now, I will clean them up and get them coated.
Wife had an item on my list also. We purchased a new bed frame, the old one had an incident, that left it a bit less than desirable. So I have to make new brackets to mount the old headboard to the new frame.
Slots where done using my Sherline Mill, fells good to make some chips fly again.
So that made we think of other things to work on. I have and I am in the process of purchasing the world supply of 914 H&H rear swaybars.
I do not like the funky linkage they have on them, I can fix that.First up get the dang things off the set of shock bolts I got with the setup.
Next up take the bolt over to the metal lathe and make more chips, and curly Qs, oh this is so much fun.
I centered it, then drilled it out to 5/16" to then tap it to 3/8-16 so I could install a bolt into the bolt.
Next up more chips flying and I had to make the spacers to get the drop links to align with the trailing arm and the swaybar arms. And this is what I came up with.
They are tapered at the end to allow the rod end room to pivot.
And all done.
Need to clean up, and get them anodized and plated. These little projects took longer than I wanted today, but I had a lot of fun, got some machine time in, got some welding and fabrication time. I can't complain.
The carving is amazing!
Posted by: 914forme Dec 3 2020, 12:30 PM
GrandPa was a talented man. Master Electrician, Plumber, and Carpenter.
I never got that good at carving, have lots of scares to prove my attempts.
Powered by Invision Power Board (http://www.invisionboard.com)
© Invision Power Services (http://www.invisionpower.com)