Printable Version of Topic
Click here to view this topic in its original format
914World.com _ 914World Garage _ OFFICIAL GRASSHOPPER "RUSTORATION" THREAD
Posted by: grasshopper Oct 12 2005, 05:13 PM
ok, heres my new http://www.914world.com/bbs2/index.php?act=ST&f=2&t=35558&hl=. this is going to go pretty slow, until i can get some decent time to get work done...  I hate school. ordered metal, and am waiting for it to arrive. I'm glad i didn't pay alot for this car, cause i found 100 percent more rust than I expected. things that looked solid, fell apart. lots of fabrication work. But i'm not afraid to fabricate stuff. I gotten pretty good. here are some pics that are more recent. Hope you enjoy this thread!!!!!!!
  drivers side after digging
Attached image(s)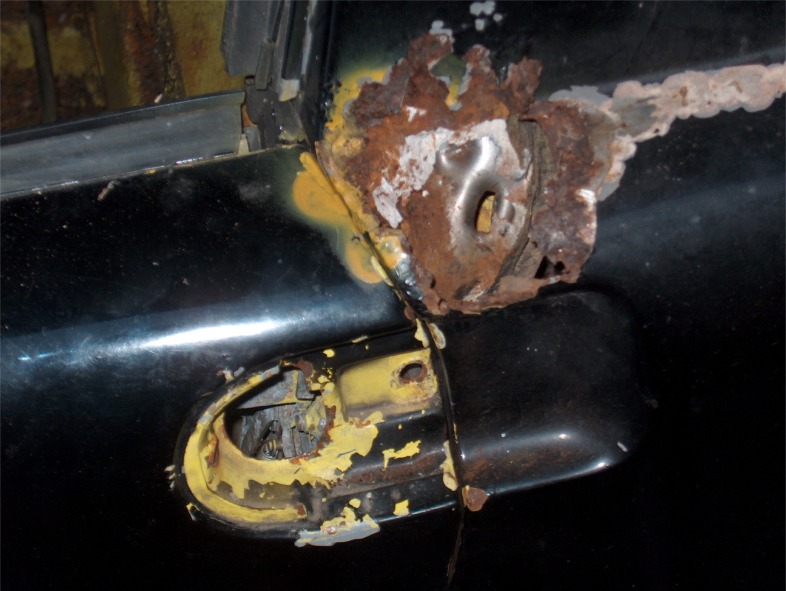
Posted by: grasshopper Oct 12 2005, 05:15 PM
drivers side after cutting
Attached image(s)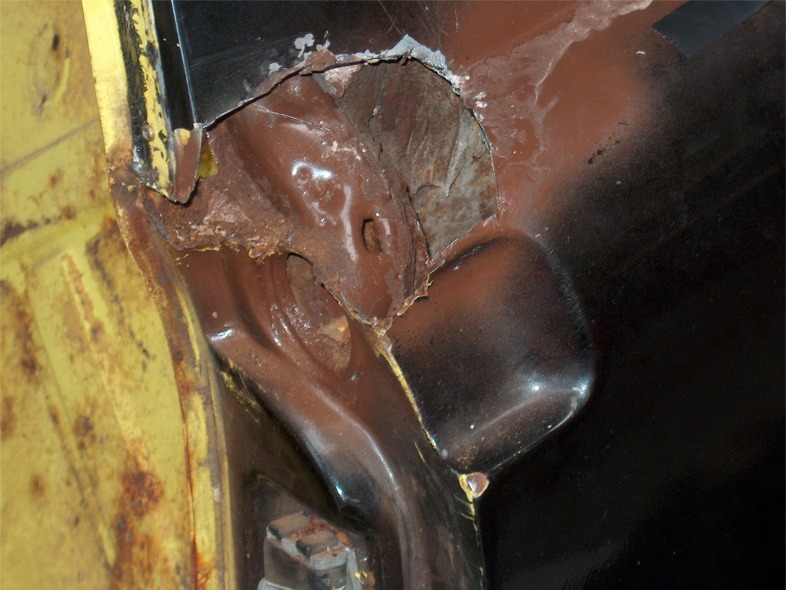
Posted by: grasshopper Oct 12 2005, 05:16 PM
template made.............no making fun 
Attached image(s)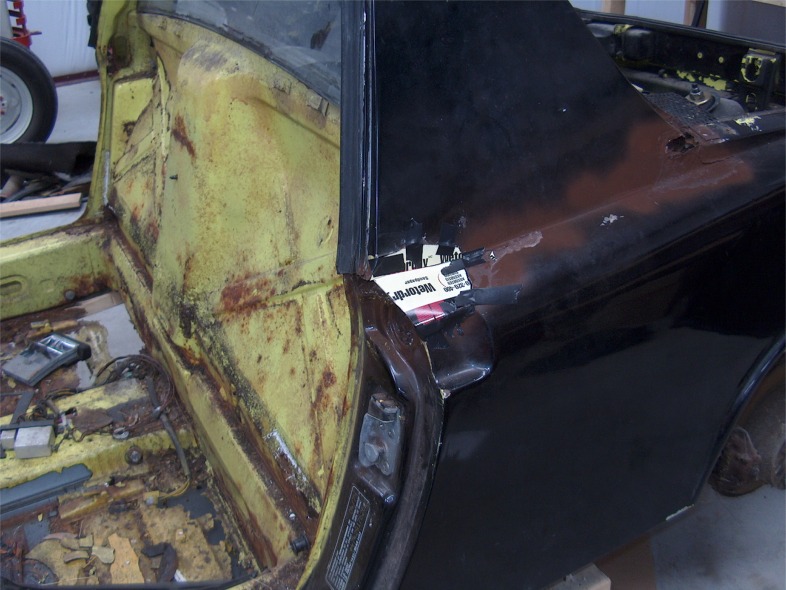
Posted by: grasshopper Oct 12 2005, 05:17 PM
metal cut and hammered to shape.....old school 
Attached image(s)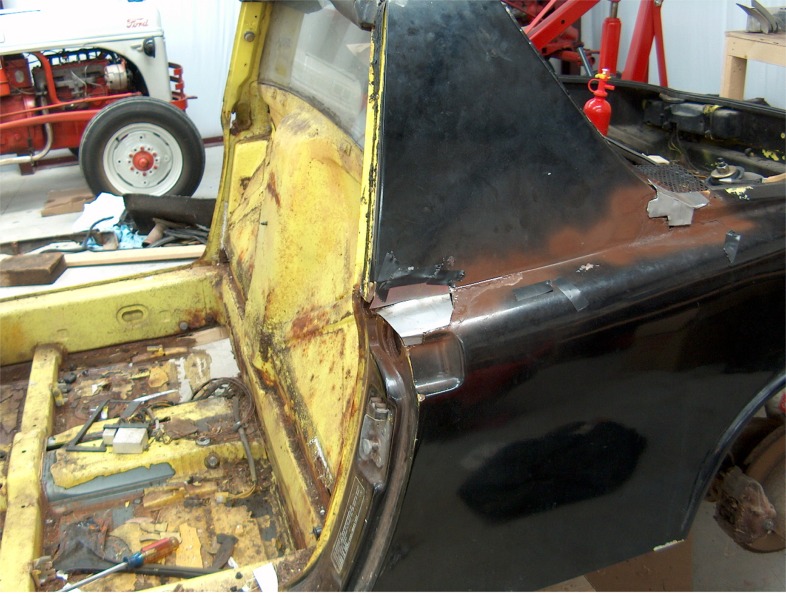
Posted by: grasshopper Oct 12 2005, 05:19 PM
havn't welded these pieces yet. and dont want to buy a 130 dollar piece to replace this  sail panel passenger side
Attached image(s)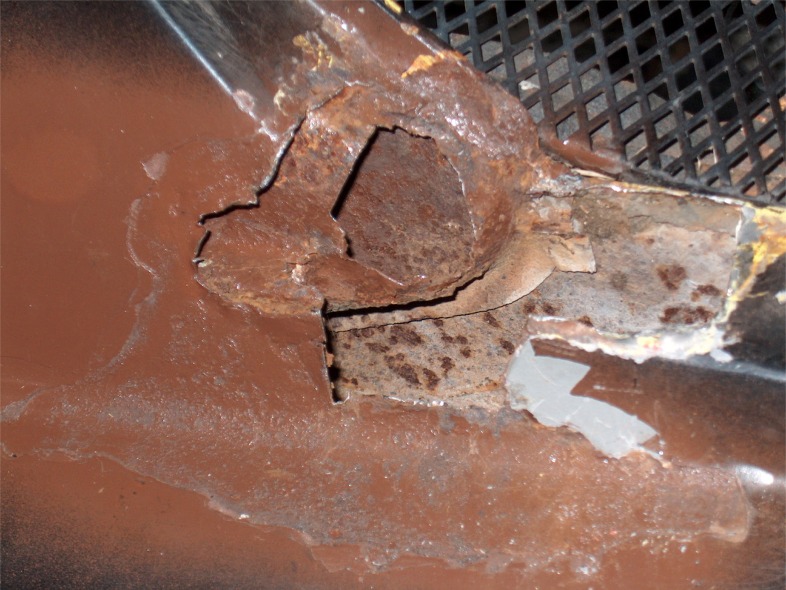
Posted by: grasshopper Oct 12 2005, 05:20 PM
template
Attached image(s)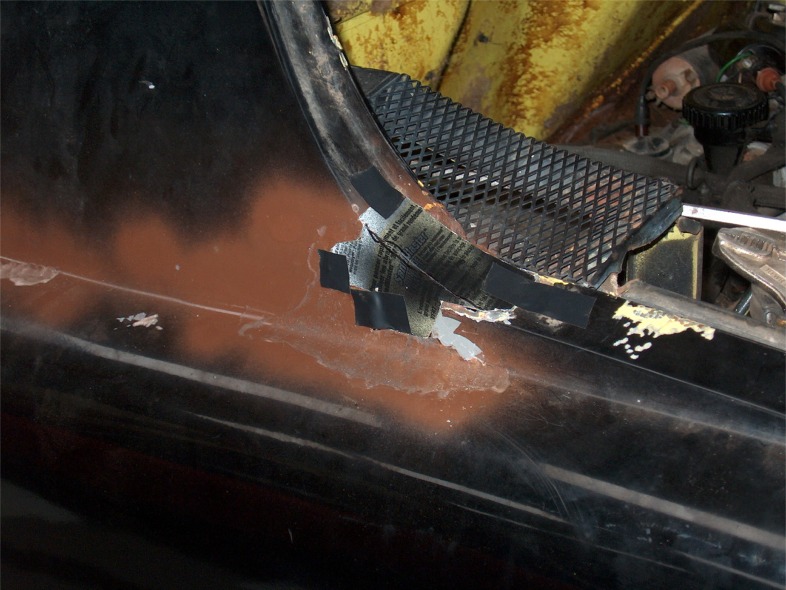
Posted by: grasshopper Oct 12 2005, 05:21 PM
metal cut and formed.....thats a hard piece to make
Attached image(s)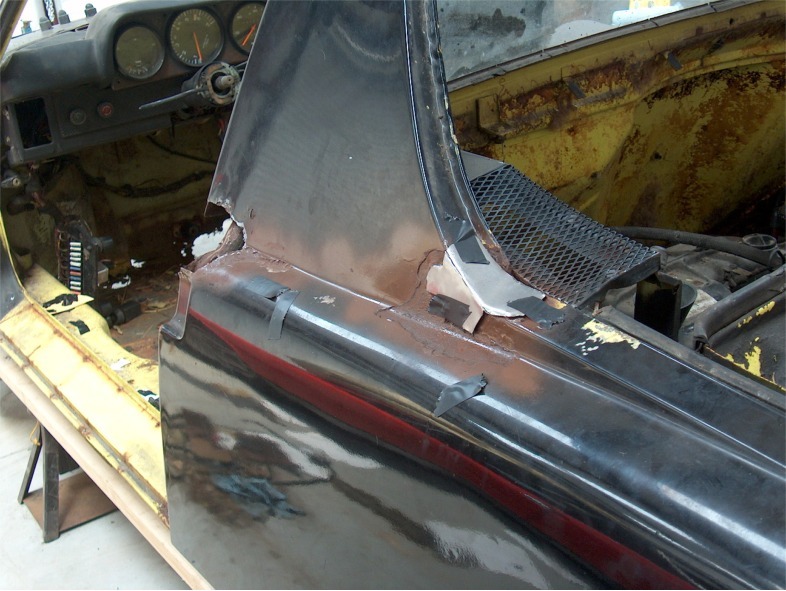
Posted by: grasshopper Oct 12 2005, 05:22 PM
passenger side firewall
Attached image(s)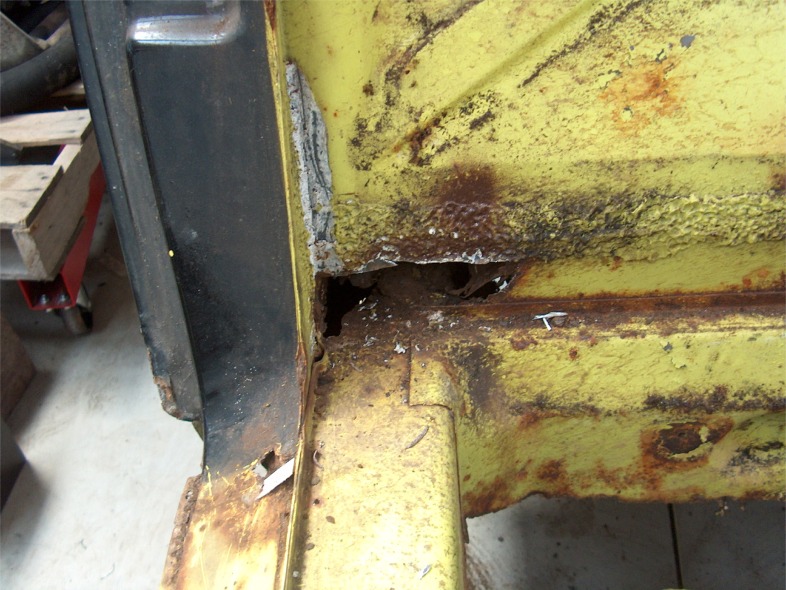
Posted by: grasshopper Oct 12 2005, 05:23 PM
metal
Attached image(s)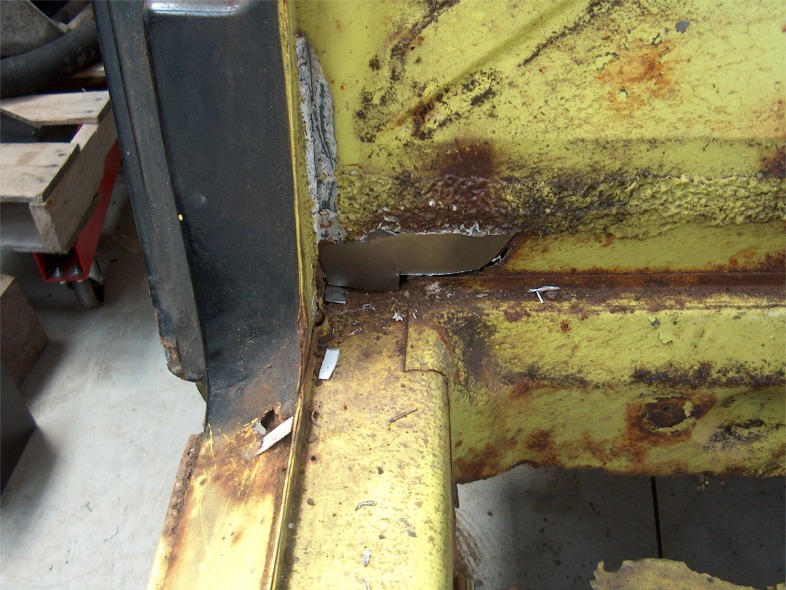
Posted by: grasshopper Oct 12 2005, 05:25 PM
passenger front side floor solid 
Attached image(s)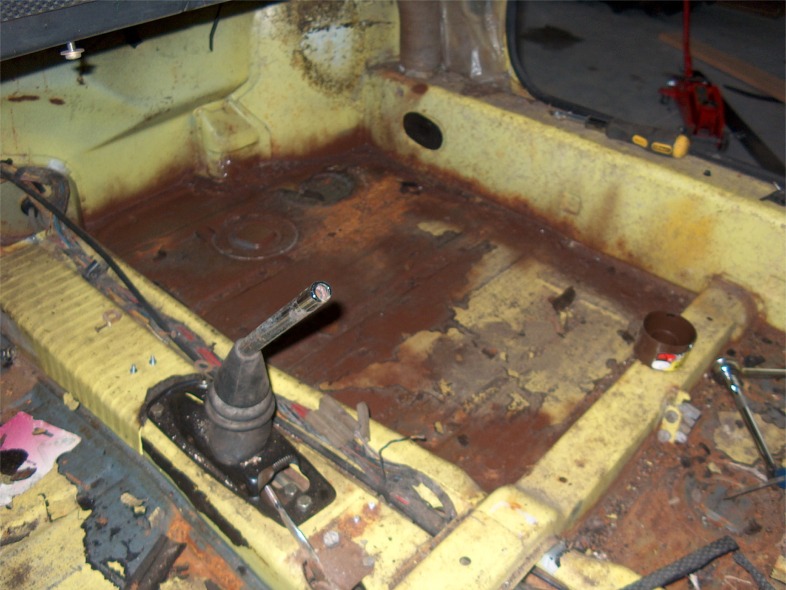
Posted by: grasshopper Oct 12 2005, 05:26 PM
cant say the same about the drivers side  nice patch.....sorry about the andy style pic
Attached image(s)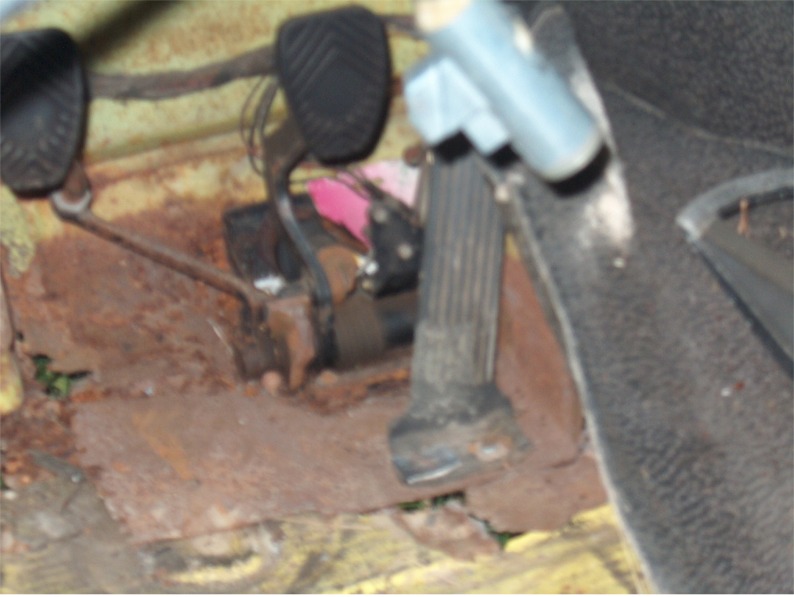
Posted by: grasshopper Oct 12 2005, 05:27 PM
patch removed 
Attached image(s)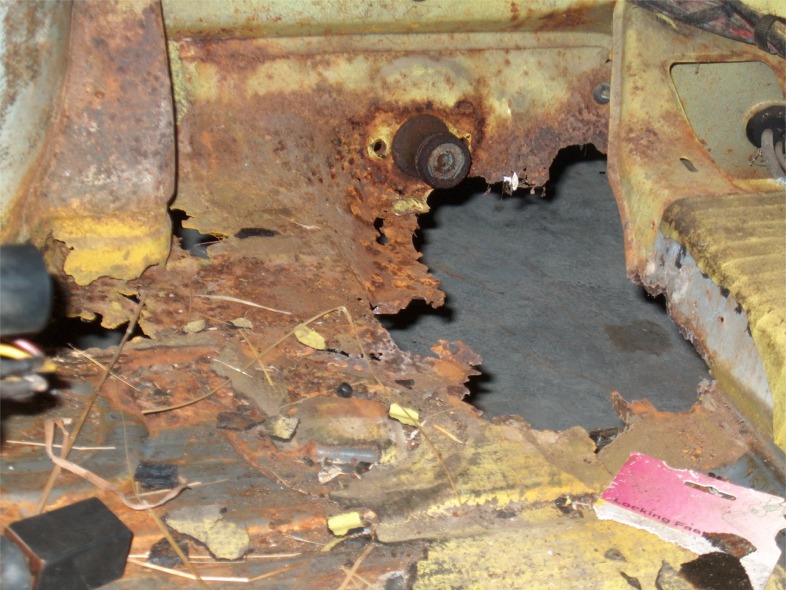
Posted by: i love porsche Oct 12 2005, 05:28 PM
looks like you have alot of work ahead
good luck and be sure to have patience!
Posted by: grasshopper Oct 12 2005, 05:29 PM
did find something that made me a little happier though. steel fuel lines through the center tunnel 
Attached image(s)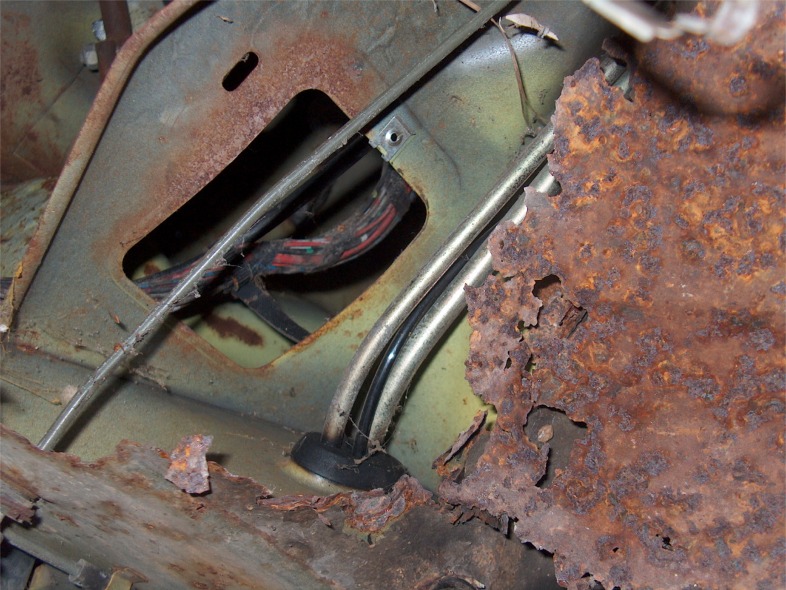
Posted by: SirAndy Oct 12 2005, 05:30 PM
well, that's going to be a lot of work, but you sure will learn A LOT about your car in the process ...
oh, and i highly recommend you buy a gallon or two of "Metal Ready" and spray the hell out of ANY surface rust you can find.
do that *before* you start patching the holes ...
 Andy
Andy
Posted by: grasshopper Oct 12 2005, 05:31 PM
whoops, skipped a couple pics. Here are the templates after they were cut
Attached image(s)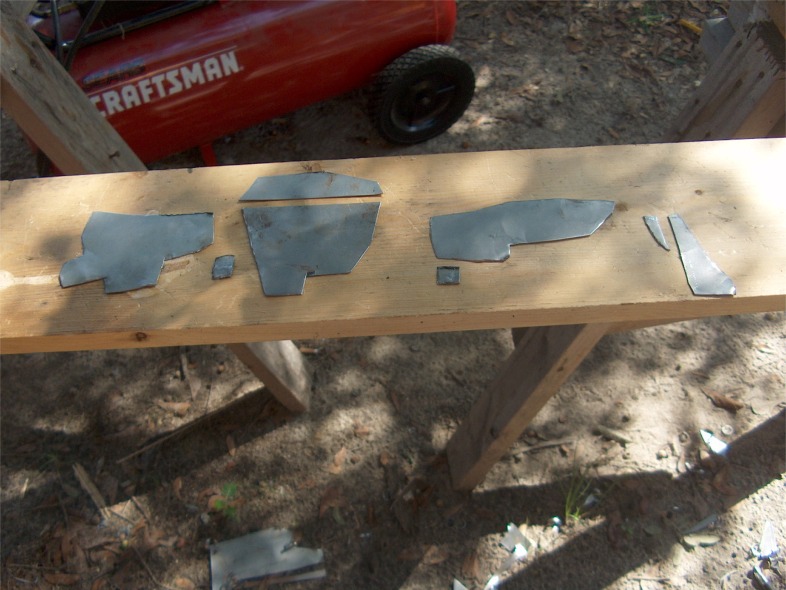
Posted by: grasshopper Oct 12 2005, 05:33 PM
and last one for now. here's a pic of me smoothing out the metal, before i bent them into place. and if you didn't know i was 14, you do now 
Attached image(s)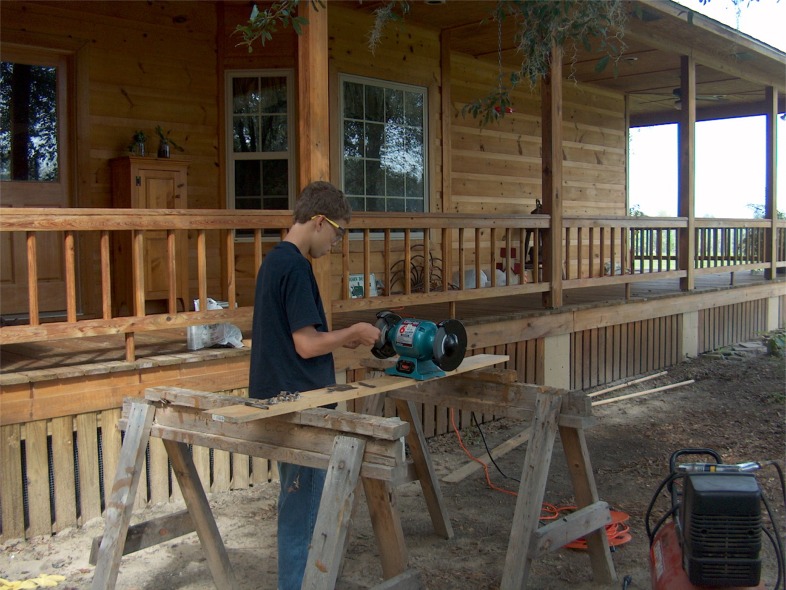
Posted by: Rand Oct 12 2005, 05:34 PM
I was just about to say it... buy Andy beat me to it. Kill the rust under there before welding the patches on. I use Ospho and paint it with Hammerite 24 hours later.
Kudos for taking this on!
Posted by: grasshopper Oct 12 2005, 05:36 PM
if you are wondering why i am working outside, its because no electricity has been run to the garage yet, cause its like 100 yards from the house. the garage is the best thing to happen when we moved
Attached image(s)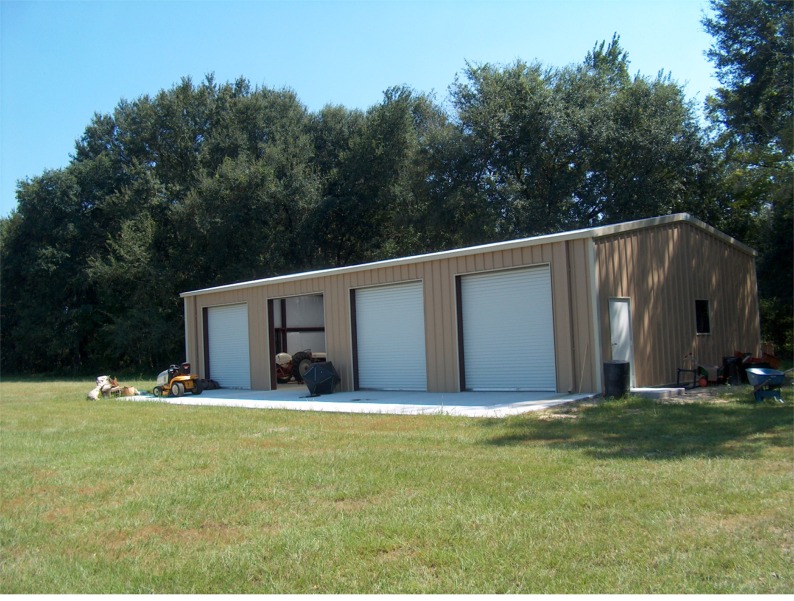
Posted by: Rand Oct 12 2005, 05:40 PM
Dang, I wish I had a garage like that. Outstanding.
Posted by: Hammy Oct 12 2005, 05:50 PM
Yes, make SURE you use Ospho or metal ready or some kind of rust killer before you cover up or patch any rust, or else the rust will still grow.
Good work... you've done a lot more so far than I've done on my car
Posted by: Headrage Oct 12 2005, 05:50 PM
| QUOTE (grasshopper @ Oct 12 2005, 04:33 PM) |
| if you didn't know i was 14, you do now |
Is that because of your looks or the fact that you are using a bench grinder teetering on a narrow piece of lumber slung between two saw horses?
Posted by: Mueller Oct 12 2005, 06:04 PM
way to go !!!!
it's awesome that you are going ahead with this, you'll be way ahead of your classmates doing a project like this....
Posted by: Aaron Cox Oct 12 2005, 06:07 PM
| QUOTE (Headrage @ Oct 12 2005, 04:50 PM) | ||
Is that because of your looks or the fact that you are using a bench grinder teetering on a narrow piece of lumber slung between two saw horses? |
ROFL

Posted by: Gint Oct 12 2005, 06:10 PM
Bravo!  That's cool, seeing a 14 year old tackle that project. Keep at it.
Posted by: SirAndy Oct 12 2005, 06:27 PM
| QUOTE (grasshopper @ Oct 12 2005, 04:33 PM) |
| and if you didn't know i was 14, you do now |
can't decide what i hate more, your guts or my age ...
when i was 14, all i was interested in was girls!
Andy
Posted by: grasshopper Oct 12 2005, 06:40 PM
| QUOTE (Headrage @ Oct 12 2005, 03:50 PM) | ||
Is that because of your looks or the fact that you are using a bench grinder teetering on a narrow piece of lumber slung between two saw horses? |
thanks, i like the encouragement

Posted by: Jeroen Oct 12 2005, 06:43 PM
Posted by: Headrage Oct 12 2005, 07:18 PM
| QUOTE (grasshopper @ Oct 12 2005, 05:40 PM) | ||||
thanks, i like the encouragement |
Easy there tiger. Just having some fun. I think what you're doing is great. Ya got your work cut out for ya and I'm looking forward to watching your progress. Lemme know if ya need any sheet metal. I have a roller that gets cut up when somebody needs something...
Posted by: grasshopper Oct 12 2005, 07:22 PM
| QUOTE (Headrage @ Oct 12 2005, 05:18 PM) | ||||||
Easy there tiger. Just having some fun. I think what you're doing is great. Ya got your work cut out for ya and I'm looking forward to watching your progress. Lemme know if ya need any sheet metal. I have a roller that gets cut up when somebody needs something... |
i know, i was just kiddin with you. thanks for the support
Posted by: MW 914 Oct 12 2005, 09:16 PM
| QUOTE (Headrage @ Oct 12 2005, 03:50 PM) | ||
Is that because of your looks or the fact that you are using a bench grinder teetering on a narrow piece of lumber slung between two saw horses? |
That is a friggin riot! I thought the same thing.
HUGE kudos on the task you have teken on!
Posted by: Eric Taylor Oct 12 2005, 09:17 PM
Alright Man! It's going to feel so good when that body is painted . Your way ahead of me age wise, I didn't wreck the 914 till I was 16:).
Eric
Posted by: jd74914 Oct 12 2005, 09:39 PM
| QUOTE (MW 914 @ Oct 12 2005, 10:16 PM) | ||||
That is a friggin riot! I thought the same thing. HUGE kudos on the task you have teken on! |
I was thinking of the lack of gloves.
I always wear gloves now because I made a mistake one day and ground part of my middle finder off with a wire wheel. I'm only 17 BTW, so now offense.
I like the metal work, just make sure you are cutting out the rust until you hit good metal. I found that the patch plates I made always ended up being bigger that I originally though because of the hidden rust. Kepp up the good work.
Also, if you don't have one already, I would suggest getting an anvil, it made my metal fabbing so much easier.
Posted by: Aaron Cox Oct 12 2005, 09:41 PM
BTDT....
cut off part of my fingernail and fingertips using an angle grinder....
bit i also weld in shorts and sandles...... 
Posted by: Jeff Bowlsby Oct 12 2005, 09:59 PM
Barry....You da Man.....what an inspiration you are to the rest of us. School is the way to the high road...don't write it off yet...
| QUOTE |
| did find something that made me a little happier though. steel fuel lines through the center tunnel |
Sorry to disappoint you, but those are the stock fuel lines. The front 2 ft or so of the lines are metal, transitioning to plastic.
Posted by: Joe Sharp Oct 12 2005, 10:15 PM
Hey Berry: How you doing with the new local now? Just rember what I told you. You know Joe and I will be moving south of you in the not to distant feature. By the time we get there you'll know more than us. This is really KOOL.
:PERMAGRIN: Joe
Posted by: jonwatts Oct 12 2005, 11:52 PM
| QUOTE (Mueller @ Oct 12 2005, 05:04 PM) |
| way to go !!!! it's awesome that you are going ahead with this, you'll be way ahead of your classmates doing a project like this.... |
Imagine how many engine attempts you'd be up to if you started when you were 14!!!!
Grasshopper, you're ahead of your time thinking the 914 is cool at your age.
Posted by: michelko Oct 13 2005, 12:47 AM
Hi,
good work. Nice to see that young people also love this old beauty´s.
Cutting out the rusted pieces: be sure you go far enough, so you can weld your nice fabricated patches to solid metal. Otherwise you won´t be very happy. Guess how i know
maybe you find this helpfull:
http://www.914world.com/bbs2/index.php?act=ST&f=2&t=16748
Keep on your nice work, hope you can drive the car soon.
Posted by: redshift Oct 15 2005, 04:47 PM
Barry, your enthusiasm is unreal, and you have a great eye buddy.
I had a great time this morning. When you get all your project stuff out of the way, I'll let you show me how to fix all my problems..
YAY!
Offer still stands if you want to drive my car around some.
Miles
Posted by: grasshopper Oct 15 2005, 05:35 PM
haha thanks miles!!
Posted by: michelko Oct 16 2005, 12:19 AM
Hi Barry,
here is the answer to the PM (don´t know how to append pic´s to pm´s, so i go this way).
I drilled out the spotwelds with a special drill. Surely you can find one at your flaps .
These are availlable in 6 and 8mm. I used the 6mm one. Worked fine for me. Be carefull not to go to deep. You dont´t want to drill the metal below the console.
Attached image(s)
Posted by: michelko Oct 16 2005, 12:27 AM
here is a shot of the console drilled out. you can nicely use the holes for welding in the console again.
Attached image(s)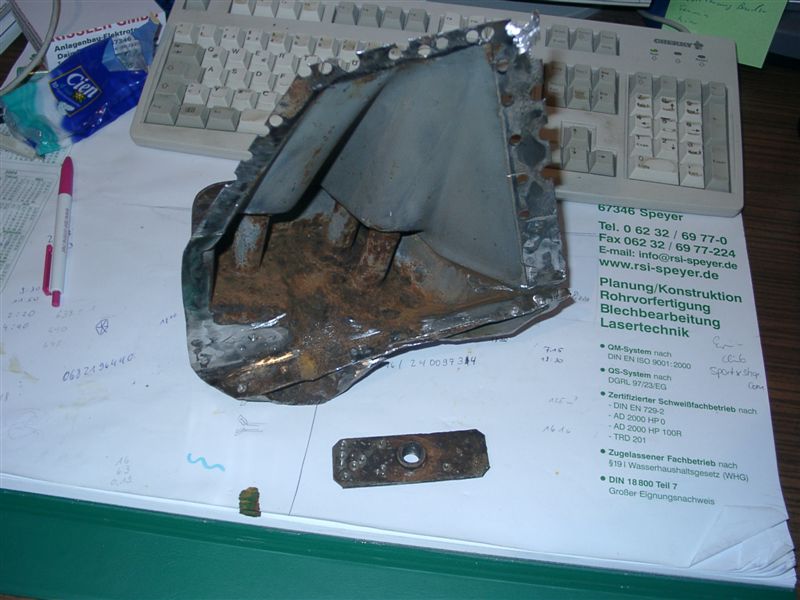
Posted by: michelko Oct 16 2005, 12:37 AM
good advice is: bracing the tub to keep the door gap in spec.
i used an bar that mounted between the safetybelt mount and the doorhinge mount.
You should also built a frame to reproduce the position of the console.
I use the engine mounts as fix points and did some additional measurement. Worked fine for me.
Attached image(s)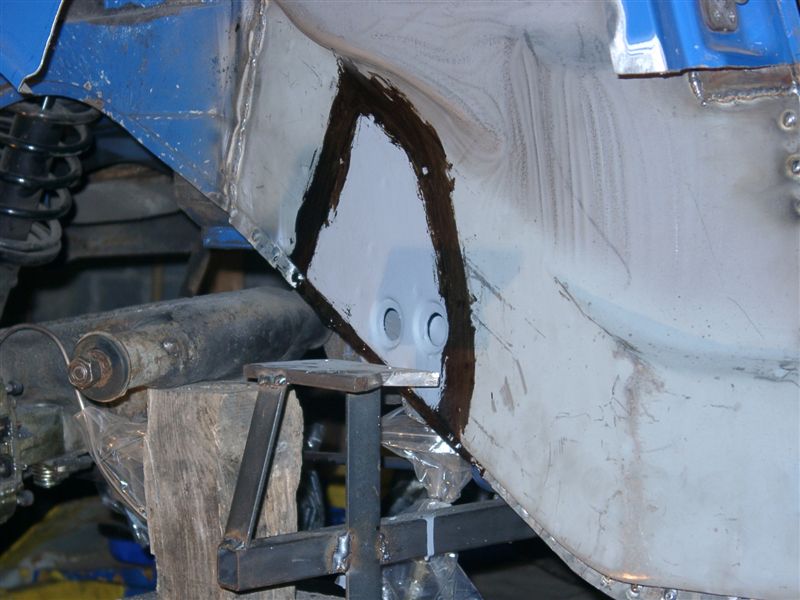
Posted by: michelko Oct 16 2005, 12:41 AM
follow the link:
http://www.michael-kost.de/forumbilder/barry.zip
If you need more (pic ore information) feel free to ask.
Posted by: grasshopper Oct 16 2005, 08:14 AM
wow!! Thanks soooo much michelko. That will help me soo much.
Posted by: grasshopper Oct 22 2005, 09:30 AM
ok, i got a question about the door vents... can i just remove them all together???? i found some nice sized rust holes around them on both sides..... heres a pic, thanks!!!
Attached image(s)
Posted by: bondo Oct 22 2005, 10:13 AM
| QUOTE (grasshopper @ Oct 22 2005, 08:30 AM) |
| ok, i got a question about the door vents... can i just remove them all together???? i found some nice sized rust holes around them on both sides..... heres a pic, thanks!!! |
Yeah, but you'll lose the venting to the outside.. really only matters when you want to defrost the windows in the rain. Air won't have any way to get out, and if you open a window you'll get wet.
Is that an 8N in the background? My grandfather had an 8N on his farm in South Dakota.. He used to give me rides on it (I was a city boy, so tractors were cool).
Posted by: McMark Oct 22 2005, 12:07 PM
| QUOTE (bondo @ Oct 22 2005, 08:13 AM) | ||
Yeah, but you'll lose the venting to the outside.. really only matters when you want to defrost the windows in the rain. Air won't have any way to get out, and if you open a window you'll get wet. |
Apparently you didn't see the rust holes Royce.
Those make nice vents.Couldn't he just vent the cabin into the rear fender?
Posted by: bondo Oct 22 2005, 12:16 PM
| QUOTE (McMark @ Oct 22 2005, 11:07 AM) |
| Apparently you didn't see the rust holes Royce. Those make nice vents.Couldn't he just vent the cabin into the rear fender? |
Hehe. Good point.. I wonder why the factory didn't do that. Road noise perhaps? It is pretty close to your ear. I guess there could also be water intrusion from water spinning off the tire.
Posted by: grasshopper Oct 22 2005, 01:07 PM
| QUOTE (bondo @ Oct 22 2005, 08:13 AM) | ||
Yeah, but you'll lose the venting to the outside.. really only matters when you want to defrost the windows in the rain. Air won't have any way to get out, and if you open a window you'll get wet. |
how does that allow much air out anyway?? its covered with the interior padding.... and yes, that is an 8N in the background... my dad has restored a couple tractors now...
Posted by: bob Oct 24 2005, 08:00 AM
Barry-
they are also used to vent the interior when you close the doors.. (unless you keep the holes, you could potentially pop a window if you slam the door closed!)
oh and good luck! you're doing an awesome job!
-bob
Posted by: grasshopper Oct 24 2005, 11:11 AM
hhhmmm... i guess i'll keep them then
Posted by: grasshopper Oct 28 2005, 09:58 AM
well, i've got most of my metal, but now that i begin to pick, i've decided that i'll also need the inner bottom firewall.... i could fabricate little patches, but i dont want to sacrifice any strength, and concidering this is going to be a completer resoration, i want it to be as close to stock as possible.....here all the new metal...still need alot more pieces though
Attached image(s)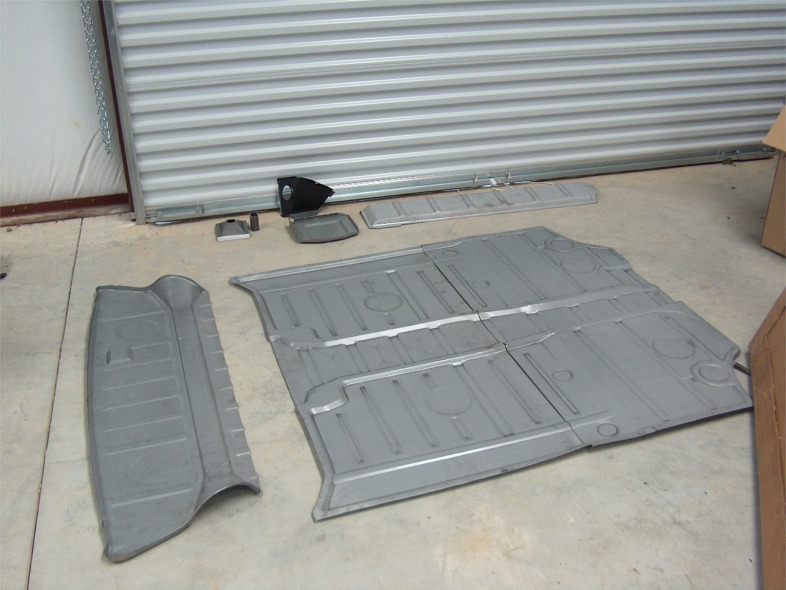
Posted by: grasshopper Nov 7 2005, 05:47 PM
going pretty slow lately... still trying to get the 75 running again.... i get my learners license in less than a month  i removed the drivers door sill... looks pretty good actually.... it was all solid from the jack post forward.... except for one spot....
Attached image(s)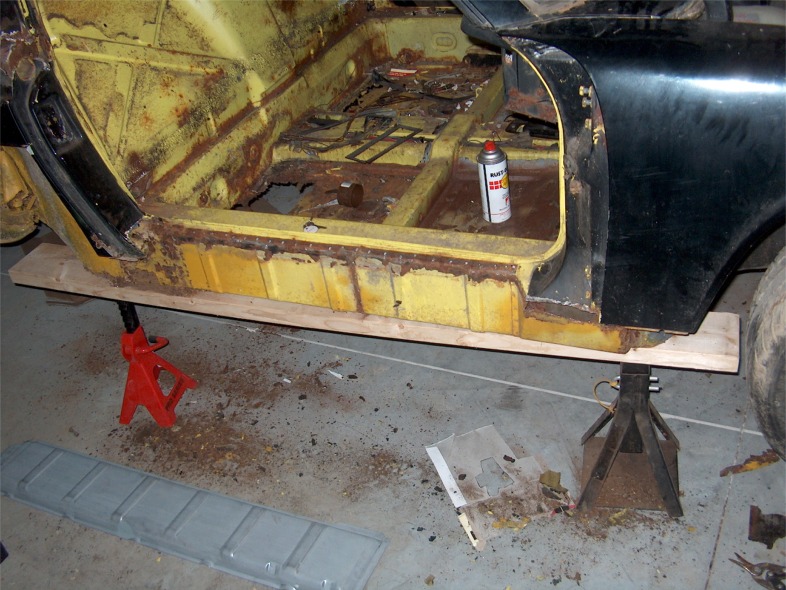
Posted by: grasshopper Nov 7 2005, 05:48 PM
the rusted spot cut out
Attached image(s)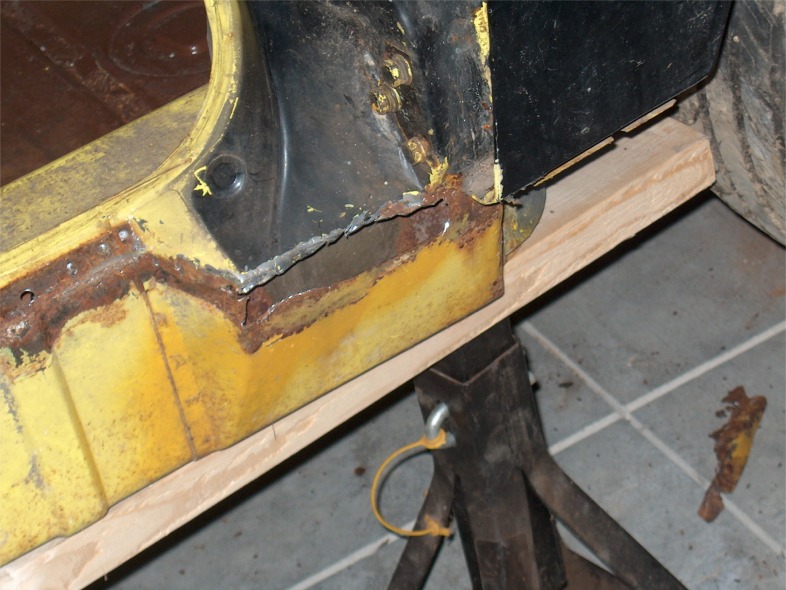
Posted by: grasshopper Nov 7 2005, 05:49 PM
i also rebuild my pedal assembly. Pretty simple....
Attached image(s)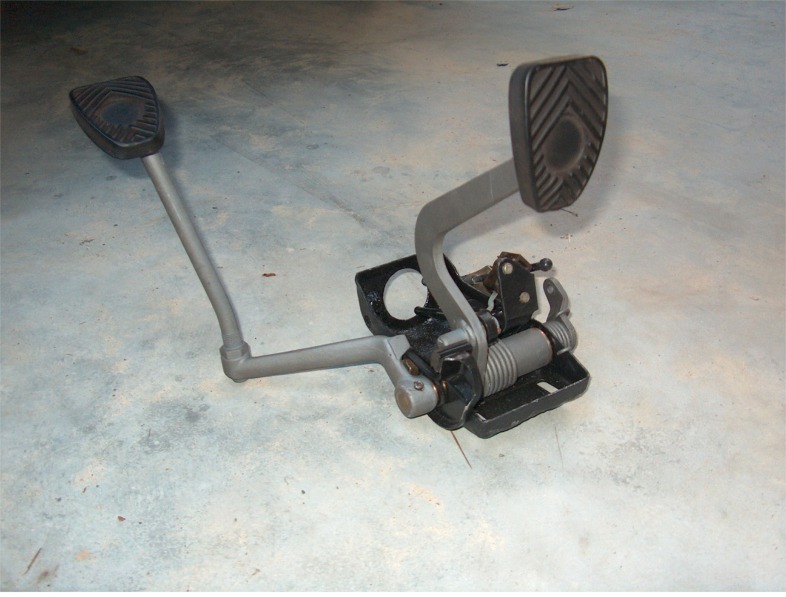
Posted by: grasshopper Nov 7 2005, 05:53 PM
i have also made my decision about suspension.... i'm going to go five lug... for the rear, im going to get eric shea's kit, and use bilsteins, and keep the stock brakes. for the front im going SC suspension, turbo tie rods, and bilsteins again. here's erics kit
Attached image(s)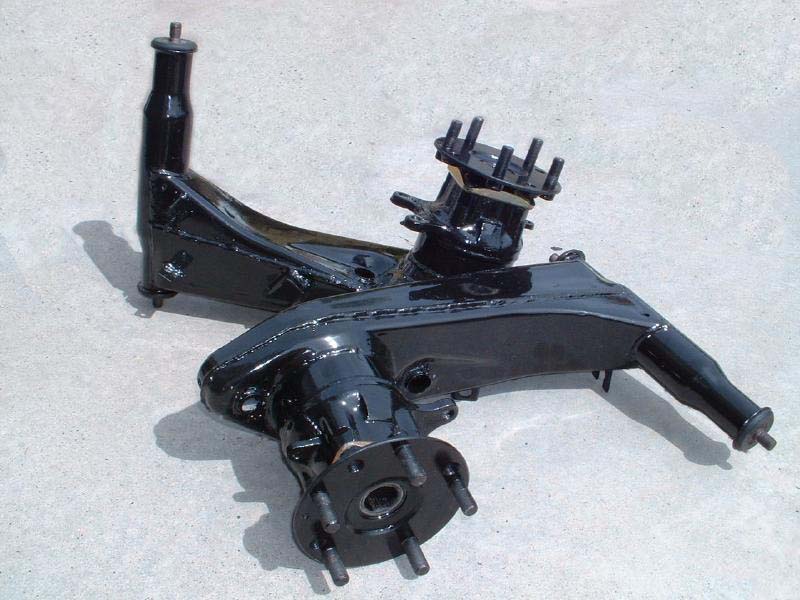
Posted by: STL914 Nov 7 2005, 10:31 PM
Grasshopper,
I sent you a PM yesterday on possibly buying a part from you.
Did you get it?
Posted by: grasshopper Nov 8 2005, 06:24 AM
nope,i never got it 
Posted by: Hammy Nov 8 2005, 07:08 AM
What's involved in rebuilding the pedal assembly?
Posted by: CptTripps Nov 8 2005, 07:20 AM
You are doing great man...I'm SURE you are going to do this restoration in record time.
Here's the thread I did on replacing floor pans...I used a spot weld remover a little different than the one mentioned earlier.
http://www.914world.com/bbs2/index.php?act=ST&f=2&t=24244
It's a LOT easier than it looks. just takes some patience. If I had to do it over again, I'd have jacked the car up about 3-ft.
Hit the edges with a wire-brush to get rid of all the undercoating and then spend a few hours getting rid of all the spot welds. It's a GIANT pain in the ass...but VERY worth it!
Good luck man....let us know if you need help.
Posted by: STL914 Nov 8 2005, 08:25 PM
| QUOTE (grasshopper @ Nov 8 2005, 04:24 AM) |
| nope,i never got it |
Send me your e-mail address to gabalke@charter.net and we'll see if we can deal. I'm parting out a couple of 74's and perhaps there are parts I have that you may need.
Gary
Posted by: grasshopper Jan 15 2006, 04:53 PM
well, i have got alot dont latley, and have also decided to put my 2.2 SIX in it  the car is comletely stipped down now, i have patched some rust, removed the engine, made support braces, and got some new metal from a donor car. Here is a picture of the SIX in its current state
Attached image(s)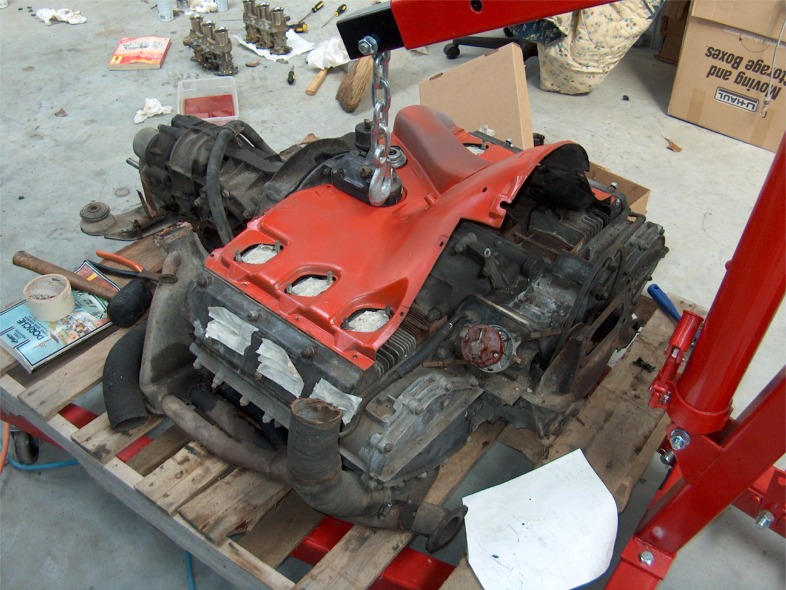
Posted by: grasshopper Jan 15 2006, 04:54 PM
the old engine is out
Attached image(s)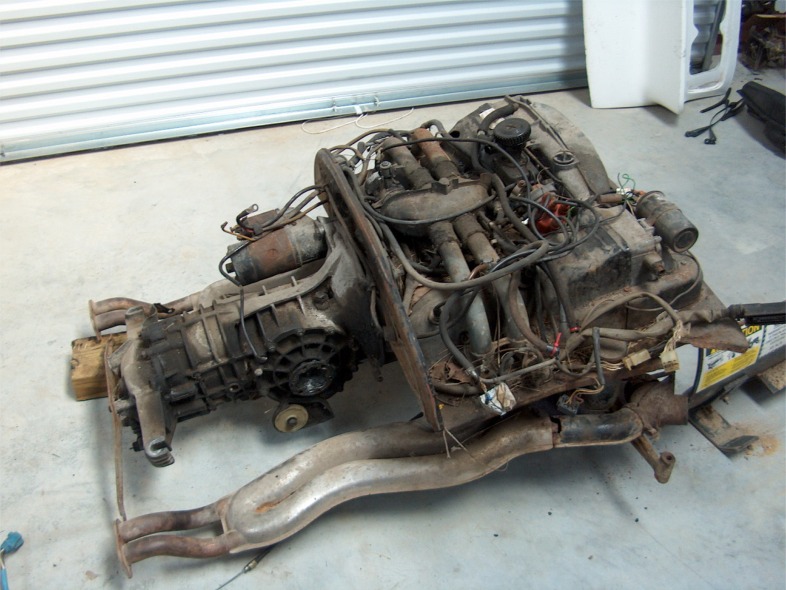
Posted by: grasshopper Jan 15 2006, 04:55 PM
how the car sits (note the rollbar on my workbench )
Attached image(s)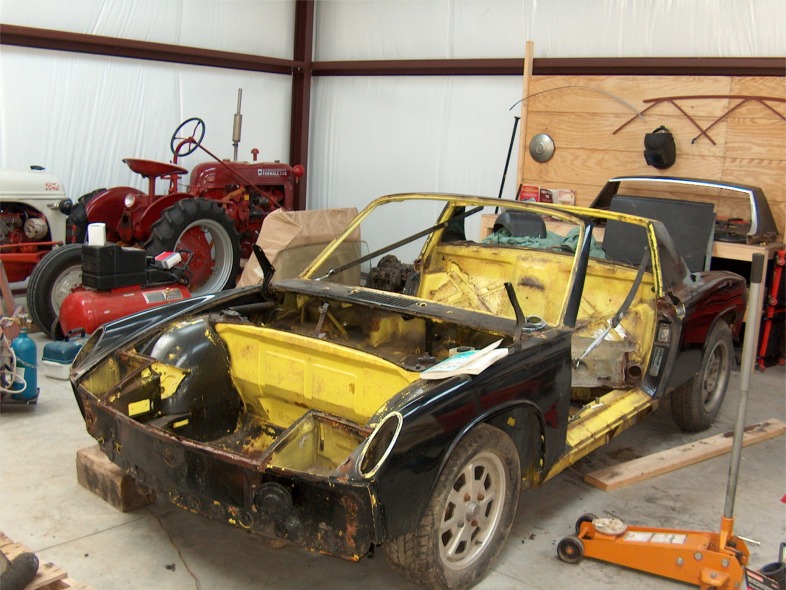
Posted by: grasshopper Jan 15 2006, 04:58 PM
found some really heavy duty adjustable...things... i cant remember what they are called now...
Attached image(s)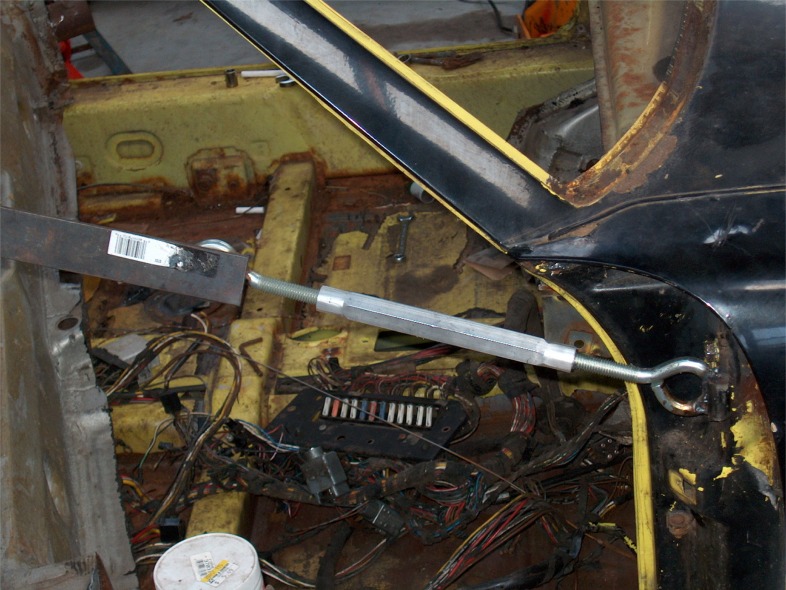
Posted by: grasshopper Jan 15 2006, 04:59 PM
got some metal for the pedal area
Attached image(s)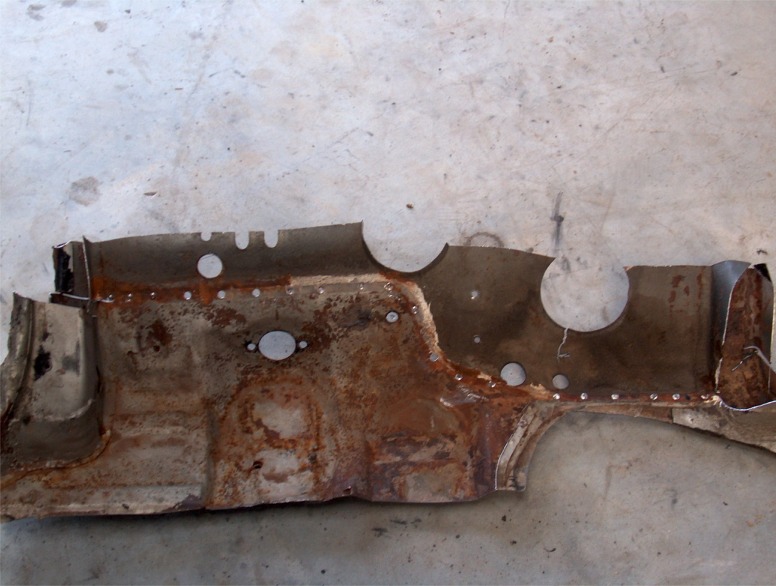
Posted by: Aaron Cox Jan 15 2006, 05:00 PM
turnbuckles...
Posted by: grasshopper Jan 15 2006, 05:01 PM
thanks arron, i remembered after i posted inner and outer firewall
Attached image(s)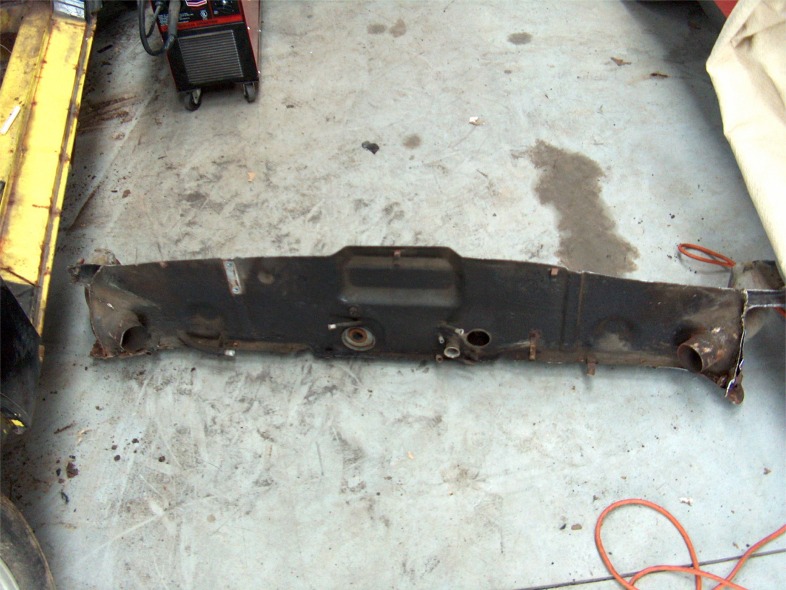
Posted by: grasshopper Jan 15 2006, 05:03 PM
did some work on the rear sail panel area. The before picture
Attached image(s)
Posted by: grasshopper Jan 15 2006, 05:04 PM
welded up the inner part.... yes, its ugly, but you dont see it, and i am still working on my welding.... but i am getting better
Attached image(s)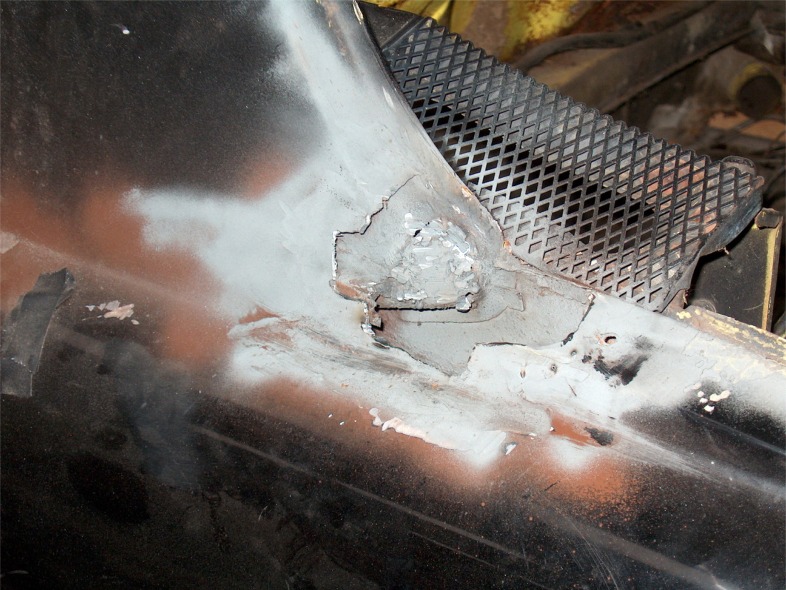
Posted by: grasshopper Jan 15 2006, 05:06 PM
added another piece to make it the way it originally was
Attached image(s)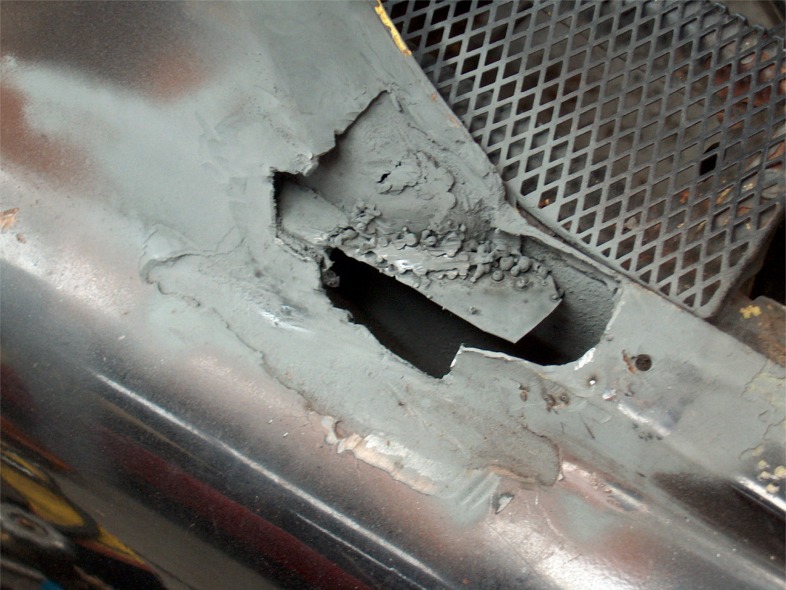
Posted by: grasshopper Jan 15 2006, 05:07 PM
also did some work on the rear fender. holes cut
Attached image(s)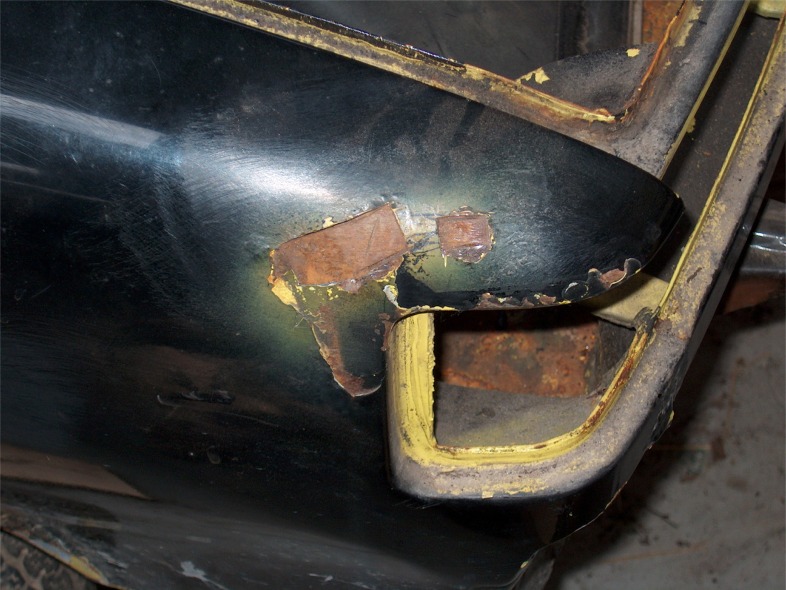
Posted by: grasshopper Jan 15 2006, 05:08 PM
patches fitted
Attached image(s)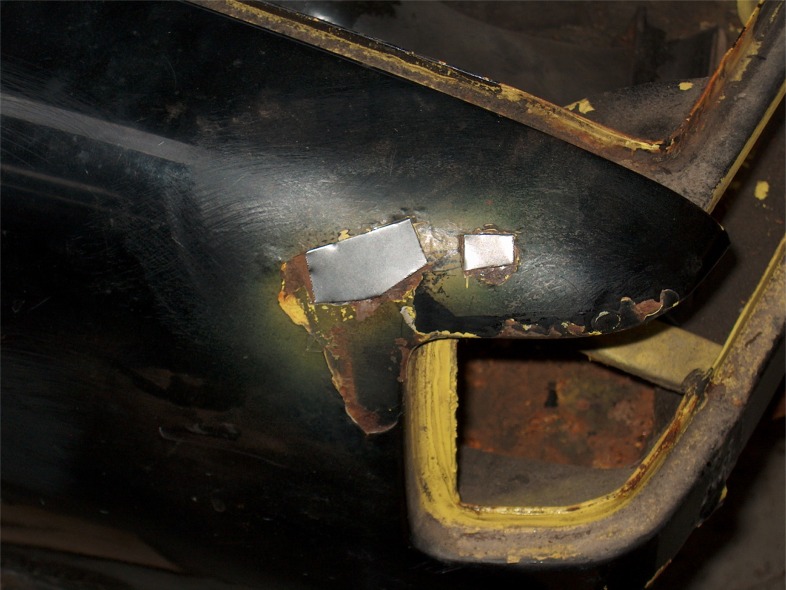
Posted by: grasshopper Jan 15 2006, 05:09 PM
nice clean welding surface
Attached thumbnail(s)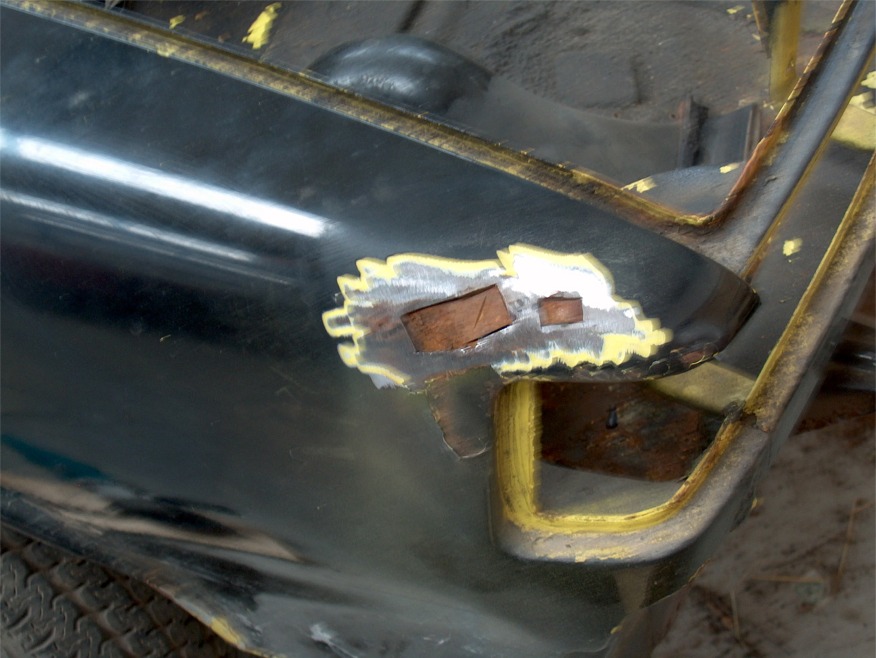
Posted by: grasshopper Jan 15 2006, 05:11 PM
welded and primered.... came out better than i expected, but i could still do better.. thats the last for now
Attached image(s)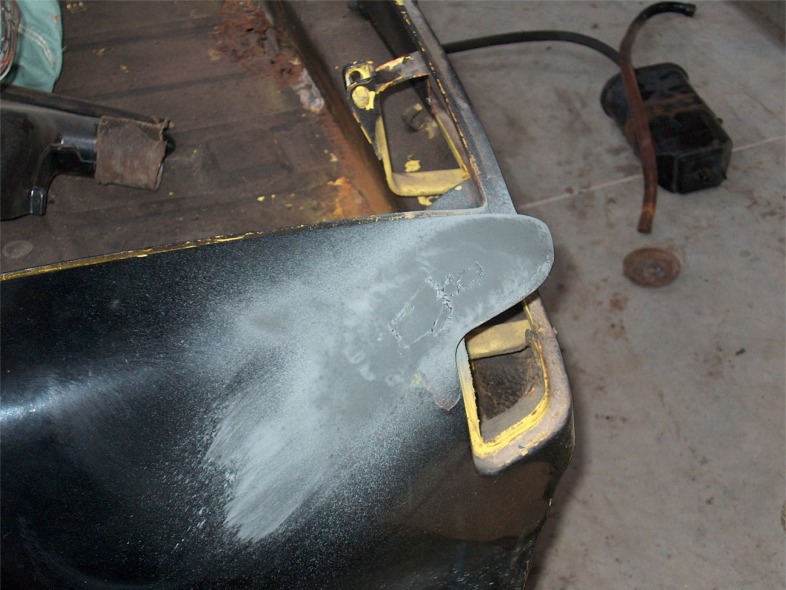
Posted by: rick 918-S Jan 16 2006, 12:17 AM


Posted by: Geodude Jan 25 2006, 10:23 PM
Thanks to Grasshopper (GA) and Michelko (Deutschland) for great pics. I'm going through some of the same rustoration on a 74 1.8. I've done some work (new floor pans, etc) on my 70 VW Beetle, but I have found the 914 to be tougher to work on. I think I have discovered the proverbial "Hell Hole". Trying to get at it is the worst part, plus the car had AC and the hoses are going to have to come out I think. Anyway as a newbie to the 914 world I may need some help. Thanks again; great job. Geodude from MS.
Posted by: michael_oberg Jan 25 2006, 11:34 PM
A hopefully not too offtopic post about welding:
From the pictures of your welds it looks like you are either not using MIG to shield, or are not using enough voltage (ie not enough current). If you already have a shielding gas, you might try increasing the voltage a bit (and/or slowing down the wirespeed).
Ive got a Lincoln 120V 3200HD welder (like the 135 but without continuous voltage controls), and I find that if I keep the wire speed between 2 and 4 (out of 10) and just vary the voltage (and amount of gas, if necessary) I get the best results. Ive been welding a lot of 16 and 18 guage steel (currently building my own bead blast cabinet) and have had a lot of success on the B voltage setting with a wire speed of about 2.5. Preventing burn through seems to be a lot more technique, but you need to make sure you've got enough currrent to create a smooth, low bead without buildup around the weld. Ive only been welding since the beginning of last summer, so if anyone with more experience feels like correcting me please do so!
BTW, your restoration looks great, grasshopper. I can't wait until I can finally buy the 914 ive been lusting after all these years.
Posted by: michelko Feb 26 2006, 02:28 AM
Hey Barry ,
how´s about some update on your project?
Keep on working man.
Posted by: grasshopper Feb 26 2006, 09:21 AM
i've been saving up for a while so i will have enough to even be semi important. I just finished stripping the passenger side, and re-welding some patches. After looking at them, i knew something wasn't right.... i took a ballpoint hammer, and i just had to hit it lightly to pop my patch out. I took about a week and practiced welding new metal and old metal together, and got it pretty good. I seem to have trouble running a bead on really thin metal even on the lowest heat setting. What i have been doing is putting spot welds, and grinding them down and putting more spots if i find pinholes. It has been working pretty well so far, and my welds are a LOT stronger... i'll post some pics later...got to go take them
Posted by: kwales Feb 26 2006, 09:36 AM
Barry,
Ya need a chill plate behind the thin metal. Something that can pull some of the heat away and act as a backing plate to prevent weld drips...
Get a short piece (3-4 inches or so )of some copper tubing.
Pound one end flat about half way down.....
Push a stick or dowel into the stil round end and secure the copper to the stick.
Bend the flat part slightly to an angle that fits behind the area you are working in...
While holding the stick, push the flat part of the copper against the back side of the weld area and hold in place. Apply weld. Copper will prevent burnthrough by absorbing excess heat, and if it does burnthrough, the weld pools up on the copper and won't drip. Weld won't stick to the copper either...
Hope that helps....
I bought a Miller 135 MIG with infinitely variable controls and I love it. I can dial it in for whatever the metal thickness.. Still use the chill plate sometimes though...
Ken
Posted by: grasshopper Feb 26 2006, 09:42 AM
well, i would have done that and will do that, but on the spots i have been welding, you couldn't get a pinky in there.... i'll post some pics..
Posted by: grasshopper Feb 27 2006, 08:23 PM
ok, a little late...sorry....the sail panel patch in place..
Attached image(s)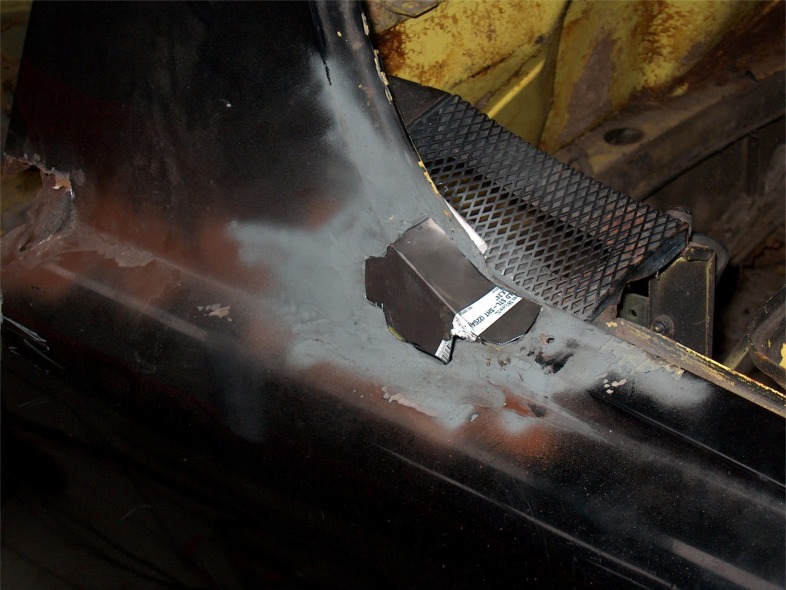
Posted by: grasshopper Feb 27 2006, 08:24 PM
welded and ground down
Attached image(s)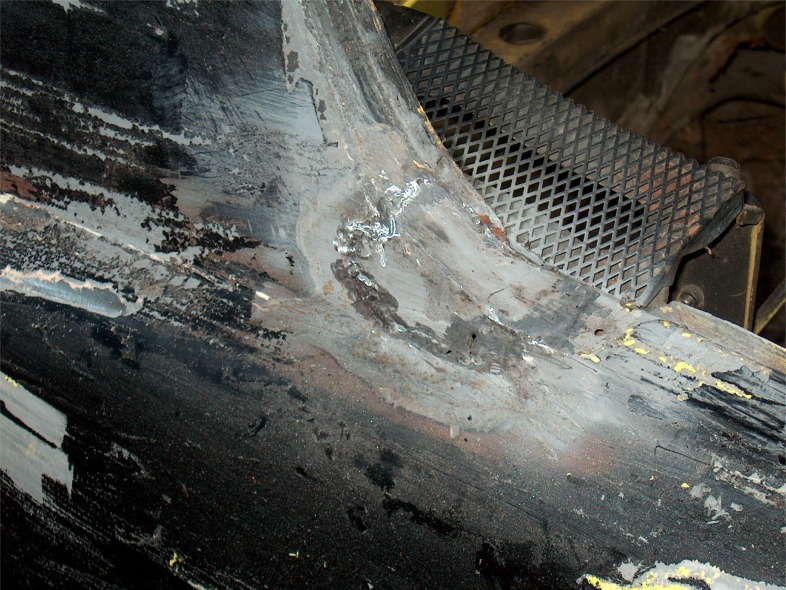
Posted by: grasshopper Feb 27 2006, 08:26 PM
as you can see, the curve isn't perfect, so i am going to get a small torch, and shrink/strech the metal until i get the correct shape...
Attached image(s)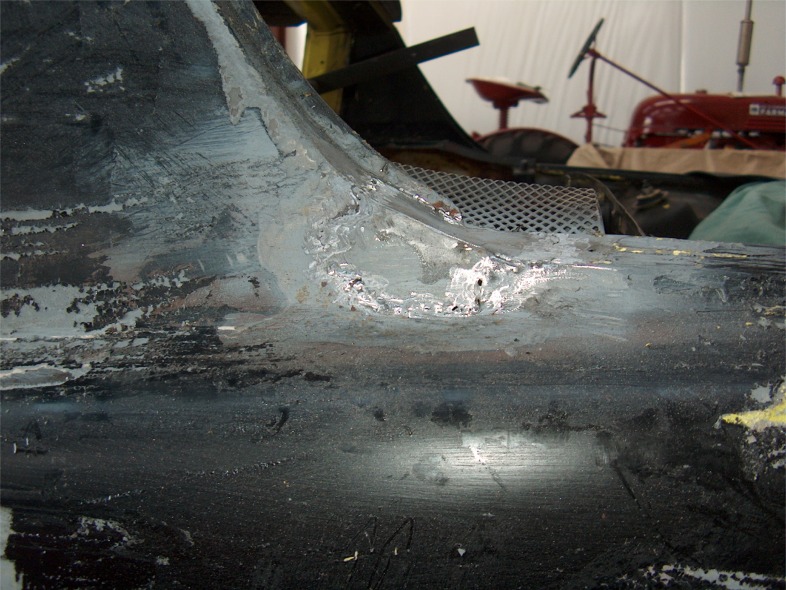
Posted by: grasshopper Feb 27 2006, 08:28 PM
rear corner of the front fender... sorry no before pic, just after
Attached image(s)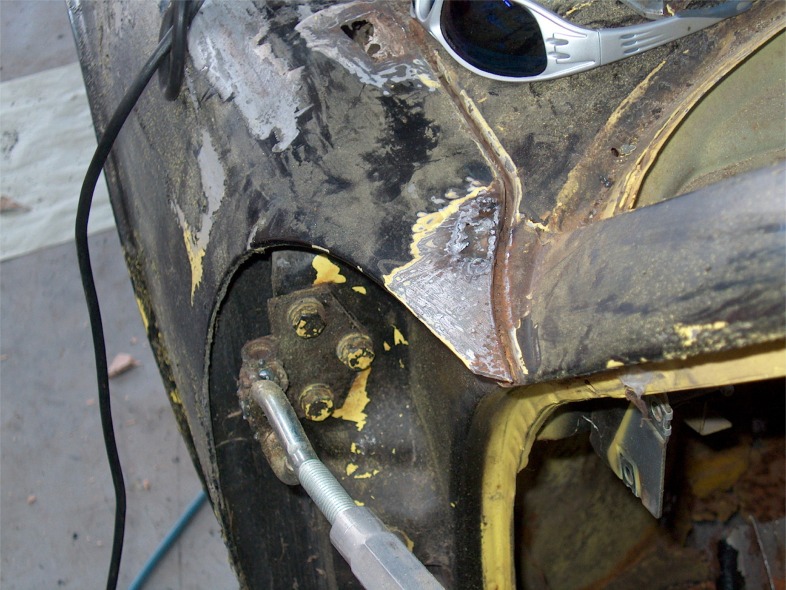
Posted by: grasshopper Feb 27 2006, 08:31 PM
more rust in that area....
Attached image(s)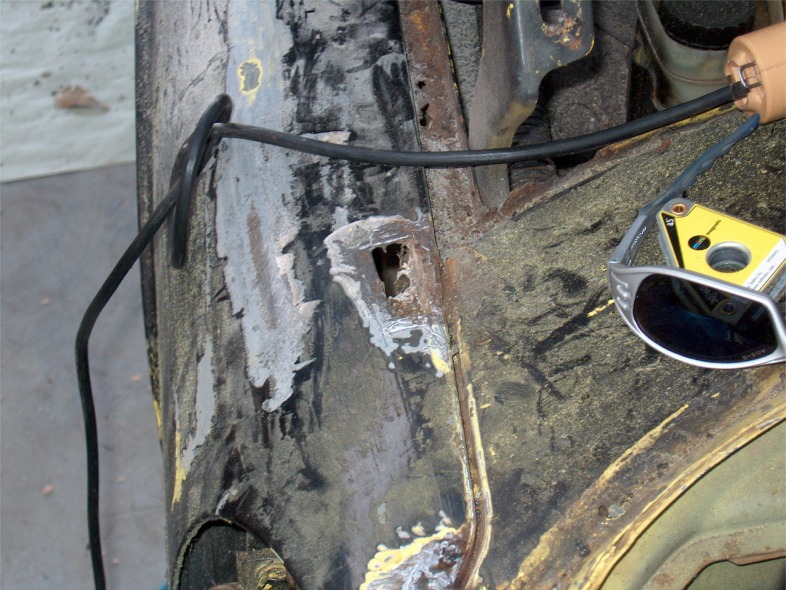
Posted by: grasshopper Feb 27 2006, 08:33 PM
welded and ground down
Attached image(s)
Posted by: grasshopper Feb 27 2006, 08:38 PM
another shot of the sail panel.... the next task is to cut out the rear trunk, and weld in the new panel. I am going to get a sand blaster and see what the hell hole really looks like.... oh yeah, after i finished all the cleanup of my patches, i am going to fill them with lead filler.....That all for now 
Attached image(s)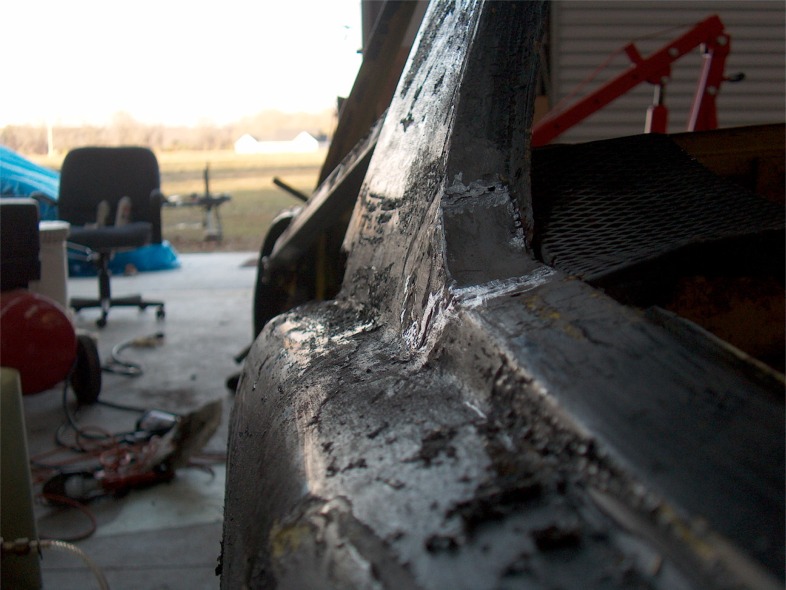
Posted by: jd74914 Feb 27 2006, 08:40 PM
why lead? bondo has gotten much better.
Posted by: grasshopper Feb 27 2006, 08:48 PM
bondo doesn't sound good but seriously, i would like as much metal as possible.... any tips on using lead?? would bondo be better??
Posted by: jd74914 Feb 27 2006, 08:57 PM
Bondo would be easier and have less of those bad fumes. If you just skim with bondo there shouldn't be any problem with cracking unless you put it on parts that flex alot (like the edges of doors). Bondo is also cheaper and comes in so many varieties now for pretty much all purposes.
IMHO with technology improvements in bondo, filling low spots with leadis more for bragging rights on show cars and hotrods.
I have never used lead and have minimal bondo experience, everything above is what I have been told by my Uncle who has done quite a bit of body work and painting.
Posted by: drewvw Feb 27 2006, 09:08 PM
Love this thread Barry. Like you, I was doing nothing but working on cars when I was 14. I had my Karmann Ghia ripped apart at that point, and it was only in a little bit better shape.
looking forward to the hell hole pics.....
Drew
Posted by: grasshopper Feb 27 2006, 09:12 PM
| QUOTE (drewvw @ Feb 27 2006, 07:08 PM) |
| looking forward to the hell hole pics..... Drew |
yeah, it was covered in bondo/fiberglass..... i started poking and pulling.... im kinda scared to do anything to that area...i'll probably save that for last

Posted by: Carrera916 Feb 27 2006, 09:16 PM
Hey Barry!
I didn't realized it was you that had requested for pictures of rear fender panels that I have for sale. I hope you got the pictures today.
Listen, about the welding part, i don't know how far you are with your work now but I thought maybe i can give an idea how to play with the MIG while welding....
When you're about to trigger the torch, watch the feedwire touching the bare metal, if the arc is popping and the feedwire is "crushing" onto the panel, two things to try out....increase the voltage (heat) and try again. If it's punching a hole, you probably got too much voltage, bring down a tad. If that doesn't seem to help a bit, then fiddle the speed of the feedwire down a bit at one heat setting of your choice until you get a very nice arc, no popping and you're able to move along the line, that's the setting you want for that perticular job you're welding on. Sometimes the same setting may not work on other area of your repair. You're gonna have to play a bit to get the feel of it.
Now, re read above, if you see your feedwire melts before it ever "feed" onto the metal, and the arc is popping, your feedwire setting is way too slow. Try increase the speed till it gives you a nice arc and nice puddle of molted feedwire on your work, then you're all set.
I always start with a tack (like spotweld) on the work area (new metal align to old metal) to check my setting before I weld down the line. When you tack weld, try do that on every one inch all the way around the perimeter of the new metal to give you a better secured piece onto the old metal before welding shut the whole thing. Then take your time to start weld from one tack to another and STOP! Let the metal cool down a bit and double check the alignment of the new metal to old metal, hammer it in place if needed to, then continue welding the next tack weld to tack weld at the opposite side of your piece from your first welding. That way the heat are spread out a bit better without warping your work out of shape and let it cool a bit. I tend to avoid water cooling as much as I can to avoid the "cold shock" onto hot weld beads. What I mean by let it cool a bit, I just the time right after I stopped welding, to check my weld bead, double check the alignment and then go on. Thats about a min of cooling which would be good. Grinding off the excessive bead that hasn't been watercooled turns out to be a bit be easier too. Hell, everyone has their own way of doing it, it's just that I wanted to share in what I do with my welding.
Oh, one last thing, a shitty (aka rusty, dirty, greasy) metal, you will NEVER be able to have a decent weld bead or most important, molted pentration/fusion between these two metals cuz the arc has to be right and it's no way for the feedwire to react properly when it's grounded. When you try weld something on poorly grounded metal (or shitty metal), the weld beads will look exactly like what you had in your first few pictures of trying it out. Grind out everything to shining metal, no rust specks or pits allowed before you weld, other wise you'll be cursing out loud inside your helmet!
Hope this helps and PM me if you got questions, i'll be gladly to help.
Good luck!
jerry
Posted by: grasshopper Feb 27 2006, 09:26 PM
hey!!! thanks for the info jerry!!at the beginning, i didn't have my settings right, and didn't know how it was supposed to sound. I can run a nice bead on the nice new metal, but i am kind of afraid to try and run a bead on the body panels....the first time i tried i burned right through...but that was before i got my settings right... i also cant figure out how fast i need to move the welder to prevent blow through.... sometimes i move to slow, and sometimes i move to fast, and cant control it....mabey ill give it another shot tomorrow at running a bead.... there sure are enough places to try on.....
Posted by: degreeoff Feb 27 2006, 10:19 PM
I like to "spot weld" the entire peice....as mentioned above work in 1" increments to "secure" the peice but that sheet metal gets SO HOT so fast that I find it easier to just do little"spot welds all the way and the metal does'nt have a chance to heat up enough for burn through....
Just my novice opinion....
Powered by Invision Power Board (http://www.invisionboard.com)
© Invision Power Services (http://www.invisionpower.com)