Printable Version of Topic
Click here to view this topic in its original format
914World.com _ 914World Garage _ The 25-year/250,000-mile refresh
Posted by: horizontally-opposed Feb 8 2008, 03:03 PM
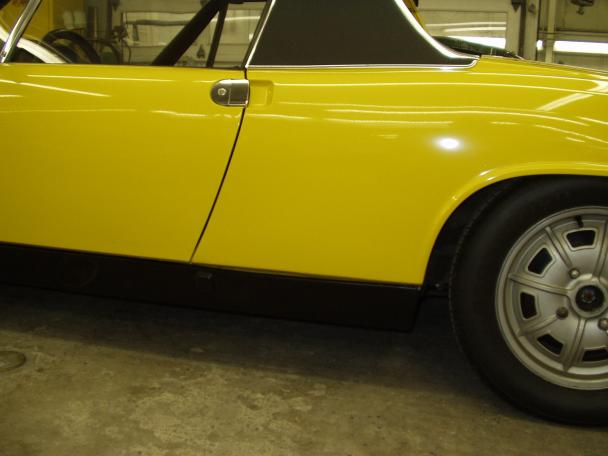
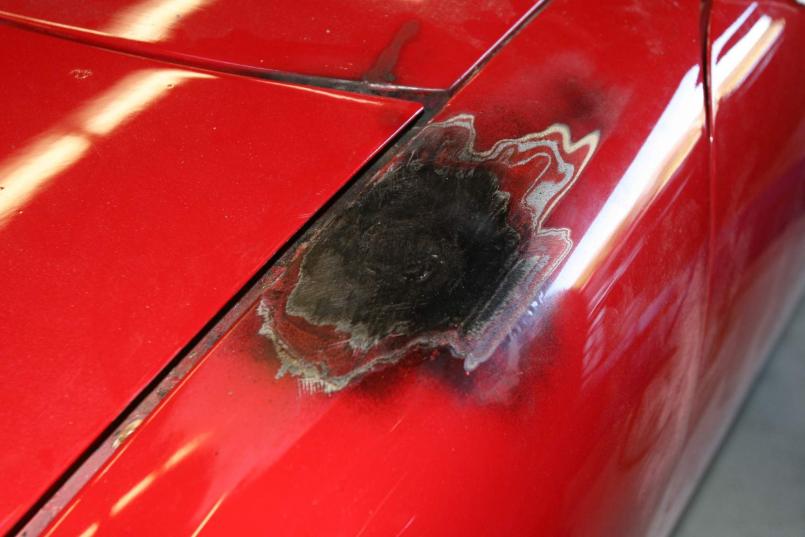
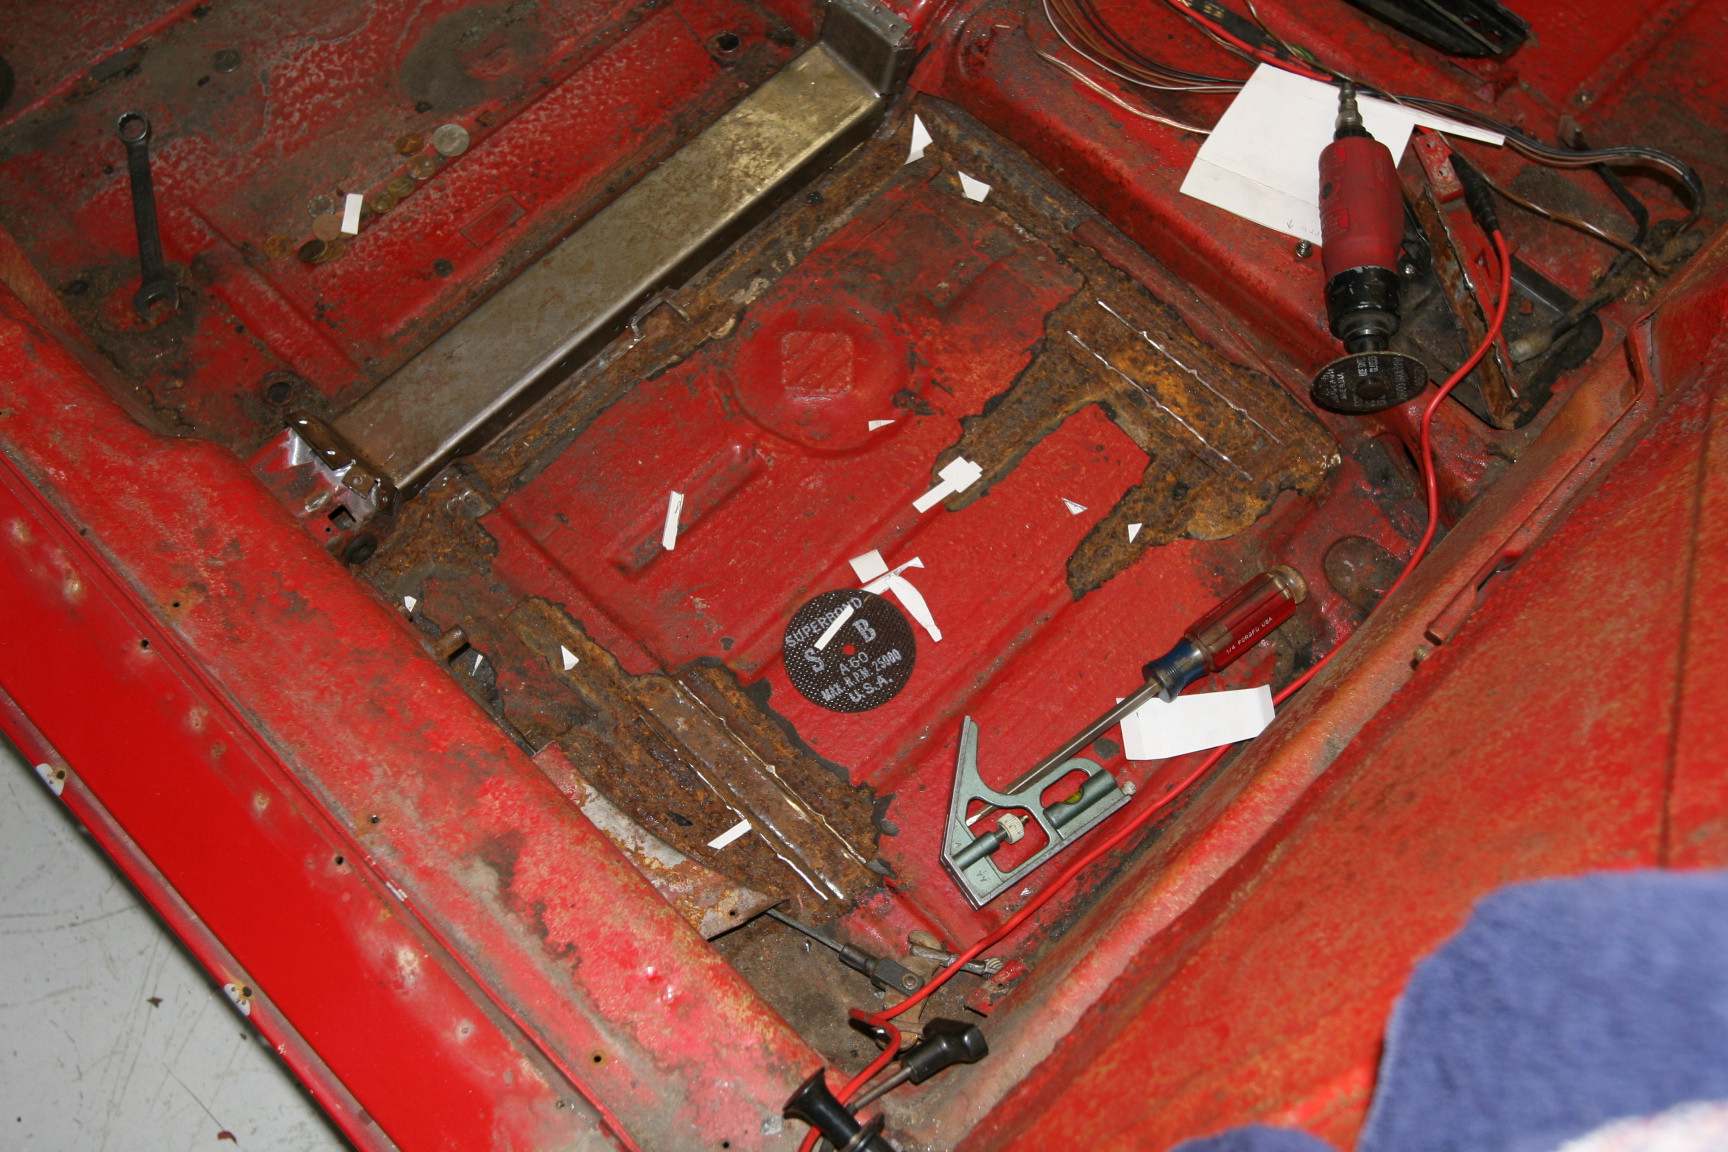
So I've decided to confront a few rust bubbles on my car, before painting it (the car looked great, but I never liked the wavy sides due to poor prep and no blocking).
If you can't stomach this first photo, please don't continue... 
pete
Attached thumbnail(s)
Posted by: horizontally-opposed Feb 8 2008, 03:04 PM
That came from here...
Posted by: rdauenhauer Feb 8 2008, 03:13 PM
Where? 
Let me Guess  ...Sails
Posted by: horizontally-opposed Feb 8 2008, 03:16 PM
Crap, I can't size some of the photos down small enough easily. But you guessed it on the sail panel. I'll load what I can now, do the rest later.
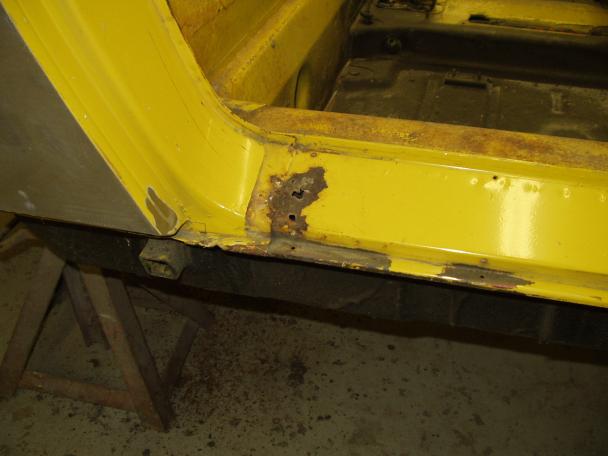
This is the left rear corner, has been bothering me for 17 years now (since the car was last painted)! Note the "RUST?" marking. Perhaps I was expecting the Easter Bunny?
pete
Attached thumbnail(s)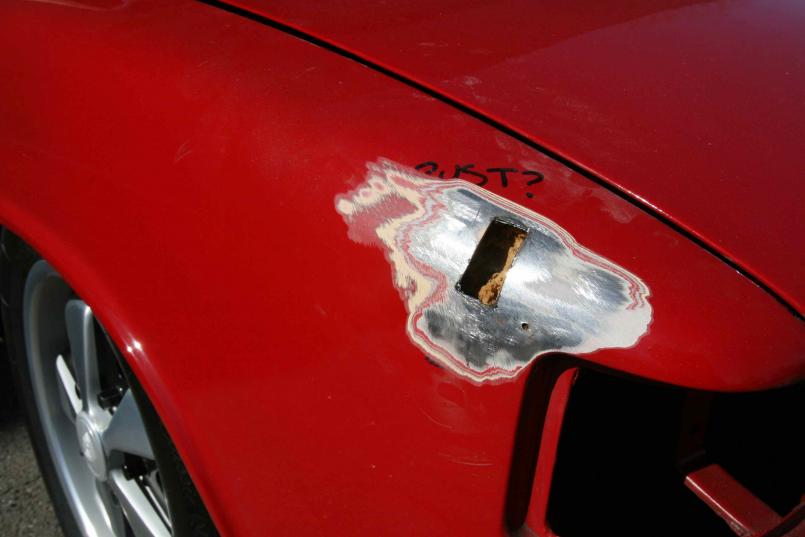
Posted by: horizontally-opposed Feb 8 2008, 03:18 PM
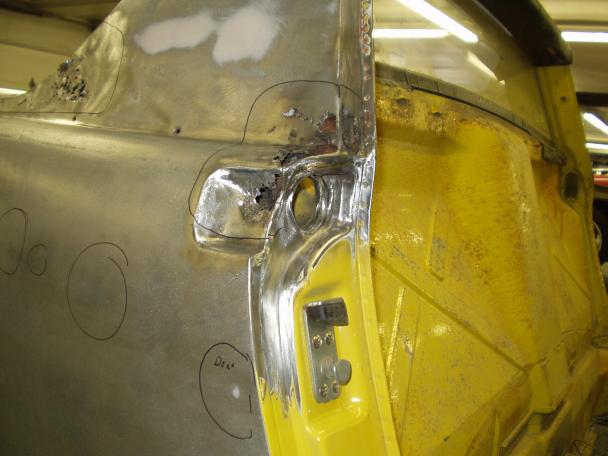
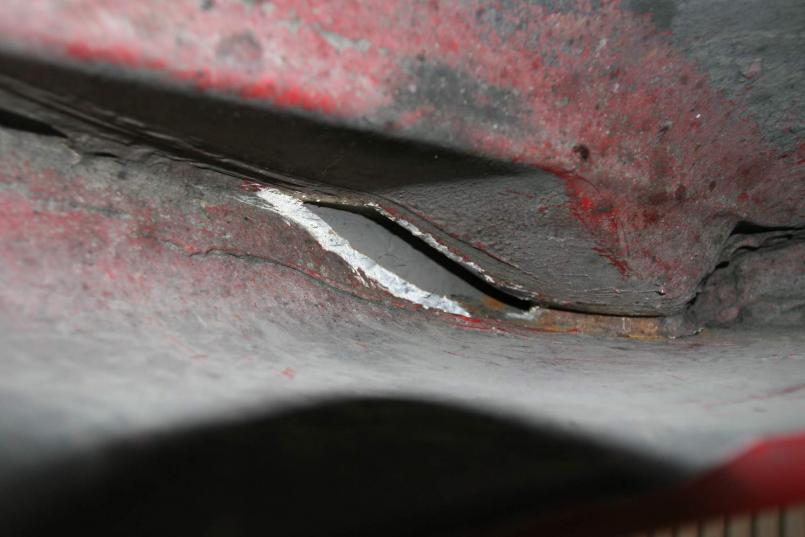
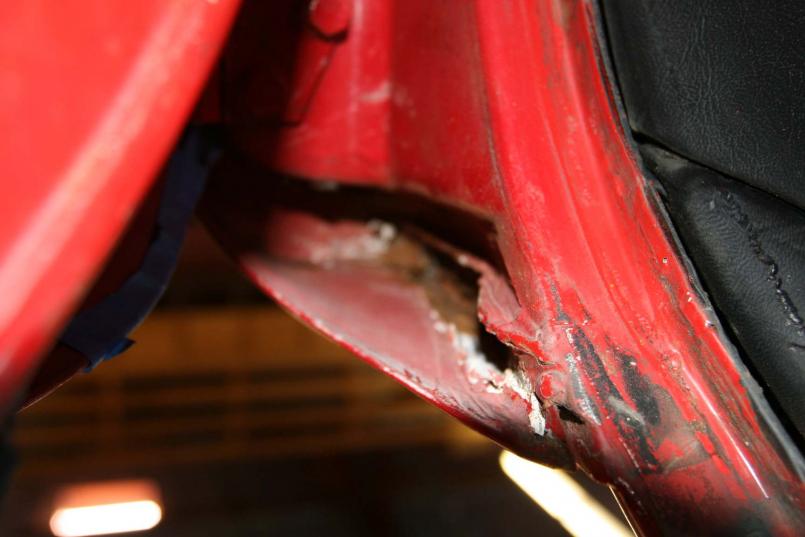
Other sail panel....
Two pinholes + the factory hole for the trim strip.
pete
Attached thumbnail(s)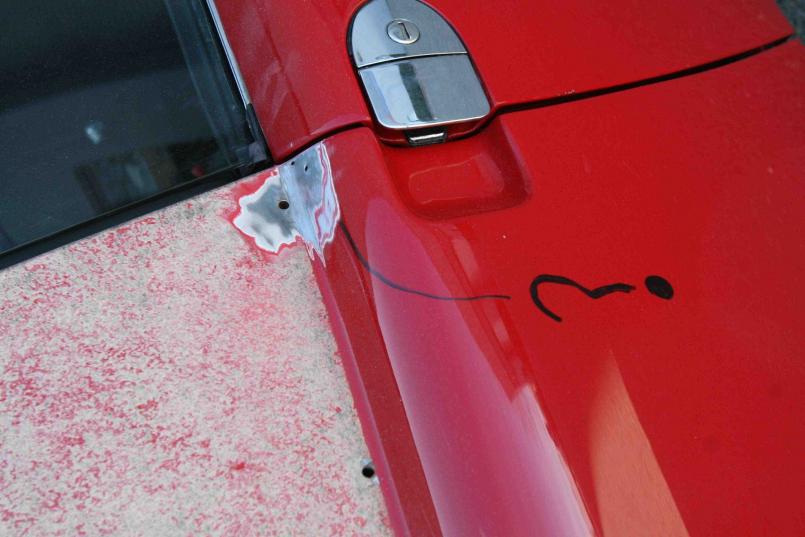
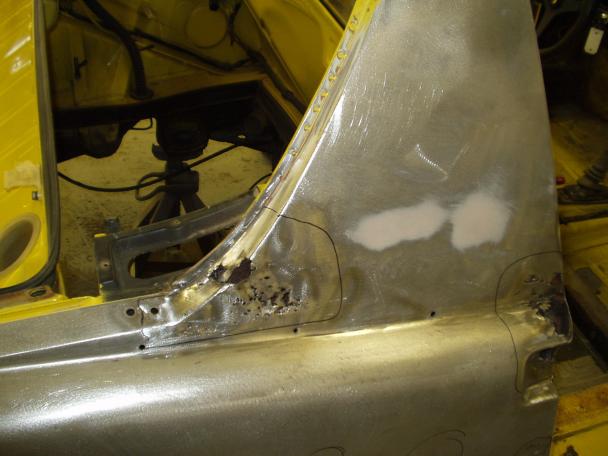
Posted by: horizontally-opposed Feb 8 2008, 03:22 PM
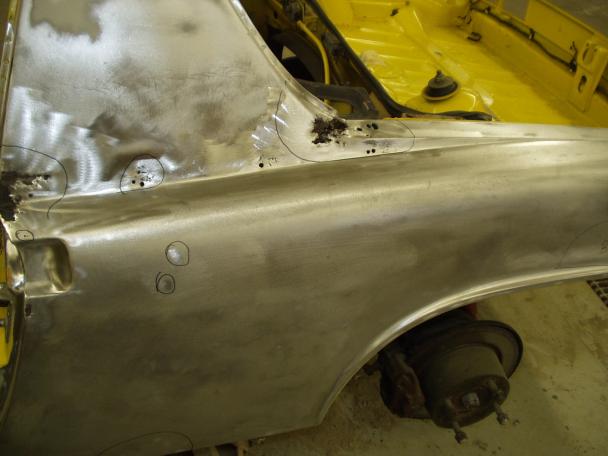
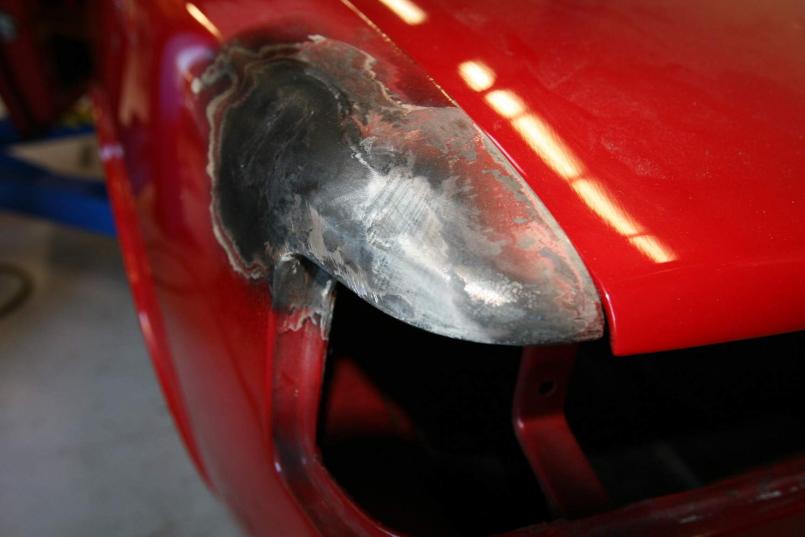
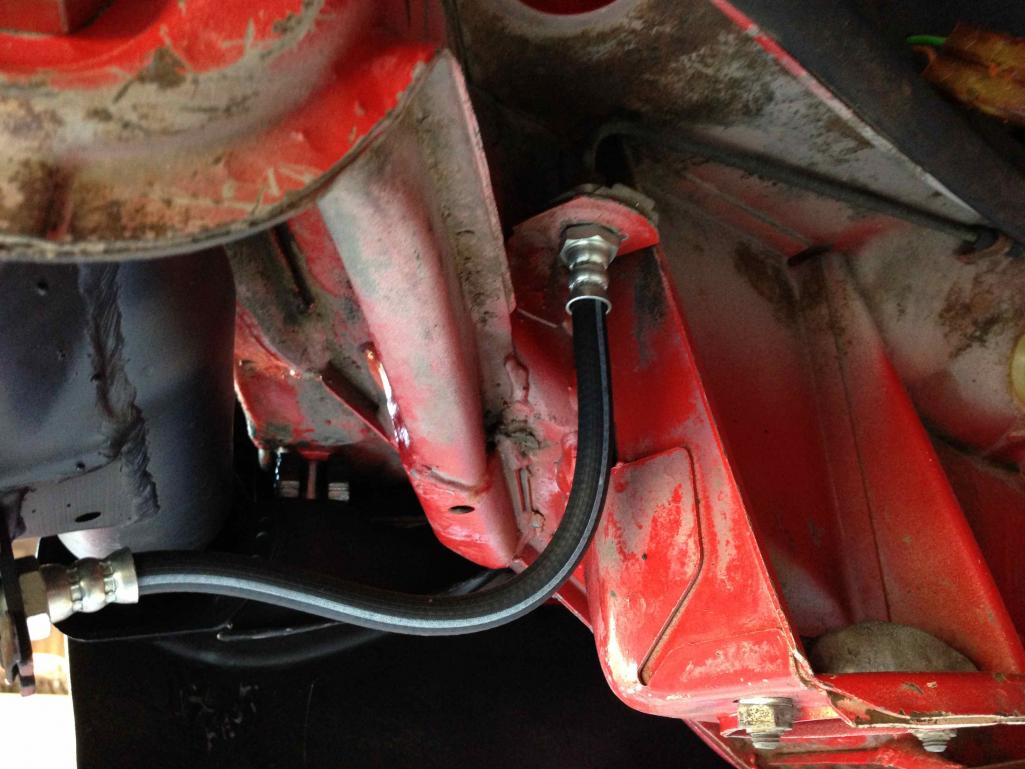
Two more pinholes in the right front fender, apparently the result of a small hole from rust in the cowl gutter, which allowed moisture into this area where you cannot get to otherwise. Short of taking off the fender, we are still thinking about the best plan of attack.
One is to drill holes in the wheelwell near this area, get a better look (possibly with a boroscope), try our best to neutralize the rust, then seal the cowl gutter up.
REALLY do not want to remove the fender, though I know it is the "best" way to go....
pete
Attached thumbnail(s)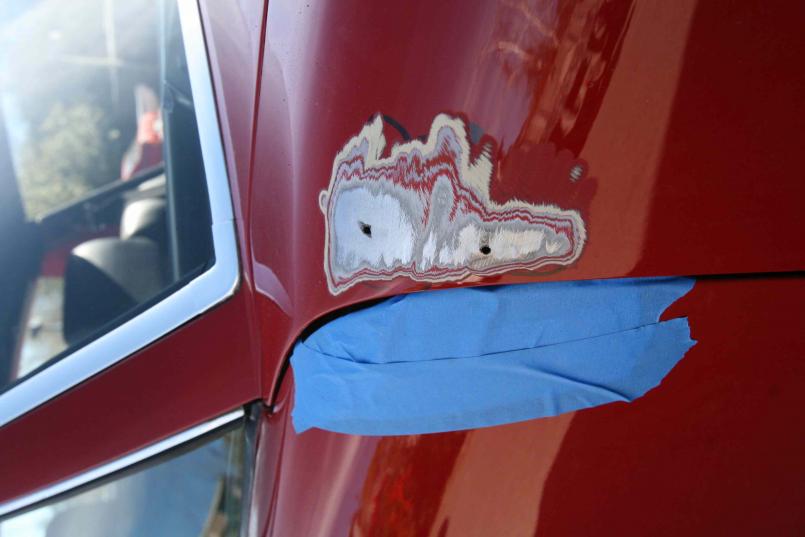
Posted by: horizontally-opposed Feb 8 2008, 03:24 PM
There's a wrong way to fill in the U.S. sidemarkers, which is what the last guy did.
Tacked a metal square in place, then DENTED the fender in, and Bondo'd over the area... 
pete
Attached thumbnail(s)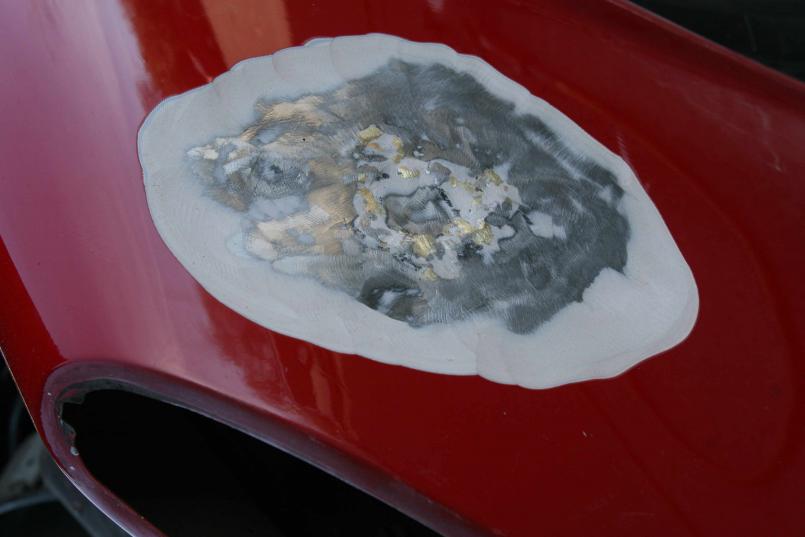
Posted by: horizontally-opposed Feb 8 2008, 03:25 PM
And then there's a right way to do it... 
pete
Attached thumbnail(s)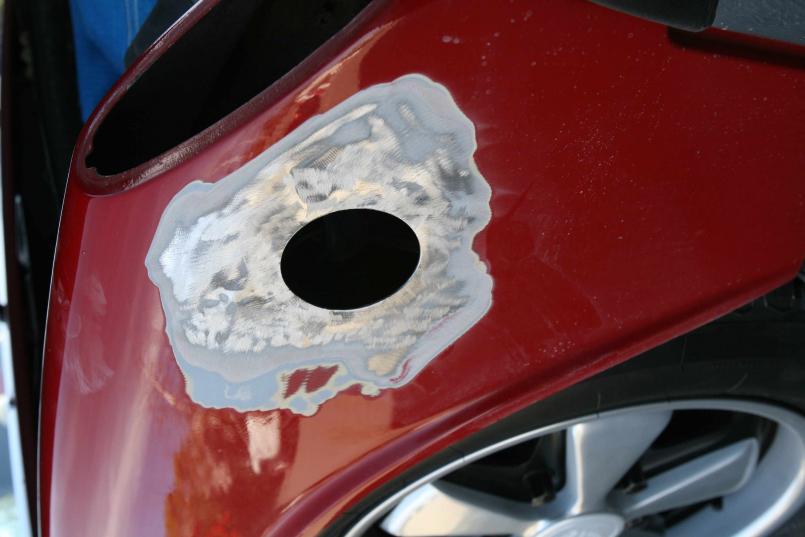
Posted by: horizontally-opposed Feb 8 2008, 03:28 PM
Sorry for the sideways jpgs.... don't mean to make you dizzy.
They are right side up in the files!?!
Posted by: horizontally-opposed Feb 8 2008, 03:35 PM
Last small enough photo for now...
Taking the chance to get rid of the antenna.
Attached thumbnail(s)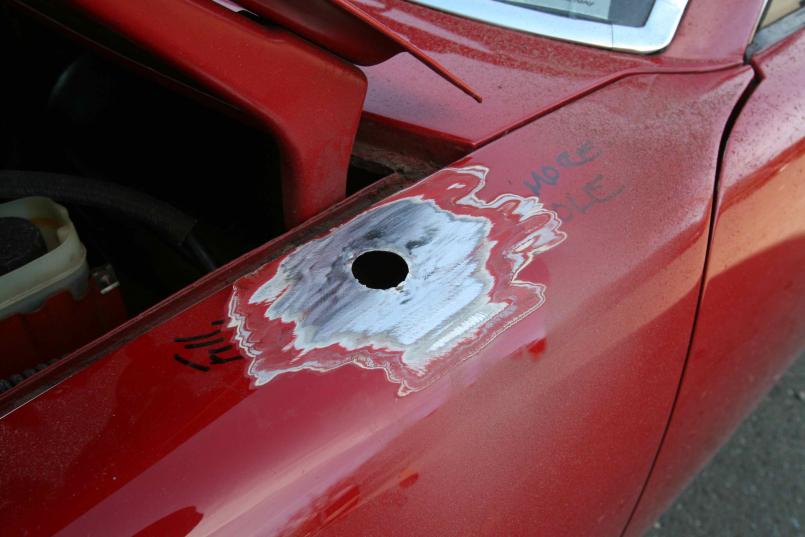
Posted by: McMark Feb 8 2008, 03:51 PM
I don't think so.

It looks... well... like a 914. I count two paint jobs since factory. Are you sanding those off? You did start the "Should we ALWAYS go down to bare metal?" thread.
Looks like FUN!

Posted by: rick 918-S Feb 8 2008, 04:35 PM
When you start to get discouraged be happy your not the owner of this car.
http://www.914world.com/bbs2/index.php?showtopic=80655
You've started on the journey...  no turning back now.
Posted by: horizontally-opposed Feb 8 2008, 04:38 PM
Paint shop will make the final decision on what to do from here. The rest of the car looks very, very good.
And, yes, I know looks can be deceiving.
The shop working on it now is a race shop at the end of the street with a good metalworker. I am listening to him carefully. My guess is the paint shop, when it gets the car, will sand down to the last fill-coat, which is pretty thick. But maybe they'll tell me they want to take it down to metal. We'll see. As it's being painted in SF, I am not crazy about down to metal...
The car was last painted in 1991. I thought that was the only time in the booth, but it looks like it was painted once before that. Besides four trouble spots, the 1991 paint has held up very, VERY well. Too bad the guy didn't block the sides... 
Right now, I'm leaning towards sanding it down to the fill coat and repainting it once more.
But we'll see.
pete
Posted by: horizontally-opposed Feb 8 2008, 04:39 PM

When you start to get discouraged be happy your not the owner of this car.
http://www.914world.com/bbs2/index.php?showtopic=80655
You've started on the journey...
no turning back now. WOW!

pete
Posted by: TINCAN914 Feb 8 2008, 04:45 PM
I don't know how much truth there is to this, but I have been told not to use a sharpie pen on the paint or metal on the car. My painter told me that he has seen cases where the ink bleeds through the new paint..
Posted by: horizontally-opposed Feb 8 2008, 04:47 PM
I don't know how much truth there is to this, but I have been told not to use a sharpie pen on the paint or metal on the car. My painter told me that he has seen cases where the ink bleeds through the new paint..
Okay, so that is scary...
pete
Posted by: McMark Feb 8 2008, 05:46 PM
Yes it will if you paint over it. Make sure it's sanded off thoroughly.
Posted by: watsonrx13 Feb 8 2008, 05:51 PM
BTW Pete, if you didn't already know, the first three pics with the pin holes are where the factory put their 'seam sealer' underneath. After many years, the seam sealer shrank and/or cracked and the water began seeping into those areas.
Good luck on the refinishing and painting, keep us informed...
-- Rob
Posted by: 1970 Neun vierzehn Feb 9 2008, 10:40 AM
Pete,
Make sure that your shop does a thorough search for rust. I thought my '70/4 was pretty nice, but the ravages of time, salty winter roads and latent moisture ultimately caused more damage than was readily apparent.
Paul
Attached image(s)
Posted by: Rusty Feb 11 2008, 01:41 PM
Dude... someone vandalized your car with a majik-marker!! 
Posted by: championgt1 Feb 11 2008, 02:02 PM

Posted by: horizontally-opposed Feb 11 2008, 02:50 PM
Pete,
Make sure that your shop does a thorough search for rust. I thought my '70/4 was pretty nice, but the ravages of time, salty winter roads and latent moisture ultimately caused more damage than was readily apparent.
Paul
Hey Paul,
I saw your pics a while back and they inspired me to get going sooner than later.
And now they've inspired me to pull my aluminum threshold plates. I was relieved, however, to find no rust evident on the longs, at the bottom of the firewall on the passenger side. I'm an Optima battery customer since 1991, and one who is happier than ever to have made the switch...Your pics also serve as a good cautionary tale for rust in general... Let me ask you this: Was the rust on the back of the sail panel evident when you stripped the vinyl away? What about elsewhere? Did you have a couple bubbles here and there and decided to fix them? Or did you strip to metal and only then find the issues?
Thanks,
pete
Posted by: 1970 Neun vierzehn Feb 11 2008, 04:25 PM
... Let me ask you this: Was the rust on the back of the sail panel evident when you stripped the vinyl away? What about elsewhere? Did you have a couple bubbles here and there and decided to fix them? Or did you strip to metal and only then find the issues?
Thanks,
pete
Pete,
Although the vinyl sail panel had no blistering or lifting/loosening of material and seemed to be solid, once it was removed, it was apparent the extent of the rust damage far exceed the 3 or 4 very small paint blisters that had appeared in almost the exact same place as shown in your photo on post #5 of this thread. I'd decided to address the rust issues on the pan of the car, never imagining the extent of the metal degradation on many parts of the exterior sheetmetal.
Here presented (again) were some surprising rust issues that were uncovered when the paint was removed.
Attached image(s)
Posted by: Jenny Feb 11 2008, 09:55 PM
 I was expecting to see "Remember to pick up milk from the store" on a fender.
Actually, it reminded me of how plastic surgeons mark up a patient in pre-op. Smart, because sometimes it's difficult communicating with body
shops and paint folks. Or sometimes you forget exactly were the wavey (that you can only see under certain lighting) was.
Good luck with everything Pete! Thanks for sharing.
Jen
Posted by: horizontally-opposed Feb 13 2008, 08:58 PM
Hey Jenny, long time no see!
Here's the result of six hours of disassembly, plus continuing rust repairs and metal work...
pete
Attached thumbnail(s)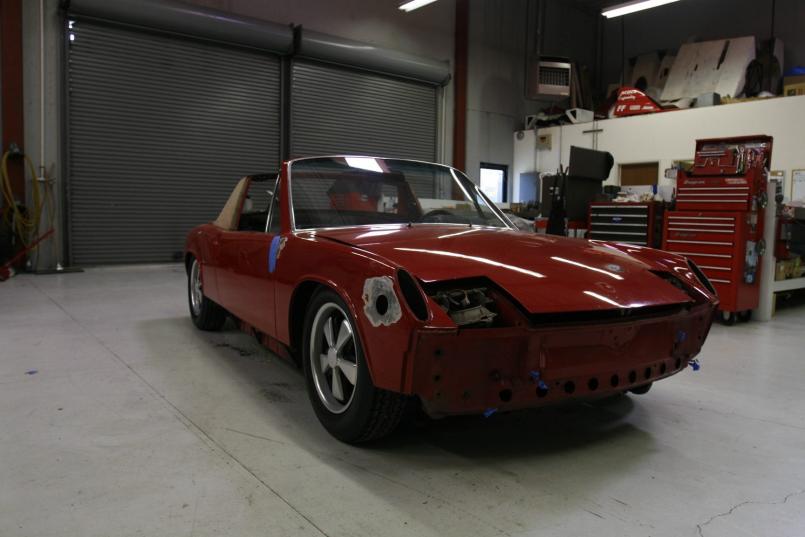
Posted by: horizontally-opposed Feb 13 2008, 08:59 PM
'nuther
Attached thumbnail(s)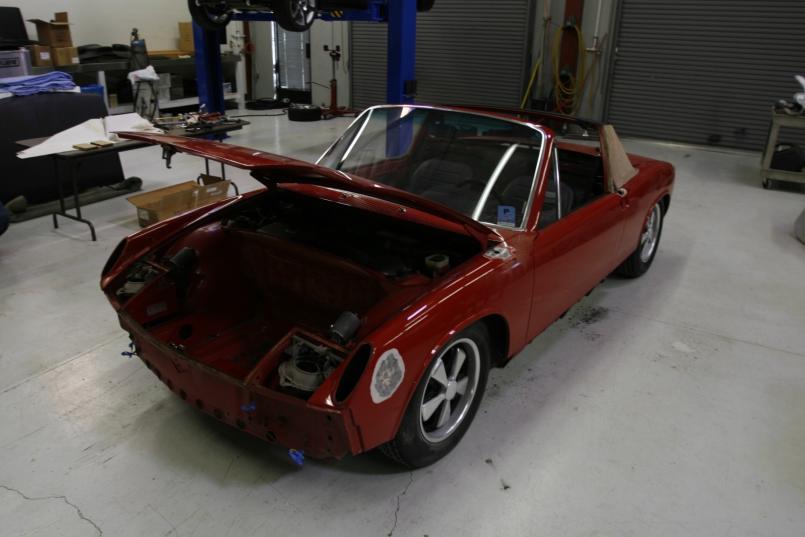
Posted by: horizontally-opposed Feb 13 2008, 09:00 PM
"I *am* a Porsche reflector" holes removed... 
Attached thumbnail(s)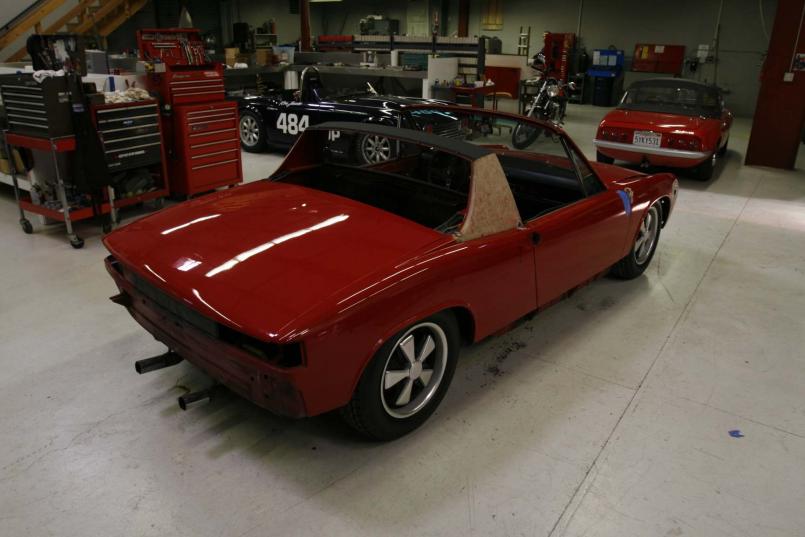
Posted by: horizontally-opposed Feb 13 2008, 09:02 PM
and, while we're at it, antenna be gone...
Attached thumbnail(s)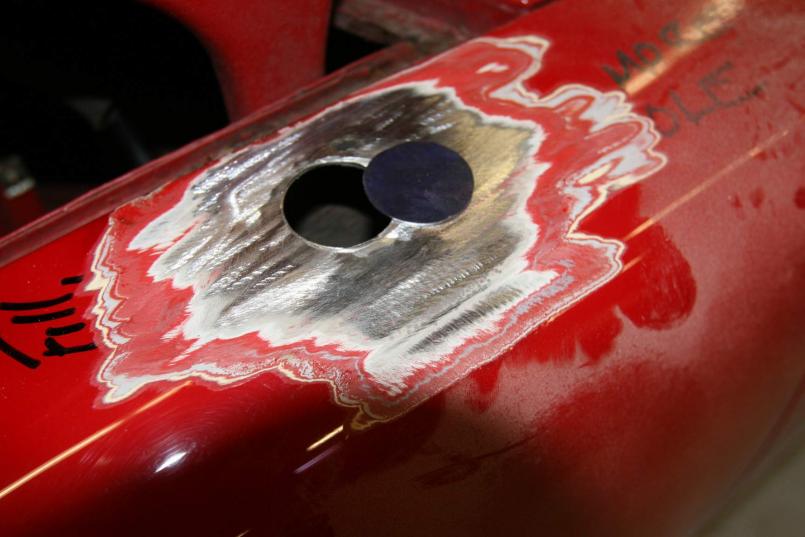
Posted by: horizontally-opposed Feb 13 2008, 09:03 PM
...
Posted by: horizontally-opposed Feb 13 2008, 09:04 PM
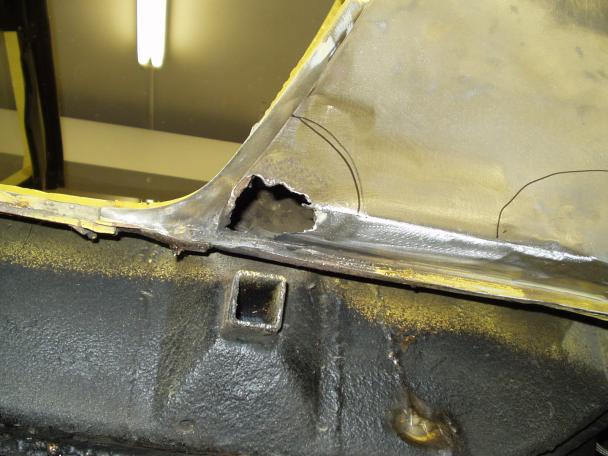
but by far the worst damage is this.... I wish I'd got after this sooner (first spotted it festering in the 1990s) but I am glad I didn't let it go much longer...
Attached thumbnail(s)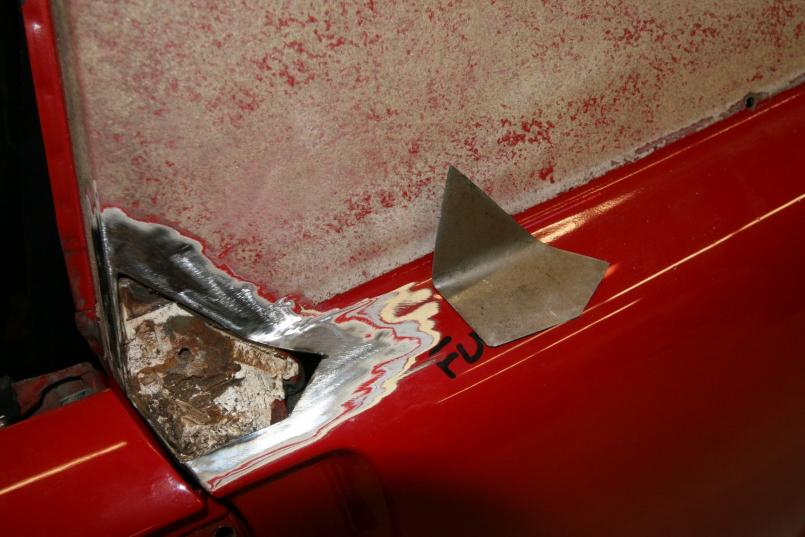
Posted by: horizontally-opposed Feb 13 2008, 09:05 PM
After melting the factory gunk (it is TOUGH stuff, unlike the foam by the taillights), the patch will go in place...
Attached thumbnail(s)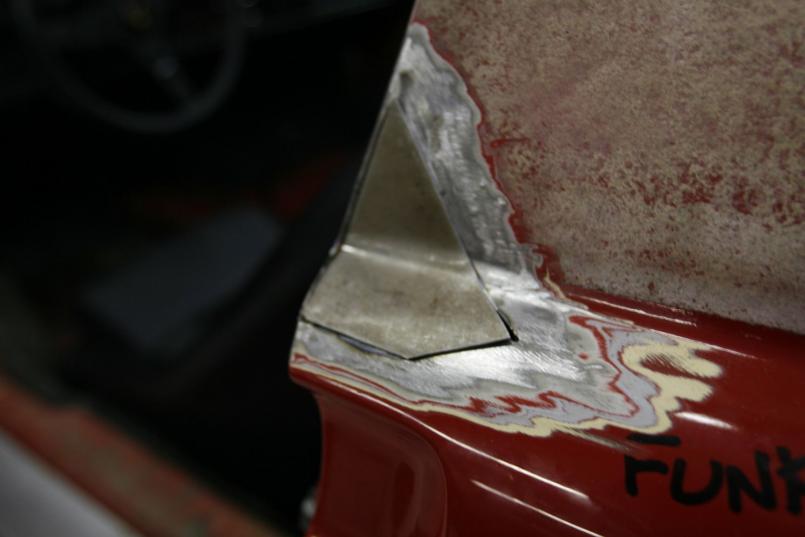
Posted by: horizontally-opposed Feb 13 2008, 09:10 PM
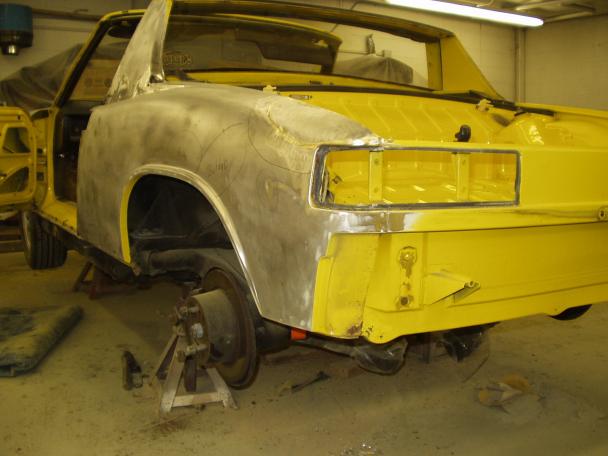
engine lid in trunk, ready to go to paint shop...
given what I've seen on a lot of 914s, I went into this gig pretty scared. So far, it's not so bad. Longitudinals seem to be VERY solid, the firewall is good, and we're not finding indications of rust anywhere else. But I'll be going over the car VERY carefully before sending it to paint.
For now, that's all. Front trunk seal gutter is pretty good, with just two TINY holes at the top corners. I think I'll kill the rust, prep them, and then make sure to seal them off well with the new trunk seal.
Re-sealing the areas where repairs have been done are scaring me a bit, however....
pete
Attached thumbnail(s)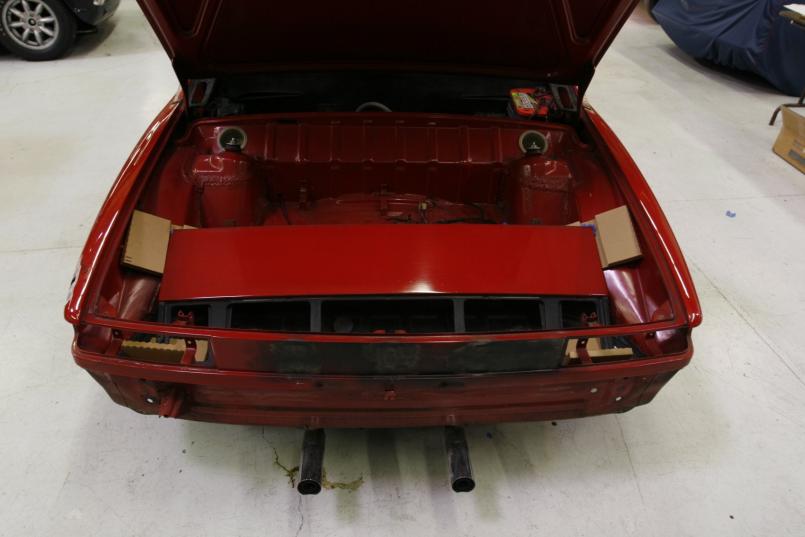
Posted by: SGB Feb 13 2008, 10:33 PM
Mines time is coming one day. There are severalareas infected with subutanious scars on the verge of breaking fourth in an alien-like explosion, too gruesome to describe
Yours will be purt'-near perfect for a good while now, I thnk.
Posted by: jd74914 Feb 13 2008, 10:42 PM
What color is your car Pete? I really like it.
Posted by: horizontally-opposed Feb 14 2008, 10:39 AM
What color is your car Pete? I really like it.
Thanks. Car is VW/Audi Toronado Red, I believe late 1980s/early 1990s spec, important to figure out because colors of the same name from the same car company can change over time. Ever looked at a perfect Guards Red 911 SC and a Guards Red Boxster side by side?
I'm going to have to find out the code, but the last person who painted it won't be painting it again and may get proprietary about it as he'll probably be offended someone else is painting it this time. In fairness, his paint had VERY good adhesion. Nothing lifted in 17 years and it seems like the body was very well sealed.
Anyway, if he won't give me the code, I am sure I can have the paint shop match it.
Car was originally Bahia Red, but I picked this red in 1991 because the painter suggested it would go well with all the black and chrome elements. It's more similar to Porsche's old Polo Red or Signal Red, very non-orangey and with a lot of blue in it. Very pure red. He's an Alfa guy, and picked this red after shooting cards with 29 different reds. 17 years later, he says he's only found one red he likes better than this one.
But, now that I'm on this whole "turn back the clock" thing, I am seriously considering shooting the car in Bahia again. Only trouble is, I'm not sure I love it. If memory serves, it's a little brown for a bright red. A cool color, in its way, but I am not sure I dig it.
Anyone have input on this? Anyone local to SF repaint a car in Bahia lately? I'd sure like to look at one...
pete
Posted by: Porsche Rescue Feb 14 2008, 11:23 AM
I too am a bit of a back to original purist. But some Bahia cars look a bit pink to my eye. The Audi red (I think it is Toronado) on the later cars turns my head whenever I see one. I especially like it on the Audi cabrios. Your car appears to be the same color. Hard call. It would keep me awake at night trying to decide.
Posted by: SirAndy Feb 14 2008, 11:57 AM
This is the left rear corner, has been bothering me for 17 years now (since the car was last painted)! Note the "RUST?" marking.
you will have to remove *ALL* of the foam in that cavity! on both sides!
the reason why it's rusted there is that the foam is sealed off but will get brittle after 30 years and soak in water which will have ample time to do it's rusty work.
you'll have to scrape out all the foam on both sides and treat the cavity with metal ready (or similar) and then seal it off with something like por-15 ...
 Andy
Andy
Posted by: John Feb 14 2008, 12:38 PM
you will have to remove *ALL* of the foam in that cavity! on both sides!
the reason why it's rusted there is that the foam is sealed off but will get brittle after 30 years and soak in water which will have ample time to do it's rusty work.
you'll have to scrape out all the foam on both sides and treat the cavity with metal ready (or similar) and then seal it off with something like por-15 ...
AndyI agree with everything Andy had to say with the exception of the POR-15. I won't be using that on anything else. Stick with a good quality epoxy primer and you will be happier in the long run.
Posted by: Travis Neff Feb 14 2008, 12:43 PM
Keep that Toranado red - it looks great on your car.
Posted by: 1970 Neun vierzehn Feb 14 2008, 01:22 PM
a pair wearing Bahia Red......
Attached image(s)
Posted by: horizontally-opposed Feb 14 2008, 02:17 PM
Thanks very much for posting that!!! I gotta find more pics of Bahia... time to do a search.
But, of course, trying to judge a real red on a computer screen is like...
pete
Posted by: Ferg Feb 14 2008, 02:57 PM
I've owned both colors these shots were taken with the same camera, but different years... Both cars were orig paint, 911 "mostly" original/
My Bahia 73.5 T
And my Toronado Red GTI
Pete, PM me you email, and I'll send you both gallery's of each car.
Ferg 
Posted by: watsonrx13 Feb 15 2008, 07:49 AM
Another sample of Bahia Red... I had this car painted at a local paint shop last year, using DuPont single stage acrylic-enamel... so my recommendation is original paint. 
-- Rob
Posted by: horizontally-opposed Mar 6 2008, 12:09 AM
So some progress has been made...
First up are better pics of the deletion of the rear reflector holes and the antenna hole.
pete
Attached thumbnail(s)
Posted by: horizontally-opposed Mar 6 2008, 12:11 AM
Next up... the targa bar and LR fender by the taillight.
Attached thumbnail(s)
Posted by: horizontally-opposed Mar 6 2008, 12:20 AM
Here's where things get interesting.
After scraping all the foam and rubberized sealer out of the LR fender corner as seen above, I can show you the first photo below, as seen from the wheelwell. You can just make out the black rectangular patch in there, as well as the rest of the surface rust hiding out in there, stewing with the foam. 
In the next photo, you can see the same area on the right fender. When I initially poked through the rubber and then the foam, I saw the nice gray metal you see in there, and way angry because I felt that I had broken into a sealed area that wasn't broke.
But then I removed the rest of the foam and the rubber and saw HOW the left side failed, and how the right side would have failed. The foam, once dry enough, wicks moisture up the vertical surface of the taillight housing's outer edge, inside, behind the rubber. The left side rust-through was the result of this process, and it had started to do the same on the right side...
Please learn from my experience. This is a California car (always), rarely driven in rain the last 10-15 years, and almost always garaged over its life...
Clean those corners out, and re-rustproof and seal them!!! It ain't fun, and it took me about 9 hours for both fenders (at the front and the back of each), but that gunk needs to come out...
pete
Attached thumbnail(s)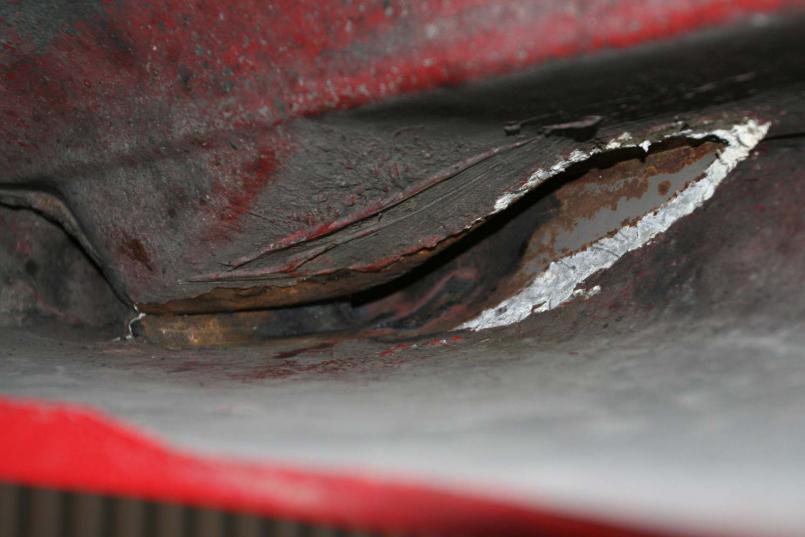
Posted by: horizontally-opposed Mar 6 2008, 12:21 AM
The two pinholes in the right front fender filled...
Attached thumbnail(s)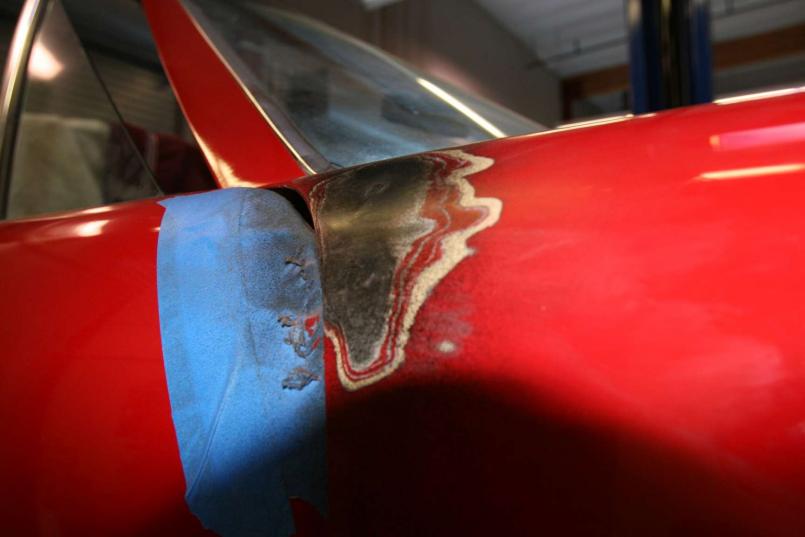
Posted by: horizontally-opposed Mar 6 2008, 12:24 AM
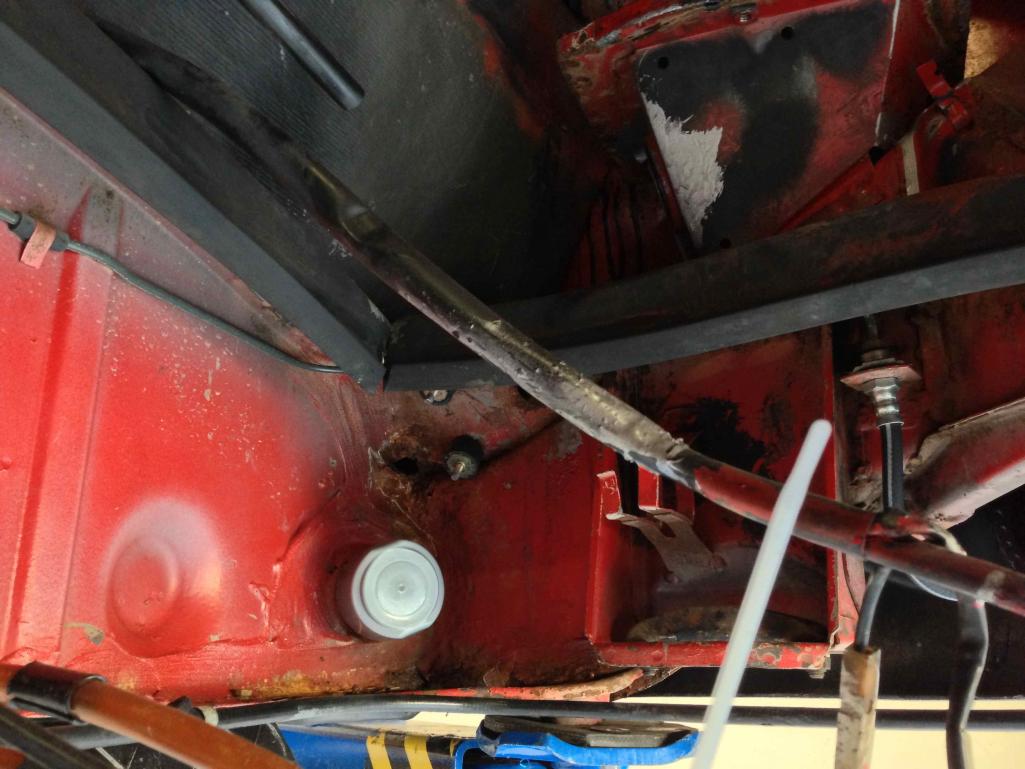
BUT, here's where the bummers begin.
Same area, as seen from the doorjamb. Sorry for the crappy angle. It's hard to shoot in there, and it will be even harder to weld in there.
Our plan at this poiint is to rid the area of the rust, gain access to the back of the metal that had the pinholes (easy because of the rust!) and then (probably) epoxy over the area once we've converted and encapsulated the rust.
It makes me cringe...
Attached thumbnail(s)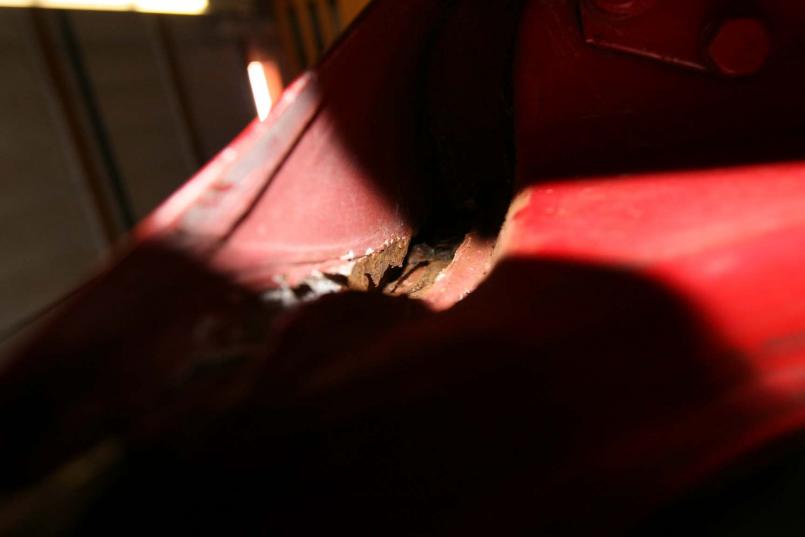
Posted by: McMark Mar 6 2008, 12:26 AM
Looking good Pete! Glad to see the seam sealer gone. You're right that this is a major PITA and is completely necessary. This is especially important for those people who are media blasting their cars (soda, dry-ice included) because the blasting won't touch that stuff.
I stopped using canned primer/paint over my metal work because I had a few experiences where the rattle can paint didn't interact well with the final paint and caused bubbling.  Now I figure a little surface rust comes off in two seconds with some 80 grit sandpaper, so why bother painting.
I agree with the epoxy fix for the door jamb area. Everyone hates on epoxy/body filler/fiberglass and raves about welding, but sometimes it's just NOT worth the hassle when somethine else will work fine.
Posted by: horizontally-opposed Mar 6 2008, 12:39 AM
While we were in there syndrome set in, so I decided to have John weld in an Engman kit and lower my driver's seat, as he figured, much to my surprise, that we can get 0.75-1.00-inch out of the height. As I have a VERY long torso (most of my 6 feet, 3 inches), this was very appealing to me.
I decided to give the go-ahead.
And that's when the real fun with rust began....
Attached thumbnail(s)
Posted by: dw914er Mar 6 2008, 12:42 AM
man
that stuff is scary
i just had a surface paint job on my car about a year ago, but it wasnt sanded down to metal, and it didnt cover the jams or anything, and now, i feel like i should strip the car and redo it all, to fix any surface rust, or anything worst
i know stuff like the longs and stuff are fine, and the battery tray is still there (though there is some rust on it (isaw it when i relaced the battery a month ago)
i am not completly satisfied with my paint job, not bad for a grand, and good color, but i had those door ding strips, and you can see where they covered it (the change in the paint at certian angles, and see old dings that werent fixed), and they covered some holes from the old wing i had on it, and one of the holes is beginning to crack, and then some mild surface rust in the trunks (all the jams, and everything on the inside hasnt been touched since it left germany back in august 73
i need to win the lotto, so i can start and redo the paint and fix any potential rust problems i cant see
Posted by: horizontally-opposed Mar 6 2008, 12:43 AM
As you can see, as soon as the Bahia-painted tar was removed from the floorpan, and what you see was the stuff that came off easy, there was lots o' surface rust.
It makes my stomach turn...
Then I removed the vinyl covering the various structural members under the seats and found them to be nice and rusty, too. A screwdriver went right through the forward beam under the driver's seat.
Made the decision to "unoriginalize" this piece in the name of getting my seat down REAL easy...
Second picture shows the beginning of the lowered boxed section.
pete
Attached thumbnail(s)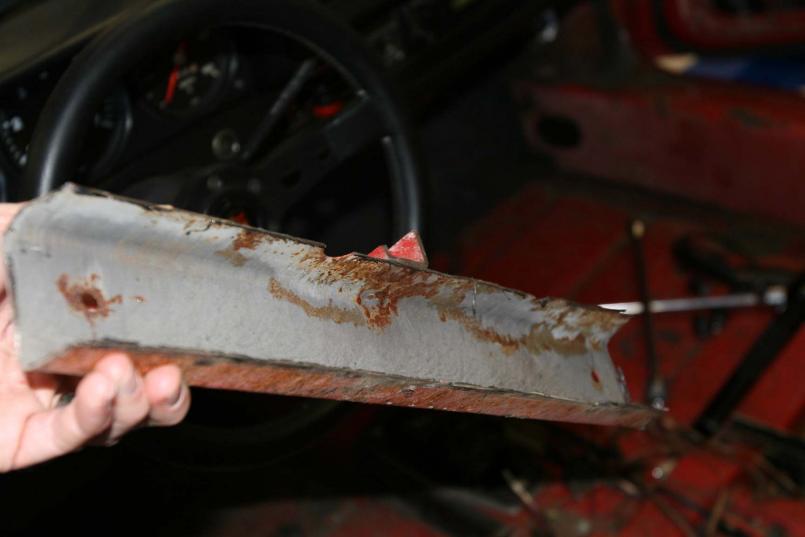
Posted by: rick 918-S Mar 6 2008, 12:48 AM
![popcorn[1].gif](style_emoticons/default/popcorn[1].gif)

Posted by: horizontally-opposed Mar 6 2008, 12:49 AM
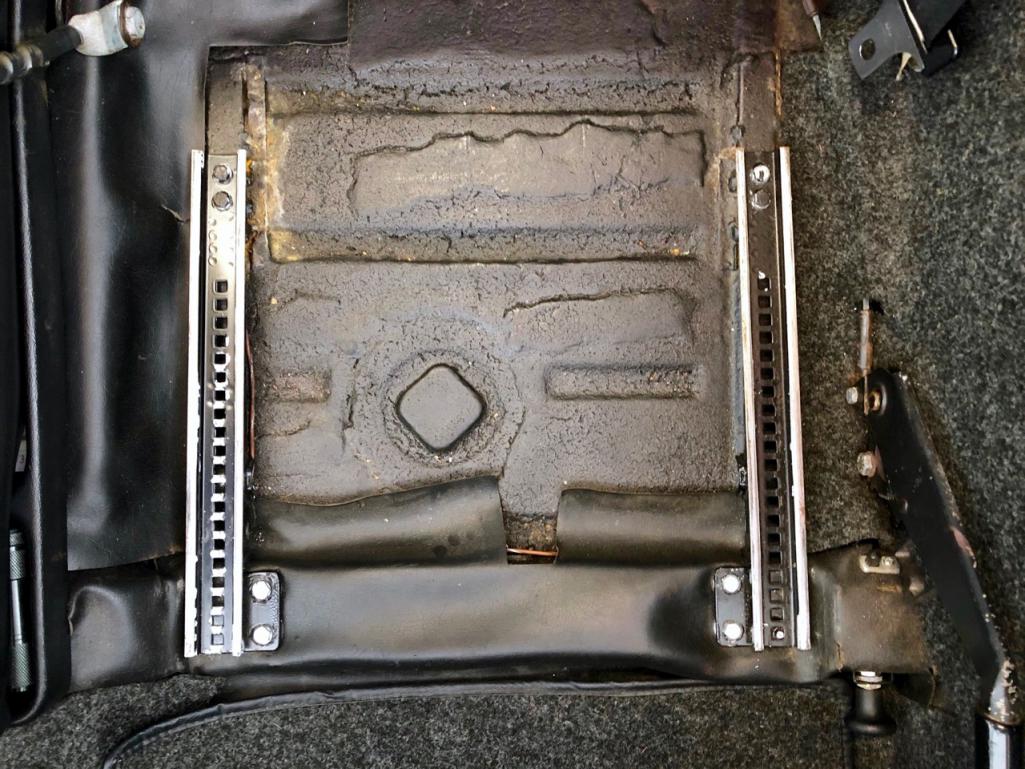
Get up close to things, and you can see where the rust is at work under the factory tar. A look down the front floorpan area indicates that only a little surface rust is having its fun along the lower longitudinal seam. We'll have to clear that up, too.
Oh yeah, you can see some of the change we've found here and there (there's been a LOT of it!!!!) and I thought I kept my floors pretty clean. Also found a cuff-link from prom in there....
Attached thumbnail(s)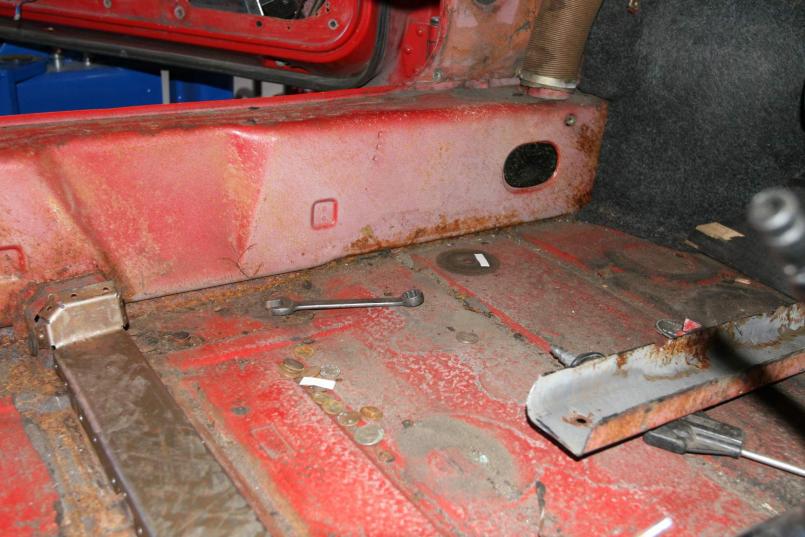
Posted by: horizontally-opposed Mar 6 2008, 12:52 AM
The right side beam under the seat, which appears to be much better than the left side (no perforation and seems strong), but will still need attention. Possibly a lot of attention...
So maybe passengers will get treated to a lower seating position, as well...
Attached thumbnail(s)
Posted by: horizontally-opposed Mar 6 2008, 01:02 AM
Unfortunately, here's where I got more than a little depressed and thought about rolling the car into the bay, or looking for a rust-free chassis...


While the main firewall, hell hole (thank Mick for the Optima back in 1992!!!), and longitudinals appear to be good, this section has succumbed to the tin worm.
Damn you thoroughly, brown monster! 
We poked around in there quite a bit and the only good news is that the real firewall seems VERY strong. The bad news is that this is plain fugly. We'll fix it right, treat the area as best we can (possibily cutting "access" holes for the processs into this "outer" panel, and be thankful the Engman kit will cover this area and add strength.
To be honest, and I know there are far braver rust fighters than I, this greatly disheartened me. But then, I have owned this car since high school and another chassis number just wouldn't be the same.
Nonetheless, and PLEASE LISTEN TO ME HERE, fix that rear window, whatever it costs. I listened to mine rattle for years, and never took it too seriously. Now I am spending big hours and big bucks to fix the problems it created, years after I had the window fixed right. If you drive your 914 in the rain, this matters.
And, if you wash your 914 with running water, this matters...
pete
Attached thumbnail(s)
Posted by: horizontally-opposed Mar 6 2008, 01:31 AM
I stopped using canned primer/paint over my metal work because I had a few experiences where the rattle can paint didn't interact well with the final paint and caused bubbling.
Yipes! Well, a little late now. I'll have the painter sand it all off and hope for the best. Or offer to do it myself. The car may come down to metal yet.
Thanks for the encouraging words! Me needs them just now.
pete
Posted by: SirAndy Mar 6 2008, 02:19 AM
If you drive your 914 in the rain, this matters.
yieks!
mine was bad, but not that bad ...
 Andy
Andy
Posted by: Richard Casto Mar 6 2008, 08:07 AM
Unfortunately, here's where I got more than a little depressed and thought about rolling the car into the bay, or looking for a rust-free chassis...
While the main firewall, hell hole (thank Mick for the Optima back in 1992!!!), and longitudinals appear to be good, this section has succumbed to the tin worm.
Damn you thoroughly, brown monster!
Pete,
Don't give up!
I am working on that same section on my car right now and it should be pretty easy to fix. I am also thinking about cutting in some access holes in that area. Both to treat/paint the inside of that bulkhead as well as monitor for rust over the long haul.I am 6'5" and I like how you lowered the box section/cross member to help lower the seat. I had thought about just cutting it completely out, but the lowered one looks good and keeps some strength in that area. I may have to steal that idea.
Richard
Posted by: McMark Mar 6 2008, 12:56 PM
BTW, you saw you have The Crack®, right?
Attached thumbnail(s)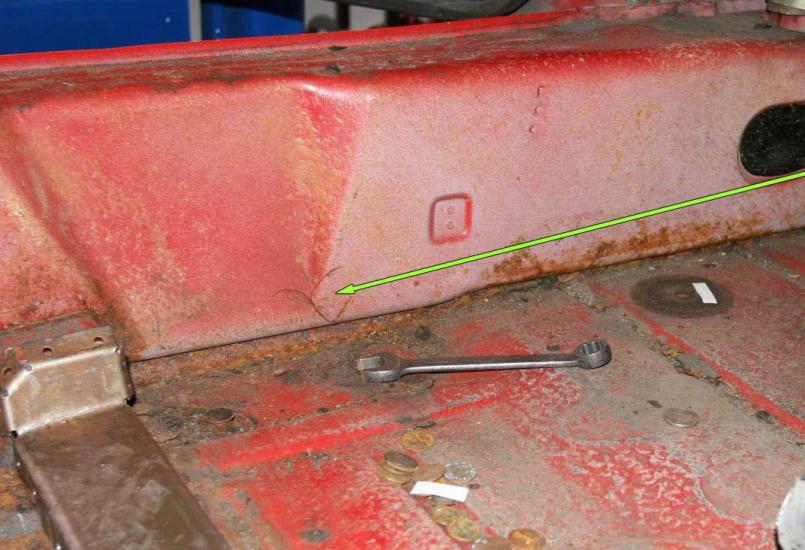
Posted by: horizontally-opposed Mar 6 2008, 01:23 PM
BTW, you saw you have The Crack®, right?
Did notice it, didn't know it had a name.... tell me more!
pete
Posted by: stevesc_us Mar 6 2008, 03:46 PM
I stopped using canned primer/paint over my metal work because I had a few experiences where the rattle can paint didn't interact well with the final paint and caused bubbling.
So that's what must have happened on Olav's paint job.
Posted by: dw914er Mar 6 2008, 03:53 PM
gotta love old cars (any old car, doesnt exactly matter)
its not what you can always see that is the problem, it is what you cannot see that sometimes where the true issues lie
well, good luck on the rust
and in my opinion, whenever the rust issues are dealt with, i think the vw tornado red is a bitchin' color, and will probably add a bit more 'pop' to the look of the car over the bahia red
anyways, good luck
(rust is the enemy!!)
Posted by: McMark Mar 6 2008, 04:43 PM
I stopped using canned primer/paint over my metal work because I had a few experiences where the rattle can paint didn't interact well with the final paint and caused bubbling.
So that's what must have happened on Olav's paint job.
For sure. I've known that since it happened.
Posted by: horizontally-opposed Mar 6 2008, 05:35 PM
For sure. I've known that since it happened.
If we sand those areas down prior to paint prep, it should be okay, right?
pete
Posted by: Krieger914 Mar 6 2008, 09:33 PM
You can do it man! Hang in there for pete's sake. Hey could this be a future Excellence article?
Posted by: McMark Mar 6 2008, 09:40 PM
For sure. I've known that since it happened.
If we sand those areas down prior to paint prep, it should be okay, right?
pete
Sand them down, and talk to your painter. Maybe a dose of brake cleaner, which eats rattle can for lunch, but doesn't usually do much to REAL paint. A wire brush can help too. You're going to have to try and get into the nooks and crannies.
Your painter will know more about interactions. A good sealer might be all it takes (after sanding it off).
Posted by: Engman Mar 6 2008, 09:46 PM
BTW, you saw you have The Crack®, right?
Did notice it, didn't know it had a name.... tell me more!
pete
The crack - you need to weld it. Best if you open it up with a cutoff wheel and then weld it. Grind it flush, then install the Engman kit. (you want to open it so after it is welded you can grind it flush and still have a good strong weld).
Love the lowering of the seats! Fantastic idea!
Keep posting more pics!
M
Posted by: John Mar 6 2008, 09:50 PM
BTW, you saw you have The Crack®, right?
Did notice it, didn't know it had a name.... tell me more!
pete
That is a common area for cracks to develop. Once the crack is welded up and ground down, the engman kit will help prevent the crack from forming again.
I have seen many cars with cracks right there including mine.
Posted by: horizontally-opposed Mar 6 2008, 10:43 PM
Thanks, guys.
Longitudinals look and sound good -- exception to this is the obvious damage from jack points that failed long ago. I've had the fix-it pieces for those for a long time, just never had them put in. And I've had the rockers off lots o' times over the year to clean out all the crud that accumulates along the sides of the car from the backroads of Northern California.
Well, this time the right jack "box" was fairly clear outside, and pretty clear when I cleaned out its drain hole. It also had good integrity.
pete
Attached thumbnail(s)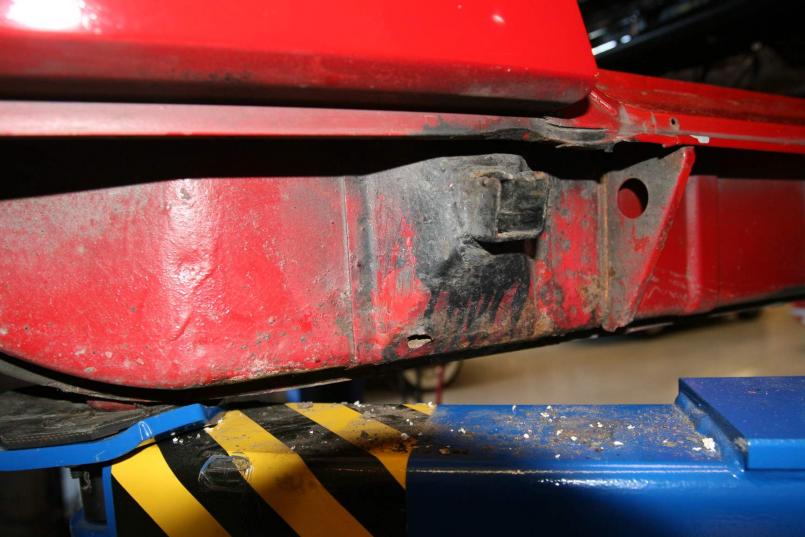
Posted by: horizontally-opposed Mar 6 2008, 10:45 PM
Unfortunately, the left box didn't appear to have a drain hole at all -- which didn't go with anything I remembered. Then I finally found it with the screwdriver.
Interestingly, the drain hole is towards the rear on the right side, where you'd think it would be, but it's towards the front on the driver's side, which isn't quite as smart (or maybe it doesn't matter...). Clearly, two stampings weren't in the cards.
Anyway, the left box was PACKED with dirt, and the predictable result was rust on the front face of the box. The good news is that the left longitudinal itself seems completely solid, and as nice as the one on the right. Phew!
I think I am going to go ahead and delete the jack-tube boxes entirely. This will give us a better look in there, and also rid the car of these now useless crud-catchers (which is what I will call these from now on) and I'm just not concerned with the concours aspect of this car. I'm much more interested in long-term preservation of utitlity...
pete
Attached thumbnail(s)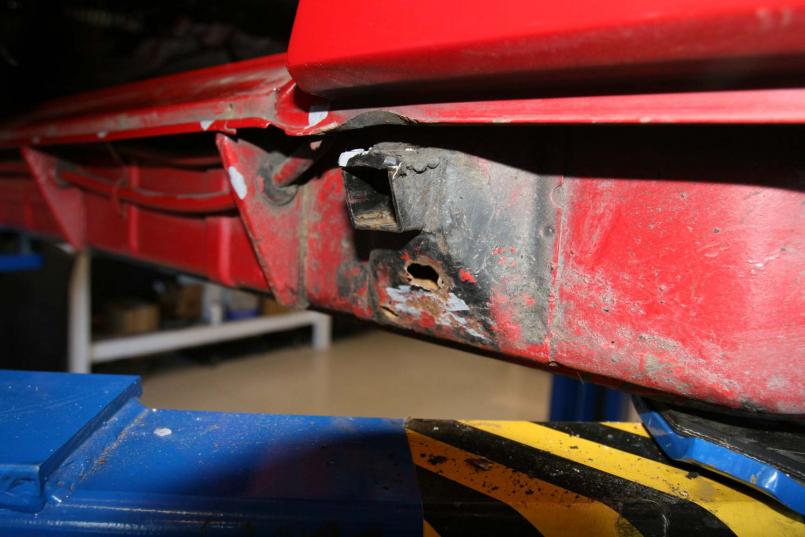
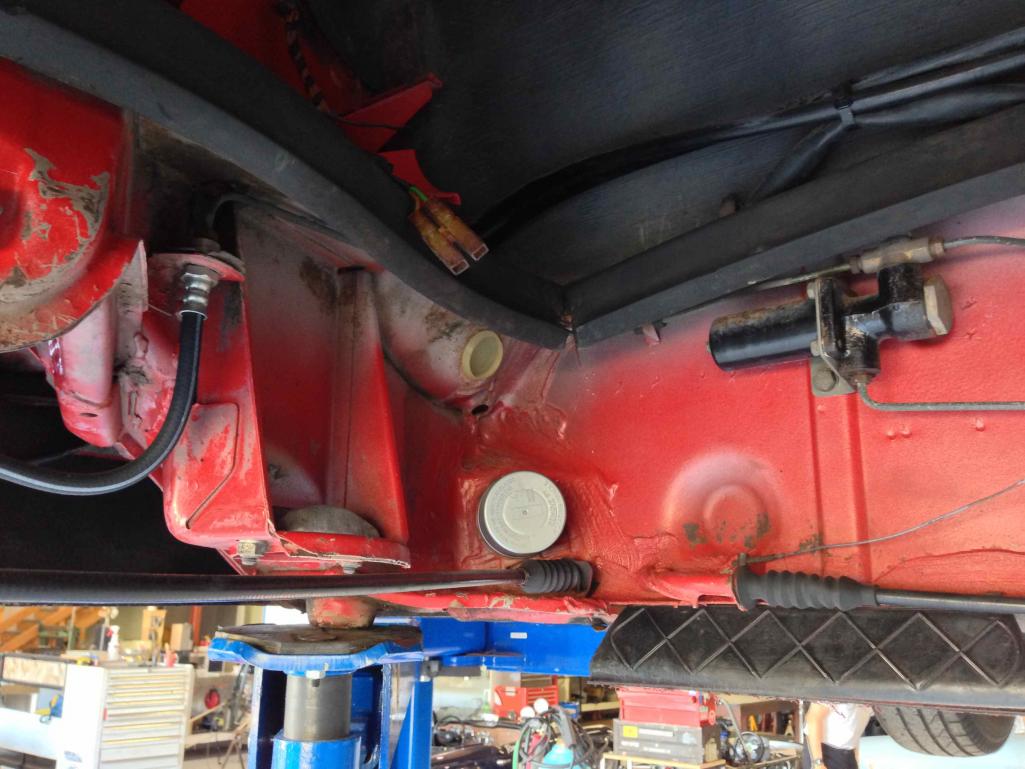
Posted by: horizontally-opposed Apr 3 2008, 04:02 PM
Moving along, here's what I took out of the voids above the taillights. The rust-darkened one from the left side where I had the rust bubble that inspired this odyssey, the light one is from the right side, which was still fine but on its way to a similar fate.
pete
Attached thumbnail(s)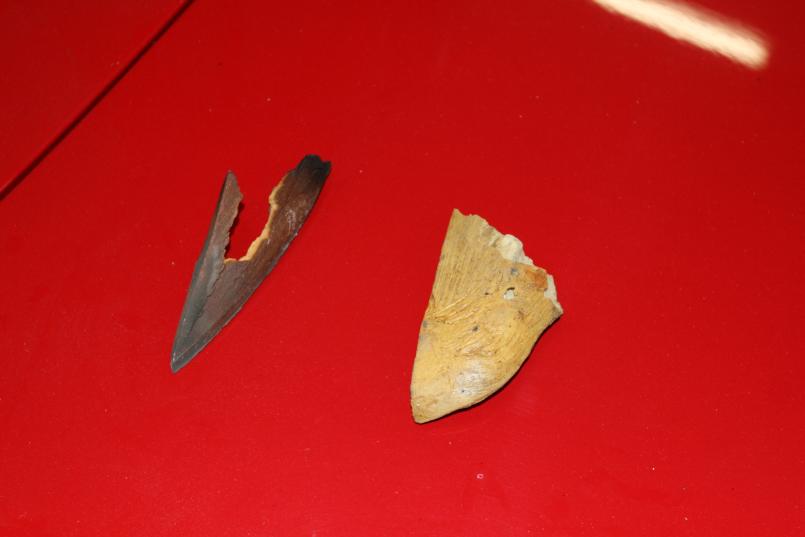
Posted by: horizontally-opposed Apr 3 2008, 04:03 PM
The good... (kinda)
Attached thumbnail(s)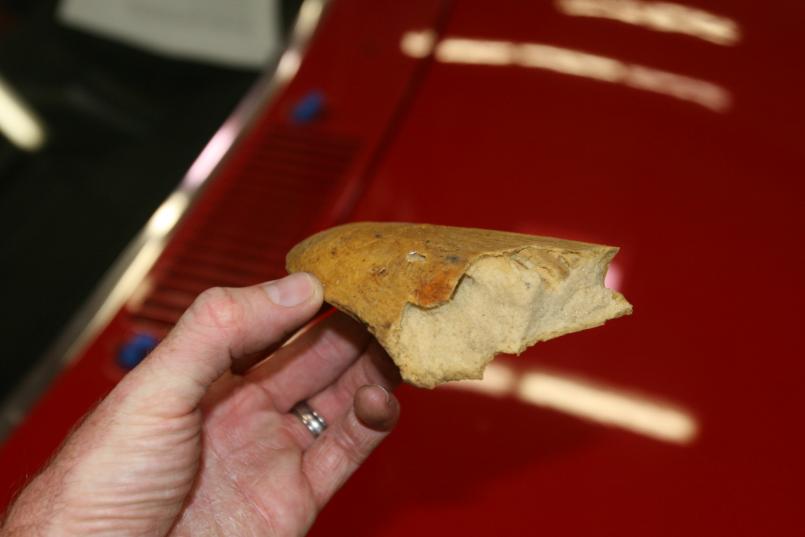
Posted by: horizontally-opposed Apr 3 2008, 04:04 PM
And the ugly...
Attached thumbnail(s)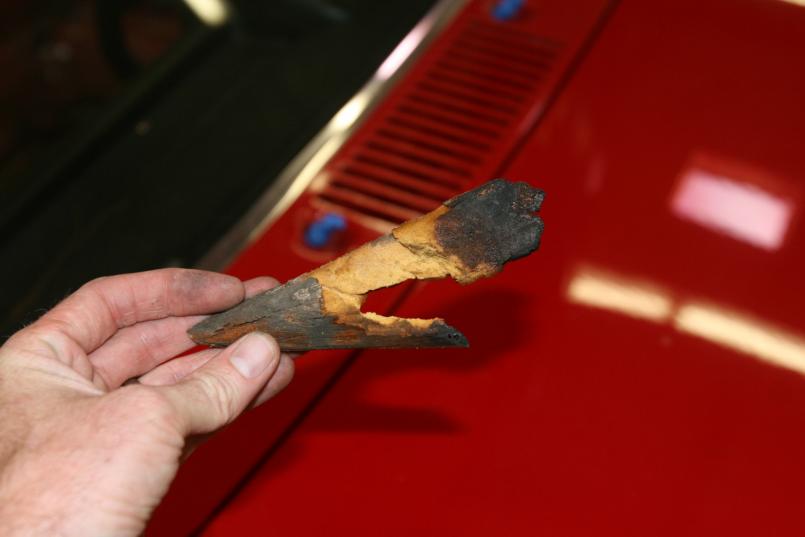
Posted by: horizontally-opposed Apr 3 2008, 04:06 PM
Now, onto the interior...
Attached thumbnail(s)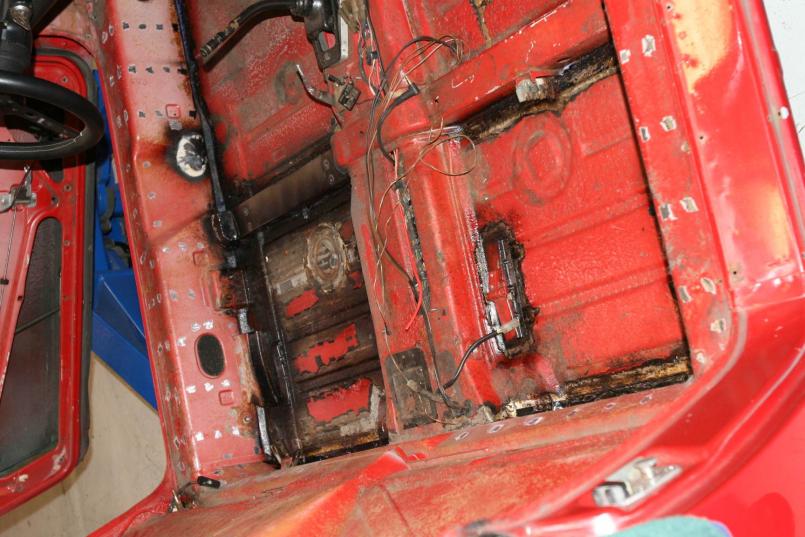
Posted by: horizontally-opposed Apr 3 2008, 04:07 PM
closer in on the lowered driver's seat...
Attached thumbnail(s)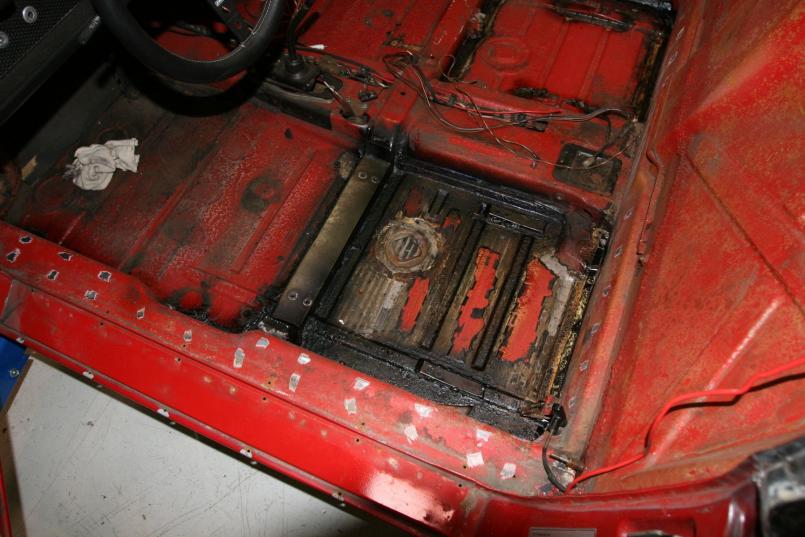
Posted by: horizontally-opposed Apr 3 2008, 04:08 PM
And closer still...
Attached thumbnail(s)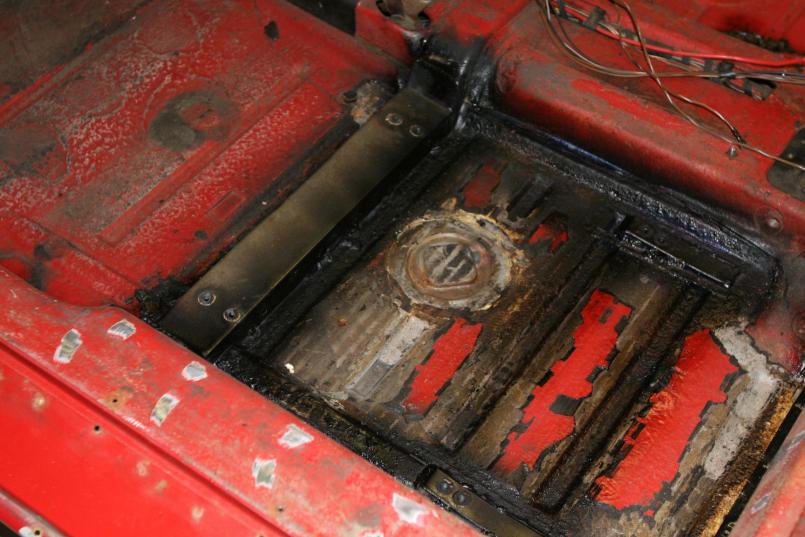
Posted by: horizontally-opposed Apr 3 2008, 04:12 PM
another angle...
Bolted the GTS seat in after this and I must say this may be one of the best mods I've ever made to my 914. I like to sit as low as possible and have a long torso, and I *finally* feel like I am sitting in the car low enough. I can see all of the tach through the Prototipo and I love the new position. The seat slides better than it did before, and if I want to change the rake (I don't think I will, but we'll see...), I can always shim it later.
VERY happy with this mod.
pete
Attached thumbnail(s)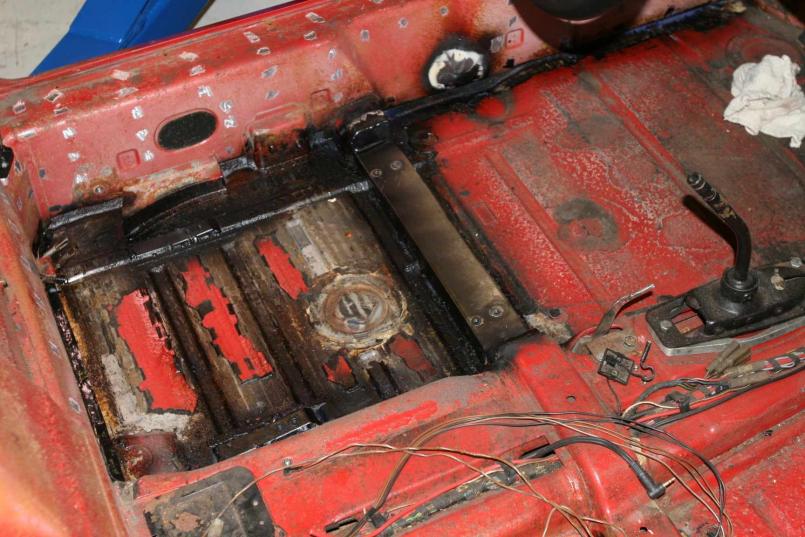
Posted by: horizontally-opposed Apr 3 2008, 04:15 PM
Now for the not so fun:
Attached thumbnail(s)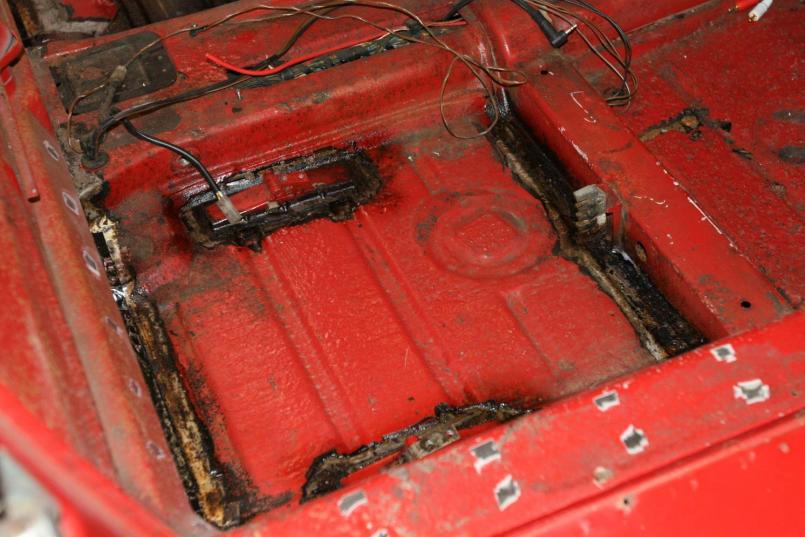
Posted by: horizontally-opposed Apr 3 2008, 04:16 PM
"My" hell hole...
Attached thumbnail(s)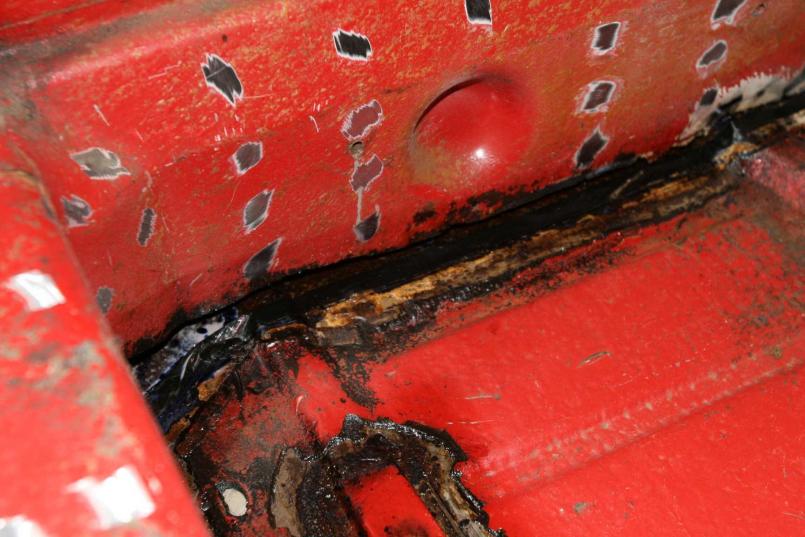
Posted by: horizontally-opposed Apr 3 2008, 04:17 PM
Another angle of hell...
Attached thumbnail(s)
Posted by: horizontally-opposed Apr 3 2008, 04:19 PM
Engman kit preparations. Very nice kit. Some holes seemed to be in the wrong spots for my early '73...
Perhaps these pics will be helpful?
Attached thumbnail(s)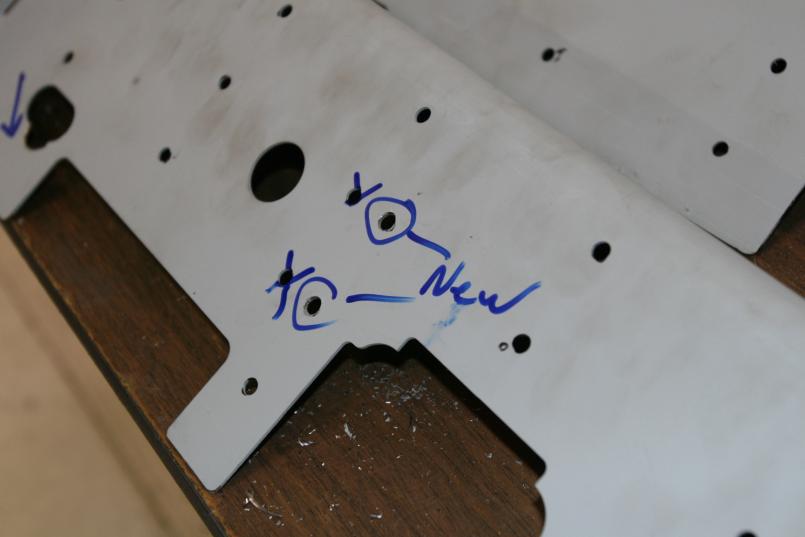
Posted by: horizontally-opposed Apr 3 2008, 04:20 PM
Another...
Attached thumbnail(s)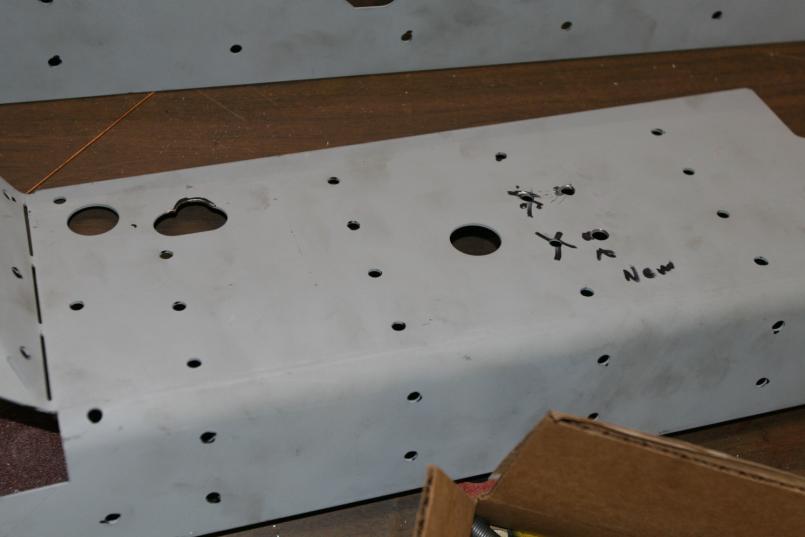
Posted by: horizontally-opposed Apr 3 2008, 04:28 PM
And one more... of the seatbelt bolt hole. Both had to be modified slightly.
Attached thumbnail(s)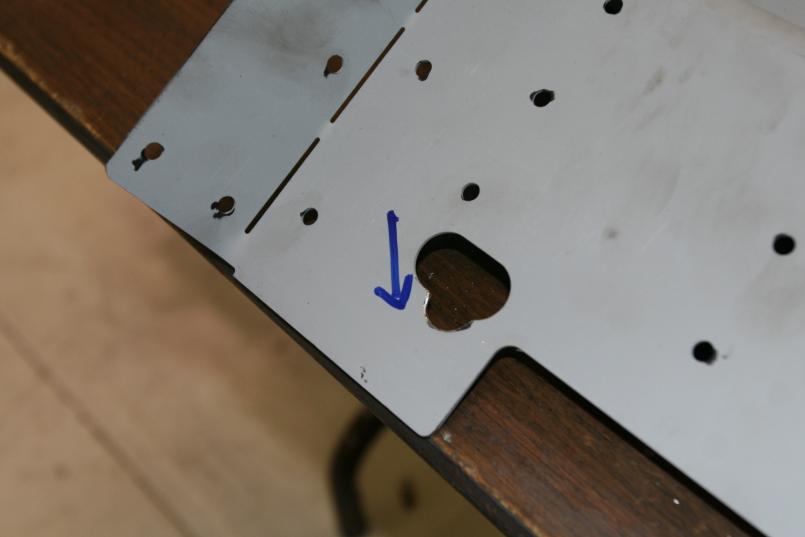
Posted by: horizontally-opposed Apr 3 2008, 04:29 PM
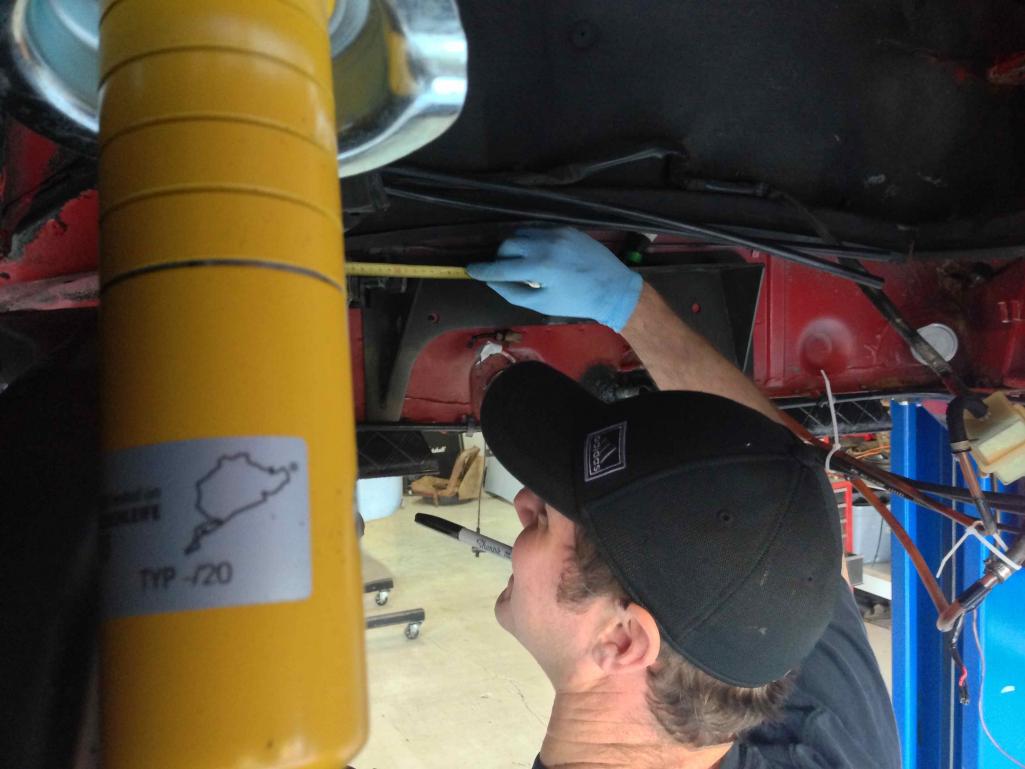
After much discussion, reviews of all the installations detailed here on 914world and on 914club, reading the Engman instructions, and reading over PRS's directives, two race mechanics and I talked over how to actually install the kit -- with the car on the lift or on its wheels. Since you could watch the door gaps grow when you lifted the car on a *very* good lift, and because the gaps were good when the car was on its four wheels and there should not be any distorting if you follow everyone's advice, we decided to weld in the pieces with the car sitting on its suspension. To that end, I went back and got the car's real wheels, with four brand-new Vredesteins, bolted them up, and left for an anniversary weekend.
Imagine my horror when my welder told me he started to see the door gap close up on the passenger side as he started to plug weld the rossette holes -- following everyone's instructions and following his own experience and being cognizant of this potential problem. That's when he decided to finish the right side with the car on the lift, and do the same with the left side. The left came out GREAT when the car was back on its wheels, but the right side was a bit tight. You could still open and close the door, but it was a bit sticky. So, he jacked up the car at a carefully selected point along the longitudinal under the door, and then heated up the plug welds until we arrived at the right gap.
I'm not saying we got it "right," but it is one more data point in this ongoing saga of learning the best way to add the stiffening kit. And no idiots were working on this. Well, at least if you don't count this one...
I'll add pics of the kit in place and some other progress next time I get down to the shop with a camera. I hope this thread is as useful for some of you as so many of your threads have been for me.
pete
Posted by: rick 918-S Apr 3 2008, 10:18 PM
Nice to hear about the progress Pete. 
Posted by: McMark Apr 4 2008, 12:19 AM
No doubt this thread is useful! Keep 'em coming Pete...
Posted by: Engman Apr 4 2008, 11:48 AM
Thank you for posting the pics! I always ask for feedback and am glad to see some. I knew the one hole was close to the dimple on the side that you redrilled – and I will relocate it in future production runs on both sides – Thanks! As to the location of the seat belt mounts – I purposely made it a slot as I have seen the front to back variance. Mc Mark is getting ready to do another install and hopefully he will tell me what he sees here. Based on your comments I will have to be more specific on the welding procedure to make sure that the welds are done in a manner to disperse the heat better.
Mark
Posted by: Root_Werks Apr 4 2008, 04:08 PM
I installed my kit last year. Went in like butter, I listened to no one because I think I am a 914 God. But either way, my 914 turned out perfect and it made a HUGE difference in the feel of the car.
Great kit Eggman. Trust me when I speak for all of us when I say we appreciate all that you put into your products. Thier quality speaks for your skills and attention to detail.

Posted by: horizontally-opposed Apr 4 2008, 10:42 PM
Mark,
I too think your kit rocks! And I think John's words were "this guy makes the kit TOO well (referencing the time it took him to get it to fit perfectly, but in a good way)." I think he was impressed by the way that you have done this kit, and appear to be laser-cutting it.
I can't wait to drive my car with it in place!
pete
Posted by: Engman Apr 4 2008, 11:52 PM
Thanks - but I am always on the lookout to improve what I make. Your feedback makes that possible! For that I thank you, and future owners of my products will too!
Mark
Posted by: horizontally-opposed Apr 7 2008, 01:55 PM
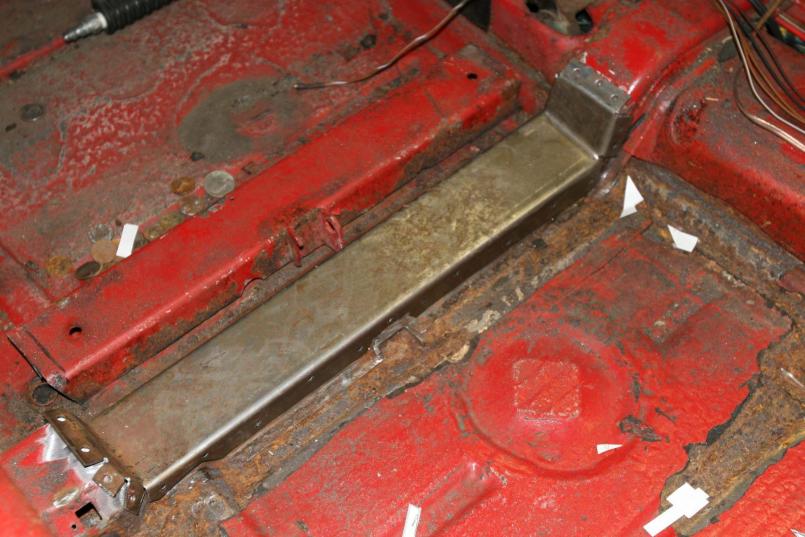
Kit in place...
Attached thumbnail(s)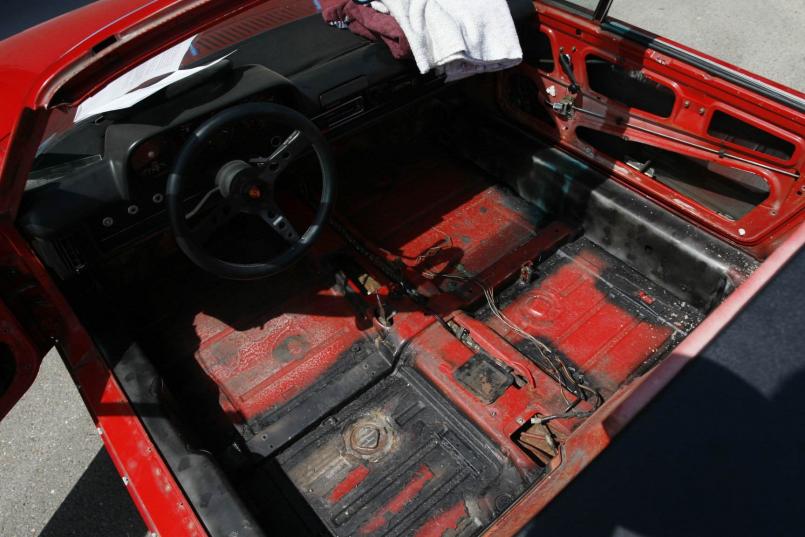
Posted by: horizontally-opposed Apr 7 2008, 01:58 PM
closer...
Attached thumbnail(s)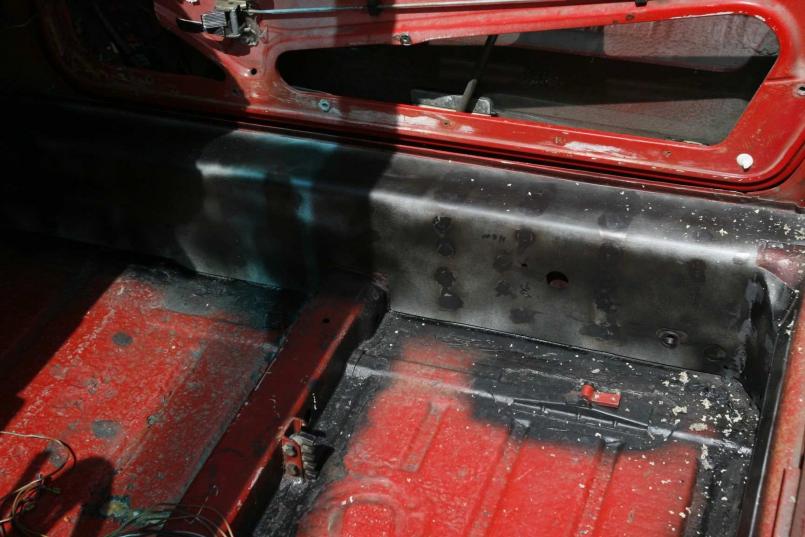
Posted by: horizontally-opposed Apr 7 2008, 01:59 PM
Bulk of sills are still Bahia thanks to the aluminum thresholds...
Attached thumbnail(s)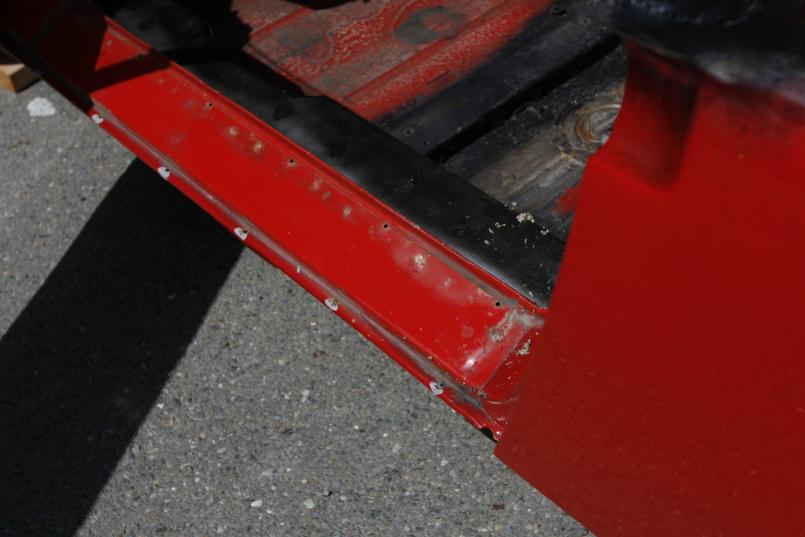
Posted by: horizontally-opposed Apr 7 2008, 02:02 PM
Once the jack-post boxes were cut away, we found solid metal. But rust was at work. I decided to eliminate the boxes, as they failed long ago in a scary way and always seems like the "catch" point for dirt and moisture.
I carry a scissors jack these days....
Attached thumbnail(s)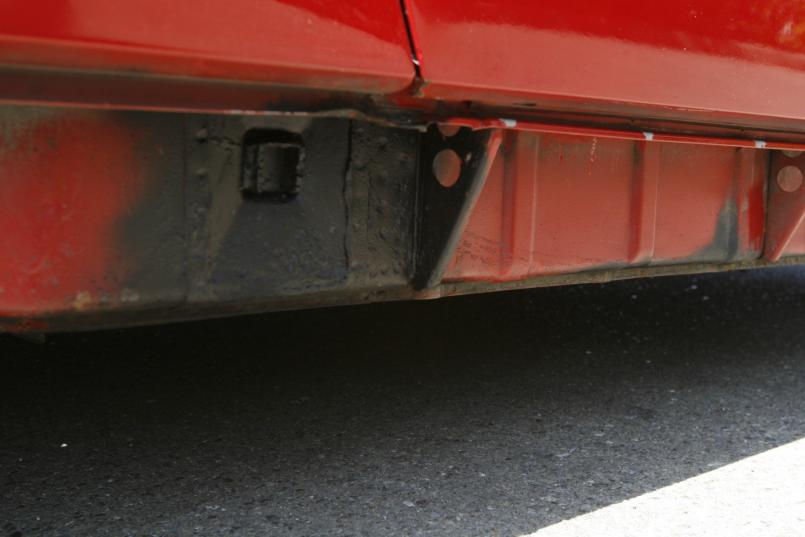
Posted by: horizontally-opposed Apr 7 2008, 02:02 PM
and the left side...
Attached thumbnail(s)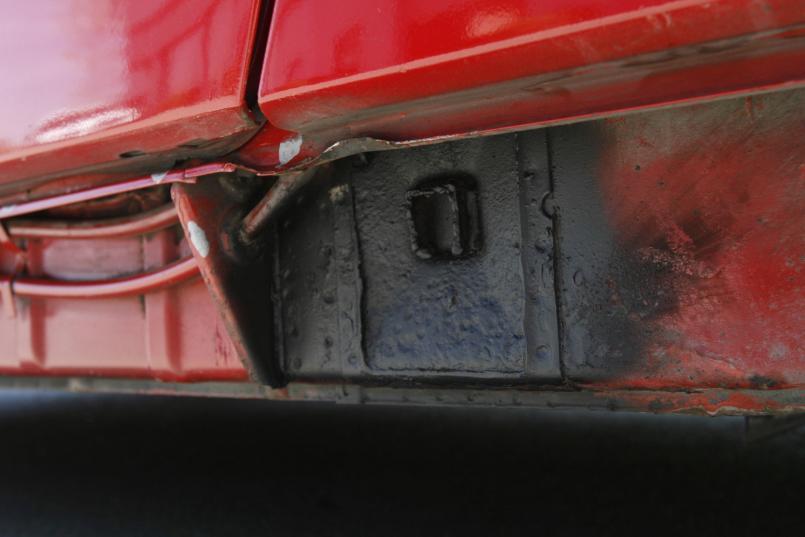
Posted by: horizontally-opposed Apr 7 2008, 02:05 PM
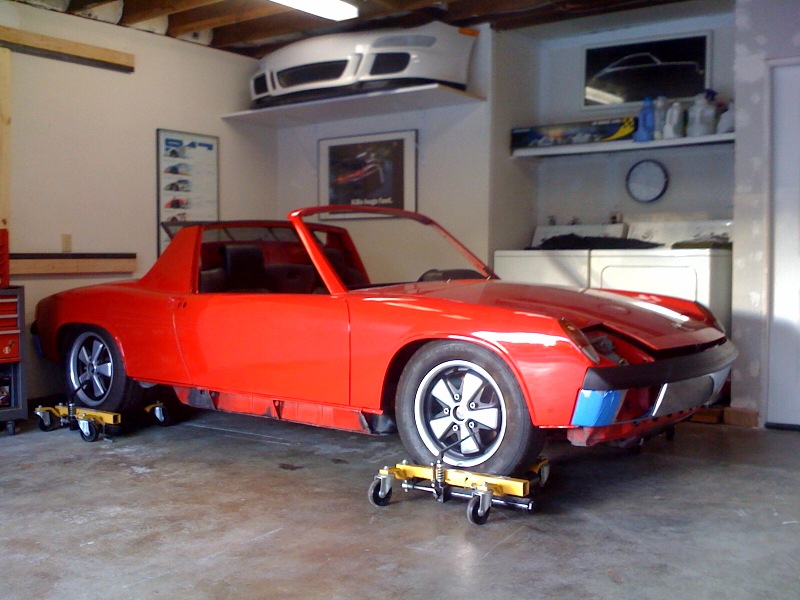
So this is where the car stands today. Just a little more work and it's off to paint...
Attached thumbnail(s)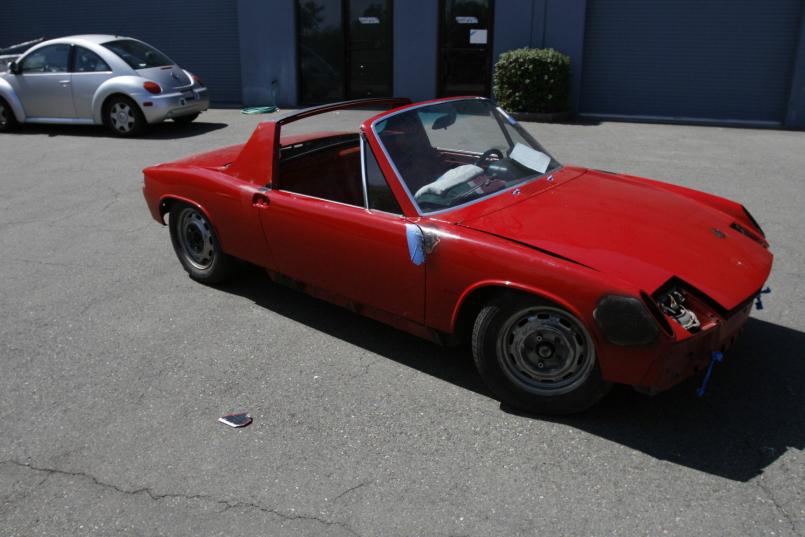
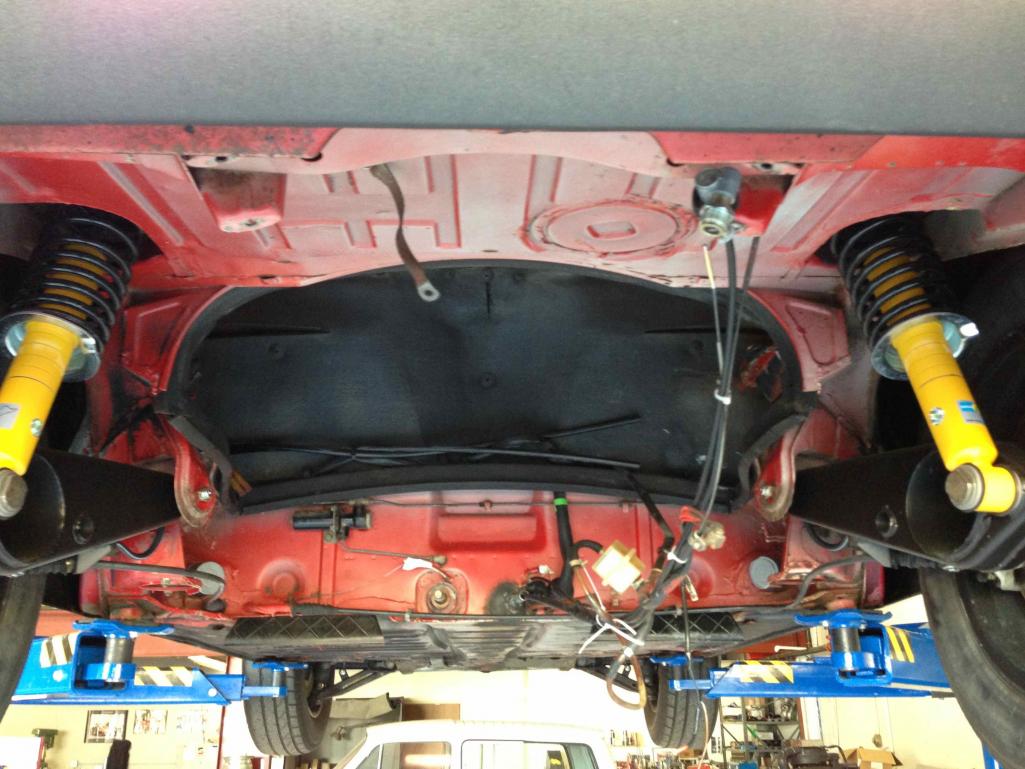
Posted by: horizontally-opposed Apr 7 2008, 02:06 PM
And from the rear. Man those 165s on steelies are killin' me!
Attached thumbnail(s)
Posted by: horizontally-opposed Apr 7 2008, 03:40 PM
In my ongoing struggle with Bahia vs. Toronado, I've taken a bunch of pictures of the few areas I've found that are factory original Bahia and untouched by the sun all these years. I suspect this would be of use not only to me, as I have had a tough time finding anything useful online when it comes to color comparisons. Of course, online color judging is inherently flawed, but...
Anyway, out of respect for bandwidth, am I committing a party foul by posting a bunch of them?
pete
Posted by: 1970 Neun vierzehn Apr 7 2008, 04:23 PM
Anyway, out of respect for bandwidth, am I committing a party foul by posting a bunch of them?
pete
Just be sure to post them vertically - as opposed to horizontally (sorry, I couldn't help posting that).
Posted by: McMark Apr 8 2008, 01:25 AM
Post away! We want them all. Always good to have an original point of reference.
Posted by: horizontally-opposed Apr 8 2008, 11:03 AM
Okay, the only useful Bahia is on the sail panels (targa bar sides). It's subtle, so if you *think* you see the difference, then that's it.
To my eye, Bahia is oranger, deader, and brighter all at once.
pete
Attached thumbnail(s)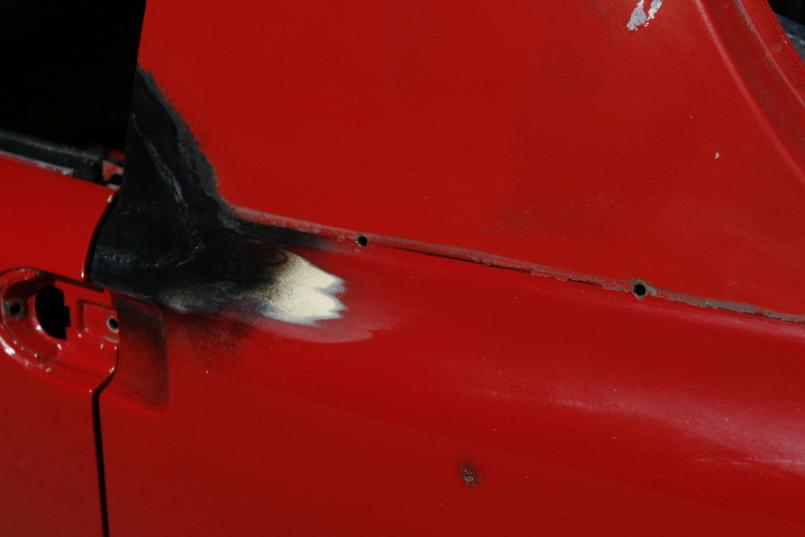
Posted by: horizontally-opposed Apr 8 2008, 11:03 AM
more
Attached thumbnail(s)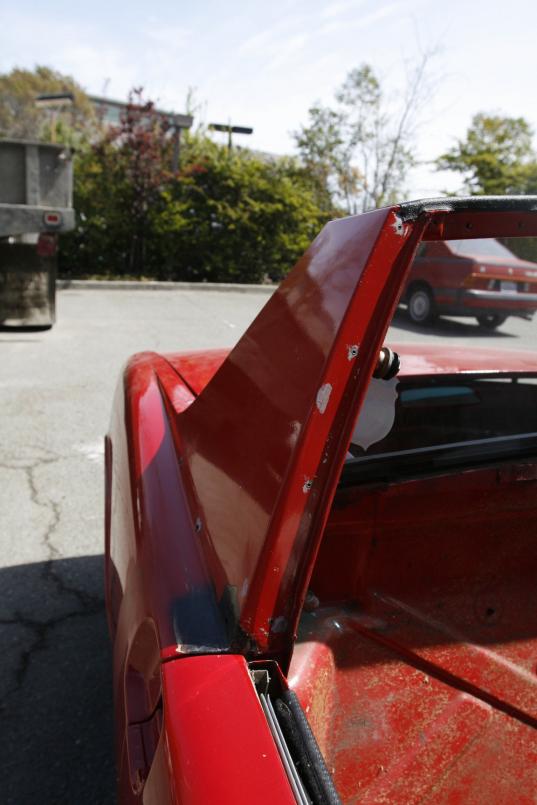
Posted by: horizontally-opposed Apr 8 2008, 11:04 AM
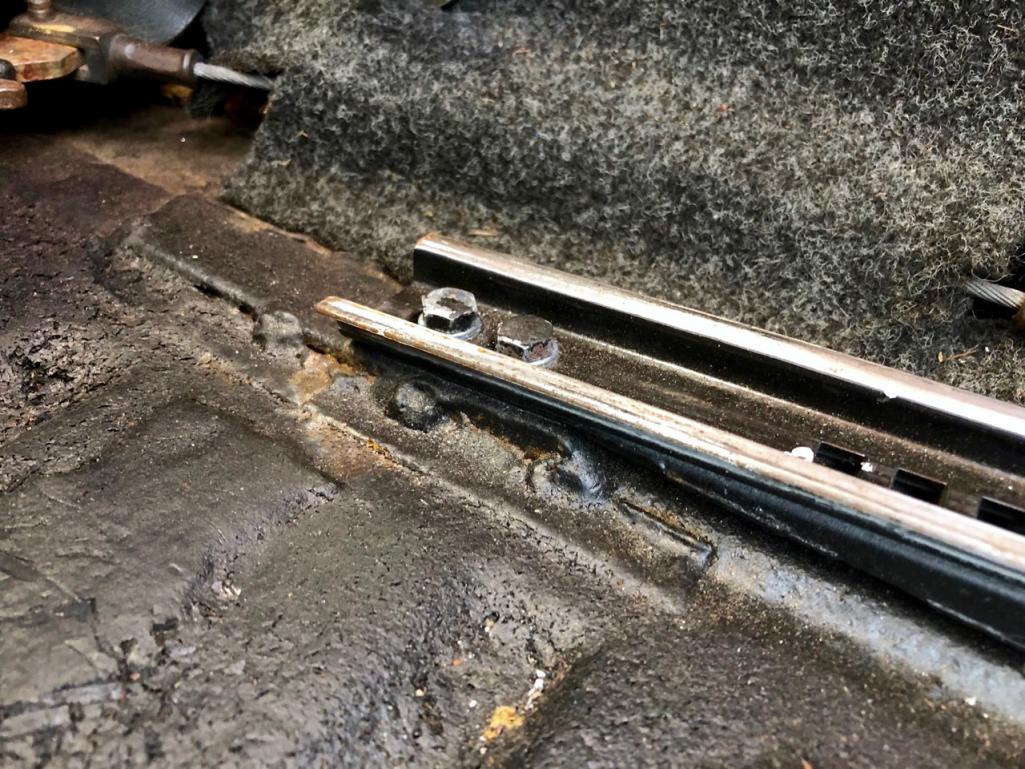
original sill, now with Engman kit next to it...
Attached thumbnail(s)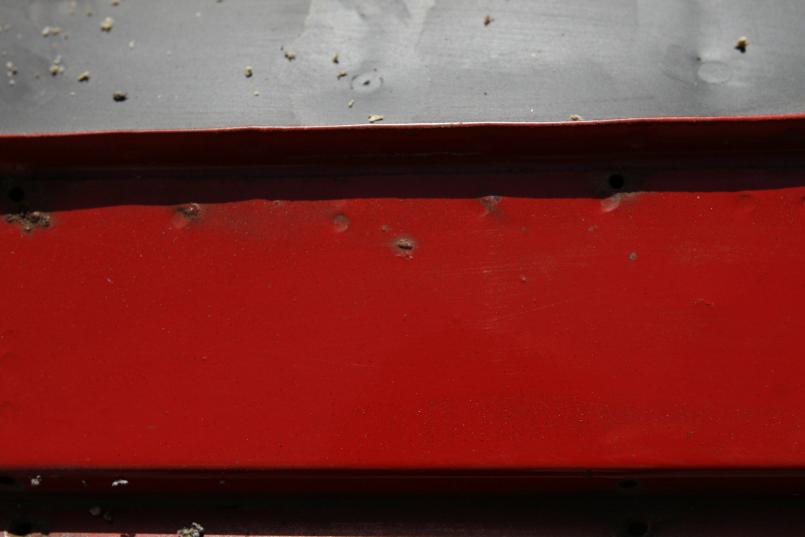
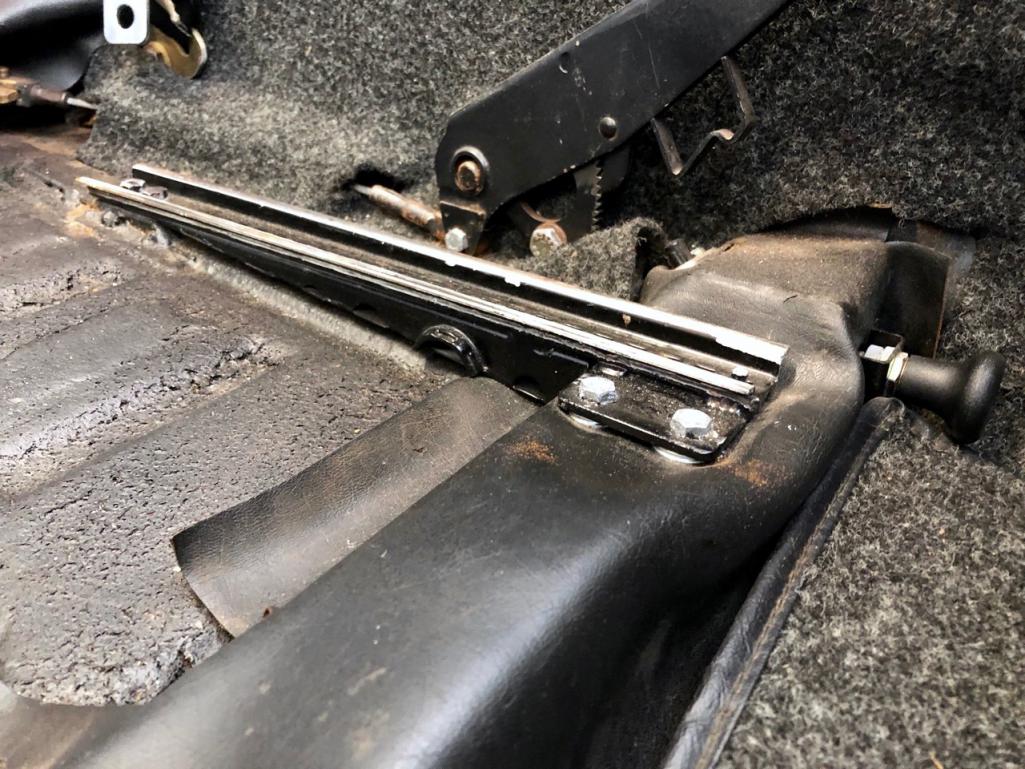
Posted by: horizontally-opposed Apr 8 2008, 11:06 AM
And Toronado, by itself, shot at the same angle/same light
Attached thumbnail(s)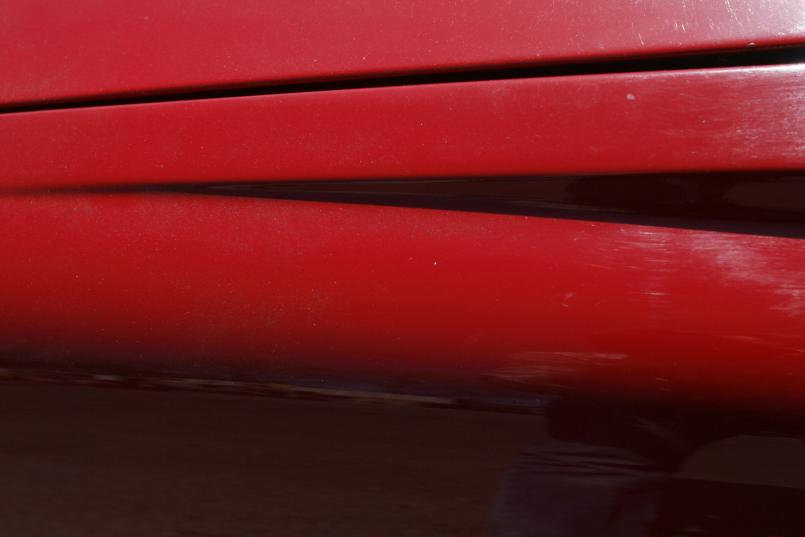
Posted by: horizontally-opposed Apr 8 2008, 11:07 AM
door to sill experiment, not so successful
Attached thumbnail(s)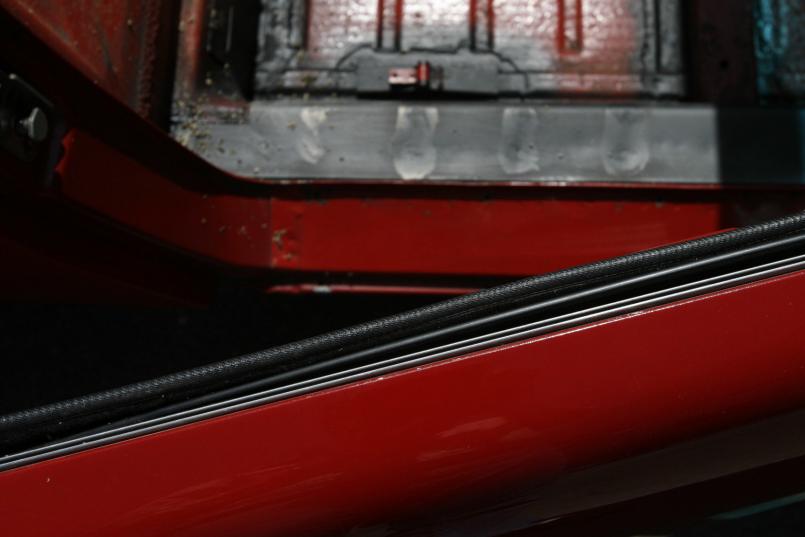
Posted by: horizontally-opposed Apr 8 2008, 11:08 AM
Walk around at differing lights to get an idea of the sail panel's color against the rest of the car...
Attached thumbnail(s)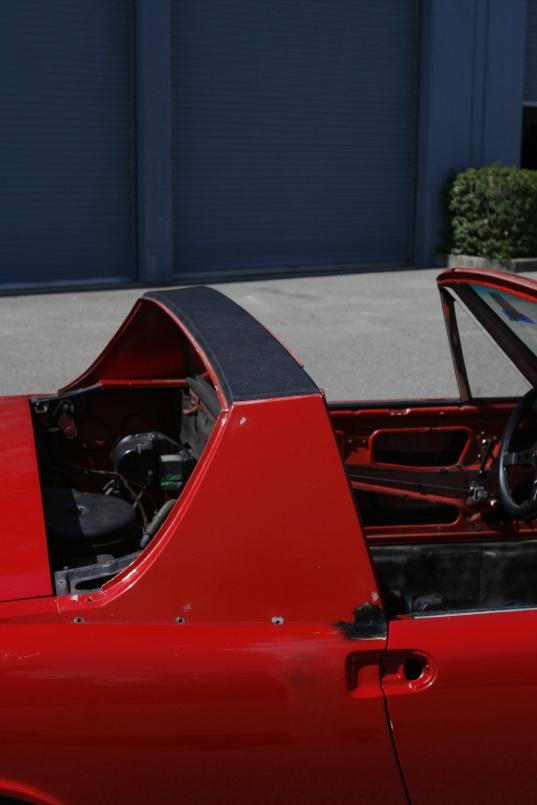
Posted by: horizontally-opposed Apr 8 2008, 11:09 AM
And another...
Attached thumbnail(s)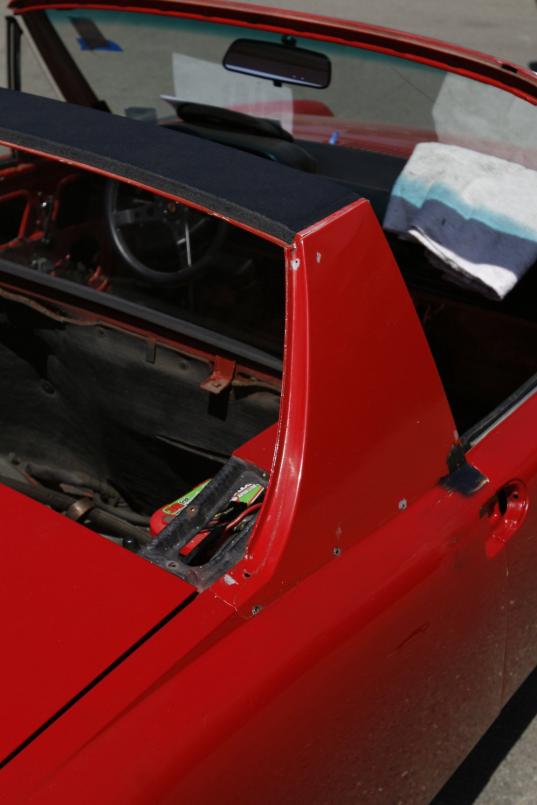
Posted by: 1970 Neun vierzehn Apr 8 2008, 11:22 AM
Pete,
Your car is one of the relatively rust free 914s out there, and the sail panels show that.
As far as color, I'm probably in the minority here when I say I have a very strong preference for OEM paints...period correct for the 914 production era .
Below is a good photo of a '72 in Bahia Red.
Paul
Attached image(s)
Posted by: horizontally-opposed Apr 8 2008, 11:23 AM
Walk around, continued
Attached thumbnail(s)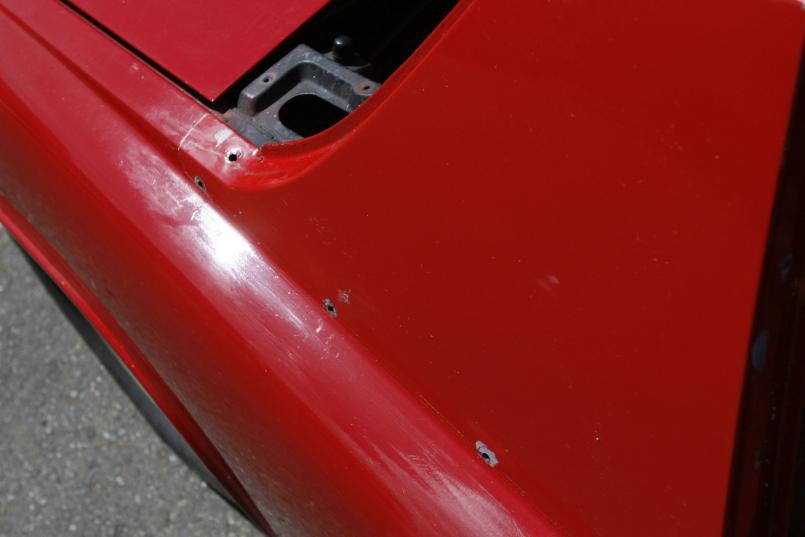
Posted by: horizontally-opposed Apr 8 2008, 11:24 AM
Keeps going (McMark made me do it )
Attached thumbnail(s)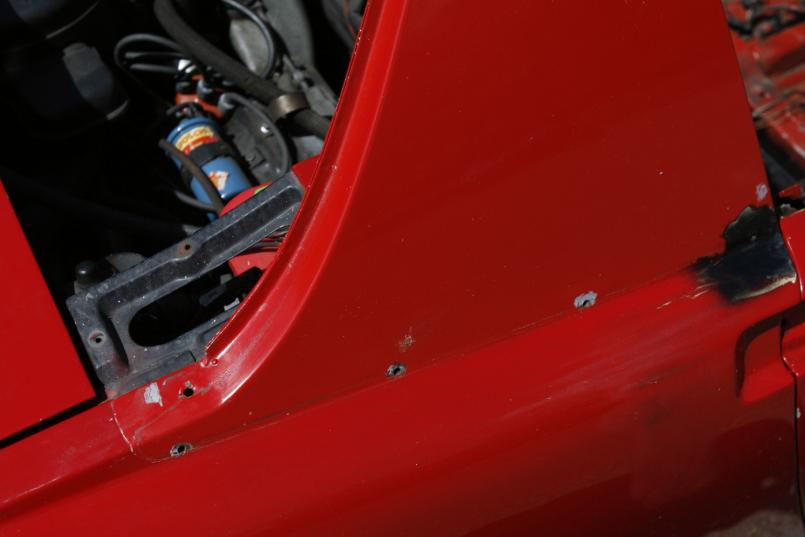
Posted by: horizontally-opposed Apr 8 2008, 11:25 AM
More...
Attached thumbnail(s)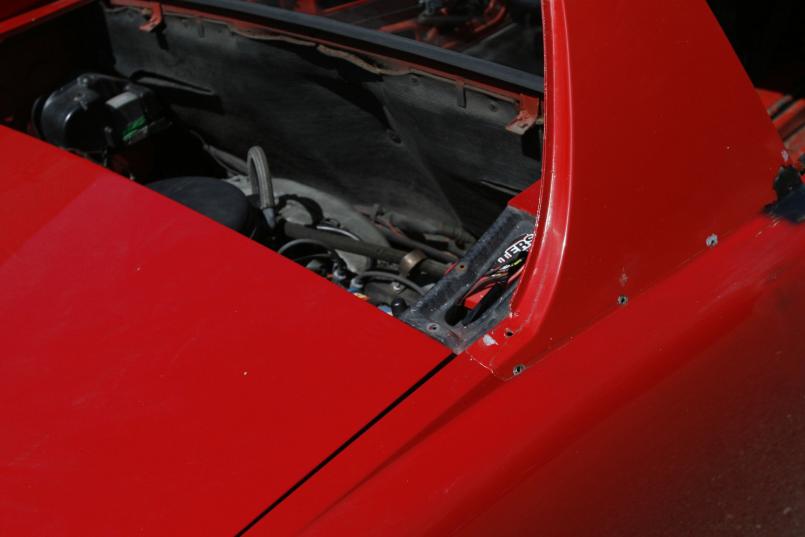
Posted by: horizontally-opposed Apr 8 2008, 11:27 AM
And another!
Attached thumbnail(s)
Posted by: horizontally-opposed Apr 8 2008, 11:29 AM
Getting to the end...
Attached thumbnail(s)
Posted by: horizontally-opposed Apr 8 2008, 11:30 AM
And two indoors, at different exposures...
Attached thumbnail(s)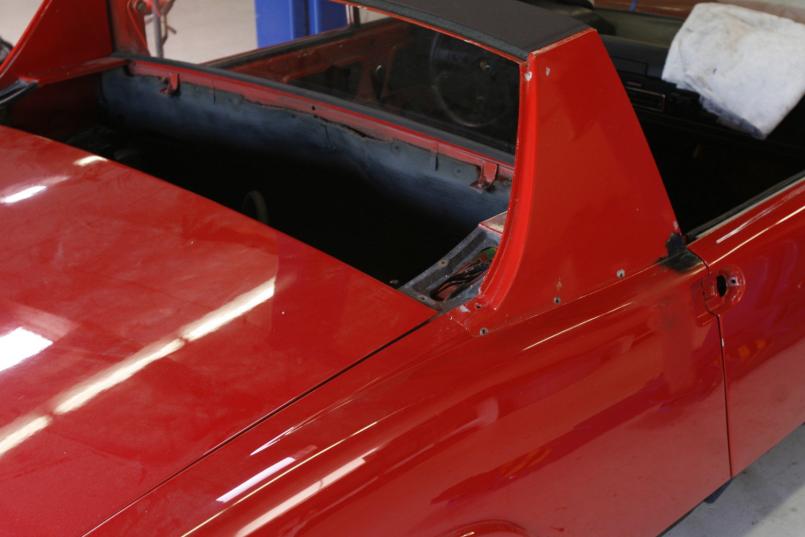
Posted by: horizontally-opposed Apr 8 2008, 11:31 AM
Last one, which I think really shows off the difference in low light...
Attached thumbnail(s)
Posted by: horizontally-opposed Apr 8 2008, 11:37 AM
Pete,
Your car is one of the relatively rust free 914s out there, and the sail panels show that.
As far as color, I'm probably in the minority here when I say I have a very strong preference for OEM paints...period correct for the 914 production era .
Below is a good photo of a '72 in Bahia Red.
Paul
Hey Paul!
Thanks!

This IS a nice photo, but the trouble is it looks like Coral non-metallic on my screen. It also looks like an old photo. Other photos I've seen of Bahia make it look almost pink, which it does not in person.
So I decided to take a bunch of photos of factory-original Bahia with the same camera on the same day on the same car in the same light (though body contours make it tough to call it a perfect excercise). Anyway, even then it's only so helpful because judging reds on screen is at best a flawed exercise. That said, for some people (myself included until I took my car apart) it may be the only exercise available to them!
Cheers,
pete
Posted by: McMark Apr 8 2008, 04:52 PM
From the photos on my screen (acknowledging the flawed color of computer screens) I think the Bahia looks WAY better. 
Posted by: Thomas J Bliznik Apr 8 2008, 09:47 PM
Pete,
Beautiful workmanship. I like what your doing about color matching. You view the original paint in all types of light & different times of day. That's the only way to get a true color match. 
Tom
Posted by: horizontally-opposed Apr 9 2008, 12:33 PM
Pete,
Beautiful workmanship. I like what your doing about color matching. You view the original paint in all types of light & different times of day. That's the only way to get a true color match.
Tom
Can't claim any credit for the workmanship. That goes to John Rock, Genoa's fabricator. ALL that I have done is disassembly and then things any idiot could do, like scrape the factory sealer gunk out of various places.
Have to say that, in person, I think I prefer Toronado to Bahia. I like oranges and I like reds, but I don't like reds that tip towards orange, which is what Bahia seems to do. I'll have another look in early light if I get the chance. This decision has kept me up nights!
I appreciate/like/love the originality thing, but this car will never be an original anyway. It's more of a mild mod-rod.
Thus, I think it's gonna be Toronado.
pete
Posted by: Travis Neff Apr 9 2008, 12:45 PM
Go Tornado!
Posted by: Todd Enlund Apr 9 2008, 01:05 PM
FWIW, It's actually Tornado Red. It replaced Mars Red for the 1986 model year. And I agree... it's one of the nicest reds out there.
Posted by: horizontally-opposed Apr 9 2008, 01:08 PM
Ah, thanks for the correction...
pete
Posted by: mike_the_man Apr 9 2008, 05:13 PM
I vote for Tornado Red. It looks a little deeper to me. And in your pics of the car before the body work, it looked great! It's obviously a colour you like alot, so I'd stick with it.
P.S. Great thread Pete!
Cheers,
Posted by: watsonrx13 Apr 9 2008, 06:49 PM
Well, since others are giving you their opinion, I'll add mine....
I'm partial to bahia red.... BTW, both are original bahia red '74 2.0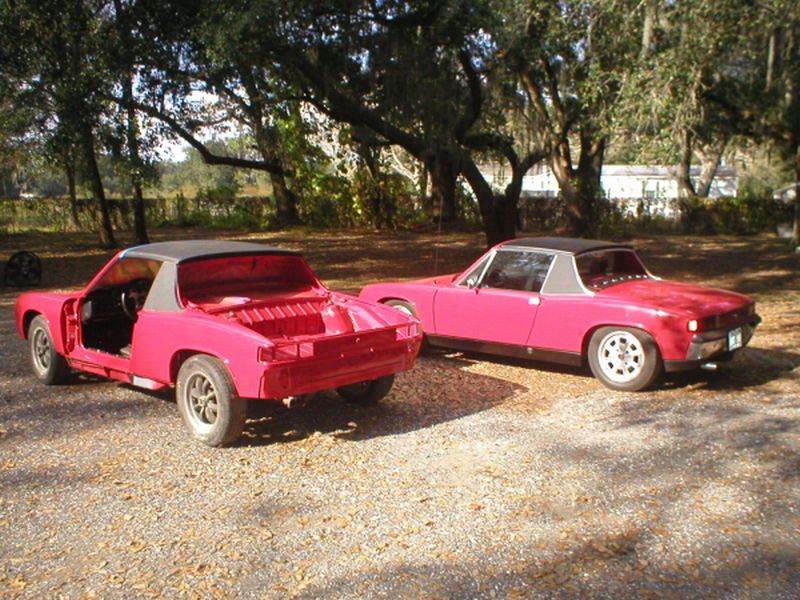
Here's a better shot of the finished bahia red driver...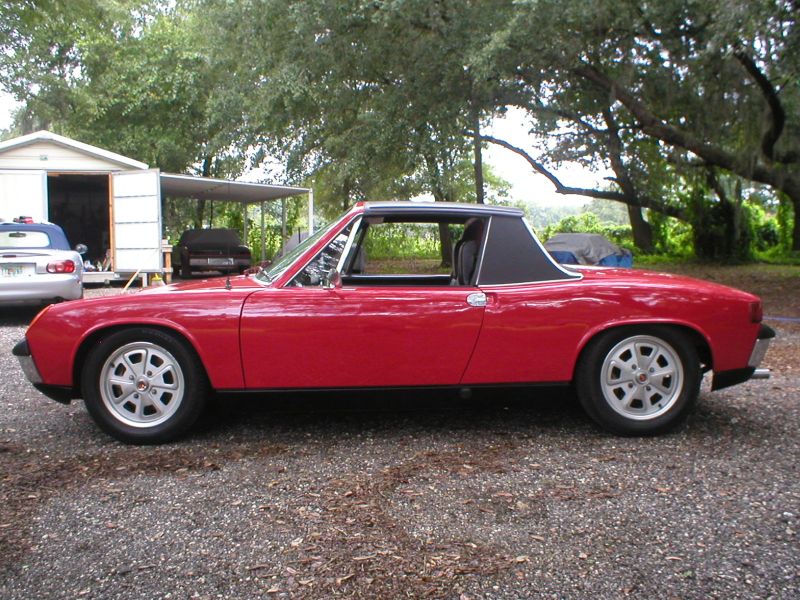
Whichever color you choose, you're doing a great job....
-- Rob
Posted by: horizontally-opposed Apr 14 2008, 05:41 PM
Long before there was a Boxster limited-edition by the same name, there was the 914 "RS60 Spyder"
Attached thumbnail(s)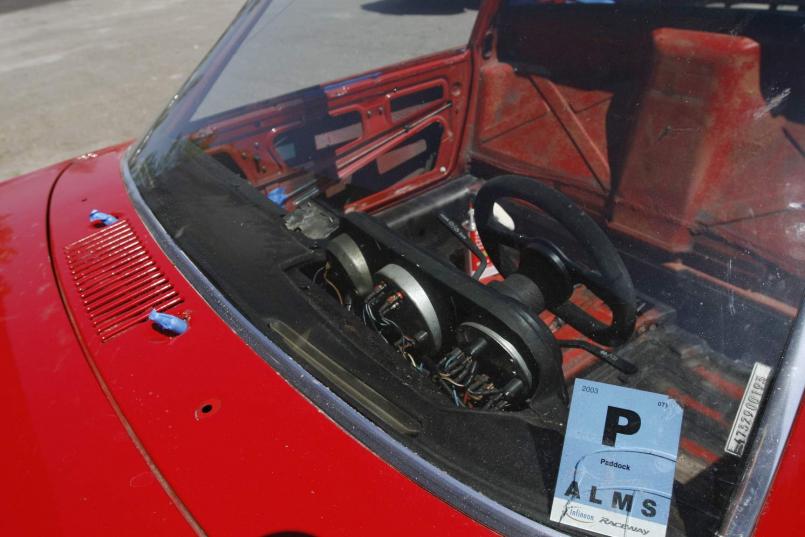
Posted by: horizontally-opposed Apr 14 2008, 05:43 PM
With its unusual formula car Momo wheel, complete with electrical tape to cover up the horn button hole-related failure...
Attached thumbnail(s)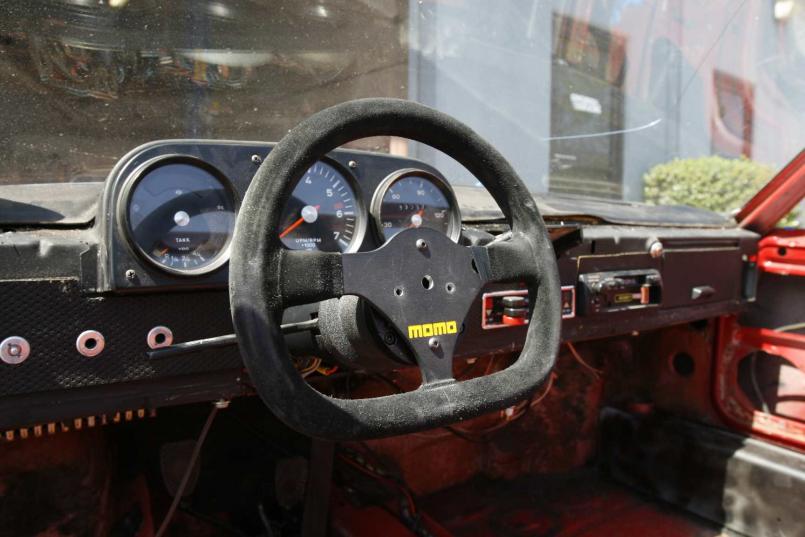
Posted by: horizontally-opposed Apr 14 2008, 05:46 PM
Getting close to ready for the paint shop. All that remains (this side of sanity) is windshield removal and a little adhesive removal on the firewall and front trunk bulkhead.
I may also make a deeper check of the previous rust treating (ca. 1991) at the back of the rear trunk floor. Or not. A cursory inspection showed it worked very well...
pete
Attached thumbnail(s)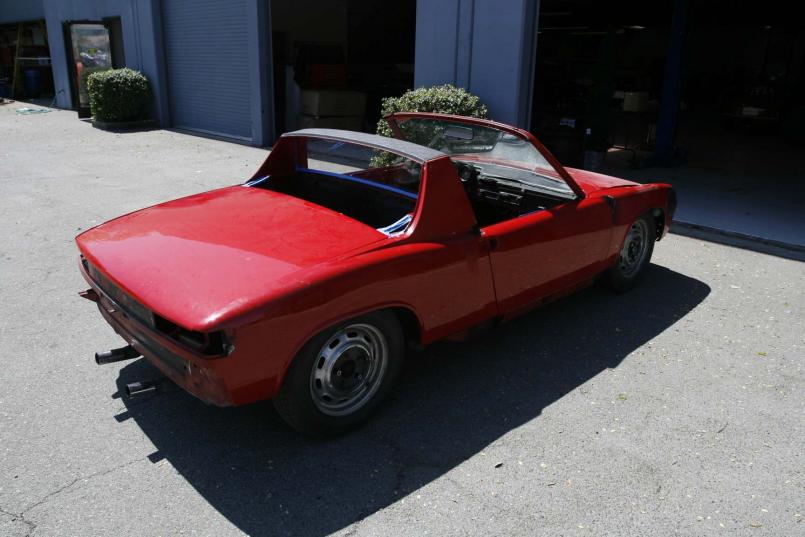
Posted by: horizontally-opposed Apr 14 2008, 05:50 PM
Finally, just for fun, we decided to weigh the car as is, with all mechanicals (it's a running, driving car but for its lack of a 15-pound driver's seat), both windshields, steel wheels, tar over most of the floors, the engine sound pad, the headlight assemblies less the lights themselves, and about a half tank of gas. Engine lid and headlight bits were in the back trunk.
To my surprise, it came out at 1,591 pounds.
My guess is that, with a light battery, alloy wheels, FG decklids and bumpers, Perlon carpeting, Plexi side windows on 356 GT/911R style strap adjusters but with seats, a top, all rubber seals, lights, and steel sides (fenders and doors), you might be able to build a streetable 914 in the 1650-1750-lb range.
Very tempting, but not what my car is.
pete
Attached thumbnail(s)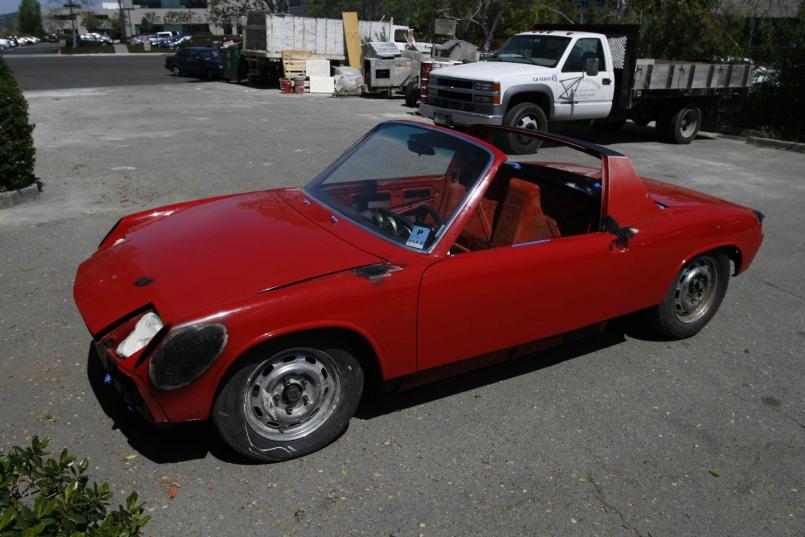
Posted by: Eric_Shea Apr 14 2008, 06:35 PM
I'll let ya know
(P.S. Your steering wheel is bent)
Posted by: horizontally-opposed Apr 14 2008, 10:37 PM
Need some advice:
I taped off the wiring and and headlight assemblies, then covered them in plastic bags with tightly taped ends to seal them off from getting wet during the inevitable bodywork soakings. Good idea?
And, more importantly, how should I prevent moisture from getting into all of the dashboard/gauge wiring once the windshield is out? Am I being paranoid? Is it better to let this stuff get a little wet and dry out in the open, or to bag it as best possible and hope for the best?
Thanks!
pete
Posted by: rick 918-S Apr 14 2008, 10:50 PM
Any good body shop masking paper taped in place of the missing glass will hold out several washings as long as you use good (3M or American brand) masking tape. Don't use cheap tape you pay for it later.
The reason the masking paper will hold back water is the solvents used in modern urothane paints will soak through the old standard masking. Todays masking is designed to resist this.
Posted by: horizontally-opposed Apr 14 2008, 11:04 PM
(P.S. Your steering wheel is bent)
So is the bottom of the one in my GTI...

pete
Posted by: Eric_Shea Apr 14 2008, 11:11 PM
Pete,
Knowing what is going to happen at the body shop I would tape and cover "everything" that you don't want a layer of dust etc. on.
Posted by: Gint Apr 15 2008, 06:04 PM
Looks pretty stripped already, but I'd completely tape up that dash and gauge/wiring. Water proof? That's a little paranoid.
Posted by: horizontally-opposed Apr 16 2008, 01:18 PM
Windshield removal on my car = no fun.
Butyl tape is everywhere and holding the trim in well enough that "the tool" ain't doin it.
Luckily, I have new windshield trim and mine was only so-so. I got the two two pieces out, but I'd like to save the bottom piece because the new one arrived nicely bent from GPR. (To his credit, Dave offered to take it back, but I never got around to sending it back.)
Ideas to get that bottom piece out? Is there something that dissolves butyl, or am I dreaming?
pete
Posted by: Travis Neff Apr 16 2008, 01:27 PM
can you add a little heat to the butyl with a heat gun might soften it up some. Not sure if that'll do a number on your glass tho (the heat that is).
Posted by: horizontally-opposed Apr 1 2009, 04:08 PM
Well, many months later, my car has returned from paint. I have to say that while it took far longer than I had hoped or planned, I am thrilled with the results.[attachmentid=173115] [attachmentid=173115]
Attached image(s)
Posted by: horizontally-opposed Apr 1 2009, 04:10 PM
...
Attached image(s)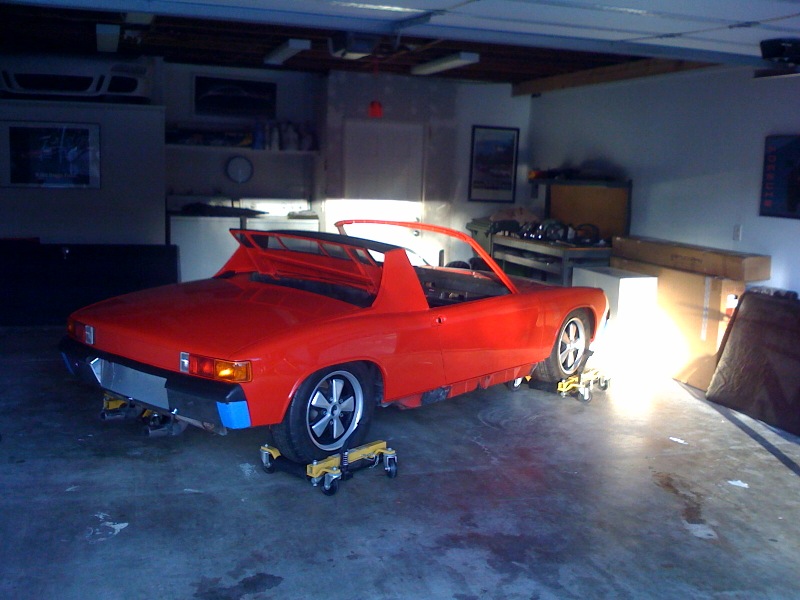
Posted by: horizontally-opposed Apr 1 2009, 04:12 PM
straighter than I've ever had it, and I've had it 20 years now...
Attached thumbnail(s)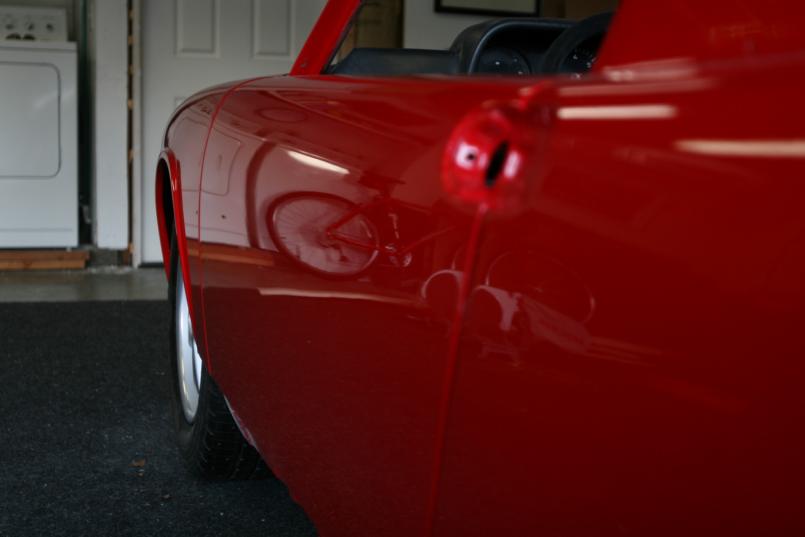
Posted by: horizontally-opposed Apr 1 2009, 04:14 PM

Attached thumbnail(s)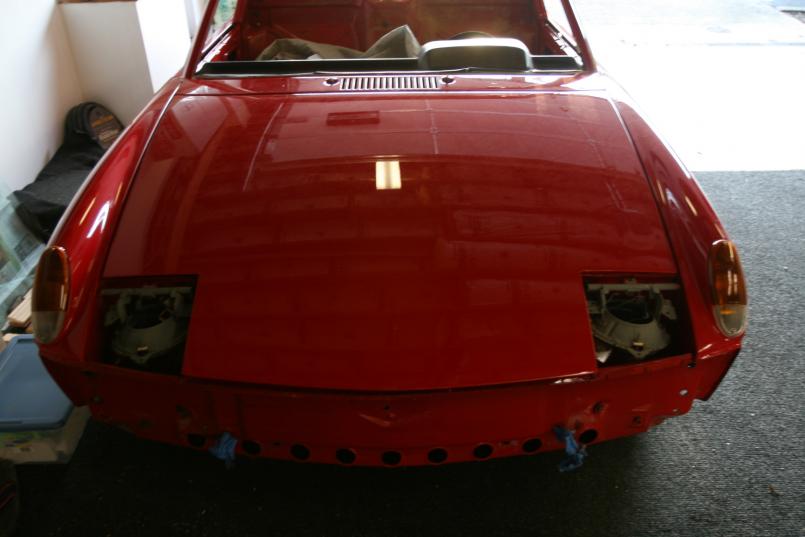
Posted by: horizontally-opposed Apr 1 2009, 04:20 PM
lots o work to do...
Attached thumbnail(s)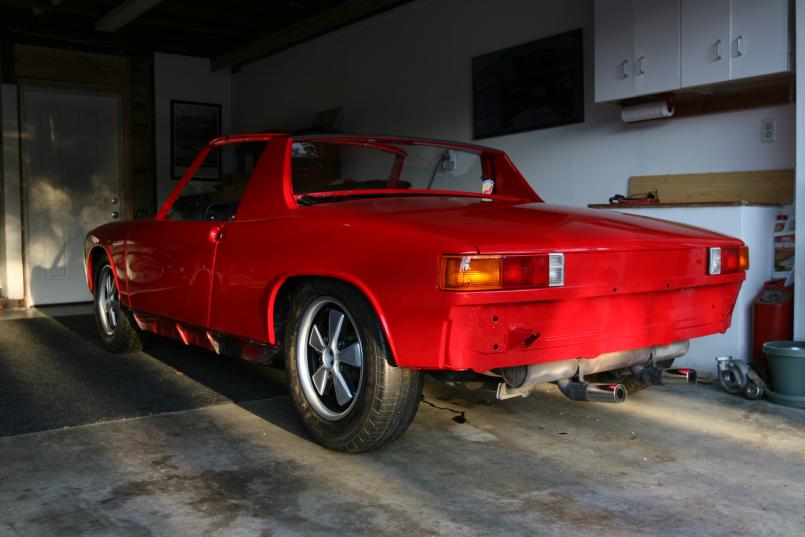
Posted by: horizontally-opposed Apr 1 2009, 04:21 PM
trunk!
Attached thumbnail(s)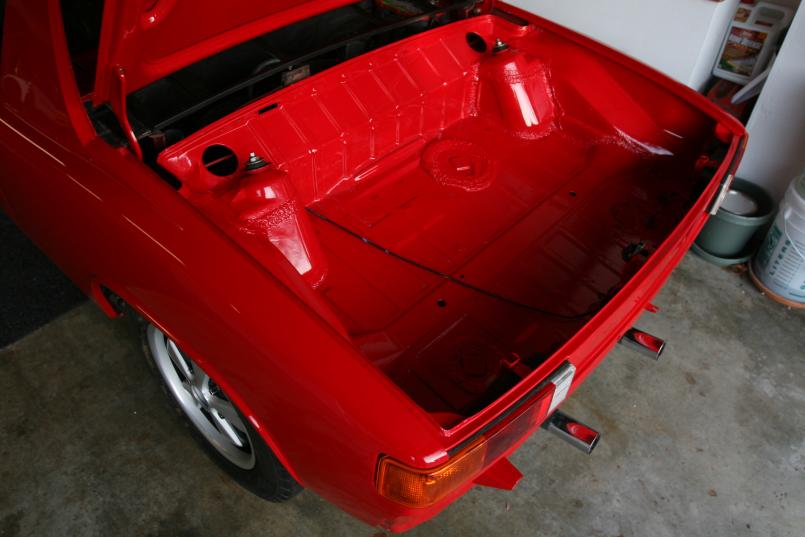
Posted by: horizontally-opposed Apr 1 2009, 04:22 PM
open wide...
Attached thumbnail(s)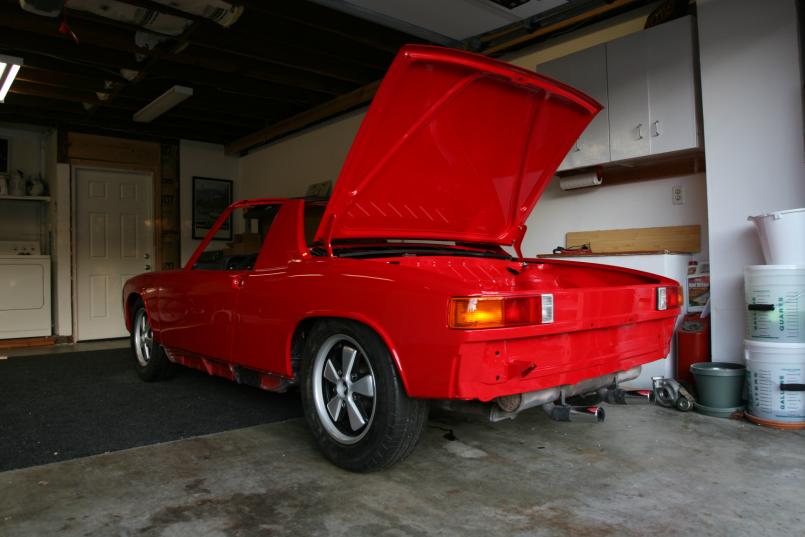
Posted by: horizontally-opposed Apr 1 2009, 04:23 PM
the "other" trunk
Attached thumbnail(s)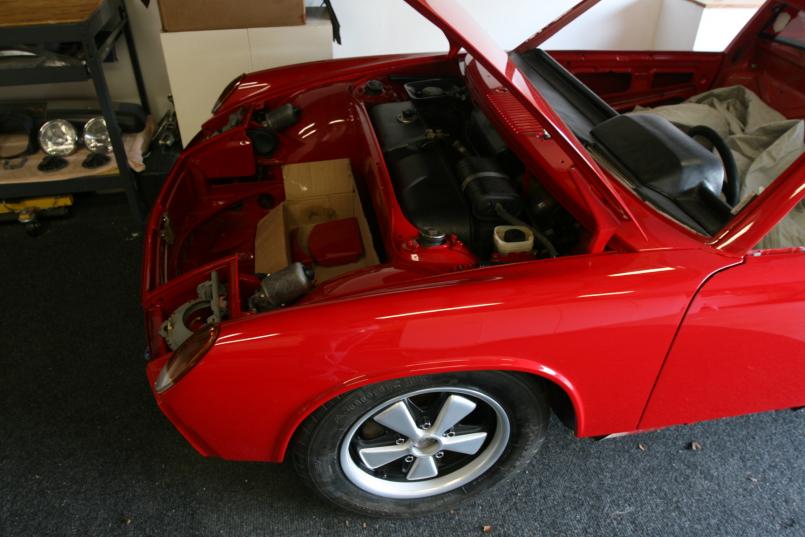
Posted by: McMark Apr 1 2009, 04:25 PM
 NICE! Can't wait to see it in person.
Posted by: horizontally-opposed Apr 1 2009, 04:26 PM
and tucked in for the night next to its new(er) roommate. notice which one has the bigger oil leak!
Attached thumbnail(s)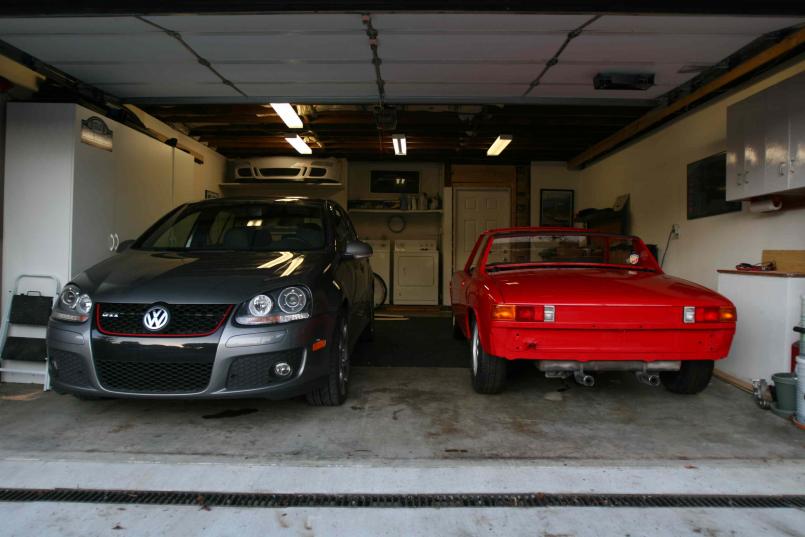
Posted by: horizontally-opposed Apr 1 2009, 04:32 PM
It's been home for a couple of months (or at least a few weeks+ ) , so I feel like I've been leaving my family out by not posting.
They decided to take it down to bare metal. Interestingly, they found no more rust ANYWHERE, so this is a counterpoint to other advice about the stuff you may not see. On the other hand, I think I'd go with that advice rather than following my (intended) path. Was nice to know we identified all the rust spots before they stripped it down. The paint has some peel in it, more subtle texture than peel. I really like it, because it looks a little more "original" this way. It's nicer than it would have been in 1973, but it doesn't have that "Pebble Beach" paint feeling, which some love but leaves me cold.
I've done a lot since these photos were taken. The outer longs are now all red (just cuz, I guess...), the area behind the front bumper is done in Wurth high-build black, as the fenderwells will be, the dash vents are re-blacked, the grill underlays are blacked, the front strut bolts and plates are back to their correct cad plating, much of the lighting is in place, etc. Still a lot to do. The level of paint is making me do stuff I never did back in 1991, like clean every bolt before reinstallation, get rid of the 1991 overspray on wires etc. It won't be perfect, but it will be a very nice driver -- though my wife teases me that it will never see a freeway again.
I have some more crappy phone pictures (like the first three) from the car in primer and in process at the body shop. I'll see if I can resize some of them. They're not that interesting, though...
pete
Posted by: rick 918-S Apr 1 2009, 04:45 PM
Hurry up you slacker.
Posted by: FourBlades Apr 1 2009, 04:48 PM
Love the color, looks fantastic. 
I am sure you can't wait to be driving it again.
The easiest way to resize photos I have found it to email them to yourself (if
you are using ms windows). It will ask it you want to resize. This will make
a 500K picture into about a 50K picture.
Great project, keep the pictures coming.
John
Posted by: veltror Apr 1 2009, 05:25 PM
I still have a long way to go on mine... good luck
Posted by: Thomas J Bliznik Apr 1 2009, 05:33 PM
It's been home for a couple of months (or at least a few weeks+ ) , so I feel like I've been leaving my family out by not posting.
They decided to take it down to bare metal. Interestingly, they found no more rust ANYWHERE, so this is a counterpoint to other advice about the stuff you may not see. On the other hand, I think I'd go with that advice rather than following my (intended) path. Was nice to know we identified all the rust spots before they stripped it down. The paint has some peel in it, more subtle texture than peel. I really like it, because it looks a little more "original" this way. It's nicer than it would have been in 1973, but it doesn't have that "Pebble Beach" paint feeling, which some love but leaves me cold.
I've done a lot since these photos were taken. The outer longs are now all red (just cuz, I guess...), the area behind the front bumper is done in Wurth high-build black, as the fenderwells will be, the dash vents are re-blacked, the grill underlays are blacked, the front strut bolts and plates are back to their correct cad plating, much of the lighting is in place, etc. Still a lot to do. The level of paint is making me do stuff I never did back in 1991, like clean every bolt before reinstallation, get rid of the 1991 overspray on wires etc. It won't be perfect, but it will be a very nice driver -- though my wife teases me that it will never see a freeway again.
I have some more crappy phone pictures (like the first three) from the car in primer and in process at the body shop. I'll see if I can resize some of them. They're not that interesting, though...
pete
Pete,
Really beautiful paint, it appears to be a real deep red without any orange tint?? Now the fun part, assembly.
BTW: I might run your assembly procedure past my good Porsche friend "Professor Topper". hee, hee (private joke).
Tom
Posted by: horizontally-opposed Apr 2 2009, 09:39 AM
I still have a long way to go on mine... good luck
Good gravy! You do indeed. You are a better man than I am, I'll tell you that much. If you're ever in San Francisco, the beer is on me!
Keep strong!
Posted by: veltror Apr 2 2009, 09:43 AM
I will take you up on that although have not been in the US since 98 or so, you guys stil drive on the right or was that just NY?
Posted by: horizontally-opposed Apr 2 2009, 09:47 AM
Pete,
Really beautiful paint, it appears to be a real deep red without any orange tint?? Now the fun part, assembly.
BTW: I might run your assembly procedure past my good Porsche friend "Professor Topper". hee, hee (private joke).
Tom
Yep, it's one of the purest reds I know: Tornado Red. No orange in it whatsoever. Very blue for a bright red.
Car was originally Bahia and I agonized over the decision of whether to stick with Tornado (which I changed it to in 1991) or go back to Bahia. Spent a lot of time looking at the Bahia sections on my car and, in the end, decided I just didn't like the color. I'm not much a red car guy, and really dislike orangy reds. Plus, my car is not an all-original kind of car and never will be -- and Pat Garvey and at least two really nice West Coast 914s have Bahia represented as it should be. So I went with what I liked.
Getting closer to trigger time, I started falling hard for Salsa Red on 2008 VW Beetles. A darker, blood red. Hit me between the eyes every time I saw one. But it was no longer a "cheat" from Bahia. It was a color change. And, if I was going to do that, it's rotisserie time. I just don't have the funds -- or need -- for that. So when the shop called to tell me the trunks were already painted, I was happy to know I wouldn't be losing anymore sleep.
Topper's alright by me. Laser vision. The right motive. Just hope he won't mind my sporadic after-deadline replies!
pete
Posted by: horizontally-opposed Apr 2 2009, 09:50 AM
I will take you up on that although have not been in the US since 98 or so, you guys stil drive on the right or was that just NY?
No, NY drives on the sidewalks.
Here in CA, we drive mostly on the right, except when texting, faxing, or putting on makeup.
pete
Posted by: rhodyguy Apr 2 2009, 09:51 AM
what's the story with the exhaust? pretty cool. is it a 'one off' or something that used to be available. the paint looks swell.
Posted by: horizontally-opposed Apr 2 2009, 10:00 AM
One other thing: I have never, ever, in all my travels, seen a paint shop with no overspray.
Until this job. From blasting to primer to paint, I never saw one iota of something that shop didn't want in an area it didn't belong in. Every time I walked in to look at the car (which wasn't often), I was shocked by how perfectly the interior and engine had been masked off and spared. I frankly could have left the whole interior in there, and I am not kidding. I haven't found so much as a dime-sized spot of overspray. They were so stingy with the paint, in fact, that they're going to have to spot in 2-3 minor details because they didn't QUITE get enough coverage -- which they will do in final detail after I've reassembled the car.
They must've looked at the overspray from 1991 and shook they heads. I've been doing the same while working to banish it once and for all...
pete
Attached thumbnail(s)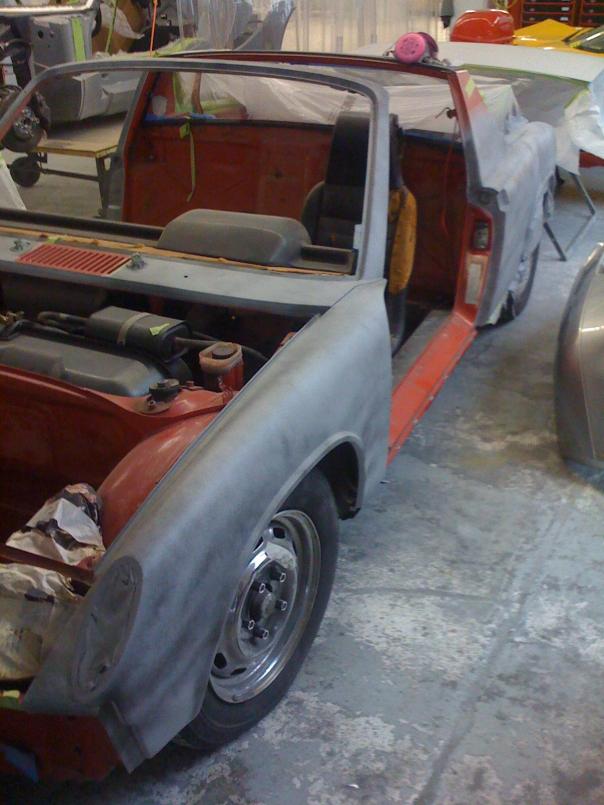
Posted by: horizontally-opposed Apr 2 2009, 10:07 AM
sorry for the crappy iPhone photos! They say the best camera is the one you've got...but I'm not so sure
Attached thumbnail(s)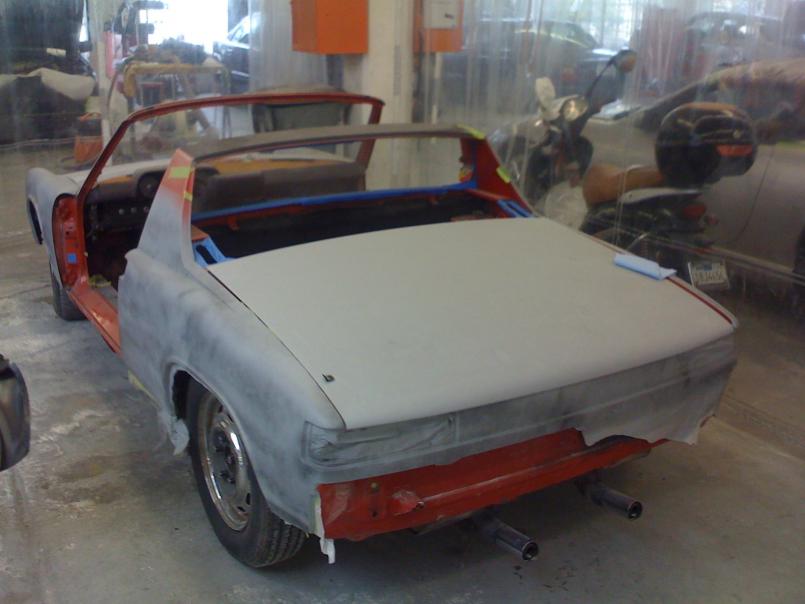
Posted by: horizontally-opposed Apr 2 2009, 10:09 AM
I don't know how interesting these are, but...
Attached thumbnail(s)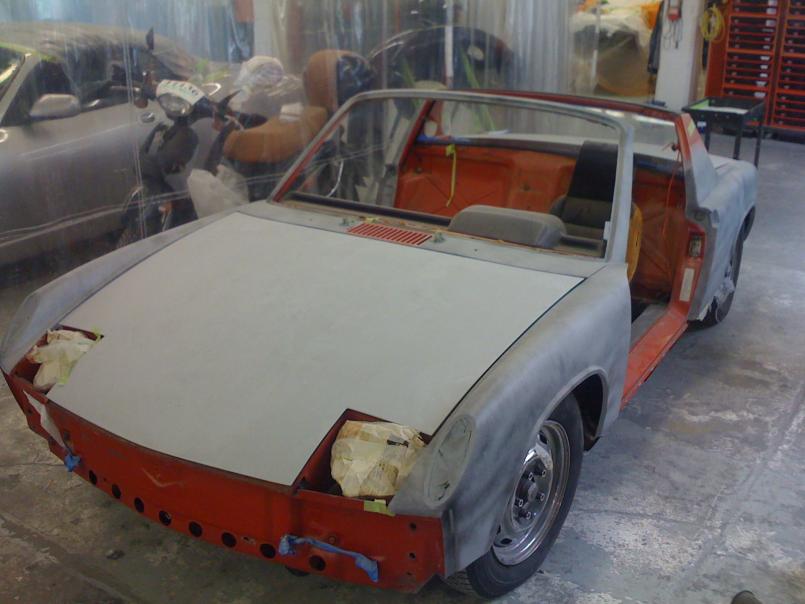
Posted by: horizontally-opposed Apr 2 2009, 10:23 AM
trunk
Attached thumbnail(s)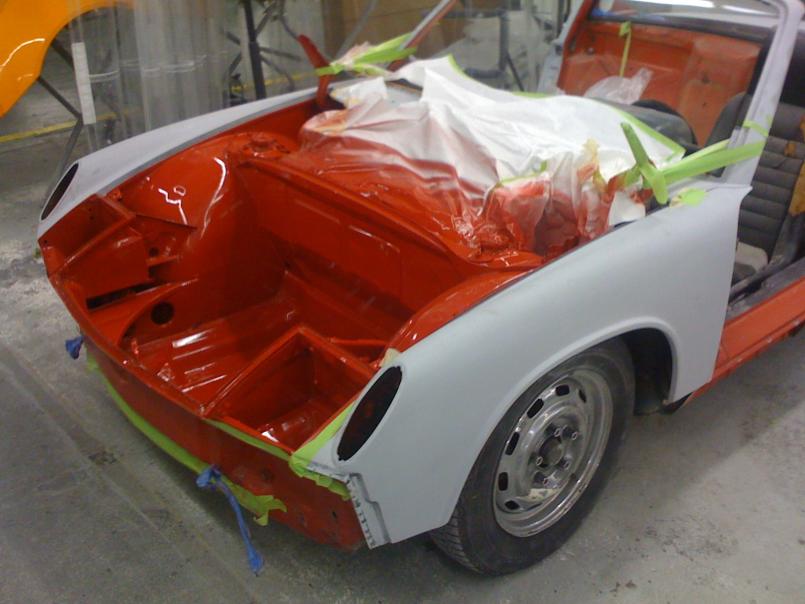
Posted by: horizontally-opposed Apr 2 2009, 11:04 AM
what's the story with the exhaust? pretty cool. is it a 'one off' or something that used to be available. the paint looks swell.
Sticker on the rear window tells the tale. It's an Abarth exhaust. Have only seen one other, and it was a little nicer than mine (the bottoms of the tips were not ground off). I found it at Partsheaven years ago. They thought it was a bus exhaust of some kind. Jim at EASY knew exactly what it was. It sounds GREAT for a four exhaust, especially on the overrun, and bolts up to the SSIs beautifully.
pete
Posted by: charliew Apr 2 2009, 12:15 PM
That is going to be a really nice driver. I know you dread the first chip. I would ask for the paint can label or the printout of the formula on your paint as you will probably never need to repaint it again but you might need some touchup. I didn't read where you said b/c or single stage or acrylic enamel?
Are you going to use a firewall pad? just curious if you think it will add to rust issues later? Also you decided on leaving off the sail vinyl is that to help prevent the moisture from entering the trim holes? I have a very small rust through at the top corner of the latch just above where the inner latch support is mounted and am worried that there's more than whats apparent in that corner as there is some small rust appearing at the corner of the jam under the vinyl trim also.
It's interesting the body closed up on the non-crack side on the longs. It seems that the welding must be a weld and let cool very slow process on the longs. I would think the rosette welds on the tops of the longs must be the troublesome ones.
Posted by: horizontally-opposed Apr 3 2009, 11:11 AM
Are you going to use a firewall pad? just curious if you think it will add to rust issues later? Also you decided on leaving off the sail vinyl is that to help prevent the moisture from entering the trim holes?
Decided to use both firewall pads for now. Long as the back window doesn't leak (and I just redid it a couple of years ago), I think it will be fine. More worried about the engine-side pad, but not sure I want the noise from pulling it. Would be curious to hear what others have found noise-wise after deleting the pad(s).
Sail vinyl is going back on. Prefer the looks. Have some ideas for the trim holes, but nothing solid yet.
As for future rust issues, I guess my approach is to not drive the car in rain. That bums me out a bit, as I actually liked to drive the thing down lonely highways in the rain. But I noticed most of my rust bubbles flared up/quickly accelerated after I pressed the car back into service as a daily driver a few years ago. My goal is to drive this car sparingly for another 30-40 years, if possible. Question now is how to wash it. I don't wanna go CW, but I also don't want to deal with rust.
pete
Posted by: SirAndy Apr 3 2009, 04:56 PM
Would be curious to hear what others have found noise-wise after deleting the pad(s).
WHAT?
Posted by: horizontally-opposed Apr 3 2009, 05:03 PM
Would be curious to hear what others have found noise-wise after deleting the pad(s).
WHAT?
Yep...exactly what I needed to hear!
pete
Posted by: charliew Apr 4 2009, 12:15 PM
There are several spray on sound proofers and also on top of that you could put on a coat of bedliner that may be my solution on the outside of the firewall.
I restored a 42 ford military jeep for a friend and tried my best to seal all the seams and he kept saying it would never see water. The first Veterans Day parade he used it in it rained the whole parade.
Posted by: horizontally-opposed Apr 13 2010, 09:18 PM
So it's been a loooooooooooooong time since I've been hanging out here. Missed you guys, but had a kitchen remodel, travel, work, various distractions, etc. interrupt the reassembly process. That and window guides that took fo-eva to get back from the plater. But I digress....let's get to the pics.
Posted by: horizontally-opposed Apr 13 2010, 09:19 PM
...
Posted by: horizontally-opposed Apr 13 2010, 09:20 PM
Valances take their place...
Attached image(s)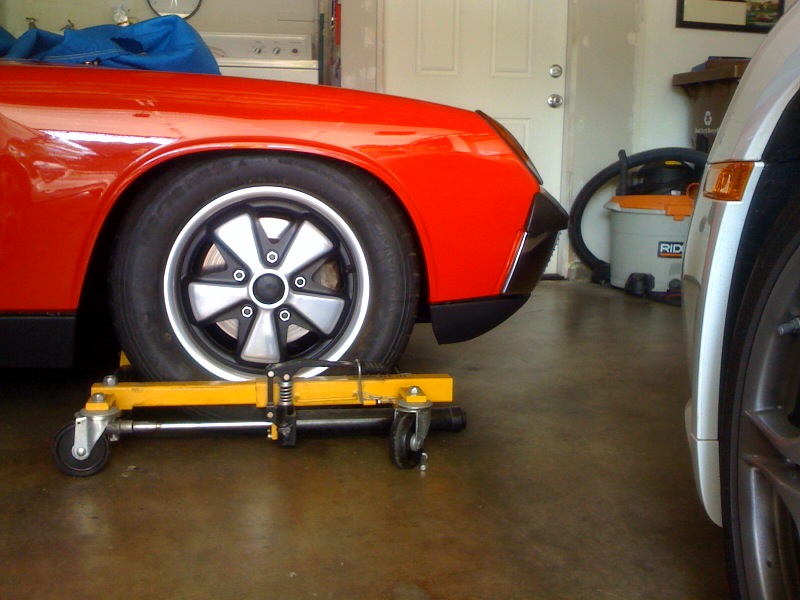
Posted by: horizontally-opposed Apr 13 2010, 09:23 PM
Hella European 914 driving lights to replace the U.S. foglights. I like them because they fill out the holes in the grills completely. They were in so-so shape when I got them. I was able to clean one, but the other reflector was cooked. Had a hotrod shop in Oregon replate it. Wasn't cheap, but wasn't bad in the grand scheme of things.
Attached image(s)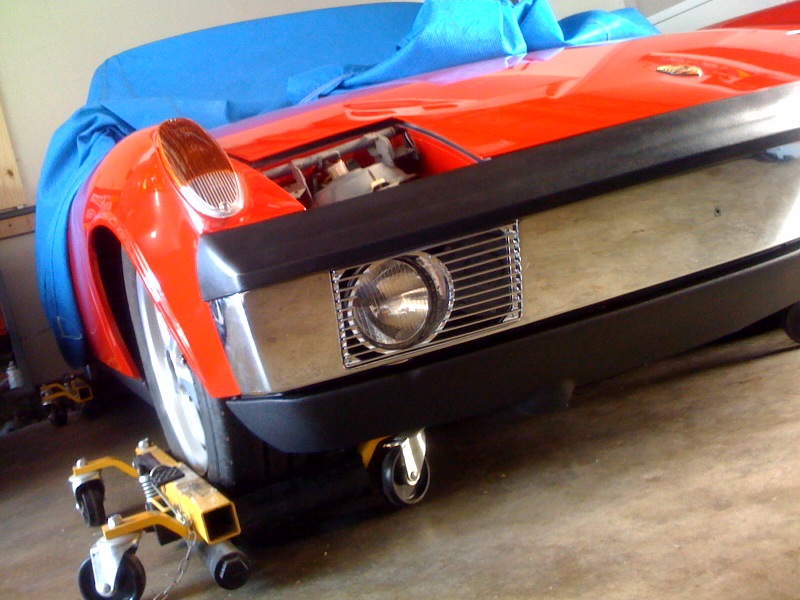
Posted by: horizontally-opposed Apr 13 2010, 09:24 PM
Then came the distractions....would you really be working on the 914, especially if you had to give the others back?
Attached image(s)
Posted by: horizontally-opposed Apr 13 2010, 09:25 PM
In case y'all didn't hate me already....
3.9 liters, 8800 rpm, 500 hp, 92+mph in second, 122+ mph in third...with three more gears to go. No, I did not find redline in fourth. Frankly, I can't believe I kept my license with this color. Phew.
Attached image(s)
Posted by: horizontally-opposed Apr 13 2010, 09:26 PM
More distraction...
3.0 liters, 330 hp, felt surprisingly slow. Really.
Attached image(s)
Posted by: horizontally-opposed Apr 13 2010, 09:28 PM
Ahem, I'd better get back to my 80-hp reality.
While cleaning up the car's original blue plate, I discovered that I should have worked those Month stickers off more carefully. I think I would have left this, the car's original 1973 sticker, in place and put the new Month sticker somewhere else. Or nowhere. Ah well....
Attached image(s)
Posted by: horizontally-opposed Apr 13 2010, 09:38 PM
More parts go on...
Attached image(s)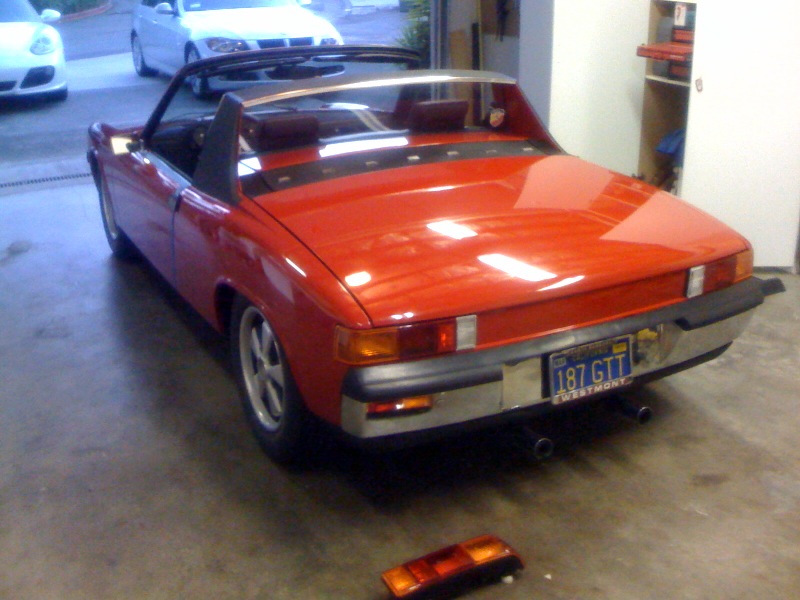
Posted by: horizontally-opposed Apr 13 2010, 09:43 PM
Started thinking about these crazy French lenses. Always liked them on Marty's car and the GTs, as well as in a picture of 914s on a lot in the background of a 917 photo.
Turns out they're NLA as lenses, but the computer showed PAG still had 2 rights and 1 left if I was willing to buy complete units. Given how bad (!!!!) the new Euro lenses I bought were (scratched at the factory before being bagged, Jeff at Sunset Porsche was awesome throughout the process, ordering multiples to get the best ones possible — probably due to the size of my order — and eventually even polishing the lenses to make them perfect), I started to think the only way to get good ones would be to buy complete units. Then the French thing came up, and I decided to order them. Then we found out there were 3 listed, but none left. Then Jeff had them do a manual check and there was 1 of each left. So here they are.
I'm trying to decide if I like 'em on a red car... Hmm, from this angle, yes, yes I do.
Attached image(s)
Posted by: horizontally-opposed Apr 13 2010, 09:45 PM
And, no, not so much. They disappear into the car and make the bumper the only thing you see. I think I'll be sticking with the Euros...
Attached image(s)
Posted by: horizontally-opposed Apr 13 2010, 09:46 PM
Interior work begins...
Attached image(s)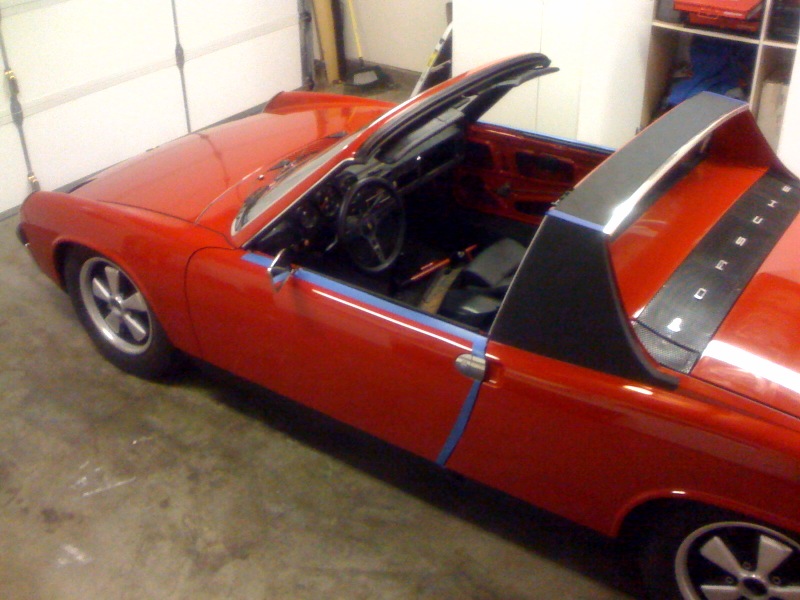
Posted by: horizontally-opposed Apr 13 2010, 09:48 PM
Felt like those darn French lenses deserved one more try before being relegated to storage. Nope, just don't work for me on a red car.
Note NOS top, thanks to a 914world member!
Attached image(s)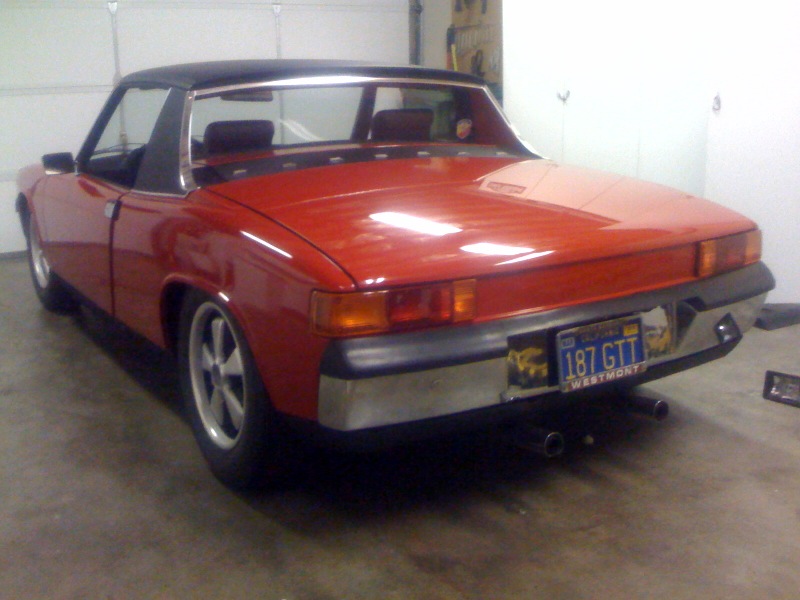
Posted by: horizontally-opposed Apr 13 2010, 09:49 PM
First time out in daylight in a long time...
Attached image(s)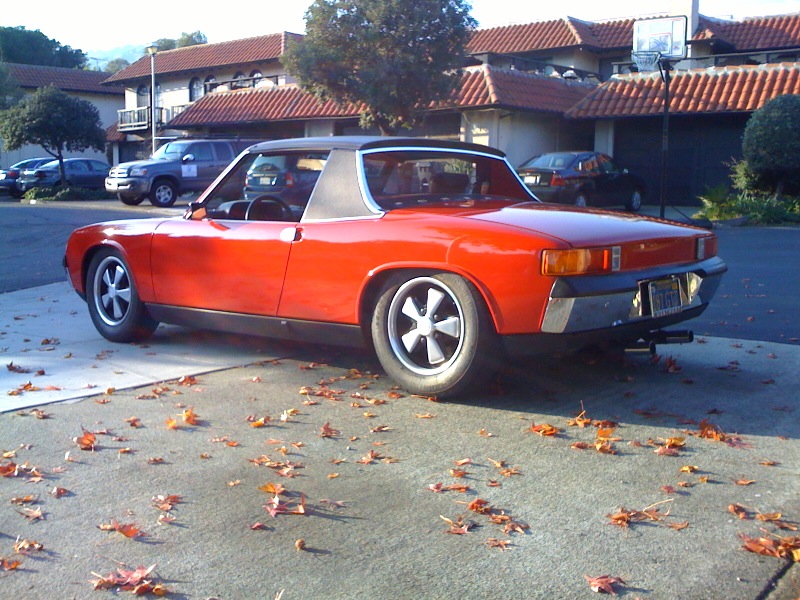
Posted by: horizontally-opposed Apr 13 2010, 09:51 PM
Hmm, trying to figure out center caps vs. no center caps... and what kind of lugs...?
Also, think I am going to go back to the LE spoiler...
Attached image(s)
Posted by: horizontally-opposed Apr 13 2010, 09:54 PM
Kinda likin' the no caps thing...
Attached image(s)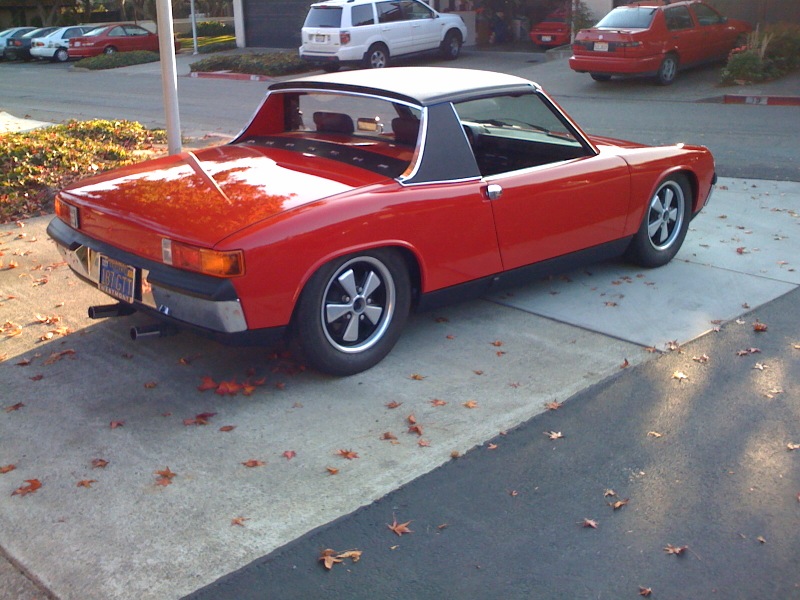
Posted by: horizontally-opposed Apr 13 2010, 09:55 PM
This just makes me want to head out for a drive. A long drive. Away from everything. Alas, much to do...
Attached image(s)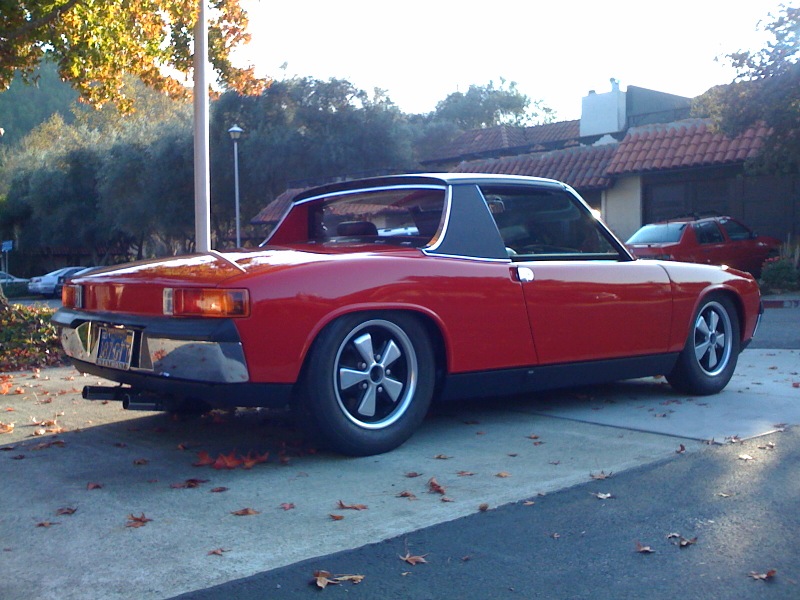
Posted by: horizontally-opposed Apr 13 2010, 09:59 PM
Since all of these, I have installed most of the interior and completed the passenger door window/guides/panel/speakers/etc. The BEST (and super helpful) advice I got on door reassembly was Perry's tip to leave all of the bolts loose on the window guide rails in the doors. I didn't think I could tighten the two inside the door, but it was easy with a box-end wrench. After hours and hours of trial and error, that one tip allowed me to finish the passenger door fitment and quarter-window to A-pillar in minutes. Thanks, Perry!
Still need to tackle the driver's door, some dash stuff, some gauge stuff, some radio stuff, and install the Engman rear trunk latch setup. Will try to get some pictures — and with a better camera — up soon.
Posted by: jcambo7 Apr 13 2010, 11:47 PM
Congrats! 
Posted by: ConeDodger Apr 14 2010, 12:27 AM
Pete,
Your car is looking great. I can't wait to see it in person. Want to do dual engine builds? A fairly stock DJet 2056 while I build an evil double-secret Raby monster?
McMark, Take note of the seat modification. I want this in my car. I have always thought the seat position was too high. Consider this a reservation for Original Customs shop time
Posted by: FourBlades Apr 14 2010, 03:50 AM
Your car is looking great, love the color. I also really liked the article on the
green car. I'm not sure I could have given that car back.
Are you putting a PORSCHE reflector in place of your rear trunk key mechanism?
I've got an original cut down 911 reflector for ya if you need one.
John
Posted by: horizontally-opposed Apr 14 2010, 10:15 AM
Pete,
Your car is looking great. I can't wait to see it in person. Want to do dual engine builds? A fairly stock DJet 2056 while I build an evil double-secret Raby monster?
McMark, Take note of the seat modification. I want this in my car. I have always thought the seat position was too high. Consider this a reservation for Original Customs shop time
I cannot recommend the seat mod enough. Every time I get into the driver's seat and remember I'm sitting lower, that alone makes this odyssey worthwhile. Can't wait to really drive this thing.
I must say I've been dreaming about a 2.4S, 2.5, or 2.8 lately, but it's going to have to remain a dream at this point — and maybe for a long, long time to come. Which keeps bringing me back to a 2056 with D-jet....
Whatever, the car definitely needs an engine. The endearing thing about the "Question-Liter" in it now (probably a 1911) is that it ALWAYS starts right up and has been in the chassis since 1986. The not so nice thing is it leaks like a sieve and probably makes no more than 80 hp. pete
Posted by: horizontally-opposed Apr 14 2010, 10:22 AM
Are you putting a PORSCHE reflector in place of your rear trunk key mechanism?
I've got an original cut down 911 reflector for ya if you need one.
John
Many thanks, but I've got one sitting on the shelf in my office and paid a lot to put it there.
I haven't decided what to do with the back panel yet. Might do nothing back there. Might put a trunk button back in, might not. Might put a beautifully aged silver "914 1.7" badge I found at EASY on there, might not. Anyone have one of the "914 VW Porsche" Euro emblem, the one that's NOT for the 914-6? That's another option and may be my first pick.
pete
Posted by: McMark Apr 14 2010, 10:44 AM
I'm actually a little unclear on the seat mod. At least with respect to how the seat mounts. It looks like you got rid of the hinges as well. So if I'm seeing it right, you lose up/down adjustment, but retain forward/backward adjustment.
Glad to see it's back on the road, Pete. I can't believe it's been a year! That means mine's been off for more than a couple... 
Posted by: Phoenix 914-6GT Apr 14 2010, 10:47 AM
Looks beautiful. Very nice work
It always feels nice to get a big project done and look this nice.
Posted by: horizontally-opposed Apr 14 2010, 10:52 AM
I'm actually a little unclear on the seat mod. At least with respect to how the seat mounts. It looks like you got rid of the hinges as well. So if I'm seeing it right, you lose up/down adjustment, but retain forward/backward adjustment.
Glad to see it's back on the road, Pete. I can't believe it's been a year! That means mine's been off for more than a couple...
You've got it.
There is no more "height" adjust (which I really found to be more of a seatback angle and upper thigh support adjustment, FWIW), but the seat still slides back and forth on the stock gear. Essentially, John liberated the rails from the stock setup, then got rid of the hinges, then welded eight blind-nuts in where appropriate, and then I bolted the liberated lower rails back in, then slid the seats back on. The fore-aft works just fine — though doing all this with 911 sliders would be even slicker. I'd want to make sure they don't add height, though. For me, every mm matters.
Next time I've got the seats out, I'll try to take some more photos of the setup with the rails in place.
pete
Posted by: Eric_Shea Apr 14 2010, 11:37 AM
Awesome.
Posted by: McMark Apr 14 2010, 01:33 PM
Sounds good!
Posted by: RobW Apr 14 2010, 03:13 PM
Pete,
Your car is looking great. I can't wait to see it in person. Want to do dual engine builds? A fairly stock DJet 2056 while I build an evil double-secret Raby monster?
McMark, Take note of the seat modification. I want this in my car. I have always thought the seat position was too high. Consider this a reservation for Original Customs shop time
How about a triple build? I've got an engine on a stand right now...

Posted by: RobW Apr 14 2010, 03:15 PM
BTW - nice looking ride Pete... get 'er out and play...
Posted by: SirAndy Nov 29 2010, 12:57 AM
I'll be doing the exact same mod when i finally get around to install my new seats ...
Posted by: flylarry Nov 30 2010, 12:14 AM
Nice job! Just remember Porsche 914's rust from the inside out ...except for the the HELL HOLE! I Have 2 of-em I know.
Posted by: watsonrx13 Nov 30 2010, 07:03 AM
Can you take a pic of the seat rail bolted in without the seat in place?
-- Rob
another angle...
Bolted the GTS seat in after this and I must say this may be one of the best mods I've ever made to my 914. I like to sit as low as possible and have a long torso, and I *finally* feel like I am sitting in the car low enough. I can see all of the tach through the Prototipo and I love the new position. The seat slides better than it did before, and if I want to change the rake (I don't think I will, but we'll see...), I can always shim it later.
VERY happy with this mod.
pete
Posted by: horizontally-opposed Jan 12 2011, 06:36 PM
Hmm, I have to say if there is a downside to the mod it is that getting the seat on and off the rails is not fun. At all. I'll try to do it anyway next time I have the car out of the back of the garage.
Haven't made much progress of late. Need to re-do the brakes with new calipers (thanks Eric!) and re-do the carpeting in the front trunk. Then it needs to go back to the painter for a final buffing and detailing. I cannot believe how long it's been off the road, but buying a house and remodeling a kitchen and life has intervened. I am sure nobody can identify!
EDIT: Took the seats out and got some photos of the completed setup. Yes, it only took me fo-eva. Text from another thread on adding Scheel seats:
Many moons ago, someone asked for photos of how my driver's seat was lowered. Getting the last pair of seats out wasn't fun, as I didn't take the time to get the rails aligned as well as they could be, but I took the opportunity to grab some photos of the setup today.
You can see that the cross bar under the front of the seat was cut out and "stepped down" with thicker metal. This was done at Genoa Racing in Novato, CA at the same time that the Engman chassis stiffening kit was added. I lost the ability to change the seat angle (which doesn't bother me, as it's pretty limited in the 914, and not bad as is), but dropped about 0.8 inch. Well worth it, imo...
Attached thumbnail(s)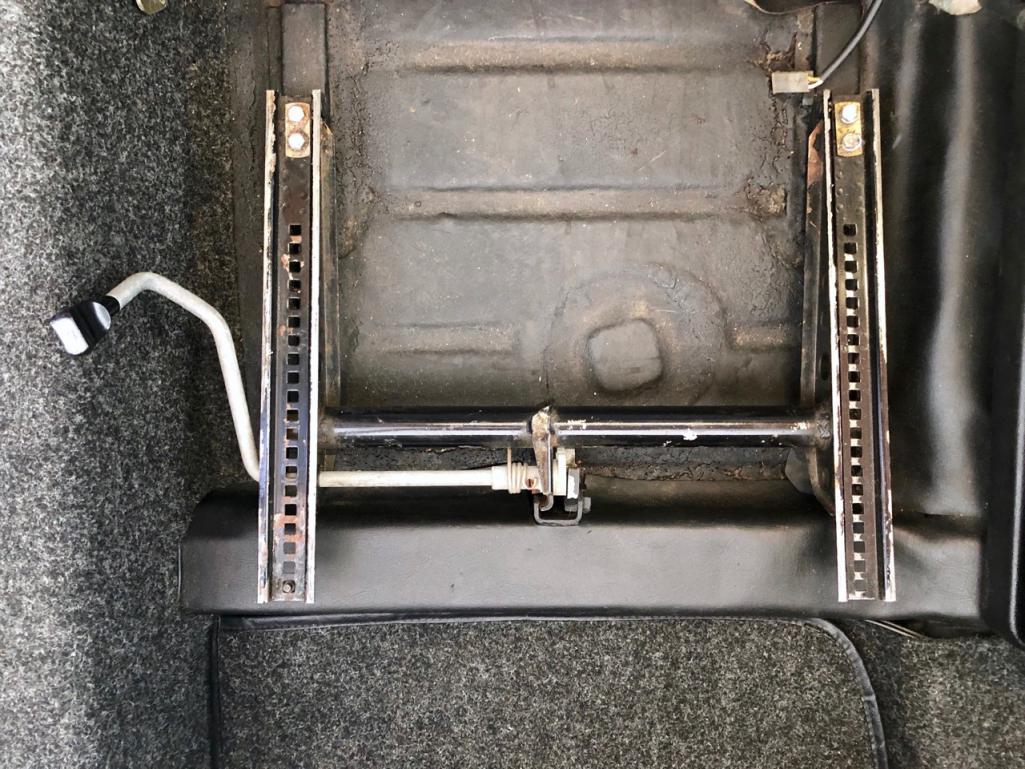

Posted by: rick 918-S Jan 12 2011, 08:23 PM
The up side is there is 24 hrs in a day. More time for everything else but the car... Maybe she'll be ready for the WCR 2011?.... 
Posted by: horizontally-opposed Apr 27 2013, 11:38 AM
Long time no post. Kitchen remodel, bathroom remodel, job change, arrival of our first child, and the wildest year I've had in general conspired to put the car well down the priority list.
Anyway, got the motor out and had the engine/transmission area professionally steam-cleaned and detailed. After 250,000~ miles (est) and 40 years, I could not believe my eyes: It looks great down there. Everything passes the screwdriver test, and the hacky high-school job I did of cleaning up the original battery tray, repainting the area, and installing an Optima back in 1991 probably helped a lot.
Last night was the first (non-work) car time I've had in probably six months. And boy was it therapeutic. Three guys, one 914, and an empty race shop.
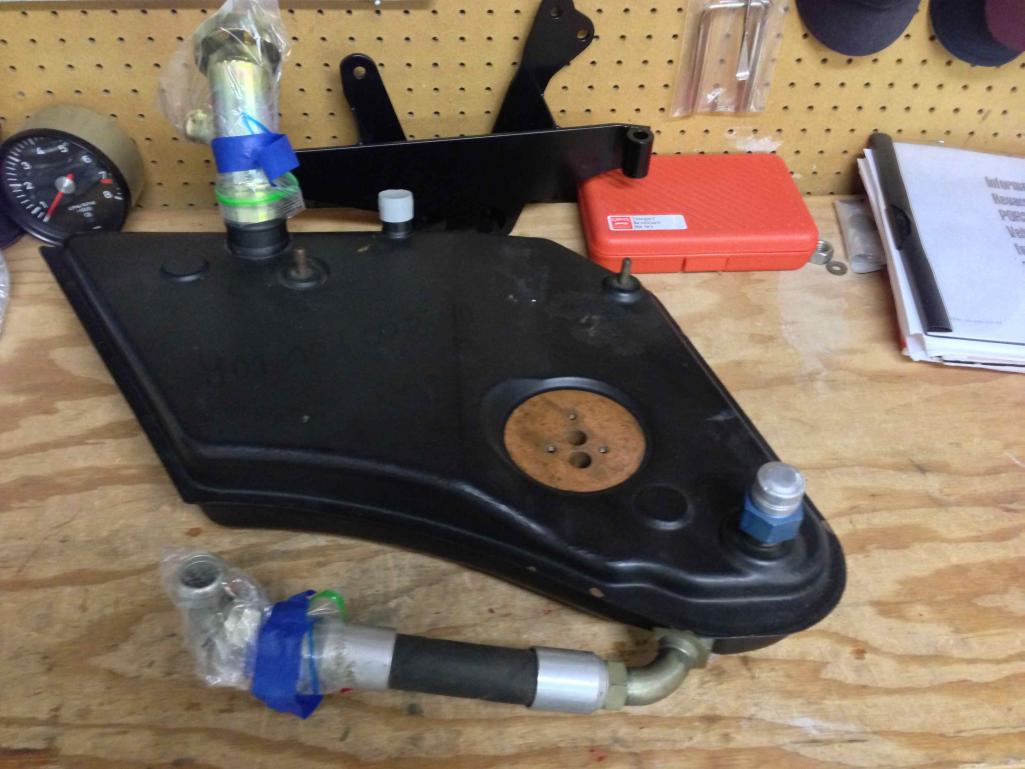
Objectives: Punch holes for NOS 914-6 oil tank and install Rich Johnson engine mount.
Fuel: Arun Thai, the best Thai food in the north bay by miles.
Outcome: Just a great night.
Photos: Below (click on any to make it a bit clearer...)
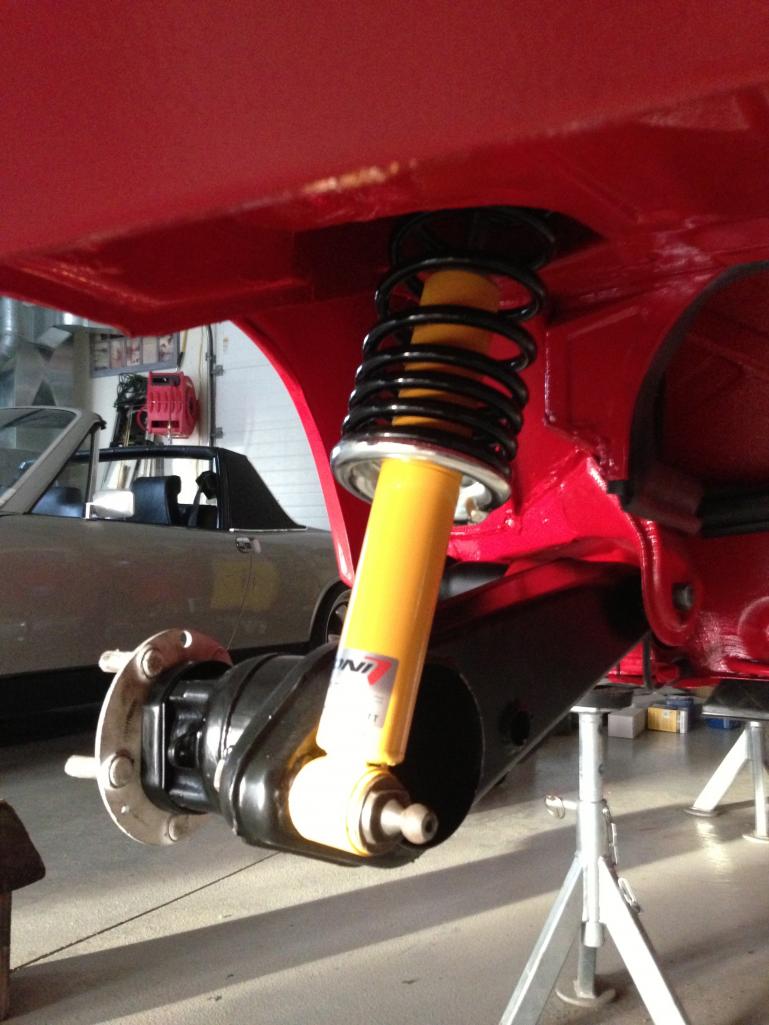
Update since last time: Engine is done, all suspension rebuilt.
Can't wait to drive this thing again...and can't believe how long this project has stretched out!
pete
Attached thumbnail(s)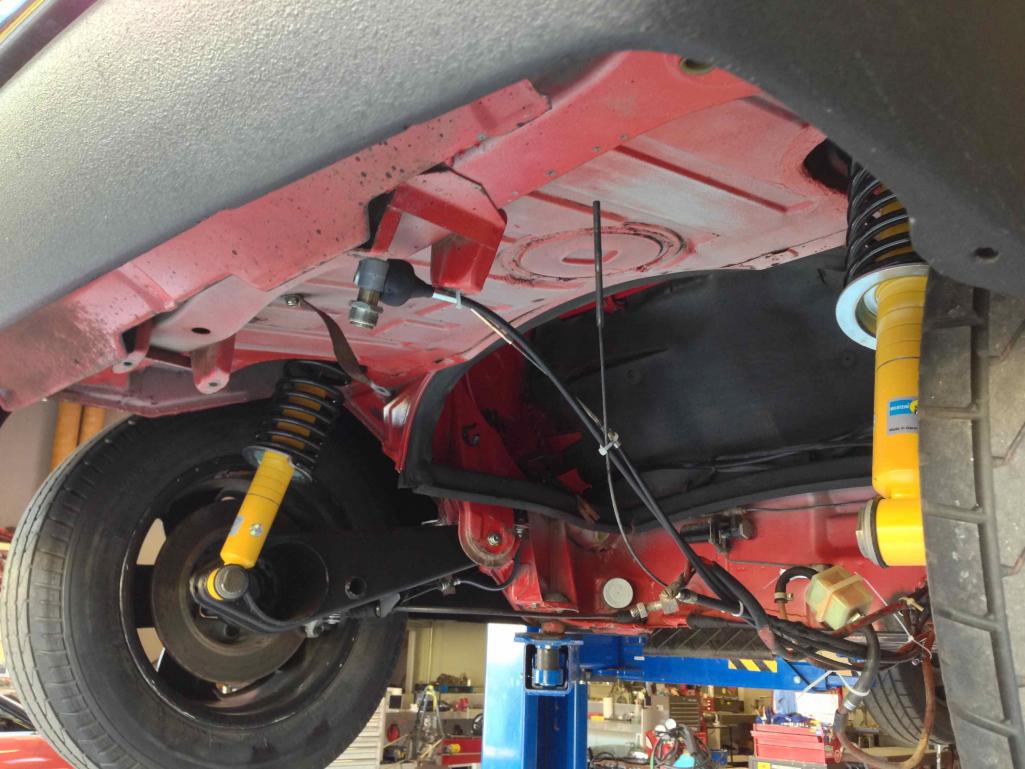


Posted by: rdauenhauer Apr 27 2013, 11:51 AM
Since you've gone this far Id take out the back pad if you haven't already & just check for any damage or thinning due to tin worm that may be lurking.
Posted by: TJB/914 Apr 27 2013, 12:43 PM
Pete,
Great to have you back Lookin forward to saying hello at Parade.
Tell us more about your engine & pics. please.
Tom
Posted by: horizontally-opposed Apr 27 2013, 03:18 PM
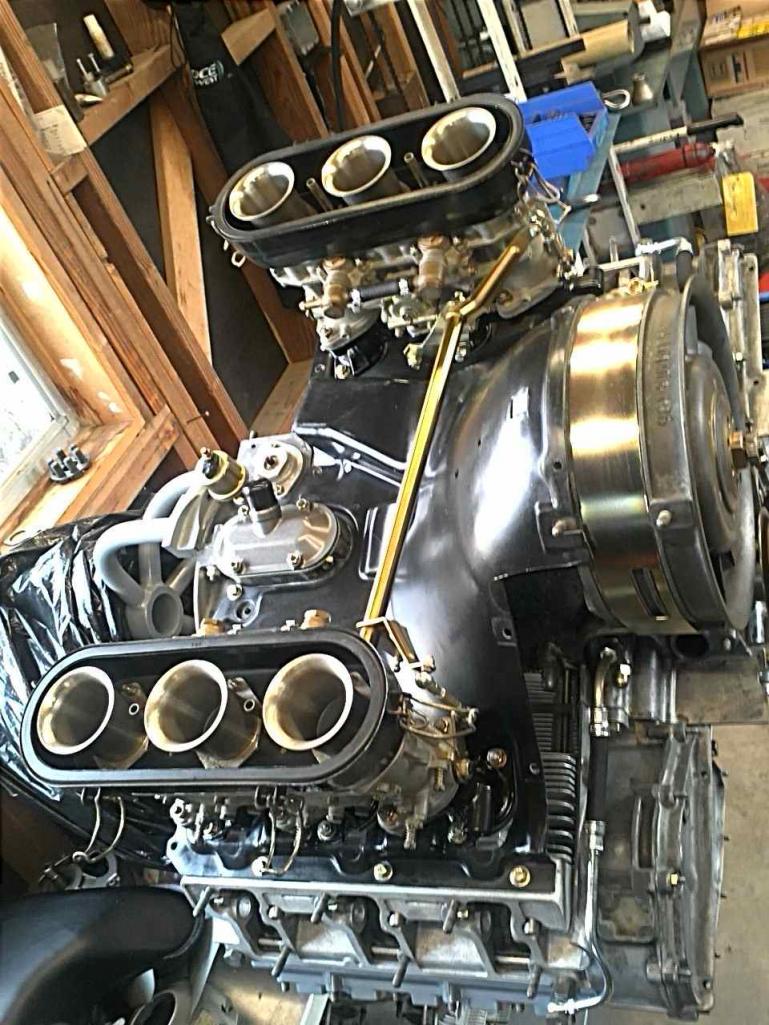
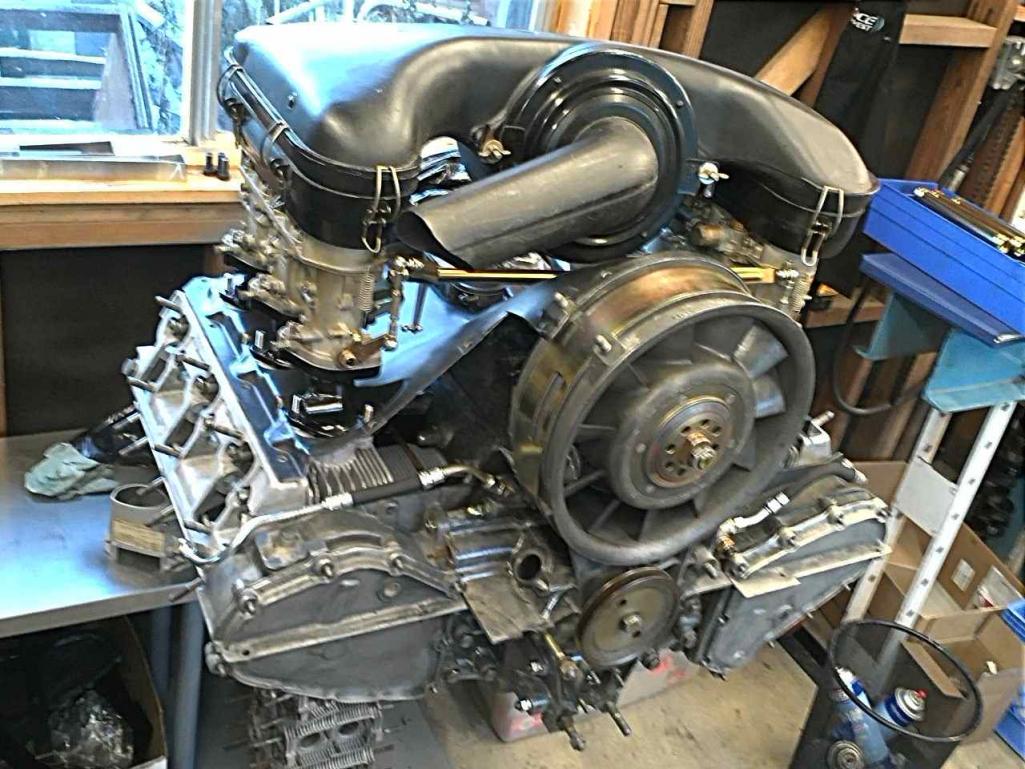
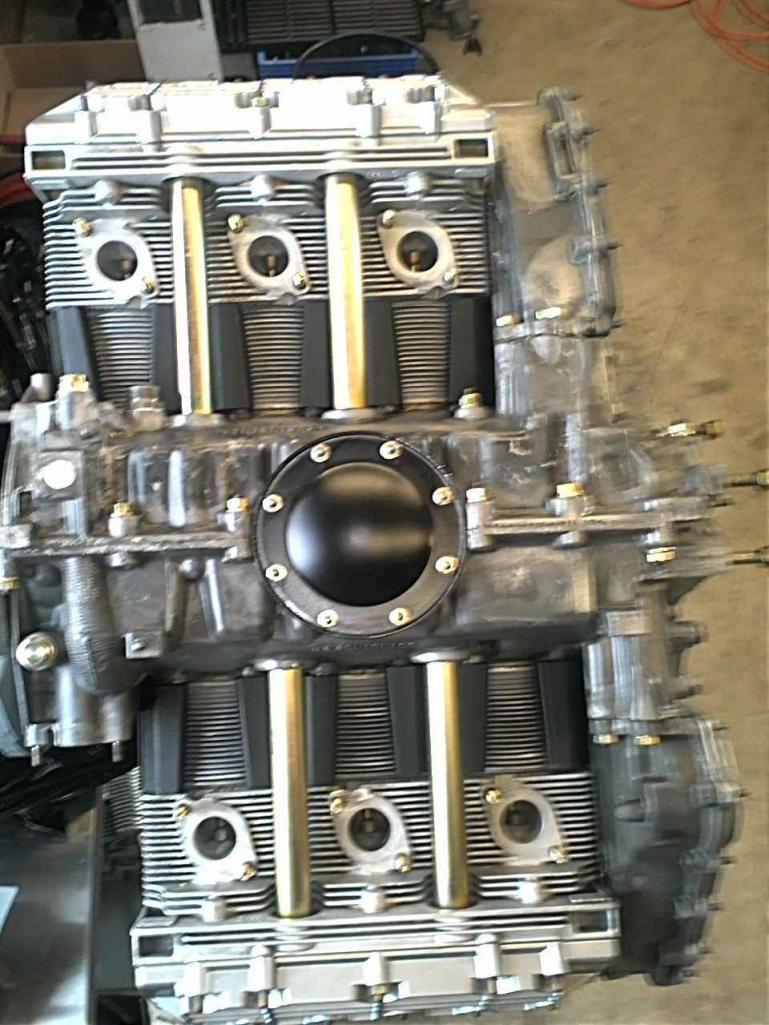
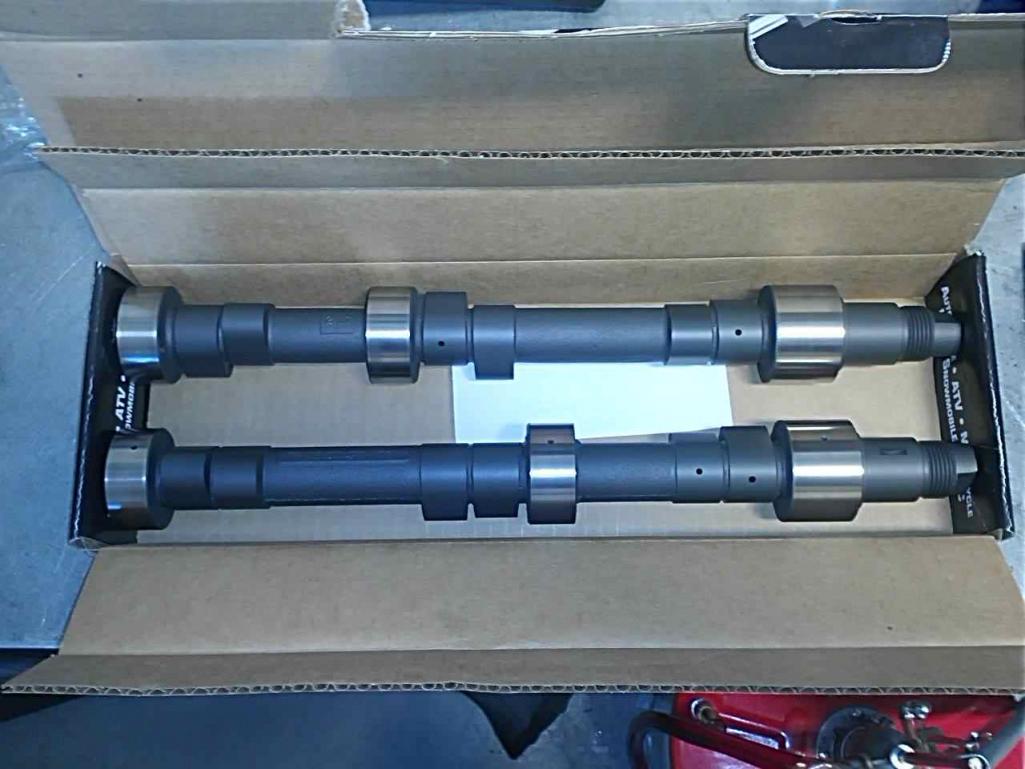
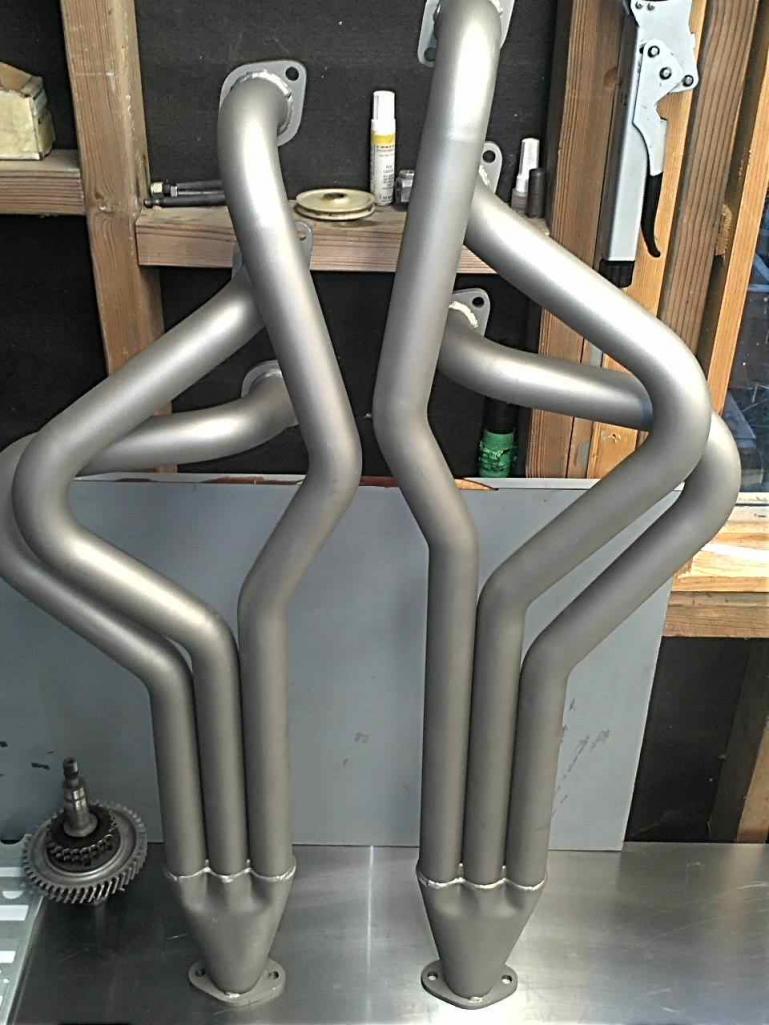
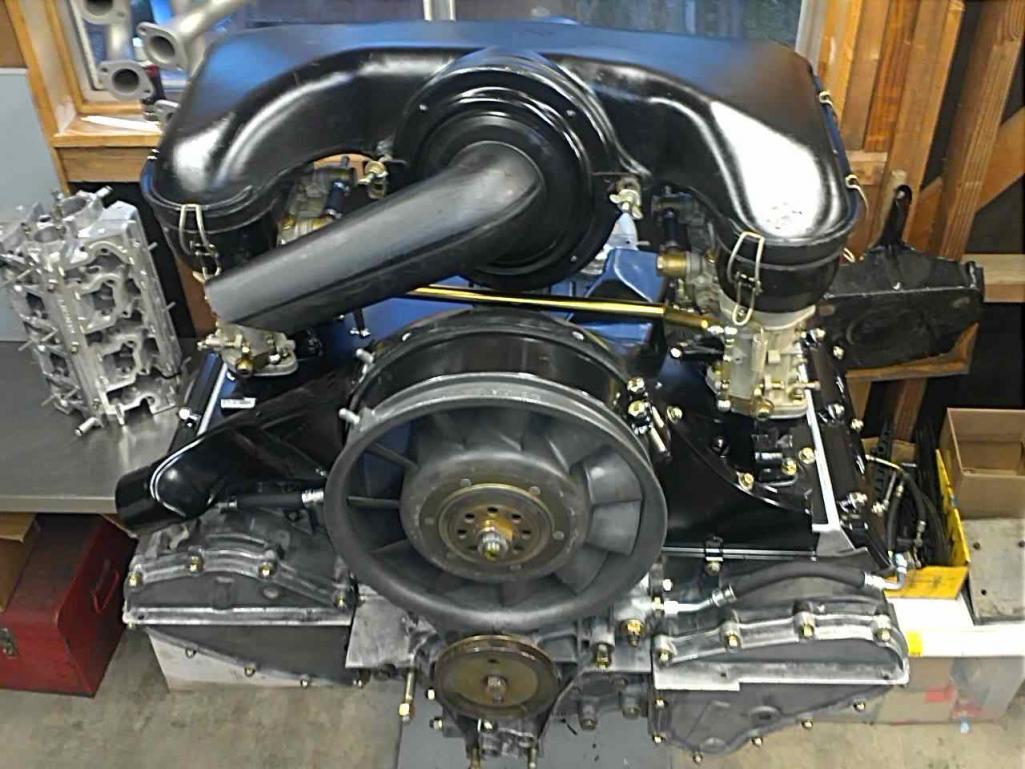
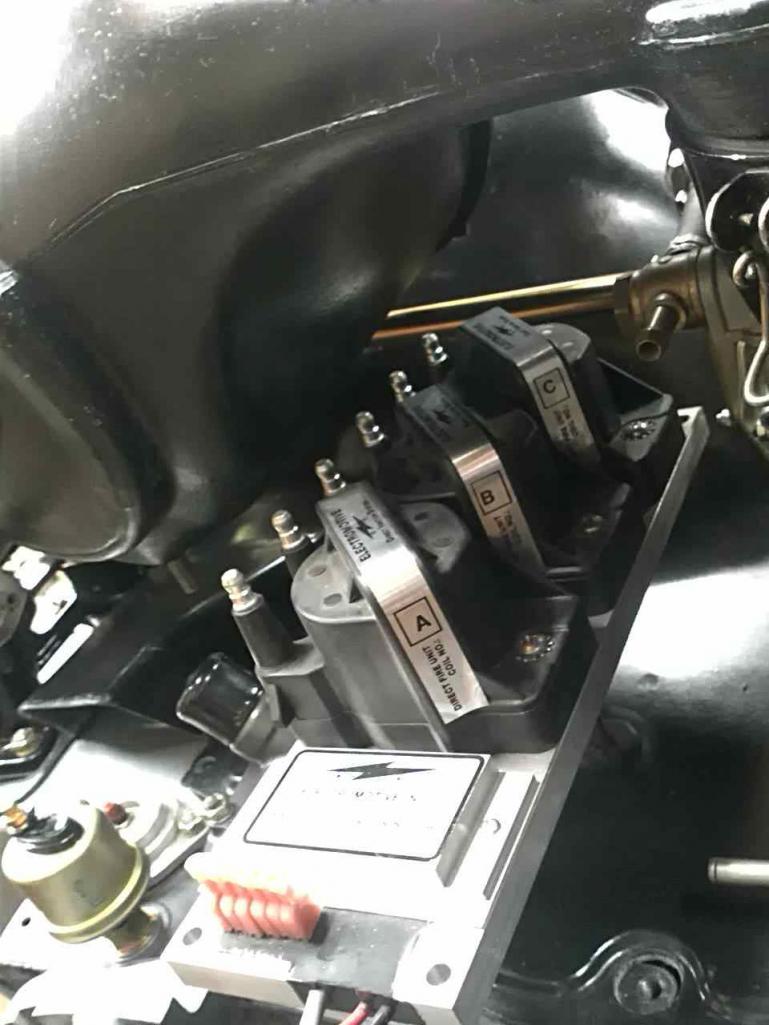
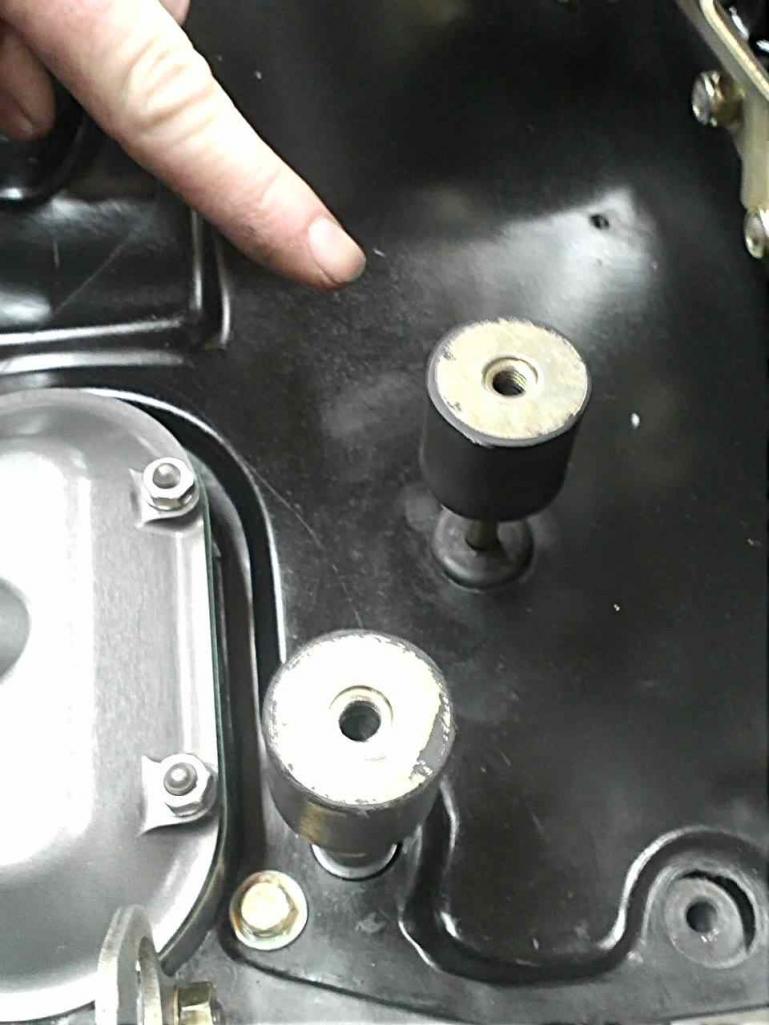
Engine is not one of the wilder setups. It's a "2.2E" built on an unstressed 911T case with a (nice) used Mahle E pistons and cylinders. It's got a bit more compression (splitting difference between E and S), Solex-grind cams, Weber 40s, Electromotive ignition on the engine (isolated by M-B mounts), headers, and (probably) a 911 sport muffler. May do something different with the muffler, we'll see.
We've been paying with the fan shroud strap and still need to touch the letters on the valve covers to spruce them up.
NOS oil tank was one of three that sat and sat and sat in the warehouse because someone mistakenly scrawled a 901 part number on each of them with a black pen—so Porsche didn't know it had them. Discovered years ago, this one has been waiting to find a home for a while.
Sorry about the phone pics, but that's what the builder, John Holleran, had handy. Then again, "the best camera is the one you've got" definitely applies here...wouldn't have had anything without it!
pete
Attached thumbnail(s)
Posted by: horizontally-opposed Apr 29 2013, 11:09 AM
Pete,
Great to have you back
Lookin forward to saying hello at Parade. Tell us more about your engine & pics. please.
Tom
Hey Tom!
And great to hear from you! Sorry I've been MIA...life's been crazy, but good! Hope the same is true for you.
pete
Posted by: Eric_Shea Apr 29 2013, 12:07 PM
Ready for Mille?
Posted by: horizontally-opposed Apr 30 2013, 02:33 PM
Pah, I think Melee would be a push.
Parade 2014, however...
pete
Posted by: JmuRiz Apr 30 2013, 06:12 PM
Great looking/spec engine combo!
Posted by: Krieger Apr 30 2013, 06:24 PM
Looks good Pete! Arun Thai on Bel Marin Keys? I was just htere Friday. It was very good.
Posted by: SKL1 Apr 30 2013, 08:09 PM
Have a similiar project going right now to join my original owner '71 silver 914 in the background. '73 Bahia Red 2.0 getting a total restoration, hope to have it running by the end of the summer with my son's help (when he's not driving his 993 or Cayman).
Spend most of last weekend getting suspension back in...
Posted by: horizontally-opposed Apr 30 2013, 09:23 PM
Looks good Pete! Arun Thai on Bel Marin Keys? I was just htere Friday. It was very good.
Yup. Place has to be the best Thai north of SF. Actually, better than my favorite places in SF, as well. Funny we were so close at the same time. How is your six conversion coming? Hope all is well!
Posted by: horizontally-opposed Apr 30 2013, 09:24 PM
Have a similiar project going right now to join my original owner '71 silver 914 in the background. '73 Bahia Red 2.0 getting a total restoration, hope to have it running by the end of the summer with my son's help (when he's not driving his 993 or Cayman).
Spend most of last weekend getting suspension back in...
That looks positively beautiful. The next time my car comes apart, it will be for that kind of job...but I'll have to save my pennies and wear it out again first.
pete
Posted by: horizontally-opposed Apr 30 2013, 09:25 PM
Great looking/spec engine combo!
Thanks!!
Posted by: Krieger Apr 30 2013, 11:21 PM
Looks good Pete! Arun Thai on Bel Marin Keys? I was just htere Friday. It was very good.
Yup. Place has to be the best Thai north of SF. Actually, better than my favorite places in SF, as well. Funny we were so close at the same time. How is your six conversion coming? Hope all is well!
I may have seen you or somebody impersonating you this last Friday about 6:15 when I was going for Thai. Later model 911 turning from Digital to Westbound Bel Marin. I am so flipping close on my car....I was supposed to get the alignment two weeks ago but....Santa Rosa AX this Saturday. Congrats on. The little Stout.
Posted by: horizontally-opposed Mar 26 2015, 10:10 PM
The glacial progress of my 914 "paint job > freshening > cosmetic restoration > brake upgrade > chassis rebuild > six conversion" continues, with the latest update being the car went onto the dyno at RPM Engines and surprised me.
With some tuning—mainly timing related—it made 169 hp at the rear wheels with 147 lb-ft of torque at the rear wheels. Applying a 15% powertrain loss factor, which always gives me the hives, that's 199 hp and 173 lb-ft at the flywheel. The torque comes on strong nice and low and then stays fairly consistent from there on up, from 3000~ rpm up to and through 6000 rpm. Not shabby for a small-bore 2.2, and very driveable. I'm told there's a little more power to be had with a different exhaust setup with the collectors moved further forward, and we lost more than we should have when the factory 914-6 air box went back on, so I need to figure out my final exhaust and intake setup before we do final tuning.
For the time being, however, I am one happy camper.
Attached image(s)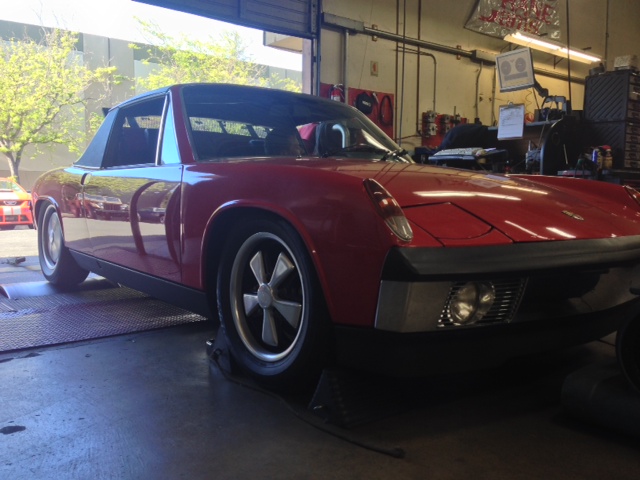
Posted by: SirAndy Mar 26 2015, 10:21 PM
Posted by: matthepcat Mar 26 2015, 10:25 PM
Sweet. There is nothing like a short stroke 911 engine in a light car.
Posted by: Mike Bellis Mar 26 2015, 10:32 PM
Now you can drive it down to the West Coast Ramble!
Great to see it's coming along Pete.
Posted by: horizontally-opposed Mar 26 2015, 11:12 PM
Now you can drive it down to the West Coast Ramble!
Great to see it's coming along Pete.
This thing you speak of...does it require the ability to take something called vacation?
Thanks, Mike!!
Next step is finalizing the wheel/tire package, then sending the car back into paint to have the sides redone. Test fit of 215/60R15 rears below, just to see if they would even physically fit in the wells. They will, though it is tight on both sides with the LR. It's a bit better on the RR, but I suspect I am going to have to play with the fenders just a bit.
Attached thumbnail(s)
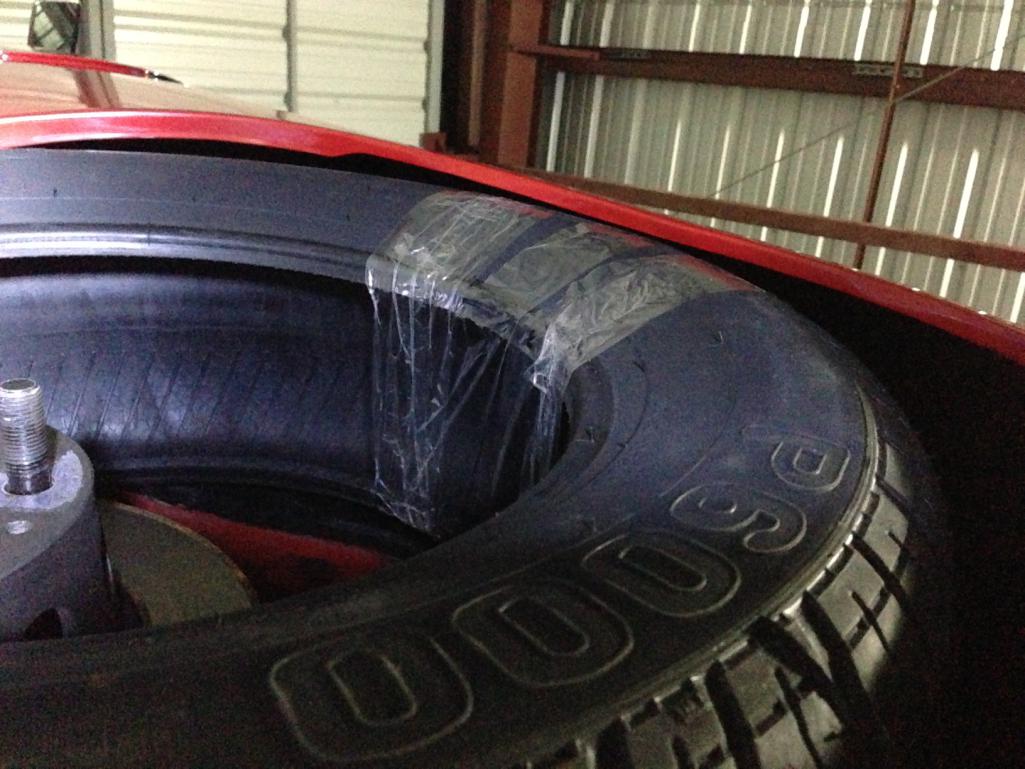
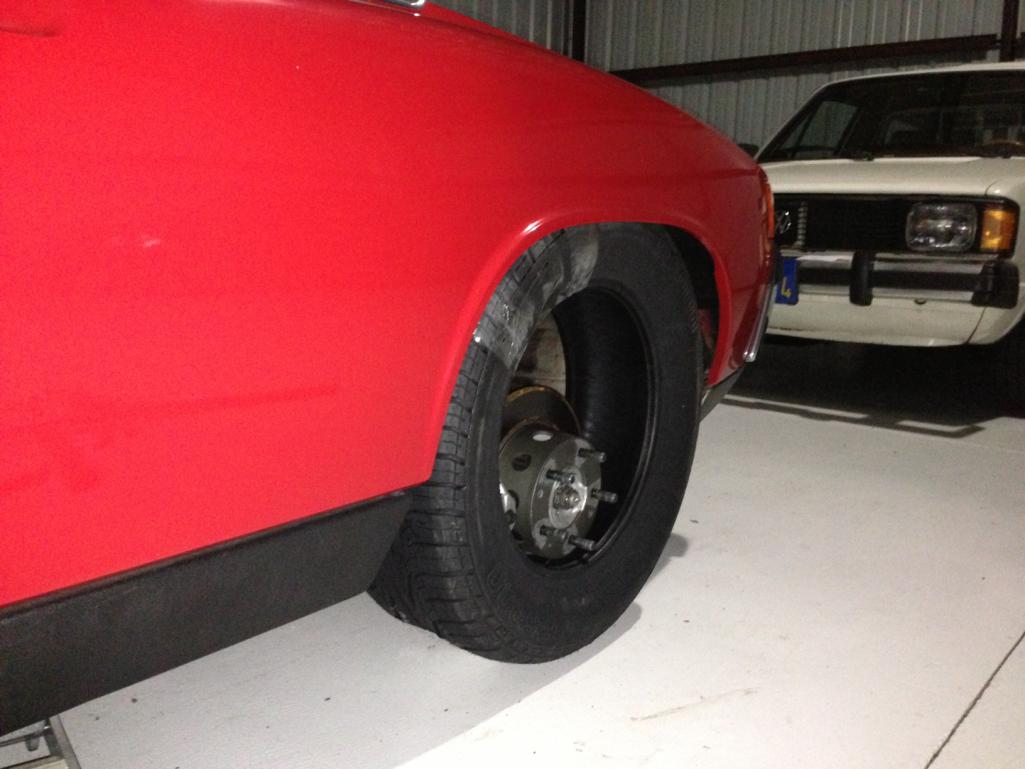
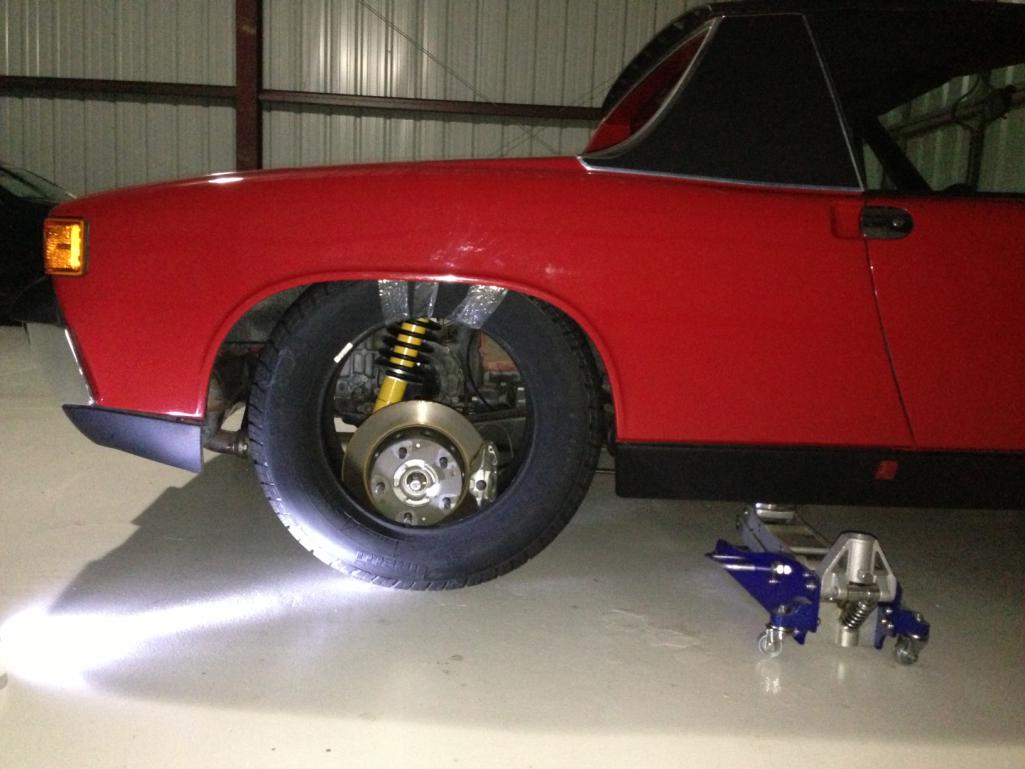
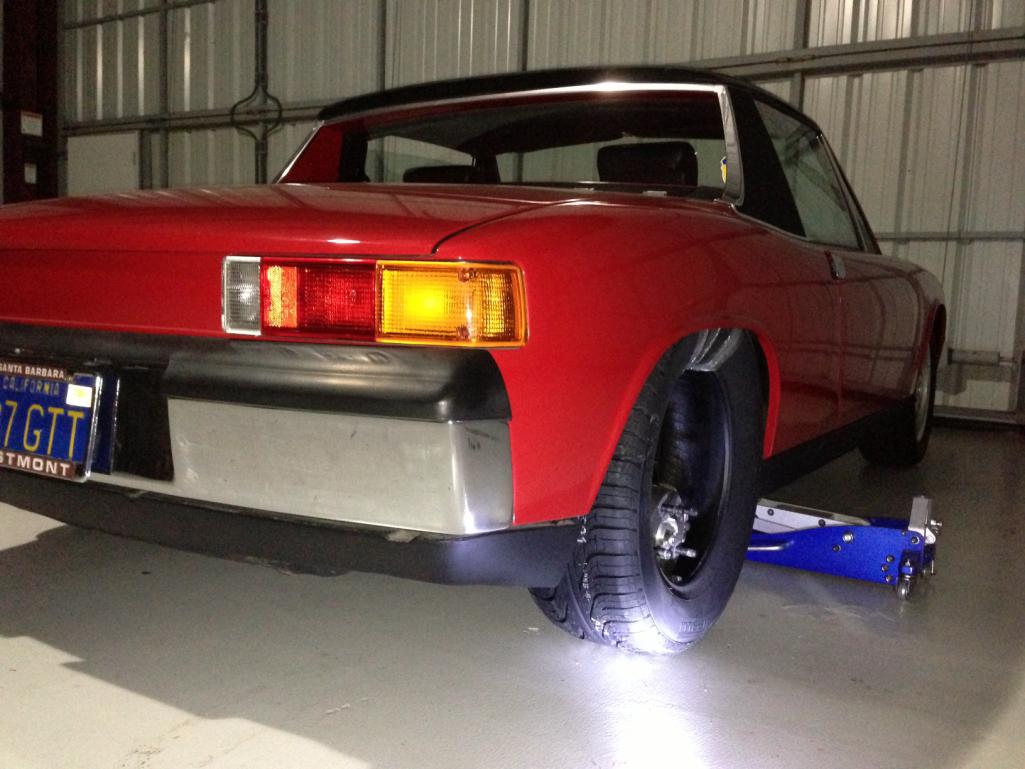
Posted by: rick 918-S Mar 27 2015, 12:19 AM
PHAT !! 
Posted by: rick 918-S Mar 27 2015, 12:19 AM
PHAT !!
Posted by: mskala Mar 27 2015, 05:25 AM
...With some tuning—mainly timing related—it made 169 hp at the rear wheels with 147 lb-ft of torque at the rear wheels. Applying a 15% powertrain loss factor, which always gives me the hives, that's 199 hp and 173 lb-ft at the flywheel. The torque comes on strong nice and low and then stays fairly consistent from there on up, from 3000~ rpm up to and through 6000 rpm. Not shabby for a small-bore 2.2, and very driveable. I'm told there's a little more power to be had with a different exhaust setup with the collectors moved further forward, and we lost more than we should have when the factory 914-6 air box went back on, so I need to figure out my final exhaust and intake setup before we do final tuning.
For the time being, however, I am one happy camper.
Good job. Looked back over the engine pictures. What is this thing? It is obviously
not your engine
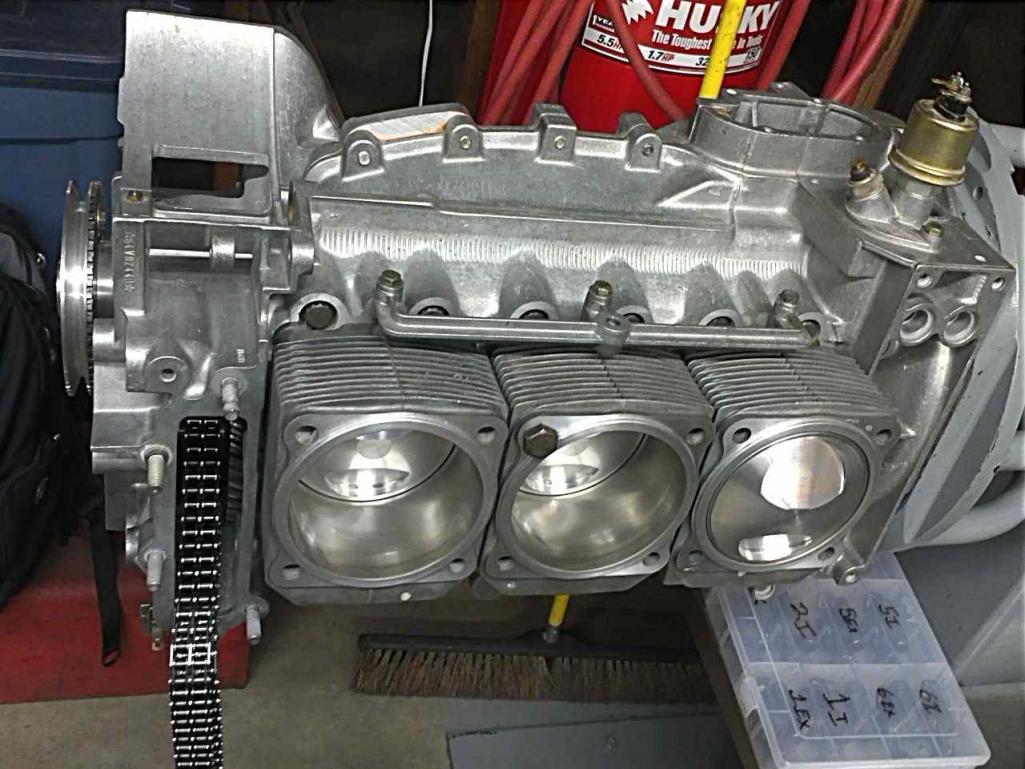
Posted by: JmuRiz Mar 27 2015, 11:38 AM
Great results, I'm tempted to scrap my distributor when I warm up my 2.7 for my project.
Posted by: horizontally-opposed May 15 2017, 12:02 PM
Can't believe it's been two years since I updated this thread. I have a lot of updating to do, but I'll skip forward to the last week or so because the car ran like a champ in its first trip to SoCal in 20 years...
If you are doing one of these projects, it can be daunting/annoying/draining/etc. Just know...it's WORTH IT!
Now, on to some pics from the run to Luftgekühlt, with the 914 packed up for a 1,000-mile journey and the GT4 kicked to the curb. What was I thinking?
Attached thumbnail(s)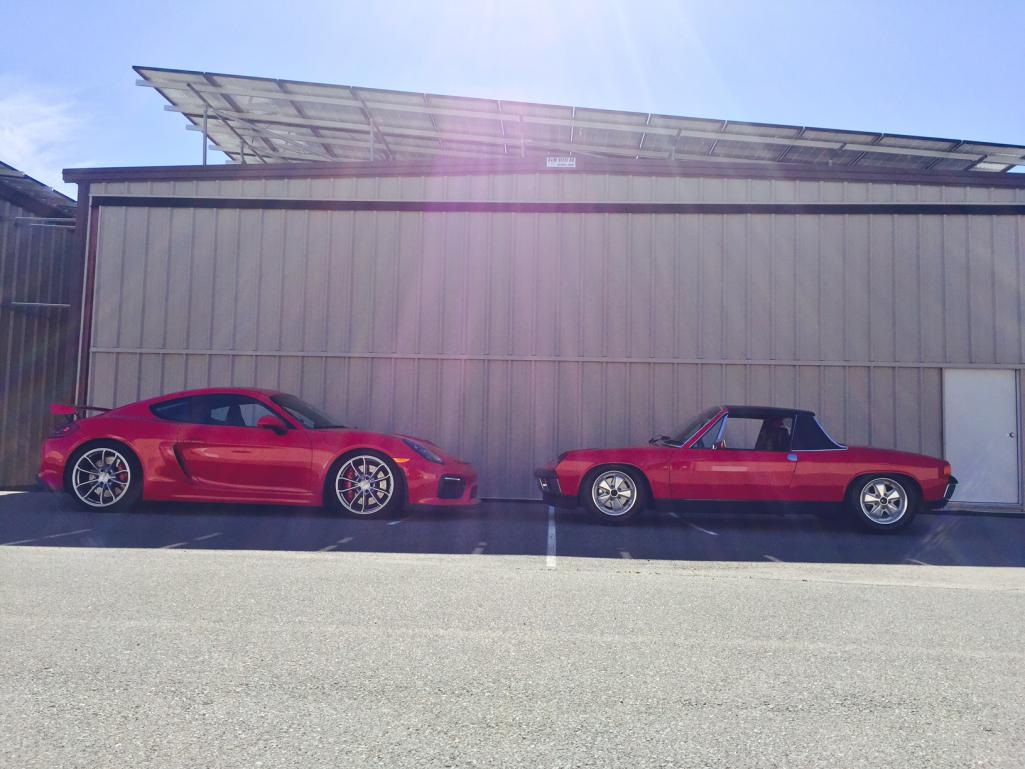
Posted by: horizontally-opposed May 15 2017, 12:07 PM
Didn't take many pics on the way down 101 to LA, but DID take a lot of notes.
The 2.2 is torquey around town, sings up to redline, and—with a factory airbox that is robbing 20 hp on the dyno—quiet enough on long drives. Unfortunately, the wind noise was awful—and a stark contrast to the quiet freeway cruiser this car was when I got it. More work is needed to quiet the noise at the A-pillars and windshield. The list of other things to sort is long, but most are minor annoyances. Some bigger ones, like heat and handling. It really was neat to go down the road in this car....need to take it on more trips.
When it got down to LA, it got checked into the Malibu Car Wash, where a 914 looks a little funny next to some of the other iron (and carbon fiber) that is usually being cleaned, but the crew there did a GREAT job, and for a lot less than the detailers I use up in Northern California.
Attached thumbnail(s)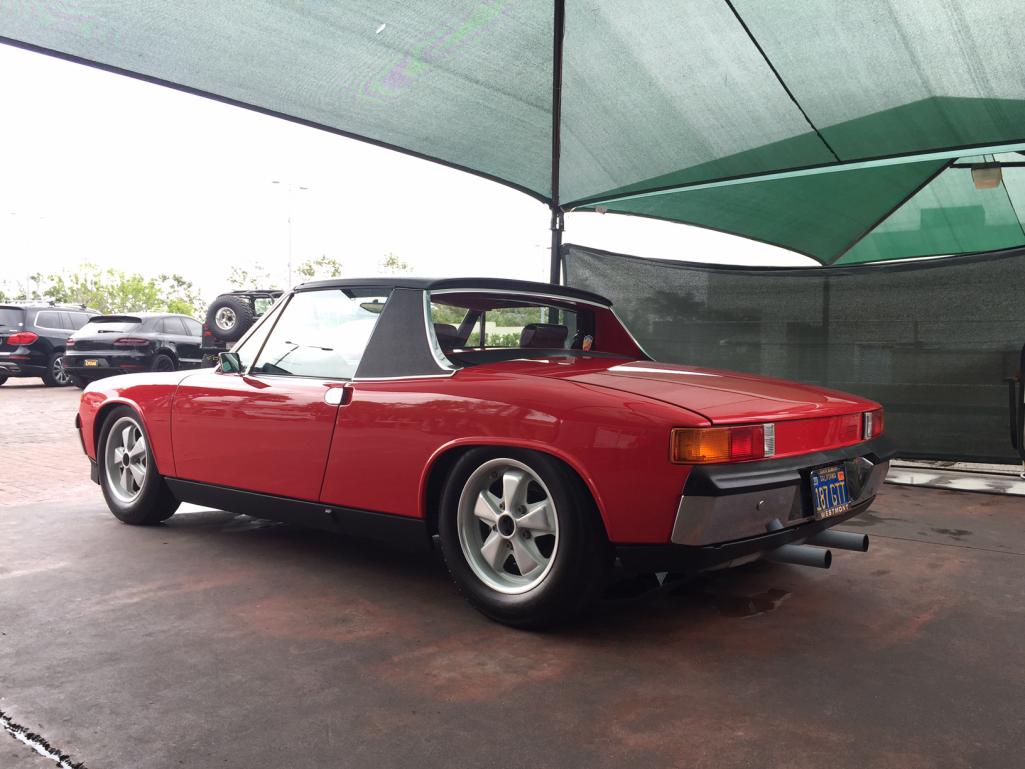
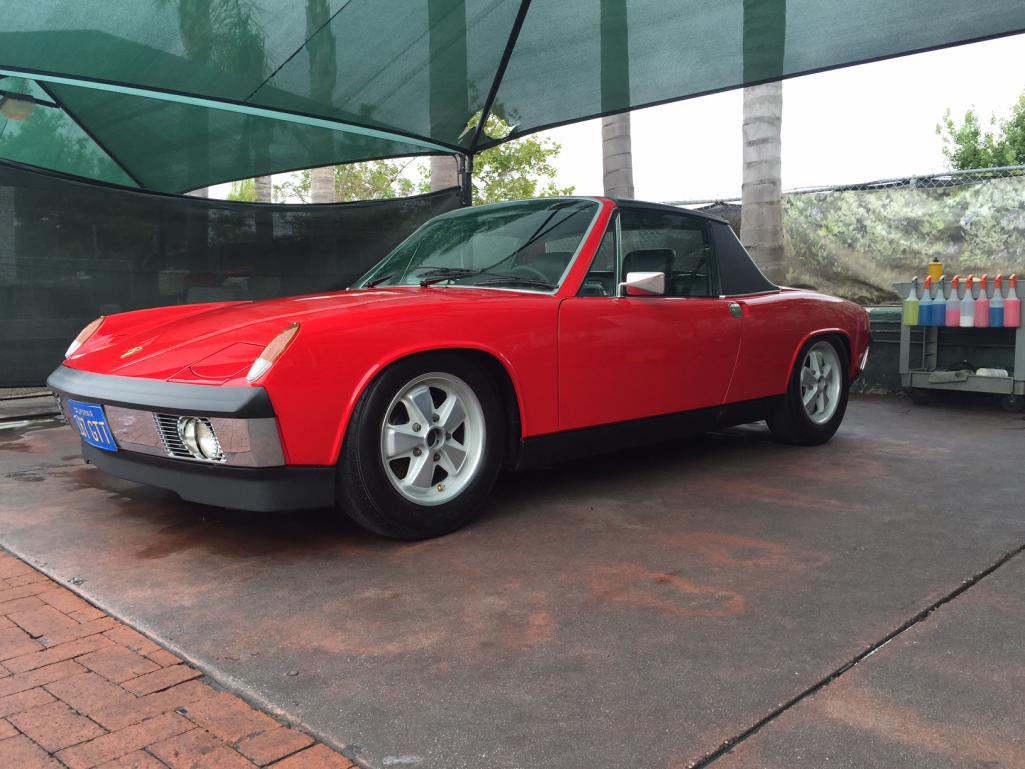
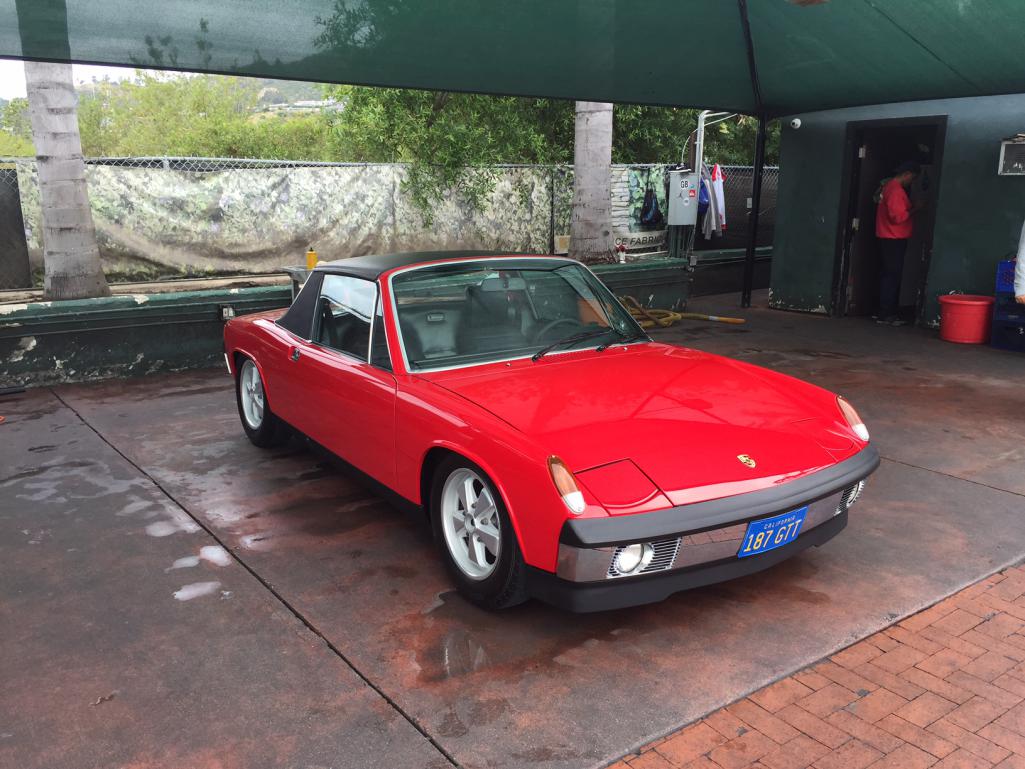
Posted by: horizontally-opposed May 15 2017, 12:14 PM
Luftgekühlt was a LOT of fun, and I was blown away by many of the cars there—and some very nice 914s also. There are so many pics online and on social feeds that I won't weigh this thread down with that stuff, so I'll just skip to three from the ride home. One from Point Magu, and then a stop in Santa Barbara where the car lived for a single semester (only felt right to play "One Headlight" by the Wallflowers on the way out of town*), and then a shot to try and capture that feeling when an old car gets you home through the night. Besides the wind noise, high-speed cruising is effortless, and it did better on fuel economy than I thought (though still not so great compared to a -4). The biggest thing, however, was the experience—I never forget the drives I take in this car.
*Particularly because, for the first time in 28 years, my headlights are acting funny, with the driver's side headlight taking its own sweet time to lower itself after turning off the lights. Sometimes 2-20 minutes after the right one goes down.
Attached thumbnail(s)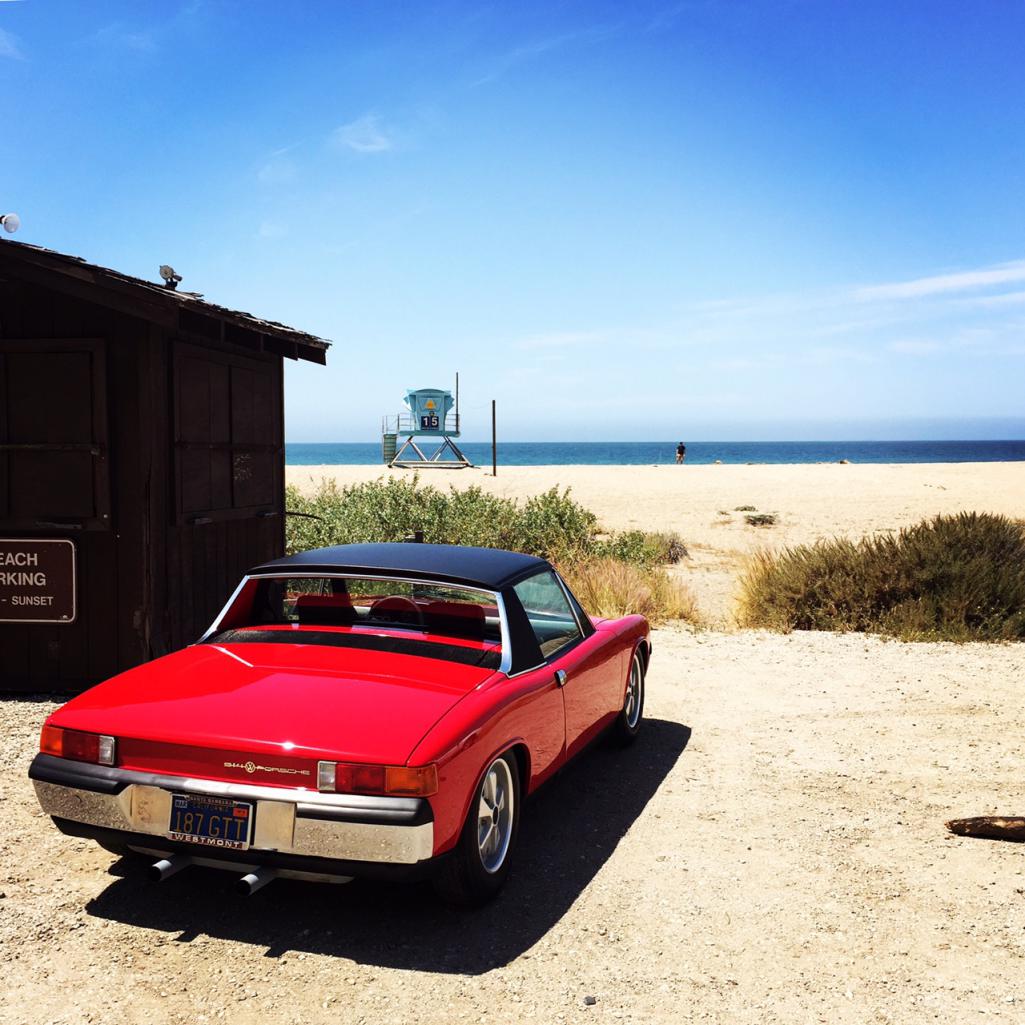
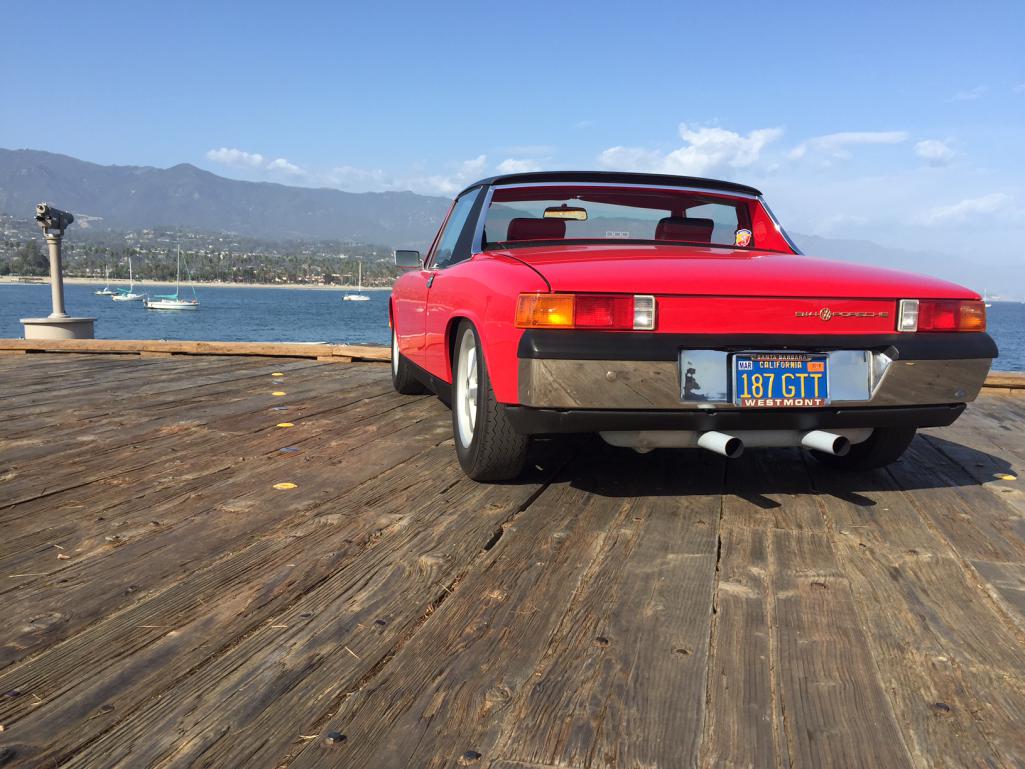
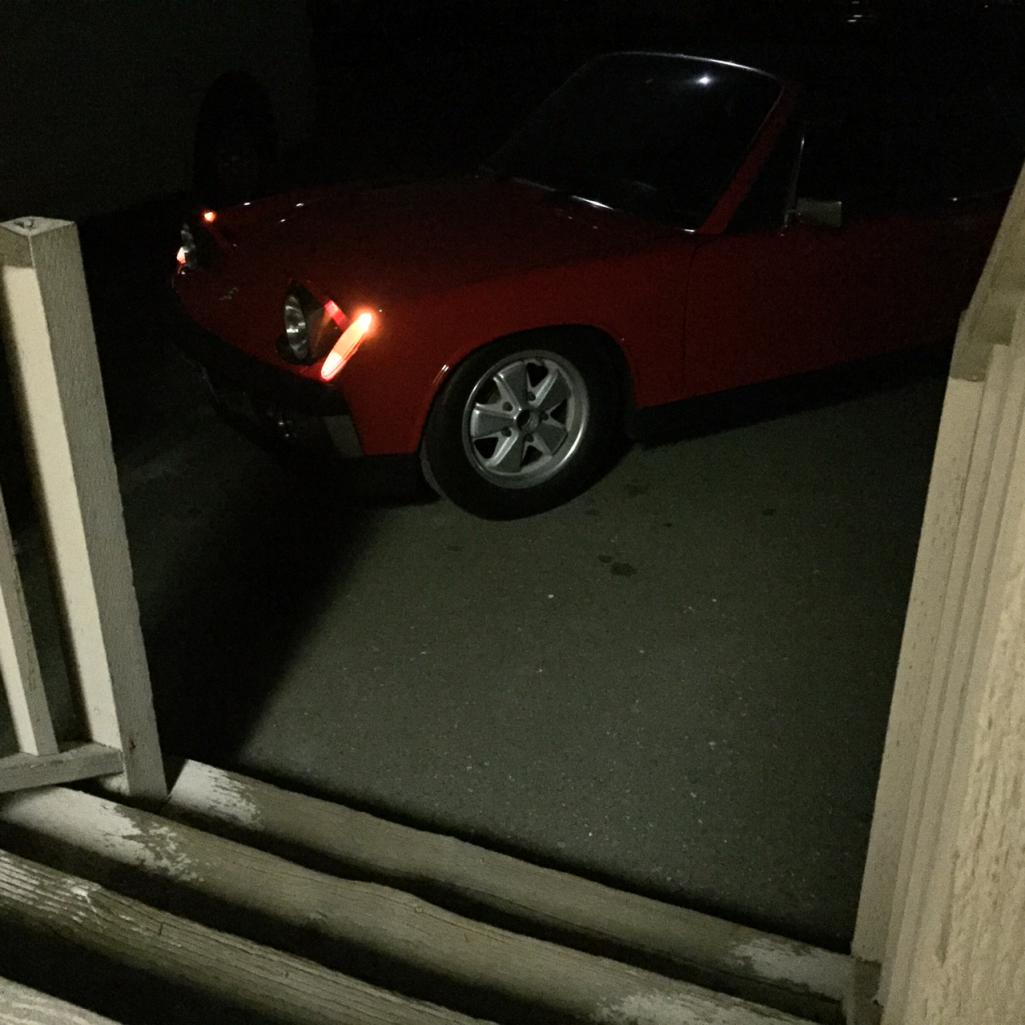
Posted by: horizontally-opposed May 15 2017, 12:17 PM
And, after a quick wash, it was back on the road to R Gruppe's 2017 Treffen in Napa—where there were several cool 914s. The 914 and GT4 got a little love, being placed up front in a row of hot-rod 911s parked next to the dinner tables, for a bit of alternate flavor and mid-engined contrast in a typically 911-dominated event.
Photos by good friend Pete Ritter
Attached thumbnail(s)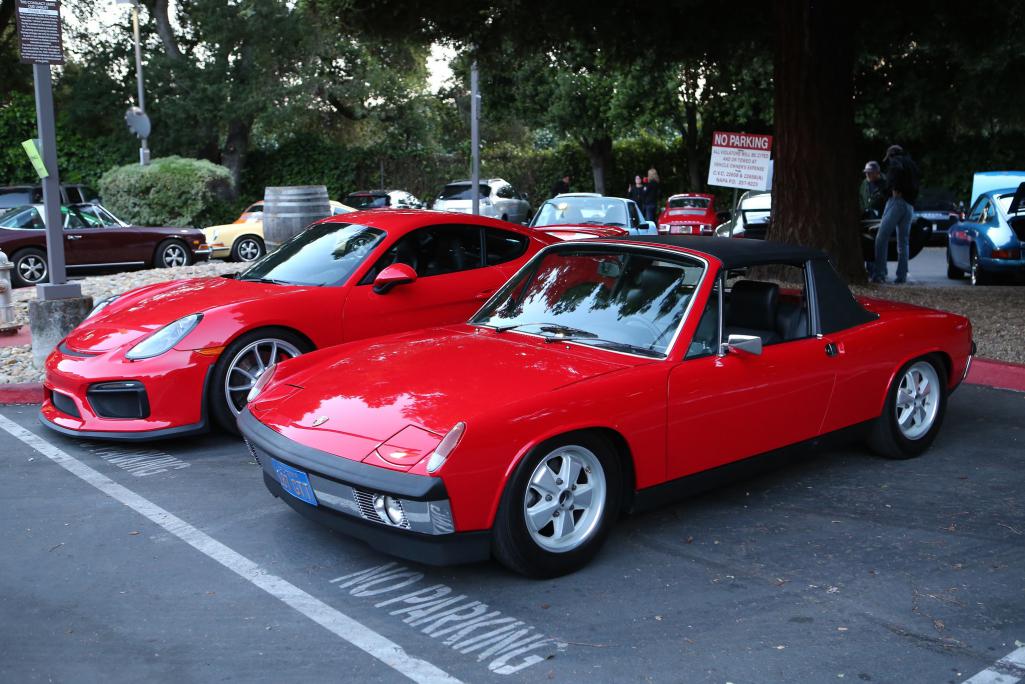
Posted by: horizontally-opposed May 15 2017, 12:21 PM
What is this thing?
Good question—was in the group of pics I got from the engine builder. Suspect that's one of his other builds.
Posted by: horizontally-opposed May 15 2017, 12:23 PM
Btw, need to find then pics, but I eventually did mount that 215/60R15 to a real 15x7R to see if it could be snuck into the rear fenders.
Working with washers and longer studs, I was able to get it into both sides, but the inner tire was rubbing on the trailing arm and car brake line, and there was NO room for the tire to "walk" around under load. So I skipped and went to 185/70R15 Avons for now. I like them, but miss seeing fatter rubber tucked under the car. May move to something else. We'll see.
Attached thumbnail(s)
Posted by: horizontally-opposed May 15 2017, 12:30 PM
Here we go...
Attached thumbnail(s)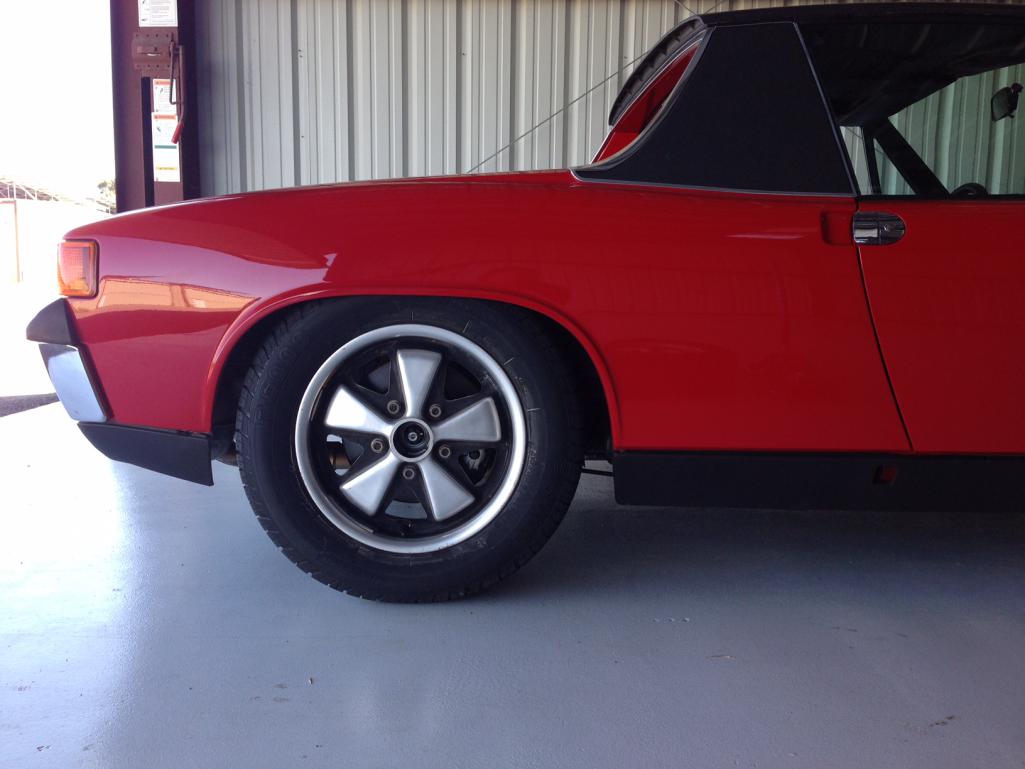
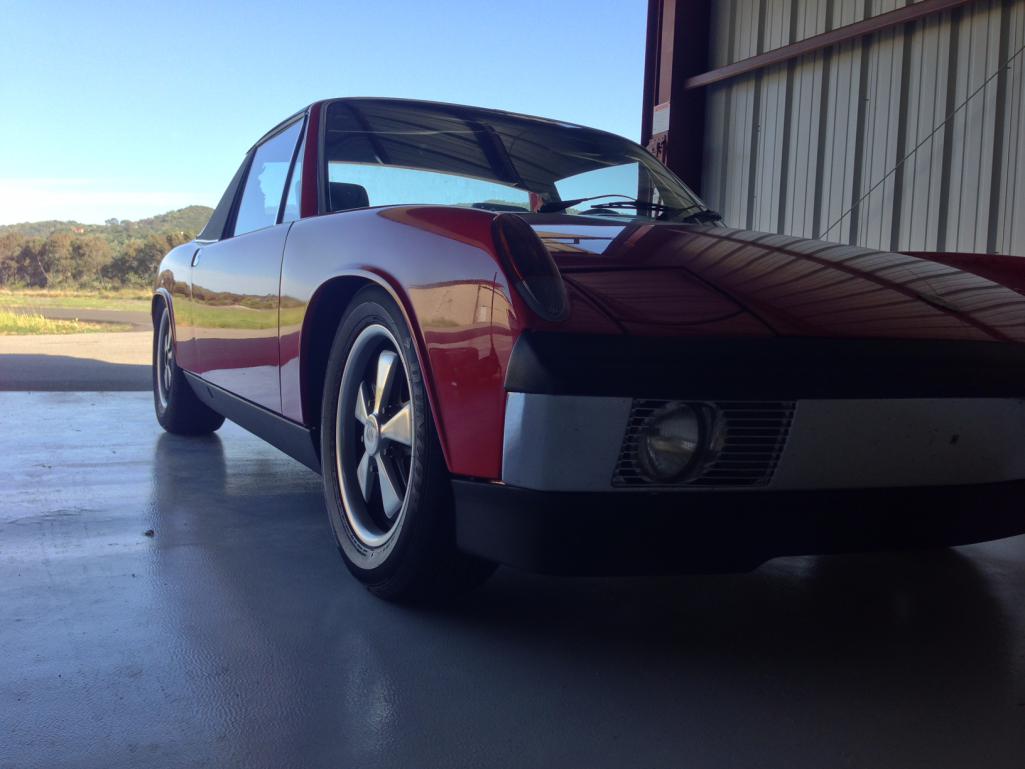
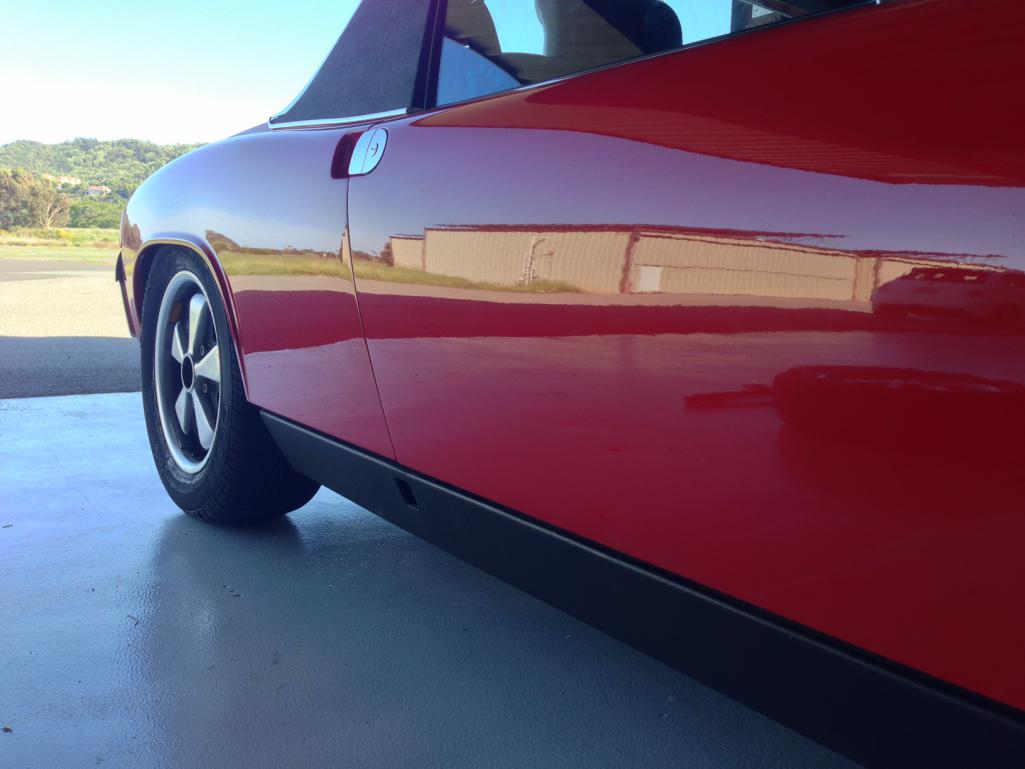
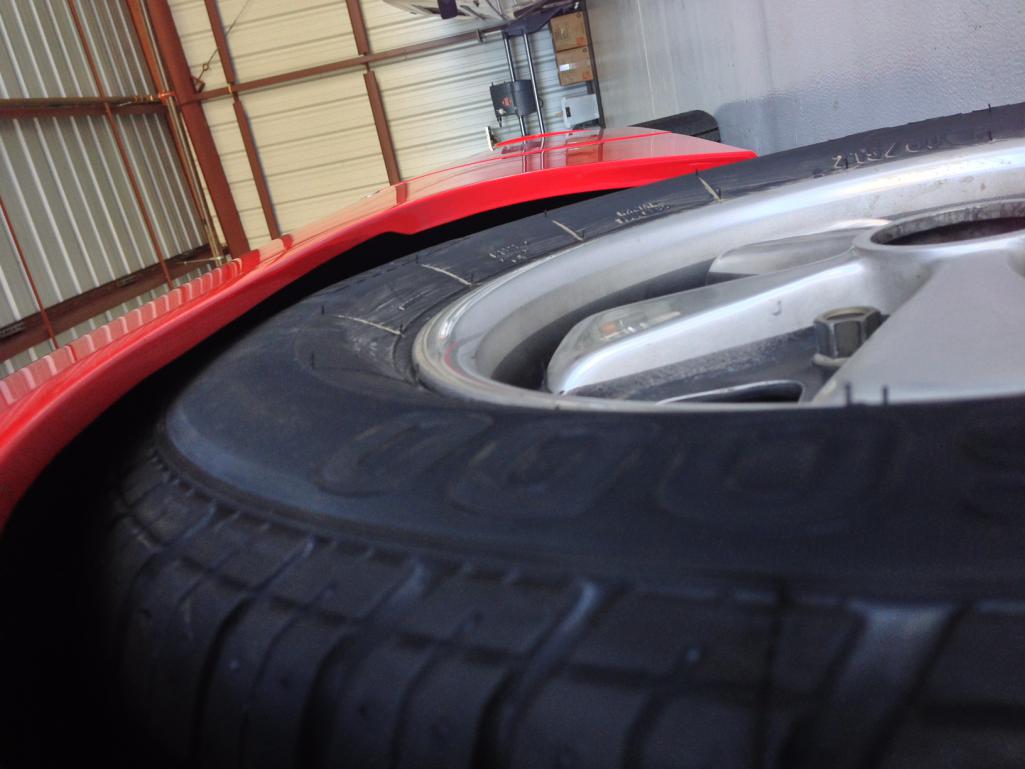
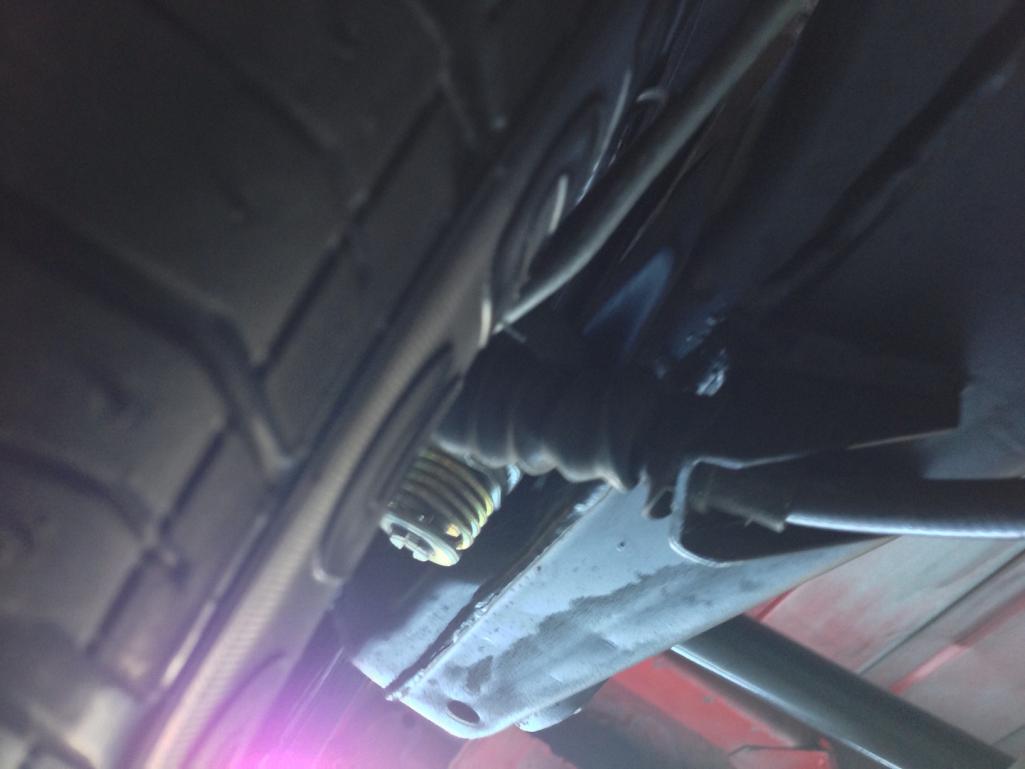
Attached image(s)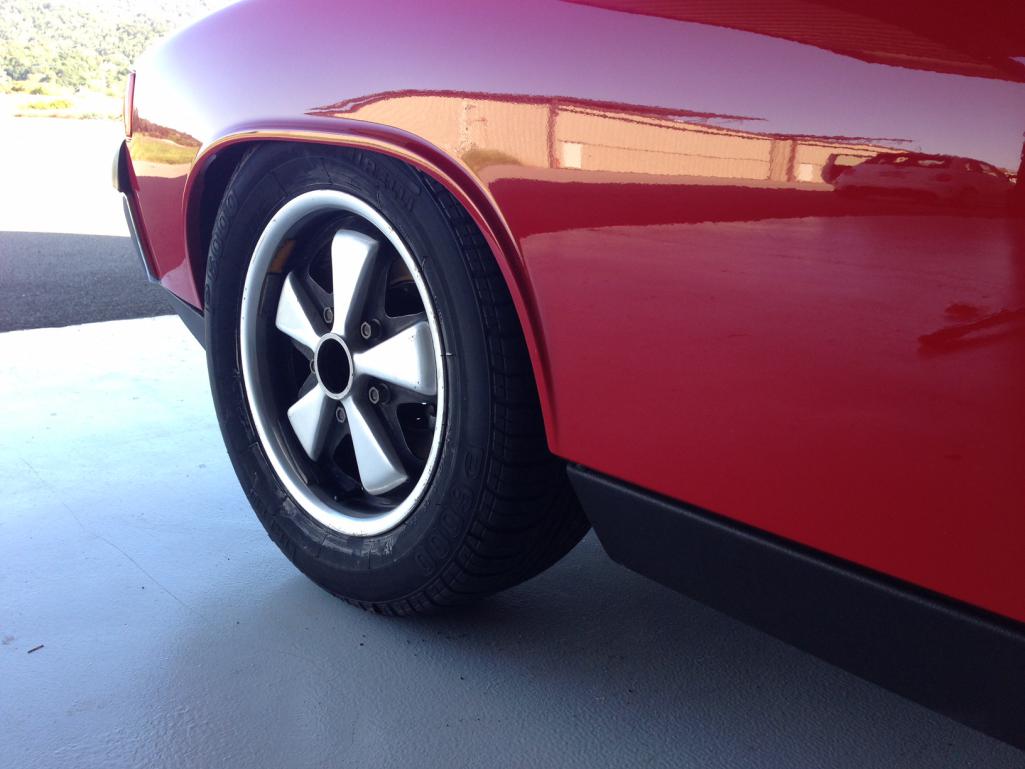
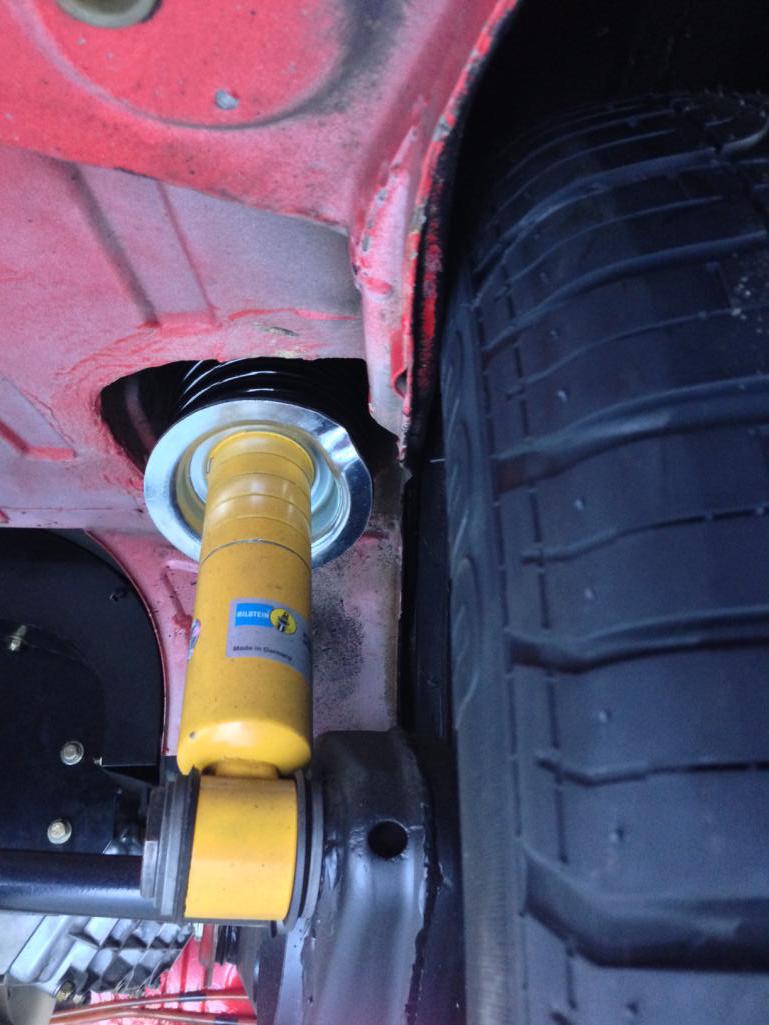
Posted by: Cairo94507 May 15 2017, 02:13 PM
Beautiful 914.
Powered by Invision Power Board (http://www.invisionboard.com)
© Invision Power Services (http://www.invisionpower.com)