|
|
|
Porsche, and the Porsche crest are registered trademarks of Dr. Ing. h.c. F. Porsche AG.
This site is not affiliated with Porsche in any way. Its only purpose is to provide an online forum for car enthusiasts. All other trademarks are property of their respective owners. |
|
|

  |

| rgolia |
 Feb 28 2013, 01:17 PM Feb 28 2013, 01:17 PM
Post
#1
|
|
GeoJoe  Group: Members Posts: 714 Joined: 5-February 10 From: PA Member No.: 11,329 Region Association: North East States |
I am in the process of painting the front trunk. I have the gas tank removed to install a sway bar and was considering also painting the area where the gas tank sits and where the ventilation stuff is located. How hard is it to remove that stuff and re-install?
 So I took everything apart and did the painting....hope I can get it back together. Photos to follow (IMG:style_emoticons/default/beer3.gif) |
   |

 
|
| championgt1 |
Feb 28 2013, 01:42 PM
Post
#2
|
|
Don't embarrass me Filmore! Group: Members Posts: 2,680 Joined: 3-January 07 From: Tacoma, Washington Member No.: 7,420 Region Association: Pacific Northwest |
It can be a pain. If you do remove it all, here is a thread that discusses the entire process.
http://www.914world.com/bbs2/index.php?showtopic=86942 |
|
|
|
| 76-914 |
Feb 28 2013, 02:34 PM
Post
#3
|
|
Repeat Offender & Resident Subaru Antagonist Group: Members Posts: 13,611 Joined: 23-January 09 From: Temecula, CA Member No.: 9,964 Region Association: Southern California |
The gas tank is 20 min job to pull, 30 min to reinstall. The airbox is similar to the 5th to ring of Hell to remove but really gets hard re-installing it. (IMG:style_emoticons/default/happy11.gif)
|
|
|
|
| toolguy |
Feb 28 2013, 02:40 PM
Post
#4
|
|
Senior Member Group: Members Posts: 1,273 Joined: 2-April 11 From: San Diego / El Cajon Member No.: 12,889 Region Association: Southern California |
From the looks of the picture 1 more day and everything else is all out. . Hardest part is the blower box, vents and cables . . gas tank is the biggest pain it the ass and you've got that done. . . . . Be careful and mark all the heater cables that go to each vent. . take pictures. . . You can probably leave the wiper motor in as the blower box covers it up, but removing all this will make the paint job a lot easier and a lot better in quality. . . will take 3-4 to put it back together without hurting the new paint. .
Looks like the wiring is pulled so that's out of the way. Clean the headlight grounds and tape the posts up. . Add some new nuts and it will look like factory direct . .Clean up the harness. I used lacquer thinner, re-tape as needed, put new plastic tubing on the harness retainer tabs. . Hard part is knowing where do you want to stop. . new hoses ?? new hose clamps? You could spend weeks . . As for paint, this is about the same as the exterior, needs to be sanded in steps until you get to 400-600 grit if you want it to look nice. . New glossy paint will make all the scratches and chips show so prepare everything well . .use de-greaser and prime. . Here are my before and after shots. Attached image(s)  
|
|
|
|
| Jgilliam914 |
Feb 28 2013, 02:52 PM
Post
#5
|
|
914 Guru Group: Members Posts: 5,335 Joined: 30-July 12 From: Iowa / Florida Member No.: 14,732 Region Association: Upper MidWest |
Getting it all apart was easy.. I haven't put mine back in yet so. I figure I am a few months behind you. I hope to have mine painted this weekend or next
|
|
|
|
| rgolia |
Feb 28 2013, 03:51 PM
Post
#6
|
|
GeoJoe Group: Members Posts: 714 Joined: 5-February 10 From: PA Member No.: 11,329 Region Association: North East States |
Thanks boys...very good information. I think I am going to go for it....I know I am going to get real pissed off at the blower at some point......would not be surprised if I am posting in the WTB classified for pieces that were just asking to be busted. (IMG:style_emoticons/default/smash.gif)
|
|
|
|
| reharvey |
Feb 28 2013, 04:16 PM
Post
#7
|
|
Senior Member Group: Members Posts: 573 Joined: 16-July 08 From: N. E. Ohio Member No.: 9,308 Region Association: North East States |
I changed the color on two of my cars so I've been through this. It's a real pain and will take you twice as long as you might think. After it's done it will look like new and everyone who sees it will be impressed. Go for it!
|
|
|
|
| 7TPorsh |
Feb 28 2013, 05:03 PM
Post
#8
|
|
7T Porsh Group: Members Posts: 2,691 Joined: 27-March 06 From: Glendale Ca Member No.: 5,782 Region Association: Southern California |
I'm cleaning up by front end too. As you remove everything you will see that you will want to buy newer or better parts...$$$$
I removed all the air valves and hoses; just kept the air box to serve as a water drain. Actually your parts look pretty good already... |
|
|
|
| bandjoey |
Feb 28 2013, 06:56 PM
Post
#9
|
|
bandjoey Group: Members Posts: 4,930 Joined: 26-September 07 From: Bedford Tx Member No.: 8,156 Region Association: Southwest Region |
The blower is held together by the clips that hold the gates of Hell together...don't try to take the blower apart to clean and paint, unless you've been to confessional and drunk>
|
|
|
|
| Spoke |
Mar 2 2013, 08:37 AM
Post
#10
|
|
Jerry Group: Members Posts: 7,052 Joined: 29-October 04 From: Allentown, PA Member No.: 3,031 Region Association: None |
It really isn't that hard to get everything out and put back together. Definitely take pictures as stuff comes out for easy replacement.
Also mark the wires off of the airbox so you get them back on correctly. The airbox goes in first and you want to make sure it runs before putting everything back in and find out the wiring is wrong. Same with the windshield wiper wires. Attached image(s) 
|
|
|
|
| PanelBilly |
Mar 2 2013, 12:00 PM
Post
#11
|
|
914 Guru Group: Members Posts: 5,840 Joined: 23-July 06 From: Kent, Wa Member No.: 6,488 Region Association: Pacific Northwest |
Wipers have a bolt that goes thru the dash. Pain in the ass to get undone. I've done it twice and both times broken the bolt. It's not easy finding a replacement.
|
|
|
|
| rgolia |
Mar 4 2013, 02:59 PM
Post
#12
|
|
GeoJoe Group: Members Posts: 714 Joined: 5-February 10 From: PA Member No.: 11,329 Region Association: North East States |
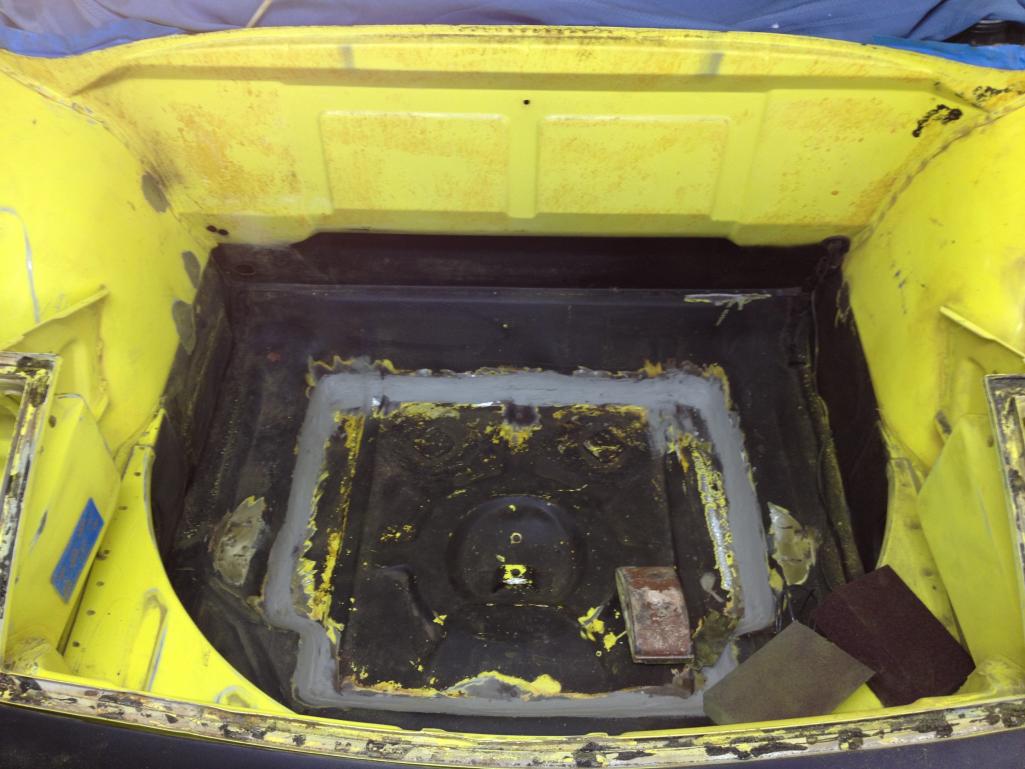
here are the photos...paint came out ok for a trunk. Hope I can get this back together. As you can see the area with the blower was messed up due to the family of rats that lived there back in the late 1990s. What a difference. My back hurts too. (IMG:style_emoticons/default/piratenanner.gif)
    [attachmentid=372 [attachmentid=372200] Attached thumbnail(s) 
|
|
|
|
| rgolia |
Mar 4 2013, 03:08 PM
Post
#13
|
|
GeoJoe Group: Members Posts: 714 Joined: 5-February 10 From: PA Member No.: 11,329 Region Association: North East States |
here is what see looks like on the outside.....now the inside matches
 |
|
|
|
| rgolia |
Mar 4 2013, 03:31 PM
Post
#14
|
|
GeoJoe Group: Members Posts: 714 Joined: 5-February 10 From: PA Member No.: 11,329 Region Association: North East States |
and one question...where do I get replacement hoses for the ducting that I removed that basically crumbled in my hands
|
|
|
|
| r_towle |
Mar 4 2013, 03:33 PM
Post
#15
|
|
Custom Member Group: Members Posts: 24,624 Joined: 9-January 03 From: Taxachusetts Member No.: 124 Region Association: North East States |
VW parts stores.
Same diameter stuff is used on beetles. rich |
|
|
|
| wndsnd |
Mar 4 2013, 03:41 PM
Post
#16
|
|
You wanted a horse, but got a goat. Nobody wants a goat.... Group: Members Posts: 2,861 Joined: 12-February 12 From: North Shore, MA Member No.: 14,124 Region Association: North East States |
I think it looks good! I am in the same boat and will be starting to reassemble next weekend. My problem is that I took it all apart last year!
I think the hoses are available, I opted to leave the wiper motor and hoses mask them. Everything else came out. And I broke my blower housing trying to mess with the clips. However I learned a trick if you took them off and didn't break anything. Paint them and put them on a block of wood. Cover with a nice thick cloth and whack with a hammer. This will spread them just enough to go back on easily and use a little seal adhesive if they got too loose. John |
|
|
|
| rgolia |
Mar 4 2013, 04:33 PM
Post
#17
|
|
GeoJoe Group: Members Posts: 714 Joined: 5-February 10 From: PA Member No.: 11,329 Region Association: North East States |
I did not take the blower housing apart as I was warned to stay away. Doesn't mean I wont break it putting it in. I will start the reassembly in two weeks, so if there are tricks...let me know.
|
|
|
|
| rgolia |
Apr 4 2013, 04:12 PM
Post
#18
|
|
GeoJoe Group: Members Posts: 714 Joined: 5-February 10 From: PA Member No.: 11,329 Region Association: North East States |
|
|
|
|


| Ferg |
Apr 4 2013, 04:32 PM
Post
#19
|
|
914 Guru Group: Members Posts: 5,948 Joined: 8-January 03 From: Boulder CO Member No.: 116 Region Association: None |
(IMG:style_emoticons/default/smilie_pokal.gif) nice work!
|
|
|
|
| rick 918-S |
Apr 4 2013, 06:41 PM
Post
#20
|
|
Hey nice rack! -Celette Group: Members Posts: 20,680 Joined: 30-December 02 From: Now in Superior WI Member No.: 43 Region Association: Northstar Region |
Great! I was worth the extra work.
|
|
|
|
|
1 User(s) are reading this topic (1 Guests and 0 Anonymous Users)
0 Members:

|
Lo-Fi Version | Time is now: 27th September 2024 - 02:12 PM |
Invision Power Board
v9.1.4 © 2024 IPS, Inc.