|
|

|
Porsche, and the Porsche crest are registered trademarks of Dr. Ing. h.c. F. Porsche AG.
This site is not affiliated with Porsche in any way. Its only purpose is to provide an online forum for car enthusiasts. All other trademarks are property of their respective owners. |
|
|
  |
| messix |
 Dec 15 2008, 08:27 PM Dec 15 2008, 08:27 PM
Post
#81
|
|
AKA "CLUTCH KILLER"!      Group: Members Posts: 6,995 Joined: 14-April 05 From: between shit kickers and pinky lifters/ puget sound wa.north of Seattle south of Canada Member No.: 3,931 Region Association: Pacific Northwest |
trust the touch of your hand and the guide coat more than your eye. sanding is your friend (IMG:style_emoticons/default/bye1.gif) [this is supposed to be steve sanding]
|
| Wes V |
 Dec 16 2008, 09:27 AM Dec 16 2008, 09:27 AM
Post
#82
|
|
Member   Group: Members Posts: 482 Joined: 11-October 07 From: Los angeles Member No.: 8,211 |
trust the touch of your hand and the guide coat more than your eye. I don't agree. (but some of it's just in the wording) Don't trust your hand. (unless you are a major pro) Only trust the guide coat sanding if you have a straight sanding board and are doing the sanding real lightly. You should just "glide" over the high points. The one thing I recommend is to get a shop light and direct it down along the surface, not directly at it! Then turn off all the other garage lights. You can then see the hills and valleys on the surface. Wes Vann |
| elwood-914 |
 Dec 16 2008, 11:14 AM Dec 16 2008, 11:14 AM
Post
#83
|
|
elwood-914   Group: Members Posts: 387 Joined: 29-December 02 From: Plymouth CA Member No.: 38 |
Great thread!! You guys make it look too easy. Makes us want to do ours too.
Thanks. (IMG:style_emoticons/default/piratenanner.gif) |
| pete-stevers |
 Dec 16 2008, 12:51 PM Dec 16 2008, 12:51 PM
Post
#84
|
|
saved from fire!     Group: Members Posts: 2,644 Joined: 10-October 04 From: Abbotsford,BC, Canada Member No.: 2,914 Region Association: Pacific Northwest 
|
my opinions on the sanding so far...it is tough to use a board for the sanding
a round sanding block is necessary, and hard and soft block as well the touch method works well as well as a guide coat but blocking a semigloss primer is great as well, the low spots shine out and blowing of the dust every now and again reveals the lows and you just keep blocking out the highs until the lows are "flat" depending on how low you are you can shoot a guide and check it again....by blocking it off plus i have 2 500 watt lights, which really help highlighting ...................... i am determined to do this without the help of a pro i think the whole idea of hotrodding is to do as much as you possibly can yourself or with the help of other like minded individuals...like Dan (IMG:style_emoticons/default/drunk.gif) and the rest of you guys |
| sixnotfour |
 Jan 2 2009, 10:47 PM Jan 2 2009, 10:47 PM
Post
#85
|
|
914 Wizard           Group: Members Posts: 10,636 Joined: 12-September 04 From: Life Elevated..planet UT. Member No.: 2,744 Region Association: Rocky Mountains 

|
new year (IMG:style_emoticons/default/icon_bump.gif)
|
| scotty b |
 Jan 3 2009, 09:28 AM Jan 3 2009, 09:28 AM
Post
#86
|
|
rust free you say ?                Group: Members Posts: 16,375 Joined: 7-January 05 From: richmond, Va. Member No.: 3,419 Region Association: None |
my opinions on the sanding so far...it is tough to use a board for the sanding a round sanding block is necessary, and hard and soft block as well the touch method works well as well as a guide coat but blocking a semigloss primer is great as well, the low spots shine out and blowing of the dust every now and again reveals the lows and you just keep blocking out the highs until the lows are "flat" depending on how low you are you can shoot a guide and check it again....by blocking it off plus i have 2 500 watt lights, which really help highlighting ...................... i am determined to do this without the help of a pro i think the whole idea of hotrodding is to do as much as you possibly can yourself or with the help of other like minded individuals...like Dan (IMG:style_emoticons/default/drunk.gif) and the rest of you guys (IMG:style_emoticons/default/agree.gif) You're doing it all right Steve. Anytime you have a radius you should use a round block. Using a hard edge block will actually cut grooves into the bondo/primer as you move across it. Sand in a criss cross pattern,ALWAYS guide coat, keep the panel clean so you can keep an eye on your guide coat, and re guide coat if you have any doubts. Run your hand lengthwise ( fingers to heel ) not cross ways, to feel the panel, also slide your hand in long strokes, short strokes will not do you much good. |
| pete-stevers |
 Jan 14 2009, 05:19 PM Jan 14 2009, 05:19 PM
Post
#87
|
|
saved from fire!     Group: Members Posts: 2,644 Joined: 10-October 04 From: Abbotsford,BC, Canada Member No.: 2,914 Region Association: Pacific Northwest 
|
i am planning to do the final block with 800 wet
Is there any problem with blocking the color with 1200 wet in between coats of color?? |
| scotty b |
 Jan 14 2009, 05:43 PM Jan 14 2009, 05:43 PM
Post
#88
|
|
rust free you say ?                Group: Members Posts: 16,375 Joined: 7-January 05 From: richmond, Va. Member No.: 3,419 Region Association: None |
i am planning to do the final block with 800 wet Is there any problem with blocking the color with 1200 wet in between coats of color?? Assuming it is a solid color 600-1000 tops. The higher grade you sand it to the less the clear has to adhere to, the easier it is to run the clear. NEVER EVER sand a metallic base, you WILL ruin it. I see no need in all honesty in sandiong the base anyway unless there is something in it. You'll get a better result wet sanding the clear then reclearing it |
| effutuo101 |
 Jan 14 2009, 05:52 PM Jan 14 2009, 05:52 PM
Post
#89
|
|
Advanced Member     Group: Members Posts: 2,735 Joined: 10-April 05 From: Lemon Grove Member No.: 3,914 Region Association: Southern California |
(IMG:style_emoticons/default/agree.gif)
for the little work I have done. |
| charliew |
 Jan 15 2009, 01:59 PM Jan 15 2009, 01:59 PM
Post
#90
|
|
Advanced Member     Group: Members Posts: 2,363 Joined: 31-July 07 From: Crawford, TX. Member No.: 7,958 |
I guess I missed it did you guys try some flared rockers to see how they lined up to start with? The curves of the flares and fenders are the easy parts. It's the almost flat areas that are tough. It takes good lighting and the experience to know how to use the angles of the lighting to pick up the very long minute waves. You can't stand back and look too much, always be looking and feeling for waves. On the last guide coat I like to put water on the surface to get it as shiney as possible to check the surfaces. If you are going to remove all the orange peel it will show every wave you miss on the final guide coat. Also the darker the color the more the waves will show up. I close my eyes when I am trying to determine where a small imperfection in the surface is and start with long sweeps of my hand till I feel something then keeping it centered in the sweeps get them shorter and shorter till I can either see or mark the spot. The closer you can get the filler to perfect the less guide coats you will need and the less shrinkage you will see in a coupla years. Also the final finish of the filler should be about 220 grit so as to not have deep scratches to fill with the primer as that can also shrink and show up when the hot solvents sink in from the top coats. If you try to level spots with clear they will usually shrink and show up later. If you use a lot of top coat it will take several months to get fully dry. Try to put a dent in it where it won't show with your fingernail (under a fender lip) a few months down the road and see how far it dents. Usually the dent will come out over time.
When the last coat of clear is on and wet you will know how good of a job you did and whether you might need to leave a little orange peel or not when you are leveling and buffing. If you don't have a real good setup to paint top coats you might want to use some fisheye eliminator. It prevents small oil specks from making pimples in the paint. Urethanes being sortof like plastic don't melt into each other as each coat goes on. If you get through and see a dryspot that looks rough and will need extra leveling you can use some ppg blending solvent to melt the paint down. Be careful and just dust it on and see how it goes, you can add more but too much and it will run or sag. It looks like magic but it will help level overspray or dryspots really well. When you are color sanding if you go through the clear you can put some more on that spot and use the blending solvent on the edge of the new clear to melt the little overspray drops in before you resand it. Be sure and use a tack rag as the blending solvent also has clear it it. When you sand clear between coats to remove nibs or lint, some clears will lift or wrinkle if they are not fully dry especially on the edge where you sand through. Clear is a weak paint and will delaminate easily if you leave to smooth of a surface for it to adhere to I use 400 or a gray scotchbrite pad to scuff the surface real well. It will try to seperate where you are bolting something on it or flexing it. Also something I try to remember when I am spraying top coats is that they are highly prone to attract dust as the electrostatic charge is always there. I have used a jumper cable connected to the underside of the body to try and ground the body to stop it as much as possible. I'm not sure that it helps because of the multiple coats and the filler but I do it anyway. |
| pete-stevers |
 Jan 26 2009, 08:51 PM Jan 26 2009, 08:51 PM
Post
#91
|
|
saved from fire!     Group: Members Posts: 2,644 Joined: 10-October 04 From: Abbotsford,BC, Canada Member No.: 2,914 Region Association: Pacific Northwest 
|
i have finished blocking the second layer of primer... (IMG:style_emoticons/default/piratenanner.gif)
now it is time to double check all painting surfaces i will shoot the undercoating on the inners clean the shop up with a vaccum triple check and paint next week, probably fri. i have trial fitted the rockers and done a bunch of glass work on them to make them work, good thing glass is so easy to work with....because there where a lot of fitment issues with them, as far as lining up goes. the glass bumpers and valences will be painted black and then it is on to painting the centers on the wheels. eights out back, sevens up front |
| scotty b |
 Jan 26 2009, 08:57 PM Jan 26 2009, 08:57 PM
Post
#92
|
|
rust free you say ?                Group: Members Posts: 16,375 Joined: 7-January 05 From: richmond, Va. Member No.: 3,419 Region Association: None |
Hose the floor down, and if at all possible wet the walls. This will do LOADS to keep the dust out of the paint. (IMG:style_emoticons/default/aktion035.gif)
|
| pete-stevers |
 Jan 28 2009, 12:39 PM Jan 28 2009, 12:39 PM
Post
#93
|
|
saved from fire!     Group: Members Posts: 2,644 Joined: 10-October 04 From: Abbotsford,BC, Canada Member No.: 2,914 Region Association: Pacific Northwest 
|
Thanks scotty...i was going to do that as well....
|
| pete-stevers |
 Jan 30 2009, 08:09 PM Jan 30 2009, 08:09 PM
Post
#94
|
|
saved from fire!     Group: Members Posts: 2,644 Joined: 10-October 04 From: Abbotsford,BC, Canada Member No.: 2,914 Region Association: Pacific Northwest 
|
Well i got a little farther today
sprayed a layer of undercoat in the innner fenders and got a three layers of base on Attached image(s) 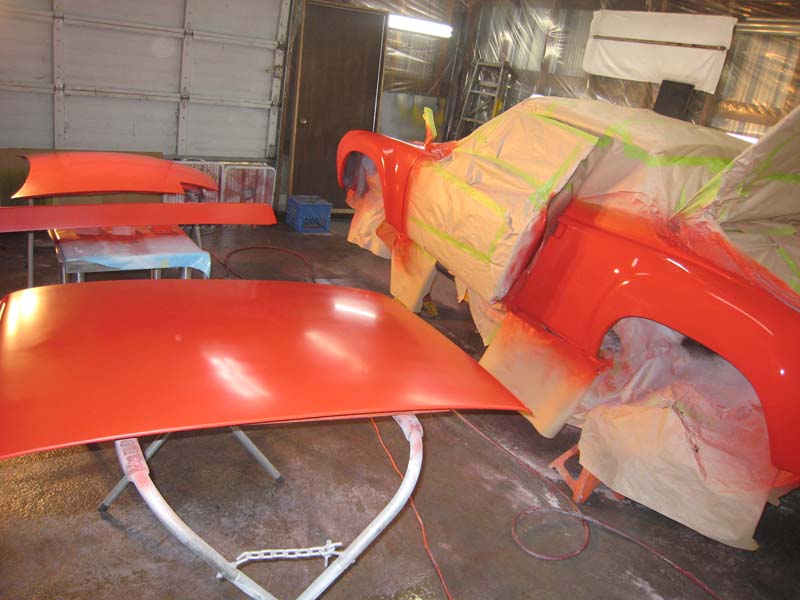 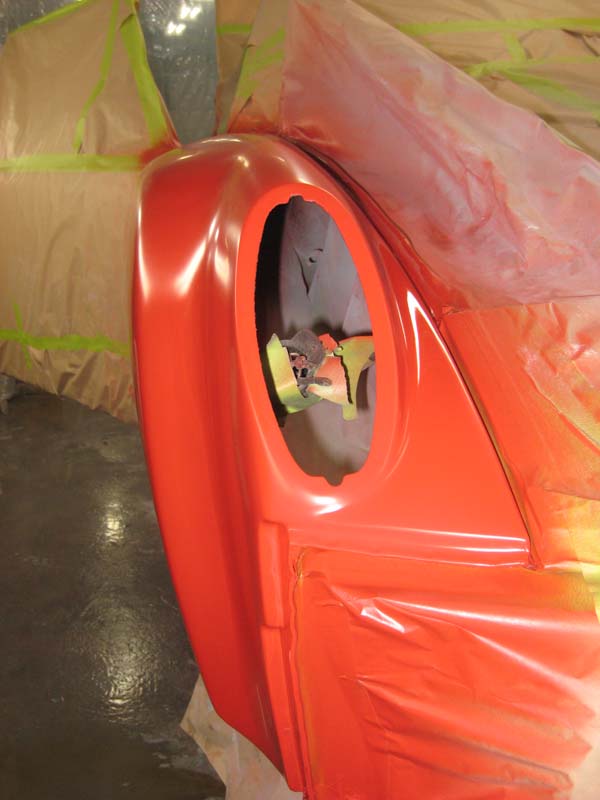
|
| pete-stevers |
 Jan 30 2009, 08:11 PM Jan 30 2009, 08:11 PM
Post
#95
|
|
saved from fire!     Group: Members Posts: 2,644 Joined: 10-October 04 From: Abbotsford,BC, Canada Member No.: 2,914 Region Association: Pacific Northwest 
|
this is the quarater that caused the most trouble due to previous damage
but this one turned out good Attached image(s) 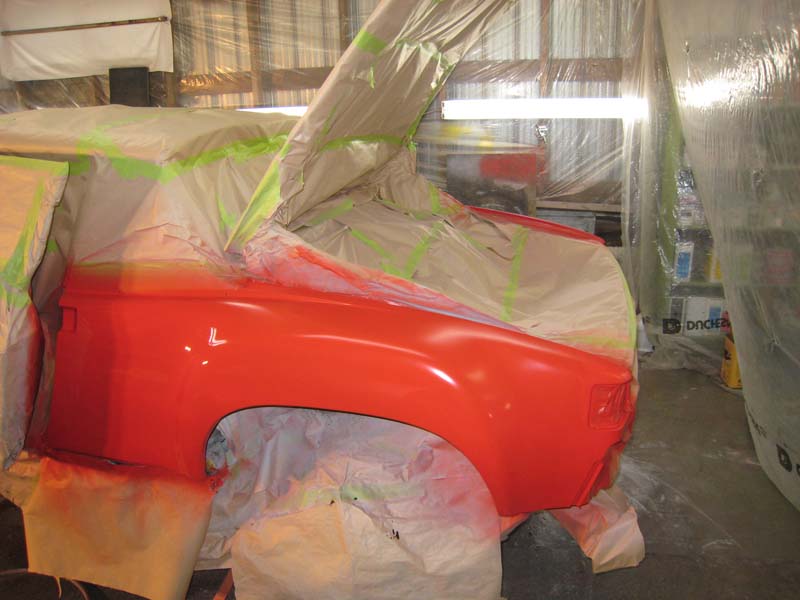
|
| pete-stevers |
 Jan 30 2009, 08:14 PM Jan 30 2009, 08:14 PM
Post
#96
|
|
saved from fire!     Group: Members Posts: 2,644 Joined: 10-October 04 From: Abbotsford,BC, Canada Member No.: 2,914 Region Association: Pacific Northwest 
|
and here is my big bad...can't even look at scotty b in eyes
i guesse i am going to have to wet sand the base... i am guessing 800 and then another layer of base ...eh? and then clear.... Attached image(s) 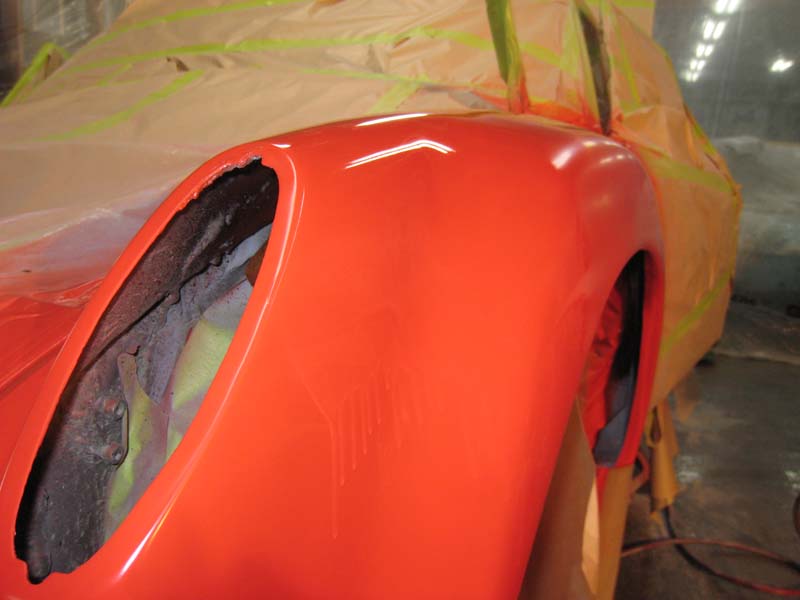
|
| pete-stevers |
 Jan 30 2009, 08:16 PM Jan 30 2009, 08:16 PM
Post
#97
|
|
saved from fire!     Group: Members Posts: 2,644 Joined: 10-October 04 From: Abbotsford,BC, Canada Member No.: 2,914 Region Association: Pacific Northwest 
|
All of this would not be possible without Sher talking her parents into taking Our four year old for the day,
With Sher on bed rest, it makes it a lot tougher to get out to the shop and work.... so i got her some of these Attached image(s) 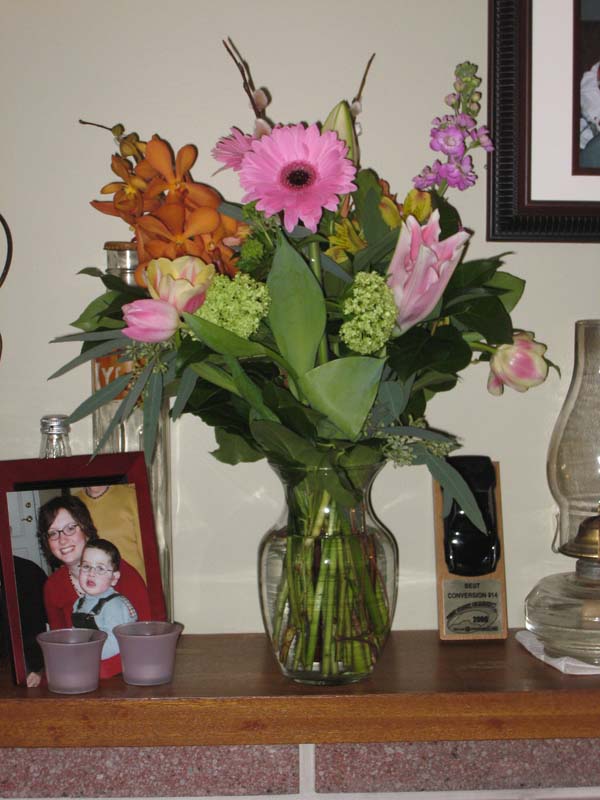
|
| greenie |
 Jan 30 2009, 08:22 PM Jan 30 2009, 08:22 PM
Post
#98
|
|
Senior Member    Group: Members Posts: 873 Joined: 26-October 04 From: Trinidad Member No.: 3,013 Region Association: Pacific Northwest |
Great job Pete, I can't wait to see it!
Don't invite PanelBilly up, it will add many hours. So what was the toughest part of the project so far? |
| pete-stevers |
 Jan 30 2009, 08:25 PM Jan 30 2009, 08:25 PM
Post
#99
|
|
saved from fire!     Group: Members Posts: 2,644 Joined: 10-October 04 From: Abbotsford,BC, Canada Member No.: 2,914 Region Association: Pacific Northwest 
|
toughest part so far is the filling,puttying and blocking of the quarters
i enjoy the painting part....except for the runs... (IMG:style_emoticons/default/mad.gif) but i enjoy the solitude working in the shop! |
| greenie |
 Jan 30 2009, 08:44 PM Jan 30 2009, 08:44 PM
Post
#100
|
|
Senior Member    Group: Members Posts: 873 Joined: 26-October 04 From: Trinidad Member No.: 3,013 Region Association: Pacific Northwest |
toughest part so far is the filling,puttying and blocking of the quarters i enjoy the painting part....except for the runs... (IMG:style_emoticons/default/mad.gif) but i enjoy the solitude working in the shop! (IMG:style_emoticons/default/agree.gif) The shaping/blocking is very tough for me, I think I'm finished and the next night I'm starting over ( maybe it's the (IMG:style_emoticons/default/beer3.gif) ). The solitude is the best part, (although it is very dusty solitude) many hours to think. Keep at it. Attached image(s) 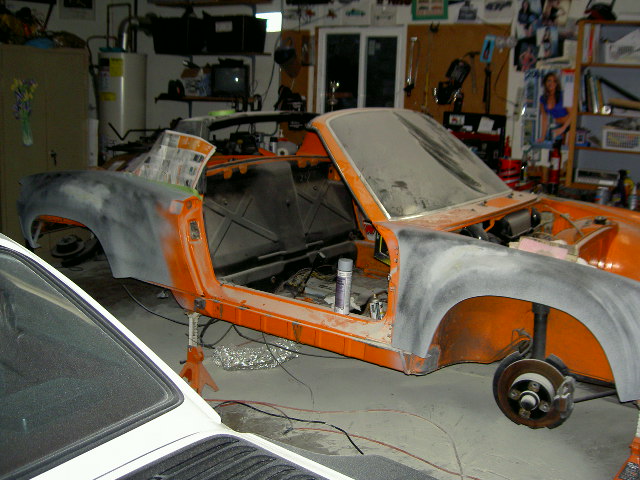
|
  |
26 User(s) are reading this topic (26 Guests and 0 Anonymous Users)
0 Members:

|
Lo-Fi Version | Time is now: 23rd November 2024 - 01:34 AM |
Invision Power Board
v9.1.4 © 2024 IPS, Inc.


