|
|
|
Porsche, and the Porsche crest are registered trademarks of Dr. Ing. h.c. F. Porsche AG.
This site is not affiliated with Porsche in any way. Its only purpose is to provide an online forum for car enthusiasts. All other trademarks are property of their respective owners. |
|
|


| corpselaurel |
 May 26 2004, 12:48 PM May 26 2004, 12:48 PM
Post
#1
|
|
Member  Group: Members Posts: 90 Joined: 15-April 04 From: usa Member No.: 1,931 |
I did a search but did not find anything on the forum.
How do you guys attach the glass fiber gt flares? Is there a site that has some tips etc. I am a big DIYer so I will be doing it myself. I have heard some rivit them - thoughts? |
   |

 
|
  |
Replies(1 - 19)
| SirAndy |
May 26 2004, 12:56 PM
Post
#2
|
|
Resident German Group: Admin Posts: 41,815 Joined: 21-January 03 From: Oakland, Kalifornia Member No.: 179 Region Association: Northern California |
you can just rivet them on, if you like the look (hey randal, time to show your car again (IMG:style_emoticons/default/biggrin.gif) ) ...
otherwise, they get glued on. you rivet or screw them on while the gluew dries, then take out the rivets or screws and lay some FG over the seam then bodo until smooth. (if you don't remove the rivets, the bondo will crack). same on the inside, lay some FG over the seem from underneath to. oh, and don't forget to cut off any excess fender sheet metal, otherwise you'll slice your tires on that first bump you hit. (IMG:style_emoticons/default/wink.gif) Andy |
|
|
|
| corpselaurel |
May 26 2004, 01:05 PM
Post
#3
|
|
Member Group: Members Posts: 90 Joined: 15-April 04 From: usa Member No.: 1,931 |
Thanks. I just found this article at pelican parts too.
Anyone with pics? (IMG:style_emoticons/default/biggrin.gif) |
|
|
|
| Eric_Shea |
May 26 2004, 02:42 PM
Post
#4
|
|
PMB Performance Group: Admin Posts: 19,289 Joined: 3-September 03 From: Salt Lake City, UT Member No.: 1,110 Region Association: Rocky Mountains |
I called AIR (the vendor I bought them from) and they were very helpful.
My advice can be long and drawn out but here goes: 1. Body Clamps. I bought two sets at Harbor. Cheap. Leave the outer rockers on for ref. and clamp the raw flares in place on the body. Take a sharpy and mark the edge of the flare and an area roughly 2" out from the edge of the flare. 2. Remove the flare and mark another line roughly 1" in from where the flare edge was marked. This will be your "cut" line. I recommend leaving the very bottom of each wheel well in tact. This is hard to describe but leave the last 1" of original metal that includes where the support comes over (front and rear). You will galss these into the bottom of the flare. 3. Cut. 4. Grind out to the outer mark with a 36 grit pad. While you have the metal off... grind the "inside" of the fender about 3" in from the edge of the cut. 5. Remount your flares and remark the edge for ref. 6. Remove the flares once again and spread the bonding agent. I don't remember the name but it's something like Vette Bond. Check with AIR. It's specially formulated to bond fiberglass to metal. 7. Mount the flares. use the rockers again as a guide and run a screwdriver through various areas of the bonding agent to find your guide. Clamp them down using the body clamps. 8. In step 4 we ground the inside of the fender. You now need to use fiberglass "cloth" (not mat) and bond the backside of the flare to the fender. You may want to take a body hammer and work the fender out toward the flare but not too much... you can crack the bonding agent. If you do not do this your flares will crack. 9. Use the same 36 grit and start working the lip of the flare and the bonding agent. Once you have it down then use MarGlass (indestructable) to fill the groove. 10. You should now have a decent looking shape with very little filler needed. At this point switch over to regular body filler for the minor work. Note: MarGlass should be worked with a filler file when it is just getting firm. If you wait until it's hard you'll need to get the grinder out. Others have used rivets and/or screws in lew of the body clamps but I found them too cheap and convenient not to buy them for this job alone. I can get some pics if you need them. |
|
|
|
| corpselaurel |
May 26 2004, 02:54 PM
Post
#5
|
|
Member Group: Members Posts: 90 Joined: 15-April 04 From: usa Member No.: 1,931 |
Thanks, I will get some clamps - seems like a better option to me.
If you can post pics that would be great. |
|
|
|
| Eric_Shea |
May 26 2004, 04:02 PM
Post
#6
|
|
PMB Performance Group: Admin Posts: 19,289 Joined: 3-September 03 From: Salt Lake City, UT Member No.: 1,110 Region Association: Rocky Mountains |
Front flare with bonding agent. You should be able to see the glass/bond/metal layers.
Attached image(s) 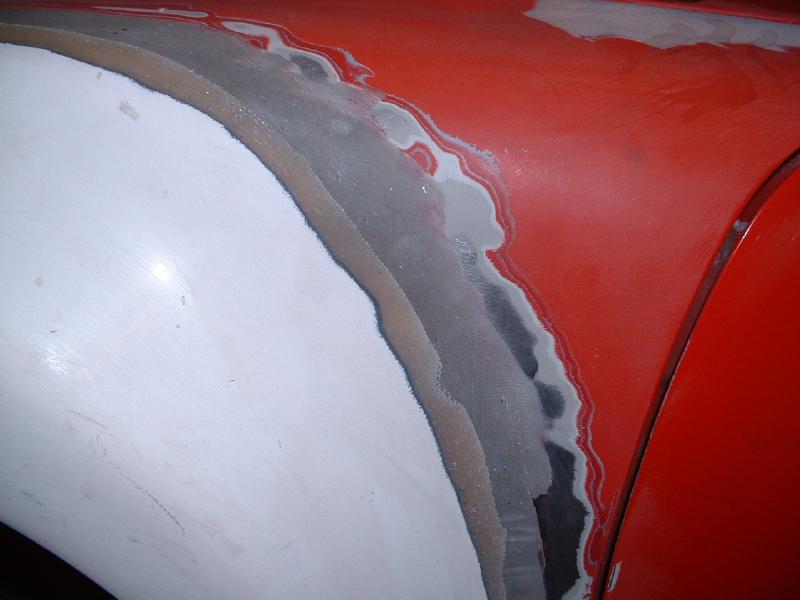
|
|
|
|
| Eric_Shea |
May 26 2004, 04:03 PM
Post
#7
|
|
PMB Performance Group: Admin Posts: 19,289 Joined: 3-September 03 From: Salt Lake City, UT Member No.: 1,110 Region Association: Rocky Mountains |
Here's the other front with a little MarGlass on it.
Attached image(s) 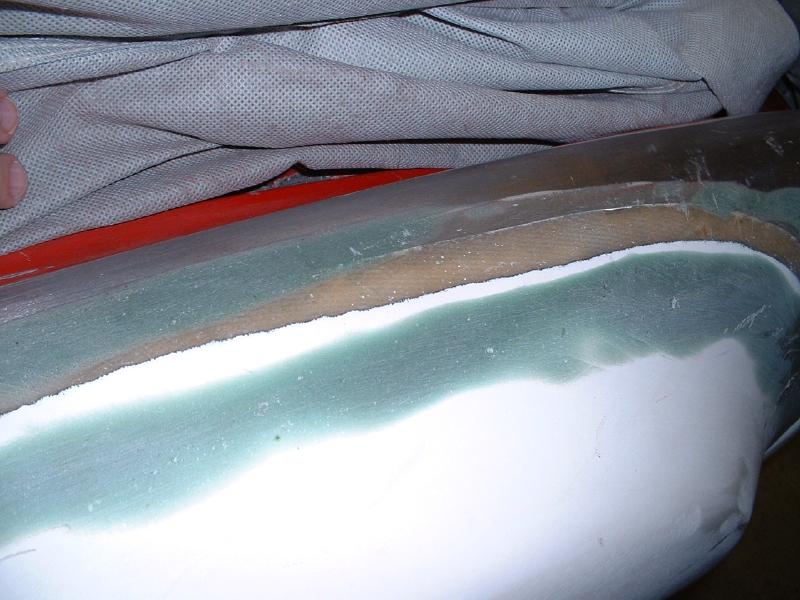
|
|
|
|
| Eric_Shea |
May 26 2004, 04:03 PM
Post
#8
|
|
PMB Performance Group: Admin Posts: 19,289 Joined: 3-September 03 From: Salt Lake City, UT Member No.: 1,110 Region Association: Rocky Mountains |
Here's an Andy shot of the inside of the front fender...
Attached image(s) 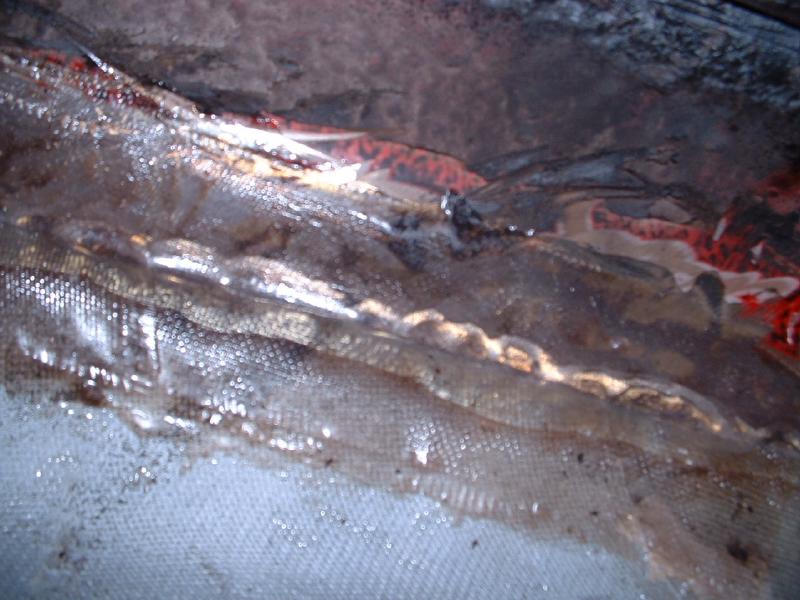
|
|
|
|
| Eric_Shea |
May 26 2004, 04:05 PM
Post
#9
|
|
PMB Performance Group: Admin Posts: 19,289 Joined: 3-September 03 From: Salt Lake City, UT Member No.: 1,110 Region Association: Rocky Mountains |
I didn't glass the backside of the rears and I started working at the base with a GT rocker. The GT rocker caught the flare and you can see what will happen if you fail to glass the backsides.
Attached image(s) 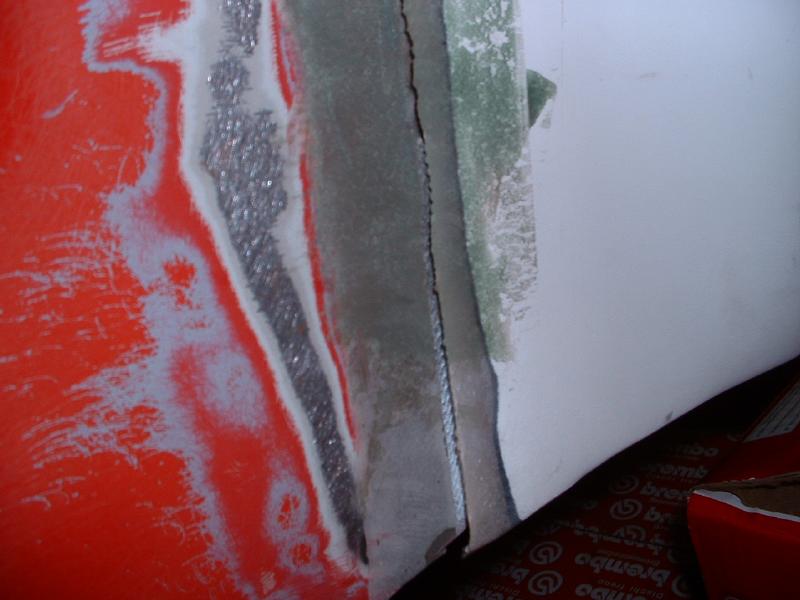
|
|
|
|
| Eric_Shea |
May 26 2004, 04:06 PM
Post
#10
|
|
PMB Performance Group: Admin Posts: 19,289 Joined: 3-September 03 From: Salt Lake City, UT Member No.: 1,110 Region Association: Rocky Mountains |
Here's a rear blended in fairly well with MarGlass
Attached image(s) 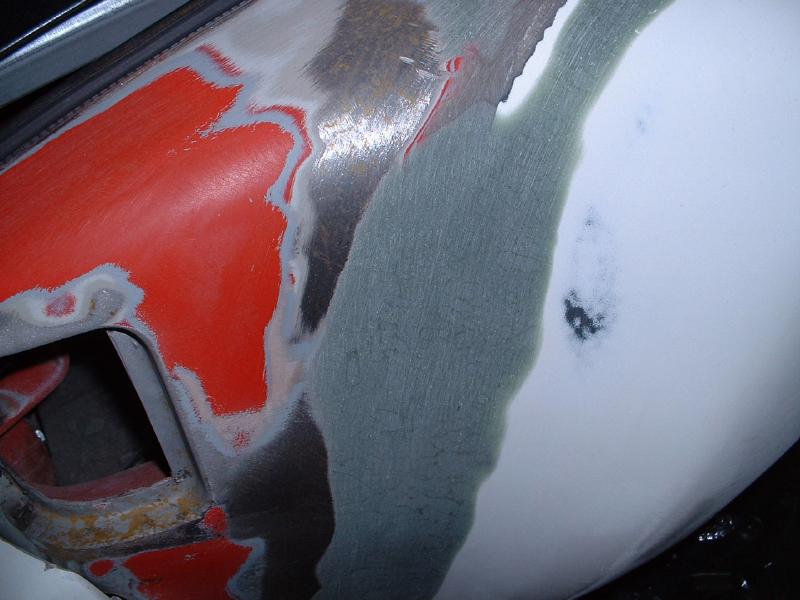
|
|
|
|
| Randal |
May 26 2004, 04:45 PM
Post
#11
|
|
Advanced Member Group: Members Posts: 4,446 Joined: 29-May 03 From: Los Altos, CA Member No.: 750 |
Fiber glass with rivets:
Attached thumbnail(s) 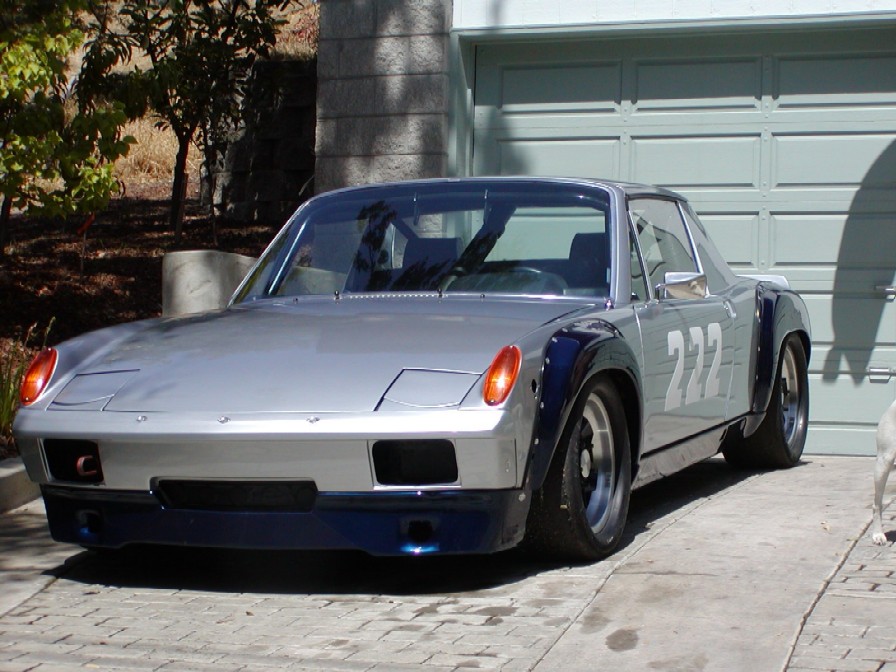
|
|
|
|
| ein 6er |
May 26 2004, 05:15 PM
Post
#12
|
|
Senior Member Group: Benefactors Posts: 1,115 Joined: 11-February 03 Member No.: 300 Region Association: None |
here is a thread on pelican of a DIY flare install with pics.
|
|
|
|
| lmcchesney |
May 26 2004, 06:59 PM
Post
#13
|
|
Member Group: Members Posts: 488 Joined: 24-November 03 From: Ocala, Fl. Member No.: 1,381 Region Association: None |
We put the FG flares on last winter. Pretty much as above, except, if you remove the paint to bare metal, be aware that the fiberglass resin may not adhere to the metal. Ours would lift off after completely setting. Upon advise of the body work guys, we coated the bare metal with epoxy first and let that set for a day, then attached the flares with fiberglass resin (Duraglass or other brand). We used the sheet metal screws for holding the flare on until dried. I left three rivets on each flare to ease my peace of mind. They have been through a lot of twisting and have not shown cracks or lifting. After the fiberglass resin is used to adhere and fill in the holes, use a soft body filler such as Spot Lite to get the even flow from the body to the flares. Takes a long time and lots of sand paper, but it works.
|
|
|
|
| lmcchesney |
May 26 2004, 07:11 PM
Post
#14
|
|
Member Group: Members Posts: 488 Joined: 24-November 03 From: Ocala, Fl. Member No.: 1,381 Region Association: None |
The sawsall.
Attached image(s) 
|
|
|
|
| lmcchesney |
May 26 2004, 07:13 PM
Post
#15
|
|
Member Group: Members Posts: 488 Joined: 24-November 03 From: Ocala, Fl. Member No.: 1,381 Region Association: None |
the hole
Attached image(s) 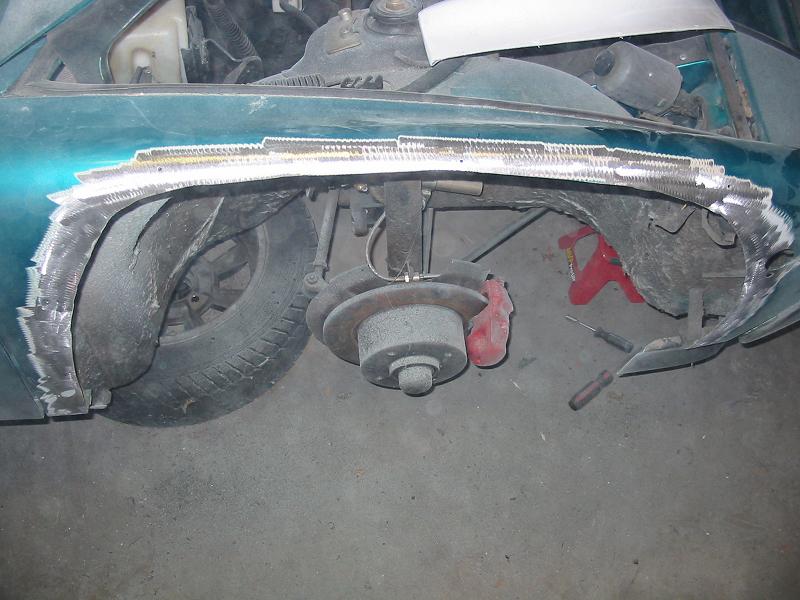
|
|
|
|
| lmcchesney |
May 26 2004, 07:14 PM
Post
#16
|
|
Member Group: Members Posts: 488 Joined: 24-November 03 From: Ocala, Fl. Member No.: 1,381 Region Association: None |
front flare
Attached image(s) 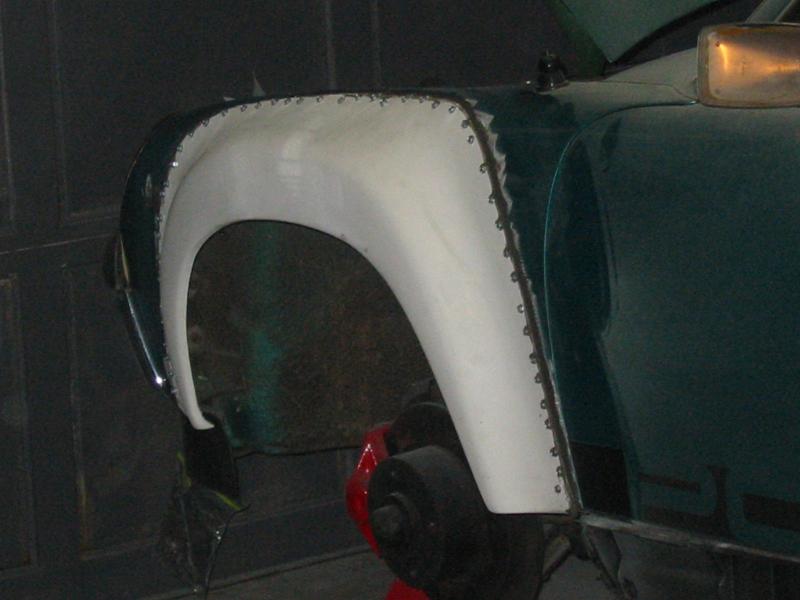
|
|
|
|
| lmcchesney |
May 26 2004, 07:15 PM
Post
#17
|
|
Member Group: Members Posts: 488 Joined: 24-November 03 From: Ocala, Fl. Member No.: 1,381 Region Association: None |
rear flare. Don't forget to fill in the inner wheel well between the fiberglass flare and the steel fender. Use fiberglass resin or bondo depending on desired weight.
Attached image(s) 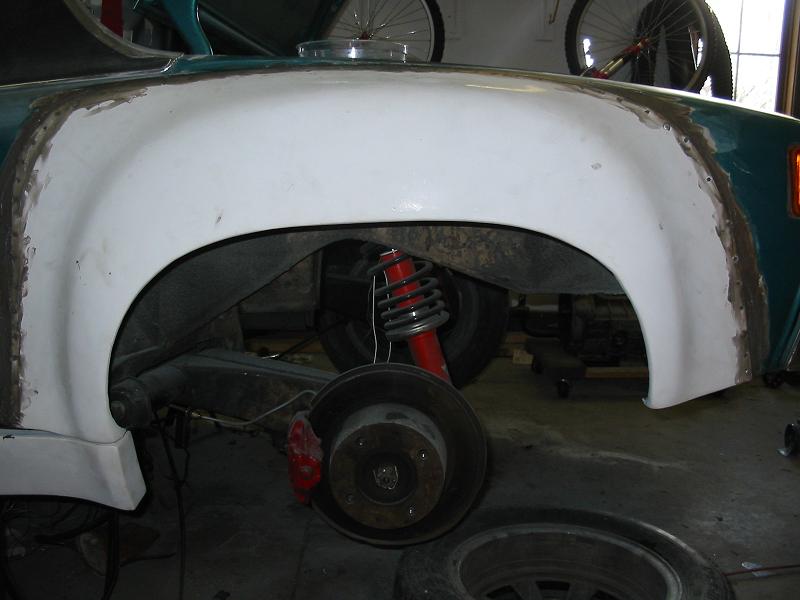
|
|
|
|
| lmcchesney |
May 26 2004, 07:16 PM
Post
#18
|
|
Member Group: Members Posts: 488 Joined: 24-November 03 From: Ocala, Fl. Member No.: 1,381 Region Association: None |
Might consider adding a cold air scoup in the rocker panels like my Andrew has done.
Attached image(s) 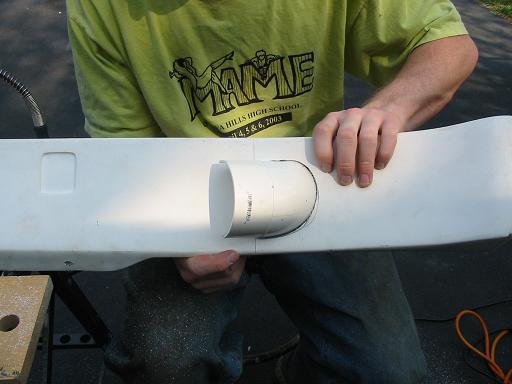
|
|
|
|
| lmcchesney |
May 26 2004, 07:18 PM
Post
#19
|
|
Member Group: Members Posts: 488 Joined: 24-November 03 From: Ocala, Fl. Member No.: 1,381 Region Association: None |
Scoup in place. We tested it prior to placement. It really does capture significant air. The air is directed to an oil cooler on one side and hosed into the engine compartment on the other side.
Attached image(s) 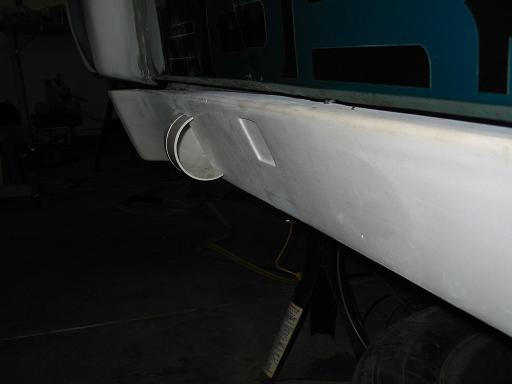
|
|
|
|
| bburke914 |
May 26 2004, 07:20 PM
Post
#20
|
|
Newbie Group: Members Posts: 7 Joined: 25-May 04 From: Raleigh,NC Member No.: 2,106 |
The method described at Pelican Parts worked great for me. I bought fiberglass flares off of ebay and the front flare appeared to be off of a 911. I ended up using it . The key is to make sure that the metal is within at least a 1/16" of the flare iteselft. I had to cut and bend and beat the fender to get this clearance. But once I did the flare worked great.
Ben |
|
|
|
|
1 User(s) are reading this topic (1 Guests and 0 Anonymous Users)
0 Members:

|
Lo-Fi Version | Time is now: 27th September 2024 - 01:47 PM |
Invision Power Board
v9.1.4 © 2024 IPS, Inc.