|
|

|
Porsche, and the Porsche crest are registered trademarks of Dr. Ing. h.c. F. Porsche AG.
This site is not affiliated with Porsche in any way. Its only purpose is to provide an online forum for car enthusiasts. All other trademarks are property of their respective owners. |
|
|
| Rotary'14 |
 Jan 19 2009, 08:36 PM Jan 19 2009, 08:36 PM
Post
#1
|
|
Senior Member    Group: Members Posts: 753 Joined: 24-April 05 From: Los Angeles Member No.: 3,977 |
Porsche Gauge illumination upgrade/modification.
For this write up I’ve used a 914 Tachometer, but the method is similar for other Porsche VDO gauges. Pointers appear dim, but this is a short coming of my camera. In real life pointers are easy to see. Tools you will need: Small flat screwdriver Scissors Soldering Iron Wire stripper Crimp tool Parts you will need: 2 wire connectors wire Small diameter heat shrink tubing Clear packaging plastic(saved from trash) Scotch tape solder 5 feet of Electro Luminesent wire 12v inverter for above wire Gauge Dis-assembly: First thing is to open up the gauge. This is done by prying at the bezel with a small screwdriver. Work around ¾ of the circumference of the gauge. It should be possible to remove the front trim bezel holding the lens in place. Beneath the lens is one or two additional bezel trim pieces (depending upon year of gauge). Examine the rear of the gauge and you should notice 3 or 4 small flat head screws. These hold the gauge mechanism in place. CAREFULLY remove the mechanism by loosening the screws, and set the mechanism aside. Attached image(s) 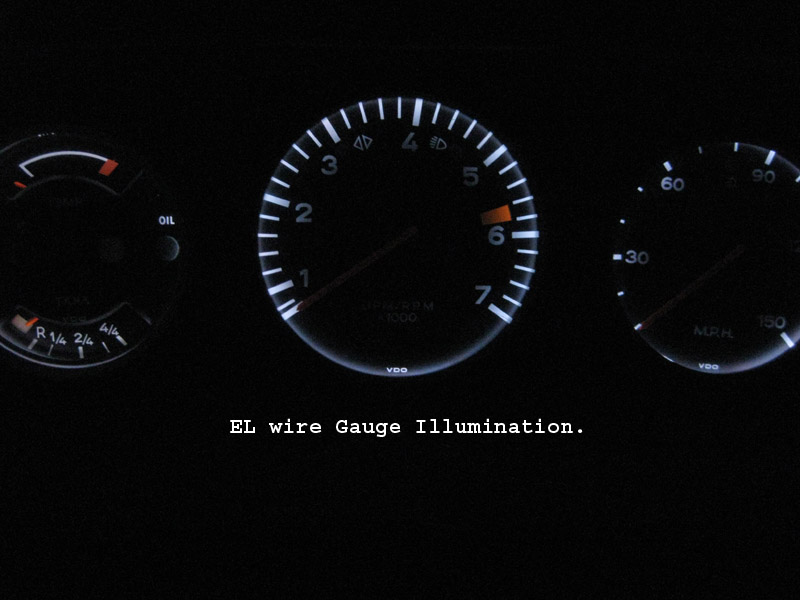 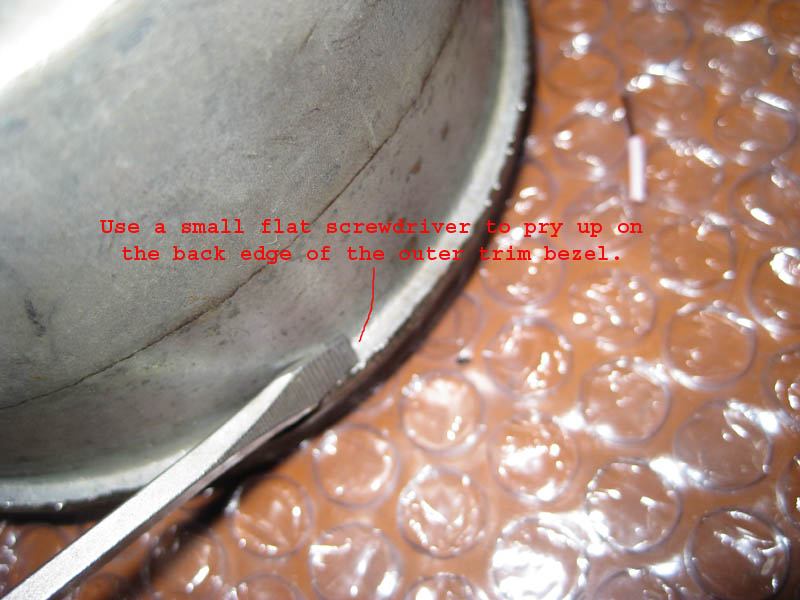 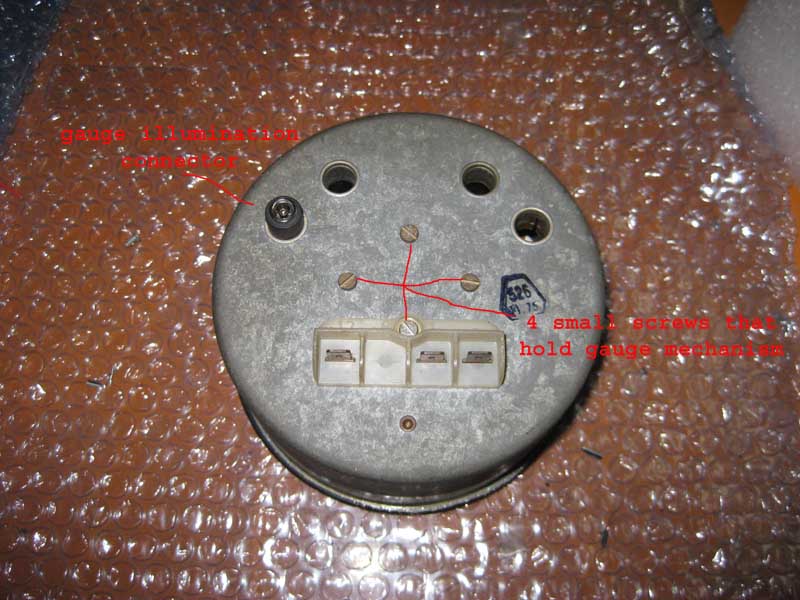 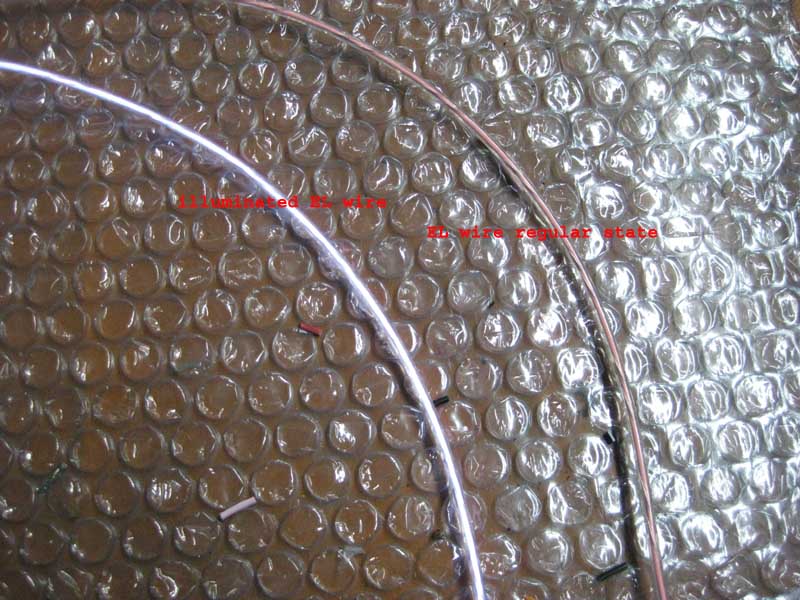
|
  |
Replies
| Rotary'14 |
 Jan 19 2009, 08:48 PM Jan 19 2009, 08:48 PM
Post
#2
|
|
Senior Member    Group: Members Posts: 753 Joined: 24-April 05 From: Los Angeles Member No.: 3,977 |
Hold lens in place over trim bezels and look for EL wire. It should be tucked up nice and tight beneath trim bezel, and should NOT be visible from the side of an assembled gauge.
If all things look good, go ahead and re-assemble the gauge, by snapping the outer trim bezel on. Don’t re bend the bezel yet,, we need to test the gauge lighting. After gauge passes lighting test, seal it back up the best you can, by bending over the back of the outer bezel. Repeat above procedure for as many gauges as you have in your car. If you also want to illuminate your glove box,, 2 small holes is all you need. Please remember to be tasteful in the application of accent lighting. Attached image(s) 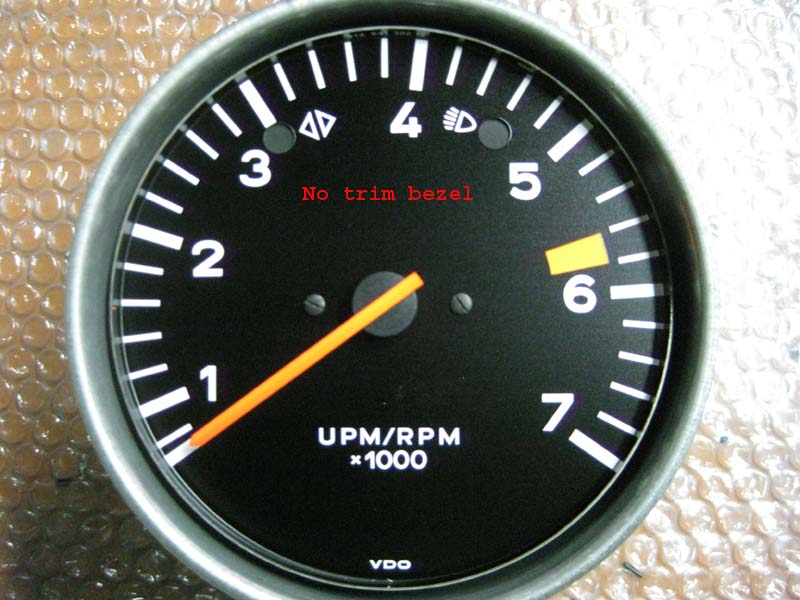 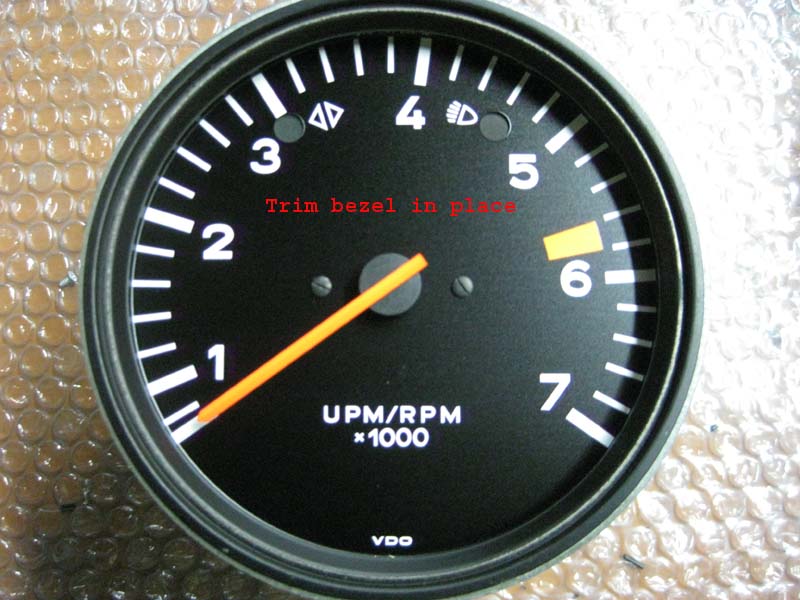
|
Posts in this topic
 Rotary'14 Guage lighting update for the CSOB Jan 19 2009, 08:36 PM
 Rotary'14 Material Preparation:
Cut the clear packing ... Jan 19 2009, 08:40 PM
 Rotary'14 Soldering EL wire:
Strip EL wire. There is a c... Jan 19 2009, 08:43 PM
 Rotary'14 We only need one inverter for any number of gauges... Jan 19 2009, 08:44 PM
 Rotary'14 Installation into Gauge:
Route EL wire thru the... Jan 19 2009, 08:47 PM
 Rotary'14 Installation of modded gauges into car:
Disconn... Jan 19 2009, 08:51 PM
 Rotary'14 And if you found the above a little too daunting,,... Jan 19 2009, 08:55 PM
 StratPlayer :trophy: Very good.. Jan 19 2009, 10:29 PM
 Dr Evil Very novel and cool! Jan 19 2009, 10:40 PM
 porsche913b_sp Robert, looks very good, so does it come in differ... Jan 19 2009, 11:30 PM
 StratPlayer Great idea and it works very well, I used the 5m o... Feb 14 2009, 11:57 AM
 StratPlayer jlkjlkjlk Feb 14 2009, 11:59 AM
 charliew Do the plastic supports just sorta stand up on the... Feb 14 2009, 12:32 PM
 mikez BTW, painting the inside of the buckets, white, is... Feb 14 2009, 12:50 PM

 Rotary'14 I am so happy somebody else decided to give this a... Feb 14 2009, 01:51 PM
 ssstikircr Guys , WAY COOL job!! Gonna have to try t... Feb 14 2009, 01:02 PM
 StratPlayer I didn't use the plastic to hold the wire in p... Feb 14 2009, 01:29 PM
 Rotary'14 Anybody want a kit or have this done to their gaug... Sep 15 2010, 05:46 PM
 StratPlayer I had a chance to show how well this set up works ... Sep 15 2010, 06:39 PM

 Rotary'14
I had a chance to show how well this set up works... Sep 15 2010, 07:01 PM
 Al Meredith I just completed a similer installation with some ... Sep 15 2010, 07:11 PM
 Mark Henry Cool stuff!
Are these still dim-able or just ... Sep 16 2010, 07:11 AM
 charliew At night can the gauge lights be turned up brighte... Sep 16 2010, 07:57 AM

 Als914
At night can the gauge lights be turned up bright... Sep 16 2010, 10:32 AM

 Rotary'14
At night can the gauge lights be turned up bright... Sep 16 2010, 11:05 AM
 charliew In gauges I like bling, that looks good in my opin... Sep 16 2010, 10:36 AM
 Als914
In gauges I like bling, that looks good in my opi... Sep 16 2010, 10:57 AM
  |
10 User(s) are reading this topic (10 Guests and 0 Anonymous Users)
0 Members:

|
Lo-Fi Version | Time is now: 23rd November 2024 - 02:41 PM |
Invision Power Board
v9.1.4 © 2024 IPS, Inc.


