|
|

|
Porsche, and the Porsche crest are registered trademarks of Dr. Ing. h.c. F. Porsche AG.
This site is not affiliated with Porsche in any way. Its only purpose is to provide an online forum for car enthusiasts. All other trademarks are property of their respective owners. |
|
|
| ruby914 |
 Jul 4 2012, 03:28 PM Jul 4 2012, 03:28 PM
Post
#1
|
|
Senior Member    Group: Members Posts: 720 Joined: 26-April 09 From: Hawthorne, Ca Member No.: 10,305 Region Association: None |
I got some budget rockers that (IMG:style_emoticons/default/barf.gif) needed lots of work.
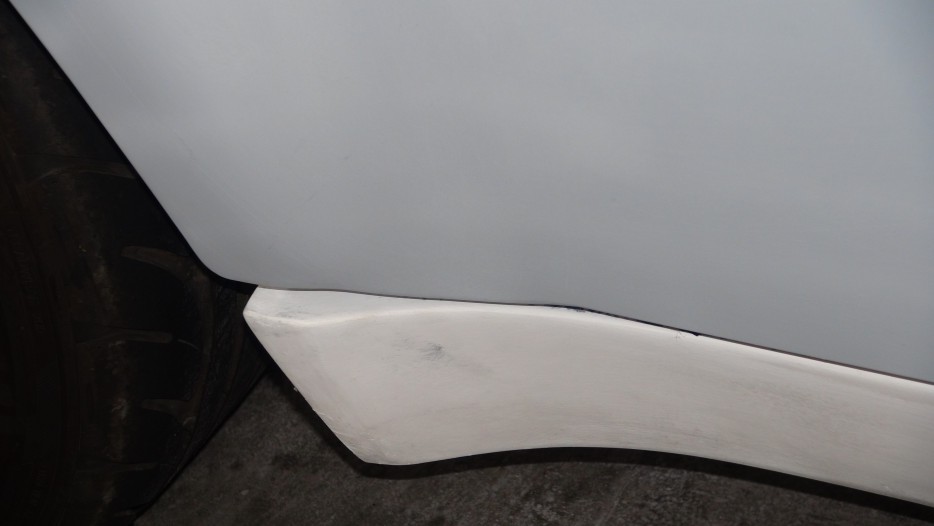
First cut about 1" off the top and had to add 3/4" to the bottom. Cut about 1/4 off the front but I still don't like how it flares out different than the body lines. On the bottom of the door there is a bevel in the body that the rocker follows until it flares out. At that point the rocker flares as much as the body, not staying set in as much as the bevel. I am thinking it would look better If the rocker didn't flare out so much. Is that clear? I would like to see how others have handled this trasition. Attached image(s) 
|
  |
Replies
| RON S. |
 Jul 4 2012, 06:25 PM Jul 4 2012, 06:25 PM
Post
#2
|
|
9140430841, FINALLY RUNNING    Group: Members Posts: 1,212 Joined: 22-May 03 From: WALTERBORO,S.C. Member No.: 724 Region Association: South East States |
I made my switch from fiberglass to steel flares on my car back in 2007.
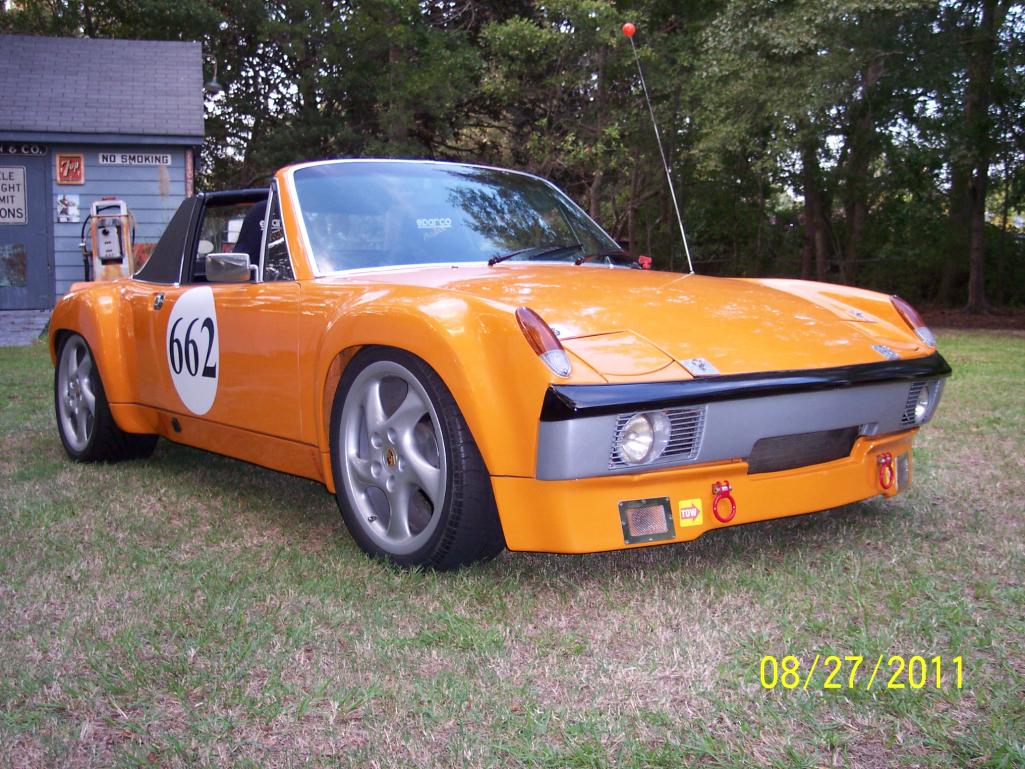
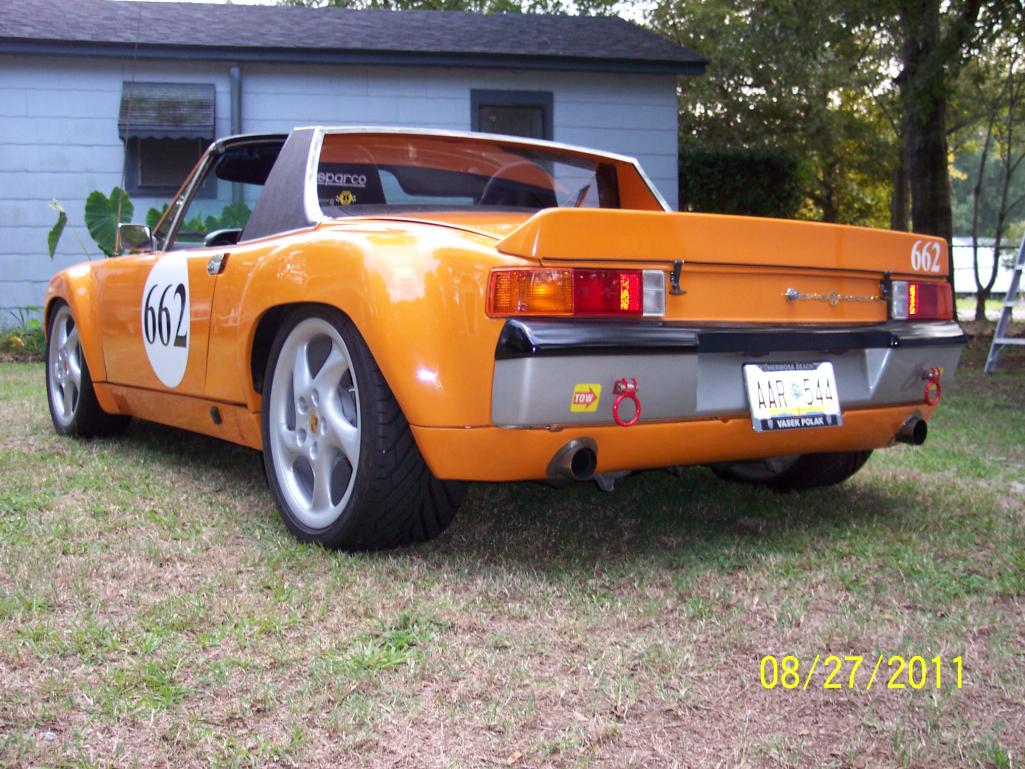
What I noticed about the flares after the initial install, was that I don't think the ends really weren't designed to match anything in particular. I to wanted all the edges to line up cleanly after all was painted and all the rockers & valances were bolted down for the final time. In the case of the rockers. After I finished welding the flares on, I cut the ends of the flares off and made sheet metal templates hat matched the existing shape of the rocker flare as it was bolted to the chassis. Then I tacked the patterns to the bottom of the flares. Then proceeded to section the flares out to meet the edges of the patterns. Then weld up the gaps, and grind down the welds. Put the rockers and valances back on to check the line up. Remove and continue to repeat until you get the right look. That is do everything before any priming or painting. Keep repeating the on and off of the valances and rockers until the factory look is achieved. Also, after all was done, I also drilled and bolted the rocker ends to he flare ends, gapping the parts with faucet washers for an even gap. I found it was easier to form the metal to mimic the rockers because with the metal it was cut, notch, weld, check fit. Immediate results. Unlike with fiber glass, it was notching, mixing resin, pasting the glass. and waiting for everything to harden to be able to check fit. In the end, I did have a little of both forming the metal and forming the glass part. But it was heavier towards the metal work. check the pics, and zoom up on the edge work. 5 years on it still looks good. Ron Attached thumbnail(s)  
|
Posts in this topic
 ruby914 GT rockers to GT flare Jul 4 2012, 03:28 PM
 porbmw Can I jump in here to say...
Sweet car, Ron S. :b... Jul 4 2012, 06:42 PM
 gothspeed Great pics!! IMO there is never enough pic... Jul 4 2012, 06:57 PM
 ruby914 Yes, that's a very nice car Ron.
Nice work.
I ... Jul 4 2012, 07:13 PM
 ruby914 Here is another photo of what I am up against. Ron... Jul 5 2012, 12:12 AM

 3d914
http://www.914world.com/bbs2/uploads/post-10305-1... Jul 6 2012, 06:24 PM
 RON S.
Can I jump in here to say...
Sweet car, Ron S. :... Jul 5 2012, 12:35 PM

 ThePaintedMan Props to a great backyard paint job! Thats how... Jul 5 2012, 12:49 PM
 ruby914
:agree: Gotta love that paint booth.
Thank... Jul 5 2012, 02:13 PM
 ClayPerrine This may help.. this is my car when the body work ... Jul 5 2012, 03:11 PM
 3d914 Ruby,
I've been concerned about the same issu... Jul 5 2012, 03:41 PM
 ruby914
This may help.. this is my car when the body work... Jul 5 2012, 03:58 PM
 3d914 Here are examples of more conventional approaches ... Jul 6 2012, 06:32 PM
 3d914 Here's a 914-6 in progress so we can see bette... Jul 6 2012, 06:38 PM
 ruby914 3d914,
Nice collection of photos.
The white car i... Jul 7 2012, 01:45 AM
 ruby914 Here is a fine example.
I would like to see a fron... Jul 7 2012, 02:13 AM
 3d914 Ruby, that's looking pretty good. Can't te... Jul 7 2012, 09:14 AM
 gothspeed
Here is a fine example.
I would like to see a fro... Feb 6 2013, 01:59 PM
 bulitt Nice thread! I added it to the steel flare in... Feb 6 2013, 02:40 PM
  |
6 User(s) are reading this topic (6 Guests and 0 Anonymous Users)
0 Members:

|
Lo-Fi Version | Time is now: 23rd November 2024 - 01:51 AM |
Invision Power Board
v9.1.4 © 2024 IPS, Inc.


