|
|
|
Porsche, and the Porsche crest are registered trademarks of Dr. Ing. h.c. F. Porsche AG.
This site is not affiliated with Porsche in any way. Its only purpose is to provide an online forum for car enthusiasts. All other trademarks are property of their respective owners. |
|
|


| McMark |
 Oct 17 2016, 05:21 PM Oct 17 2016, 05:21 PM
Post
#1
|
|
914 Freak!  Group: Retired Admin Posts: 20,179 Joined: 13-March 03 From: Grand Rapids, MI Member No.: 419 Region Association: None |
One of my winter tasks is to build a stock 2.0 with my MicroSquirt fuel injection that I can install in my car and get it dyno tuned. That's been the missing piece of my MicroSquirt setup for the last few years.
Since there isn't much demand for a stock 2.0, I just plan on doing the minimum to build a solid motor. I plan on having the valves reground, cylinder surfaces machined and reringing the pistons. Regrinding the cam and rebuilding the rods and all new bearings as well. This should give me a motor that will last through the testing, and be worth something when I'm done to pass on to a new owner at a nice price. This thread does not represent my standard procedures for rebuilding engines. This is a special case and special circumstances. For those of you on a budget, but looking to refresh their motor should appreciate this writeup. Starting off with a core engine. The previous owner mentioned this engine had a 'knock', so I'll be on the lookout for what might have caused that. This is a 'GC' code engine with air injection ports in the heads. Attached image(s) 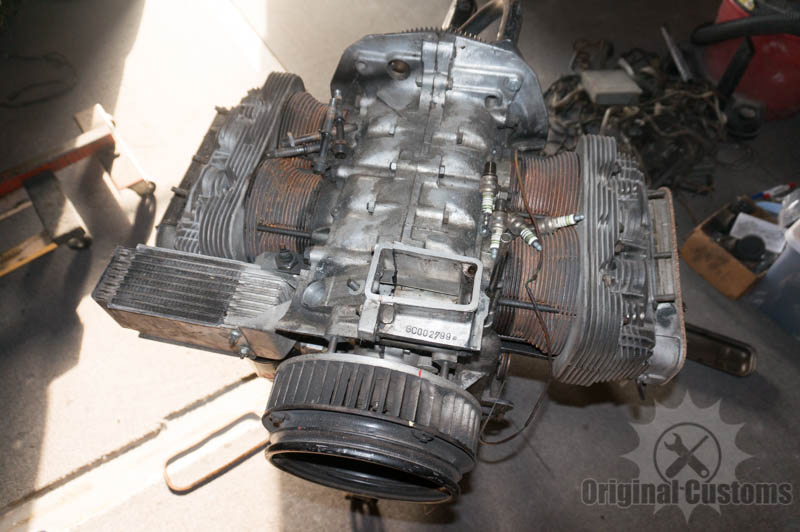 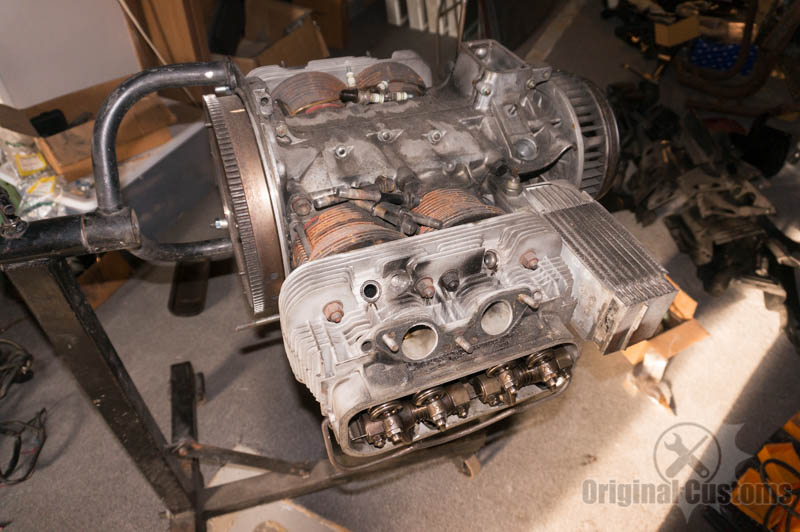
|
   |

 
|
  |
Replies
| McMark |
Oct 2 2017, 06:11 AM
Post
#2
|
|
914 Freak! Group: Retired Admin Posts: 20,179 Joined: 13-March 03 From: Grand Rapids, MI Member No.: 419 Region Association: None |
Working on assembling the crank finally. This isn't going to be a step by step build thread. Mostly just pointing out the thing that I look for that aren't listed in most other build threads. This is the nitpicky stuff.
I installed the rods on the crank, and everything went fine with that. But before I heat and install the gears onto the crank I like to make sure and set myself up for success. The keys that locate the gears are often nicked, dented or deformed. I find it very worthwhile to remove the keys from the crank and test fit them in their respective slots. Any keys that have deformations get smoothed on all sides with some fine, adhesive-backed sandpaper (designed for body shops, but works great for many things). As with most things I've talked about in this thread so far, this is a nuanced operation. You're trying to removed to protruding material without affecting the original size of the key. You should also be checking the key in the keyway as you go. Once the key slides smoothly through the keyway, you're done. This is super helpful when you're trying to quickly slide a HOT crank gear into place and this makes sure it doesn't get stuck. I still keep a brass drift and hammer at the ready when I'm installing gears, but I haven't ever needed them once I started test fitting and cleaning these parts. Now that I started doing this, the gears just slide easily into place. These are the parts that go on the crank. 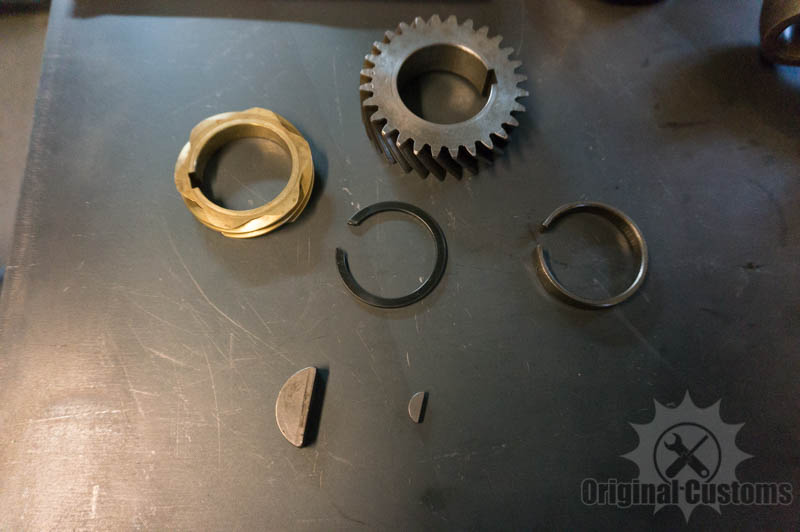 The big key needs to slide through this slot easily. 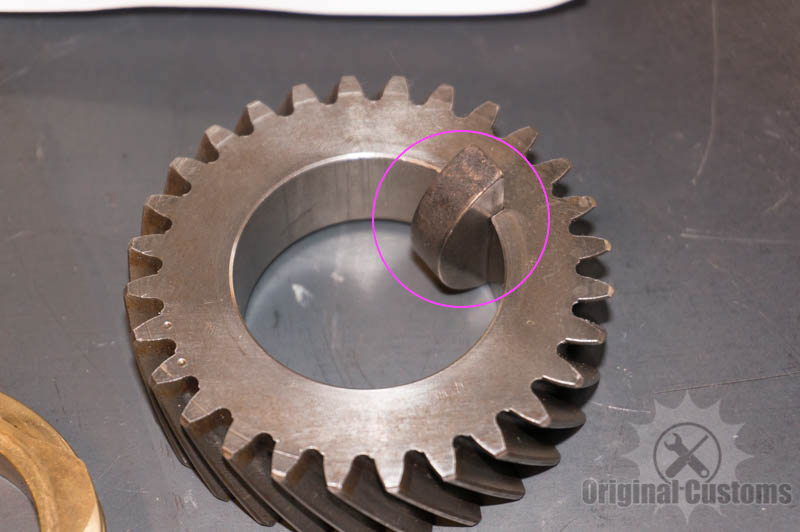 The small key needs to slide in the fan hub slot. 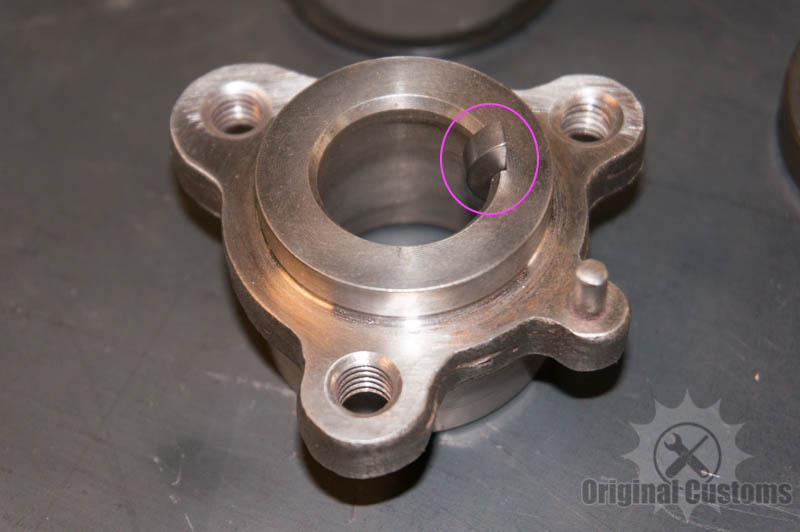 Some examples of damage. 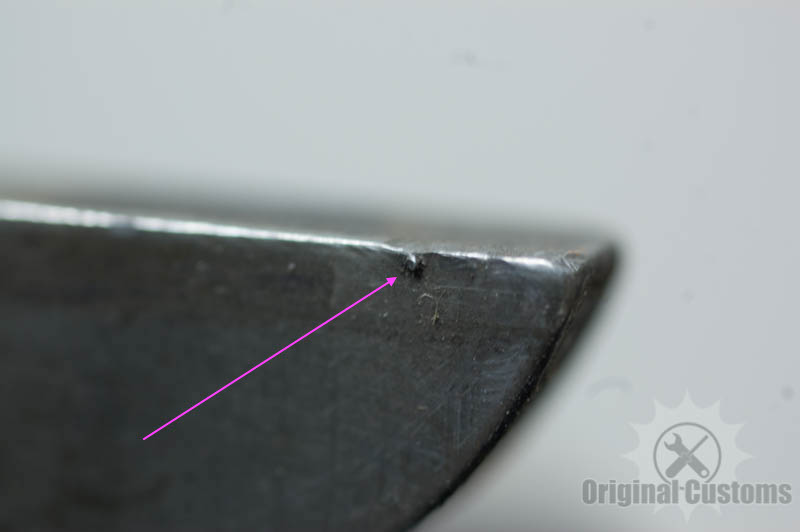 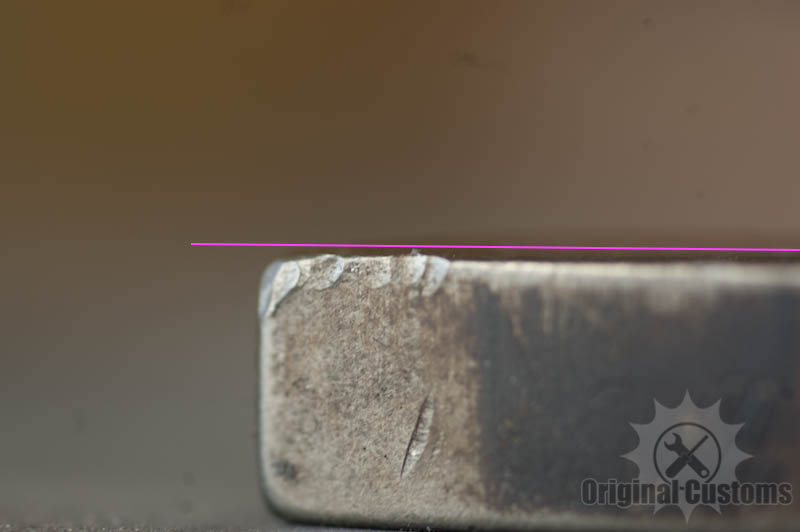 Smoothing keys with adhesive backed sandpaper on a smooth surface. Not trying to remove any more material than just enough for things to slide. 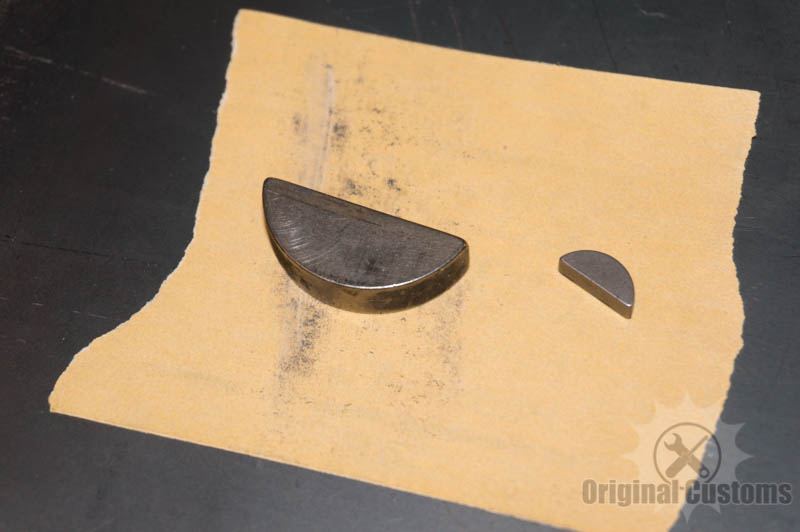 Using a small file with edge serrations to clean and smooth the corners of the keyway. Not all files have the edge teeth/serrations. Again, not trying to remove any more material than just enough for things to slide. 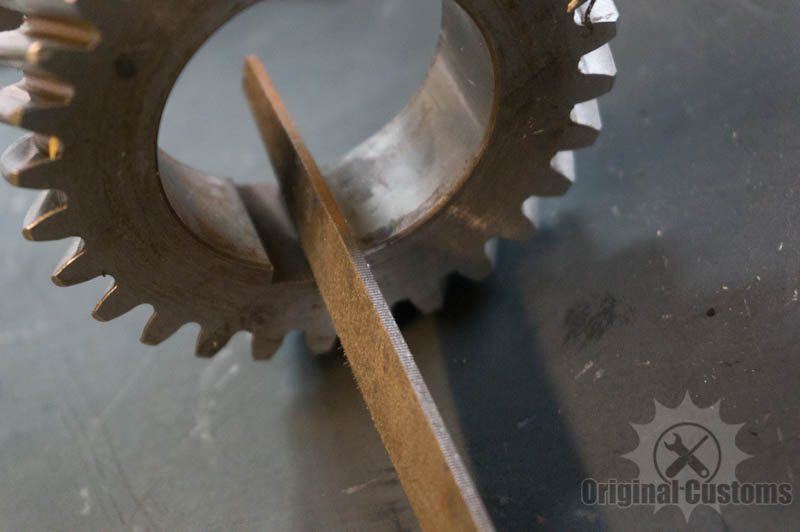 |
|
|
|
Posts in this topic
 McMark Quickie 2.0 Rebuild Oct 17 2016, 05:21 PM
 McMark Pulled the heads and found the first issue. I thi... Oct 17 2016, 05:28 PM Bartlett 914 :popcorn: Oct 17 2016, 05:29 PM McMark Another issue that I found was that the cam instal... Oct 17 2016, 05:33 PM McMark Still on the cam, the end plug was installed backw... Oct 17 2016, 05:35 PM McMark And finally, it appears the cam was beginning to g... Oct 17 2016, 05:37 PM
 rgalla9146
And finally, it appears the cam was beginning to ... Aug 23 2017, 02:07 PM McMark And finally, it appears the cam was beginning to g... Aug 23 2017, 03:35 PM Dave_Darling
can you believe this ?.....VERY heavy wear.
... Aug 23 2017, 11:01 PM rgalla9146
can you believe this ?.....VERY heavy wear.
... Aug 24 2017, 08:16 AM worn
[quote name='Dave_Darling' post='2520240' date='A... Aug 24 2017, 06:51 PM worn Darn spell check. Not talking about pet animals. B... Aug 24 2017, 06:54 PM McMark So now that my quickie 2.0 rebuild is torn down, I... Oct 17 2016, 05:42 PM napasteve As Chance the gardener said "I like to watch... Oct 17 2016, 07:26 PM 76-914 :popcorn: I'm sure this isn't the first ti... Oct 17 2016, 08:15 PM Vacca Rabite I would not worry about the cam bolt to oil pump c... Oct 19 2016, 11:50 AM Mueller thanks for the thread Mark, always nice to learn f... Oct 19 2016, 11:54 AM ottox914 I have a set of 2.0 flat top pistons and cyls that... Oct 19 2016, 01:09 PM JOEPROPER :popcorn: This looks to be the makings of a grea... Oct 19 2016, 02:43 PM Kansas 914
:popcorn: This looks to be the makings of a gre... Oct 20 2016, 08:12 AM McMark Got a PM from a member who has stock 2.0 pistons t... Oct 20 2016, 08:55 AM Mblizzard
Got a PM from a member who has stock 2.0 pistons ... Aug 22 2017, 06:55 AM blackmoon :Qarl: I appreciated the build with the explanati... Oct 20 2016, 09:20 AM McMark FINALLY got caught up enough to jump back into thi... Aug 20 2017, 01:49 PM pichu Nice thread and idea! Not all of us are rich ... Aug 21 2017, 10:34 PM Phoenix914
[b]FINALLY got caught up enough to jump back into... Aug 23 2017, 05:10 AM moorepower
FINALLY got caught up enough to jump back into th... Aug 23 2017, 09:14 AM McMark Many people don't understand that glass beads ... Aug 23 2017, 09:53 AM cary subscribed Aug 22 2017, 06:59 AM 76-914 Tambien. Aug 22 2017, 09:23 PM Toast Mark,
I know it's not your norm but I'm v... Aug 23 2017, 07:19 AM McMark
There's no real secrets in engine building, I... Aug 23 2017, 09:56 AM Phoenix914 Thanks for taking the time to respond with such a ... Aug 23 2017, 02:00 PM 914_teener :agree:
Let's assume that when a cam looks l... Aug 24 2017, 07:22 PM 76-914 Good info :beer2: Oct 2 2017, 09:22 AM 90quattrocoupe It is the little things that are important in a re... Oct 2 2017, 01:20 PM Mblizzard I have done a number of complete rebuilds in my da... Oct 2 2017, 03:09 PM DM_2000 A few things on this thread. I've repaired / ... Oct 2 2017, 05:34 PM McMark Everyone's got their ways, that's part of ... Oct 2 2017, 08:19 PM McMark Getting ready to finally finish this project. :wac... Feb 1 2018, 11:16 AM JOEPROPER Looks like you're ready to go! I'll b... Feb 1 2018, 11:48 AM gothspeed Looks good so far, can't wait until the micros... Feb 1 2018, 03:08 PM
rgalla9146
And finally, it appears the cam was beginning to ... Aug 23 2017, 02:07 PM McMark And finally, it appears the cam was beginning to g... Aug 23 2017, 03:35 PM Dave_Darling
can you believe this ?.....VERY heavy wear.
... Aug 23 2017, 11:01 PM rgalla9146
can you believe this ?.....VERY heavy wear.
... Aug 24 2017, 08:16 AM worn
[quote name='Dave_Darling' post='2520240' date='A... Aug 24 2017, 06:51 PM worn Darn spell check. Not talking about pet animals. B... Aug 24 2017, 06:54 PM McMark So now that my quickie 2.0 rebuild is torn down, I... Oct 17 2016, 05:42 PM napasteve As Chance the gardener said "I like to watch... Oct 17 2016, 07:26 PM 76-914 :popcorn: I'm sure this isn't the first ti... Oct 17 2016, 08:15 PM Vacca Rabite I would not worry about the cam bolt to oil pump c... Oct 19 2016, 11:50 AM Mueller thanks for the thread Mark, always nice to learn f... Oct 19 2016, 11:54 AM ottox914 I have a set of 2.0 flat top pistons and cyls that... Oct 19 2016, 01:09 PM JOEPROPER :popcorn: This looks to be the makings of a grea... Oct 19 2016, 02:43 PM Kansas 914
:popcorn: This looks to be the makings of a gre... Oct 20 2016, 08:12 AM McMark Got a PM from a member who has stock 2.0 pistons t... Oct 20 2016, 08:55 AM Mblizzard
Got a PM from a member who has stock 2.0 pistons ... Aug 22 2017, 06:55 AM blackmoon :Qarl: I appreciated the build with the explanati... Oct 20 2016, 09:20 AM McMark FINALLY got caught up enough to jump back into thi... Aug 20 2017, 01:49 PM pichu Nice thread and idea! Not all of us are rich ... Aug 21 2017, 10:34 PM Phoenix914
[b]FINALLY got caught up enough to jump back into... Aug 23 2017, 05:10 AM moorepower
FINALLY got caught up enough to jump back into th... Aug 23 2017, 09:14 AM McMark Many people don't understand that glass beads ... Aug 23 2017, 09:53 AM cary subscribed Aug 22 2017, 06:59 AM 76-914 Tambien. Aug 22 2017, 09:23 PM Toast Mark,
I know it's not your norm but I'm v... Aug 23 2017, 07:19 AM McMark
There's no real secrets in engine building, I... Aug 23 2017, 09:56 AM Phoenix914 Thanks for taking the time to respond with such a ... Aug 23 2017, 02:00 PM 914_teener :agree:
Let's assume that when a cam looks l... Aug 24 2017, 07:22 PM 76-914 Good info :beer2: Oct 2 2017, 09:22 AM 90quattrocoupe It is the little things that are important in a re... Oct 2 2017, 01:20 PM Mblizzard I have done a number of complete rebuilds in my da... Oct 2 2017, 03:09 PM DM_2000 A few things on this thread. I've repaired / ... Oct 2 2017, 05:34 PM McMark Everyone's got their ways, that's part of ... Oct 2 2017, 08:19 PM McMark Getting ready to finally finish this project. :wac... Feb 1 2018, 11:16 AM JOEPROPER Looks like you're ready to go! I'll b... Feb 1 2018, 11:48 AM gothspeed Looks good so far, can't wait until the micros... Feb 1 2018, 03:08 PM |
4 User(s) are reading this topic (4 Guests and 0 Anonymous Users)
0 Members:

|
Lo-Fi Version | Time is now: 27th September 2024 - 01:35 PM |
Invision Power Board
v9.1.4 © 2024 IPS, Inc.