|
|
|
Porsche, and the Porsche crest are registered trademarks of Dr. Ing. h.c. F. Porsche AG.
This site is not affiliated with Porsche in any way. Its only purpose is to provide an online forum for car enthusiasts. All other trademarks are property of their respective owners. |
|
|

  |

| Mikey914 |
 Jun 26 2012, 02:06 AM Jun 26 2012, 02:06 AM
Post
#141
|
|
The rubber man  Group: Members Posts: 12,711 Joined: 27-December 04 From: Hillsboro, OR Member No.: 3,348 Region Association: None |
First I notched the corners section out of the back of the corners, and installed it on the fiberglass section.
Attached image(s) 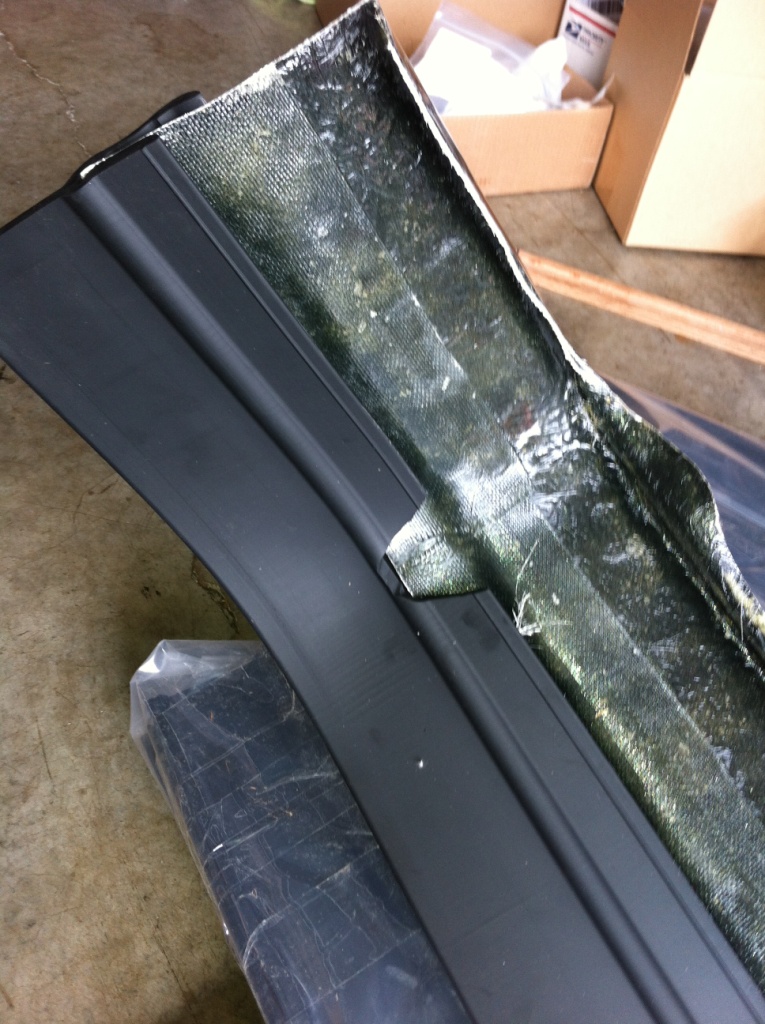 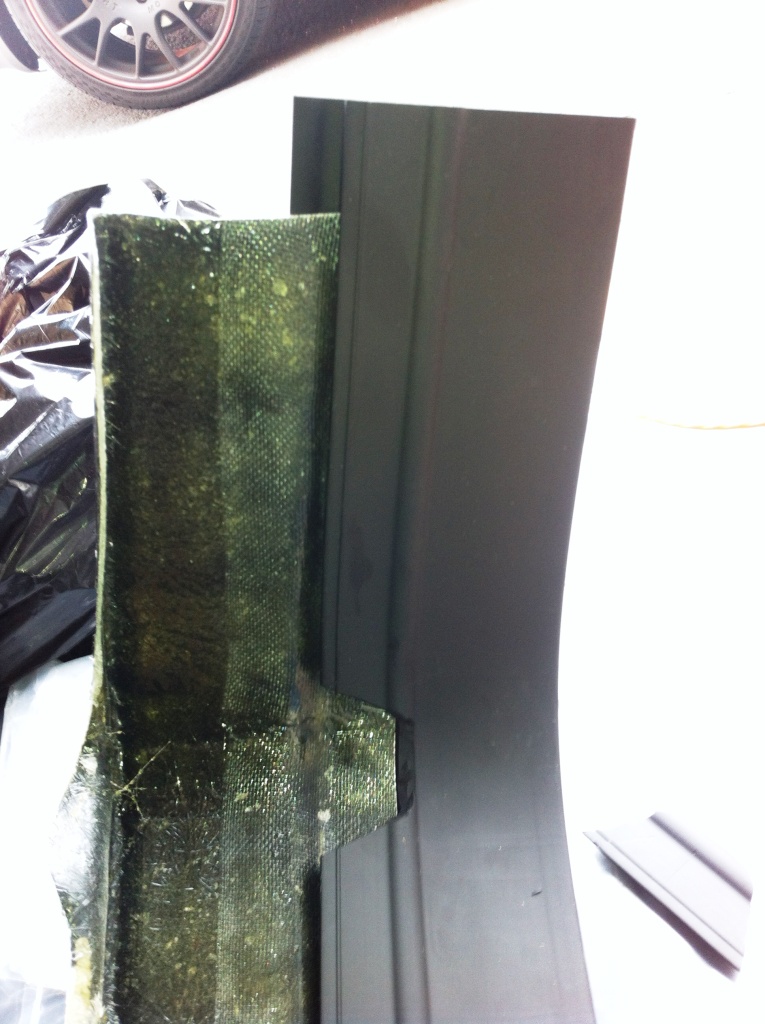
|
   |

 
|
| Mikey914 |
Jun 26 2012, 02:11 AM
Post
#142
|
|
The rubber man Group: Members Posts: 12,711 Joined: 27-December 04 From: Hillsboro, OR Member No.: 3,348 Region Association: None |
I then drilled the rubber and fiberglass using 5/16" drill bit.
NOTE - Place a piece of metal under the fiberglass to keep from drilling all the way through. I tried it at first just being really carefull. I wound up just using an old spoon, but anything with some meat will keep you from drilling all the way through. Attached image(s) 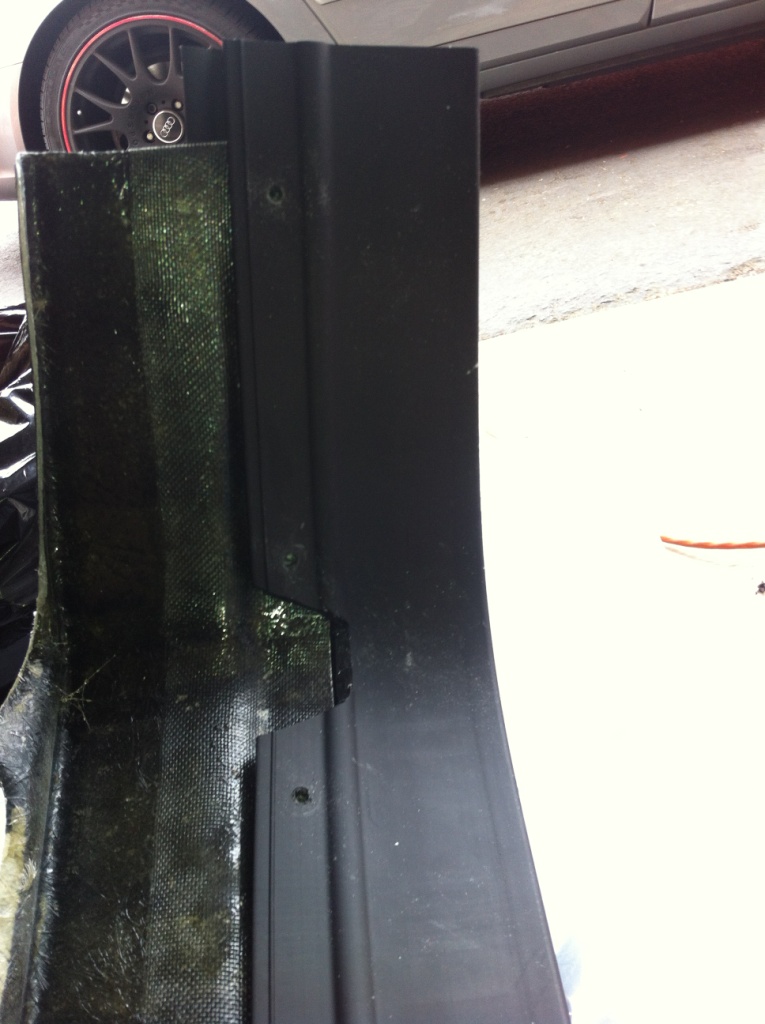 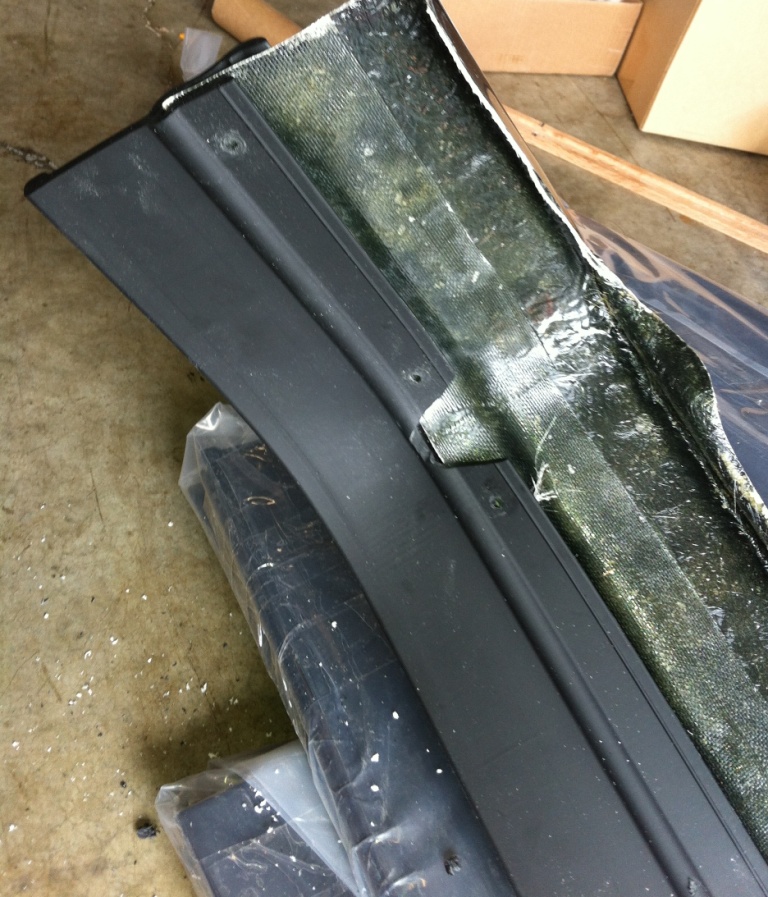
|
|
|
|
| Mikey914 |
Jun 26 2012, 02:15 AM
Post
#143
|
|
The rubber man Group: Members Posts: 12,711 Joined: 27-December 04 From: Hillsboro, OR Member No.: 3,348 Region Association: None |
Install the carrage bolts and place washers on the back side with nuts.
Attached image(s) 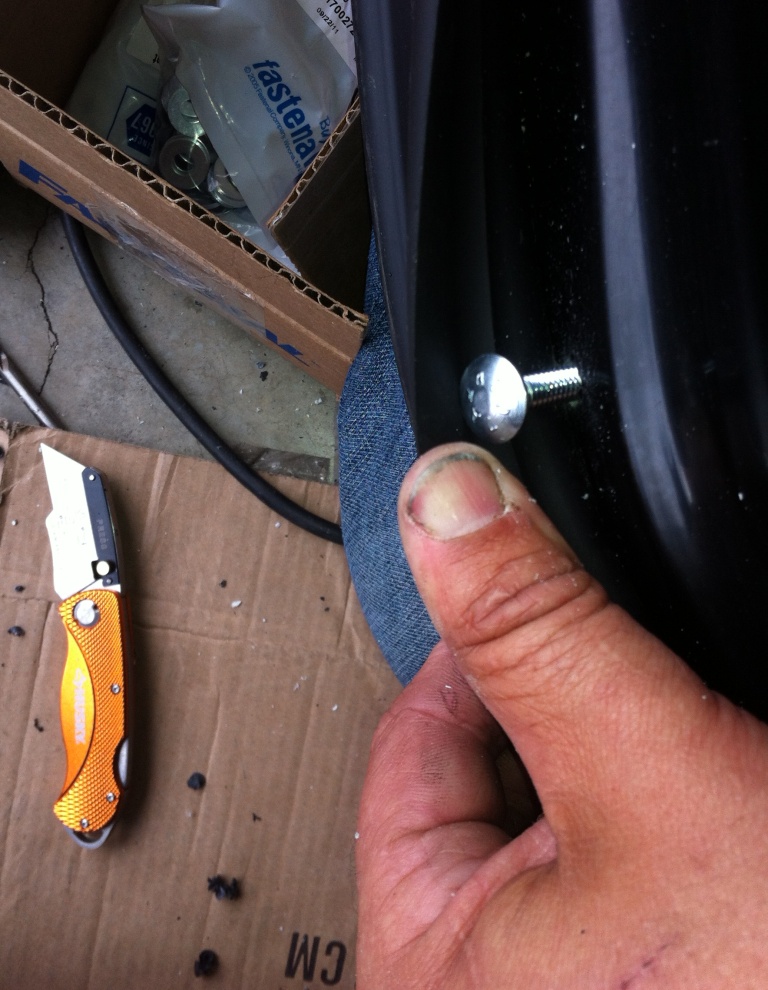 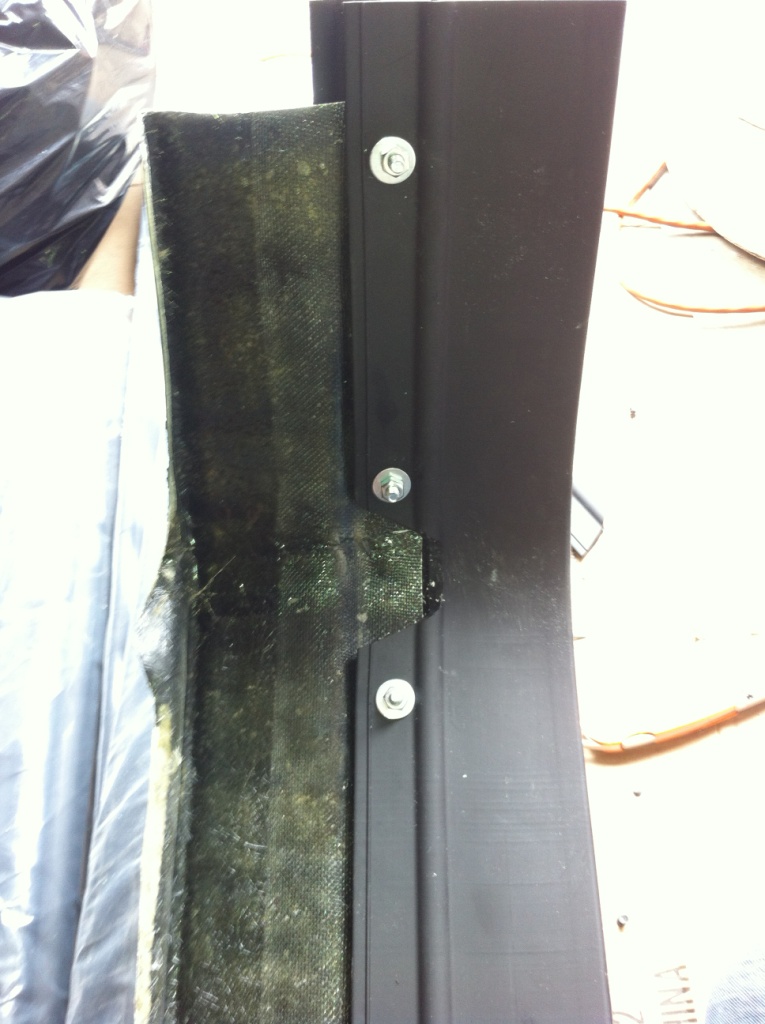 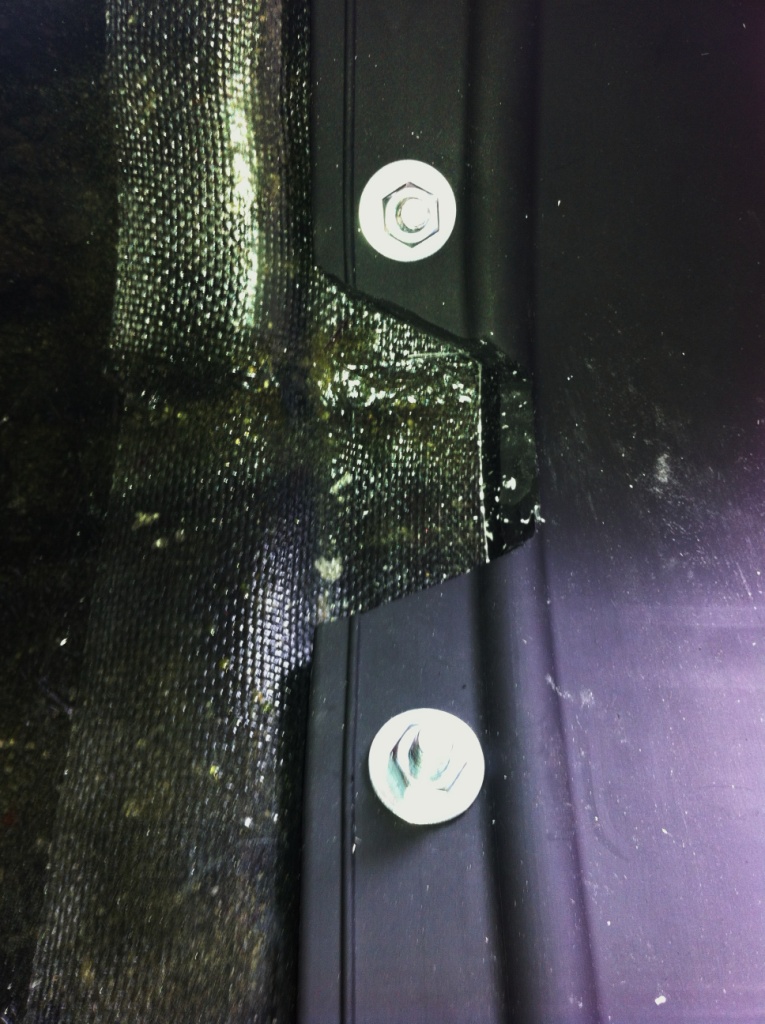 
|
|
|
|
| Mikey914 |
Jun 26 2012, 02:22 AM
Post
#144
|
|
The rubber man Group: Members Posts: 12,711 Joined: 27-December 04 From: Hillsboro, OR Member No.: 3,348 Region Association: None |
And cut the drop to create the edge. Use a very sharp knife and soapy water and the rubber will cut like butter.
Attached image(s) 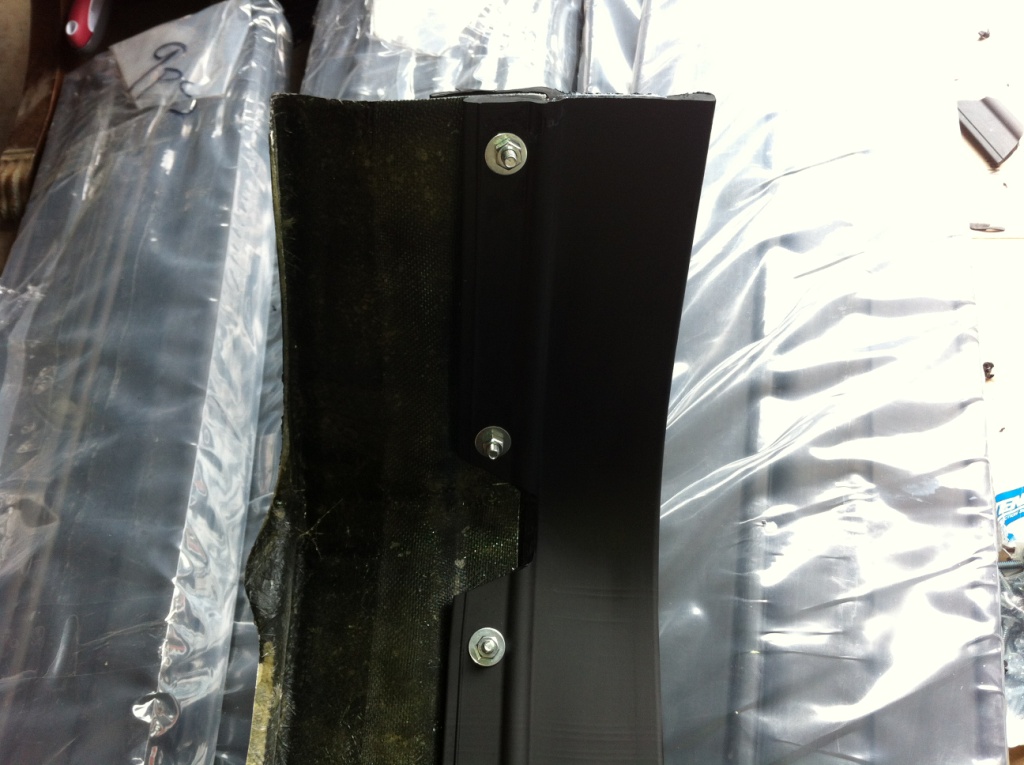
|
|
|
|
| Mikey914 |
Jun 26 2012, 02:23 AM
Post
#145
|
|
The rubber man Group: Members Posts: 12,711 Joined: 27-December 04 From: Hillsboro, OR Member No.: 3,348 Region Association: None |
Install.
Well maybe not here Attached thumbnail(s) 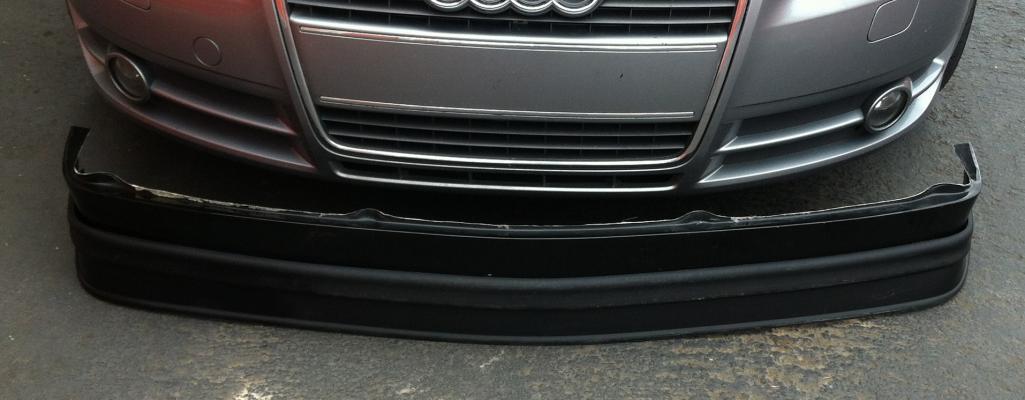 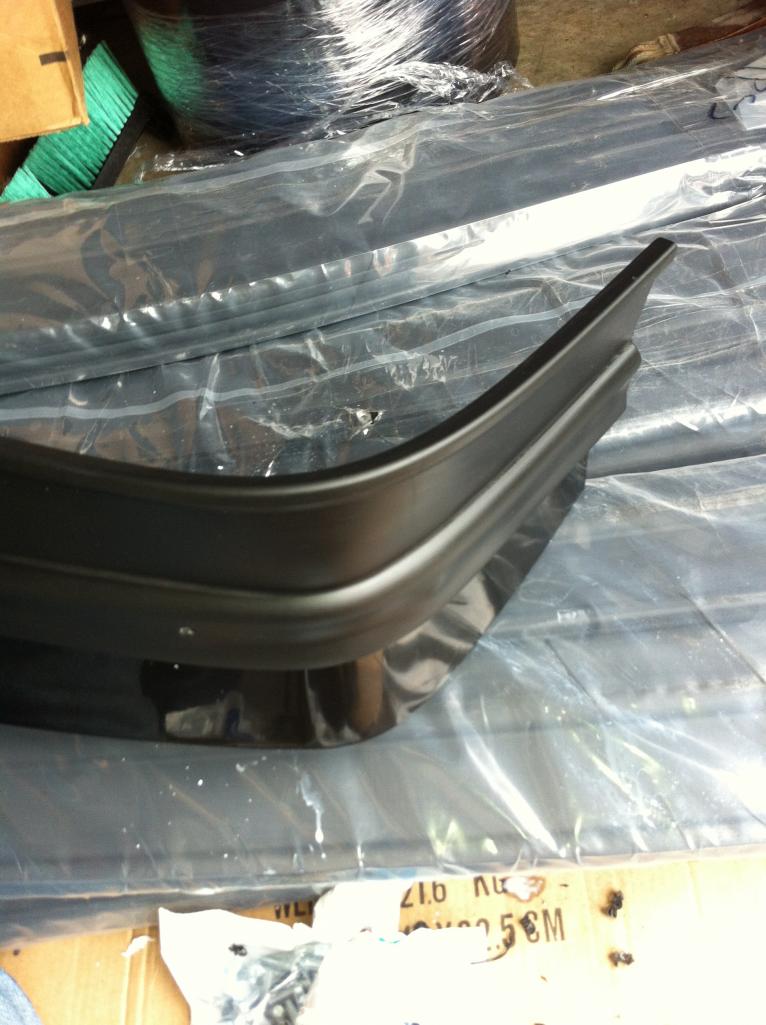 Attached image(s) 
|
|
|
|
| Mikey914 |
Jun 26 2012, 02:28 AM
Post
#146
|
|
The rubber man Group: Members Posts: 12,711 Joined: 27-December 04 From: Hillsboro, OR Member No.: 3,348 Region Association: None |
Note that the improved " rubber " section is thermally formable. I draped the edge over a halogen light guard for about 2 minutes and bent the rubber into a 270 deg bend. After dropping it into cold water for 5 min., it's set.
Attached thumbnail(s) 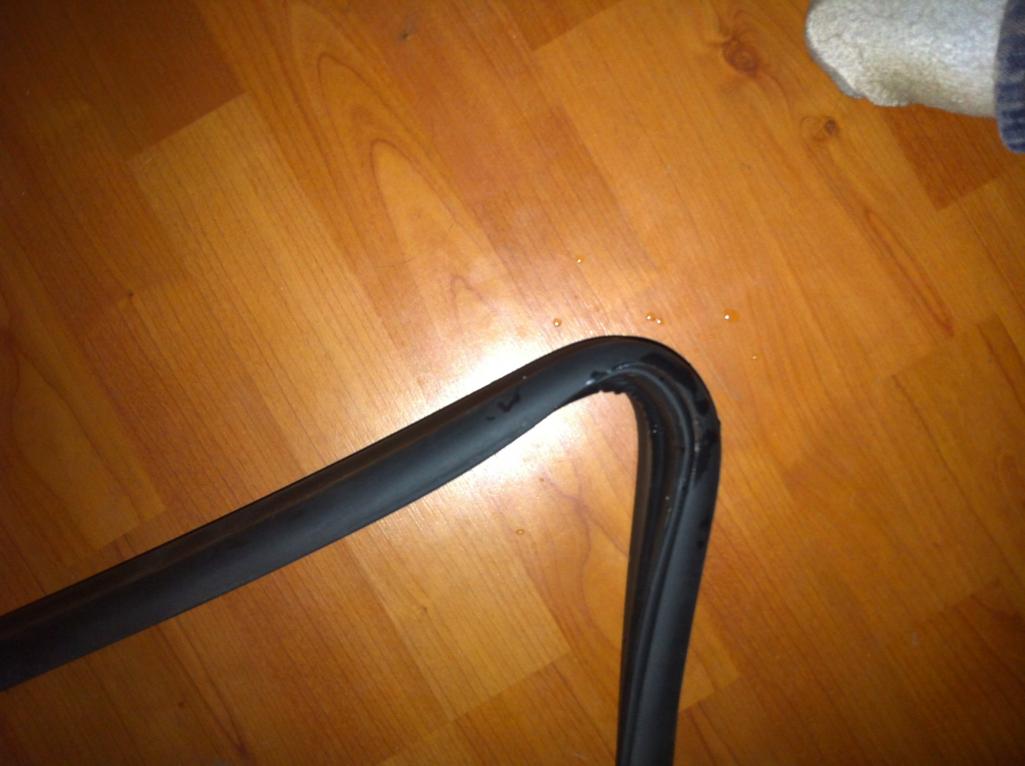
|
|
|
|
| Mikey914 |
Jun 26 2012, 11:11 AM
Post
#147
|
|
The rubber man Group: Members Posts: 12,711 Joined: 27-December 04 From: Hillsboro, OR Member No.: 3,348 Region Association: None |
Anyone who wanted just the rubber let me know I know there were a few of you.
Thx |
|
|
|
| MartyYeoman |
Jun 26 2012, 01:24 PM
Post
#148
|
|
Senior Member Group: Members Posts: 1,525 Joined: 19-June 03 From: San Ramon, CA Member No.: 839 Region Association: Northern California |
Can you please provide the dimension shown in the image below?
Thanks, Marty Attached image(s) 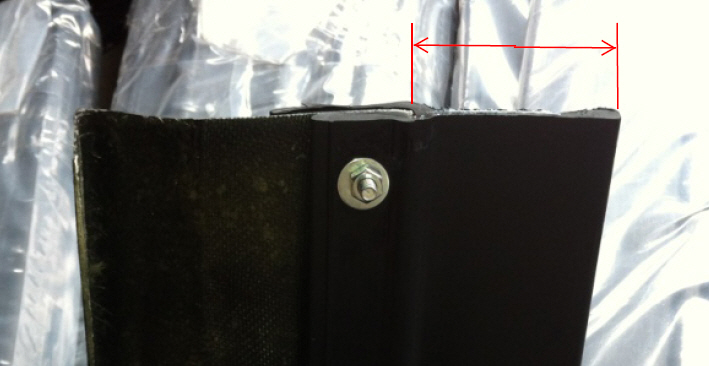
|
|
|
|
| jsayre914 |
Jun 27 2012, 09:55 AM
Post
#149
|
|
Speed Up !!! Group: Members Posts: 3,199 Joined: 10-February 08 From: Timonium MD 21093 Member No.: 8,696 Region Association: MidAtlantic Region |
Im so excited. And I just can't hide it !
(IMG:style_emoticons/default/cheer.gif) (IMG:style_emoticons/default/piratenanner.gif) (IMG:style_emoticons/default/cheer.gif) thanks (IMG:style_emoticons/default/aktion035.gif) |
|
|
|
| RoadGlue |
Jun 27 2012, 10:07 AM
Post
#150
|
|
Sonoma County Gear Head Group: Admin Posts: 2,033 Joined: 8-January 03 From: Santa Rosa, CA Member No.: 108 Region Association: Northern California |
Nice work Mark!
|
|
|
|
| Mikey914 |
Jun 27 2012, 10:12 AM
Post
#151
|
|
The rubber man Group: Members Posts: 12,711 Joined: 27-December 04 From: Hillsboro, OR Member No.: 3,348 Region Association: None |
QUOTE(Marty Yeoman @ Jun 26 2012, 12:24 PM)  Can you please provide the dimension shown in the image below? Thanks, Marty 2-7/8" Probably not something you want to use on a lowered car. Attached image(s) 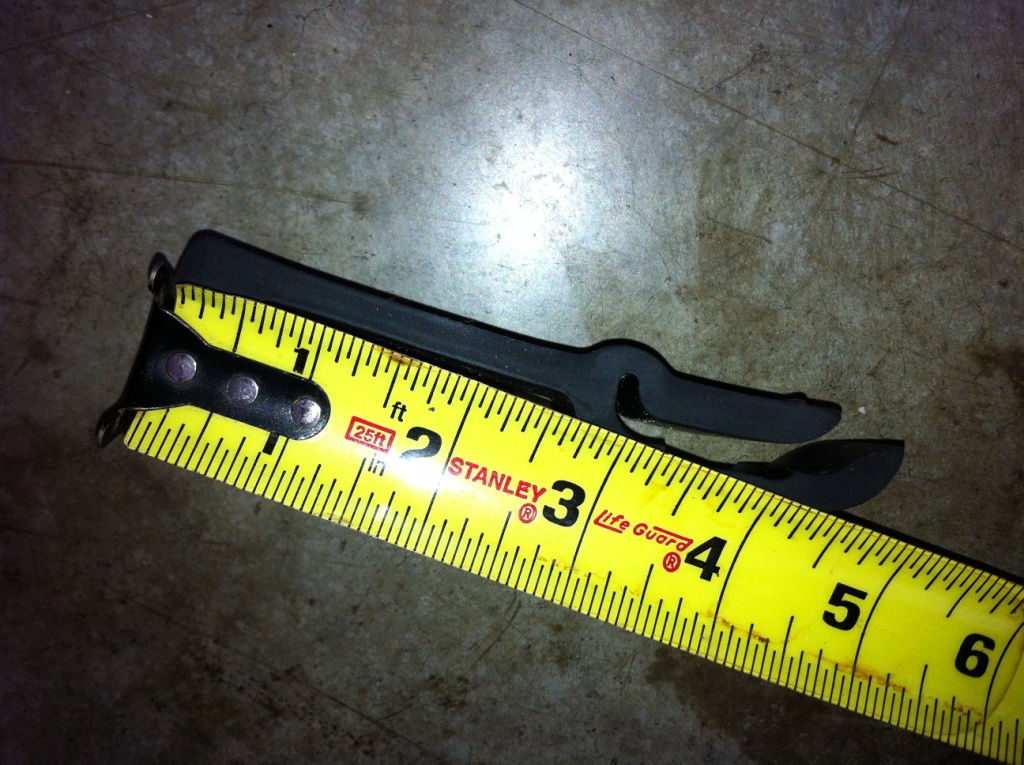
|
|
|
|
| RoadGlue |
Jun 27 2012, 10:43 AM
Post
#152
|
|
Sonoma County Gear Head Group: Admin Posts: 2,033 Joined: 8-January 03 From: Santa Rosa, CA Member No.: 108 Region Association: Northern California |
Douglas Wright (project914) used to have a similar dam on his 914-6, and the car was lowered a bit. Sure, the rubber bit scraped the ground when pulling in/out of parking lots, etc, but it never hurt the rubber.
Can it be expected that the rubber will hold up to similar abuse? It's the point of the rubber to help minimize the amount of air that flows underneath the car, so it would actually work better on a lowered car? Thanks! Just trying to smarten up. |
|
|
|
| Mikey914 |
Jun 27 2012, 11:26 AM
Post
#153
|
|
The rubber man Group: Members Posts: 12,711 Joined: 27-December 04 From: Hillsboro, OR Member No.: 3,348 Region Association: None |
QUOTE(RoadGlue @ Jun 27 2012, 09:43 AM) Douglas Wright (project914) used to have a similar dam on his 914-6, and the car was lowered a bit. Sure, the rubber bit scraped the ground when pulling in/out of parking lots, etc, but it never hurt the rubber. Can it be expected that the rubber will hold up to similar abuse? It's the point of the rubber to help minimize the amount of air that flows underneath the car, so it would actually work better on a lowered car? Thanks! Just trying to smarten up. This "rubber" is actually an improvement over the origianl. The original was an organic rubber. I noticed it was quite heavy, and really didn't want to mold around the corners. I actually decided to change the material and the tooling (that's one of the reasons it took longer) in mid stream to a thermo-plasticized rubber. It makes it lighter by about 1# , more durable and easier to form. As you can see from the picture above. I'm very happy with the end result, even if it did increase the cost. |
|
|
|
| eric9144 |
Jun 27 2012, 01:19 PM
Post
#154
|
|
Advanced Member Group: Members Posts: 2,739 Joined: 30-March 11 From: San Diego, CA Member No.: 12,876 Region Association: Southern California |
Payment sent 1 Dam + 2 rubber bottoms...
I still have my original Flex Dam but the lower rubber section could use a replacement...I can't wait!! (IMG:style_emoticons/default/beerchug.gif) |
|
|
|
| euro911 |
Jun 27 2012, 04:35 PM
Post
#155
|
|
Retired & living the dream. God help me if I wake up! Group: Members Posts: 8,855 Joined: 2-December 06 From: So.Cal. & No.AZ (USA) Member No.: 7,300 Region Association: Southern California |
I actually like air moving under my cars ... it helps to dislodge all the spiderwebs that build up from sitting too long (IMG:style_emoticons/default/shades.gif)
|
|
|
|
| eric9144 |
Jun 27 2012, 05:52 PM
Post
#156
|
|
Advanced Member Group: Members Posts: 2,739 Joined: 30-March 11 From: San Diego, CA Member No.: 12,876 Region Association: Southern California |
QUOTE(euro911 @ Jun 27 2012, 03:35 PM) I actually like air moving under my cars ... it helps to dislodge all the spiderwebs that build up from sitting too long (IMG:style_emoticons/default/shades.gif) Just drive faster (IMG:style_emoticons/default/poke.gif) (IMG:style_emoticons/default/biggrin.gif) |
|
|
|
| VegasRacer |
Jun 29 2012, 12:17 AM
Post
#157
|
|
ELVIRA Group: Benefactors Posts: 8,624 Joined: 27-March 03 From: Between Scylla and Charybdis Member No.: 481 Region Association: None |
I got my rubber today. (IMG:style_emoticons/default/piratenanner.gif) Great product. Thanks Mark. (IMG:style_emoticons/default/first.gif)
The material does look and feel like it will be better than the original. |
|
|
|
| Mikey914 |
Jul 2 2012, 10:45 AM
Post
#158
|
|
The rubber man Group: Members Posts: 12,711 Joined: 27-December 04 From: Hillsboro, OR Member No.: 3,348 Region Association: None |
QUOTE(Kargeek @ Feb 2 2012, 05:39 PM) If you tool up to make these, add a an inside fender lip to match the one on the fender. After installing the rubber I'm glad I didn't make these as it wouldn't line up right. |
|
|
|
| jsayre914 |
Jul 4 2012, 11:49 AM
Post
#159
|
|
Speed Up !!! Group: Members Posts: 3,199 Joined: 10-February 08 From: Timonium MD 21093 Member No.: 8,696 Region Association: MidAtlantic Region |
Got mine in the mail yesterday !!!
THANK YOU (IMG:style_emoticons/default/pray.gif) (IMG:style_emoticons/default/first.gif) Attached image(s) 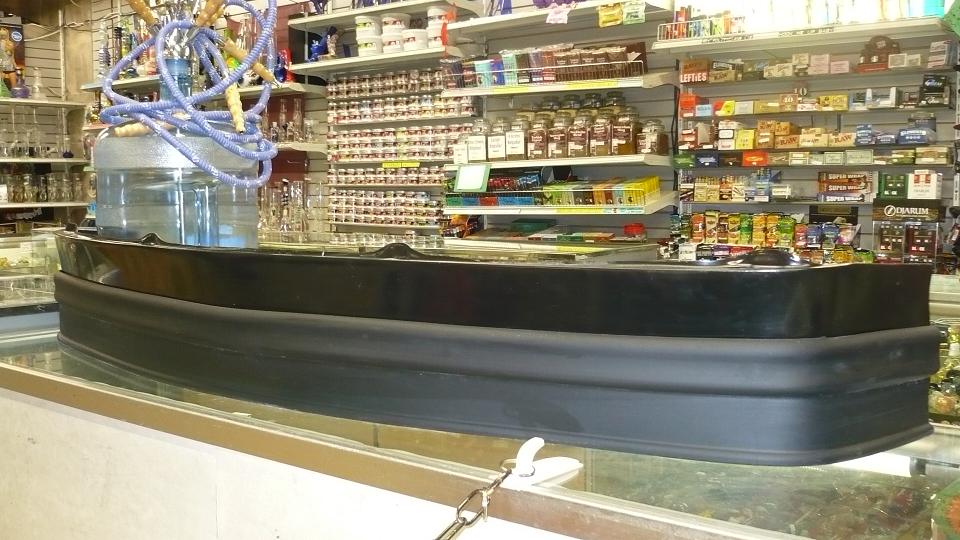
|
|
|
|
| Elliot Cannon |
Jul 4 2012, 05:34 PM
Post
#160
|
|
914 Guru Group: Retired Members Posts: 8,487 Joined: 29-December 06 From: Paso Robles Ca. (Central coast) Member No.: 7,407 Region Association: None |
Just finished installing Marks air dam. Looks great. (IMG:style_emoticons/default/wub.gif) Three inches from the ground in the center. (IMG:style_emoticons/default/laugh.gif) Also installed some eyetalian driving lights I got at the Parts Heaven swap meet. Now I just got to figure out how to wire them up. (IMG:style_emoticons/default/lol-2.gif)
Attached image(s) 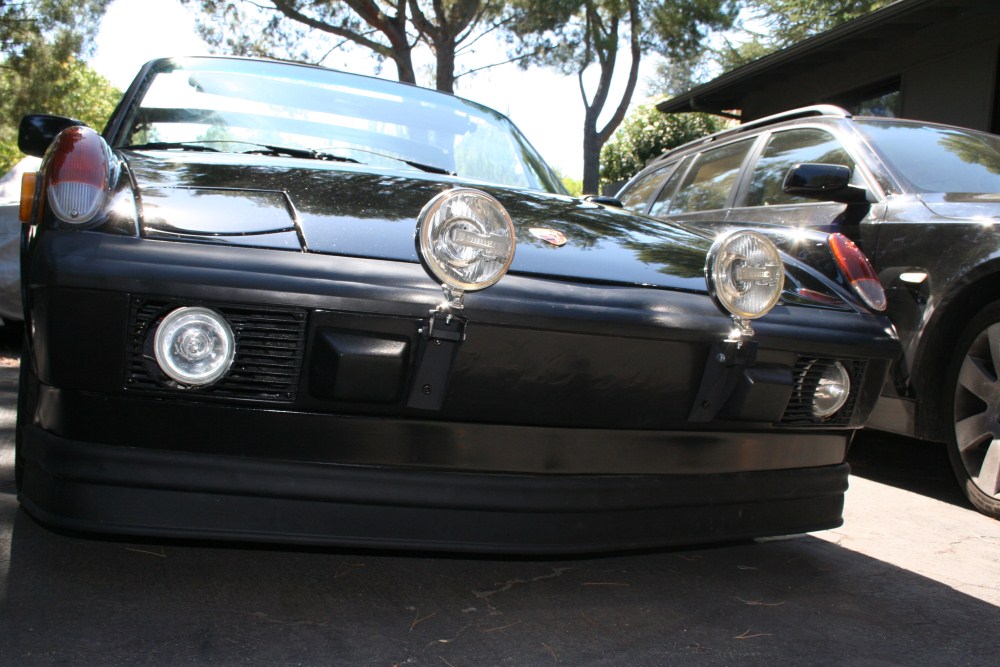
|
|
|
|
|
2 User(s) are reading this topic (2 Guests and 0 Anonymous Users)
0 Members:

|
Lo-Fi Version | Time is now: 27th September 2024 - 01:21 AM |
Invision Power Board
v9.1.4 © 2024 IPS, Inc.