|
|

|
Porsche, and the Porsche crest are registered trademarks of Dr. Ing. h.c. F. Porsche AG.
This site is not affiliated with Porsche in any way. Its only purpose is to provide an online forum for car enthusiasts. All other trademarks are property of their respective owners. |
|
|
  |
| 76-914 |
 Apr 24 2014, 06:10 PM Apr 24 2014, 06:10 PM
Post
#301
|
|
Repeat Offender & Resident Subaru Antagonist           Group: Members Posts: 13,634 Joined: 23-January 09 From: Temecula, CA Member No.: 9,964 Region Association: Southern California 
|
So this is the side that fits right? (IMG:style_emoticons/default/bye1.gif) Hey Ross, correctomundo. The 3/16" lip of the flange is all that prevents the other side from sliding in. I'll give this another look Saturday now that I got my head wrapped around this minor set back. As the car sets in the picture(axle level) how much movement do you have on the axle? Pushing into the transaxle cv joint. Bob (IMG:style_emoticons/default/bye1.gif) Hey Bob, how ya'll are? I took a quick measurement of 1.25", maybe a hair more. I didn't slide under the car for exact measurement but it is at least 1.25". Any trailing arm movement, up or down, should increase this distance because it is flat now. Is 1.25" enough, Bob? Another thing I completely missed is the possibility that one or both trailing arms are out of spec. I read a few posts re: string alignment and thought I should check this out before I go too far. |
| 76-914 |
 Apr 28 2014, 10:17 PM Apr 28 2014, 10:17 PM
Post
#302
|
|
Repeat Offender & Resident Subaru Antagonist           Group: Members Posts: 13,634 Joined: 23-January 09 From: Temecula, CA Member No.: 9,964 Region Association: Southern California 
|
I finally connected the bat tonite. Started by adding one fuse at a time until power was restored to cabin. When I hit "start" I just got a loud click which can be many things. New clutch binding, crappy starter, bad ground(s) or other bad connection? The solenoid which I added in the start circuit (to aid the switch) might not be sized correctly and God only knows what else. Before I go further I'll jump the starter solenoid so I know which path to follow (IMG:style_emoticons/default/piratenanner.gif) (IMG:style_emoticons/default/piratenanner.gif) (IMG:style_emoticons/default/piratenanner.gif)
What the FUCH am I dancing for then. Because nothing popped; no majic smoke. I'm not saying there aren't problems ahead. I haven't energized the ECU nor connected the cursory gage wires so maybe I'm not out of the woods, yet. It's just a matter of plugging 2 fuses in zap it but I wanted to quit for the nite and enjoy the moment. (IMG:style_emoticons/default/beer3.gif) |
| CptTripps |
 Apr 29 2014, 07:24 AM Apr 29 2014, 07:24 AM
Post
#303
|
|
:: Punch and Pie ::     Group: Members Posts: 3,584 Joined: 26-December 04 From: Mentor, OH Member No.: 3,342 Region Association: Upper MidWest |
Stay on it man.
You're close!!! |
| Chris H. |
 Apr 29 2014, 07:29 AM Apr 29 2014, 07:29 AM
Post
#304
|
|
Senior Member     Group: Members Posts: 4,048 Joined: 2-January 03 From: Chicago 'burbs Member No.: 73 Region Association: Upper MidWest 
|
Hey way to go Kent! No smoke is good! That happened to me and the problem was I didn't have it wired up to the starter relay quite right so it wasn't engaging the starter. You'll figure it out.
I got all my hoses, just waiting for reducers and a few other things and I should be ready to plumb mine up. Think I better install the clutch first though. Hey do you have the part # for "L" shaped fitting you used on the end of the clutch master cylinder? |
| rnellums |
 Apr 29 2014, 08:29 AM Apr 29 2014, 08:29 AM
Post
#305
|
|
Professional Enthusiast    Group: Members Posts: 1,646 Joined: 26-November 09 From: Littleton, CO Member No.: 11,072 Region Association: Rocky Mountains |
Good going! Now once yours starts properly I'll need you to make a detailed schematic of your harness (IMG:style_emoticons/default/biggrin.gif) . Kidding about that, but seriously, great progress!
|
| 76-914 |
 Apr 29 2014, 08:32 AM Apr 29 2014, 08:32 AM
Post
#306
|
|
Repeat Offender & Resident Subaru Antagonist           Group: Members Posts: 13,634 Joined: 23-January 09 From: Temecula, CA Member No.: 9,964 Region Association: Southern California 
|
Stay on it man. You're close!!! I see your in "Electrical Heaven" yourself. (IMG:style_emoticons/default/happy11.gif) Misery loves company. Hey way to go Kent! No smoke is good! That happened to me and the problem was I didn't have it wired up to the starter relay quite right so it wasn't engaging the starter. You'll figure it out. I got all my hoses, just waiting for reducers and a few other things and I should be ready to plumb mine up. Think I better install the clutch first though. Hey do you have the part # for "L" shaped fitting you used on the end of the clutch master cylinder? Chris, I looked thru my Ebay history and it wasn't there so I probably got it at JEG's. If you don't see it there pm me and I'll find it in my receipt's. I do have one of the fittings that goes from the slave directly to the AN3 flare nut on the SS line if either one of you want to bypass that banjo fitting. That first electrical test is like a first flight. Make or break it! (IMG:style_emoticons/default/w00t.gif) |
| 76-914 |
 May 1 2014, 10:23 PM May 1 2014, 10:23 PM
Post
#307
|
|
Repeat Offender & Resident Subaru Antagonist           Group: Members Posts: 13,634 Joined: 23-January 09 From: Temecula, CA Member No.: 9,964 Region Association: Southern California 
|
I jumped the starter solenoid tonite and nothing. (IMG:style_emoticons/default/sad.gif) I was going to drop the starter for bench testing and I thought maybe I should confirm a good ground. I ran a jumper cable from the -BAT to the bolt head on the starter and whadaya know. Spins the engine like crazy. (IMG:style_emoticons/default/slap.gif) I ran another ground and will add a few more to the engine block. (IMG:style_emoticons/default/smash.gif) Then turned the ign key over and I listened to that 6 wanting some gas. Got an instant shit eating grin on my face. Speaking of gas my next item will be to reform Robert's (Rotary914) SS fuel lines to suite my needs. I was lucky enough to see him at G&R and asked him about bending his lines while in place. They're almost new so I'll make em work for me. After the gas is hooked up I might have see if it will start. (IMG:style_emoticons/default/unsure.gif) The further I get without a major screw up the more I worry I'm due a doozy. (IMG:style_emoticons/default/blink.gif)
|
| 76-914 |
 May 3 2014, 06:07 PM May 3 2014, 06:07 PM
Post
#308
|
|
Repeat Offender & Resident Subaru Antagonist           Group: Members Posts: 13,634 Joined: 23-January 09 From: Temecula, CA Member No.: 9,964 Region Association: Southern California 
|
I want to keep center console with it's gage cluster so I thought I'd make a run at installing a Suby gage in the center gage cluster. My donor is a clock.
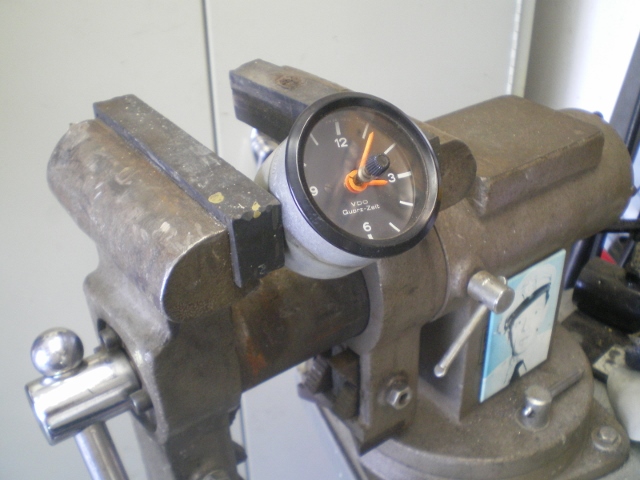 I read where Toolguy uses a hose clamp around the bezel before prying it off to keep it from stretching and getting beaten to (IMG:style_emoticons/default/stromberg.gif) . My hose clamp was kind of beefy and I didn't trust it would conform so I took this short piece of 2.5" copper and cut a slit in it. The diameter was 1mm too small to slip over the bezel. 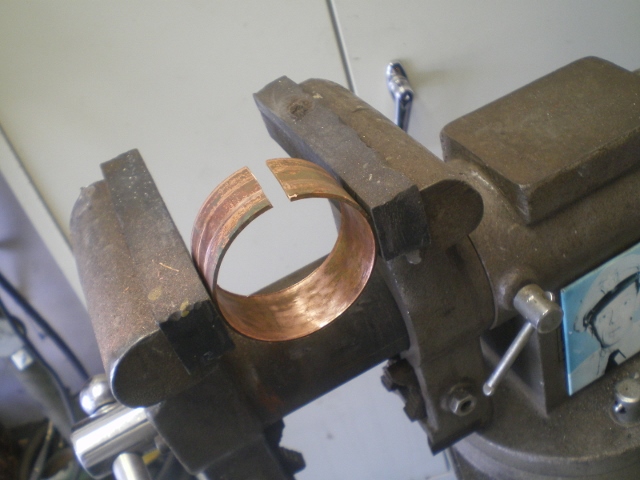 Then I placed the gage so the bezel was flush with the edge of the copper sleeve and tightened a hose clamp around the copper to lightly compress the bezel. 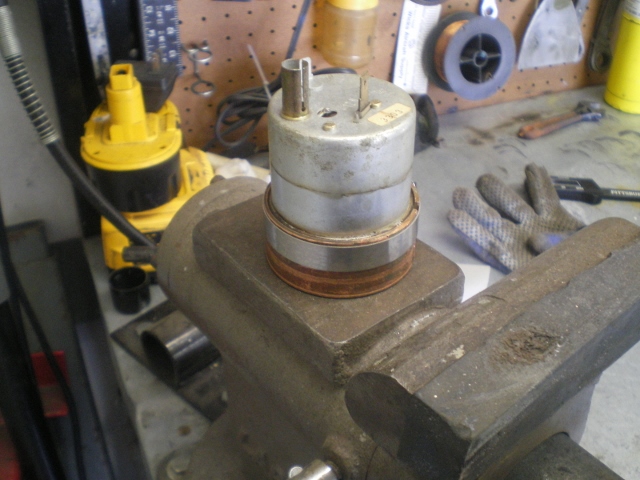 Here it is from the south end. 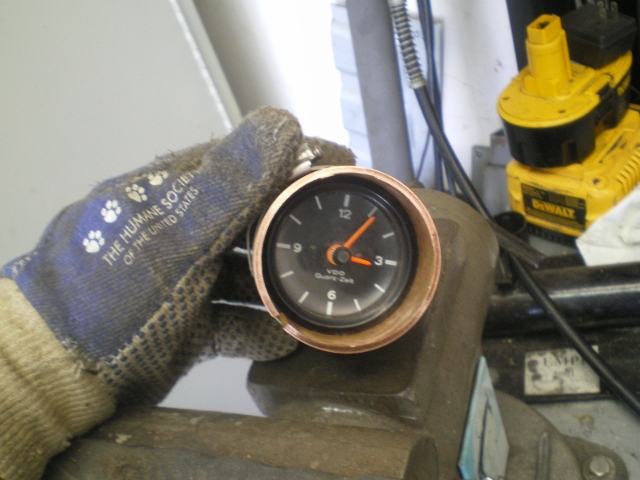 Then work a small flat blade screw driver around about 80% of the circle and remove the bezel and glass. 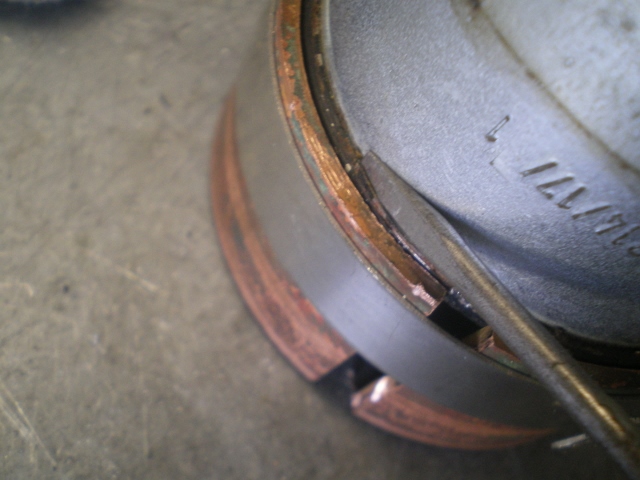 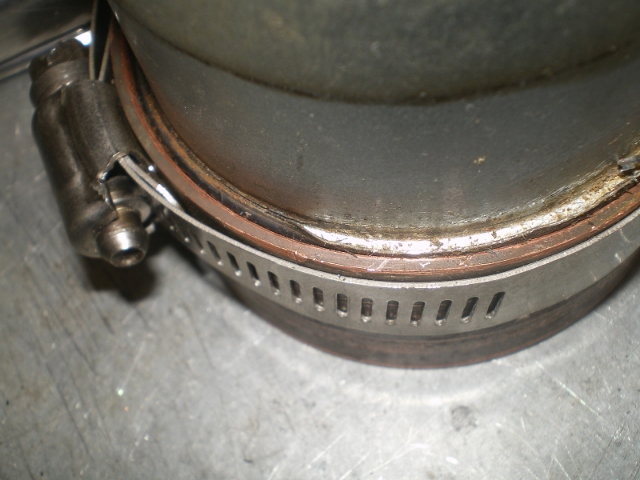 Next remove the 3 screws from the back, clip the solder joint off and the clock will fall out. 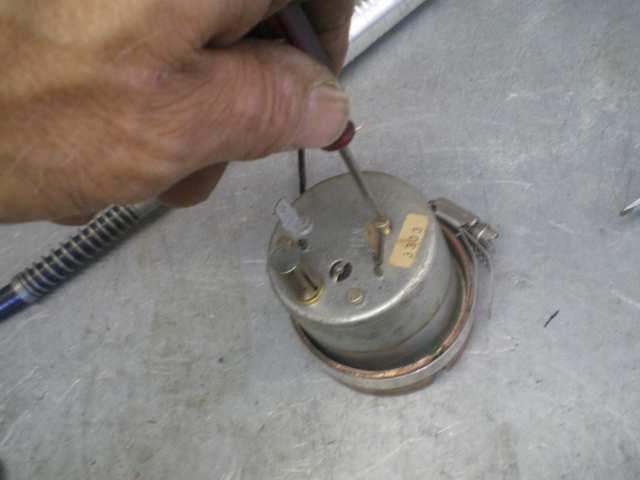 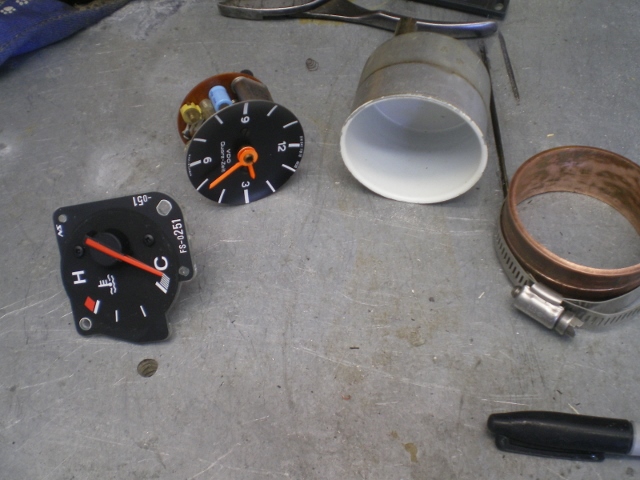 Clamp the gage to the can and mark for first cut with a scroll 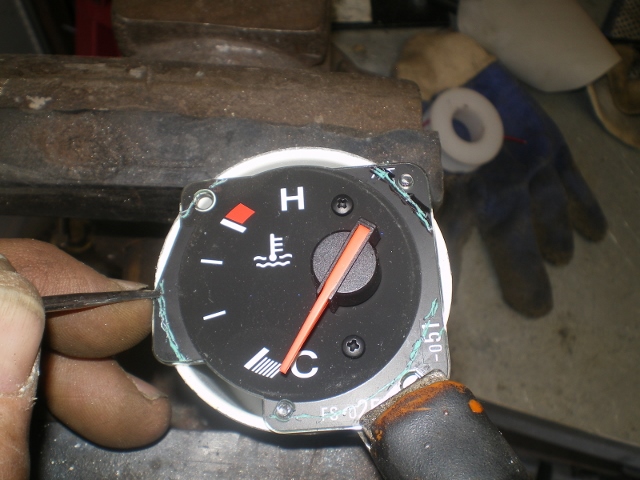 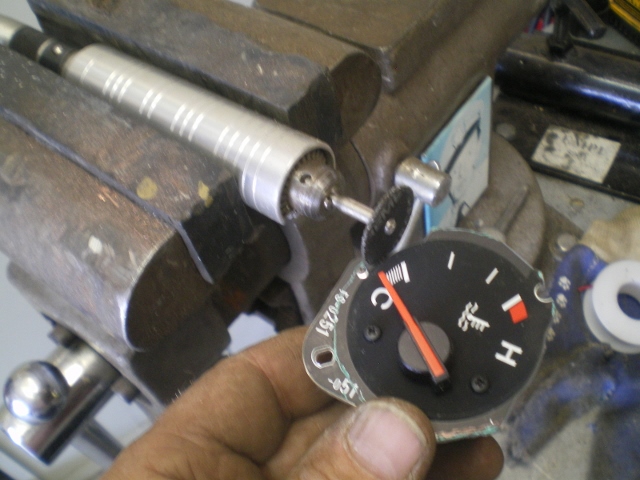 A quick test fit 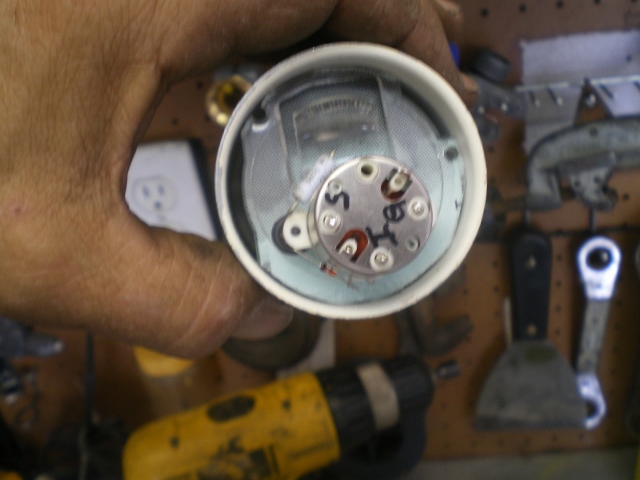 These are the pins that are attached to the circuit board which this gage was originally attached to. I pulled them out of the circuit board with pliers then put them in the vise and hit them with heat and a blast of compressed air to blow out the solder joint. It leaves a neat little pattern where the solder blows. 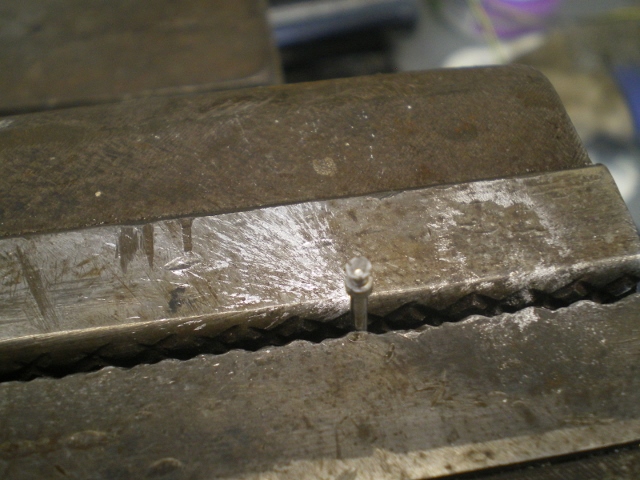 The 3 posts soldered with leads in and ready to place in the can 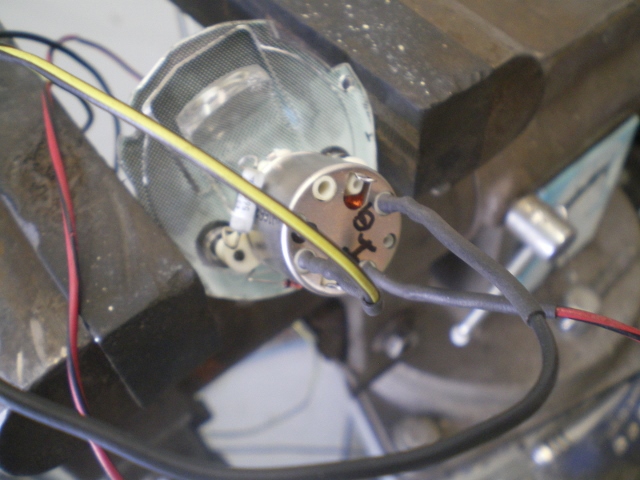 I haven't closed the bezel as I need to locate a glass cover w/o the hole in the center. And the silicone holding the gage in place isn't dry but other than that I think this one is done. 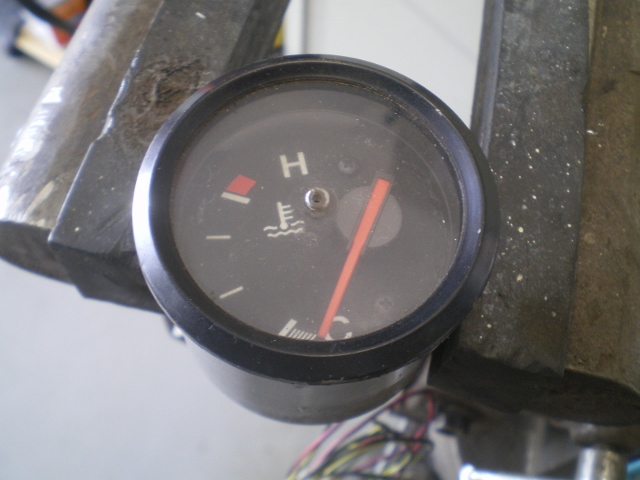 Attached image(s) 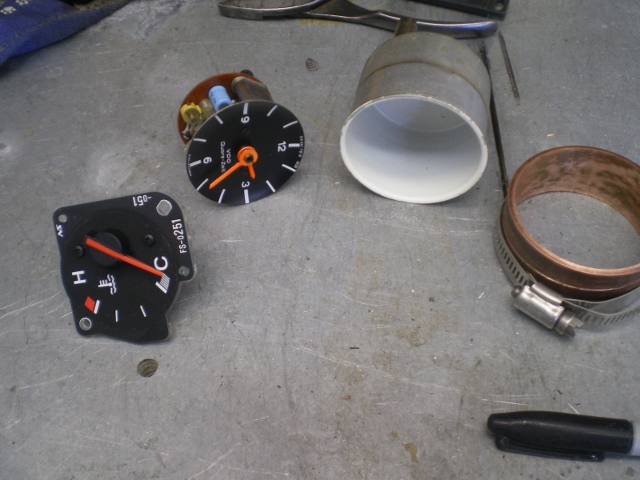
|
| 914forme |
 May 3 2014, 07:31 PM May 3 2014, 07:31 PM
Post
#309
|
|
Times a wastin', get wrenchin'!     Group: Members Posts: 3,896 Joined: 24-July 04 From: Dayton, Ohio Member No.: 2,388 Region Association: None 
|
Nice Job on the gauges Kent, also the pedal cluster made it, and it looks great, thanks again.
|
| Jonathan Livesay |
 May 3 2014, 07:40 PM May 3 2014, 07:40 PM
Post
#310
|
|
Senior Member    Group: Members Posts: 744 Joined: 13-March 10 From: La Canada CA Member No.: 11,461 Region Association: None 
|
(IMG:http://www.914world.com/bbs2/uploads_offsite/i60.tinypic.com-11461-1399167616.1.jpg)
My Subaru 914 gauges from NHW Speedo. |
| 76-914 |
 May 3 2014, 08:16 PM May 3 2014, 08:16 PM
Post
#311
|
|
Repeat Offender & Resident Subaru Antagonist           Group: Members Posts: 13,634 Joined: 23-January 09 From: Temecula, CA Member No.: 9,964 Region Association: Southern California 
|
|
| 76-914 |
 May 6 2014, 10:02 PM May 6 2014, 10:02 PM
Post
#312
|
|
Repeat Offender & Resident Subaru Antagonist           Group: Members Posts: 13,634 Joined: 23-January 09 From: Temecula, CA Member No.: 9,964 Region Association: Southern California 
|
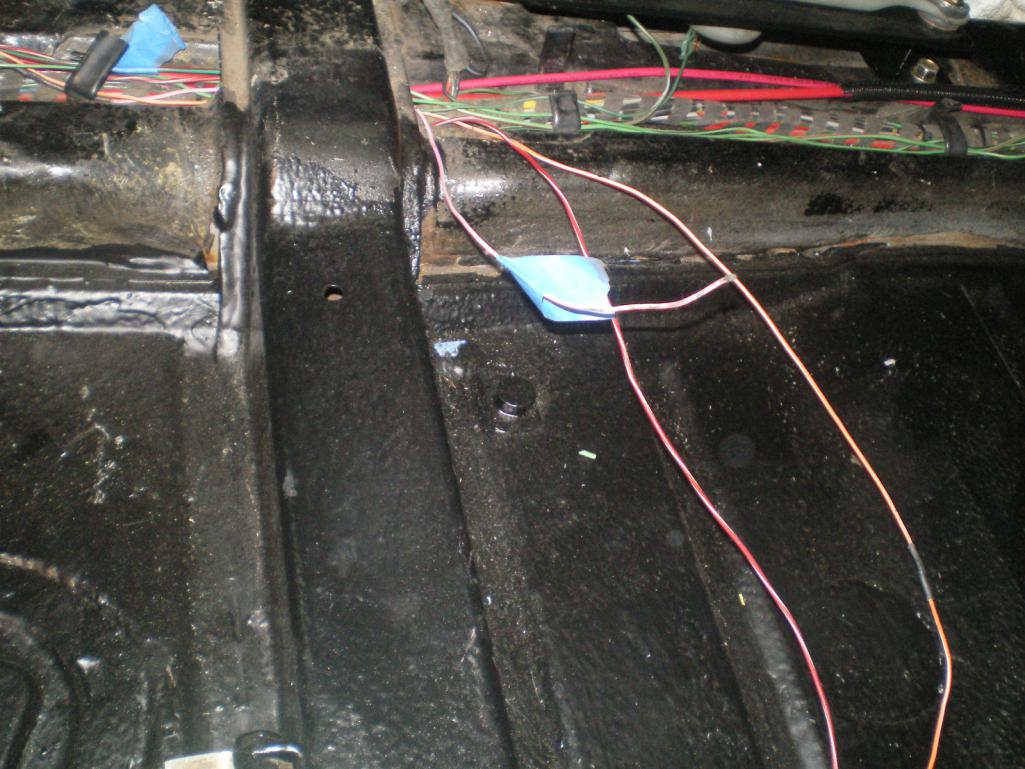
These might be the last 3 wires that need to be connected. One is an addition; the Check Engine Light, one is Temp which is waiting for the center console for final connection and the other is for the Tach which I haven't converted yet. There are a few wire nuts and crimp connectors that will be corrected but the end is in sight.
 Finally got up the courage to cut the front bumper and fairing.. We'll see how this works before I clean it up. It obviously needs to be blacked out before it's screened. 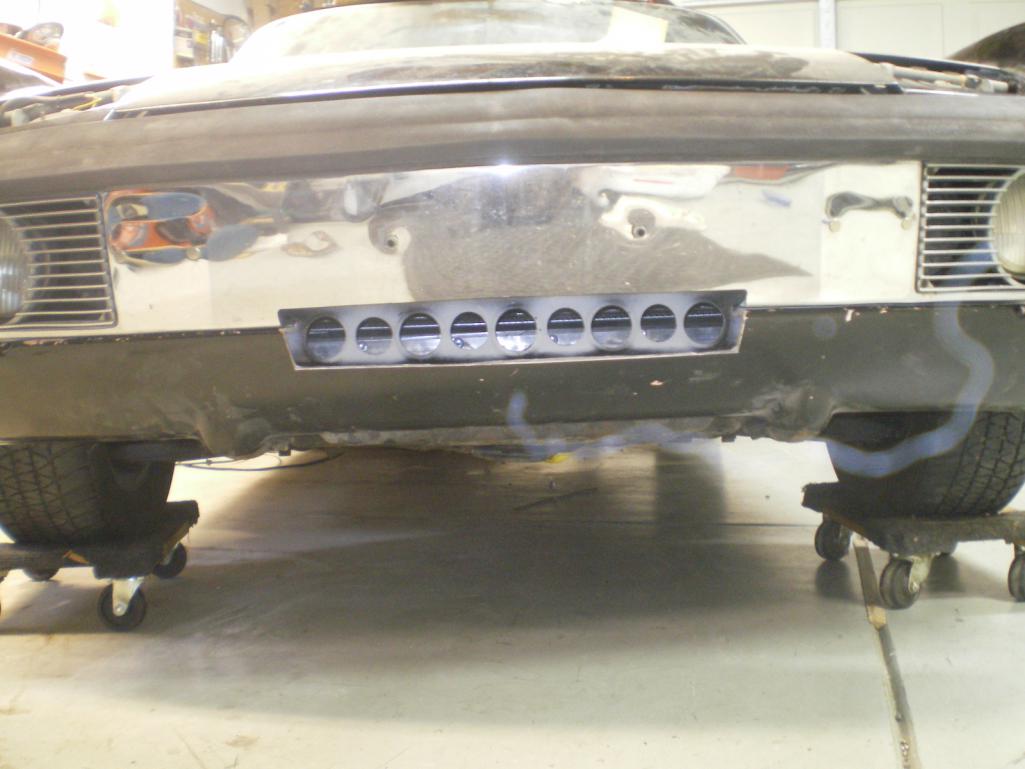 |
| euro911 |
 May 6 2014, 10:53 PM May 6 2014, 10:53 PM
Post
#313
|
|
Retired & living the dream. God help me if I wake up!      Group: Members Posts: 8,858 Joined: 2-December 06 From: So.Cal. & No.AZ (USA) Member No.: 7,300 Region Association: Southern California 
|
Are those dollies the little half-size HF dollies?
|
| Chris H. |
 May 7 2014, 06:21 AM May 7 2014, 06:21 AM
Post
#314
|
|
Senior Member     Group: Members Posts: 4,048 Joined: 2-January 03 From: Chicago 'burbs Member No.: 73 Region Association: Upper MidWest 
|
Now you've done it! Time to gas it up.
|
| 76-914 |
 May 7 2014, 08:01 AM May 7 2014, 08:01 AM
Post
#315
|
|
Repeat Offender & Resident Subaru Antagonist           Group: Members Posts: 13,634 Joined: 23-January 09 From: Temecula, CA Member No.: 9,964 Region Association: Southern California 
|
Are those dollies the little half-size HF dollies? Yeppers. I had 2 small ones for dropping the drivetrain. Then I bought the large one. Since the large one has become my welding cart and these 2 small ones have been re-purposed, temporarily. BTW, they work great, are cheaper than their car dollies and can still be used to drop the drivetrain on the 4 banger. Now you've done it! Time to gas it up. I'm sneaking up on it. (IMG:style_emoticons/default/lol-2.gif) I think back a year ago when I thought it might run by Oct. (IMG:style_emoticons/default/slap.gif) I was smart enough to keep that one to myself. (IMG:style_emoticons/default/biggrin.gif) I know now, that I should never have stopped working on the electrical and should have stayed with it start to finish. The start/stop method requires that I re-familiarize myself each time I re-start and at my age that is not smart. Shit I can't even remember what I had for breakfast! (IMG:style_emoticons/default/blink.gif) |
| Chris H. |
 May 7 2014, 08:44 AM May 7 2014, 08:44 AM
Post
#316
|
|
Senior Member     Group: Members Posts: 4,048 Joined: 2-January 03 From: Chicago 'burbs Member No.: 73 Region Association: Upper MidWest 
|
Yeah don't feel bad I was planning to drive mine to Garold's annual event in August last year. Riiiiight! I'll be lucky to make this one but it's looking pretty good.
|
| ruby914 |
 May 7 2014, 10:19 AM May 7 2014, 10:19 AM
Post
#317
|
|
Senior Member    Group: Members Posts: 720 Joined: 26-April 09 From: Hawthorne, Ca Member No.: 10,305 Region Association: None |
[quote name='Chris H.' post='2034364' date='May 7 2014, 05:21 AM']
Now you've done it! Time to gas it up. [/quote] I'm sneaking up on it. (IMG:style_emoticons/default/lol-2.gif) I think back a year ago when I thought it might run by Oct. (IMG:style_emoticons/default/slap.gif) I was smart enough to keep that one to myself. (IMG:style_emoticons/default/biggrin.gif) I know now, that I should never have stopped working on the electrical and should have stayed with it start to finish. The start/stop method requires that I re-familiarize myself each time I re-start and at my age that is not smart. Shit I can't even remember what I had for breakfast! (IMG:style_emoticons/default/blink.gif) [/quote] I was going to (IMG:style_emoticons/default/poke.gif) you and Doug to drive to the G&R (IMG:style_emoticons/default/happy11.gif) Looking good. |
| 76-914 |
 May 7 2014, 01:30 PM May 7 2014, 01:30 PM
Post
#318
|
|
Repeat Offender & Resident Subaru Antagonist           Group: Members Posts: 13,634 Joined: 23-January 09 From: Temecula, CA Member No.: 9,964 Region Association: Southern California 
|
Doug and I would have been happy to drive our new conversions there had we been able. (IMG:style_emoticons/default/mad.gif) If'n the good Lord's willing and the creeks don't rise I'm pretty sure there will be 3 more conversions hitting the road this summer. (IMG:style_emoticons/default/piratenanner.gif)
|
| 76-914 |
 May 7 2014, 07:24 PM May 7 2014, 07:24 PM
Post
#319
|
|
Repeat Offender & Resident Subaru Antagonist           Group: Members Posts: 13,634 Joined: 23-January 09 From: Temecula, CA Member No.: 9,964 Region Association: Southern California 
|
The Suby Temp gage that I just transplanted received an upgrade. I had recessed the gage a bit too far, it felt rubbery and was just a hair out of square. As you can seen an 1 1/2" ABS (or PVC) coupling fits like it was made for it. It needs to be trimmed to 28.5mm in length and siliconed on both ends. The ridge or stop inside the coupling will interfer with the gage if it is placed towards the top. IOW, the stop is dead center inside the coupling until I cut some off one end. Now, the gage sits flush, it's base is sturdy and it sets the depth so the needle clears the lens.
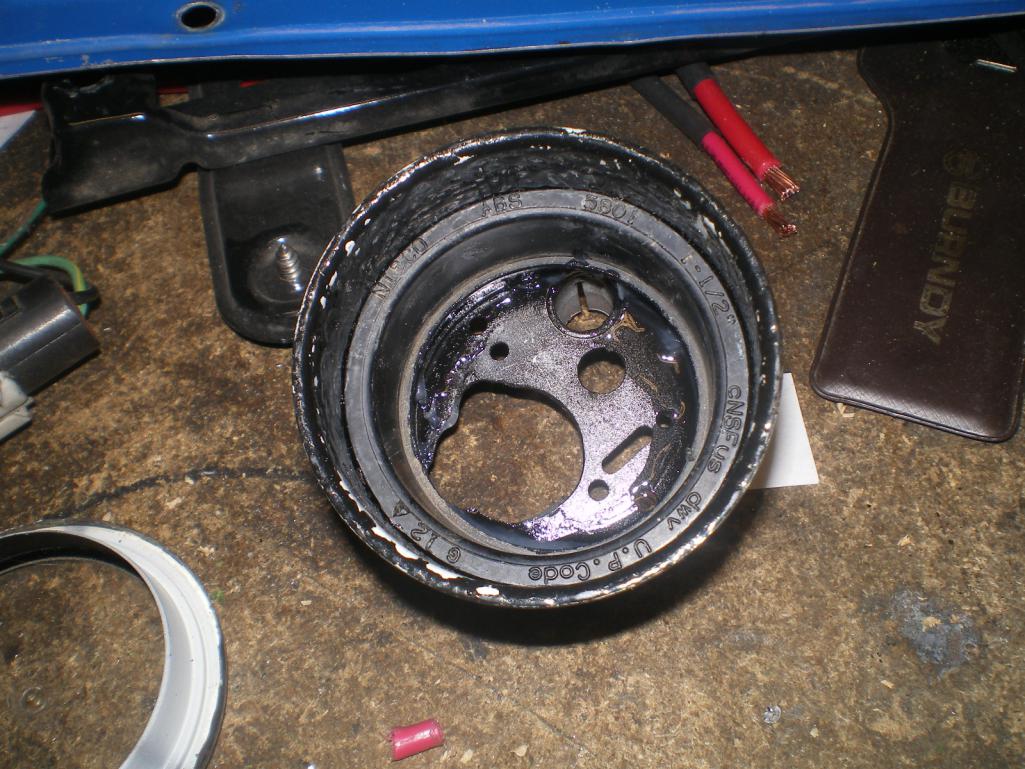 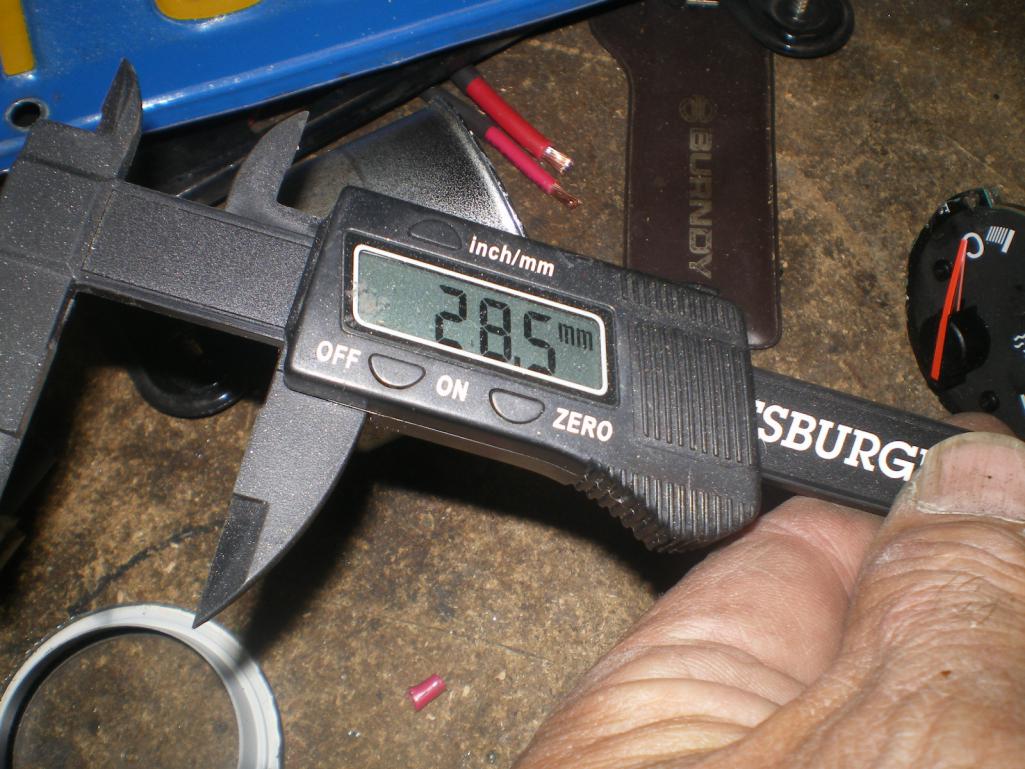 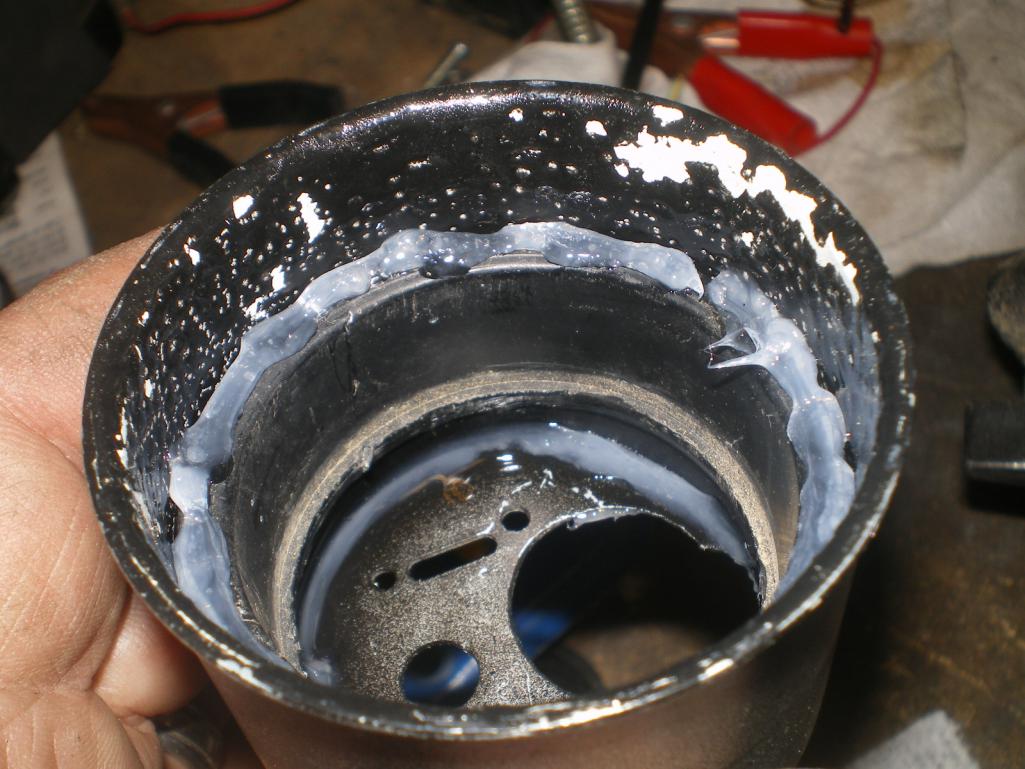 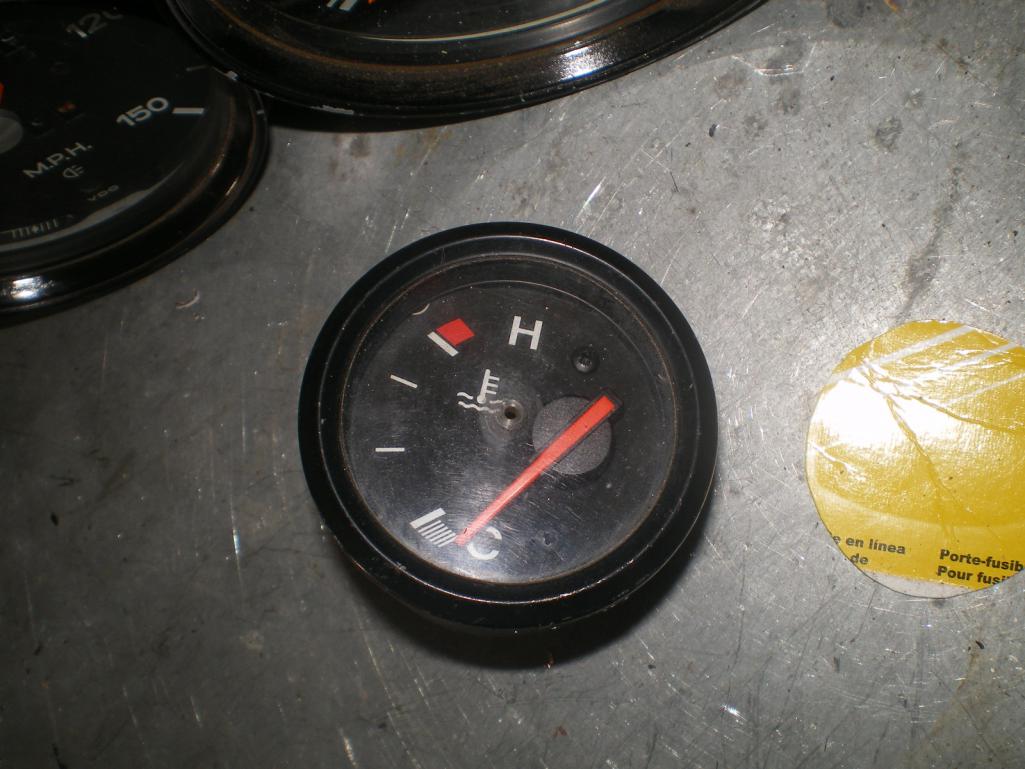 |
| BIGKAT_83 |
 May 7 2014, 07:30 PM May 7 2014, 07:30 PM
Post
#320
|
|
Senior Member    Group: Members Posts: 1,798 Joined: 25-January 03 From: Way down south Bogart,GA Member No.: 194 Region Association: South East States 

|
Doug and I would have been happy to drive our new conversions there had we been able. (IMG:style_emoticons/default/mad.gif) If'n the good Lord's willing and the creeks don't rise I'm pretty sure there will be 3 more conversions hitting the road this summer. (IMG:style_emoticons/default/piratenanner.gif) Make that 5! Two more coming out of my garage. (IMG:style_emoticons/default/sawzall-smiley.gif) (IMG:style_emoticons/default/welder.gif) Bob |
  |
3 User(s) are reading this topic (3 Guests and 0 Anonymous Users)
0 Members:

|
Lo-Fi Version | Time is now: 23rd November 2024 - 07:35 AM |
Invision Power Board
v9.1.4 © 2024 IPS, Inc.


