|
|

|
Porsche, and the Porsche crest are registered trademarks of Dr. Ing. h.c. F. Porsche AG.
This site is not affiliated with Porsche in any way. Its only purpose is to provide an online forum for car enthusiasts. All other trademarks are property of their respective owners. |
|
|
  |
| CptTripps |
 May 7 2014, 09:08 PM May 7 2014, 09:08 PM
Post
#321
|
|
:: Punch and Pie ::     Group: Members Posts: 3,584 Joined: 26-December 04 From: Mentor, OH Member No.: 3,342 Region Association: Upper MidWest |
I'm getting close!
Really only about a month later than I wanted. I can be ok with that. Your build is looking great man. Stay with it! |
| 76-914 |
 May 8 2014, 10:40 AM May 8 2014, 10:40 AM
Post
#322
|
|
Repeat Offender & Resident Subaru Antagonist           Group: Members Posts: 13,634 Joined: 23-January 09 From: Temecula, CA Member No.: 9,964 Region Association: Southern California 
|
Doug and I would have been happy to drive our new conversions there had we been able. (IMG:style_emoticons/default/mad.gif) If'n the good Lord's willing and the creeks don't rise I'm pretty sure there will be 3 more conversions hitting the road this summer. (IMG:style_emoticons/default/piratenanner.gif) Make that 5! Two more coming out of my garage. (IMG:style_emoticons/default/sawzall-smiley.gif) (IMG:style_emoticons/default/welder.gif) Bob, How about sharing some pic's and info on those? I'd love to tap into your knowledge bank some more. (IMG:style_emoticons/default/biggrin.gif) I'm getting close! Really only about a month later than I wanted. I can be ok with that. Your build is looking great man. Stay with it! Don't be discouraged if it takes longer, Doug. That 90%/90% rule is a harsh reality when building. If this trend continues RRC, WCR will be joined by SCC. (Suby Conversion Classic) Nah, we might have to explain why more 40 yo air cooled cars made the trip w/o a breakdown than our Suby's (IMG:style_emoticons/default/av-943.gif) (IMG:style_emoticons/default/lol-2.gif) (IMG:style_emoticons/default/laugh.gif) |
| 76-914 |
 May 8 2014, 09:24 PM May 8 2014, 09:24 PM
Post
#323
|
|
Repeat Offender & Resident Subaru Antagonist           Group: Members Posts: 13,634 Joined: 23-January 09 From: Temecula, CA Member No.: 9,964 Region Association: Southern California 
|
While waiting on some tach cans I thought it might be a good idea to run some fuel lines. My original plan was to run the fuel to the left side along the firewall. However, that side ended up being quite busy so I left the SS lines in place. I decided to run the gas line across the engine (just like the 914) but I didn't want to worry about the rubber lines shooting fuel about the compartment. So I bought these 5/16" anodized lines in 51" & 60" lengths. $15 for both.
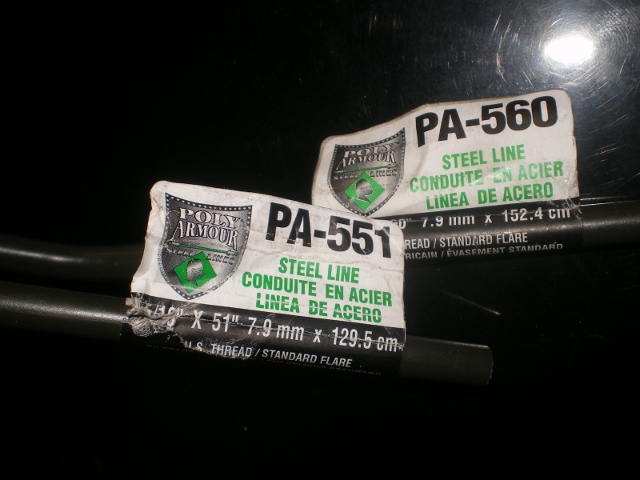 Then a few simple tools and 45 min's later 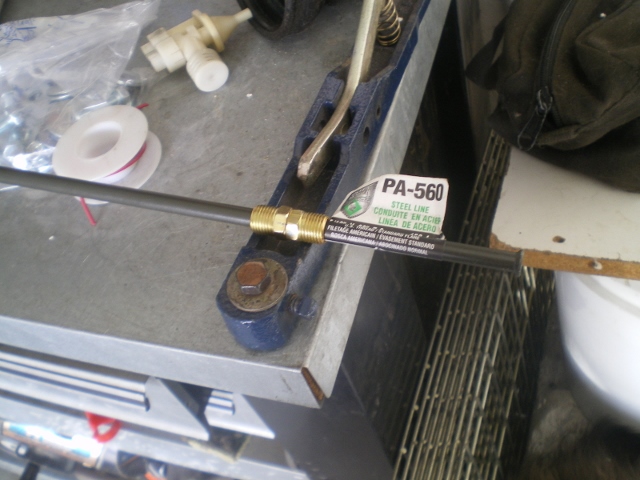 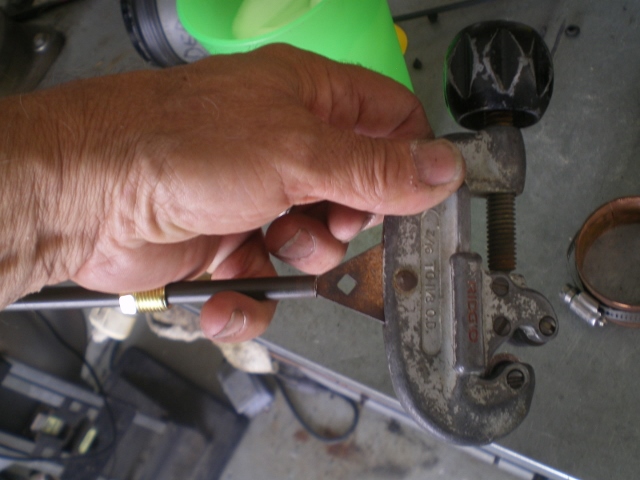 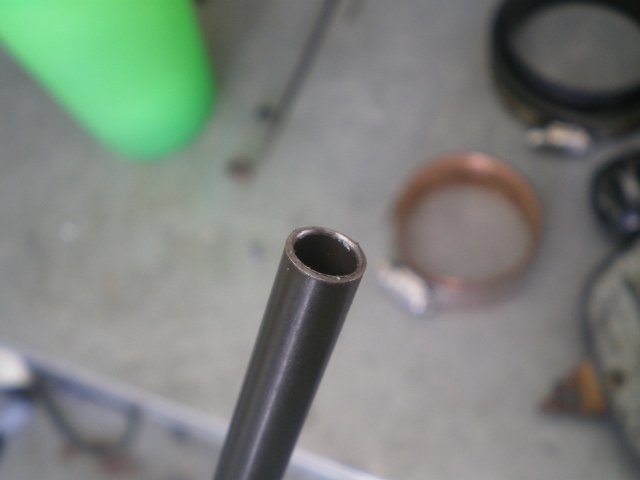 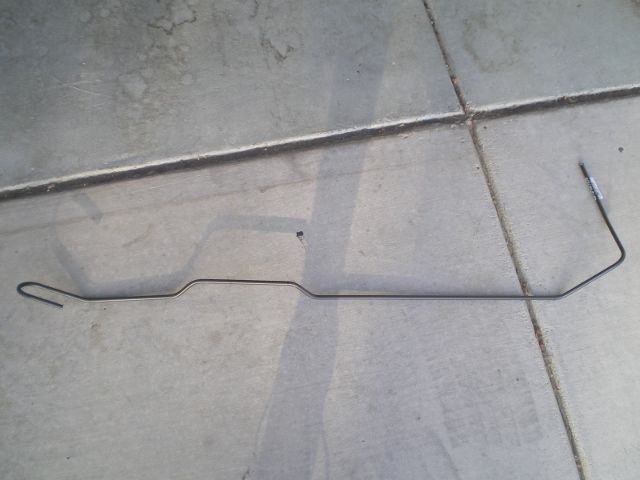 Test fit the first piece. You can't see it but they will run one spaced above the other along a 1" path above the TB opening. No room to wiggle. 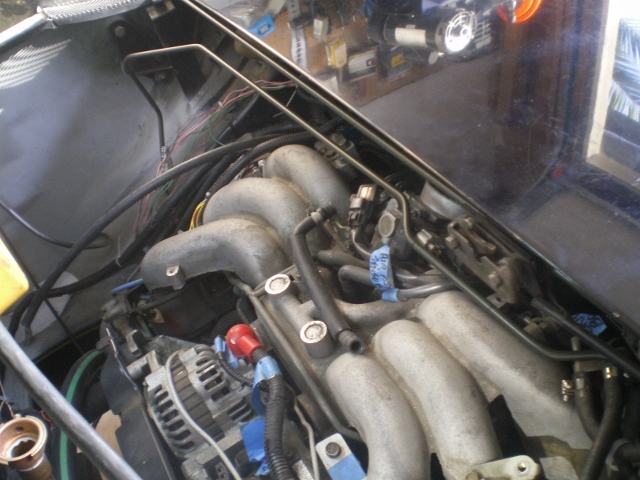 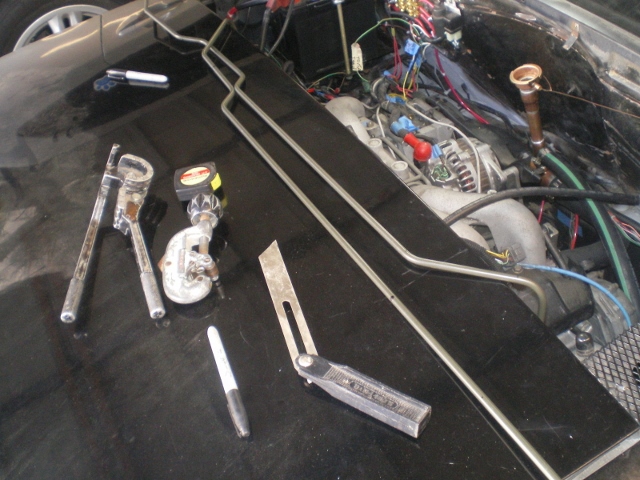 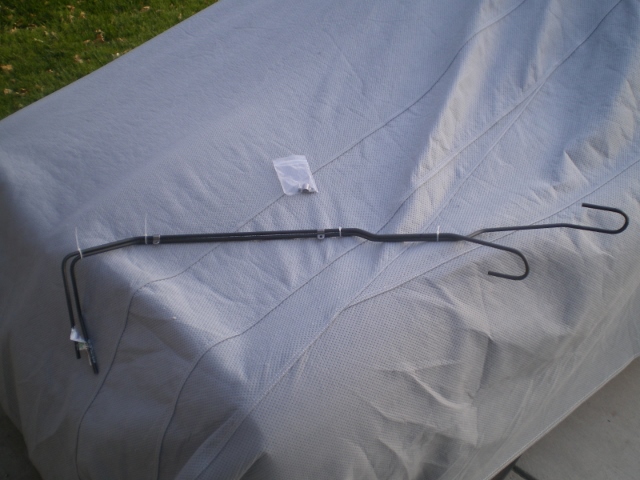 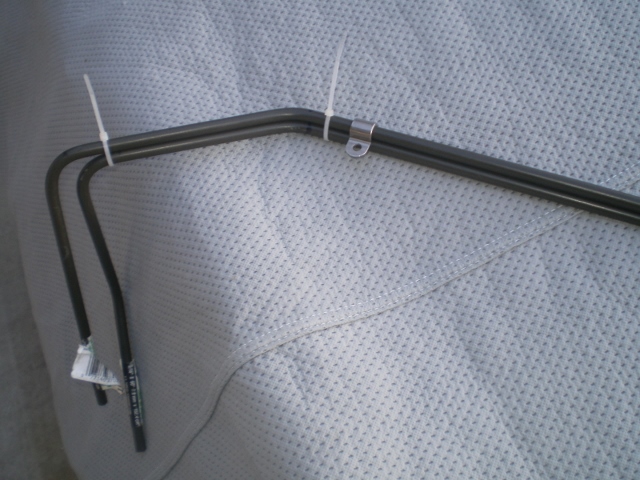 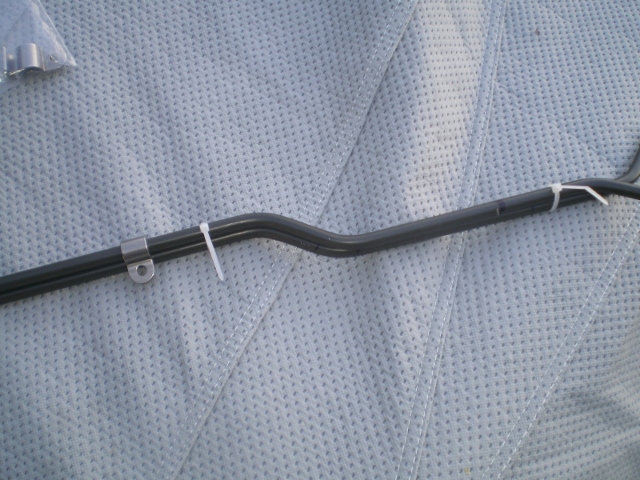 They're flipped 180 from how they'll attach. That will happen after I drop the engine again. Then I can do some spring cleaning and tidying up. 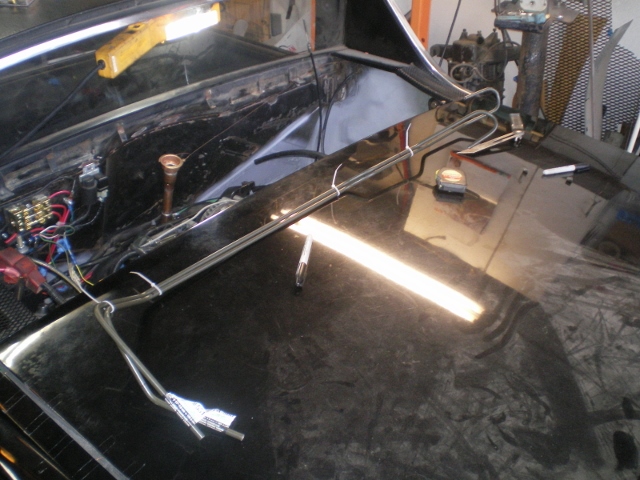 |
| Rotary'14 |
 May 10 2014, 11:38 AM May 10 2014, 11:38 AM
Post
#324
|
|
Senior Member    Group: Members Posts: 753 Joined: 24-April 05 From: Los Angeles Member No.: 3,977 |
That looks really nice! Let's hear her fire up!
-Rob |
| 76-914 |
 May 10 2014, 05:27 PM May 10 2014, 05:27 PM
Post
#325
|
|
Repeat Offender & Resident Subaru Antagonist           Group: Members Posts: 13,634 Joined: 23-January 09 From: Temecula, CA Member No.: 9,964 Region Association: Southern California 
|
Thx Rob, but it's no where near your level of expertise.
I found that I needed to change the gage layout a bit if I'm to use the Suby tack and Suby speedo. But I can't use the existing panel and need to make another one. The new panel will have 2 large cans and 1 small can vs. the old layout of 2 small and one large. I think there is just enough room but I won't know until I get the cans next week. But there's stuff I can do now. I need a model so time to pull the gages and remove the panel. Luckily I never removed the markers I put on last year so that was time saved. 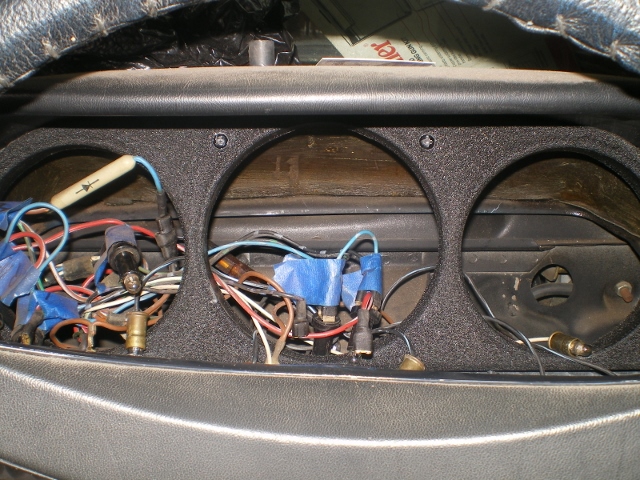 A piece of some aluminum plate cut to appx size with a pilot hole for alignment to the OG panel. 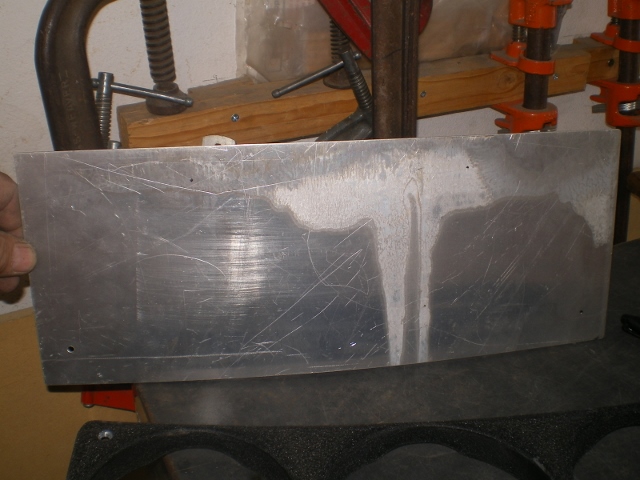 My tool box top has a nice big radius lip so I covered the edge with some blue painters tape and pulled the plate across it several times to get a gradual curve like the OG. 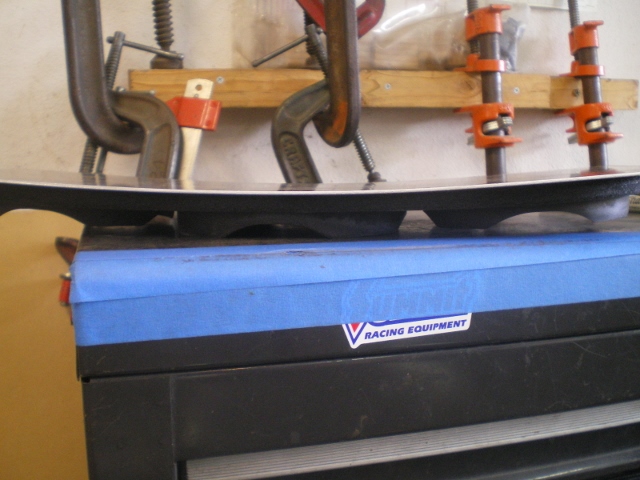 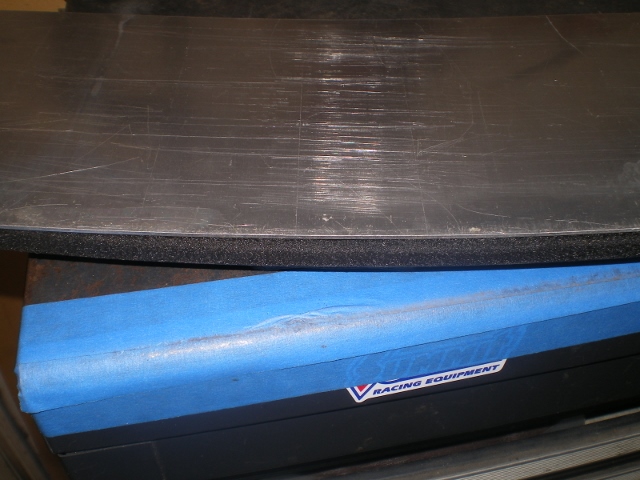 A quick layout check 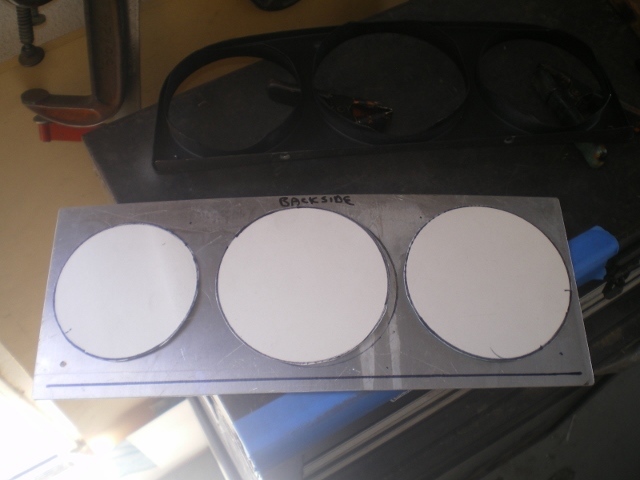 Checking the bottom for flatness after the lower flange(s) were bent. I couldn't have one continuous lip because of the curvature of the face. 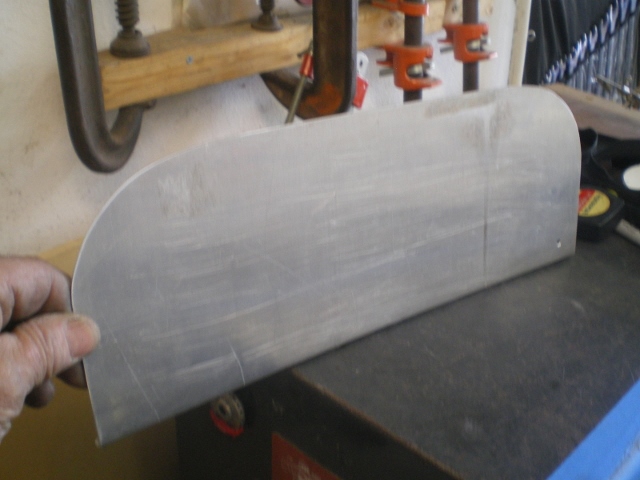 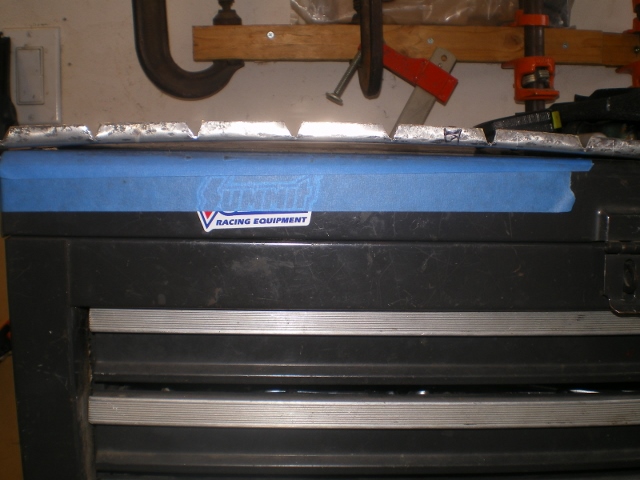 Another quick test fit. Still on track. 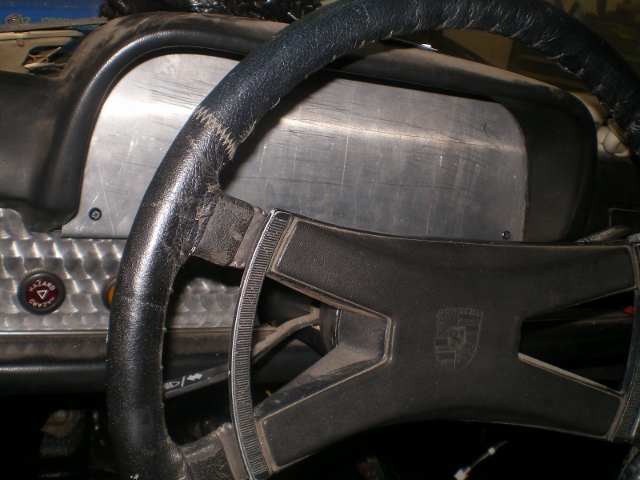 Now to countersink the holes 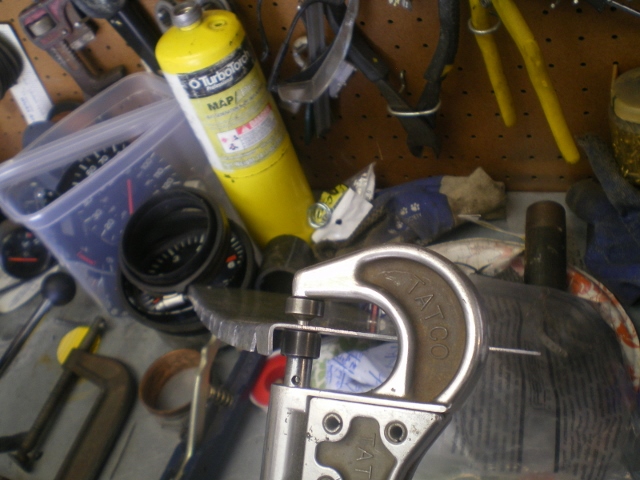 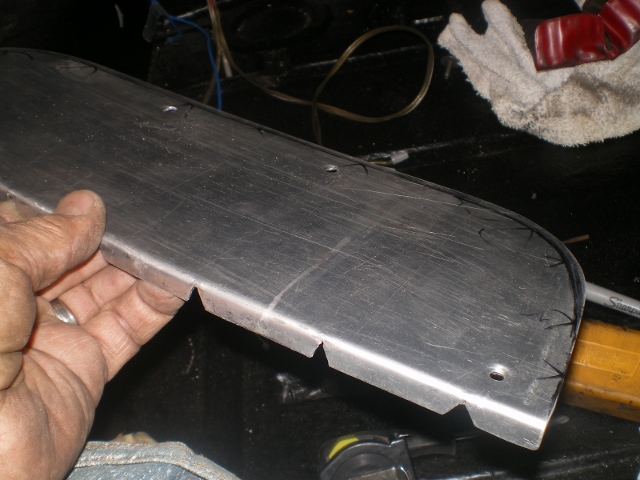 I need to buy another flycutter so I can cut those holes. The centers are punched so it will just be a matter of cutting the holes. But before I can do that I need to laminate the back with 5/8" poly carbonate. Once that is drilled out it should create the shoulders for the gages just as the stamped OG panel has. More when the cans arrive. EDIT: These holes are marked incorrectly. They are each 5mm too large. So 115mm & 100mm. 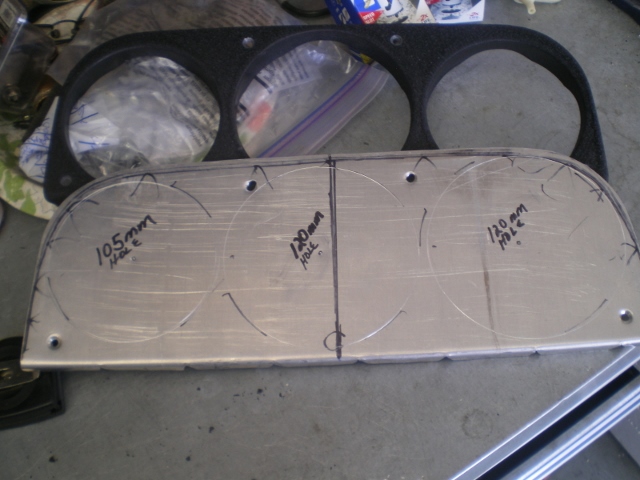 |
| 76-914 |
 May 12 2014, 09:54 PM May 12 2014, 09:54 PM
Post
#326
|
|
Repeat Offender & Resident Subaru Antagonist           Group: Members Posts: 13,634 Joined: 23-January 09 From: Temecula, CA Member No.: 9,964 Region Association: Southern California 
|
The 2 salvage tach's came today. Thx Garold, once again. Remove 4 screws on the backside and everything falls out after the bezel is removed.
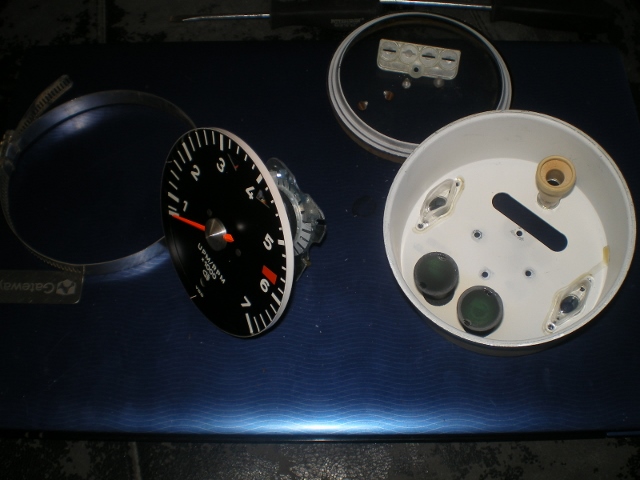 These little post do double duty. They support the gage and also function as light tubes for the blinkers and HiBeam light. 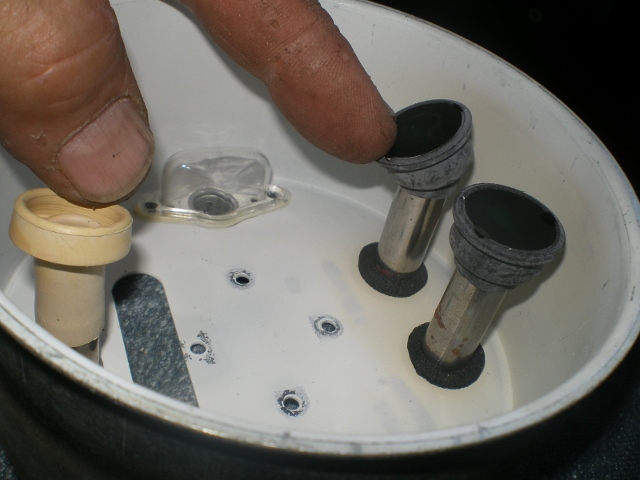 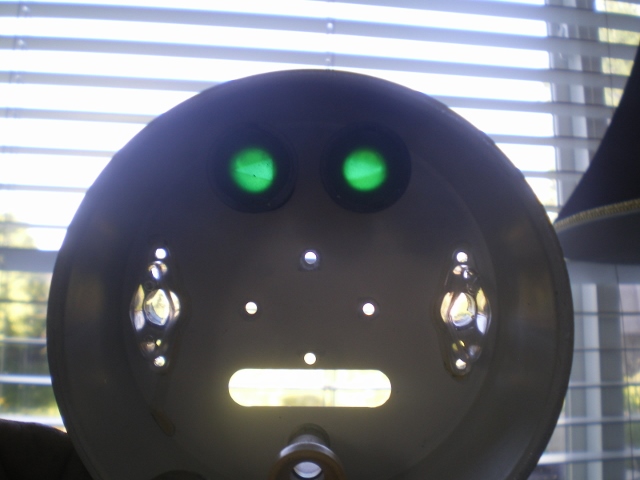 Here is the Suby gage that was cut from the panel cluster. It still needs to be trimmed. 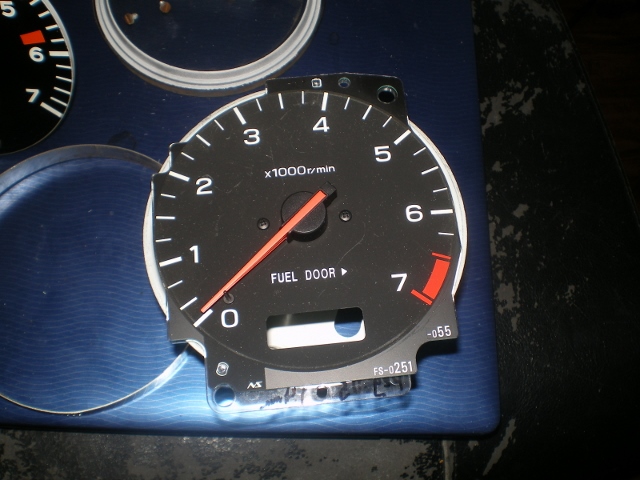 Use the line that is the radius line of the gage face. It's where dull black goes to grey or clear. 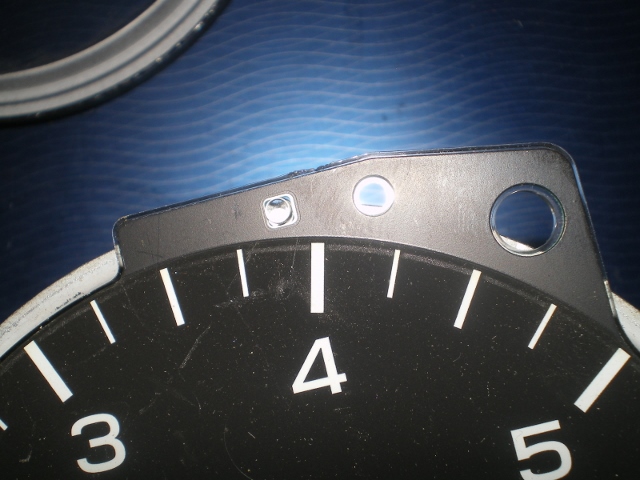 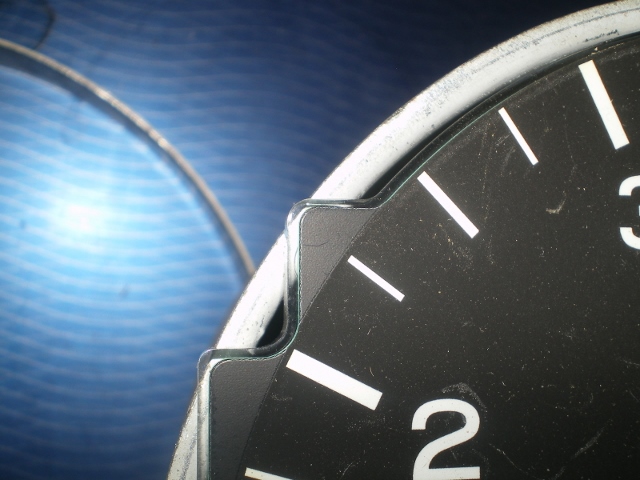 Then drill a hole (be damned sure to use a bit for plastic) as shown for the stock HiBeam indicator lite. 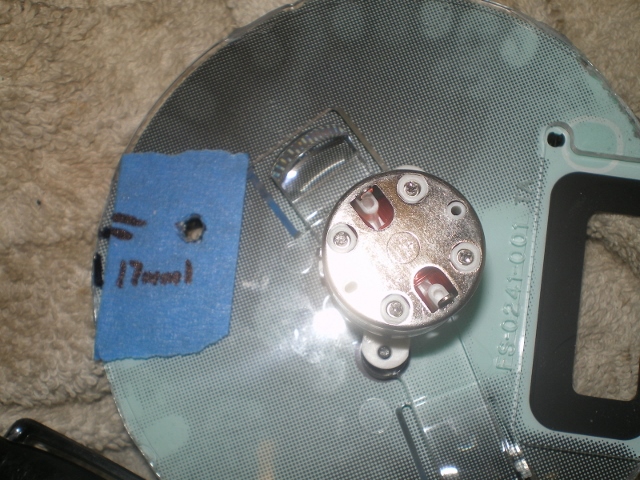 This is strictly a Shits n Grin mock up to see is it works. A piece of alum with a couple of holes and some electrical tape to blend in. 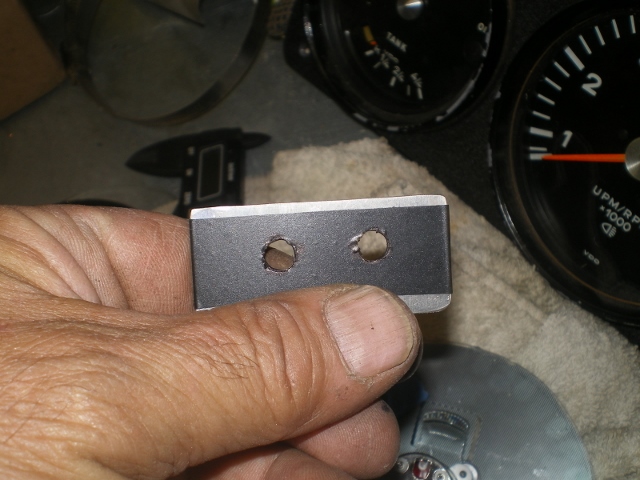 Temp taped to the back. Final vers will be glued in place w/ arrows. 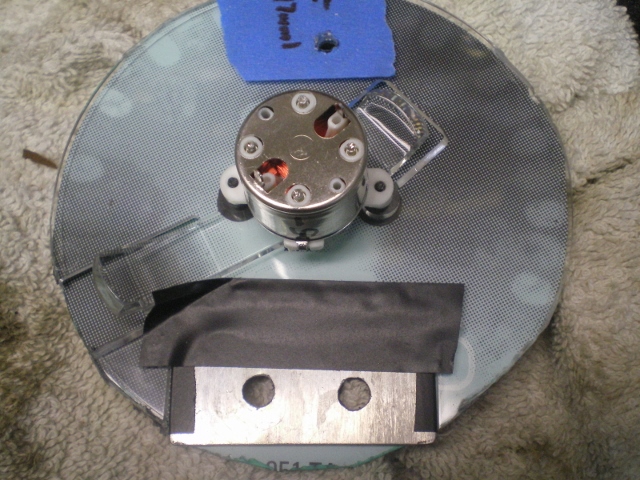 The HiBeam hole (in yellow) from the back of gage. 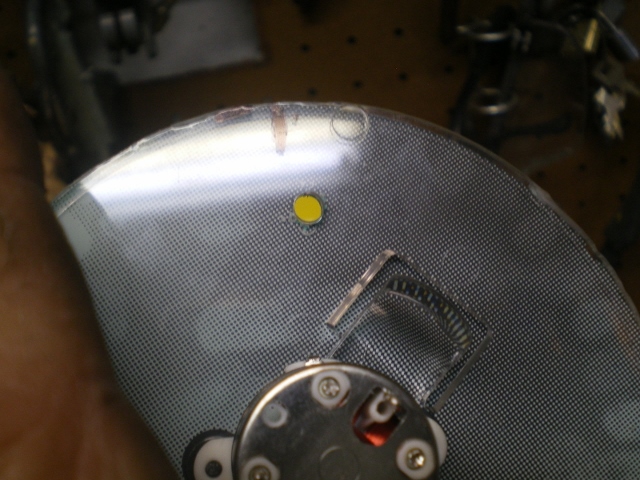 Put a little power to it to see what it would look like. It also need a blue lens for the HiBeam tube. The turn signals are now on the bottom and HiBeam on top. Otherwise it's pretty damned stock looking. 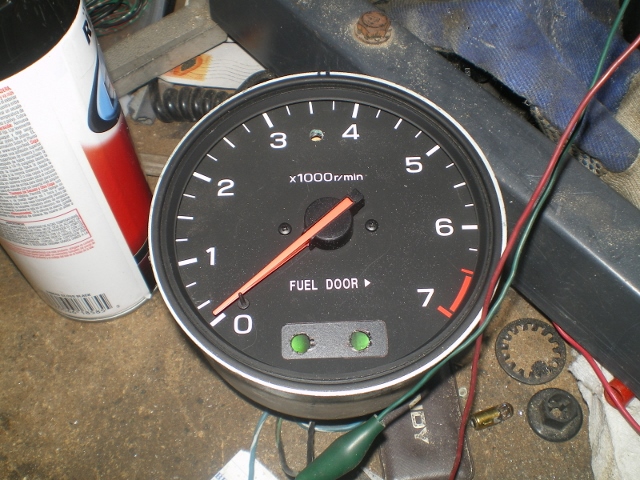 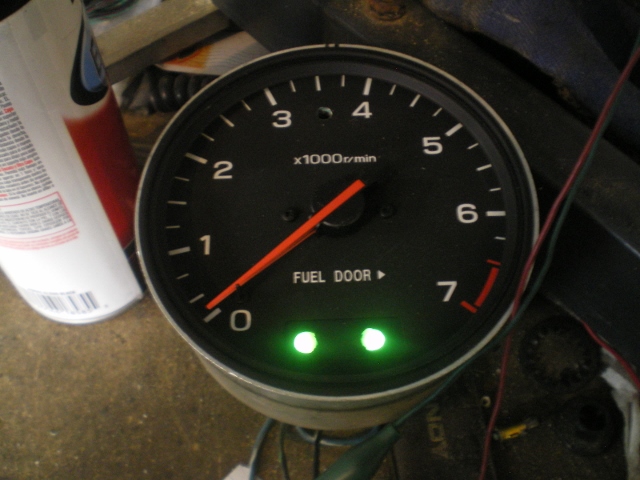 Next up is the Suby Speedo Transfer. |
| ruby914 |
 May 12 2014, 10:12 PM May 12 2014, 10:12 PM
Post
#327
|
|
Senior Member    Group: Members Posts: 720 Joined: 26-April 09 From: Hawthorne, Ca Member No.: 10,305 Region Association: None |
WOW.
Kent, your making this look far too easy. Why wasn't this done before. (IMG:style_emoticons/default/confused24.gif) Maybe, I saw all that circuit board and looked the other way. Didn't think of digging that deep. I still have my AT Suby cluster and converted and aborted 914 gauges. I should make mine like you are doing and pass them on. Good work (IMG:style_emoticons/default/beerchug.gif) (IMG:style_emoticons/default/popcorn[1].gif) (IMG:style_emoticons/default/popcorn[1].gif) |
| 914forme |
 May 14 2014, 05:59 AM May 14 2014, 05:59 AM
Post
#328
|
|
Times a wastin', get wrenchin'!     Group: Members Posts: 3,896 Joined: 24-July 04 From: Dayton, Ohio Member No.: 2,388 Region Association: None 
|
Im not sure why people fear gauges so, but as normal thx for showing us another way of doing this.
BTW, you can pickup a sample of plastic light lens films, the sheets are great to change or update colors for things like High Beams and warning lights. Literally any color you want under the rainbow is yours. All in light translucent glory. Now lets get this thing fired up (IMG:style_emoticons/default/driving.gif) |
| Chris H. |
 May 14 2014, 06:27 AM May 14 2014, 06:27 AM
Post
#329
|
|
Senior Member     Group: Members Posts: 4,048 Joined: 2-January 03 From: Chicago 'burbs Member No.: 73 Region Association: Upper MidWest 
|
Yeah this is awesome. I liked the SVX gauge faces and thought about cutting them down but decided not to. The panel is way too big but now you got me thinking...
|
| 76-914 |
 May 14 2014, 06:12 PM May 14 2014, 06:12 PM
Post
#330
|
|
Repeat Offender & Resident Subaru Antagonist           Group: Members Posts: 13,634 Joined: 23-January 09 From: Temecula, CA Member No.: 9,964 Region Association: Southern California 
|
Well Mike, if it weren't easy and cheap I wouldn't do it. (IMG:style_emoticons/default/biggrin.gif) Thx Stephen and Chris. (IMG:style_emoticons/default/beerchug.gif) . Well this post on the Speedo install will be short because almost all of the work is the same covered in the Tach post! One difference is the speedo is also installed in a large "tach can". As you can see it is the same size as the Suby tach and needs to be trimmed to fit and the window won't have turn signals.
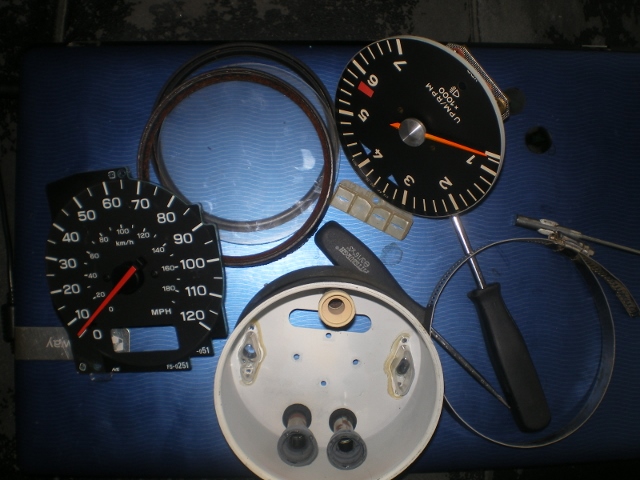 Then I peeled the laminate face off of the old Suby panel face and robbed some needed labels. 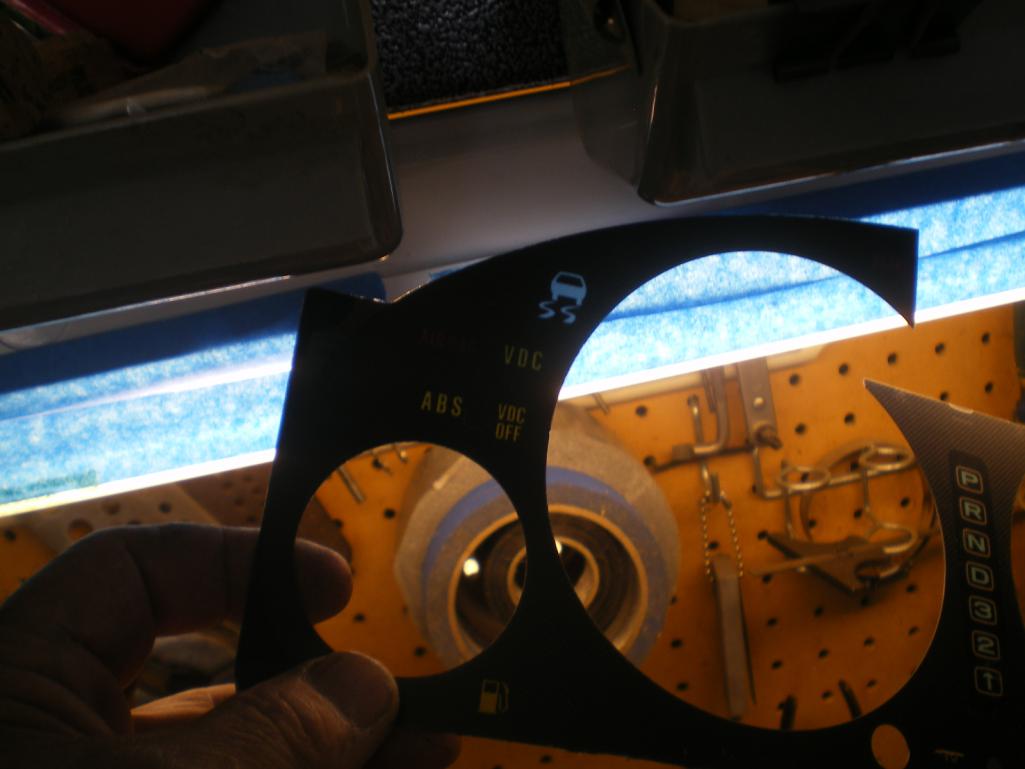 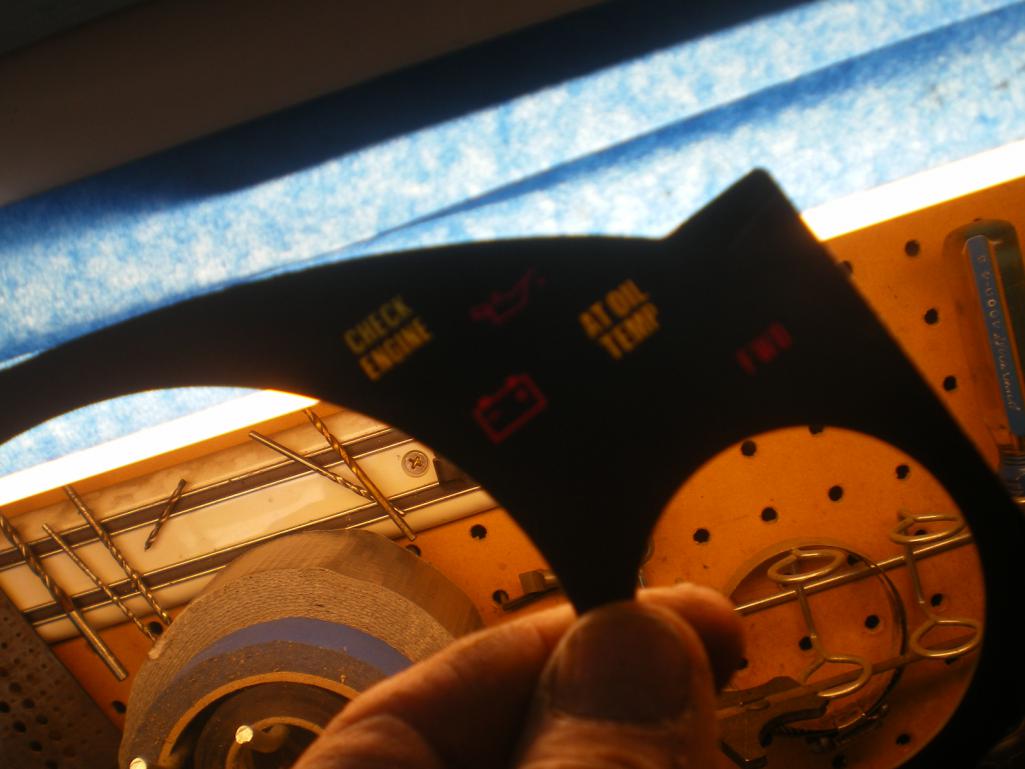 Thought I'd throw in this side by side of OG Tach and Suby Tach. 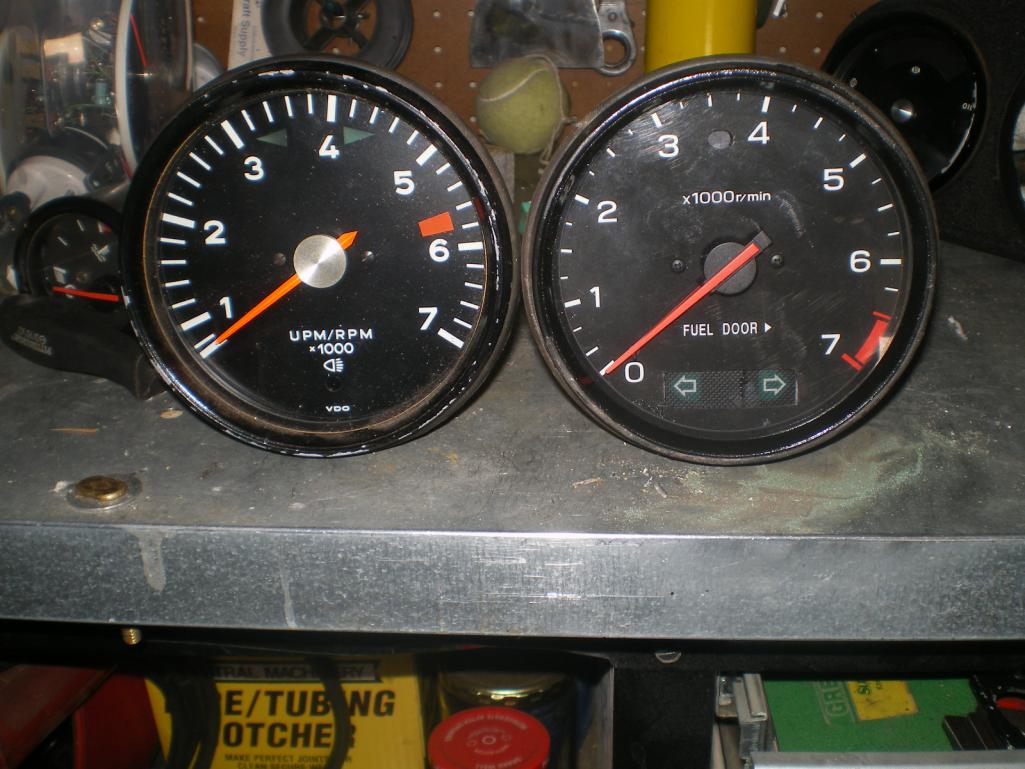 And the finished products 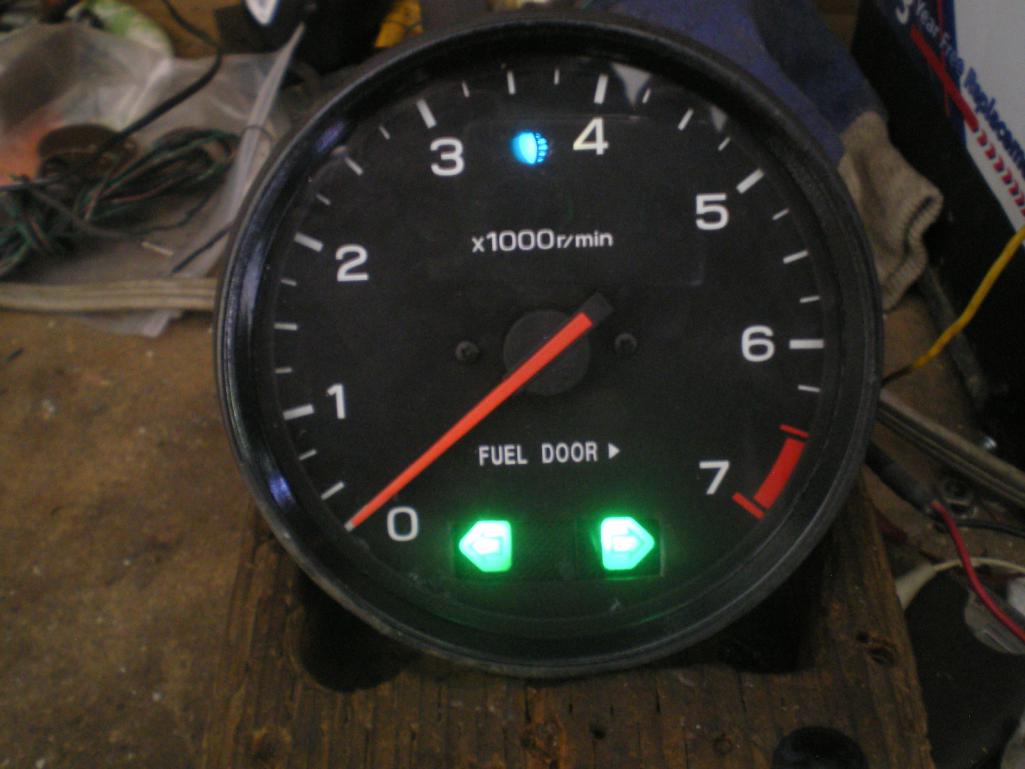 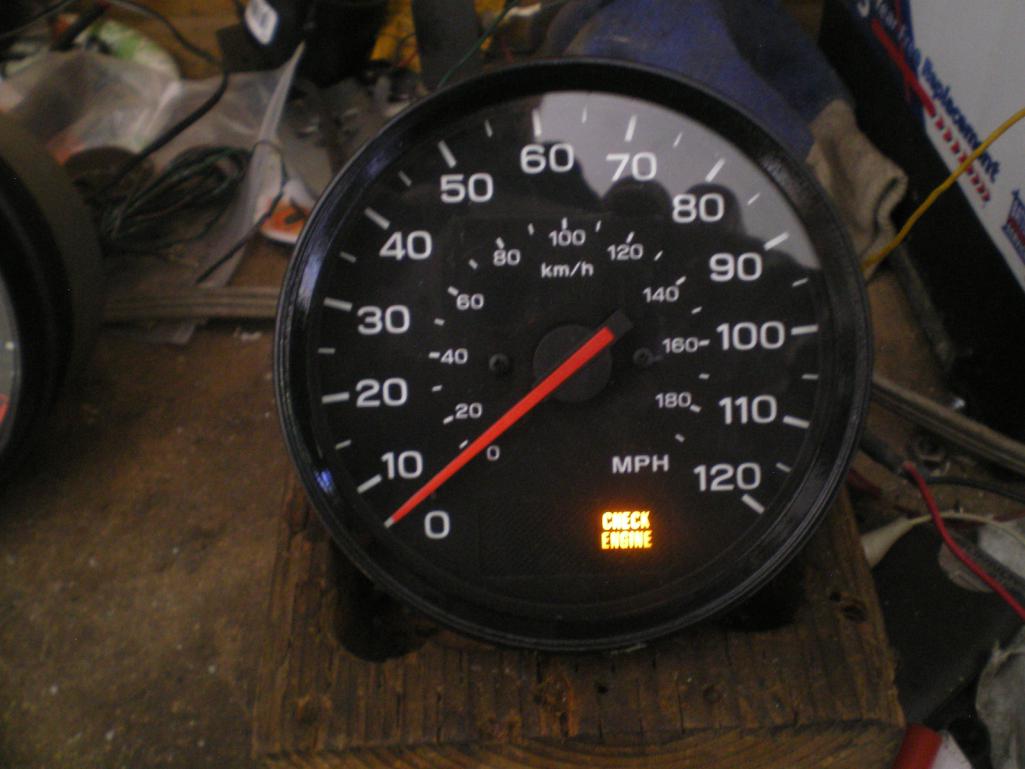 |
| Chris H. |
 May 14 2014, 07:34 PM May 14 2014, 07:34 PM
Post
#331
|
|
Senior Member     Group: Members Posts: 4,048 Joined: 2-January 03 From: Chicago 'burbs Member No.: 73 Region Association: Upper MidWest 
|
Dude.... (IMG:style_emoticons/default/pray.gif) Seriously way to dig into that pod and make it your beyotch.
|
| Rotary'14 |
 May 14 2014, 08:05 PM May 14 2014, 08:05 PM
Post
#332
|
|
Senior Member    Group: Members Posts: 753 Joined: 24-April 05 From: Los Angeles Member No.: 3,977 |
(IMG:style_emoticons/default/agree.gif)
You are doing some really great work any CSOB will appreciate your ingenuity. I really like how your car is coming along. |
| 76-914 |
 May 14 2014, 10:01 PM May 14 2014, 10:01 PM
Post
#333
|
|
Repeat Offender & Resident Subaru Antagonist           Group: Members Posts: 13,634 Joined: 23-January 09 From: Temecula, CA Member No.: 9,964 Region Association: Southern California 
|
Thx guys but its really just that simple. You'll see if you do it.
|
| mgp4591 |
 May 15 2014, 02:25 AM May 15 2014, 02:25 AM
Post
#334
|
|
914 Guru      Group: Members Posts: 5,481 Joined: 1-August 12 From: Salt Lake City Ut Member No.: 14,748 Region Association: Intermountain Region 
|
Great work and you make it look too easy! Now you've got me thinking about my Subie guages.... (IMG:style_emoticons/default/idea.gif)
|
| 76-914 |
 May 15 2014, 02:36 PM May 15 2014, 02:36 PM
Post
#335
|
|
Repeat Offender & Resident Subaru Antagonist           Group: Members Posts: 13,634 Joined: 23-January 09 From: Temecula, CA Member No.: 9,964 Region Association: Southern California 
|
Great work and you make it look too easy! Now you've got me thinking about my Subie guages.... (IMG:style_emoticons/default/idea.gif) It truly is too easy. Do it! I did neglect to mention that you need to place a few small dabs of silicone to hold the gage face so it won't slide forwards. There are no screws holding it to the back of the can like OEM gages. And the last caveat I foresee is lighting. The OEM gages have openings along the side of the gage to allow light to enter from the rear. I will have to #1- open up some places on the Suby gages to allow for this; #2- install post lamps; #3- install AC style "red" exterior mt. panel lamps; #4- install led's; #5- ship them to Timothy for some of his magic lighting skills. Anyone of these methods should work but I just wanted to throw this out there as it is not the 100% changeover. Lighting (other than those you see working in the pic's) will need to be addressed. (IMG:style_emoticons/default/beerchug.gif) |
| Rotary'14 |
 May 15 2014, 07:25 PM May 15 2014, 07:25 PM
Post
#336
|
|
Senior Member    Group: Members Posts: 753 Joined: 24-April 05 From: Los Angeles Member No.: 3,977 |
You might want to try for lighting if you don't go LED,,,since your gauges are open.
http://www.914world.com/bbs2/index.php?sho...&hl=el+wire -Rob |
| 76-914 |
 May 16 2014, 09:21 AM May 16 2014, 09:21 AM
Post
#337
|
|
Repeat Offender & Resident Subaru Antagonist           Group: Members Posts: 13,634 Joined: 23-January 09 From: Temecula, CA Member No.: 9,964 Region Association: Southern California 
|
You might want to try for lighting if you don't go LED,,,since your gauges are open. http://www.914world.com/bbs2/index.php?sho...&hl=el+wire -Rob Perfect! Thx a million Rob. I'll try to locate that material this evening and order it up. If any of you guy's following this live near Doug in OH, give him a ring. He could use some help and friend's from the brotherhood. |
| Chris H. |
 May 16 2014, 09:45 AM May 16 2014, 09:45 AM
Post
#338
|
|
Senior Member     Group: Members Posts: 4,048 Joined: 2-January 03 From: Chicago 'burbs Member No.: 73 Region Association: Upper MidWest 
|
The needles on the Subie gauges also MIGHT light up. Not sure how that works...
I wish I lived closer to Doug...can't swing anything now but we'll see how the summer goes. For sure someone needs to roll out there and help him finish that car. Or BS and tell big fish stories and drink bottled beverages while SITTING in the unfinished car. Man stuff. |
| 914forme |
 May 16 2014, 12:32 PM May 16 2014, 12:32 PM
Post
#339
|
|
Times a wastin', get wrenchin'!     Group: Members Posts: 3,896 Joined: 24-July 04 From: Dayton, Ohio Member No.: 2,388 Region Association: None 
|
I think Doug should toss together a meet up and a few of use might be able to run up, or over depending on our locations. Not many can run down, Lake Erie kinda makes that a little hard. He needs a few good hands on that car to get it done.
I am booked solid though most of the summer. |
| 76-914 |
 May 16 2014, 07:25 PM May 16 2014, 07:25 PM
Post
#340
|
|
Repeat Offender & Resident Subaru Antagonist           Group: Members Posts: 13,634 Joined: 23-January 09 From: Temecula, CA Member No.: 9,964 Region Association: Southern California 
|
The needles on the Subie gauges also MIGHT light up. Not sure how that works... I wish I lived closer to Doug...can't swing anything now but we'll see how the summer goes. For sure someone needs to roll out there and help him finish that car. Or BS and tell big fish stories and drink bottled beverages while SITTING in the unfinished car. Man stuff. Well Chris, I feel kinda stupid now. It never occurred to me to place the OG lighting back in to verify that it would/would not work. (IMG:style_emoticons/default/headbang.gif) Damnit! I'll get back with you. |
  |
2 User(s) are reading this topic (2 Guests and 0 Anonymous Users)
0 Members:

|
Lo-Fi Version | Time is now: 23rd November 2024 - 07:34 AM |
Invision Power Board
v9.1.4 © 2024 IPS, Inc.


