|
|

|
Porsche, and the Porsche crest are registered trademarks of Dr. Ing. h.c. F. Porsche AG.
This site is not affiliated with Porsche in any way. Its only purpose is to provide an online forum for car enthusiasts. All other trademarks are property of their respective owners. |
|
|
  |
| CptTripps |
 Aug 19 2014, 09:35 AM Aug 19 2014, 09:35 AM
Post
#521
|
|
:: Punch and Pie ::     Group: Members Posts: 3,584 Joined: 26-December 04 From: Mentor, OH Member No.: 3,342 Region Association: Upper MidWest |
My reservoir leaked ALL the fluid out before I caught it. I was very relieved when I discovered it was just the clamp. I haven't filled it back up yet because I didn't think of a good fix.
|
| Chris H. |
 Aug 19 2014, 03:38 PM Aug 19 2014, 03:38 PM
Post
#522
|
|
Senior Member     Group: Members Posts: 4,048 Joined: 2-January 03 From: Chicago 'burbs Member No.: 73 Region Association: Upper MidWest 
|
I certainly might have under-tightened mine and then overtightened it. Still don't like that kind but I get why they make it that way.
|
| 76-914 |
 Aug 19 2014, 05:43 PM Aug 19 2014, 05:43 PM
Post
#523
|
|
Repeat Offender & Resident Subaru Antagonist           Group: Members Posts: 13,634 Joined: 23-January 09 From: Temecula, CA Member No.: 9,964 Region Association: Southern California 
|
My reservoir leaked ALL the fluid out before I caught it. I was very relieved when I discovered it was just the clamp. I haven't filled it back up yet because I didn't think of a good fix. PM Chris. He'll get ya set up with the Honda part #'s and links. That freaking brake fluid is like a time bomb waiting to go off. Luckily the fluid from mine held on to the bottom of the hose until clear of the car. Well, one little spot beneath the tank which I caught in time. I wasn't too f*^$% happy about pulling the gas tank at 2100hr's when I noticed the leak. (IMG:style_emoticons/default/headbang.gif) |
| partwerks |
 Aug 20 2014, 07:43 PM Aug 20 2014, 07:43 PM
Post
#524
|
|
Senior Member    Group: Members Posts: 1,598 Joined: 7-September 06 From: Grand Island, NE Member No.: 6,787 |
I'm in manufacturing. You'll have to check with Chris in supply. (IMG:style_emoticons/default/lol-2.gif) (IMG:style_emoticons/default/av-943.gif) I honestly don't know but we'll get that info to you soon. Here is a shot of one installed but I'm getting ahead of myself. Is center to center on the MC'S (1 1/2" holes) 91MM so when I hole saw out the other hole, I get it the correct distance over so it is in line with where it hooks up at? Also, vertical, where did you measure from to get it in the correct location? 91 Millimeters (mm) = 3.58268 Inches (in) |
| 76-914 |
 Aug 20 2014, 07:49 PM Aug 20 2014, 07:49 PM
Post
#525
|
|
Repeat Offender & Resident Subaru Antagonist           Group: Members Posts: 13,634 Joined: 23-January 09 From: Temecula, CA Member No.: 9,964 Region Association: Southern California 
|
I'm in manufacturing. You'll have to check with Chris in supply. (IMG:style_emoticons/default/lol-2.gif) (IMG:style_emoticons/default/av-943.gif) I honestly don't know but we'll get that info to you soon. Here is a shot of one installed but I'm getting ahead of myself. Is center to center on the MC'S (1 1/2" holes) 91MM so when I hole saw out the other hole, I get it the correct distance over so it is in line with where it hooks up at? Also, vertical, where did you measure from to get it in the correct location? 91 Millimeters (mm) = 3.58268 Inches (in) I'll measure that when the new MC arrives. Mine is installed so I can't get that for you right now. Chris said it was shipped a few days ago so maybe manana. |
| partwerks |
 Aug 20 2014, 07:59 PM Aug 20 2014, 07:59 PM
Post
#526
|
|
Senior Member    Group: Members Posts: 1,598 Joined: 7-September 06 From: Grand Island, NE Member No.: 6,787 |
I'm in manufacturing. You'll have to check with Chris in supply. (IMG:style_emoticons/default/lol-2.gif) (IMG:style_emoticons/default/av-943.gif) I honestly don't know but we'll get that info to you soon. Here is a shot of one installed but I'm getting ahead of myself. Is center to center on the MC'S (1 1/2" holes) 91MM so when I hole saw out the other hole, I get it the correct distance over so it is in line with where it hooks up at? Also, vertical, where did you measure from to get it in the correct location? 91 Millimeters (mm) = 3.58268 Inches (in) I'll measure that when the new MC arrives. Mine is installed so I can't get that for you right now. Chris said it was shipped a few days ago so maybe manana. I wonder if a person could just measure on the pedal assembly where the two linkage parts are, from center to center on that? |
| Chris H. |
 Aug 20 2014, 08:13 PM Aug 20 2014, 08:13 PM
Post
#527
|
|
Senior Member     Group: Members Posts: 4,048 Joined: 2-January 03 From: Chicago 'burbs Member No.: 73 Region Association: Upper MidWest 
|
It's a little more complicated than that. Makes it a lot easier if you just have the dimensions of the bracket.
Hey Kent, check today's stack of mail...or your front door/bushes/etc. Tracking says it was delivered today USPS. |
| 76-914 |
 Aug 21 2014, 08:11 PM Aug 21 2014, 08:11 PM
Post
#528
|
|
Repeat Offender & Resident Subaru Antagonist           Group: Members Posts: 13,634 Joined: 23-January 09 From: Temecula, CA Member No.: 9,964 Region Association: Southern California 
|
I got Chris' new MC today so I'll pick up where I left off. Mine had screw in studs but this one has pressed in studs. Otherwise no difference. This is what I used; a MC, the modified plate, a clevis, an 8x1.25x16mm coupling nut (aka rod socket in SAE).
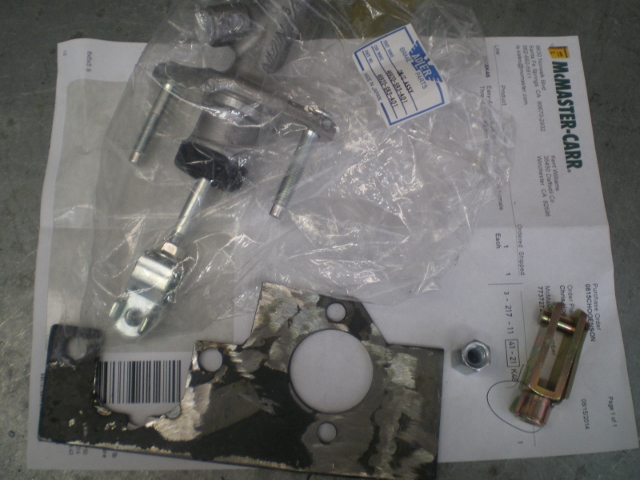 A pic of the MC with press in studs in place 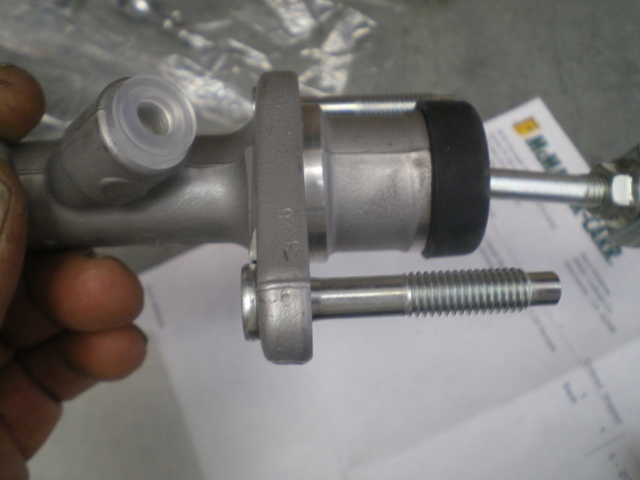 There is a step on the backside that makes for an uneven surface to press against. You can see step where the washer is held. 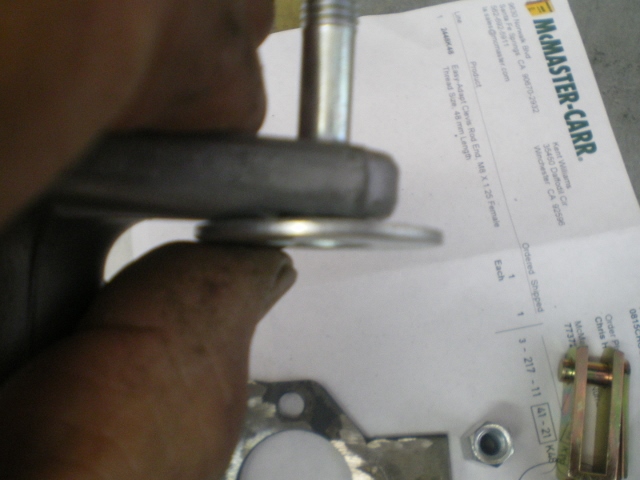 When viewed from the end, the step is a semi circle so I cut this 5/16" washer in half 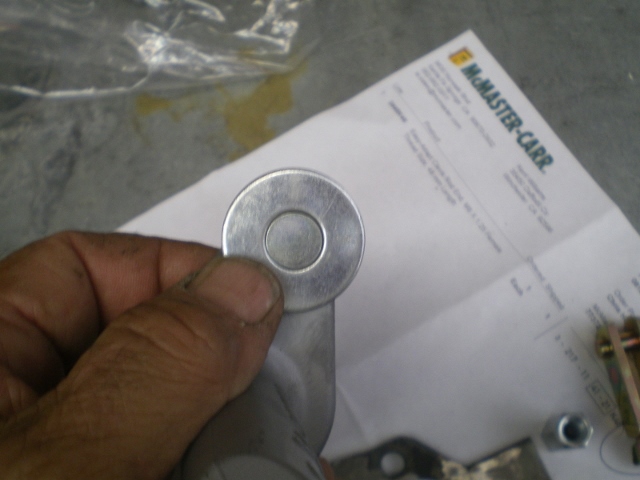 Set it beneath the impact socket that the stud will pass thru 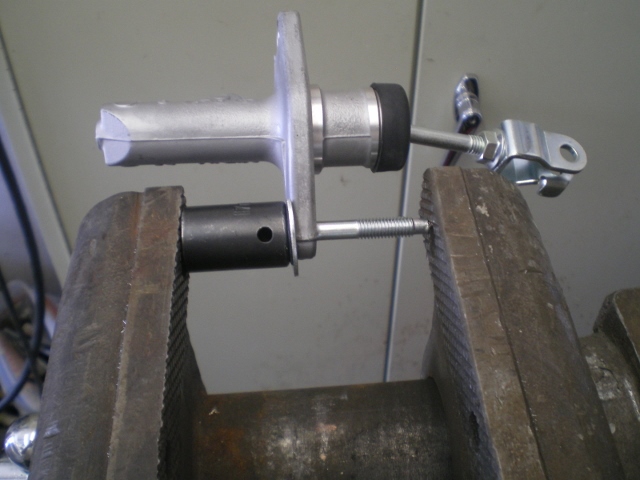 Place the MC on the plate and match drill 5/16" / 8mm holes. 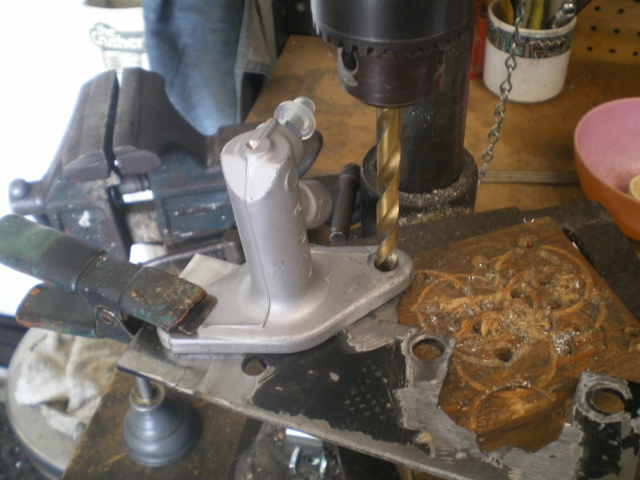 While you still have the bit chucked up drill the threads out of the clevis. It will guide itself but keep a good gripe on it with pliers or vice grips. 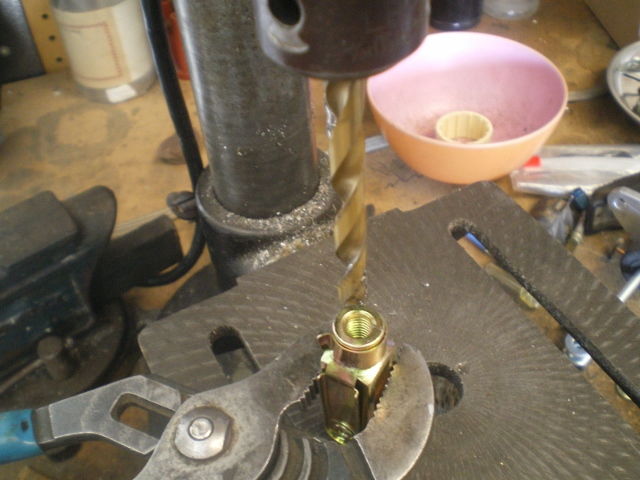 Make sure the clevis will slide freely down the threaded shaft. 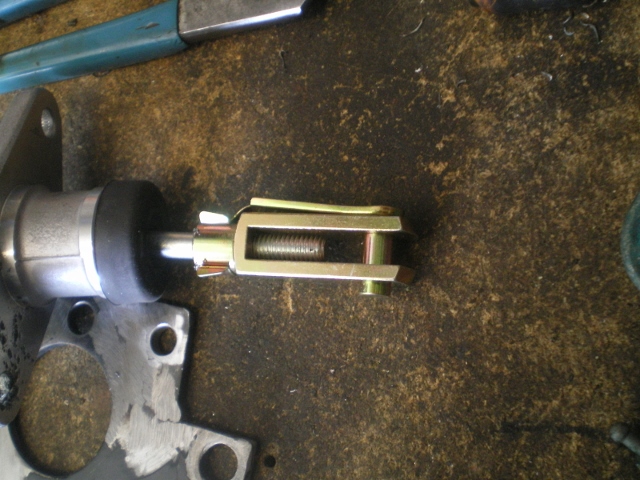 Bevel the ends of the clevis and nut 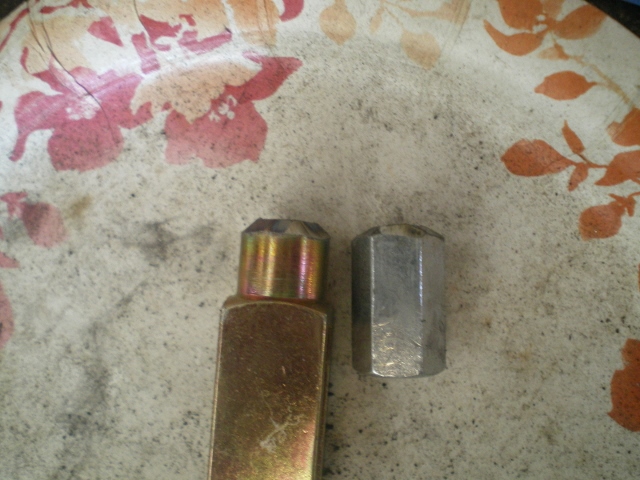 Take one of the studs you just pressed out, thread it thru the nut and let it pass into the clevis so as to align the 2 pieces then clamp in place and weld. Get the stud out after the first tack so you don't weld it in place. That would suck. Grind off excess neatly so the clip will slide back over the clevis. 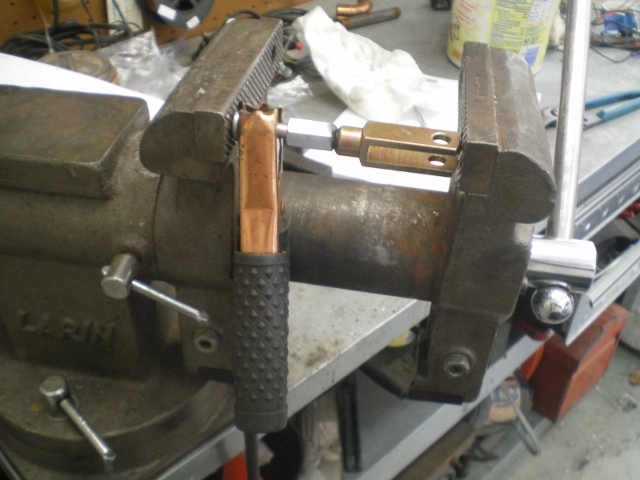 Should end up like this 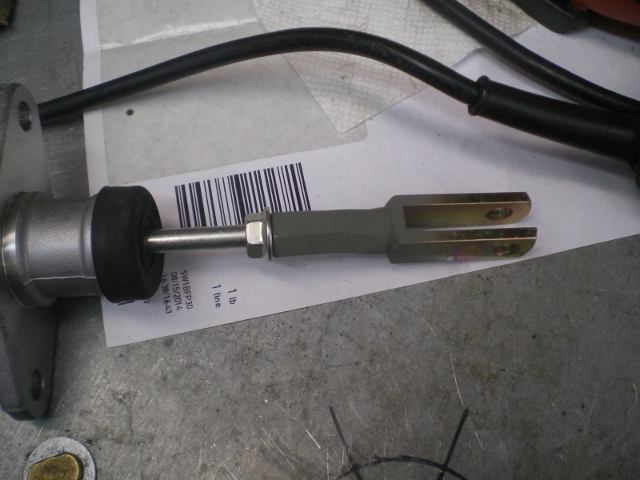 I think this is the measurement that you needed. 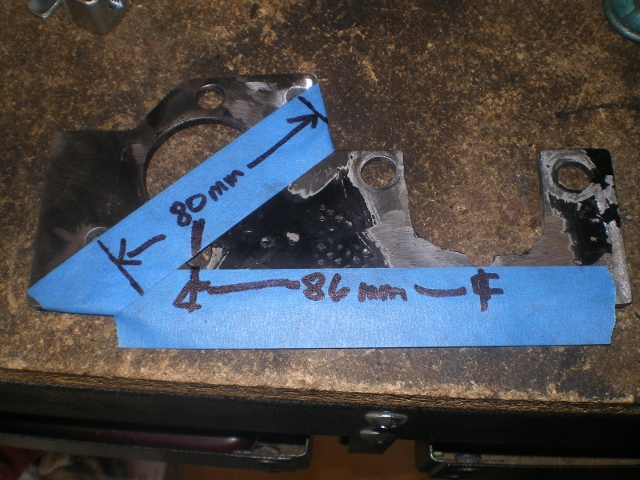 |
| Chris H. |
 Aug 21 2014, 08:56 PM Aug 21 2014, 08:56 PM
Post
#529
|
|
Senior Member     Group: Members Posts: 4,048 Joined: 2-January 03 From: Chicago 'burbs Member No.: 73 Region Association: Upper MidWest 
|
Great work Kent! Thanks for fixing that up for me!
|
| partwerks |
 Aug 23 2014, 10:49 PM Aug 23 2014, 10:49 PM
Post
#530
|
|
Senior Member    Group: Members Posts: 1,598 Joined: 7-September 06 From: Grand Island, NE Member No.: 6,787 |
Here are the dimensions for those interested. All dimensions are "mm" except for the 2, 1 1/2" dia. holes. Plate is 3/16" mild steel. ***NOTE*** The dotted bend line should read 3 Degrees NOT 30 Degrees Hey Chris, this one's got your name on it. PM your address. This one's mine. You can paint yours any color you want. 91MM center to center, + 34 + 18 = 143 210-143 =67. As the picture is laying, on the RH side must be 67 to the center of the 1 1/2 hole, but seems out of whack for 78 mm to be in as far as it is marked, or is it just me?? According to the dimensions on the picture. I cut my piece 8 1/4" X 3 9/16", but marking it from the left hand side seems to leave a lot running wild on the RH side. Are the holes about 3 9/16" center to center? I'm referring to the original pattern that the Wilwood, will use back on page 10. |
| 76-914 |
 Aug 24 2014, 09:55 PM Aug 24 2014, 09:55 PM
Post
#531
|
|
Repeat Offender & Resident Subaru Antagonist           Group: Members Posts: 13,634 Joined: 23-January 09 From: Temecula, CA Member No.: 9,964 Region Association: Southern California 
|
Closer to 3 3/8". Just center the hole with the clutch pedal arm. I ordered a new MC and found I didn't need one. Well I have a spare now and don't need to bleed it down again. (IMG:style_emoticons/default/biggrin.gif)
|
| CptTripps |
 Aug 25 2014, 02:11 PM Aug 25 2014, 02:11 PM
Post
#532
|
|
:: Punch and Pie ::     Group: Members Posts: 3,584 Joined: 26-December 04 From: Mentor, OH Member No.: 3,342 Region Association: Upper MidWest |
This is a very interesting mod. That looks like it'd be a LOT easier to attach to the resivoir. It'd be great to get an updated pattern for that plate after you're done.
I'm sure someone makes a clevis joint that'll work without welding. Right? |
| BIGKAT_83 |
 Aug 25 2014, 02:56 PM Aug 25 2014, 02:56 PM
Post
#533
|
|
Senior Member    Group: Members Posts: 1,798 Joined: 25-January 03 From: Way down south Bogart,GA Member No.: 194 Region Association: South East States 

|
This is a very interesting mod. That looks like it'd be a LOT easier to attach to the resivoir. It'd be great to get an updated pattern for that plate after you're done. I'm sure someone makes a clevis joint that'll work without welding. Right? On the ones I have made I just used a longer rod and a hiem joint with a button head allen bolt on the pedal end. I may be in Cleveland this weekend. Maybe I can come by and check out your car? Bob |
| Chris H. |
 Aug 25 2014, 04:19 PM Aug 25 2014, 04:19 PM
Post
#534
|
|
Senior Member     Group: Members Posts: 4,048 Joined: 2-January 03 From: Chicago 'burbs Member No.: 73 Region Association: Upper MidWest 
|
Oh man I hope this works out. Just talking to Bob on the phone for 15 minutes keeps me going for a month! BTW the car he is working on with d914 has the same engine...that thing sounds like it's gonna quite a handful (in a good way).
|
| 76-914 |
 Aug 25 2014, 05:57 PM Aug 25 2014, 05:57 PM
Post
#535
|
|
Repeat Offender & Resident Subaru Antagonist           Group: Members Posts: 13,634 Joined: 23-January 09 From: Temecula, CA Member No.: 9,964 Region Association: Southern California 
|
This is a very interesting mod. That looks like it'd be a LOT easier to attach to the resivoir. It'd be great to get an updated pattern for that plate after you're done. I'm sure someone makes a clevis joint that'll work without welding. Right? That one is pretty long! I like Bob's idea. This is a very interesting mod. That looks like it'd be a LOT easier to attach to the resivoir. It'd be great to get an updated pattern for that plate after you're done. I'm sure someone makes a clevis joint that'll work without welding. Right? On the ones I have made I just used a longer rod and a hiem joint with a button head allen bolt on the pedal end. I may be in Cleveland this weekend. Maybe I can come by and check out your car? Bob Did you use a spare one or dress the end of a bolt, Bob? |
| BIGKAT_83 |
 Aug 26 2014, 03:54 AM Aug 26 2014, 03:54 AM
Post
#536
|
|
Senior Member    Group: Members Posts: 1,798 Joined: 25-January 03 From: Way down south Bogart,GA Member No.: 194 Region Association: South East States 

|
This is a very interesting mod. That looks like it'd be a LOT easier to attach to the resivoir. It'd be great to get an updated pattern for that plate after you're done. Did you use a spare one or dress the end of a bolt, Bob? I used a 5/16 grade 8 bolt and turned the head just like the Honda one. |
| partwerks |
 Aug 26 2014, 06:13 AM Aug 26 2014, 06:13 AM
Post
#537
|
|
Senior Member    Group: Members Posts: 1,598 Joined: 7-September 06 From: Grand Island, NE Member No.: 6,787 |
Did you use a hole saw for the hole in the firewall?
|
| CptTripps |
 Aug 26 2014, 08:10 AM Aug 26 2014, 08:10 AM
Post
#538
|
|
:: Punch and Pie ::     Group: Members Posts: 3,584 Joined: 26-December 04 From: Mentor, OH Member No.: 3,342 Region Association: Upper MidWest |
|
| 76-914 |
 Aug 26 2014, 08:20 AM Aug 26 2014, 08:20 AM
Post
#539
|
|
Repeat Offender & Resident Subaru Antagonist           Group: Members Posts: 13,634 Joined: 23-January 09 From: Temecula, CA Member No.: 9,964 Region Association: Southern California 
|
|
| Chris H. |
 Aug 26 2014, 08:09 PM Aug 26 2014, 08:09 PM
Post
#540
|
|
Senior Member     Group: Members Posts: 4,048 Joined: 2-January 03 From: Chicago 'burbs Member No.: 73 Region Association: Upper MidWest 
|
A hole punch? That would take FOREVER (IMG:style_emoticons/default/av-943.gif) . I know, I know....not a paper hole punch.
So I think I owe the group some measurements, part numbers, etc. First, if you're gonna do the Honda MC you have to COMMIT. The MC housing is longer at the front so you have to cut a hole so the whole housing (not just the pin) comes through the floor. Not a huge deal unless you might change to another type of MC at some point...hole might be a little big in that case and you'd have to plug it. 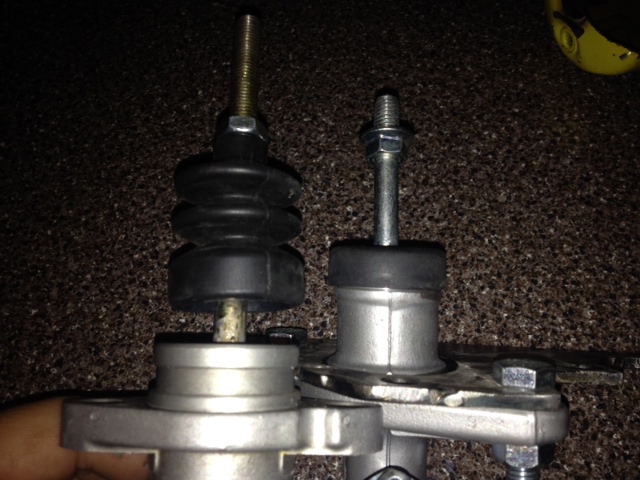 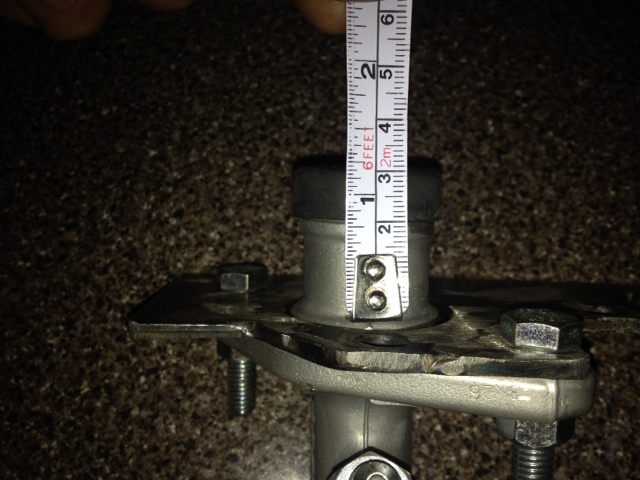 It wasn't that hard to cut the hole since I already had a smaller one. So the stock OEM Honda master is made by Nissin. You want the years 1992ish to 2000. Anything newer is obviously different because it has a weird triangular piece at the end of it. You DON'T want that kind. Sometimes marketed as "Adler", they are about $45-$55 shipped new, or $25-$30 used. There are a TON of aftermarket ones as well. The only aftermarket MC I've heard negative things about has been Omni. The stock reservoir to MC hose is an 8mm hose (this is the actual one from Kent's, which is only 6 inches long because his is out of a Del Sol). You can probably use 914 fuel hose or brake hose if you have some. 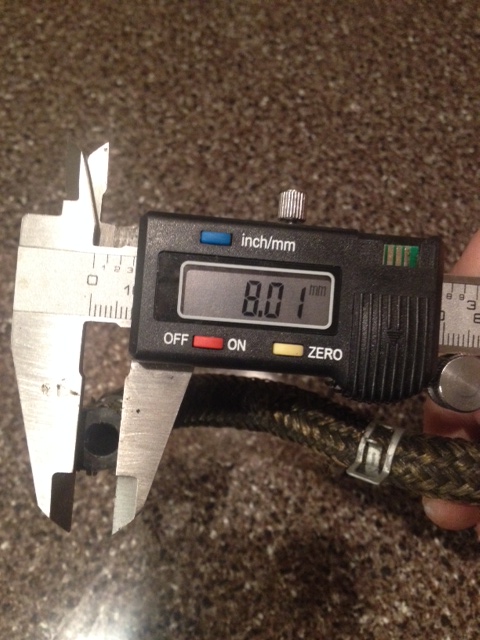 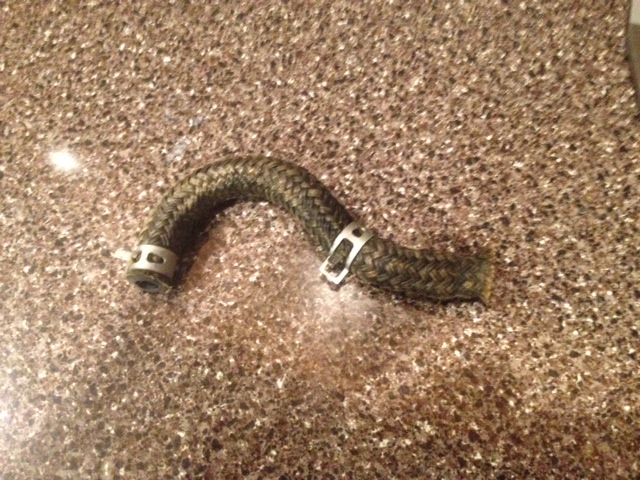 You can either get a used Honda MC reservoir or buy a generic one. I got mine for $18 on e-bay. If you go generic just make sure the outlet is at least 7mm but not too large for the 8mm hose to stretch onto. 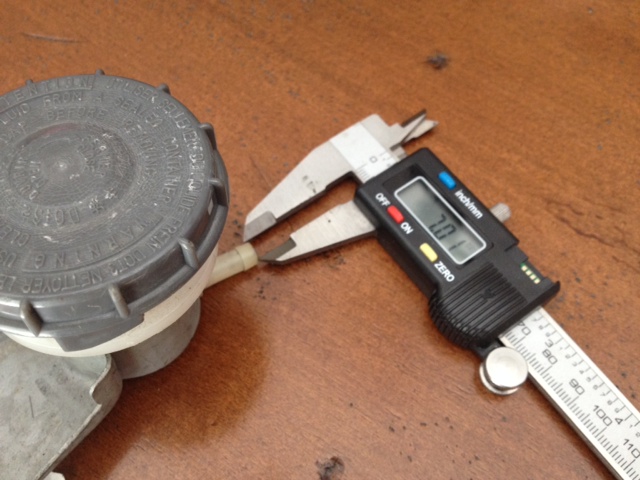 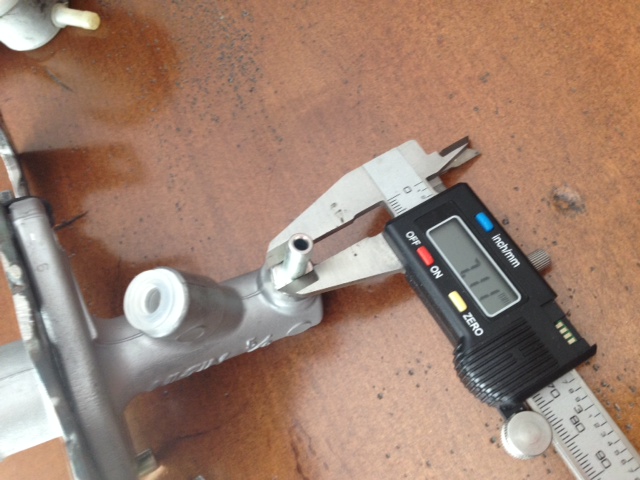 For the hydraulic line connection you need a very specific 10x1 fitting. One end is tapered, the other is not. Here's the one Kent and I bought: Fitting The longest clevis I've found is 48mm. Here it is: Clevis Still not long enough, Kent added a piece to it to extend it as described previously. He can tell you what he used, but it's probably an 8mm nut of some kind. Bob also mentioned changing the rod end to a longer one, which is a great idea as well. Beyond that you need what you need for any hydraulic conversion. We bought 15 feet of Aeroquip -3an hose, a 10x1 Banjo fitting at the slave cylinder end, and this fitting on the other end: Fitting Kent, did I miss anything? |
  |
1 User(s) are reading this topic (1 Guests and 0 Anonymous Users)
0 Members:

|
Lo-Fi Version | Time is now: 23rd November 2024 - 04:31 AM |
Invision Power Board
v9.1.4 © 2024 IPS, Inc.


