|
|

|
Porsche, and the Porsche crest are registered trademarks of Dr. Ing. h.c. F. Porsche AG.
This site is not affiliated with Porsche in any way. Its only purpose is to provide an online forum for car enthusiasts. All other trademarks are property of their respective owners. |
|
|
  |
| 76-914 |
 Aug 27 2014, 08:41 AM Aug 27 2014, 08:41 AM
Post
#541
|
|
Repeat Offender & Resident Subaru Antagonist           Group: Members Posts: 13,634 Joined: 23-January 09 From: Temecula, CA Member No.: 9,964 Region Association: Southern California 
|
Excellent. Thanks for adding that, Chris. You didn't miss a thing. Wish I could say that. (IMG:style_emoticons/default/dry.gif) That was an experience, huh? It was worth it though. God I love that smooooooooooth hydraulic clutch. And unlike cables they give a little notice when failing.
|
| partwerks |
 Aug 30 2014, 09:59 PM Aug 30 2014, 09:59 PM
Post
#542
|
|
Senior Member    Group: Members Posts: 1,598 Joined: 7-September 06 From: Grand Island, NE Member No.: 6,787 |
The Heim joint shown will be replaced with a clevis fitting. Otherwise it is offset too much for my taste.
If that dog leg is eliminated, then how is that other system hooked up then to the CMC? Could a person remove the dog leg part, and make one that is a straight piece instead of the offset? Would the timing of it need to be the same position as the dog leg one? |
| 76-914 |
 Sep 3 2014, 06:49 PM Sep 3 2014, 06:49 PM
Post
#543
|
|
Repeat Offender & Resident Subaru Antagonist           Group: Members Posts: 13,634 Joined: 23-January 09 From: Temecula, CA Member No.: 9,964 Region Association: Southern California 
|
I've got around 250 miles on Kugel now and thought I'd share some of my teething problems up to this point. Somewhere around test drive #5, I had settled down enough to realize that it was (IMG:style_emoticons/default/sheeplove.gif) hot in the cabin. Not only that but my gas tank had become a heat sink as well. The first thing was to seal the gap where the "old heat tube" passed thru the bulkhead. This required a couple of crescent shaped pieces of foam.
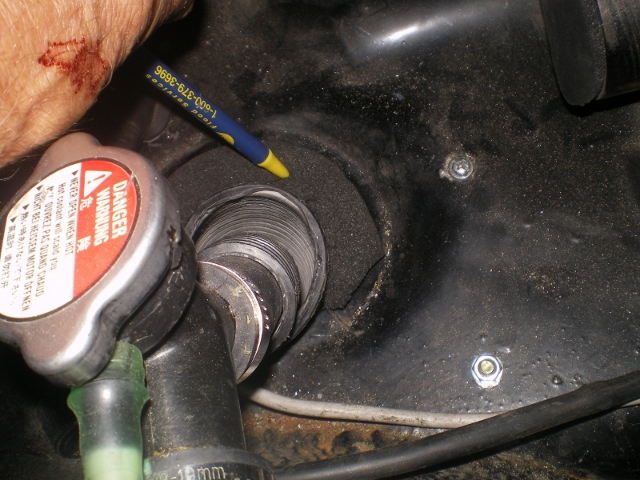 Test drive #6 revealed no noticeable improvement. I forgot to seal off the air box so I made a couple of foam plugs. 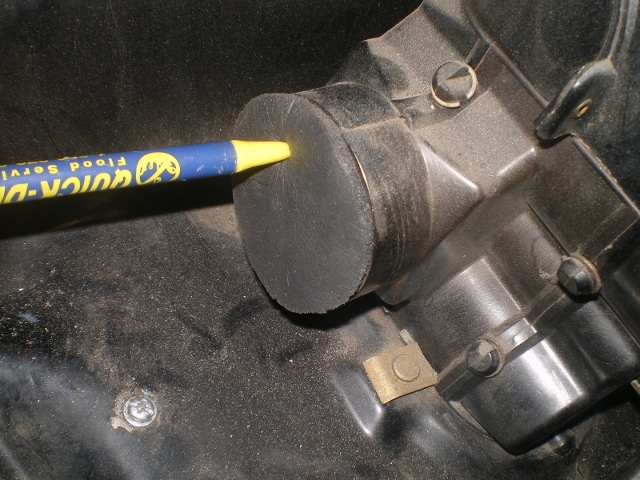 Test drive #7 showed a big improvement but found the "full" gas tank was still hot to the touch after a run. I had one of Mark's cowl seals on my shopping list because mine was toast but I thought I would try something different instead. After all, should I expect a new seal to perform way outside the envelope for which it was developed. The OG seal had 5ea / 45mm for an area of 1590mm)openings (if any) opening into the front trunk. And I had added 4 38mm holes or 1134sq mm. So this was my solution. I took apiece of 1/2" walled pipe insulation and placed it over the existing old damaged seal. As you can see in the pic's it comes with a slit in it so it slides right over the old one. The first nite it was a tight fit and raised the hood very slightly. By the 3rd day the insulation had compressed into place and the hood now sits as it should. Noticed the compressed area on the insulation? 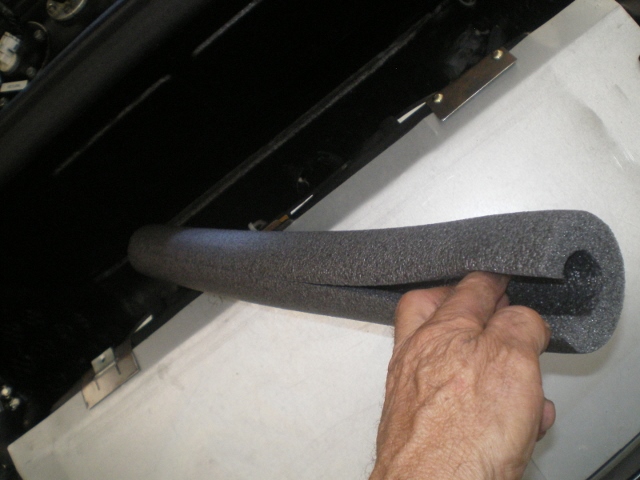 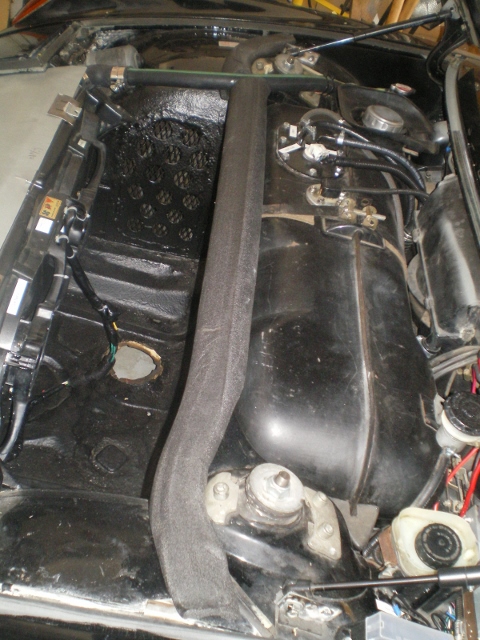 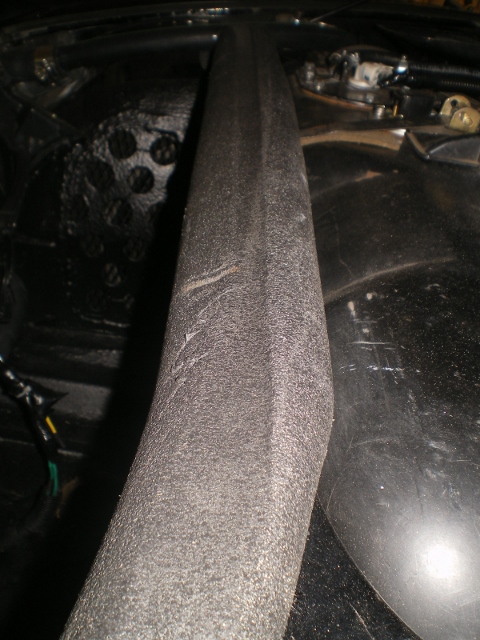 This was the final fix and I'm happy with how cool the cabin is since these changes. But I still had a nagging overheating problem. I had been warned not to run thru the longs by a few members so I'm hoping it isn't the additional length of hose that is the problem. I choose a 14 mile round trip to begin testing. OAT range from 88F to 95F. 7F is a small difference. The next 3 test runs consisted of attaching a small lip to the bottom of the fender opening to act as a scoop; enlarging the opening in the fiberglass fairing 1/2" across the bottom; removing one access plug in the floor and running with the front hood partially open or cracked. None of these attempts helped. I was able to find the temps would always begin their ascent at 9 miles nom. With the IR I found I had a 5F drop across the radiator. Hold'er Newt. That ain't right. With fans on high, low or off didn't matter. Unless the cover for the radiator was removed. And then the fans cooled it quickly. So now I can assume the radiator is sized correctly, thermostat good, hose runs good, fans good, etc. How could this be. I assumed because others had success with the OEM oil cooler openings (along with 4 more punched out) that this should work for me as well. But I was comparing apples to oranges. My radiator, fans, and venting were different as well. (IMG:style_emoticons/default/idea.gif) I didn't think it would make any difference but I decided to cut out the area that had the punched holes before I called Bob to explain what a dumb ass I am. The overall cut out was only 3.25" x 18" or the same as the area cut out on the bumper and fairing. Here is a pic of the removed piece. 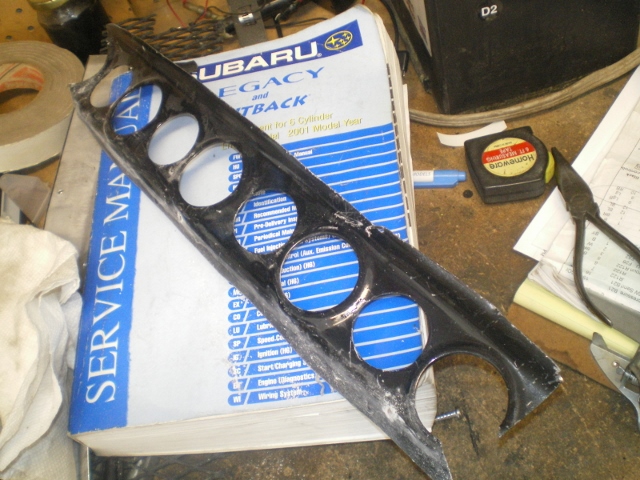 Not much larger but after "now" Test drive #15 I had my first result. I completed the test run and temps were in the middle. Checked a few items and went back out. After 6 miles the temps began to rise but leveled off towards the high end of the scale. It was 82F that run. The coolest so far but still not much difference in ambient temps. (IMG:style_emoticons/default/idea.gif) Then I spotted it. What an idiot! All I can say is that I missed this one and have no excuses. 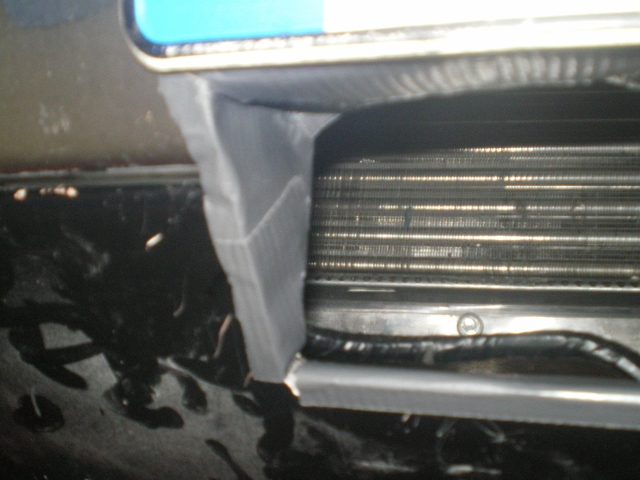 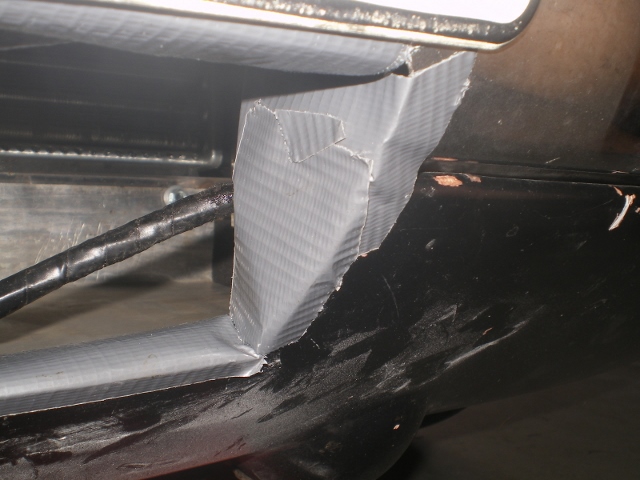 I had not considered the gap between the fender/fairing and the body. The gap along the bottom is appx 1/2", you can see the pie shaped openings on the sides and the one along the top edge was 1.5"-2". After a quick duct taping we went on Test drive #16. Holy (IMG:style_emoticons/default/stromberg.gif) , that was it. Duh! That incoming compressed air had been shooting thru the gaps. The gaps were probably low pressure areas and diverted most of that incoming air right out the fender. I have been running w/o fans for 2 days without any temps above the 1/2 way mark. (IMG:style_emoticons/default/piratenanner.gif) Tonite I removed the tape and filled the gaps with foam. The gap was so large along the top that I stuffed an untrimmed piece of pipe insulation in there to seal it. I have a few cosmetic items and other things to do but other than that, I think this might be the final chapter. I hope some of this build thread will help others with there conversion somewhere. (IMG:style_emoticons/default/beerchug.gif) Attached image(s) 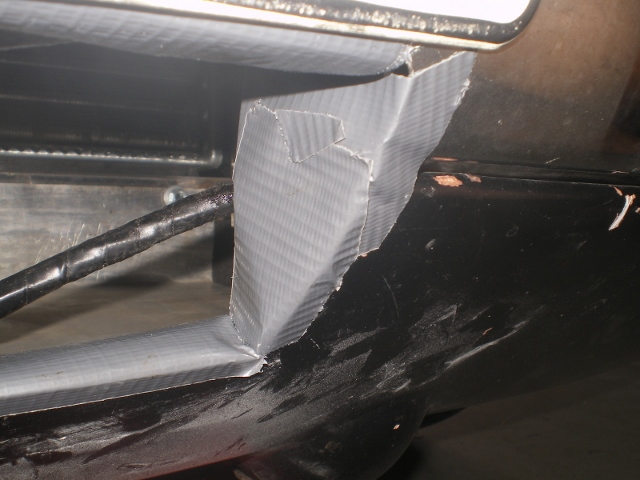
|
| 76-914 |
 Sep 20 2014, 11:15 PM Sep 20 2014, 11:15 PM
Post
#544
|
|
Repeat Offender & Resident Subaru Antagonist           Group: Members Posts: 13,634 Joined: 23-January 09 From: Temecula, CA Member No.: 9,964 Region Association: Southern California 
|
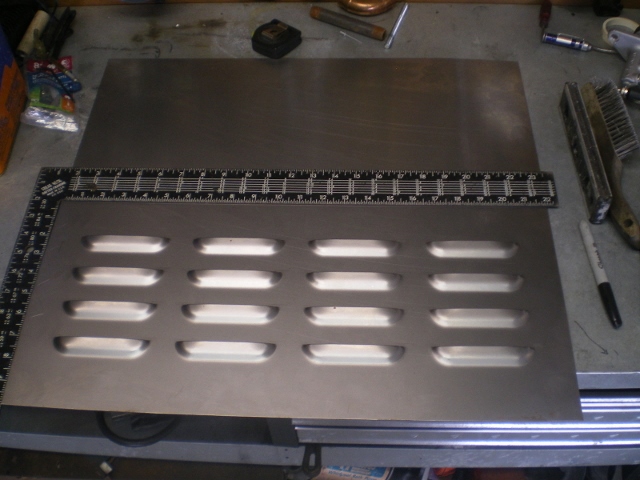
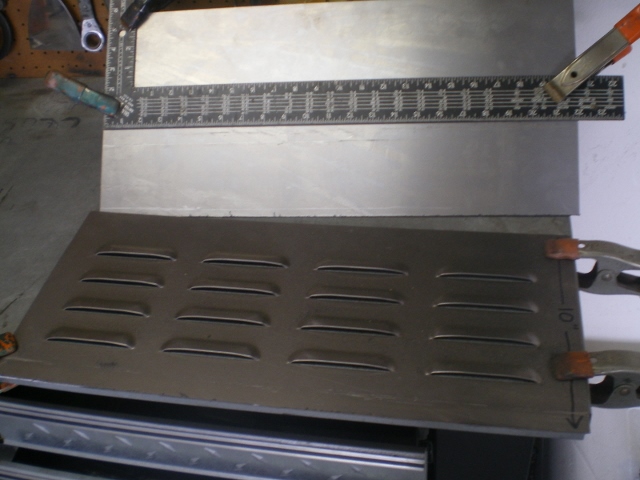
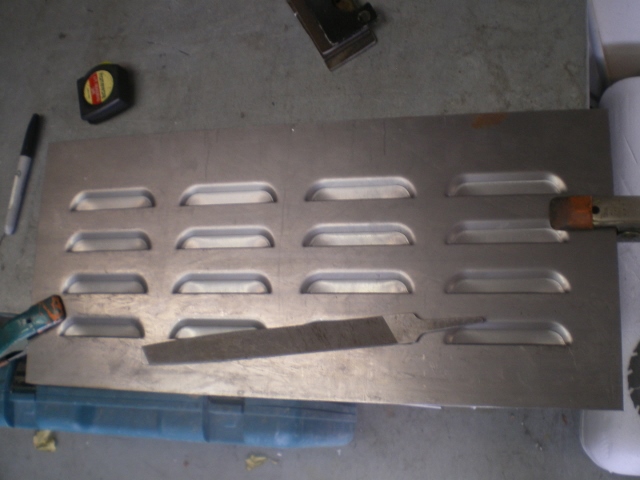
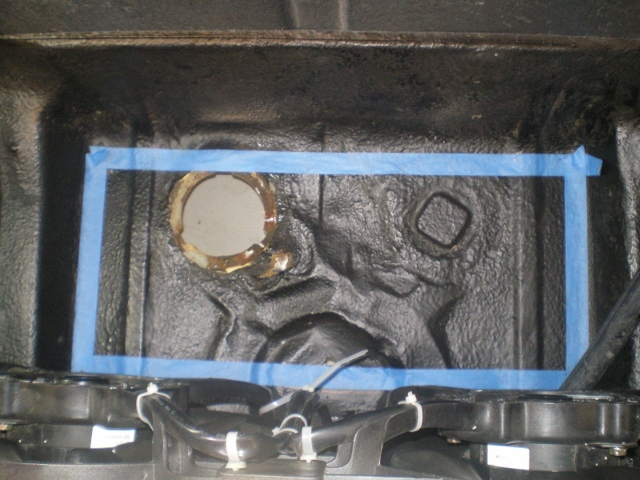
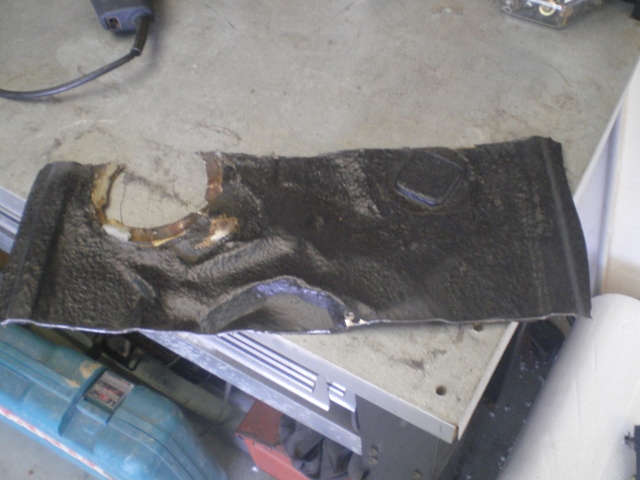
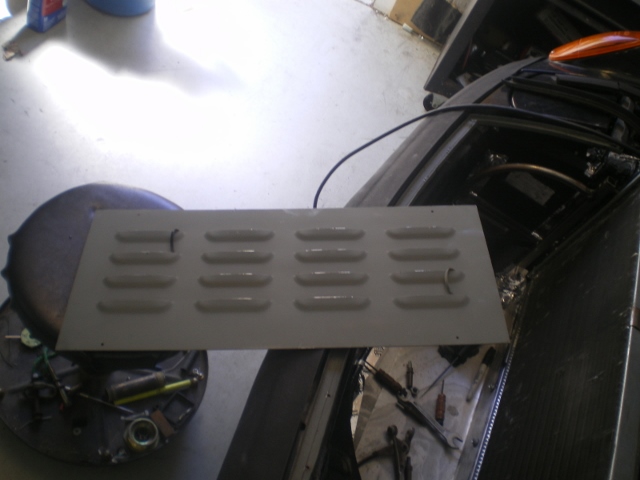
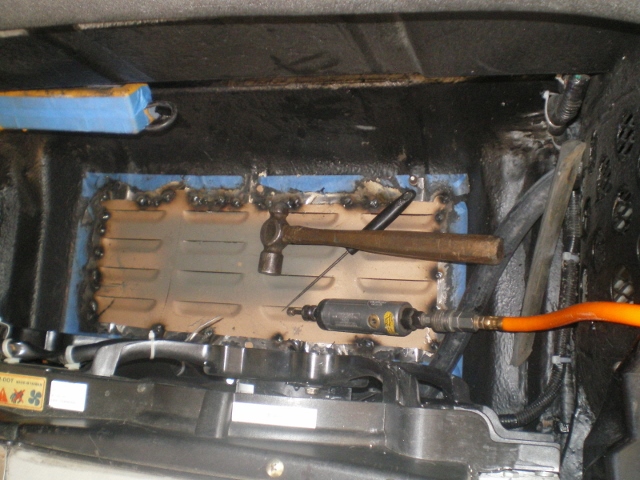
I think this will be a nice functional addition to my cooling system. Chris told me (Bob told Chris and so it goes)about these 914-6 louvered floor pans. My floor pan was beat to shit so I welcomed this opportunity to have a nice flat surface and increase my venting with the addition of the louvers. The panel is $68 from Patrick Motorsports. Needs paint and the bottom side needs a trim in 2 spots and then welded. That's just cosmetic but I need to jack it up pretty high so I'm in no hurry. (IMG:style_emoticons/default/biggrin.gif)
       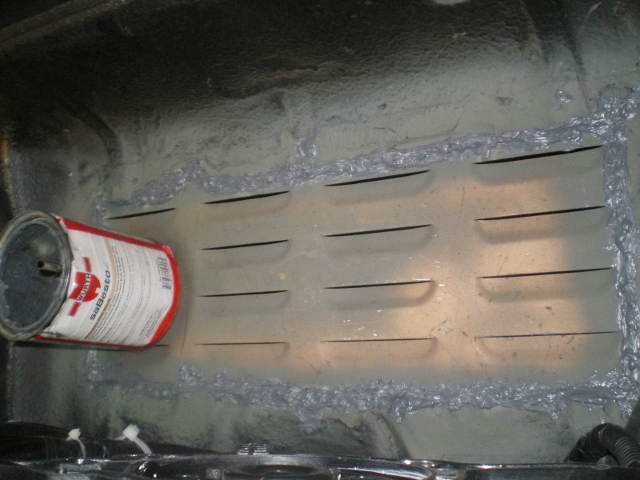 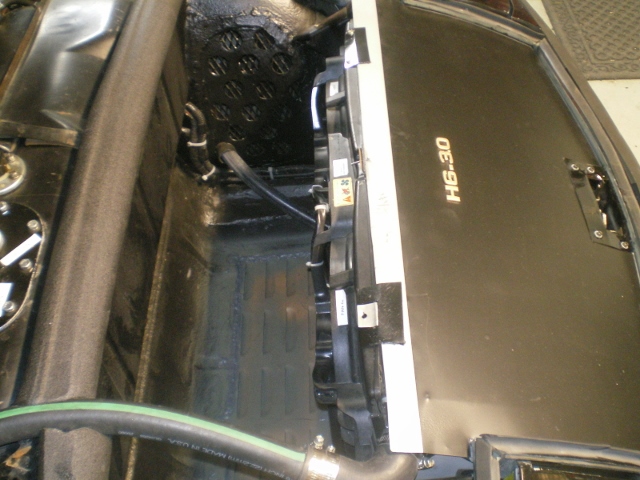 |
| JRust |
 Sep 21 2014, 12:08 AM Sep 21 2014, 12:08 AM
Post
#545
|
|
914 Guru      Group: Members Posts: 6,310 Joined: 10-January 03 From: Corvallis Oregon Member No.: 129 Region Association: Pacific Northwest 
|
I dig the louvers. Nice touch & glad to hear you figured the cooling. Always seem to be some trial & error. Glad you were able to make it work in the longs. While it definitely would not have worked with my v8. I don't doubt I could cool my 2.5 suby conversion hearing yours is working. Mine doesn't get hot with the smallest of openings for inlets. Hope to see yours soon bud. Nice work (IMG:style_emoticons/default/beerchug.gif)
|
| 76-914 |
 Sep 21 2014, 08:58 AM Sep 21 2014, 08:58 AM
Post
#546
|
|
Repeat Offender & Resident Subaru Antagonist           Group: Members Posts: 13,634 Joined: 23-January 09 From: Temecula, CA Member No.: 9,964 Region Association: Southern California 
|
I dig the louvers. Nice touch & glad to hear you figured the cooling. Always seem to be some trial & error. Glad you were able to make it work in the longs. While it definitely would not have worked with my v8. I don't doubt I could cool my 2.5 suby conversion hearing yours is working. Mine doesn't get hot with the smallest of openings for inlets. Hope to see yours soon bud. Nice work (IMG:style_emoticons/default/beerchug.gif) (IMG:style_emoticons/default/bye1.gif) Hey Jamie, thanks a lot. And you will see me in a year. At RRC 2015. Just missed RRC by a week or two this year. We will both be driving our Suby's next year. (IMG:style_emoticons/default/piratenanner.gif) Word on the street is that there will be 3 to 5 Suby powered 914's at RRC next year! Can you guess the others? Any updates on yours? |
| Cairo94507 |
 Sep 21 2014, 09:31 AM Sep 21 2014, 09:31 AM
Post
#547
|
|
Michael           Group: Members Posts: 10,091 Joined: 1-November 08 From: Auburn, CA Member No.: 9,712 Region Association: Northern California 
|
That is exactly what Scotty and I were discussing as one of the options for my trunk if we were to add a front oil cooler.
|
| Chris H. |
 Sep 21 2014, 10:08 AM Sep 21 2014, 10:08 AM
Post
#548
|
|
Senior Member     Group: Members Posts: 4,048 Joined: 2-January 03 From: Chicago 'burbs Member No.: 73 Region Association: Upper MidWest 
|
Nice work Kent! You already said it but yes, 100% Bob's idea. I haven't done mine yet because I'm routing all my air out the bottom so I need more louvers punched. Finally found a place around here who can do it about 90 miles away, just have to get there. Just gonna get another row of 4 X 4.
|
| GS Guy |
 Sep 21 2014, 01:01 PM Sep 21 2014, 01:01 PM
Post
#549
|
|
Member   Group: Members Posts: 243 Joined: 8-July 04 From: Columbia, MD Member No.: 2,325 Region Association: North East States |
Check out Hammond Mfg. PN PVLL19012BK2
Louvered instrument rack panel - packed with louvers, about $40. If the size works this might be a less expensive alternative that a custom louvered panel. |
| 76-914 |
 Sep 21 2014, 03:40 PM Sep 21 2014, 03:40 PM
Post
#550
|
|
Repeat Offender & Resident Subaru Antagonist           Group: Members Posts: 13,634 Joined: 23-January 09 From: Temecula, CA Member No.: 9,964 Region Association: Southern California 
|
Just be sure it's .050 / 18ga.
It cleaned up nicely. (IMG:style_emoticons/default/biggrin.gif) 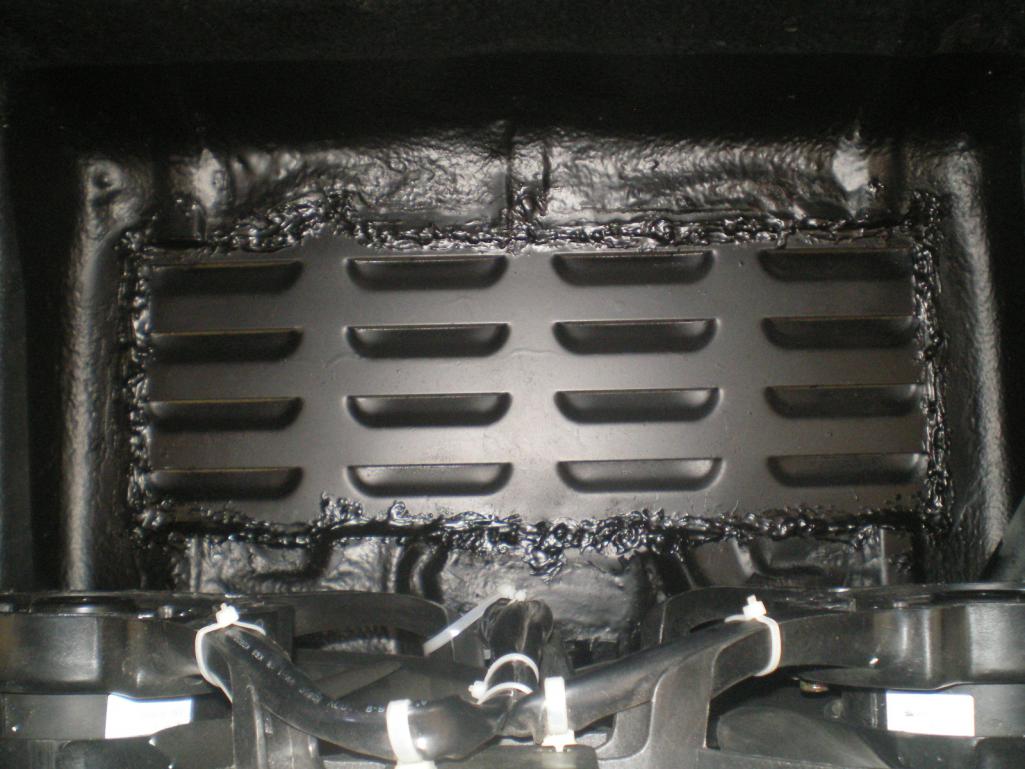 Bandjoey had mentioned Duplicolor's carpet paint so I tried some. I'll need another can to complete the job. I did the rear trunk and floor pieces with one can. Side by Side difference 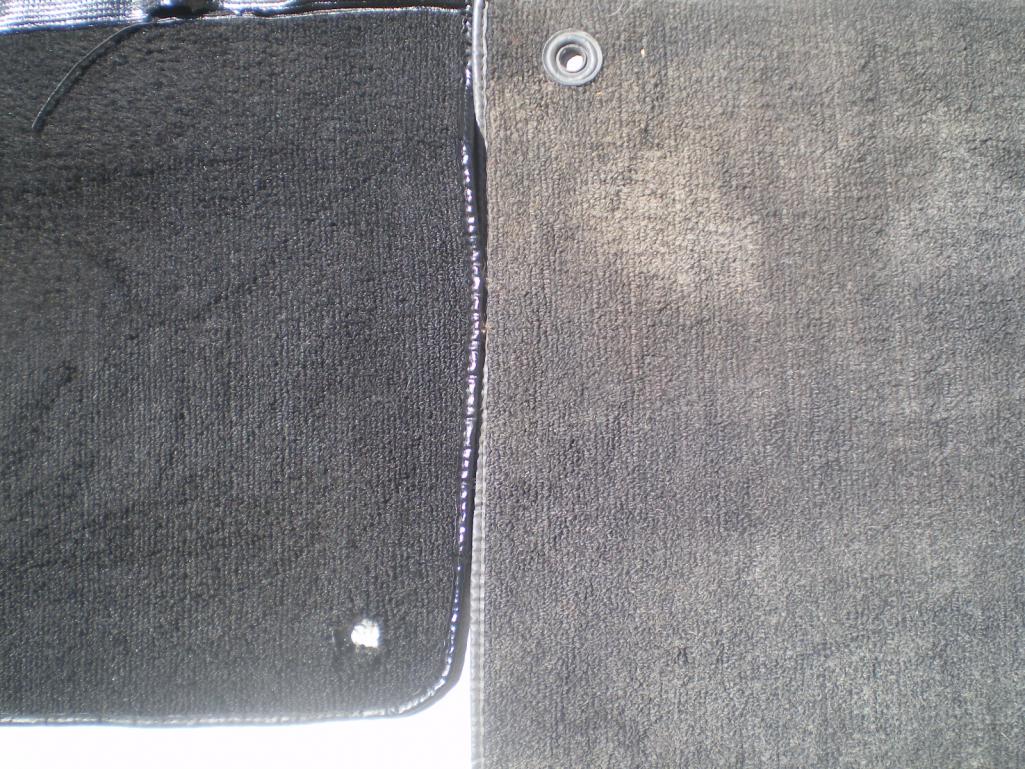 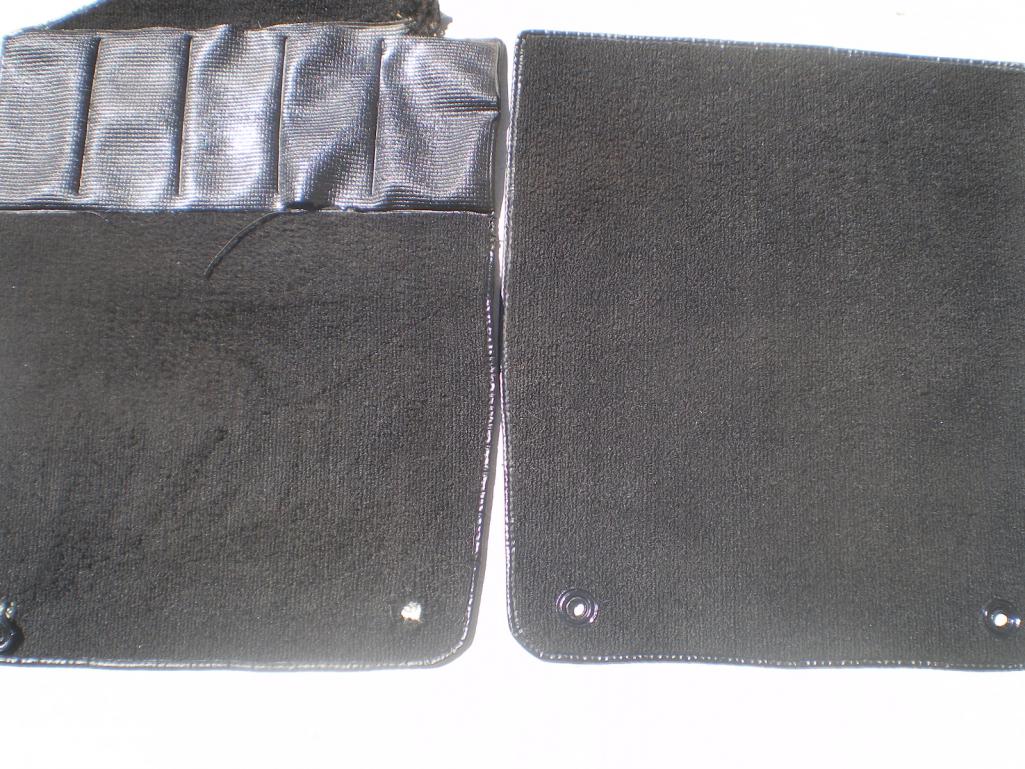 Before the one on the right was sprayed. 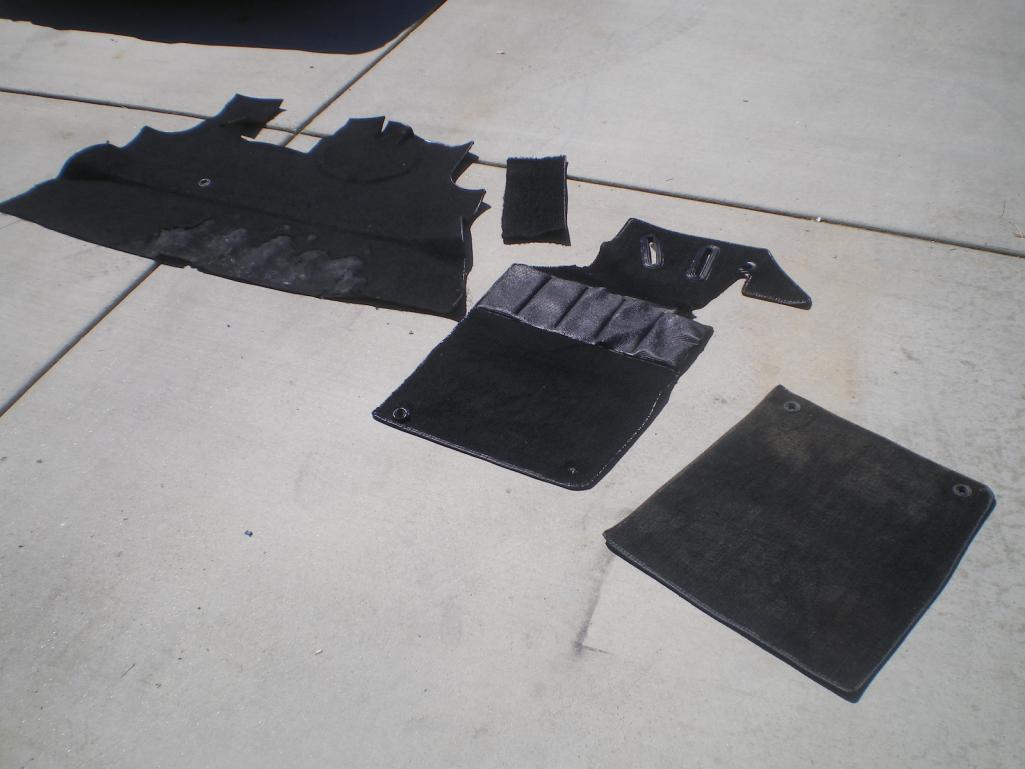 |
| BIGKAT_83 |
 Sep 21 2014, 03:47 PM Sep 21 2014, 03:47 PM
Post
#551
|
|
Senior Member    Group: Members Posts: 1,798 Joined: 25-January 03 From: Way down south Bogart,GA Member No.: 194 Region Association: South East States 

|
Not really my idea on the louvers. It was d914's but he put them on the hood.Wished I had a picture of D914 car with the hood louvers but I'm out of the country now and not at home.
I have planned to use them in the floor if needed on my LS3 car. Bob |
| Chris H. |
 Sep 21 2014, 04:32 PM Sep 21 2014, 04:32 PM
Post
#552
|
|
Senior Member     Group: Members Posts: 4,048 Joined: 2-January 03 From: Chicago 'burbs Member No.: 73 Region Association: Upper MidWest 
|
Check out Hammond Mfg. PN PVLL19012BK2 Louvered instrument rack panel - packed with louvers, about $40. If the size works this might be a less expensive alternative that a custom louvered panel. I'm liking that! Has 30 louvers VERY close together...and you can buy another smaller panel if need be. Definitely something to consider. Thank you Geoff. Specs:  PVLL19012__2_.pdf ( 76.04k )
Number of downloads: 111
PVLL19012__2_.pdf ( 76.04k )
Number of downloads: 111Here is a pic of Greg's car: 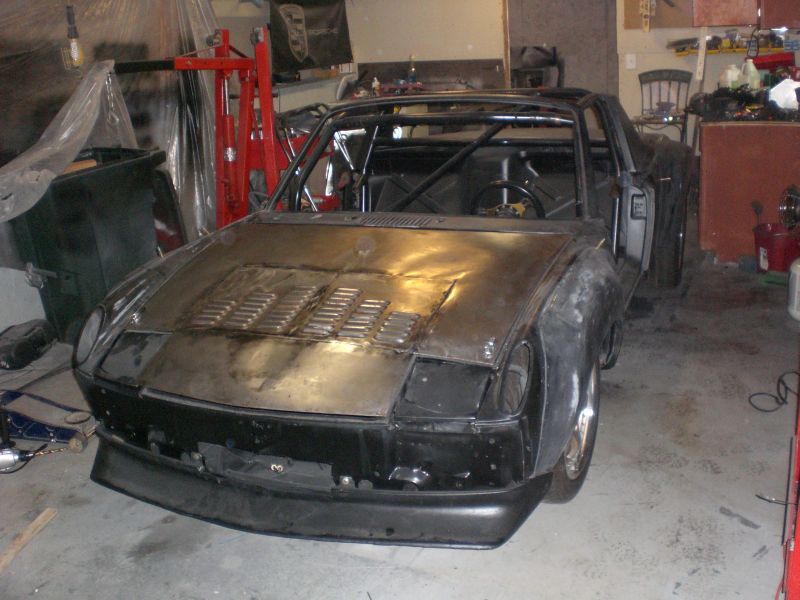 It looks like he used those hot rod panels. Looks cool. |
| d914 |
 Sep 21 2014, 06:07 PM Sep 21 2014, 06:07 PM
Post
#553
|
|
Advanced Member     Group: Members Posts: 2,343 Joined: 12-July 03 From: Atlanta, ga Member No.: 904 Region Association: South East States |
I did, and I have a reverse view, very open, and should cause a draw of air flow out
|
| d914 |
 Sep 21 2014, 06:09 PM Sep 21 2014, 06:09 PM
Post
#554
|
|
Advanced Member     Group: Members Posts: 2,343 Joined: 12-July 03 From: Atlanta, ga Member No.: 904 Region Association: South East States |
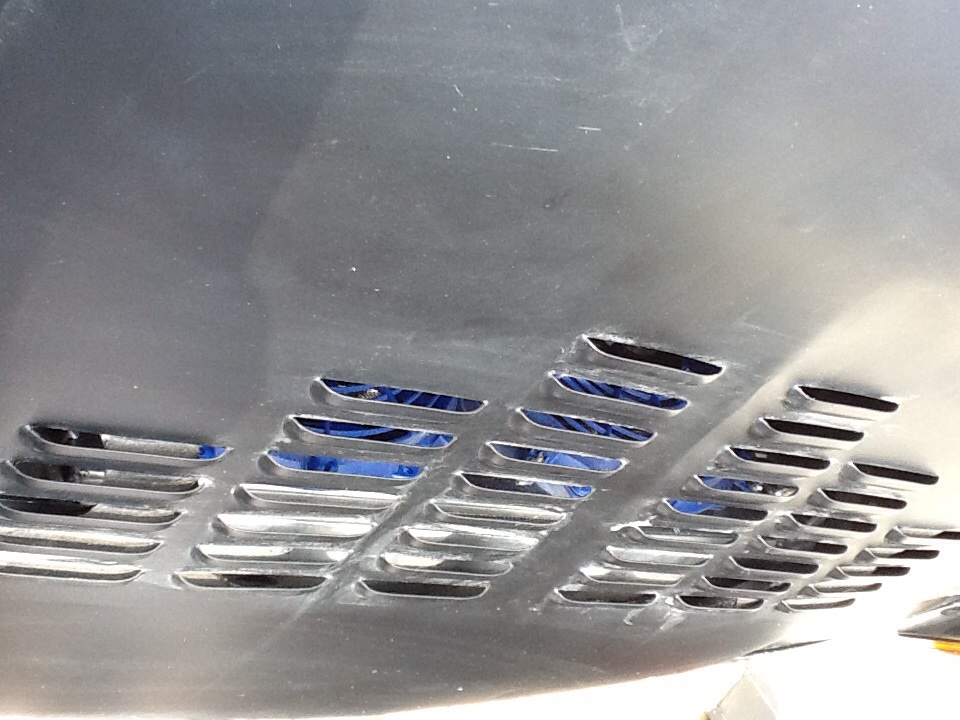 |
| madmax914 |
 Sep 22 2014, 09:21 AM Sep 22 2014, 09:21 AM
Post
#555
|
|
Member   Group: Members Posts: 204 Joined: 16-February 14 From: Salem, Oregon Member No.: 17,007 Region Association: Pacific Northwest |
Great thread for the Subie guys! I’ve been following Kent’s build for several months now and your louvered front trunk floor has raised some questions for me and my Subaru conversion. First I’m not even close to buying my motor and tranny for my car at this point; I want to sort out the suspension and other components before I dive into the actual conversion. My question is my 914 had A/C and I wanted to use the opening in the floor to allow the air to flow out through that opening. I was thinking to screen it and then shroud the radiator so the air flowed down and out the opening. My concern is that I’d be putting too much air under the car and affecting the down force. I plan on using this car as driver with an occasional autocross if I feel the need. Sounds like most of you have been around the block with these conversions and wanted your opinions.
Sorry Kent I’m not trying to hijack your tread, I just know a lot of Subie guys are reading it. Thanks, Brent Attached thumbnail(s) 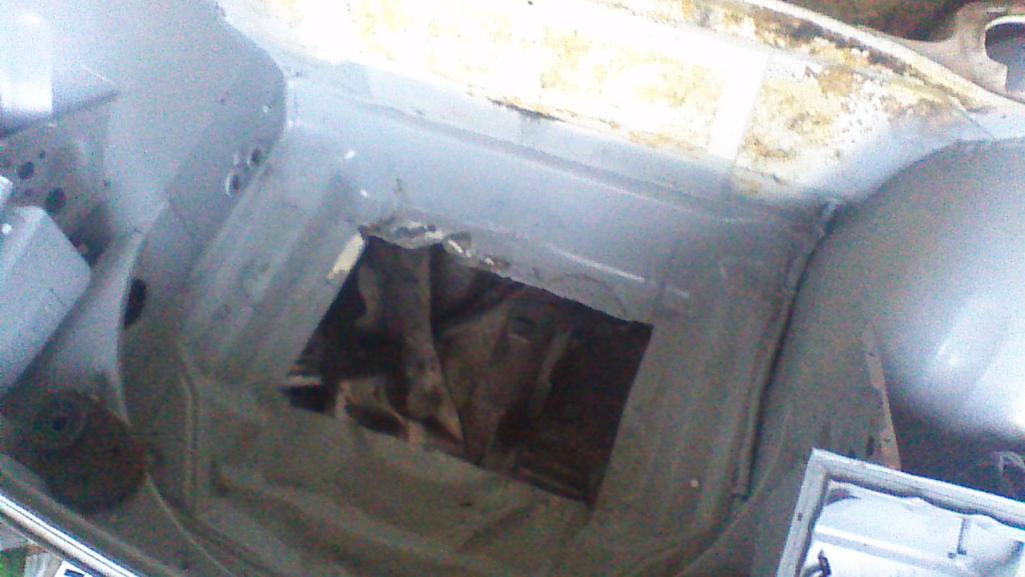
|
| 76-914 |
 Sep 22 2014, 09:52 AM Sep 22 2014, 09:52 AM
Post
#556
|
|
Repeat Offender & Resident Subaru Antagonist           Group: Members Posts: 13,634 Joined: 23-January 09 From: Temecula, CA Member No.: 9,964 Region Association: Southern California 
|
Talk with Ross (Rnellums here), he did exactly that and I think it is working great for him. There have been discussions re: this style install and it's effect upon high speed handling but I believe most of this information is either hear say or conjecture as there aren't enough similar conversions that use this method to draw any concrete conclusions. Personally, I cannot speak to this as my top speed (on 10 yr old tires) has only been 105mph, thus far. Once it has new tires I should be able to comment with some reservations. (IMG:style_emoticons/default/biggrin.gif) FWIW, I believe one could retain 60% of their front trunk space by using this fan install method coupled with some 5" sub-floor design that would also serve as the ducting to floor vented fan. Did you start a thread for us to follow, yet? (IMG:style_emoticons/default/drooley.gif)
|
| ruby914 |
 Sep 22 2014, 11:45 AM Sep 22 2014, 11:45 AM
Post
#557
|
|
Senior Member    Group: Members Posts: 720 Joined: 26-April 09 From: Hawthorne, Ca Member No.: 10,305 Region Association: None |
Kent,
Did you remove the clutch return spring from the peddle assembly? I am pre-installing everything now, it seems like the clutch peddle would need a very light spring the other way, if anything? |
| 76-914 |
 Sep 22 2014, 03:44 PM Sep 22 2014, 03:44 PM
Post
#558
|
|
Repeat Offender & Resident Subaru Antagonist           Group: Members Posts: 13,634 Joined: 23-January 09 From: Temecula, CA Member No.: 9,964 Region Association: Southern California 
|
Removed. Not necessary! Overkill run a muck. (IMG:style_emoticons/default/ar15.gif)
|
| Chris H. |
 Sep 22 2014, 03:56 PM Sep 22 2014, 03:56 PM
Post
#559
|
|
Senior Member     Group: Members Posts: 4,048 Joined: 2-January 03 From: Chicago 'burbs Member No.: 73 Region Association: Upper MidWest 
|
You can either add a spacer or just unclip it like I did (after pounding the sh*(t out of my roll pin). I'm just going to cut the hooks off when I take mine apart again to paint it.
|
| 76-914 |
 Sep 22 2014, 06:02 PM Sep 22 2014, 06:02 PM
Post
#560
|
|
Repeat Offender & Resident Subaru Antagonist           Group: Members Posts: 13,634 Joined: 23-January 09 From: Temecula, CA Member No.: 9,964 Region Association: Southern California 
|
You can either add a spacer or just unclip it like I did (after pounding the sh*(t out of my roll pin). I'm just going to cut the hooks off when I take mine apart again to paint it. Chris, use the spacer or carry a spare spring in case that one breaks. If that clutch tube slides to either side the clevis fitting will bind and begin to wear. |
  |
1 User(s) are reading this topic (1 Guests and 0 Anonymous Users)
0 Members:

|
Lo-Fi Version | Time is now: 23rd November 2024 - 05:16 AM |
Invision Power Board
v9.1.4 © 2024 IPS, Inc.


