|
|
|
Porsche, and the Porsche crest are registered trademarks of Dr. Ing. h.c. F. Porsche AG.
This site is not affiliated with Porsche in any way. Its only purpose is to provide an online forum for car enthusiasts. All other trademarks are property of their respective owners. |
|
|

  |

| barrym |
 Oct 26 2014, 04:05 PM Oct 26 2014, 04:05 PM
Post
#1
|
|
Member  Group: Members Posts: 88 Joined: 12-October 14 From: Australia Member No.: 18,008 Region Association: None |
First time post of lurking here for a while.
I bought a '75 914 a couple of weeks ago that had already been partly pulled apart to restore- its mostly complete but needs to be further pulled down to repair the rust & make mods to it for my intended purpose. it already came as right hand drive and has an amazingly good condition dash board. I have no history with the car so cant tell who or when the conversion was done. I don't even know if it was a US or European import, or if it was an aussie delivered car ... how can I tell ??? it has a scallop out of the right hand side chassis rail for the handbrake, but not the left hand side ... it used to be viper green and has had a poor respray in red - it's going back to viper green (IMG:style_emoticons/default/smile.gif) I have some garage space with a couple of chaps who has worked on 14's before which is a HUGE help to me, very lucky as i'm new to Porsche having owned lotus's for years (and still do). the plan is to restore it for partial road use but mostly track & tarmac rally. in the short term I plan to drop a 3.0 Subaru engine in while I build up funds & parts for a 2.7 Porsche engine. Its been in dry storage for at least 11 years than I know of, and possibly more before that. anyway, am documenting my rebuild thread here. I've made a start on removing the hacked up loom & vacuuming all the loose rust out. Its better than expected (as I bought the car only from pictures) it needs; new hell holes back of floorpan & bottom of firewall boot and that's about it - the rest of it looks (at this stage) like only surface rust - the suspension consoles are solid as is the majority of the front boot - again, only surface rust there ... the windscreen will come out next to get access to pull out the dash so I can continue to remove the loom. i'll be making up a new loom for it. question though - how do I remove the left hand seat ? the lever at the side does nothing - possibly broken ? and there is no handle at the front to slide the seat forwards to get at the rear bolts ... stumped on this one ... Attached image(s) 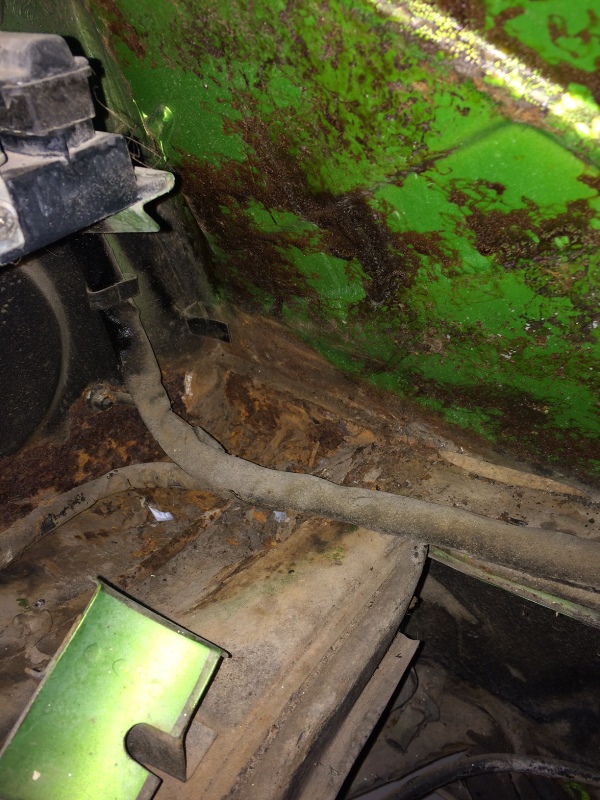 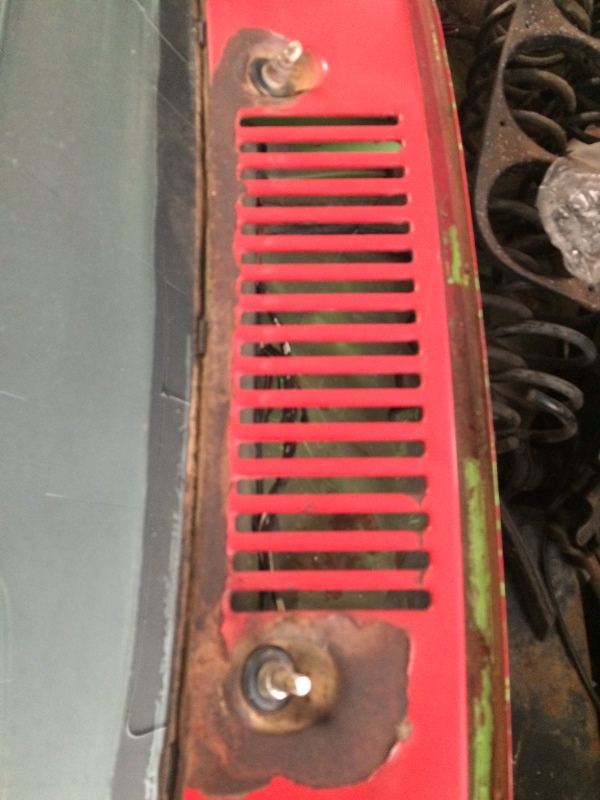 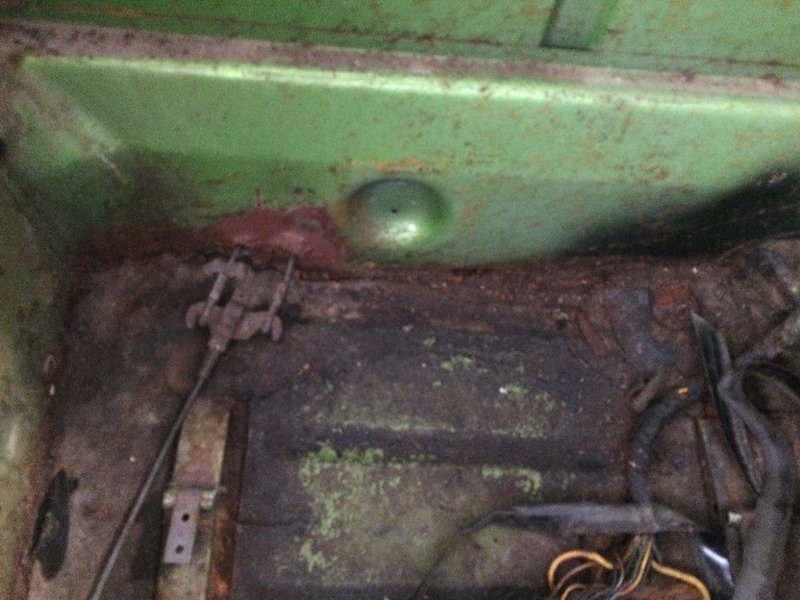 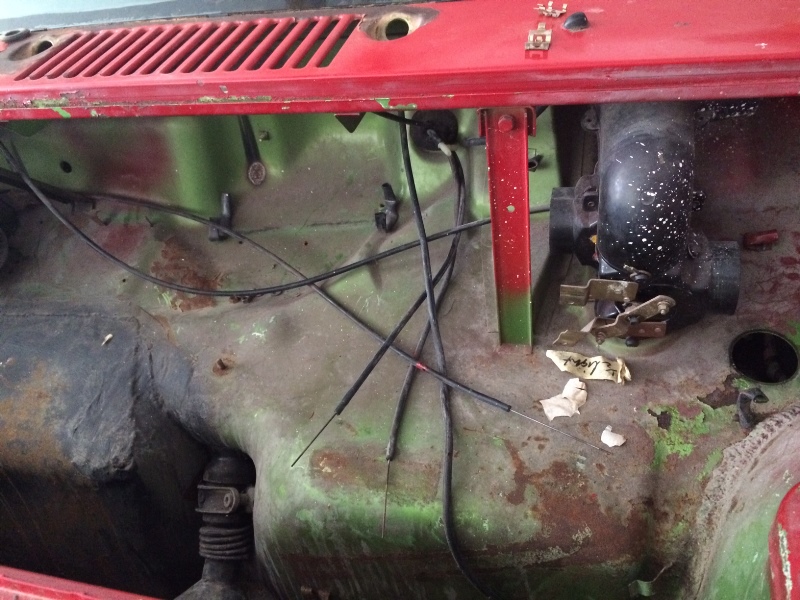 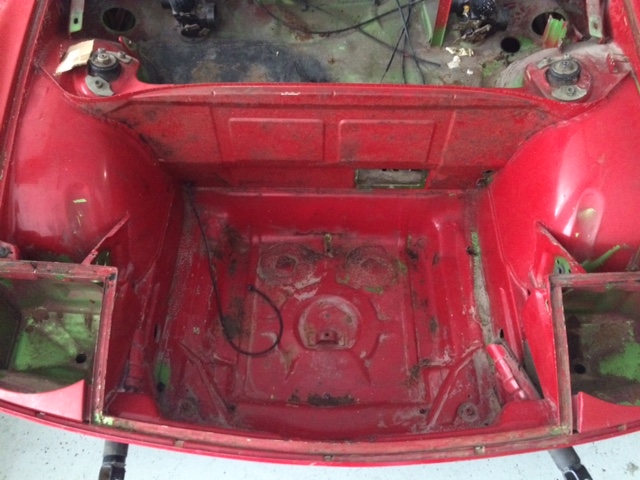  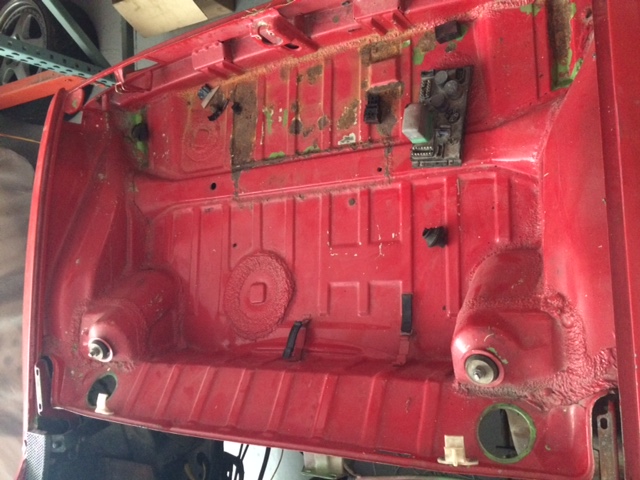
|
   |

 
|
| 76-914 |
Oct 26 2014, 05:20 PM
Post
#2
|
|
Repeat Offender & Resident Subaru Antagonist Group: Members Posts: 13,485 Joined: 23-January 09 From: Temecula, CA Member No.: 9,964 Region Association: Southern California |
(IMG:style_emoticons/default/welcome.png) You'd better not drive that thing with the Suby 6. You might not want to go to a P 2.7 if you do. (IMG:style_emoticons/default/shades.gif)
|
 |
|
| Betty |
Oct 26 2014, 06:40 PM
Post
#3
|
|
Driver Group: Members Posts: 510 Joined: 10-December 04 From: Hurst, TX Member No.: 3,255 Region Association: South East States |
(IMG:style_emoticons/default/welcome.png)
(IMG:style_emoticons/default/thisthreadisworthlesswithoutpics.gif) Howdy from Texas! |
|
|
|
| Mike Bellis |
Oct 26 2014, 06:58 PM
Post
#4
|
|
Resident Electrician Group: Members Posts: 8,345 Joined: 22-June 09 From: Midlothian TX Member No.: 10,496 Region Association: None |
|
|
|
|
| porschefile2010 |
Oct 26 2014, 07:27 PM
Post
#5
|
|
Member Group: Members Posts: 228 Joined: 26-May 11 From: Whangaparaoa, New Zealand Member No.: 13,118 Region Association: Australia and New Zealand |
That doesn't look too bad at all. I've seen a lot worse for sure. Would you really want to waste a 2.7 engine on a teener though? Not sure if your investment would stack up when you come to sell. If you want a buzz I would stick with your Subaru plan.
To get the front seat out you need to drag the seat as far forward as you can and then (from memory ) slide a long screwdriver down the right hand rail and lift the tab out of it's locking hole and it should just slip right out. If the lever is broken, follow this anyway to move the seat forward. Good luck. Be interested to see how it all comes together. There's a yellow 914 in race set up over here. I think it's still for sale but haven't seen it at a track yet. |
|
|
|
| edwin |
Oct 26 2014, 07:59 PM
Post
#6
|
|
Member Group: Members Posts: 321 Joined: 20-May 09 From: Australia Member No.: 10,384 Region Association: Australia and New Zealand |
I was watching that one on eBay good to see it's found a good home
Where abouts are you based? I'm in Geelong. Would be great to catch up if you're close. Seems a fair bit of work to convert to water cooled if you want to go back to a Porsche six in the future I'd be pretty sure that's a US car as euros didn't have the side marker lights like yours. The handbrake cutout on the left has likely been covered over. Be worth checking for cracks around the one that's been cut in too Cheers Edwin |
|
|
|
| abnrdo |
Oct 26 2014, 08:29 PM
Post
#7
|
|
Member Group: Members Posts: 399 Joined: 24-September 04 From: Panama City, FL Member No.: 2,820 Region Association: South East States |
(IMG:style_emoticons/default/welcome.png)
Nice car color! You have a rare one my friend! Maybe we can give each other motivation! Cheers! |
|
|
|
| rick 918-S |
Oct 26 2014, 09:11 PM
Post
#8
|
|
Hey nice rack! -Celette Group: Members Posts: 20,406 Joined: 30-December 02 From: Now in Superior WI Member No.: 43 Region Association: Northstar Region |
Viper! (IMG:style_emoticons/default/drooley.gif)
(IMG:style_emoticons/default/welcome.png) (IMG:style_emoticons/default/assimilate.gif) |
|
|
|
| barrym |
Oct 26 2014, 09:19 PM
Post
#9
|
|
Member Group: Members Posts: 88 Joined: 12-October 14 From: Australia Member No.: 18,008 Region Association: None |
Thanks all ..
the 2.7 idea is essentially required if I want to race it in historic racing as a 916 (has been done here before) I can race it in timed sprints & tarmac rally with the subi engine which gives me something fun to do for a while (IMG:style_emoticons/default/smile.gif) Edwin - i'm in Sydney :/ will check out the inner rockers for evidence - although i'll be putting the strengthening kit in there as well & moving the handbrake to the centre. |
|
|
|
| Dave_Darling |
Oct 27 2014, 10:41 AM
Post
#10
|
|
914 Idiot Group: Members Posts: 14,980 Joined: 9-January 03 From: Silicon Valley / Kailua-Kona Member No.: 121 Region Association: Northern California |
Let's see. US-spec models would have the "warts" on the side between the turn signals and the front wheels. They would also have a VIN tag on the windshield frame near the lower-left corner.
To slide the seat forward, reach under the seat along the seat rails, where the adjusting loop would be. One rail will have a metal bar inside of it, push this upward and slide the seat forward. When it stops, reach under the other rail and push up the metal tab in there, and slide the seat forward off the rails. Note that the rails may be greasy; I use rubber gloves when I do this. --DD |
|
|
|
| Downunderman |
Oct 27 2014, 11:17 AM
Post
#11
|
|
Senior Member Group: Members Posts: 852 Joined: 31-May 03 From: Sydney, Australia Member No.: 766 Region Association: Australia and New Zealand |
It's good to have another teener in the historic garage, so soon after mine left. It is a remarkably sound shell, and wont take much to fix.
Cheers, |
|
|
|
| johnnymagoo |
Oct 27 2014, 02:25 PM
Post
#12
|
|
Newbie Group: Members Posts: 1 Joined: 14-April 13 From: United Kingdom Member No.: 15,769 Region Association: England |
A company called Crayford in the UK offered a RHD conversion for the LHD only 914 in the early 70's.
I saw a crayford conversion on the UK ebay site a few years back in pieces for sale. So one of them is still out there somewhere. www.crayfordconvertibleclub.com site has some pictures of a 914 being worked on and some details of work carried out on conversion. Look under the Porsche section of their site. |
|
|
|
| barrym |
Oct 27 2014, 02:55 PM
Post
#13
|
|
Member Group: Members Posts: 88 Joined: 12-October 14 From: Australia Member No.: 18,008 Region Association: None |
(IMG:style_emoticons/default/smile.gif)
little more progress last night - got the windscreen out and started to take the sill (rocker?) covers off, at which resulted in MANY years of mud & stones falling out I'll have a go at the seat tonight - thanks for the info all. and yes, it looks like it was a US car - has the tag on the windshield frame & the side repeaters. also found that during the RHD conversion some muppet has welded the dashboard frame TO the car ... so I cant get it out :/ Attached image(s) 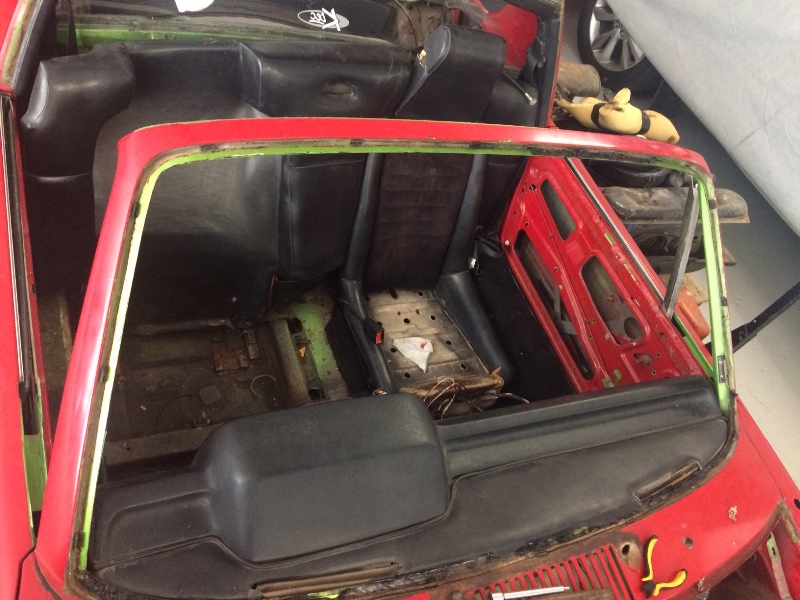
|
|
|
|
| mein_tag |
Oct 27 2014, 05:26 PM
Post
#14
|
|
Member Group: Members Posts: 66 Joined: 9-April 08 From: sunny Phoenix Member No.: 8,905 Region Association: Southwest Region |
Really like the color!
|
|
|
|
| barrym |
Oct 28 2014, 03:23 PM
Post
#15
|
|
Member Group: Members Posts: 88 Joined: 12-October 14 From: Australia Member No.: 18,008 Region Association: None |
A little more work last night was very successful - wont be able to work on it for a few more days so was good to make progress.
Door came off - easy, but geez its heavy - I can see a fibreglass skin in its very near future ! Pulled off sill cover expecting a fair amount of rust given how mud mud & stone fell out when I pulled the cover off - but 10 minutes cleaning revealed an extremely clean sill/rocker ! couple of small spots of surface rust but otherwise extremely good. Finished removing the loom - there is about 3kg of surplus in that I think (IMG:style_emoticons/default/wink.gif) removed the seat, the pic shows the seat with the broken off tab - I was stuffing around for ages with this poking bits of metal under the seat - all I needed to do was lift the tab up - I think it should have a longer tab on it that's broken off ... removed rear windscreen - as I pulled it out a folded up bit of paper fell out that was wedging it in place ... see pic - I guess I know where it came from now ! started cleaning up the firewall around the engine lid release - bit of rust here, but its quite concentrated to this area - easily cut out & replaced. the left land side scallop in the rocker has been well covered - couldn't see any cracks but will clean it back to bare metal & get a better look. removed the gear shift lever - seems a fair amount of surface rust on the floor pan under there, should I remove the centre tunnel & clean it up ??? and thanks to maddogmortorsport who are shipping me the full chassis strengthening kit (IMG:style_emoticons/default/smile.gif) I have a query with Coldwater914 for the sub conversion now (IMG:style_emoticons/default/smile.gif) Attached image(s) 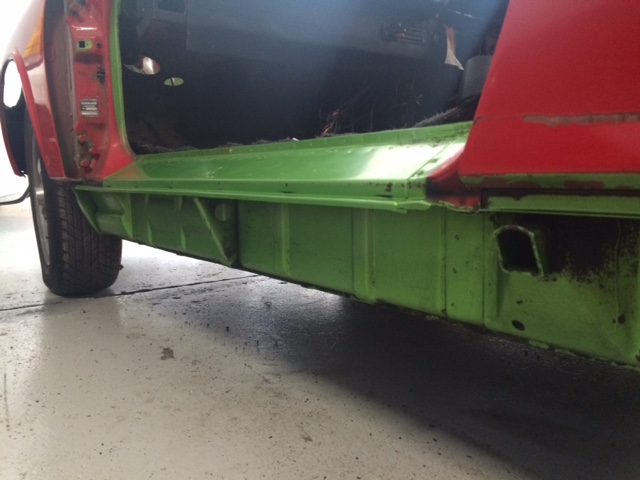 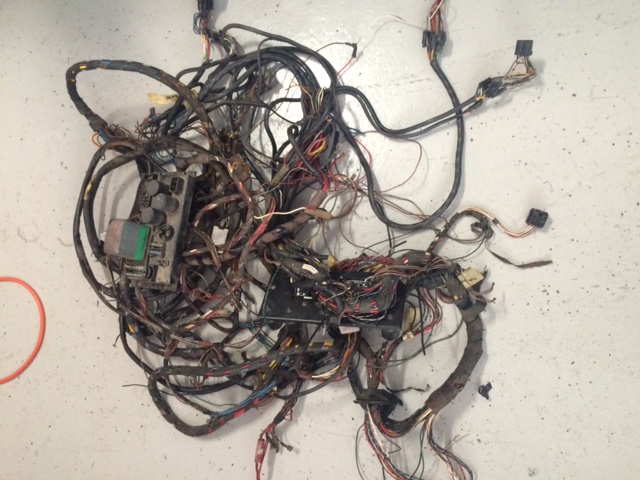 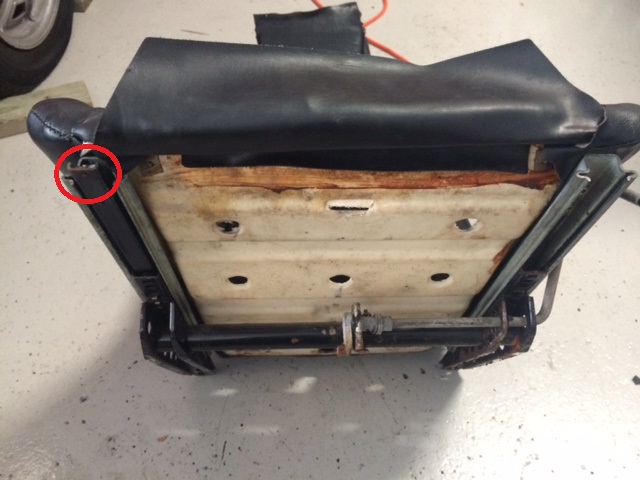 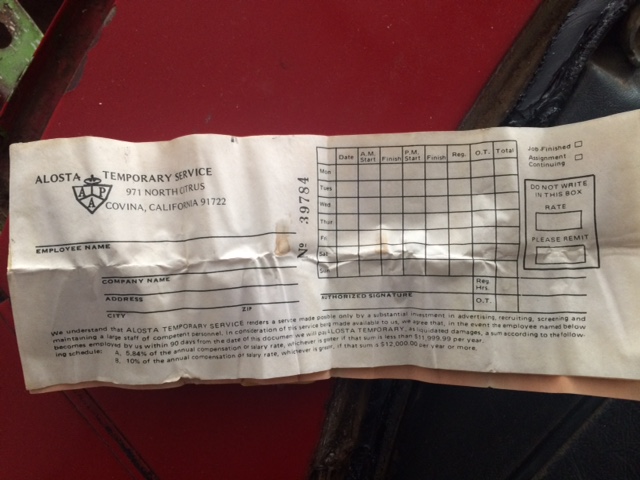 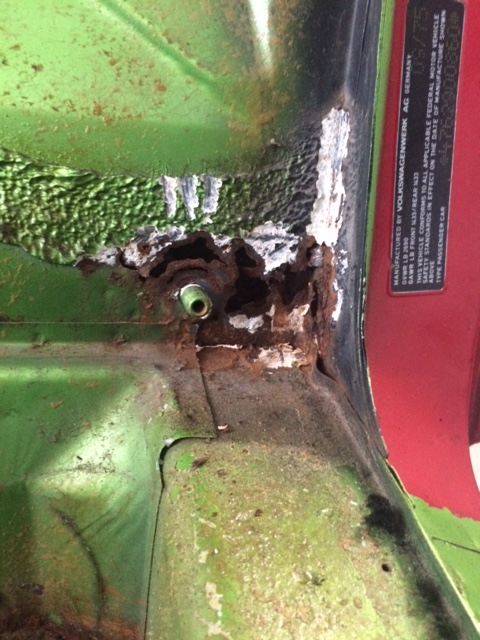 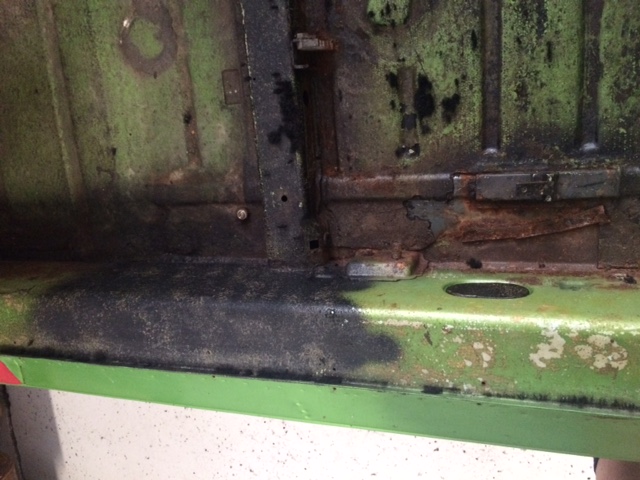 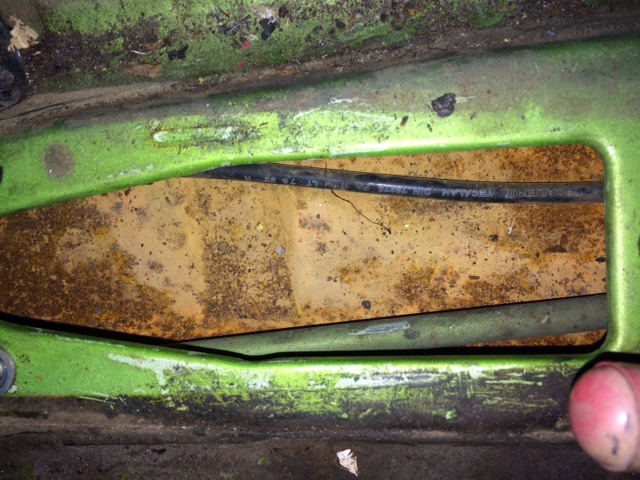
|
|
|
|
| barrym |
Oct 31 2014, 11:47 PM
Post
#16
|
|
Member Group: Members Posts: 88 Joined: 12-October 14 From: Australia Member No.: 18,008 Region Association: None |
little more progress today;
did a little workshop organising to make some more space - always takes longer than expected :/ removed the floor covering - the tar like stuff - gave it a little heat and it peels off easily enough .. Cut off the handbrake mount points - there were two of them - one on each side as it was converted to right hand drive the left hand one was just left in place. Removed both rear seat mounts as I have secured a pair of sparco rev plus seats. When I pulled out the rear seat mounts I found a bunch of coins under them - quarters & dimes by the look of them ?? - fair well corroded tho ... Removed a bunch of small brackets on the floor & cleaned it all up & gave a spray of weld thru primer. next job is to remove the cross floor brace and cut the top off the tunnel to clean out the surface rust & give it a coat of epoxy. Attached image(s) 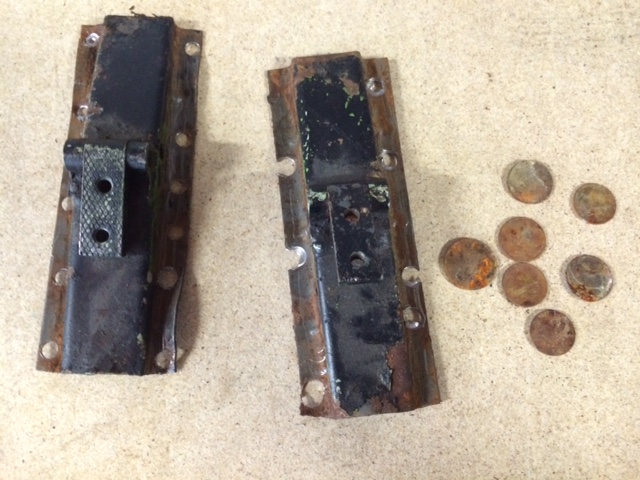 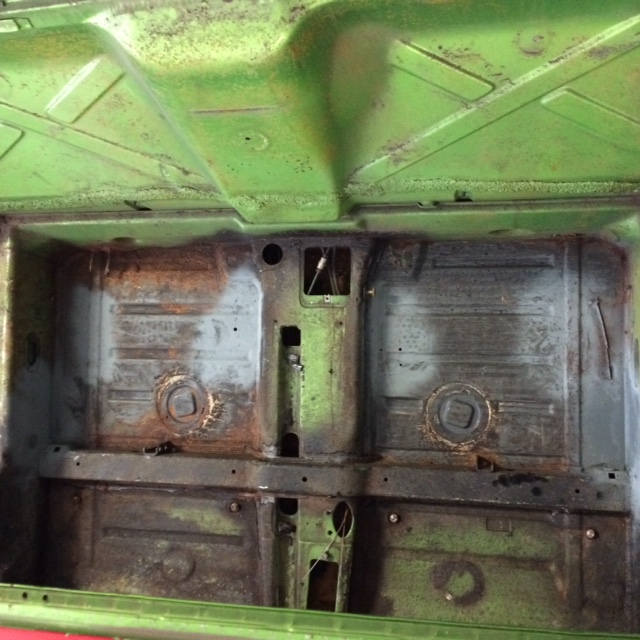
|
|
|
|
| al weidman |
Nov 1 2014, 10:00 AM
Post
#17
|
|
Al Weidman Group: Members Posts: 156 Joined: 22-February 08 From: Oroville, Ca. Member No.: 8,736 Region Association: Northern California |
A fiberglass door skin will not help much on a US '75 car door. The US car doors have safety crash bars in them. The earlier doors are much lighter. You can, however, remove the guts of your doors and they will be very reasonable in weight. I also hope you backdate the bumpers for additional weight savings.(IMG:style_emoticons/default/sawzall-smiley.gif) (IMG:style_emoticons/default/smile.gif)
|
|
|
|
| barrym |
Nov 1 2014, 01:18 PM
Post
#18
|
|
Member Group: Members Posts: 88 Joined: 12-October 14 From: Australia Member No.: 18,008 Region Association: None |
Can the crash bars be removed without splitting the door skins ?
|
|
|
|
| barrym |
Nov 3 2014, 10:11 PM
Post
#19
|
|
Member Group: Members Posts: 88 Joined: 12-October 14 From: Australia Member No.: 18,008 Region Association: None |
small update - i have a spare shifter tunnel & cables from my lotus - will build this into the 914 tunnel (IMG:style_emoticons/default/smile.gif) will also have handbrake attached & lotus shifter cover ...
Attached image(s) 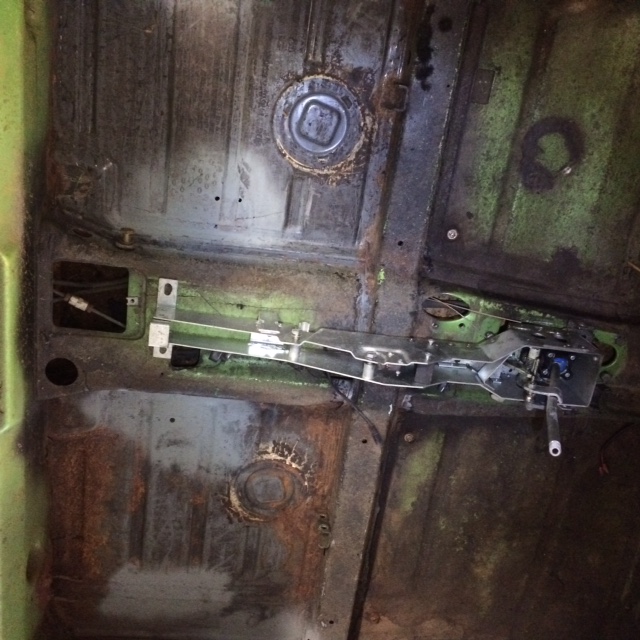
|
|
|
|
| Dave_Darling |
Nov 4 2014, 10:20 AM
Post
#20
|
|
914 Idiot Group: Members Posts: 14,980 Joined: 9-January 03 From: Silicon Valley / Kailua-Kona Member No.: 121 Region Association: Northern California |
QUOTE(barrym @ Nov 1 2014, 11:18 AM)  Can the crash bars be removed without splitting the door skins ? I believe you can go in through the door webbing and get much of the bar out. I've seen that done in a track-only car before. --DD |
|
|
|
|
1 User(s) are reading this topic (1 Guests and 0 Anonymous Users)
0 Members:

|
Lo-Fi Version | Time is now: 19th April 2024 - 10:48 AM |
Invision Power Board
v9.1.4 © 2024 IPS, Inc.