|
|
|
Porsche, and the Porsche crest are registered trademarks of Dr. Ing. h.c. F. Porsche AG.
This site is not affiliated with Porsche in any way. Its only purpose is to provide an online forum for car enthusiasts. All other trademarks are property of their respective owners. |
|
|

  |

| tygaboy |
 Jun 11 2017, 08:14 AM Jun 11 2017, 08:14 AM
Post
#1
|
|
914 Guru  Group: Members Posts: 5,268 Joined: 6-October 15 From: Petaluma, CA Member No.: 19,241 Region Association: Northern California |
I though you might enjoy seeing some details on this "build".
With "Crest Version 1" (my interpretation) being given away as a WCR award, I've decided to make some "improvements" to V2. This one will hang in my home office. As you may have noticed in my LS build (with things like the engine compartment panel), I most often have to build something and experience it physically before I know what I really like. Same thing is happening here. Comparing V1 and the pieces/cut patterns for V2, you can see I decided to add an additional layer to the main body area - I think that'll be more interesting and better balanced. The grid in the design is 4'x4' so you can see, this uses a bit of metal! I'm thinking I may do this one in stainless, depending on cost. And I have an idea for a wall frame that should be pretty neat. More on that as I get to it. Attached thumbnail(s) 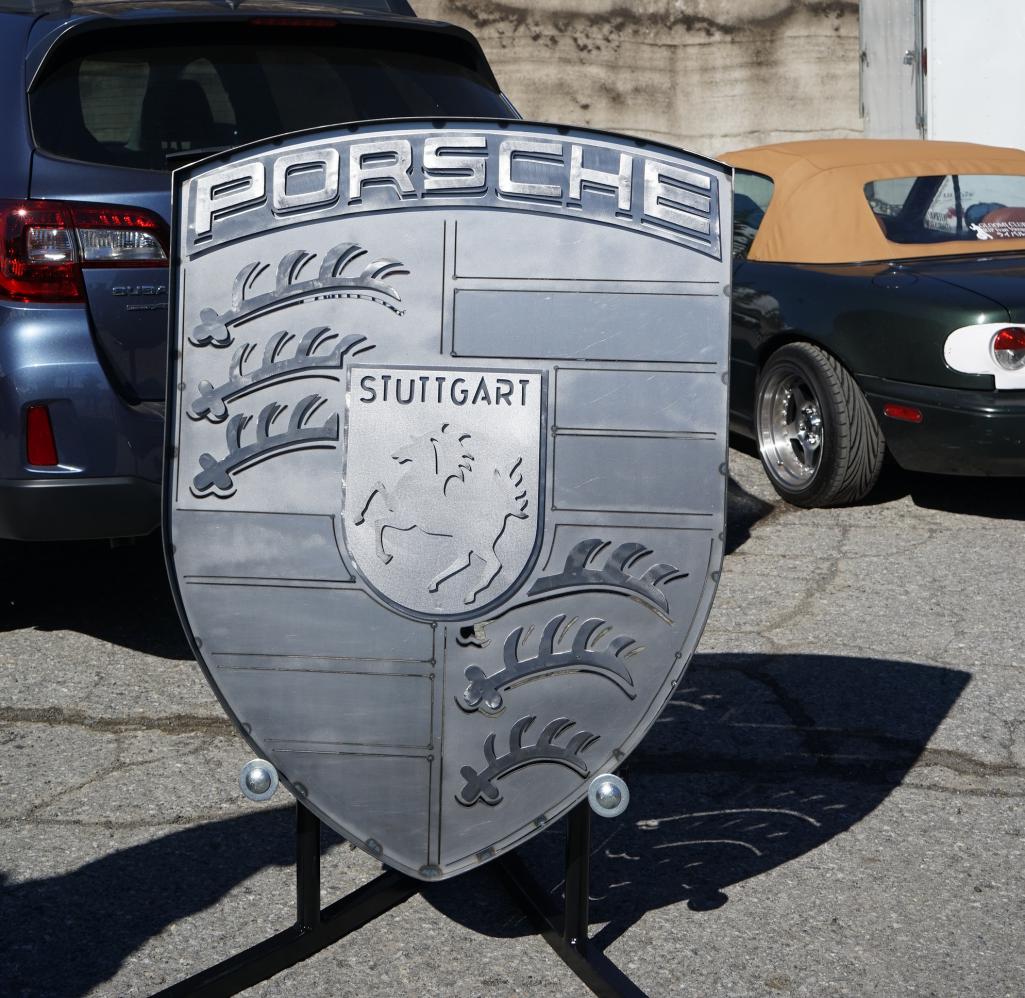 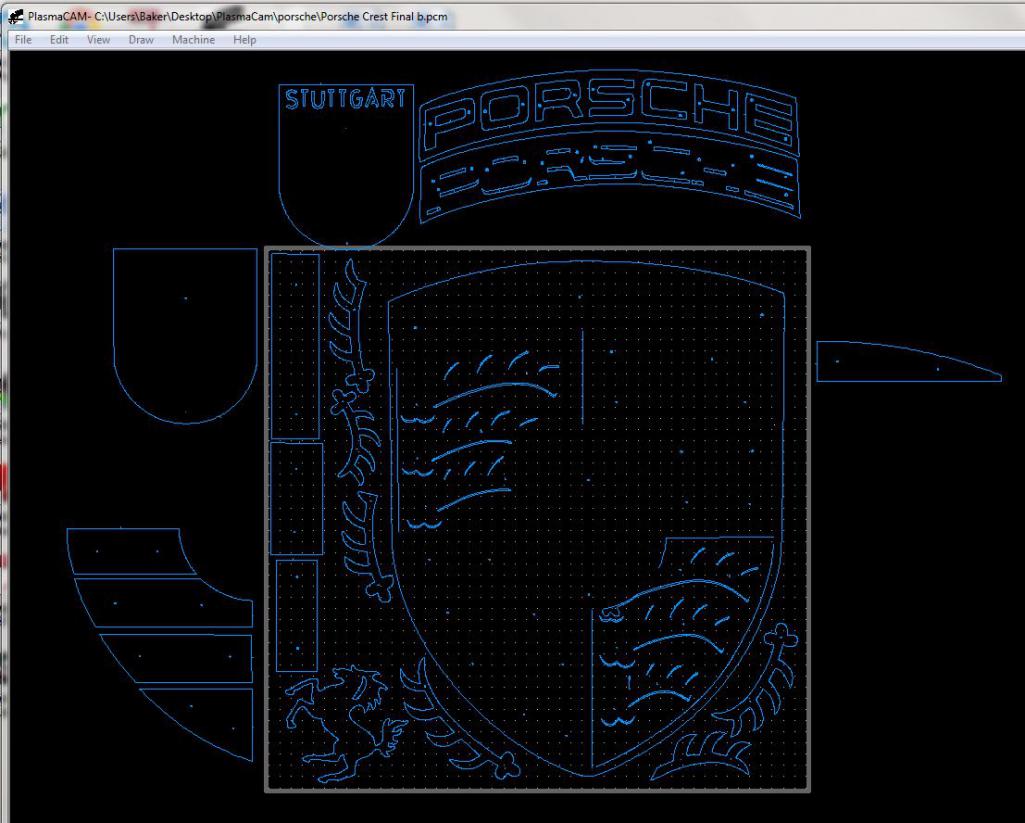
|
   |

 
|
| Andyrew |
Jun 11 2017, 08:52 AM
Post
#2
|
|
Spooling.... Please wait Group: Members Posts: 13,376 Joined: 20-January 03 From: Riverbank, Ca Member No.: 172 Region Association: Northern California |
|
|
|
|
| ConeDodger |
Jun 11 2017, 09:02 AM
Post
#3
|
|
Apex killer! Group: Members Posts: 23,553 Joined: 31-December 04 From: Tahoe Area Member No.: 3,380 Region Association: Northern California |
|
|
|
|
| mb911 |
Jun 11 2017, 01:49 PM
Post
#4
|
|
914 Guru Group: Members Posts: 6,802 Joined: 2-January 09 From: Burlington wi Member No.: 9,892 Region Association: Upper MidWest |
I think it looks great
|
|
|
|
| tygaboy |
Jun 12 2017, 09:18 AM
Post
#5
|
|
914 Guru Group: Members Posts: 5,268 Joined: 6-October 15 From: Petaluma, CA Member No.: 19,241 Region Association: Northern California |
I'm still considering additional design changes so I decided to go ahead and do this version in regular vs stainless steel. I try to maximize material usage but it's a challenge with the odd, "one each" pieces I need.
In the end, there's not much left of a 4x5' sheet of steel - and there are still pieces to be cut! (Yes, this is "wrong side up".) I'll pick up more material today or tomorrow. I'd like to get this finished in time to take it to the next R Gruppe / EASY gathering. I think those folks would enjoy seeing it. Attached thumbnail(s) 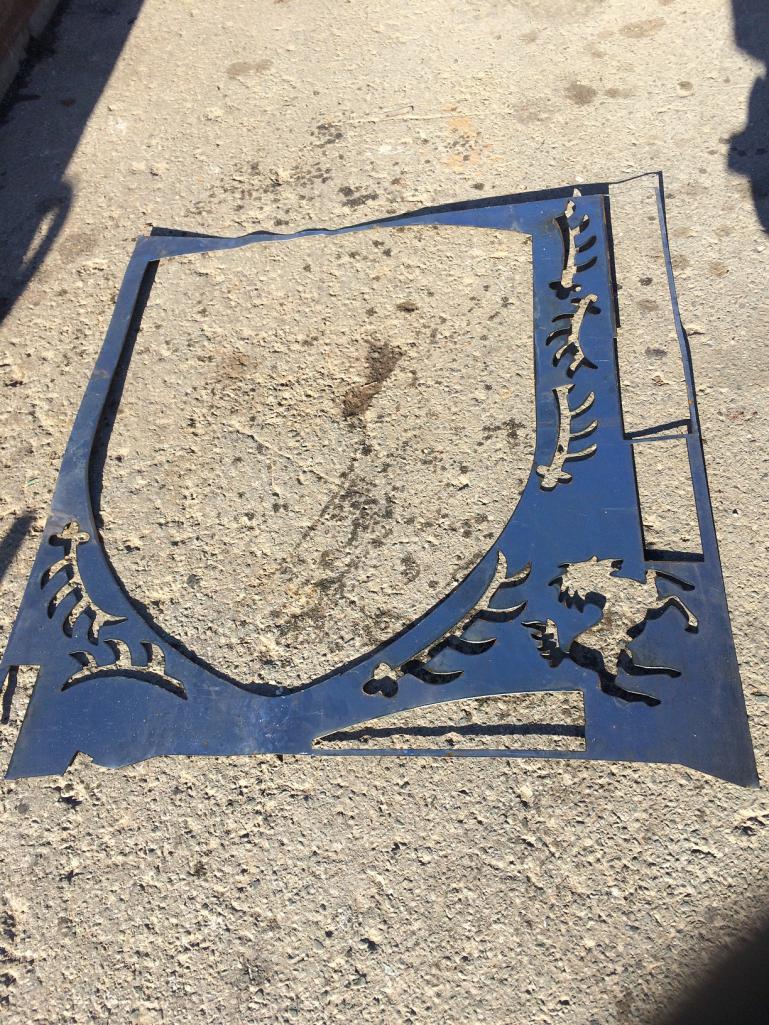
|
|
|
|
| tygaboy |
Jun 12 2017, 09:40 AM
Post
#6
|
|
914 Guru Group: Members Posts: 5,268 Joined: 6-October 15 From: Petaluma, CA Member No.: 19,241 Region Association: Northern California |
The cut parts on the table. I cut those little "locating holes" on all the parts which makes it a slam dunk to get each piece just where it's supposed to be.
Again, the differences with this version are the addition of the panels (show only in the upper right area) that will add dimension where previously, I just did cut lines. Attached thumbnail(s) 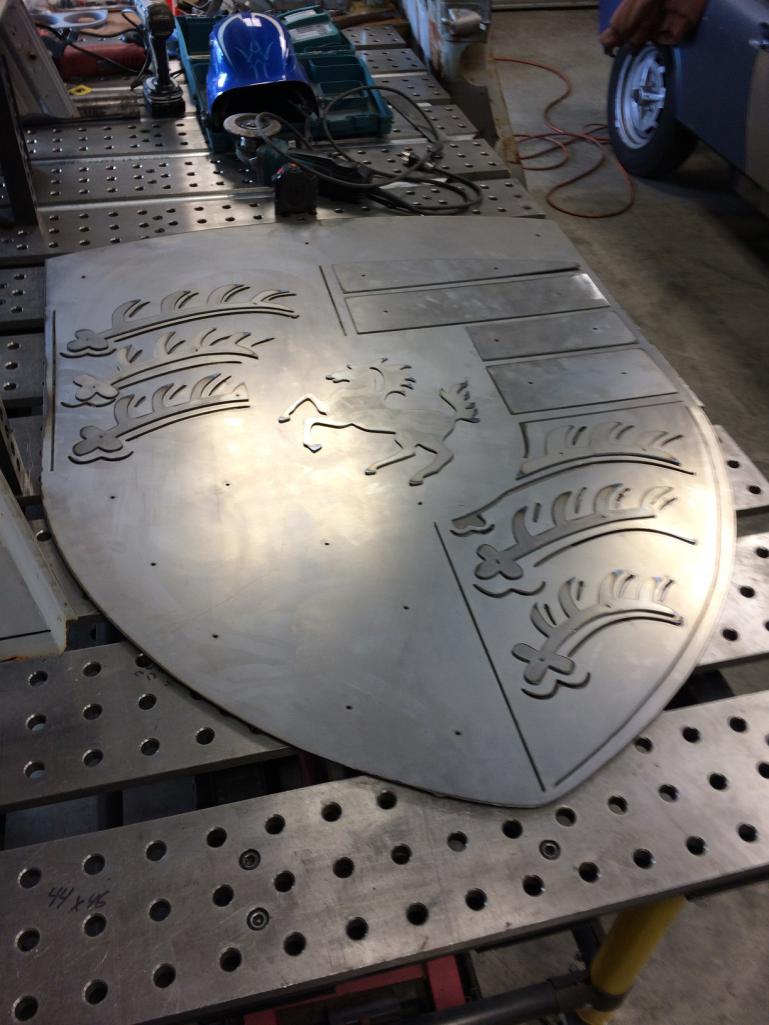
|
|
|
|
| mb911 |
Jun 12 2017, 09:45 AM
Post
#7
|
|
914 Guru Group: Members Posts: 6,802 Joined: 2-January 09 From: Burlington wi Member No.: 9,892 Region Association: Upper MidWest |
What are you using to cut it as in what brand plasma table?
|
|
|
|
| tygaboy |
Jun 12 2017, 10:11 AM
Post
#8
|
|
914 Guru Group: Members Posts: 5,268 Joined: 6-October 15 From: Petaluma, CA Member No.: 19,241 Region Association: Northern California |
QUOTE(mb911 @ Jun 12 2017, 08:45 AM)  What are you using to cut it as in what brand plasma table? I have an old (like from 1998) PlasmaCam 4'x4' table with a Miller 375 Extreme plasma cutter. I just learned that PlasmaCam is no longer supporting this verision and spare parts are limited to what they have in stock. So I just bought all new bearings, a few spare pulley and belt sets, etc. I have this project and two "surprise" gifts I'm doing for some special 914 folks (what, oh what might these be??? (IMG:style_emoticons/default/idea.gif) ) and then I plan to pull it apart for a rebuild. I've been eyeing the Archlight Dynamics 5x5 table as a replacement but so long as the good ol' PlasmaCam still works well, I figure I may as well hold off. Though I would really like the torch height control. Someday.... |
|
|
|
| Mueller |
Jun 12 2017, 12:15 PM
Post
#9
|
|
914 Freak! Group: Members Posts: 17,146 Joined: 4-January 03 From: Antioch, CA Member No.: 87 Region Association: None |
Nice work as usual, I like your welding table as well. Your shop must be huge!
|
|
|
|
| tygaboy |
Jun 17 2017, 03:43 PM
Post
#10
|
|
914 Guru Group: Members Posts: 5,268 Joined: 6-October 15 From: Petaluma, CA Member No.: 19,241 Region Association: Northern California |
Finished cutting the pieces. I'm really liking how it looks with the addition of panels. It just looks more "finished" to me.
Now it's "some assembly required" time! (IMG:style_emoticons/default/welder.gif) Attached thumbnail(s) 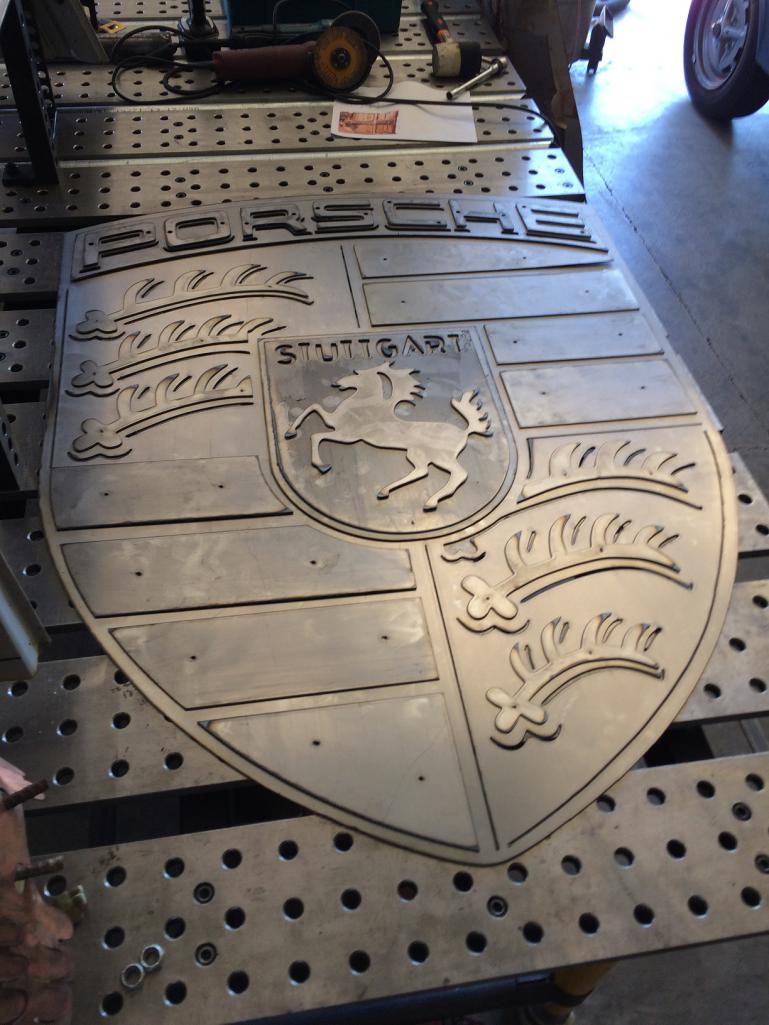
|
|
|
|
| tygaboy |
Jun 17 2017, 03:46 PM
Post
#11
|
|
914 Guru Group: Members Posts: 5,268 Joined: 6-October 15 From: Petaluma, CA Member No.: 19,241 Region Association: Northern California |
My wife recently retired and she's happy to run errands for me! (Gotta love her!)
So I asked her to go pick up an order at the metal yard. Problem was, they cut a couple pieces incorrectly and instead of 2 @ 24" x 48", I ended up with 4 @ 24" x24". What to do...? Scale the crest by 50% and make a 2 foot tall baby one! I think I may paint this one... Attached thumbnail(s) 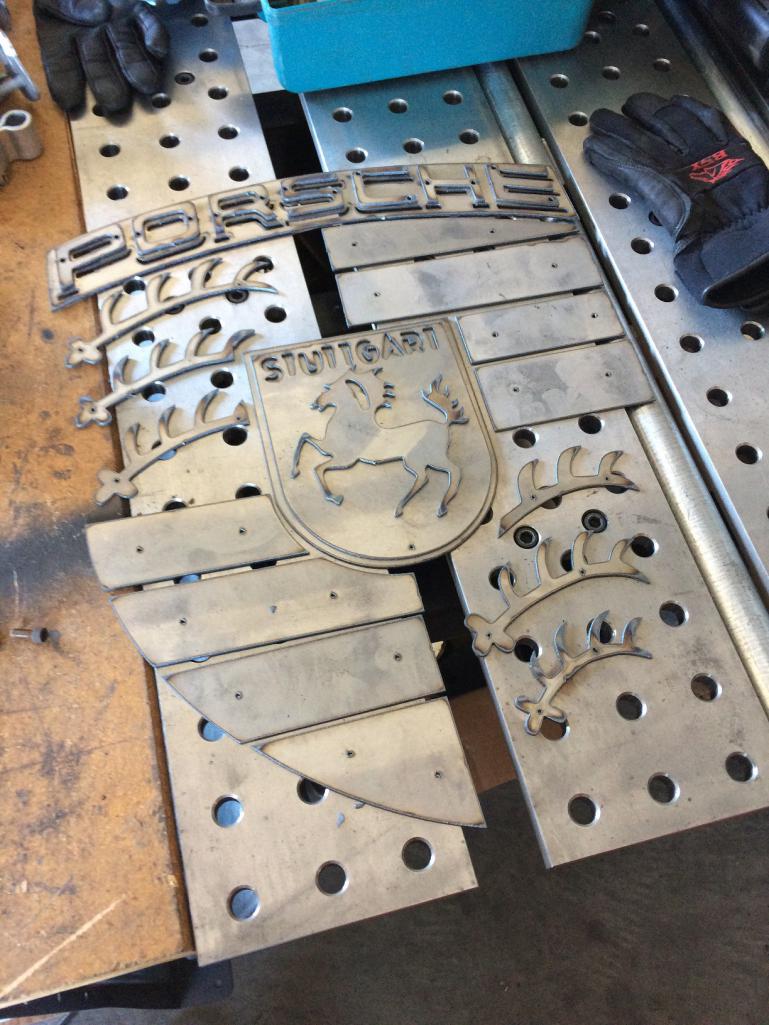
|
|
|
|
| tygaboy |
Jun 17 2017, 03:50 PM
Post
#12
|
|
914 Guru Group: Members Posts: 5,268 Joined: 6-October 15 From: Petaluma, CA Member No.: 19,241 Region Association: Northern California |
And I may as well disclose how I plan to frame and light the big one.
Remember that '72 I parted out a while back? Well it struck me that the targa bar would be a cool soffit! I'll add a backing and some lighting up inside it, etc. Should be pretty cool! Attached thumbnail(s) 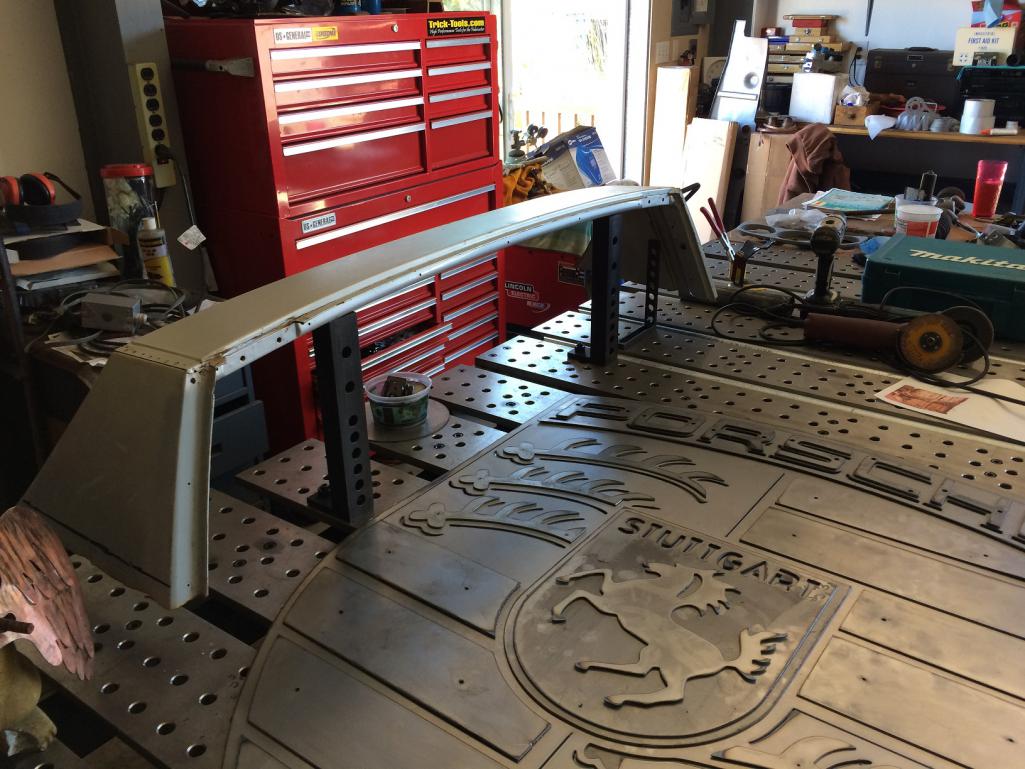
|
|
|
|
| tygaboy |
Jun 25 2017, 09:23 PM
Post
#13
|
|
914 Guru Group: Members Posts: 5,268 Joined: 6-October 15 From: Petaluma, CA Member No.: 19,241 Region Association: Northern California |
I need to become proficient at TIG welding and figured the 2 foot version of the crest would be good practice. Before I knew it, I was done!
I decided not to paint it as I like the raw look. I'll hit all the stand-off panels with a flap disc to give then the same pattern, then it's clear coat everything and this little guy is ready to go. Not sure what I'll do with it. probably end up giving it away. Now it's back to the big one! Attached thumbnail(s) 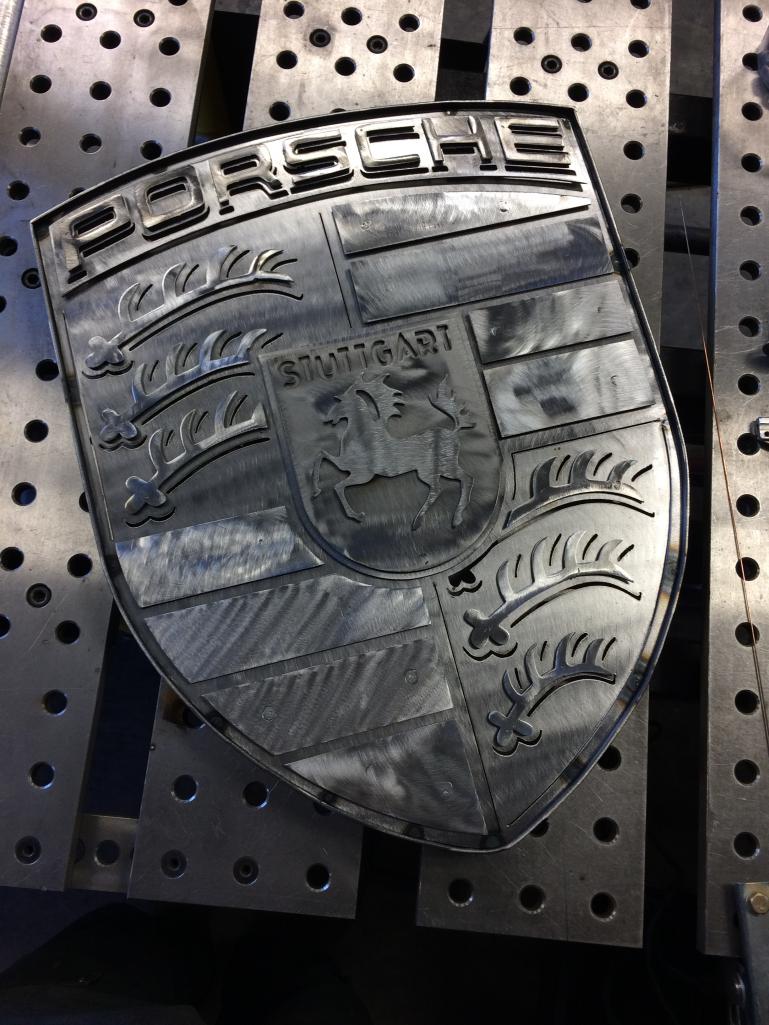
|
|
|
|
| Cracker |
Jun 25 2017, 11:13 PM
Post
#14
|
|
Advanced Member Group: Members Posts: 2,148 Joined: 2-February 10 From: Atlanta (area) Member No.: 11,316 Region Association: South East States |
Looks fantastic as always Chris...I am more than thankful to own and display v1!
Tony |
|
|
|
| Krieger |
Jun 25 2017, 11:37 PM
Post
#15
|
|
Advanced Member Group: Members Posts: 4,694 Joined: 24-May 04 From: Santa Rosa CA Member No.: 2,104 Region Association: None |
Nice work! That will look cool
|
 |
|
| Mark Henry |
Jun 26 2017, 07:31 AM
Post
#16
|
|
that's what I do! Group: Members Posts: 20,065 Joined: 27-December 02 From: Port Hope, Ontario Member No.: 26 Region Association: Canada |
Figure out a price! I bet some of the higher end Porsche guy's and shops would lap it up.
But then you might get a letter.... (IMG:style_emoticons/default/dry.gif) I'd also make it just a hair smaller so you can make it out of a 1/4 or 1/2 sheet. |
|
|
|
| tygaboy |
Jun 26 2017, 08:22 AM
Post
#17
|
|
914 Guru Group: Members Posts: 5,268 Joined: 6-October 15 From: Petaluma, CA Member No.: 19,241 Region Association: Northern California |
QUOTE(Mark Henry @ Jun 26 2017, 06:31 AM) Figure out a price! I bet some of the higher end Porsche guy's and shops would lap it up. But then you might get a letter.... (IMG:style_emoticons/default/dry.gif) I'd also make it just a hair smaller so you can make it out of a 1/4 or 1/2 sheet. Hi Mark - Yep, doubt I'll sell them. I tend to give away most of my stuff. It keeps things fun vs. "I have to get this done by next week...", etc. And I'm with you on material usage. Here's the cut layout for the 2 footer. I can get 2 complete sets of parts out of a 4' x4' sheet. Attached image(s) 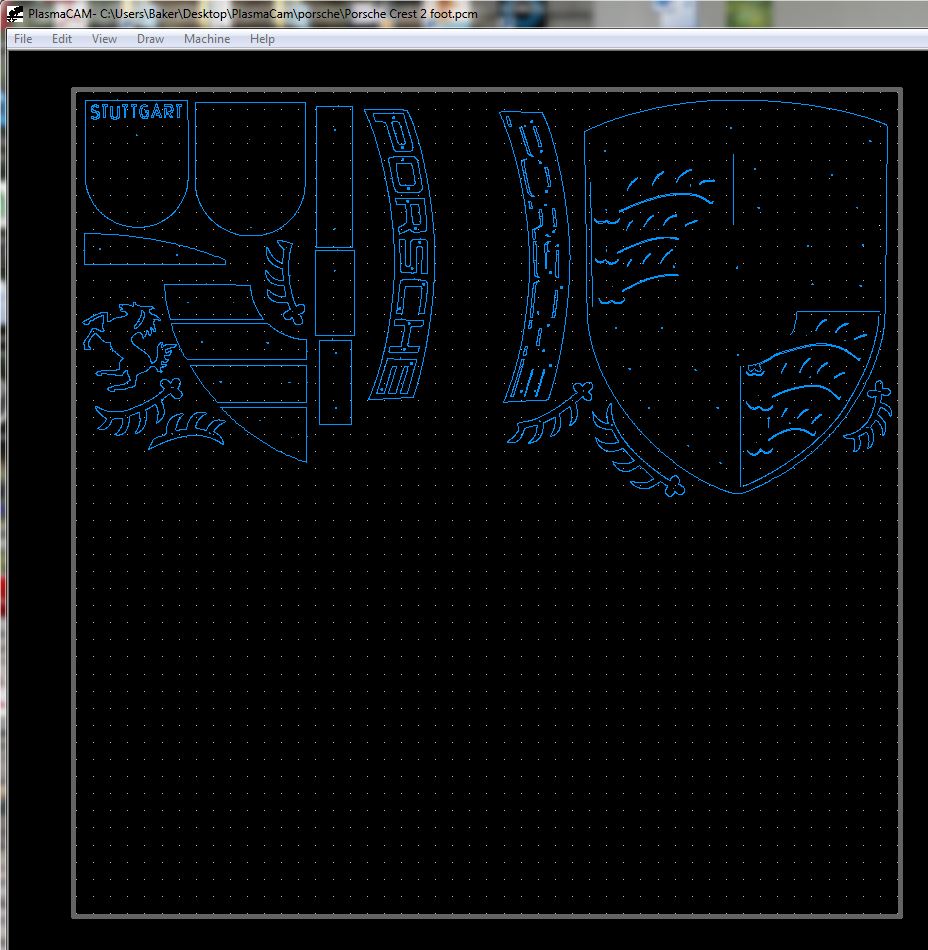
|
|
|
|
| tygaboy |
Jun 26 2017, 08:25 AM
Post
#18
|
|
914 Guru Group: Members Posts: 5,268 Joined: 6-October 15 From: Petaluma, CA Member No.: 19,241 Region Association: Northern California |
And then this fell off the plasma table...
Another "thanks for all you do!" I decided to make for McMark! I was inspired by his t-shirt that I got at WCR. Yes, the wrench/screwdriver aren't set correctly but they will be when it's done. (Please people, give me a little credit! (IMG:style_emoticons/default/biggrin.gif) ) It'll be about 36" wide when complete. Say it with me: Thanks Mark! For all you do for us and our little cars! (IMG:style_emoticons/default/aktion035.gif) Attached thumbnail(s) 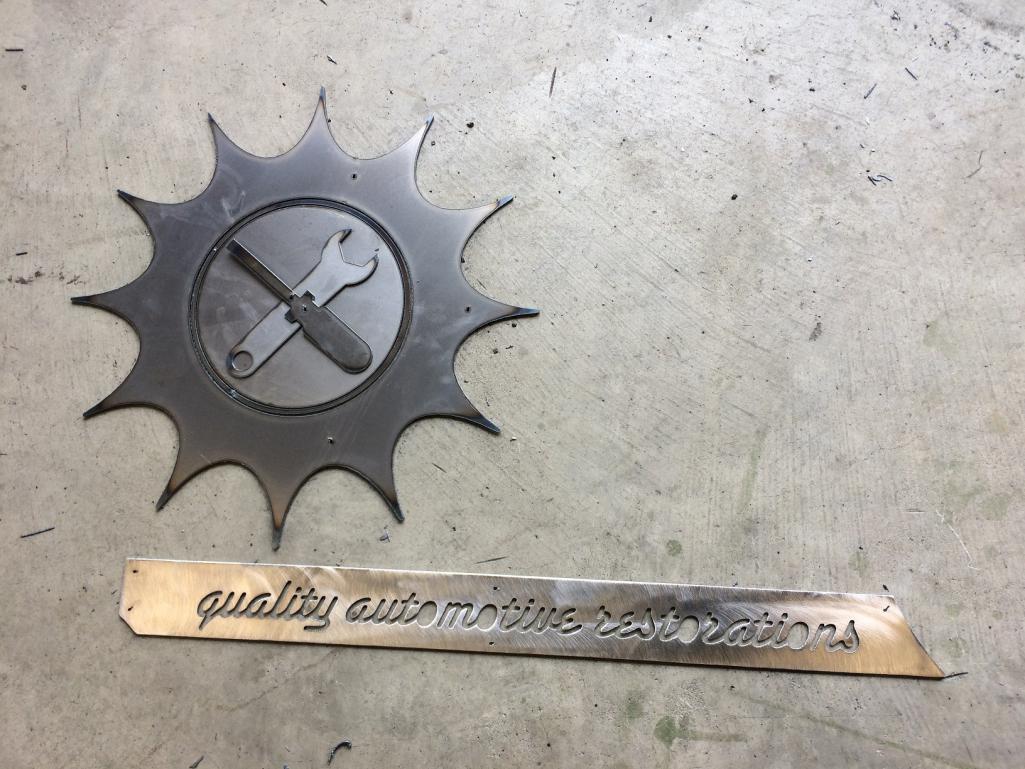 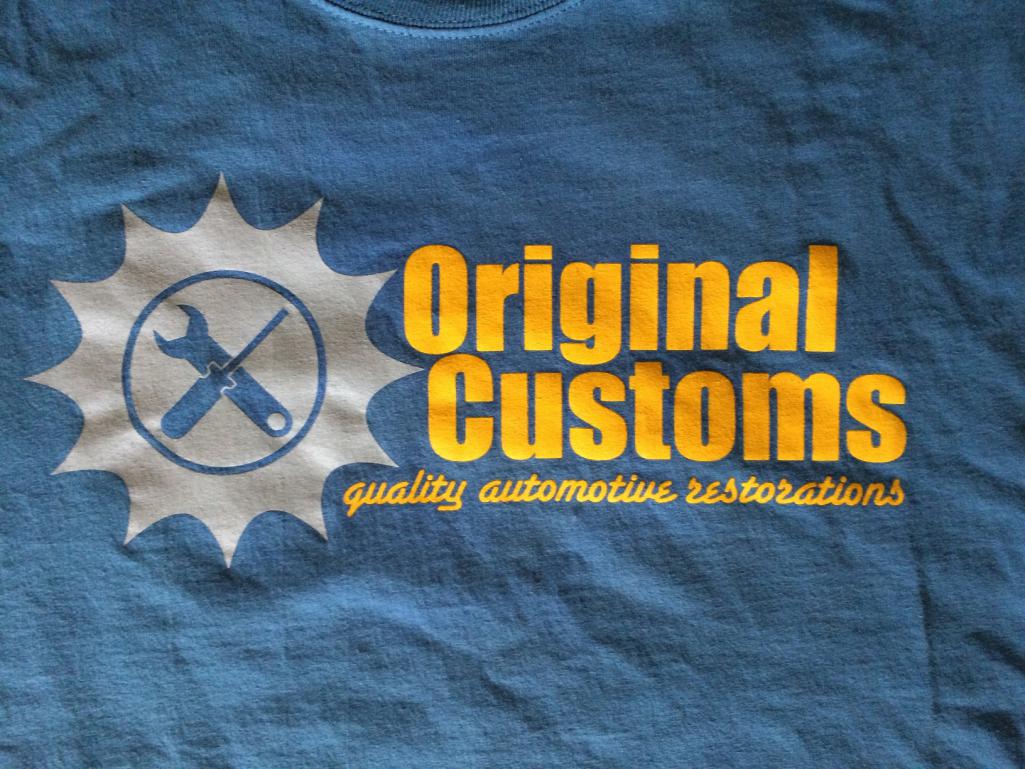
|
|
|
|
| Andyrew |
Jun 26 2017, 08:35 AM
Post
#19
|
|
Spooling.... Please wait Group: Members Posts: 13,376 Joined: 20-January 03 From: Riverbank, Ca Member No.: 172 Region Association: Northern California |
That looks amazing! Are you able to just burn the metal and not just cut through? It almost looks like thats what you did.
|
|
|
|
| McMark |
Jun 26 2017, 10:09 AM
Post
#20
|
|
914 Freak! Group: Retired Admin Posts: 20,179 Joined: 13-March 03 From: Grand Rapids, MI Member No.: 419 Region Association: None |
|
|
|
|
|
1 User(s) are reading this topic (1 Guests and 0 Anonymous Users)
0 Members:

|
Lo-Fi Version | Time is now: 20th April 2024 - 09:52 AM |
Invision Power Board
v9.1.4 © 2024 IPS, Inc.