|
|
|
Porsche, and the Porsche crest are registered trademarks of Dr. Ing. h.c. F. Porsche AG.
This site is not affiliated with Porsche in any way. Its only purpose is to provide an online forum for car enthusiasts. All other trademarks are property of their respective owners. |
|
|

  |

| iankarr |
 Dec 9 2018, 10:28 PM Dec 9 2018, 10:28 PM
Post
#1
|
|
The wrencher formerly known as Cuddy_K  Group: Members Posts: 2,471 Joined: 22-May 15 From: Heber City, UT Member No.: 18,749 Region Association: Intermountain Region |
Hi Guys,
Had a great time with @ValcoOscar , @914-300hemi , @mike_D and @secondwind working on @914_7T3 's car yesterday and shot this video while we refurbed and installed his fresh air box. My hands still hurt, but hopefully this video helps the greater good. Shout out as always to @mikey914 and @matty900 Enjoy... https://www.youtube.com/watch?v=Uhs6pedBOXM |
   |

 
|
| 914_7T3 |
Dec 9 2018, 11:27 PM
Post
#2
|
|
Please forgive me, I'm new to all of this! Group: Members Posts: 1,846 Joined: 3-April 17 From: Los Angeles, CA Member No.: 20,991 Region Association: Southern California |
@cuddy_k Video came out great and glad that this can be referenced for other owners going forward. Also pleased to see that the audio portion was edited so as to have a PG-13 version and not the rated R version as shot in real time.
(IMG:style_emoticons/default/lol-2.gif) |
|
|
|
| iankarr |
Dec 9 2018, 11:30 PM
Post
#3
|
|
The wrencher formerly known as Cuddy_K Group: Members Posts: 2,471 Joined: 22-May 15 From: Heber City, UT Member No.: 18,749 Region Association: Intermountain Region |
If you listen closely, there are still a few "that's what she said"'s in there...
|
|
|
|
| raynekat |
Dec 10 2018, 12:41 AM
Post
#4
|
|
Advanced Member Group: Members Posts: 2,153 Joined: 30-December 14 From: Coeur d'Alene, Idaho Member No.: 18,263 Region Association: Pacific Northwest |
And "now" it's time to attach the cables?
You better have the one that goes on the back of the fresh air box already on the box before putting the box in....or God help you. Virtually impossible to install the cable on the back of the box after it's in the car. Otherwise, great video. I liked the clamp idea; I'll use that next time. On my install, I needed to sand down the outer circumference of the plastic screen from 914 Rubber as it was too big to fit with the gasket onto the box. |
|
|
|
| porschetub |
Dec 10 2018, 01:04 AM
Post
#5
|
|
Advanced Member Group: Members Posts: 4,696 Joined: 25-July 15 From: New Zealand Member No.: 18,995 Region Association: None |
Yep not easy,would think a new seal would make it even harder (IMG:style_emoticons/default/sad.gif) ,I cut blocks of wood to hold it up before doing the bolts up.
I did swear a bit but got there. |
|
|
|
| iankarr |
Dec 10 2018, 01:25 AM
Post
#6
|
|
The wrencher formerly known as Cuddy_K Group: Members Posts: 2,471 Joined: 22-May 15 From: Heber City, UT Member No.: 18,749 Region Association: Intermountain Region |
QUOTE(raynekat @ Dec 10 2018, 01:41 AM)  And "now" it's time to attach the cables? You better have the one that goes on the back of the fresh air box already on the box before putting the box in....or God help you. Virtually impossible to install the cable on the back of the box after it's in the car. Otherwise, great video. I liked the clamp idea; I'll use that next time. On my install, I needed to sand down the outer circumference of the plastic screen from 914 Rubber as it was too big to fit with the gasket onto the box. Yeah, the one on the bottom is a bitch. I find it more impossible to get the box installed with that short cable already clamped on the bottom, so I put it on after. I guess it's a pick your poison thing. It's not too terrible to install the bottom cable in-place. The cable through the screw part is pretty easy. It's the clamp around the sheath that's the bear. But with a long enough needle nose pliers, it can be done. That's what I did yesterday. Three times, actually...as the first time I hooked up the wrong cable and the second time the sheath fell out of the groove. Ugh. |
|
|
|
| euro911 |
Dec 10 2018, 01:44 AM
Post
#7
|
|
Retired & living the dream. God help me if I wake up! Group: Members Posts: 8,845 Joined: 2-December 06 From: So.Cal. & No.AZ (USA) Member No.: 7,300 Region Association: Southern California |
Hell, I would have told my wife to wake me up early so I could have attended the event had I known Joe Walsh was going to be there (IMG:style_emoticons/default/laugh.gif)
(IMG:style_emoticons/default/poke.gif) 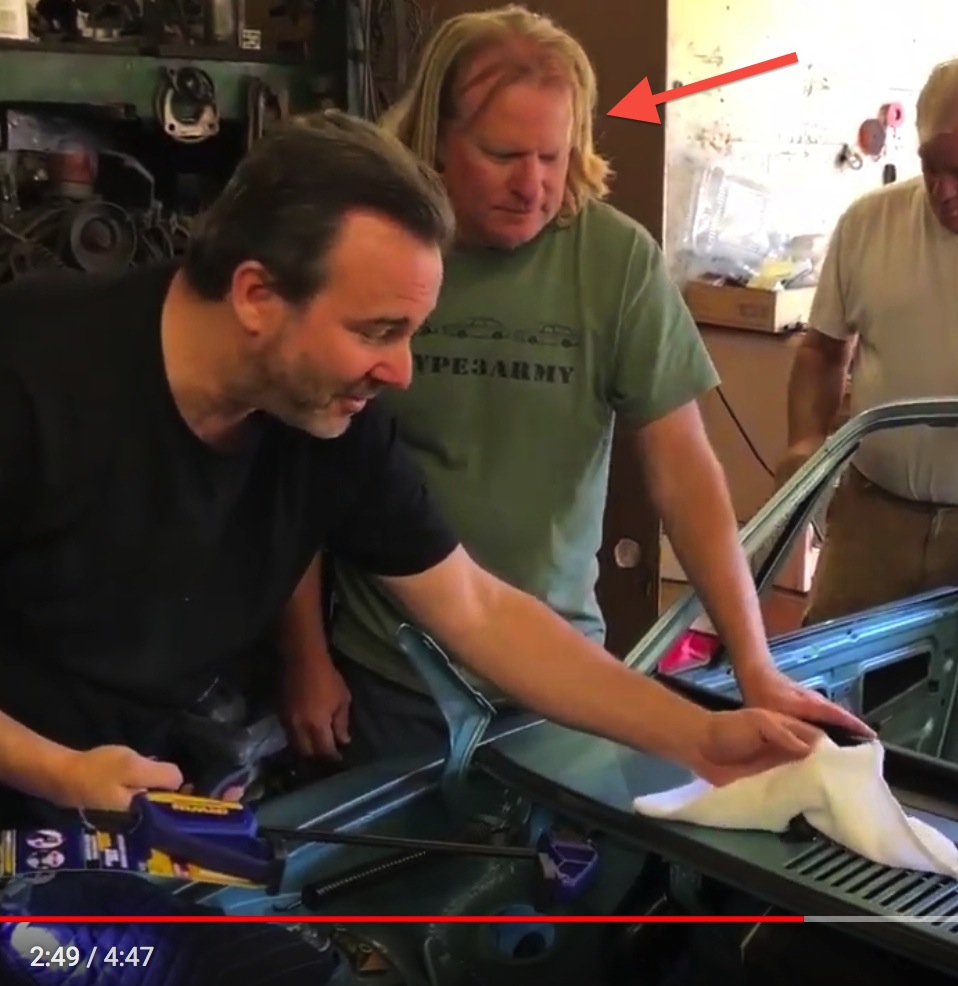 (IMG:style_emoticons/default/first.gif) Great video, Ian. It's the first time I've seen how the F/A box gets reinstalled. Good to know those tips, as I'll need to eventually do this on my car too. EDIT: I checked out some of your other videos (control arm bushings, turbo tie rods & sway bar videos) - all top notch. Thanks for making & posting them. . |
|
|
|
| Porschef |
Dec 10 2018, 05:41 AM
Post
#8
|
|
How you doin' Group: Members Posts: 2,165 Joined: 7-September 10 From: LawnGuyland Member No.: 12,152 Region Association: North East States |
Will there be a cable attaching video? Cuz that'll be the expletive loaded one... (IMG:style_emoticons/default/biggrin.gif)
Nice job Ian (IMG:style_emoticons/default/beerchug.gif) |
|
|
|
| jim_hoyland |
Dec 10 2018, 07:18 AM
Post
#9
|
|
Get that VIN ? Group: Members Posts: 9,250 Joined: 1-May 03 From: Sunset Beach, CA Member No.: 643 Region Association: Southern California |
Thanks you ! Great How-T0 video; gotta see the cable attachment procedure....
Please move to Classics........ |
|
|
|
| DRPHIL914 |
Dec 10 2018, 08:51 AM
Post
#10
|
|
Dr. Phil Group: Members Posts: 5,756 Joined: 9-December 09 From: Bluffton, SC Member No.: 11,106 Region Association: South East States |
I agree with previous post about the clamp, this is a "golden nugget"* put an asterk on that one. I did this a couple months back getting car ready for Okteenerfest and almost just left the box out because the new seal was to tight, it took 2 of us and yes I had the cable on mine before so I wouldn't have to mess with it after but between the seal and the cable its not easy for sure. In the end we got it into place and its a nice snug fit so no leaks! Looking great, now get that motor in and drive it!
|
|
|
|
| Mikey914 |
Dec 10 2018, 11:24 AM
Post
#11
|
|
The rubber man Group: Members Posts: 12,636 Joined: 27-December 04 From: Hillsboro, OR Member No.: 3,348 Region Association: None |
Great video. I've had many folks ask how to install the box. As you as see it's a bugger, but the rubber bands were an addition that I had not thought of.
NICE WORK |
|
|
|
| iankarr |
Dec 10 2018, 03:12 PM
Post
#12
|
|
The wrencher formerly known as Cuddy_K Group: Members Posts: 2,471 Joined: 22-May 15 From: Heber City, UT Member No.: 18,749 Region Association: Intermountain Region |
Thanks guys. I took some stills when I was installing the fan control cable and will try to make a video on that soon...
|
|
|
|
| rstover |
Dec 10 2018, 06:27 PM
Post
#13
|
|
Member Group: Members Posts: 136 Joined: 15-November 11 From: Kerrville, TX Member No.: 13,785 Region Association: Southwest Region |
I always appreciate postings on tips and tricks. I recently installed the air box and all the cables and ect. The first time I tried it never works, but gets better with each additional attempt. I ended up with this order on air box.
I separated the fan and air box. 1. Attached cable to fan housing. 2. Lay the fan flat a little forward. 3. Install box. 4. Connect the fan housing to the air box. The most difficult part was getting the bolts started attaching the fan to air box after the air box was installed. This became much easier when I got some longer bolts 5mm bolts. It would also been easier if the gasket between the fan housing air box was made of a material that would allow the fan housing to slide a little easier when trying to get the holes lined up. |
|
|
|
| euro911 |
Dec 10 2018, 07:06 PM
Post
#14
|
|
Retired & living the dream. God help me if I wake up! Group: Members Posts: 8,845 Joined: 2-December 06 From: So.Cal. & No.AZ (USA) Member No.: 7,300 Region Association: Southern California |
I just added the air box gaskets to my existing 914 Rubber order, but had to go look at my '71 because apparently the plastic grilles didn't start showing up on the cars until the 1973 YM (IMG:style_emoticons/default/unsure.gif)
Yep, verified, no grille on the car (IMG:style_emoticons/default/dry.gif) Will the grilles fit the early cars? ... if so, I'll need to grab one somewhere (IMG:style_emoticons/default/popcorn[1].gif) |
|
|
|
| iankarr |
Dec 10 2018, 07:57 PM
Post
#15
|
|
The wrencher formerly known as Cuddy_K Group: Members Posts: 2,471 Joined: 22-May 15 From: Heber City, UT Member No.: 18,749 Region Association: Intermountain Region |
@rstover Interesting idea to separate the box. I wonder if that's how the factory did it? I swear, some of this stuff is like trying to figure out how the Egyptians built the pyramids.
One way to make your approach even easier would be to substitute the fan assembly bolts with threaded studs. then all you'd have to do is put the fan on and spin some nuts down. Not concours, but kudos to any judges who can get their eyeballs under the air box (IMG:style_emoticons/default/wink.gif) |
|
|
|
| rstover |
Dec 10 2018, 08:20 PM
Post
#16
|
|
Member Group: Members Posts: 136 Joined: 15-November 11 From: Kerrville, TX Member No.: 13,785 Region Association: Southwest Region |
QUOTE(cuddy_k @ Dec 10 2018, 07:57 PM) @rstover Interesting idea to separate the box. I wonder if that's how the factory did it? I swear, some of this stuff is like trying to figure out how the Egyptians built the pyramids. One way to make your approach even easier would be to substitute the fan assembly bolts with threaded studs. then all you'd have to do is put the fan on and spin some nuts down. Not concours, but good luck getting a judges eyeballs under the air box (IMG:style_emoticons/default/wink.gif) If I had not been fighting the foam gasket and had longer bolts I think it would have been fairly easy. If I was doing it again I would make my own gasket out of cork i think. I believe it acts more of a spacer than a gasket anyway. |
|
|
|
| rstover |
Dec 10 2018, 08:46 PM
Post
#17
|
|
Member Group: Members Posts: 136 Joined: 15-November 11 From: Kerrville, TX Member No.: 13,785 Region Association: Southwest Region |
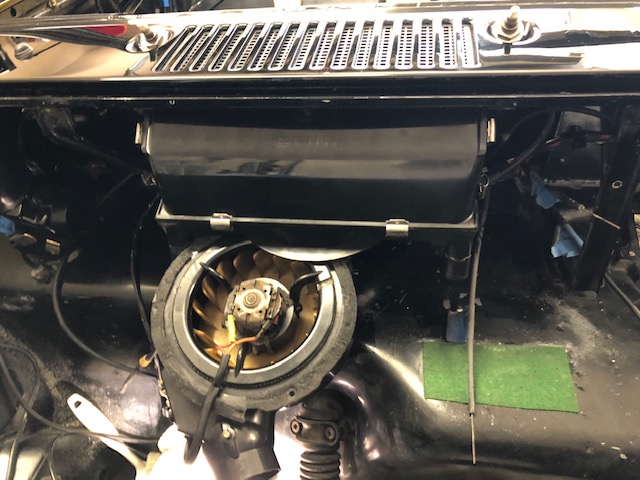
Don't want to hijack thread, but here is a pic. No doubt that figuring out the order of things is a large part of battle.
 |
|
|
|
| Mikey914 |
Dec 10 2018, 09:14 PM
Post
#18
|
|
The rubber man Group: Members Posts: 12,636 Joined: 27-December 04 From: Hillsboro, OR Member No.: 3,348 Region Association: None |
QUOTE(rstover @ Dec 10 2018, 06:20 PM) QUOTE(cuddy_k @ Dec 10 2018, 07:57 PM) @rstover Interesting idea to separate the box. I wonder if that's how the factory did it? I swear, some of this stuff is like trying to figure out how the Egyptians built the pyramids. One way to make your approach even easier would be to substitute the fan assembly bolts with threaded studs. then all you'd have to do is put the fan on and spin some nuts down. Not concours, but good luck getting a judges eyeballs under the air box (IMG:style_emoticons/default/wink.gif) If I had not been fighting the foam gasket and had longer bolts I think it would have been fairly easy. If I was doing it again I would make my own gasket out of cork i think. I believe it acts more of a spacer than a gasket anyway. Cork would be harder and yes you would definitely need longer bolts. The closed cell foam is what factory used and mine is 1/16" thicker |
|
|
|
| 914_7T3 |
Dec 10 2018, 09:34 PM
Post
#19
|
|
Please forgive me, I'm new to all of this! Group: Members Posts: 1,846 Joined: 3-April 17 From: Los Angeles, CA Member No.: 20,991 Region Association: Southern California |
QUOTE(euro911 @ Dec 10 2018, 05:06 PM) I just added the air box gaskets to my existing 914 Rubber order, but had to go look at my '71 because apparently the plastic grilles didn't start showing up on the cars until the 1973 YM (IMG:style_emoticons/default/unsure.gif) Yep, verified, no grille on the car (IMG:style_emoticons/default/dry.gif) Will the grilles fit the early cars? ... if so, I'll need to grab one somewhere (IMG:style_emoticons/default/popcorn[1].gif) @euro911 I have an extra 914 Rubber one as I used an OEM one that I picked up from @914werke PM me if interested! (IMG:style_emoticons/default/beerchug.gif) |
|
|
|
| 914_7T3 |
Dec 10 2018, 09:43 PM
Post
#20
|
|
Please forgive me, I'm new to all of this! Group: Members Posts: 1,846 Joined: 3-April 17 From: Los Angeles, CA Member No.: 20,991 Region Association: Southern California |
QUOTE(cuddy_k @ Dec 9 2018, 11:25 PM) QUOTE(raynekat @ Dec 10 2018, 01:41 AM) And "now" it's time to attach the cables? You better have the one that goes on the back of the fresh air box already on the box before putting the box in....or God help you. Virtually impossible to install the cable on the back of the box after it's in the car. Otherwise, great video. I liked the clamp idea; I'll use that next time. On my install, I needed to sand down the outer circumference of the plastic screen from 914 Rubber as it was too big to fit with the gasket onto the box. Yeah, the one on the bottom is a bitch. I find it more impossible to get the box installed with that short cable already clamped on the bottom, so I put it on after. I guess it's a pick your poison thing. It's not too terrible to install the bottom cable in-place. The cable through the screw part is pretty easy. It's the clamp around the sheath that's the bear. But with a long enough needle nose pliers, it can be done. That's what I did yesterday. Three times, actually...as the first time I hooked up the wrong cable and the second time the sheath fell out of the groove. Ugh. Also helpful to have extra clamps on hand as they tend to break. Luckily we had a parts car on site where we could secure extras to complete the installation. 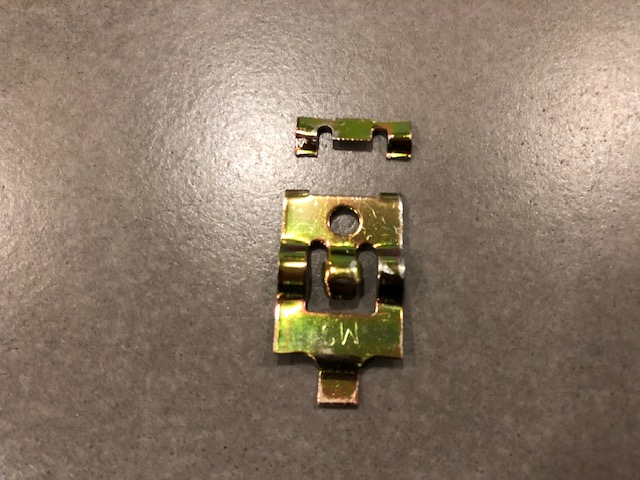 |
|
|
|
|
1 User(s) are reading this topic (1 Guests and 0 Anonymous Users)
0 Members:

|
Lo-Fi Version | Time is now: 15th April 2024 - 11:35 PM |
Invision Power Board
v9.1.4 © 2024 IPS, Inc.