|
|
|
Porsche, and the Porsche crest are registered trademarks of Dr. Ing. h.c. F. Porsche AG.
This site is not affiliated with Porsche in any way. Its only purpose is to provide an online forum for car enthusiasts. All other trademarks are property of their respective owners. |
|
|

  |

| bkrantz |
 Jun 29 2021, 07:06 PM Jun 29 2021, 07:06 PM
Post
#3201
|
|
914 Guru  Group: Members Posts: 8,065 Joined: 3-August 19 From: SW Colorado Member No.: 23,343 Region Association: Rocky Mountains |
Back to engine work today. I tried to mount the #3 cylinder, and found interference between the engine stand yoke and a cooling fin.
Attached thumbnail(s) 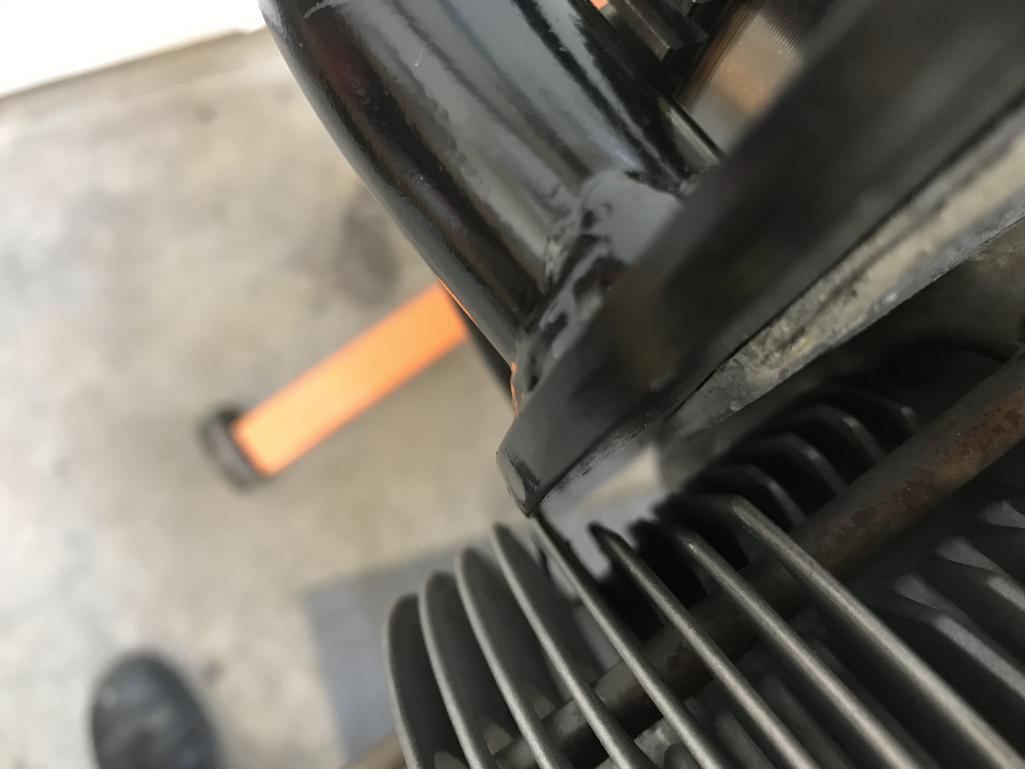
|
   |

 
|
| bkrantz |
Jun 29 2021, 07:07 PM
Post
#3202
|
|
914 Guru Group: Members Posts: 8,065 Joined: 3-August 19 From: SW Colorado Member No.: 23,343 Region Association: Rocky Mountains |
More importantly, I realized that the yoke blocks access of the piston pin for #3.
Attached thumbnail(s) 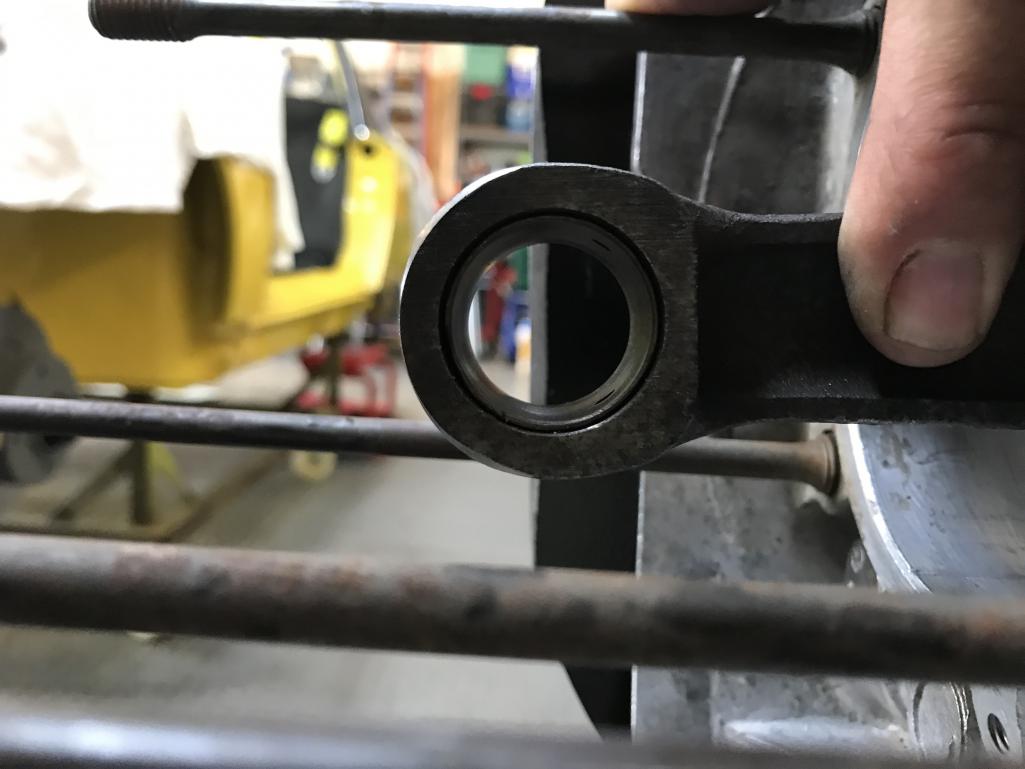
|
|
|
|
| bkrantz |
Jun 29 2021, 07:09 PM
Post
#3203
|
|
914 Guru Group: Members Posts: 8,065 Joined: 3-August 19 From: SW Colorado Member No.: 23,343 Region Association: Rocky Mountains |
How to get the engine off the stand so I can work on the yoke? Without getting out my hoist, I built up a support from miscellaneous stuff.
Attached thumbnail(s) 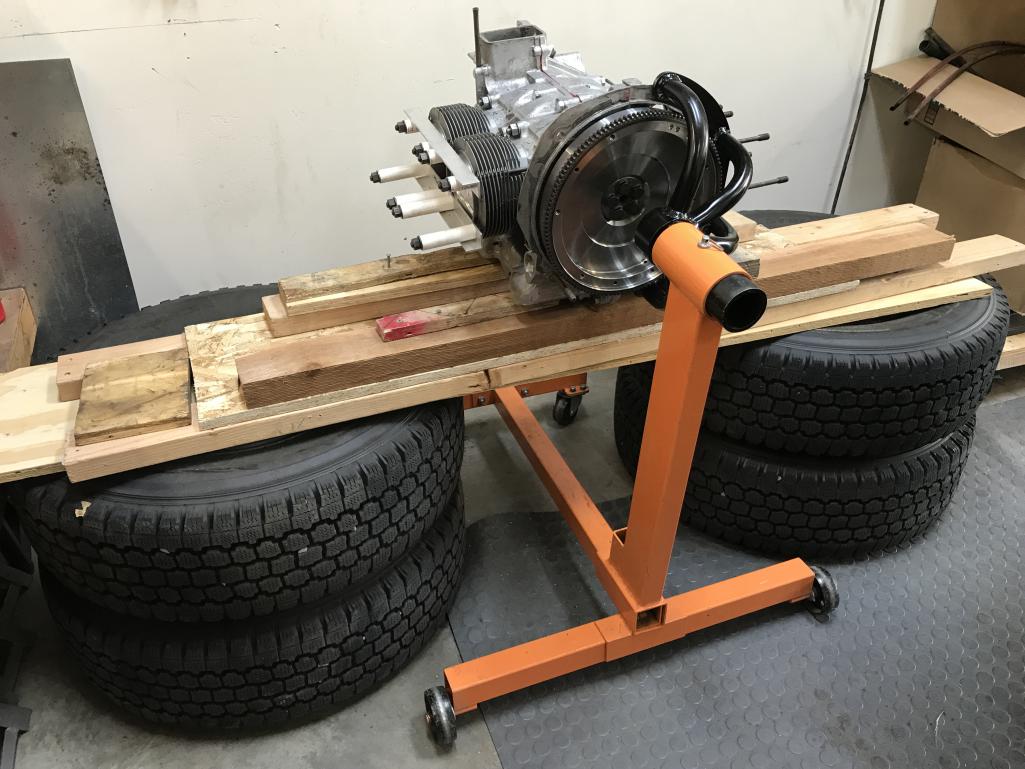
|
|
|
|
| bkrantz |
Jun 29 2021, 07:10 PM
Post
#3204
|
|
914 Guru Group: Members Posts: 8,065 Joined: 3-August 19 From: SW Colorado Member No.: 23,343 Region Association: Rocky Mountains |
Engine off. BTW, I did screw together the various bits of lumber.
Attached thumbnail(s) 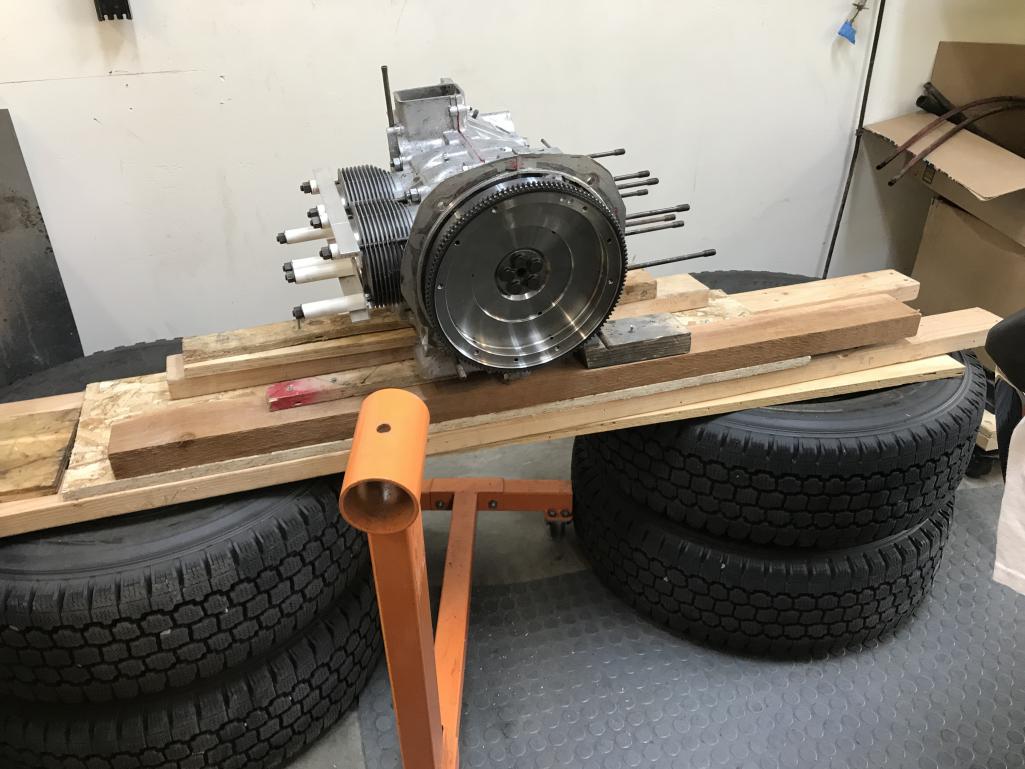
|
|
|
|
| bkrantz |
Jun 29 2021, 07:10 PM
Post
#3205
|
|
914 Guru Group: Members Posts: 8,065 Joined: 3-August 19 From: SW Colorado Member No.: 23,343 Region Association: Rocky Mountains |
After some grinding.
Attached thumbnail(s) 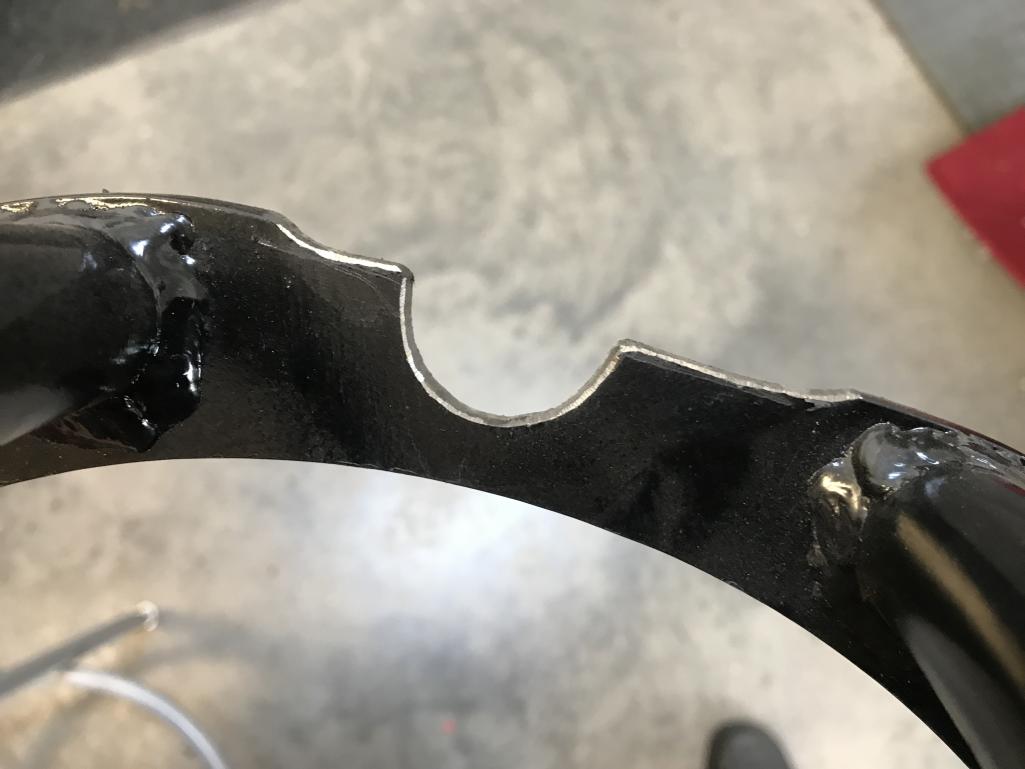
|
|
|
|
| bkrantz |
Jun 29 2021, 07:11 PM
Post
#3206
|
|
914 Guru Group: Members Posts: 8,065 Joined: 3-August 19 From: SW Colorado Member No.: 23,343 Region Association: Rocky Mountains |
It works.
Yes, I do realize I could shift the yoke to the other half of the case and not have clearance problems, but that would be too easy. Attached thumbnail(s) 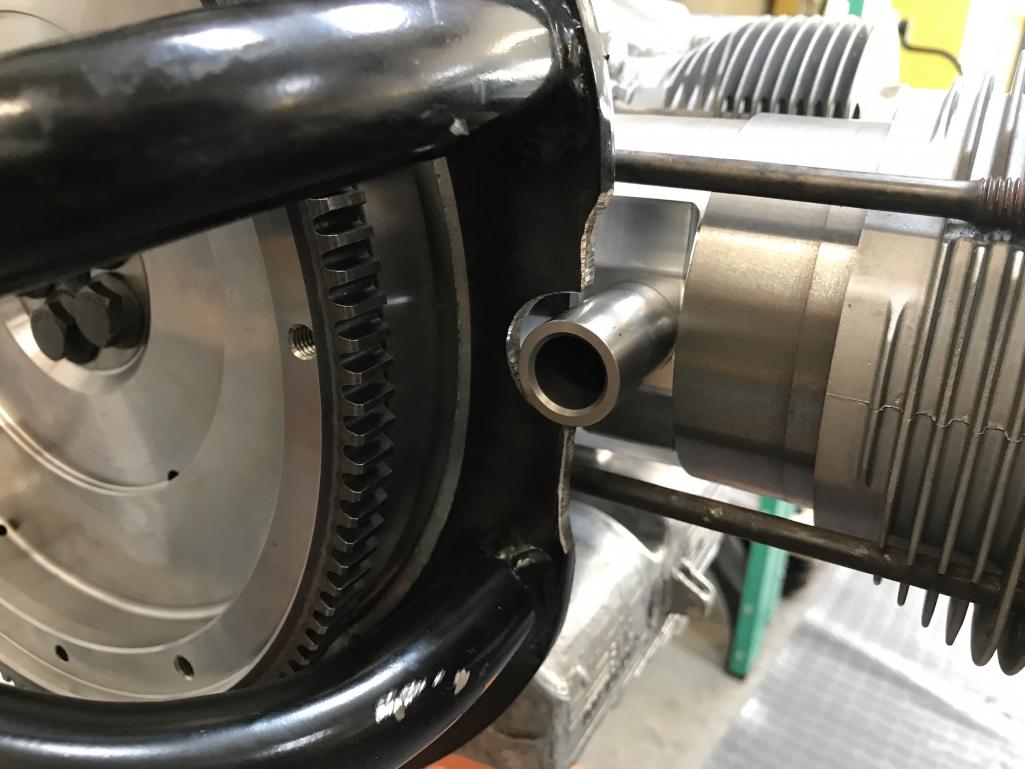
|
|
|
|
| bkrantz |
Jun 29 2021, 07:15 PM
Post
#3207
|
|
914 Guru Group: Members Posts: 8,065 Joined: 3-August 19 From: SW Colorado Member No.: 23,343 Region Association: Rocky Mountains |
That let me mount P&C #3 and #4. I did notice that the cylinder on #3 seemed to rock a bit against the case. And after I did a quick deck height measurement, #4 was about .02 inch more than all the others.
Attached thumbnail(s) 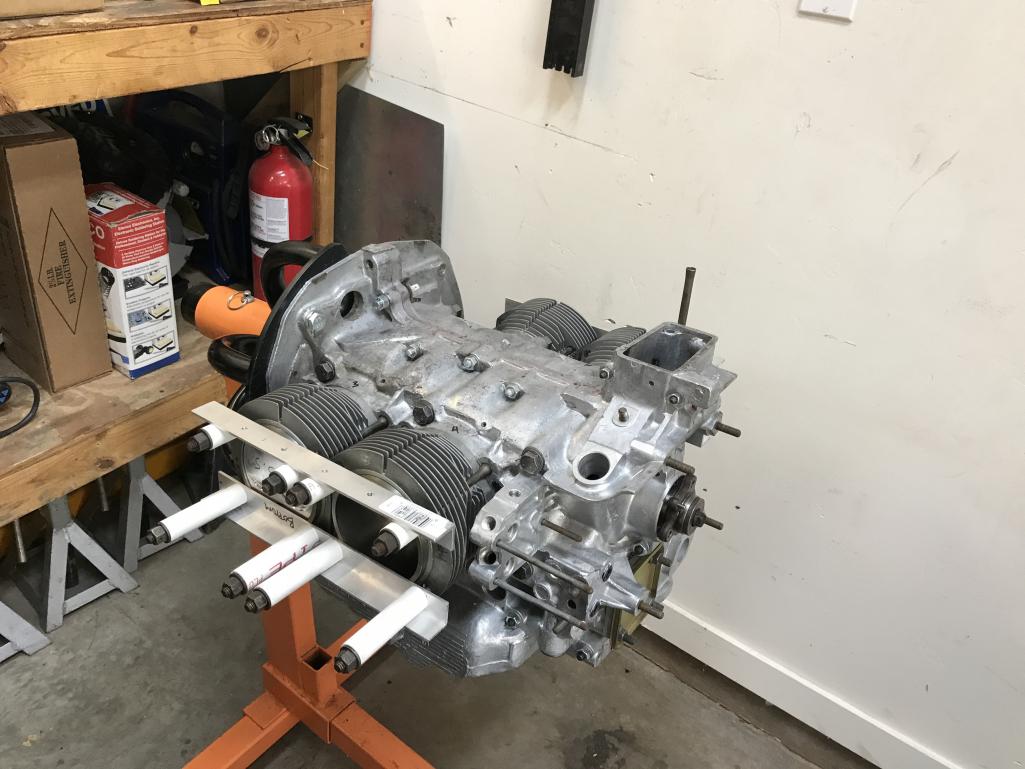
|
|
|
|
| bkrantz |
Jun 29 2021, 07:20 PM
Post
#3208
|
|
914 Guru Group: Members Posts: 8,065 Joined: 3-August 19 From: SW Colorado Member No.: 23,343 Region Association: Rocky Mountains |
I pulled #3 and #4 off, and found small raised edges around the outside of the machined surfaces of the case cylinder holes. The new cylinders seem to be a bit wider and are sitting on the edges instead of square on the machined circles.
I did not want to do any grinding or sanding, and so got out a sharp utility blade and trimmed the raised edges where they might interfere. That made the #3 cylinder sit square without rocking. I still need to work on the #4 seat. Attached thumbnail(s) 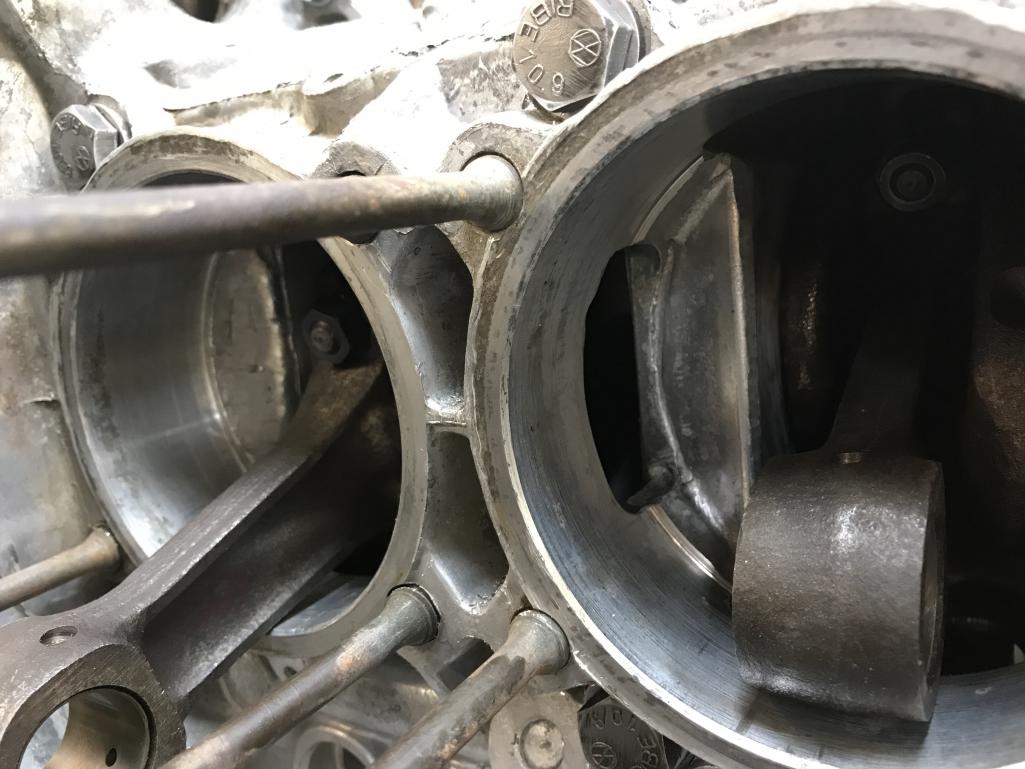
|
|
|
|
| bbrock |
Jun 29 2021, 07:26 PM
Post
#3209
|
|
914 Guru Group: Members Posts: 5,269 Joined: 17-February 17 From: Montana Member No.: 20,845 Region Association: Rocky Mountains |
QUOTE(bkrantz @ Jun 28 2021, 06:08 PM)  This arrived today, from Mario at the Dub Shop: complete EFI and ignition system. A very interesting thread just got REALLY interesting. I'm pretty sure my car is destined for this treatment so will be watching with great interest! (IMG:style_emoticons/default/popcorn[1].gif) |
|
|
|
| Morph914 |
Jun 30 2021, 04:43 AM
Post
#3210
|
|
Member Group: Members Posts: 435 Joined: 22-August 16 From: St Augustine, FL Member No.: 20,326 Region Association: South East States |
Nice work as always! Very interested in the EFI set up. If I can’t figure out my electrical gremlins, I may be going that route.
|
|
|
|
| bkrantz |
Jun 30 2021, 07:07 PM
Post
#3211
|
|
914 Guru Group: Members Posts: 8,065 Joined: 3-August 19 From: SW Colorado Member No.: 23,343 Region Association: Rocky Mountains |
I know that getting the Dub Shop kit installed and tuned will take some work, but I decided that would be more fun, and give me better results, that fighting with the D-jet system.
|
|
|
|
| bkrantz |
Jun 30 2021, 07:20 PM
Post
#3212
|
|
914 Guru Group: Members Posts: 8,065 Joined: 3-August 19 From: SW Colorado Member No.: 23,343 Region Association: Rocky Mountains |
I took care of the raised edge on the #4 opening, so the cylinder sits flat. And then I did a quick measurement of deck height, using my caliper with a T-bar attachment. My initial measurements:
#1, .068" #2, .067" #3, .067" #4, .072" These are a bit bigger than I want, and #4 is still trying to cause trouble. I need to set up and measure more carefully, and then see. |
|
|
|
| bkrantz |
Jun 30 2021, 07:54 PM
Post
#3213
|
|
914 Guru Group: Members Posts: 8,065 Joined: 3-August 19 From: SW Colorado Member No.: 23,343 Region Association: Rocky Mountains |
I got my cowl braces back from the paint shop.
Attached thumbnail(s) 
|
|
|
|
| bkrantz |
Jun 30 2021, 07:55 PM
Post
#3214
|
|
914 Guru Group: Members Posts: 8,065 Joined: 3-August 19 From: SW Colorado Member No.: 23,343 Region Association: Rocky Mountains |
I pulled the gas tank out again, and installed the right side brace.
Attached thumbnail(s) 
|
|
|
|
| bkrantz |
Jun 30 2021, 07:56 PM
Post
#3215
|
|
914 Guru Group: Members Posts: 8,065 Joined: 3-August 19 From: SW Colorado Member No.: 23,343 Region Association: Rocky Mountains |
And the left side brace.
Attached thumbnail(s) 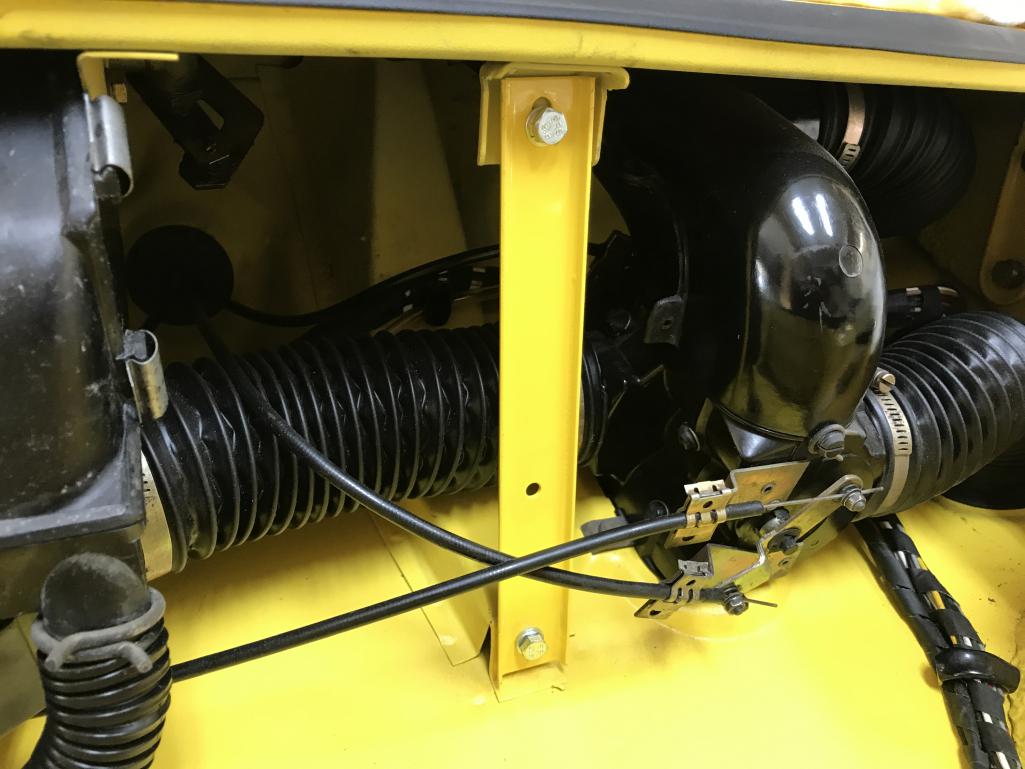
|
|
|
|
| bkrantz |
Jun 30 2021, 07:58 PM
Post
#3216
|
|
914 Guru Group: Members Posts: 8,065 Joined: 3-August 19 From: SW Colorado Member No.: 23,343 Region Association: Rocky Mountains |
Then I got out the frunk hinges. One of these was also at the paint shop.
Attached thumbnail(s) 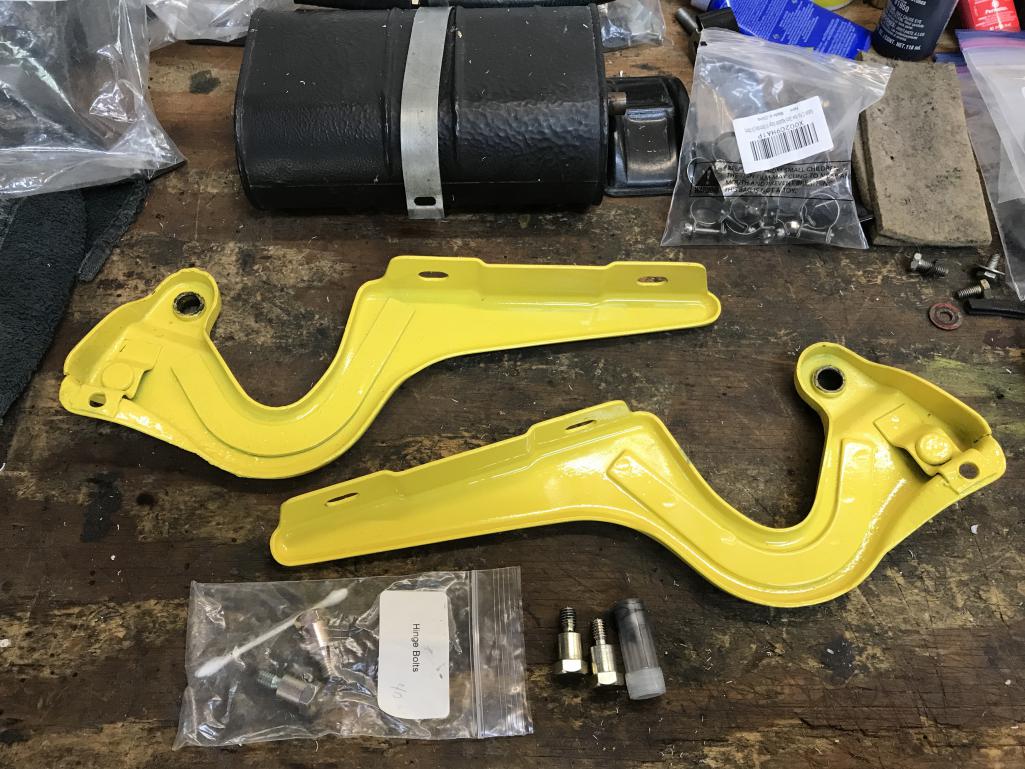
|
|
|
|
| bkrantz |
Jun 30 2021, 08:00 PM
Post
#3217
|
|
914 Guru Group: Members Posts: 8,065 Joined: 3-August 19 From: SW Colorado Member No.: 23,343 Region Association: Rocky Mountains |
I installed those with new pivot bolts, and a bit of grease. This photo shows the repair above the hinge I had to make since the PO let the original hinges get bent and open up into the cowl.
Attached thumbnail(s) 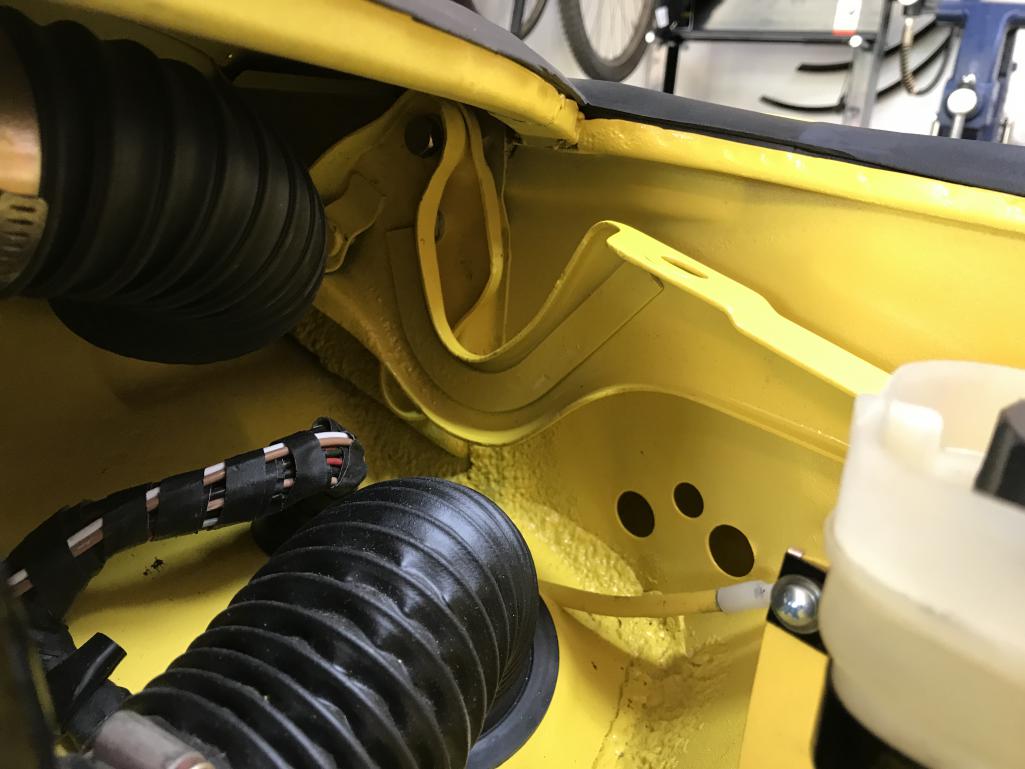
|
|
|
|
| bkrantz |
Jun 30 2021, 08:02 PM
Post
#3218
|
|
914 Guru Group: Members Posts: 8,065 Joined: 3-August 19 From: SW Colorado Member No.: 23,343 Region Association: Rocky Mountains |
Then I got out the frunk lid springs.
Attached thumbnail(s) 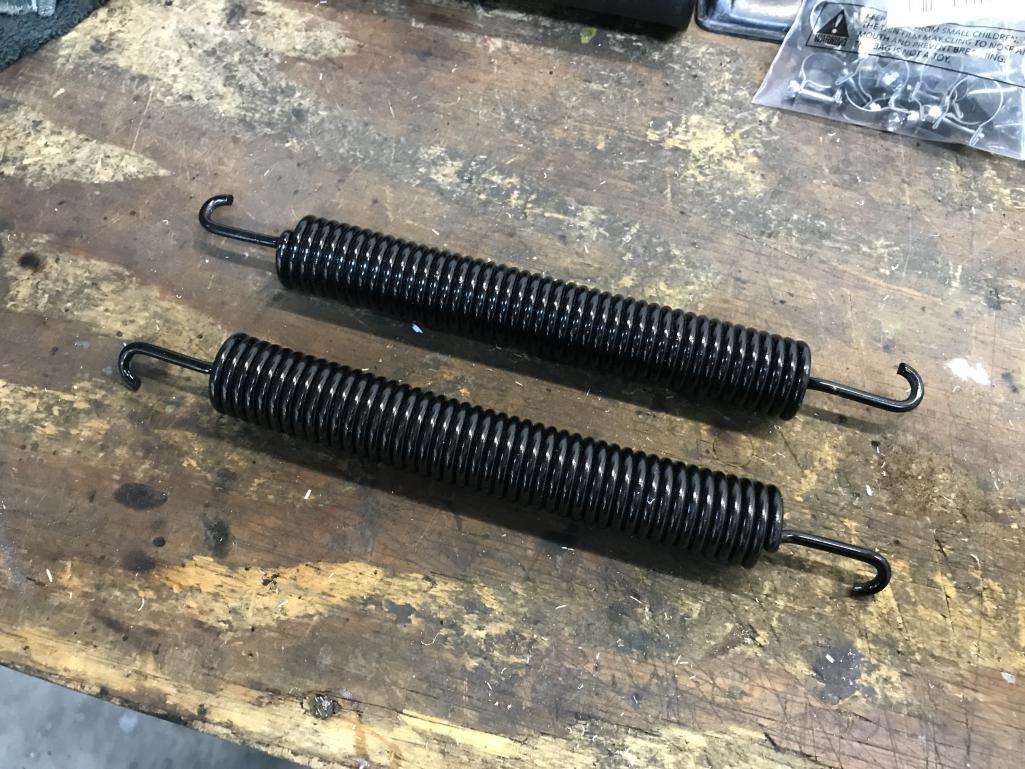
|
|
|
|
| bkrantz |
Jun 30 2021, 08:04 PM
Post
#3219
|
|
914 Guru Group: Members Posts: 8,065 Joined: 3-August 19 From: SW Colorado Member No.: 23,343 Region Association: Rocky Mountains |
Here's my version of using a pry bar against the strut top bushing to pull the spring into place. I put the spring into the second notch for now.
Attached thumbnail(s) 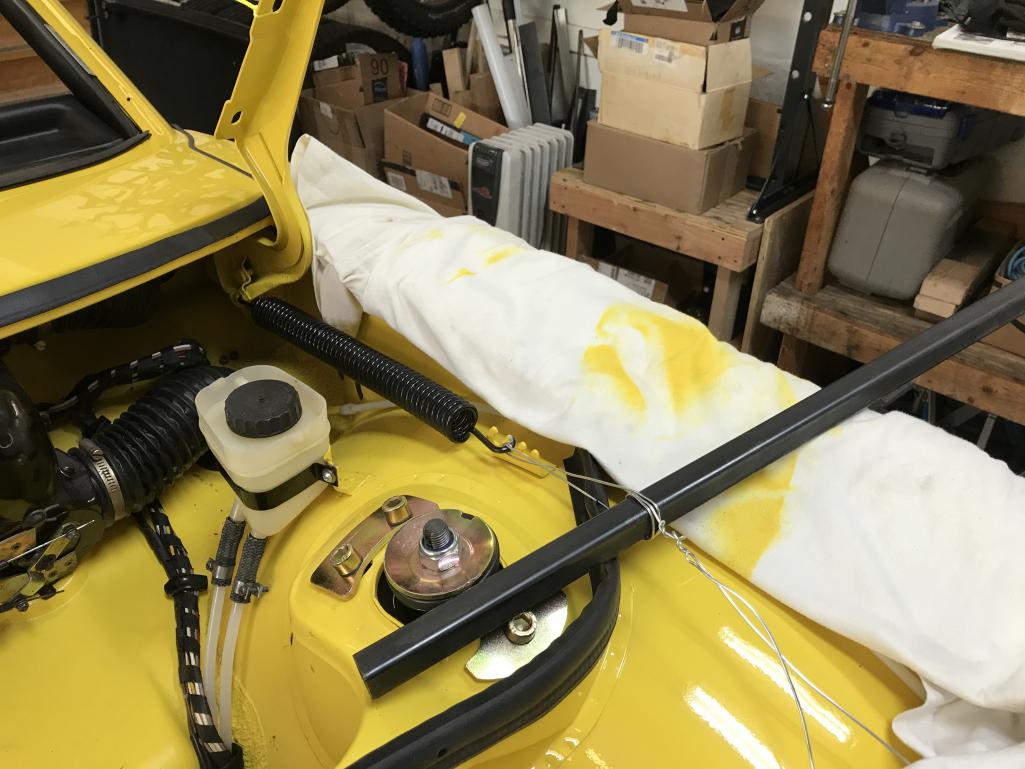
|
|
|
|
| bkrantz |
Jun 30 2021, 08:06 PM
Post
#3220
|
|
914 Guru Group: Members Posts: 8,065 Joined: 3-August 19 From: SW Colorado Member No.: 23,343 Region Association: Rocky Mountains |
Both hinges ready for the frunk lid, once I get the gas tank installed for real.
Attached thumbnail(s) 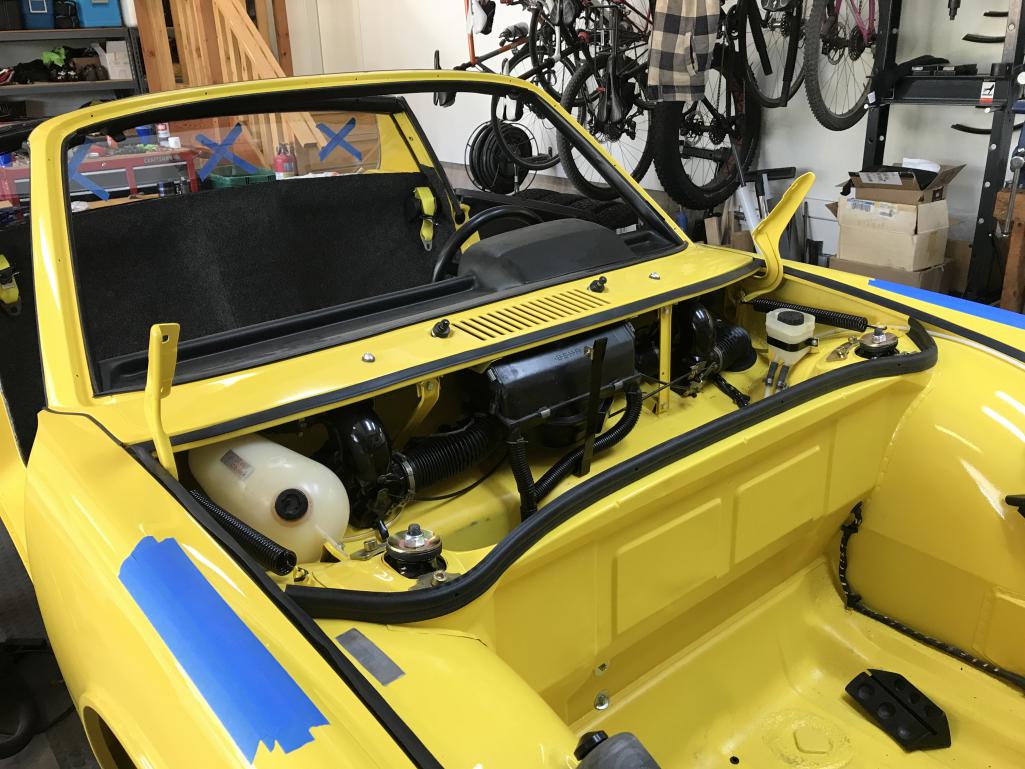
|
|
|
|
|
1 User(s) are reading this topic (1 Guests and 0 Anonymous Users)
0 Members:

|
Lo-Fi Version | Time is now: 26th September 2024 - 09:05 PM |
Invision Power Board
v9.1.4 © 2024 IPS, Inc.