|
|
|
Porsche, and the Porsche crest are registered trademarks of Dr. Ing. h.c. F. Porsche AG.
This site is not affiliated with Porsche in any way. Its only purpose is to provide an online forum for car enthusiasts. All other trademarks are property of their respective owners. |
|
|

  |

| 76-914 |
 Jan 17 2020, 12:08 PM Jan 17 2020, 12:08 PM
Post
#1
|
|
Repeat Offender & Resident Subaru Antagonist  Group: Members Posts: 13,483 Joined: 23-January 09 From: Temecula, CA Member No.: 9,964 Region Association: Southern California |
About 7-8 years ago I installed the trailing arm urethane bushings when doing the Subaru conversion. I really enjoyed how they installed so easily. That was the last time I enjoyed anything about them. The first time that I pulled out of the driveway I heard such a noise I thought something had broken. Within minutes I determined it was the urethane bushings. That noise has been a constant source of irritation if not embarrassment ever since.
Last month I purchased some rubber ones via Elephant racing. I knew what I was getting into as I began the installation. It soon became apparent to me that I needed something other than the tools which elephant supplies. In the pics below you can see that I turned a few additional pieces to aid in the installation. I found that when installing the rod through the first bushing the bushing wants to be pulled into the opening and gets "sucked" in even though I used plenty of glycerine. To get it flush required that it be pushed back out a tad bit. This is where the longer piece of 1.25" copper comes in handy. It is narrow enough to slide inside the arm and big enough to slide over the rod itself. Notice that I hexed the end of the pipe. That makes a larger contact area with the rubber bushing so it won't eat into the bushing itself. Next I hammer the pipe with a 3# slag and pop it back out to the point it is flush again. Repeat the push in/push out 2-3 times, applying lubricant each time and the bushing won't be as prone to being sunk in as easily. After the 3rd time I place the shorter piece of copper which is flush with the bushing & opposite opening then flip it over on the press with the protruding end up. This acts as a brace and keeps the bushing from sinking in. Then press in the rod until there is about 4-5" sticking out. Next, I place the bullet or short tapered piece on the threaded end before I place the 2nd bushing in the arm making sure the rod is centered in the arm. The bushing should just contact the bullet when flush & fully seated. This is to keep the bullet in place when I flip it over. Now the end with the 2nd bushing is placed upon the metal plate and centered with the 1 1/8" hole. I found the plate to be much more stable than the round meal piece when pressure is applied.This opening is just a tad larger than the 1.1" rod. Flip and press the 1st end until the rod penetrates the plate. You'll find the bushing will be about 1/2" short of being flush with the arm. To get it to sit flush I flip the arm over again and with the "proud" bushing on top I placed a 1" x 3/4" pipe bushing over it and pressed the bushing until it was flush. The supplied female tool just would never get the bushing flush as it stops prematurely when contact is made with the flange of the arm. The reducer I used is more narrow that the metal and allowed me to press the bushing in just bit more. Next time I will "turn" a stepped piece that allows more pressure on the inner part of the bushing. I know this verbiage won't make much sense w/o a video but it might help some. I've heard the KY jelly is another lubricant that works, too. (IMG:style_emoticons/default/beerchug.gif) 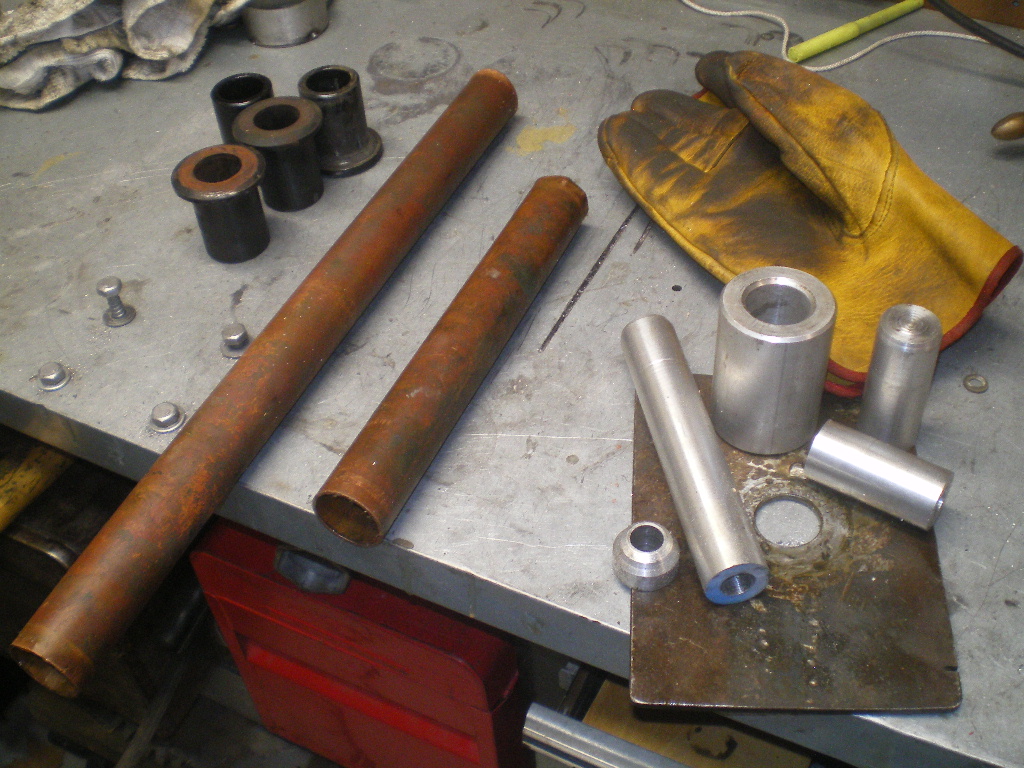 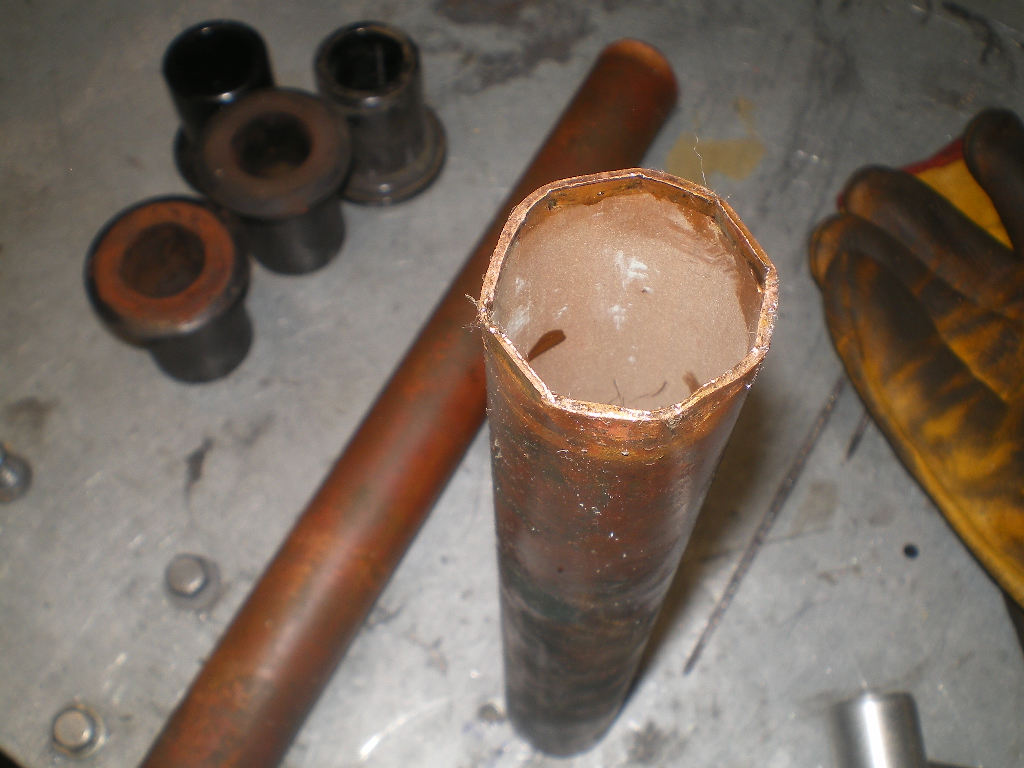 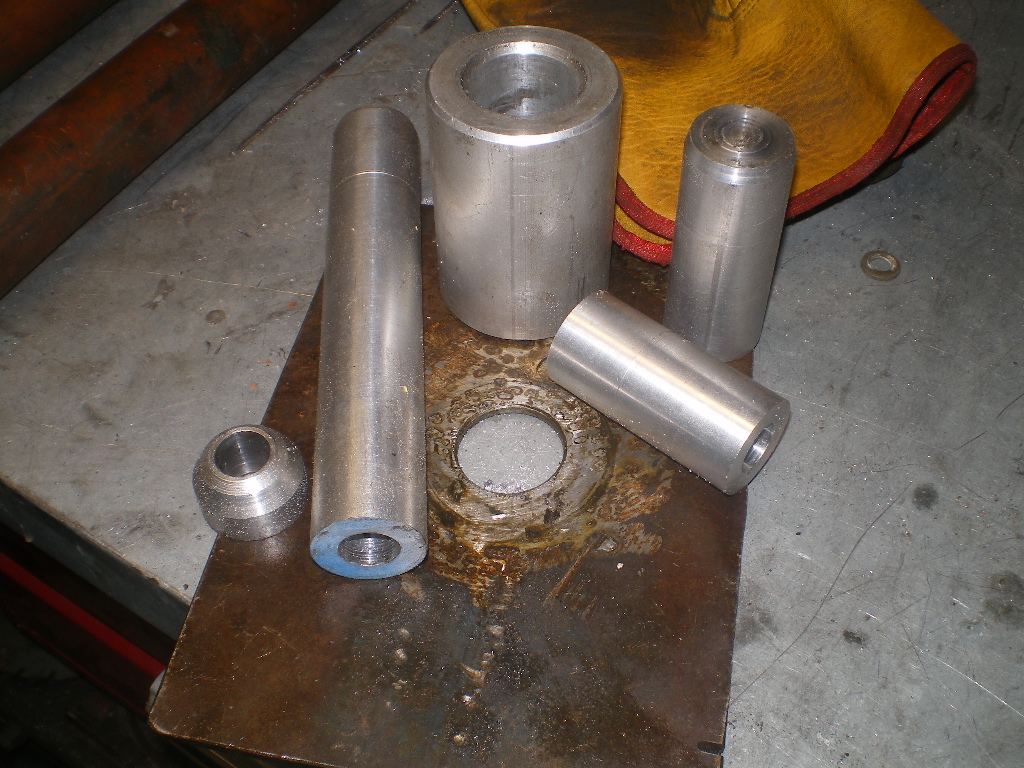 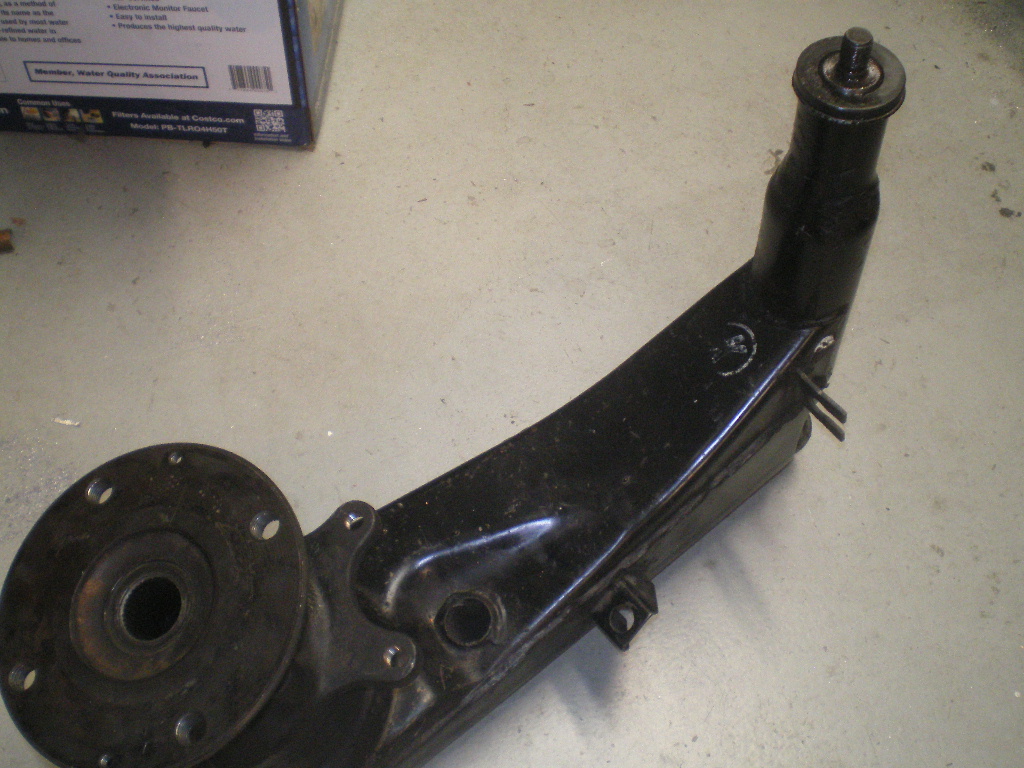 |
   |

 
|
| Tdskip |
Jan 17 2020, 12:26 PM
Post
#2
|
|
Advanced Member Group: Members Posts: 3,678 Joined: 1-December 17 From: soCal Member No.: 21,666 Region Association: None |
Thanks for posting this
|
 |
|
| TargaToy |
Jan 17 2020, 09:09 PM
Post
#3
|
|
-NONSOLIS RADIOS SEDIOUIS FULMINA MITTO- Group: Members Posts: 692 Joined: 26-March 10 From: DelMarVa Peninsula Member No.: 11,509 Region Association: MidAtlantic Region |
Holy smokes. This sounds like every project I ever do. Nothing is just plug n play as it seemingly should be. Thanks a lot for the write up and pics. That's very helpful.
|
|
|
|
| johnhora |
Jan 20 2020, 09:19 PM
Post
#4
|
|
Senior Member Group: Members Posts: 865 Joined: 7-January 03 From: Derby City KY Member No.: 107 Region Association: None |
76-914
with your install did you use a shop press or a pipe clamp thanks |
|
|
|
| 76-914 |
Jan 21 2020, 04:35 PM
Post
#5
|
|
Repeat Offender & Resident Subaru Antagonist Group: Members Posts: 13,483 Joined: 23-January 09 From: Temecula, CA Member No.: 9,964 Region Association: Southern California |
QUOTE(johnhora @ Jan 20 2020, 07:19 PM)  76-914 with your install did you use a shop press or a pipe clamp thanks $99 HF press. Get a helper, another pair hands. It will be much easier. (IMG:style_emoticons/default/beerchug.gif) |
|
|
|
| 914werke |
Oct 23 2020, 04:02 PM
Post
#6
|
|
"I got blisters on me fingers" Group: Members Posts: 9,995 Joined: 22-March 03 From: USofA Member No.: 453 Region Association: Pacific Northwest |
(IMG:style_emoticons/default/icon_bump.gif) @76-914 were all the alum bits supplied by Elephant?
Which ones did you find necessary which were shiet? (IMG:style_emoticons/default/smile.gif) |
|
|
|
|
1 User(s) are reading this topic (1 Guests and 0 Anonymous Users)
0 Members:

|
Lo-Fi Version | Time is now: 18th April 2024 - 10:49 PM |
Invision Power Board
v9.1.4 © 2024 IPS, Inc.