|
|

|
Porsche, and the Porsche crest are registered trademarks of Dr. Ing. h.c. F. Porsche AG.
This site is not affiliated with Porsche in any way. Its only purpose is to provide an online forum for car enthusiasts. All other trademarks are property of their respective owners. |
|
|
  |
| Retroracer |
 Dec 6 2022, 08:26 PM Dec 6 2022, 08:26 PM
Post
#441
|
|
Senior Member    Group: Members Posts: 621 Joined: 7-July 13 From: Bend OR Member No.: 16,100 Region Association: Pacific Northwest 
|
Chris - something to think about: will you still be able to get a socket/spanner on the inner axle pivot bolt with the engine/headers in place? Might a well placed slot in the console "beard" side braces be prudent?
Trying to think ahead here.... and, stunning work thus far! - Tony |
| Krieger |
 Dec 6 2022, 08:26 PM Dec 6 2022, 08:26 PM
Post
#442
|
|
Advanced Member     Group: Members Posts: 4,763 Joined: 24-May 04 From: Santa Rosa CA Member No.: 2,104 Region Association: None 
|
That is the perfect Ferrari to 914 engine mount! It seems so obvious now!
|
| tygaboy |
 Dec 6 2022, 11:30 PM Dec 6 2022, 11:30 PM
Post
#443
|
|
914 Guru      Group: Members Posts: 5,452 Joined: 6-October 15 From: Petaluma, CA Member No.: 19,241 Region Association: Northern California 
|
Chris - something to think about: will you still be able to get a socket/spanner on the inner axle pivot bolt with the engine/headers in place? Might a well placed slot in the console "beard" side braces be prudent? Trying to think ahead here.... and, stunning work thus far! - Tony @Retroracer - Tony - yes, the design allows for a wrench to be able to get at the pivot shaft fastener. It'll be clear once I get to boxing in the console. That said, I'm OK sacrificing (some) service access, but only as a last resort. |
| tygaboy |
 Dec 7 2022, 06:20 PM Dec 7 2022, 06:20 PM
Post
#444
|
|
914 Guru      Group: Members Posts: 5,452 Joined: 6-October 15 From: Petaluma, CA Member No.: 19,241 Region Association: Northern California 
|
Action photo! The cradle's lower bars hang below the chassis so to minimize chance of the fastener snagging, I opted to run a flat head allen - and that requires a 90 degree counter sink. A bit of time spent locating and leveling in both directions and some "mill as a drill press" and we're all set.
Attached thumbnail(s) 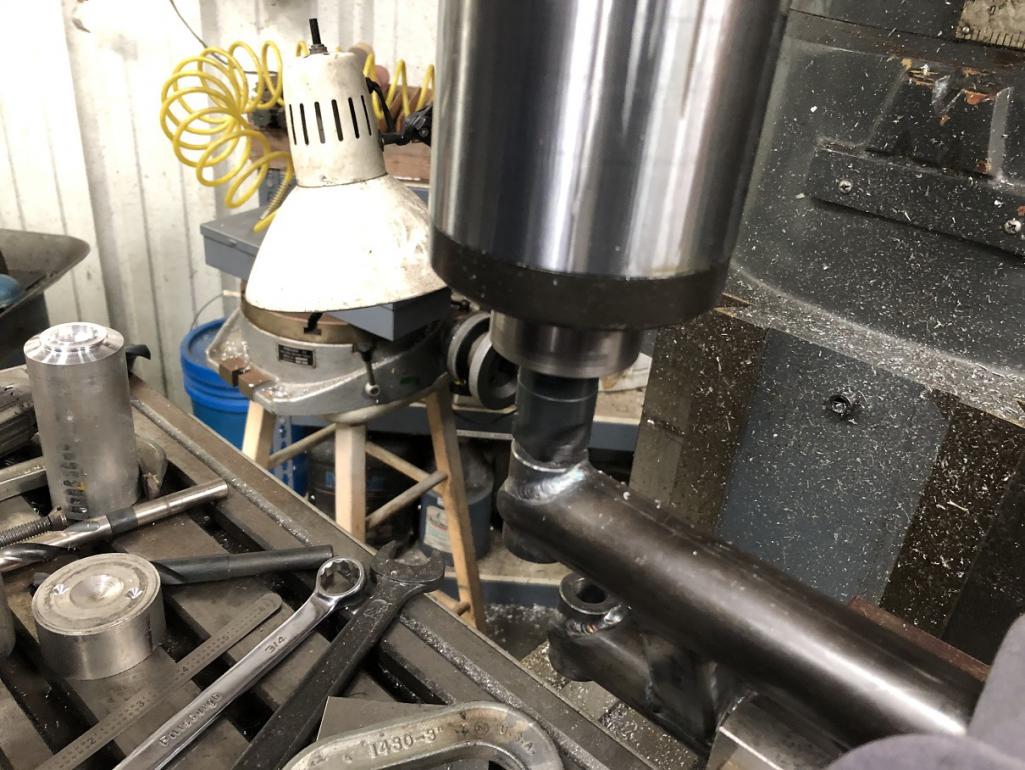
|
| tygaboy |
 Dec 7 2022, 06:22 PM Dec 7 2022, 06:22 PM
Post
#445
|
|
914 Guru      Group: Members Posts: 5,452 Joined: 6-October 15 From: Petaluma, CA Member No.: 19,241 Region Association: Northern California 
|
Countersink, meet fastener. Fastener, Countersink. I predict you won't become simply friends, I know you'll become very close... (IMG:style_emoticons/default/av-943.gif)
Attached thumbnail(s) 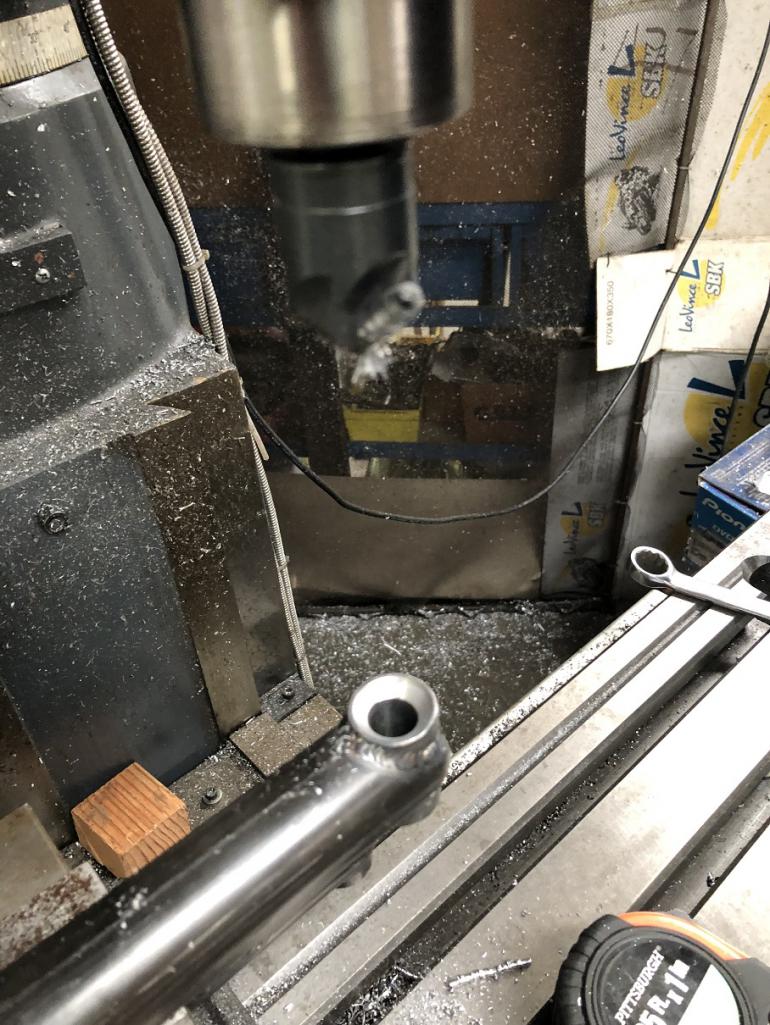 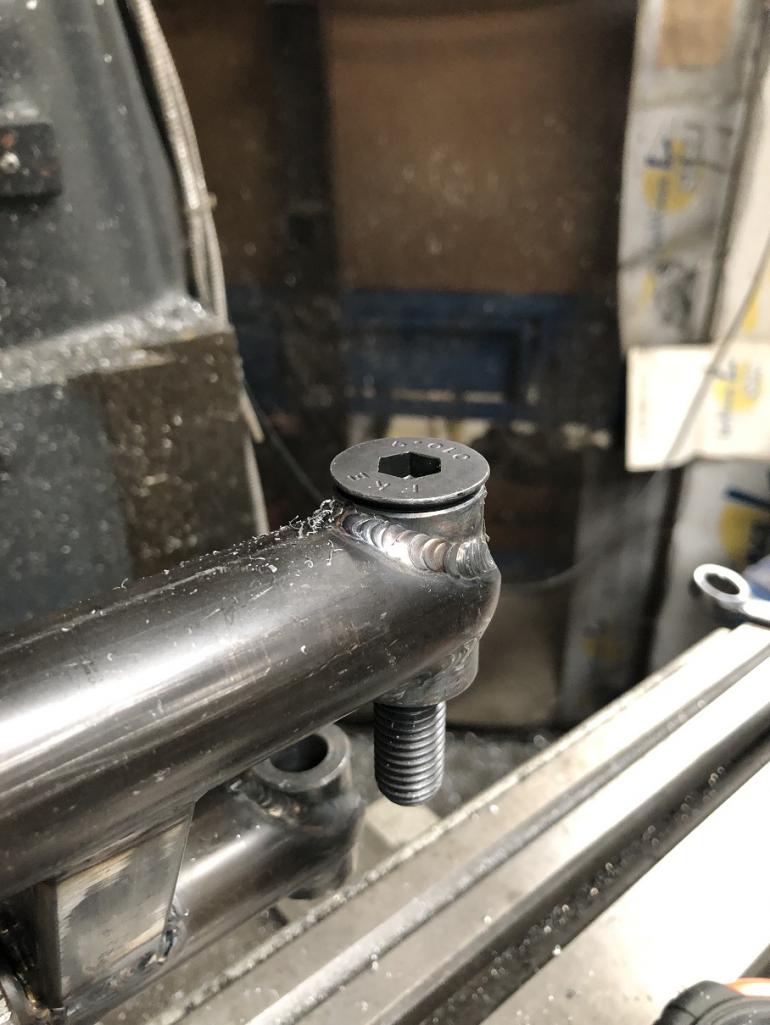
|
| tygaboy |
 Dec 7 2022, 06:28 PM Dec 7 2022, 06:28 PM
Post
#446
|
|
914 Guru      Group: Members Posts: 5,452 Joined: 6-October 15 From: Petaluma, CA Member No.: 19,241 Region Association: Northern California 
|
Next was to cut the bars to length and weld in the threaded bungs. Martin broke out his NHRA rule book experience and mentioned that whenever there was a plug weld, you had to leave a bit of the inner material visible through the outer material and weld so the tech inspector could validate things met the requirements and safety specs. Like you weren't trying to sneak in thinner wall than is required, etc.
The good news is that I can now officially pass tech and drag race this thing! Street Outlaws/No Prep Kings, here I come! (IMG:style_emoticons/default/shades.gif) Attached thumbnail(s) 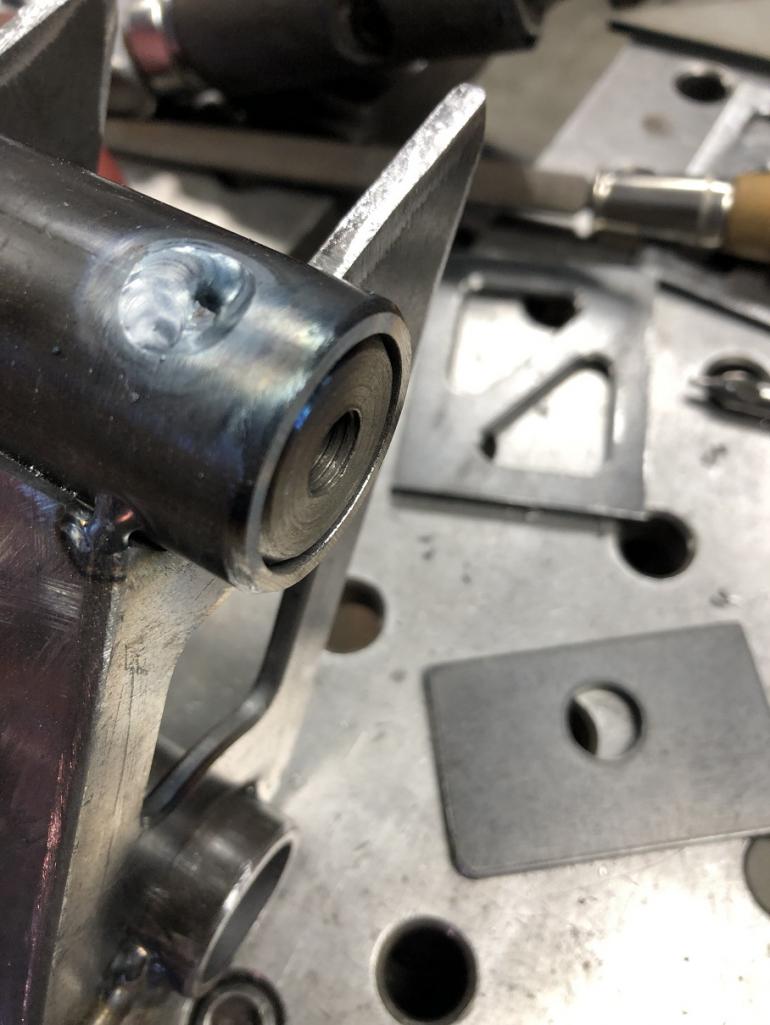
|
| tygaboy |
 Dec 7 2022, 06:30 PM Dec 7 2022, 06:30 PM
Post
#447
|
|
914 Guru      Group: Members Posts: 5,452 Joined: 6-October 15 From: Petaluma, CA Member No.: 19,241 Region Association: Northern California 
|
Martin did a super cool job fuse-welding the bungs to the tubes.
Attached thumbnail(s) 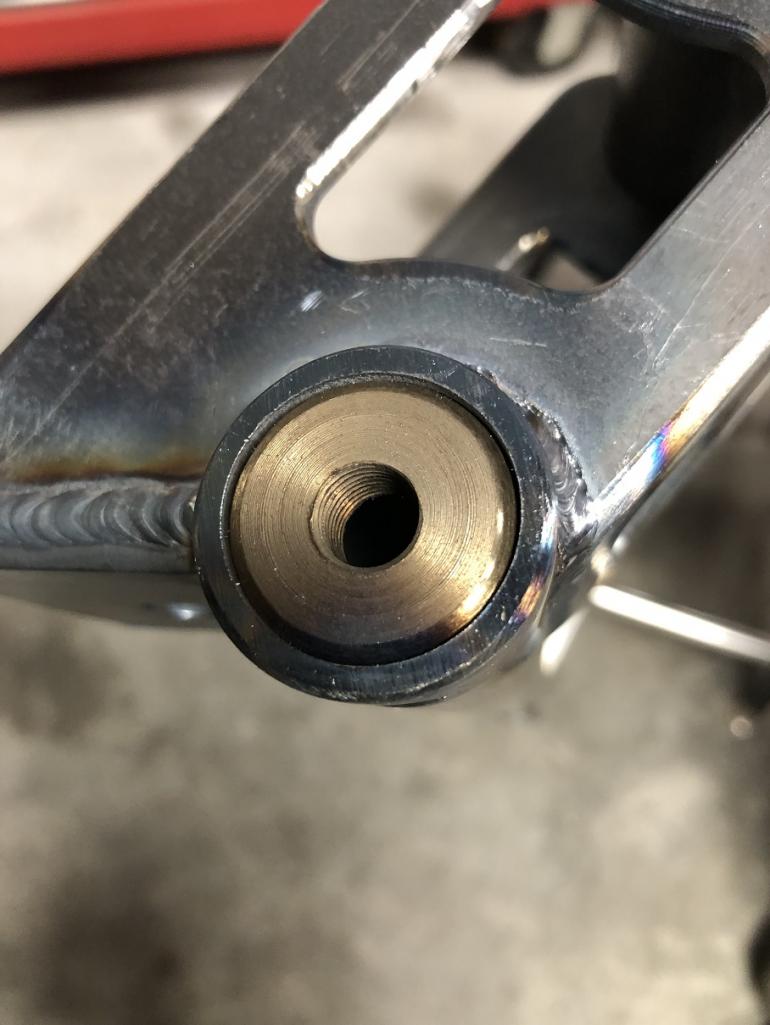 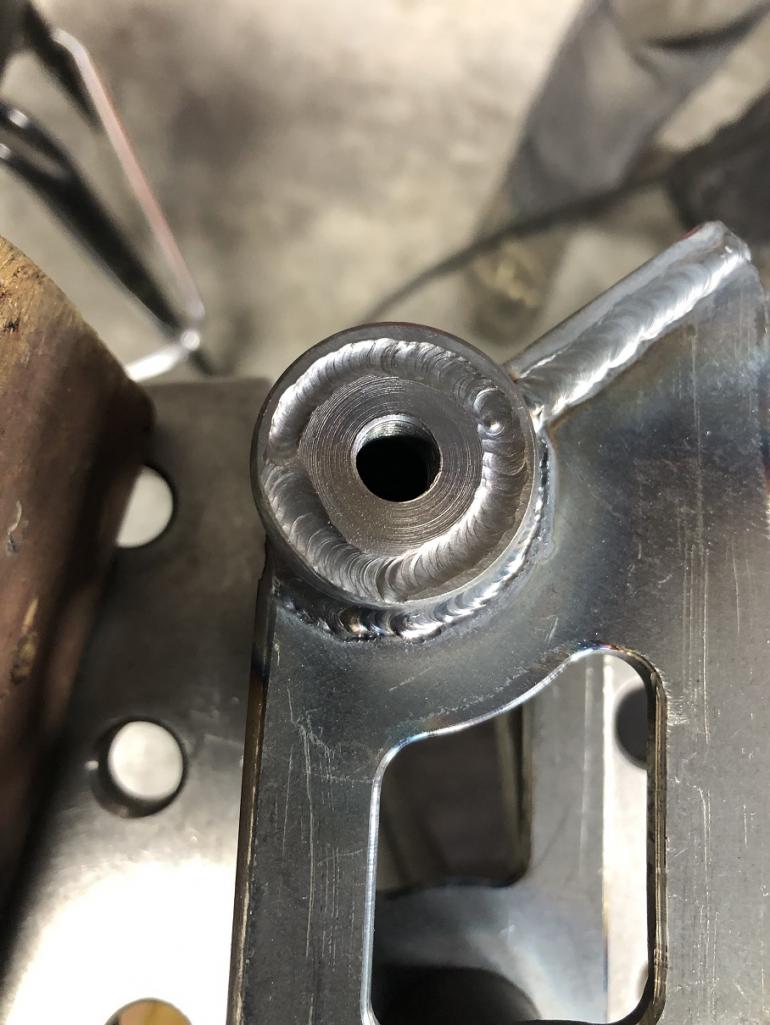
|
| tygaboy |
 Dec 7 2022, 06:34 PM Dec 7 2022, 06:34 PM
Post
#448
|
|
914 Guru      Group: Members Posts: 5,452 Joined: 6-October 15 From: Petaluma, CA Member No.: 19,241 Region Association: Northern California 
|
Major milestone for the cradle: all final welding is complete!
The fire wall tabs are also fit and ready to go. The plan is that tomorrow sees them welded in place. With that done, I'll be able to complete the design and CAD work to make the suspension console pick up mounts. So. Close. (IMG:style_emoticons/default/piratenanner.gif) Attached thumbnail(s) 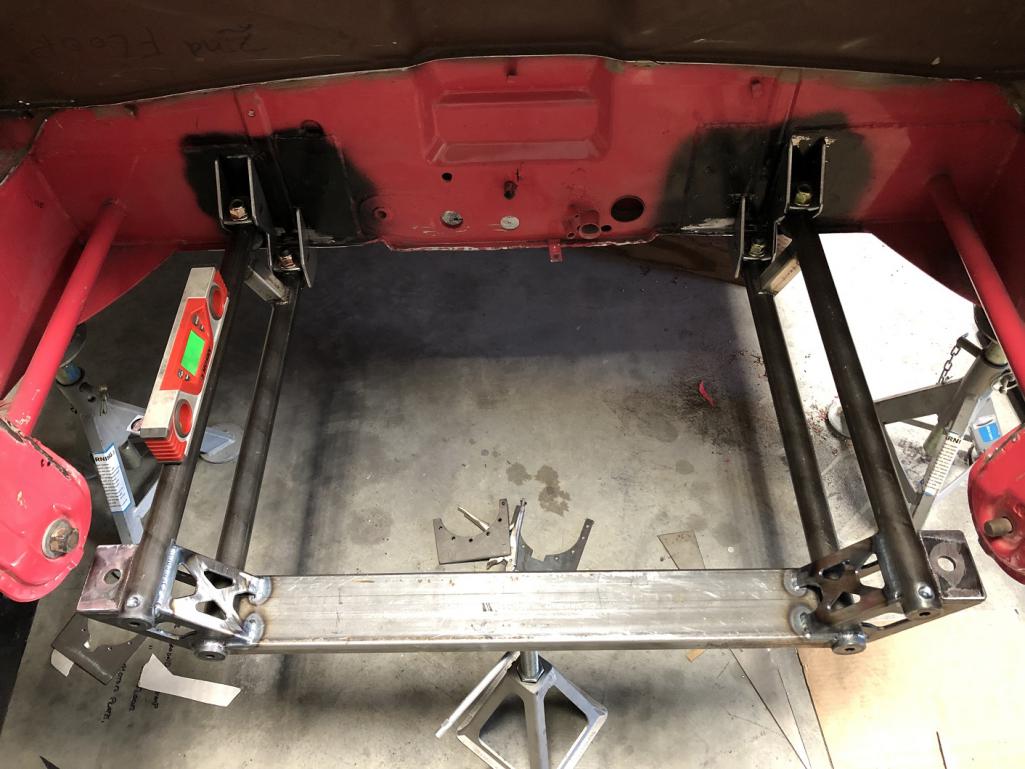
|
| BillC |
 Dec 7 2022, 07:10 PM Dec 7 2022, 07:10 PM
Post
#449
|
|
Senior Member    Group: Members Posts: 555 Joined: 24-April 15 From: Silver Spring, MD Member No.: 18,667 Region Association: MidAtlantic Region 
|
Very cool!
|
| Tferrer |
 Dec 8 2022, 09:45 AM Dec 8 2022, 09:45 AM
Post
#450
|
|
Newbie  Group: Members Posts: 7 Joined: 5-October 22 From: Bay Area Member No.: 26,896 Region Association: Northern California |
Just catching up with this thread. AMAZING work, Chris. Utterly amazing...
|
| Cairo94507 |
 Dec 8 2022, 09:49 AM Dec 8 2022, 09:49 AM
Post
#451
|
|
Michael           Group: Members Posts: 10,093 Joined: 1-November 08 From: Auburn, CA Member No.: 9,712 Region Association: Northern California 
|
Wow- Martin's welds are works of art. The whole cradle is amazing. (IMG:style_emoticons/default/smilie_pokal.gif) (IMG:style_emoticons/default/beerchug.gif)
|
| tygaboy |
 Dec 8 2022, 03:25 PM Dec 8 2022, 03:25 PM
Post
#452
|
|
914 Guru      Group: Members Posts: 5,452 Joined: 6-October 15 From: Petaluma, CA Member No.: 19,241 Region Association: Northern California 
|
OK, let's see just how far away I can take this from 914 content. (IMG:style_emoticons/default/lol-2.gif)
WARNING: Potentially boring content alert!! Whenever making mounts that locate other items using a bolt, it's obvious you want to align all the holes as accurately as possible. In production situations with their plus/minus and variation, alignment is generally accomodated with slots and/or holes with a bit more 'slop' than you'd think was needed. Look at the 914 engine bar's outside mount - there's the vertical bolt and its slop to the hole in the bar, then the bolt's slop to the U-shaped plate that sits on the chassis' mounting plate and the slop between the two bolts to the U-shaped plate and to the chassis mount plate... In all, LOTS of room to move things around so everything can be assembled. Jokes about how I do things over and over aside (!), I don't have to think about "production" so I get to (have to? (IMG:style_emoticons/default/blink.gif) ) work with tighter tolerances. In the case of the cradle mounts, I do have clearance between the bolts and everything through which they'll pass. But how to control the available fastener clearance? I don't want to risk the slop all ending up to one side, making things tight on the other side. That'd make assembly lots less fun. So, to manage that, here's a fabrication best practice: slice up an aluminum can and wrap the fastener and anything it passes through to ensure the fastener is centered in everything! Now you know you've removed any "slop bias" and things will be nicely aligned, come assembly time. Is this sort of prep tedious and time consuming? Yes, it is. Especially that 1/8" strip for the tab! But also a worthwhile. Particularly if you're a bit OCD, like me. Attached thumbnail(s) 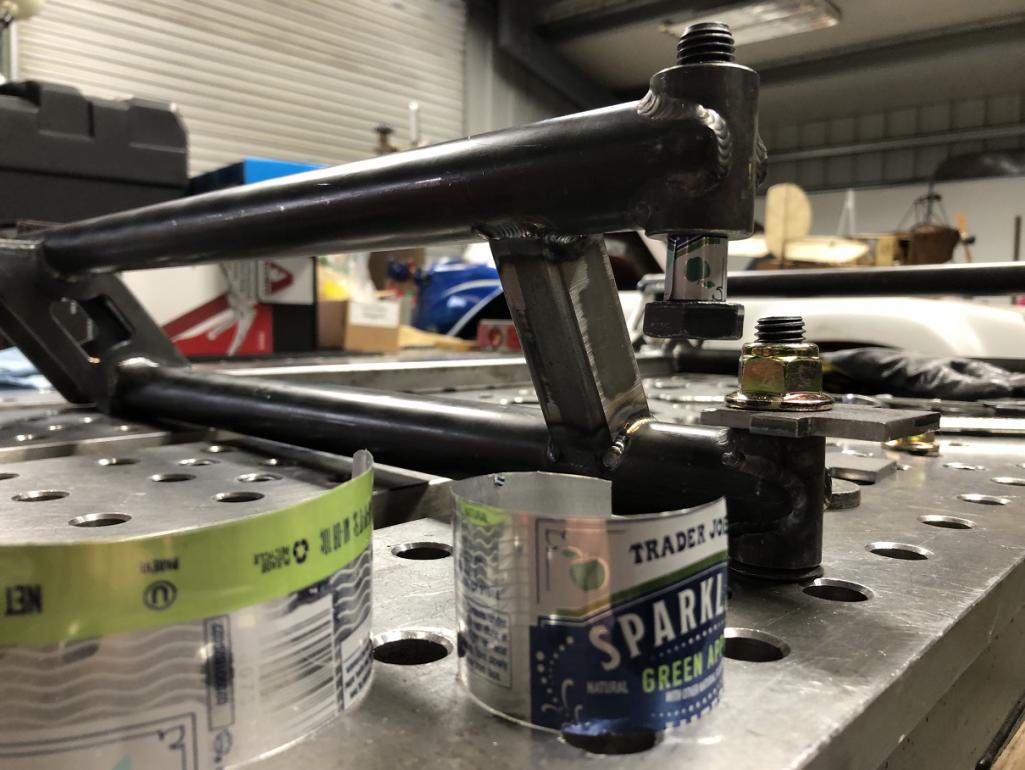 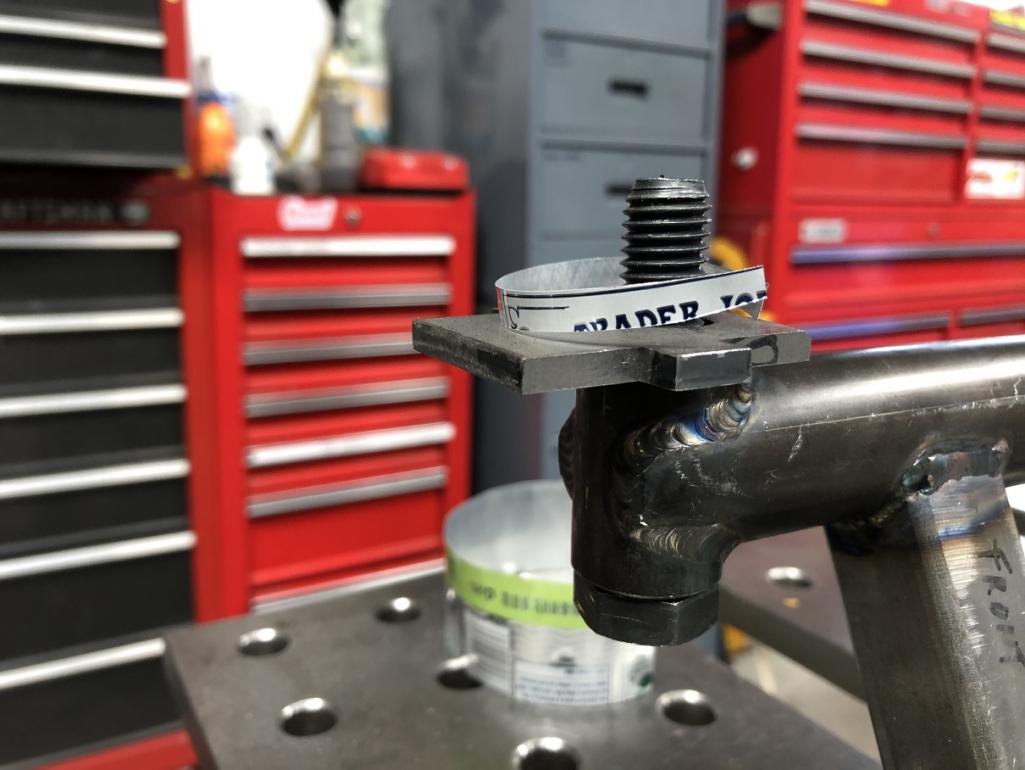
|
| cooler |
 Dec 9 2022, 01:02 PM Dec 9 2022, 01:02 PM
Post
#453
|
|
"Very Interesting!"  Group: Members Posts: 32 Joined: 6-December 11 From: British Columbia Member No.: 13,865 Region Association: Canada |
beautiful fabrication work! Are you going to add any triangulation members or rely completely on moment transferring connections?
|
| tygaboy |
 Dec 9 2022, 03:31 PM Dec 9 2022, 03:31 PM
Post
#454
|
|
914 Guru      Group: Members Posts: 5,452 Joined: 6-October 15 From: Petaluma, CA Member No.: 19,241 Region Association: Northern California 
|
beautiful fabrication work! Are you going to add any triangulation members or rely completely on moment transferring connections? The engine mounts and related bracing have yet to be added. Once that's all in place, we'll see what's what and if it appears it'll need anything more. |
| roundtwo |
 Dec 10 2022, 12:42 AM Dec 10 2022, 12:42 AM
Post
#455
|
|
Member   Group: Members Posts: 311 Joined: 9-February 20 From: Petaluma, CA Member No.: 23,905 Region Association: Central California 
|
Martin did a super cool job fuse-welding the bungs to the tubes. Slick (IMG:style_emoticons/default/beer3.gif) |
| horizontally-opposed |
 Dec 10 2022, 10:57 AM Dec 10 2022, 10:57 AM
Post
#456
|
|
Advanced Member     Group: Members Posts: 3,445 Joined: 12-May 04 From: San Francisco Member No.: 2,058 Region Association: None 
|
Look at the 914 engine bar's outside mount - there's the vertical bolt and its slop to the hole in the bar, then the bolt's slop to the U-shaped plate that sits on the chassis' mounting plate and the slop between the two bolts to the U-shaped plate and to the chassis mount plate... In all, LOTS of room to move things around so everything can be assembled. Question warning, as you might get mad at me for asking it now (maybe it was discussed earlier and I missed it), but: What's the plan for NVH isolation? (IMG:style_emoticons/default/poke.gif) I remember Richard Parr telling me about a customer who had a rough go trying to get his engine running right until they figured out the problem was driven by vibrations from the engine being hard-mounted to the chassis. (And no, I didn't think about this until you reminded me of the design of the 914 engine mounts…which include the transmission mounts…which got me to thinking about the cool solid engine/trans mounts Parr was talking about.) |
| tygaboy |
 Dec 10 2022, 11:45 AM Dec 10 2022, 11:45 AM
Post
#457
|
|
914 Guru      Group: Members Posts: 5,452 Joined: 6-October 15 From: Petaluma, CA Member No.: 19,241 Region Association: Northern California 
|
Look at the 914 engine bar's outside mount - there's the vertical bolt and its slop to the hole in the bar, then the bolt's slop to the U-shaped plate that sits on the chassis' mounting plate and the slop between the two bolts to the U-shaped plate and to the chassis mount plate... In all, LOTS of room to move things around so everything can be assembled. Question warning, as you might get mad at me for asking it now (maybe it was discussed earlier and I missed it), but: What's the plan for NVH isolation? (IMG:style_emoticons/default/poke.gif) I remember Richard Parr telling me about a customer who had a rough go trying to get his engine running right until they figured out the problem was driven by vibrations from the engine being hard-mounted to the chassis. (And no, I didn't think about this until you reminded me of the design of the 914 engine mounts…which include the transmission mounts…which got me to thinking about the cool solid engine/trans mounts Parr was talking about.) @horizontally-opposed Pete - Yes, the cradle will be hard-mounted to the chassis but the factory Ferrari rubber mounts are being retained at the trans hanger and both sides' engine mounts. So isolation-wise, it's identical to how it was mounted in the 360. |
| tygaboy |
 Dec 10 2022, 11:48 AM Dec 10 2022, 11:48 AM
Post
#458
|
|
914 Guru      Group: Members Posts: 5,452 Joined: 6-October 15 From: Petaluma, CA Member No.: 19,241 Region Association: Northern California 
|
OK, I'm a slacker. I had designs on doing a big(ger) deal YouTube channel for this build but that's just not in the cards. So, I'll just start and keep posting the vids I've done. Note these are essentially raw footage so no complaining! (IMG:style_emoticons/default/poke.gif)
For a while, these'll take you back to previously completed work but maybe you'll enjoy seeing some add'l details on what's gone into this build. Here's "Day 1": https://www.youtube.com/watch?v=9ONAEuWHrIc |
| KELTY360 |
 Dec 10 2022, 03:45 PM Dec 10 2022, 03:45 PM
Post
#459
|
|
914 Neferati      Group: Members Posts: 5,089 Joined: 31-December 05 From: Pt. Townsend, WA Member No.: 5,344 Region Association: Pacific Northwest 
|
Particularly if you're a bit OCD, like me. A bit OCD.....? Sorry, couldn't let that pass unnoticed. (IMG:style_emoticons/default/aktion035.gif) |
| tygaboy |
 Dec 10 2022, 05:16 PM Dec 10 2022, 05:16 PM
Post
#460
|
|
914 Guru      Group: Members Posts: 5,452 Joined: 6-October 15 From: Petaluma, CA Member No.: 19,241 Region Association: Northern California 
|
More about how the sausage is made:
Getting ready to final weld the fire wall tabs. To make it simple to get everything centered, I took a piece of scrap and made up a "centering plate". The center is marked in Sharpie / pointed out with the arrow. This will align with a center mark on the fire wall and set the left/right location. What about up/down, you ask? The fire wall tabs were designed with with a notch that fits the lip on the lower edge of where the fire wall meets the floor. Those locations were determined by eyeballing where I wanted the bottom of the drive train to end up in relation to that lip. Attached thumbnail(s) 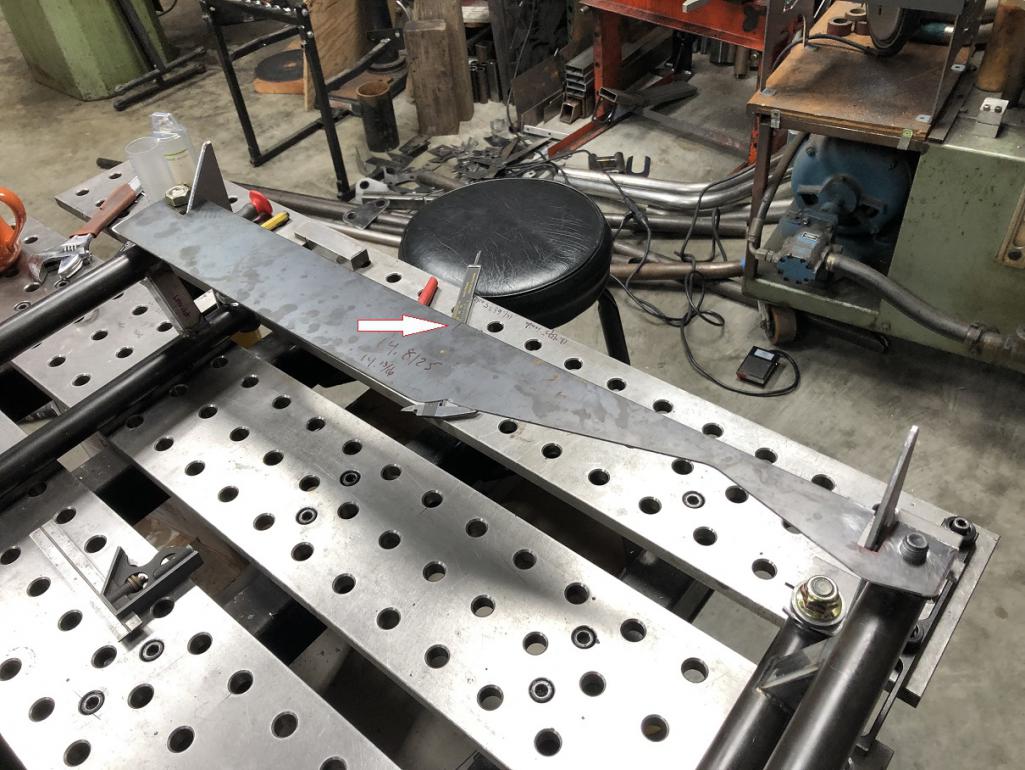
|
  |
5 User(s) are reading this topic (5 Guests and 0 Anonymous Users)
0 Members:

|
Lo-Fi Version | Time is now: 23rd November 2024 - 02:35 PM |
Invision Power Board
v9.1.4 © 2024 IPS, Inc.


