|
|
|
Porsche, and the Porsche crest are registered trademarks of Dr. Ing. h.c. F. Porsche AG.
This site is not affiliated with Porsche in any way. Its only purpose is to provide an online forum for car enthusiasts. All other trademarks are property of their respective owners. |
|
|

  |

| doug_b_928 |
 May 23 2023, 08:06 AM May 23 2023, 08:06 AM
Post
#21
|
|
Senior Member  Group: Members Posts: 703 Joined: 17-January 13 From: Winnipeg Member No.: 15,382 Region Association: Canada |
Points well taken from both sides.
If it was removed it looks to me like the only way to get to the spot welds on the underside would be a belt sander, which probably also means welding in a new flange once the piece is out (maybe would be needed anyway). Looking at this pic of a NOS quarter from Montreal914's thread, I've added green dots where the spot welds go through two layers and lines where it looks to me like cuts would be needed. @Montreal914 does this look correct? It looks to me like once the spot welds are removed through the double wall part of the quarter, then cuts could be made inlcuding a cut through the vertical piece that attaches to the top of the door pillar (don't think it would be possible to even see those spot welds (assuming there are some) let alone see them. 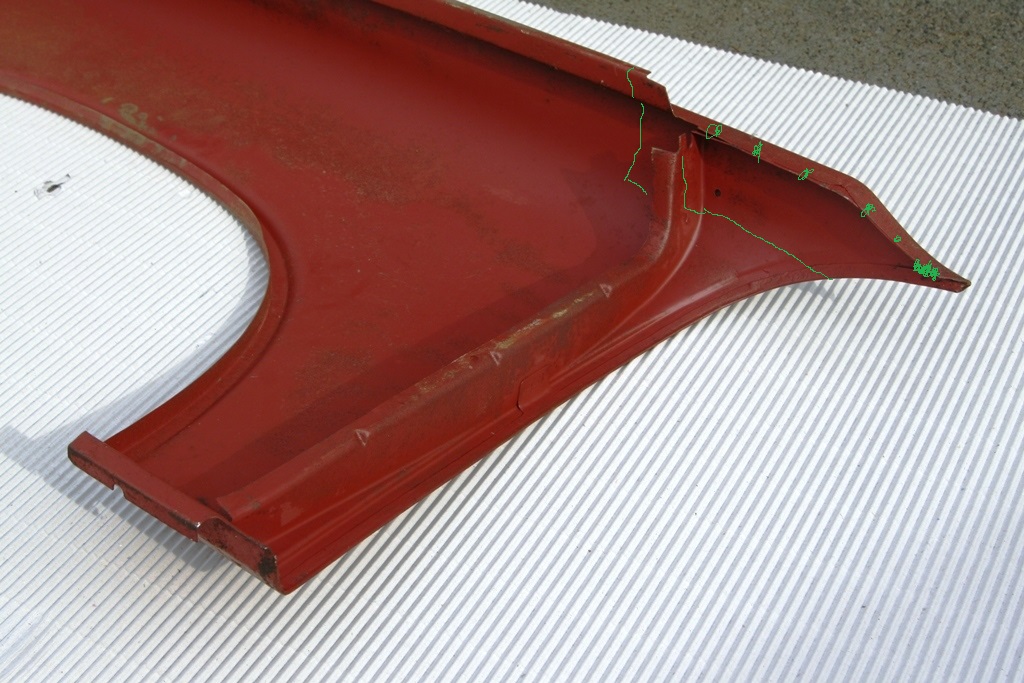 |
   |

 
|
| mgphoto |
May 23 2023, 09:45 AM
Post
#22
|
|
"If there is a mistake it will find me" Group: Members Posts: 1,363 Joined: 1-April 09 From: Los Angeles, CA Member No.: 10,225 Region Association: Southern California |
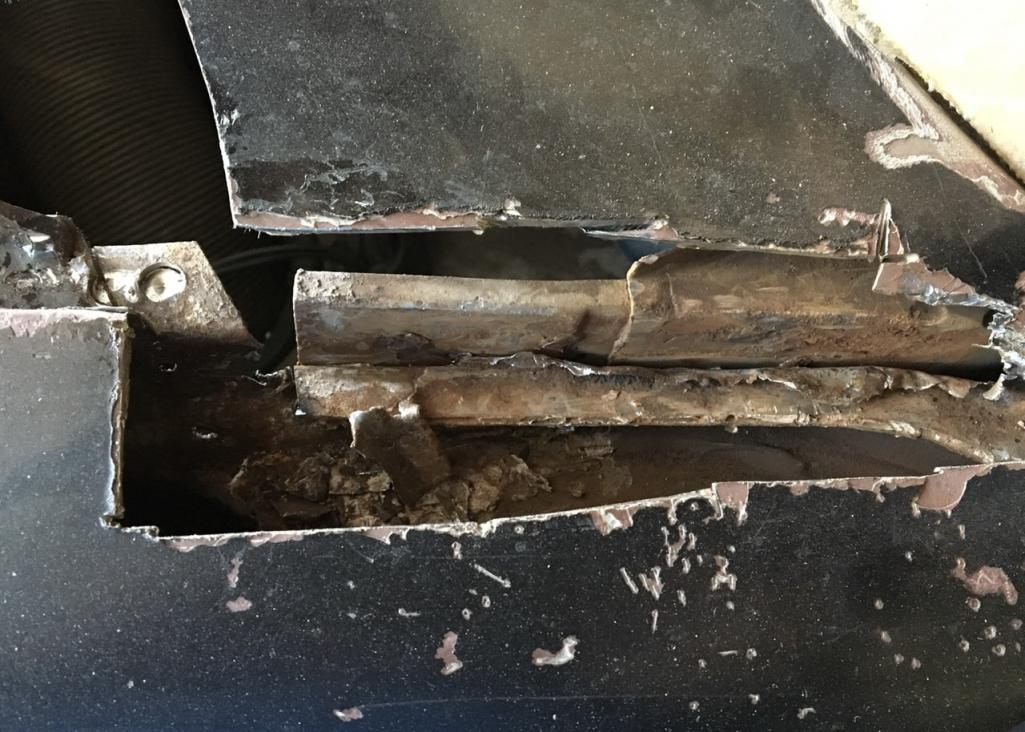
This is what Navel Jelly looks like after 30 years. The cuts are to make it easier to remove.
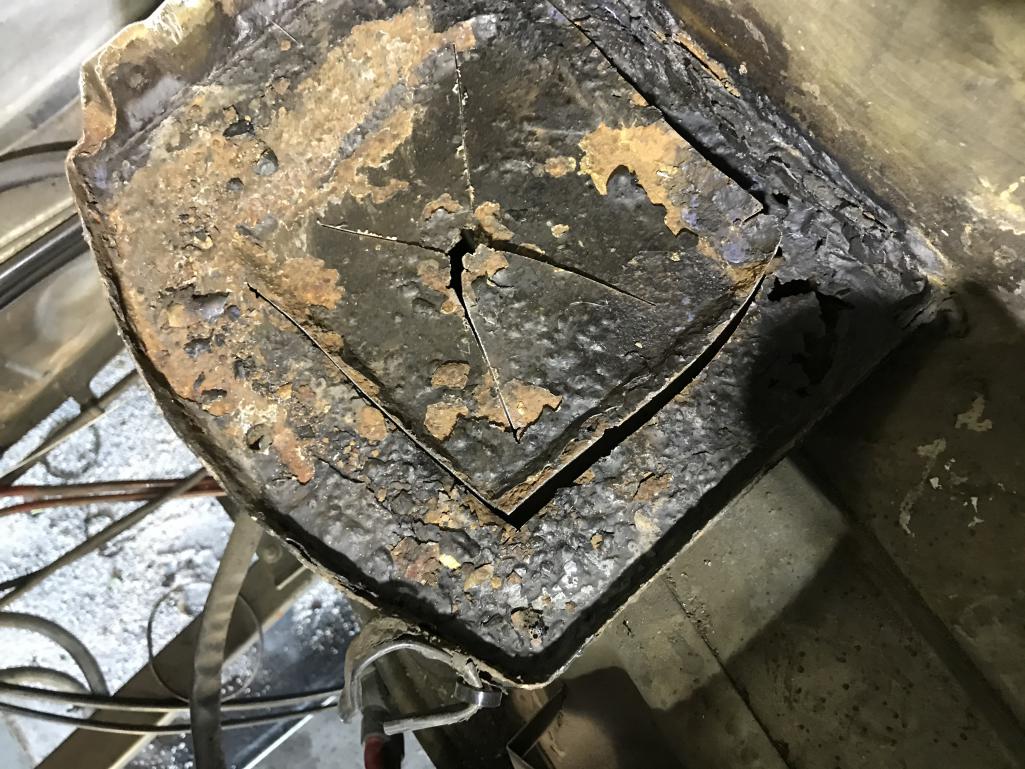 It did it’s job but a permanent fix is needed. |
 |
|
| mgphoto |
May 23 2023, 09:59 AM
Post
#23
|
|
"If there is a mistake it will find me" Group: Members Posts: 1,363 Joined: 1-April 09 From: Los Angeles, CA Member No.: 10,225 Region Association: Southern California |
I was forced to make this repair, they tell you in body shop school always replace the latch when making a damage repair to a hood, I didn’t, the latch let go and the hood destroyed the cowl.
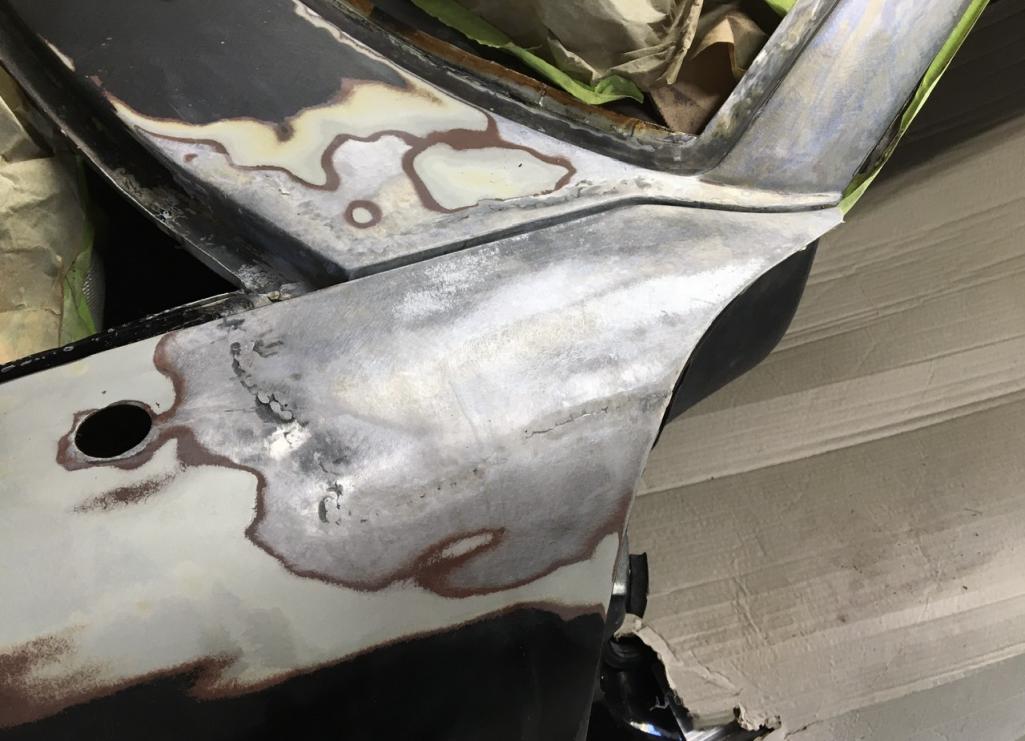 The cowl and fender were rotted, the replacement was from a ‘76 which had the radio aerial on the opposite side, hence the difference in the slope of the fender. I was able to separate the two pieces repair the metal adequately, weld them back in place. |
|
|
|
| mgphoto |
May 23 2023, 10:18 AM
Post
#24
|
|
"If there is a mistake it will find me" Group: Members Posts: 1,363 Joined: 1-April 09 From: Los Angeles, CA Member No.: 10,225 Region Association: Southern California |
I looked for some of the photos I took, this is the cowl section I used, it was more difficult than most as I needed to save both sections, this is before the new sections were available.
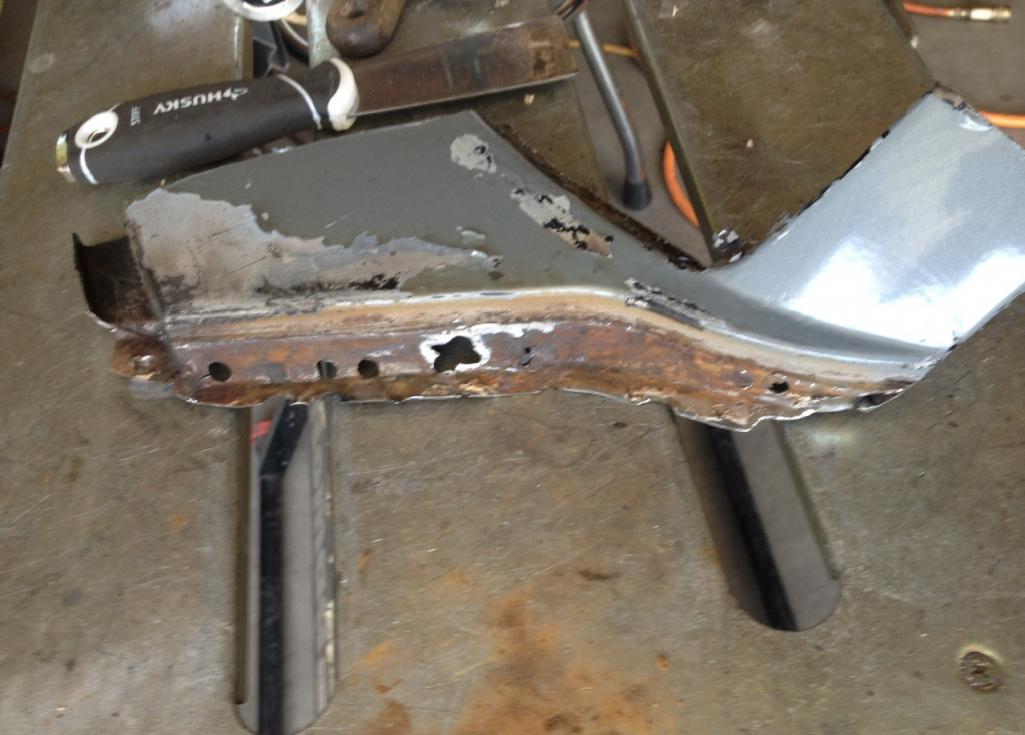 You can see here that the rust is surface mostly and after some tig work I can even use the drill holes for plug welds. |
|
|
|
| mgphoto |
May 23 2023, 11:14 AM
Post
#25
|
|
"If there is a mistake it will find me" Group: Members Posts: 1,363 Joined: 1-April 09 From: Los Angeles, CA Member No.: 10,225 Region Association: Southern California |
I found more photos of the repair.
 I cut the fender back in small sections till I get the work space I need.  Once I have enough working space I remove all signs of rust. 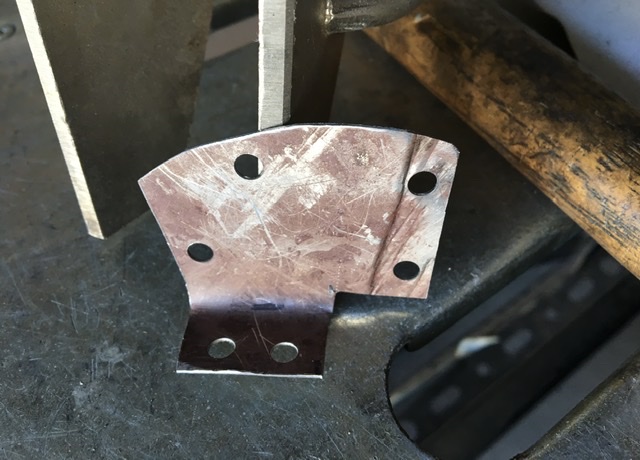 This piece had to be fashioned to close the gap where rust has been removed. 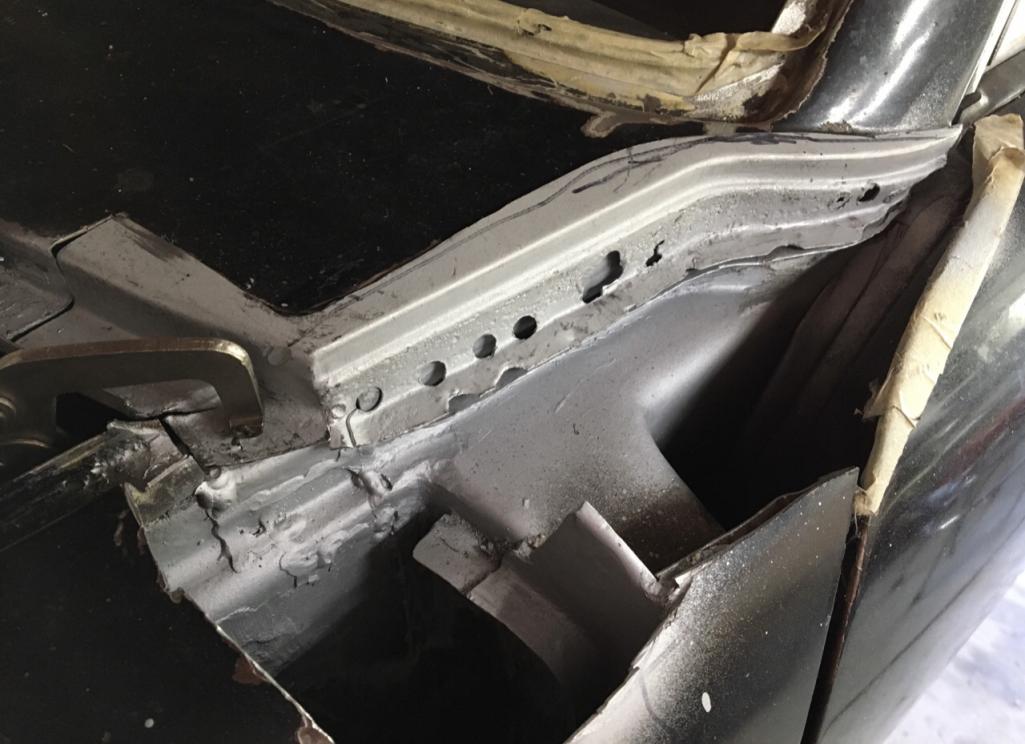 If the process takes me a bit of time, I coat the parts in zinc based weld through primer, (it’s easily removed with paint thinner as it doesn’t have binders in the paint), also if I don’t remove it from creases and folds it is great rust protection. 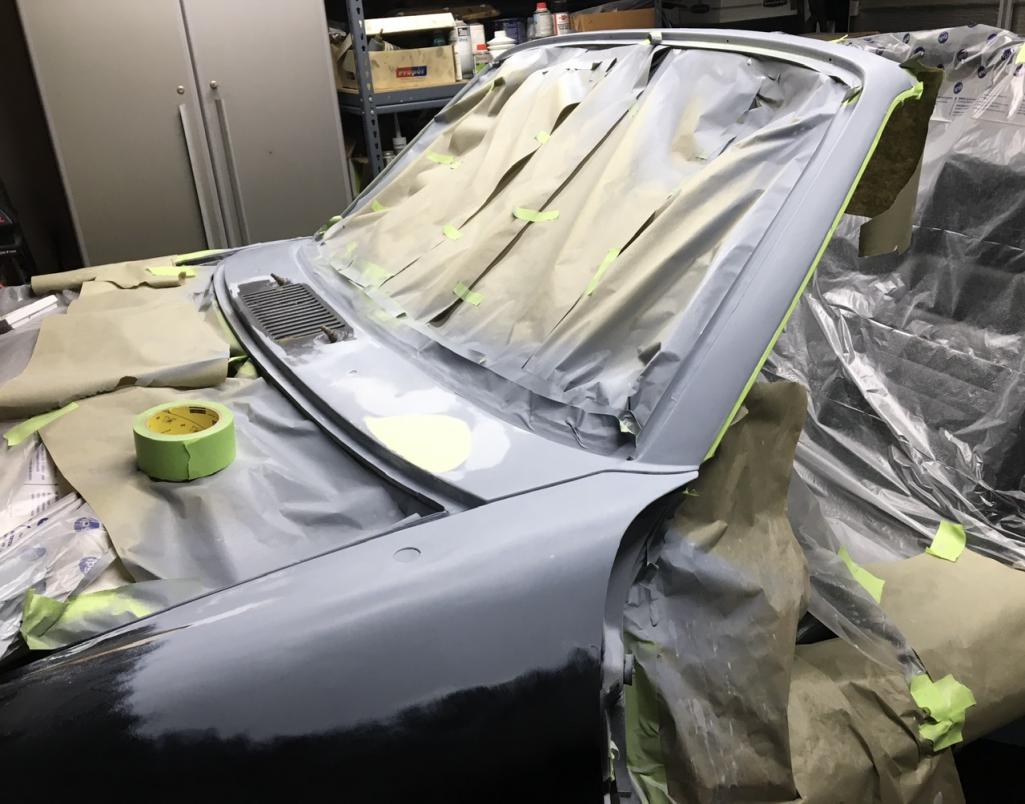 It takes a fair amount of time but the results are well worth it. |
|
|
|
| doug_b_928 |
May 23 2023, 02:09 PM
Post
#26
|
|
Senior Member Group: Members Posts: 703 Joined: 17-January 13 From: Winnipeg Member No.: 15,382 Region Association: Canada |
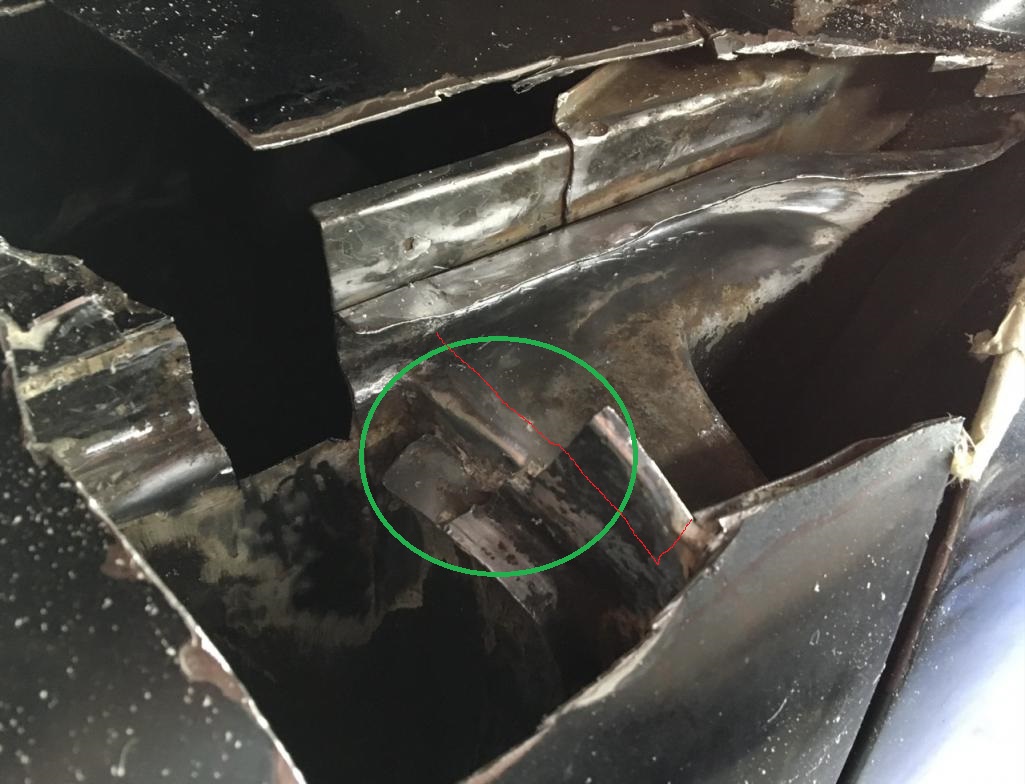
Nice work. In my case I'd be trying to save, repair, and reuse the quarter piece that I'd cut out. On your image below, I've drawn a green ellipse around the vertical part that sits on top of the door post. You appear to have removed a chunk including where it spot welds to the door post. The red line is where I'm thinking I could cut. Then upon re-installation of the quarter section I could butt weld along that seam where I'd made the cut. I find this area a bit abstract to look at so I'm trying to ensure that I understand how this location all goes together (e.g., took me a while to figure out that the back part of the top of the quarter is double layered).
 |
|
|
|
| Montreal914 |
May 23 2023, 09:52 PM
Post
#27
|
|
Senior Member Group: Members Posts: 1,675 Joined: 8-August 10 From: Claremont, CA Member No.: 12,023 Region Association: Southern California |
This is a pretty complex area. From one of your picture my concern is here:
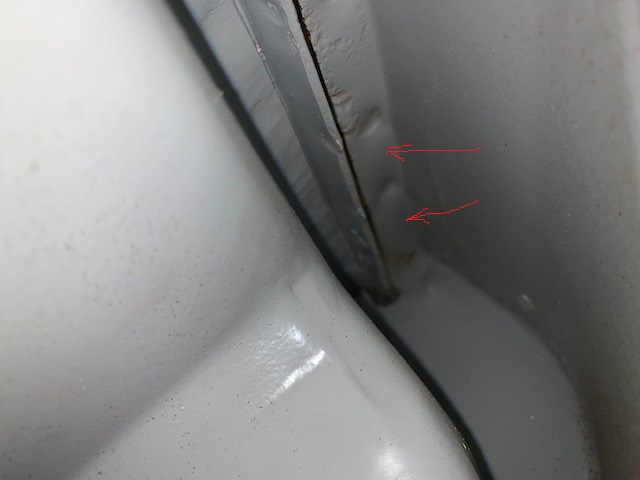 Where the arrows are pointing the metal is bulging. Why is that? Well that is because there is rust in between the 2 layers there and it is pushing the metal out yet the spot welds keep this together. So the question is how to go in there. (IMG:style_emoticons/default/idea.gif) The green circle you have in mgphoto's picture is near the "upside down "J" (for lack of better description) joint between the inner layer of the fender (refer to the OEM fender picture), and the area in front of the door. That would be a real pain to drill the spot welds there. So your suggestion of the horizontal cut above it and butt weld seems like a possible solution. Edit: I guess using the narrow belt sander you might be able to reach the spot welds but you will have to grind the two fender layers to get to the spot welds that are bonding to the cowl. I would do the other cuts first, then maybe you will be able to pull out the fender and rip at the cowl. It will be bad anyway and you will need to repair it. The fender might not be too bad. The weakest link will let go first. So is there a gain to want to use the belt sander? In the end it will damage pretty badly that area. (IMG:style_emoticons/default/sad.gif) |
|
|
|
| mgphoto |
May 23 2023, 09:56 PM
Post
#28
|
|
"If there is a mistake it will find me" Group: Members Posts: 1,363 Joined: 1-April 09 From: Los Angeles, CA Member No.: 10,225 Region Association: Southern California |
QUOTE(doug_b_928 @ May 23 2023, 01:09 PM)  Nice work. In my case I'd be trying to save, repair, and reuse the quarter piece that I'd cut out. On your image below, I've drawn a green ellipse around the vertical part that sits on top of the door post. You appear to have removed a chunk including where it spot welds to the door post. The red line is where I'm thinking I could cut. Then upon re-installation of the quarter section I could butt weld along that seam where I'd made the cut. I find this area a bit abstract to look at so I'm trying to ensure that I understand how this location all goes together (e.g., took me a while to figure out that the back part of the top of the quarter is double layered). It was very confusing to me until I began pulling the onion apart. I believe the section you are pointing to is actually attached to the fender and eventually spot welded to the door upright. I removed the entire rear third of the front fender to repair the door attachment. The section you circled is what you indicated on the NOS part. |
|
|
|
|
1 User(s) are reading this topic (1 Guests and 0 Anonymous Users)
0 Members:

|
Lo-Fi Version | Time is now: 26th September 2024 - 09:50 PM |
Invision Power Board
v9.1.4 © 2024 IPS, Inc.