Help - Search - Members - Calendar
Full Version: This is a “How to” on replacing the worn shift linkage bushing for the
914World.com > The 914 Forums > 914World Garage
Kalva
This is a “How to” on replacing the worn shift linkage bushing for the 69-72 tail shift 914’s.
I picked up the 914 Shift Bushing Super Kits form Pelican Parts
http://www.pelicanparts.com/catalog/shopca...t_pg1.htm#item0

Parts needed:

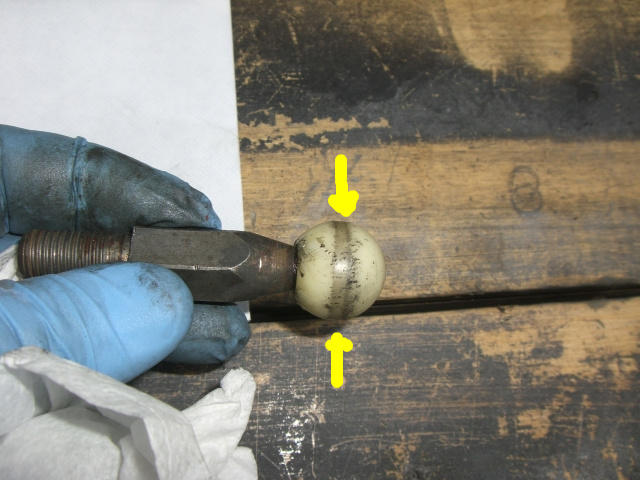
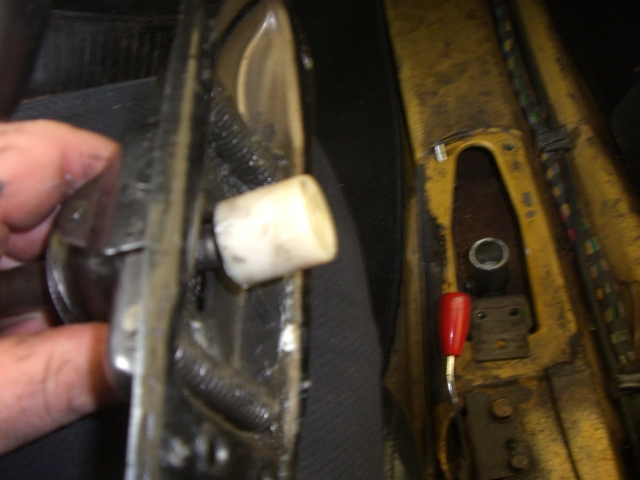
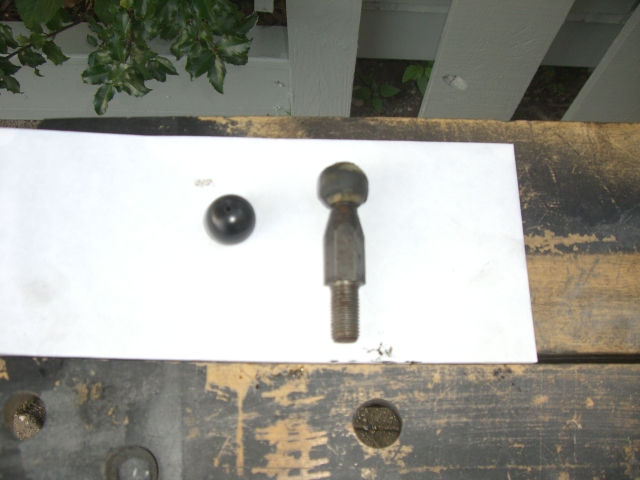
1 New Ball Cup Bushing
3 New Firewall & Shift Rod Bushings
2 New Shift Rod Bushings

Tools I used:
10mm socket
12mm socket
13mm socket
2-13mm open end wrench
4mm, 5mm Allen keys
1 flathead screwdriver
Grease for bushings
Paper towels
Magnetic pickup tool (not needed but helpful)
Needle nose pliers
Jack & jack stands or ramps if you can in reverse
700 Tech Book & Haynes manual


When my 71’ 914 arrived it started but would not go into 1st or Reverse. I was told the tranny needed some help from the previous owner. First thing I did before buying the 914 was order & read thru the 700 Tech Tips by George A. Hussey. Great read and a must for 914 owners, pg. 48 #344-352 was very helpful in solving the tranny issues I had.

1st- The tranny would not go into reverse, but it felt like it was going into 1st or maybe 3rd I couldn’t tell do to how loose the stick felt. I knew that the shifting bushing needed to be changed (the car is 39 years old).

Now for the fun:
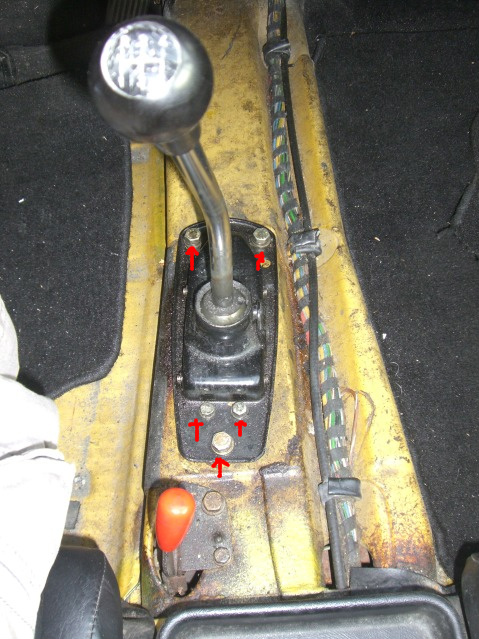
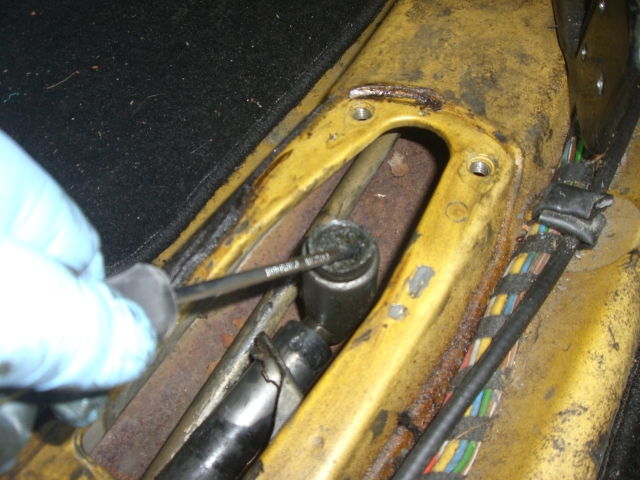
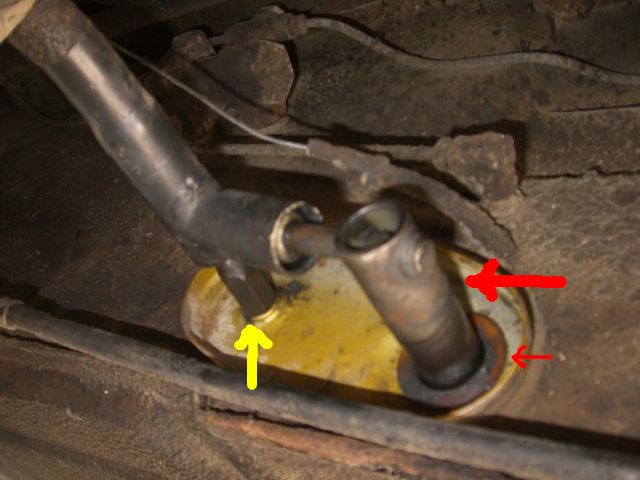
Jack up & support the car with two jack stands or if you can use two ramps so you can get under to remove the shifting rod and to replace the bushings.

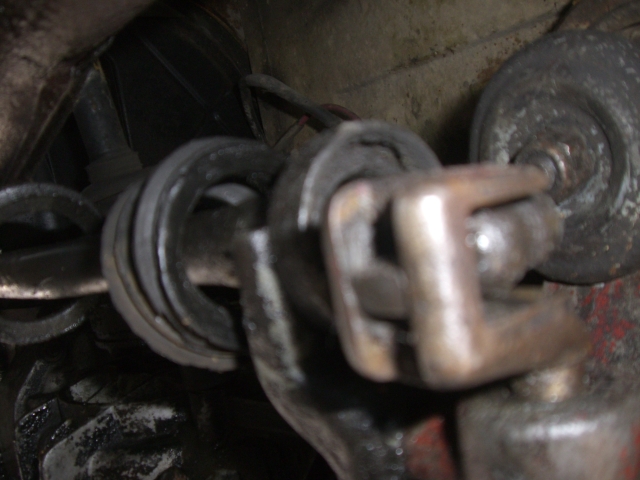
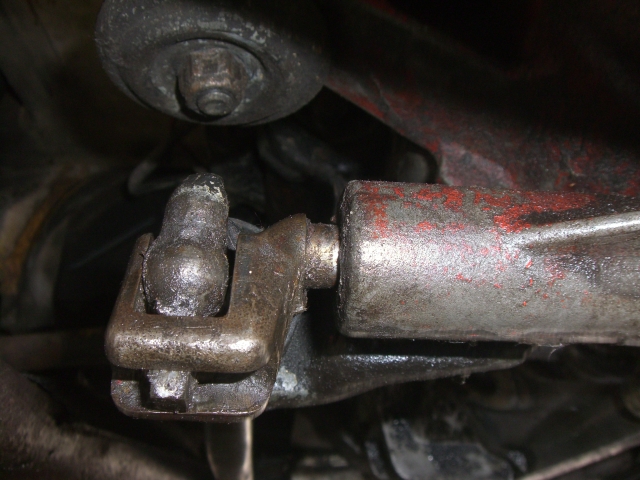
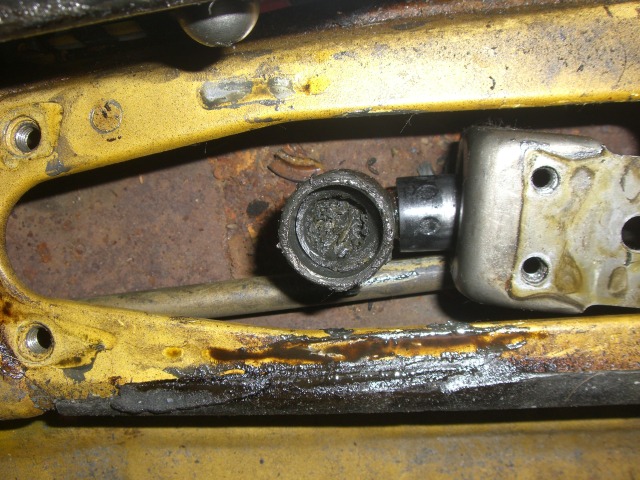
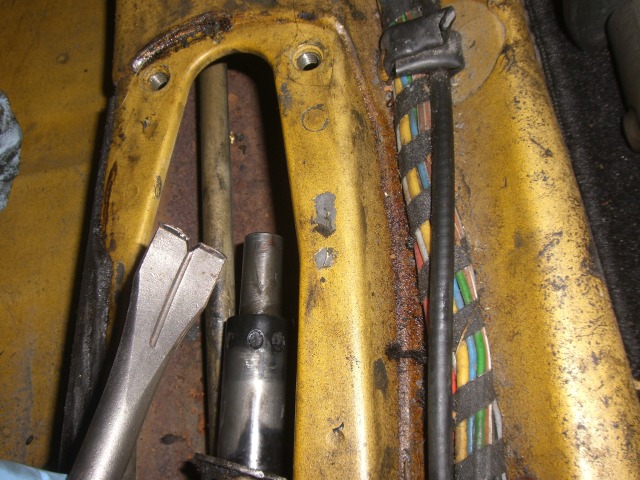
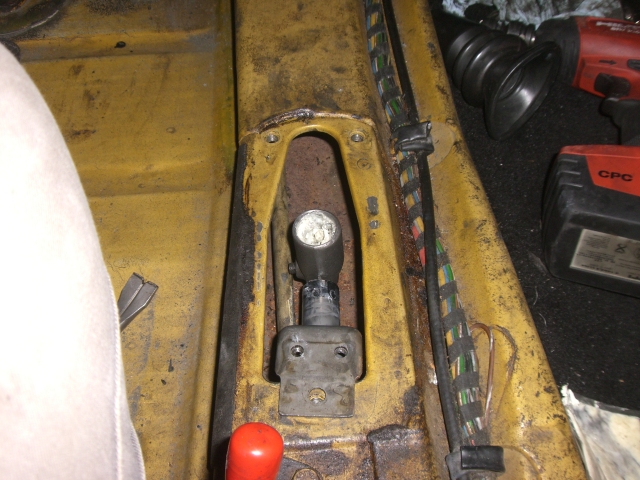
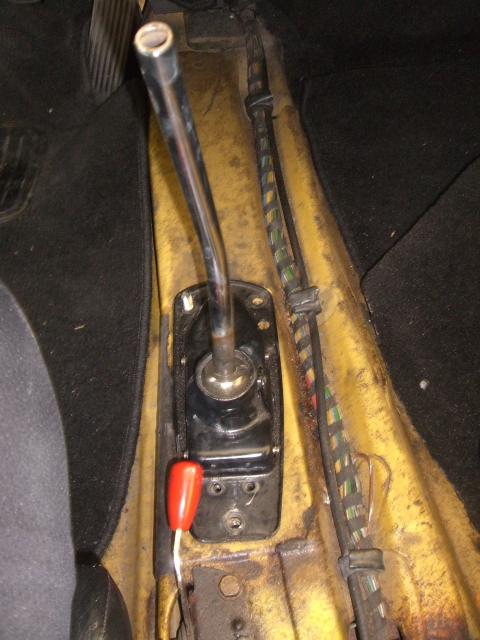
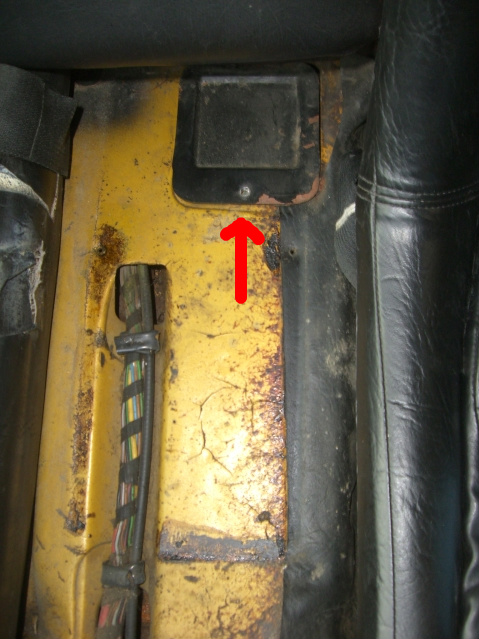
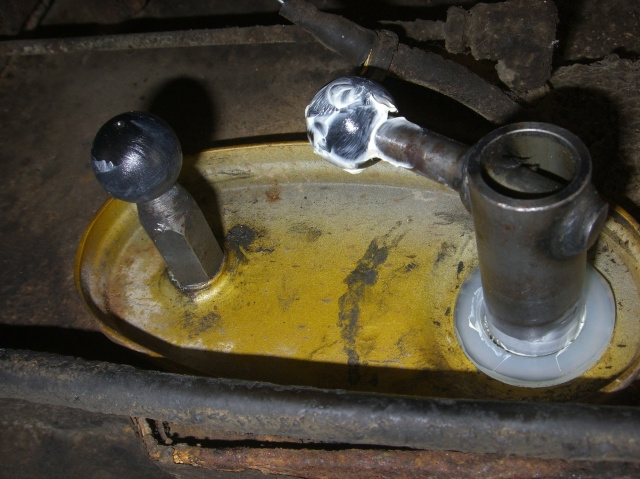
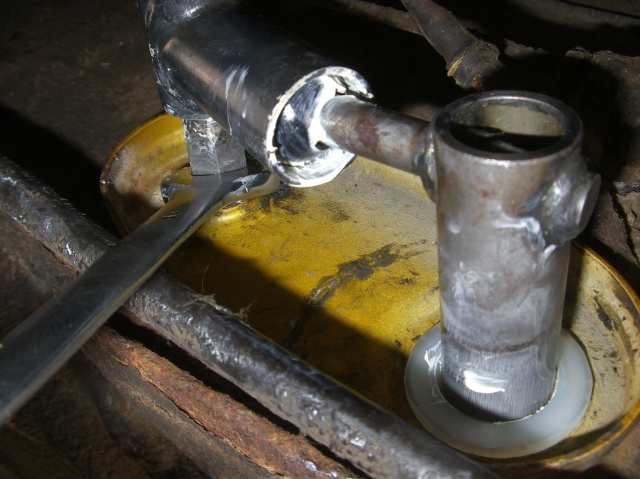
This is what I found:
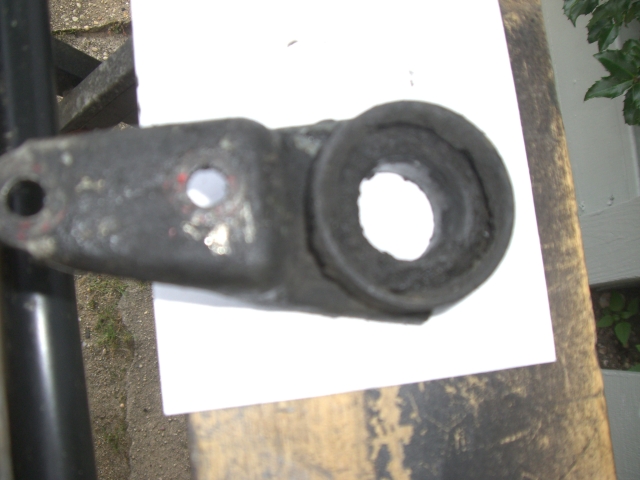
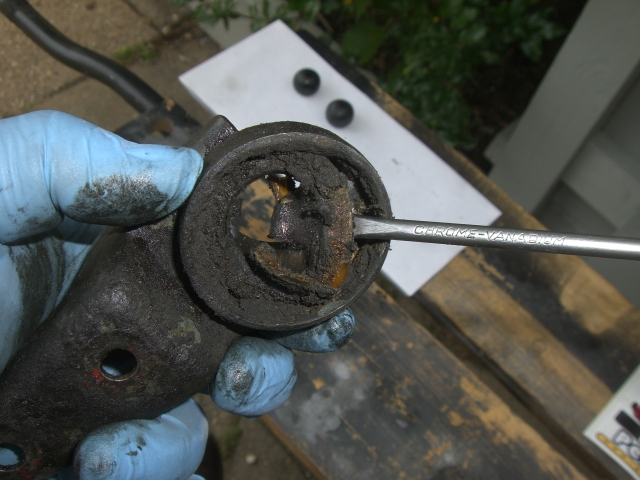
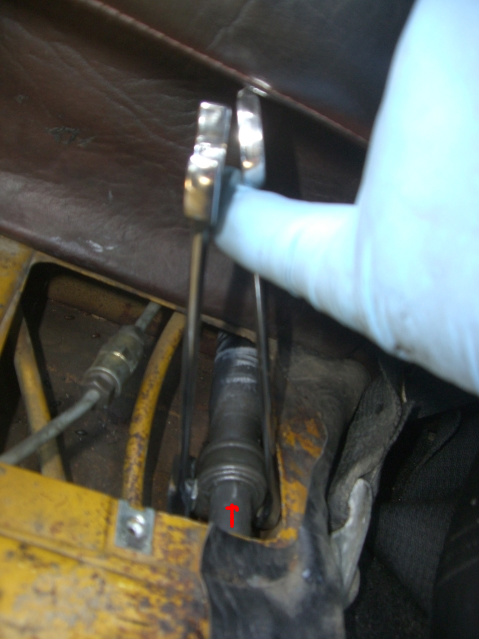
Tail shift mechanism has lost its cover & some rubber things are around it.
IPB Image

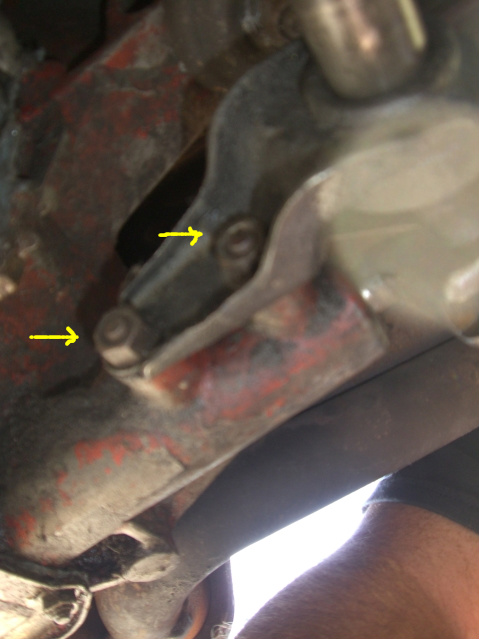
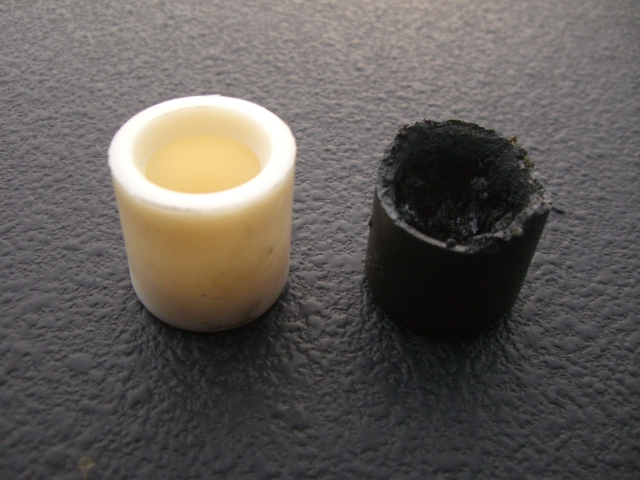
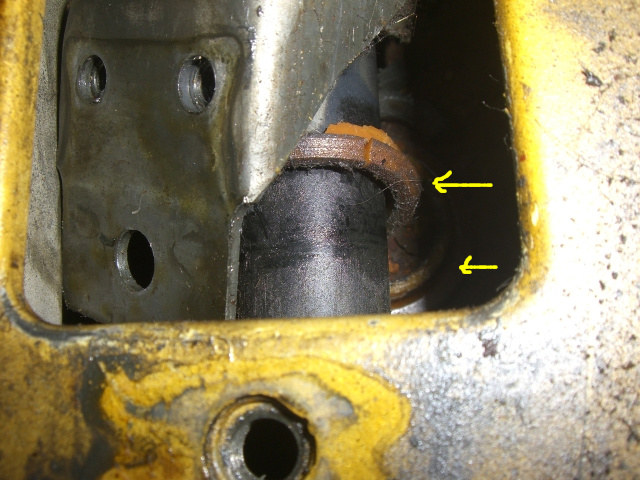
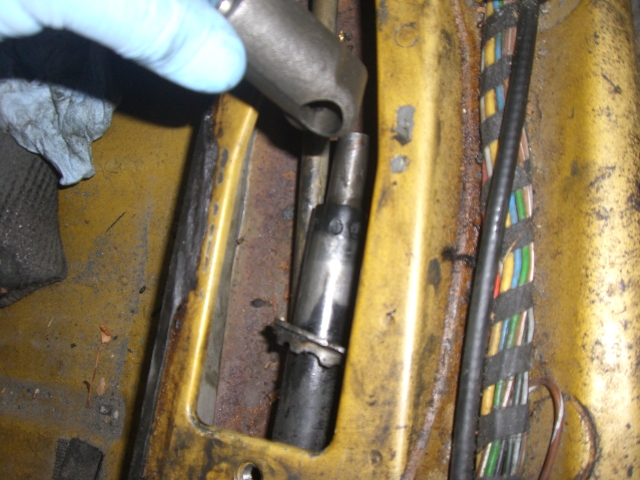
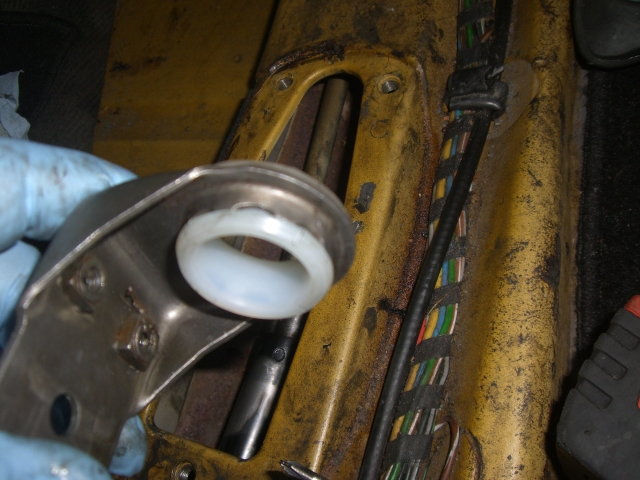
This is the cover that houses the two ball shifting bushings. Look at what’s left of the boot.
IPB Image
Kalva
Let’s start:
Remove the two 13mm nuts holding the rear bushing housing. You can now push up on the rod shaft and pop out the rod from its housing/shifting clip.
IPB Image

IPB Image

With the rear end of the shift rod lose, slide the yellow plastic cover down the shaft so you can reach the ball bushings.
IPB Image

Use a 13mm or 15mm open end wrench to remove the stud coming from the fire wall
IPB Image

Look at the ware on the ball after it was cleaned up.
IPB Image

Now with this done slide out the shift linkage rod.

Next remove the rear bushing housing by sliding it off the end.
IPB Image

Use a flathead screw driver to remove the old plastic bushing. Then clean the bracket and pop in the new bushing.
IPB Image

Next pull up the carpet around the stick shift and unbolt the three 13mm bolts and two 10mm bolts holding the stick shift mounting plate.
IPB Image

With the shifter removed this is what I saw:
IPB Image

Pull out the Ball Cup Bushing
IPB Image

It’s amazing what 39 years can do.
IPB Image

.
You’ll need to remove this bracket to replace the shaft bushing, look at what was left of mine.
IPB Image
Kalva
To remove the Ball Cup Bushing holder use a 4mm or 5mm Allen key, when the retain screw is remove push out the Ball Cup Bushing holder with a large flathead screw driver or if you have one a chisel and tap it off

IPB Image

IPB Image

IPB Image

Pop in the new shaft bushing add some grease and slide back over the shaft.
IPB Image

Next "The ball cup must be snapped onto the shifter ball while outside of the cup (to allow room for expansion), then the shifter with bushing is inserted into the shift rod head." thanks Jwest. Add some grease to the ball cup before snaping into place and add some grease to the holder.
IPB Image

Now slide the ball cap bushing holder back on the shaft, locate the small hole for the 4mm or 5mm Allen bolt and tighten.
IPB Image

Replace the shifter base, make sure you slide in the ball cap bushing into its holder and bolt the three 13mm bolts and two 10mm bolts.
IPB Image

Next you’ll need to remove the selector shaft rod form the car to replace the firewall bushing (thin red line) and the ball bushing on the selector shaft rod (thick red line)
IPB Image

Between the seats under the tray/third seat is a black access cover remove, I used a Philips screw driver.
IPB Image

Use a marker or something to mark the locations for when you put it back. (It’s a reference point for reassembly) Next loosen and remove the 13mm nut and bolt. FYI the retain collar will not slid off without the bolt removed, it has a notch for the bolt don’t try and force it off just remove the bolt & nut.
IPB Image

IPB Image

Next go back under the car and pull out the shaft. With the shaft out pull off the ball. I use a vise and pliers for both.
IPB Image

IPB Image

To replace the new plastic bushing ball I first greased the stud and put some grease into the ball, then I gently used my 3lbs hammer to pop the ball back on.
IPB Image

Now with the new ball bushing in place, replace the old firewall bushing and put back the selector shaft, add a little grease when sliding it in.
IPB Image

Next slide the shift rod back under the engine mount and put it back into place,
IPB Image

Pop the rear of the shaft onto the tail of the tranny and tighting the two 13mm nuts and put back on the ball bushing cover.

IPB Image

Now attach the shafts line up your earlier marks, replace the nut & bolt then tighten
At this point the bushing replacement is completed you should now make adjustments to get the teener to shift like new. After completing the bushing install the shifting was much tighter. I hope this "How To" helps anyone interested in replacing the shifting bushings.
'73-914kid
This is an excellent how-to thread! While I have side-shift in my car, for those with tail shift, this is an invaluable how-to.. Classic thread?
Ericv1
QUOTE('73-914kid @ Aug 3 2010, 02:11 AM) *

This is an excellent how-to thread! While I have side-shift in my car, for those with tail shift, this is an invaluable how-to.. Classic thread?


I agree. This thread was a great read. Did the bushing replacement fix your 1st/reverse issue?
VaccaRabite
Wow. I have never seen how a tail shift worked before. I can't believe it DOES work as designed! Makes you wonder why they did not use a cable shifter.

Zach
JWest
You installed the shifter ball cup bushing incorrectly.

The ball cup must be snapped onto the shifter ball while outside of the cup (to allow room for expansion), then the shifter with bushing is inserted into the shift rod head.
Kalva
QUOTE(JWest @ Aug 3 2010, 08:53 AM) *

You installed the shifter ball cup bushing incorrectly.

The ball cup must be snapped onto the shifter ball while outside of the cup (to allow room for expansion), then the shifter with bushing is inserted into the shift rod head.

I was wondering about that. This is why we need a "How To" I'll try that later and Up-date the thread.

Thanks
Kalva
QUOTE(JWest @ Aug 3 2010, 08:53 AM) *

You installed the shifter ball cup bushing incorrectly.

The ball cup must be snapped onto the shifter ball while outside of the cup (to allow room for expansion), then the shifter with bushing is inserted into the shift rod head.

Thanks Jwest...
OPhas been updated with new pics and Jwest info.
Kalva
QUOTE(Ericv1 @ Aug 3 2010, 07:37 AM) *

QUOTE('73-914kid @ Aug 3 2010, 02:11 AM) *

This is an excellent how-to thread! While I have side-shift in my car, for those with tail shift, this is an invaluable how-to.. Classic thread?


I agree. This thread was a great read. Did the bushing replacement fix your 1st/reverse issue?


It cleaned up the slop in the shifter/linkage. When I adjusted the linkage I was able to get back to the stock position on the tail shifter shaft which gave me the full range of gears. I found that the rear shift ball was on 4th & 5th gear location, so what felt like reverse & 1st was 4th & 5th.

This is neutral after adjustment, the ball was pined to the left causing the issues.
IPB Image
Calwaterbear
Thanks so much for this thread/ how to, I have used it as my bible , redoing the shift linkage on my 72.

I do have a question:
I used Auto Atlanta rebuild kit.
Got the 3 firewall spacers, they are all in place

got the 2 balls, they are all in place

The shift Lever Ball Socket will be put onto the shifter

but i have 2 parts i cannot figure out where they are supposed to go.

the "shift Spring Guide" part # 901 424 132 00 (I assume thats AA part number?)
The "shift Rod Bushing 901 424 135 00

anyone care to share some knowledge on where those 2 pieces go?
rhodyguy
Both bushings cradle the shift lever spring. Both of those #s are for tail shift linkage systems. #'s 6 (upper) and 8 (lower) in the exploded parts diagram.

Side shift uses #6 but there are 2 other different #s for the lower shift lever bushings labeled as #39.

The cradle bushings are usually worn pretty thin. This is where the old AA paper catalog comes in handy.
Dr Evil
6 and 9
Calwaterbear
QUOTE(Dr Evil @ Oct 12 2017, 07:22 AM) *

6 and 9


Got it, the picture is worth 10,000 words

Thanks Dr. Evil
Dr Evil
For future reference, I love the Porsche has the PET on line for free. I search Porsche PET, put in your year and model, then scroll through the PDF. Its where I get all these pics smile.gif
Calwaterbear
perfect, I'll do that right now - thanks for the tip
gandalf_025
I’ve never seen a 4 cylinder tailshift linkage before.
Didn’t realize it was that different from a six...
RestoReese
I followed this exactly and it was perfect. Only thing I could have used is the how to for adjusting the shifter after reassembly. All of the parts on my car were covered in grease and years of road grime so the marks that were made were cleaned away.
cpavlenko
QUOTE(Kalva @ Aug 2 2010, 10:08 PM) *

To remove the Ball Cup Bushing holder use a 4mm or 5mm Allen key, when the retain screw is remove push out the Ball Cup Bushing holder with a large flathead screw driver or if you have one a chisel and tap it off

IPB Image

IPB Image

IPB Image

Pop in the new shaft bushing add some grease and slide back over the shaft.
IPB Image

Next "The ball cup must be snapped onto the shifter ball while outside of the cup (to allow room for expansion), then the shifter with bushing is inserted into the shift rod head." thanks Jwest. Add some grease to the ball cup before snaping into place and add some grease to the holder.
IPB Image

Now slide the ball cap bushing holder back on the shaft, locate the small hole for the 4mm or 5mm Allen bolt and tighten.
IPB Image

Replace the shifter base, make sure you slide in the ball cap bushing into its holder and bolt the three 13mm bolts and two 10mm bolts.
IPB Image

Next you’ll need to remove the selector shaft rod form the car to replace the firewall bushing (thin red line) and the ball bushing on the selector shaft rod (thick red line)
IPB Image

Between the seats under the tray/third seat is a black access cover remove, I used a Philips screw driver.
IPB Image

Use a marker or something to mark the locations for when you put it back. (It’s a reference point for reassembly) Next loosen and remove the 13mm nut and bolt. FYI the retain collar will not slid off without the bolt removed, it has a notch for the bolt don’t try and force it off just remove the bolt & nut.
IPB Image

IPB Image

Next go back under the car and pull out the shaft. With the shaft out pull off the ball. I use a vise and pliers for both.
IPB Image

IPB Image

To replace the new plastic bushing ball I first greased the stud and put some grease into the ball, then I gently used my 3lbs hammer to pop the ball back on.
IPB Image

Now with the new ball bushing in place, replace the old firewall bushing and put back the selector shaft, add a little grease when sliding it in.
IPB Image

Next slide the shift rod back under the engine mount and put it back into place,
IPB Image

Pop the rear of the shaft onto the tail of the tranny and tighting the two 13mm nuts and put back on the ball bushing cover.

IPB Image

Now attach the shafts line up your earlier marks, replace the nut & bolt then tighten
At this point the bushing replacement is completed you should now make adjustments to get the teener to shift like new. After completing the bushing install the shifting was much tighter. I hope this "How To" helps anyone interested in replacing the shifting bushings.

Also FYI, move the driver's seat all the way forward then pull vinyl down and you'll see access hole for socket instead of using 2 wrenches like ur pic shows. The hole is right below where access cover is. Makes things easier doing this.
rgalla9146

agree.gif That last tip is absolutely correct. I was just about to suggest it.
Through that access hole use a ratchet, a four inch extension and a shallow 13mm socket. This allows a view of the adjustment parts and changes as you make them
without two hands in the way.
DennisV
QUOTE(Kalva @ Aug 2 2010, 10:03 PM) *

This is a “How to” on replacing the worn shift linkage bushing for the 69-72 tail shift 914’s.

This post was super helpful. Thanks for taking time to write it up.

QUOTE(cpavlenko @ Oct 19 2019, 07:54 PM) *
move the driver's seat all the way forward then pull vinyl down and you'll see access hole for socket instead of using 2 wrenches like ur pic shows. The hole is right below where access cover is. Makes things easier doing this.

Here is a photo of the aforementioned access hole. Can we just call it a-hole? biggrin.gif
Click to view attachment
jim_hoyland
Great write up ! Glad I don’t own an early 914 biggrin.gif
Green626
Ok - help ! Any tricks to getting the ball pivot on - having no luck with the 3 pound hammer-
This is a "lo-fi" version of our main content. To view the full version with more information, formatting and images, please click here.
Invision Power Board © 2001-2024 Invision Power Services, Inc.