|
|
|
Porsche, and the Porsche crest are registered trademarks of Dr. Ing. h.c. F. Porsche AG.
This site is not affiliated with Porsche in any way. Its only purpose is to provide an online forum for car enthusiasts. All other trademarks are property of their respective owners. |
|
|

  |

| Jeff Hail |
 Feb 23 2011, 11:21 PM Feb 23 2011, 11:21 PM
Post
#541
|
|
Senior Member  Group: Members Posts: 1,141 Joined: 3-May 07 From: LA/ CA Member No.: 7,712 |
Installed some new metal on the left side of the tunnel where the flange/ floor meet.
Trim, trim, trim and drill a bazillion spot welds. The left side floor crossmember has twice as many resistance welds as the passenger side. Some rust under the crossmember flange actually "rust welded" the floor together. I might make new crossmember overlays if it doesnt come apart at the flanges easily. An air chisel will tear the flanges up and a hand spot weld buster is already doing that. Attached image(s) 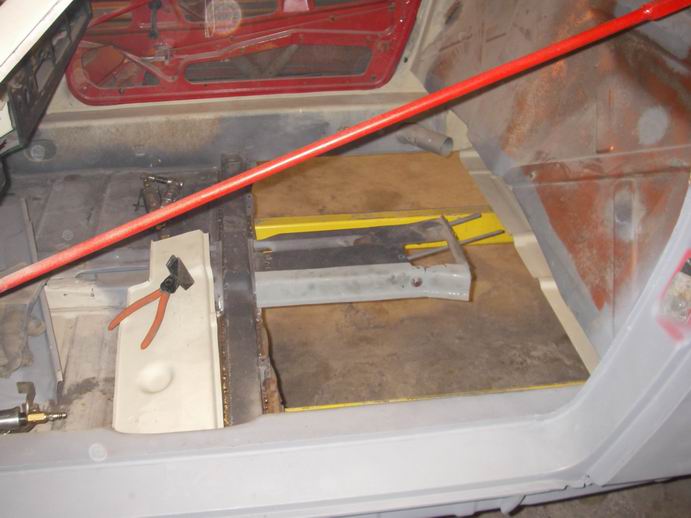 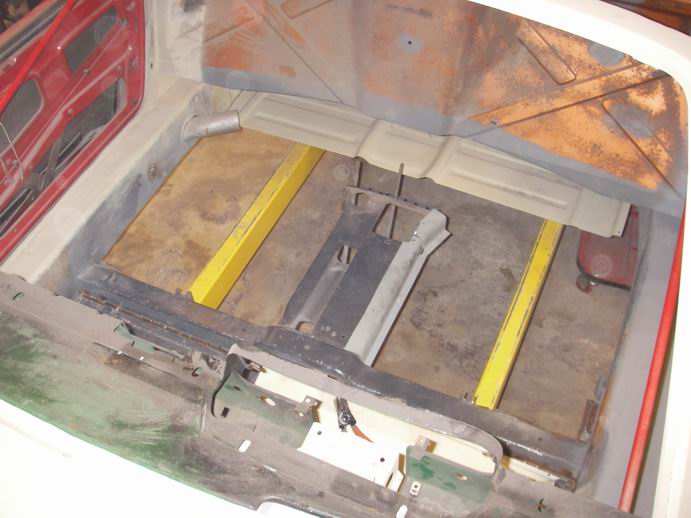
|
   |

 
|
| krazykonrad |
Feb 24 2011, 10:48 AM
Post
#542
|
|
Senior Member Group: Members Posts: 1,129 Joined: 21-February 06 From: Canton, GA Member No.: 5,610 |
QUOTE(Jeff Hail @ Feb 23 2011, 09:21 PM)  "rust welded" Don't cut out the rust welds. Those are original from the factory! (IMG:style_emoticons/default/blink.gif) Konrad |
|
|
|
| Jeff Hail |
Mar 7 2011, 05:03 PM
Post
#543
|
|
Senior Member Group: Members Posts: 1,141 Joined: 3-May 07 From: LA/ CA Member No.: 7,712 |
A few more modifications to the early firewall. Closed off the heater cable tube holes and airtube exits from the inside.
Early/ Late lower firewall: The brake presure regulator and brake line exit sits farther to the left on the early firewall. I think I will leave them where the early panel locates them. Not sure if the later location will interfere with the 3.2 but I don't want to find out later. Lower firewall final fit up done. Held with Cleco's. Inner reinforcement (AA) halves welded together to create a single panel...easier to assemble. Attached image(s) 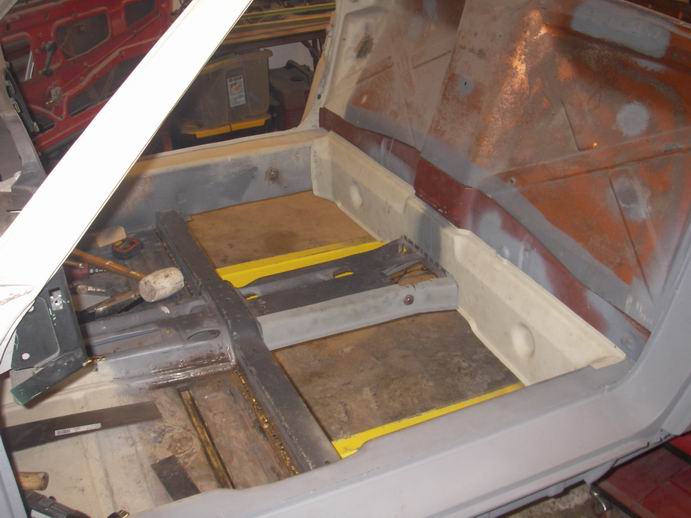 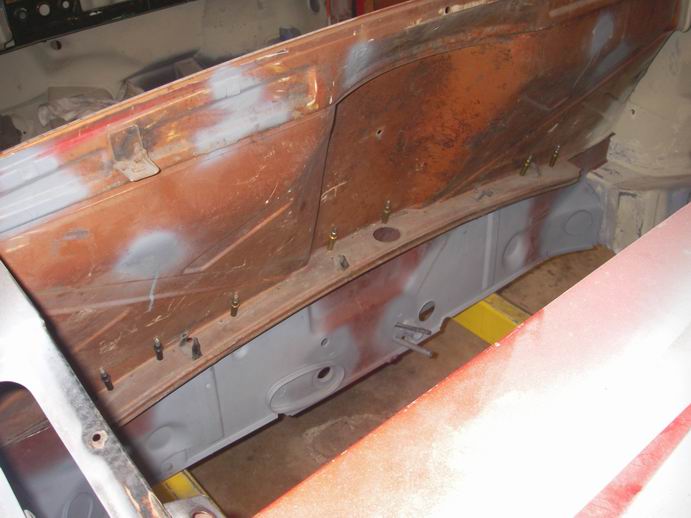 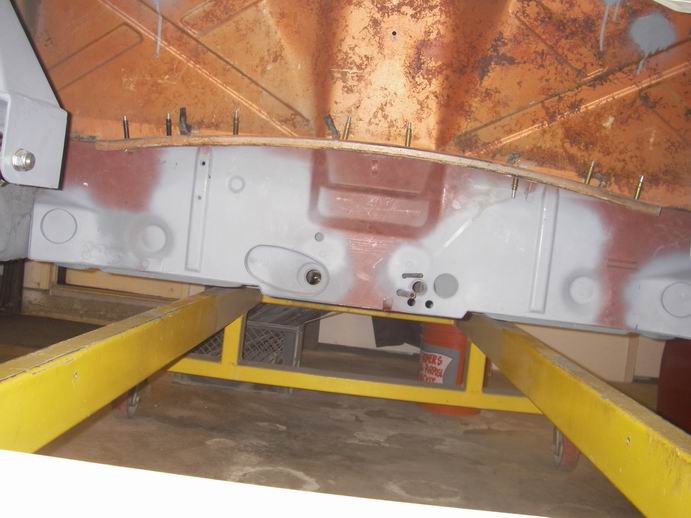
|
|
|
|
| Jeff Hail |
Mar 7 2011, 05:06 PM
Post
#544
|
|
Senior Member Group: Members Posts: 1,141 Joined: 3-May 07 From: LA/ CA Member No.: 7,712 |
Next I will fit the floor and trim as needed. Take it all apart and punch the holes for the plugs.
|
|
|
|
| Jeff Hail |
Mar 7 2011, 05:08 PM
Post
#545
|
|
Senior Member Group: Members Posts: 1,141 Joined: 3-May 07 From: LA/ CA Member No.: 7,712 |
QUOTE(krazykonrad @ Feb 24 2011, 08:48 AM) QUOTE(Jeff Hail @ Feb 23 2011, 09:21 PM) "rust welded" Don't cut out the rust welds. Those are original from the factory! (IMG:style_emoticons/default/blink.gif) Konrad I missed that Konrad. You're a funny guy! I wonder if "Rustone" was a factory color code option? |
|
|
|
| Jeff Hail |
Mar 21 2011, 11:55 PM
Post
#546
|
|
Senior Member Group: Members Posts: 1,141 Joined: 3-May 07 From: LA/ CA Member No.: 7,712 |
Bunch of little things to tidy up, fabricate... before I button the floor up....
1)FABRICATE THE PASSENGER SIDE TUNNEL REPAIR PART. Fabrication is easy. Doing it twice with opposites is a challenge. Even know the parts are dimensionally symetrical they are not the same. ( Cutouts, notches etc) Came out a beautiful piece of metal !!! Attached thumbnail(s) 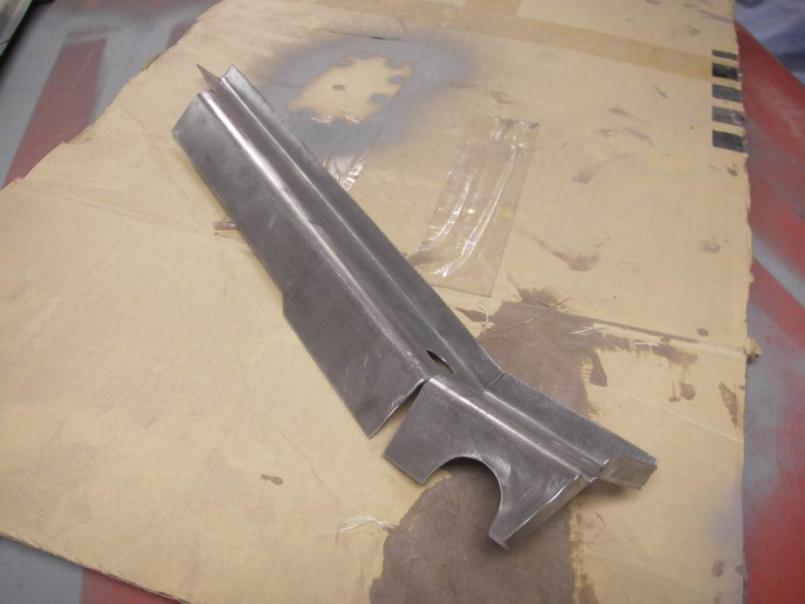  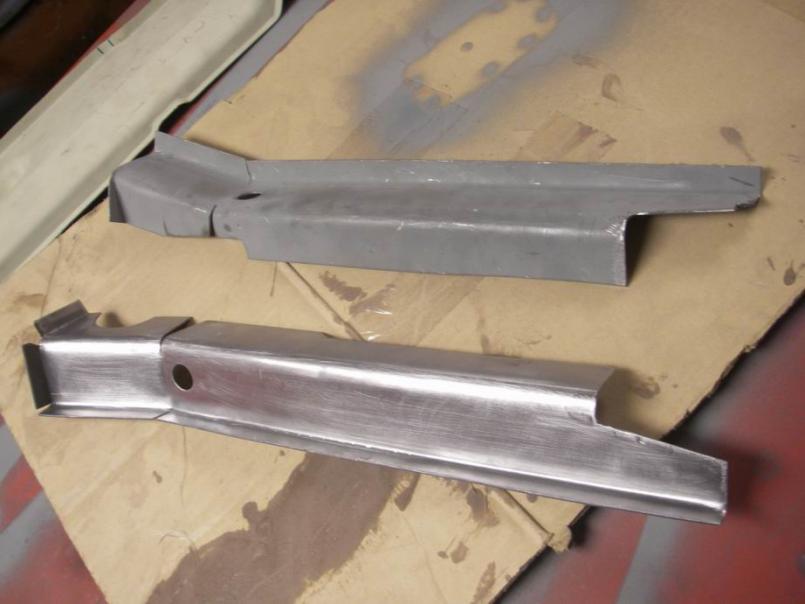
|
|
|
|
| Jeff Hail |
Mar 21 2011, 11:56 PM
Post
#547
|
|
Senior Member Group: Members Posts: 1,141 Joined: 3-May 07 From: LA/ CA Member No.: 7,712 |
Now thats a SHIFT knob !!
Whatcha think? Attached thumbnail(s) 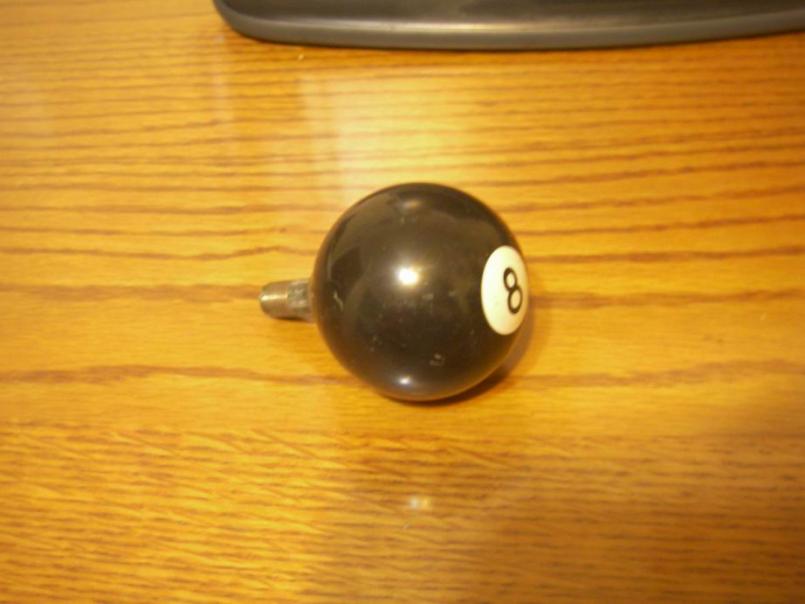
|
|
|
|
| KELTY360 |
Mar 22 2011, 12:13 AM
Post
#548
|
|
914 Neferati Group: Members Posts: 5,043 Joined: 31-December 05 From: Pt. Townsend, WA Member No.: 5,344 Region Association: Pacific Northwest |
QUOTE(Jeff Hail @ Mar 21 2011, 09:56 PM) Now thats a SHIFT knob !! Whatcha think? I can get behind that. |
|
|
|
| Hontec |
Mar 25 2011, 12:26 PM
Post
#549
|
|
I see things..... Group: Members Posts: 261 Joined: 23-September 10 From: Netherlands Member No.: 12,210 Region Association: Europe |
I just read your topic and maybe I read over it, but the lower part of the firewall on the engine side, who makes that panel? AA or restoration design or did you manage to get an original one?
Thanks and I love the way you're doing this, extremely nice work!!! |
|
|
|
| 914outlaw |
Mar 26 2011, 09:33 AM
Post
#550
|
|
Dave Group: Members Posts: 198 Joined: 2-June 10 From: Central, NJ Member No.: 11,800 Region Association: North East States |
QUOTE(Jeff Hail @ Mar 22 2011, 01:55 AM) Bunch of little things to tidy up, fabricate... before I button the floor up.... 1)FABRICATE THE PASSENGER SIDE TUNNEL REPAIR PART. Fabrication is easy. Doing it twice with opposites is a challenge. Even know the parts are dimensionally symetrical they are not the same. ( Cutouts, notches etc) Came out a beautiful piece of metal !!! Nice work Jeff. What gauge steel did you use by the way? |
|
|
|
| Jeff Hail |
Apr 6 2011, 08:58 AM
Post
#551
|
|
Senior Member Group: Members Posts: 1,141 Joined: 3-May 07 From: LA/ CA Member No.: 7,712 |
QUOTE(Hontec @ Mar 25 2011, 11:26 AM) I just read your topic and maybe I read over it, but the lower part of the firewall on the engine side, who makes that panel? AA or restoration design or did you manage to get an original one? Thanks and I love the way you're doing this, extremely nice work!!! The lower outer firewall is a New Old Stock panel for an early car. |
|
|
|
| Jeff Hail |
Apr 6 2011, 08:59 AM
Post
#552
|
|
Senior Member Group: Members Posts: 1,141 Joined: 3-May 07 From: LA/ CA Member No.: 7,712 |
QUOTE(dpires914 @ Mar 26 2011, 08:33 AM) QUOTE(Jeff Hail @ Mar 22 2011, 01:55 AM) Bunch of little things to tidy up, fabricate... before I button the floor up.... 1)FABRICATE THE PASSENGER SIDE TUNNEL REPAIR PART. Fabrication is easy. Doing it twice with opposites is a challenge. Even know the parts are dimensionally symetrical they are not the same. ( Cutouts, notches etc) Came out a beautiful piece of metal !!! Nice work Jeff. What gauge steel did you use by the way? 16 guage |
|
|
|
| obscurity |
Apr 6 2011, 09:34 AM
Post
#553
|
|
Member Group: Members Posts: 411 Joined: 24-February 06 From: Atlanta ,GA Member No.: 5,628 Region Association: South East States |
QUOTE(Jeff Hail @ Apr 6 2011, 10:58 AM) QUOTE(Hontec @ Mar 25 2011, 11:26 AM) I just read your topic and maybe I read over it, but the lower part of the firewall on the engine side, who makes that panel? AA or restoration design or did you manage to get an original one? Thanks and I love the way you're doing this, extremely nice work!!! The lower outer firewall is a New Old Stock panel for an early car. Where did you find the part? Was it pricey? |
|
|
|
| krazykonrad |
Apr 8 2011, 09:05 PM
Post
#554
|
|
Senior Member Group: Members Posts: 1,129 Joined: 21-February 06 From: Canton, GA Member No.: 5,610 |
Jeff-
Your level of craftsmanship is incredible! Every time i see this thread, I'm just amazed. Konrad |
|
|
|
| Jeff Hail |
May 7 2011, 12:05 AM
Post
#555
|
|
Senior Member Group: Members Posts: 1,141 Joined: 3-May 07 From: LA/ CA Member No.: 7,712 |
A bit of a hiatus after two back to back surgeries. Nothing major just time away for healing.
I have never been a fan of articulated headlamps. Loss of form when raised and aerodynamically handicapped. Added weight etc, etc, etc. I have been on the hunt for three years for a viable compact alternative to the original. Hella offers a solution but not econonical at $1400 a pair including ballast. F that! I have seen flush mounted lamps that frankly look and are cheap substitutes for a functional alternative to the original. CRITERIA: 1) A more powerful lighting solution. 2) Improved illumination with less power draw on high beam than the original sealed beams 3) Cost effective and easy to fabricate/modify. 4) Able to fit into the original lamp bucket without cutting original material away (in case I ever want to revert back to the pop ups) 5) Somewhat plug and play. Enter Bi-Xenon lamps: ake Daimlers "Xenarc" projector headlamp A compact and short Bi-Xenon projector assembly Both the 2010 SL55 and E class use the same Xenon projector assembly. The lamp assemblies are completly different as the SL55 has adaptive (pan, tilt) servos BUT the actual projector inside the lamp is the same identical unit. A friend at a Benz shop has damaged assemblies all day long BUT the projector is always OK. I take a few junk damaged headlamp assemblies home and start destroying them for the guts. The high end cars have about 180 individual pieces that make up ONE headlamp assembly. I am only after the projector with the shutter actuator. Bi-Xenon lamps do not have a low and high beam. The lamp is always on. What differentiates high and low beams is a shutter or brow that blocks off a partial amount of light like a camera lens shutter or iris. These are light weight, short and compact. I only need to fabricate a housing like the 944 flush headlamps and lens. Make sure it is servicable and sealed. If Lamborghini could get away with using 92 Nissan 300ZX headlamps on the Diablo I can do this easily. (bet you never knew that) Attached thumbnail(s) 
|
|
|
|
| Loser_Cruiser |
May 21 2011, 08:58 PM
Post
#556
|
|
Member Group: Members Posts: 407 Joined: 4-April 05 From: Bellingham, WA Member No.: 3,873 Region Association: Pacific Northwest |
any updates? (IMG:style_emoticons/default/smile.gif)
|
|
|
|
| Jeff Hail |
May 21 2011, 10:39 PM
Post
#557
|
|
Senior Member Group: Members Posts: 1,141 Joined: 3-May 07 From: LA/ CA Member No.: 7,712 |
QUOTE(Loser_Cruiser @ May 21 2011, 07:58 PM) Nope... busy elsewhere. |
|
|
|
| saigon71 |
May 23 2011, 02:38 PM
Post
#558
|
|
Advanced Member Group: Members Posts: 2,000 Joined: 1-June 09 From: Dillsburg, PA Member No.: 10,428 Region Association: MidAtlantic Region |
Awesome work Jeff! I have learned a lot from this thread. (IMG:style_emoticons/default/welder.gif)
|
|
|
|
| Jeff Hail |
May 25 2011, 11:18 PM
Post
#559
|
|
Senior Member Group: Members Posts: 1,141 Joined: 3-May 07 From: LA/ CA Member No.: 7,712 |
A little time to play last night. Been busy everywhere else.
The rear portion of the tunnel is done and welded. Spent a lot of time fitting the floor to the tunnel flanges and lower rear firewall. Lots of trimming here and there, leveling and self tapping screws for positioning. Then take it all apart again for the last time before I weld everything up. 1)Still need to weld in the mid bracing for both the clutch and throttle cable tubes rom the underside. Need to pickup some copper rod to shove inside the tubes so I dont blow holes. 2) Contemplating moving the shifter tower back a couple of inches. 3) Need to media blast the inside of the tunnel to remove the last of any scale. Attached image(s) 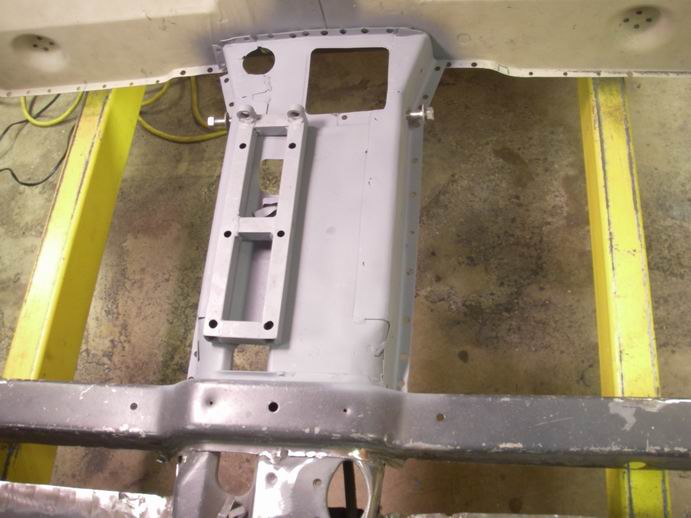 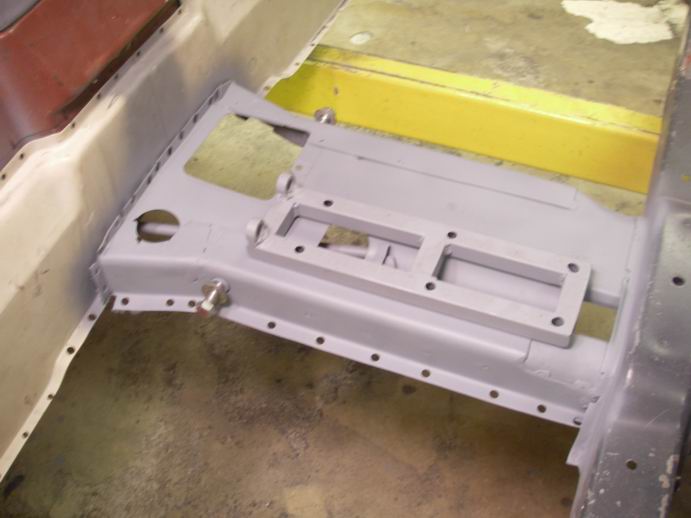 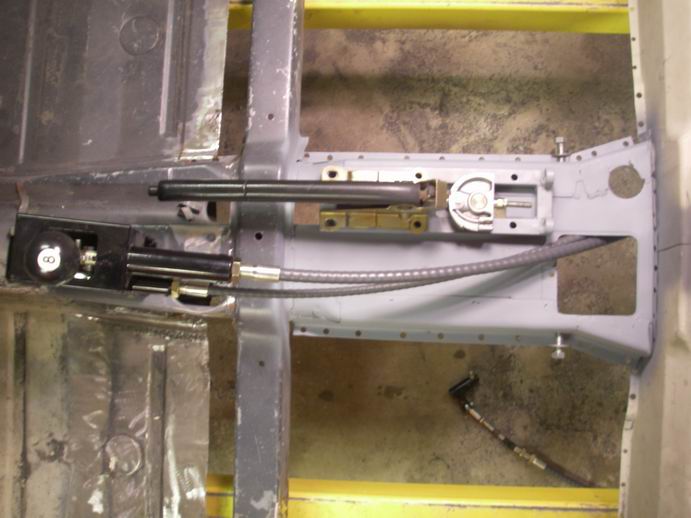 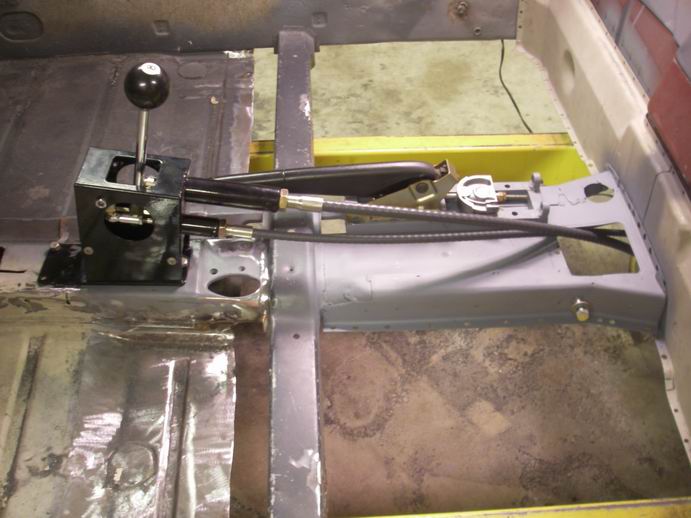 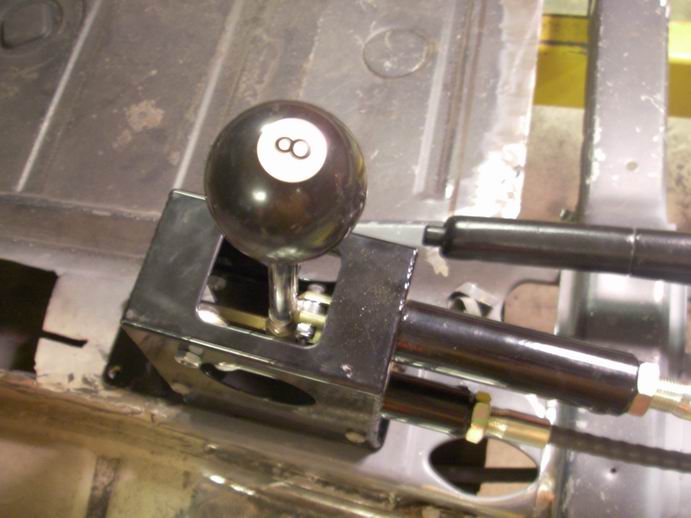
|
|
|
|
| speed metal army |
May 25 2011, 11:52 PM
Post
#560
|
|
Waiting for the rain to stop... Group: Members Posts: 1,068 Joined: 4-September 10 From: PNW Member No.: 12,137 Region Association: Canada |
QUOTE(Jeff Hail @ Mar 21 2011, 10:56 PM) Now thats a SHIFT knob !! Whatcha think? I think youre on the right track.Fu**in A! (IMG:style_emoticons/default/aktion035.gif) (IMG:style_emoticons/default/aktion035.gif) |
|
|
|
|
2 User(s) are reading this topic (2 Guests and 0 Anonymous Users)
0 Members:

|
Lo-Fi Version | Time is now: 5th July 2024 - 08:30 AM |
Invision Power Board
v9.1.4 © 2024 IPS, Inc.