|
|

|
Porsche, and the Porsche crest are registered trademarks of Dr. Ing. h.c. F. Porsche AG.
This site is not affiliated with Porsche in any way. Its only purpose is to provide an online forum for car enthusiasts. All other trademarks are property of their respective owners. |
|
|
  |
| Chris Pincetich |
 May 3 2007, 12:33 AM May 3 2007, 12:33 AM
Post
#1
|
|
B-)     Group: Members Posts: 2,082 Joined: 3-October 05 From: Point Reyes Station, CA Member No.: 4,907 Region Association: Northern California |
I finished my sideshift conversion on my 1972 1.7 street/AX 914 almost a month ago, and did about 18 AX runs with it this weekend. What an amazing difference! I did more than merely swap crusty transmissions and linkages, but more on that later. I ask so many questions on other threads, this one is pics and stuff I learned along the way (IMG:style_emoticons/default/beerchug.gif)
And thank yous to all who contributed, which is a lot (IMG:style_emoticons/default/beerchug.gif) (IMG:style_emoticons/default/beerchug.gif) And here is a SWEET photo I just found on ground-speed.com, who are awesome and I will probably buy a big print of this one! (IMG:style_emoticons/default/beerchug.gif) (IMG:style_emoticons/default/beerchug.gif) (IMG:style_emoticons/default/beerchug.gif) Attached image(s) 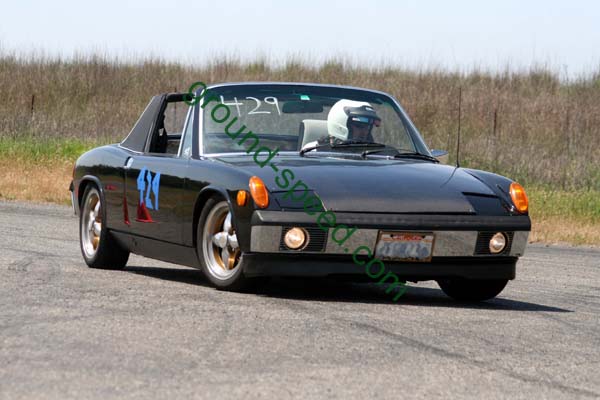
|
| Twystd1 |
 May 3 2007, 12:43 AM May 3 2007, 12:43 AM
Post
#2
|
|
You don't want to know... really.....     Group: Members Posts: 2,515 Joined: 12-September 04 From: Newport Beach, California Member No.: 2,743 |
Suhweet dude...!!!!!!!!!
great pic. Clayton |
| Chris Pincetich |
 May 3 2007, 12:49 AM May 3 2007, 12:49 AM
Post
#3
|
|
B-)     Group: Members Posts: 2,082 Joined: 3-October 05 From: Point Reyes Station, CA Member No.: 4,907 Region Association: Northern California |
After lots of searches reading lurking saving buying and more researching I was ready to start. There is a really good article on the side-shift conversion process found in the archive blog of "Lapuwali " aka James who has many posts in the
Lapuwali Classic Thread Forum Dedicated to our late forum moderator, Lapuwali Forum Led by: lapuwali James says to drop the engine, so I prepared for that. I used a modified Pelican method...with a few surprises. I wanted to take it in steps, so off came all the connections and CVs first. I like jacking one side up at a time, loosening the CV bolts on the grounded wheel, with car supported by jack stands of course. I knew I might have trouble maneuvering the engine solo, swapping trannies on the cart etc...somewhere decided I could yank the transmission first solo then engine second. I had converted to the mini starter and knew about the crazy bolt there that goes through both sides...a wedged socket in the engine bay held one end while I loosened the other. 3 different size bolts all around the tranny...there was an OZ of gunk in my reverse light boot, and all over on the old tail shift 901. Linkage came off easy (IMG:style_emoticons/default/beerchug.gif) I had already bought a used and "recently rebuilt" sideshift 901 from Craigslist for $350 (IMG:style_emoticons/default/beerchug.gif) (IMG:style_emoticons/default/beerchug.gif) I knew I could lift it no sweat (IMG:style_emoticons/default/laugh.gif) Attached image(s) 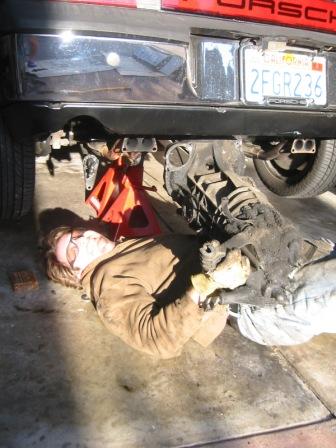
|
| Chris Pincetich |
 May 3 2007, 12:53 AM May 3 2007, 12:53 AM
Post
#4
|
|
B-)     Group: Members Posts: 2,082 Joined: 3-October 05 From: Point Reyes Station, CA Member No.: 4,907 Region Association: Northern California |
Now for the good surprises. I sourced a 13 lb flywheel through the Classifieds - I think is was waaaaaaay back when my whole world was the club before it became the world and club and all the other awesome 914 sites...cool peeps and great deals out there everywhere. $150. It was balanced to pressure plate before instalation. OH YEAH! That's why I pulled the 901 first, to send my pressure plate to McMark with the flywheel. Thanks Mark! (IMG:style_emoticons/default/beerchug.gif)
Attached image(s) 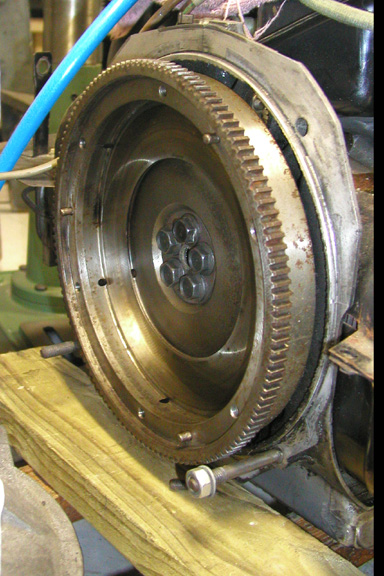
|
| Chris Pincetich |
 May 3 2007, 01:03 AM May 3 2007, 01:03 AM
Post
#5
|
|
B-)     Group: Members Posts: 2,082 Joined: 3-October 05 From: Point Reyes Station, CA Member No.: 4,907 Region Association: Northern California |
I also had a box with new side-shift bushings from Pelican
AND from JWest - side shift rod boot, bushing, and Rennshifter (IMG:style_emoticons/default/smilie_pokal.gif) No pic yet, gotta find camera, but you know where to look at a Rennshifter...JWest Engineering!! I got mine for 2006 price, Thanks for the great email James - I have it adjusted a lot better now (IMG:style_emoticons/default/beerchug.gif) AND from a generous Classified sale a black powdercoated engine mount bar, complete with mocked up mounts. This is the LATE style, for the side-shift linkage(through hole) (IMG:style_emoticons/default/beerchug.gif) - Thanks Dave at GPR and (IMG:style_emoticons/default/mcmark.gif) Attached image(s) 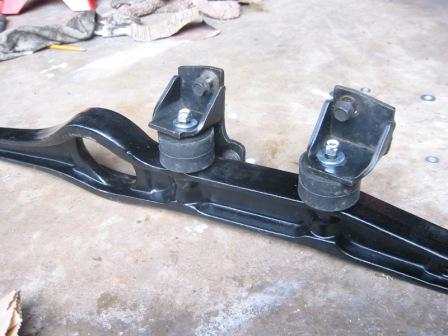
|
| Chris Pincetich |
 May 3 2007, 01:10 AM May 3 2007, 01:10 AM
Post
#6
|
|
B-)     Group: Members Posts: 2,082 Joined: 3-October 05 From: Point Reyes Station, CA Member No.: 4,907 Region Association: Northern California |
Here is a pic taken when I was about to remove the engine. CVs in bags, muffler off, 901 off, jack in place, and 2 x 4 support. I only had the one jack, so I used the engine bar on one and and a 2 x 4 on the other end to balance. It worked out great being solo - totally saved my heads when the engine broke free and lurched 3 inches down. The 2x 4 and engine bar rested on their supports before the engine could tilt any further on my small jack...almost tweaked the HEs real bad which would have pulled an exhaust stud and made a hole in my heads (no leaks now - it's all good).
Attached thumbnail(s) 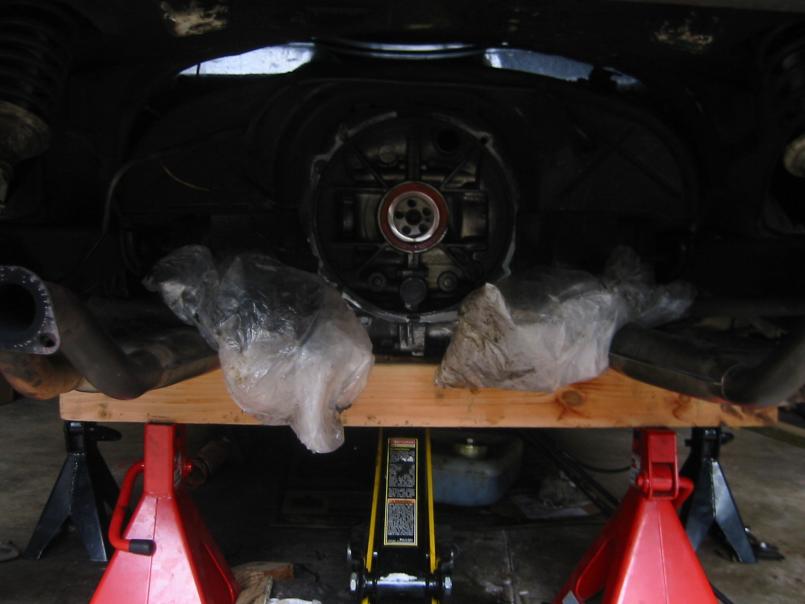
|
| Chris Pincetich |
 May 3 2007, 01:14 AM May 3 2007, 01:14 AM
Post
#7
|
|
B-)     Group: Members Posts: 2,082 Joined: 3-October 05 From: Point Reyes Station, CA Member No.: 4,907 Region Association: Northern California |
Success! (IMG:style_emoticons/default/beerchug.gif)
The engine "drop" went OK. I was bummed to find out that while I was yanking the engine out on its cart with the CV and axle on top, the spark plug wire broke off its connector to the distributor cap, and would soon find a fuel injector wire broken off of its connector (IMG:style_emoticons/default/dry.gif) I LATER read that a bungee cord between the fuel rails helps keep them from snaggin - I did that on the install (IMG:style_emoticons/default/beerchug.gif) Attached image(s) 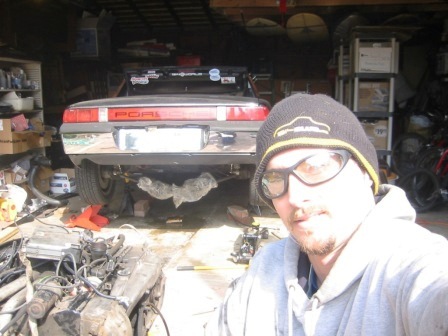
|
| Chris Pincetich |
 May 3 2007, 01:27 AM May 3 2007, 01:27 AM
Post
#8
|
|
B-)     Group: Members Posts: 2,082 Joined: 3-October 05 From: Point Reyes Station, CA Member No.: 4,907 Region Association: Northern California |
AT this point I realized my quick side-shift conversion was going to be an engine bay rustoration. "While I'm in there..." right??!!!?? More on that later...
The big swap, besides the 901, is the linkage. I needed to get the new engine mount bar on my engine for the side-shift linkage to fit. I removed the engine tin, only around the fan = easy. The engine bar mounts are accessable, but not really wrenchable, and the bolts are tight. I got 2 of 4 bolts no sweat, the other 2 are impossible due to the solid shape of the early-style SOLID engine bar to engine mount. I really researched this one, then called McMark about my flywheel progress and causually asked about the mount bolts. He suggested removing the fan, pulling the housing back on the studs just enough, then wrenching. It was a bit of work but once the wrench was in there, it went quickly. Otherwise, almost impossible...could be done with engine in car I suppose, but tricky! This pick shows the fan off, 12-point bolts x 3 (same style as CV bolt), can of PB Blaster, new Snap-On 3/8 wobble extension (IMG:style_emoticons/default/smile.gif) Attached image(s) 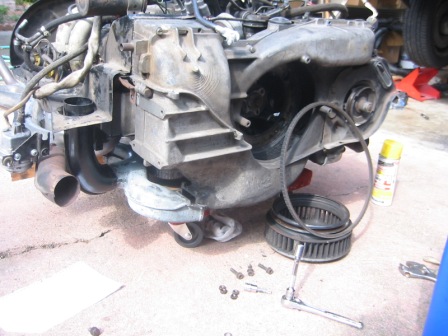
|
| Chris Pincetich |
 May 3 2007, 01:35 AM May 3 2007, 01:35 AM
Post
#9
|
|
B-)     Group: Members Posts: 2,082 Joined: 3-October 05 From: Point Reyes Station, CA Member No.: 4,907 Region Association: Northern California |
This out of focus pic shows the socket wrench on the mount bolt now that the fan housing is pulled back. The complete removal of the housing happened by accident for 5 seconds, and I was glad it didn't slip far because it was not easy to line up with all the studs, tin, etc. Looks OK in this pics, but when the bolt is unscrewed it binds the wrench so that more clearance is needed for the bolt.
Attached image(s) 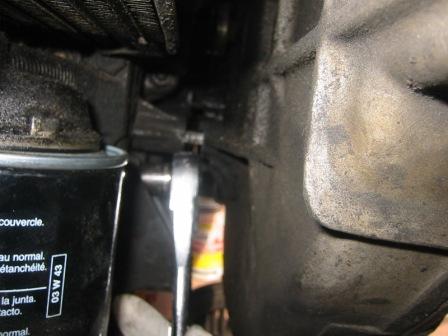
|
| Dave_Darling |
 May 3 2007, 10:18 AM May 3 2007, 10:18 AM
Post
#10
|
|
914 Idiot                Group: Members Posts: 15,067 Joined: 9-January 03 From: Silicon Valley / Kailua-Kona Member No.: 121 Region Association: Northern California 
|
Here's some more pics from Sunday for ya:
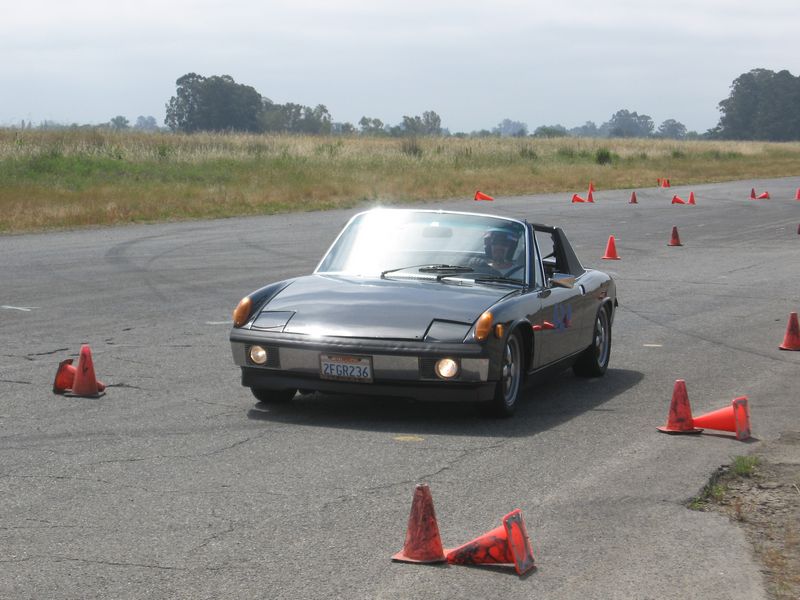 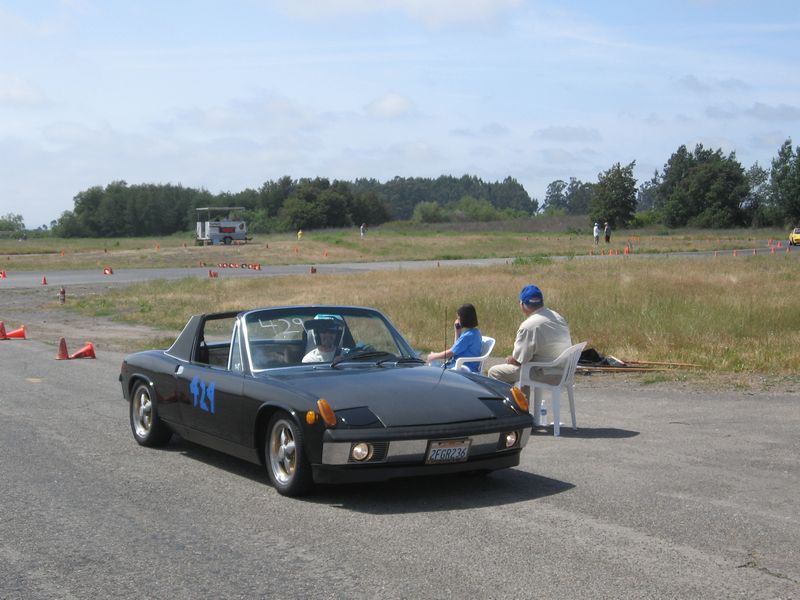 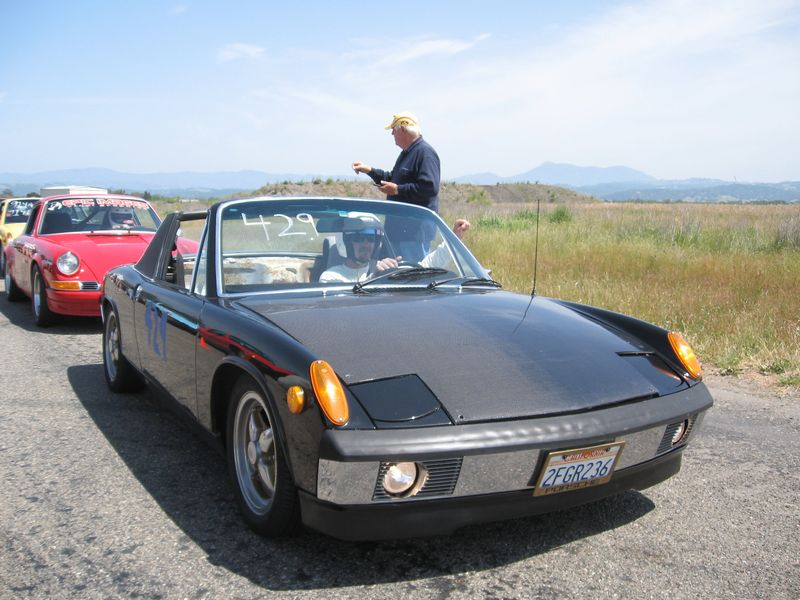 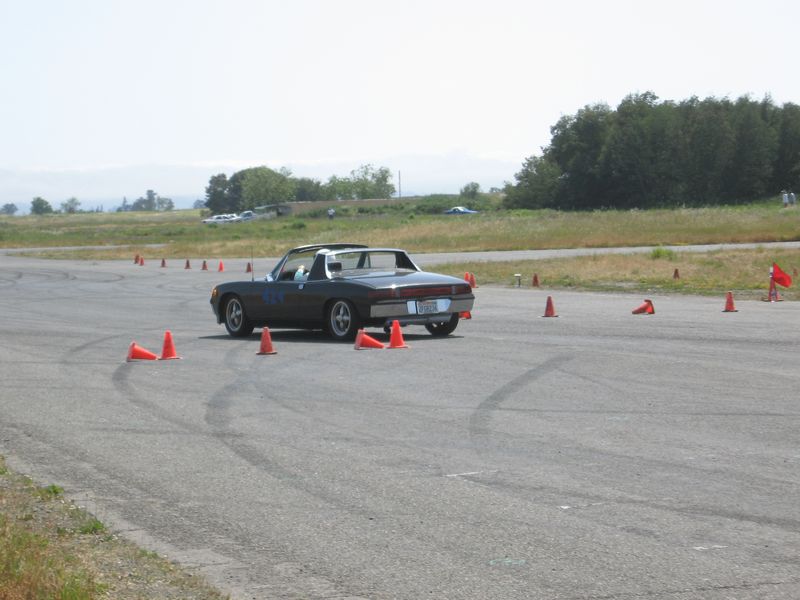 --DD |
| Chris Pincetich |
 May 3 2007, 10:49 AM May 3 2007, 10:49 AM
Post
#11
|
|
B-)     Group: Members Posts: 2,082 Joined: 3-October 05 From: Point Reyes Station, CA Member No.: 4,907 Region Association: Northern California |
Thanks Dave! (IMG:style_emoticons/default/beerchug.gif) I need to get some hood pins on there - works great w/o them but looks very crooked and I think the officials were worried because the kept pulling on it to check.
|
| Aaron Cox |
 May 3 2007, 11:42 AM May 3 2007, 11:42 AM
Post
#12
|
|
Professional Lawn Dart                Group: Retired Admin Posts: 24,541 Joined: 1-February 03 From: OC Member No.: 219 Region Association: Southern California |
Success! (IMG:style_emoticons/default/beerchug.gif) The engine "drop" went OK. I was bummed to find out that while I was yanking the engine out on its cart with the CV and axle on top, the spark plug wire broke off its connector to the distributor cap, and would soon find a fuel injector wire broken off of its connector (IMG:style_emoticons/default/dry.gif) I LATER read that a bungee cord between the fuel rails helps keep them from snaggin - I did that on the install (IMG:style_emoticons/default/beerchug.gif) (IMG:http://www.914world.com/bbs2/uploads/post-4907-1178176491.jpg) you look like ALI G in that photo (IMG:style_emoticons/default/chairfall.gif) |
| Chris Pincetich |
 May 25 2007, 06:38 PM May 25 2007, 06:38 PM
Post
#13
|
|
B-)     Group: Members Posts: 2,082 Joined: 3-October 05 From: Point Reyes Station, CA Member No.: 4,907 Region Association: Northern California |
Ok - back to the subject at hand. Here's the tin I removed to move the fan housing.
SIMPLE GREEN is non-toxic and biodegradeable. Lots of old T-Shirts and the SG were my cleaning tools of choice. Cardboard catches any cleaning solution(s) to reduce toxic rain run-off off of my driveway, and I try to use the shop vac to clean up all the paint chips and oily/greasy grime+dirt that falls off during the cleaning process. This is the front fan housing tin removed to pull back the fan housing. I ended up using some Quiet Car sound deadening paint on the outside of this piece. It was hard to tell if it made a difference in cabin engine noise, it did make that piece of tin quite a bit heavier! Has anybody tried pulling off the fan housing with the engine in and just this pice of tin removed? (IMG:style_emoticons/default/idea.gif) Attached image(s) 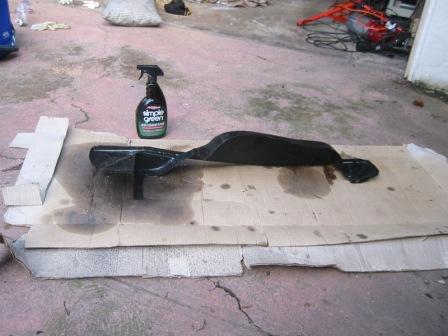
|
| Chris Pincetich |
 May 25 2007, 06:46 PM May 25 2007, 06:46 PM
Post
#14
|
|
B-)     Group: Members Posts: 2,082 Joined: 3-October 05 From: Point Reyes Station, CA Member No.: 4,907 Region Association: Northern California |
In this pic the forward late-model shift rod is being used to center the clutch disk in the almost tight pressure plate+flywheel sandwitch. It worked great (IMG:style_emoticons/default/beerchug.gif)
I guess I'll be a "real" Porsche mechanic when I buy and use their tool, but the forward end of the shift rod is the perfect OD to slip in the flywheel bearing ID and the rest of the shift rod then fits right in the clutch disk ID, and is the sameish OD as the drive shaft coming out of the transaxle. I'm NARPM (IMG:style_emoticons/default/biggrin.gif) ps - still can't find my camera with WAY more pics (IMG:style_emoticons/default/headbang.gif) (IMG:style_emoticons/default/headbang.gif) Attached image(s) 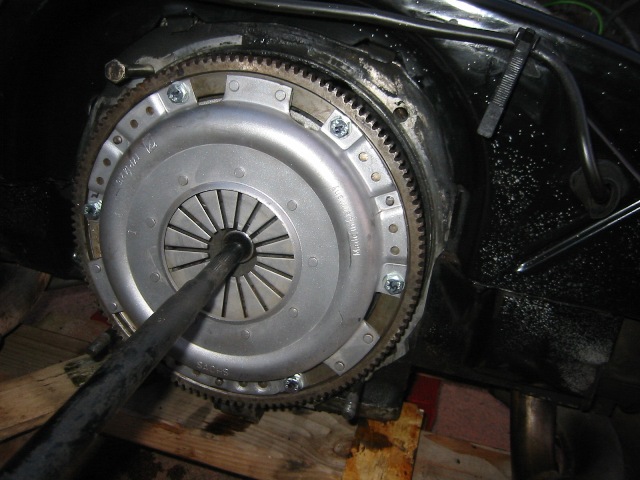
|
  |
1 User(s) are reading this topic (1 Guests and 0 Anonymous Users)
0 Members:

|
Lo-Fi Version | Time is now: 3rd January 2025 - 01:18 AM |
Invision Power Board
v9.1.4 © 2025 IPS, Inc.


