|
|
|
Porsche, and the Porsche crest are registered trademarks of Dr. Ing. h.c. F. Porsche AG.
This site is not affiliated with Porsche in any way. Its only purpose is to provide an online forum for car enthusiasts. All other trademarks are property of their respective owners. |
|
|

  |

| Jeff Hail |
 Jul 14 2008, 12:30 AM Jul 14 2008, 12:30 AM
Post
#321
|
|
Senior Member  Group: Members Posts: 1,141 Joined: 3-May 07 From: LA/ CA Member No.: 7,712 |
QUOTE(Eric_Shea @ Jul 13 2008, 11:14 PM)  Hindsight. Should have probably gone silver (clear) plating. The Red and Yellow (gold) reminds of a zip code in 90210. (IMG:style_emoticons/default/idea.gif) Oh well. But hey the price was right and will function as intended! I am having ARP make the correct 7mm bolts in 12.9 grade for an undisclosed sum. Jimmy got an ear full from me over that. Always best to move forward and that is what I am doing. |
   |

 
|
| Jeff Hail |
Jul 21 2008, 12:01 AM
Post
#322
|
|
Senior Member Group: Members Posts: 1,141 Joined: 3-May 07 From: LA/ CA Member No.: 7,712 |
Busy week. Didn't have any time to get out into the garage.
Finally got a moment late last night (100am) to finish the right front fender and give it a squirt of Duratec. One product I really like using. It covers, it hides, it sticks and anything underneath isnt ever coming through everrrrrrrrr! Right fender done. Attached image(s) 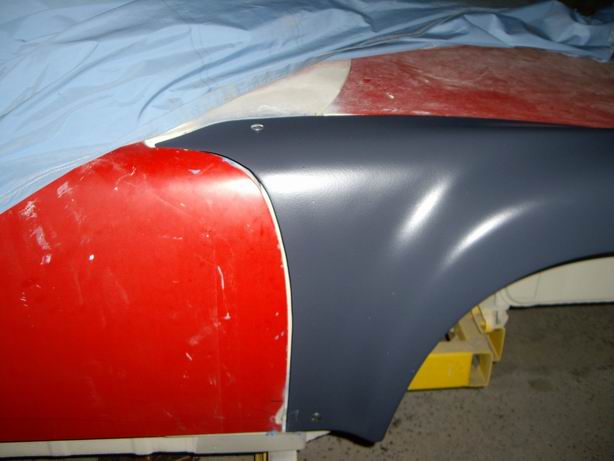 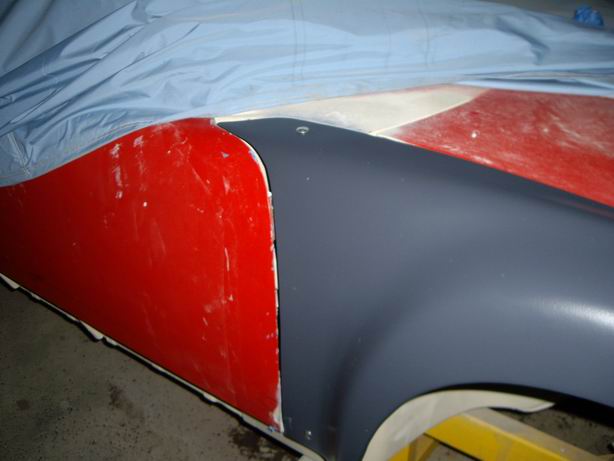 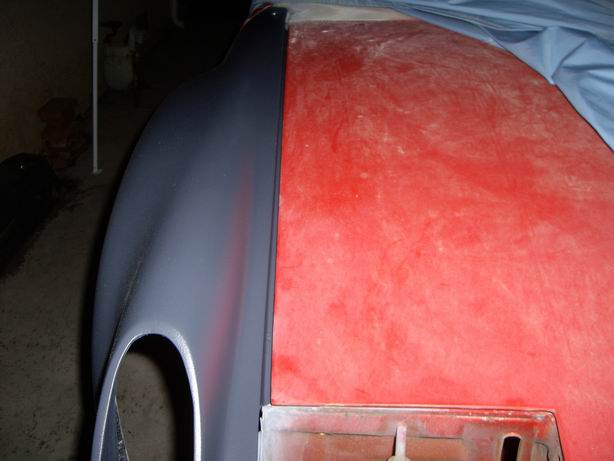 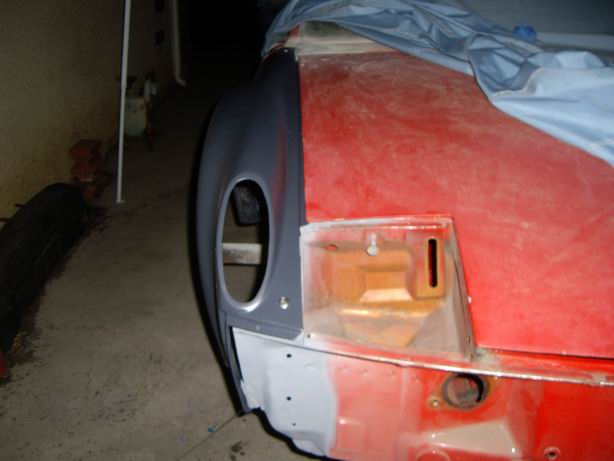 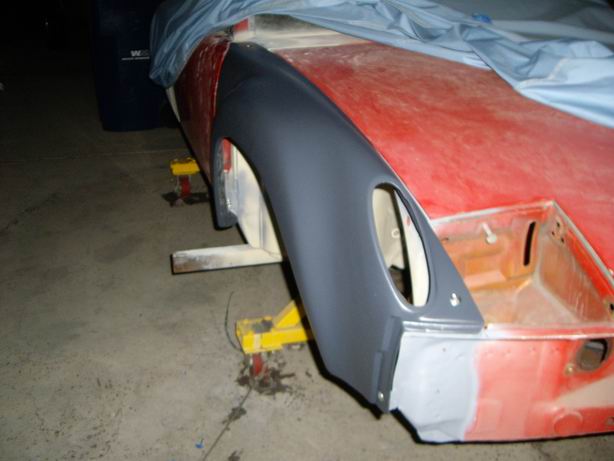 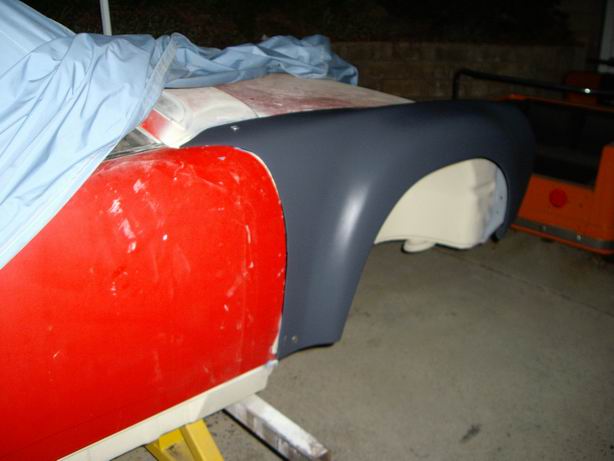
|
|
|
|
| Jeff Hail |
Jul 21 2008, 12:02 AM
Post
#323
|
|
Senior Member Group: Members Posts: 1,141 Joined: 3-May 07 From: LA/ CA Member No.: 7,712 |
Dzus fasteners and mounting plates. I will most likely add a baffle at the rear of the fender to stop road crud from accumulating at the front of the door shell and hinge area. Nice light thin aluminum piece is in mind.
Attached image(s) 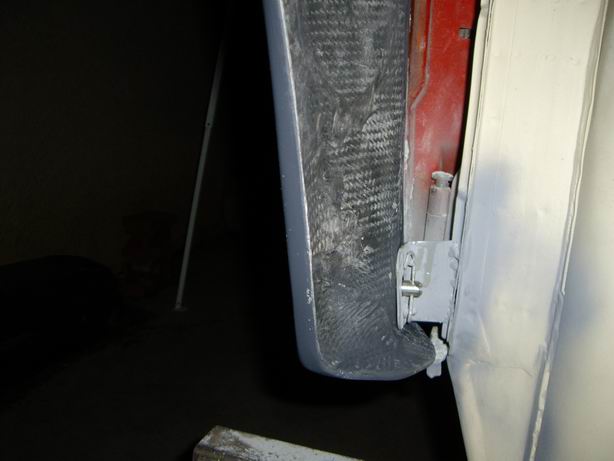 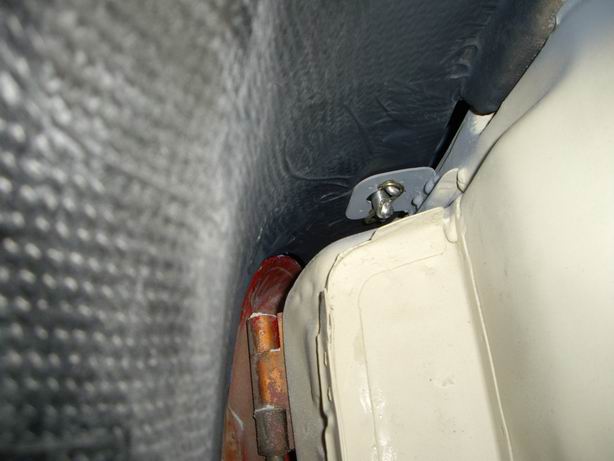 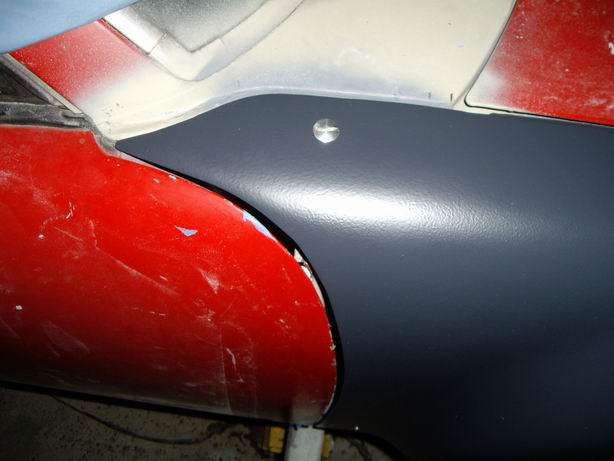
|
|
|
|
| Eric_Shea |
Jul 21 2008, 07:34 AM
Post
#324
|
|
PMB Performance Group: Admin Posts: 19,289 Joined: 3-September 03 From: Salt Lake City, UT Member No.: 1,110 Region Association: Rocky Mountains |
Looks slick Amigo. Sure wish you had made an extra set of fenders. You dzus good werk. (IMG:style_emoticons/default/wink.gif)
|
|
|
|
| Todd Enlund |
Jul 21 2008, 01:40 PM
Post
#325
|
|
Resident Photoshop Guru Group: Members Posts: 3,251 Joined: 24-August 07 From: Laurelhurst (Portland), Oregon Member No.: 8,032 Region Association: Pacific Northwest |
Man, that is one lucky 914 (IMG:style_emoticons/default/biggrin.gif)
|
|
|
|
| Jeff Hail |
Aug 8 2008, 12:54 AM
Post
#326
|
|
Senior Member Group: Members Posts: 1,141 Joined: 3-May 07 From: LA/ CA Member No.: 7,712 |
Projects, projects........always a monkey wrench thrown in for good measure somewhere.
One of the projects formula was I had to retain the stock rear calipers and use spacers for the wide Carrera rear rotors. (to retain the E-brake) Spacers easy. Fasteners not so easy. I could have used Grade 10 1/4x28 bolts but I did not feel the safety factor of 20% was there. I researched and contacted Verbus. They provided the specs for the original 914 caliper bolts and confirmed my research that Grade 10 did not provide the safety/ failure factor I required. Verbus also does not make a longer caliper half/bolt in 12.9 grade. No one makes an off the shelf bolt this length. Guess what no one including Multi-Specialty-Metric fasteners had the M7 bolts that would survive hell and back with a 20% safety factor. I learned long ago do not sacrifice or compromise anything when it comes to brakes and hardware. First rule in racing is you can only go as fast as you can stop. I called an old aquaintance to the challenge. Gary at ARP (Automotive Racing Products). Through the "specialty department" I worked with Jay in manufacturing custom M7 fasteners that would even exceed the 8mm bolts used on the 911 Carrera calipers. 190Ksi caliper bolts with 12 point heads. Unobtainium! Cost was startling but I did not have much choice. Still a bargain when you compare to a ready set of 914/6 calipers. These fasteners come into "unobtainium" category when you look at the tensile strength specs. Far exceeding the 20% safety factor and the extra 14 mm in width will not flex or break. Money well spent. Attached thumbnail(s) 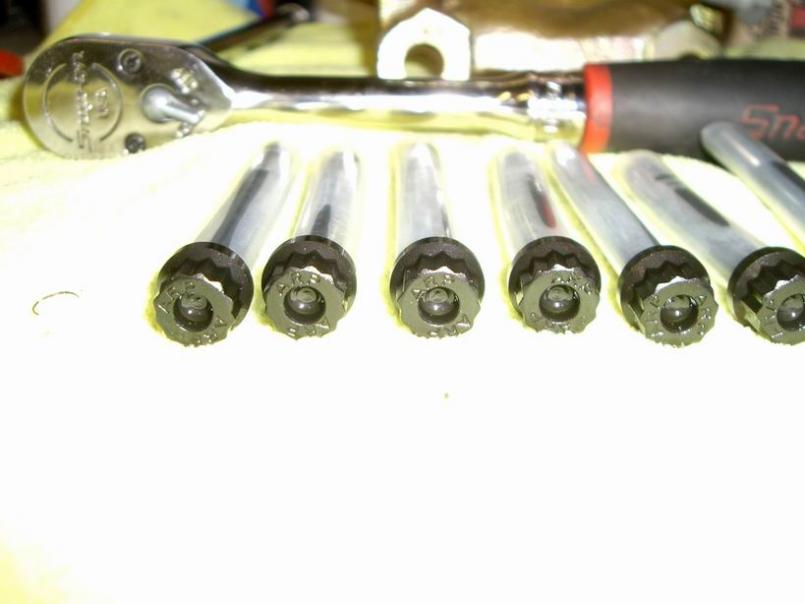 Attached image(s)  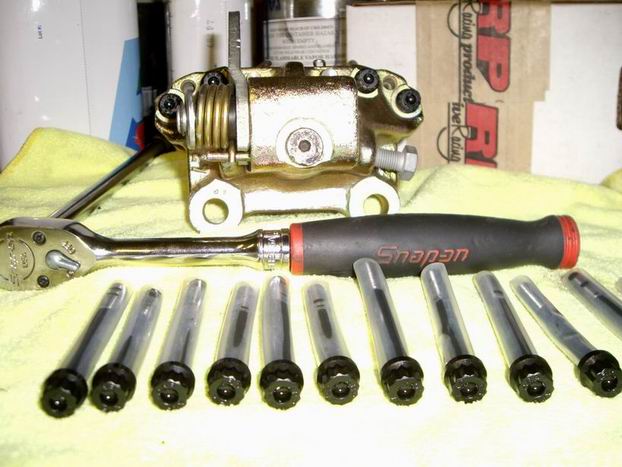 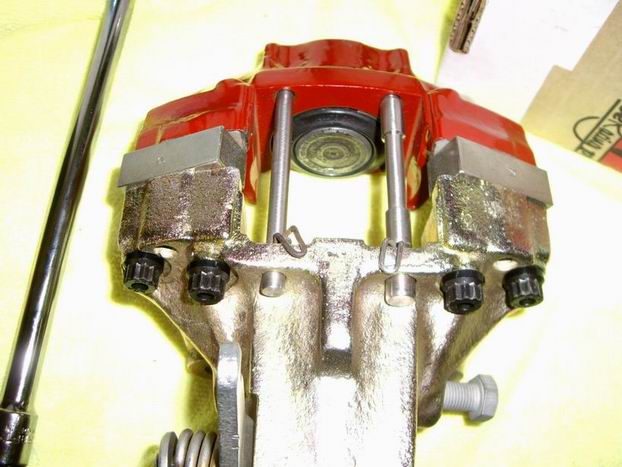
|
|
|
|
| Wes V |
Aug 8 2008, 10:53 AM
Post
#327
|
|
Member Group: Members Posts: 482 Joined: 11-October 07 From: Los angeles Member No.: 8,211 |
Jeff;
Couldn't ARP have done it with studs and nuts with hardened washers. It sure would have been easier to manufacture. Wes V |
|
|
|
| Jeff Hail |
Aug 8 2008, 01:18 PM
Post
#328
|
|
Senior Member Group: Members Posts: 1,141 Joined: 3-May 07 From: LA/ CA Member No.: 7,712 |
QUOTE(Wes V @ Aug 8 2008, 09:53 AM) Jeff; Couldn't ARP have done it with studs and nuts with hardened washers. It sure would have been easier to manufacture. Wes V The length was an issue as strength diminishes with length. 8mm was not an option as the calipers do not have enough meat to drill out. The strength is based on the diameter ,grip area and length of the fasteners. Longer bolts (through), washers and nuts were not recommended with the heat span calipers are subject to. Growth and contraction with heat affect dimensions. This possibly could result in the caliper halfs shifting ever so slightly which could result in fluid seepage between the halfs. Studs were considered but would have still had "play" because the outer half would still need to be drilled to 7mm. 12.9 and higher grade fasteners require a 90% proof rating. In plain english when you torque the fasteners properly a given amount of stretch occurs. Grade 12.9 bolts are tightened right up to their 90% proof load. There is no other effective way to tighten a grade 12.9 bolt. Grade 12.9 bolts do not work effectively with spring washers or shakeproof washers. These don't bite into the hardened surface of the bolt. |
|
|
|
| Eric_Shea |
Aug 8 2008, 06:26 PM
Post
#329
|
|
PMB Performance Group: Admin Posts: 19,289 Joined: 3-September 03 From: Salt Lake City, UT Member No.: 1,110 Region Association: Rocky Mountains |
So... ARP makes the fasteners. Red Green supplied the spacers. (IMG:style_emoticons/default/biggrin.gif)
I just finished a set of Carera (IMG:style_emoticons/default/wink.gif) rear calipers with the "honk'n" spacers (not as sexy as your's mind you...) and the Verbus M7 hardware was (I think) 65 and 70mm. No workie? (IMG:style_emoticons/default/confused24.gif) Damn (IMG:style_emoticons/default/headbang.gif) I just mailed them out this AM and I could have checked. Fasteners look slick Mr. |
|
|
|
| Jeff Hail |
Aug 8 2008, 07:49 PM
Post
#330
|
|
Senior Member Group: Members Posts: 1,141 Joined: 3-May 07 From: LA/ CA Member No.: 7,712 |
QUOTE(Eric_Shea @ Aug 8 2008, 05:26 PM) So... ARP makes the fasteners. Red Green supplied the spacers. (IMG:style_emoticons/default/biggrin.gif) I just finished a set of Carera (IMG:style_emoticons/default/wink.gif) rear calipers with the "honk'n" spacers (not as sexy as your's mind you...) and the Verbus M7 hardware was (I think) 65 and 70mm. No workie? (IMG:style_emoticons/default/confused24.gif) Damn (IMG:style_emoticons/default/headbang.gif) I just mailed them out this AM and I could have checked. Fasteners look slick Mr. Funny thing is M7 hardware is found all over the world on cars, bikes everwhere. Just cant find replacements in these lengths in the aftermarket. Your measurements are correct 65,70mm -why did they not work?. Bet they were 8's huh? I thought the Carrera bolts were 8mm? Actually I think the early one's were 7mm. Fronts were 8 for sure....maybe....ok I admit not sure on the early's. (IMG:style_emoticons/default/huh.gif) The lates pretty damn sure though. (IMG:style_emoticons/default/poke.gif) Never dealt with Red. Wasn't he the guy from "The Taking of Pelum One Two Three" back in 1974? (IMG:style_emoticons/default/stirthepot.gif) |
|
|
|
| Jeff Hail |
Aug 8 2008, 07:55 PM
Post
#331
|
|
Senior Member Group: Members Posts: 1,141 Joined: 3-May 07 From: LA/ CA Member No.: 7,712 |
Haven't worked on the tub in a few weeks. Now I can get back to my regular programming.
Then today my friend Chris sends me this. Have a feeling I am going to get sidetracked helping out. Attached image(s) 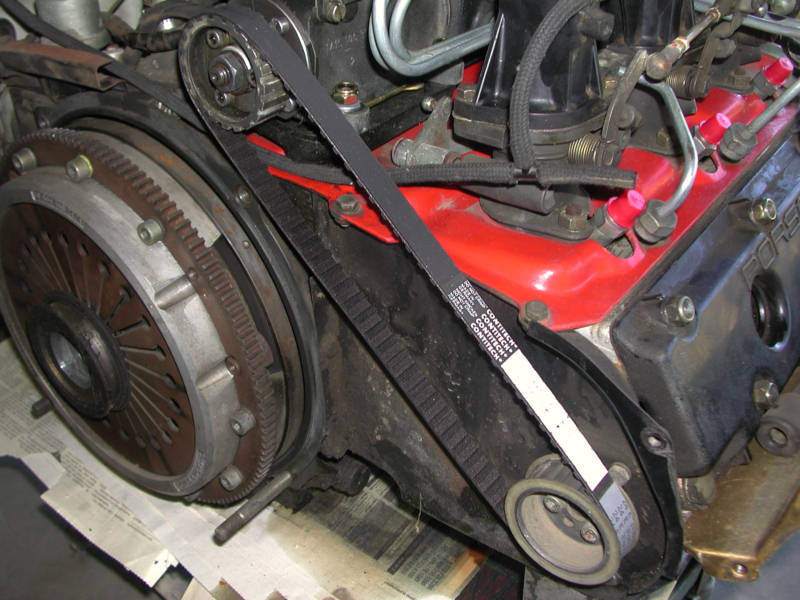 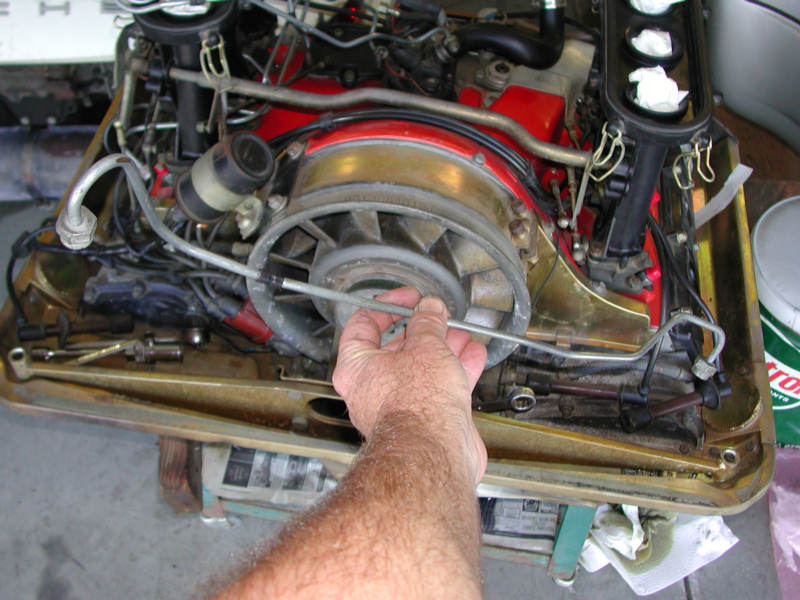  
|
|
|
|
| Eric_Shea |
Aug 8 2008, 08:23 PM
Post
#332
|
|
PMB Performance Group: Admin Posts: 19,289 Joined: 3-September 03 From: Salt Lake City, UT Member No.: 1,110 Region Association: Rocky Mountains |
QUOTE Your measurements are correct 65,70mm -why did they not work?. Bet they were 8's huh? No, they worked fine for me. I was asking why they wouldn't have worked for you. It seems it would be less expensive to pick up a core pair of rear Carrera calipers and steal the fasteners. I'm fairly certain all rear Carrera calipers are M7. The set I rebuilt had the 65 and 70mm M7... I really can't recall if they were Ribe or Verbus. The funny thing with M7 stuff on Porsche calipers is they are both Verbus and Ribe on the same caliper. Ribe made the longer fasteners on the 914 front caliper and Verbus made the shorter ones. Maybe this is why Verbus didn't have anything listed... (IMG:style_emoticons/default/confused24.gif) Ribe is listed at 12.9 and Verbus is 11.9 |
|
|
|
| Jeff Hail |
Aug 8 2008, 10:04 PM
Post
#333
|
|
Senior Member Group: Members Posts: 1,141 Joined: 3-May 07 From: LA/ CA Member No.: 7,712 |
QUOTE(Eric_Shea @ Aug 8 2008, 07:23 PM) QUOTE Your measurements are correct 65,70mm -why did they not work?. Bet they were 8's huh? No, they worked fine for me. I was asking why they wouldn't have worked for you. It seems it would be less expensive to pick up a core pair of rear Carrera calipers and steal the fasteners. I'm fairly certain all rear Carrera calipers are M7. The set I rebuilt had the 65 and 70mm M7... I really can't recall if they were Ribe or Verbus. The funny thing with M7 stuff on Porsche calipers is they are both Verbus and Ribe on the same caliper. Ribe made the longer fasteners on the 914 front caliper and Verbus made the shorter ones. Maybe this is why Verbus didn't have anything listed... (IMG:style_emoticons/default/confused24.gif) Ribe is listed at 12.9 and Verbus is 11.9 The original Verbus I pulled off was 12.9 on all. One concern was when they are proofed (torqued to 90%) they really arent supposed to be reused over and over. I doubt I would ever have a problem but don't want to find out. |
|
|
|
| Jeff Hail |
Aug 9 2008, 08:46 PM
Post
#334
|
|
Senior Member Group: Members Posts: 1,141 Joined: 3-May 07 From: LA/ CA Member No.: 7,712 |
Back to the regular program.........
Stripped the nose and primed today. 3rd pic shows driver side cowl with a bit of rust in the usual place. Attached image(s) 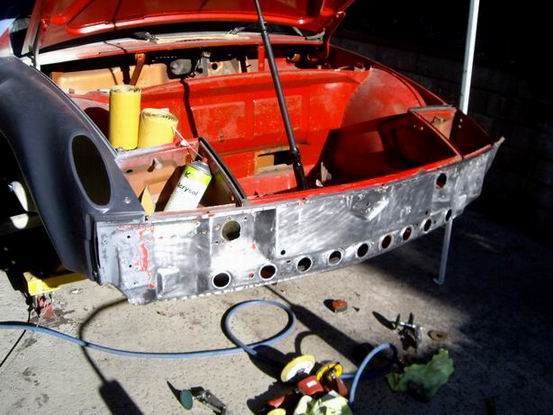  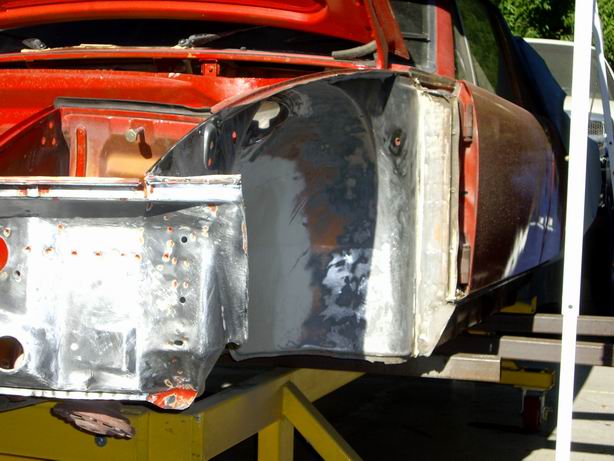 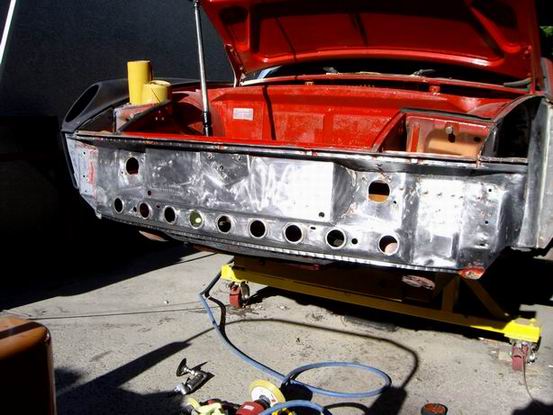 
|
|
|
|
| Jeff Hail |
Aug 9 2008, 08:47 PM
Post
#335
|
|
Senior Member Group: Members Posts: 1,141 Joined: 3-May 07 From: LA/ CA Member No.: 7,712 |
Easy day
Attached image(s) 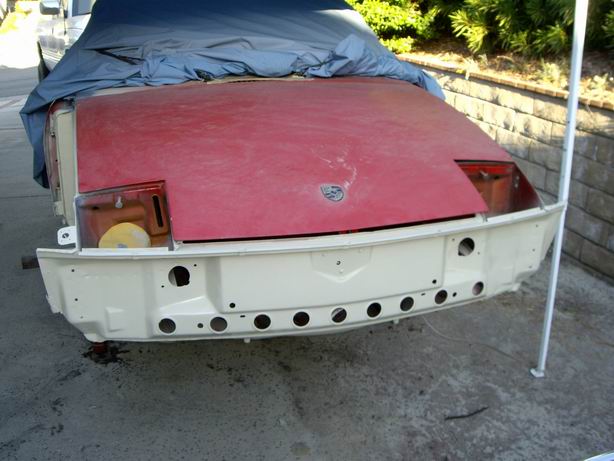
|
|
|
|
| KELTY360 |
Aug 9 2008, 08:58 PM
Post
#336
|
|
914 Neferati Group: Members Posts: 5,091 Joined: 31-December 05 From: Pt. Townsend, WA Member No.: 5,344 Region Association: Pacific Northwest |
QUOTE(Jeff Hail @ Aug 8 2008, 06:55 PM) Haven't worked on the tub in a few weeks. Now I can get back to my regular programming. Then today my friend Chris sends me this. Have a feeling I am going to get sidetracked helping out. So when does the engine go back in the Mulholland RSR? |
|
|
|
| plymouth37 |
Aug 9 2008, 09:48 PM
Post
#337
|
|
Senior Member Group: Members Posts: 1,825 Joined: 24-May 05 From: Snoqualmie, WA Member No.: 4,138 Region Association: Pacific Northwest |
My god those fenders are fricken amazing! How much for a set, serously I need those, where should I send the check?
You are going into production with these whether you like it or not! |
|
|
|
| Jeff Hail |
Aug 9 2008, 10:15 PM
Post
#338
|
|
Senior Member Group: Members Posts: 1,141 Joined: 3-May 07 From: LA/ CA Member No.: 7,712 |
QUOTE(KELTY360 @ Aug 9 2008, 07:58 PM) QUOTE(Jeff Hail @ Aug 8 2008, 06:55 PM) Haven't worked on the tub in a few weeks. Now I can get back to my regular programming. Then today my friend Chris sends me this. Have a feeling I am going to get sidetracked helping out. So when does the engine go back in the Mulholland RSR? When my phone rings? |
|
|
|
| Jeff Hail |
Aug 9 2008, 10:53 PM
Post
#339
|
|
Senior Member Group: Members Posts: 1,141 Joined: 3-May 07 From: LA/ CA Member No.: 7,712 |
QUOTE(plymouth37 @ Aug 9 2008, 08:48 PM) My god those fenders are fricken amazing! How much for a set, serously I need those, where should I send the check? You are going into production with these whether you like it or not! Lot of time to make them Dana. I did make 4, other 2 are in storage as spares- I hope I will never need them. Believe me I thought about making a run but they were very time intensive to do. The last two I pulled in a big hurry and distroyed both molds in the process. No kidding. I will be doing a set of 12 inch rear flares in c/f soon. These will be tricky as I have no plug to pull a mold from. I have a few ideas though (IMG:style_emoticons/default/happy11.gif)....running around this head of mine. By the way nice project you are doing. You have impressive skills. |
|
|
|
| Jeff Hail |
Aug 20 2008, 09:11 AM
Post
#340
|
|
Senior Member Group: Members Posts: 1,141 Joined: 3-May 07 From: LA/ CA Member No.: 7,712 |
Fitting the front structure. Just tacked so I can square all the pieces during the mockup.
Fit of the pieces is perfect considering it began as an email and photo in California and fabbed in Conneticuit (by Chris Foley). Chris's work is first rate. All ties into the lower control arm and suspension crossmember control points at the same time triangulating the nose and cowl. Very light weight. Hey Chris think the headlight motors are going to fit? Attached image(s)  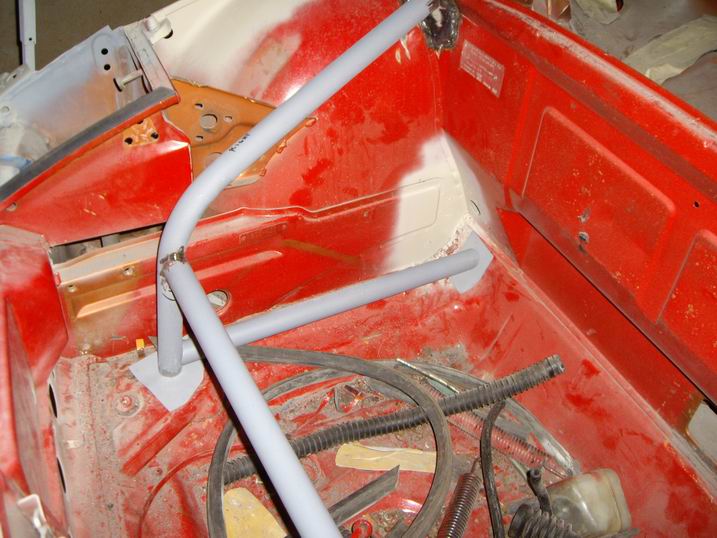 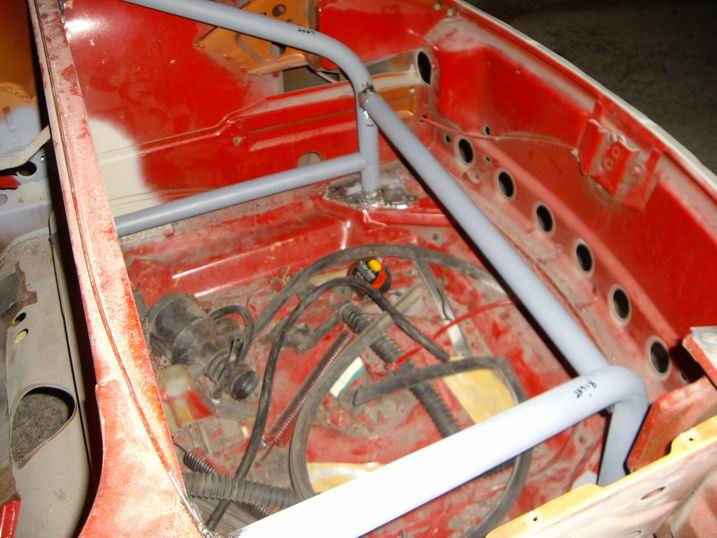 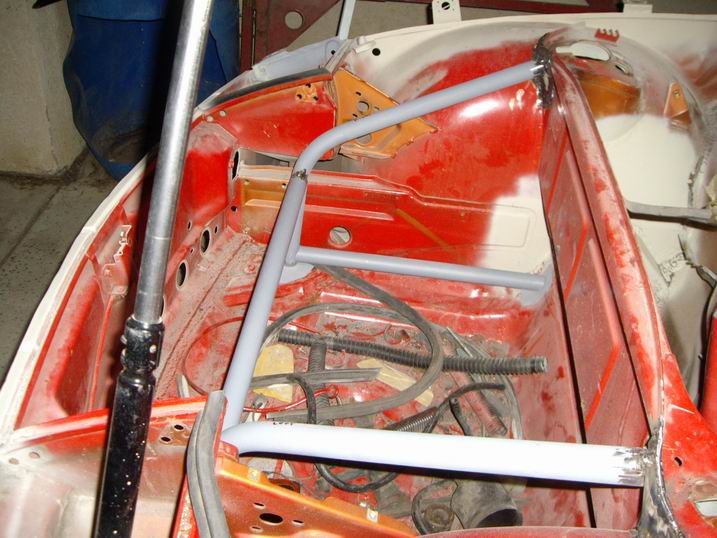
|
|
|
|
|
3 User(s) are reading this topic (3 Guests and 0 Anonymous Users)
0 Members:

|
Lo-Fi Version | Time is now: 25th November 2024 - 11:42 AM |
Invision Power Board
v9.1.4 © 2024 IPS, Inc.