|
|
|
Porsche, and the Porsche crest are registered trademarks of Dr. Ing. h.c. F. Porsche AG.
This site is not affiliated with Porsche in any way. Its only purpose is to provide an online forum for car enthusiasts. All other trademarks are property of their respective owners. |
|
|

  |

| strawman |
 Jun 17 2009, 12:23 AM Jun 17 2009, 12:23 AM
Post
#401
|
|
Senior Member  Group: Members Posts: 885 Joined: 25-January 08 From: Los Osos, CA Member No.: 8,624 Region Association: Central California |
QUOTE(Jeff Hail @ Jun 16 2009, 10:45 PM)  Don't count me out until you see the box going into the ground!!!!! Move completed. Dealing with house things now. Garage is secondary at the moment. Good to see you haven't given up on your incredible project. I've been having withdrawals these past few months waiting for an update. Hope you can back to the project soon! Geoff |
   |

 
|
| Jeff Hail |
Oct 19 2009, 01:04 AM
Post
#402
|
|
Senior Member Group: Members Posts: 1,141 Joined: 3-May 07 From: LA/ CA Member No.: 7,712 |
The house stuff is close enough. Shop has been fitted. Now its time to get back to work. Winter is coming and no time like the better to.......GET THIS BITCH DONE![size=7]
Attached image(s) 
|
|
|
|
| veltror |
Oct 19 2009, 04:09 AM
Post
#403
|
|
Senior Member Group: Members Posts: 928 Joined: 27-April 08 From: Potters Bar Herts UK Member No.: 8,978 Region Association: None |
First class, I hope to have some news on my project soon also...
|
|
|
|
| Jeff Hail |
Nov 13 2009, 08:19 PM
Post
#404
|
|
Senior Member Group: Members Posts: 1,141 Joined: 3-May 07 From: LA/ CA Member No.: 7,712 |
Where was I? Oh yeah....rust
I pulled the tack welded ft tube structure from under the hood to access the lower control arm bracket, floor and corner reinforcement. Wasnt as bad as anticipated. Always new it was there under the reinforcement. Remove the corner reinforcement Hello floor Wire wheel the area. Floor repair will follow later as I have to make a template and didnt have the correct guage sheetmetal. Attached image(s) 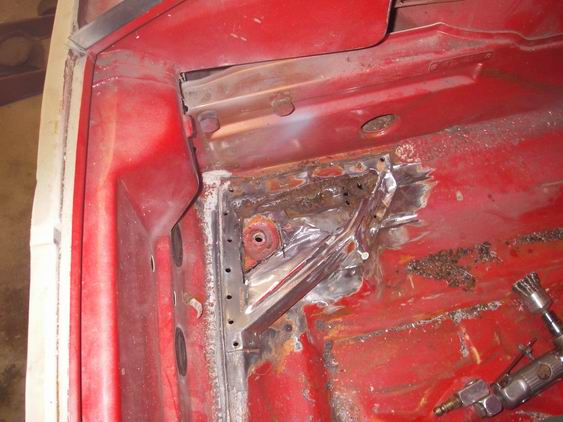 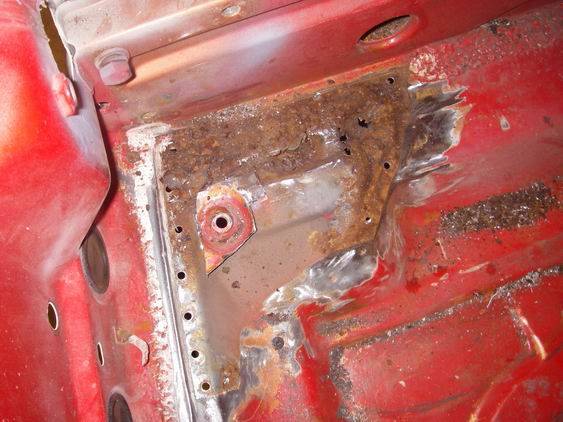 
|
|
|
|
| Jeff Hail |
Nov 13 2009, 08:24 PM
Post
#405
|
|
Senior Member Group: Members Posts: 1,141 Joined: 3-May 07 From: LA/ CA Member No.: 7,712 |
Made a template of the reinforcement using the old one.
Salvaged the inboard portion and fabricated the new section. Lots of weird contours on this piece to duplicate. You can see the holes where the spot welds were on the old section that remains. Presto! Attached image(s) 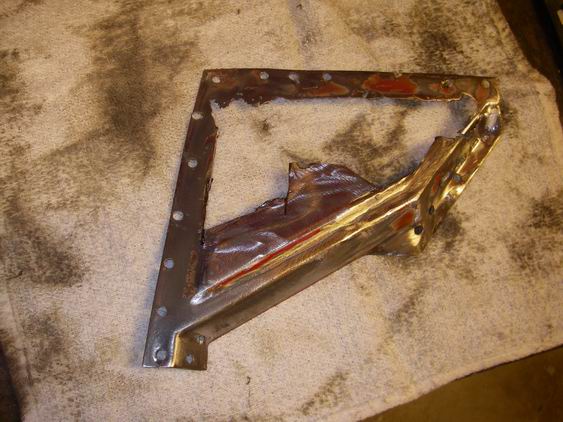 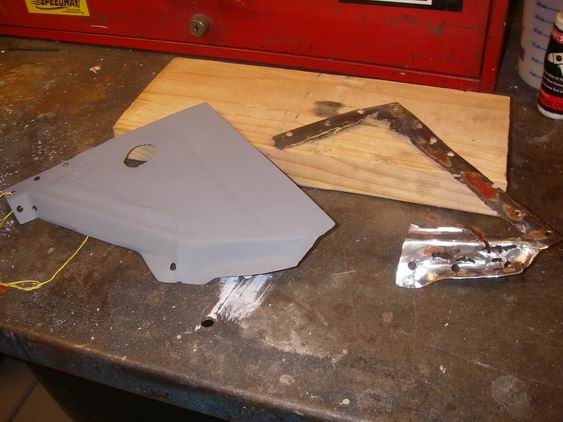 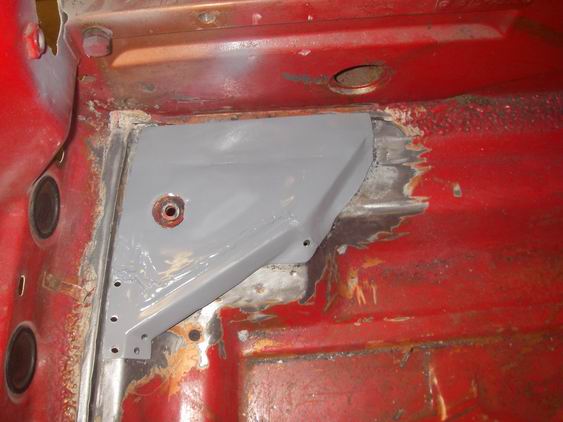
|
|
|
|
| Jeff Hail |
Nov 13 2009, 08:37 PM
Post
#406
|
|
Senior Member Group: Members Posts: 1,141 Joined: 3-May 07 From: LA/ CA Member No.: 7,712 |
BTW
Clayton, Clayton. Calling the Twisted one. Think were overdue for a cup of really strong Joe. Glad your back. |
|
|
|
| my928s4 |
Nov 13 2009, 09:12 PM
Post
#407
|
|
Member Group: Members Posts: 349 Joined: 18-August 07 From: Spokane, WA Member No.: 8,018 Region Association: Pacific Northwest |
QUOTE(Jeff Hail @ Nov 13 2009, 06:19 PM) Wire wheel the area. Floor repair will follow later as I have to make a template and didnt have the correct guage sheetmetal. What did you coat that rusted area with? |
|
|
|
| Jeff Hail |
Nov 13 2009, 10:10 PM
Post
#408
|
|
Senior Member Group: Members Posts: 1,141 Joined: 3-May 07 From: LA/ CA Member No.: 7,712 |
Its not coated. Just Jasco metal prep. Cheap as water and works as well as anything. I just sprayed a bit on after wire wheeling the area. The rust is going to get cut out anyway under the corner reinforcement.
|
|
|
|
| brp986s |
Nov 13 2009, 10:21 PM
Post
#409
|
|
Member Group: Members Posts: 434 Joined: 27-September 07 From: los angeles Member No.: 8,167 |
Well...Did you get a bigger garage?
(IMG:style_emoticons/default/thisthreadisworthlesswithoutpics.gif) |
|
|
|
| Jeff Hail |
Nov 15 2009, 02:11 AM
Post
#410
|
|
Senior Member Group: Members Posts: 1,141 Joined: 3-May 07 From: LA/ CA Member No.: 7,712 |
QUOTE(brp986s @ Nov 13 2009, 08:21 PM) Well...Did you get a bigger garage? (IMG:style_emoticons/default/thisthreadisworthlesswithoutpics.gif) Actually the shop is 2 feet shorter than the old one. But I have a hell of lot more cabinet and storage space. A 6x6x10 storage closet plus 400 square feet of floored attic storage! The shop is still in a bit of disarray but one less car equals more work space. Fire resistant dropped ceiling tiles, better lighting and sound proofing. 800 watt stereo. I cant complain and the neighbors cant hear a thing. I wanna bang all night. In space no one can hear you scream! A 914 in process. A 1965 Harley Davidson Golf Cart (250cc Aermacchi powered 2-stroke) that will tear the balls off an EasyGo or Gator cart. The nightmare of the greens keeper. An awesome and special woman in my life. Only the best will do. Life is good. Attached image(s) 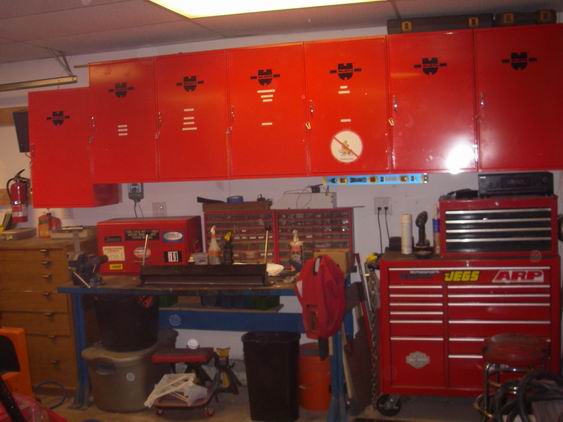 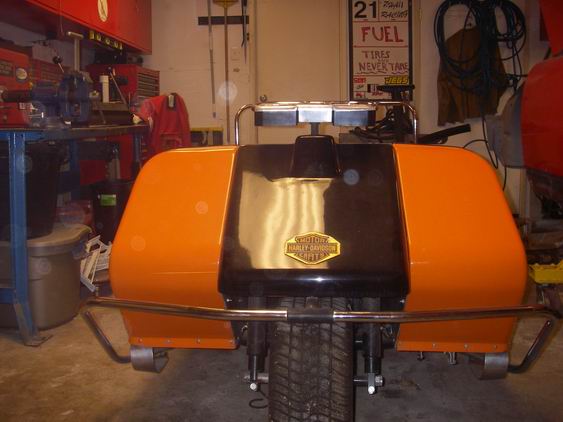
|
|
|
|
| Jeff Hail |
Nov 15 2009, 02:37 AM
Post
#411
|
|
Senior Member Group: Members Posts: 1,141 Joined: 3-May 07 From: LA/ CA Member No.: 7,712 |
Before I start cutting the rusted area from the front floor which really isnt bad. I had to fabricate a jig for the control arm mounting points. This is a critical area that cannot be left to guessing so when in doubt build a jig. Fifteen minutes of fab time will more than make up for improper positioning of the front lower control arm pivot bracket during repair of the affected area.
If I have to remove the bracket during repair, concerns that can be eliminated by doing this are: Incorrect caster/ camber Incorrect Steering Axis Inclination (SAI) Do it once right the first time and sleep well. Attached thumbnail(s) 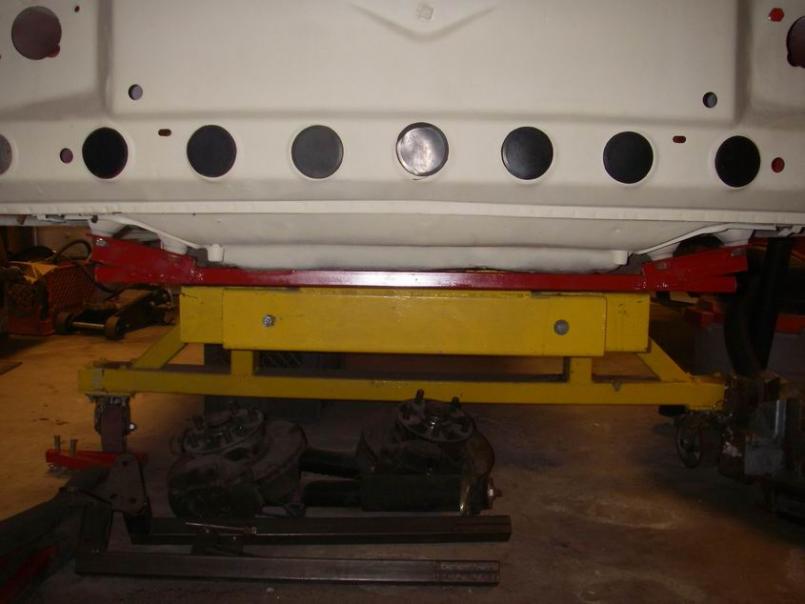
|
|
|
|
| Jeff Hail |
Nov 15 2009, 07:41 PM
Post
#412
|
|
Senior Member Group: Members Posts: 1,141 Joined: 3-May 07 From: LA/ CA Member No.: 7,712 |
Cut the affected sheetmetal back to good metal. Traced a template and fabricated the repair panel. In she is. Next I will install the corner reinforcement I made earlier.
Attached thumbnail(s) 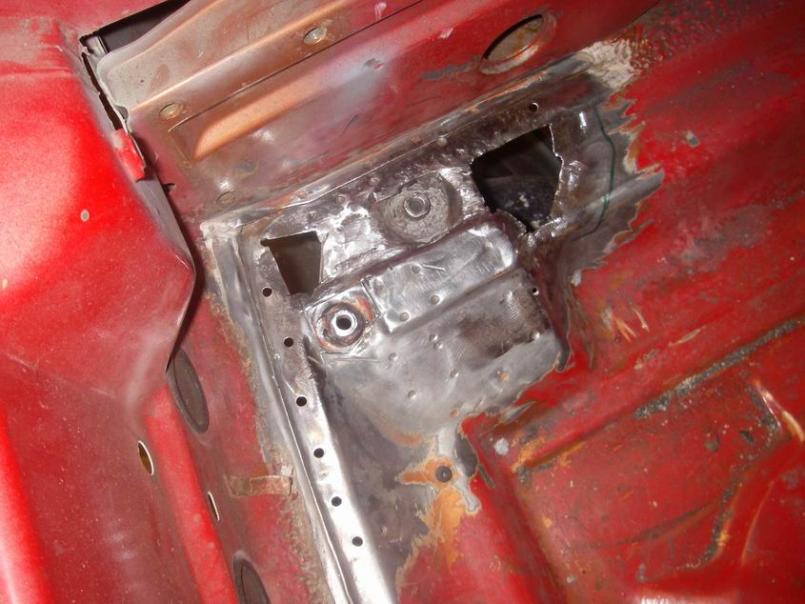  Attached image(s) 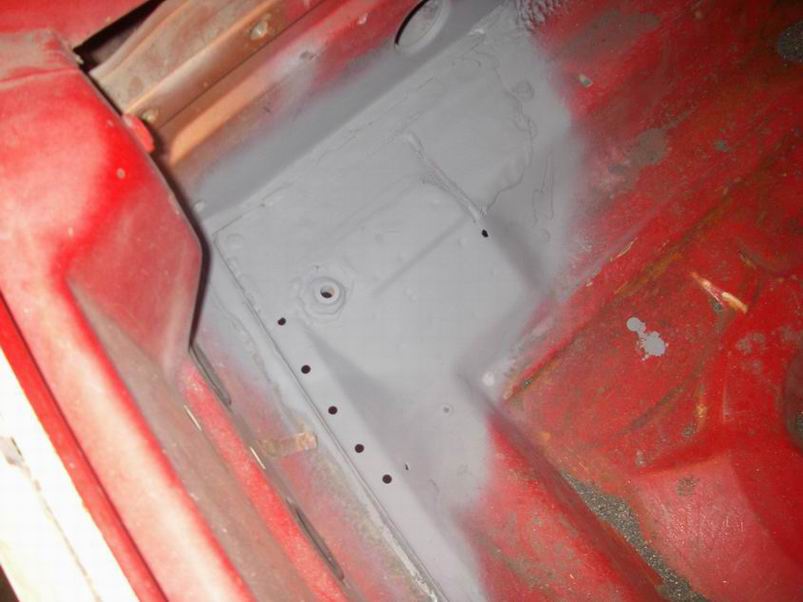
|
|
|
|
| ChrisFoley |
Nov 15 2009, 07:46 PM
Post
#413
|
|
I am Tangerine Racing Group: Members Posts: 7,964 Joined: 29-January 03 From: Bolton, CT Member No.: 209 Region Association: None |
Every 914 I have worked on has its own unique rust signature.
Good work Jeff! |
|
|
|
| FourBlades |
Nov 15 2009, 08:19 PM
Post
#414
|
|
From Wreck to Rockin Group: Members Posts: 2,056 Joined: 3-December 07 From: Brevard, FL Member No.: 8,414 Region Association: South East States |
Whoo Hoo, Jeff is back!!! We are ready to learn from you once again. Nice looking workshop. (IMG:style_emoticons/default/piratenanner.gif) (IMG:style_emoticons/default/popcorn[1].gif) (IMG:style_emoticons/default/piratenanner.gif) (IMG:style_emoticons/default/popcorn[1].gif) (IMG:style_emoticons/default/piratenanner.gif) John |
|
|
|
| Jeff Hail |
Nov 26 2009, 02:12 AM
Post
#415
|
|
Senior Member Group: Members Posts: 1,141 Joined: 3-May 07 From: LA/ CA Member No.: 7,712 |
Ft floor done. Well almost... a ding just behind the nose panel needs some dolly work but that will take just a second.
Front tube structure fully welded in and spot primed. (A Thank you plug to Mr. Foley for the pipe work) Attached thumbnail(s) 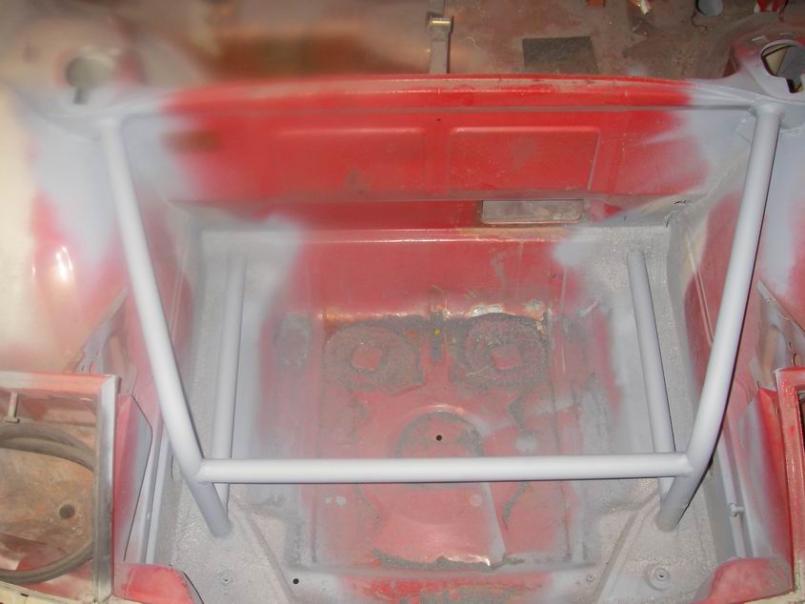
|
|
|
|
| Jeff Hail |
Nov 26 2009, 02:23 AM
Post
#416
|
|
Senior Member Group: Members Posts: 1,141 Joined: 3-May 07 From: LA/ CA Member No.: 7,712 |
Ok
I lied... I did do some work back in January. Better living through chemicals, gelcoat and carbon fiber mat. 14 inches from the inner wheel well to the outer lip of the flair. Something tells me my 9 inch Rota's are going to need some spacers. Don't ever tell a girl her ass it fat! It will give her complex! Attached thumbnail(s) 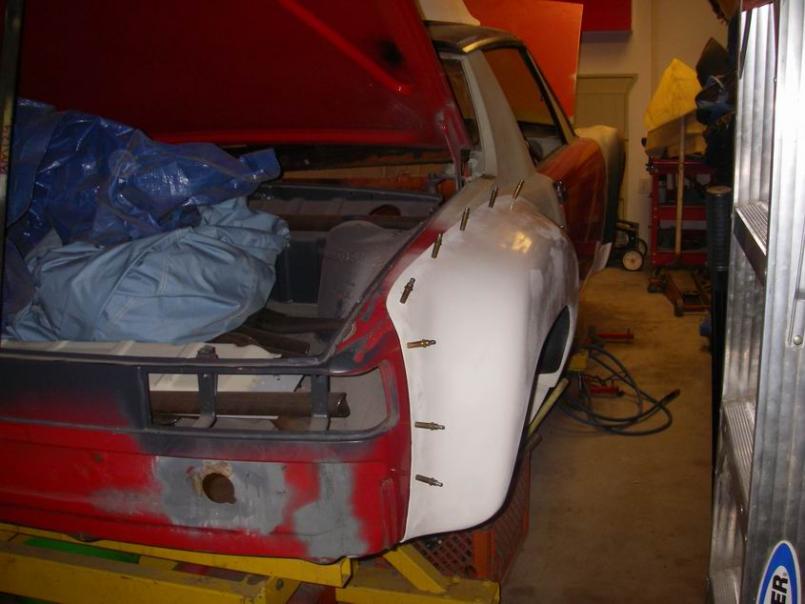
|
|
|
|
| ChrisFoley |
Nov 26 2009, 08:49 AM
Post
#417
|
|
I am Tangerine Racing Group: Members Posts: 7,964 Joined: 29-January 03 From: Bolton, CT Member No.: 209 Region Association: None |
QUOTE(Jeff Hail @ Nov 26 2009, 03:23 AM) 14 inches from the inner wheel well to the outer lip of the flair. That is wide! A stock rear is about 10" to the edge of the fender lip, measured from just above the step on the inner wheel well. You need to put 275's in there or she'll just look flabby. (IMG:style_emoticons/default/bootyshake.gif) |
|
|
|
| Jeff Hail |
Nov 27 2009, 10:34 PM
Post
#418
|
|
Senior Member Group: Members Posts: 1,141 Joined: 3-May 07 From: LA/ CA Member No.: 7,712 |
One of last years unfinished area's. In a previous post I rebuilt the drain trough and the corner just behind the hood then life got busy.
The driver side cowl.... Done ! Ground down the rear side area and fabricated a new layer. This area is super thin from the factory where the dies stretch and thin the sheetmetal. Lots of trigger on/off to stitch it in. Funny I forgot to reload the spool of 023 wire and had 030 in the mig. Oops but hey good penetration. Attached thumbnail(s)  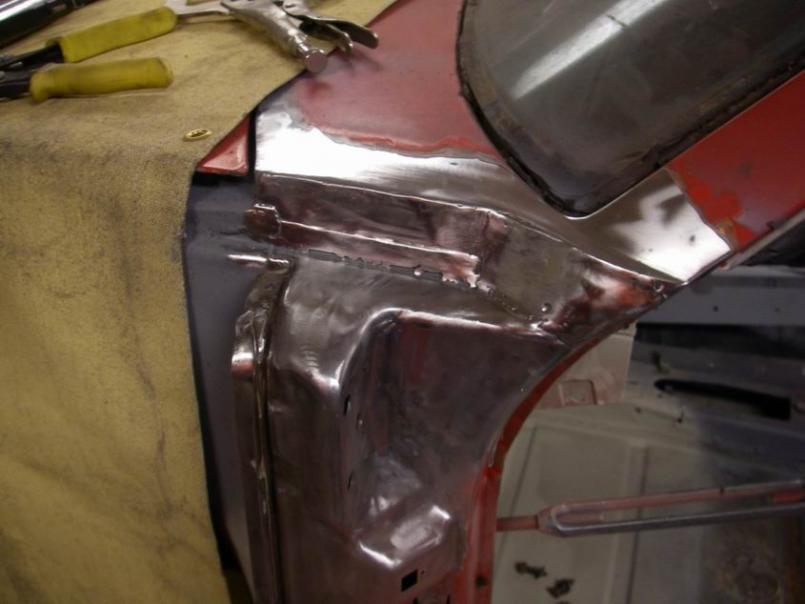
|
|
|
|
| Jeff Hail |
Nov 27 2009, 10:35 PM
Post
#419
|
|
Senior Member Group: Members Posts: 1,141 Joined: 3-May 07 From: LA/ CA Member No.: 7,712 |
After shaping and grinding. Came out a lot better than the passenger side.
Attached thumbnail(s) 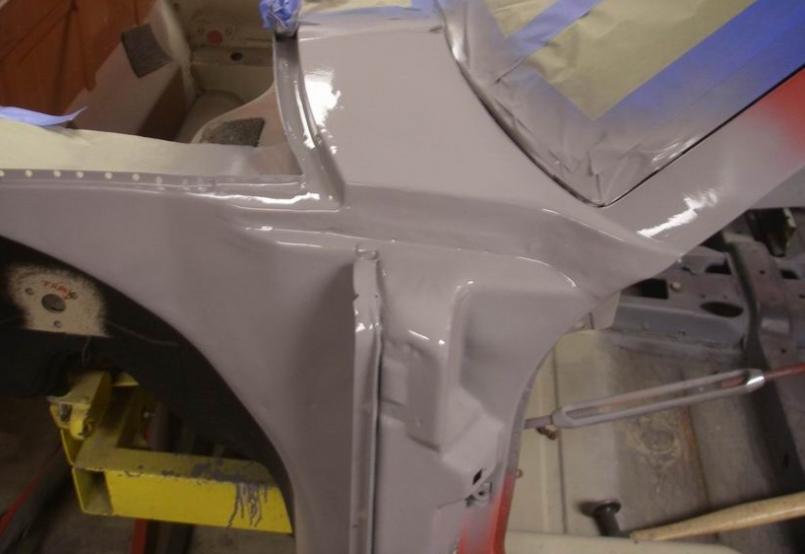 Attached image(s) 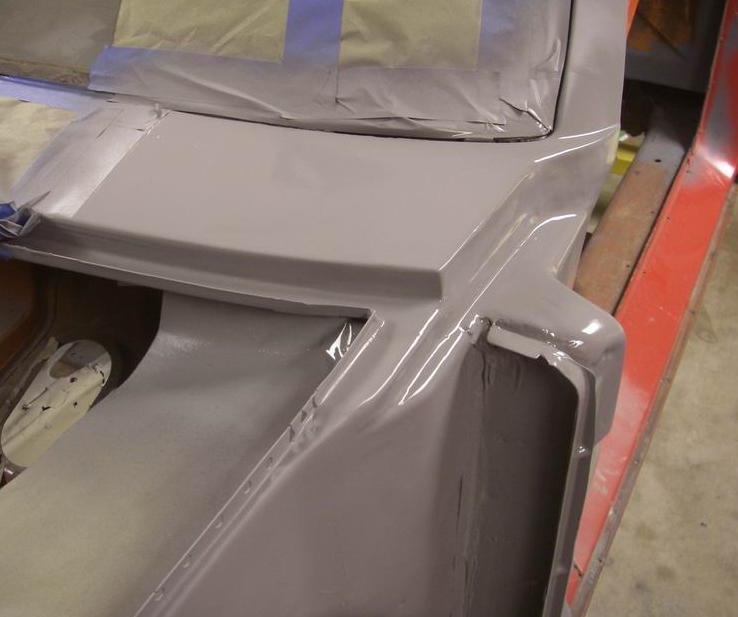
|
|
|
|
| 914Mike |
Nov 28 2009, 07:58 PM
Post
#420
|
|
Member Group: Members Posts: 330 Joined: 27-January 03 From: San Jose, CA Member No.: 198 |
QUOTE(Jeff Hail @ Nov 27 2009, 09:35 PM) After shaping and grinding. Came out a lot better than the passenger side. How's the hood fit this area? The pics make it look a little too flat/forward at the corners to me. |
|
|
|
|
3 User(s) are reading this topic (3 Guests and 0 Anonymous Users)
0 Members:

|
Lo-Fi Version | Time is now: 25th November 2024 - 03:22 PM |
Invision Power Board
v9.1.4 © 2024 IPS, Inc.