|
|
|
Porsche, and the Porsche crest are registered trademarks of Dr. Ing. h.c. F. Porsche AG.
This site is not affiliated with Porsche in any way. Its only purpose is to provide an online forum for car enthusiasts. All other trademarks are property of their respective owners. |
|
|

  |

| Jeff Hail |
 Jan 30 2010, 12:55 AM Jan 30 2010, 12:55 AM
Post
#441
|
|
Senior Member  Group: Members Posts: 1,141 Joined: 3-May 07 From: LA/ CA Member No.: 7,712 |
I forgot to post these before I went out of town. Boredom today and itching to burn some metal when I get back. I hate leaving in the middle.
Left inner long: Typical rust at the bottom of the rail from the motor mount forward. Exploratory cutting until I hit good steel. Fabricate the lower portion of the long, flange it and burn it in. It was easier to shape the rear upward angle after the front lower portion was tacked in. 16 guage tends to want to hold its memory. Still not done here but had to leave in the middle. Lots of finish work and weld grinding to do. Need to add a piece at the rear of the motor mount recess area but will hold off until I see what Foleys raised pickup kit extends to. As a side note: The motor mounts, heater tube and silencer, ebrake handle mount will not be reused. Attached image(s) 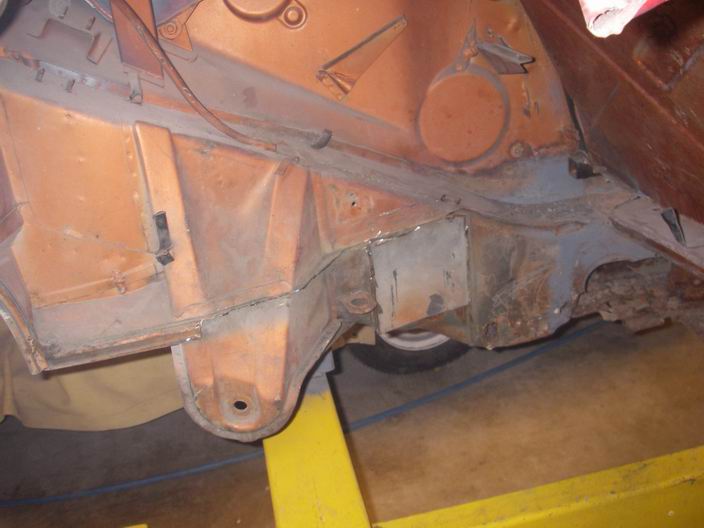 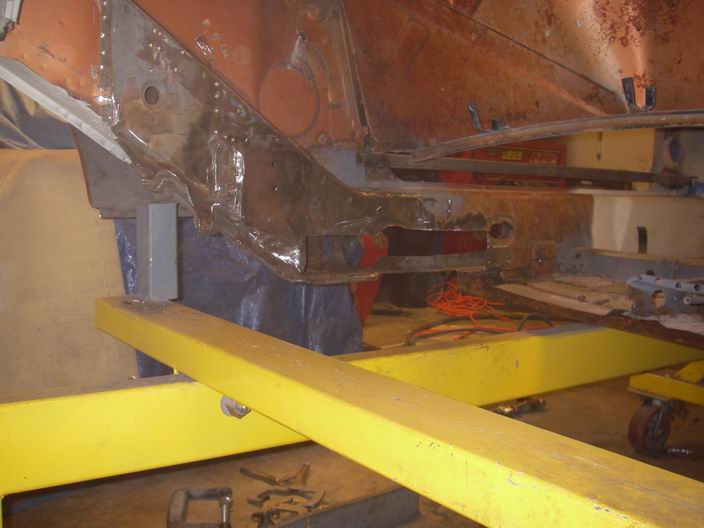 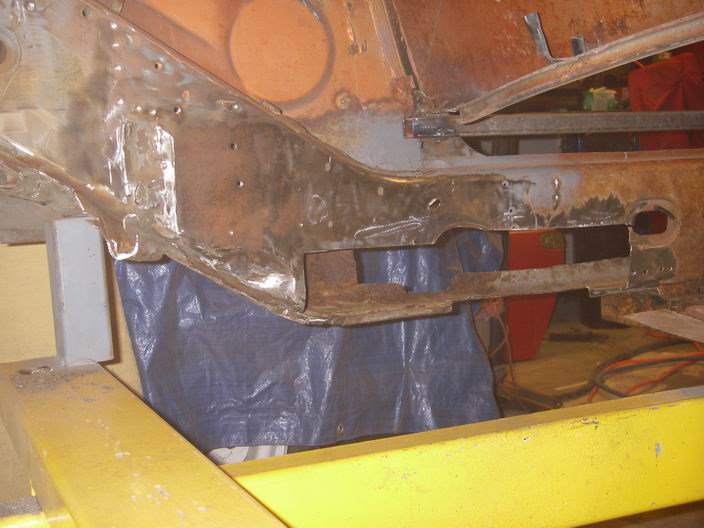 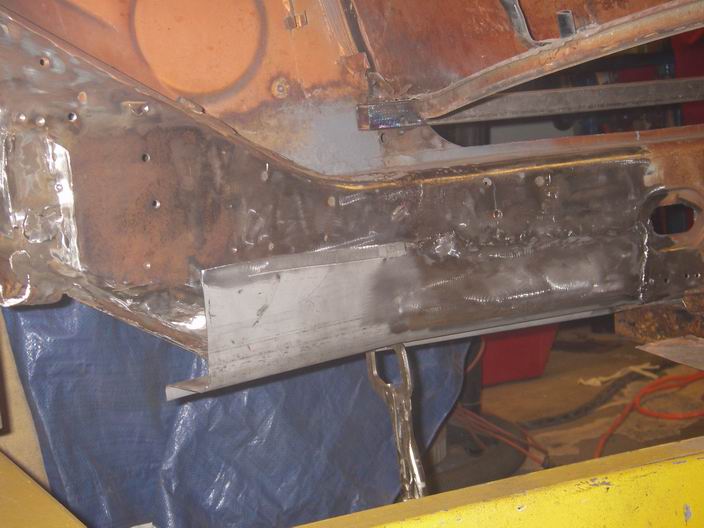 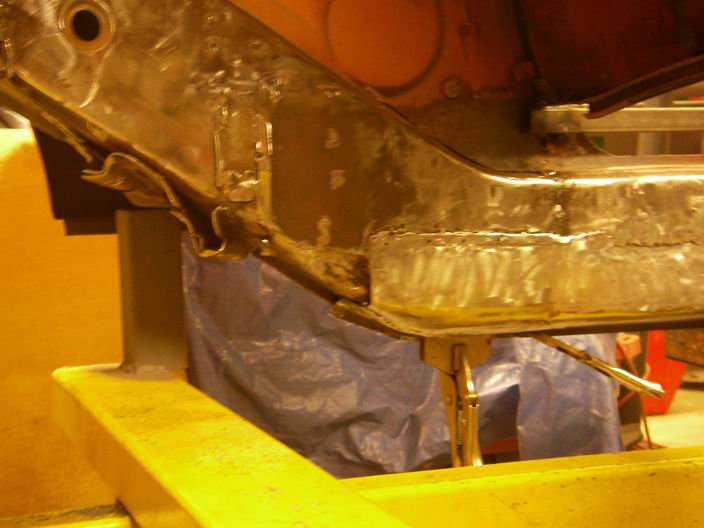
|
   |

 
|
| Jeff Hail |
Feb 3 2010, 12:26 AM
Post
#442
|
|
Senior Member Group: Members Posts: 1,141 Joined: 3-May 07 From: LA/ CA Member No.: 7,712 |
mis·cel·la·neous rambings
I'm back. Interesting leave of absence. Women can be strange at times. Never can understand them can we? Back to work. Anyone ever notice my photos are semi myopic? Cant ever show too much can you? Here is where I am at: Front body is 98% done. Front bumper and fenders just need to be hung. Dzus fastener mounts are all located. Just need to complete the finish work on the left fender and basicly done. I havent come to a conclusion on headlamps yet but I hate the pop up lids - so they must go. Considering the CA laws on lamps some ideas have come to mind. Just like a formula in racing its all really open to interpretation and the risk. Attached thumbnail(s)  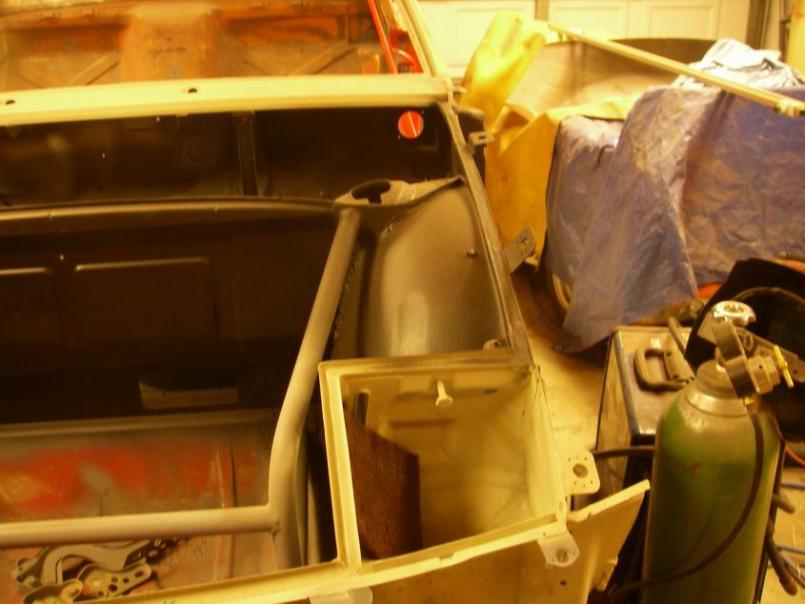
|
|
|
|
| Jeff Hail |
Feb 3 2010, 12:30 AM
Post
#443
|
|
Senior Member Group: Members Posts: 1,141 Joined: 3-May 07 From: LA/ CA Member No.: 7,712 |
Working on the left inner long. Its done. Just need to replace the outer long and good to go. Threw the Engman stiffener on there for looks.
I am getting ready for the rear floor section and lower firewall installation. I'm excited. Attached thumbnail(s) 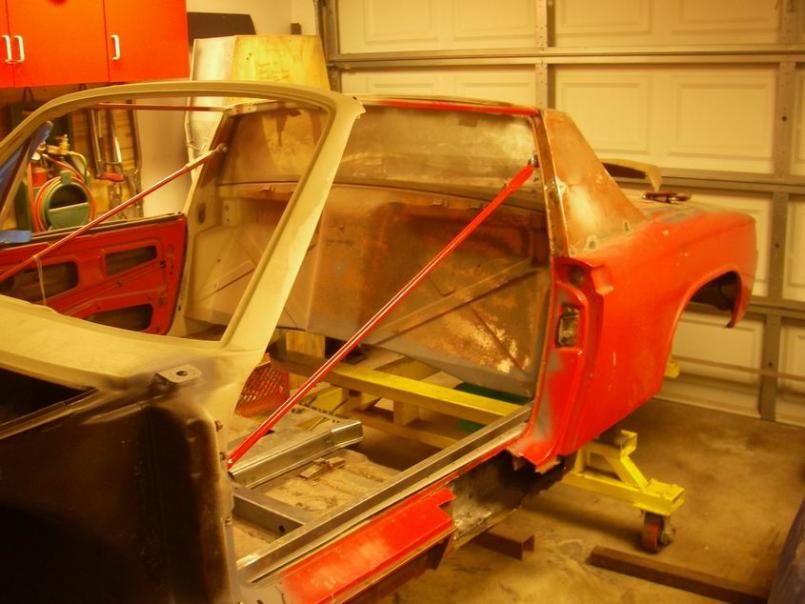 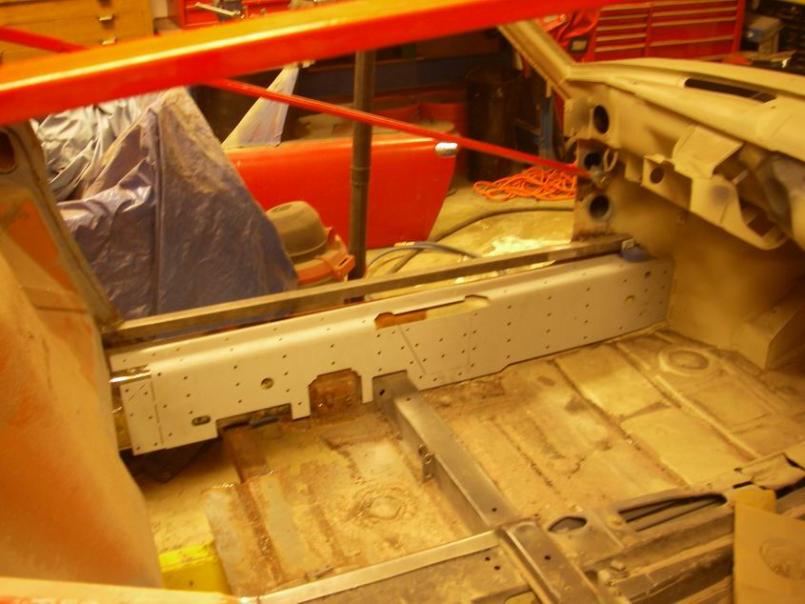
|
|
|
|
| Jeff Hail |
Feb 3 2010, 12:34 AM
Post
#444
|
|
Senior Member Group: Members Posts: 1,141 Joined: 3-May 07 From: LA/ CA Member No.: 7,712 |
Completed the tunnel repair patch for both sides. This will be plug welded once I install the floor. Fitment prior to floor cut and trim.
An afterthought! Porsche/VW should have made the tunnel the same height as the longs. Would have made a much stiffer platform. Shorten the shifter a bit and well.. it didnt happen. Attached thumbnail(s) 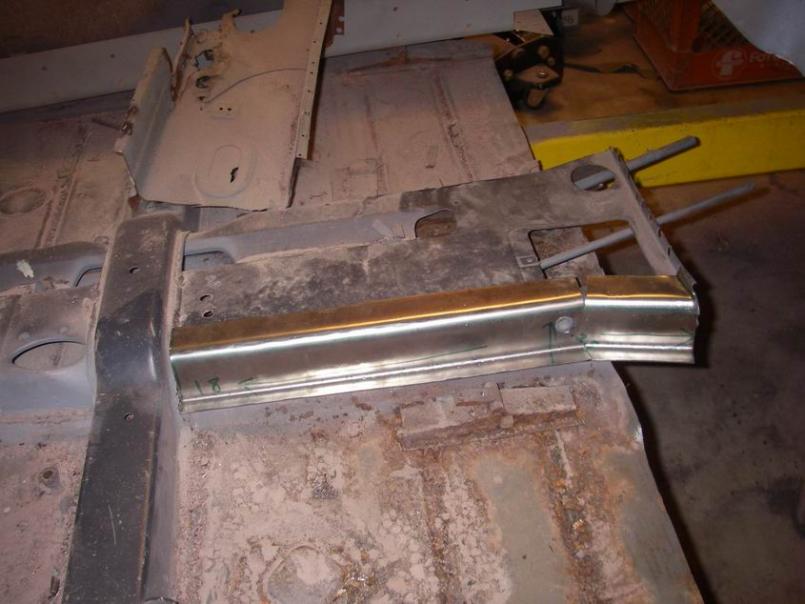
|
|
|
|
| strawman |
Feb 3 2010, 01:29 PM
Post
#445
|
|
Senior Member Group: Members Posts: 885 Joined: 25-January 08 From: Los Osos, CA Member No.: 8,624 Region Association: Central California |
Hi Jeff,
Lookin' great! I can't wait to see what you come up with for the headlights. I have mocked up my radiator mounting for my Suby swap, and the upper mount bar and airflow would be much better IMHO without the headlight boxes to deal with. I've got a front fender cut that I hope to use to mock up HID bulbs inside the factory turn signal pods... much easier on the workbench than on the car. Geoff |
|
|
|
| bcaschera |
Feb 3 2010, 05:38 PM
Post
#446
|
|
Member Group: Members Posts: 73 Joined: 1-October 09 From: san jose Member No.: 10,873 Region Association: None |
(IMG:style_emoticons/default/agree.gif)
The turn signal pods are just begging to be stuffed with some nice HID lamps. I found some high/low HID's from PIAA and i believe they would fit nicely. The only problem being the cover and the price (IMG:style_emoticons/default/icon8.gif) . This project looks great by the way... I wish i had half the tools and 1/8 the skills you have. Keep it up (IMG:style_emoticons/default/chowtime.gif) |
|
|
|
| Jeff Hail |
Feb 3 2010, 06:24 PM
Post
#447
|
|
Senior Member Group: Members Posts: 1,141 Joined: 3-May 07 From: LA/ CA Member No.: 7,712 |
The recent copy of Exellence provided a few extreme ideas.
|
|
|
|
| Jeff Hail |
Feb 15 2010, 10:46 PM
Post
#448
|
|
Senior Member Group: Members Posts: 1,141 Joined: 3-May 07 From: LA/ CA Member No.: 7,712 |
The Redhead has me stirred up!!!
Need to take it out on some 16 gauge steel. Ok, Fabricate the closing plate at the rear of the left outer long (rocker to us body guys) Start with a big flat piece of 16 gauge steel. A little bending in the brake. Some trimming and there you go. Attached image(s) 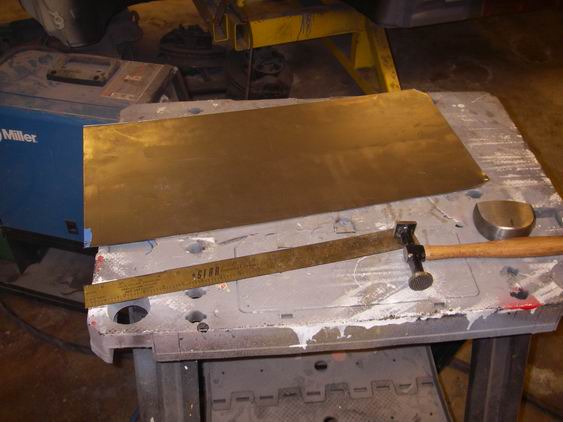 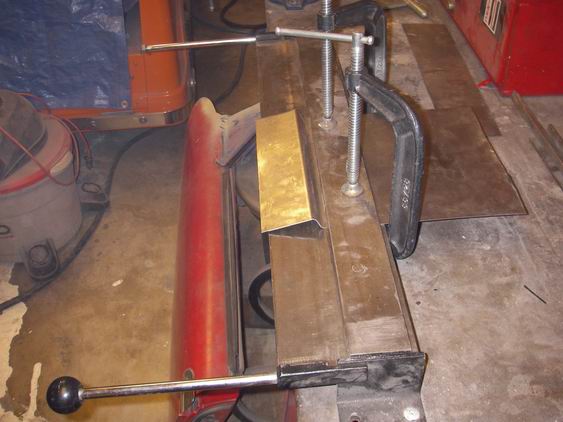 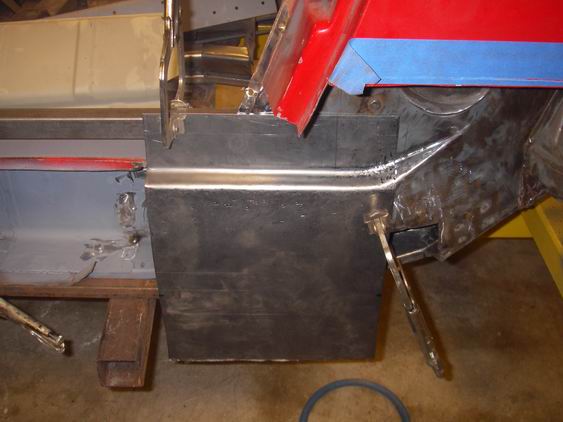 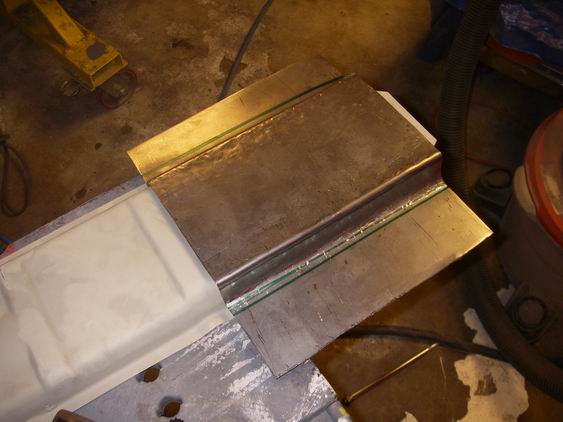 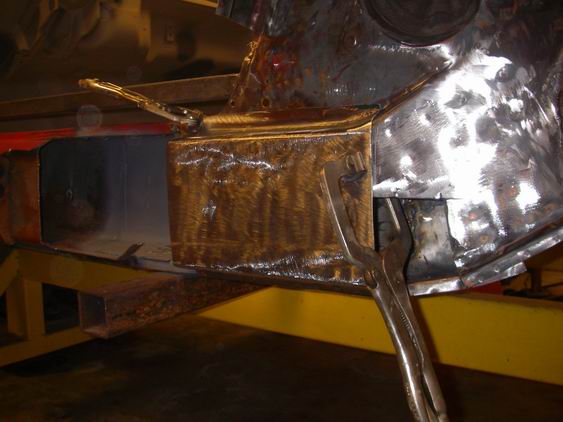 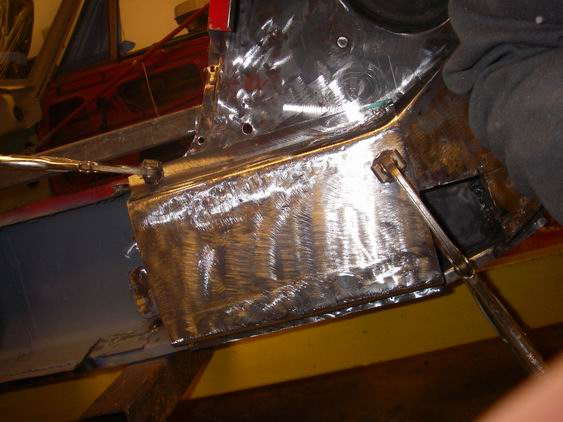 
|
|
|
|
| Jeff Hail |
Feb 21 2010, 10:45 PM
Post
#449
|
|
Senior Member Group: Members Posts: 1,141 Joined: 3-May 07 From: LA/ CA Member No.: 7,712 |
The Red Head has me really stirred up! And she probably still has the link I sent her 8 months ago. I do care about her.
Left inner long has been repaired. Last will see of it. Should have signed my initials on the inside before I closed it up. Next: Prepare the new outer long. Fit and add a sleeve for the infamous Hail butt weld. Sleeves make the joint twice as strong and provide a solid joint to burn in without blowing holes. A tight fitting backer is the key to a good structural joint. Really not a butt weld but a modified butt/ lap... kind of. Attached thumbnail(s) 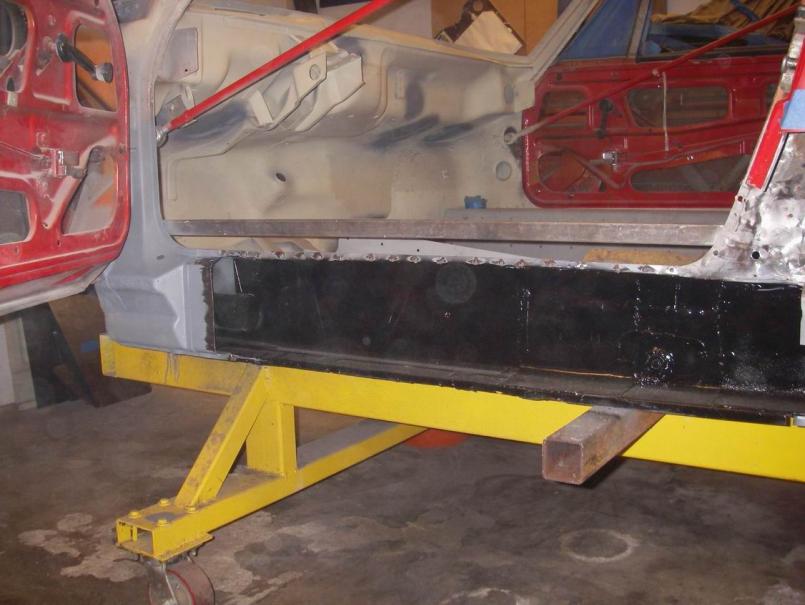  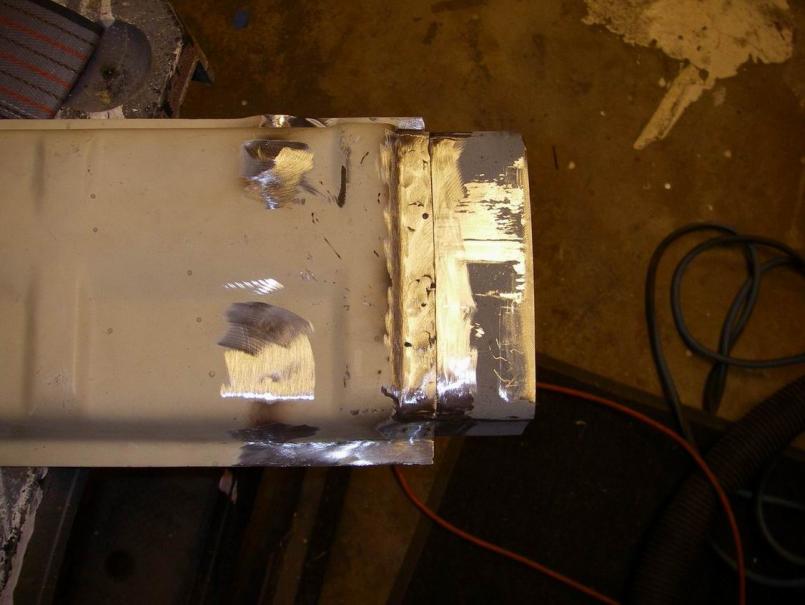
|
|
|
|
| Jeff Hail |
Feb 21 2010, 10:48 PM
Post
#450
|
|
Senior Member Group: Members Posts: 1,141 Joined: 3-May 07 From: LA/ CA Member No.: 7,712 |
Test fit of the Left Outer Long. Check for level and top and bottom flanges.
Clamp in place. Punch the requisite holes and grind the flanges as appropriate. Attached thumbnail(s)  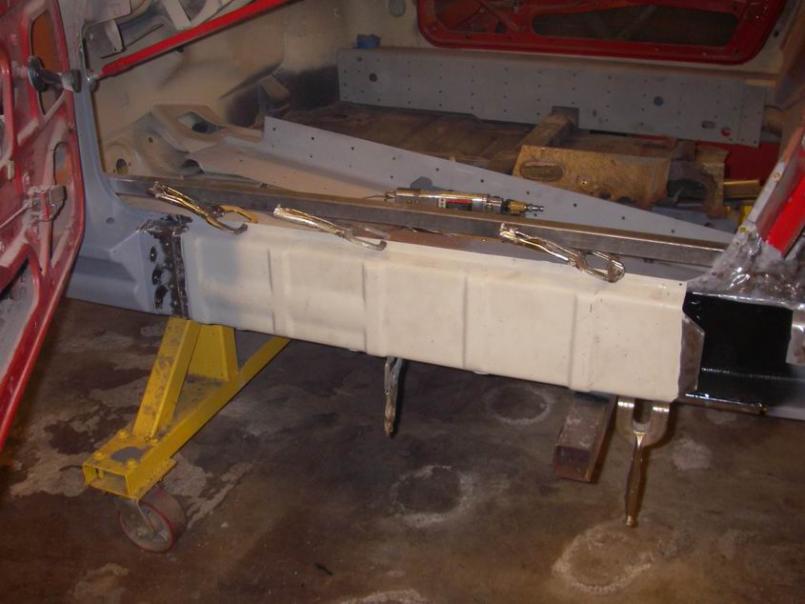
|
|
|
|
| Jeff Hail |
Feb 21 2010, 10:49 PM
Post
#451
|
|
Senior Member Group: Members Posts: 1,141 Joined: 3-May 07 From: LA/ CA Member No.: 7,712 |
Lets burn some metal. Alchemy!!
Grinding the plugs is next. BTW.. the upper flange was welded on the inside as I pre-drilled the holes on the inner long. Makes for a better cleaner finished product on the outside. Attached thumbnail(s) 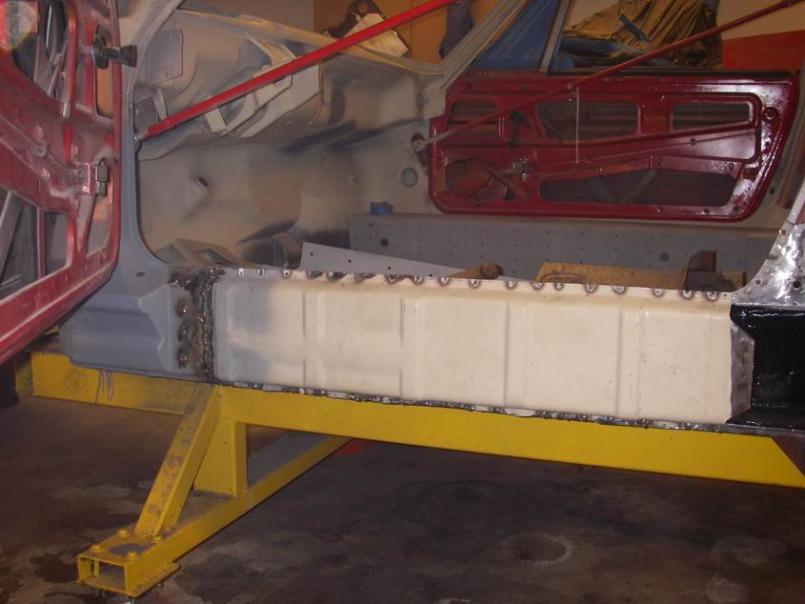
|
|
|
|
| Jeff Hail |
Feb 21 2010, 11:09 PM
Post
#452
|
|
Senior Member Group: Members Posts: 1,141 Joined: 3-May 07 From: LA/ CA Member No.: 7,712 |
I removed the brace just above the inner long before I welded the outer together.
The door gap stayed perfect. Lot of talk lately on the site about twisted chassis when welding in roll cages and long reinforcements. The only conclusion is "Occums Razor".. aka welding to fast. I burned the outer long in about 45 minutes while piping in air flow with an air nozzle laying inside the long. Just a bleed of air flow to cool the metal as I plugged along. I would say I generated the same amount of heat welding the outer long as installing an Engman reinforcement. Weld slowly! Take your time. Attached thumbnail(s) 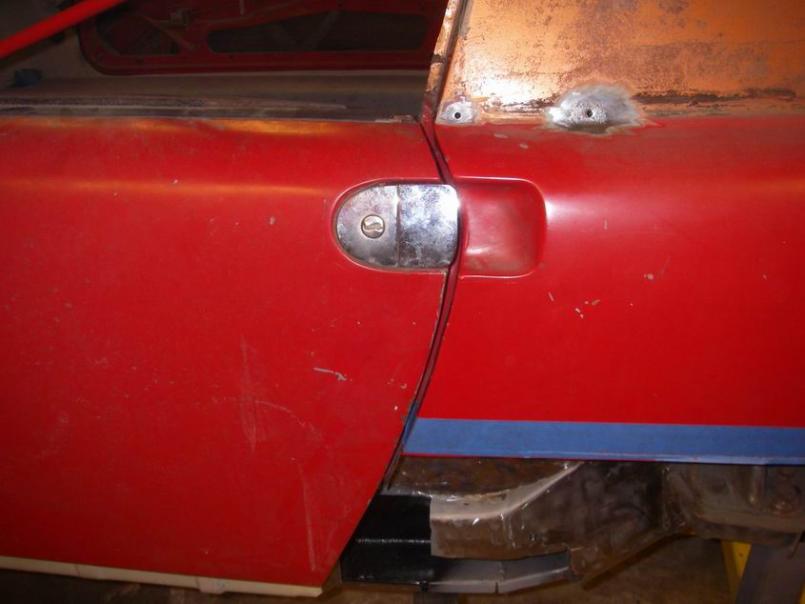
|
|
|
|
| Eric_Shea |
Feb 27 2010, 03:38 PM
Post
#453
|
|
PMB Performance Group: Admin Posts: 19,289 Joined: 3-September 03 From: Salt Lake City, UT Member No.: 1,110 Region Association: Rocky Mountains |
QUOTE Did ya notice the hinges? Weight Watchers for Fat Girls style. Jeff, What method did you use to get the support bar out of the hinge? (nevermind...upon further inspection, it looks to still be in place.) |
|
|
|
| Jeff Hail |
Feb 28 2010, 02:56 AM
Post
#454
|
|
Senior Member Group: Members Posts: 1,141 Joined: 3-May 07 From: LA/ CA Member No.: 7,712 |
Hi Eric
|
|
|
|
| Jeff Hail |
Feb 28 2010, 02:58 AM
Post
#455
|
|
Senior Member Group: Members Posts: 1,141 Joined: 3-May 07 From: LA/ CA Member No.: 7,712 |
A few mnutes to play...
Final fitting of the rear outer rocker closing plate. Burn it in! I will grind all the welds down tomorrow. Attached thumbnail(s) 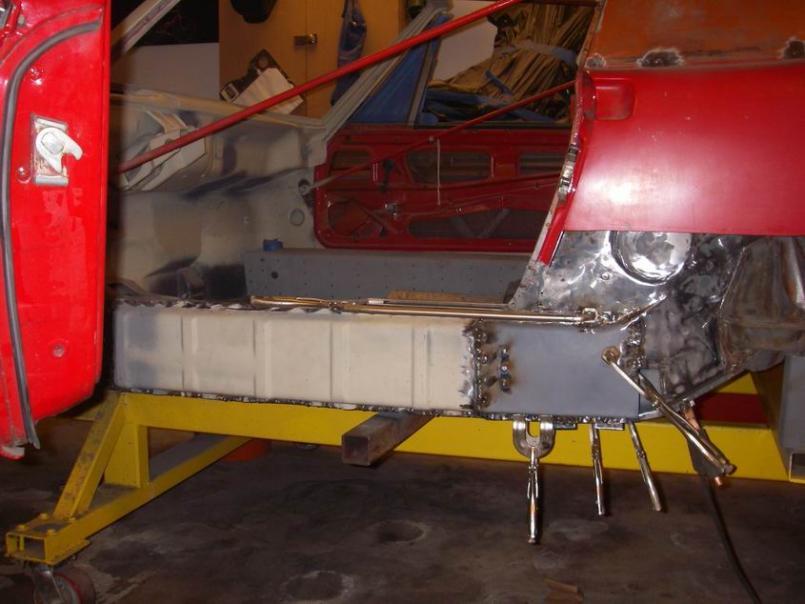 
|
|
|
|
| Jeff Hail |
Feb 28 2010, 03:06 AM
Post
#456
|
|
Senior Member Group: Members Posts: 1,141 Joined: 3-May 07 From: LA/ CA Member No.: 7,712 |
Ok shit that hurts. Anyone who works with sheetmetal is gonna get a "hurts donut" inevitably. Got this one when the vise grip slipped and banged my knuckle on the edge where the qtr panel is cut off for access. Yep it went to the bone and was a bleeder. Probably should have gotten 3-4 stitches. No time but cyanoacrylate closed it right up.
Attached thumbnail(s) 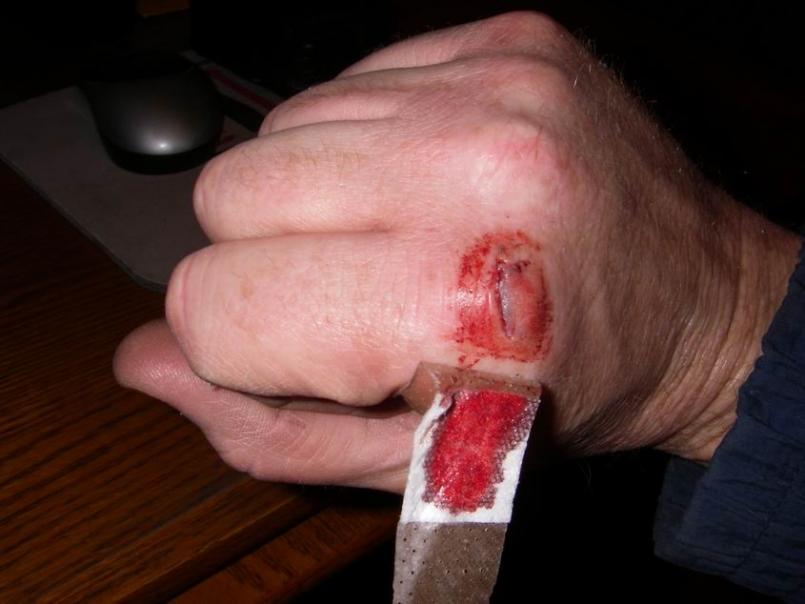
|
|
|
|
| rick 918-S |
Feb 28 2010, 08:05 AM
Post
#457
|
|
Hey nice rack! -Celette Group: Members Posts: 20,785 Joined: 30-December 02 From: Now in Superior WI Member No.: 43 Region Association: Northstar Region |
Nice work Jeff! (IMG:style_emoticons/default/thumb3d.gif) REAlly nice gash! (IMG:style_emoticons/default/chowtime.gif) (IMG:style_emoticons/default/biggrin.gif)
|
 |
|
| Krank |
Feb 28 2010, 09:07 AM
Post
#458
|
|
Member Group: Members Posts: 140 Joined: 11-October 09 From: Winnipeg, MB Member No.: 10,922 Region Association: Canada |
A little lemon and salt on there and I bet the vodka would go down really fast! Nice thread Jeff, lots of great info for peeps of all levels here. Thanks for all the extra time spent on pics and documentation. It takes enough time just getting the work done.
|
|
|
|
| Cairo94507 |
Feb 28 2010, 09:25 AM
Post
#459
|
|
Michael Group: Members Posts: 10,095 Joined: 1-November 08 From: Auburn, CA Member No.: 9,712 Region Association: Northern California |
Wow; Jeff you are one talented man. Any chance you might move to Alamo California anytime soon? I would love to have your skill set.
|
|
|
|
| d914 |
Feb 28 2010, 10:40 AM
Post
#460
|
|
Advanced Member Group: Members Posts: 2,343 Joined: 12-July 03 From: Atlanta, ga Member No.: 904 Region Association: South East States |
I WAS married to a red head!! Say no more I fully understand!!!!! (IMG:style_emoticons/default/smile.gif)
|
|
|
|
|
2 User(s) are reading this topic (2 Guests and 0 Anonymous Users)
0 Members:

|
Lo-Fi Version | Time is now: 25th November 2024 - 05:39 PM |
Invision Power Board
v9.1.4 © 2024 IPS, Inc.