|
|

|
Porsche, and the Porsche crest are registered trademarks of Dr. Ing. h.c. F. Porsche AG.
This site is not affiliated with Porsche in any way. Its only purpose is to provide an online forum for car enthusiasts. All other trademarks are property of their respective owners. |
|
|
  |
| maf914 |
 May 6 2009, 02:20 PM May 6 2009, 02:20 PM
Post
#101
|
|
Not a Guru!     Group: Members Posts: 3,049 Joined: 30-April 03 From: Central Florida Member No.: 632 Region Association: None 
|
Chris,
Great looking work. Your resto thread ranks with the best of them. Were you a novice at welding before you started? That is a skill you must have to do the work you are doing. My real question is do you think you should have used a rotisserie? If I were ever attempt a project like yours, I know my back (herniated disc) wouldn't be up to the squatting, crawling, bending, etc. of working under the car. I know a rotisserie doesn't make the project easy, but access is much improved. And once you finish I assume there will always be someone out there that wants a rotisserie for their project. |
| maf914 |
 May 6 2009, 02:25 PM May 6 2009, 02:25 PM
Post
#102
|
|
Not a Guru!     Group: Members Posts: 3,049 Joined: 30-April 03 From: Central Florida Member No.: 632 Region Association: None 
|
I held my fg rocker from aa up to my 75 body and I can't decide how to get a small gap at the joint of the flare and also work with the bevel on the bottom of the body, that seems to be a tough fit. It really looks like the fg rockers need to be straighter down more than angled in at the bottom edge. Charlie, Are these the new flared factory replicas from Automobile Atlanta that George was telling us about. If so, how is the quality? Straight, square, symmetrical? I haven't heard anyone comment on them yet. Thanks. (IMG:style_emoticons/default/idea.gif) |
| my928s4 |
 May 6 2009, 03:52 PM May 6 2009, 03:52 PM
Post
#103
|
|
Member   Group: Members Posts: 349 Joined: 18-August 07 From: Spokane, WA Member No.: 8,018 Region Association: Pacific Northwest |
My real question is do you think you should have used a rotisserie? If I were ever attempt a project like yours, I know my back (herniated disc) wouldn't be up to the squatting, crawling, bending, etc. of working under the car. I know a rotisserie doesn't make the project easy, but access is much improved. And once you finish I assume there will always be someone out there that wants a rotisserie for their project. No question about it, looking back if I knew then what I know now I would have made a rotisserie. I am too old for this s*** is what I think when I am on my back trying to get things done. I have the AA flares, they are pretty good although one side is shorter than the other. I need to trim the excess and do a final fit check, will post pics. |
| charliew |
 May 11 2009, 10:52 PM May 11 2009, 10:52 PM
Post
#104
|
|
Advanced Member     Group: Members Posts: 2,363 Joined: 31-July 07 From: Crawford, TX. Member No.: 7,958 |
I think the aa flares are pretty good but they damn sure don't fall in place. I got my flares and rockers about a year ago. The rockers are nowhere near a good fit with the bulges on the flares. It takes a lot of imagination to figgure out how to make the transition of the steel flare make a smooth joint with the rocker. Under the quarter and bottom of the door is the 45 edge that the flares don't have so it's f*****g magic at the bottom of the flare. The rocker has way too much sticking out to fit the flare of the steel.
I think George covered this on his flare how to instructions. Thats why they call it sheetmetal work I guess. And fg work. I find myself now looking at every picture of a flared car I come across to see how that particular car's rocker fit's. |
| Kansas 914 |
 Jun 14 2009, 10:19 AM Jun 14 2009, 10:19 AM
Post
#105
|
|
Advanced Member     Group: Members Posts: 2,999 Joined: 1-March 03 From: Durango, Colorado Member No.: 373 Region Association: Rocky Mountains 
|
Here is a pic of my welding machine, a Miller was a little rich for my blood and after reading everyone elses experience this seem like s good compromise. I will be using the same welder on the same part of the floorpans. I have no wire welding experience - so if can pick your brain a little... Do you remember amperage and wire feed speed? I need a starting place. Your project continues educate and inspire! Cheers! |
| my928s4 |
 Jun 15 2009, 10:06 PM Jun 15 2009, 10:06 PM
Post
#106
|
|
Member   Group: Members Posts: 349 Joined: 18-August 07 From: Spokane, WA Member No.: 8,018 Region Association: Pacific Northwest |
I will be using the same welder on the same part of the floorpans. I have no wire welding experience - so if can pick your brain a little... Do you remember amperage and wire feed speed? I need a starting place. Your project continues educate and inspire! Cheers! Hi Mike Hope this is of some use, I wrote some settings down but the scrap of paper is nowhere to be found. For 80% of the time setting B between 4 and 6 will suffice, same wire speed in setting C will be needed to bite into the longs. I occasionally use A on a higher wire speed when the metal gets thin. For welding upside down you will need a higher wire speed than if welding in a more normal position. Hope that is of some use, good luck with your project and post pics for the rest of use to see your handywork! |
| my928s4 |
 Jun 15 2009, 10:13 PM Jun 15 2009, 10:13 PM
Post
#107
|
|
Member   Group: Members Posts: 349 Joined: 18-August 07 From: Spokane, WA Member No.: 8,018 Region Association: Pacific Northwest |
Starting to make some progress again, our track day was a blast and you can see pics here if you are interested. Also tiling the bathroom so nearly done there (or at least good enough to be allowed back into the garage .....).
Got some more parts back from the platers 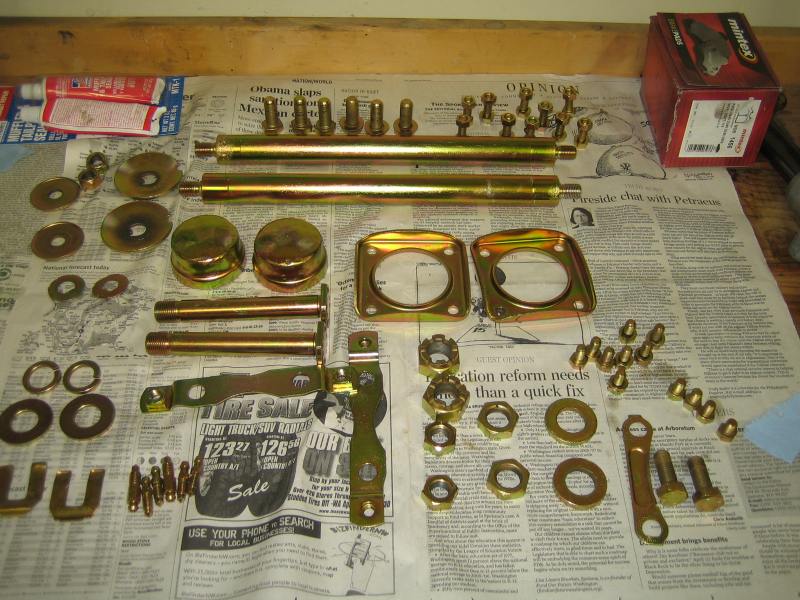 Pressed the wheel bearings in, forgot to tell the powder coater NOT to paint in the shock bolt hole ... someone at work is reaming that out and then I can press in the hubs and new bushings 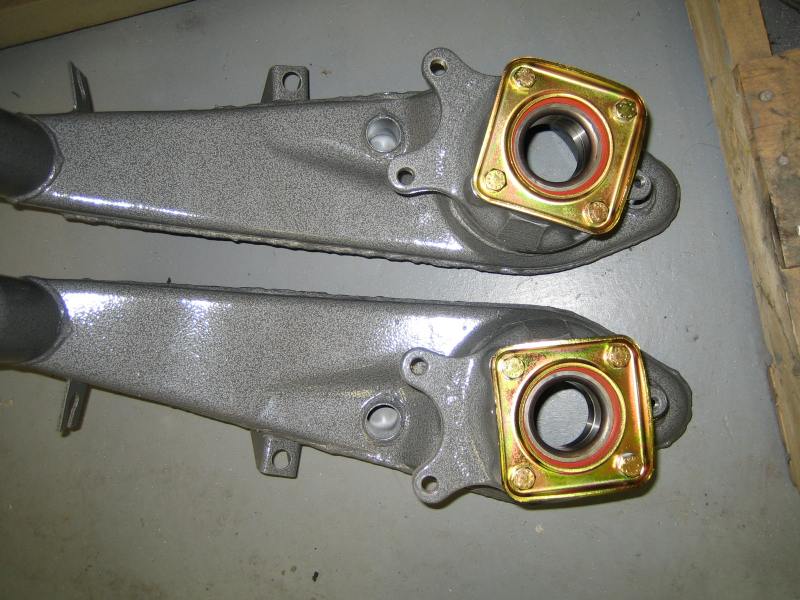 Talking about bushings I just finished tweaking these to fit, many thanks to Eric for parts and advice as and when needed, awesome service. I rebuilt the rear brakes just need to save up for the V caliper kit 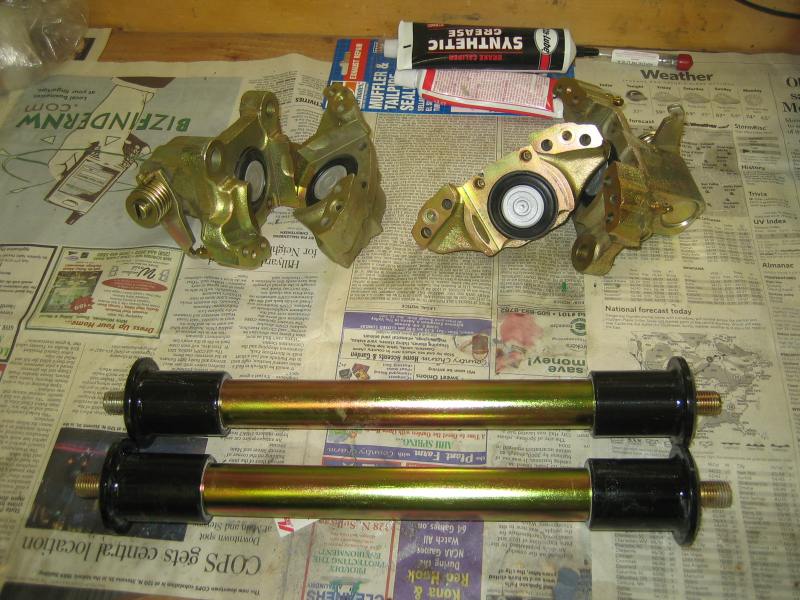 |
| my928s4 |
 Jun 19 2009, 08:04 PM Jun 19 2009, 08:04 PM
Post
#108
|
|
Member   Group: Members Posts: 349 Joined: 18-August 07 From: Spokane, WA Member No.: 8,018 Region Association: Pacific Northwest |
With the shock bolt holes cleared of powder coat I pressed in the 5 bolt hubs with the use of some 3/8" thread plus nuts and washers. Also placed the hubs in the freezer to assist with the effort.
Greased the bushings and put those in also, I need to drill and tap for zerks but could not find the ones I wanted locally so will have to wait for my next McMaster order. Anyway another minor project complete, these go to the basement to await fitting to the chassis at some (hopefully not too distant) date. 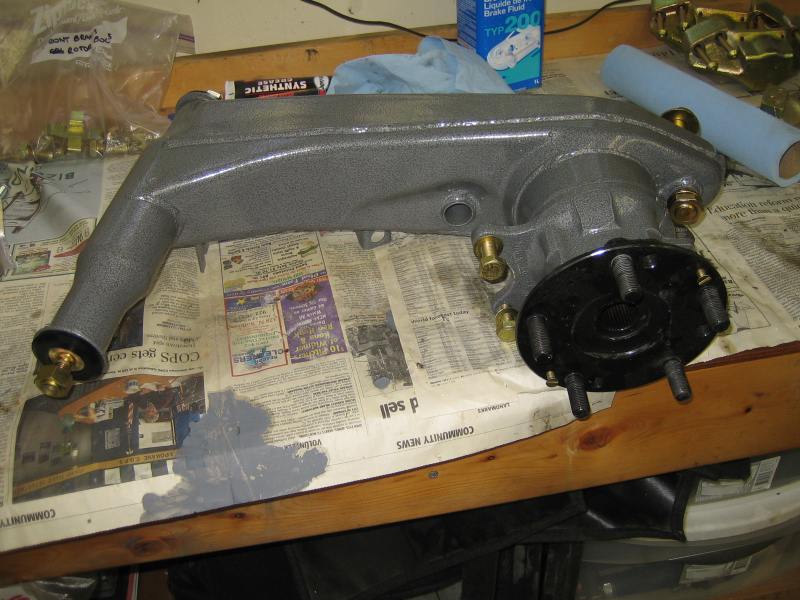 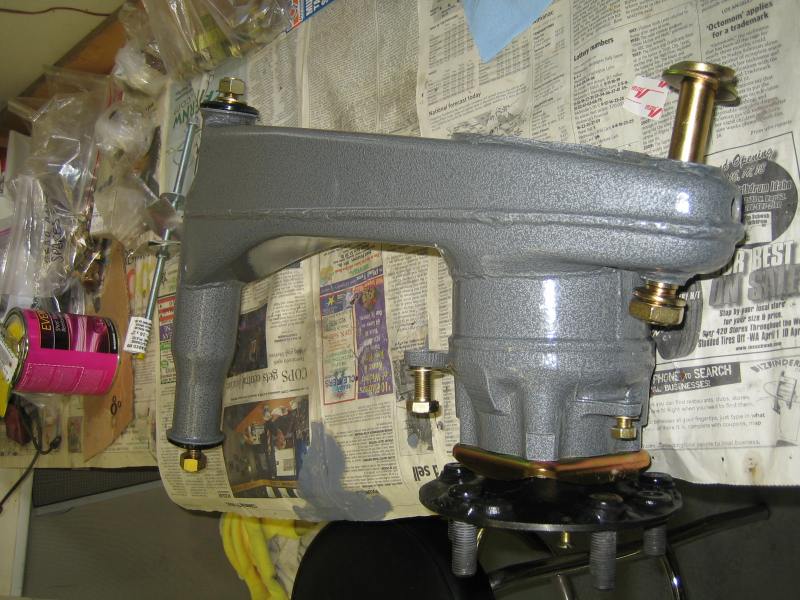 |
| my928s4 |
 Jun 21 2009, 10:23 PM Jun 21 2009, 10:23 PM
Post
#109
|
|
Member   Group: Members Posts: 349 Joined: 18-August 07 From: Spokane, WA Member No.: 8,018 Region Association: Pacific Northwest |
Nothing major today as I started to re-organize a bit, I decided it is time I started making a parts list. Up to this point I have been winging it, not quite sure why but one reason could be I don't want to get distracted by the $$. I have some big ticket items (Koni shocks, front sway bar and wheels/tires) coming up but got to face the facts sooner or later. My spreadsheet is growing ....
I dismantled the axles, it was a messy job but now have the CV joints bagged and ready for cleaning and re-greasing at a later date. Earlier in this thread somone had mentioned that a carbide burr would be a good idea so on my last Mcmaster order I bought one, now I wonder how I did without it. For cleaning up in those hard to reach places this thing rocks. 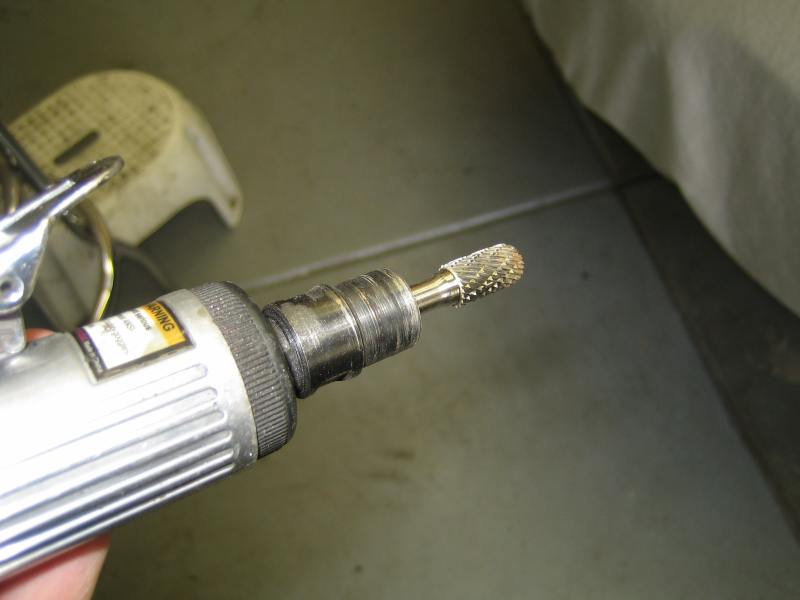 I used it to great effect to remove the remanents of the jack post welds, I was going to do the delete thing but decided I would put them back in. I had to weld a plate over the recess where the tube locates on the drivers side, the following is a picture from Richard's site which was very useful. 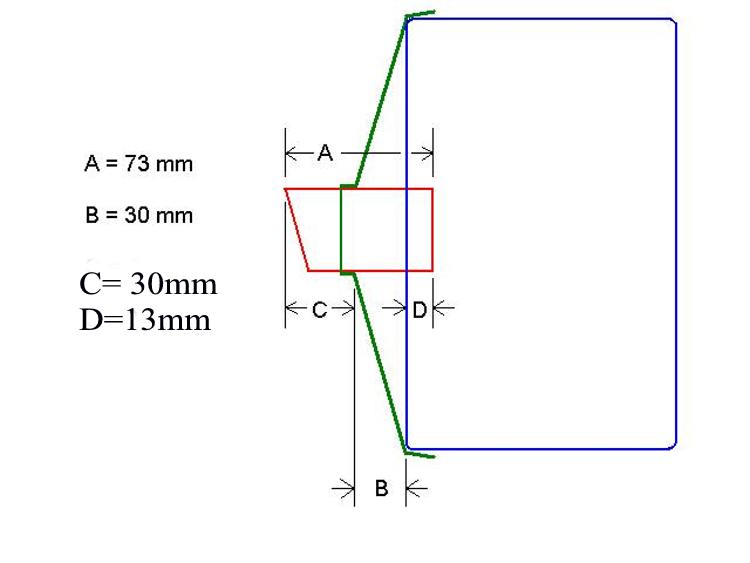 I removed 7mm from the post and welded it in place. 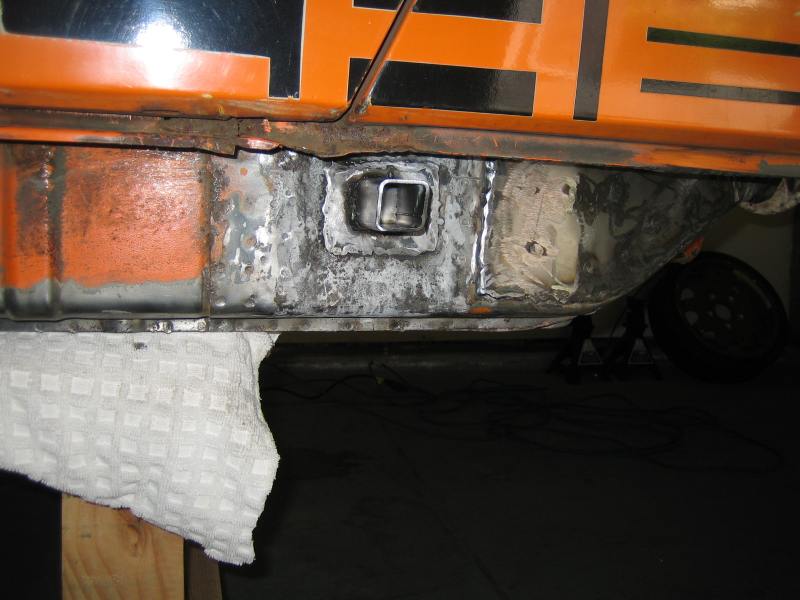 Passenger side was easier although this pic came out looking like it is askew but it looks alright to the naked eye, honest. 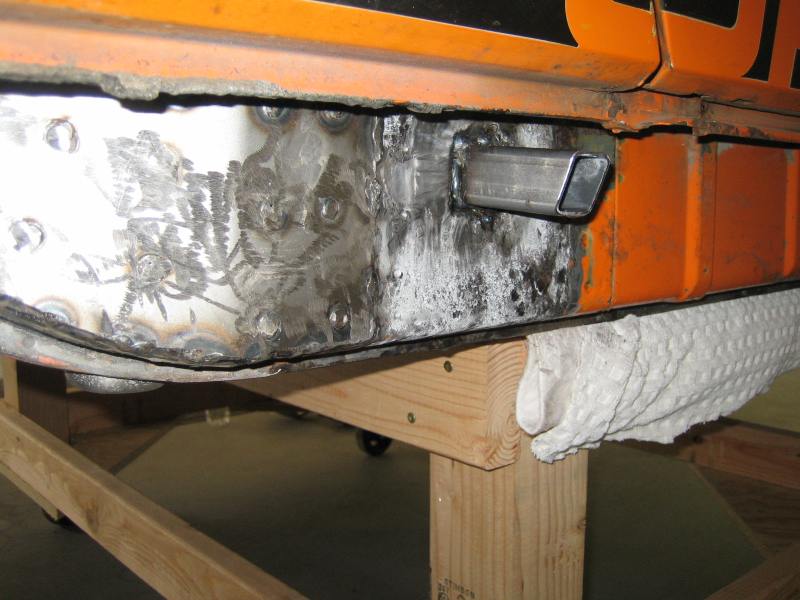 Decided to use up some of my POR-15 stock to treat the area which will be sealed off. Now for the surpise part, with the tube located into position the cover plate will no longer fit over the tube and against the chassis rail .... this was a good point to go take a break and watch the British GP. Rather than use a BFH (tempting) I cut two small diagonal slits on the cover plate and bent the area out temporarily to allow the plate to fit, with the cover screwed into place a tap with a screwdriver and hammer and all is good. I can weld up the slits when I weld the plate into place tomorrow. 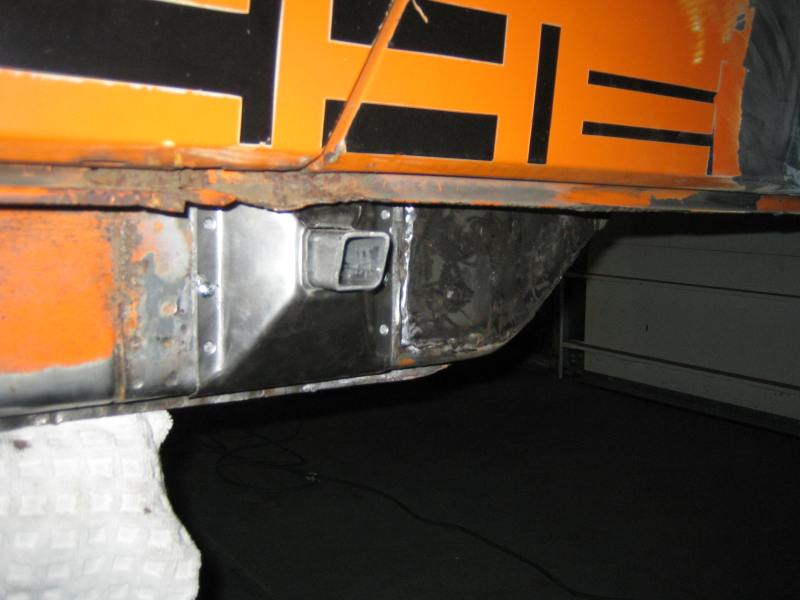 |
| my928s4 |
 Jul 5 2009, 04:12 PM Jul 5 2009, 04:12 PM
Post
#110
|
|
Member   Group: Members Posts: 349 Joined: 18-August 07 From: Spokane, WA Member No.: 8,018 Region Association: Pacific Northwest |
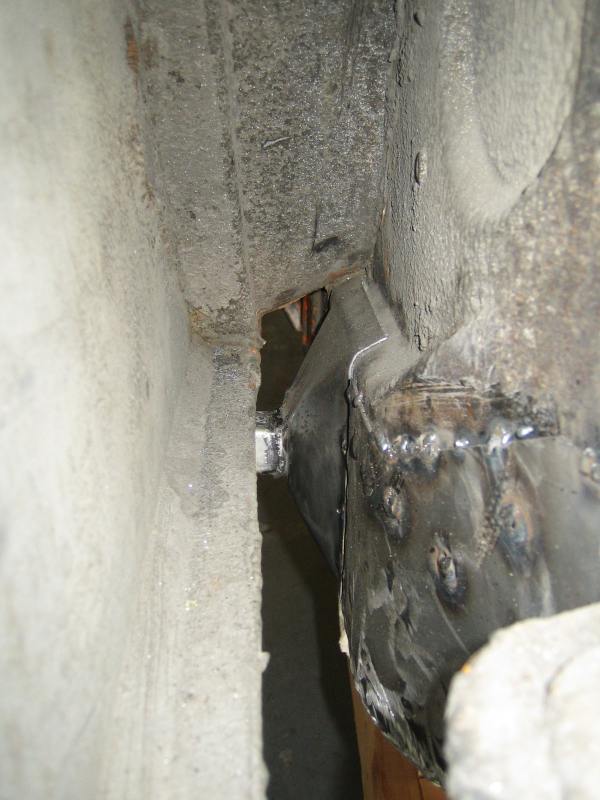
Finished up the welds on the jack posts, apart from some minor issues on getting a nice weld on the tube these went on OK. Took a shot of the inside of the wheel well so you can how flush this part sits, nice.
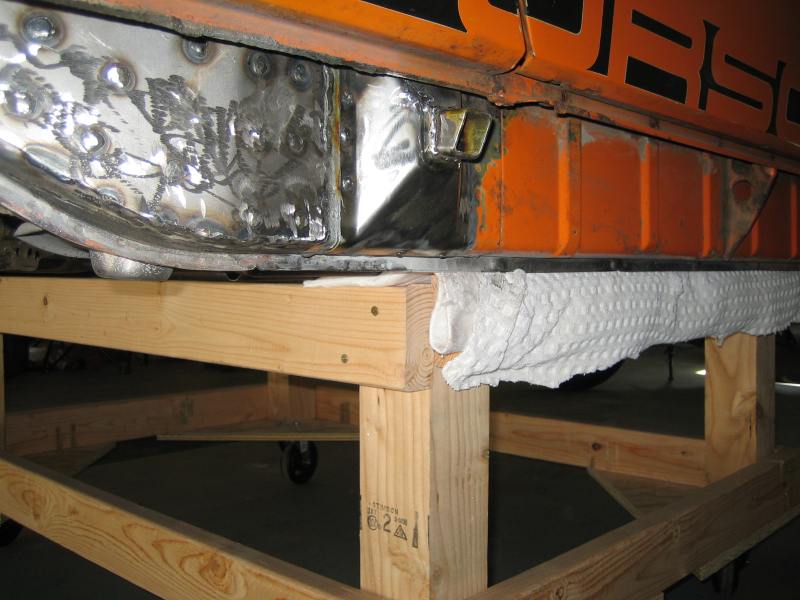 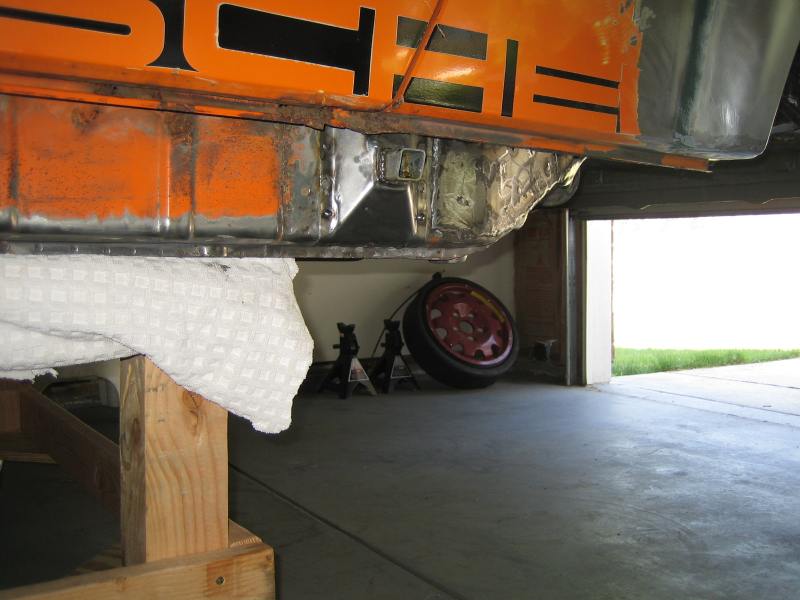  I also welded the front sway bar supports in place, note to self, do a better job of cleaning weld thru primer from the area. 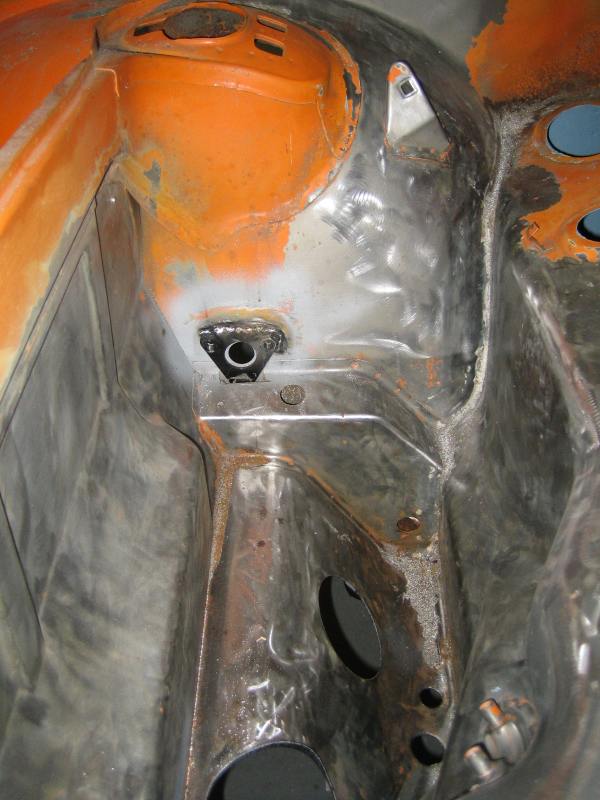 I boughts some Etch Primer and Tri Primer for the interior a while ago, yesterday I rolled the car out into the fresh air and cleaned the wheel wells and used compressed air to blow the accummulated dust out from everywhere. With that done the interior was in a better state to be worked on. Etch Primer (one coat as it used the whole can). 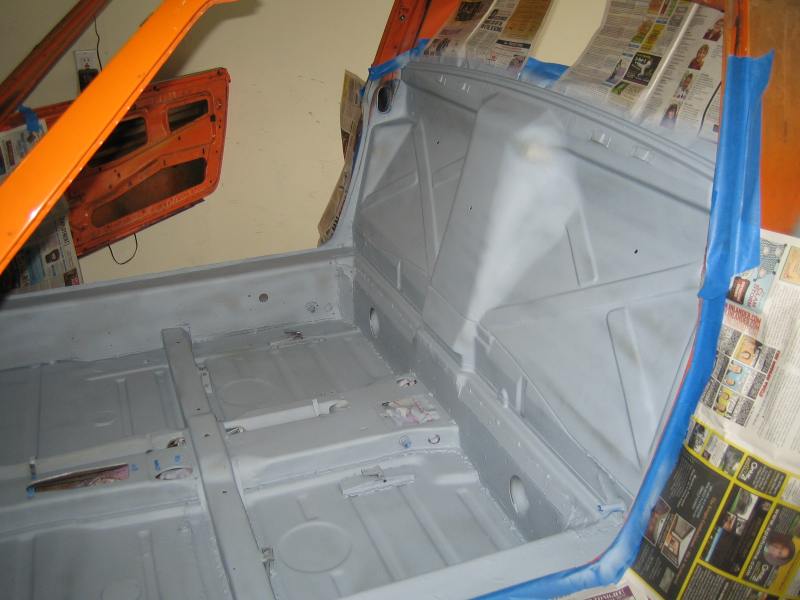 And then the tri-coat, 'all' this needs is some sanding and then color .... 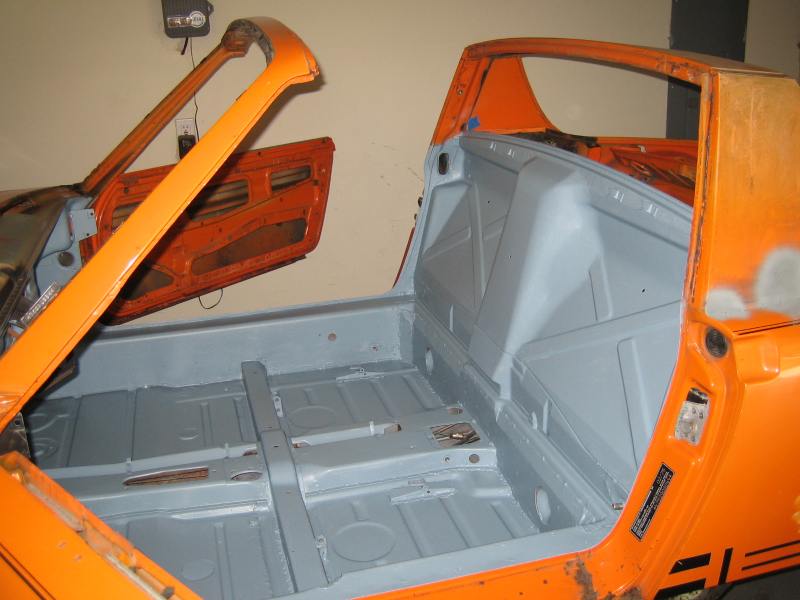 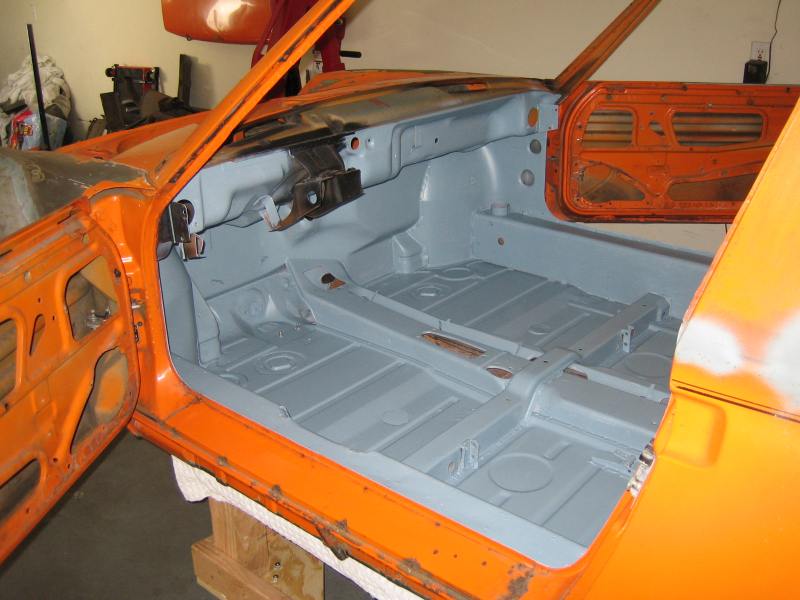 |
| my928s4 |
 Aug 29 2009, 04:13 PM Aug 29 2009, 04:13 PM
Post
#111
|
|
Member   Group: Members Posts: 349 Joined: 18-August 07 From: Spokane, WA Member No.: 8,018 Region Association: Pacific Northwest |
This summer sure has flown by, trying to finish up the underside and my next goal is to get the rear suspension together and then the front ... then maybe get this project onto some wheels.
Same process on the rear as the rest, epoxy primer, seam sealant, epoxy primer and then underseal. My last can of underseal didn't quite do the job so need to go get another can Monday, bummer, as I was hoping to put the rear suspension together tomorrow. Oh well will prep my gearbox for the rebuild clinic instead. 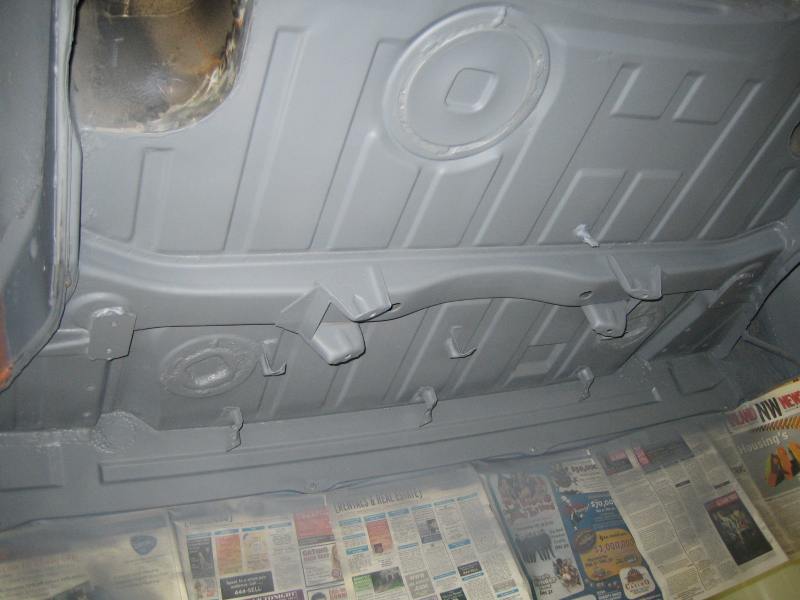 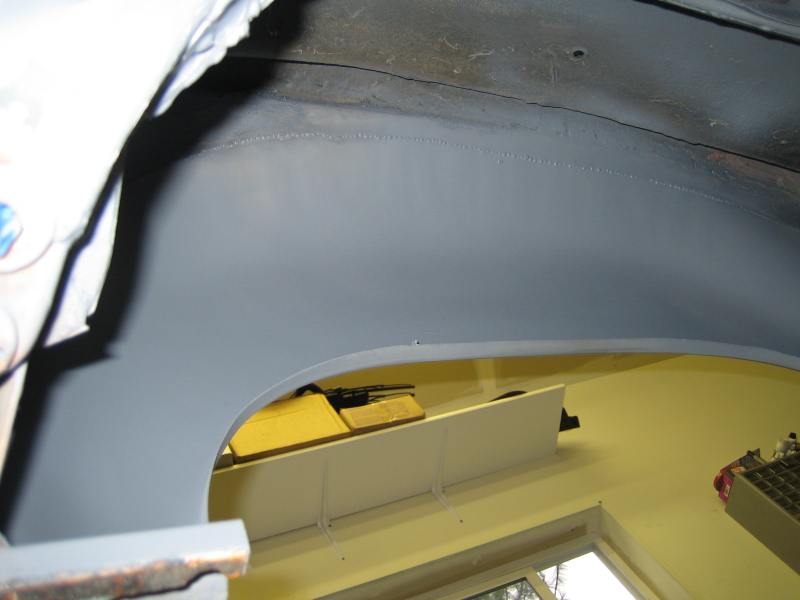 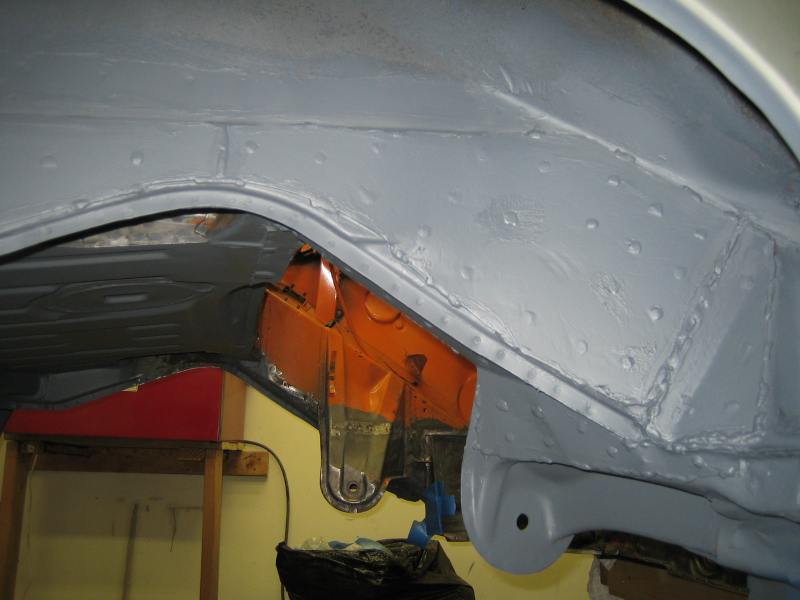 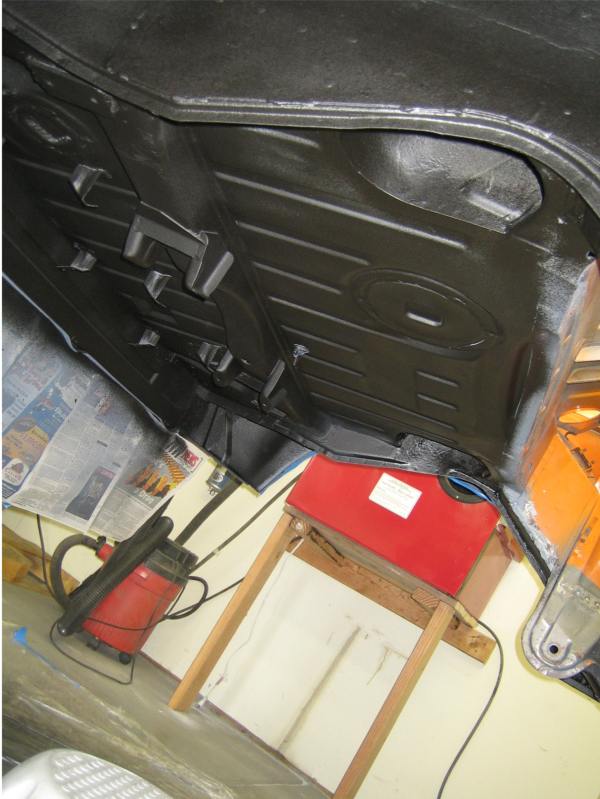 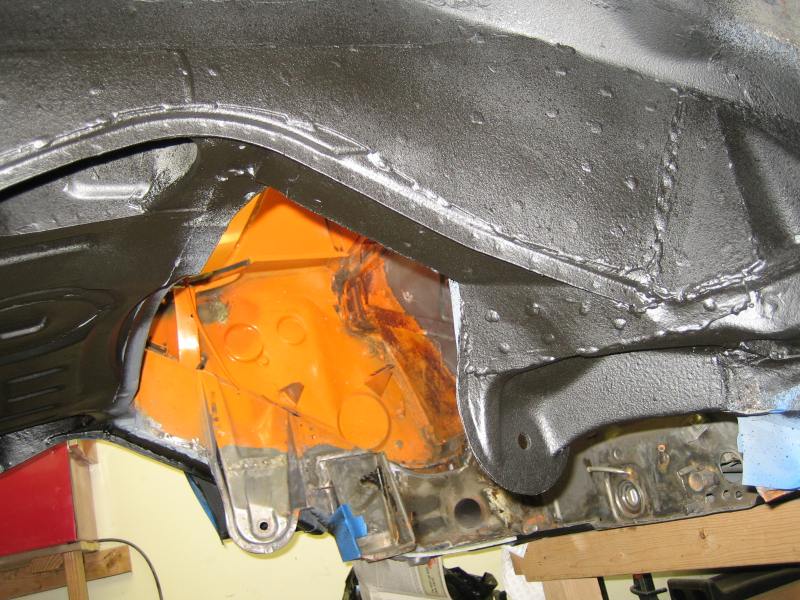 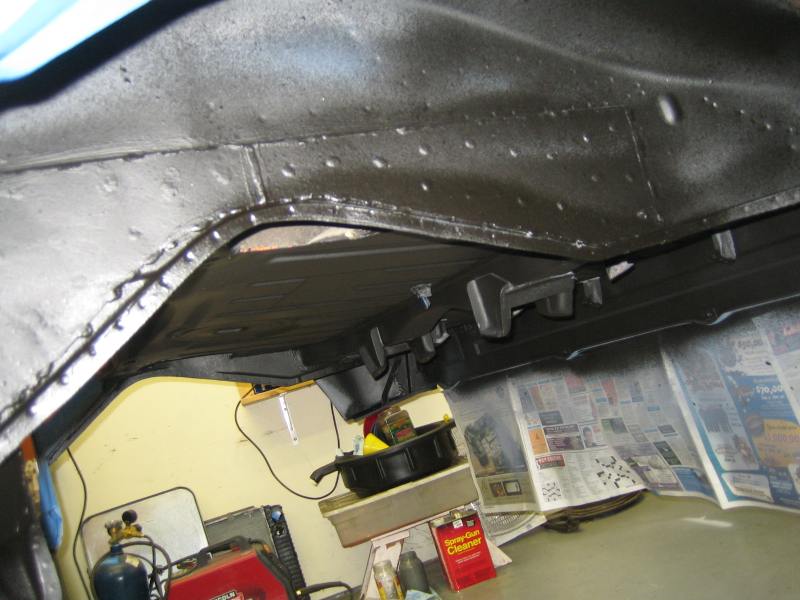 |
| my928s4 |
 Aug 29 2009, 04:17 PM Aug 29 2009, 04:17 PM
Post
#112
|
|
Member   Group: Members Posts: 349 Joined: 18-August 07 From: Spokane, WA Member No.: 8,018 Region Association: Pacific Northwest |
Got my v-caliper kit so can finally finish off the rear calipers, got Porterfield pads for front and back. Thanks Eric !
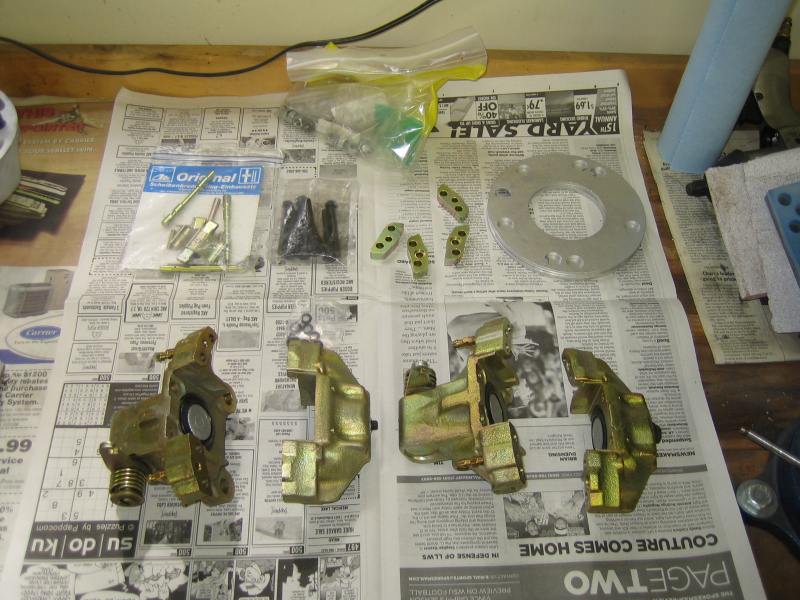 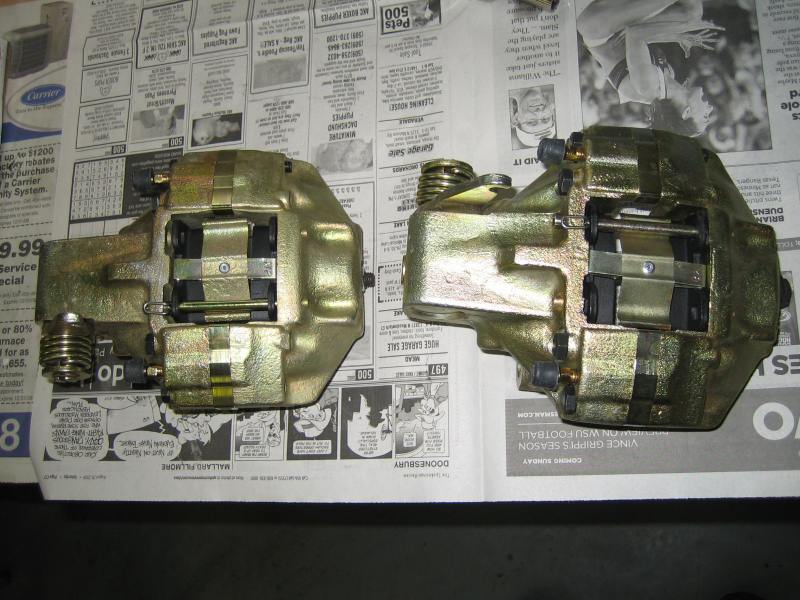 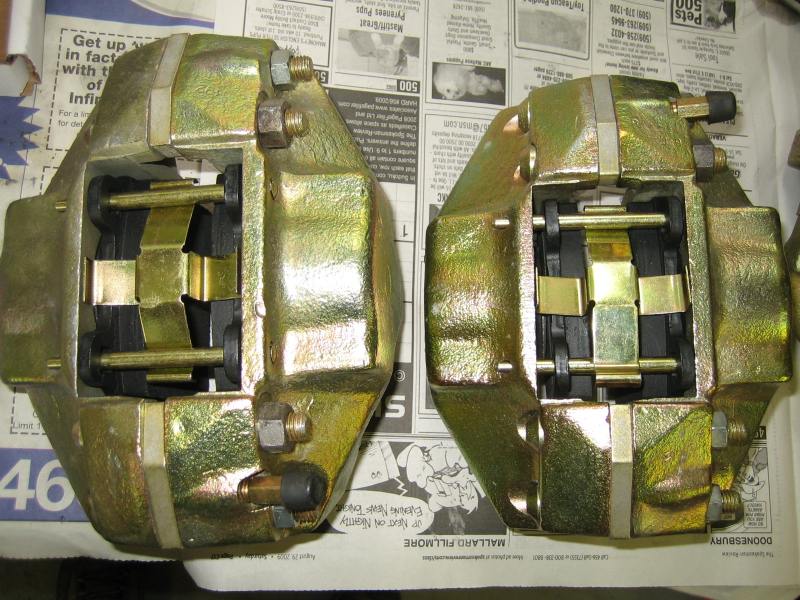 Put my Koni shocks and coil over kit together, does this look right?? I think this is the right mix of original and aftermarket parts .... 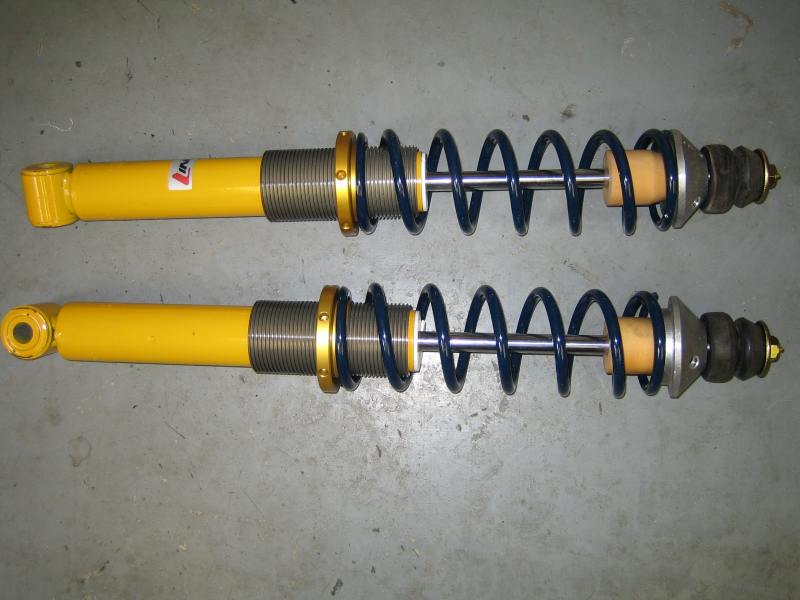 Finally cleaned up the front hubs and put new bearings in, wife doesn't even bat an eyelid when I put parts in the oven .... 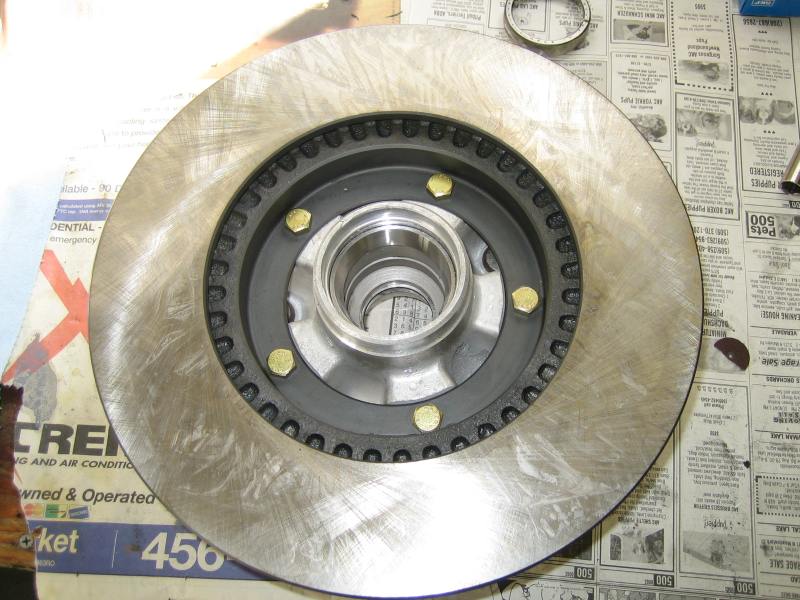 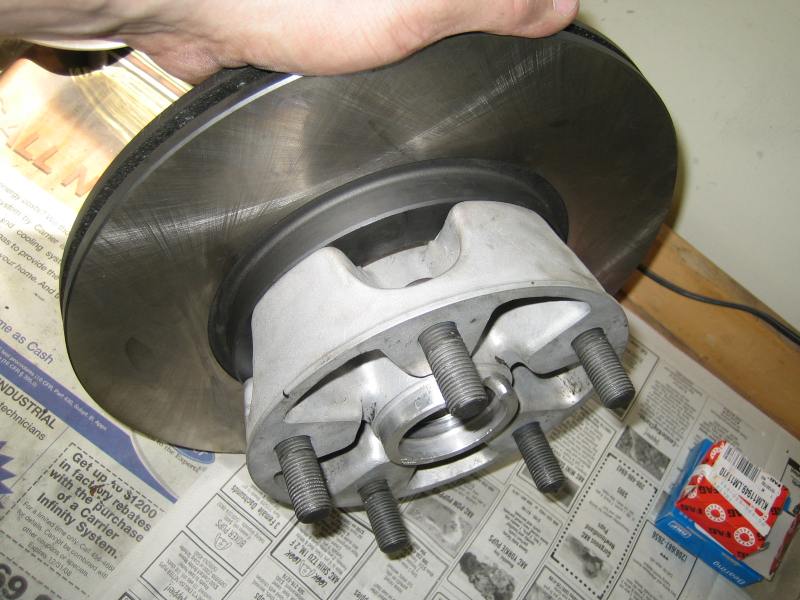 |
| 993inNC |
 Aug 29 2009, 06:00 PM Aug 29 2009, 06:00 PM
Post
#113
|
|
Member   Group: Members Posts: 194 Joined: 14-August 09 From: at the beach Member No.: 10,676 Region Association: South East States |
as a newbie to both here and 914's (and welding), I have to say you're project looks to be coming along well. You're doing a great job, and I only hope i have the patience to carry through as you have, on my 75. Today was more stripping of the interior. I know I don't have the patience to grind like you have so i'm going to have mine blasted to get it all clean before starting the panel replacement process.
Keep up the great work! |
| lotus_65 |
 Aug 29 2009, 06:42 PM Aug 29 2009, 06:42 PM
Post
#114
|
|
Senior Member    Group: Members Posts: 1,608 Joined: 21-March 05 From: minneapolis, mn Member No.: 3,795 Region Association: Northstar Region |
|
| my928s4 |
 Sep 5 2009, 09:33 AM Sep 5 2009, 09:33 AM
Post
#115
|
|
Member   Group: Members Posts: 349 Joined: 18-August 07 From: Spokane, WA Member No.: 8,018 Region Association: Pacific Northwest |
It felt really good to bolt on some parts so thought I would share, next will be the front but first I need to clean up my gearbox for next weekends tranny clinic.
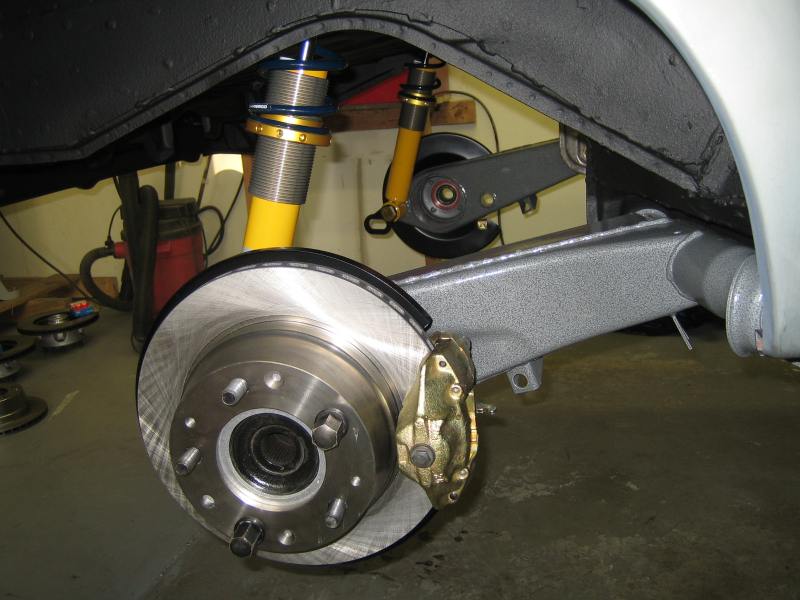 |
| my928s4 |
 Sep 7 2009, 04:55 PM Sep 7 2009, 04:55 PM
Post
#116
|
|
Member   Group: Members Posts: 349 Joined: 18-August 07 From: Spokane, WA Member No.: 8,018 Region Association: Pacific Northwest |
Well I had some spare time today and before I did the finish work on the front wheel wells I wanted to cut the holes for cooling outlet and while I am in there might as well cut the holes for the radiator.
Got some useful pics from the Anklebiter thread, because mine is a 75 I have the reinforcement that spans usually where you would cut in the wheel well. Decided I wanted to keep that and I hope the hole I cut will suffice for cooling, we shall see some distant time in the future. For the front: First I marked of the area I wanted to cut with a sharpie. 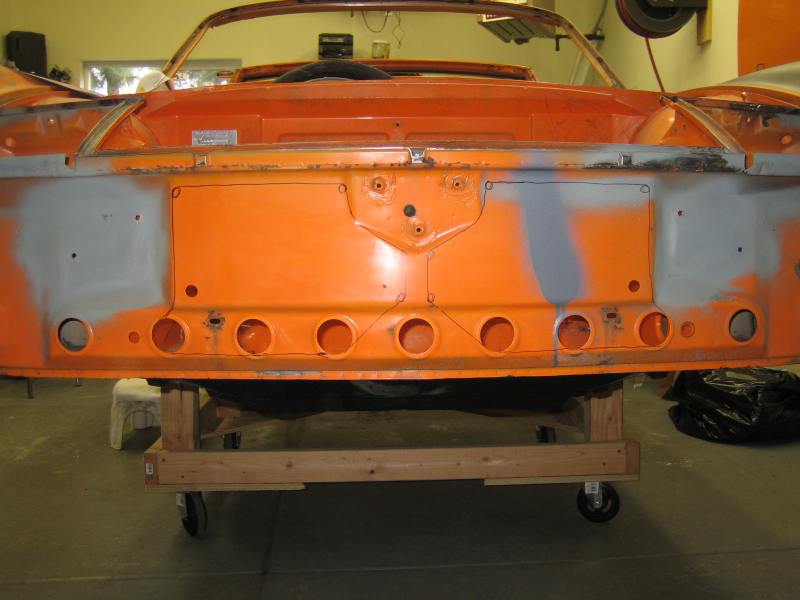 Then drilled holes on the 90degree corners. 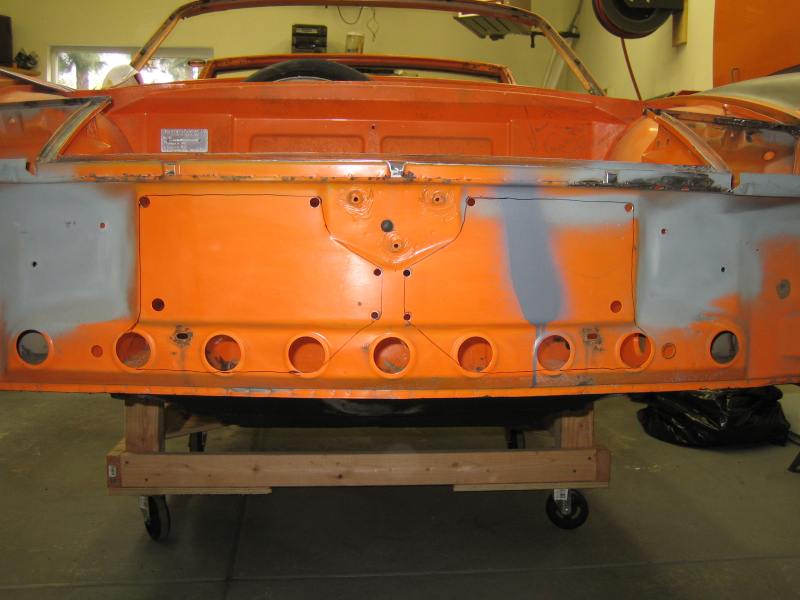 Finally cut out the metal, still needs some finish work. 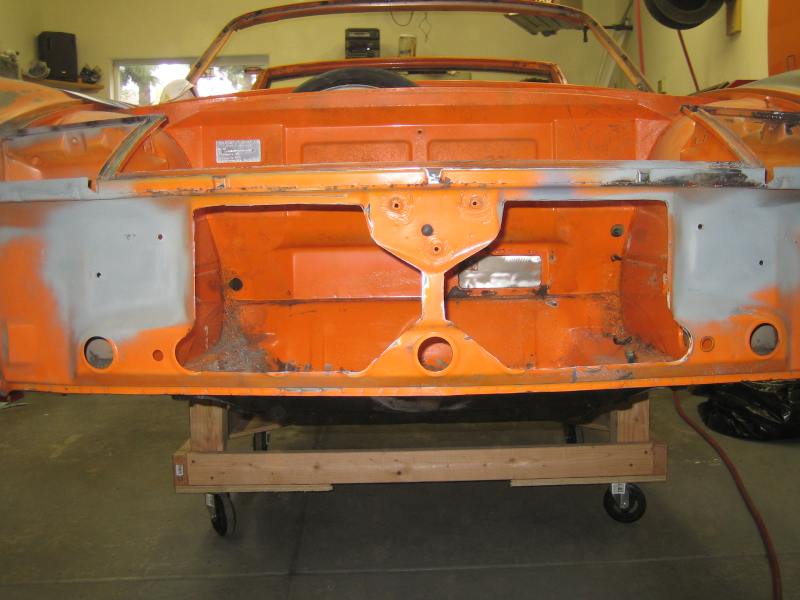 On the wheel wells I made a carboard template so that both sides were pretty much the same. Then followed the above procedure again. Finished hole. 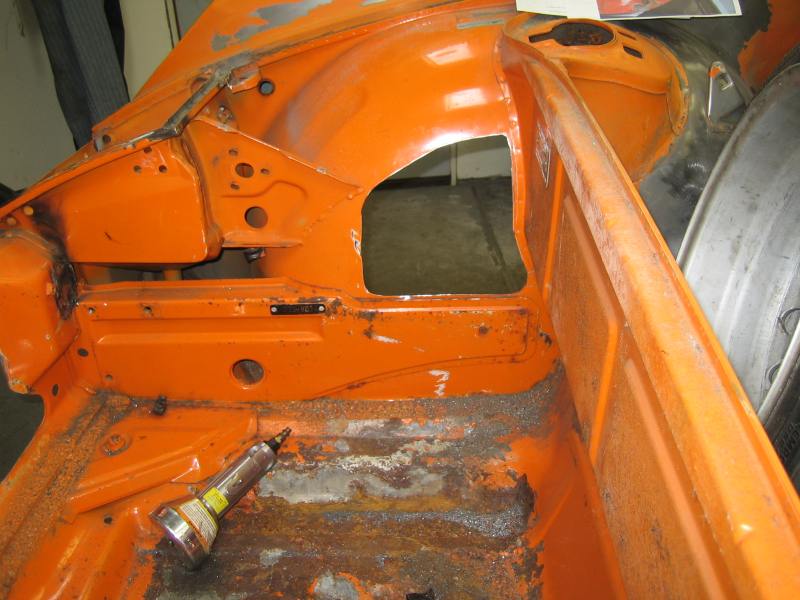 I have not attacked the front trunk but that is next, it has some rust that needs removal but I got the worst off, been a while since I used the wire wheel and grinder! 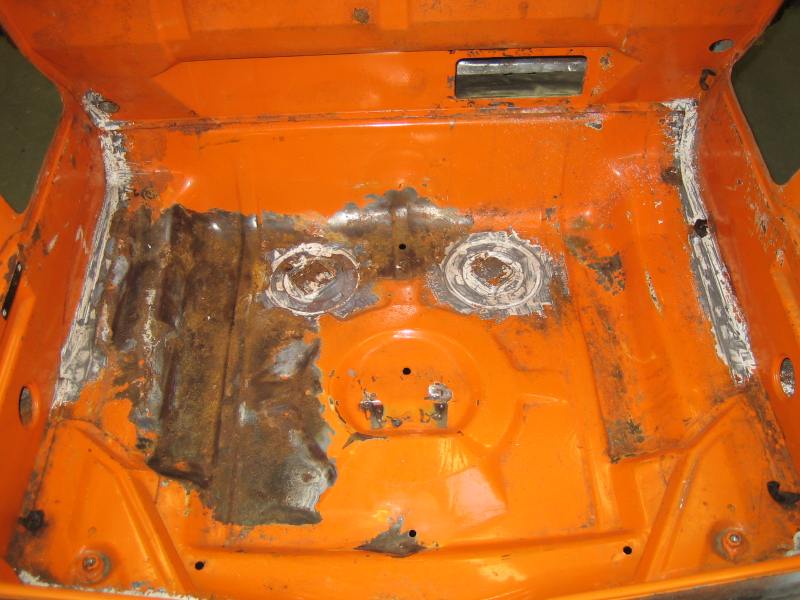 |
| Zaney |
 Sep 9 2009, 03:21 PM Sep 9 2009, 03:21 PM
Post
#117
|
|
Deuchland en der Haus   Group: Members Posts: 461 Joined: 1-March 04 From: Engine 11 Redmond, WA Member No.: 1,738 Region Association: Pacific Northwest |
Looks great! (IMG:style_emoticons/default/smilie_pokal.gif)
What kind of engine is going back in? Suby? |
| my928s4 |
 Sep 9 2009, 03:47 PM Sep 9 2009, 03:47 PM
Post
#118
|
|
Member   Group: Members Posts: 349 Joined: 18-August 07 From: Spokane, WA Member No.: 8,018 Region Association: Pacific Northwest |
Looks great! (IMG:style_emoticons/default/smilie_pokal.gif) What kind of engine is going back in? Suby? Hey thanks! Yes a Suby, still mulling over whether to go with the pre or post 2005 WRX motor, that is a decision for sometime next year and will depend on what is available at the time. |
| my928s4 |
 Oct 18 2009, 07:18 PM Oct 18 2009, 07:18 PM
Post
#119
|
|
Member   Group: Members Posts: 349 Joined: 18-August 07 From: Spokane, WA Member No.: 8,018 Region Association: Pacific Northwest |
Over the last few weeks it has been one of those phases where you work on a bunch of stuff but there is not much to show for all the effort.
My gearbox is now sitting pretty after the PNW rebuild clinic, maybe one day it will have something to hook up to but great to have that done for sure. I cleaned up the front trunk area, there were various superficial areas of rust and under the paint you only find more. I will take a picture next time, where there is a tiny pin hole through the paint to metal, under the paint is a spider web of rust which you would never have guessed. This was especially true under the front indicator where the paint looked good but stone chips mean that underneath was a nice area of rust. Front trunk 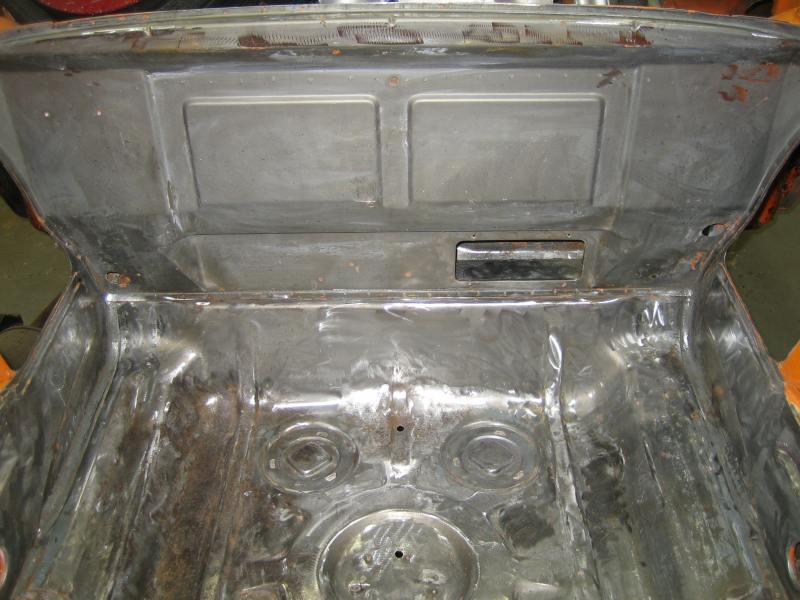 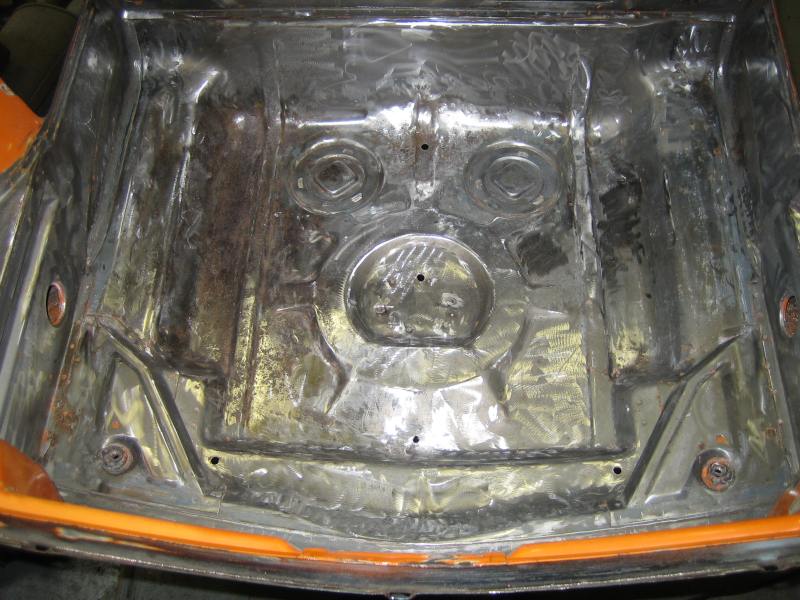 Front valence, when I did the metal mods for the chrome bumper retrofit I left a lip on the front edge but on closer inspection the surface of the metal underneath did not look too good. I am glad I removed it as it took a lot of clean up but now I need to weld a strip back on. 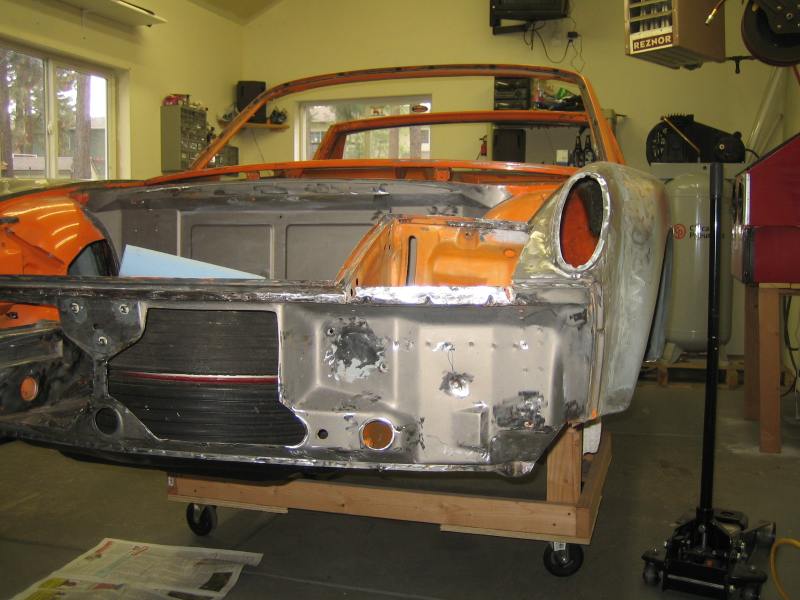 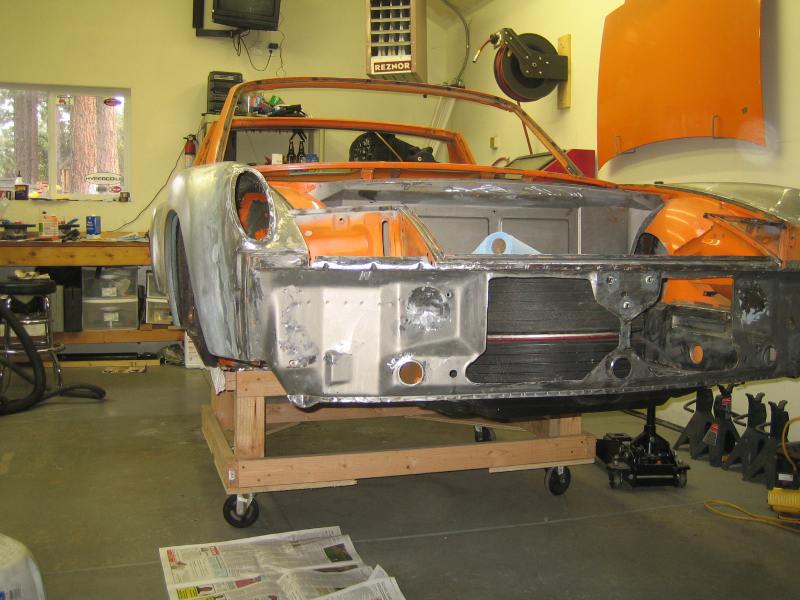 Started prepping the front wheel wells so I can primer and undercoat like the rear, just stripping where the original undercoat was not well adhered. This is what it looked like after the first application of the stripper, one more and should be good to go. 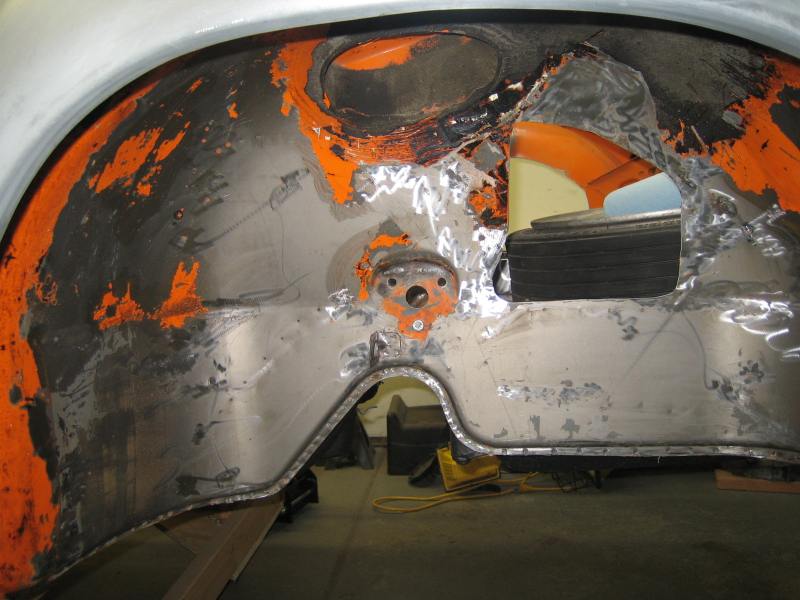 |
| my928s4 |
 Oct 25 2009, 05:38 PM Oct 25 2009, 05:38 PM
Post
#120
|
|
Member   Group: Members Posts: 349 Joined: 18-August 07 From: Spokane, WA Member No.: 8,018 Region Association: Pacific Northwest |
Last time I mentioned how the rust spreads under the paint, well got a good shot this week before I sanded away the rust. This is what a small hole in the paints does to the metal underneath.
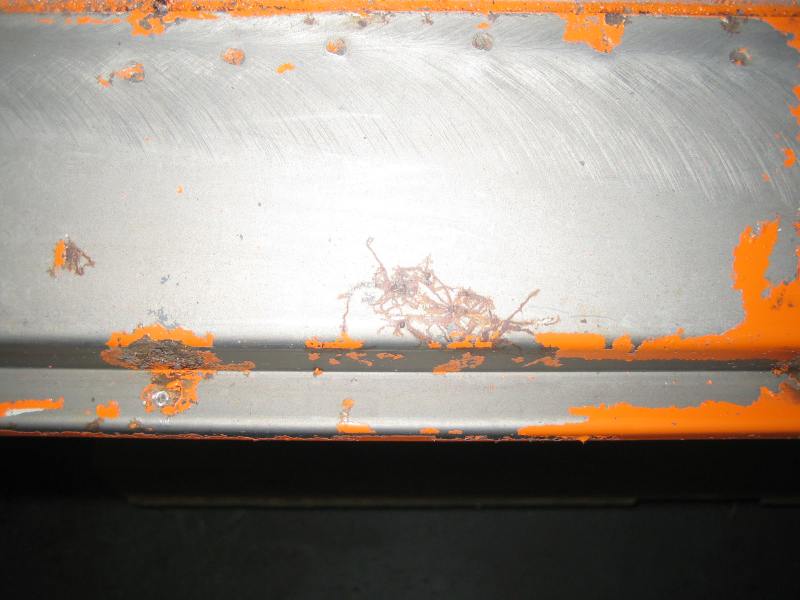 I started removing the rest of the paint from the passenger rear quarter and decided I ought to look in the door jams. Definitely some surface rust so lets get rid of the paint and see what we have. Hmmm 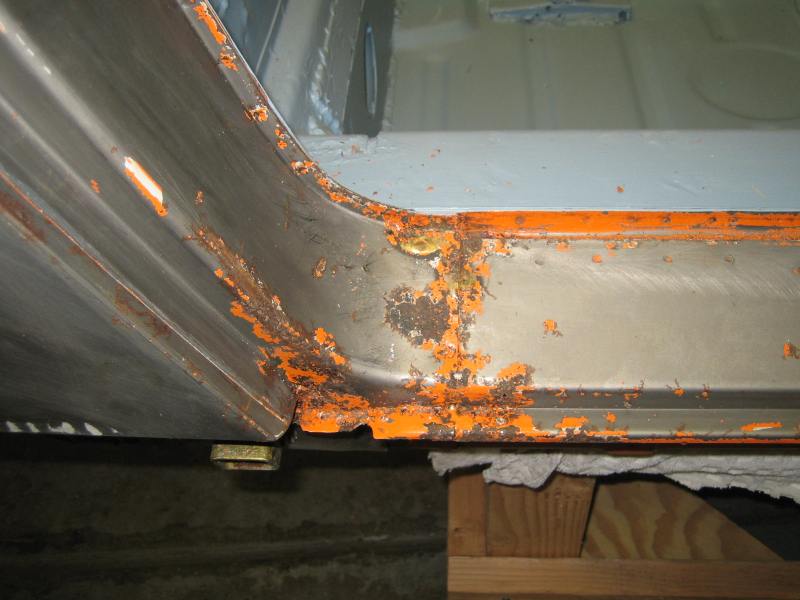 After more thorough prep you can see some small holes that are going to need some attention. 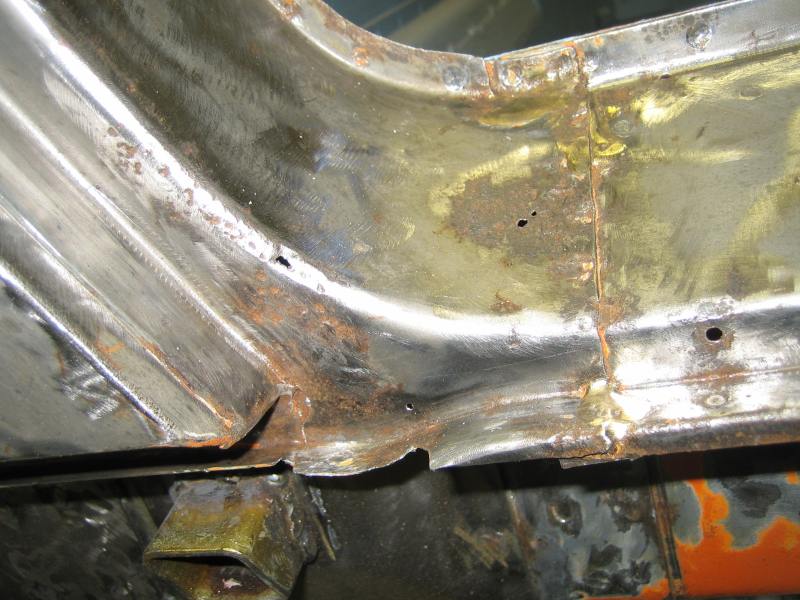 Before I get the welder out might as well remove the door and keep on stripping to finish off the passenger side of the car. 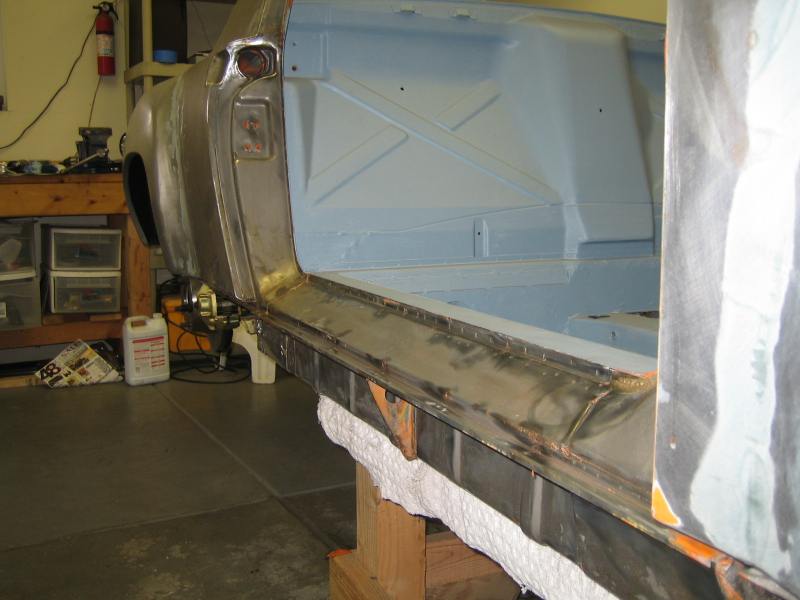 I just need to get under the sill and then done. Finished off the driver front wheel well too. 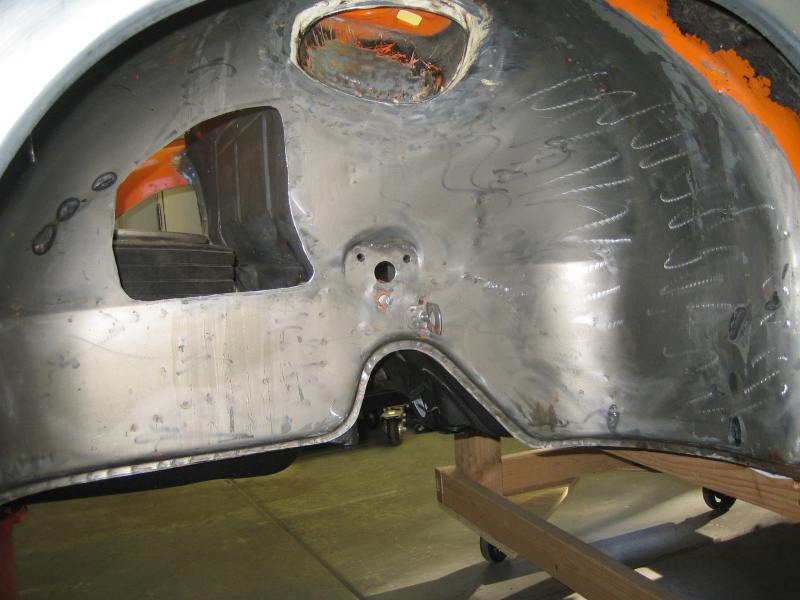 If I can patch the holes without too many problems I am thinking bondo next and then some primer. |
  |
1 User(s) are reading this topic (1 Guests and 0 Anonymous Users)
0 Members:

|
Lo-Fi Version | Time is now: 6th January 2025 - 02:07 AM |
Invision Power Board
v9.1.4 © 2025 IPS, Inc.


