|
|

|
Porsche, and the Porsche crest are registered trademarks of Dr. Ing. h.c. F. Porsche AG.
This site is not affiliated with Porsche in any way. Its only purpose is to provide an online forum for car enthusiasts. All other trademarks are property of their respective owners. |
|
|
  |
| Hontec |
 Feb 12 2011, 07:50 AM Feb 12 2011, 07:50 AM
Post
#181
|
|
I see things.....   Group: Members Posts: 261 Joined: 23-September 10 From: Netherlands Member No.: 12,210 Region Association: Europe |
Damn, that's a lot of nice work you put down there! respect.. (IMG:style_emoticons/default/pray.gif)
|
| my928s4 |
 Mar 19 2011, 05:18 PM Mar 19 2011, 05:18 PM
Post
#182
|
|
Member   Group: Members Posts: 349 Joined: 18-August 07 From: Spokane, WA Member No.: 8,018 Region Association: Pacific Northwest |
Been a while since the last update but finally made some progress, trying to remove the old PP bushings from the front a-arms I gave in and purchased a HF press. Should have done it a long while ago, talk about making your life easier.
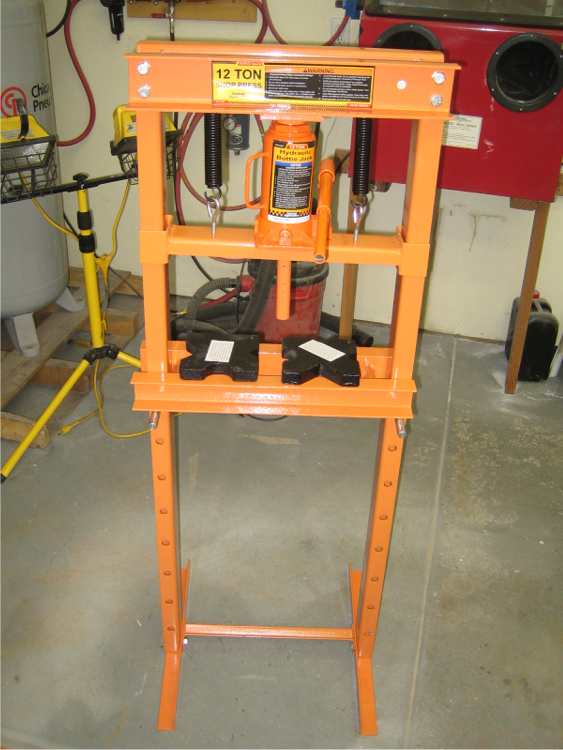 Putting the new PMB bushings in was interesting, first couple of tries the bushings were not hot enough but once I had that figured out it was plain sailing. A-arms move nicely now, glad I took it all apart to change them. Finally the rear trunk came together, this panel required the most work of any so far. Just when I thought I had it I would find another low spot ... once I got it where I wanted adding color on the inside was easy. 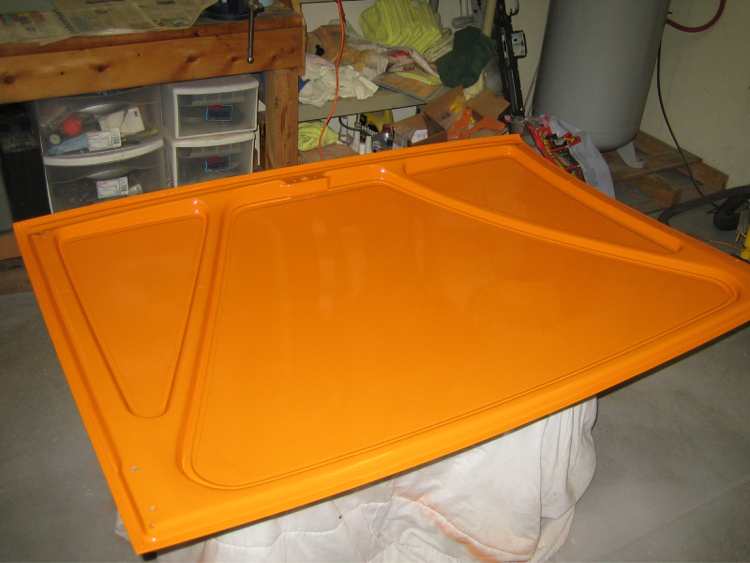 Also got to fit my J West trunk hinges, fiddly getting everything lined up as the old brackets were gone so no reference point. They work great. 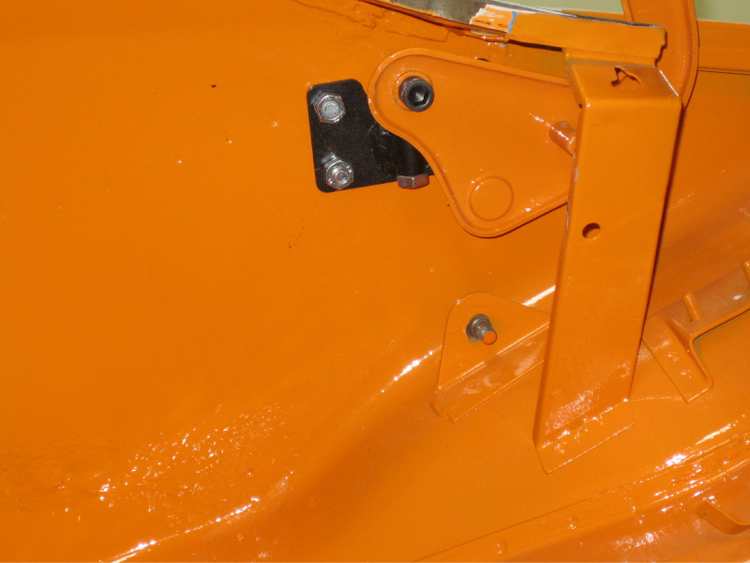 Last bit was to add the shox kit. 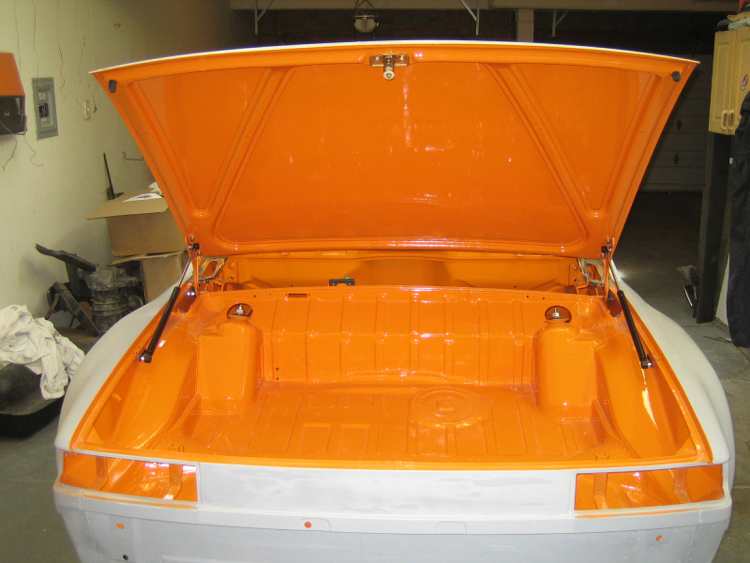 One rear corner is not quite where I want it but will leave that for another day, nice to get another part on the car. 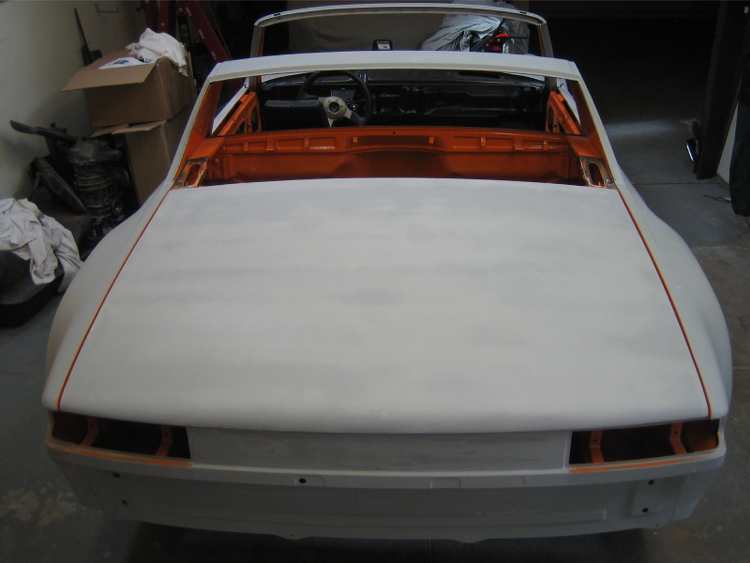 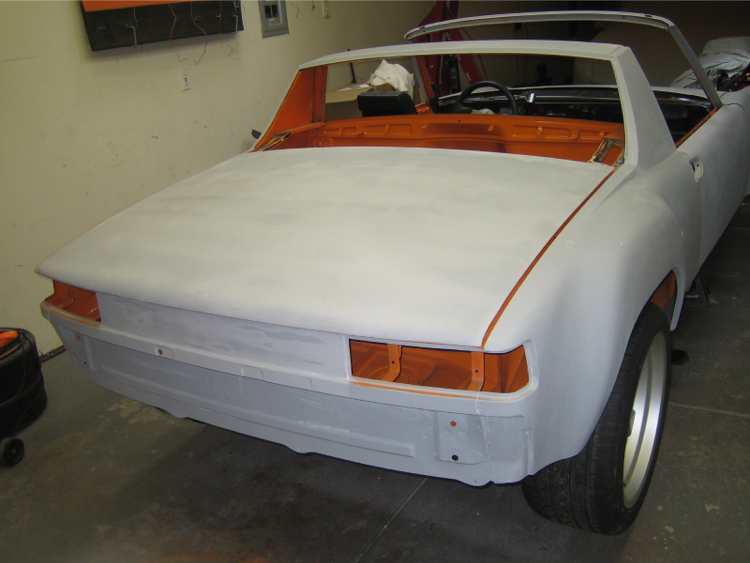 Next I need to work on that radiator and hoses. |
| my928s4 |
 Apr 23 2011, 11:24 AM Apr 23 2011, 11:24 AM
Post
#183
|
|
Member   Group: Members Posts: 349 Joined: 18-August 07 From: Spokane, WA Member No.: 8,018 Region Association: Pacific Northwest |
It has been a while but sometimes the project takes second priority, started looking for some small items to complete to get back in the game. Fished out the headlight assemblies, pretty nasty. Was thinking I would strip and paint but my sandblaster had a hard time with some of the pitted rust so took it down to the powder coaters and let them deal with it.
Before : 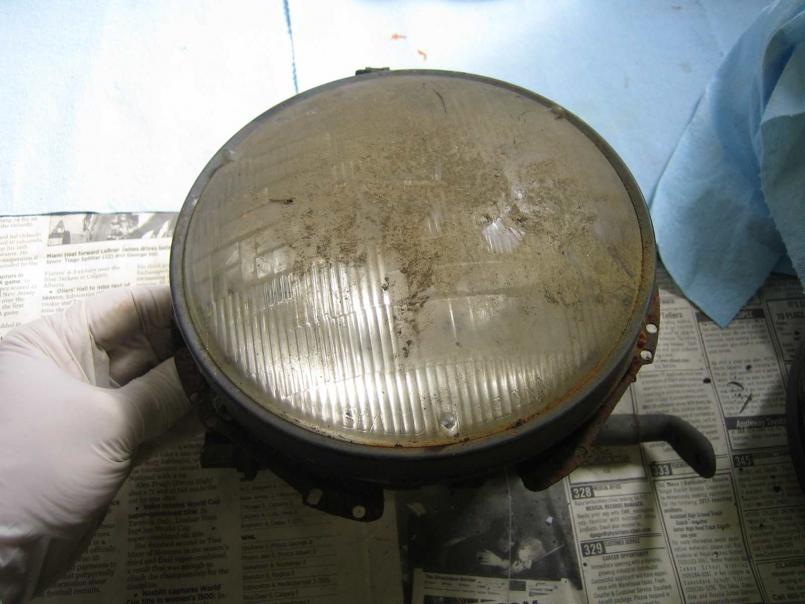 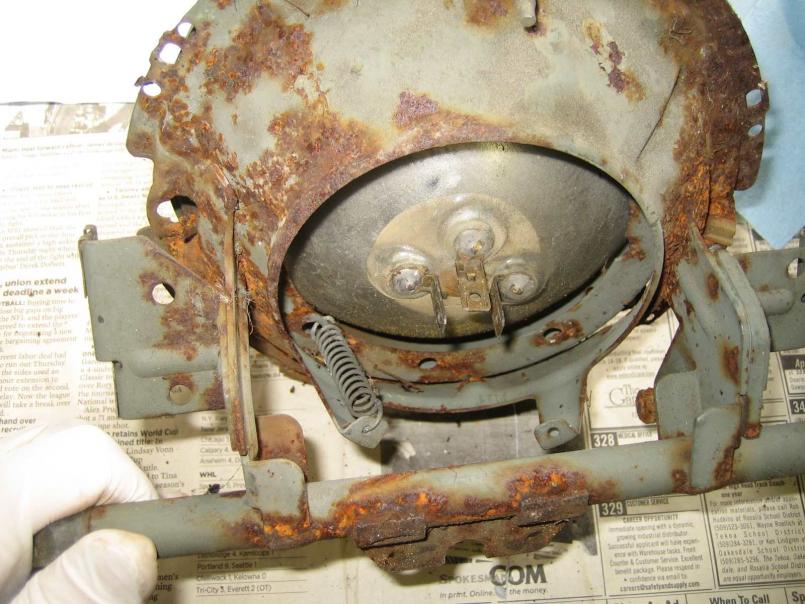 After, and yes those are the same sealed beam lights, those cleaned up nice. 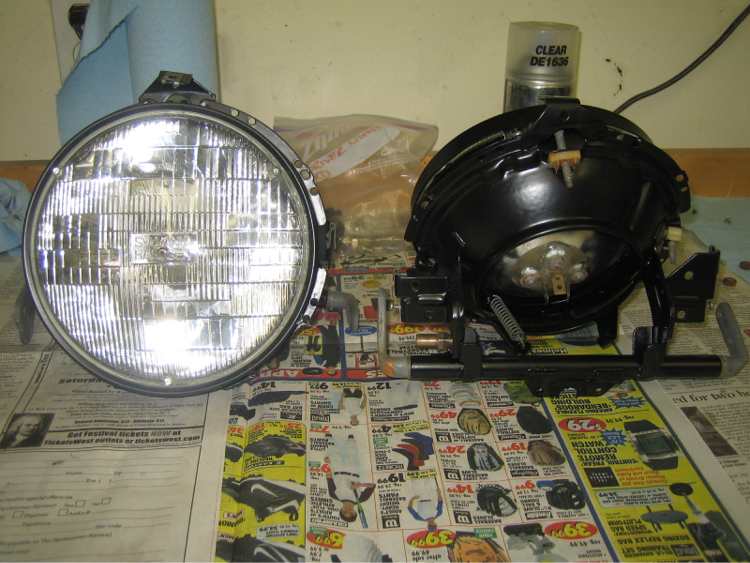 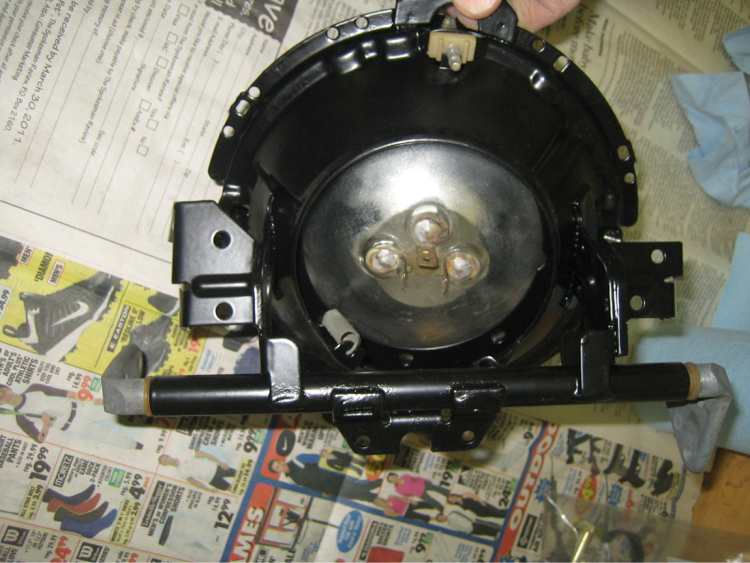 |
| my928s4 |
 Apr 23 2011, 11:27 AM Apr 23 2011, 11:27 AM
Post
#184
|
|
Member   Group: Members Posts: 349 Joined: 18-August 07 From: Spokane, WA Member No.: 8,018 Region Association: Pacific Northwest |
Also got the raidator brackets powder coated at the same time, I bolted the bottom panel in, riveted the side panels to the bottom and then put fastners so the side top panel can screw to the sides.
Next on the todo list is to route the radiator hoses. 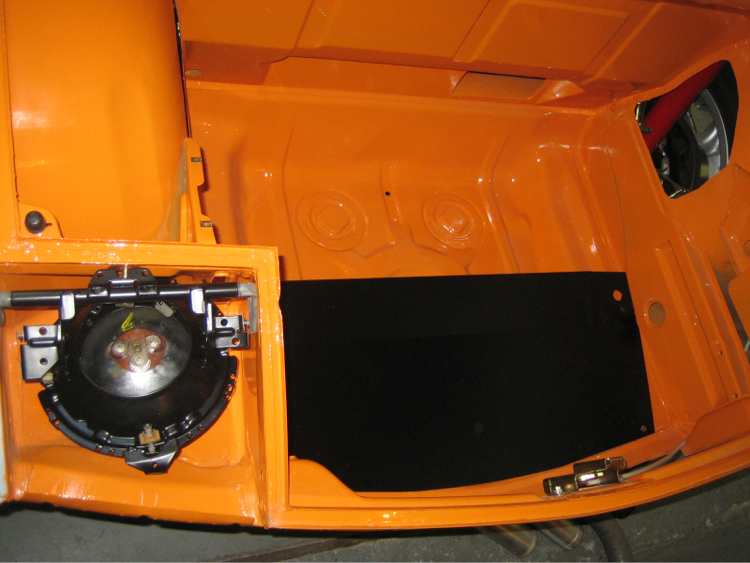 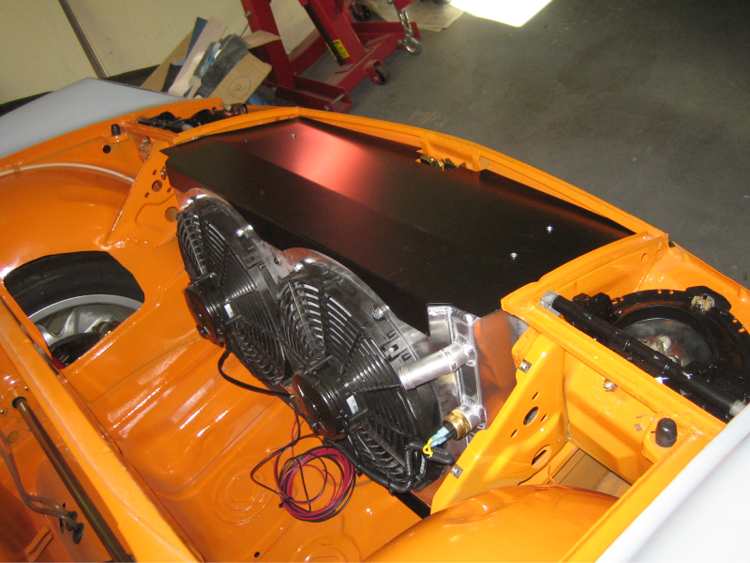 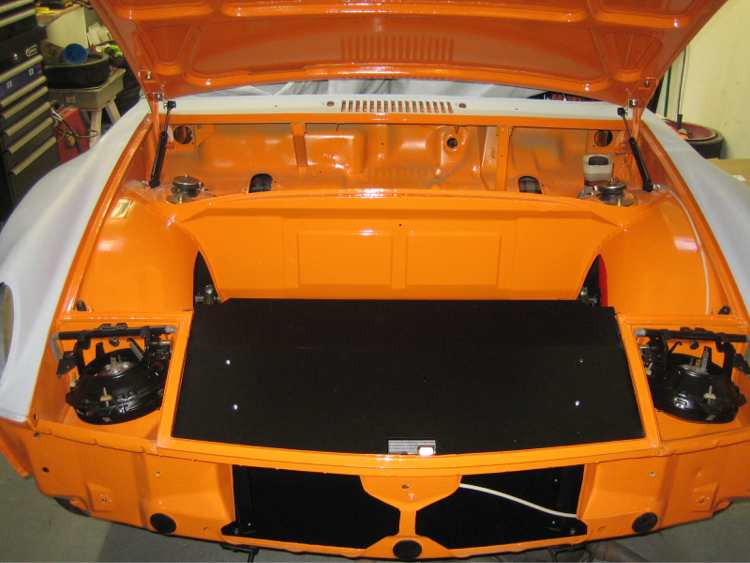 |
| rohar |
 Apr 23 2011, 11:33 AM Apr 23 2011, 11:33 AM
Post
#185
|
|
Senior Member    Group: Members Posts: 924 Joined: 25-October 08 From: spokane Member No.: 9,685 Region Association: None |
That thing is REALLY coming along! Wish I could say the same about mine. Who's doing your powder coating? I'm gonna need a local shop shortly.
BTW. This car is the reason I've got quarts and quarts of orange paint on the shelf that will never be used. Can't have two of them in the same town, it'd be like two girls showing up to the prom in the same dress (IMG:style_emoticons/default/wink.gif) |
| rwilner |
 Apr 23 2011, 11:34 AM Apr 23 2011, 11:34 AM
Post
#186
|
|
No Ghosts in the Machine    Group: Members Posts: 953 Joined: 30-March 10 From: Boston, MA Member No.: 11,530 Region Association: North East States |
After, and yes those are the same sealed beam lights, those cleaned up nice. I don't believe you. (IMG:style_emoticons/default/smile.gif) |
| my928s4 |
 Apr 23 2011, 12:47 PM Apr 23 2011, 12:47 PM
Post
#187
|
|
Member   Group: Members Posts: 349 Joined: 18-August 07 From: Spokane, WA Member No.: 8,018 Region Association: Pacific Northwest |
That thing is REALLY coming along! Wish I could say the same about mine. Who's doing your powder coating? I'm gonna need a local shop shortly. BTW. This car is the reason I've got quarts and quarts of orange paint on the shelf that will never be used. Can't have two of them in the same town, it'd be like two girls showing up to the prom in the same dress (IMG:style_emoticons/default/wink.gif) Thanks! PowderTech out in the industrial estate, really nice to deal with and great value. So if not orange for you then what ! |
| rohar |
 Apr 23 2011, 01:13 PM Apr 23 2011, 01:13 PM
Post
#188
|
|
Senior Member    Group: Members Posts: 924 Joined: 25-October 08 From: spokane Member No.: 9,685 Region Association: None |
That thing is REALLY coming along! Wish I could say the same about mine. Who's doing your powder coating? I'm gonna need a local shop shortly. BTW. This car is the reason I've got quarts and quarts of orange paint on the shelf that will never be used. Can't have two of them in the same town, it'd be like two girls showing up to the prom in the same dress (IMG:style_emoticons/default/wink.gif) Thanks! PowderTech out in the industrial estate, really nice to deal with and great value. So if not orange for you then what ! I'm leaning to a slightly more modern, dechromed creamsicle-esque nightmare. All the fabrication and hardware will probably be blaze orange though, gotta do something with all this! |
| my928s4 |
 May 29 2011, 07:28 PM May 29 2011, 07:28 PM
Post
#189
|
|
Member   Group: Members Posts: 349 Joined: 18-August 07 From: Spokane, WA Member No.: 8,018 Region Association: Pacific Northwest |
Still chipping away at the smaller stuff, I got the exhaust heat shield powder coated after I filled in some holes from drilling out the spot welds. I left one hole per bracket and then used that to bolt the heatshield back on.
This is the heatshield and steering rack shield after cleaning, will need to wait to get the rack shield painted until I have routed the coolant lines and put in an appropriate notch. 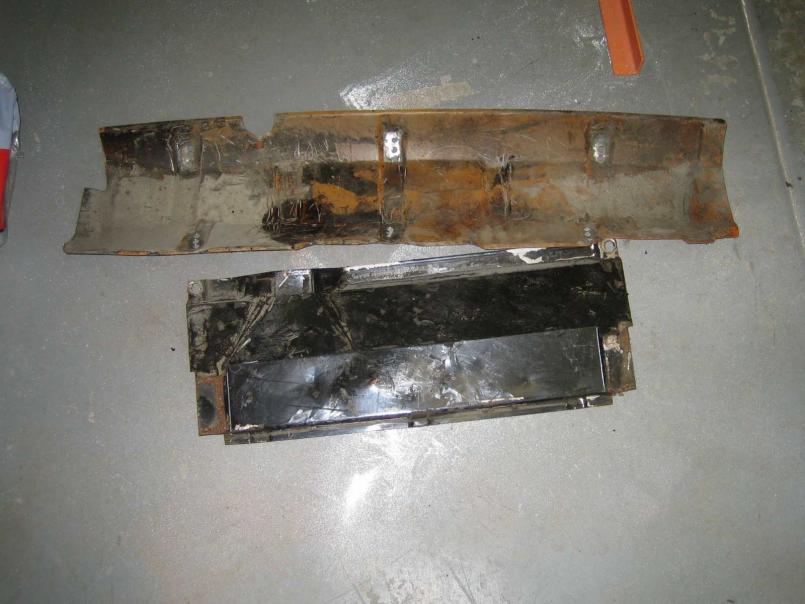 Heat shield fitted to car, dusty prints sure show up well ... 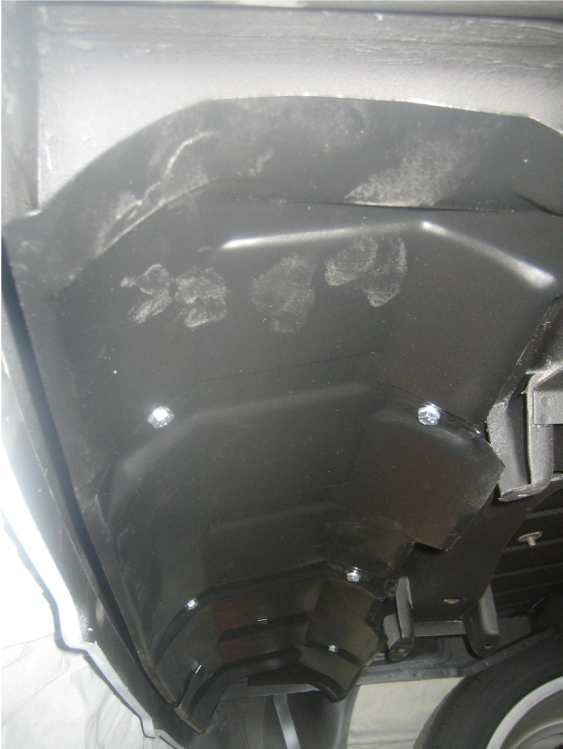 Got some plated parts back and was waiting for the cam on the headlight mechanism, so with that back I put the motor assembly on the headlights. 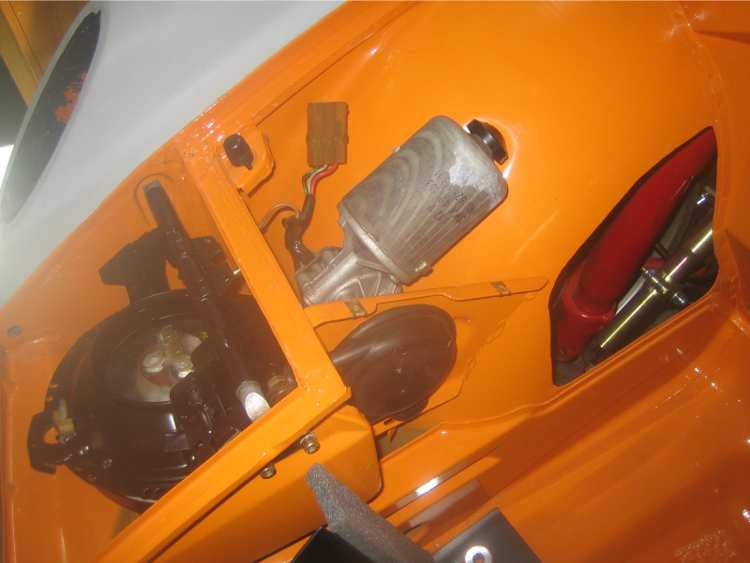 I was going to start wiring up the front trunk area and then realised that the 914 wiring loom is all one and not seperate sections, going to think about whether I want to rewire the whole car or not. |
| CrashDown |
 May 29 2011, 07:59 PM May 29 2011, 07:59 PM
Post
#190
|
|
Fake Carbon Fiber MASTA!   Group: Members Posts: 159 Joined: 8-June 09 From: Union City, CA Member No.: 10,453 Region Association: Northern California |
What an awesome goddamn build this is........
|
| uncle smokey |
 Oct 1 2011, 04:36 PM Oct 1 2011, 04:36 PM
Post
#191
|
|
Newbie  Group: Members Posts: 19 Joined: 4-June 11 From: PA Member No.: 13,157 Region Association: None |
I just read the whole thing, awesome job. Any updates?
|
| my928s4 |
 Oct 29 2011, 10:30 AM Oct 29 2011, 10:30 AM
Post
#192
|
|
Member   Group: Members Posts: 349 Joined: 18-August 07 From: Spokane, WA Member No.: 8,018 Region Association: Pacific Northwest |
Wow, it has been a while but finally getting back to it. The 928 needed some love which culminated in a 3,000 mile round trip down to LA, started with replacing the gearbox and then I got sidetracked with WYAIT items including powder coating and refurbing the rear axle assembly. I mention this because having done the same with the rear of the 914 items such as rear wheel bearings on the 928 was much less ardous. Although I did invest in a press this time, wish I had done that with the 914 .. lesson learned I guess.
Here is a pic of the 928 assembly shortly before going back in the car. 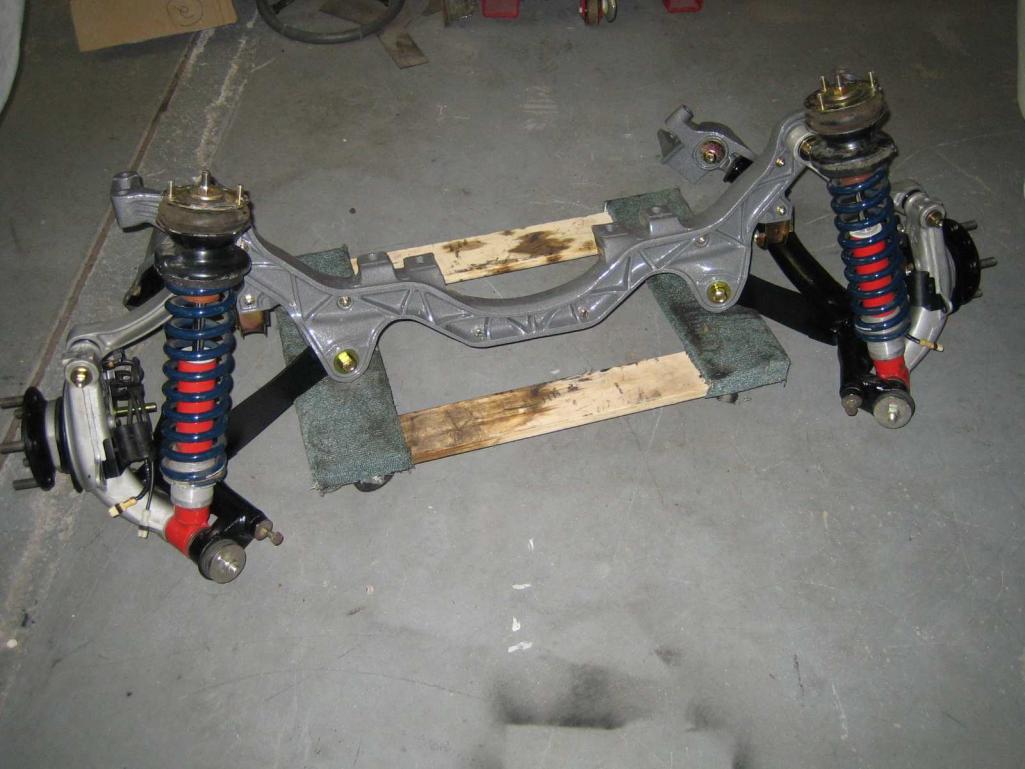 Alright back to the 914, so I bought some more Dynamat to finish of what I started a while back with some left overs. I could have put more in the interior but decided this is good enough, I am certainly not expecting this car to be quiet but I don't want that tin can feeling either. Will be a while before it gets put to the test but something easy to do to get back in the swing of things. 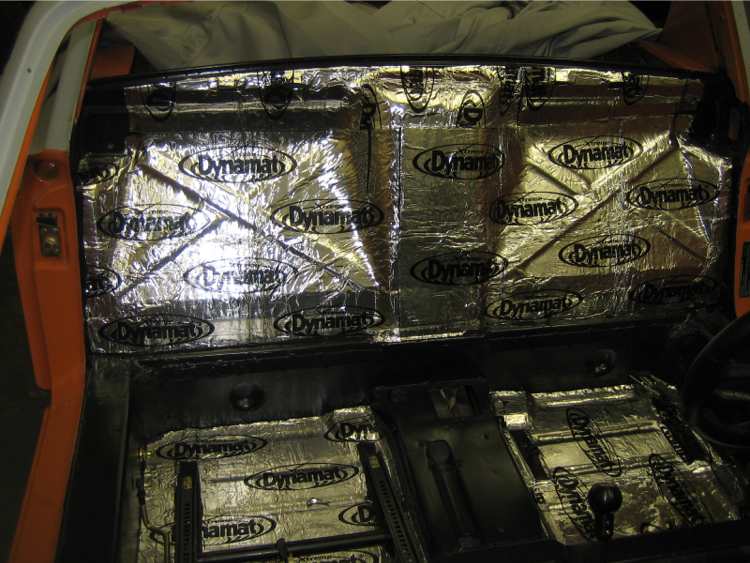 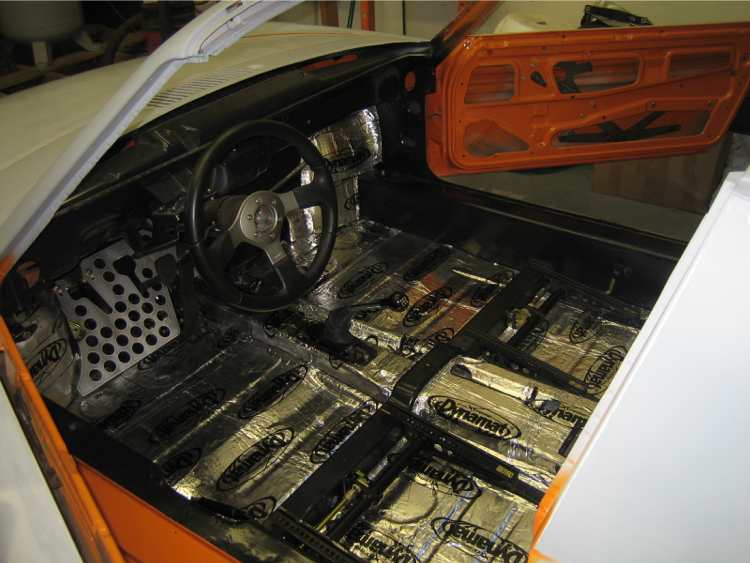 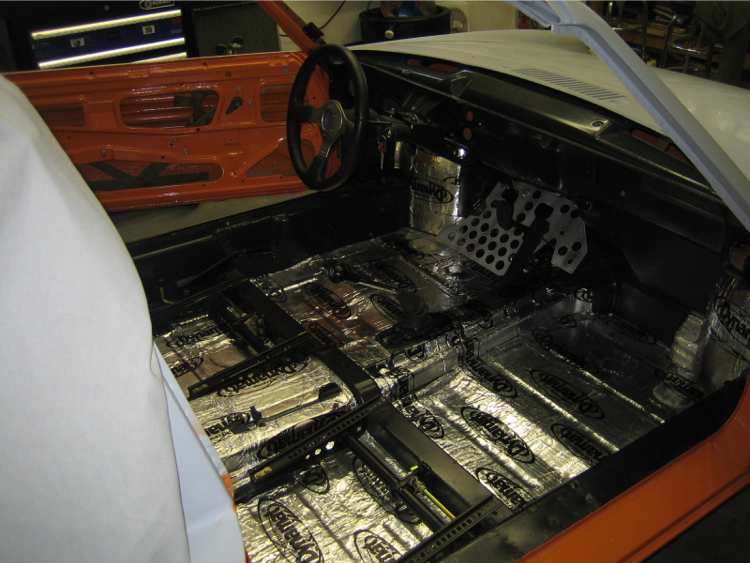 |
| Rod |
 Oct 29 2011, 12:28 PM Oct 29 2011, 12:28 PM
Post
#193
|
|
Senior Member    Group: Members Posts: 617 Joined: 1-January 08 From: Farnham UK Member No.: 8,526 Region Association: England |
Good work on the deadening, looks like a great job - BUT you need MLV on top of that dynamite to stop road noise and engine noise getting through. I think from memory that the Dynamat product is called Dynaliner..
Its a vinyl product - which stops sounds dead, dynamat will just stop your panels sounding dead when you tap them rather than ring out.. |
| my928s4 |
 Nov 13 2011, 02:15 PM Nov 13 2011, 02:15 PM
Post
#194
|
|
Member   Group: Members Posts: 349 Joined: 18-August 07 From: Spokane, WA Member No.: 8,018 Region Association: Pacific Northwest |
Finally got the parts I needed to get this done, nothing uncoventional here just following the majority in routing the lines under the car in the recesses along the tunnel.
I will say that with the car on stands this was quite the workout with drilling and rivetting, my arms are still shaking. I drilled pilot holes from under the car into the front trunk first. 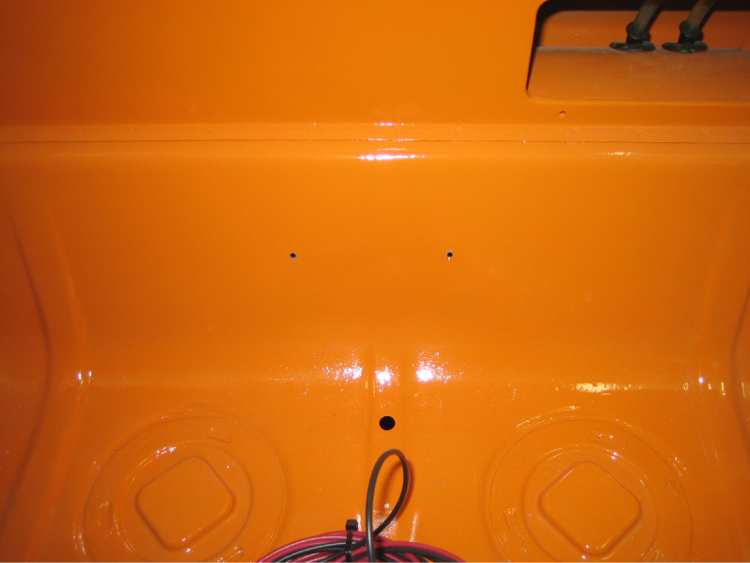 Then used the hole saw from inside the trunk, at Renegade I saw them drill from the underside but decided I preferred it this way as I had more room. Smaller hole was done with cheap Harbor Freight item, you get what you pay for ... 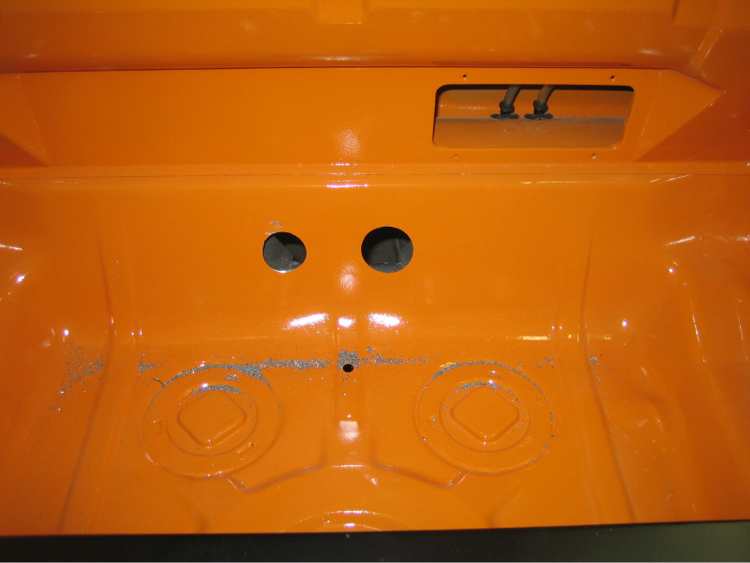 Front trunk looking good 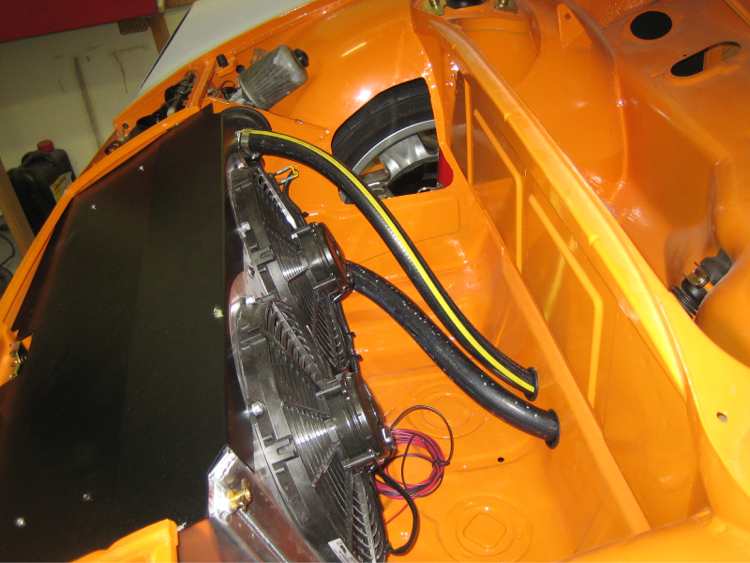 Started at front and then attached the brackets towards the rear, I bought the brackets from McMaster and they were good quality. Due to uneveness of the floor the cheaper brackets from HomeDepot may have been a better option as I needed a vice to modify the brackets. Used the axle stands to help support the hose. 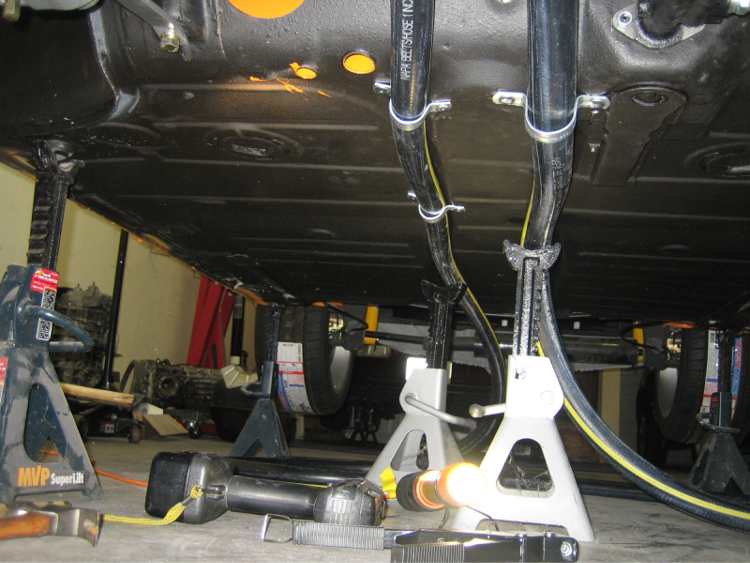 All done for now, I need one more bracket for each hose at the rear but waiting on engine install for that. 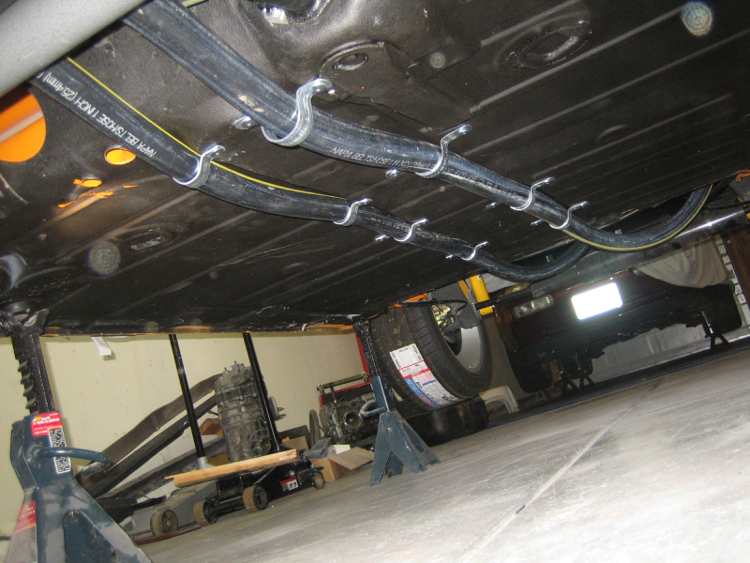 Plenty of extra hose ! 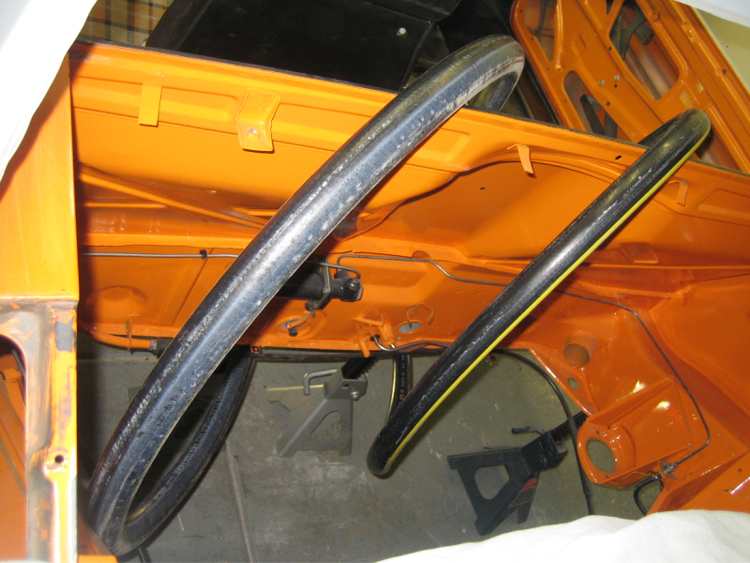 |
| rohar |
 Nov 13 2011, 02:35 PM Nov 13 2011, 02:35 PM
Post
#195
|
|
Senior Member    Group: Members Posts: 924 Joined: 25-October 08 From: spokane Member No.: 9,685 Region Association: None |
WOOT! That's a hell of a challenge to clear!
Still pissed you took my color (IMG:style_emoticons/default/smile.gif) |
| my928s4 |
 Jan 2 2012, 09:25 PM Jan 2 2012, 09:25 PM
Post
#196
|
|
Member   Group: Members Posts: 349 Joined: 18-August 07 From: Spokane, WA Member No.: 8,018 Region Association: Pacific Northwest |
OK time to make some progress, with some free time yesterday I decided to get back into the swing of things and decided that sooner or later I need to put the wiring harness back in the car. Was reluctant at first because I was unsure about what would end up being redone, well figured that most of the chassis harness was still needed and any additions can always be added later.
Oh, I also modified the metal pan that sits below the rack for the cooling pipes, stripped and is now at the powder coaters. 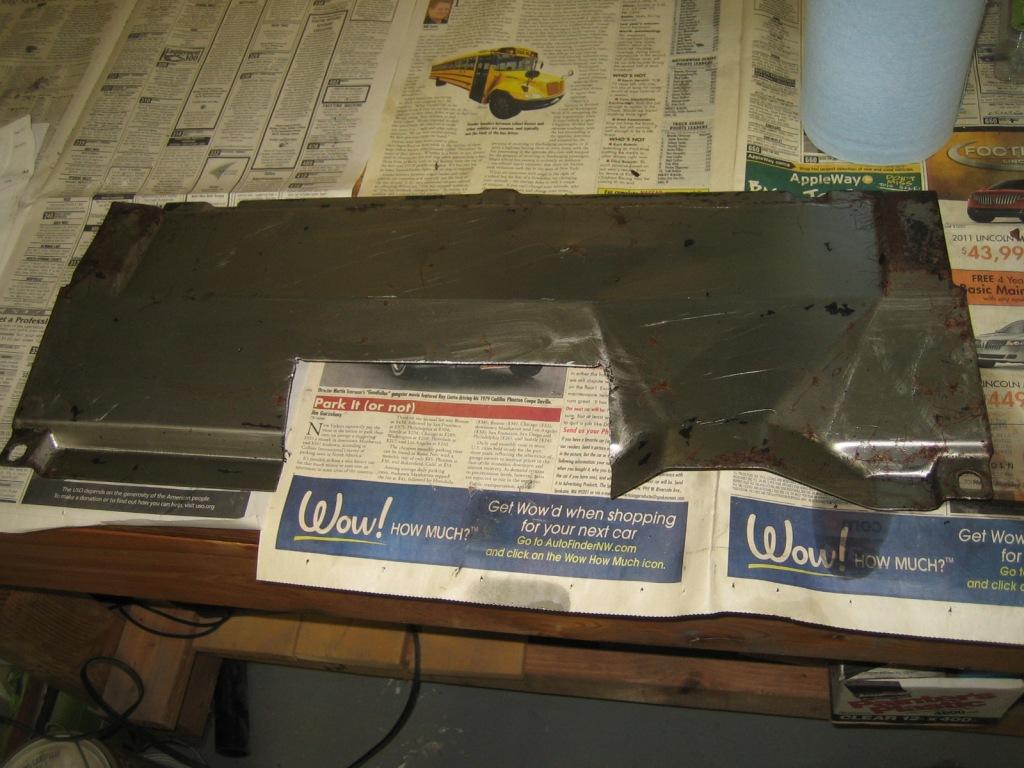 Started by cleaning and making some repairs on the harness from the bulk head forward, most of it was in surprisingly good shape. I need to get some harness fasteners in a few places, glad I took lots of photos when I dis assembled but wish I had taken more ..... 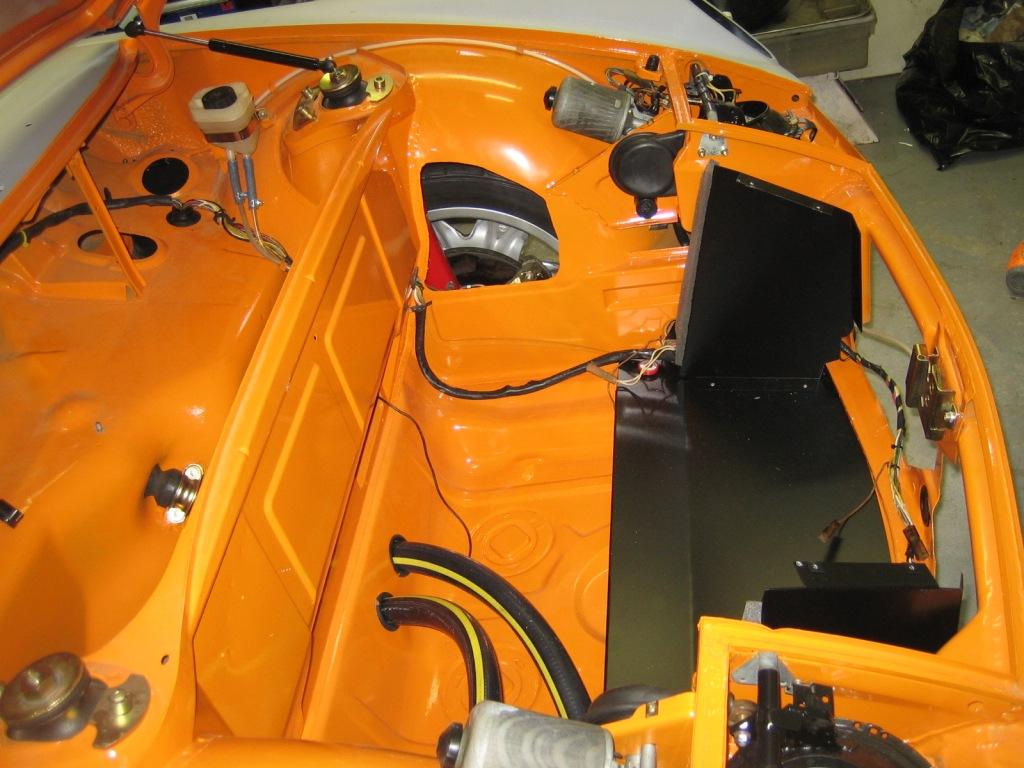 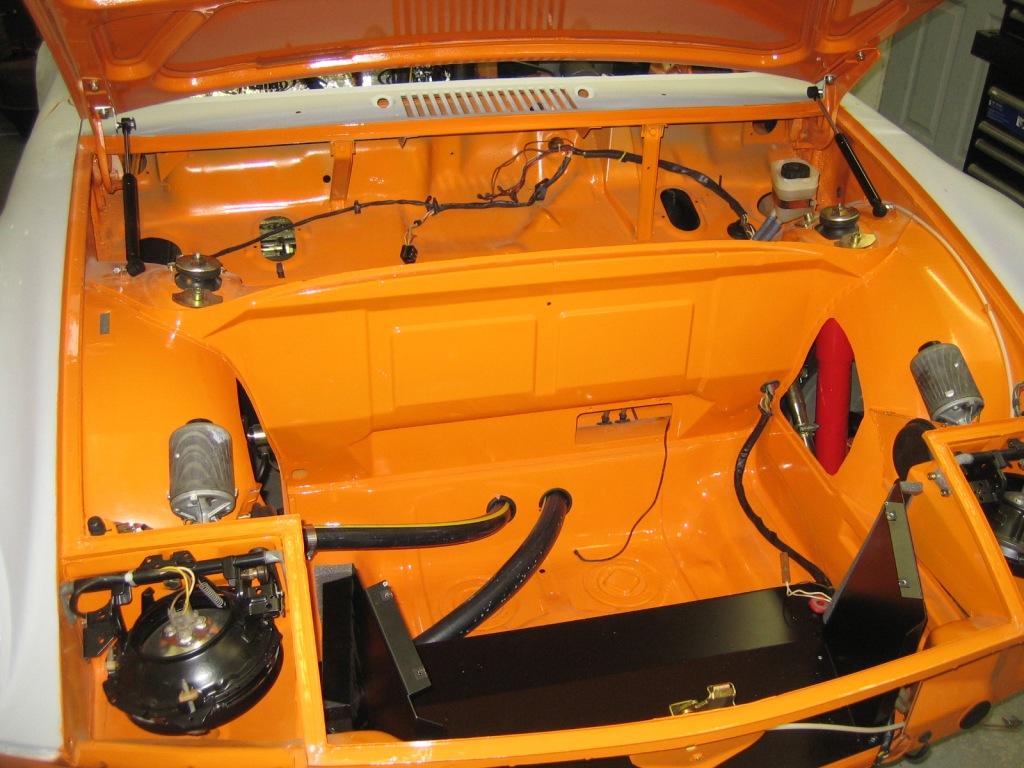 I was going to take a break here but decided to keep going, ordered a new fuse panel from Jwest, the old one is toasty. I pulled some owner added extra wiring that had been added over the years also. OK need to get the dash back in, hmmm looks like crap so stripped the old vinyl and foam whose adhesive was a bear to remove. Guessing in 1975 they did not worry about ecological goodness in their chemicals. I did discover Hans's signature though. 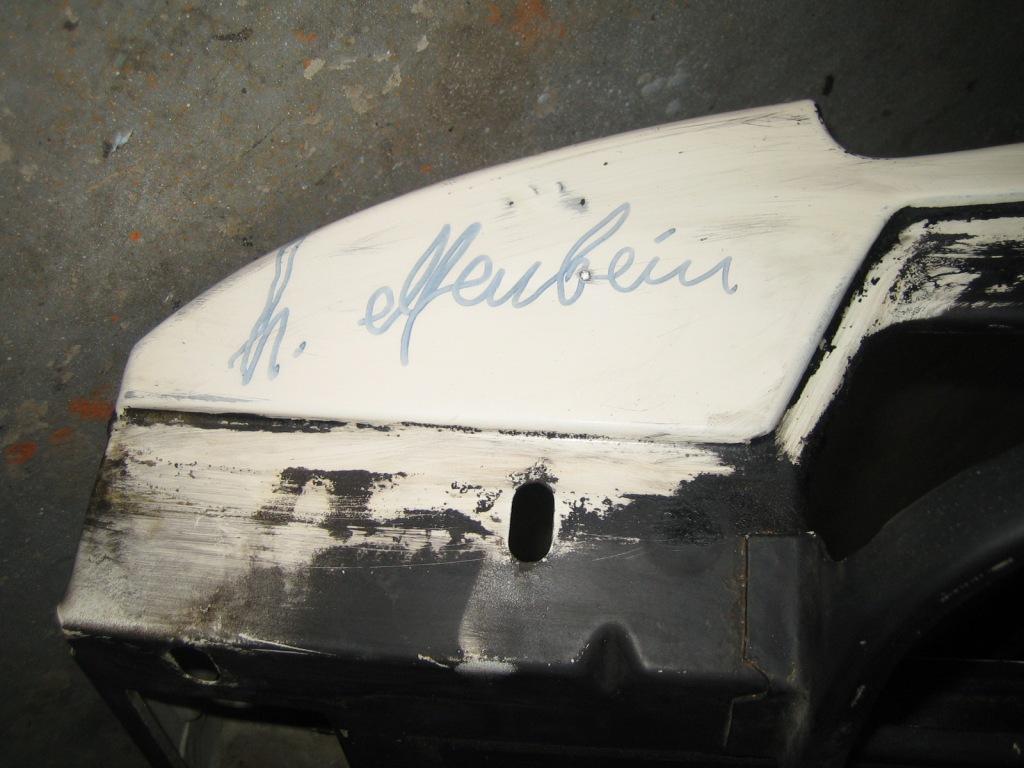 Sanded and prepped for paint. 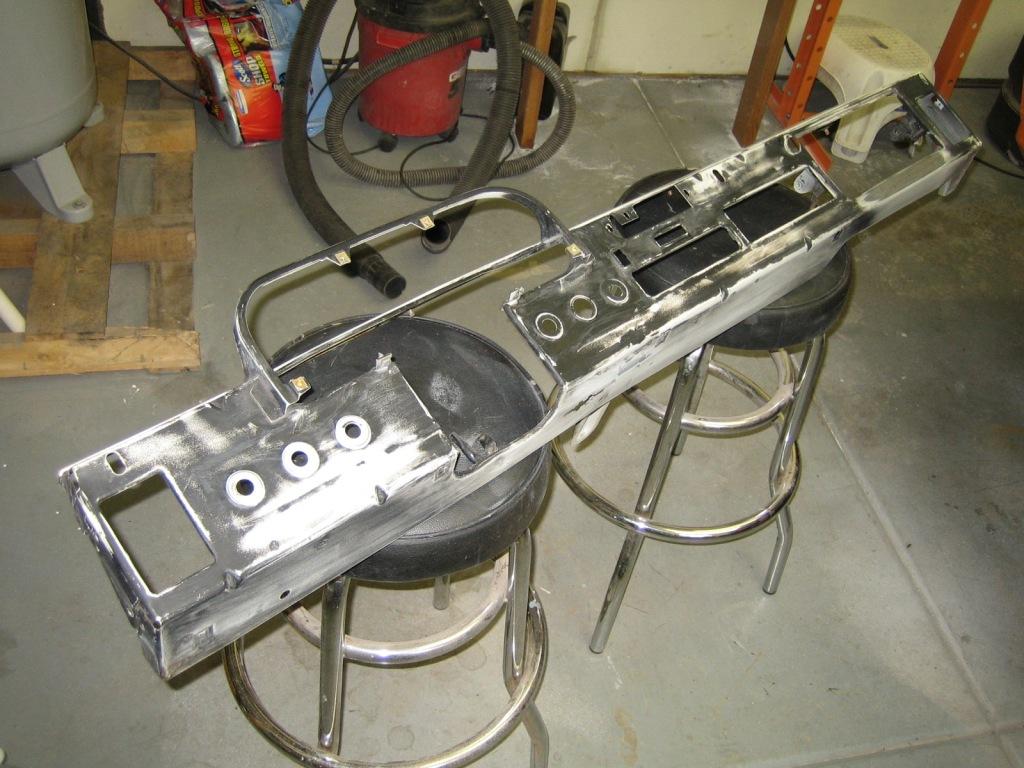 One rattle can later. 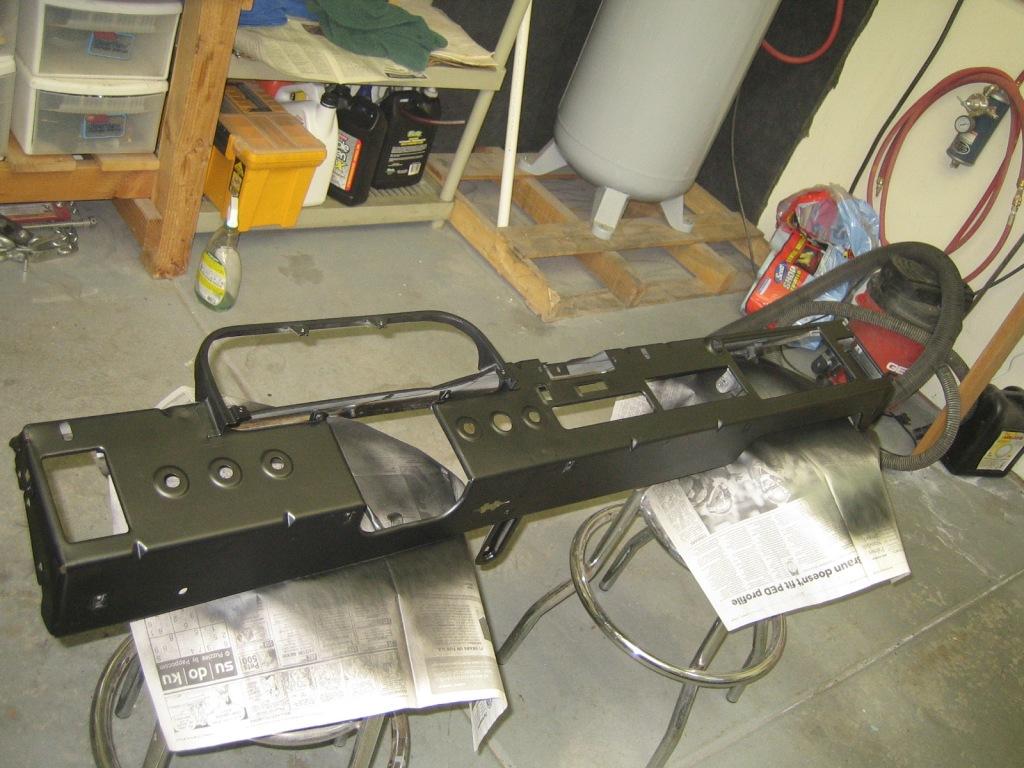 Adding back in the switch's I realized the wires for the front fogs and rear demister were some of the PO wiring, will have to figure that out later. This is where I stopped, also realized this roller came without the engine bay relay panel also. 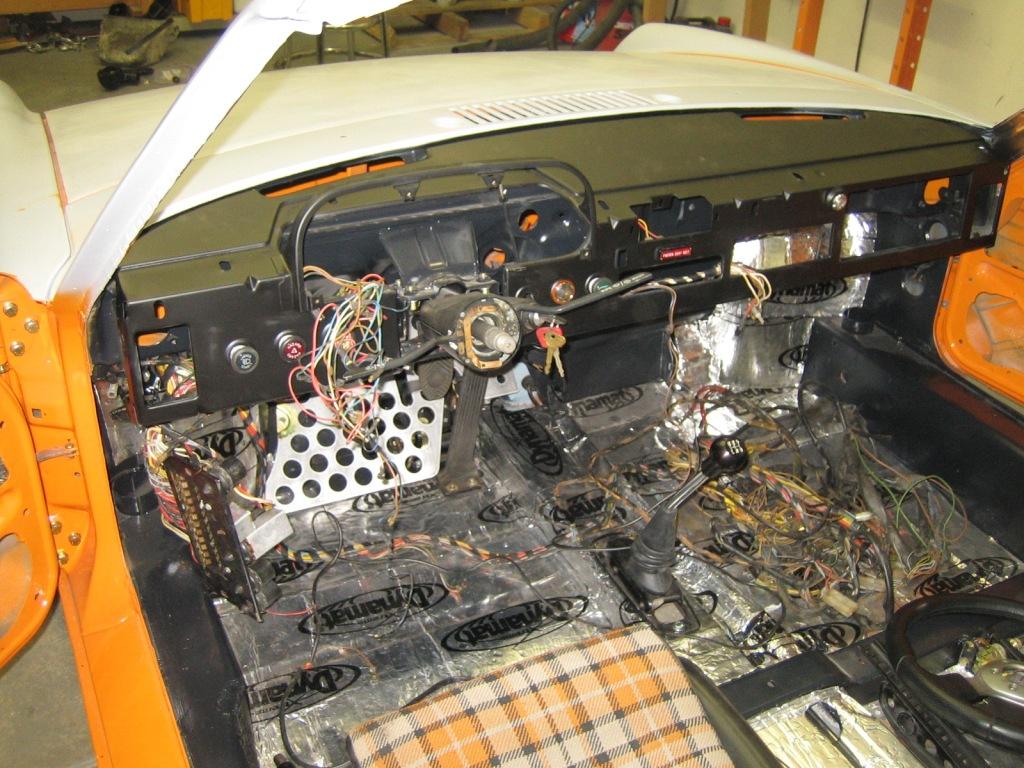 I have the Haynes manual wiring diagram but it is missing plenty of circuits for the 75 MY. A pain when you cannot remember where a couple of wires went. |
| my928s4 |
 Jan 7 2012, 08:56 PM Jan 7 2012, 08:56 PM
Post
#197
|
|
Member   Group: Members Posts: 349 Joined: 18-August 07 From: Spokane, WA Member No.: 8,018 Region Association: Pacific Northwest |
I ordered a bunch of small parts this week for the electrical but nothing arrived (IMG:style_emoticons/default/sad.gif), hopefully next week I can finish it all off. Anyway this had all taken longer than I expected, mainly because when I think I am done I come up with something to add or modify or I re-read the wiring diagram and figure something else out.
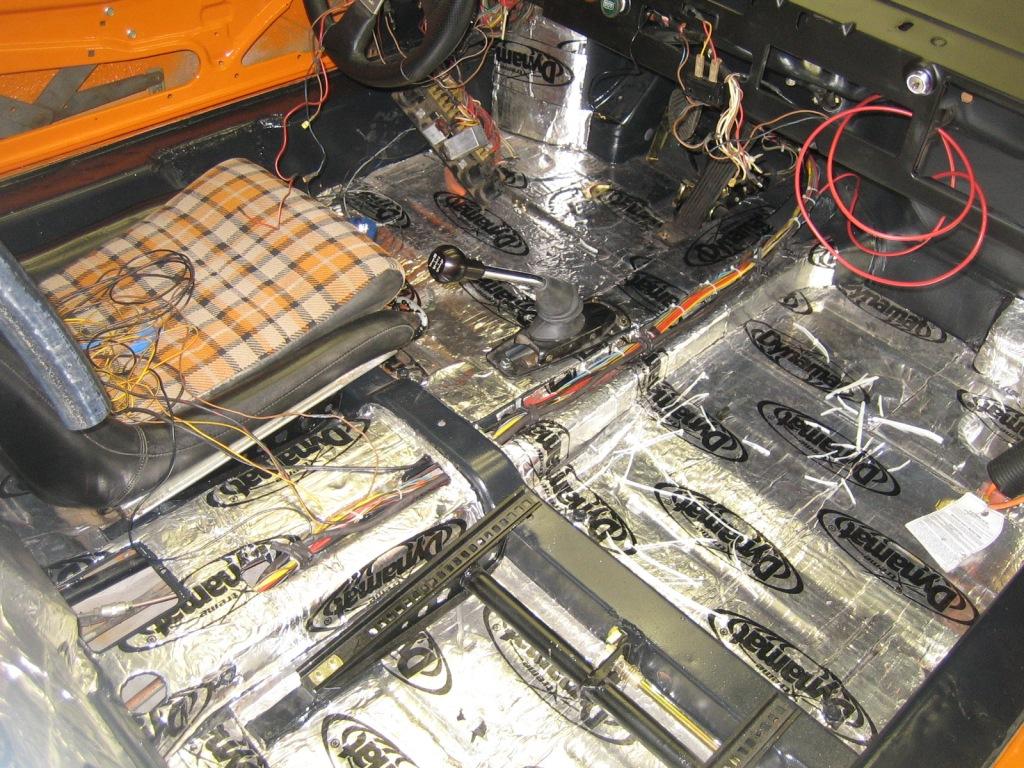
Last time I mentioned i did not have the engine bay relay box, well I have now worked out I do not need it so that is good! More on that in a bit. Spent quite a bit of time tidying the loom up where I could, considering it is nearly 30years old the majority was pretty good. A good example was the tail light wiring in the trunk, cleaned off all the rust stains, removed the tape and put some heat shrink on. 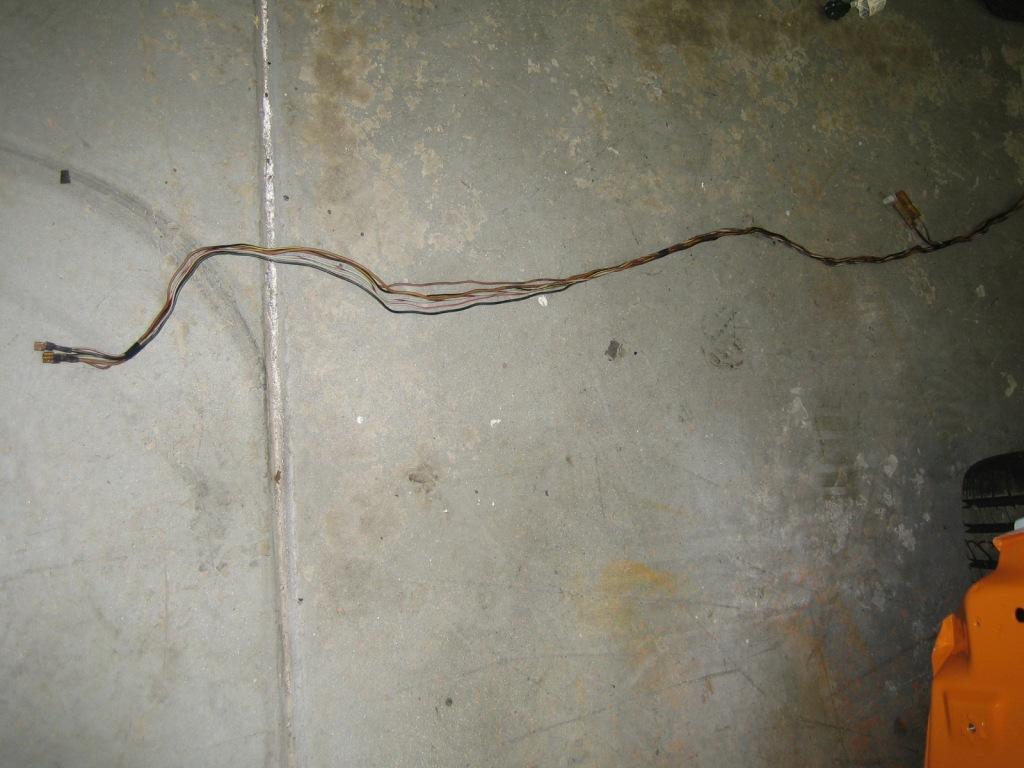 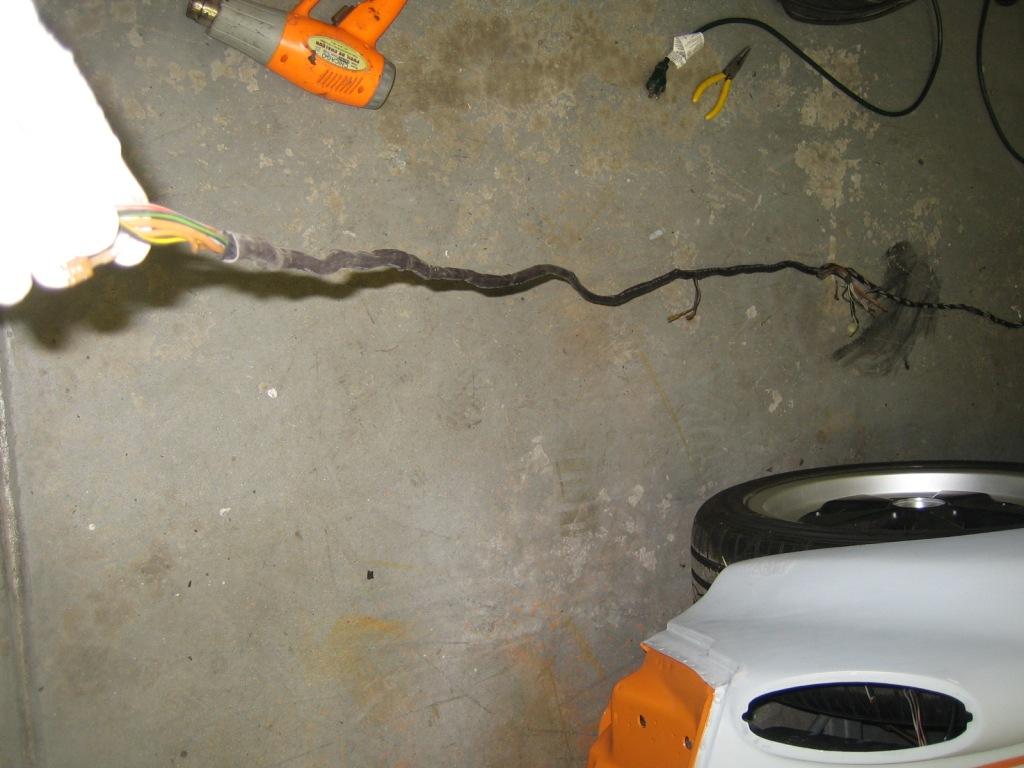 I pulled the harness through to the engine bay and then thought it might be a good idea to feed through a couple more power feeds, one for the radio/amp and another for the cooling fans. Maybe overkill but better than overloading old circuits. Also added one more signal wire, going to get the Quad gauge, with Water Temp, Oil Temp, Volts, Fuel I needed to add a wire for Water. Well I need to pull the harness back through to get the extra wires through, pain but it worked out OK in the end. Oh, battery is going to be in the rear trunk. 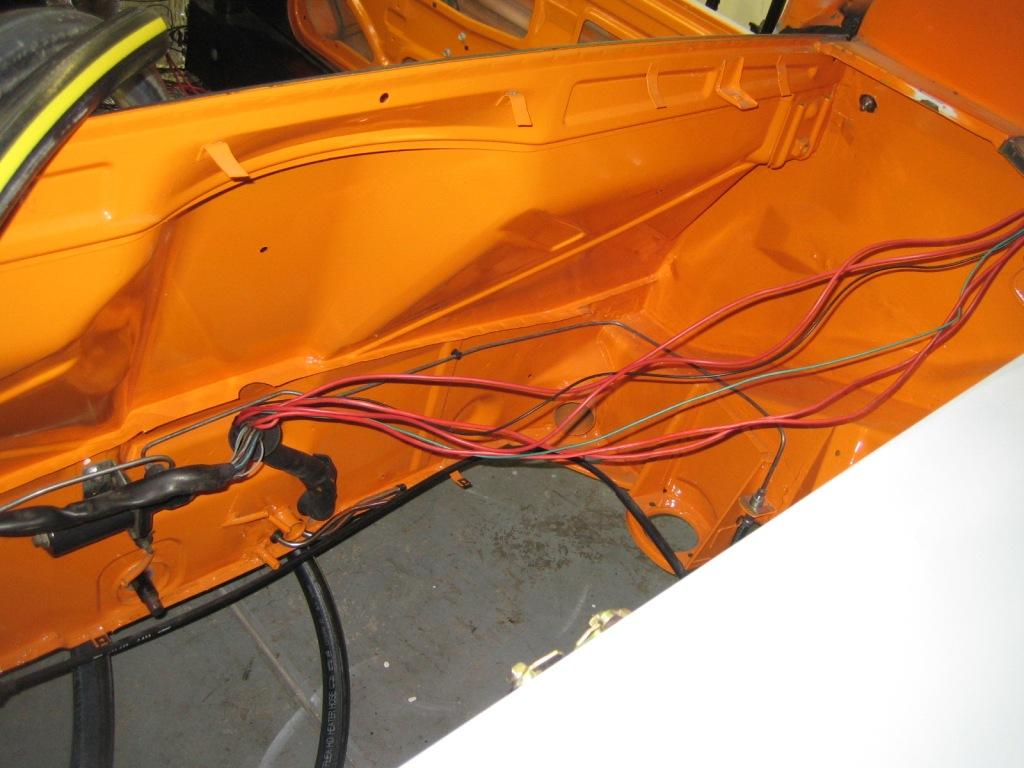 Here is the pile with all the wires removed from the harness, I could have just left them but WYAIT seemed worth tidying up. 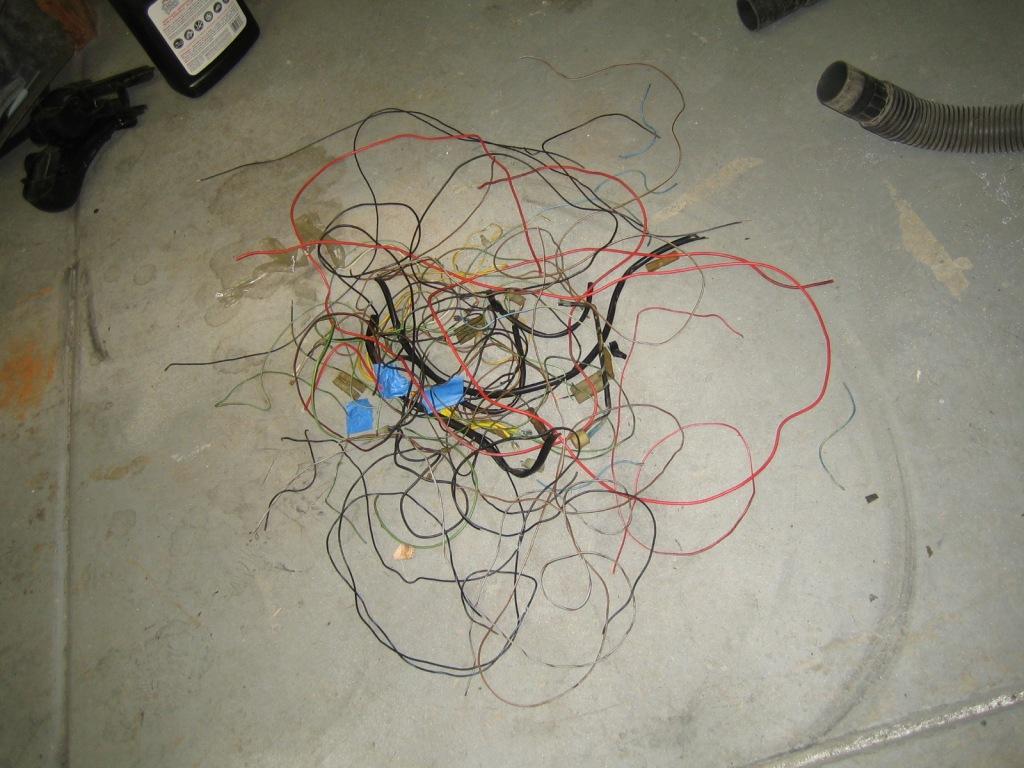 Ditched the rear dome light and going to add this LED lighting under the dash. 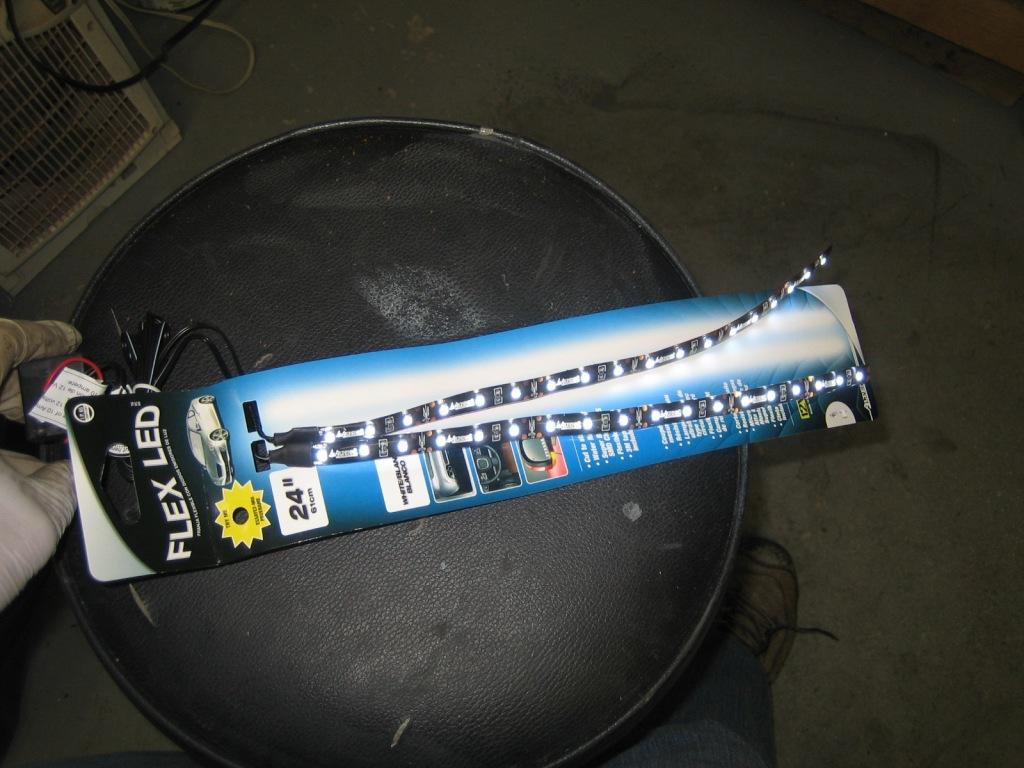 So my old door switches were toast and I threw them out when I dismantled, the handbrake switch was pretty nasty also. Can't be much to replace, bloody hell, $15 and another $5 for the gasket! That was a shock, found some Audi ones that would work then came across these from MAMotorworks, $3.99 that is more like it ... 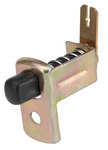 There were 2 mystery connectors, one in the trunk and another on the floor by the bulkhead, I trawled the wiring diagrams but they don't exist so presume maybe for rear foglamp or something? In the rear there is blue/yellow (signal), black (power) and brown (ground), inside the same wires and also the blue generator charge signal. The Blue/Yellow continues to the dash. I commandeered the blue/yellow for oil temp and removed or bypassed everything else. Rear Trunk connector: 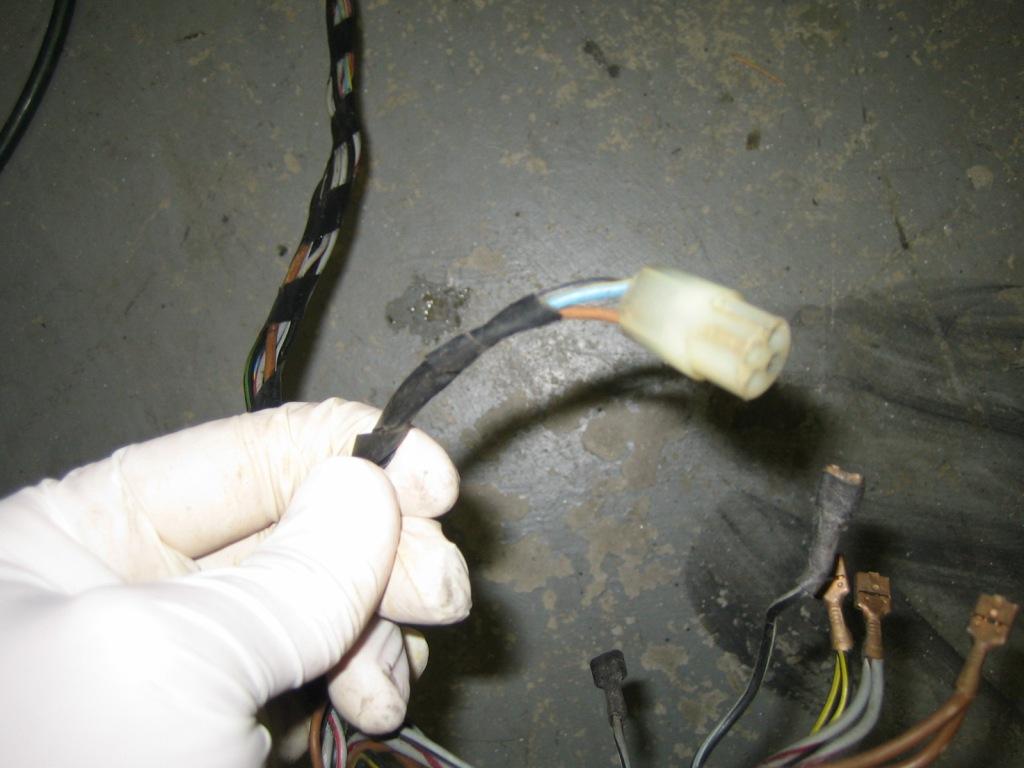 Inside connector: 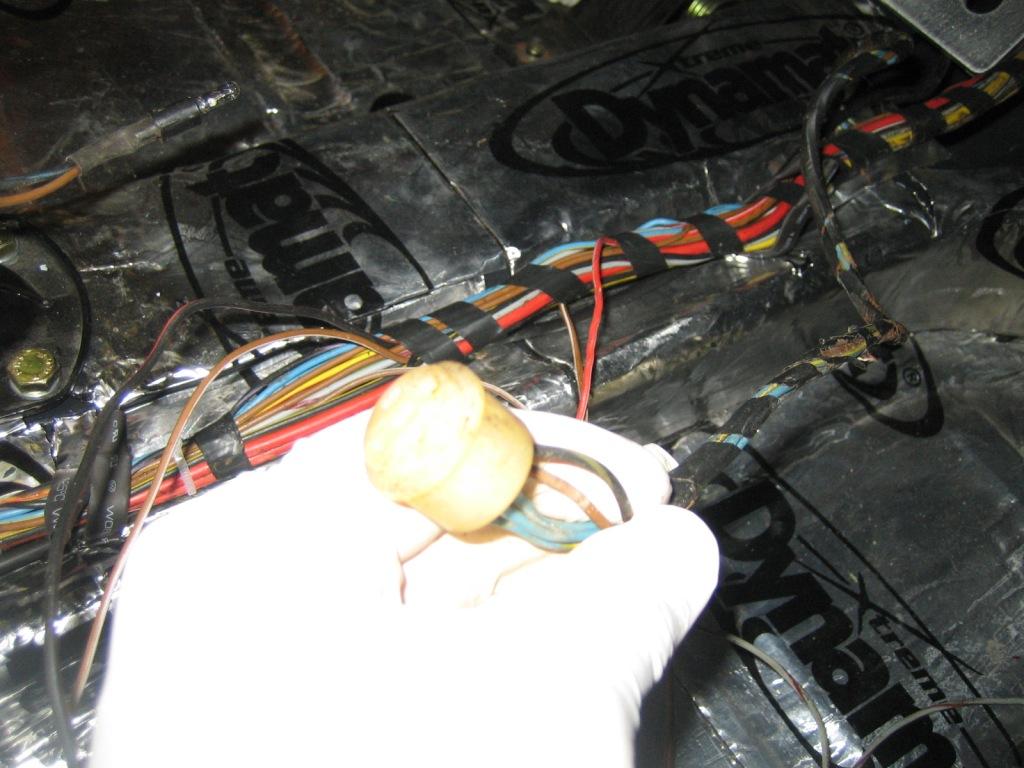 Inside the engine bay where the harness connects to the relay box I removed what was not needed and will need to connectorize the others to the Suby engine harness. 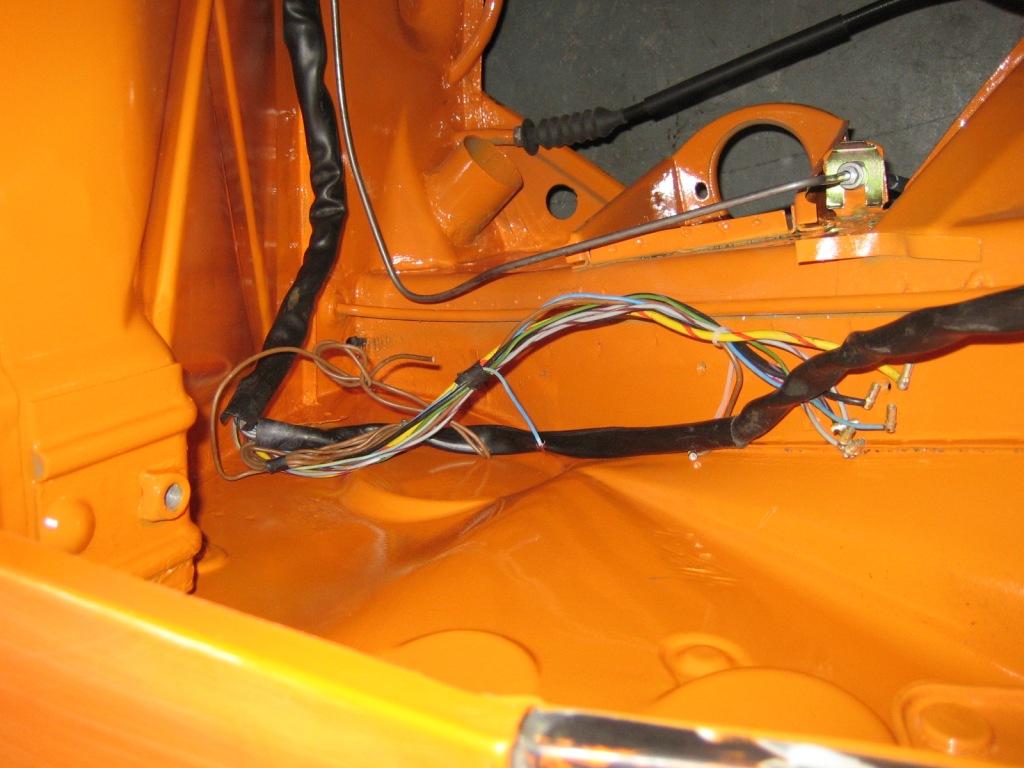 So the interior is coming along nicely, need to tidy up the fuse box area but will wait for the new one to arrive. Wires on the seat are for
 |
| rohar |
 Jan 7 2012, 09:27 PM Jan 7 2012, 09:27 PM
Post
#198
|
|
Senior Member    Group: Members Posts: 924 Joined: 25-October 08 From: spokane Member No.: 9,685 Region Association: None |
Yay, more progress. I'm pulling the entire harness out off mine and going aftermarket for most of it. If you need to canibalize any connectors, let me know. I'm in the neighborhood. I'll pm my phone #.
|
| Lennies914 |
 Jan 7 2012, 09:55 PM Jan 7 2012, 09:55 PM
Post
#199
|
|
Slacker    Group: Members Posts: 828 Joined: 9-January 10 From: NorCal Member No.: 11,216 Region Association: Northern California  |
The one mystery connector in the trunk was for the 02 sensor.
|
| OllieG |
 Jan 12 2012, 03:30 AM Jan 12 2012, 03:30 AM
Post
#200
|
|
OllieG   Group: Members Posts: 212 Joined: 6-July 11 From: UK Member No.: 13,282 Region Association: England |
This is a great thread...really useful for novices like me, thanks alot! I'm in the early stages of a 6cyl resto/conversion, about to strip the underside, and will also be welding flares on shortly.
The epoxy primer you used for the underside - is that a 2pk epoxy? If so, what breathing mask did you use? I've read for 2pk paints you really need an air fed respirator..what do you think? You said in an earlier post that you made a mistake with one of the flares by fixing the bottoms first and working up from both sides - what went wrong when you did it this way? How did you do it in the end so it worked out...? Cheers. |
  |
4 User(s) are reading this topic (4 Guests and 0 Anonymous Users)
0 Members:

|
Lo-Fi Version | Time is now: 7th January 2025 - 01:52 PM |
Invision Power Board
v9.1.4 © 2025 IPS, Inc.


