|
|
|
Porsche, and the Porsche crest are registered trademarks of Dr. Ing. h.c. F. Porsche AG.
This site is not affiliated with Porsche in any way. Its only purpose is to provide an online forum for car enthusiasts. All other trademarks are property of their respective owners. |
|
|

  |

| watsonrx13 |
 Oct 1 2007, 05:16 AM Oct 1 2007, 05:16 AM
Post
#61
|
|
Advanced Member  Group: Members Posts: 2,735 Joined: 18-February 03 From: Plant City, FL Member No.: 312 Region Association: South East States |
Well, after getting my first project completed.... (IMG:style_emoticons/default/av-943.gif) and surviving a very hot summer, I've gone back to working on this car...
Here's the link to the post showing how I installed the rear trunk floor... 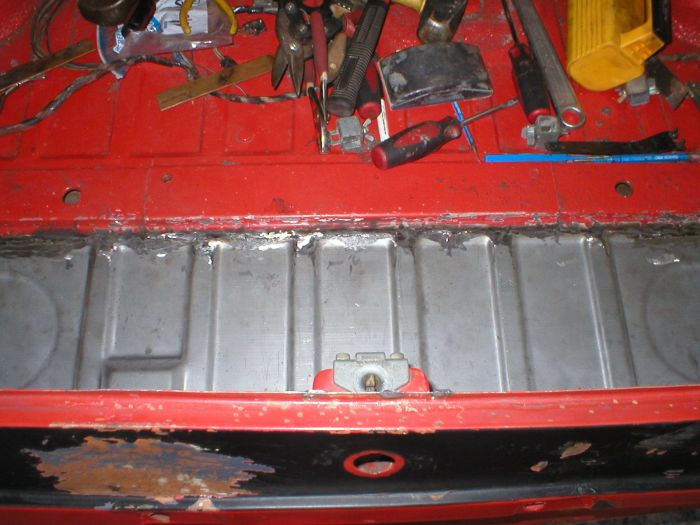 -- Rob |
   |

 
|
| thomasotten |
Oct 1 2007, 07:44 AM
Post
#62
|
|
Senior Member Group: Members Posts: 1,550 Joined: 16-November 03 From: San Antonio, Texas Member No.: 1,349 |
I like your project... we'd be budds if you lived closer!
|
|
|
|
| watsonrx13 |
Oct 7 2007, 01:10 PM
Post
#63
|
|
Advanced Member Group: Members Posts: 2,735 Joined: 18-February 03 From: Plant City, FL Member No.: 312 Region Association: South East States |
Thanks Thomas.... good luck on your project... (IMG:style_emoticons/default/sawzall-smiley.gif)
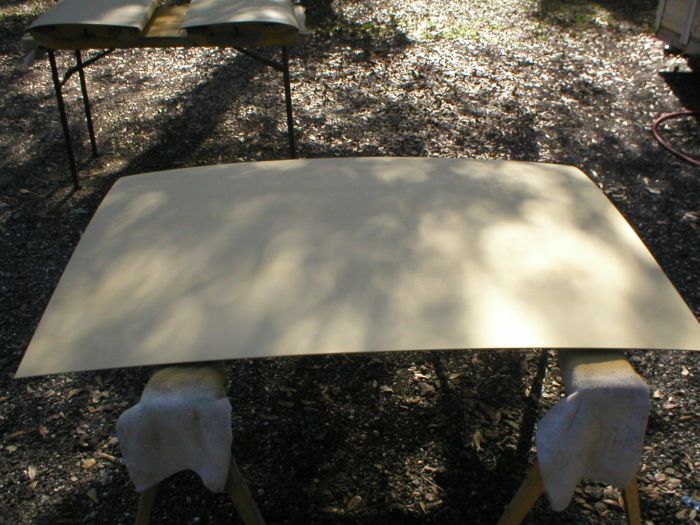
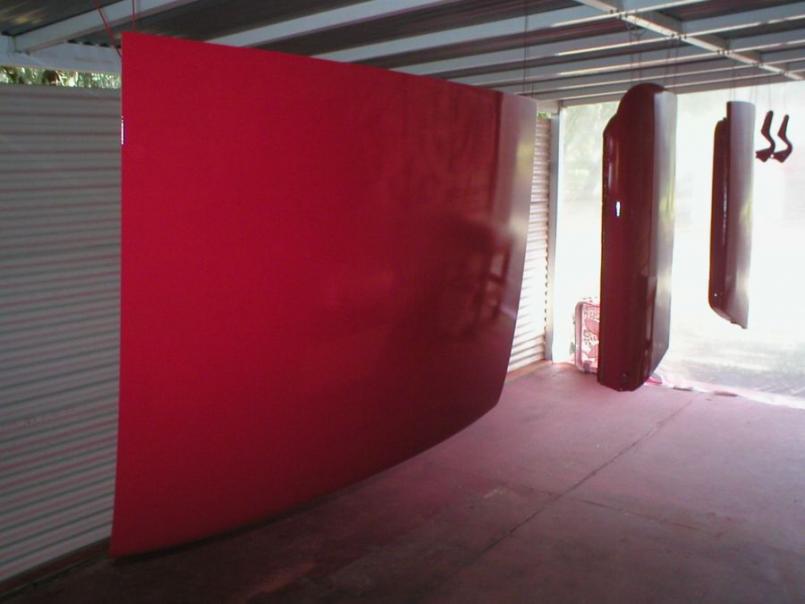
Trunk has been primered, now all I have to do is paint it... 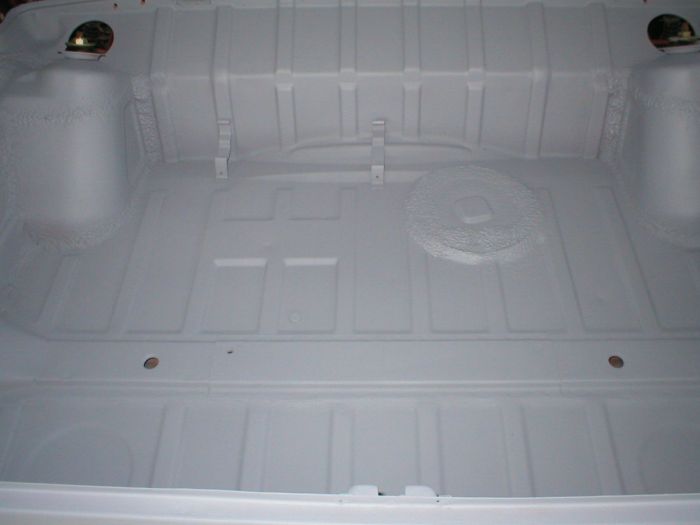 -- Rob |
|
|
|
| watsonrx13 |
Oct 21 2007, 06:32 PM
Post
#64
|
|
Advanced Member Group: Members Posts: 2,735 Joined: 18-February 03 From: Plant City, FL Member No.: 312 Region Association: South East States |
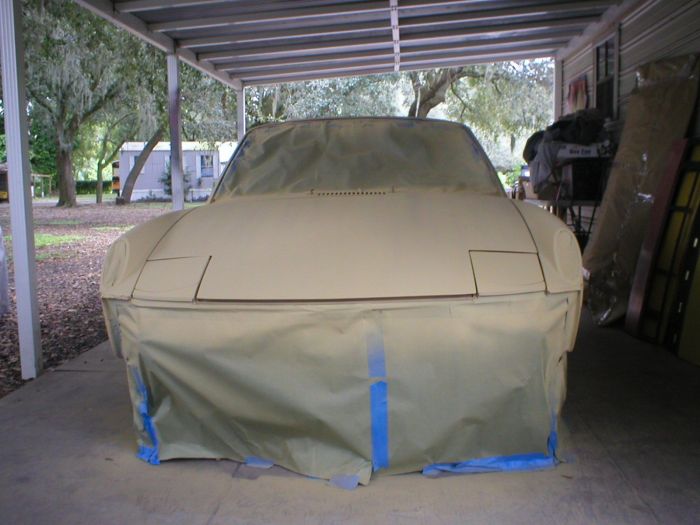
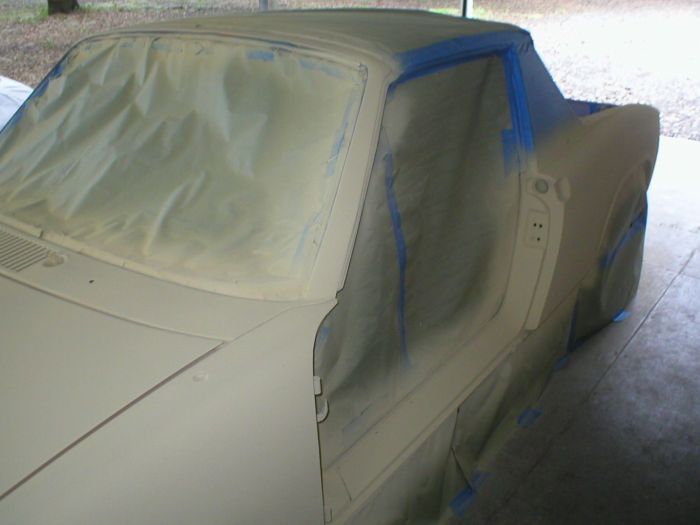
I spent the last couple of weeks prepping the car and was finally able to paint it with primer this weekend. Man, it takes me several hours to tape this car... Anyway, here's the after pics....
  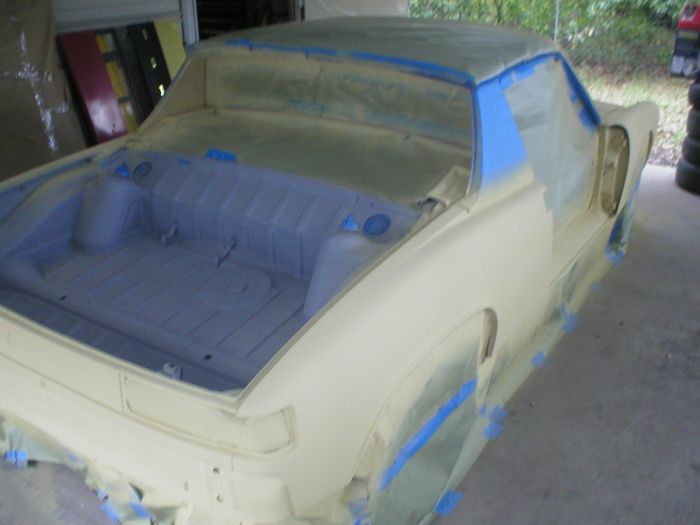 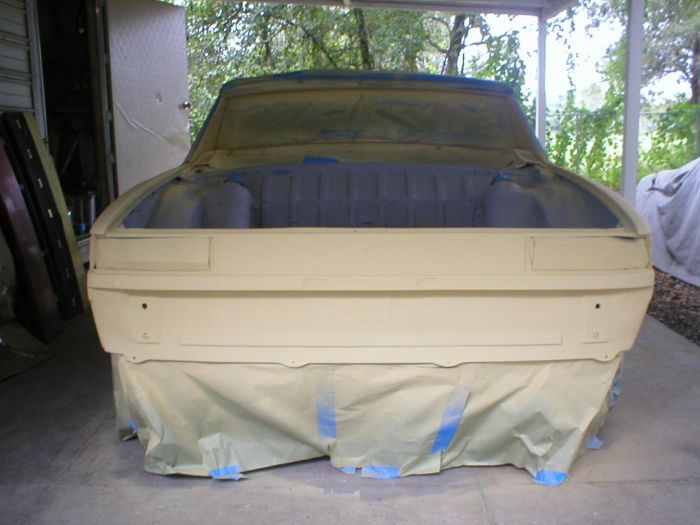 I'm soooo tired from this weekend. I'm popping open several Sam Adam's Octoberfest and relaxing tonight... (IMG:style_emoticons/default/beer3.gif) -- Rob |
|
|
|
| Joe Ricard |
Oct 22 2007, 12:24 PM
Post
#65
|
|
CUMONIWANNARACEU Group: Members Posts: 6,811 Joined: 5-January 03 From: Gautier, MS Member No.: 92 |
Are you doing the painting too?
Be prepared for lots of sanding as this is what makes a decent paint job into a spectacular one. |
|
|
|
| watsonrx13 |
Nov 11 2007, 03:24 PM
Post
#66
|
|
Advanced Member Group: Members Posts: 2,735 Joined: 18-February 03 From: Plant City, FL Member No.: 312 Region Association: South East States |
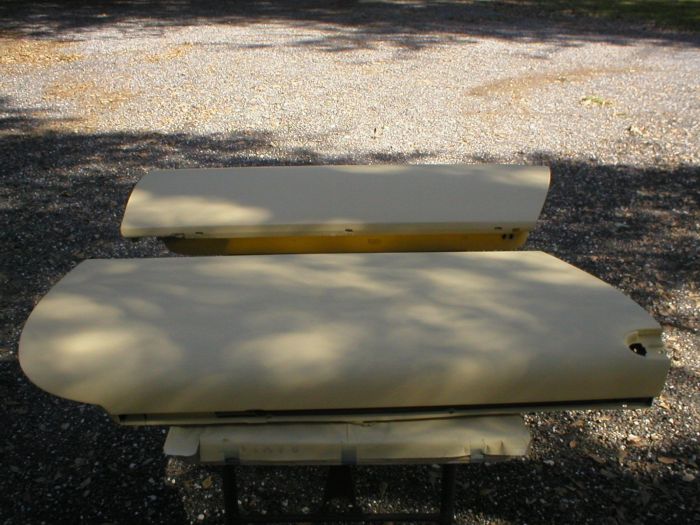
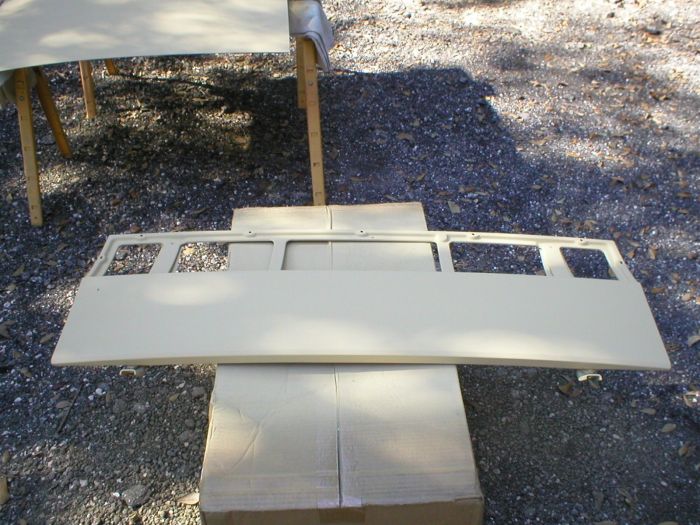
After a couple of weeks of prepping the doors, engine lid and rear trunk lid, I was able to lay the first couple of layers of primer on them. I still need to do some more sanding, then a light couple of layers of reduced primer before I can have them ready for paint...
   -- Rob |
|
|
|
| stateofidleness |
Nov 11 2007, 05:18 PM
Post
#67
|
|
Senior Member Group: Members Posts: 810 Joined: 1-September 07 From: Canyon Lake, Texas! Member No.: 8,065 Region Association: None |
id like to steal that steering wheel from you (IMG:style_emoticons/default/wink.gif)
car looks great, floorboards look awesome! i noticed the wiring harness stayed in, so how did you paint with it in? just curious as i will be doing this soon as well and dont want to remove the wiring. |
|
|
|
| watsonrx13 |
Nov 11 2007, 07:53 PM
Post
#68
|
|
Advanced Member Group: Members Posts: 2,735 Joined: 18-February 03 From: Plant City, FL Member No.: 312 Region Association: South East States |
QUOTE(stateofidleness @ Nov 11 2007, 06:18 PM)  id like to steal that steering wheel from you (IMG:style_emoticons/default/wink.gif) car looks great, floorboards look awesome! i noticed the wiring harness stayed in, so how did you paint with it in? just curious as i will be doing this soon as well and dont want to remove the wiring. Thanks for the compliments.... (IMG:style_emoticons/default/smile.gif) Here's a link on my website that shows the center section painted. I used a plastic wiring loom and aluminum foil to protect the wires and small sections I didn't want to paint... -- Rob |
|
|
|
| watsonrx13 |
Nov 26 2007, 03:10 PM
Post
#69
|
|
Advanced Member Group: Members Posts: 2,735 Joined: 18-February 03 From: Plant City, FL Member No.: 312 Region Association: South East States |
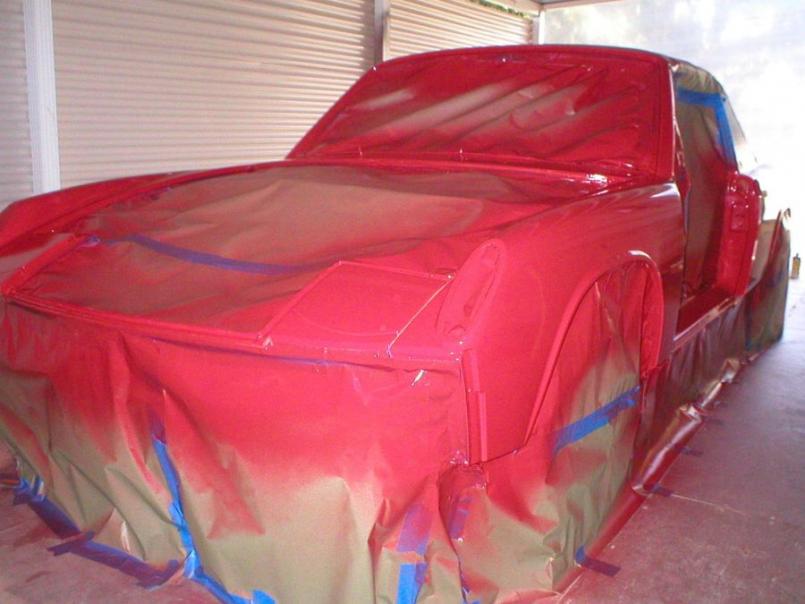
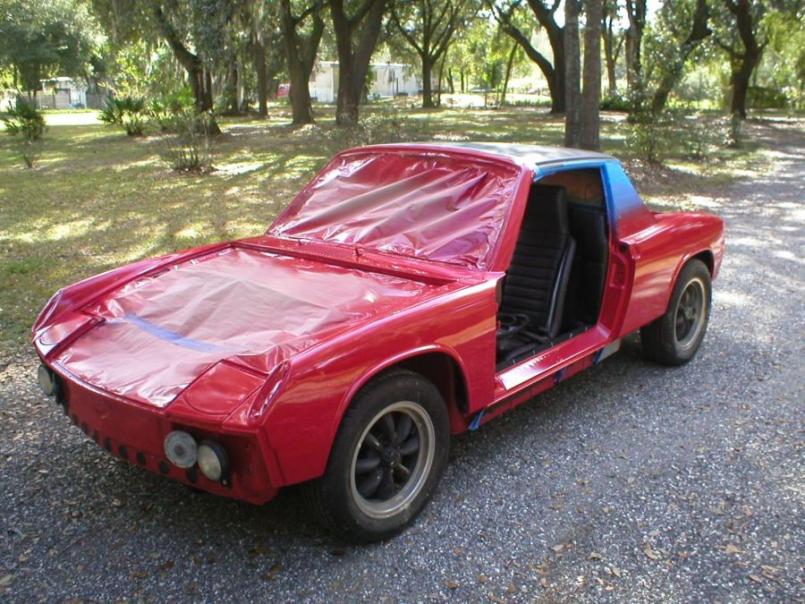
Well.... I painted the car this weekend.... I decided to paint it with single stage acrylic/enamel, also the original color, bahia red...
   -- Rob |
|
|
|
| watsonrx13 |
Jan 30 2008, 07:10 PM
Post
#70
|
|
Advanced Member Group: Members Posts: 2,735 Joined: 18-February 03 From: Plant City, FL Member No.: 312 Region Association: South East States |
Well, I've finally gotten back to working on the car. After the paint cured, I buffed it out and installed the hardware for the rear trunk.
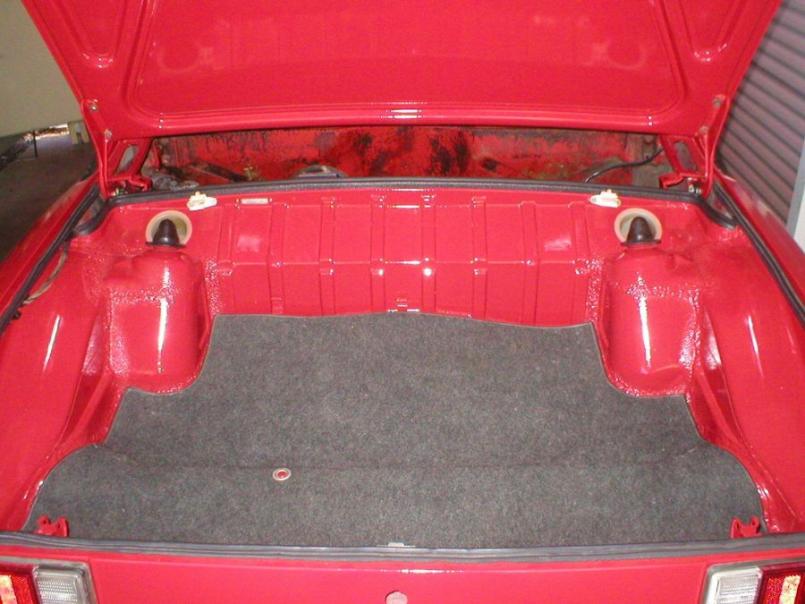 And the rear trunk lid and rear tail lights...  -- Rob |
|
|
|
| Root_Werks |
Jan 30 2008, 09:01 PM
Post
#71
|
|
Village Idiot Group: Members Posts: 8,341 Joined: 25-May 04 From: About 5NM from Canada Member No.: 2,105 Region Association: Pacific Northwest |
WOW! Nice work! (IMG:style_emoticons/default/smilie_pokal.gif)
|
|
|
|
| jd74914 |
Jan 30 2008, 11:07 PM
Post
#72
|
|
Its alive Group: Members Posts: 4,782 Joined: 16-February 04 From: CT Member No.: 1,659 Region Association: North East States |
It looks great Rob. (IMG:style_emoticons/default/biggrin.gif)
|
|
|
|
| rhodyguy |
Jan 31 2008, 08:26 AM
Post
#73
|
|
Chimp Sanctuary NW. Check it out. Group: Members Posts: 22,117 Joined: 2-March 03 From: Orion's Bell. The BELL! Member No.: 378 Region Association: Galt's Gulch |
super. looks great.
k |
|
|
|
| watsonrx13 |
Feb 9 2008, 02:10 PM
Post
#74
|
|
Advanced Member Group: Members Posts: 2,735 Joined: 18-February 03 From: Plant City, FL Member No.: 312 Region Association: South East States |
Thanks for the compliments everyone....
I finished installing the rear valance, bumper and rear trunk lock... 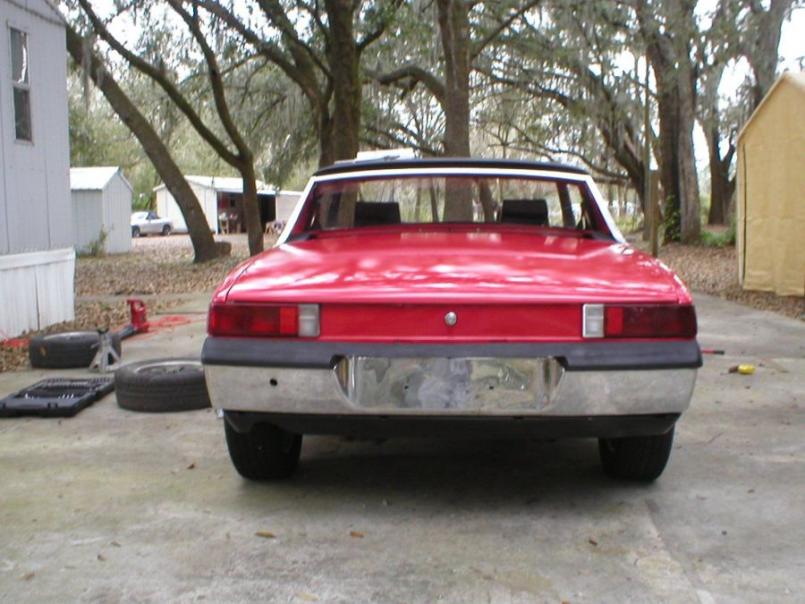 I also completed installing the interior, after I took some of it apart to paint the car. Here's a view of the seats. 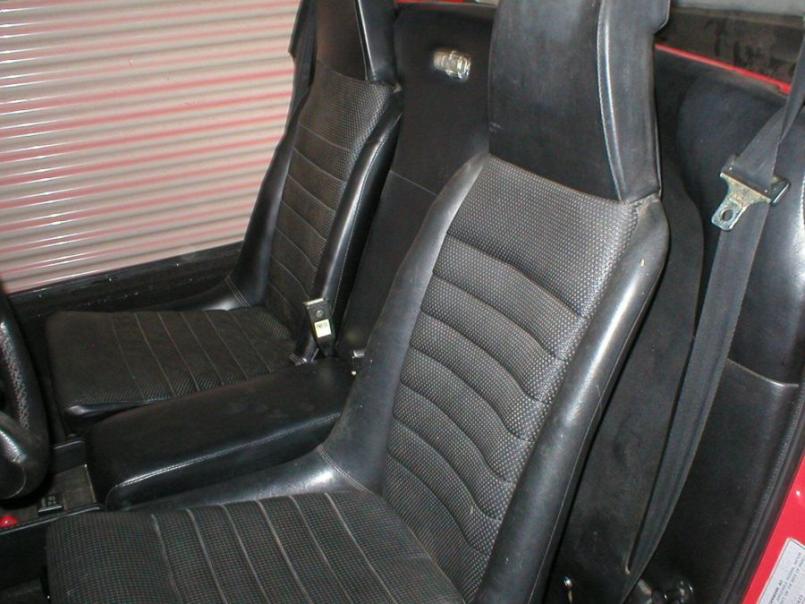 And here's the dash. I still have to wire the speakers, install the sun visors and have a professional install the windshield... 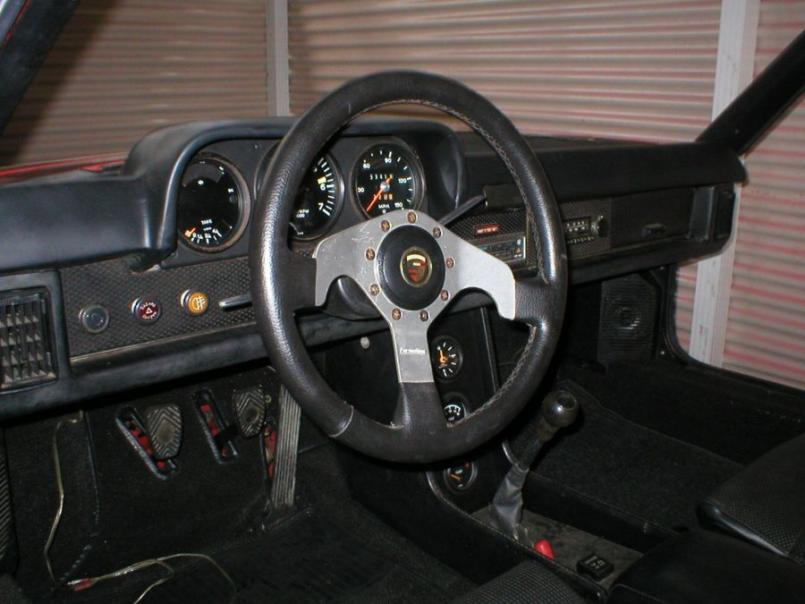 -- Rob |
|
|
|
| biosurfer1 |
Feb 9 2008, 02:40 PM
Post
#75
|
|
Teener fo Life! Group: Members Posts: 3,020 Joined: 3-August 03 From: Roseville, CA Member No.: 977 Region Association: Northern California |
this is the first time i have seen this thread...excellent work. its not often people post consistently throughout the build.
look forward to seeing the final project! |
|
|
|
| watsonrx13 |
May 8 2008, 07:40 PM
Post
#76
|
|
Advanced Member Group: Members Posts: 2,735 Joined: 18-February 03 From: Plant City, FL Member No.: 312 Region Association: South East States |
Well, I've resumed working on this car. The current car that I've been driving has been sold and will be shipping out to NY soon. My wife and I are planning to attend Parade the first week of July. Well since I've sold my driver I'm going to try to finish this car and drive it up to NC...
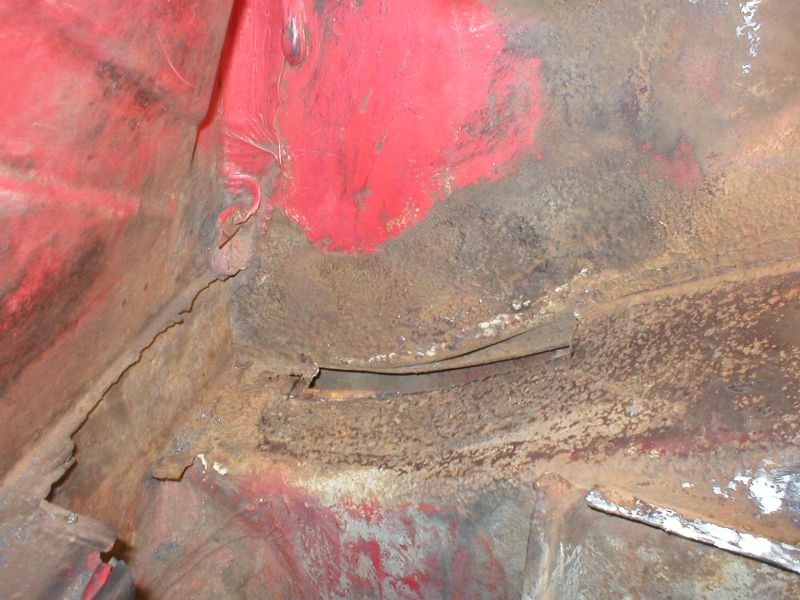
Anyway, I dropped the engine/tranny so that I could finish the repairs in the engine compartment. This first business was to remove the battery tray and stand. The PO had already replaced this, but they mounted it back into place with either pop-rivets or sheet metal screws. Here's the before shot... 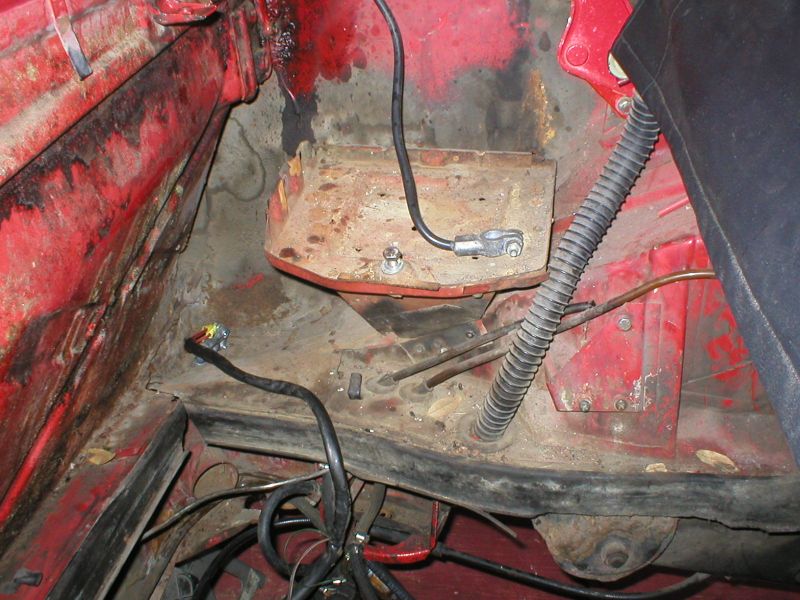 After I got the battery tray out of the way, I noticed that the side wall needed some repair.. 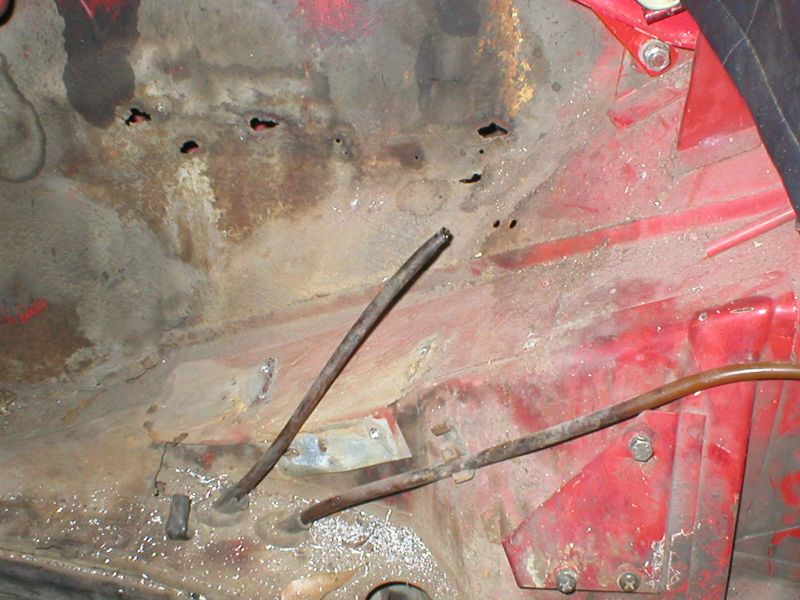 Then I noticed that the hell hole needed some attention... 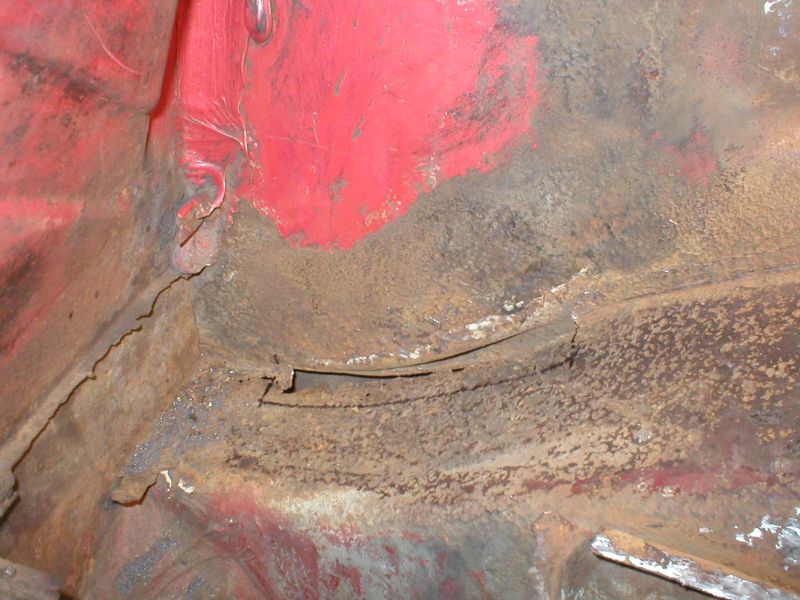 |
|
|
|
| watsonrx13 |
May 8 2008, 07:43 PM
Post
#77
|
|
Advanced Member Group: Members Posts: 2,735 Joined: 18-February 03 From: Plant City, FL Member No.: 312 Region Association: South East States |
Here's a shot of the rusted area cut out...
 The patch I made and set in place... 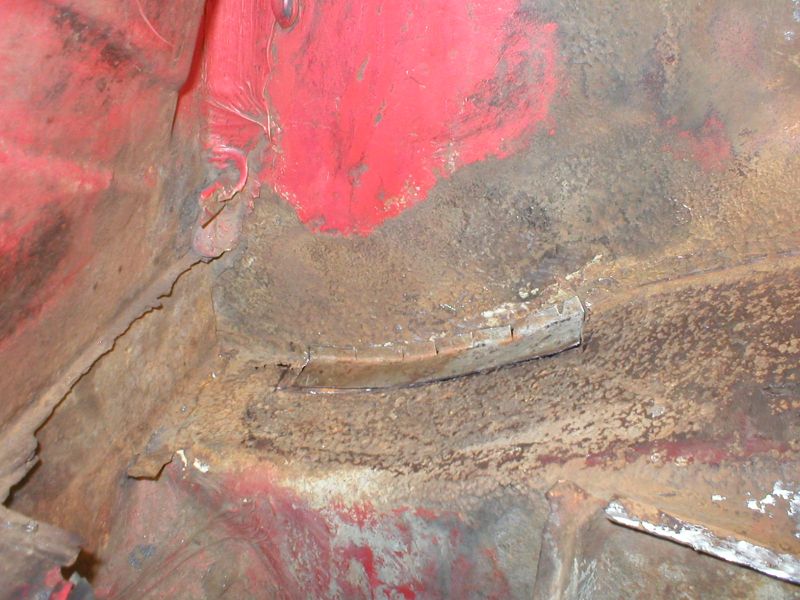 And here's a shot after welding, grinding, and primer... 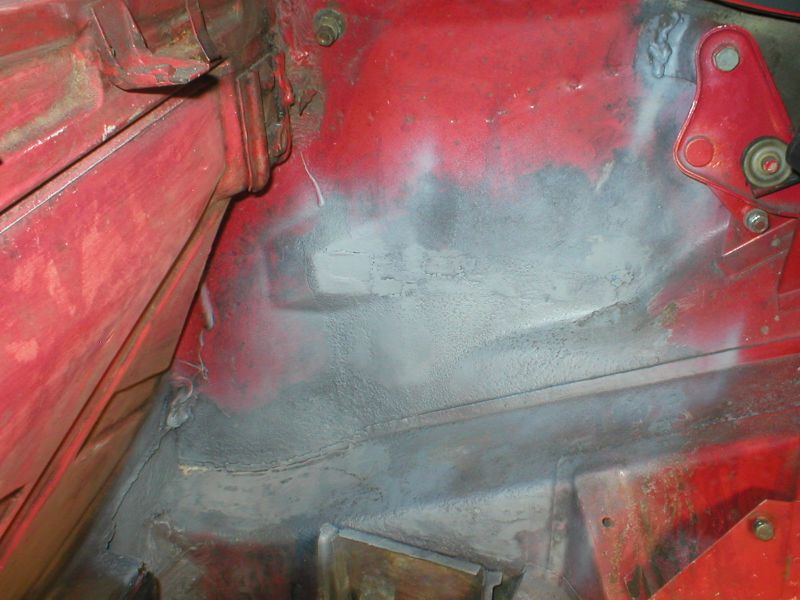 -- Rob |
|
|
|
| watsonrx13 |
May 10 2008, 05:44 PM
Post
#78
|
|
Advanced Member Group: Members Posts: 2,735 Joined: 18-February 03 From: Plant City, FL Member No.: 312 Region Association: South East States |
More engine compartment clean up...
When I dropped the engine I noticed that the right rear suspension ear had been repaired in the past. Someone had done a lot of welding and didn't bother to grind/clean it up. So I decided to grind it down and see what the issue was.... Well here's a shot of the weld gone and a nice rusted hole .... 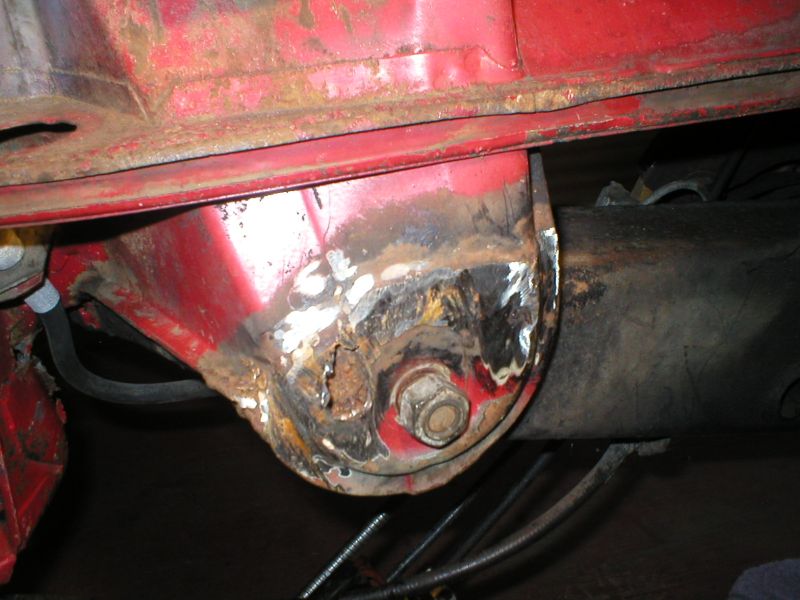 So I spent the day removing the suspension ear... BTW, I've seen other, more experienced 914ers remove theirs, but I had to remove mine in about 2-dozen pieces. The worst part was removing the factory applied strap welded underneath, in 2 places.... Anyway, here's a shot of it removed.... I have the part on order and expect to receive it next week.... 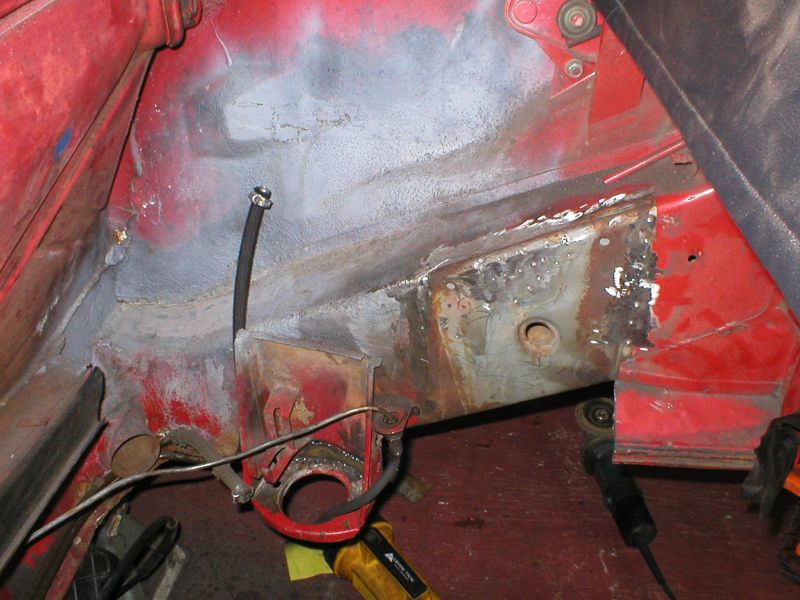 -- Rob |
|
|
|
| watsonrx13 |
May 11 2008, 01:15 PM
Post
#79
|
|
Advanced Member Group: Members Posts: 2,735 Joined: 18-February 03 From: Plant City, FL Member No.: 312 Region Association: South East States |
I finished rebuilding the doors and mounted them today....
Here's a shot of the widow winder and the slider at the bottom... 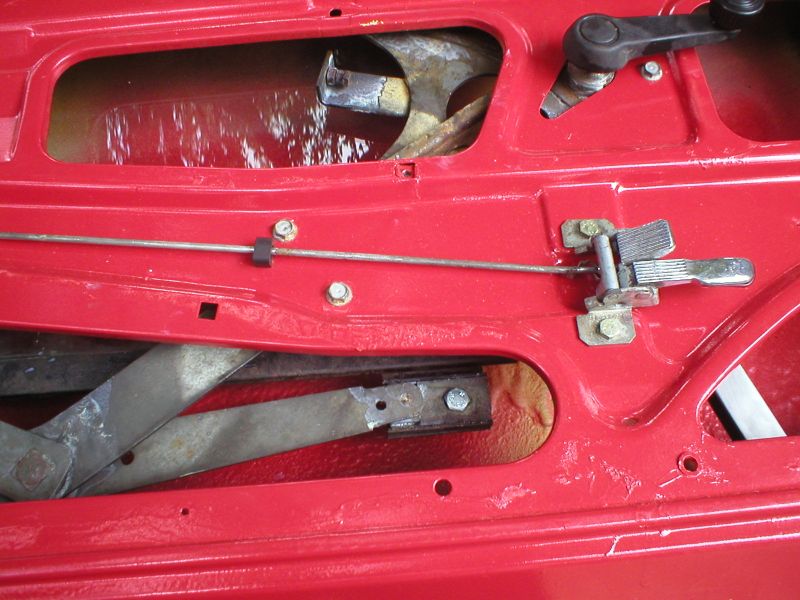 Here's a shot of the driver's door mounted... 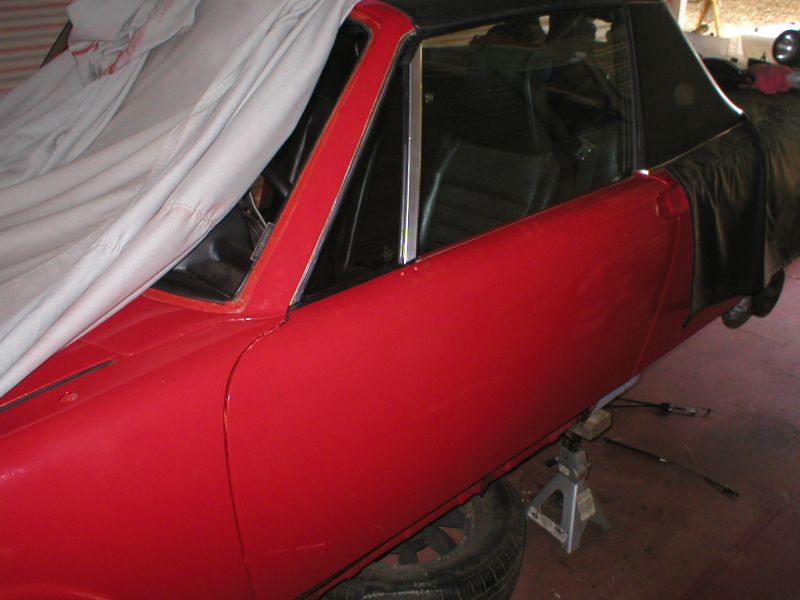 -- Rob |
|
|
|
| evan |
May 11 2008, 05:46 PM
Post
#80
|
|
Little Bean Group: Members Posts: 117 Joined: 8-September 05 From: Gaithersburg, MD Member No.: 4,767 |
(IMG:style_emoticons/default/beerchug.gif)
Rob, loved the work on the previous car! Turned out awesome, and your attention to detail start to finish is to be admired. So when can I bring my car down to you for a little nip and tuck?? Evan] |
|
|
|
|
1 User(s) are reading this topic (1 Guests and 0 Anonymous Users)
0 Members:

|
Lo-Fi Version | Time is now: 28th June 2024 - 09:54 PM |
Invision Power Board
v9.1.4 © 2024 IPS, Inc.