|
|

|
Porsche, and the Porsche crest are registered trademarks of Dr. Ing. h.c. F. Porsche AG.
This site is not affiliated with Porsche in any way. Its only purpose is to provide an online forum for car enthusiasts. All other trademarks are property of their respective owners. |
|
|
  |
| cary |
 Nov 17 2013, 10:39 AM Nov 17 2013, 10:39 AM
Post
#241
|
|
Advanced Member     Group: Members Posts: 3,900 Joined: 26-January 04 From: Sherwood Oregon Member No.: 1,608 Region Association: Pacific Northwest 
|
Here's the fit we're working on.
Plus keeping the door gap at a perfect 5mm. 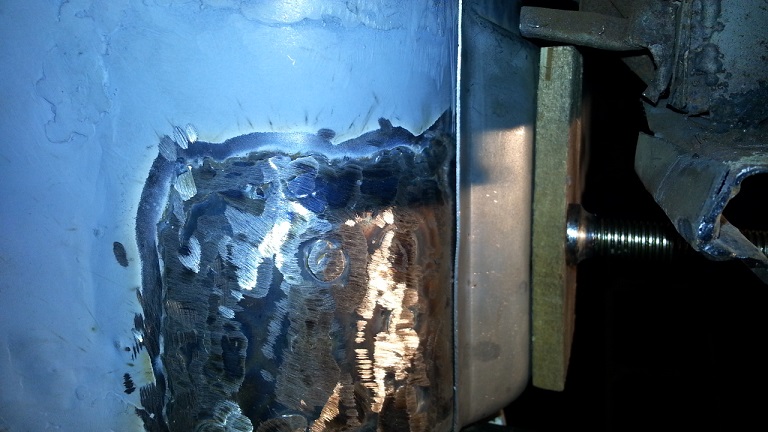 Seam sealer and under coat will make the less than stellar patch disappear like magic. But I'll know its there. (IMG:style_emoticons/default/sad.gif) (IMG:style_emoticons/default/sad.gif) |
| cary |
 Nov 17 2013, 10:41 AM Nov 17 2013, 10:41 AM
Post
#242
|
|
Advanced Member     Group: Members Posts: 3,900 Joined: 26-January 04 From: Sherwood Oregon Member No.: 1,608 Region Association: Pacific Northwest 
|
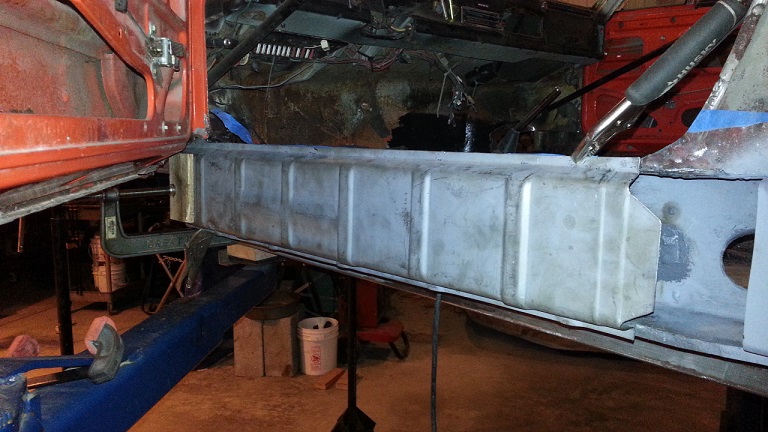
Here's the test fit at the end of the day. (IMG:style_emoticons/default/biggrin.gif) (IMG:style_emoticons/default/biggrin.gif)
 |
| cary |
 Nov 17 2013, 10:45 AM Nov 17 2013, 10:45 AM
Post
#243
|
|
Advanced Member     Group: Members Posts: 3,900 Joined: 26-January 04 From: Sherwood Oregon Member No.: 1,608 Region Association: Pacific Northwest 
|
Prepped the heater tubes for installation.
Next step is to encapsulate the inside. Finish up welding on the patch on the heater tube corner in the engine compartment. Get that all sanitary and seam sealed before the heater tube is tacked in. 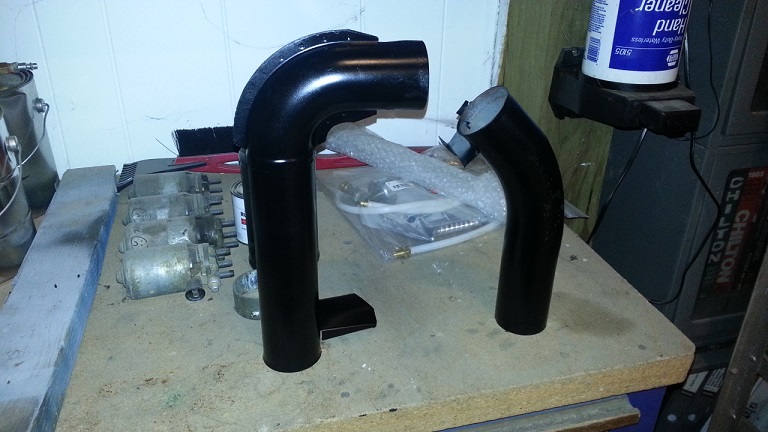 |
| FourBlades |
 Nov 17 2013, 07:03 PM Nov 17 2013, 07:03 PM
Post
#244
|
|
From Wreck to Rockin     Group: Members Posts: 2,056 Joined: 3-December 07 From: Brevard, FL Member No.: 8,414 Region Association: South East States 
|
Awesome thread man!
You are really getting there. I always found using the bzzt bzzt bzzt technique of just making one large tack weld after another to be the easiest way to deal with the old metal on these cars. You start the next tack weld while the previous one is still red hot. Putting the next tack on the edge of the red hot one prevents any problems getting the arc going cleanly. It ends up looking like this. This was tacked at 3 inch intervals all the way around and then filled in slowly. 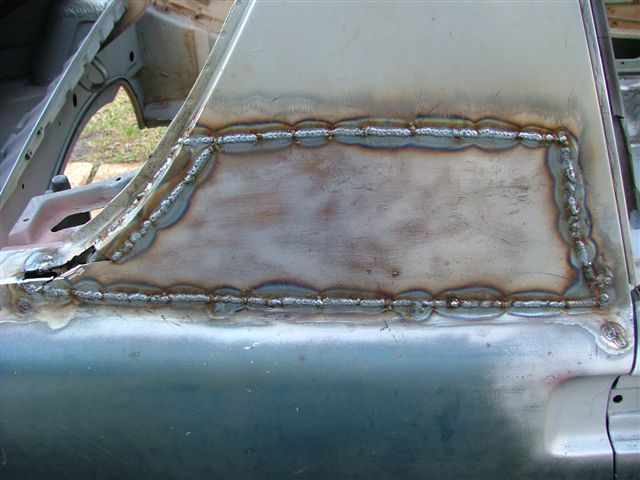 Looking forward to seeing your car back on its wheels again. John |
| cary |
 Nov 17 2013, 10:12 PM Nov 17 2013, 10:12 PM
Post
#245
|
|
Advanced Member     Group: Members Posts: 3,900 Joined: 26-January 04 From: Sherwood Oregon Member No.: 1,608 Region Association: Pacific Northwest 
|
Nice work. Thanks for the tip.
|
| cary |
 Nov 17 2013, 10:20 PM Nov 17 2013, 10:20 PM
Post
#246
|
|
Advanced Member     Group: Members Posts: 3,900 Joined: 26-January 04 From: Sherwood Oregon Member No.: 1,608 Region Association: Pacific Northwest 
|
Had another great day.
Spent most the day just puttering in the shop. Tidied up the office shop. It had six months of just sitting things down everywhere. Now we're all tidied up. Then I went after finishing up heater tube corner. 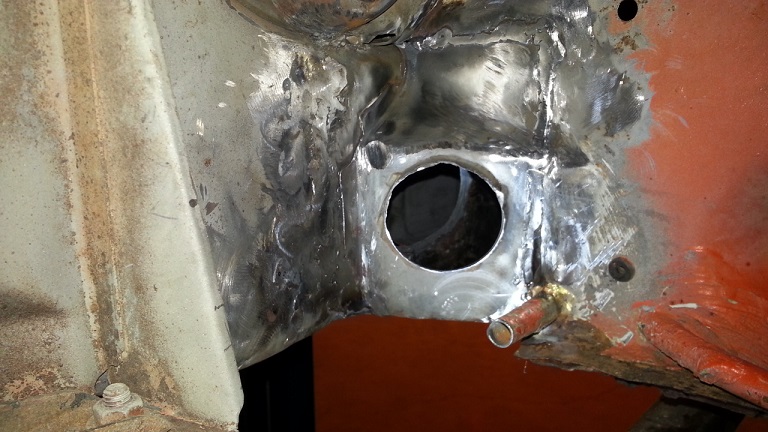 All seam sealed up. (IMG:style_emoticons/default/biggrin.gif) (IMG:style_emoticons/default/biggrin.gif) 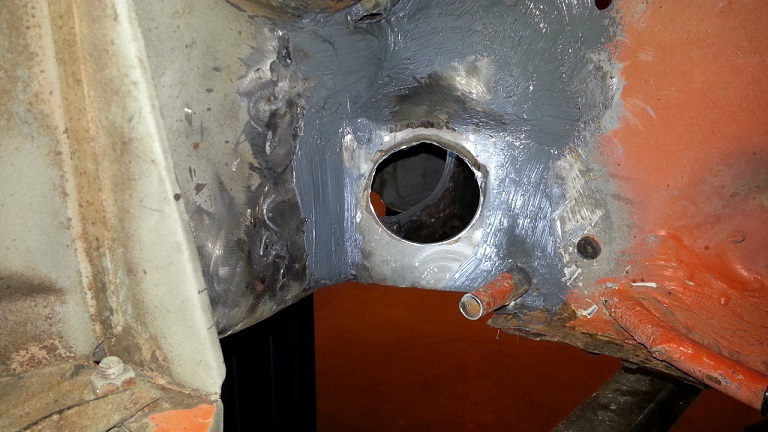 |
| cary |
 Nov 17 2013, 10:24 PM Nov 17 2013, 10:24 PM
Post
#247
|
|
Advanced Member     Group: Members Posts: 3,900 Joined: 26-January 04 From: Sherwood Oregon Member No.: 1,608 Region Association: Pacific Northwest 
|
After smoothing out the opening. I test fit the heater tube.
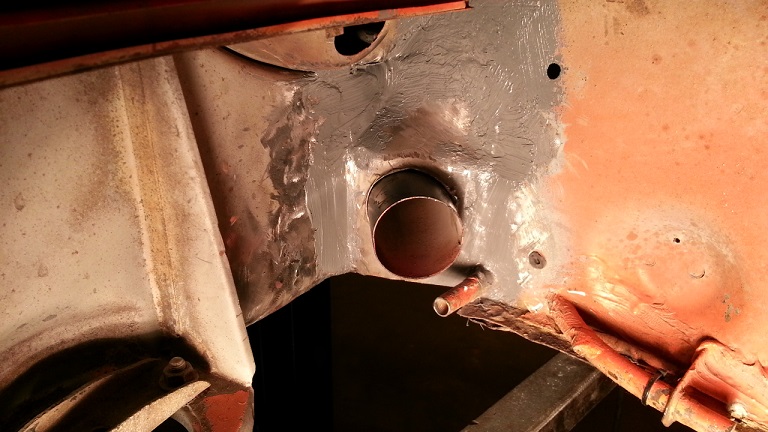 Then I test fit the muffler. 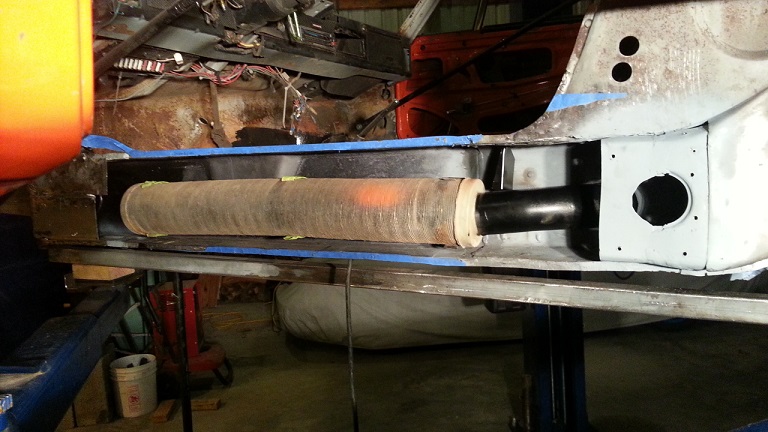 |
| cary |
 Nov 17 2013, 10:40 PM Nov 17 2013, 10:40 PM
Post
#248
|
|
Advanced Member     Group: Members Posts: 3,900 Joined: 26-January 04 From: Sherwood Oregon Member No.: 1,608 Region Association: Pacific Northwest 
|
Now its time to seal up the long.
Going to be spraying in Eastwood Antirust. 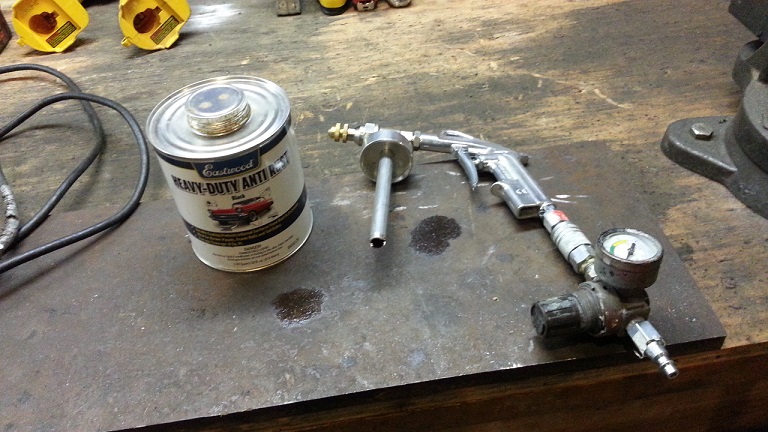 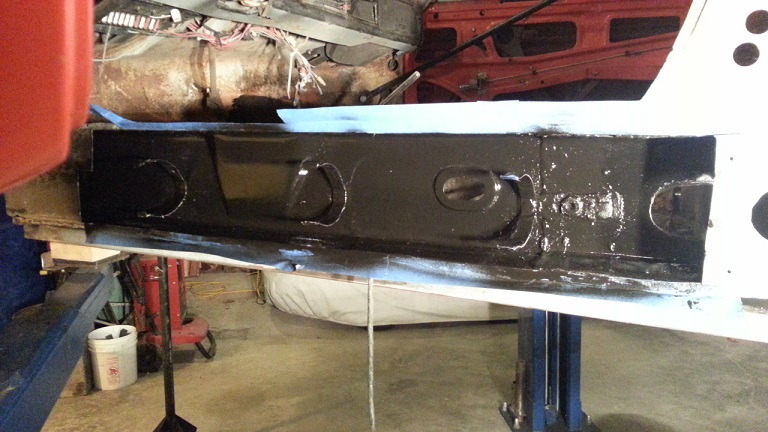 The Eastwood kit worked pretty good. A little too cold for the extensions and the tubes to work. Hopefully it will be a little warmer on my next day off. Then I can spray the inside of the wheelhouse. The one flex tube sprays like lawn sprinkler. Should work perfect. Might need to cut it with solvent it it doesn't get warm enough. |
| cary |
 Nov 24 2013, 10:59 AM Nov 24 2013, 10:59 AM
Post
#249
|
|
Advanced Member     Group: Members Posts: 3,900 Joined: 26-January 04 From: Sherwood Oregon Member No.: 1,608 Region Association: Pacific Northwest 
|
Most of the day off was spent re-leveling the car. It still amazes me how flexible it is without a long on the passenger side. This time a few less jacks. Added some weight to the trunk. Hillbilly bench adjustment
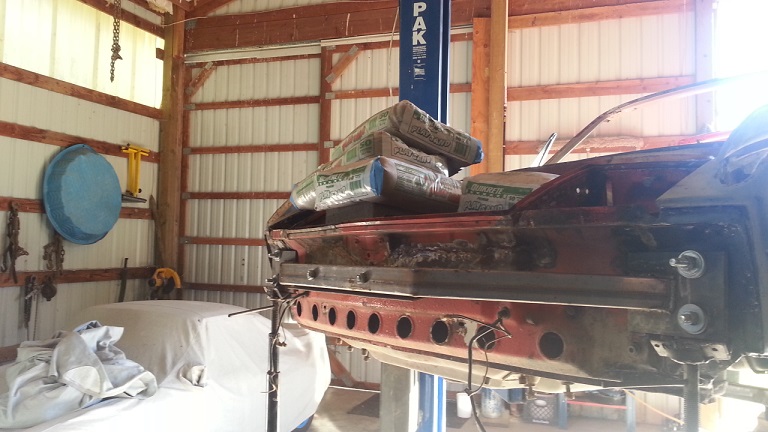 Inner long is fitted, welded in and sealed up on the drivers side. One thing to remember. Don't forget to install the front heater tube into the long before you weld it back in. (IMG:style_emoticons/default/yellowsleep[1].gif) Welded in the heater tube to the engine compartment. After the struggle getting the front heater tube in. It's ready to be welded. (IMG:style_emoticons/default/sad.gif) So now its time to get back to the passenger long. Right now its disconnected at the front fire wall, mid fire wall and the wheel house. |
| 76-914 |
 Nov 24 2013, 11:29 AM Nov 24 2013, 11:29 AM
Post
#250
|
|
Repeat Offender & Resident Subaru Antagonist           Group: Members Posts: 13,655 Joined: 23-January 09 From: Temecula, CA Member No.: 9,964 Region Association: Southern California 
|
Wow, I hadn't checked your build in a few month's and you've got a lot done. Nice work. Wish I lived close enough to view in person. (IMG:style_emoticons/default/thumb3d.gif)
|
| gifted914 |
 Nov 24 2013, 01:59 PM Nov 24 2013, 01:59 PM
Post
#251
|
|
middleagecrisis  Group: Members Posts: 30 Joined: 17-April 13 From: Australia / Brisbane Member No.: 15,778 Region Association: Australia and New Zealand |
Great SUPERINLAW.
(IMG:style_emoticons/default/welder.gif) (IMG:style_emoticons/default/welder.gif) (IMG:style_emoticons/default/welder.gif) (IMG:style_emoticons/default/welder.gif) (IMG:style_emoticons/default/welder.gif) (IMG:style_emoticons/default/welder.gif) (IMG:style_emoticons/default/welder.gif) |
| cary |
 Nov 24 2013, 03:45 PM Nov 24 2013, 03:45 PM
Post
#252
|
|
Advanced Member     Group: Members Posts: 3,900 Joined: 26-January 04 From: Sherwood Oregon Member No.: 1,608 Region Association: Pacific Northwest 
|
It feels like its taking forever ..............................
Thanks for the words of encouragement. I'm hoping once both longs are attached things will pick up. I spend a lot of time checking and double checking the door gaps and the windshield to targa bar gap. I don't remember if I mentioned that this car was a front clip repair. Which aligned well. But the workmanship was poor. It's getting a little cold here in PDX. Next project is to replace a couple sections in the wood stove pipe. |
| cary |
 Nov 30 2013, 10:12 AM Nov 30 2013, 10:12 AM
Post
#253
|
|
Advanced Member     Group: Members Posts: 3,900 Joined: 26-January 04 From: Sherwood Oregon Member No.: 1,608 Region Association: Pacific Northwest 
|
Here's the next piece we need to recreate. McMark called it the torque box.
The new outer long doesn't come with that piece. In flipping thru the pages in the Body 914 manual. It looks like its a seperate piece. Here's the new outer long from RD. 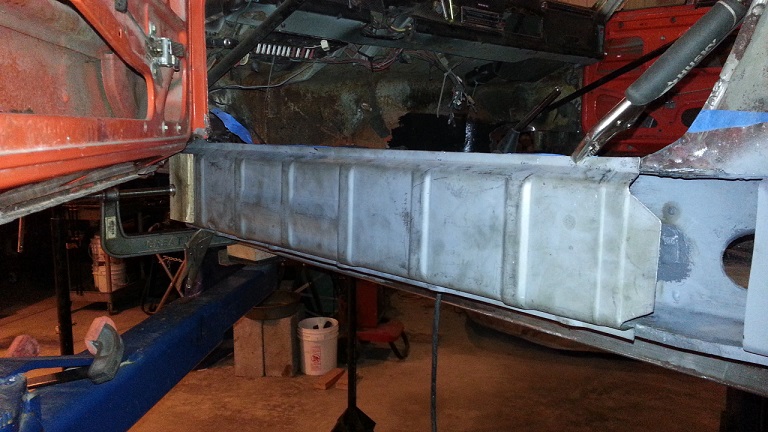 You'll see where the block and c-clamp is attached doesn't have the torque box. Now you see the NOS door pillar. It doesn't contain the bottom of the torque box either. 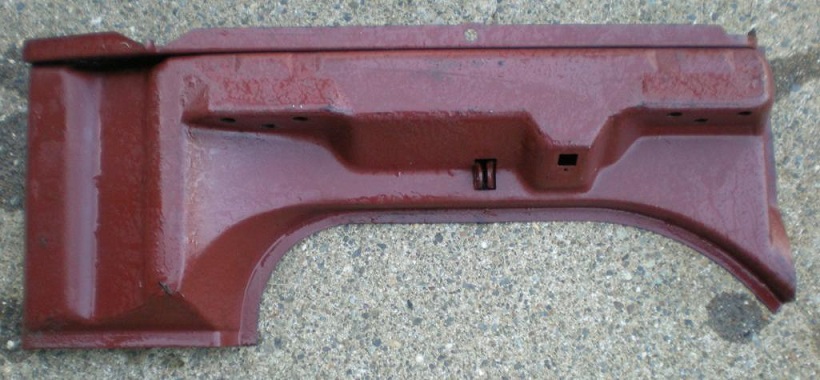 But here's a picture with the door off. 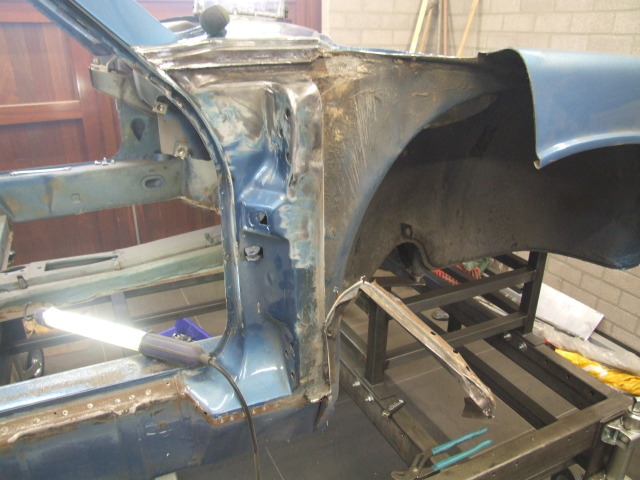 Here's where we need to get too. 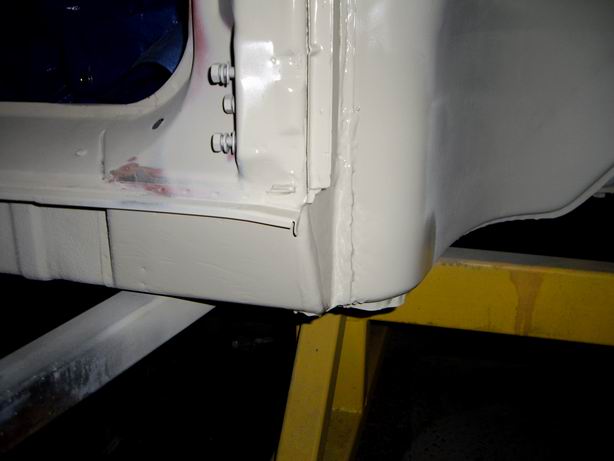 |
| cary |
 Nov 30 2013, 10:15 AM Nov 30 2013, 10:15 AM
Post
#254
|
|
Advanced Member     Group: Members Posts: 3,900 Joined: 26-January 04 From: Sherwood Oregon Member No.: 1,608 Region Association: Pacific Northwest 
|
As I wrote the last post I'm thinking I have a good piece for the drivers side that I took off of the long I bought from Perry @ 914 Network.
When I get to the shop I'll have to do some digging. Nothing has been tossed yet. |
| cary |
 Nov 30 2013, 10:36 AM Nov 30 2013, 10:36 AM
Post
#255
|
|
Advanced Member     Group: Members Posts: 3,900 Joined: 26-January 04 From: Sherwood Oregon Member No.: 1,608 Region Association: Pacific Northwest 
|
Post #123 & #124 show the piece I took off of Perry's drivers long.
Looks like it will need some patching. Or maybe I'll make a new one and save this one for a pattern. Hmmm. 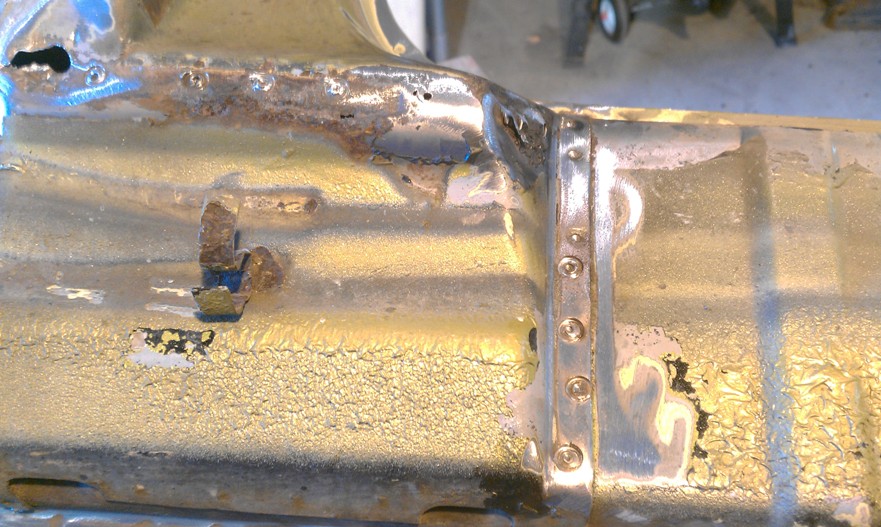 Here's the piece I'm looking for. 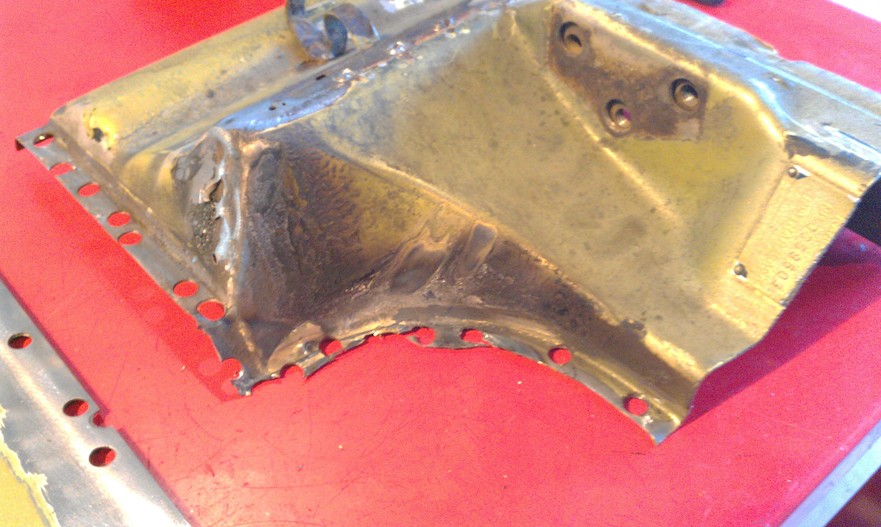 It has to be created like the factory piece so it will fit under the RD frame stiffener. But after spending an entire day tinkering with the door alignment. This is one of the most important attachment points on the car. Very critical in the upper 1/2 of the door alignment. I think I'll some research on the PET to see if the part exists. Off I go to the shop .................... |
| cary |
 Nov 30 2013, 11:36 PM Nov 30 2013, 11:36 PM
Post
#256
|
|
Advanced Member     Group: Members Posts: 3,900 Joined: 26-January 04 From: Sherwood Oregon Member No.: 1,608 Region Association: Pacific Northwest 
|
I stand corrected. The NOS part picture is the complete part.
The blue car looks like it has an RD 346 frame stiffener installed. The primered car is Jeff Hail's 1st. class metal work. It's interesting how these pieces are layered together. If you would want to take this apart in the future you can't put any welds behind that torque box at the bottom of the a-pillar. Hmmmm. |
| cary |
 Dec 1 2013, 12:04 AM Dec 1 2013, 12:04 AM
Post
#257
|
|
Advanced Member     Group: Members Posts: 3,900 Joined: 26-January 04 From: Sherwood Oregon Member No.: 1,608 Region Association: Pacific Northwest 
|
Time to fire up the heat...
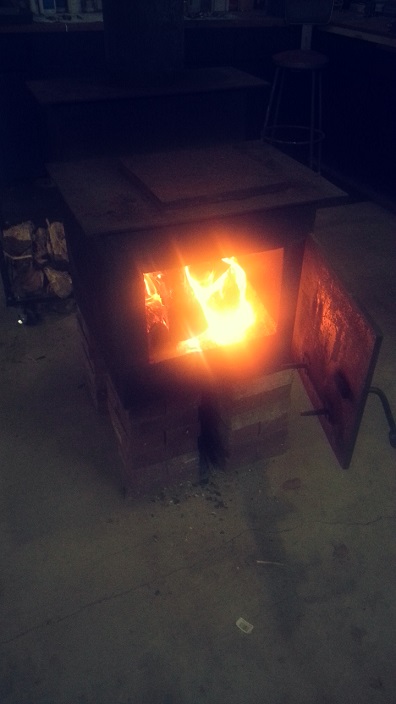 Dr's ready to go to work.  |
| cary |
 Dec 1 2013, 12:12 AM Dec 1 2013, 12:12 AM
Post
#258
|
|
Advanced Member     Group: Members Posts: 3,900 Joined: 26-January 04 From: Sherwood Oregon Member No.: 1,608 Region Association: Pacific Northwest 
|
Nice to see that the door gap held up.
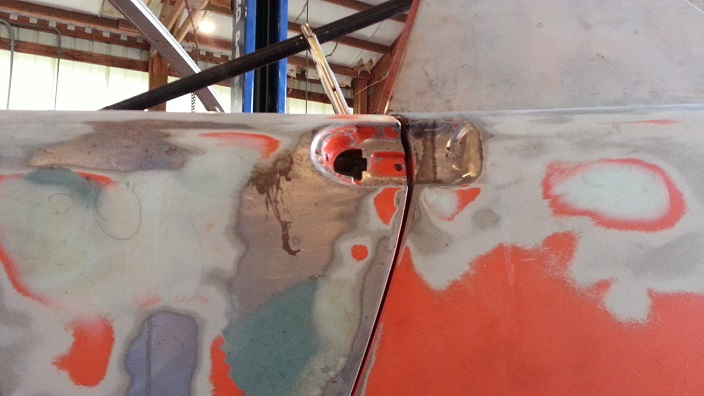 Would just need a small tweak to level up enough to weld the outer long in place. |
| cary |
 Dec 1 2013, 12:16 AM Dec 1 2013, 12:16 AM
Post
#259
|
|
Advanced Member     Group: Members Posts: 3,900 Joined: 26-January 04 From: Sherwood Oregon Member No.: 1,608 Region Association: Pacific Northwest 
|
Found the part in the parts pile.
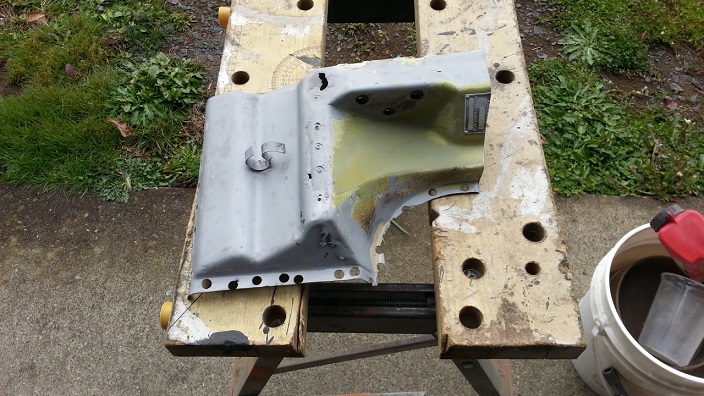 Here's the place that needs repaired. 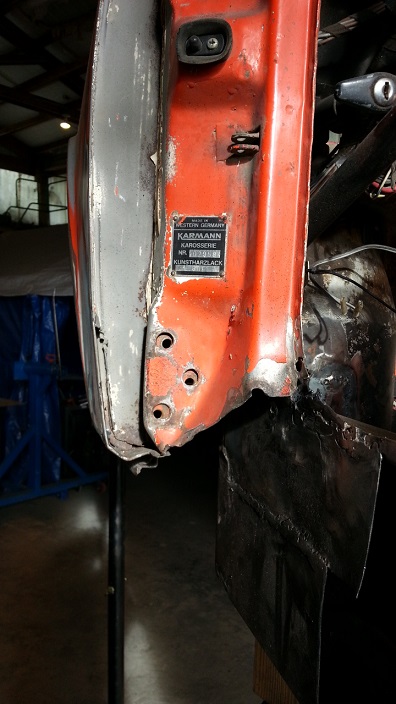 |
| cary |
 Dec 1 2013, 10:04 AM Dec 1 2013, 10:04 AM
Post
#260
|
|
Advanced Member     Group: Members Posts: 3,900 Joined: 26-January 04 From: Sherwood Oregon Member No.: 1,608 Region Association: Pacific Northwest 
|
Here's the only patch I had to put in.
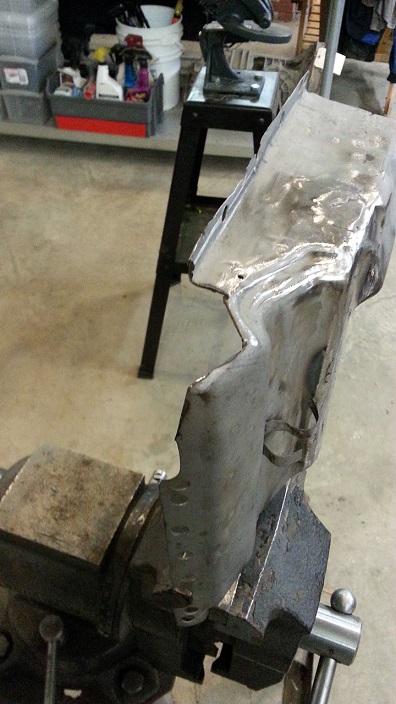 Pattern cut out of cardboard. 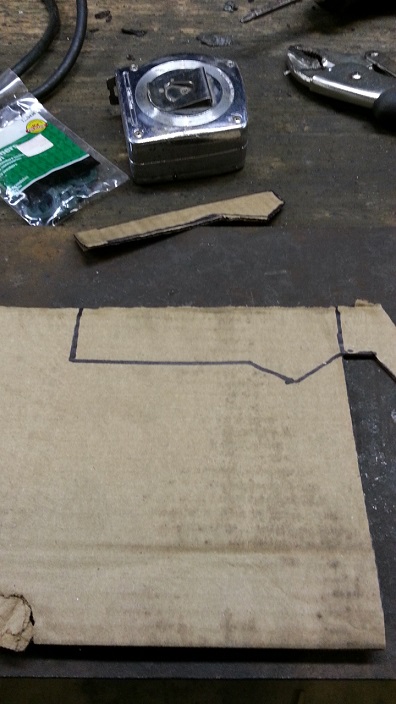 Patch ready to weld in. Old metal got a little religious on me. 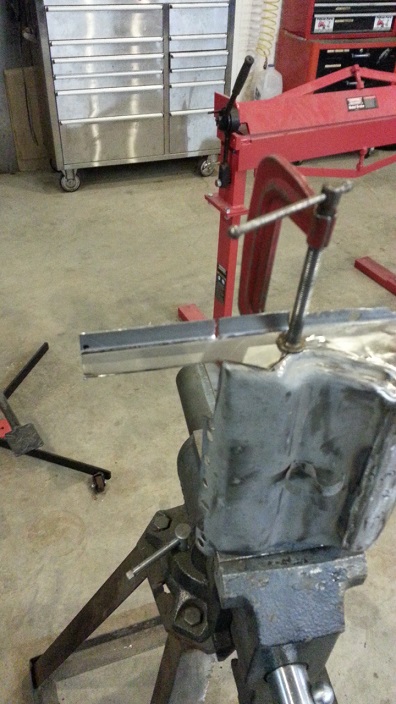 |
  |
7 User(s) are reading this topic (7 Guests and 0 Anonymous Users)
0 Members:

|
Lo-Fi Version | Time is now: 16th January 2025 - 03:55 PM |
Invision Power Board
v9.1.4 © 2025 IPS, Inc.


