|
|

|
Porsche, and the Porsche crest are registered trademarks of Dr. Ing. h.c. F. Porsche AG.
This site is not affiliated with Porsche in any way. Its only purpose is to provide an online forum for car enthusiasts. All other trademarks are property of their respective owners. |
|
|
  |
| cary |
 Jan 5 2014, 10:36 AM Jan 5 2014, 10:36 AM
Post
#306
|
|
Advanced Member     Group: Members Posts: 3,900 Joined: 26-January 04 From: Sherwood Oregon Member No.: 1,608 Region Association: Pacific Northwest 
|
Next lesson learned. Make sure you take more time to align the door hinges. Not only was I off 1mm in vertical. I was probably off 1mm in spacing. If I was too do this for a living I'd build a jig to hold the hinges in place while I welded.
Probably not 1 mm. Just Googled credit card thickness. They are .75mm. So probably more like .5 mm. 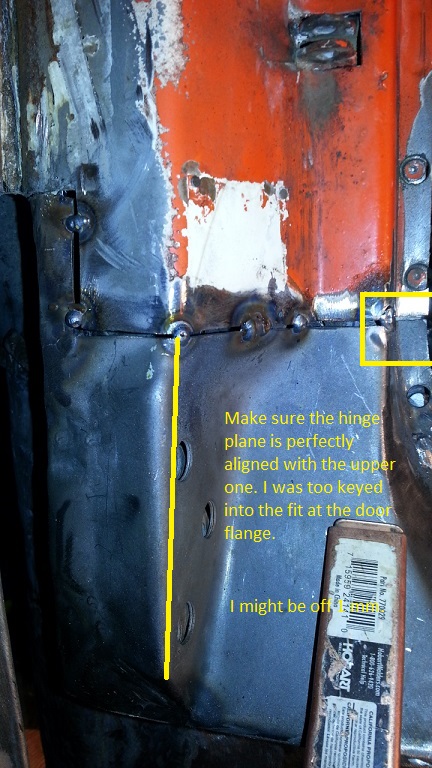 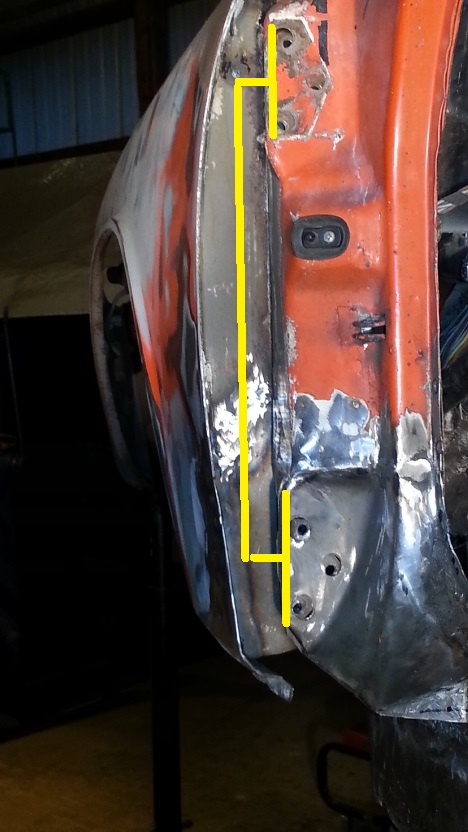 |
| cary |
 Jan 5 2014, 11:15 AM Jan 5 2014, 11:15 AM
Post
#307
|
|
Advanced Member     Group: Members Posts: 3,900 Joined: 26-January 04 From: Sherwood Oregon Member No.: 1,608 Region Association: Pacific Northwest 
|
NEVER, NEVER............NEVER
Take the car out of door alignment to tinker with a fit. (IMG:style_emoticons/default/headbang.gif) (IMG:style_emoticons/default/headbang.gif) I'll let you in on my biggest mistake ................... First, on both the inner fender corners we created, the bottom edge wasn't perfectly horizontal. This is where the Celette would be nice. Something to measure against. I'll figure out something for next time........ Second, I was thinking because I didn't have the outer rocker attached I could tweek the long to tidy up the fit. NOT Here's what I did ........................ Doesn't it look beautiful. 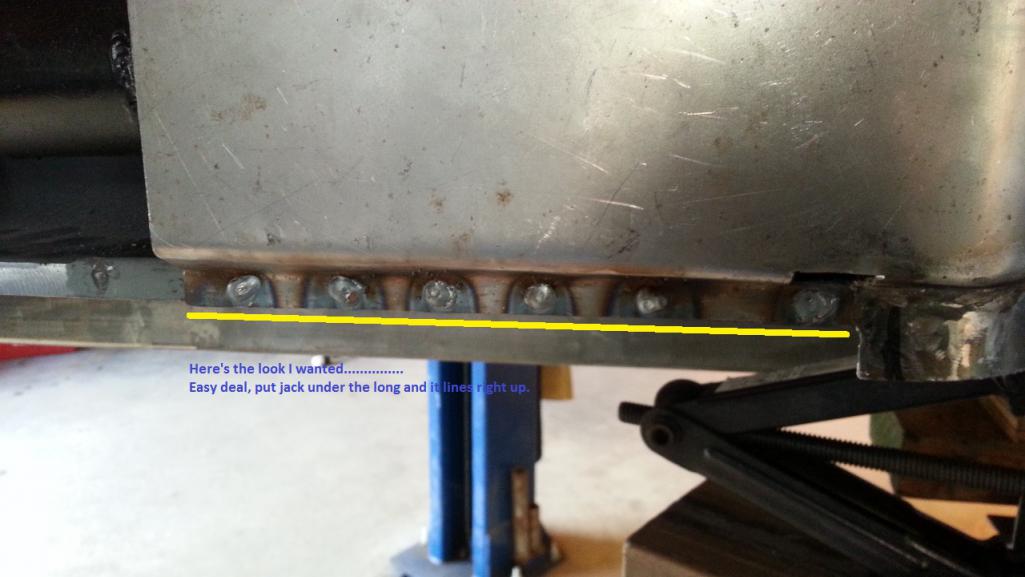 After I cut out the welds ........... That little bit kept me from aligning the doors. 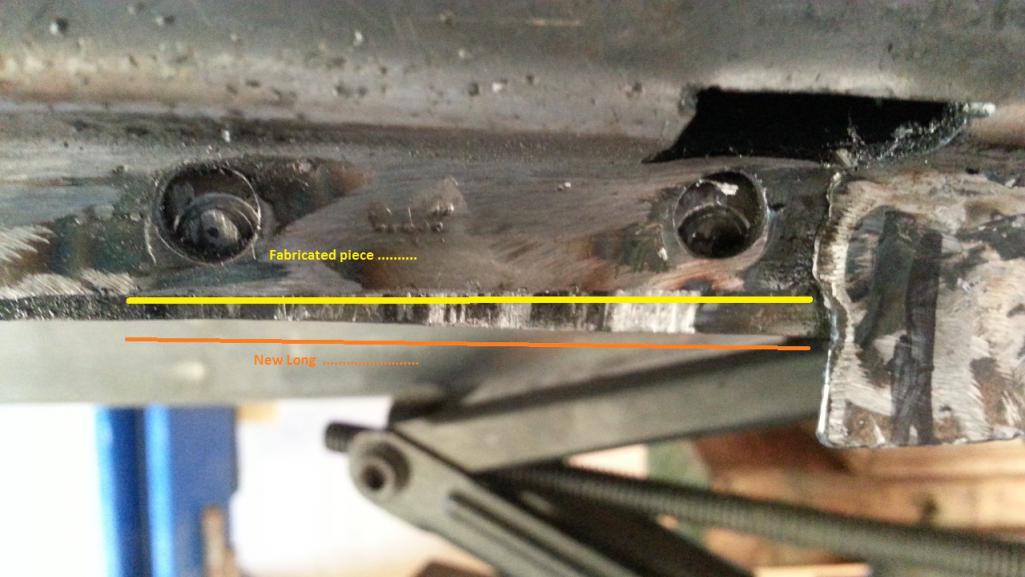 |
| cary |
 Jan 12 2014, 10:01 PM Jan 12 2014, 10:01 PM
Post
#308
|
|
Advanced Member     Group: Members Posts: 3,900 Joined: 26-January 04 From: Sherwood Oregon Member No.: 1,608 Region Association: Pacific Northwest 
|
Time to prep the right long for closure ..................
Decided to use the Eastwood HD Anti Rust that I'd bought. So we'll do the test in 40 more years. Left side is done with Rustoluem. Right side with Eastwood HD Anti-Rust. 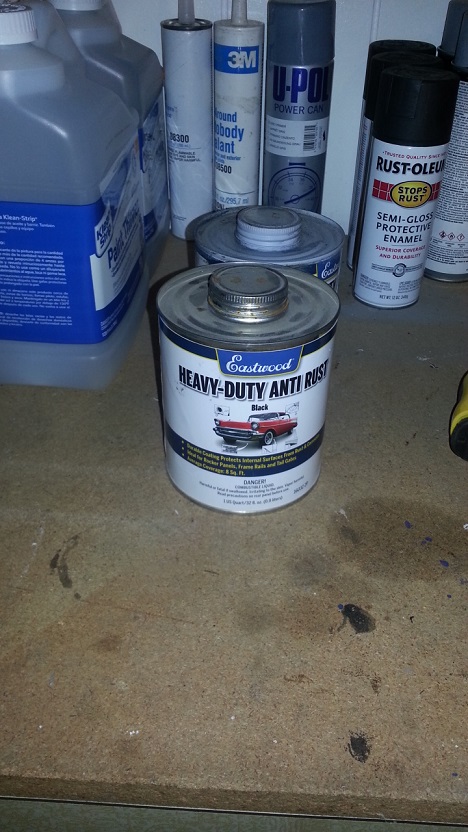 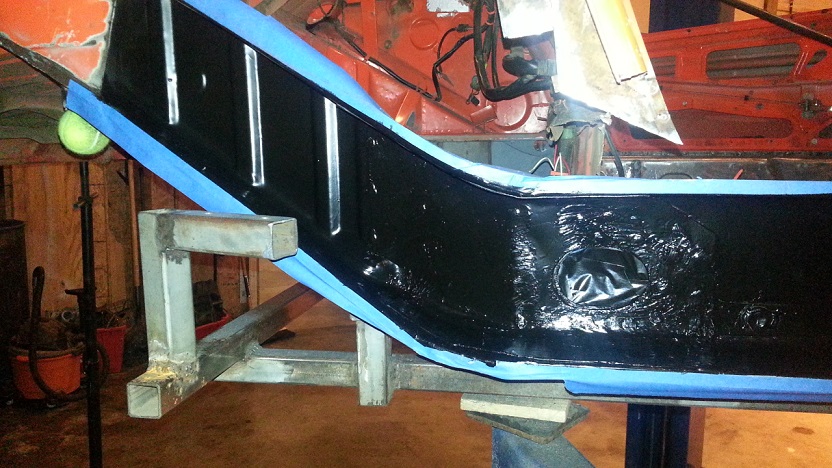 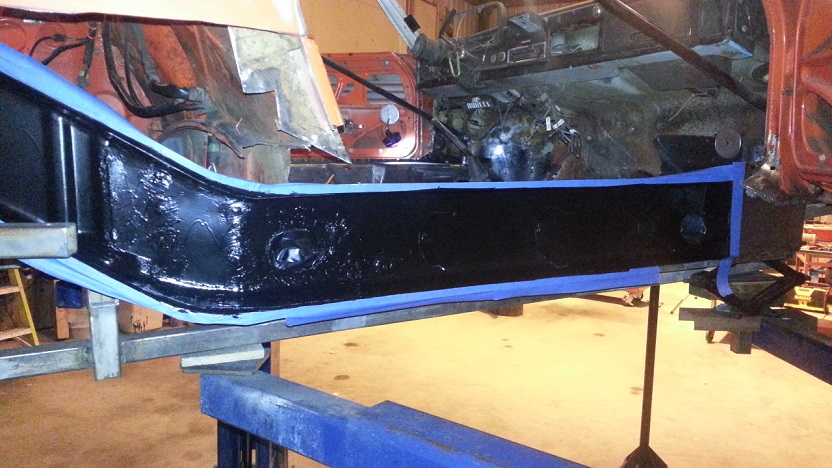 |
| cary |
 Jan 12 2014, 10:08 PM Jan 12 2014, 10:08 PM
Post
#309
|
|
Advanced Member     Group: Members Posts: 3,900 Joined: 26-January 04 From: Sherwood Oregon Member No.: 1,608 Region Association: Pacific Northwest 
|
Then I started installing the base of the left door hinge post.
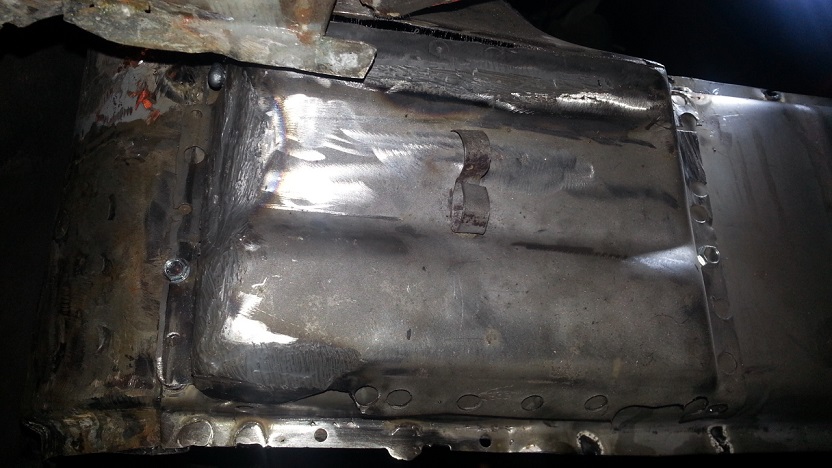 Won't be long before I get this thing of the lift. Then on to the new floor, tunnel repairs and the new pedal box. |
| saigon71 |
 Jan 13 2014, 07:28 AM Jan 13 2014, 07:28 AM
Post
#310
|
|
Advanced Member     Group: Members Posts: 2,007 Joined: 1-June 09 From: Dillsburg, PA Member No.: 10,428 Region Association: MidAtlantic Region 

|
Great progress.
Keep (IMG:style_emoticons/default/smash.gif) (IMG:style_emoticons/default/sawzall-smiley.gif) (IMG:style_emoticons/default/welder.gif) away! |
| cary |
 Jan 20 2014, 09:48 PM Jan 20 2014, 09:48 PM
Post
#311
|
|
Advanced Member     Group: Members Posts: 3,900 Joined: 26-January 04 From: Sherwood Oregon Member No.: 1,608 Region Association: Pacific Northwest 
|
Coming together ..............
Wheelhouse trimmed. Took quite a bit fiddling to get the upper edge bent to match. The next time I'll anchor it to the upper long and do a double cut like you'd cut wall paper. 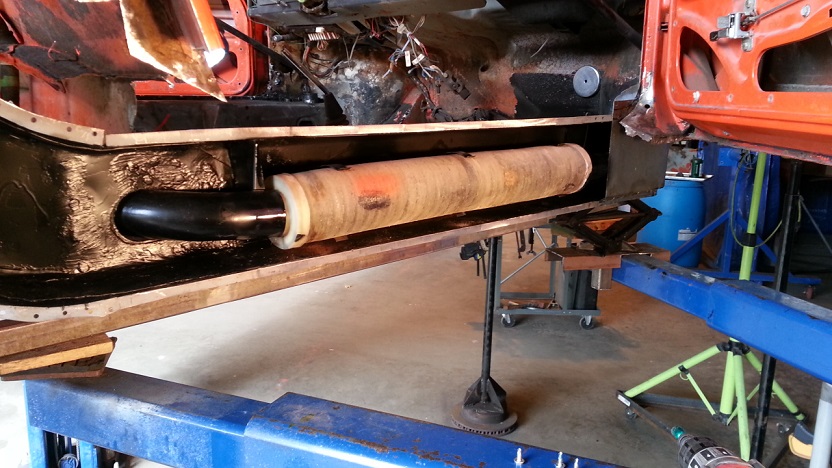 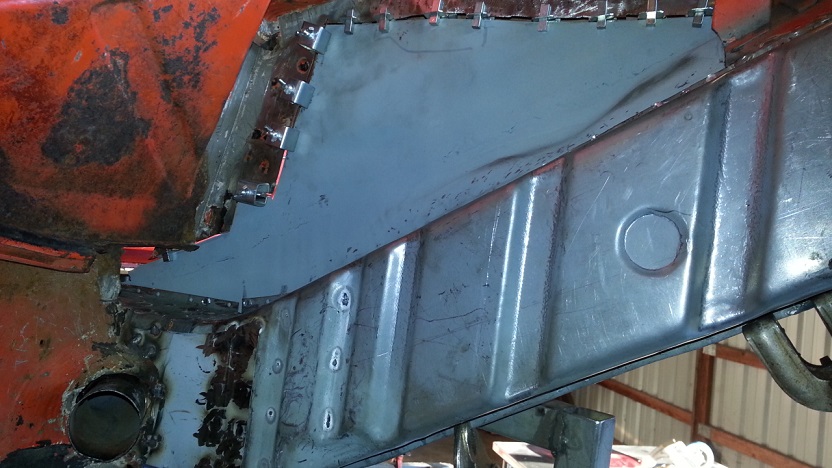 Ready to stitch weld on the next trip to the shop. |
| cary |
 Jan 20 2014, 09:53 PM Jan 20 2014, 09:53 PM
Post
#312
|
|
Advanced Member     Group: Members Posts: 3,900 Joined: 26-January 04 From: Sherwood Oregon Member No.: 1,608 Region Association: Pacific Northwest 
|
New tool cart .................
Tired of chasing around looking for clamps and Vice-Grips. 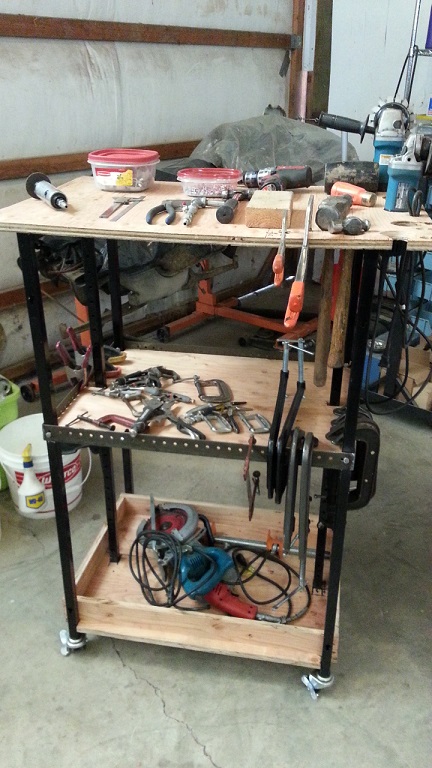 Super - In - Law project ................... Just need a divider on the second shelf to separate the small C-clamps and Vice-grips. |
| injunmort |
 Jan 21 2014, 04:06 PM Jan 21 2014, 04:06 PM
Post
#313
|
|
Senior Member    Group: Members Posts: 1,024 Joined: 12-April 10 From: sugarloaf ny Member No.: 11,604 Region Association: North East States |
I love this thread, great work. you make sorry I cut up a car that was about in the same shape. keep it coming
|
| cary |
 Jan 21 2014, 10:38 PM Jan 21 2014, 10:38 PM
Post
#314
|
|
Advanced Member     Group: Members Posts: 3,900 Joined: 26-January 04 From: Sherwood Oregon Member No.: 1,608 Region Association: Pacific Northwest 
|
I keep telling myself the next 4 will be easier. LOL.
Start another vacation on Thursday. Hopefully we'll get it back on the rotisserie by the following Thursday. |
| cary |
 Jan 25 2014, 09:42 PM Jan 25 2014, 09:42 PM
Post
#315
|
|
Advanced Member     Group: Members Posts: 3,900 Joined: 26-January 04 From: Sherwood Oregon Member No.: 1,608 Region Association: Pacific Northwest 
|
Great Day ....................
Finished up welding in the wheelhouse. That's gives me a warm fuzzy. 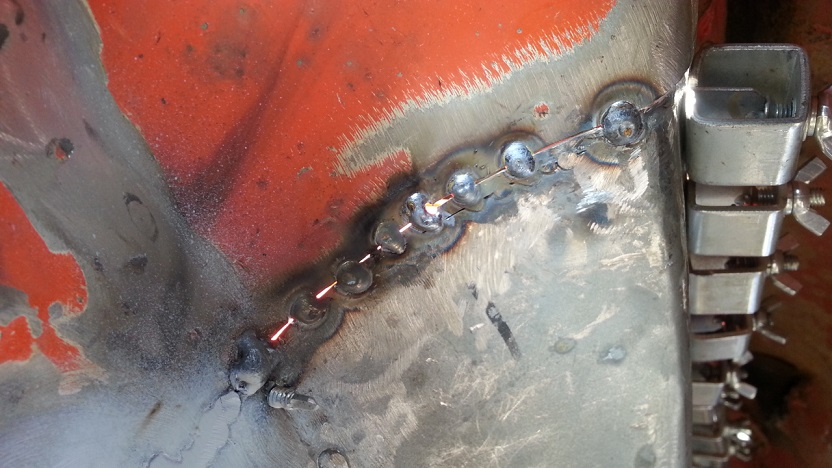 Need to finish tidying up the engine bay side. Here's where I ended the day ............. (IMG:style_emoticons/default/smilie_pokal.gif) (IMG:style_emoticons/default/smilie_pokal.gif) (IMG:style_emoticons/default/smilie_pokal.gif) 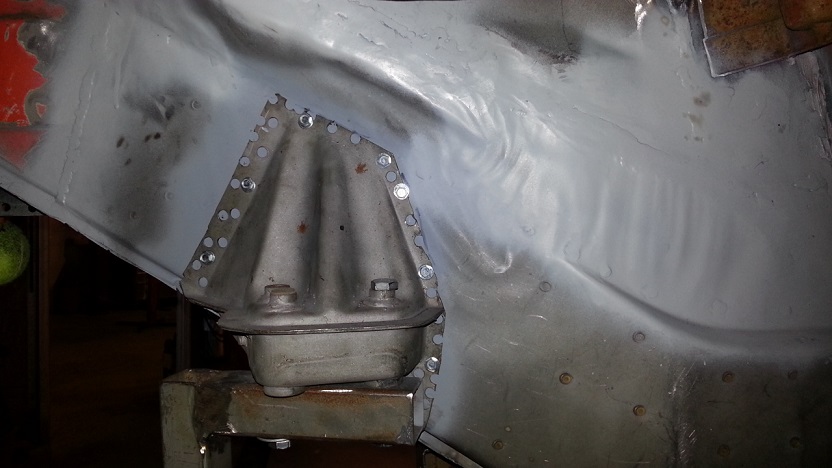 Slid the inner rocker in to warm my heart. (IMG:style_emoticons/default/piratenanner.gif) (IMG:style_emoticons/default/piratenanner.gif) (IMG:style_emoticons/default/piratenanner.gif) 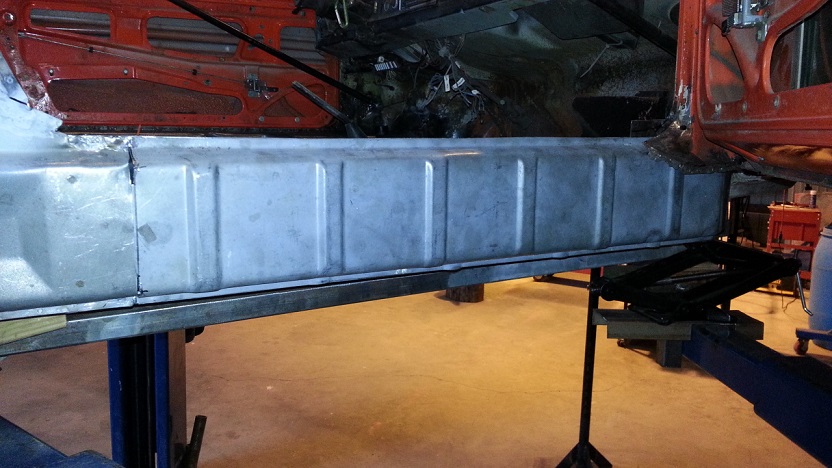 |
| cary |
 Jan 27 2014, 11:09 PM Jan 27 2014, 11:09 PM
Post
#316
|
|
Advanced Member     Group: Members Posts: 3,900 Joined: 26-January 04 From: Sherwood Oregon Member No.: 1,608 Region Association: Pacific Northwest 
|
Tinkered with the door gaps and body dimensions a bit.
http://www.914world.com/bbs2/index.php?showtopic=229264 With Rick's help I'm pretty close. |
| cary |
 Jan 27 2014, 11:14 PM Jan 27 2014, 11:14 PM
Post
#317
|
|
Advanced Member     Group: Members Posts: 3,900 Joined: 26-January 04 From: Sherwood Oregon Member No.: 1,608 Region Association: Pacific Northwest 
|
Finally got the car off the lift .............
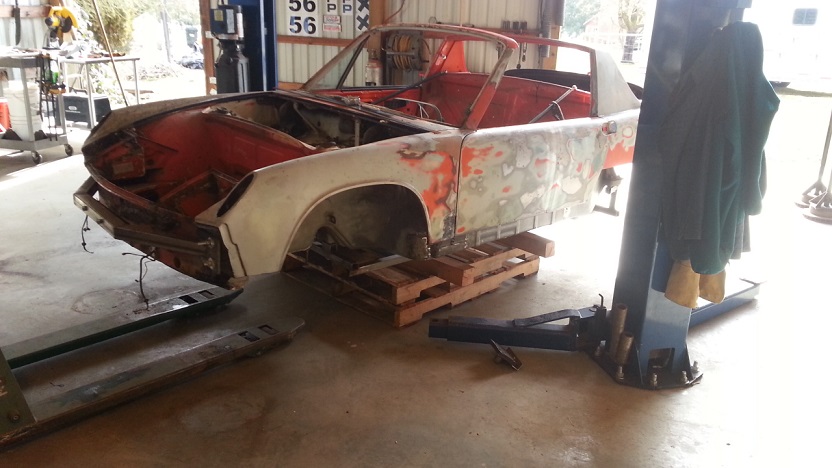 Bought some leveling jacks 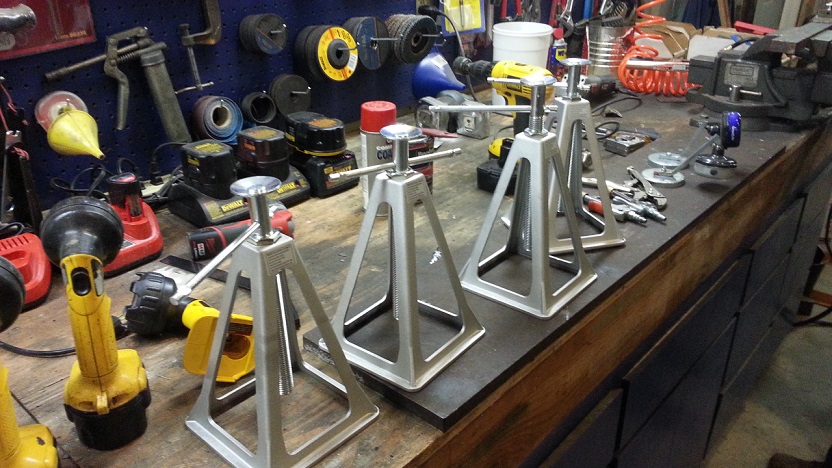 Here's where we started ............. 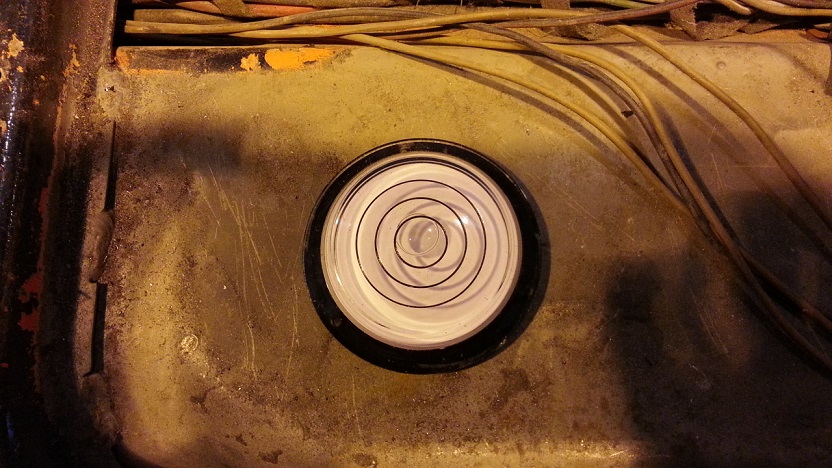 |
| cary |
 Jan 27 2014, 11:22 PM Jan 27 2014, 11:22 PM
Post
#318
|
|
Advanced Member     Group: Members Posts: 3,900 Joined: 26-January 04 From: Sherwood Oregon Member No.: 1,608 Region Association: Pacific Northwest 
|
Finally off the lift ........................ now I can get back to work.
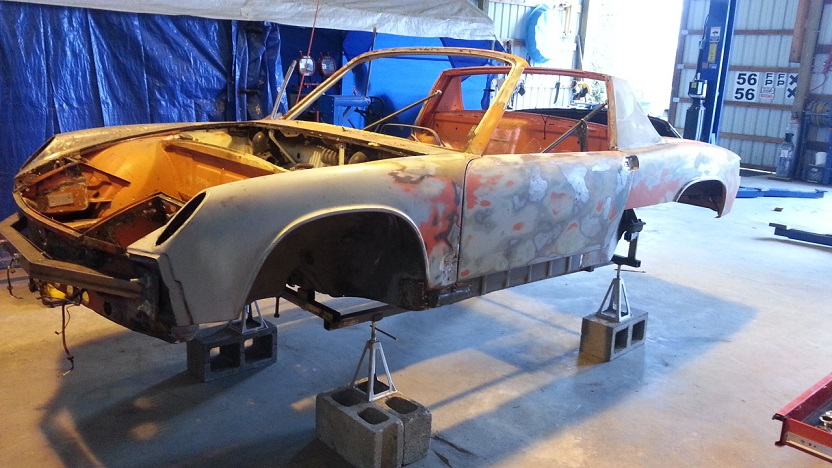 Here's where we start tomorrow ............ Screwed in and ready to weld. 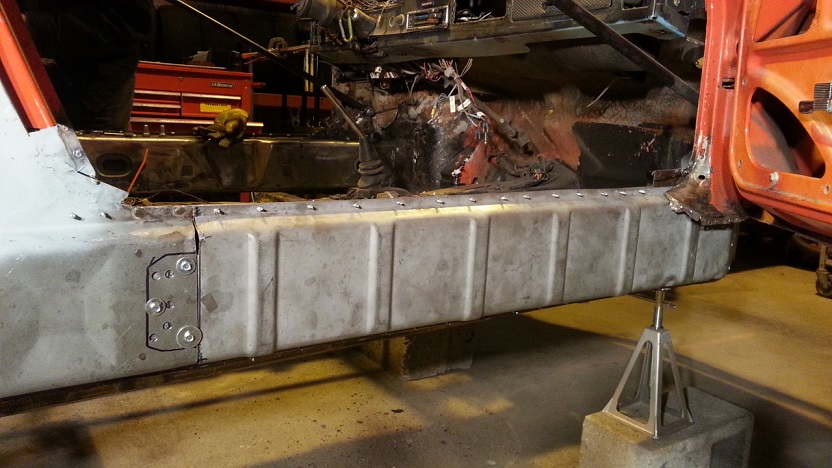 (IMG:style_emoticons/default/welder.gif) (IMG:style_emoticons/default/welder.gif) (IMG:style_emoticons/default/welder.gif) |
| cary |
 Jan 27 2014, 11:35 PM Jan 27 2014, 11:35 PM
Post
#319
|
|
Advanced Member     Group: Members Posts: 3,900 Joined: 26-January 04 From: Sherwood Oregon Member No.: 1,608 Region Association: Pacific Northwest 
|
Adding a new set of door braces.
Kind of a low budget set like Hontek built. 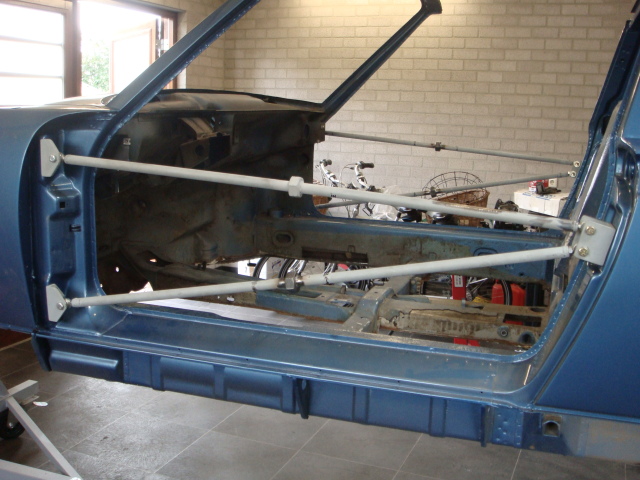 That way I can take the doors off after I weld in the right inner rocker and recheck the door fit. |
| boogie_man |
 Jan 28 2014, 10:55 AM Jan 28 2014, 10:55 AM
Post
#320
|
|
Member   Group: Members Posts: 308 Joined: 22-April 11 From: So Cal Member No.: 12,969 Region Association: Southern California |
Wow, that's some great work right there, keep it going, looking great !!!!
|
| cary |
 Jan 28 2014, 09:46 PM Jan 28 2014, 09:46 PM
Post
#321
|
|
Advanced Member     Group: Members Posts: 3,900 Joined: 26-January 04 From: Sherwood Oregon Member No.: 1,608 Region Association: Pacific Northwest 
|
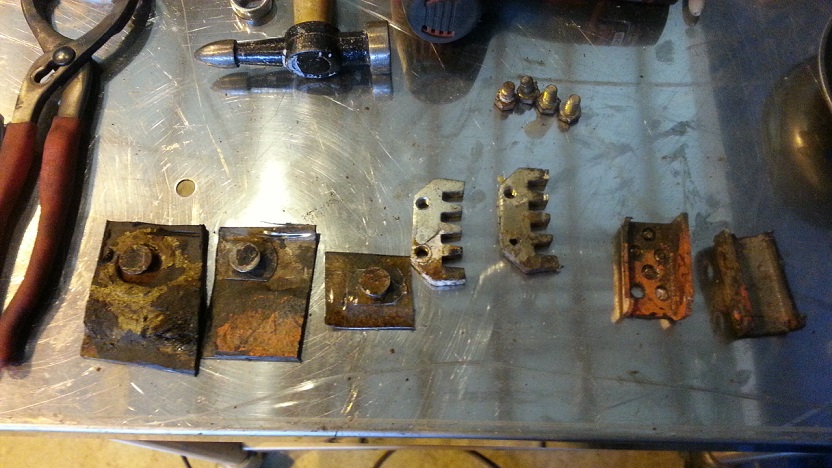
While Super In Law is building our new door braces I decided to do some housekeeping. I needed to cut out a few parts from the sheet metal that will be scraped.
 Here's the new door braces. I want to be able to flip it upside down and not have to worry about everything staying in place. 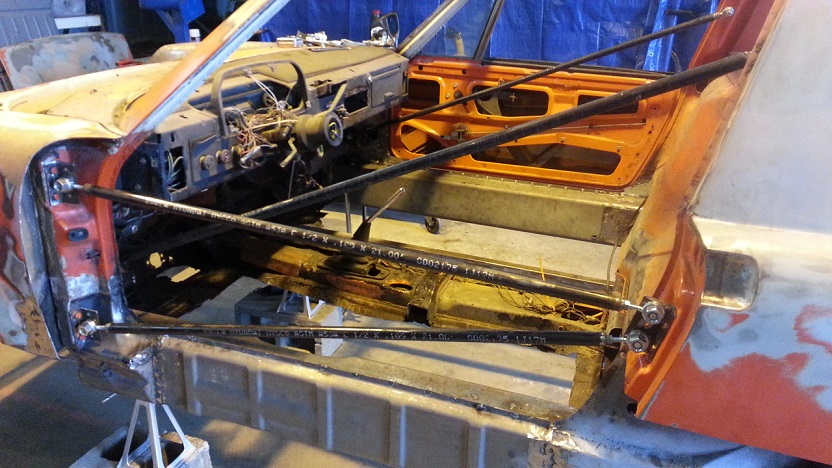 |
| cary |
 Jan 28 2014, 09:48 PM Jan 28 2014, 09:48 PM
Post
#322
|
|
Advanced Member     Group: Members Posts: 3,900 Joined: 26-January 04 From: Sherwood Oregon Member No.: 1,608 Region Association: Pacific Northwest 
|
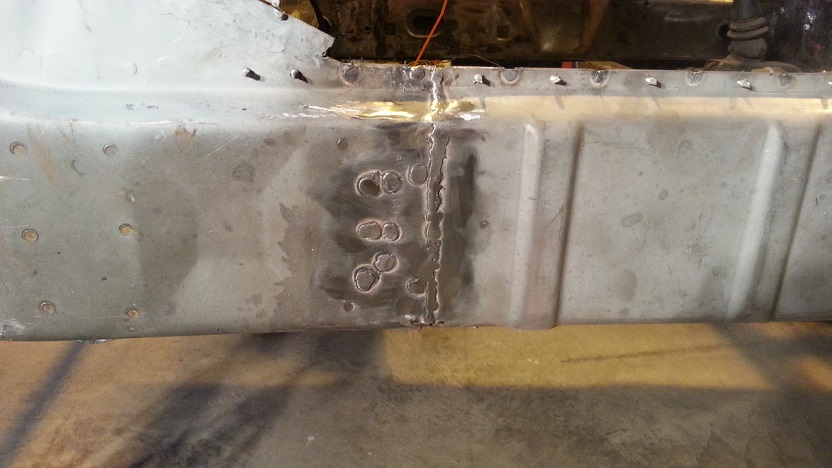
Tried some thing a little different. I pulled the puddle up while I was stitch welding the rocker seam.
 |
| cary |
 Jan 28 2014, 09:49 PM Jan 28 2014, 09:49 PM
Post
#323
|
|
Advanced Member     Group: Members Posts: 3,900 Joined: 26-January 04 From: Sherwood Oregon Member No.: 1,608 Region Association: Pacific Northwest 
|
Finally putting her back on the rotisserie.
Attached image(s) 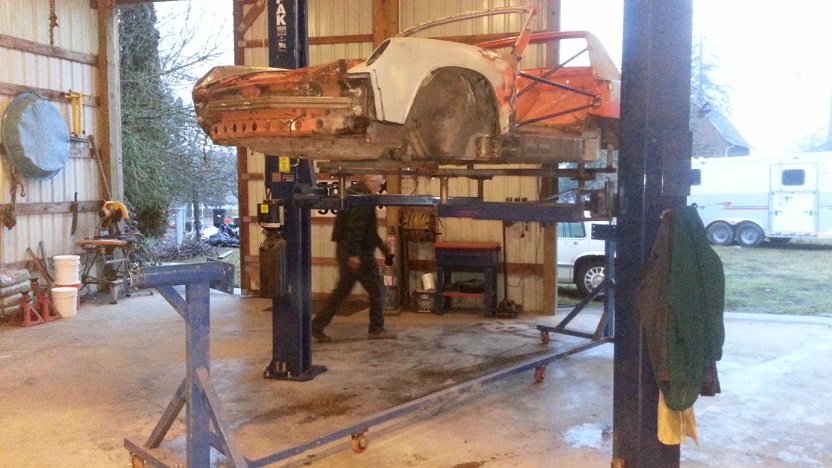
|
| cary |
 Jan 28 2014, 09:51 PM Jan 28 2014, 09:51 PM
Post
#324
|
|
Advanced Member     Group: Members Posts: 3,900 Joined: 26-January 04 From: Sherwood Oregon Member No.: 1,608 Region Association: Pacific Northwest 
|
Heading home ....................
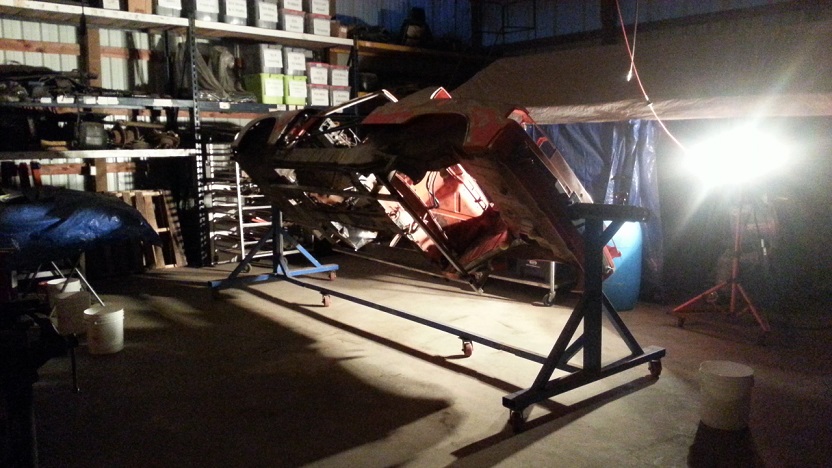 |
| cary |
 Jan 30 2014, 10:49 PM Jan 30 2014, 10:49 PM
Post
#325
|
|
Advanced Member     Group: Members Posts: 3,900 Joined: 26-January 04 From: Sherwood Oregon Member No.: 1,608 Region Association: Pacific Northwest 
|
Spent Wednesday finishing up welding in the inner rockers and grinding down the rosettes.
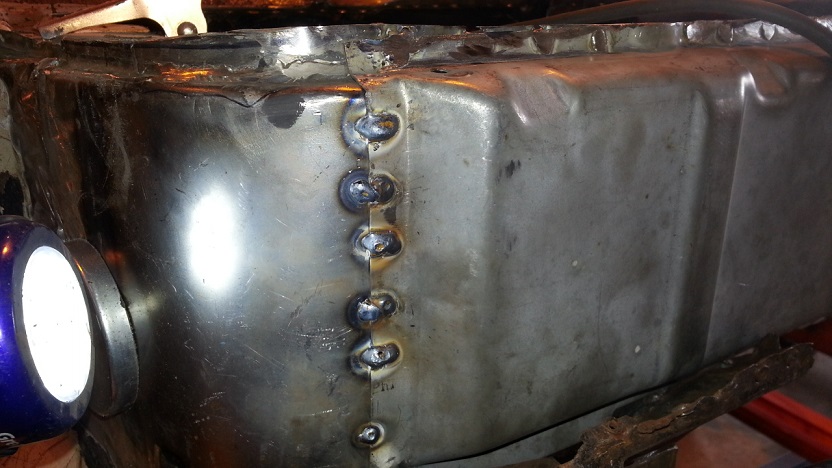 Then I went after the hinge post bases. Finished up welding in the left side. 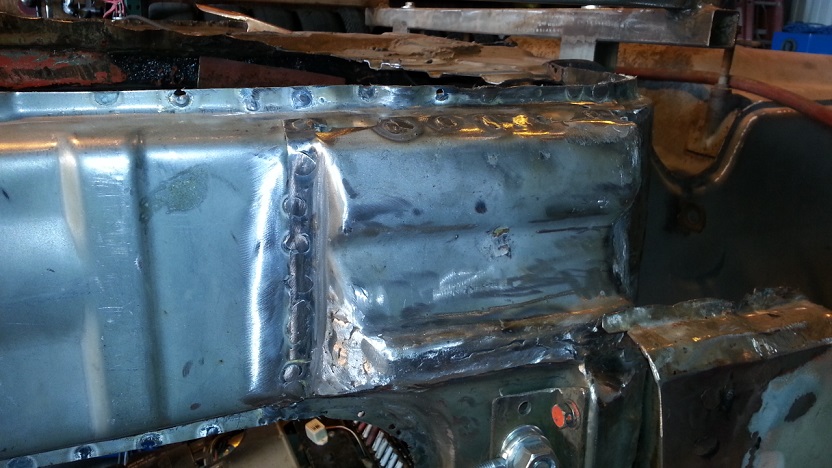 |
  |
6 User(s) are reading this topic (6 Guests and 0 Anonymous Users)
0 Members:

|
Lo-Fi Version | Time is now: 16th January 2025 - 10:14 AM |
Invision Power Board
v9.1.4 © 2025 IPS, Inc.


