|
|

|
Porsche, and the Porsche crest are registered trademarks of Dr. Ing. h.c. F. Porsche AG.
This site is not affiliated with Porsche in any way. Its only purpose is to provide an online forum for car enthusiasts. All other trademarks are property of their respective owners. |
|
|
  |
| FourBlades |
 Oct 29 2014, 06:07 PM Oct 29 2014, 06:07 PM
Post
#346
|
|
From Wreck to Rockin     Group: Members Posts: 2,056 Joined: 3-December 07 From: Brevard, FL Member No.: 8,414 Region Association: South East States 
|
I have seen people do the pans first then the firewall and I have seen people do the firewall first, especially if they are using the replacement firewall panels. I think doing the pans first is easier, I did both my cars that way. John |
| cary |
 Oct 30 2014, 12:12 AM Oct 30 2014, 12:12 AM
Post
#347
|
|
Advanced Member     Group: Members Posts: 3,900 Joined: 26-January 04 From: Sherwood Oregon Member No.: 1,608 Region Association: Pacific Northwest 
|
Super In Law went to reading the instruction book on the torch. He said it's been 40 years since he's used a torch. Then we had to run to AirGas to get the gas tanks filled.
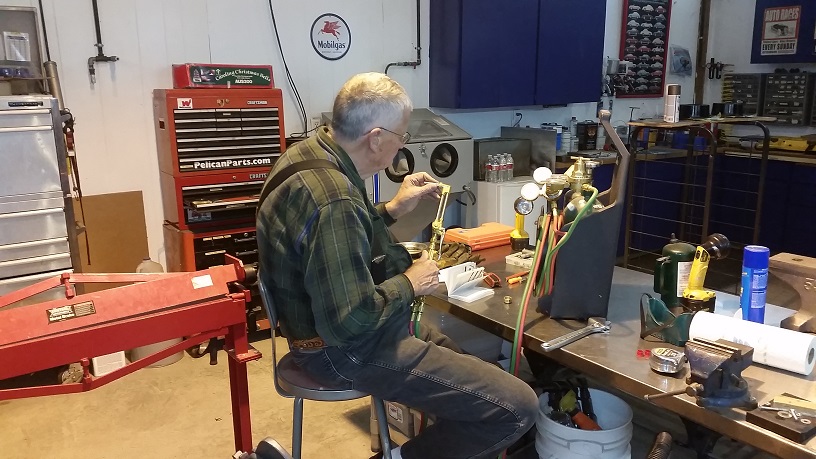 So away we went. Out came the clutch tube. Ran it over the lie detector (Scotty B). Looks to be still usable. Gave it an Ospho spray down. I'm thinking it will get Ford Blue Rustoleum. So 40 years from now someone will open it up again and go, What the Hell. 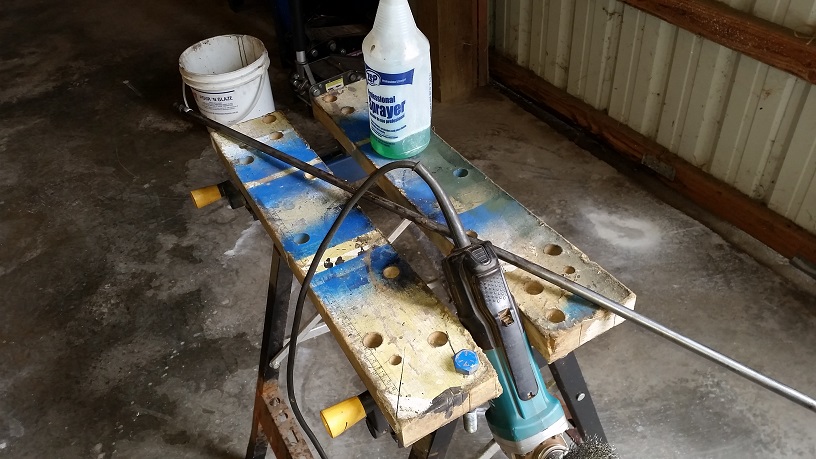 So here is the barnacles I was talking about. So out came the accelerator and heater tubes. 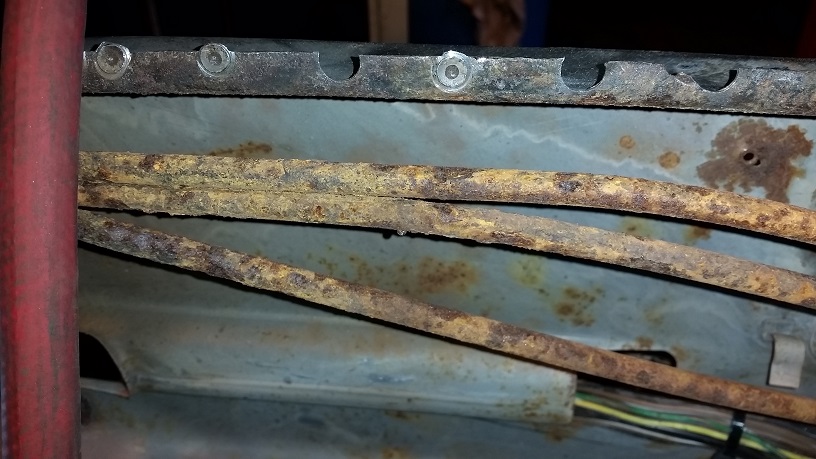 Now we have an emptied out center console. Getting it ready for Rustoluem paint job. Need to recreate the tube attachment bracket. 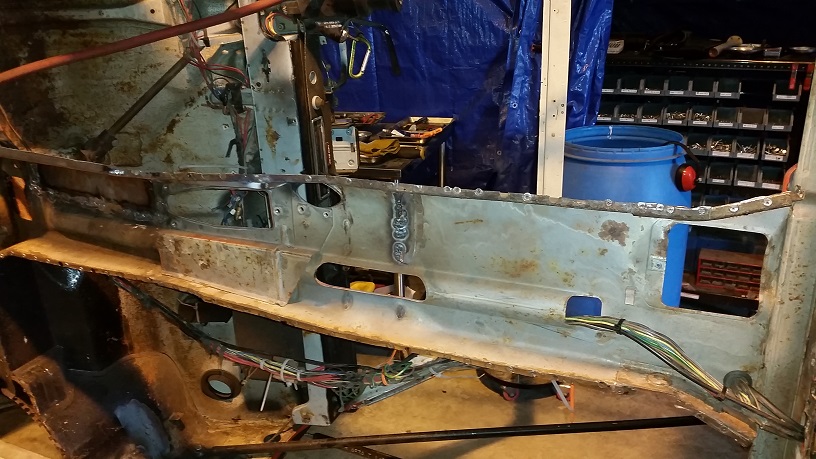 Ospohed ............. 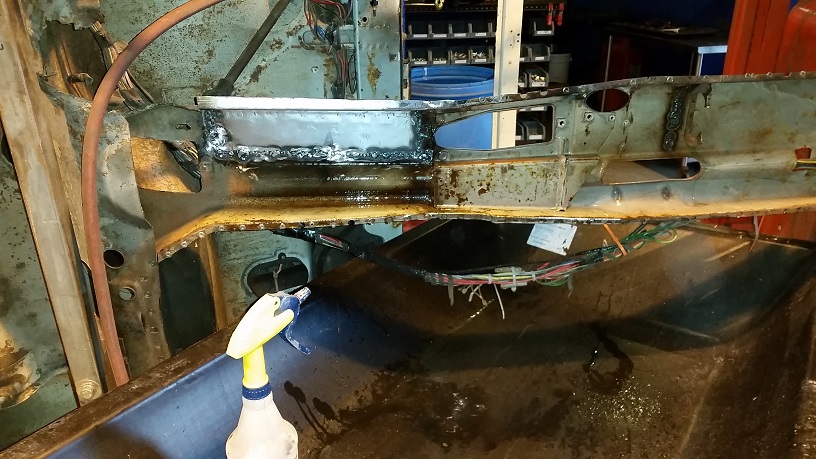 Firewall emptied out ........... Trying to decide whether to recreate or buy the panel and cut out what I need. 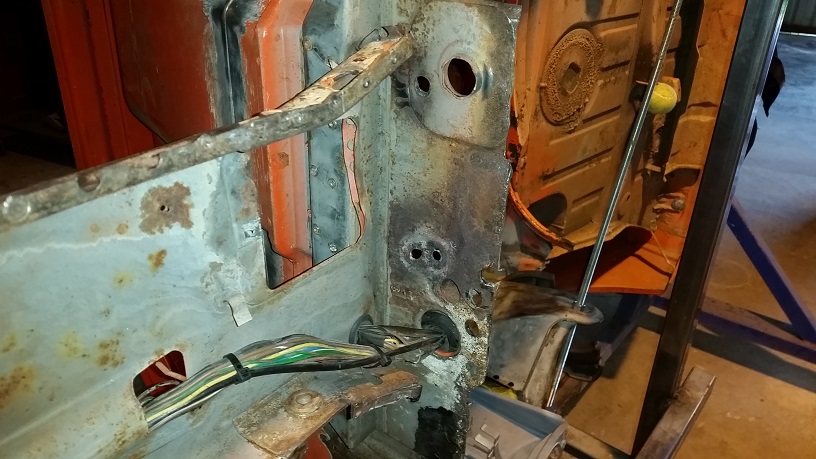 Make sure you use protection for the wiring harness. The heat and brazing dripping could cause a serious issues. 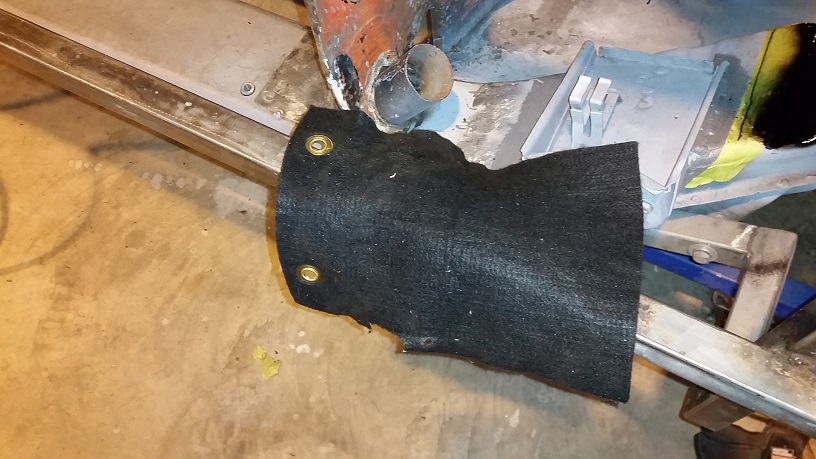 |
| cary |
 Oct 30 2014, 12:50 AM Oct 30 2014, 12:50 AM
Post
#348
|
|
Advanced Member     Group: Members Posts: 3,900 Joined: 26-January 04 From: Sherwood Oregon Member No.: 1,608 Region Association: Pacific Northwest 
|
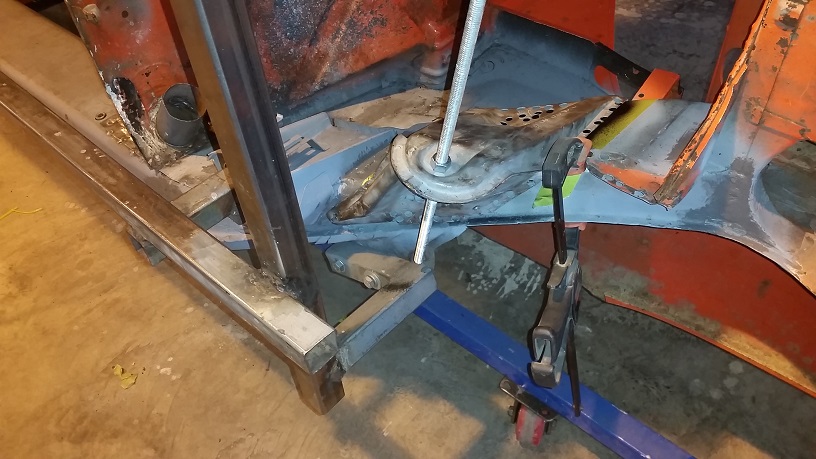
As Super In Law was reading I went to getting ready to install the right side suspension console. Super In Law had his measurements on the white car from when we changed it out 7 or 8 years ago. Got the triangle measurement from the World info. Found a piece of all thread and nuts needed to create the measurement.
 This post has been edited by cary: Nov 3 2014, 07:24 AM |
| cary |
 Oct 31 2014, 08:30 AM Oct 31 2014, 08:30 AM
Post
#349
|
|
Advanced Member     Group: Members Posts: 3,900 Joined: 26-January 04 From: Sherwood Oregon Member No.: 1,608 Region Association: Pacific Northwest 
|
We decided that we'll make our own patch. We'll see how that goes. I have a lead on a new panel for $100.
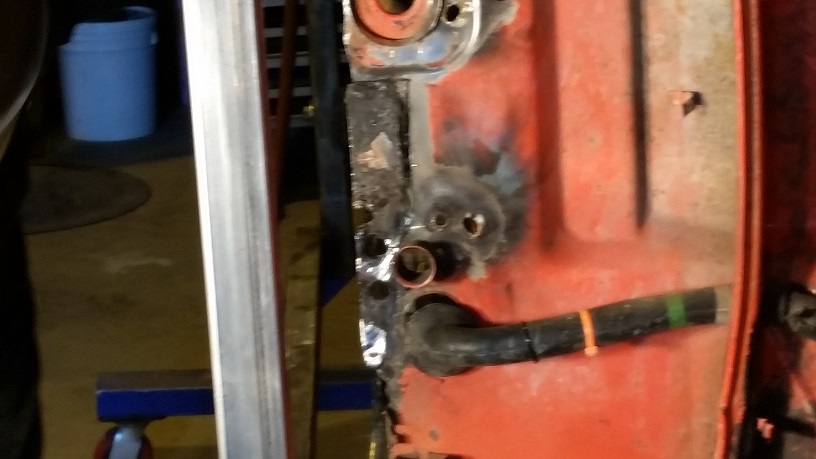 Spent most of the day measuring over and over. Then tweaking the suspension console over and over. If I had to do it over again, I should have bought a new one. Too many Rosette holes in taking off the old one off. Need to find the MPS plate I haven't been welding the old Rosettes closed before I put the old parts back on. I might start doing that too. Welds are too big. Don't look tidy enough. After seam sealer and paint they'll disappear, LOL, 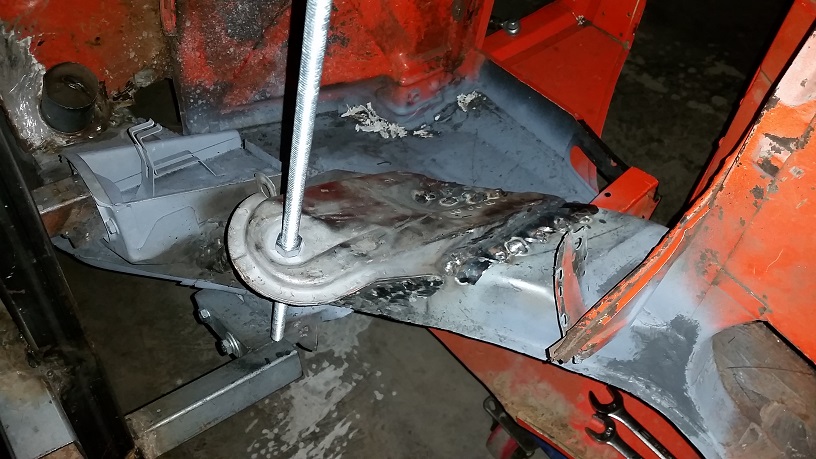 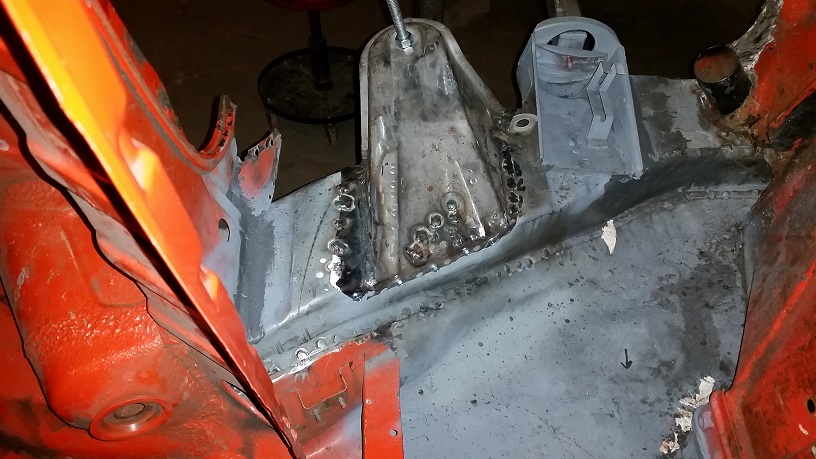 When it is all said and done I'm dead on the 33 5/16 from the shifter hole to bolt and suspension console (Factory, 914 info). From the firewall to center of the hole I'm off just shy of an 1/8". I'm going to use Jeff Hail's numbers this am to double check again. Kind of late now, just being anal Spent last night reading all 20 pages of a "suspension console" search to see what I could have done different to maybe not have the 1/8". Maybe I should have tacked the suspension console on the upper long when I installed it. It's the angle of the engine compartment long that caused the 1/8". |
| cary |
 Nov 2 2014, 09:50 AM Nov 2 2014, 09:50 AM
Post
#350
|
|
Advanced Member     Group: Members Posts: 3,900 Joined: 26-January 04 From: Sherwood Oregon Member No.: 1,608 Region Association: Pacific Northwest 
|
I had to walk away from the console after measuring it again about 10 times.
Decided to cut and prep the pedal box that I bought from Bruce. Both the pedal box and the area around the fuel line rubber mount/holder are pretty tore up. The pedal box was rusted. The fuel line hole was just hacked up. Had to remove the pedal support and decided to save the suspension mounting point. 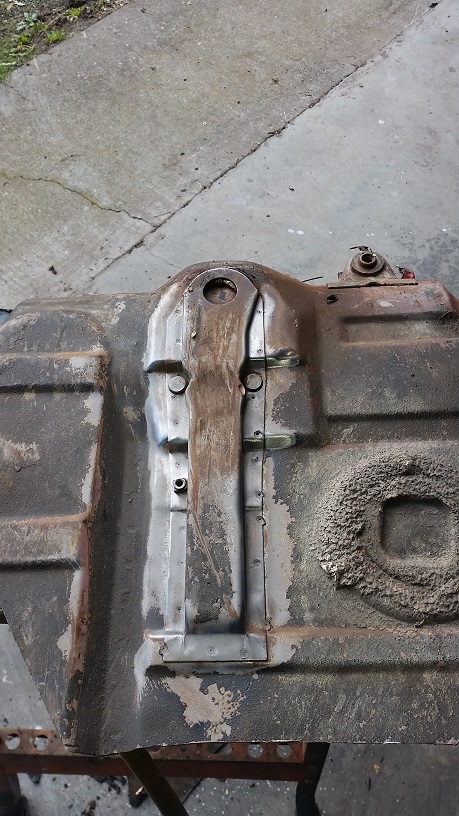 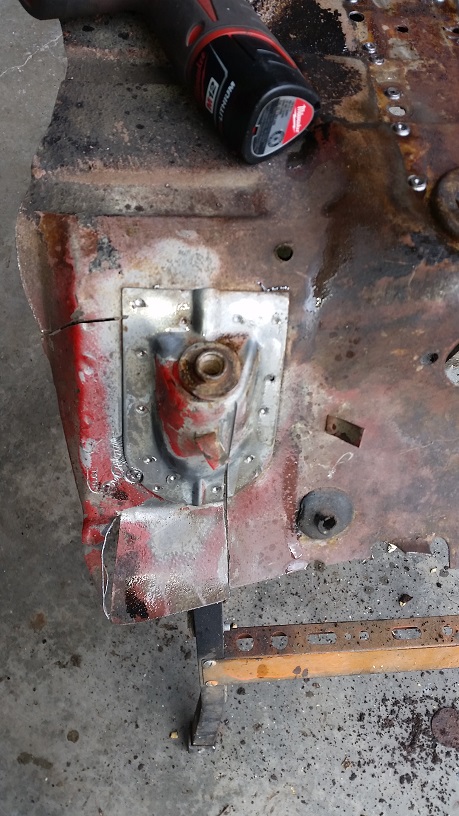 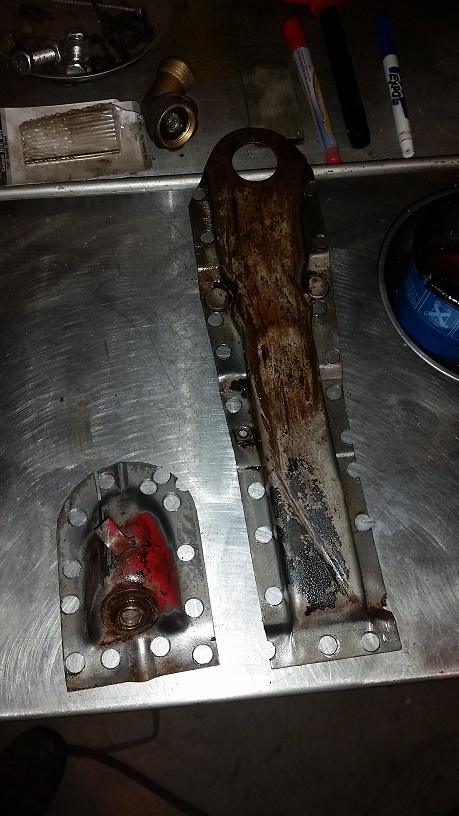 The cut portion is sitting overnight in the parts washer. Then I'll dip it in my bucket of muratic acid and water left over from the gas tank cleaning. Should come out gooder and new. Then I'll brew a pot of coffee and start the suspension console surgery. (IMG:style_emoticons/default/hissyfit.gif) Maybe I'll sell the 2 frame stiffeners that I bought from RD and I'm not going to use to ease the pain. Shot of the harness tab locations in the tunnel. They're coming out so I get all the POR15 off. 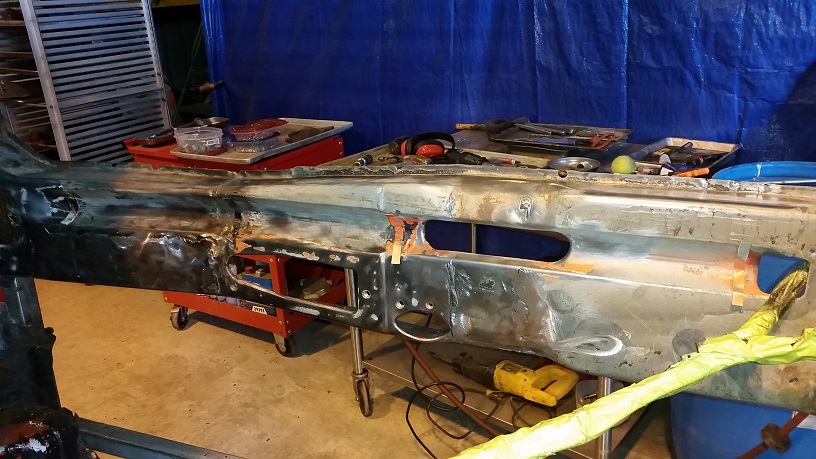 Last day of vacation |
| cary |
 Nov 2 2014, 08:35 PM Nov 2 2014, 08:35 PM
Post
#351
|
|
Advanced Member     Group: Members Posts: 3,900 Joined: 26-January 04 From: Sherwood Oregon Member No.: 1,608 Region Association: Pacific Northwest 
|
Cut off the suspension console. It ended up being 3/16's too close to the firewall. And the car would have been 3/16's higher on that side. The 3/16's out from the wall will move it up the long there by lowering the car.
More of that conversation located here: http://www.914world.com/bbs2/index.php?showtopic=189224 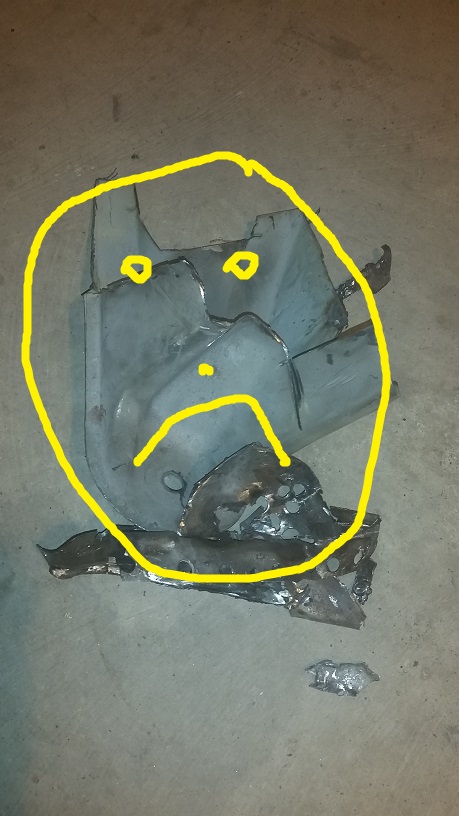 Removed suspension console Removed suspension console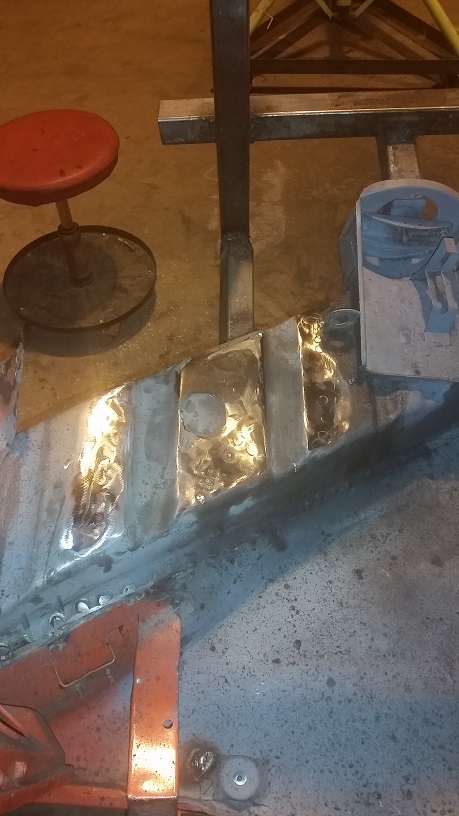 Ready for new suspension console Ready for new suspension consoleNew part ordered from RD 11/3/2014 This post has been edited by cary: Nov 3 2014, 07:33 AM |
| cary |
 Nov 9 2014, 10:27 AM Nov 9 2014, 10:27 AM
Post
#352
|
|
Advanced Member     Group: Members Posts: 3,900 Joined: 26-January 04 From: Sherwood Oregon Member No.: 1,608 Region Association: Pacific Northwest 
|
On a positive note. We're back to work.
Super In Law is working on the buggered up fuel line grommet hole hole on the right side of the tunnel to front firewall. Can't really figure what some one did, so we cut it out. It's like they used a big screwdriver to lever the grommet. 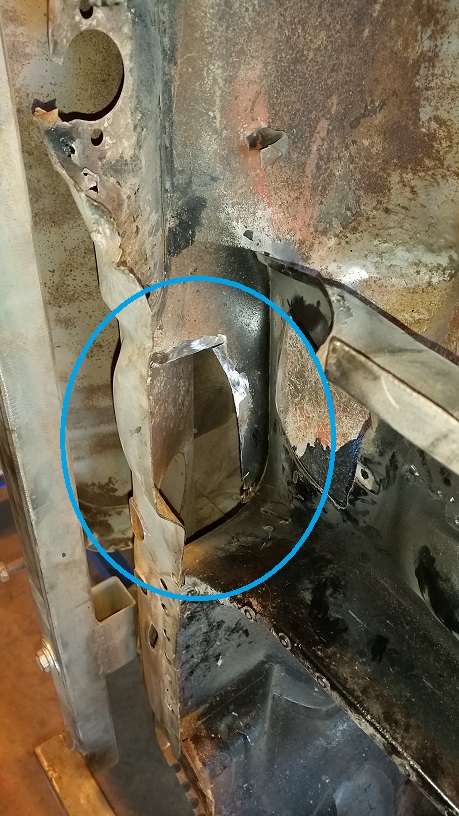 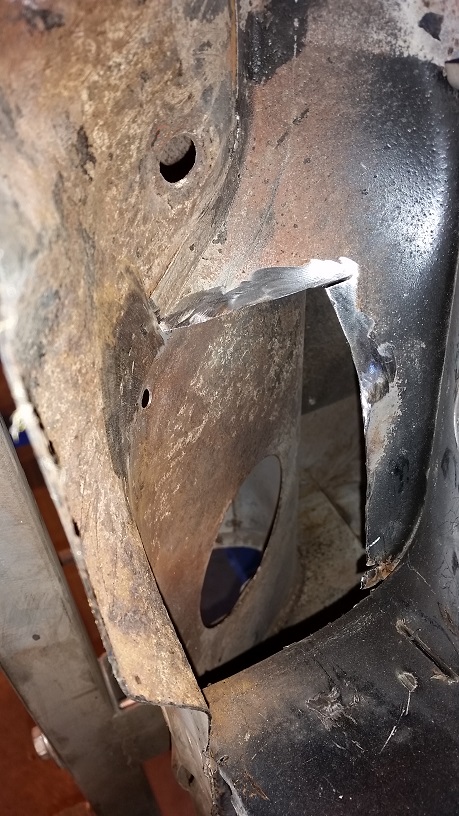 The floor pan section you see on the left will come out with the new to me pedal box and the new floor pan. 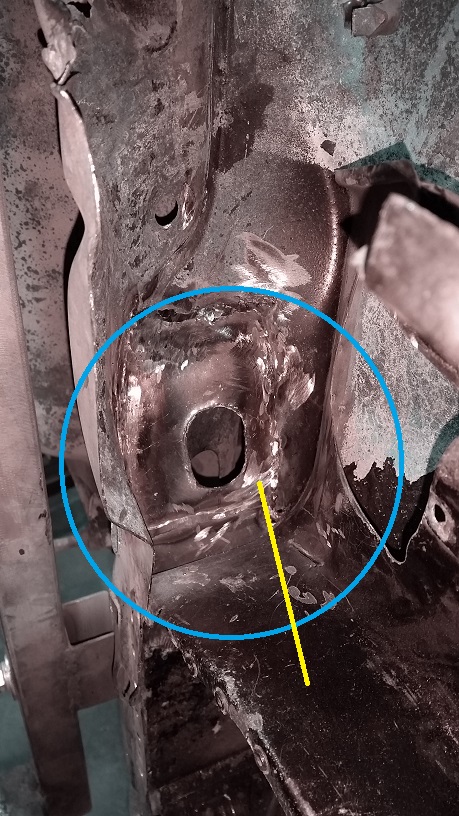 He did I nice job of getting it fitted. He built the lip with the press, vise and a pipe. Its a little rough, but it will work. The line points to the only spot that we're having a tough time grinding down the welds. Might try this weapon next time. But like always I don't know if theres enough room for the tool and the hose. http://www.harborfreight.com/3-in-extended...tool-67996.html I like them smooth enough so they look tidy and tight (no holes) after I seam seal them. |
| cary |
 Nov 9 2014, 10:53 AM Nov 9 2014, 10:53 AM
Post
#353
|
|
Advanced Member     Group: Members Posts: 3,900 Joined: 26-January 04 From: Sherwood Oregon Member No.: 1,608 Region Association: Pacific Northwest 
|
Then I went about creating the pattern to patch the bottom of the engine compartment fire wall, the rusty spot where the tubes and cables come thru. Like just about everything on this car.That area was way over welded when we put it on the road 12 years ago. (IMG:style_emoticons/default/sad.gif)
I used the new back floor pan as the pattern. Then used the white car, which is still on the lift to take top to bottom measurements from. 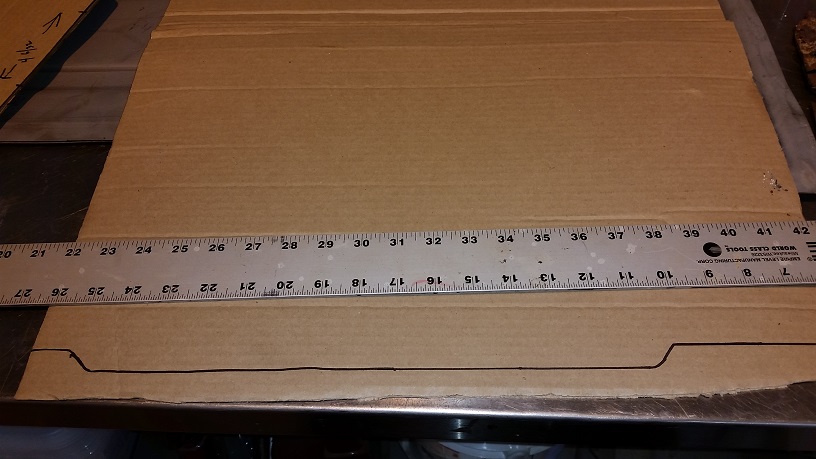 Remember when you go about making your pattern you have to compensate for the width of the cutting disk you used to cut out the part. 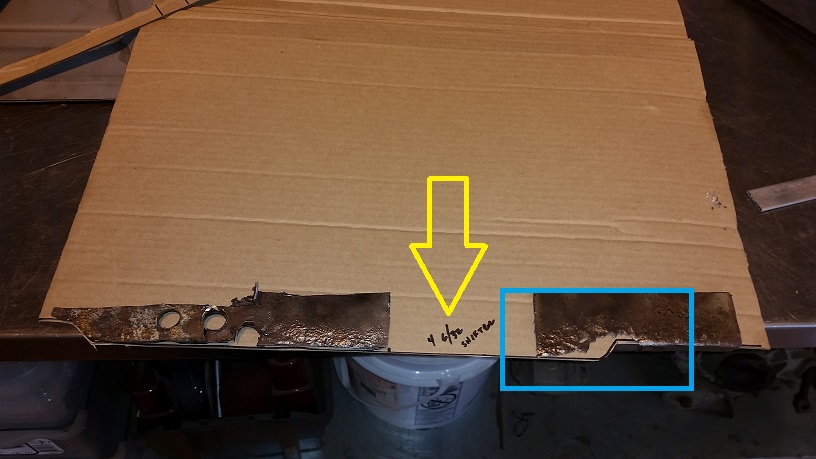 Here's the two removed pieces that I started with. The yellow arrow points to the shifter rod bushing console. The blue box is the section that will need the most test fitting and fiddling. I'm just now getting a handle on the pattern cutting. Do you cut it with the marker line or marker line out? Kind of like making wood cabinets. One blade width makes a HUGE difference. (IMG:style_emoticons/default/biggrin.gif) |
| cary |
 Nov 9 2014, 11:21 AM Nov 9 2014, 11:21 AM
Post
#354
|
|
Advanced Member     Group: Members Posts: 3,900 Joined: 26-January 04 From: Sherwood Oregon Member No.: 1,608 Region Association: Pacific Northwest 
|
Here's were I ended the day. Left patch is in. I like it.
Right patch I'm still fitting. Next trip I'll flip the car on its lid so the floor pan will be laying flat for fitting. 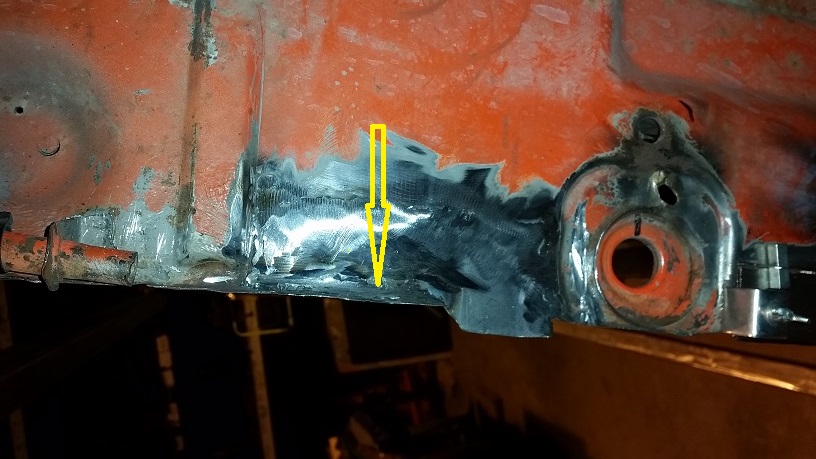 That's with a portion of the new flange installed. Yellow Arrow This was real handy for welding on the flange. Used the 90 degree plate. http://www.eastwood.com/welders-helper-3x3...cop-plates.html And not being a dumbass and taking the finger off the trigger. Stitch welded. This was new metal to new metal. So it was weld, cool with air hose, and weld again. No blow thru. My biggest problem is seeing the weld location while I'm welding. Not enough light. I wish AirGas had loaner helmets. 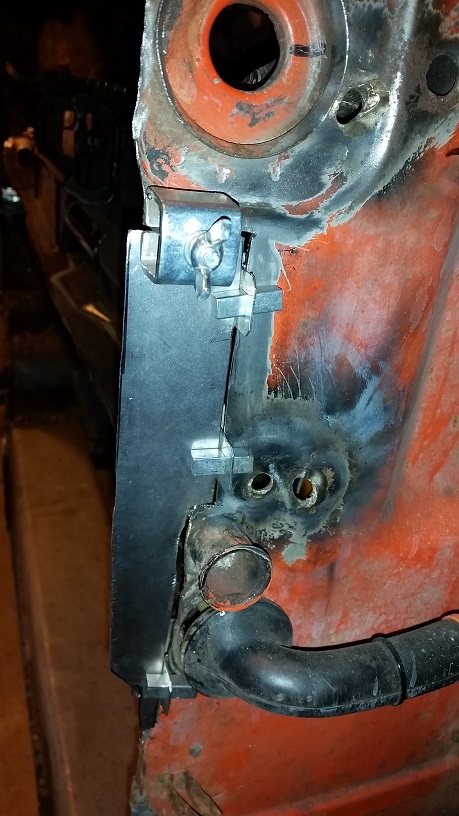 Here's were I ended. Might have to make a new one, the hole under the speedo tube is a bit too wide. Got impatient with the bench grinder. Plus I'll have issues with the brass brazing so I won't want to be in that spot too long or too hot. Heading home ....................... Then (IMG:style_emoticons/default/beer3.gif) (IMG:style_emoticons/default/beer3.gif) |
| cary |
 Nov 9 2014, 11:32 AM Nov 9 2014, 11:32 AM
Post
#355
|
|
Advanced Member     Group: Members Posts: 3,900 Joined: 26-January 04 From: Sherwood Oregon Member No.: 1,608 Region Association: Pacific Northwest 
|
When we got home my package from RD had arrived.
Left Ontario on Tuesday, arrived in Sherwood on Saturday. As always , great service and great packaging. 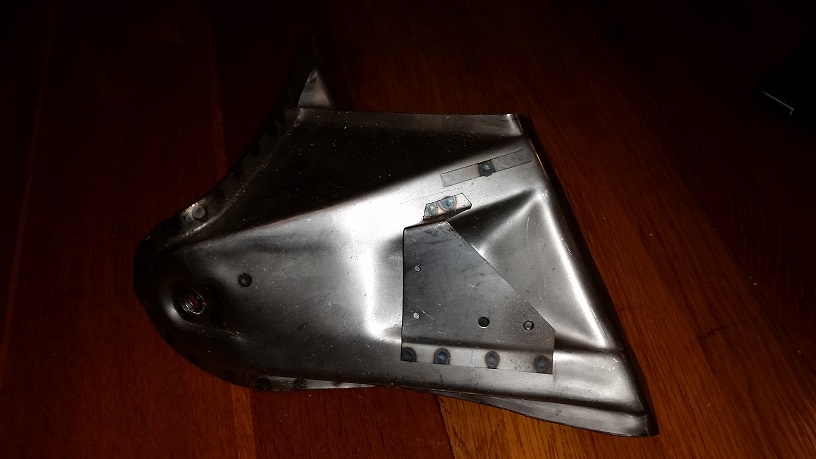 I've decided I'll wait until the floor, tunnel and inside fire wall are installed before I get after this part again. I'm going ask RD for some close ups of the outriggers they built onto the 914 jig. I want mine to be removable. So that when I finish with either the left or right console I can get them out of the way. I'm always banging my head on the jig with either the welding helmet or the face shield flipped up. |
| cary |
 Nov 9 2014, 11:39 AM Nov 9 2014, 11:39 AM
Post
#356
|
|
Advanced Member     Group: Members Posts: 3,900 Joined: 26-January 04 From: Sherwood Oregon Member No.: 1,608 Region Association: Pacific Northwest 
|
As I was sitting here writing these 3 or 4 posts I think I'll have my son come out and shoot some short video of us using the shear, shrinker/stretcher and the brake as we build these patch pieces. Plus some of the different pieces of steel that we pound on.
All my metal working tools are DIY or Harbor Freight not JET (winning the Powerball wish list). Until Thursday my next day off. |
| cary |
 Nov 13 2014, 09:50 PM Nov 13 2014, 09:50 PM
Post
#357
|
|
Advanced Member     Group: Members Posts: 3,900 Joined: 26-January 04 From: Sherwood Oregon Member No.: 1,608 Region Association: Pacific Northwest 
|
Another good day. Super In Law cut out and tacked in the the new pedal cluster pan. Pretty easy fit. Just laid the new one right inside the old one. Bolted them together right thru the master cylinder holes. Then cut right thru both layers with the cutting disk.
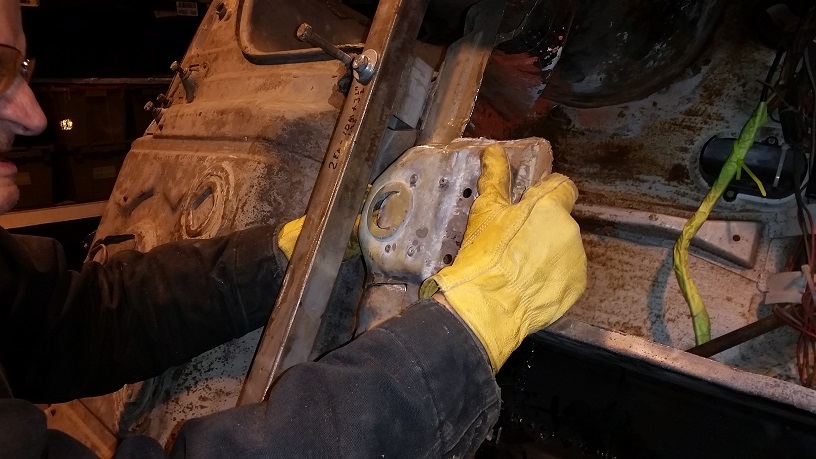 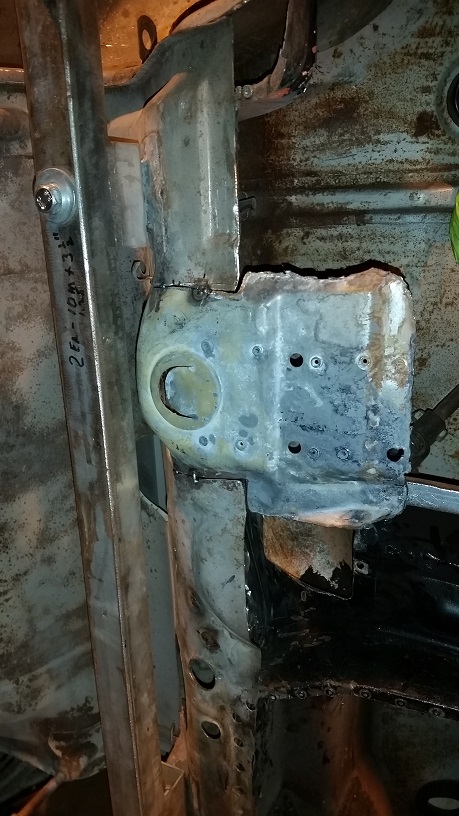 Haven't decided where we'll cut Haven't decided where we'll cut |
| cary |
 Nov 13 2014, 10:07 PM Nov 13 2014, 10:07 PM
Post
#358
|
|
Advanced Member     Group: Members Posts: 3,900 Joined: 26-January 04 From: Sherwood Oregon Member No.: 1,608 Region Association: Pacific Northwest 
|
While he was working on that. I went back to fabricating the engine compartment lower firewall patch.
I started with aligning the new rear portion of the floor pan to find the final shape. Held it in place with multiple clamps. That worked perfect. 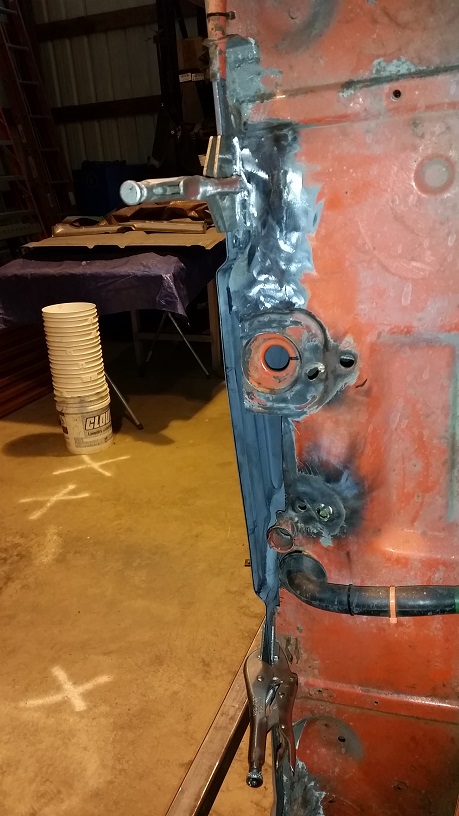 New patch piece created with flange welded on. Holes drilled in it with a HF step drill bit. It worked like champ. 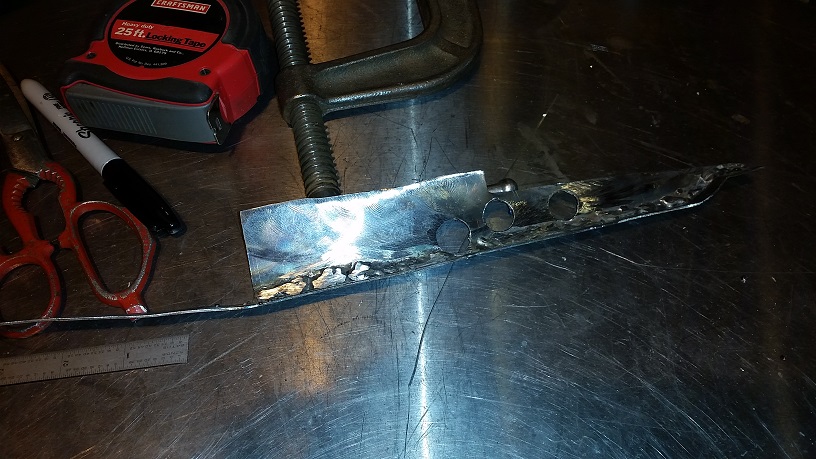 Patch welded in. Need to touch up a couple pin holes that I saw. I'll tidy them up tomorrow. 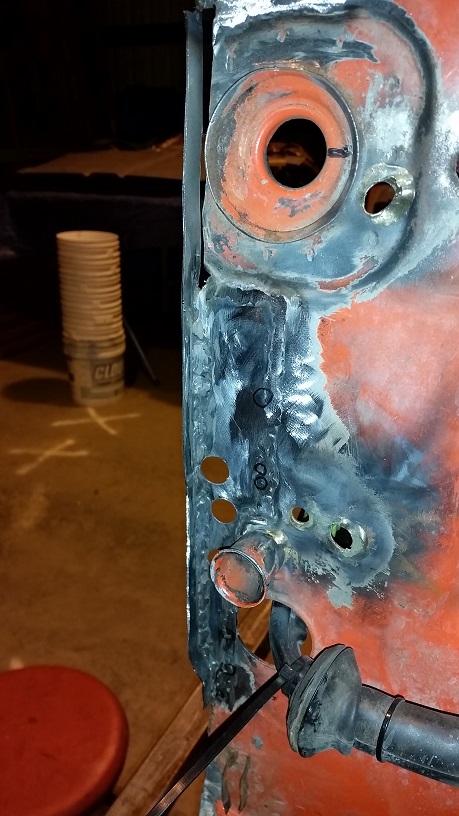 |
| cary |
 Nov 20 2014, 10:01 PM Nov 20 2014, 10:01 PM
Post
#359
|
|
Advanced Member     Group: Members Posts: 3,900 Joined: 26-January 04 From: Sherwood Oregon Member No.: 1,608 Region Association: Pacific Northwest 
|
Back to work ............
I start with filling the gap between the shift bushing console and the firewall flange. 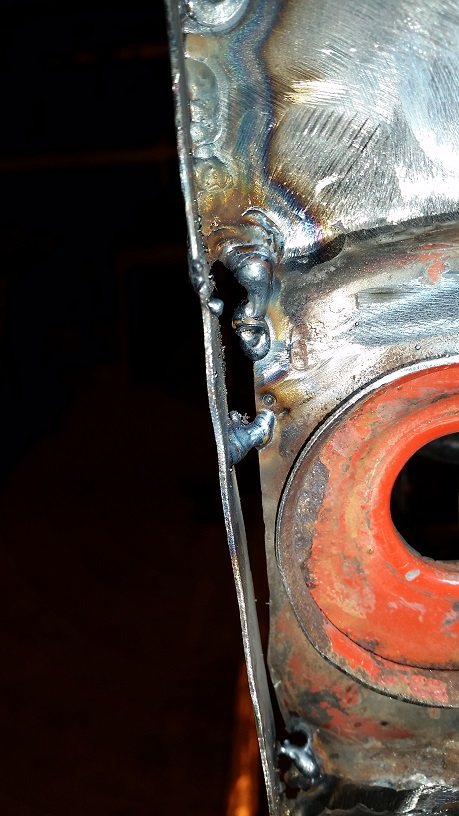 So I start with tacking it together. Then I start the stitch welding. I use 4 different shapes and sizes of brass to back the weld. Key is patience. No more than four pulses at one time without stopping and cooling with an air hose. Did I say be patient? This was actually easier than it looks. New 18 gauge for the flange. And the firewall and shifter console are heavy enough to absorb the heat. I am starting to do a better job of wire brushing between welds. It seems to be helping. 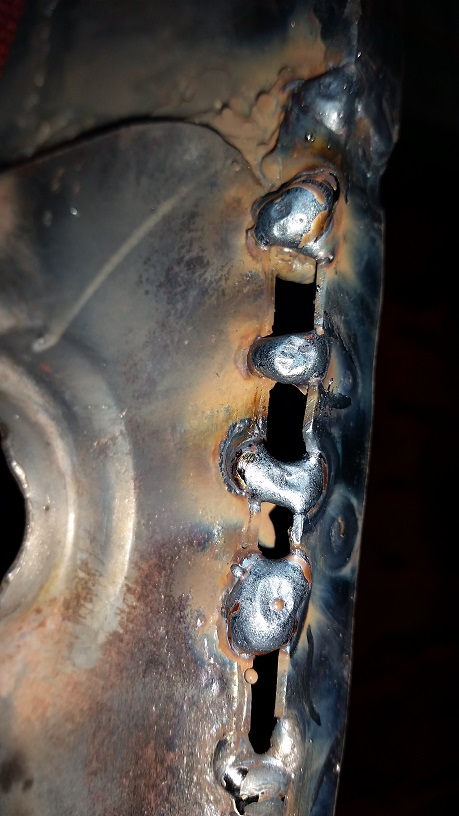 All done and tidied up .......... (IMG:style_emoticons/default/piratenanner.gif) (IMG:style_emoticons/default/piratenanner.gif) 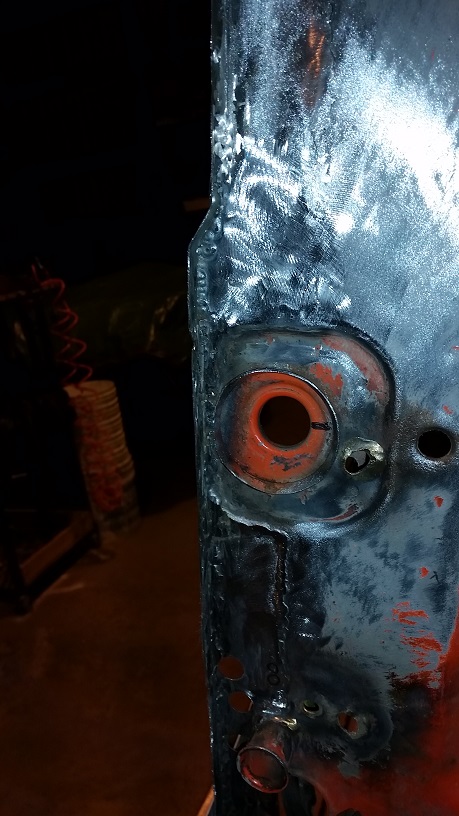 This was actually the welding that I feared the most. I thought it was going to be tougher than it was. Or maybe I'm just learning what to do and not to do. Practice, practice and practice. Entire flange is installed side to side. 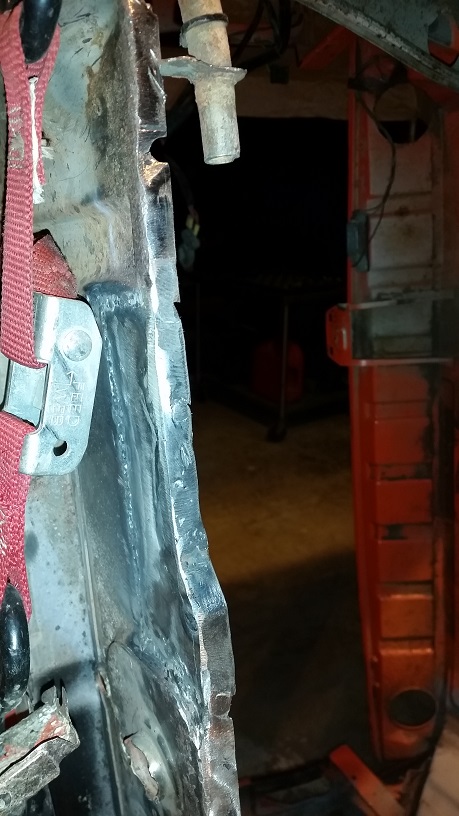 Here's the back. Without touching it up or grinding. 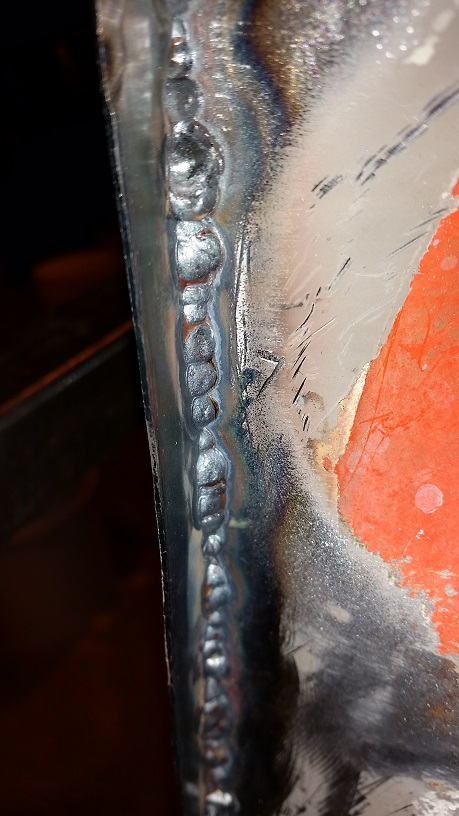 |
| cary |
 Nov 20 2014, 10:09 PM Nov 20 2014, 10:09 PM
Post
#360
|
|
Advanced Member     Group: Members Posts: 3,900 Joined: 26-January 04 From: Sherwood Oregon Member No.: 1,608 Region Association: Pacific Northwest 
|
Finally opened up my Christmas present.
TP Tools. 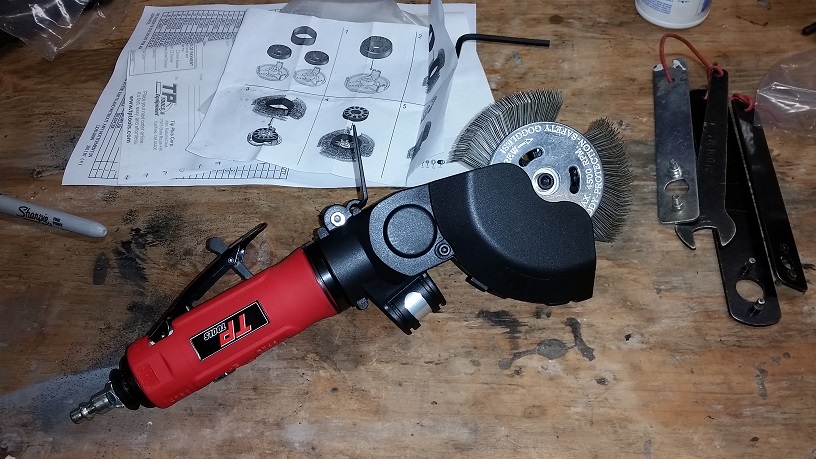 I used it to remove the seam sealer around the bottom of the firewall. Easy deal. That way the welding magnets could stick to hold up the new flange. Then I tinkered with removing the undercoating in the front fender. |
| cary |
 Nov 20 2014, 10:13 PM Nov 20 2014, 10:13 PM
Post
#361
|
|
Advanced Member     Group: Members Posts: 3,900 Joined: 26-January 04 From: Sherwood Oregon Member No.: 1,608 Region Association: Pacific Northwest 
|
Then I bought some power tool cord repair sleeves to use as fuel line firewall bushing.
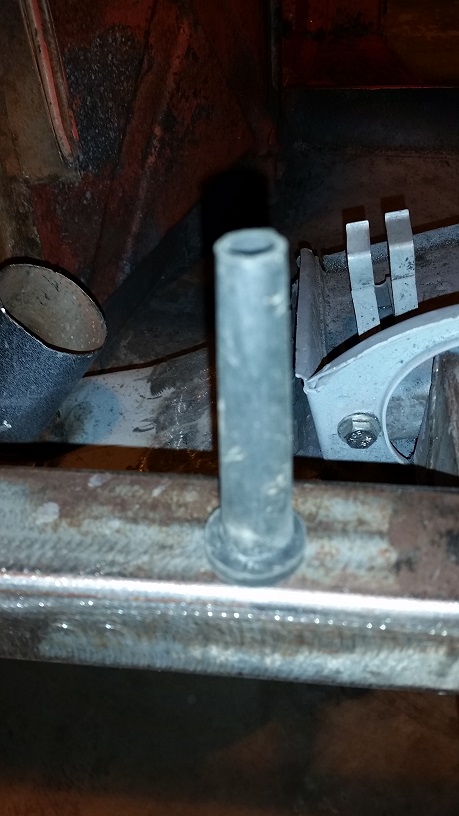 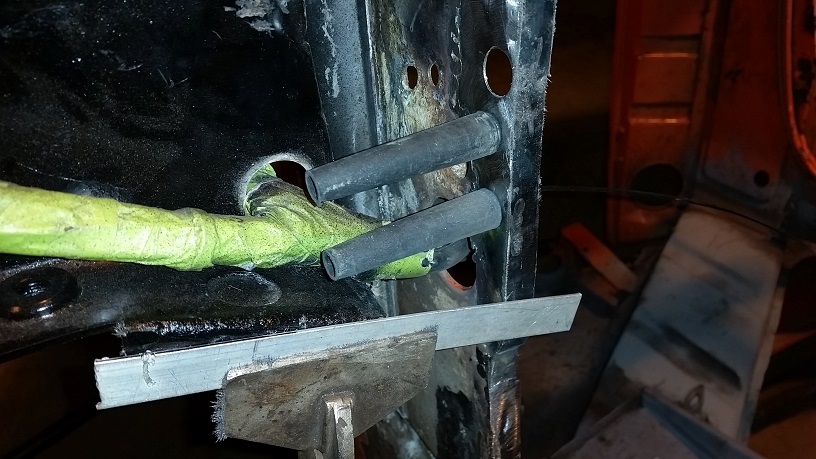 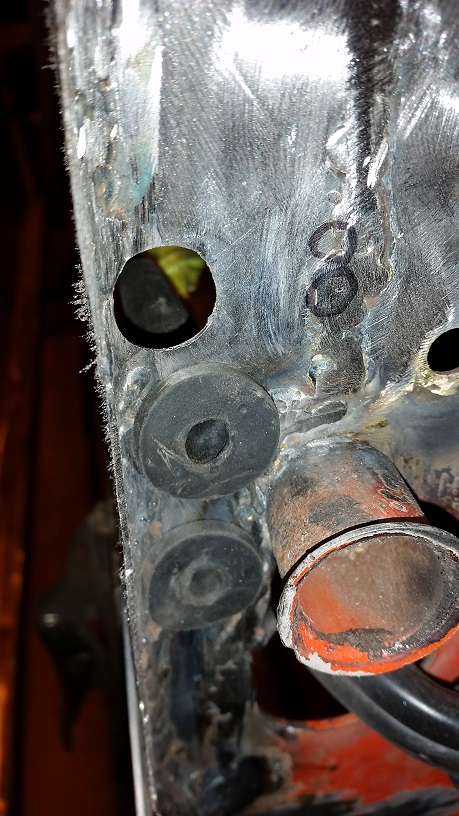 I'll trim them down after I see if they'll work. |
| cary |
 Nov 22 2014, 08:11 AM Nov 22 2014, 08:11 AM
Post
#362
|
|
Advanced Member     Group: Members Posts: 3,900 Joined: 26-January 04 From: Sherwood Oregon Member No.: 1,608 Region Association: Pacific Northwest 
|
No pictures from yesterday.
Welded in a cover over the left front suspension point next to the pedal/master cylinder mounting. Hole had been punched in it. Cant imagine why? Threads are good. Then we went about building some patches on the upper rear firewall right above the seam to the lower portion. These are caused by moisture getting behind the engine sound pad. The new Christmas tool made short work of that glue/hair left from the firewall pad on the engine compartment side. All I can add from yesterday is. Make sure you make the patch big enough to make sure your welding the new patch to good metal. You'll spend more time stitching the big hole you blew in the material than you will welding in the whole piece. Dammit that pisses me off................. Flashed my eyes tinkering with my helmet on my first weld. Made for a tough start to the day. I was tinkering with grind setting. Turns off the auto darkening. Probably wont use that again ................... When I started burning rust it made it a little tough to see. Plus like a dumbass I laid down too much weld thru primer, again, Which causes another good flash. By the end of the day all was good. All fine this am. |
| arkitect |
 Nov 23 2014, 09:33 AM Nov 23 2014, 09:33 AM
Post
#363
|
|
Senior Member    Group: Members Posts: 617 Joined: 3-March 10 From: Stockton, CA Member No.: 11,426 Region Association: None |
Cary,
Amazing work you've done on this teener. Keep it up, like to see it when it's done. Dave (IMG:style_emoticons/default/first.gif) |
| worn |
 Nov 23 2014, 11:19 AM Nov 23 2014, 11:19 AM
Post
#364
|
|
Winner of the Utah Twisted Joint Award     Group: Members Posts: 3,383 Joined: 3-June 11 From: Madison, WI Member No.: 13,152 Region Association: Upper MidWest 
|
As Super In Law was reading I went to getting ready to install the right side suspension console. Super In Law had his measurements on the white car from when we changed it out 7 or 8 years ago. Got the triangle measurement from the World info. Found a piece of all thread and nuts needed to create the measurement.  Hi Cary, This is one of my favorite threads. With the console have you considered mounting the outer ear and spacing with that? I would think that would be a critical dimension. You and super in law are hereby inducted into "L'order du fer grinding dust and fire". Glad to see you both side by side. |
| worn |
 Nov 23 2014, 11:23 AM Nov 23 2014, 11:23 AM
Post
#365
|
|
Winner of the Utah Twisted Joint Award     Group: Members Posts: 3,383 Joined: 3-June 11 From: Madison, WI Member No.: 13,152 Region Association: Upper MidWest 
|
Flashed my eyes tinkering with my helmet on my first weld. Made for a tough start to the day. I was tinkering with grind setting. Turns off the auto darkening. Probably wont use that again ................... When I started burning rust it made it a little tough to see. Plus like a dumbass I laid down too much weld thru primer, again, Which causes another good flash. By the end of the day all was good. All fine this am. Yeah, I got a brand name helmet with auto darkening that you had to turn on every time you use it! So of course I learned if the first flash is too bright to close my eyes, stop, take off the helmet, and push the button inside. That helmet is no longer in use. |
  |
6 User(s) are reading this topic (6 Guests and 0 Anonymous Users)
0 Members:

|
Lo-Fi Version | Time is now: 16th January 2025 - 10:14 AM |
Invision Power Board
v9.1.4 © 2025 IPS, Inc.


