|
|

|
Porsche, and the Porsche crest are registered trademarks of Dr. Ing. h.c. F. Porsche AG.
This site is not affiliated with Porsche in any way. Its only purpose is to provide an online forum for car enthusiasts. All other trademarks are property of their respective owners. |
|
|
  |
| cary |
 Nov 23 2014, 02:11 PM Nov 23 2014, 02:11 PM
Post
#366
|
|
Advanced Member     Group: Members Posts: 3,900 Joined: 26-January 04 From: Sherwood Oregon Member No.: 1,608 Region Association: Pacific Northwest 
|
Next time ....................
We're going to build a jig that bolts to the ear, BEFORE we take off the old one. Kinda of like what RD did. That way it will line back up EXACTLY. Plus if we hadn't had to replace the upper long it would have been a little easier to align back in the exact spot. I know everyone says all it has to be is within 3-4mm. But I like zero if it can be done. The other dimension that I will take next time is the distance between the upper longs right where they go into the rear trunk. I think I was off just a smidgeon in that spot. Which caused a top to bottom minute twist in the upper long. Which I believe is what caused my 3/16 issue with the console. Lesson learned. That's why I started with my worst car first ............. 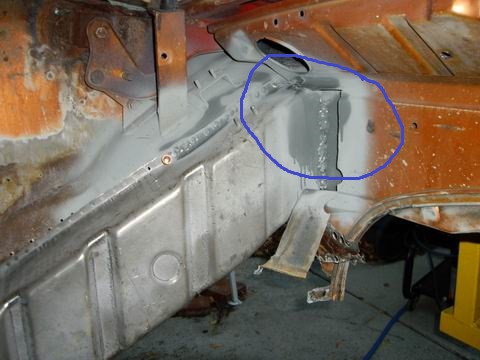 This post has been edited by cary: Nov 25 2014, 08:07 AM |
| cary |
 Nov 24 2014, 10:15 PM Nov 24 2014, 10:15 PM
Post
#367
|
|
Advanced Member     Group: Members Posts: 3,900 Joined: 26-January 04 From: Sherwood Oregon Member No.: 1,608 Region Association: Pacific Northwest 
|
Well, here's where we started today. Upper firewall patches.
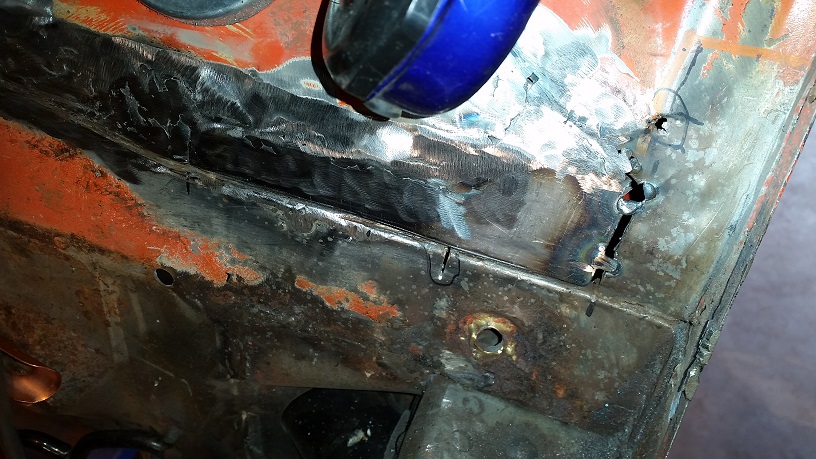 Left patch welded in. 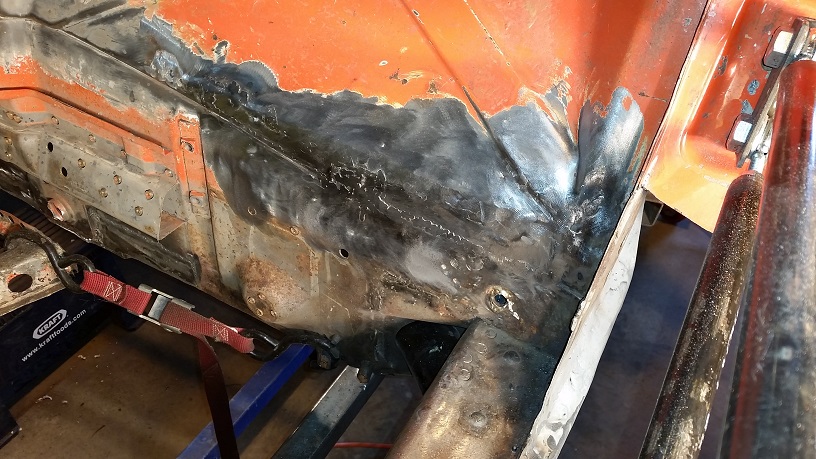 Left all sealed up. 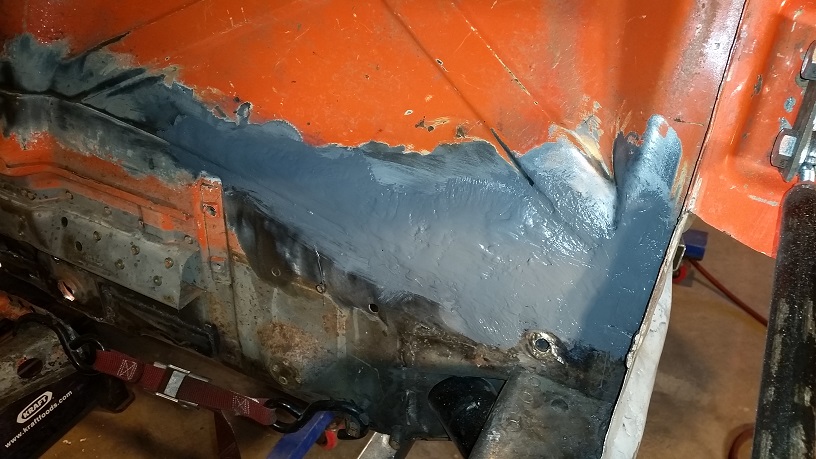 |
| cary |
 Nov 24 2014, 10:20 PM Nov 24 2014, 10:20 PM
Post
#368
|
|
Advanced Member     Group: Members Posts: 3,900 Joined: 26-January 04 From: Sherwood Oregon Member No.: 1,608 Region Association: Pacific Northwest 
|
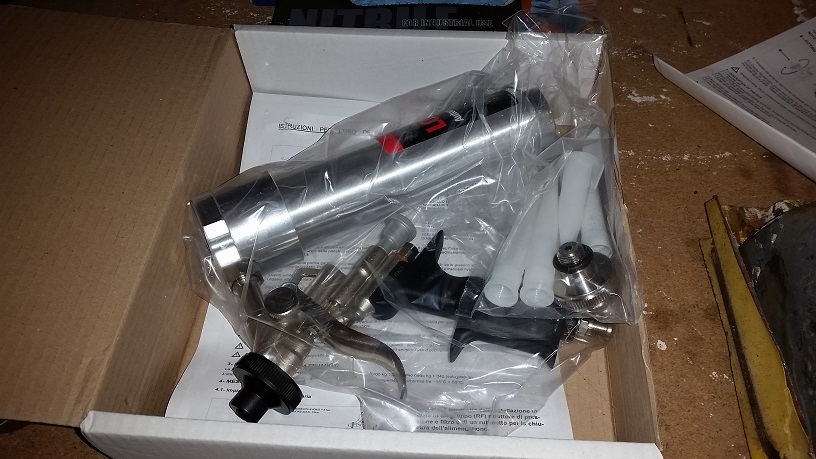
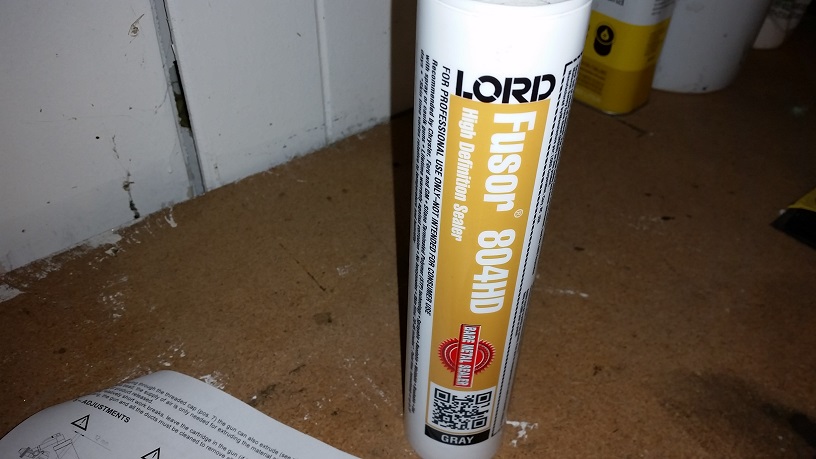
I was hoping to use my new spray seam sealer tool. But it's still a bit too cold. Plus I found that tube of seam sealer that I bought with the gun was outdated.
  |
| cary |
 Nov 24 2014, 10:23 PM Nov 24 2014, 10:23 PM
Post
#369
|
|
Advanced Member     Group: Members Posts: 3,900 Joined: 26-January 04 From: Sherwood Oregon Member No.: 1,608 Region Association: Pacific Northwest 
|
Then I move to the middle patch.
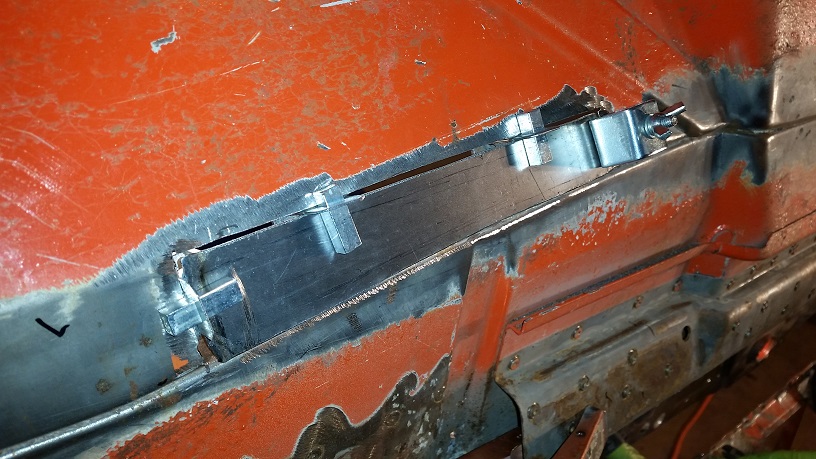 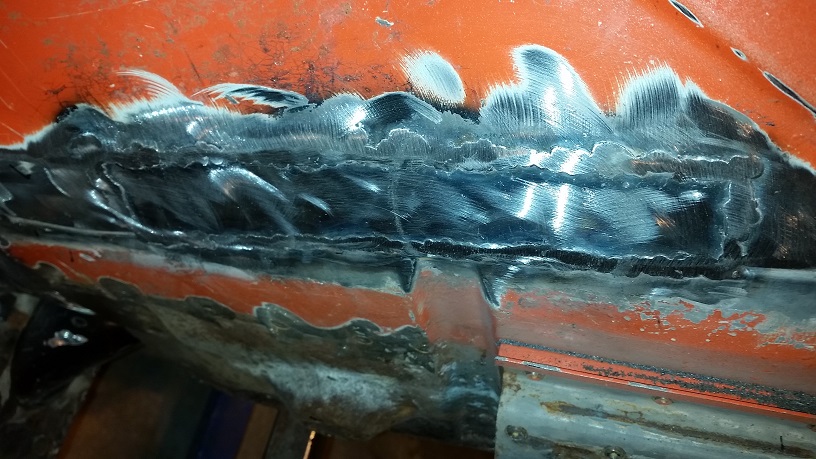 Trying to be a good boy and not over grind. I'll take it down just a bit more before I seam seal it. |
| cary |
 Nov 24 2014, 10:52 PM Nov 24 2014, 10:52 PM
Post
#370
|
|
Advanced Member     Group: Members Posts: 3,900 Joined: 26-January 04 From: Sherwood Oregon Member No.: 1,608 Region Association: Pacific Northwest 
|
Then I move to the right patch. Super In Law is making the patches right ahead of me.
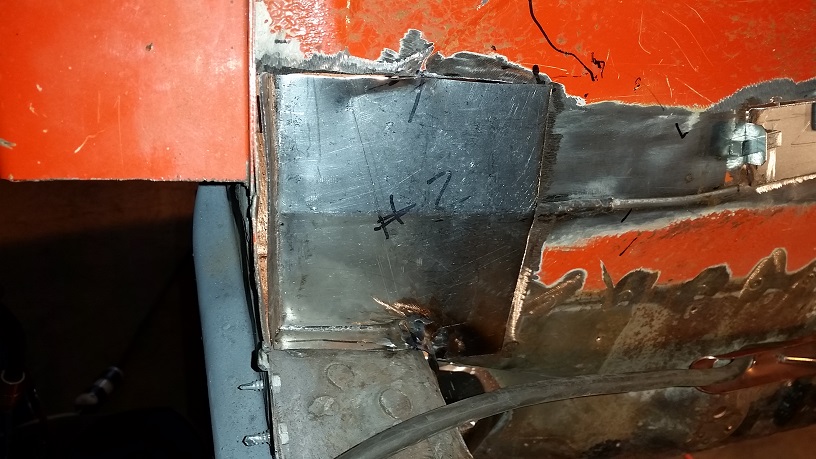 A couple spots got a little too rusty on the backside. Therefore blew out a big hole. But it was exacerbated by the fact that Super In Law turned up the wire speed to 40 and I missed it. Too Hot. 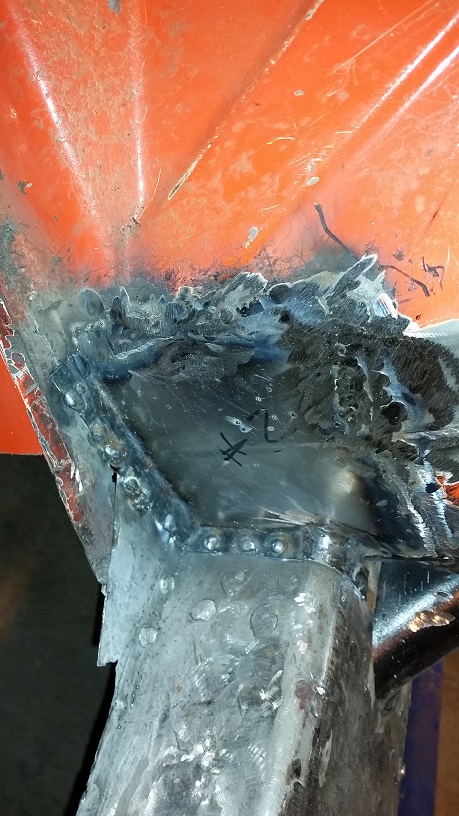 Elected to put the flange on the inside. It will make for a better sealed joint in the bottom of the hell hole. 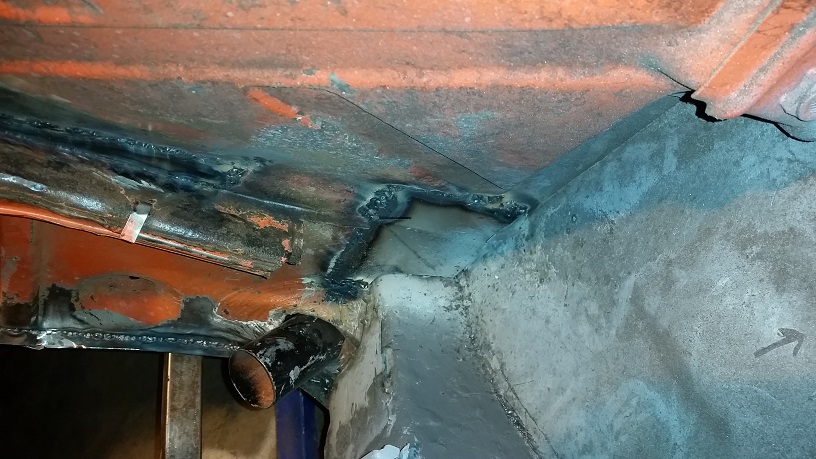 While I'm welding in the last patch, Super In Law is designing a rolling car stacker. We went and looked at a couple more tubs yesterday. A 74 and a 75. Both with titles. Both with engines and transmissions. One needs a back half floor pan. The other car might need a patch on the bottom side of the right long. Both hell holes are solid. He wants to build a wooden 4 * 4 gadget that we tow would around with the 4 wheeler. I'm thinking we put up the next two sections of pallet racking. Then I rent a fork lift and put them in the racking. Minus engine, transmission and interiors |
| saigon71 |
 Nov 25 2014, 07:54 AM Nov 25 2014, 07:54 AM
Post
#371
|
|
Advanced Member     Group: Members Posts: 2,007 Joined: 1-June 09 From: Dillsburg, PA Member No.: 10,428 Region Association: MidAtlantic Region 

|
Great progress! Keep on (IMG:style_emoticons/default/sawzall-smiley.gif) (IMG:style_emoticons/default/smash.gif) (IMG:style_emoticons/default/welder.gif)
|
| cary |
 Dec 20 2014, 08:26 PM Dec 20 2014, 08:26 PM
Post
#372
|
|
Advanced Member     Group: Members Posts: 3,900 Joined: 26-January 04 From: Sherwood Oregon Member No.: 1,608 Region Association: Pacific Northwest 
|
Been busy with the brakes on the other 914. Just finished them up
Super In Law is fabricating a locking ring on the rotisserie. Currently we have four pin holes. This will give us infinite locking locations. 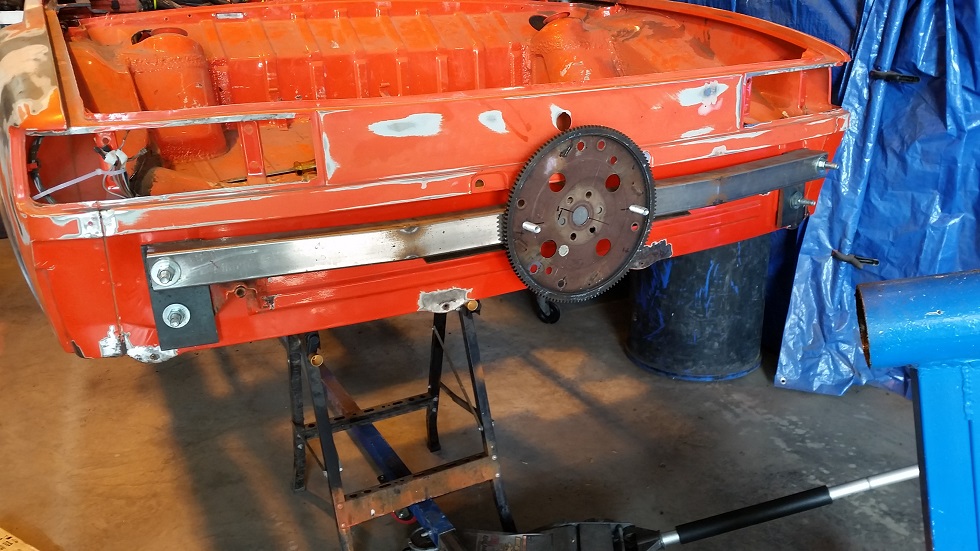 So I decided to teach myself to braze. Kind of got it figured out. I do a beautiful with copper pipe and solder. I'll work on when to pull away the torch. 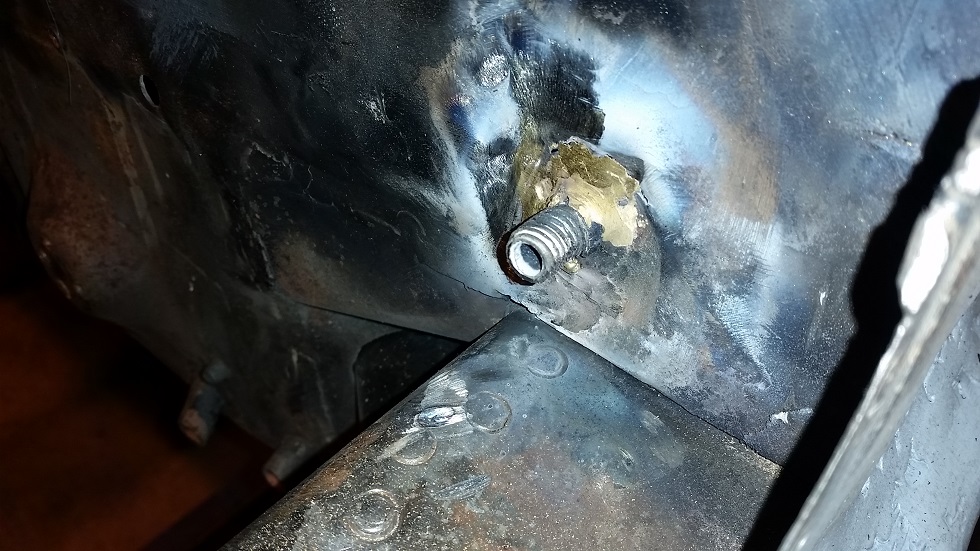 |
| cary |
 Jan 2 2015, 09:46 PM Jan 2 2015, 09:46 PM
Post
#373
|
|
Advanced Member     Group: Members Posts: 3,900 Joined: 26-January 04 From: Sherwood Oregon Member No.: 1,608 Region Association: Pacific Northwest 
|
Back to work ............
On to rebuilding the tubes in the tunnel. All new except for the clutch tube. First shot at brazing the torch wasn't hot enough. Spent my morning coffee time watching brazing videos on YouTube. Now I've got it figured out. Easy Deal. 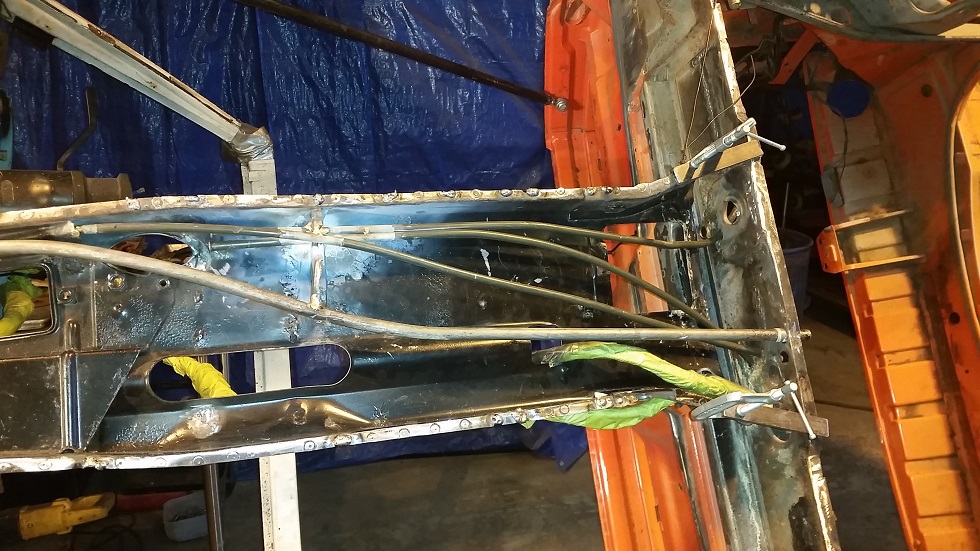 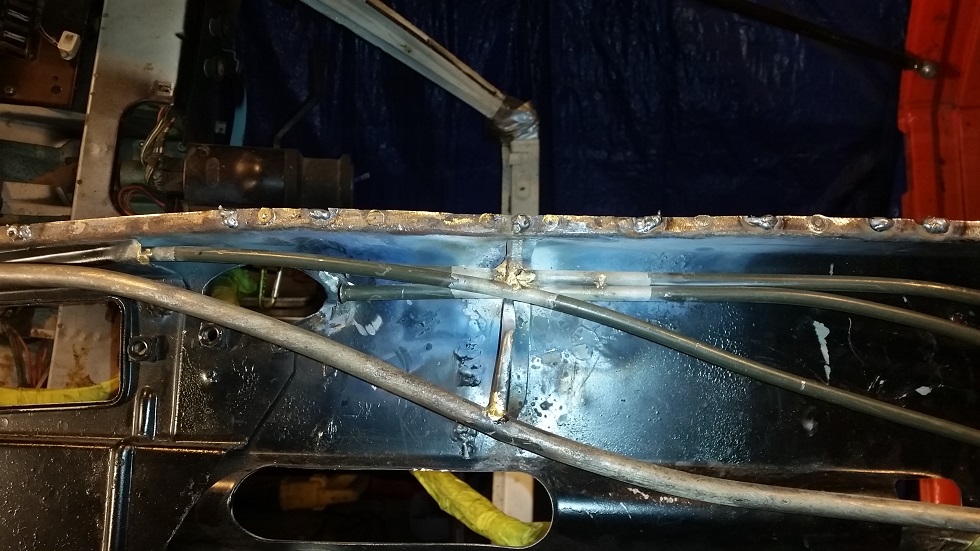 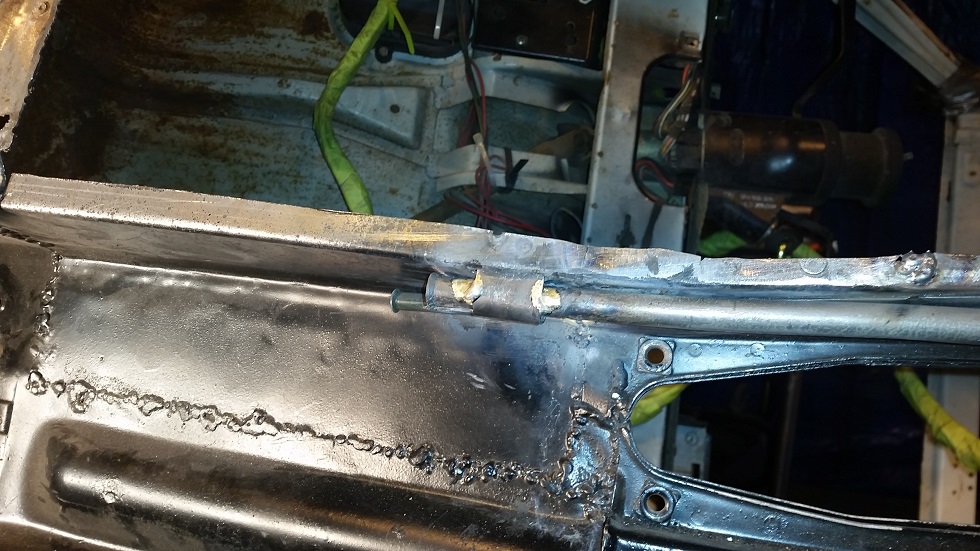 |
| cary |
 Jan 7 2015, 11:19 PM Jan 7 2015, 11:19 PM
Post
#374
|
|
Advanced Member     Group: Members Posts: 3,900 Joined: 26-January 04 From: Sherwood Oregon Member No.: 1,608 Region Association: Pacific Northwest 
|
Building a new center tunnel brake line. To do so I had to put a new bubble flare on one end. Took 4-5 test runs to get it dialed in.
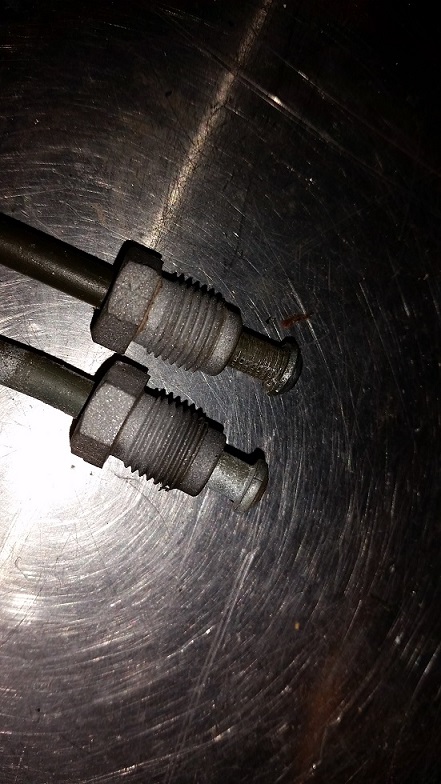 |
| cary |
 Jan 7 2015, 11:29 PM Jan 7 2015, 11:29 PM
Post
#375
|
|
Advanced Member     Group: Members Posts: 3,900 Joined: 26-January 04 From: Sherwood Oregon Member No.: 1,608 Region Association: Pacific Northwest 
|
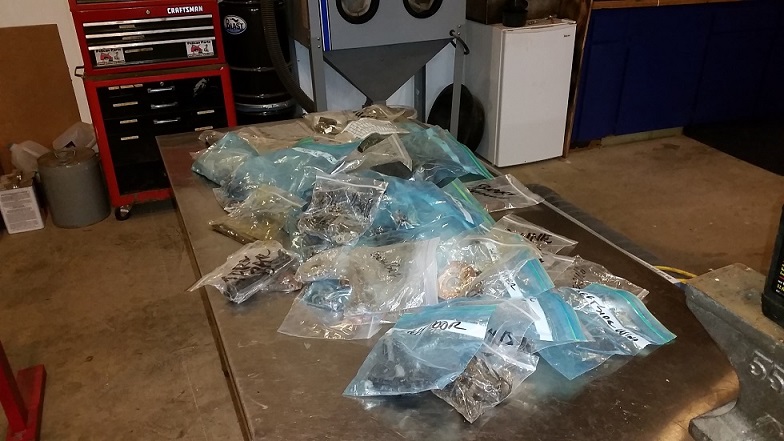 Started the day by pulling all the hardware bags out of the parts totes. I'm working on a plan to hang them on the wall so I can find them as needed. I'm getting tired of digging thru the totes to the find pieces I'm looking for. After I get them hung on the wall then I'll start preparing them for plating. |
| cary |
 Jan 7 2015, 11:33 PM Jan 7 2015, 11:33 PM
Post
#376
|
|
Advanced Member     Group: Members Posts: 3,900 Joined: 26-January 04 From: Sherwood Oregon Member No.: 1,608 Region Association: Pacific Northwest 
|
Ended the day finishing the plumbing in the center tunnel. Added a conduit for the fuel pump wires. It always bugged me that the wire was just flopping around in there.
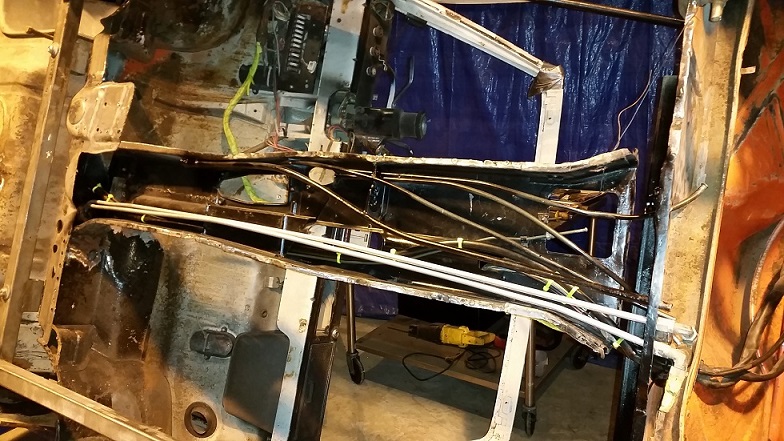 |
| cary |
 Jan 18 2015, 11:02 AM Jan 18 2015, 11:02 AM
Post
#377
|
|
Advanced Member     Group: Members Posts: 3,900 Joined: 26-January 04 From: Sherwood Oregon Member No.: 1,608 Region Association: Pacific Northwest 
|
Haven't stopped working.
1. Prepping the inside of the lower engine bay firewall so it can be sealed up for another 40 years. Nothing exciting to take pictures of. 2. I've been tinkering with the other car so it can get back on the road. DONE. 3. Mark came over and we tinkered with his new fender liners. They're installed on the white car. 4. Super In Law collected all of our drill bits and taught himself how to sharpen them with our Drill Doctor. When the dust cleared we have three good sets. Just need to buy some more 1/8s. |
| cary |
 Jan 28 2015, 09:00 PM Jan 28 2015, 09:00 PM
Post
#378
|
|
Advanced Member     Group: Members Posts: 3,900 Joined: 26-January 04 From: Sherwood Oregon Member No.: 1,608 Region Association: Pacific Northwest 
|
Back at it.
I'm working on filling the spot weld cutter holes left over from the inner lower fire wall removal. 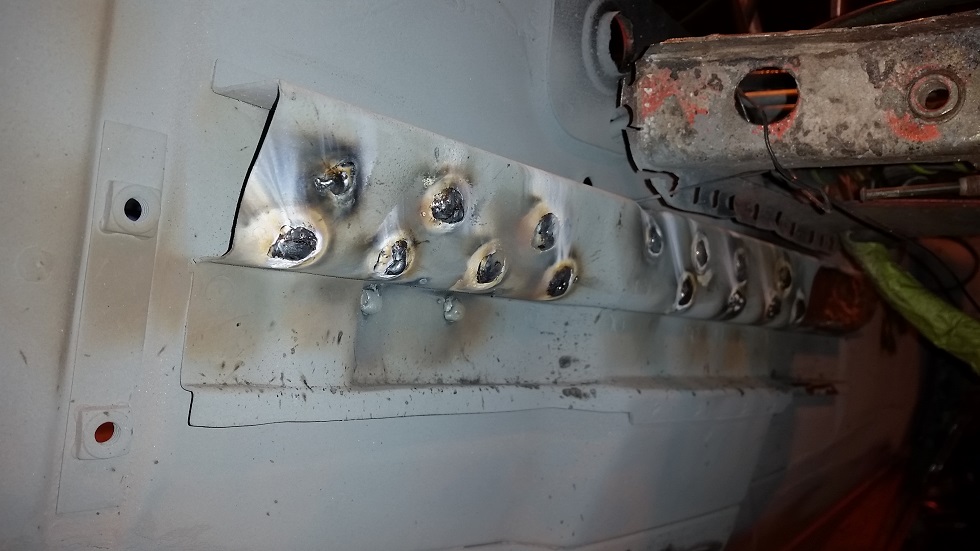 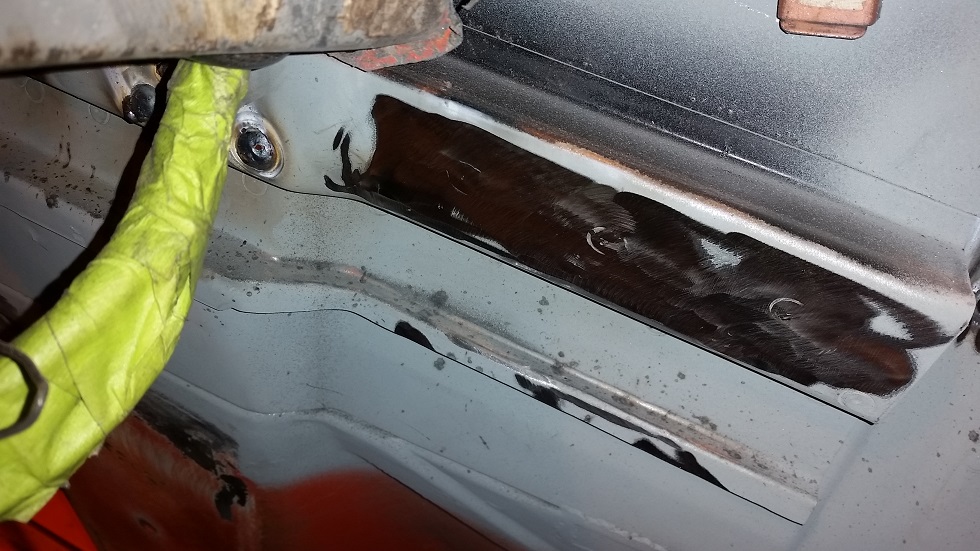 Super In Law is working at prepping the lips and floorpan. Getting ready to install the floorpan. Feels like it will be a big leap. 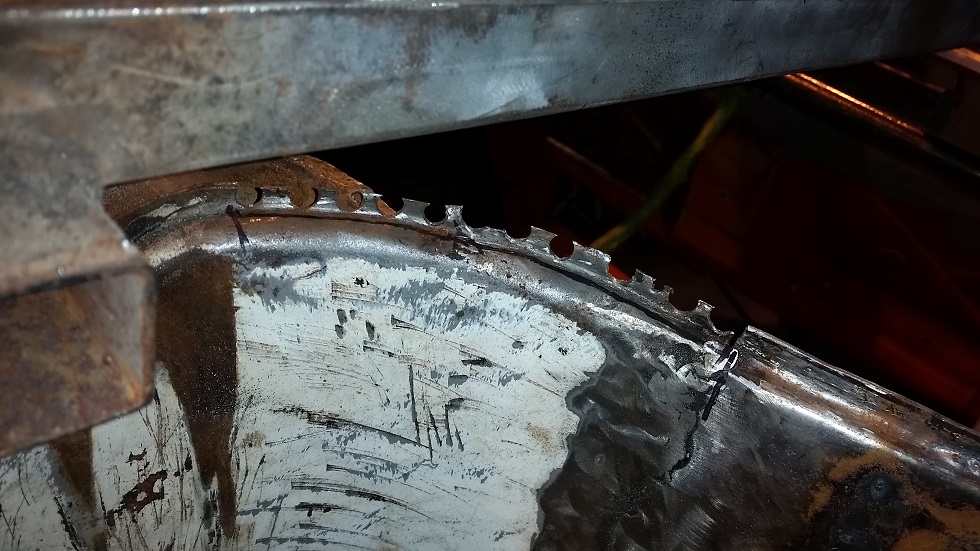 Plus I sold the seats in my 911. Just ordered Corbeau Clubman seats. One piece, and lighter. |
| cary |
 Feb 6 2015, 10:48 AM Feb 6 2015, 10:48 AM
Post
#379
|
|
Advanced Member     Group: Members Posts: 3,900 Joined: 26-January 04 From: Sherwood Oregon Member No.: 1,608 Region Association: Pacific Northwest 
|
Been busy selling the seats in my 911 and removing factory mounts. Now I'm going to fabricate some mounts to install my new Corbeau Clubman seats. Lowering the seat about 2"s I hope.
But we did make the money cut yesterday on the front edge of the front floor pan. Its starting to feel like its coming back together. 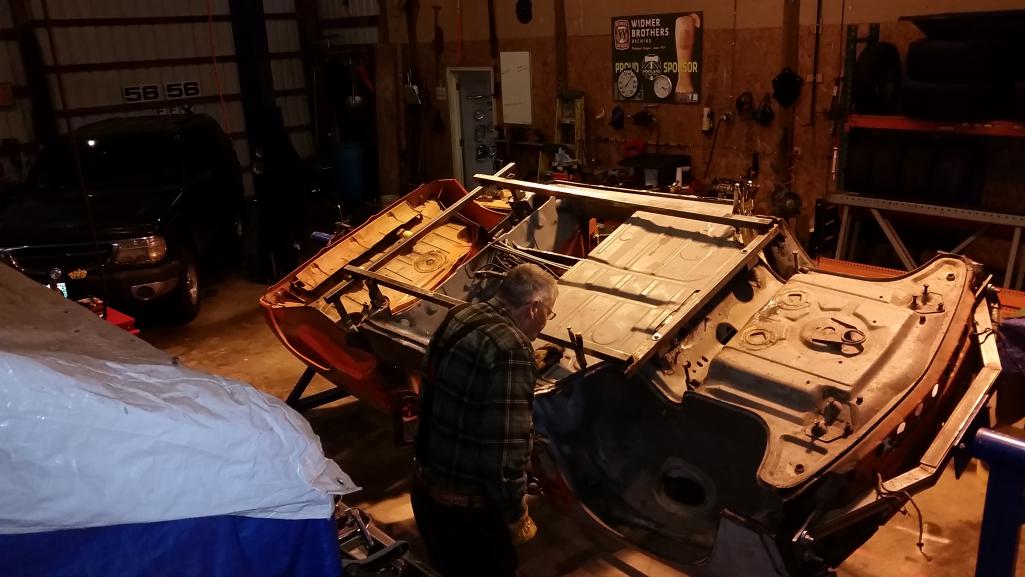 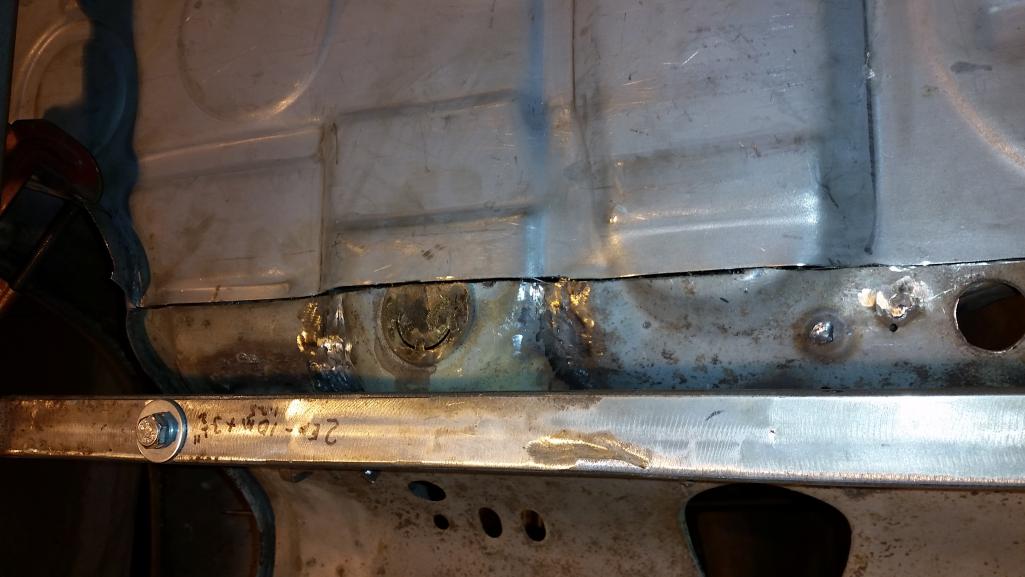 It will take some fiddling and dolly work to get it finessed the way I want it. Nice and Sanitary It's going to be a joy welding on good solid steel. LOL. |
| cary |
 Mar 26 2015, 07:25 AM Mar 26 2015, 07:25 AM
Post
#380
|
|
Advanced Member     Group: Members Posts: 3,900 Joined: 26-January 04 From: Sherwood Oregon Member No.: 1,608 Region Association: Pacific Northwest 
|
Took a time out .............
I've been working on my 911. Lowered the seat rails. Bought new seats. Now I'm tackling one of the hardest (needs LOTS of patience) 911 DIY projects. Installing RS carpet kit. Portland PCA season starts Saturday. Hopefully I'll get the carpet finished on Friday. But while we're at it Super In Law (Grandpa Jack) is installing some new to us pallet racking. 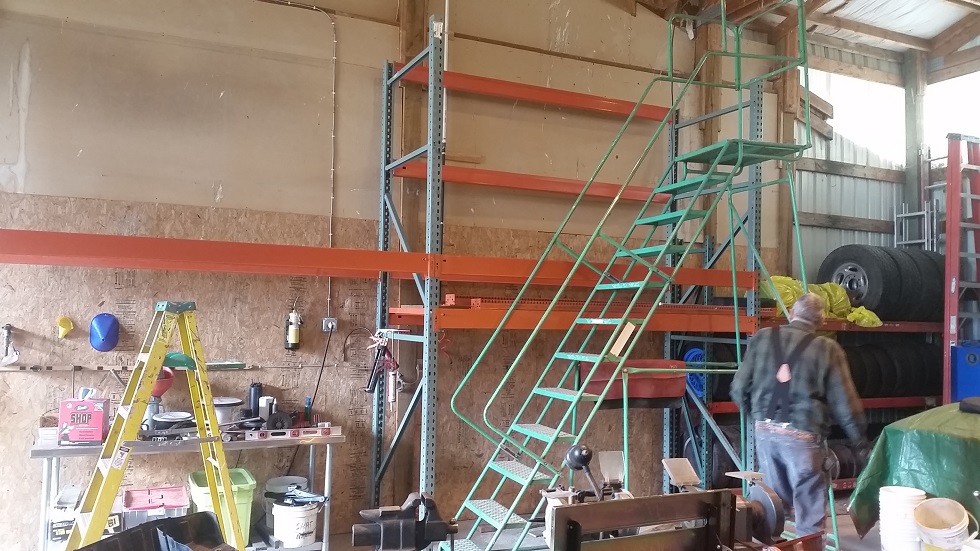 |
| Larmo63 |
 Mar 26 2015, 07:35 AM Mar 26 2015, 07:35 AM
Post
#381
|
|
Advanced Member     Group: Members Posts: 4,267 Joined: 3-March 14 From: San Clemente, Ca Member No.: 17,068 Region Association: Southern California |
Damn, Granpa Jack is a handy man to have around!
Good meeting you in Corona Del Mar and The swap a few weeks ago. |
| cary |
 May 8 2015, 08:38 AM May 8 2015, 08:38 AM
Post
#382
|
|
Advanced Member     Group: Members Posts: 3,900 Joined: 26-January 04 From: Sherwood Oregon Member No.: 1,608 Region Association: Pacific Northwest 
|
Well we're finally back to working on the 914 rustoration. 911 is all set to go for the AX season. Seems likes its been a loooonnnggg time. For the PNW folks, I've been involved in the transition from Albertsons to Haggen. Its been a long couple of months.
Started the day by tidying up the shop. 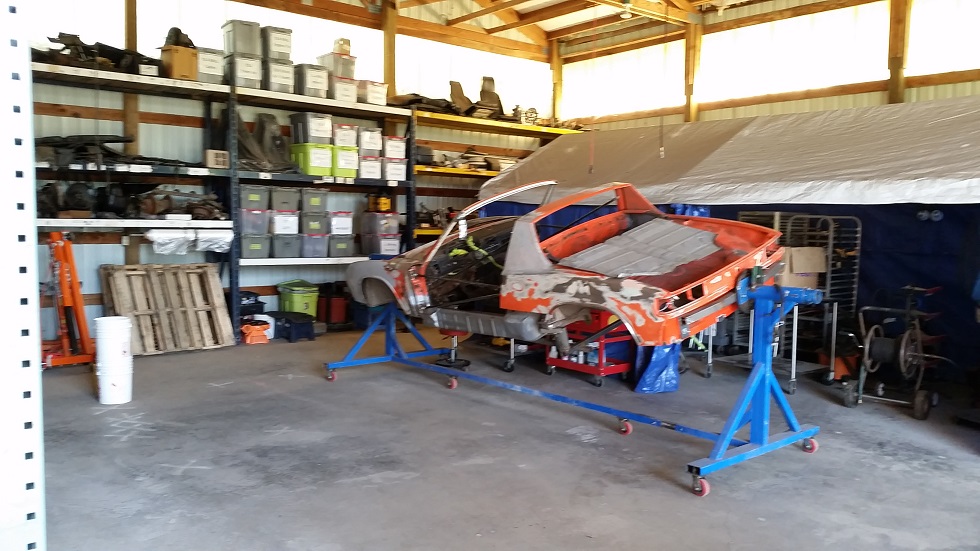 Ended the day with the front edge of the front floor pan welded and tidied up. Quite a bit of fiddling to get it to line up perfectly. Next time suggestion, I would make the cut/seam to the tub be all up on the top/flat surface. Passenger side looks tidy, Drivers side I was down in a dip and couldn't really tidy to the weld as much as I like. As for the fiddling. It was relatively easy work. I never welded more than an inch after I had all my tacks in place. 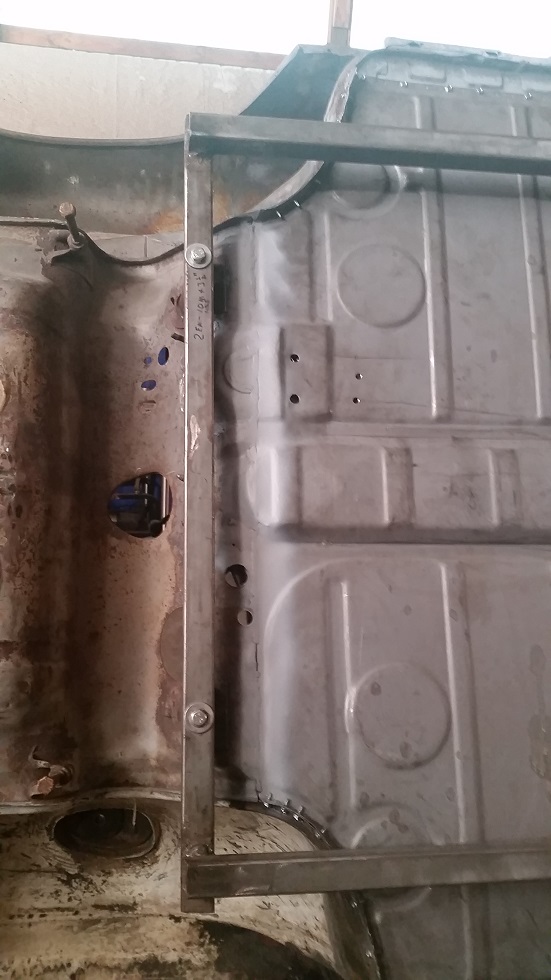 As you can see I have the rest of the pan all screwed into place. Ready to go for tomorrow. I finally feel like we're making progress, man what a feeling. I left the shop with huge smile on my face. Oh yeah, it's really fun welding on NEW RD metal. I only ran into a couple thin spots when mating up to the tub. All it takes is a little bump down in heat, I mean a little. My MillerMatic 180 has settings for metal gauge. So lets say I'm operating at 17.25 on the dial. I'll bump it up to 17.50 -17.65 and puddle the hole closed. But for that front seam I've been running in the mid 17's. But that's not seam welding, its stitch welding. Maybe three puddles max. Man do you want to keep going. But your putting way to much heat in one spot. Take your finger off the trigger. Clarification on the Caryism ........... Down in heat means up in metal gauge on the dial. I'll shoot a picture on the dial tomorrow. I didn't weld in the pedal support yet. I wanted to get the seam welded first. You can see on Adam's RD floor install video you'll need to elongate the hole in the pedal support just a smidgen to get the pedal support to align correctly. Mine was exactly the same. A word of wisdom, when you lay the pedal support on the pan to draw where to drill the holes. Draw the hole about 1/2 the width of the stud towards the fire wall. That compensates for the angle. A Habor Freight step drill bit was real handy for drilling the holes. If you've keep up with the entire thread you can kind of figure out that I'm kind of fixture/tool/gadget whore. We built a jig to hold up the floor because the inner bottom firewall has yet to be installed. Tunnel is still loose. Seems to have worked great. Built two. One for the front, one for the back. It was made out of an old bed frame. 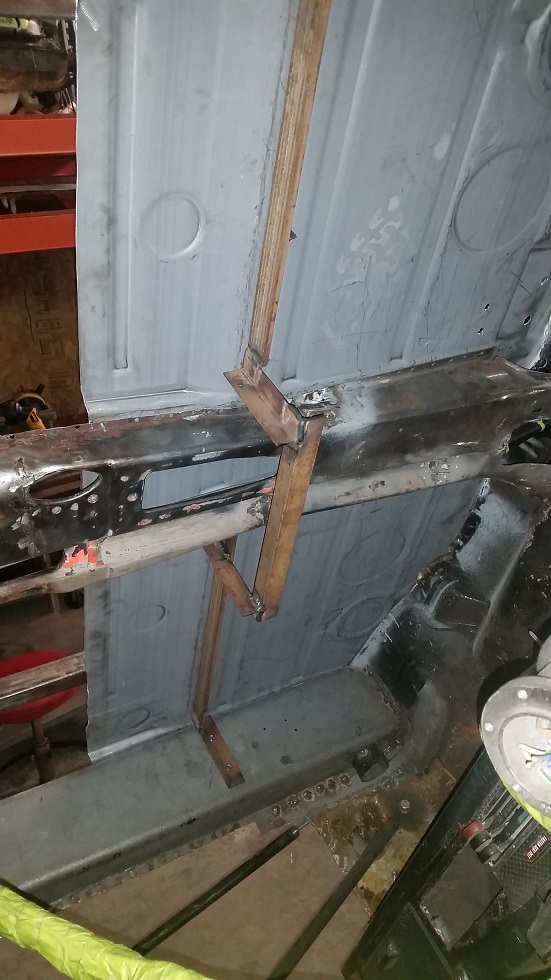 Might stop at the paint store and buy some spray on seam sealer for the other new toy that I've never used. (IMG:style_emoticons/default/biggrin.gif) (IMG:style_emoticons/default/biggrin.gif) (IMG:style_emoticons/default/biggrin.gif) (IMG:style_emoticons/default/biggrin.gif) (IMG:style_emoticons/default/biggrin.gif) (IMG:style_emoticons/default/biggrin.gif) (IMG:style_emoticons/default/biggrin.gif) (IMG:style_emoticons/default/biggrin.gif) This post has been edited by cary: May 8 2015, 09:35 PM |
| cary |
 May 8 2015, 08:56 AM May 8 2015, 08:56 AM
Post
#383
|
|
Advanced Member     Group: Members Posts: 3,900 Joined: 26-January 04 From: Sherwood Oregon Member No.: 1,608 Region Association: Pacific Northwest 
|
Another Tool Whore segment. In Adam's RD video he mentions that he drills the rosette weld holes. That's way too much work. I use my air punch wherever I can. I does have thickness and depth limitations. But it works in most places.
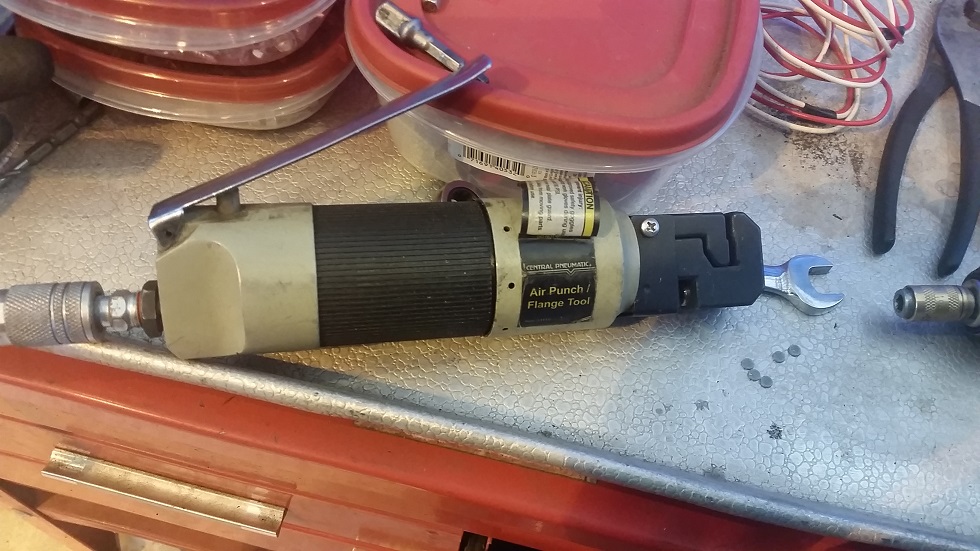 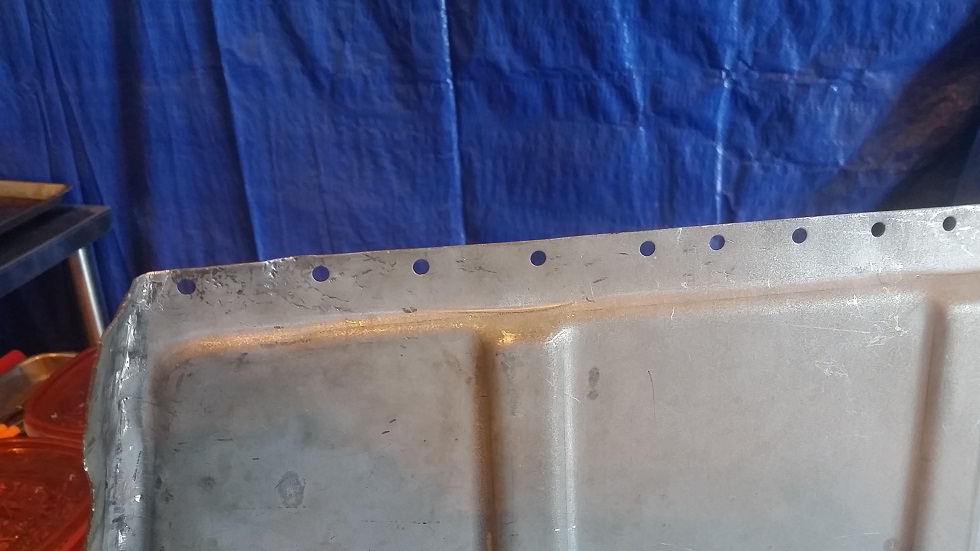 http://www.harborfreight.com/air-punch-flange-tool-1110.html Another Tool Whore word of advice. Don't buy HF air fittings, they SUCK. I use NAPA or Home Depot with nice leak free results. |
| cary |
 May 8 2015, 09:33 PM May 8 2015, 09:33 PM
Post
#384
|
|
Advanced Member     Group: Members Posts: 3,900 Joined: 26-January 04 From: Sherwood Oregon Member No.: 1,608 Region Association: Pacific Northwest 
|
I had to re-cut the center seam again. Had a little too much hanging off the back. (IMG:style_emoticons/default/mad.gif)
All it takes is time. So by the middle of the day I was ready to start welding. Here's the promised shot to the welder dials. 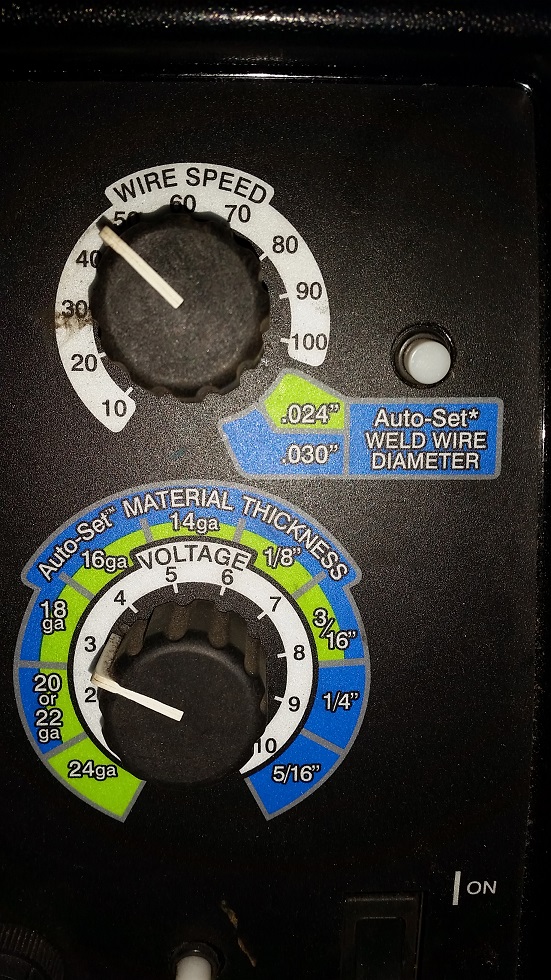 Then I started stitching ............ 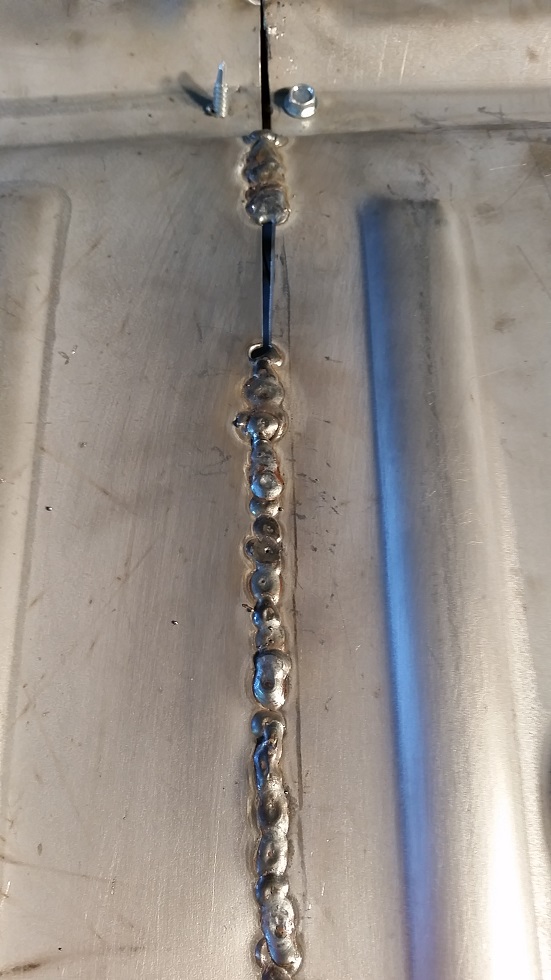 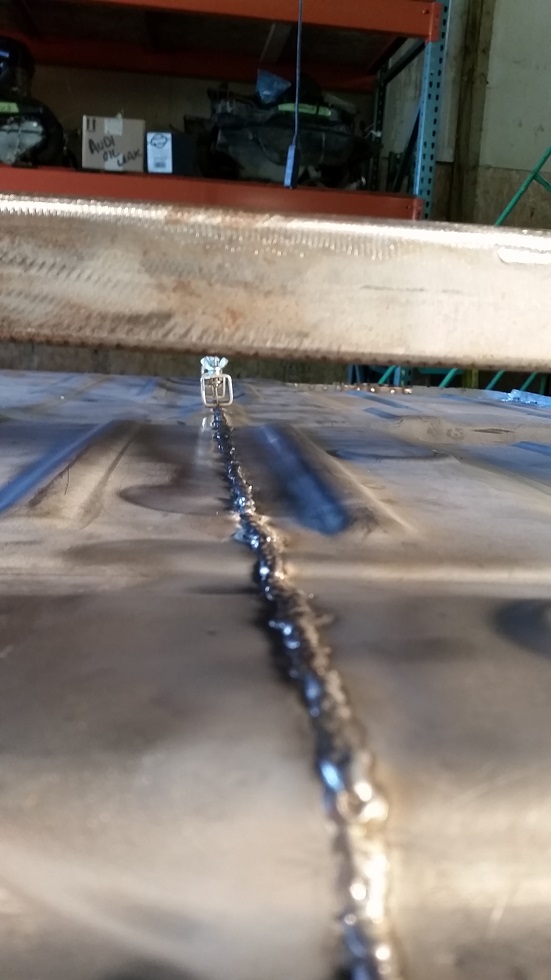 |
| cary |
 May 8 2015, 09:43 PM May 8 2015, 09:43 PM
Post
#385
|
|
Advanced Member     Group: Members Posts: 3,900 Joined: 26-January 04 From: Sherwood Oregon Member No.: 1,608 Region Association: Pacific Northwest 
|
Another lesson today. After watching Adam's RD floor install video. I was thinking it was a waste of time putting a screw into rosette hole. So I did every other hole.
Come to find out there is a method to his madness. The holes punched out without a screw ran though them are a pain in the ass. Your fighting the flash off of the weld thru primer in every weld. The screw holes created a much nicer weld. All you need to do is start the wire on the bottom layer and circle your way out. 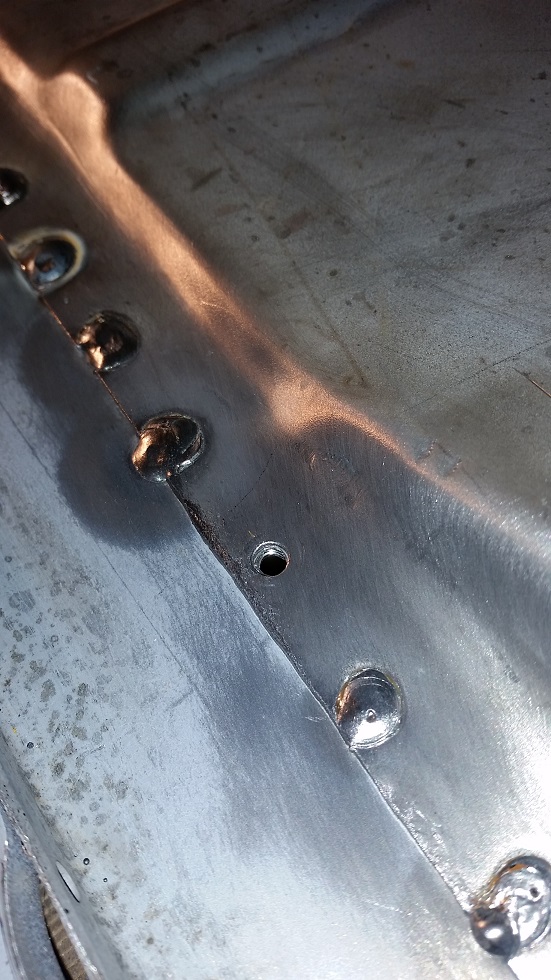 |
  |
63 User(s) are reading this topic (63 Guests and 0 Anonymous Users)
0 Members:

|
Lo-Fi Version | Time is now: 16th January 2025 - 01:08 PM |
Invision Power Board
v9.1.4 © 2025 IPS, Inc.


