|
|

|
Porsche, and the Porsche crest are registered trademarks of Dr. Ing. h.c. F. Porsche AG.
This site is not affiliated with Porsche in any way. Its only purpose is to provide an online forum for car enthusiasts. All other trademarks are property of their respective owners. |
|
|
  |
| cary |
 Jun 5 2015, 10:14 PM Jun 5 2015, 10:14 PM
Post
#426
|
|
Advanced Member     Group: Members Posts: 3,900 Joined: 26-January 04 From: Sherwood Oregon Member No.: 1,608 Region Association: Pacific Northwest 
|
Here are the fiddling weapons I was talking about.
Metal. Different shapes an sizes. 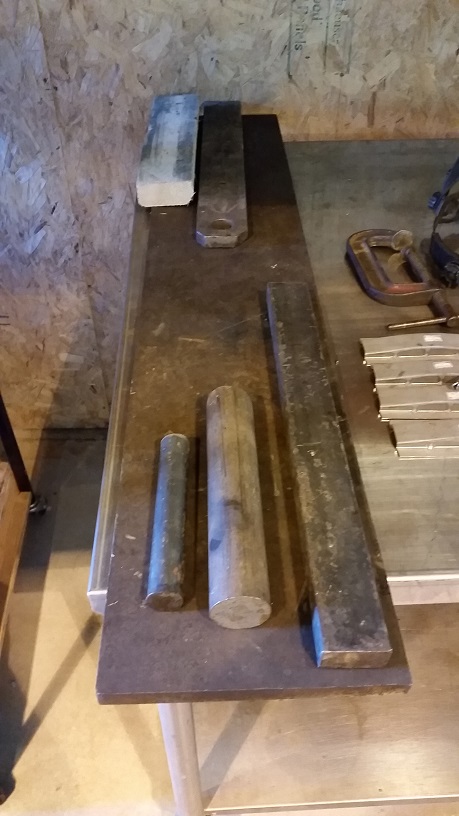 Something to hold the metal and wood. 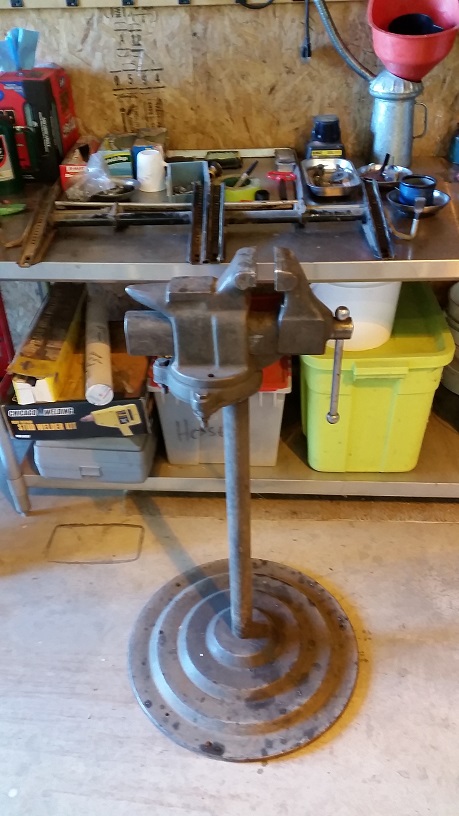 Something to pound on. 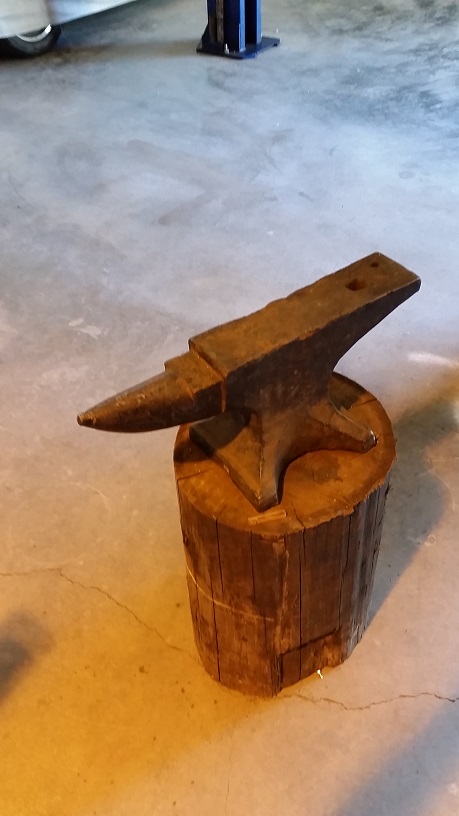 |
| cary |
 Jun 5 2015, 10:32 PM Jun 5 2015, 10:32 PM
Post
#427
|
|
Advanced Member     Group: Members Posts: 3,900 Joined: 26-January 04 From: Sherwood Oregon Member No.: 1,608 Region Association: Pacific Northwest 
|
Decided I'd cut out the e-brake light switch while the brace was out. Took the location and size off the yellow (74) car.
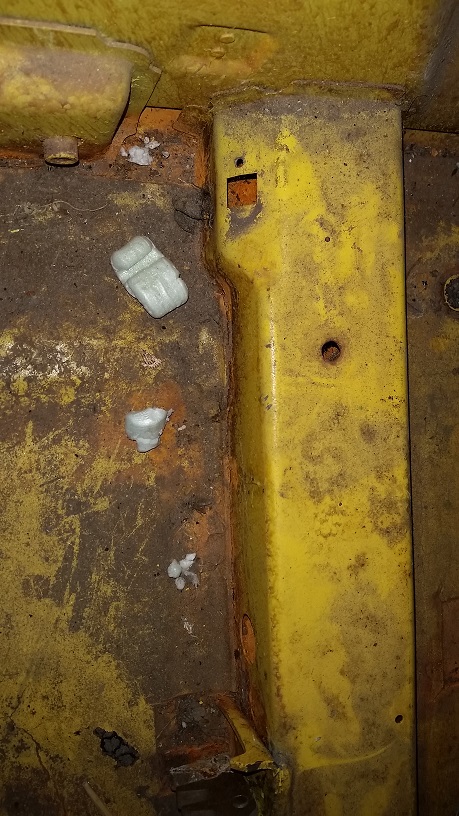 It's just a smidgen shy of a 1/2" square. Drilled a hole in each corner. Then cut between the holes with the Dremel. Should have used a smaller cutting disc. But I like the reinforced one ................ Does blow apart when you breath on it. 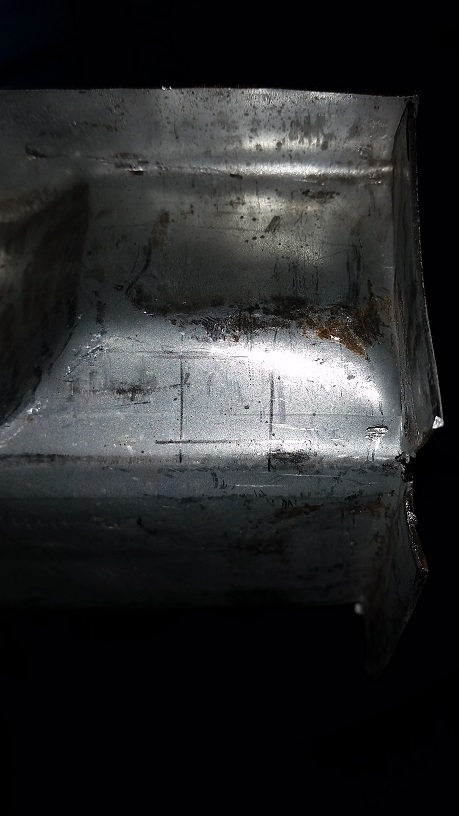 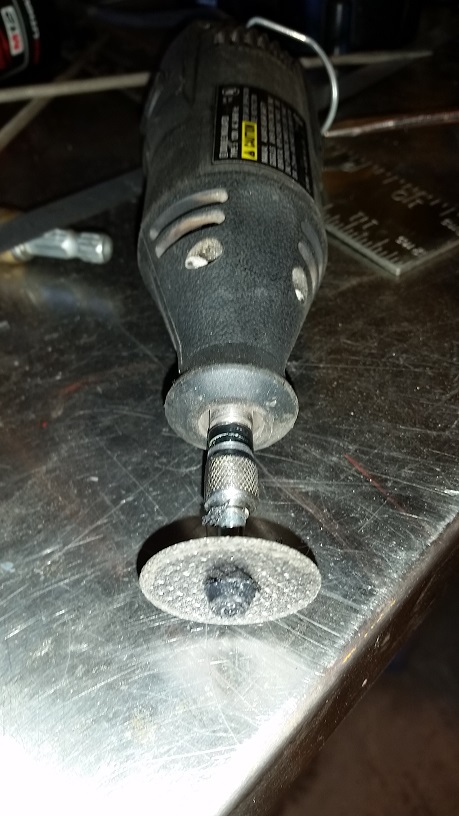 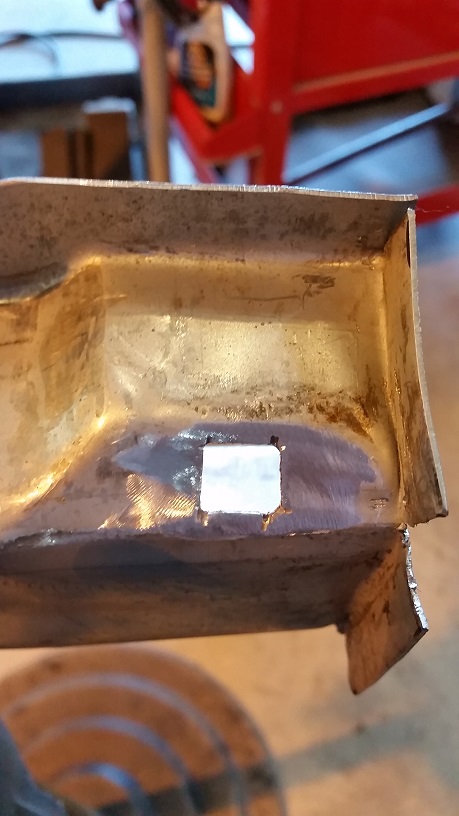 |
| cary |
 Jun 5 2015, 11:08 PM Jun 5 2015, 11:08 PM
Post
#428
|
|
Advanced Member     Group: Members Posts: 3,900 Joined: 26-January 04 From: Sherwood Oregon Member No.: 1,608 Region Association: Pacific Northwest 
|
Now for the task at hand ...................
Forgot to shoot pictures of installing the adjustment brackets. Pretty simple. 245mm from the long. Square up. Weld in the rosettes. 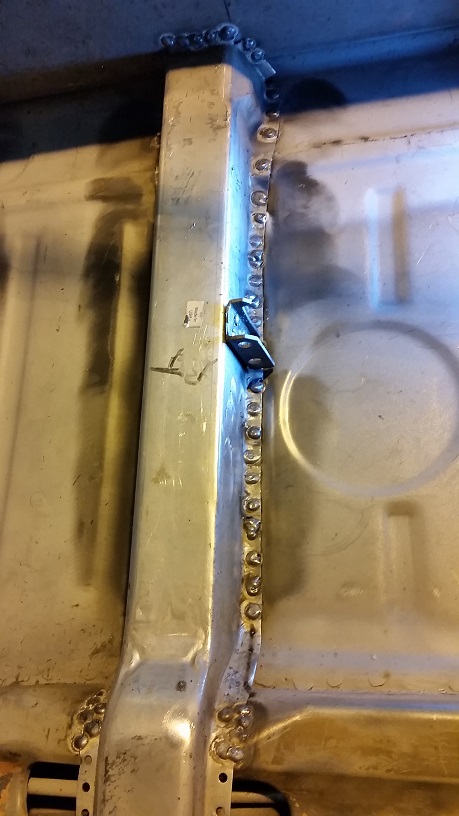 Rosettes welded in. The larger ones are caused by not letting or the getting the metal cooled down. 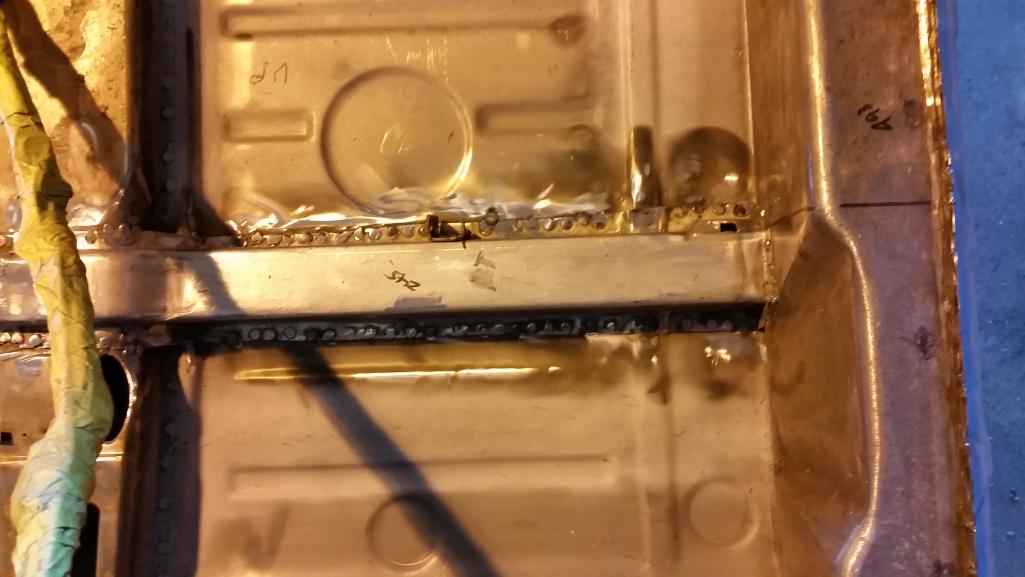 Beautiful ending to wonderful day ................. 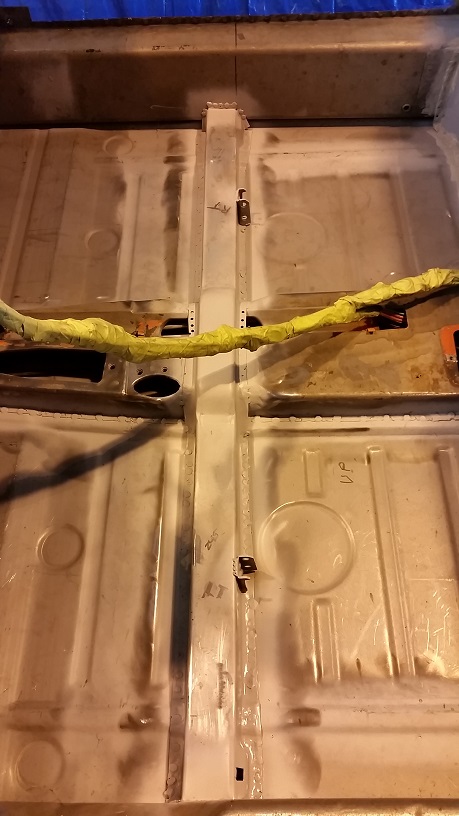 |
| raynekat |
 Jun 6 2015, 07:16 PM Jun 6 2015, 07:16 PM
Post
#429
|
|
Advanced Member     Group: Members Posts: 2,167 Joined: 30-December 14 From: Coeur d'Alene, Idaho Member No.: 18,263 Region Association: Pacific Northwest 
|
Hey I need to do that passenger side movable seat install on my car.
Tried to come by on Friday, but I couldn't really find the shop. Guess I need better directions next time. Saw a horse stable and a farm, but nothing looking to inviting. Better luck next time I suppose. |
| cary |
 Jun 6 2015, 09:10 PM Jun 6 2015, 09:10 PM
Post
#430
|
|
Advanced Member     Group: Members Posts: 3,900 Joined: 26-January 04 From: Sherwood Oregon Member No.: 1,608 Region Association: Pacific Northwest 
|
You were there .............
It's up behind the horse stable. Turn at the third driveway. Sorry I didn't give the phone number with the address. (IMG:style_emoticons/default/sad.gif) (IMG:style_emoticons/default/sad.gif) Let's call it a unique arrangement, .15c sq. ft. utilities paid. |
| cary |
 Jun 6 2015, 10:36 PM Jun 6 2015, 10:36 PM
Post
#431
|
|
Advanced Member     Group: Members Posts: 3,900 Joined: 26-January 04 From: Sherwood Oregon Member No.: 1,608 Region Association: Pacific Northwest 
|
|
| Andyrew |
 Jun 6 2015, 10:51 PM Jun 6 2015, 10:51 PM
Post
#432
|
|
Spooling.... Please wait           Group: Members Posts: 13,377 Joined: 20-January 03 From: Riverbank, Ca Member No.: 172 Region Association: Northern California 
|
Great looking work!! Turn your wire speed down or your temp up on your mig, your welds are a hair large (IMG:style_emoticons/default/smile.gif)
|
| cary |
 Jun 7 2015, 07:02 AM Jun 7 2015, 07:02 AM
Post
#433
|
|
Advanced Member     Group: Members Posts: 3,900 Joined: 26-January 04 From: Sherwood Oregon Member No.: 1,608 Region Association: Pacific Northwest 
|
I think I'm going to tinker with turning the wire speed down just a hair. This is a good test area because I can look a the penetration from the back side.
On this beautiful RD Galvanneal I run the Miller 180 (220v) at 17 on the thickness gauge (heat) and 45 on the speed. Thanks for the critique .... |
| cary |
 Jun 13 2015, 07:53 AM Jun 13 2015, 07:53 AM
Post
#434
|
|
Advanced Member     Group: Members Posts: 3,900 Joined: 26-January 04 From: Sherwood Oregon Member No.: 1,608 Region Association: Pacific Northwest 
|
So we have another day to play. First half of the was spent unloading the enclosed trailer full of the middle kids stuff into the warehouse.
Then onto the seat mount/hinges. Watched the RD video a couple times, Adam does a nice job. Tried doing the hinge tack on the first one. Just didn't work with the door braces in the way. Really pretty simple. The hinge pin is supposed to be centered right at the peak of the mount. Just scribed a line on the mount and aligned the hinge pin the line. First step was to get everything in place. Bad part, looks like the seat frames will need a little restoration. Handle shaft has some rust. I'm thinking yellow cad plating on the handle ? 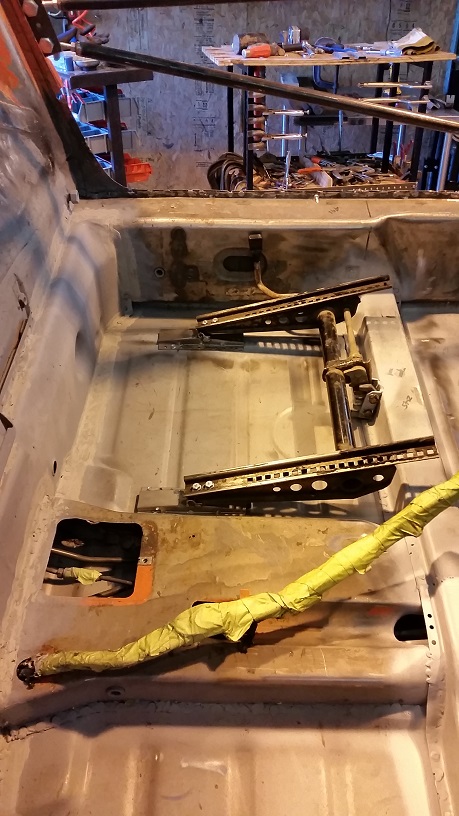 A couple shots of the hinge welding. 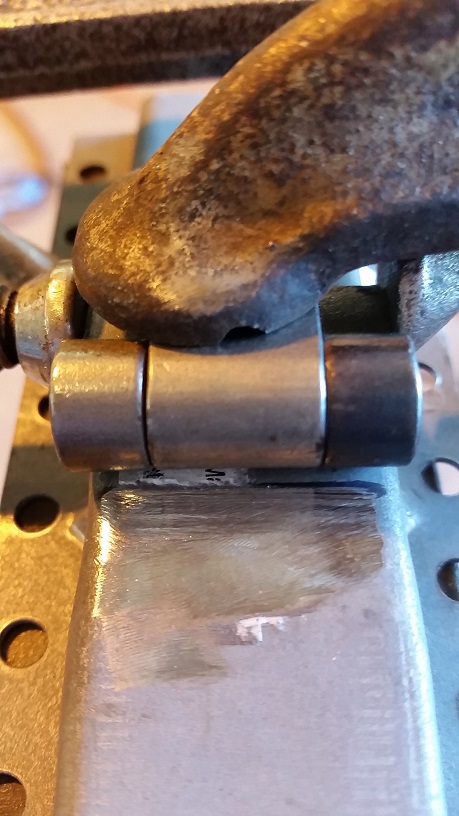 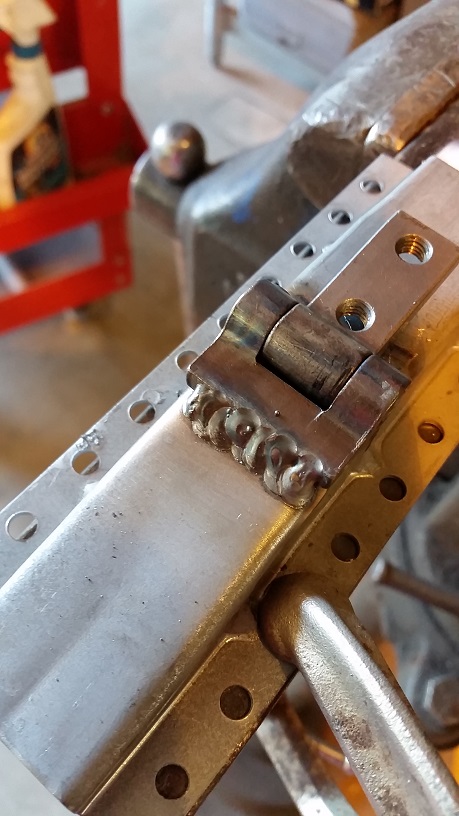 Once again lots of time spent cooling the metal. Rosette welds still a little too big. Turned down the wire speed, which made them flatter. But still to wide. Maybe Next Time. But the welding is just about over. Next will be the door sills. 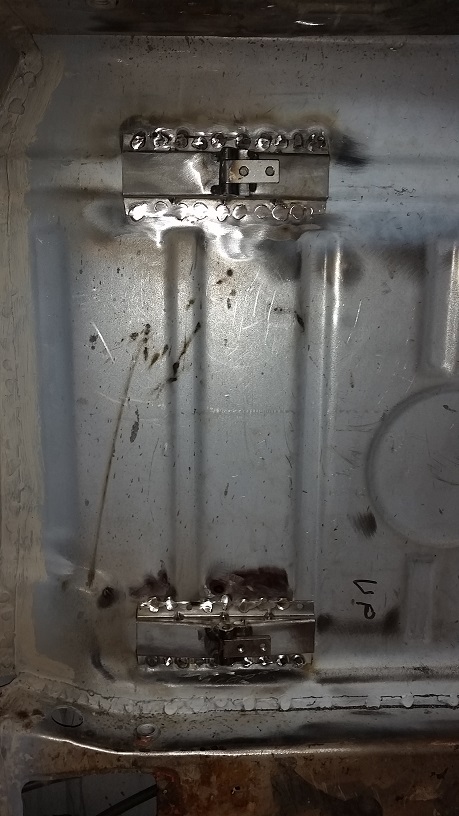 Sitting here watching the first hour of Lemans on Fox Sports 2. Then off to my first PCA Arrive and Drive rally in the Carrera. 100 mile drive with 40 or 50 Porsche's. Tomorrow will be spent at the Rose Cup races at PIR. Might squeeze in a 30-40 bike ride after the arrive and drive. |
| saigon71 |
 Jun 14 2015, 04:20 PM Jun 14 2015, 04:20 PM
Post
#435
|
|
Advanced Member     Group: Members Posts: 2,007 Joined: 1-June 09 From: Dillsburg, PA Member No.: 10,428 Region Association: MidAtlantic Region 

|
|
| cary |
 Jun 22 2015, 10:38 PM Jun 22 2015, 10:38 PM
Post
#436
|
|
Advanced Member     Group: Members Posts: 3,900 Joined: 26-January 04 From: Sherwood Oregon Member No.: 1,608 Region Association: Pacific Northwest 
|
Back to work. Finished grinding down the spot welds and touching up the backside.
Kind of tricky grinding. A lot of using the outside edge. Then proceeded to apply the first layer of brush on seam sealer. 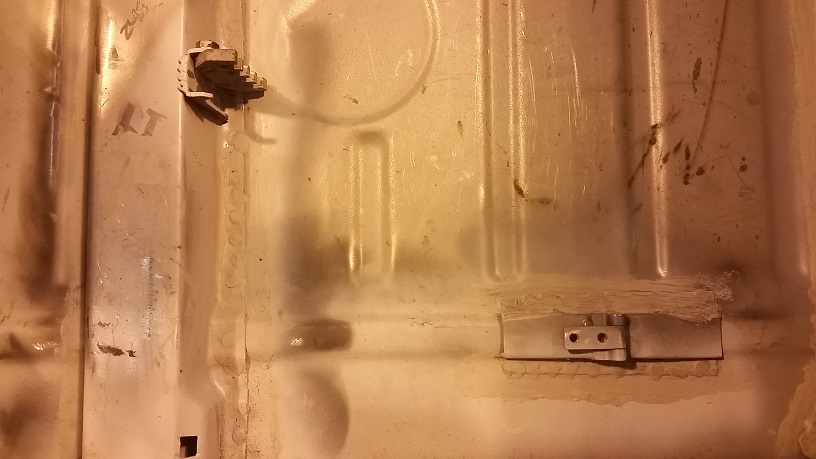 Spent the first half of the day putting new pads and rotors on the pickup. What a messy job ................ That brake dust gets everywhere. Then took out the lower door brace so I can start working on the door sill. 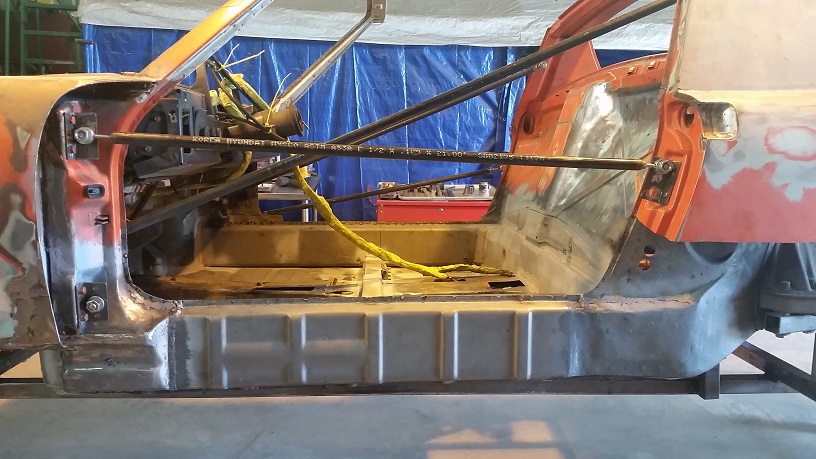 |
| cary |
 Jun 22 2015, 10:42 PM Jun 22 2015, 10:42 PM
Post
#437
|
|
Advanced Member     Group: Members Posts: 3,900 Joined: 26-January 04 From: Sherwood Oregon Member No.: 1,608 Region Association: Pacific Northwest 
|
Another Tool Whore shot.
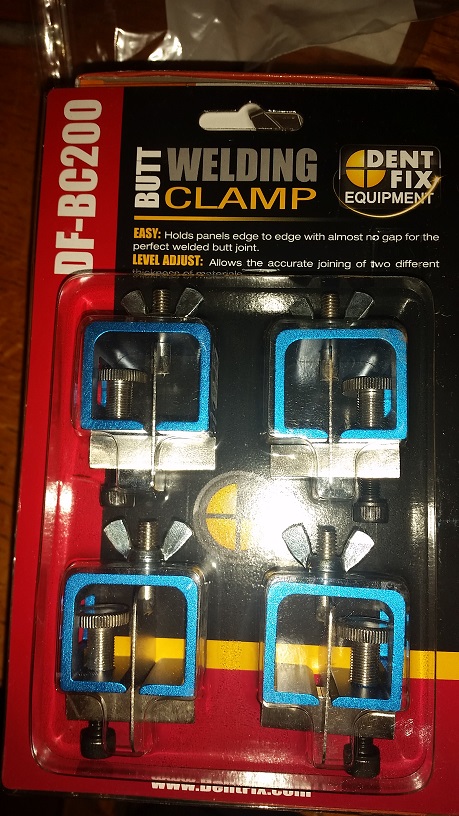 Bought a good set of butt weld clamps for re-attaching the rear fender. I've already bent the crap out of the HF ones. |
| cary |
 Jun 23 2015, 08:48 AM Jun 23 2015, 08:48 AM
Post
#438
|
|
Advanced Member     Group: Members Posts: 3,900 Joined: 26-January 04 From: Sherwood Oregon Member No.: 1,608 Region Association: Pacific Northwest 
|
Just finished reading Michelko's, Digging into Hell. Kind of wish I'd used POR15 along the way. Looks so nice and tidy after he finished a section. Oh Well ...
Looking at buying a fresh air respirator before I start shooting the epoxy primer. http://www.ebay.com/itm/Supplied-fresh-Air...k-/380153845245 I'm going with prepping the metal with OSPHO, then SPI epoxy primer. After that, spray on seam sealer, for the factory look. I am brushing on sealer sealer over SEM self etching primer in the spot/rosette welded areas as I go. |
| raynekat |
 Jun 23 2015, 02:24 PM Jun 23 2015, 02:24 PM
Post
#439
|
|
Advanced Member     Group: Members Posts: 2,167 Joined: 30-December 14 From: Coeur d'Alene, Idaho Member No.: 18,263 Region Association: Pacific Northwest 
|
Dude.....you gonna come out and work on mine too sometime?
(IMG:style_emoticons/default/welder.gif) Seriously....after looking at your rotisserie, I'd like one but don't have the lift to get the shell onto it. Need to do the seat bracket thing on my car for sure. But I think the paint & body shop I'm going to use can handle it. All in all, you're the "man." So much work you've been knocking out. Do you really have a "real" job too? hehe Where do you find the time? Plus you must have a godzillion dollars worth of new-ish tools as well. Well done young man..... (IMG:style_emoticons/default/flag.gif) |
| cary |
 Jun 23 2015, 02:49 PM Jun 23 2015, 02:49 PM
Post
#440
|
|
Advanced Member     Group: Members Posts: 3,900 Joined: 26-January 04 From: Sherwood Oregon Member No.: 1,608 Region Association: Pacific Northwest 
|
If you buy a rotisserie most have a lift built in.
I try to do as much done as I can in two days per week that I have ............. This is my sanity check But now it will be three weeks before I get back. AX this Sunday and the STP bike ride the week after. |
| cary |
 Jun 23 2015, 08:47 PM Jun 23 2015, 08:47 PM
Post
#441
|
|
Advanced Member     Group: Members Posts: 3,900 Joined: 26-January 04 From: Sherwood Oregon Member No.: 1,608 Region Association: Pacific Northwest 
|
Very Productive Day .............
Started by removing my frame/jig that has been on there a couple years. (IMG:style_emoticons/default/mad.gif) Now we're making progress. 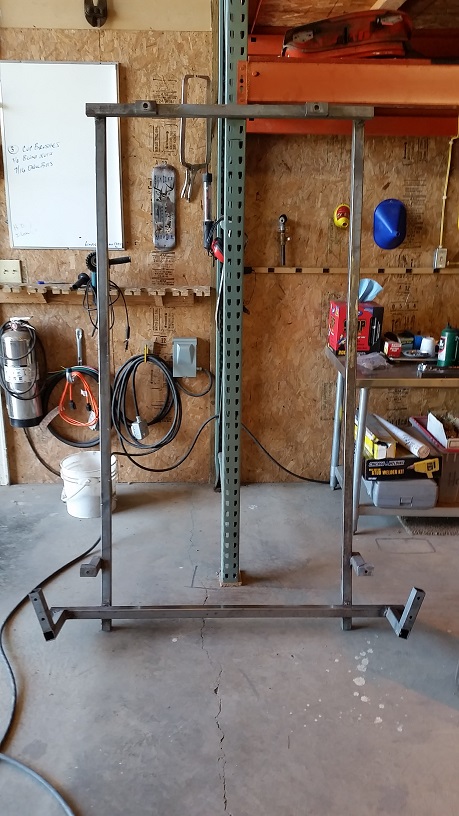 Without jig. That allowed me to tidy up the seams and rosettes that I couldn't get to with the jig in the way. 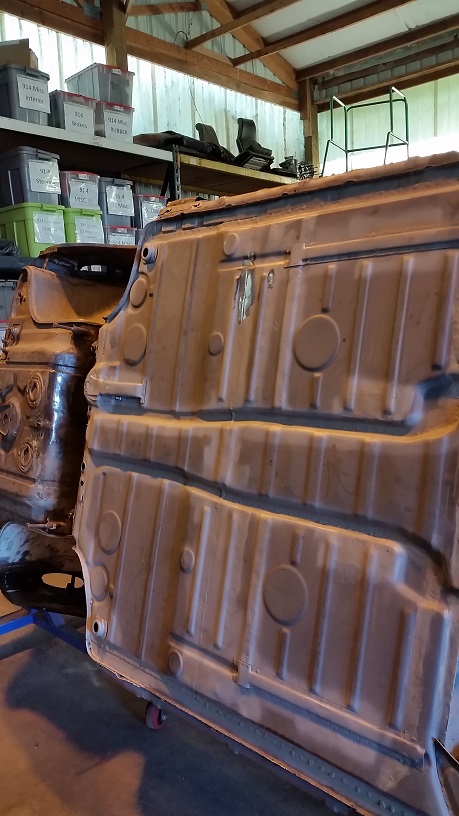 |
| cary |
 Jun 23 2015, 09:13 PM Jun 23 2015, 09:13 PM
Post
#442
|
|
Advanced Member     Group: Members Posts: 3,900 Joined: 26-January 04 From: Sherwood Oregon Member No.: 1,608 Region Association: Pacific Northwest 
|
On to the task at hand.
Installing the door sills. 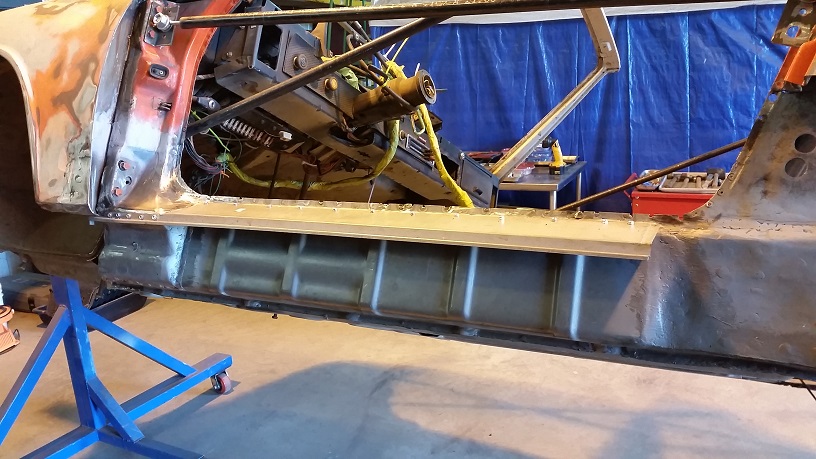 Rosettes went real well. A little more heat, a little less wire speed. But it almost feels like cheating, welding new metal to new metal. 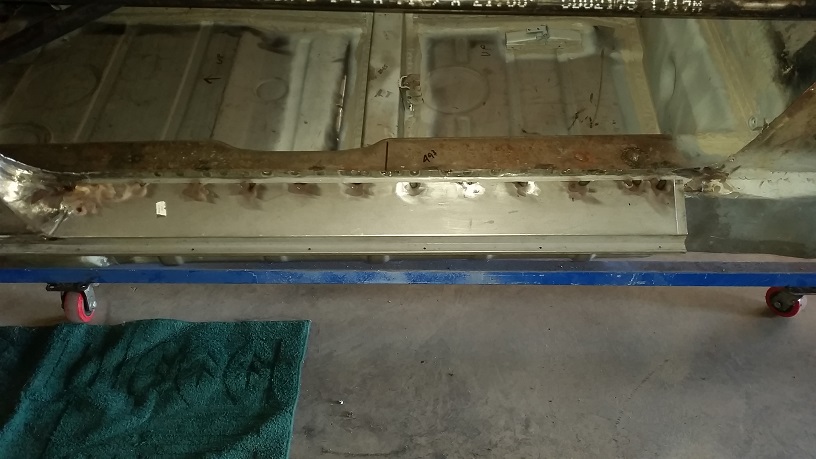 Then I installed the braces. Used the tri square to line up the top screws. 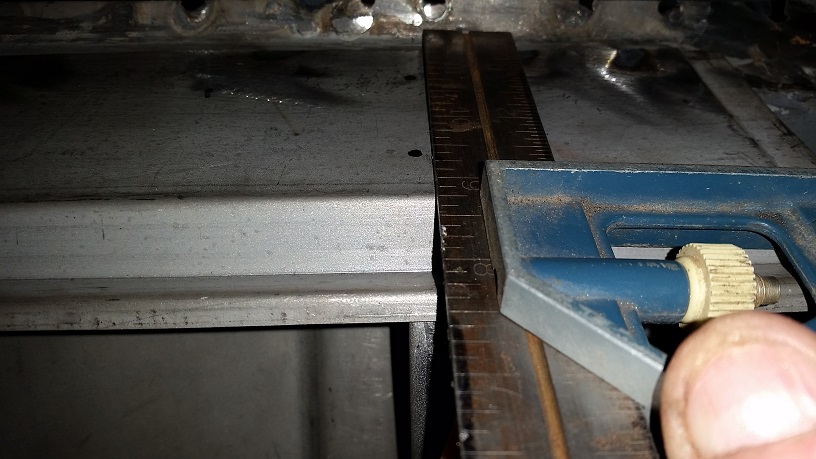 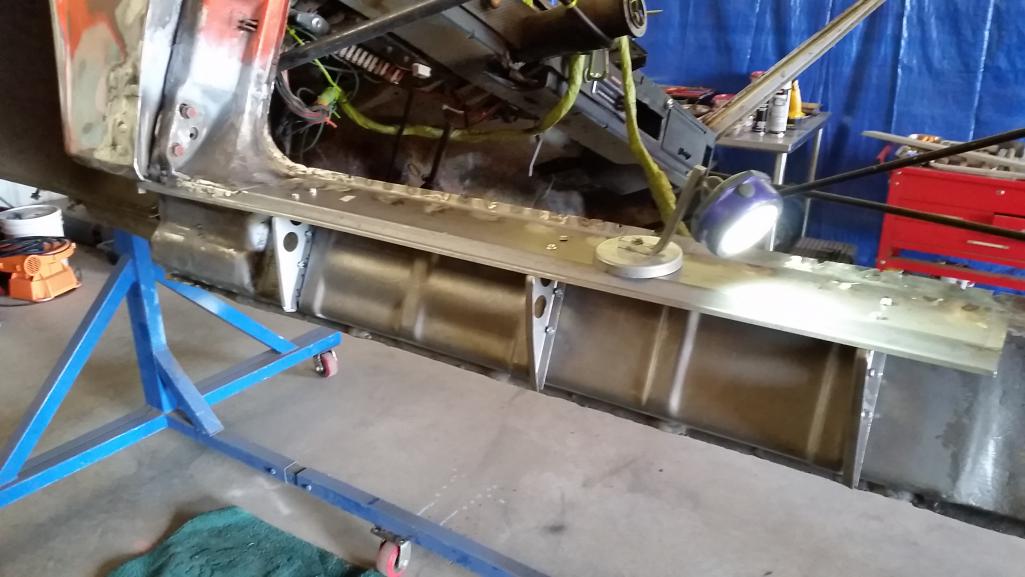 Added a third brace. Salvaged off the old stuff. |
| cary |
 Jun 23 2015, 09:54 PM Jun 23 2015, 09:54 PM
Post
#443
|
|
Advanced Member     Group: Members Posts: 3,900 Joined: 26-January 04 From: Sherwood Oregon Member No.: 1,608 Region Association: Pacific Northwest 
|
Then I moved on to the door jam .............. That's dandy piece. Not an RD manufactured part and it shows. If you look at your door jam. All the bends are acute 90 angles. But on this piece they're all rounded. So there as quite a bit of reworked to get it to fit nice.
Then Mr. Patience let the metal at the butt weld get too hot. I had it almost perfect on the first pass. Ground down the weld with the flapper disk. Then went to add just a smidgen in the low spot. Made a mess ................ time to walk away. Should have had another project going at the same time. Dammit (IMG:style_emoticons/default/hissyfit.gif) (IMG:style_emoticons/default/hissyfit.gif) ............... I'm going to have to look into cooling gel. Attached image(s) 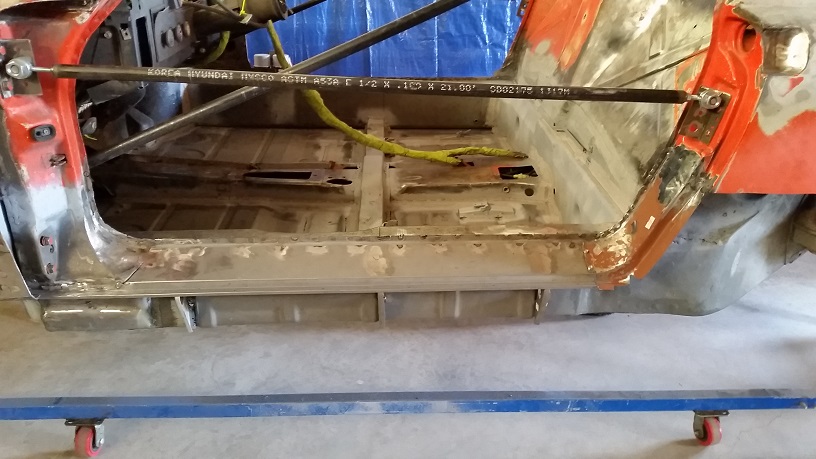
|
| cary |
 Jun 23 2015, 10:01 PM Jun 23 2015, 10:01 PM
Post
#444
|
|
Advanced Member     Group: Members Posts: 3,900 Joined: 26-January 04 From: Sherwood Oregon Member No.: 1,608 Region Association: Pacific Northwest 
|
So I went to look at the fender that needs to be welded back on. Looks like I need to remove the old door jam material from the backside of the fender. (IMG:style_emoticons/default/mad.gif) (IMG:style_emoticons/default/mad.gif)
That's going to take some doing to get it out of there without bending the fender. I didn't leave myself a lot of space to work. There's about 10 spot welds to drill out. 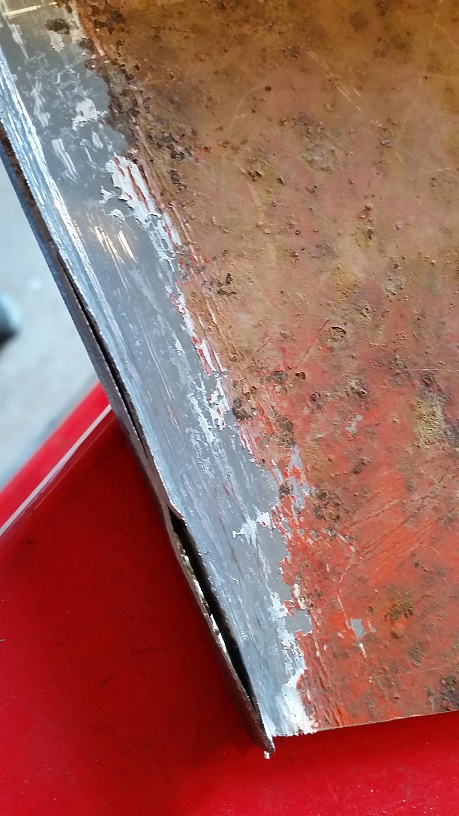 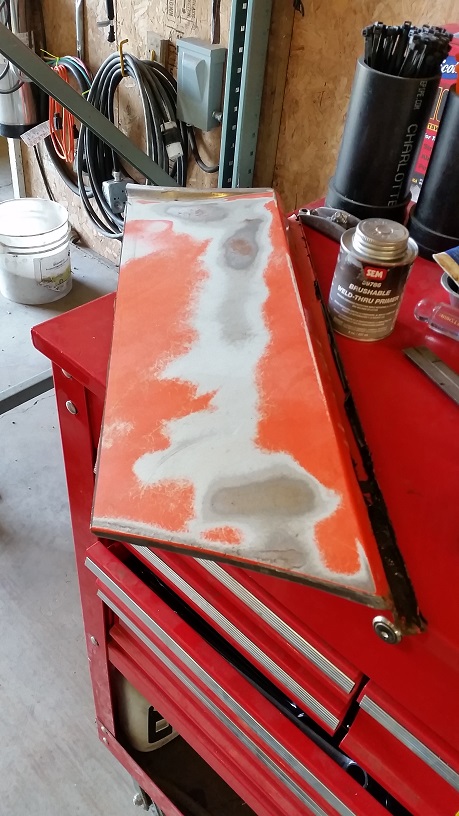 |
| trojanhorsepower |
 Jul 1 2015, 04:57 PM Jul 1 2015, 04:57 PM
Post
#445
|
|
Senior Member    Group: Members Posts: 867 Joined: 21-September 03 From: Marion, NC Member No.: 1,179 Region Association: None |
Cary,
Was that 245mm from the long to one edge of the bracket? If so which edge? Or center? |
  |
4 User(s) are reading this topic (4 Guests and 0 Anonymous Users)
0 Members:

|
Lo-Fi Version | Time is now: 17th January 2025 - 07:47 AM |
Invision Power Board
v9.1.4 © 2025 IPS, Inc.


