|
|

|
Porsche, and the Porsche crest are registered trademarks of Dr. Ing. h.c. F. Porsche AG.
This site is not affiliated with Porsche in any way. Its only purpose is to provide an online forum for car enthusiasts. All other trademarks are property of their respective owners. |
|
|
  |
| barefoot |
 Aug 20 2015, 01:48 PM Aug 20 2015, 01:48 PM
Post
#501
|
|
Senior Member    Group: Members Posts: 1,337 Joined: 19-March 13 From: Charleston SC Member No.: 15,673 Region Association: South East States 
|
The back half of the trunk came off real easy. Then I decide to do it right, the muffler heat shield needs to come off. There's no way to get things cleaned up right with it in the way.
First thing to do is locate the spot welds. Came off pretty easy. Next time I would use 3/8" spot weld cutter. The 1/4" I usually use was too small. [[/quote] On mine since i was replacing the rear trunk back section, I cut the heat shield standoffs out at the trunk side and left them attached to the heat shield. On re-assembly, i used SS pop rivets to reattach 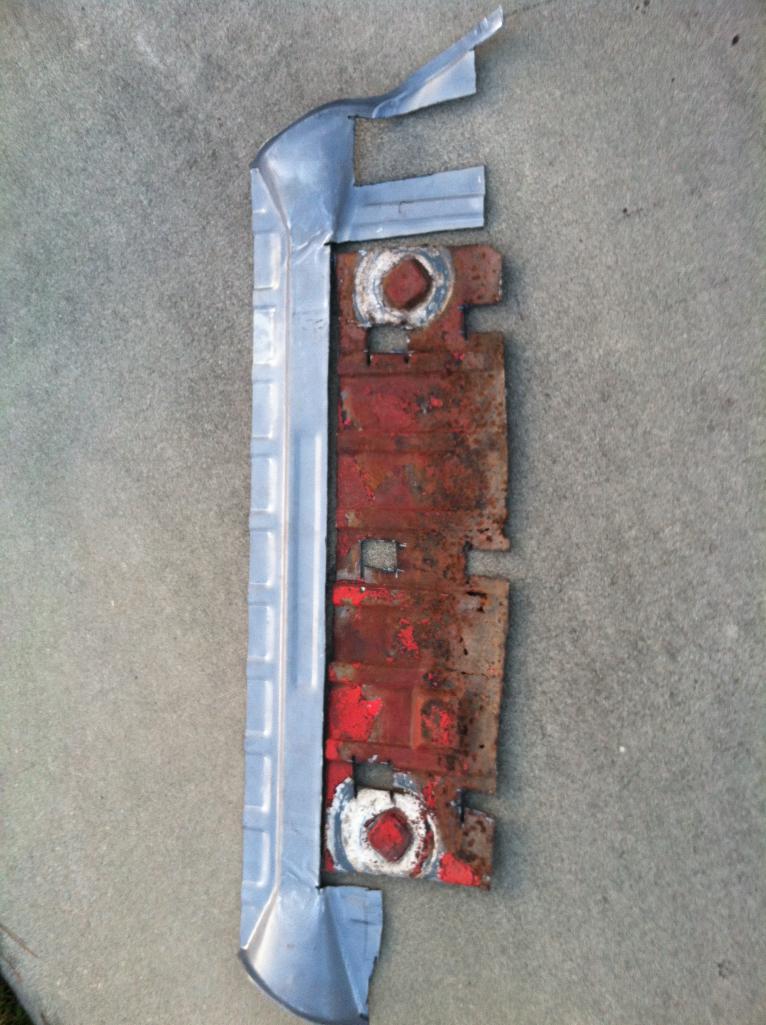 |
| cary |
 Aug 20 2015, 01:53 PM Aug 20 2015, 01:53 PM
Post
#502
|
|
Advanced Member     Group: Members Posts: 3,900 Joined: 26-January 04 From: Sherwood Oregon Member No.: 1,608 Region Association: Pacific Northwest 
|
Started the day at Newberg Steel for some 12 gauge scraps to create the suspension tie. $6.84.
Here's a couple shots of the right side. Still complete. We'll use it as our pattern. 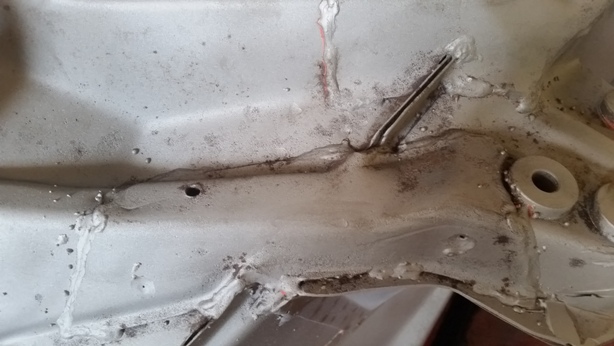 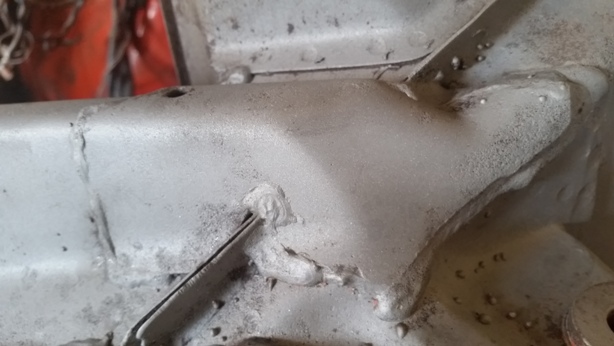 Here's the King of Cardboard getting after the pattern. 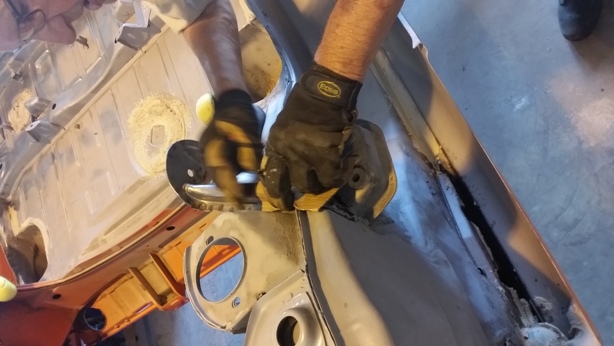 |
| cary |
 Aug 20 2015, 01:58 PM Aug 20 2015, 01:58 PM
Post
#503
|
|
Advanced Member     Group: Members Posts: 3,900 Joined: 26-January 04 From: Sherwood Oregon Member No.: 1,608 Region Association: Pacific Northwest 
|
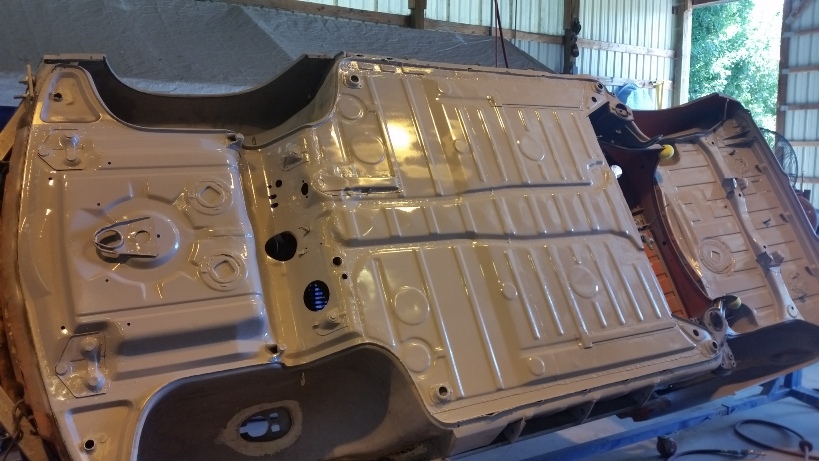
Now we're getting somewhere. Heading to lunch to let it dry.
 |
| cary |
 Aug 20 2015, 09:32 PM Aug 20 2015, 09:32 PM
Post
#504
|
|
Advanced Member     Group: Members Posts: 3,900 Joined: 26-January 04 From: Sherwood Oregon Member No.: 1,608 Region Association: Pacific Northwest 
|
Super In Law spent the entire day working on the upper/smaller tie. The 12 gauge is a little tough to work with. He's trying to create it one piece. Our equipment just isn't heavy enough.
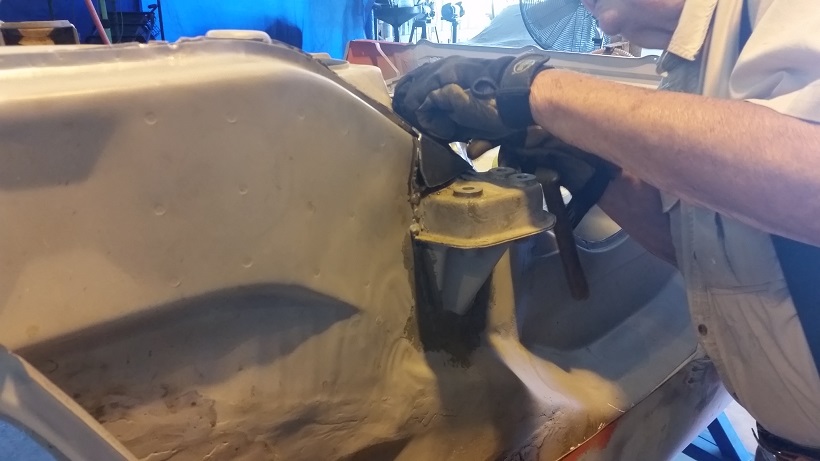 Not quite ready to weld in. I think we'll build the other one two piece. |
| cary |
 Aug 20 2015, 10:16 PM Aug 20 2015, 10:16 PM
Post
#505
|
|
Advanced Member     Group: Members Posts: 3,900 Joined: 26-January 04 From: Sherwood Oregon Member No.: 1,608 Region Association: Pacific Northwest 
|
So I kind of spent the afternoon puttering.
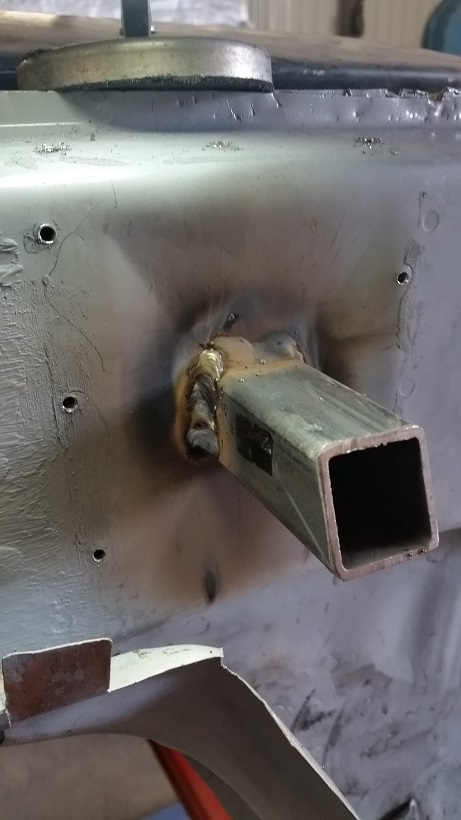
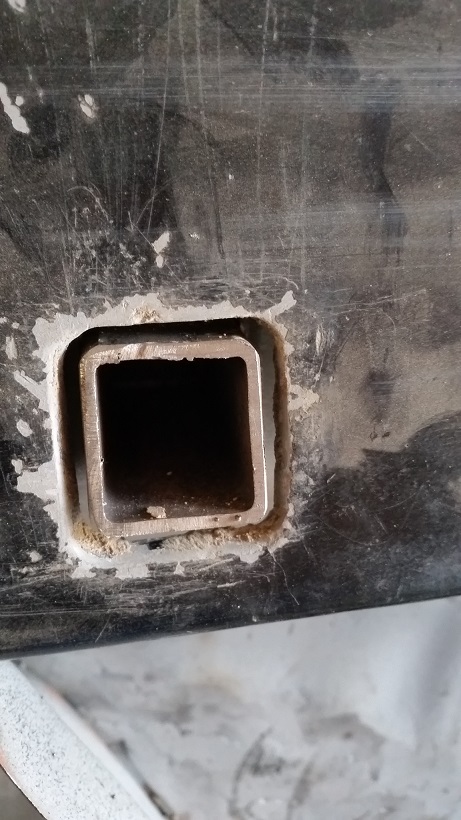
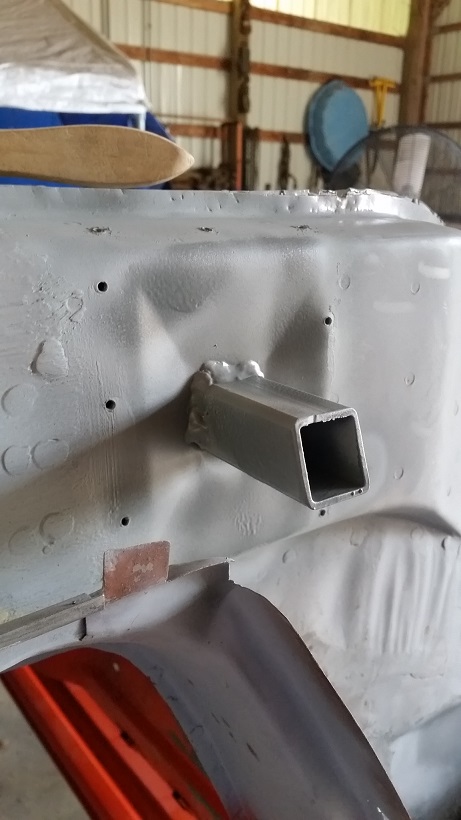
1. Filled a few spot weld cut outs on the outer suspension mount. 2. Finished a couple welds on the tabs that attach the door sills to the base of the hinge post. 3. Then went to tackle the holes on the front pan under the headlight bucket. I was feeling good about my welding touch. So I elected to weld up the holes. They about doubled before I hit good solid material. 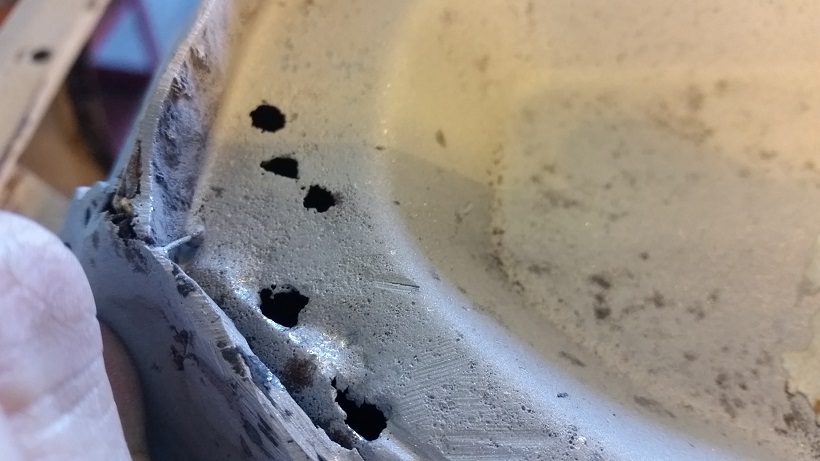 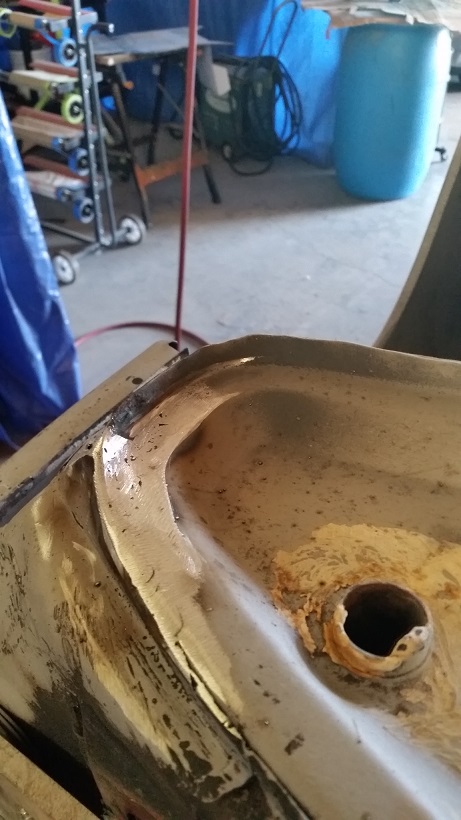 4. Then I broke out the tube seam sealer and sealed the gap between the door sills and the outer long. 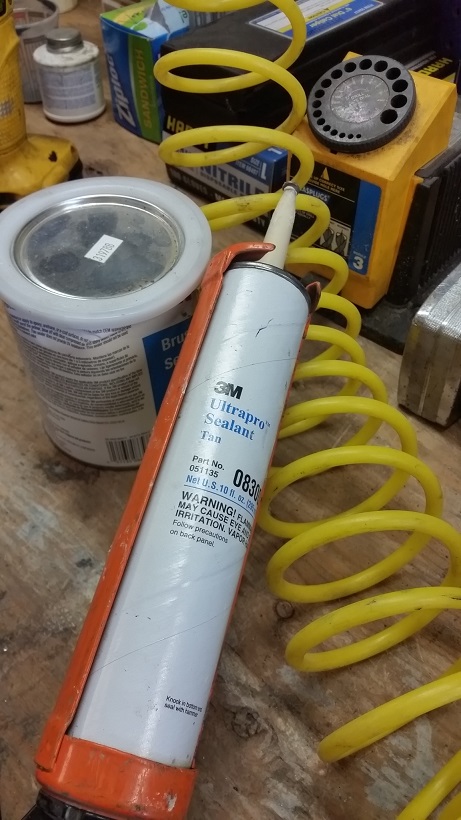 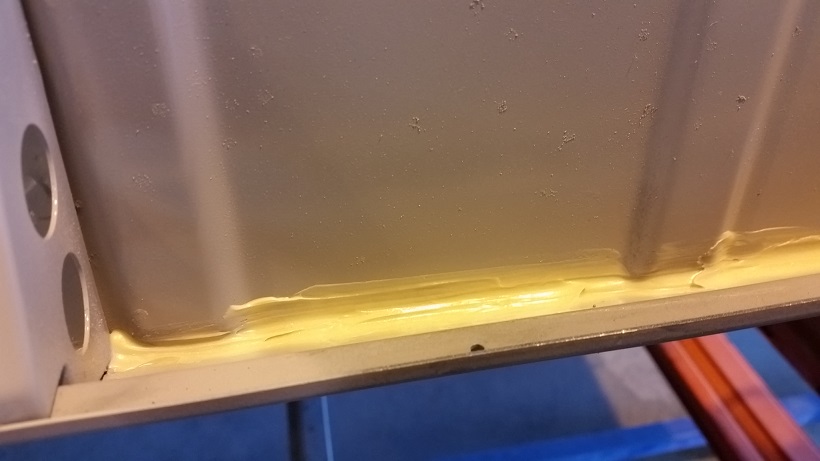 Pretty easy to do when the car is upside down. 5. Then I located and screwed the jack plates in place. Ready to weld in tomorrow. Looks like I'll need to add some drain holes. I"ll probably put two on each one. 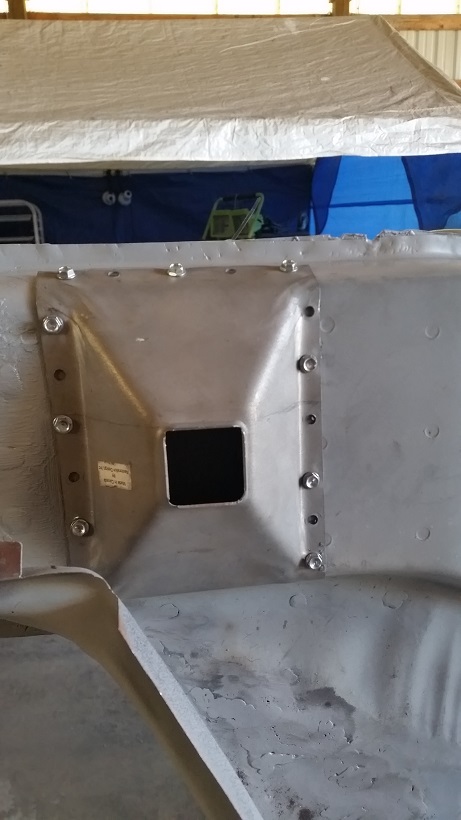 |
| Luke M |
 Aug 21 2015, 08:38 AM Aug 21 2015, 08:38 AM
Post
#506
|
|
Senior Member    Group: Members Posts: 1,400 Joined: 8-February 05 From: WNY Member No.: 3,574 Region Association: North East States 
|
Make sure you weld the square tube in place before the cover plate..
|
| JoeDees |
 Aug 21 2015, 10:05 AM Aug 21 2015, 10:05 AM
Post
#507
|
|
Senior Member    Group: Members Posts: 515 Joined: 10-November 14 From: Northern Kentucky Member No.: 18,106 Region Association: None |
I gratefully request you to post pictures of the ties before you weld them on. Thanks
|
| cary |
 Aug 21 2015, 12:20 PM Aug 21 2015, 12:20 PM
Post
#508
|
|
Advanced Member     Group: Members Posts: 3,900 Joined: 26-January 04 From: Sherwood Oregon Member No.: 1,608 Region Association: Pacific Northwest 
|
I gratefully request you to post pictures of the ties before you weld them on. Thanks Will do. Stopped by the dealership this am. All four parts are NLA. So fabrication is the only answer. The 12 guage is over our paygrade, wish we had a forge. So the big ass hammer is the tool of choice, leaves it kind of ugly. |
| cary |
 Aug 21 2015, 11:39 PM Aug 21 2015, 11:39 PM
Post
#509
|
|
Advanced Member     Group: Members Posts: 3,900 Joined: 26-January 04 From: Sherwood Oregon Member No.: 1,608 Region Association: Pacific Northwest 
|
Started the day with welding in the jack posts.
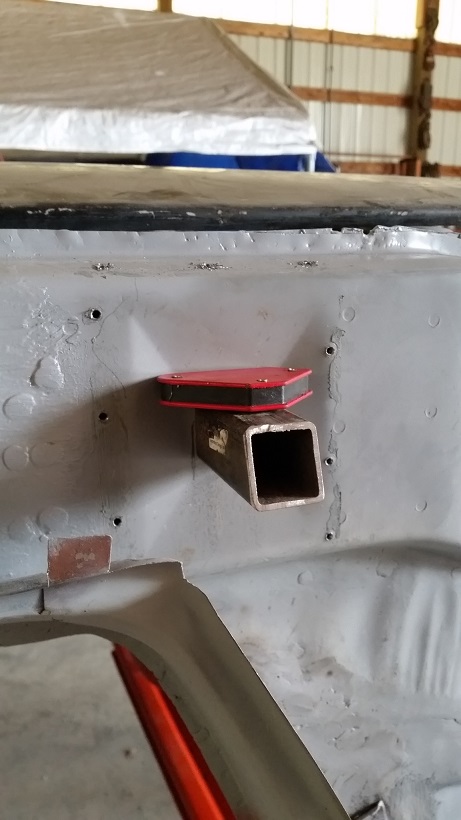    |
| cary |
 Aug 21 2015, 11:54 PM Aug 21 2015, 11:54 PM
Post
#510
|
|
Advanced Member     Group: Members Posts: 3,900 Joined: 26-January 04 From: Sherwood Oregon Member No.: 1,608 Region Association: Pacific Northwest 
|
Super In Law finally finished the upper tie. A little crude, but it will work.
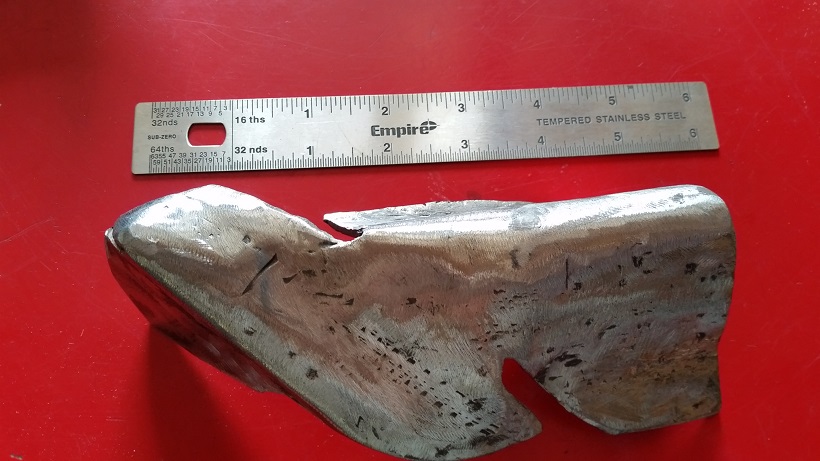 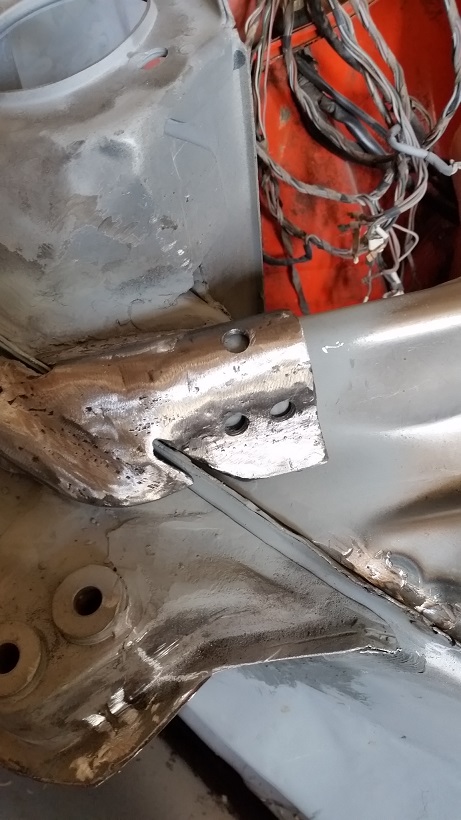 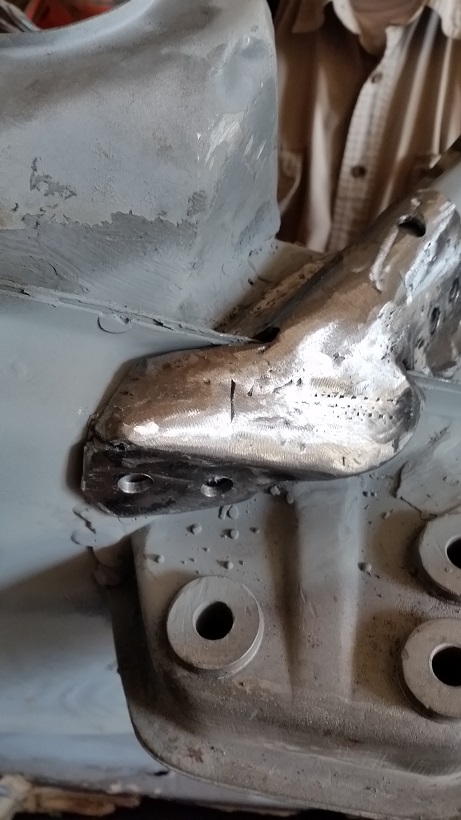 He built it a little bigger than the factory one on the other side. I predrilled 5 rosette holes. Then it was ready to weld. 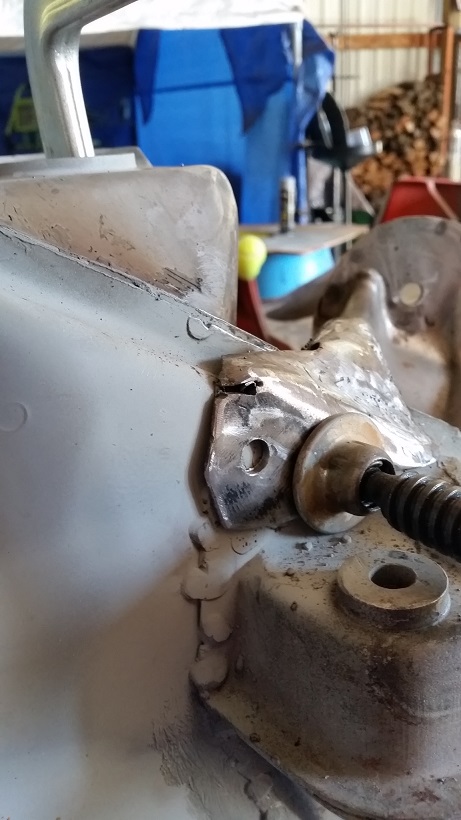 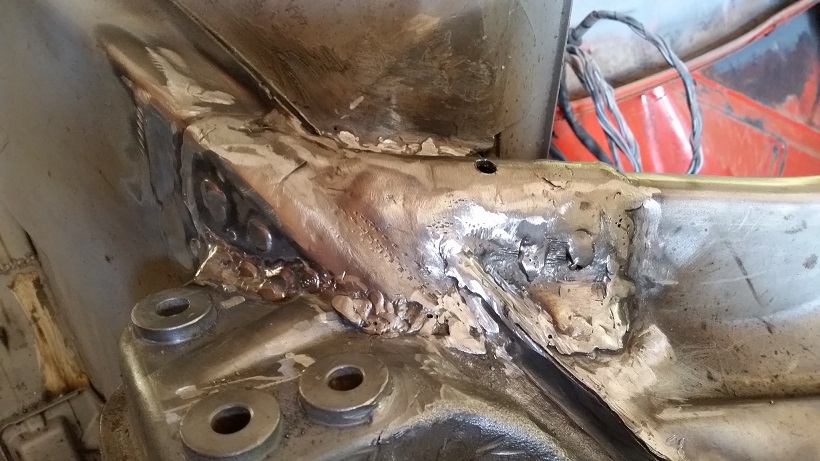 I know its over welded. But I just can't help myself. I just love melting metal. LOL. I drilled a drain hole thru both layers. I also opened up the drain on the suspension console. |
| JoeDees |
 Aug 22 2015, 08:24 AM Aug 22 2015, 08:24 AM
Post
#511
|
|
Senior Member    Group: Members Posts: 515 Joined: 10-November 14 From: Northern Kentucky Member No.: 18,106 Region Association: None |
For working with 12gauge, I don't consider that crude at all. I'm dreading having to make them in the coming months and almost wonder if doubling up 18 or 20 could accomplish the task.
|
| cary |
 Aug 30 2015, 07:53 AM Aug 30 2015, 07:53 AM
Post
#512
|
|
Advanced Member     Group: Members Posts: 3,900 Joined: 26-January 04 From: Sherwood Oregon Member No.: 1,608 Region Association: Pacific Northwest 
|
After a couple other family automotive issues we got to spend the afternoon back on the car.
Super In Law (Grandpa Jack) went to work on the suspension console tie. It was created in two pieces like the one on the web hypertext. Test fit ............. 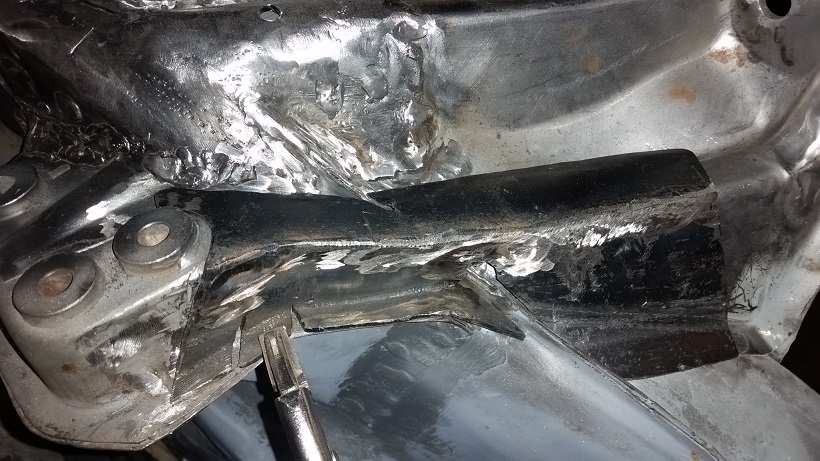 As far as I got welding before it was time to head home. 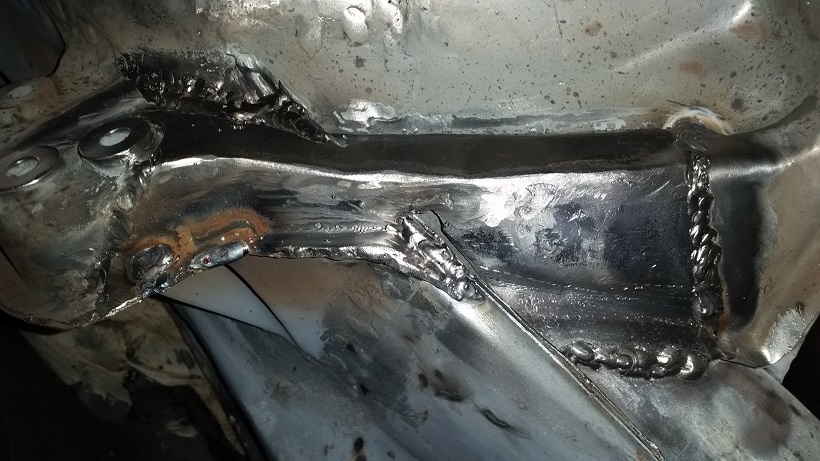 |
| cary |
 Aug 30 2015, 08:12 AM Aug 30 2015, 08:12 AM
Post
#513
|
|
Advanced Member     Group: Members Posts: 3,900 Joined: 26-January 04 From: Sherwood Oregon Member No.: 1,608 Region Association: Pacific Northwest 
|
I decided to dissect the crappy patch job on the right front fender.
Starting point. 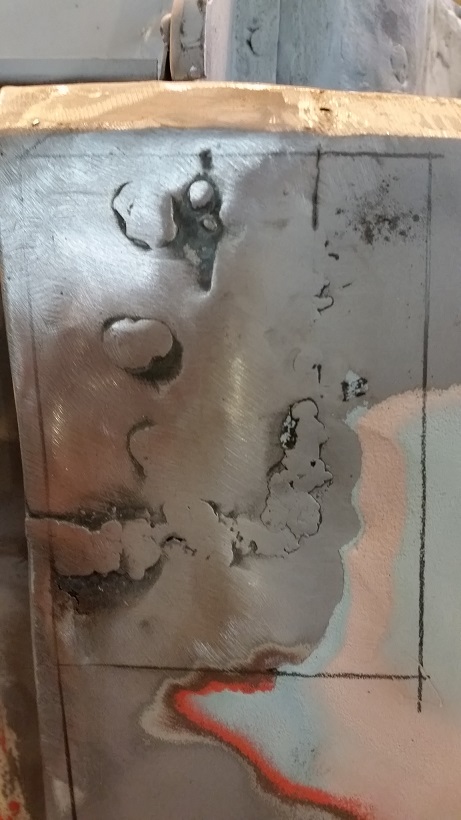 Kind of hard too see because of the steel color. But I cut it out in 2 pieces.That made it easier to get at the back of the spot welds. 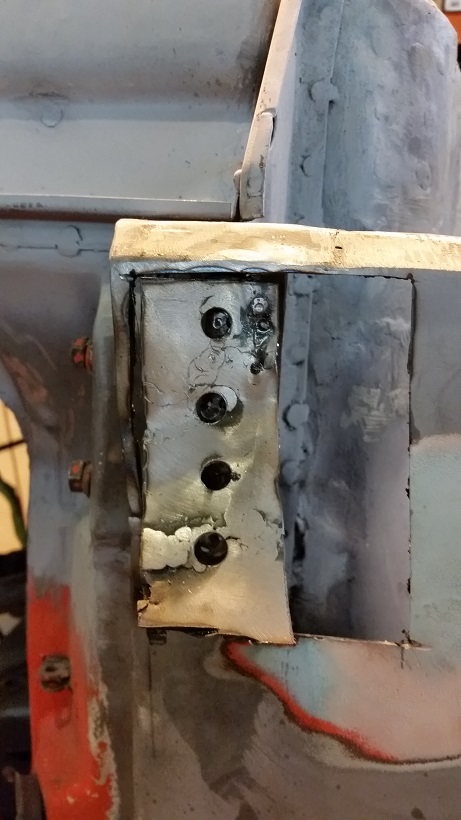 Then I made my Ed (Wheeler Dealer) pattern. That technique comes in real handy. 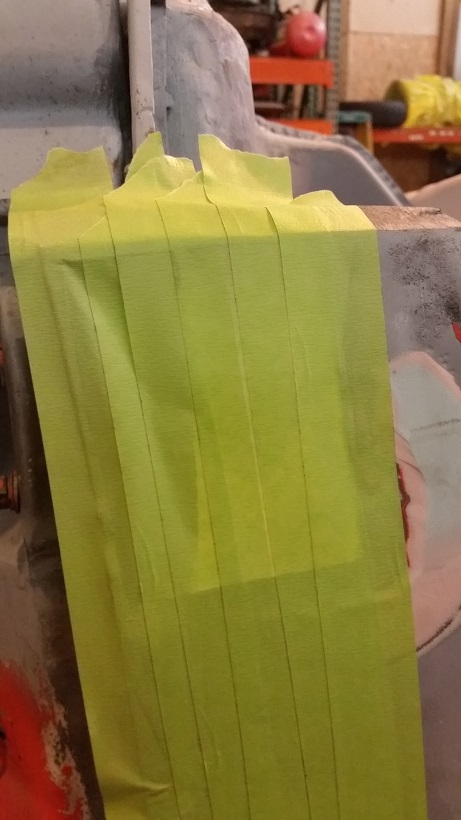 Went to my sheet of 18 gauge. Laid the tape on the steel and cut it out using my HF shears. I hate to admit it but the HF one cuts better the our Old Milwaukie pair. 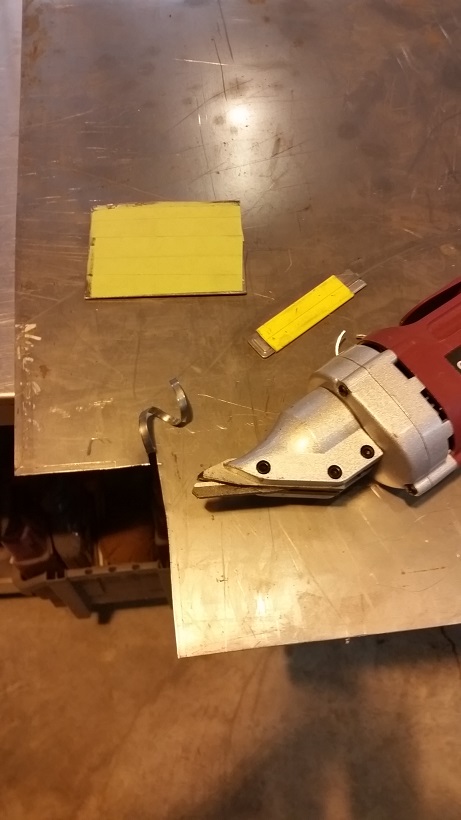 |
| cary |
 Aug 30 2015, 08:27 AM Aug 30 2015, 08:27 AM
Post
#514
|
|
Advanced Member     Group: Members Posts: 3,900 Joined: 26-January 04 From: Sherwood Oregon Member No.: 1,608 Region Association: Pacific Northwest 
|
Then on to welding it in.
I could have used 2 or 3 of these. The pair I have are too small for the right side. The 4" ones worked great for the left side. http://www.cometsupply.com/mp/IRWIN/pm/IRW...6bCgaArxg8P8HAQ 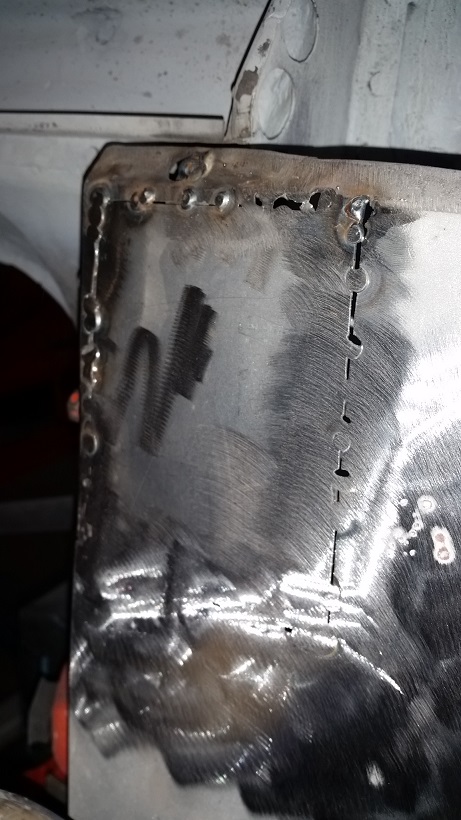 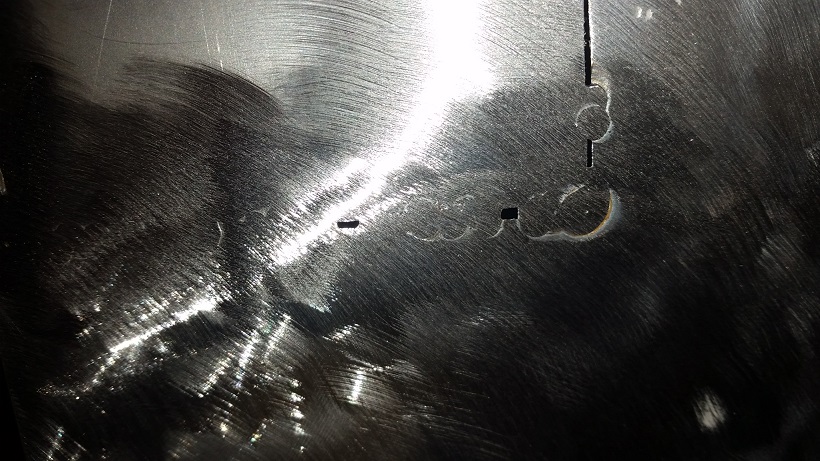 Looks like I'm on the right track. Taking my time, cooling with air, moving all around the piece. The bottom piece is kind of crappy. As you can tell from the holes blown thru it. I think I'll hold off on the grinder until I'm finished. I'm a little grinder happy I'm challenging myself to be able to put my cut off fenders back on without a huge amount of filler. Using Jeff Hail's example as my goal. |
| JoeDees |
 Aug 30 2015, 08:50 AM Aug 30 2015, 08:50 AM
Post
#515
|
|
Senior Member    Group: Members Posts: 515 Joined: 10-November 14 From: Northern Kentucky Member No.: 18,106 Region Association: None |
|
| saigon71 |
 Aug 30 2015, 10:38 AM Aug 30 2015, 10:38 AM
Post
#516
|
|
Advanced Member     Group: Members Posts: 2,007 Joined: 1-June 09 From: Dillsburg, PA Member No.: 10,428 Region Association: MidAtlantic Region 

|
Excellent work as usual! (IMG:style_emoticons/default/beerchug.gif)
Those console ties look great. I found them to be a challenge to fabricate as well & ended up doing each one in three sections. Keep on truckin! |
| cary |
 Aug 30 2015, 08:23 PM Aug 30 2015, 08:23 PM
Post
#517
|
|
Advanced Member     Group: Members Posts: 3,900 Joined: 26-January 04 From: Sherwood Oregon Member No.: 1,608 Region Association: Pacific Northwest 
|
Thanks for the words of encouragement.
I think I'm going to add another piece to the top. 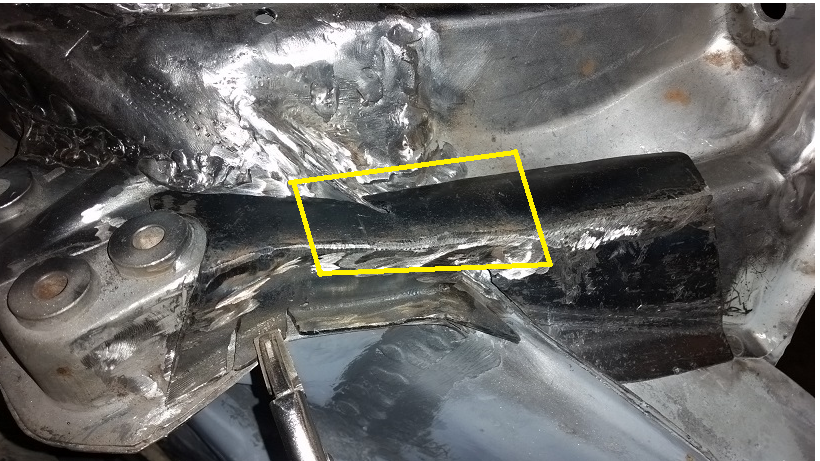 |
| cary |
 Aug 31 2015, 09:14 PM Aug 31 2015, 09:14 PM
Post
#518
|
|
Advanced Member     Group: Members Posts: 3,900 Joined: 26-January 04 From: Sherwood Oregon Member No.: 1,608 Region Association: Pacific Northwest 
|
Another day at the shop. I would call this one a so so day.
Started by finishing up the welding in of the suspension tie. Just for fun I decided to give the Millermatic function a try. On the 12 gauge stuff it worked like a dream. Unbelievable. I should have tightened up my E's to stack the puddles a little tighter. 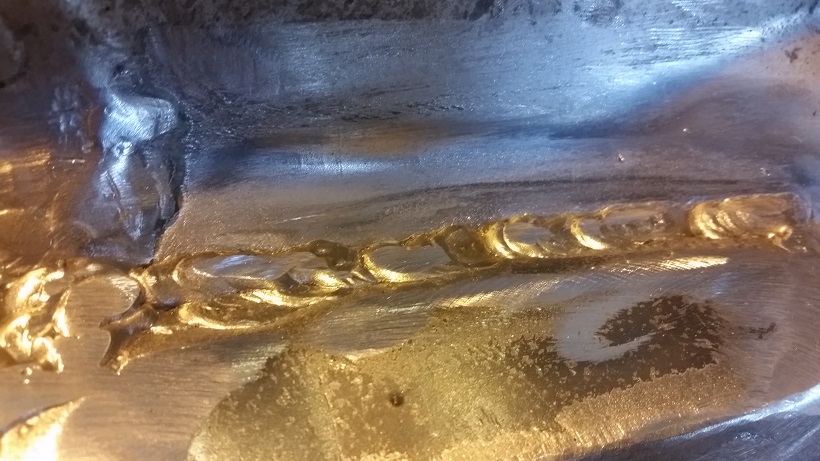 So I decided to try it on the front fender is was working on. BIG MISTAKE. I blew a hole with the first weld. It went form bad to worse. Today was a turd. I had visions of grandeur of getting it welded in perfectly with invisible welds. Now that I now where the crappy steel is. I'll cut it out AGAIN and do it over. (IMG:style_emoticons/default/mad.gif) (IMG:style_emoticons/default/mad.gif) |
| cary |
 Aug 31 2015, 09:29 PM Aug 31 2015, 09:29 PM
Post
#519
|
|
Advanced Member     Group: Members Posts: 3,900 Joined: 26-January 04 From: Sherwood Oregon Member No.: 1,608 Region Association: Pacific Northwest 
|
While I was cussing up a storm. Super In Law was creating a new end cap for the long/rocker panel.
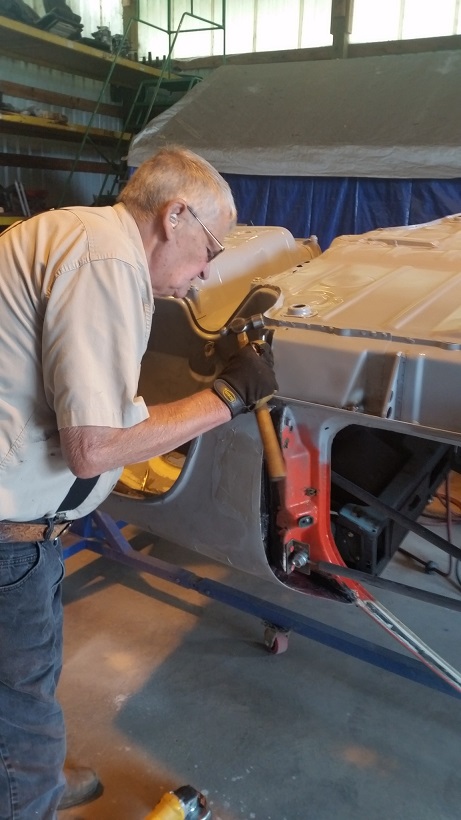 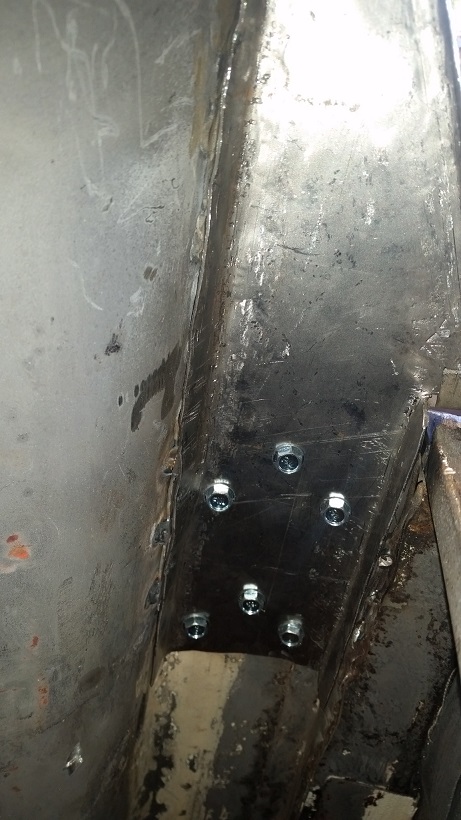 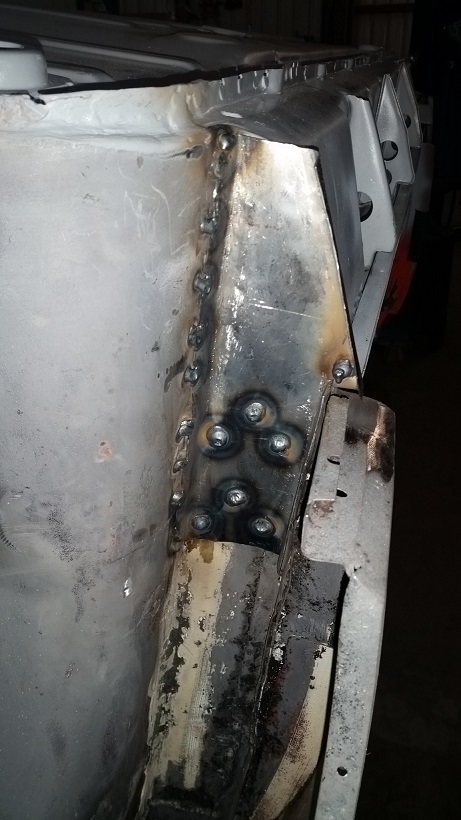 Once the welds are ground down I'll seal things up with brush on seam sealer. Then we'll spray it with 2 coats of epoxy primer. Then we'll apply spray on seam sealer. |
| cary |
 Aug 31 2015, 09:54 PM Aug 31 2015, 09:54 PM
Post
#520
|
|
Advanced Member     Group: Members Posts: 3,900 Joined: 26-January 04 From: Sherwood Oregon Member No.: 1,608 Region Association: Pacific Northwest 
|
While he was finishing the end cap. I welded in the patch on the bottom of the fender.
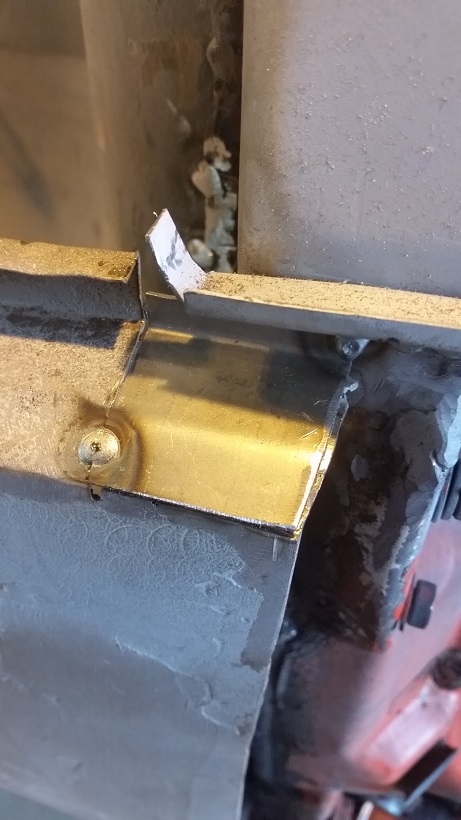 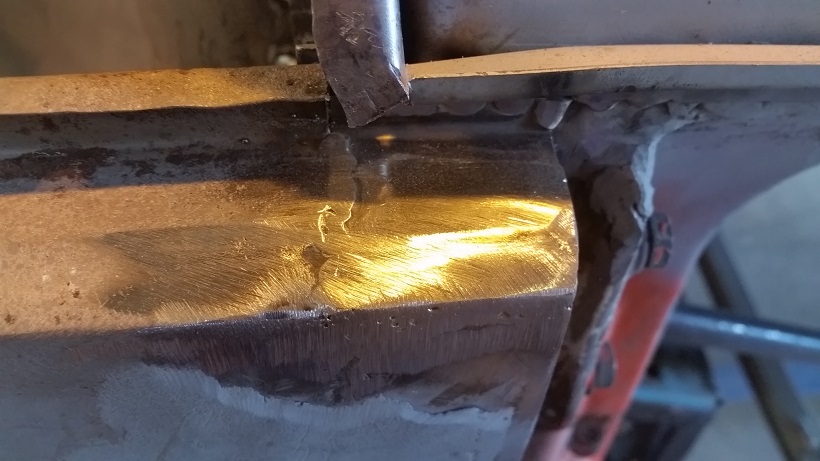 |
  |
1 User(s) are reading this topic (1 Guests and 0 Anonymous Users)
0 Members:

|
Lo-Fi Version | Time is now: 17th January 2025 - 04:05 AM |
Invision Power Board
v9.1.4 © 2025 IPS, Inc.


