|
|

|
Porsche, and the Porsche crest are registered trademarks of Dr. Ing. h.c. F. Porsche AG.
This site is not affiliated with Porsche in any way. Its only purpose is to provide an online forum for car enthusiasts. All other trademarks are property of their respective owners. |
|
|
  |
| cary |
 Oct 15 2015, 08:19 PM Oct 15 2015, 08:19 PM
Post
#546
|
|
Advanced Member     Group: Members Posts: 3,900 Joined: 26-January 04 From: Sherwood Oregon Member No.: 1,608 Region Association: Pacific Northwest 
|
My bad.
I didn't mention that I go straight to the air nozzle after each tack. Have a special magnetic loop to keep it real close. |
| cary |
 Oct 17 2015, 09:31 PM Oct 17 2015, 09:31 PM
Post
#547
|
|
Advanced Member     Group: Members Posts: 3,900 Joined: 26-January 04 From: Sherwood Oregon Member No.: 1,608 Region Association: Pacific Northwest 
|
Now we'll start the left rear fender. (IMG:style_emoticons/default/welder.gif)
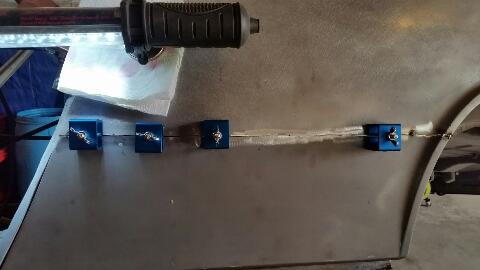 The adjustable butt weld clamps are pretty trick. Lots of time flipping them over to get a perfect tight fit. Like I mentioned above I used the straight edge to measure the surfaces. 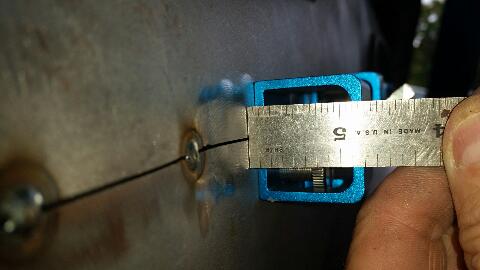 I also removed the clamps after I tacked both sides. Which allowed me use the body hammer to keep things flat. Sorry to say, I had one blow out right in the middle. (IMG:style_emoticons/default/mad.gif) Like I thought, this caused a slight warp. 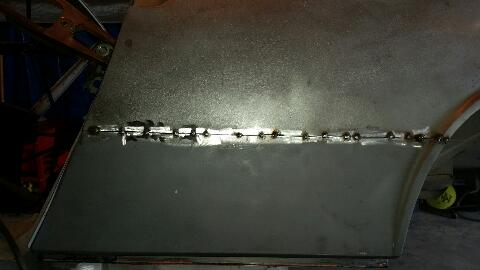 Stacking the welds went much better. I used the edge of the heat ring as my starting point to pull new tack into the old. 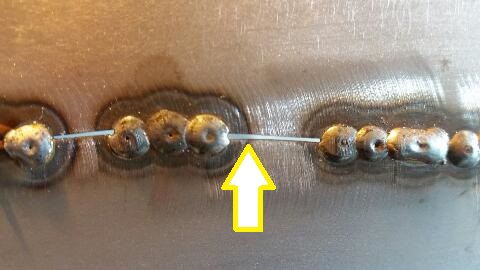 |
| cary |
 Oct 17 2015, 09:56 PM Oct 17 2015, 09:56 PM
Post
#548
|
|
Advanced Member     Group: Members Posts: 3,900 Joined: 26-January 04 From: Sherwood Oregon Member No.: 1,608 Region Association: Pacific Northwest 
|
I think it took me about 3 hours. The blow out took 5 or 6 tacks to fill in. (IMG:style_emoticons/default/mad.gif)
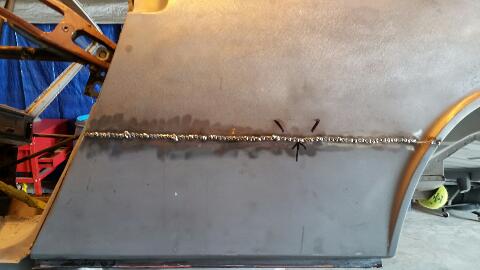 Markers show the low spot. The rest went reletively well. On to grinding. I use the edge of the cutting disc to grind the top off the weld. 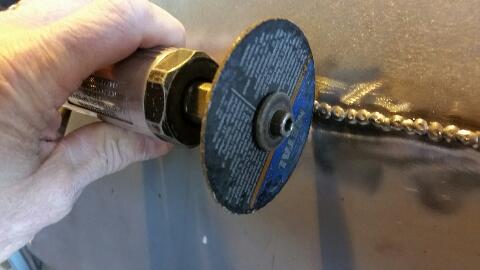 I cut about 2 inches at a time. Depending on the thickness of the weld I stopped about 1/2 way through and cooled with air. 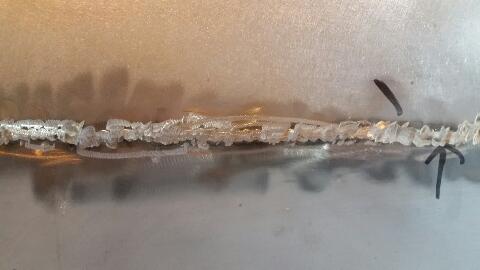 Then I finished the grinding with a flapper disc. At the end of the day I have one low spot above the weld I just can't pull up. 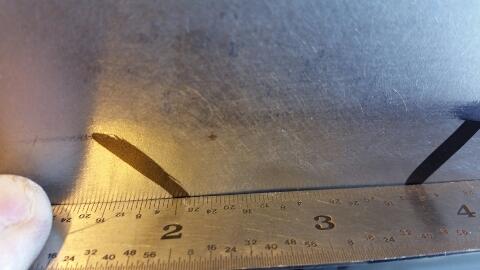 |
| cary |
 Oct 17 2015, 10:10 PM Oct 17 2015, 10:10 PM
Post
#549
|
|
Advanced Member     Group: Members Posts: 3,900 Joined: 26-January 04 From: Sherwood Oregon Member No.: 1,608 Region Association: Pacific Northwest 
|
I still have tendency to over work it. I don't want to have use too much body filler
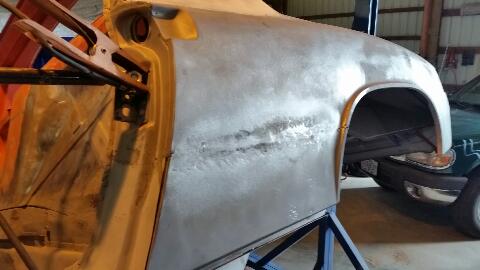 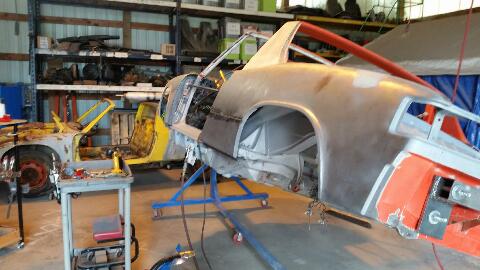 The remaining bare metal on the exterior of the fenders was cleaned with wax and grease remover. It's ready to get sprayed with epoxy on the next work day. Hopefully it will stay warm enough. |
| 76-914 |
 Oct 18 2015, 04:01 PM Oct 18 2015, 04:01 PM
Post
#550
|
|
Repeat Offender & Resident Subaru Antagonist           Group: Members Posts: 13,655 Joined: 23-January 09 From: Temecula, CA Member No.: 9,964 Region Association: Southern California 
|
One of my favorite build threads! (IMG:style_emoticons/default/beerchug.gif) Like a good book, I hope it never ends. (IMG:style_emoticons/default/biggrin.gif)
|
| cary |
 Oct 18 2015, 06:19 PM Oct 18 2015, 06:19 PM
Post
#551
|
|
Advanced Member     Group: Members Posts: 3,900 Joined: 26-January 04 From: Sherwood Oregon Member No.: 1,608 Region Association: Pacific Northwest 
|
Here's what I'm trying accomplish. I consider this the benchmark
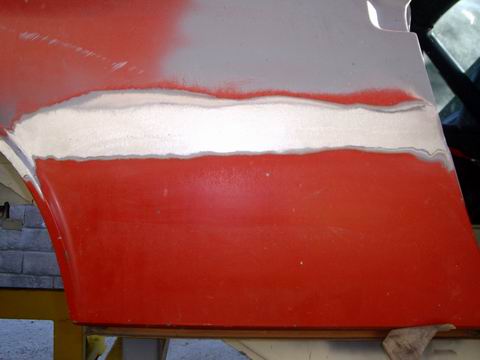 http://www.914world.com/bbs2/index.php?sho...ead&st=2009 Starts at Post #223 |
| cary |
 Oct 18 2015, 06:29 PM Oct 18 2015, 06:29 PM
Post
#552
|
|
Advanced Member     Group: Members Posts: 3,900 Joined: 26-January 04 From: Sherwood Oregon Member No.: 1,608 Region Association: Pacific Northwest 
|
The only other thing that I've read that might be causing some of my issues.
220v mig welding. Reading thru the hot rod welding boards. Some say that the 220v welders create a harder weld that can't be worked. Also more brittle. |
| cary |
 Oct 19 2015, 07:49 AM Oct 19 2015, 07:49 AM
Post
#553
|
|
Advanced Member     Group: Members Posts: 3,900 Joined: 26-January 04 From: Sherwood Oregon Member No.: 1,608 Region Association: Pacific Northwest 
|
Here's Jeff Hail's How To Grind Down Butt Weld :
Installed the rt quarter panel that I had to cut off for the wheelhouse. Used the butt-welding clamps to secure and align the panel. Making a series of tack weld's while stopping to cool the panel with compressed air. More tacks, let cool, and many, many more tacks, let cool etc etc etc until one solid weld is complete all the way across the gap. When butt-welding along with good weld penetration the key is the grinding and finishing process. I begin with a spot weld grinding disc ( I can't find what one of hose looks like or is) to take the crown of the weld down to just above panel height. Move slow and let the panel cool. A grinder will warp thin sheetmetal just like overheating while welding. Then I use a 3 inch 36 grit disc on a angle die grinder to take the crown down a little more. Then I switch to a 6 inch flat flap disc and follow the crown back and forth eliminating any high spots. At the end I then use a different type of flap disc on a straight die grinder. I follow just the butt weld crown. This will level the weld and not dig into the surrounding metal. This type of disc is like 250 grit emery cloth. Then I take a dual action sander with 40 grit and enlarge the area of finishing. The DA really smooths the weld and surrounding area well. Switch to 80 grit paper and then 120. I then knocked down the inside of the qtr panel with 80 grit 3 inch discs and then a squirt of primer. I will let the primer dry and block sand the the panel Tuesday. No bondo. Will see after block sanding. Most likely just a skim coat of metal glaze is all it will require if that. 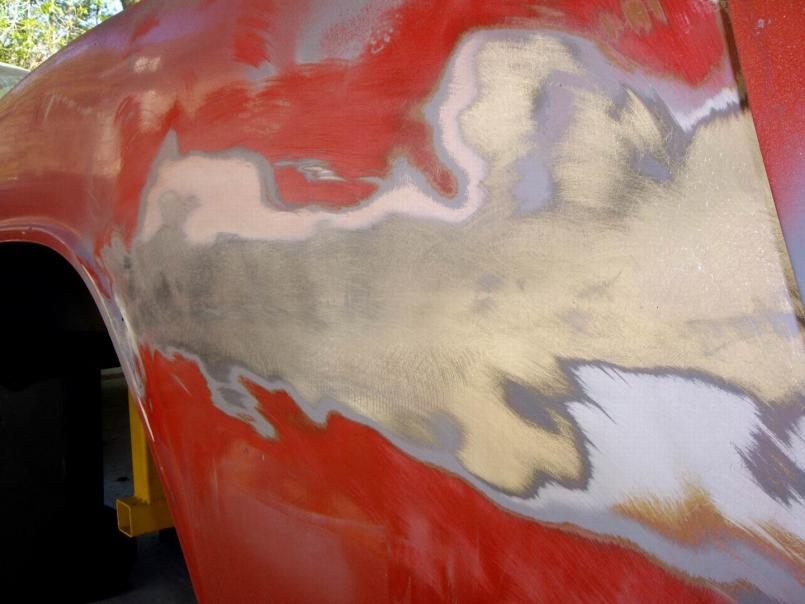 Here's the other style flapper disc. I have one but didn't use it (IMG:style_emoticons/default/sad.gif) 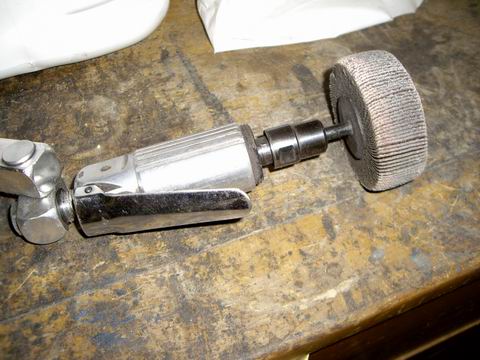 As I'm sitting here drinking my morning coffee. I'm thinking I'm going to cut off the rear fenders on my $75 parts car and try to perfect this skill/talent. I think I have the welding down. It's the grinding down that needs a little work. Most of the problem is between the ears. But some of it could be tool selection. |
| cary |
 Oct 19 2015, 08:14 AM Oct 19 2015, 08:14 AM
Post
#554
|
|
Advanced Member     Group: Members Posts: 3,900 Joined: 26-January 04 From: Sherwood Oregon Member No.: 1,608 Region Association: Pacific Northwest 
|
|
| cary |
 Oct 20 2015, 08:20 AM Oct 20 2015, 08:20 AM
Post
#555
|
|
Advanced Member     Group: Members Posts: 3,900 Joined: 26-January 04 From: Sherwood Oregon Member No.: 1,608 Region Association: Pacific Northwest 
|
Here's some nice work. Metals a little thicker than ours. But has some good technique ideas.
http://www.garagejournal.com/forum/showthread.php?t=53534 Spent the entire night reading up on butt welding and grinding. I've got the welding down. Now it's time to perfect the grinding. The Tool Whore is going to order some 2" 3m Cubitron discs for smoothing out the weld after I take down the bead. The Cubitron is supposed to cut faster and cooler. Plus I'll use a much lighter touch with grinder and let the media do the work. Not me pressing down on the grinder. |
| cary |
 Oct 21 2015, 07:51 PM Oct 21 2015, 07:51 PM
Post
#556
|
|
Advanced Member     Group: Members Posts: 3,900 Joined: 26-January 04 From: Sherwood Oregon Member No.: 1,608 Region Association: Pacific Northwest 
|
Here's a nice selection of Cubitron discs.
http://www.zoro.com/search?q=cubitron&...N+II&page=6 I ordered a small selection. We'll see if it's 3m hype or a better mousetrap. |
| cary |
 Oct 22 2015, 08:18 PM Oct 22 2015, 08:18 PM
Post
#557
|
|
Advanced Member     Group: Members Posts: 3,900 Joined: 26-January 04 From: Sherwood Oregon Member No.: 1,608 Region Association: Pacific Northwest 
|
Upped my seam sealer game ..............
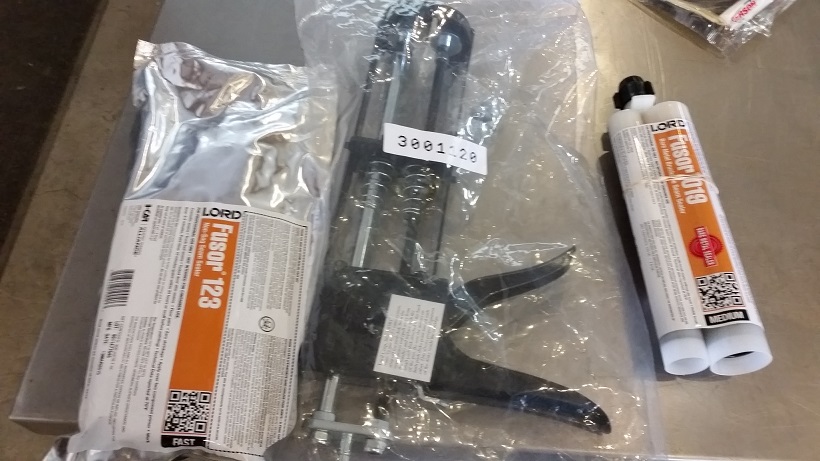 Both are 2 part. The 019 is brush on. The 123 is squeeze on. |
| cary |
 Oct 22 2015, 09:13 PM Oct 22 2015, 09:13 PM
Post
#558
|
|
Advanced Member     Group: Members Posts: 3,900 Joined: 26-January 04 From: Sherwood Oregon Member No.: 1,608 Region Association: Pacific Northwest 
|
Today was kind of a race against temp and time. The SPI epoxy primer is pretty adamant that it needs to be kept at 70 degrees for 24 hours.
When I got to the shop it was 60 degrees. Spent the morning welding in the right jack point and the patch Super In Law made for the inner fender support. I didn't shoot enough pictures today, imagine that. Here's a shot of the fender well with the new epoxy primer. 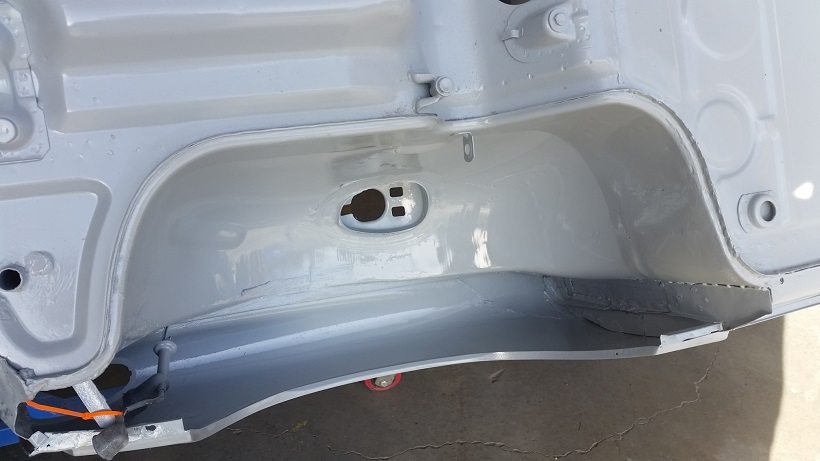 Then I emptied the tent so it could finally be used a booth. I'm not painting in it, but I am going to use it to cure the primer. Using a pair of shop lights as the heat source. Too paranoid to use a heater. I'll run back out there tomorrow night to check on the lights and temp the steel. 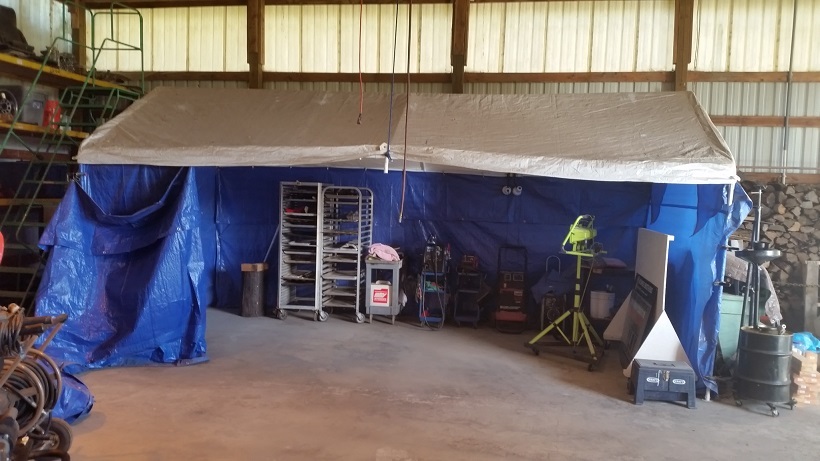 Snug as a bug in a rug. Car into the booth for the first time. 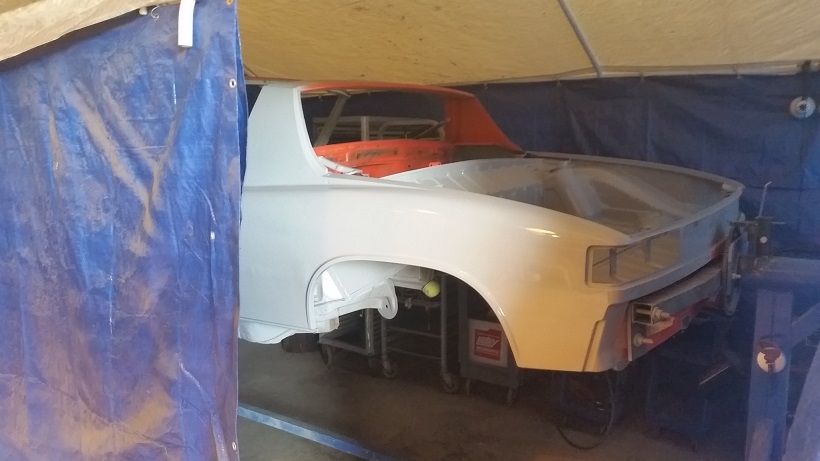 Sorry for the lack of photos. That's not like me ......... 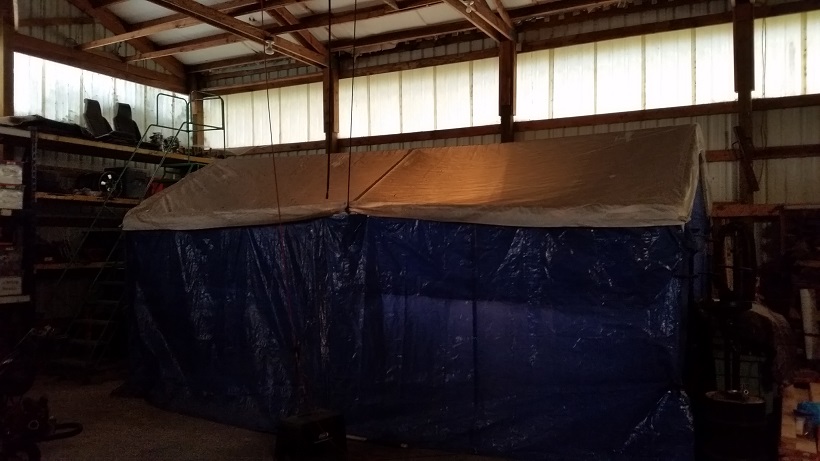 |
| cary |
 Oct 22 2015, 09:16 PM Oct 22 2015, 09:16 PM
Post
#559
|
|
Advanced Member     Group: Members Posts: 3,900 Joined: 26-January 04 From: Sherwood Oregon Member No.: 1,608 Region Association: Pacific Northwest 
|
Redecorated my welding helmet .............
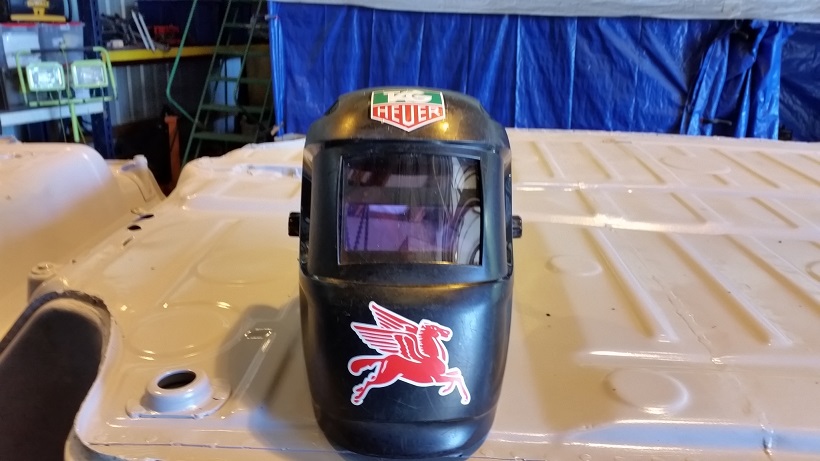 |
| cary |
 Oct 22 2015, 09:24 PM Oct 22 2015, 09:24 PM
Post
#560
|
|
Advanced Member     Group: Members Posts: 3,900 Joined: 26-January 04 From: Sherwood Oregon Member No.: 1,608 Region Association: Pacific Northwest 
|
I was digging in my parts stash looking for a front hood that I'll start using for paint gun testing panel when I found early engine lid. It had a pair of rubber bumpers. (IMG:style_emoticons/default/piratenanner.gif)
Attached thumbnail(s) 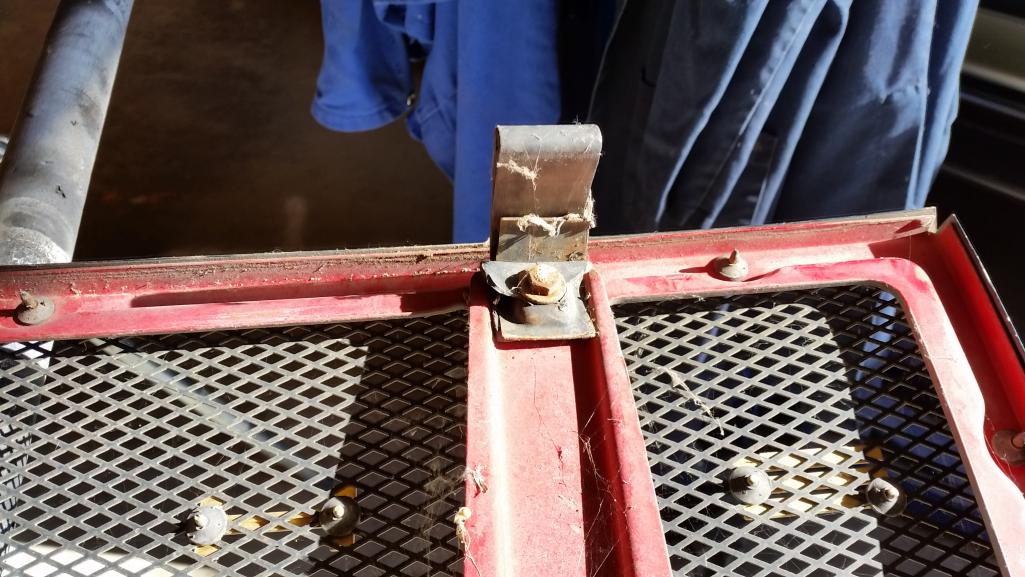
|
| 914forme |
 Oct 23 2015, 06:47 AM Oct 23 2015, 06:47 AM
Post
#561
|
|
Times a wastin', get wrenchin'!     Group: Members Posts: 3,896 Joined: 24-July 04 From: Dayton, Ohio Member No.: 2,388 Region Association: None 
|
Wow lots of good information here.
ESAB Easy Grind 0.023" wire. It has a lower tensile strength, and can be hammer welded easier. Only use it for sheet metal body work. Go back to normal wire for anything that have a load on it. Less heat, easy to grind dow, and then since it is a low carbon steel, it can be hammered and dollied back into shape. BTW how did the SPI work out? |
| cary |
 Oct 23 2015, 07:36 AM Oct 23 2015, 07:36 AM
Post
#562
|
|
Advanced Member     Group: Members Posts: 3,900 Joined: 26-January 04 From: Sherwood Oregon Member No.: 1,608 Region Association: Pacific Northwest 
|
I'll have to look for the wire. I'm using Hobart .024 now, it cools pretty hard. I did tinker with hammering the rosette welds on the jack support yesterday. They harden pretty quick. I'll take a trip to AirGas for lunch.
SPI Epoxy, I like it. The portions that needed to be sanded so I could blend in the adjacent area look to have great adhesion. Yesterday was a change of gun and tips. Plus I used my touch up gun to cut in the tight areas. Once I got it dialed in, it laid down real nice. The first application (couple weeks ago) had a few fish eyes on the first fender. I didn't let the Wax & Grease remover flash off completely. My Bad. If all else fails, follow the instructions. I ordered their W&G Remover on the order I placed Wednesday. I'm going to bring an old fashioned egg timer from home. |
| cary |
 Oct 24 2015, 07:25 AM Oct 24 2015, 07:25 AM
Post
#563
|
|
Advanced Member     Group: Members Posts: 3,900 Joined: 26-January 04 From: Sherwood Oregon Member No.: 1,608 Region Association: Pacific Northwest 
|
I'll have to look for the wire. I'm using Hobart .024 now, it cools pretty hard. I did tinker with hammering the rosette welds on the jack support yesterday. They harden pretty quick. I'll take a trip to AirGas for lunch. Airgas was a no go. They only carry .030. I have a roll coming from weldersupply.com. Irony is, is that I only have a couple of pieces from my huge RD order left to go. Engine shelf, trunk hinge mount and battery mount and tray. But I still need to order the long stiffener kit from Maddog. http://www.maddogsmotorsports.com/ |
| cary |
 Oct 24 2015, 07:34 AM Oct 24 2015, 07:34 AM
Post
#564
|
|
Advanced Member     Group: Members Posts: 3,900 Joined: 26-January 04 From: Sherwood Oregon Member No.: 1,608 Region Association: Pacific Northwest 
|
Back to the fender support patch.
Here it is having weld thru primer shot on the portion that will slide into the hem on the fender patch. 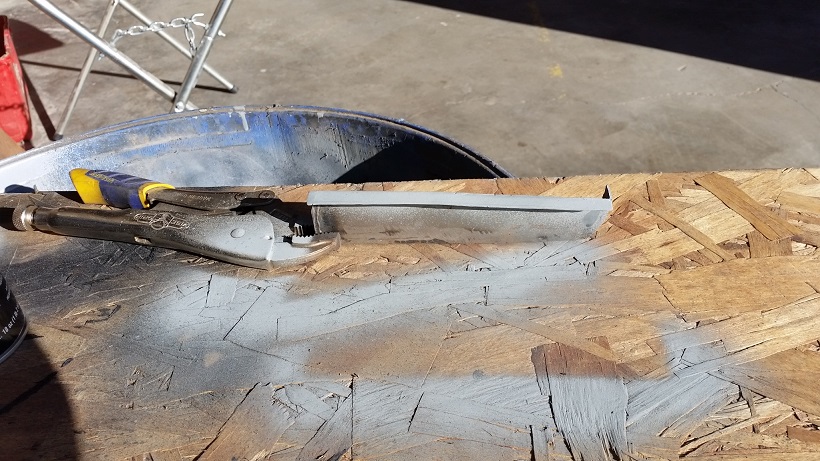 That primer portion will slide into the hem you see here. 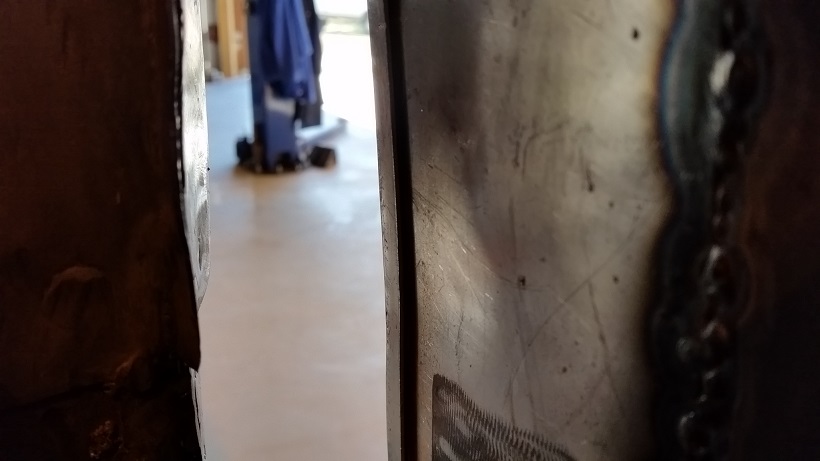 Here is a couple shots of it installed both front and back. 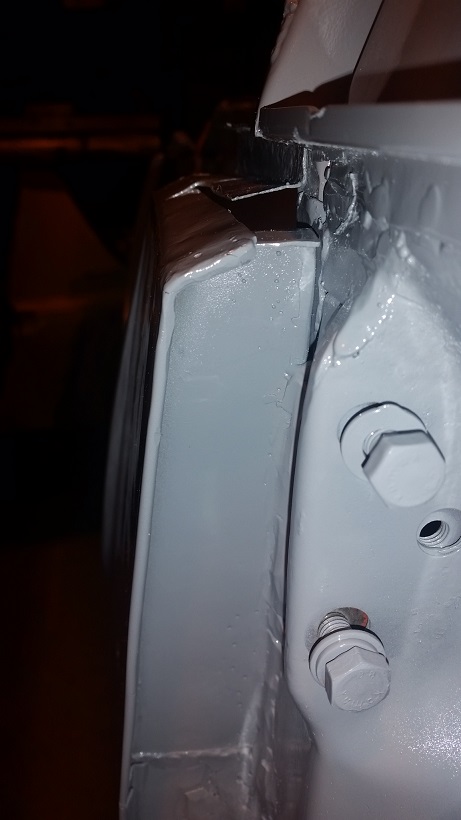 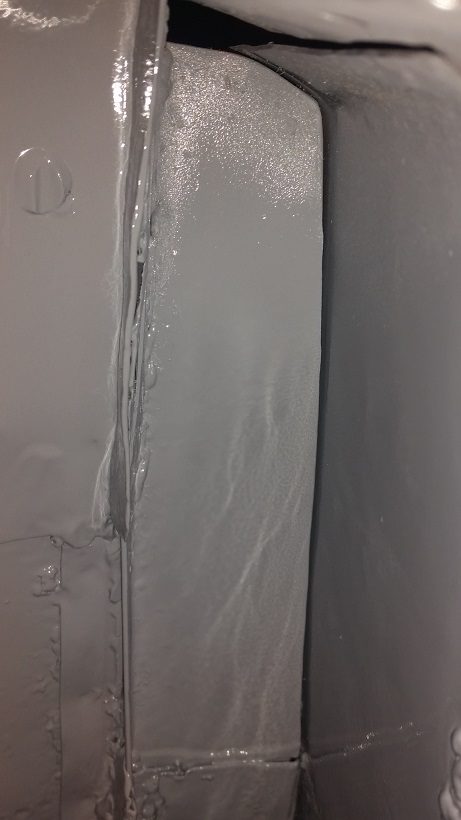 The hem has been left loose until I install the doors. After that I'll either spot weld or tighten the hem and 2 part seam seal. The bumpy welds you see are usually welding on top of old welds. I probably don't give them quite enough heat. |
| cary |
 Oct 24 2015, 07:43 AM Oct 24 2015, 07:43 AM
Post
#565
|
|
Advanced Member     Group: Members Posts: 3,900 Joined: 26-January 04 From: Sherwood Oregon Member No.: 1,608 Region Association: Pacific Northwest 
|
When I got out to the shop the body temped at 60 degrees. Not too bad. But air temp in the shop was 55. So I'll need to figure something out.
So here she is .............. 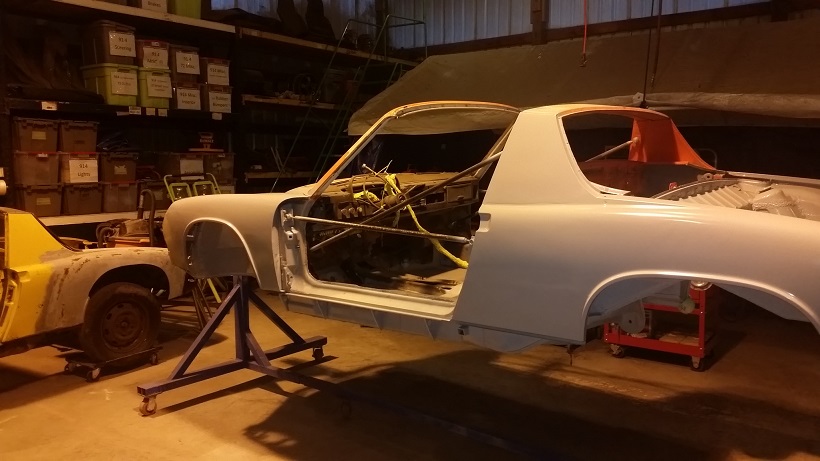 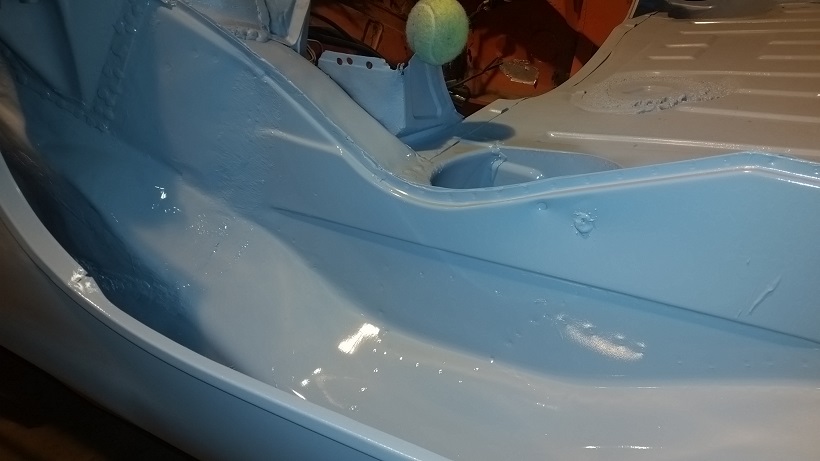 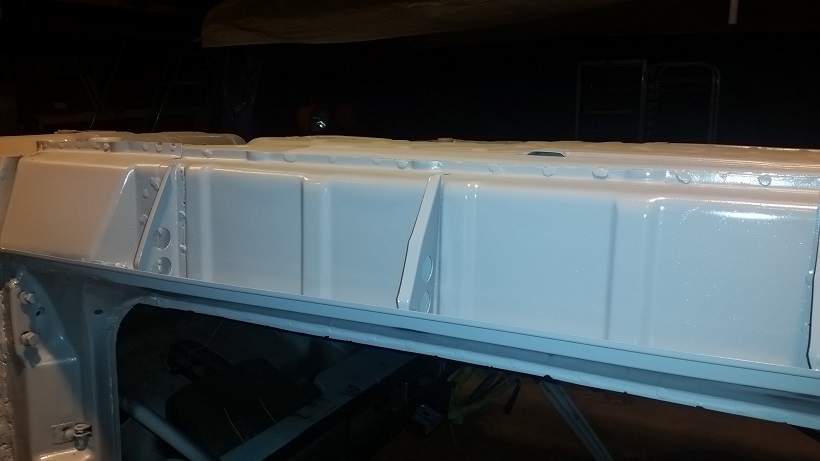 |
  |
4 User(s) are reading this topic (4 Guests and 0 Anonymous Users)
0 Members:

|
Lo-Fi Version | Time is now: 18th January 2025 - 05:03 AM |
Invision Power Board
v9.1.4 © 2025 IPS, Inc.


