|
|

|
Porsche, and the Porsche crest are registered trademarks of Dr. Ing. h.c. F. Porsche AG.
This site is not affiliated with Porsche in any way. Its only purpose is to provide an online forum for car enthusiasts. All other trademarks are property of their respective owners. |
|
|
  |
| bbrock |
 Apr 11 2021, 08:41 PM Apr 11 2021, 08:41 PM
Post
#441
|
|
914 Guru      Group: Members Posts: 5,269 Joined: 17-February 17 From: Montana Member No.: 20,845 Region Association: Rocky Mountains 
|
My engine bar had a bolt rust welded into the bar and sheared off just like that. MAPP gas and a BFH took care of it. I'm pretty sure you could bend that straight too. I had to straighten one once and recall it being pretty easy to clamp in a vice and straighten it out.
I can't imaging that wallowed out hole will be an issue once the bolts are torqued down, but I like the sleeve idea. Somehow I missed your March update with the rattle can 2K. That's pretty cool! |
| Superhawk996 |
 Apr 18 2021, 11:36 AM Apr 18 2021, 11:36 AM
Post
#442
|
|
914 Guru      Group: Members Posts: 6,505 Joined: 25-August 18 From: Woods of N. Idaho Member No.: 22,428 Region Association: Galt's Gulch 
|
Problem Fixes:
Trailing arm was fixed by inserting a piece of 1" OD, 0.065" wall tube into the orignal though tube and then welding it up slowly. This will keep water and excess garbage from being funneled into the trailing arm. 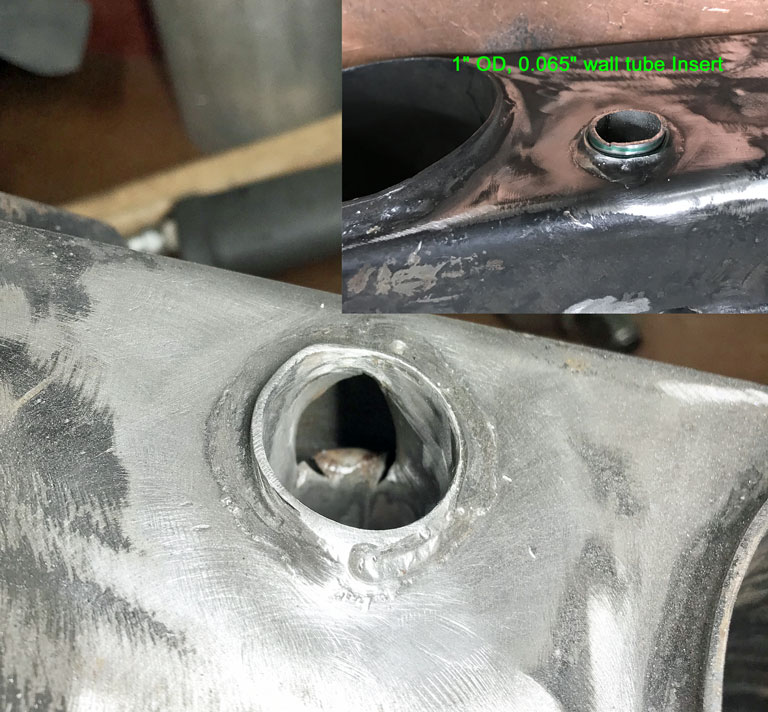 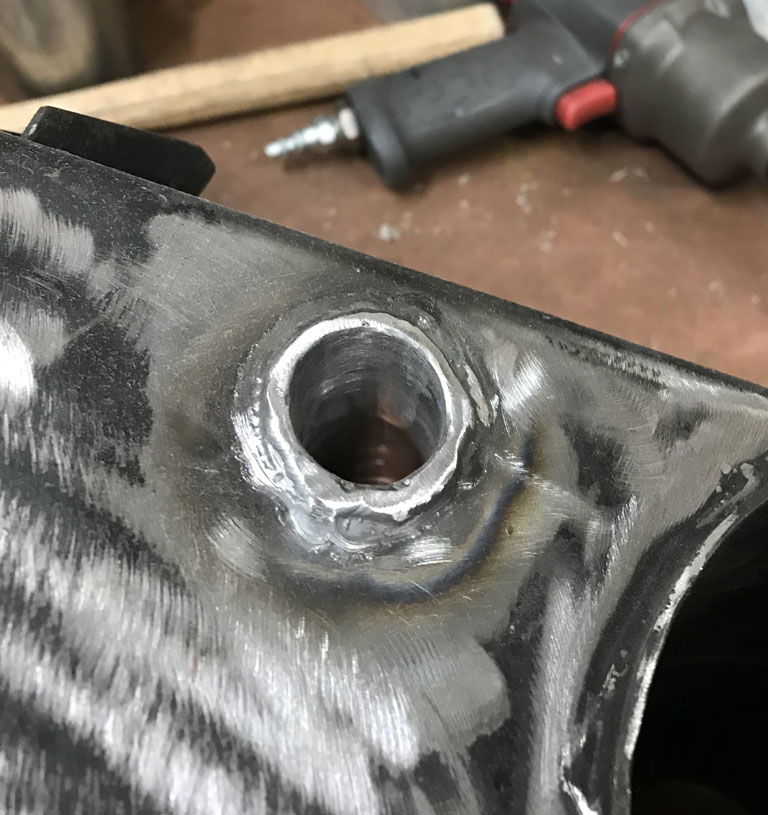 Engine bar was fixed by turning up an insert to fit the hole that was elongated and then welding it in place. 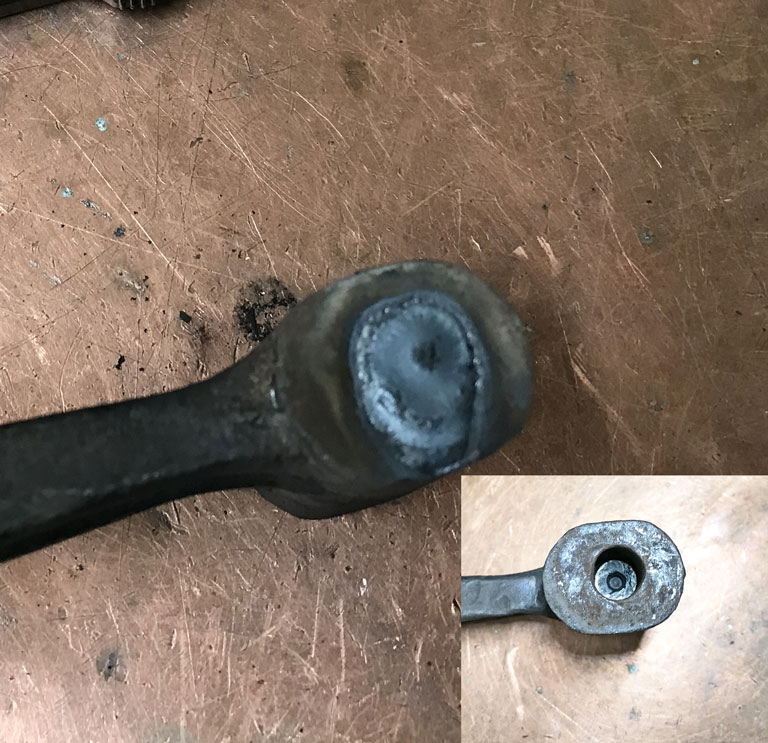 Excess weld was flycut back to original surface. Re-drilled the though hole. 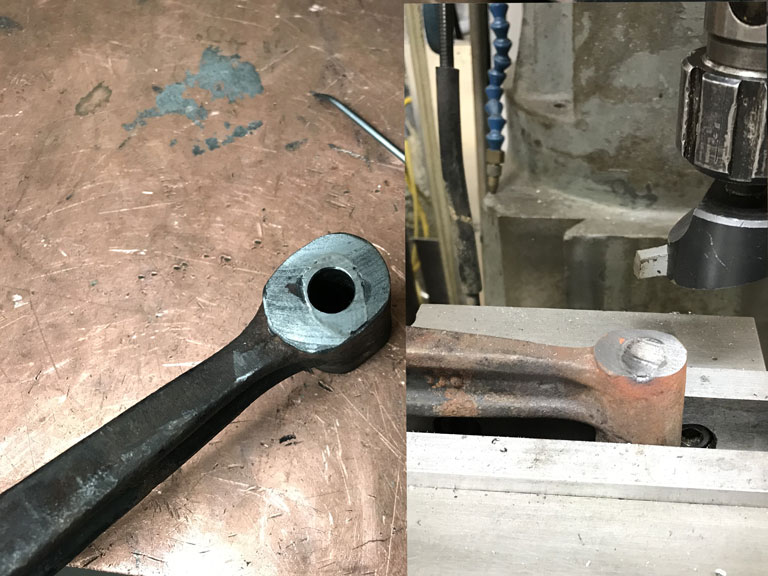 Fixed right and good for another 50 years. On to bigger and better things (IMG:style_emoticons/default/biggrin.gif) |
| 930cabman |
 Apr 18 2021, 12:57 PM Apr 18 2021, 12:57 PM
Post
#443
|
|
Advanced Member     Group: Members Posts: 3,643 Joined: 12-November 20 From: Buffalo Member No.: 24,877 Region Association: North East States 
|
@Superhawk, when does it end??
|
| Superhawk996 |
 Apr 18 2021, 01:57 PM Apr 18 2021, 01:57 PM
Post
#444
|
|
914 Guru      Group: Members Posts: 6,505 Joined: 25-August 18 From: Woods of N. Idaho Member No.: 22,428 Region Association: Galt's Gulch 
|
@Superhawk, when does it end?? @930cabman End? (IMG:style_emoticons/default/av-943.gif) It never ends (IMG:style_emoticons/default/happy11.gif) Finish chassis structural rustoration to get to a driveable state. Many more bits still need powder coat and/or plating Assemble the stock 2.0L four cylinder engine with hope of driving it a smidge this fall Rebuild transmission for long term reliability. Finish rebuild of 2.4L six and associated conversion bits and do conversion. Eventually do full rotisserie re-paint and steel flares 1000 other little tasks (fix wiring, add the front fog lamps that are missing, replace all rubber seals) And notice I haven't even included the other curve balls life always throws at us. (IMG:style_emoticons/default/shades.gif) |
| 930cabman |
 Apr 18 2021, 04:55 PM Apr 18 2021, 04:55 PM
Post
#445
|
|
Advanced Member     Group: Members Posts: 3,643 Joined: 12-November 20 From: Buffalo Member No.: 24,877 Region Association: North East States 
|
True, it ends when we are carried by six, then our kids can figure it out. Lucky them
|
| Superhawk996 |
 Apr 26 2021, 06:08 AM Apr 26 2021, 06:08 AM
Post
#446
|
|
914 Guru      Group: Members Posts: 6,505 Joined: 25-August 18 From: Woods of N. Idaho Member No.: 22,428 Region Association: Galt's Gulch 
|
Spent some time this weekend filling in the hole left when the passenger side bulkhead had to be cut to rebuild the long all the way back to the trunk.
Upper portion of the hole was easy. I just reused the section cut out and that was done months ago. The lower portion that constitutes the hell hole was a bit more fabrication work. Not a big deal but time to create templates and need to fix a small section of pinholes down at the engine shelf slowed it down. Wanted to recreate the same type of weld flange as was there originally. Couple views of the templates. 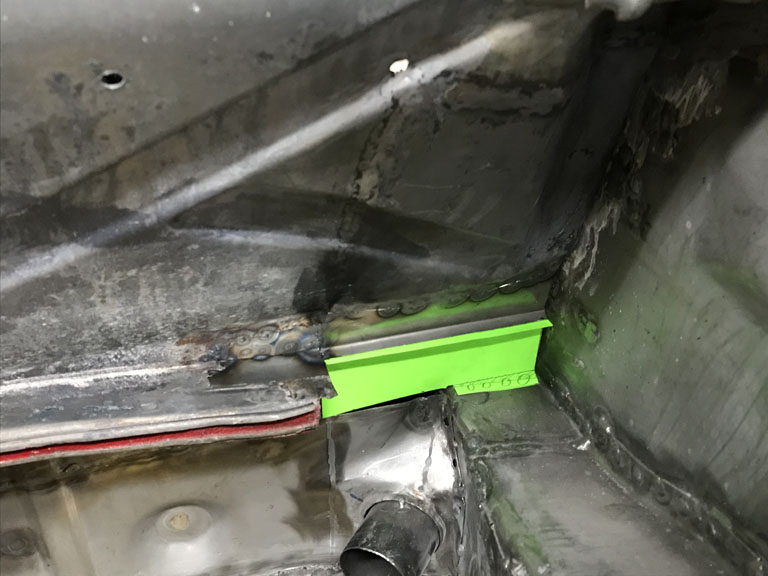 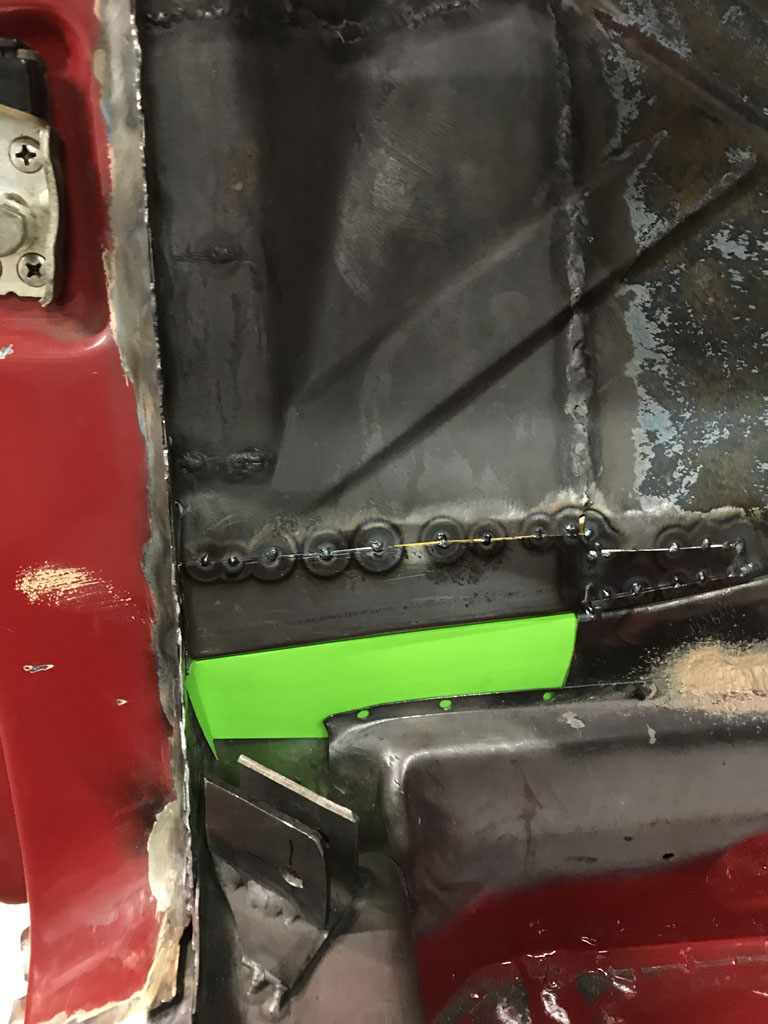 Metal in place 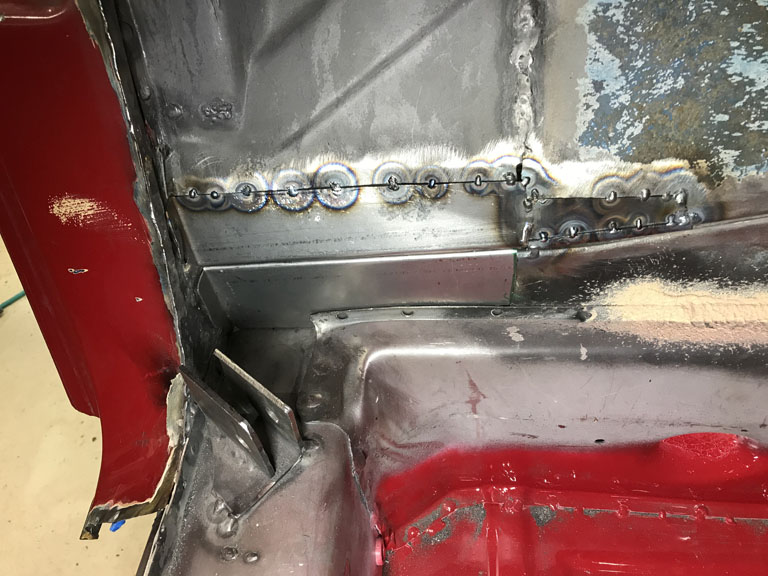 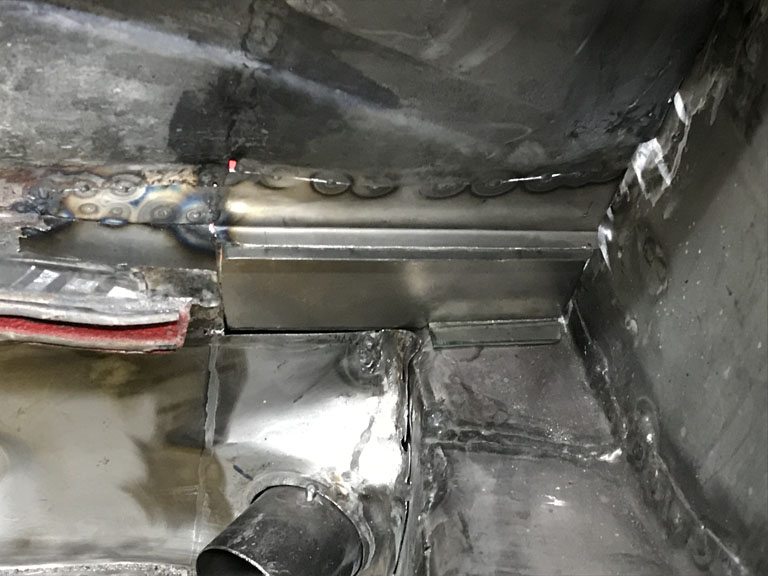 Unfortunately, I ran low on Argon and could only tack weld in parts this weekend. Poor planning on my part. (IMG:style_emoticons/default/dry.gif) |
| Superhawk996 |
 May 9 2021, 06:41 PM May 9 2021, 06:41 PM
Post
#447
|
|
914 Guru      Group: Members Posts: 6,505 Joined: 25-August 18 From: Woods of N. Idaho Member No.: 22,428 Region Association: Galt's Gulch 
|
No big progress of late. Lots of little jobs.
Finished up close out of the rear passenger side bulkhead and started some rough fit up of the inner suspension console. 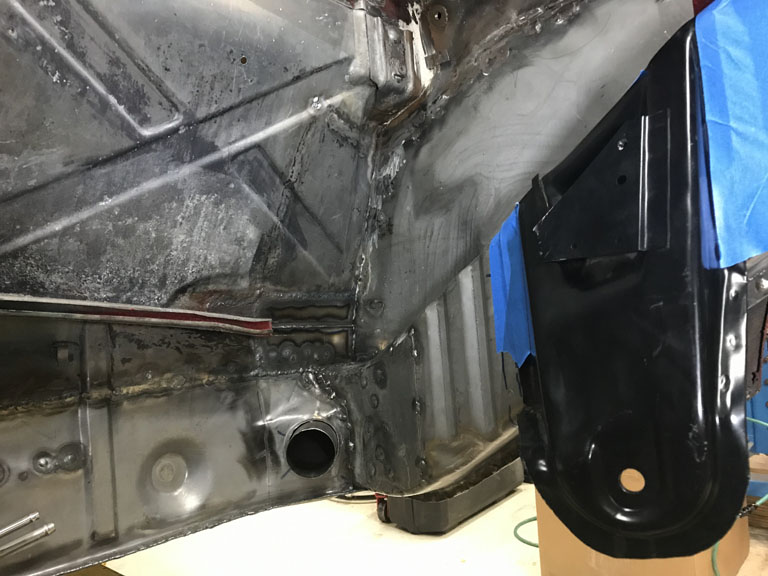 Filled another one of the holes in the passenger wheel house that was hacked for the AC install. Still needs some finish work. And of course there were also a couple of other P-clip holes where the metal surgeons just shot self tapping screws though the wheel house. 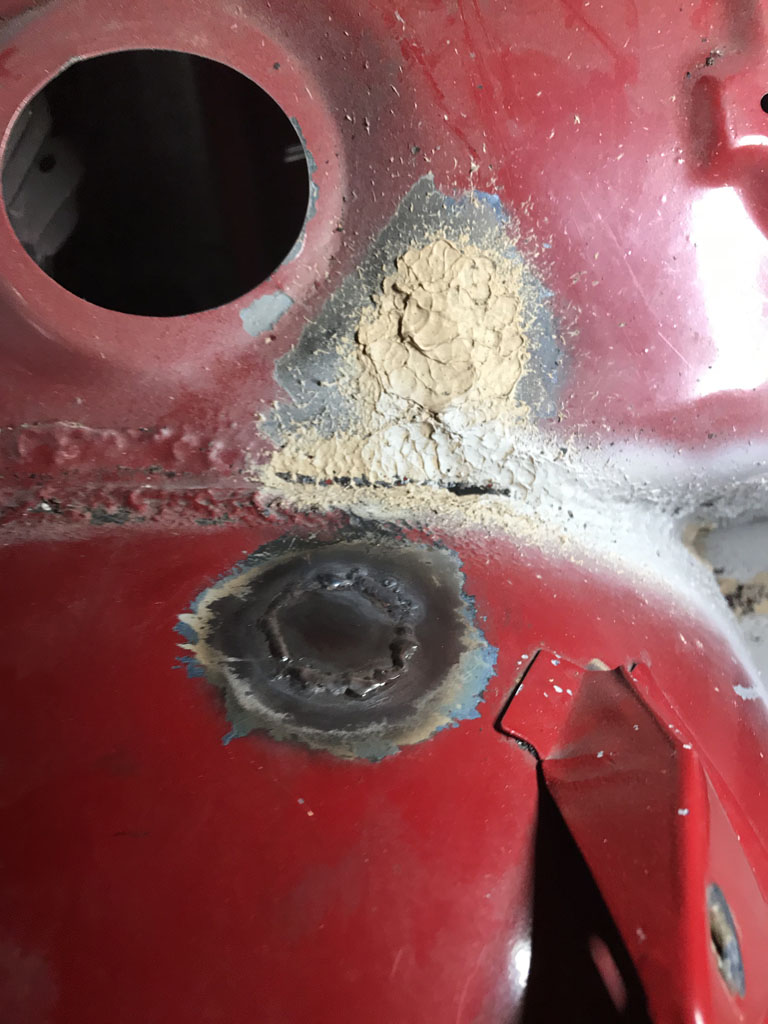 While I was screwing around up in that area I decided to do a little VIN excavation. The heavy primer and paint over it rendered it barely readable. 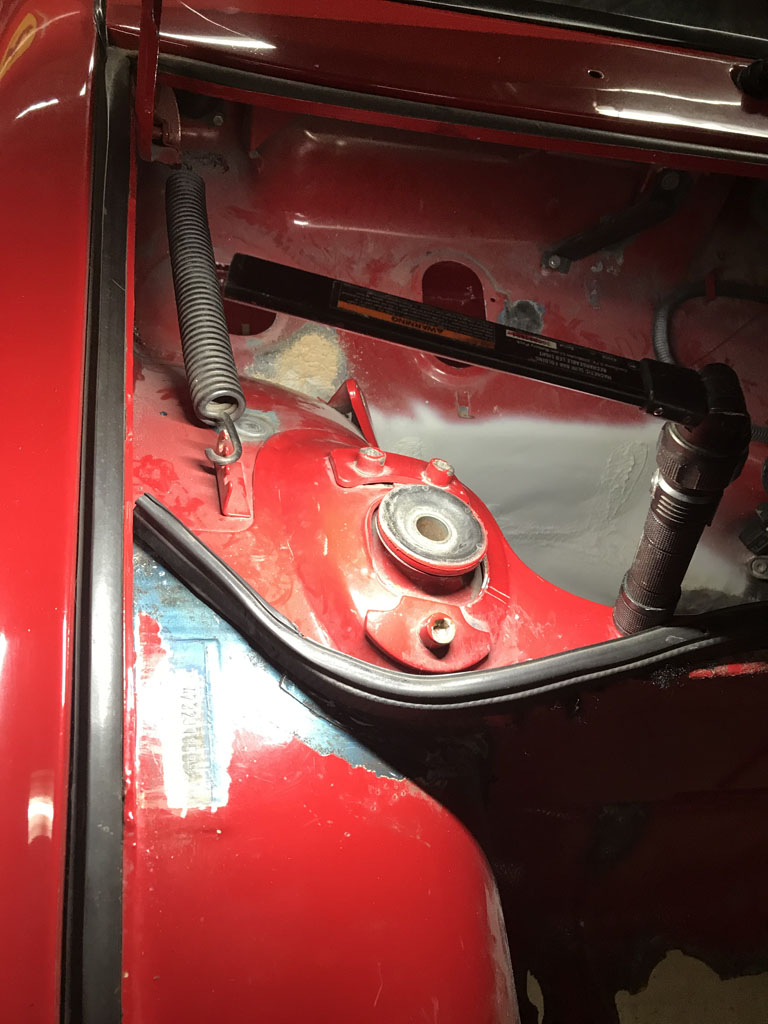 And in anticipation of having to do final fitting of the suspension console, I figured I better do another round of measurement since I hadn't done one since installing the floor pans, tunnel, and seat crossmembers. I couldn't be happer than a pig in (IMG:style_emoticons/default/stromberg.gif). I was able to get the last little bit of "match boxing" of the chassis out with a diagonal heim joint brace that went from rear of passenger door to the front driver cowl area. 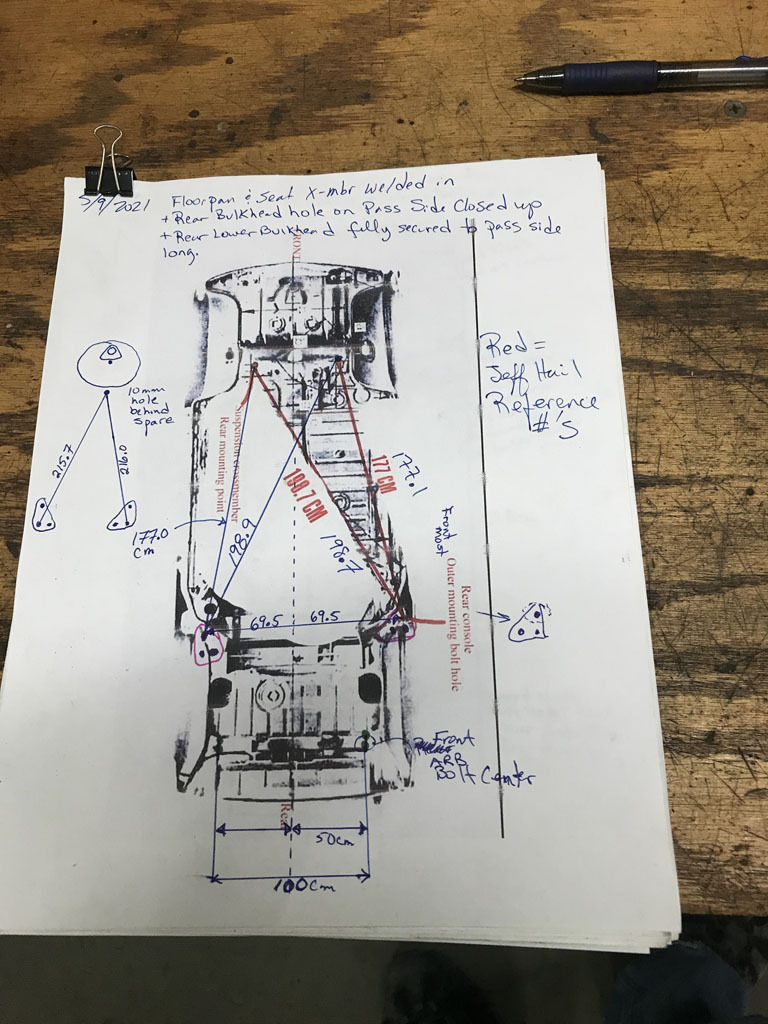 |
| 930cabman |
 May 10 2021, 04:50 AM May 10 2021, 04:50 AM
Post
#448
|
|
Advanced Member     Group: Members Posts: 3,643 Joined: 12-November 20 From: Buffalo Member No.: 24,877 Region Association: North East States 
|
Small bites are the only way we can complete these projects. Keep up the good work and thanks for documenting, I will be following soon with our rustout project, but on to the "rust free" project for now.
Measure twice, weld once should be our mantra |
| Superhawk996 |
 May 15 2021, 10:10 AM May 15 2021, 10:10 AM
Post
#449
|
|
914 Guru      Group: Members Posts: 6,505 Joined: 25-August 18 From: Woods of N. Idaho Member No.: 22,428 Region Association: Galt's Gulch 
|
Wanted to just drop a quick post to thank Pete at Restoration Design.
I couldn't find a local Detroit supplier that was willing to sell me some shear cuts of 18 gauge Galvaneal. My usual suspects don't stock Galvaneal, and/or weren't willing to sell just a partial sheet. I only needed enough to "wrap" the corrugated longitudinal section up in the engine compartment. I want a smooth OEM look. And to top it off the location where my inner suspension console needs to sit is partially, overlapping one of the corrugations. It need to be built out a bit for stiffness and then I'll wrap this into two layers like OEM section was. I'll also have enough to fix the rust pin hole section of the rear bulkhead behind the driver that was damaged by the OEM noise insulation that holds water. 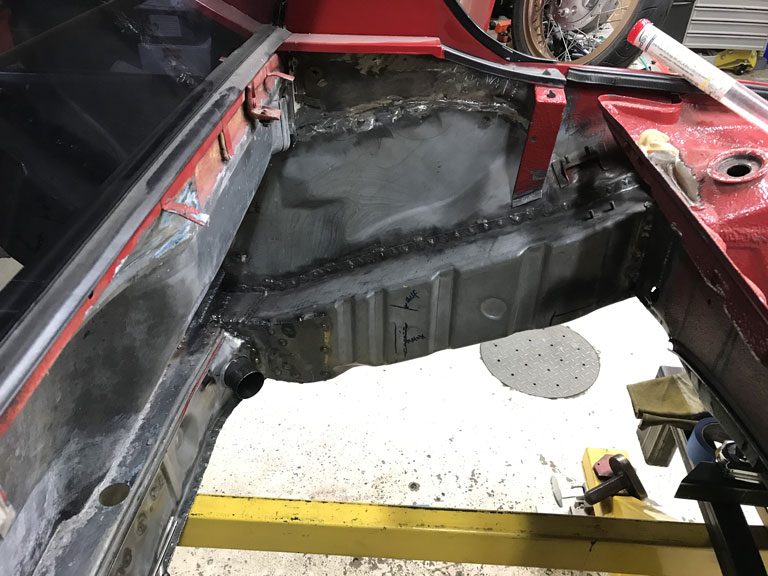 Why do I want Galvaneal so much? Short answer is that it has a thin layer of zinc annealed into the surface layer of the steel itself. It does a great job of holding off corrosion. Note that the bare metal shown above is over two years old, welded, and not showing any signs of surface rust that untreated sheet metal would. That is especially important to me where I'll end up with two layers of steel. The gap between two layers is a great place for corrosion to get started. I trust Galvaneal more than weldable primer. So not finding what I wanted locally, a quick PM to @Peteyd landed me with exactly what I wanted at a very nominal cost. 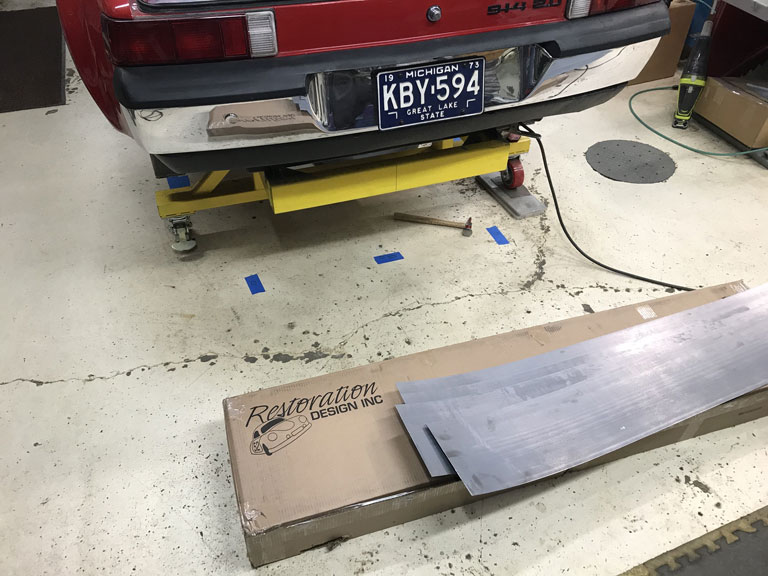 Awesome company & great people supporting our vintage Porsche's. (IMG:style_emoticons/default/first.gif) Support them whenever you can! |
| bbrock |
 May 15 2021, 12:14 PM May 15 2021, 12:14 PM
Post
#450
|
|
914 Guru      Group: Members Posts: 5,269 Joined: 17-February 17 From: Montana Member No.: 20,845 Region Association: Rocky Mountains 
|
Good idea using Galvaneal on sandwiched parts. Now I wish I had done that. I like the way it welds too even though I know that zinc is a bit nasty. I'm also not sold on weld-thru primer. After noticing that even the UPOL good stuff has about the same burn back as 2K epoxy and not being able to find a single hard datum that it actually protected the metal or prevented rust better than other primers , I decided to stop draining my wallet to resupply on weld-thru.
I don't mean to brag but two year old welded metal in my shop looks just your galvaneal even without the zinc. On second thought no. I DID mean to brag. As a Midwestern escapee, that's exactly what I intended to do. (IMG:style_emoticons/default/happy11.gif) |
| peteyd |
 May 17 2021, 10:55 AM May 17 2021, 10:55 AM
Post
#451
|
|
Senior Member    Group: Members Posts: 729 Joined: 27-March 08 From: Elora, Ontario, Canada Member No.: 8,858 Region Association: Canada |
@Superhawk996
I'm glad I could help out and get it to you before the weekend. We want to eliminate this process for the customer in the future, so we will be making the two pieces combined. Once we get back to making tooling for the 914 that is. Pete |
| Superhawk996 |
 May 29 2021, 09:46 AM May 29 2021, 09:46 AM
Post
#452
|
|
914 Guru      Group: Members Posts: 6,505 Joined: 25-August 18 From: Woods of N. Idaho Member No.: 22,428 Region Association: Galt's Gulch 
|
Parts Porn
Suspension parts back from powder coat this morning. @Bdstone914 provided a nice set of plated pivot shafts. 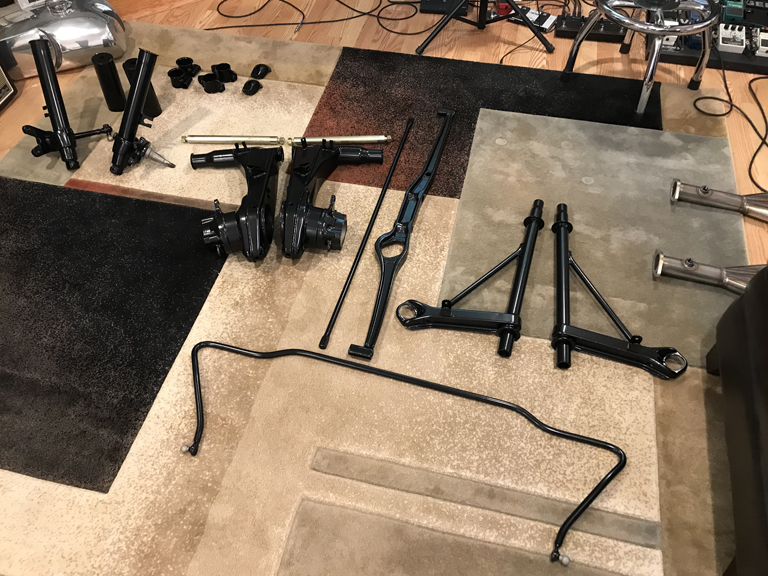 Will be a while before all this ends up back on the car. Memorial Day weekend, so hoping to get some time to get templates created for the engine bay long, and maybe get some of the welds under the floor pan cleaned up, seam sealed and painted. Might be ambitious. (IMG:style_emoticons/default/laugh.gif) |
| Superhawk996 |
 Jun 1 2021, 06:27 AM Jun 1 2021, 06:27 AM
Post
#453
|
|
914 Guru      Group: Members Posts: 6,505 Joined: 25-August 18 From: Woods of N. Idaho Member No.: 22,428 Region Association: Galt's Gulch 
|
All in all, got some stuff done despite other comittments.
Got a template made. Will make this in 3 pieces. Top bottom and sides to accomidate ease of fabrication and to take care of the compound curvatures. 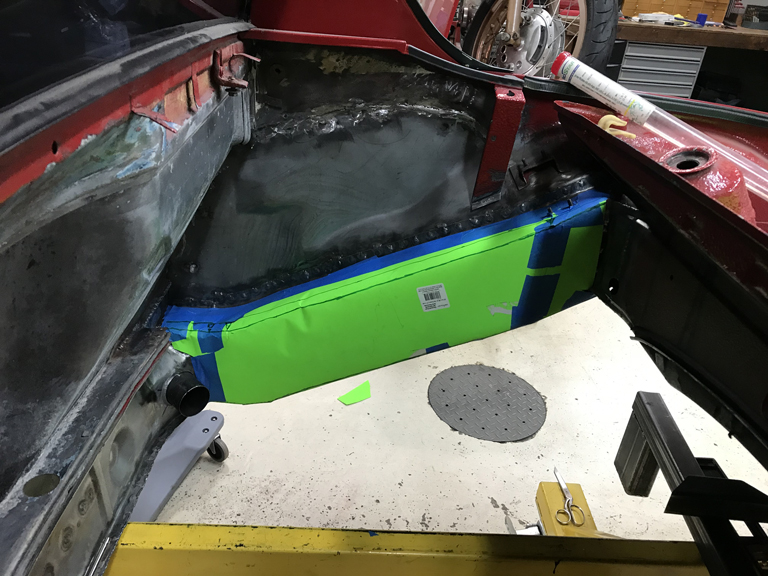 Underbody got seam sealed first, and then shot on some 2K epoxy primer. Still need to shoot some primer over the sealer once that dries. Undecided on how to proceed with all the puddle welds. Seam sealer seems like overkill since they aren't likey to wick in water. I'm thinking Raptor or other underbody coating will likely seal them and make them a little less obvious. Still time to decide on that. 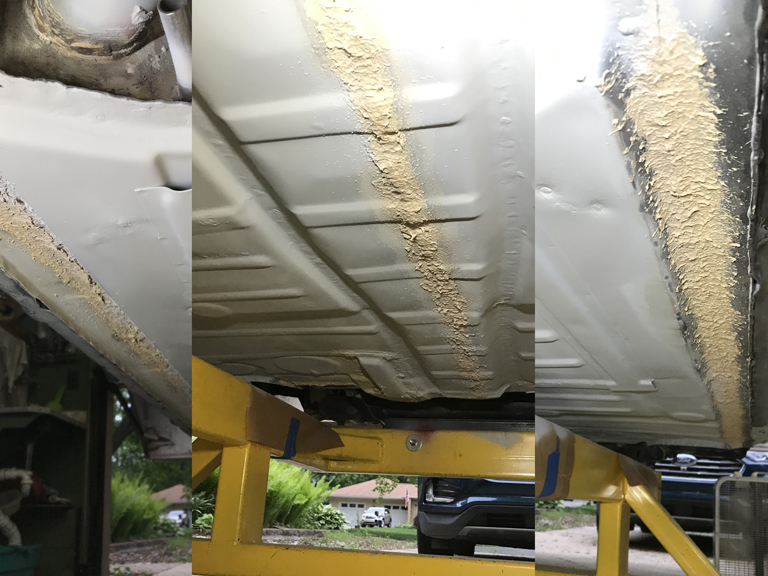 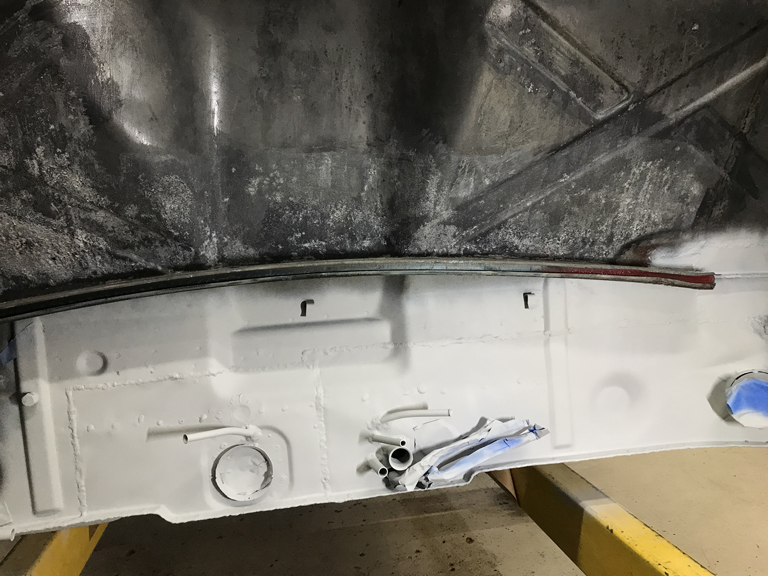 And I managed to get in a little bonus project. Bumper chrome was getting a bit nasty after 3 seasons of sitting around so a little maintenace polish was in order. The fact that this car was largely complete and had great bumpers was 1/2 the reason I bought it in the first place. 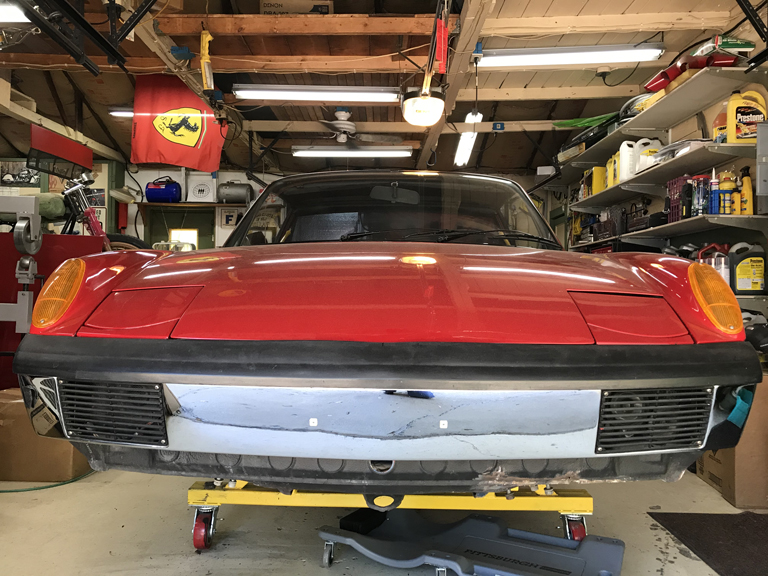 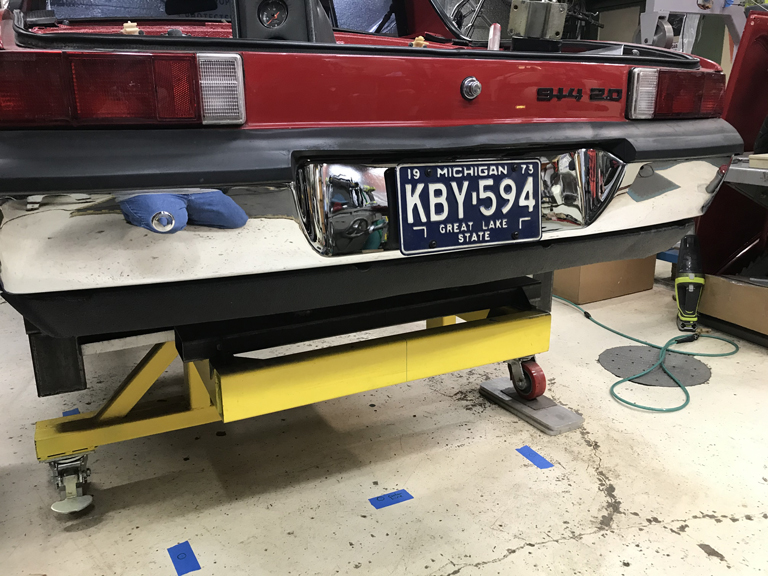 |
| Superhawk996 |
 Jun 5 2021, 03:03 PM Jun 5 2021, 03:03 PM
Post
#454
|
|
914 Guru      Group: Members Posts: 6,505 Joined: 25-August 18 From: Woods of N. Idaho Member No.: 22,428 Region Association: Galt's Gulch 
|
You know you're getting too old when installing trailing arm bushings and a pivot shaft is enough work for one day.
Used @Bdstone914 's install tool to get the job done. I really would like to do this with a shop press, but I don't really have room for one. Somehow I've made do without one all my life but this job is testing me. Nothing wrong with Bruce's tool. Just a lot of high effort wrench turning. Wouldn't even have affected me 20 years ago! In fact, it really is a pretty great tool that helps keep the bushings from being sucked into or pushed out of the the arm. I bought the Restoration Design bushings that Bruce did a group buy on a while back. Apparently it comes with complimentary loaner of the installation too. (IMG:style_emoticons/default/smilie_pokal.gif) I decided on a belt and suspenders approach so I glued my bushings into the trailing arms using grip glue before starting the install. Loved the instruction label that came with the glue. 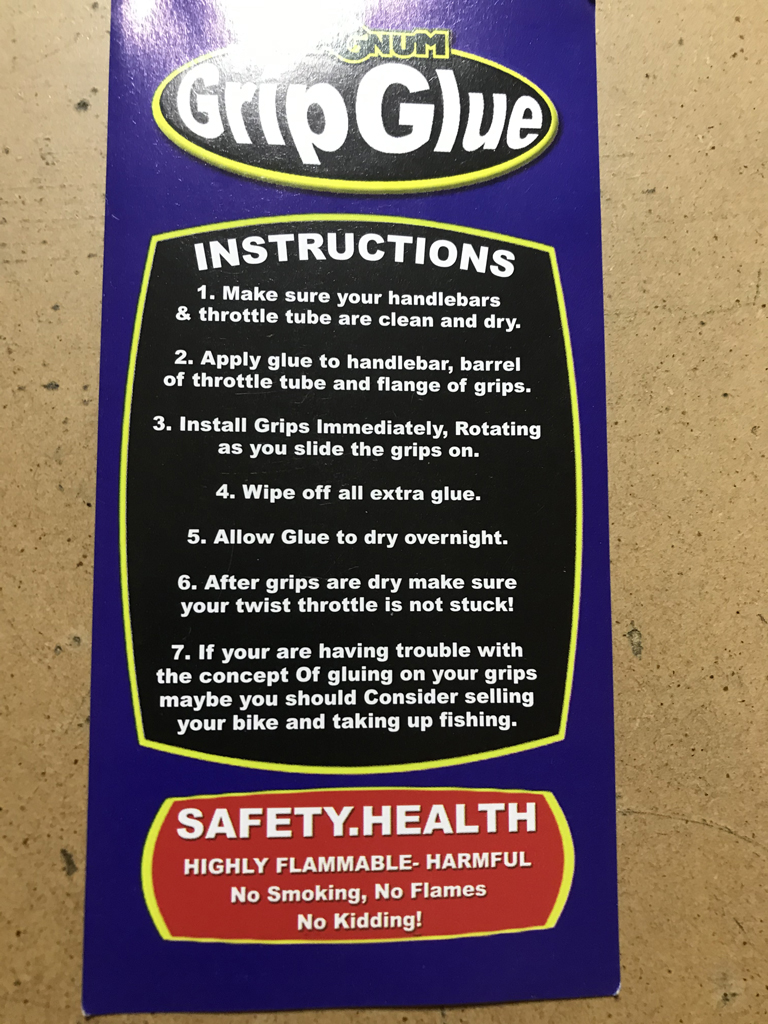 Tool setup is straight forward, using a threaded rod to pull the pivot shaft into the bushings. 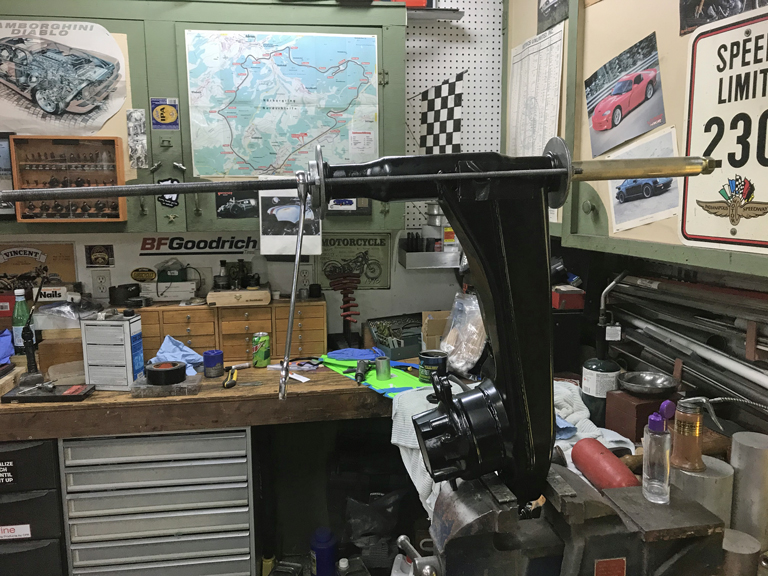 Lots of wrench turning later, done! 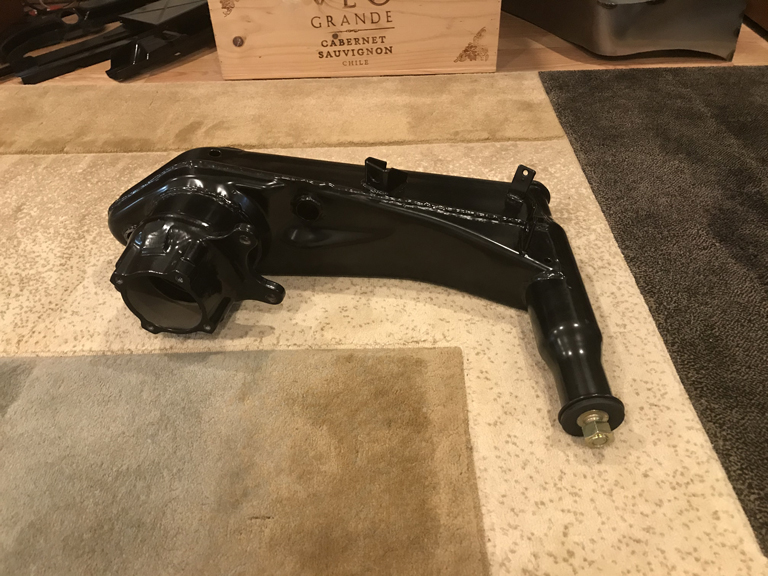 2nd one on deck for tomorrow! Many thanks to Bruce for doing the group buy of RD bushings, for creating the install tool, and of course for the use of the tool! (IMG:style_emoticons/default/first.gif) |
| Superhawk996 |
 Dec 6 2021, 10:20 AM Dec 6 2021, 10:20 AM
Post
#455
|
|
914 Guru      Group: Members Posts: 6,505 Joined: 25-August 18 From: Woods of N. Idaho Member No.: 22,428 Region Association: Galt's Gulch 
|
Been a long time since I've posted in June. Lots of life getting in the way of progress on the 914.
Trailing arm bushings were sucessfully replaced with RD 85 duro bushings. During the install on the 2nd arm, I managed to put a tear into one of the bushings. Problem was, I only had 4 bushings. To make a long story short, after trying to source them directly out of RD Europe, after multiple e-mails back and forth trying to make sure I got 85 duro parts rather than the softer OEM parts, Alex at RD Canada got involved and came though! Can't say enough good things about Restoration Design. But by that time I was out west though the end of August and nowhere near the 914. By Sept, it became clear that my job and my wife's job are in jeopardy. Nothing like the possibility of the full loss of 100% of the household income to put a damper on things. Priorities immediately shifted. (IMG:style_emoticons/default/headbang.gif) Sept/October were spent getting Michigan house ready to go up for sale. Now there is a high priority on getting this thing back to a rolling chassis in preparation for a move. So close but yet so much to do to make that a reality. I think I have between now and spring to get it done. Dug out the Caswell plating kit, knocked out the trailing arm bearing retainers to top off the new wheel bearings that had been pressed in. Did a bunch of other parts like the Front ARB lever arms, drop links,etc., while I was at it. A couple quick pictures. Retainers before plating: 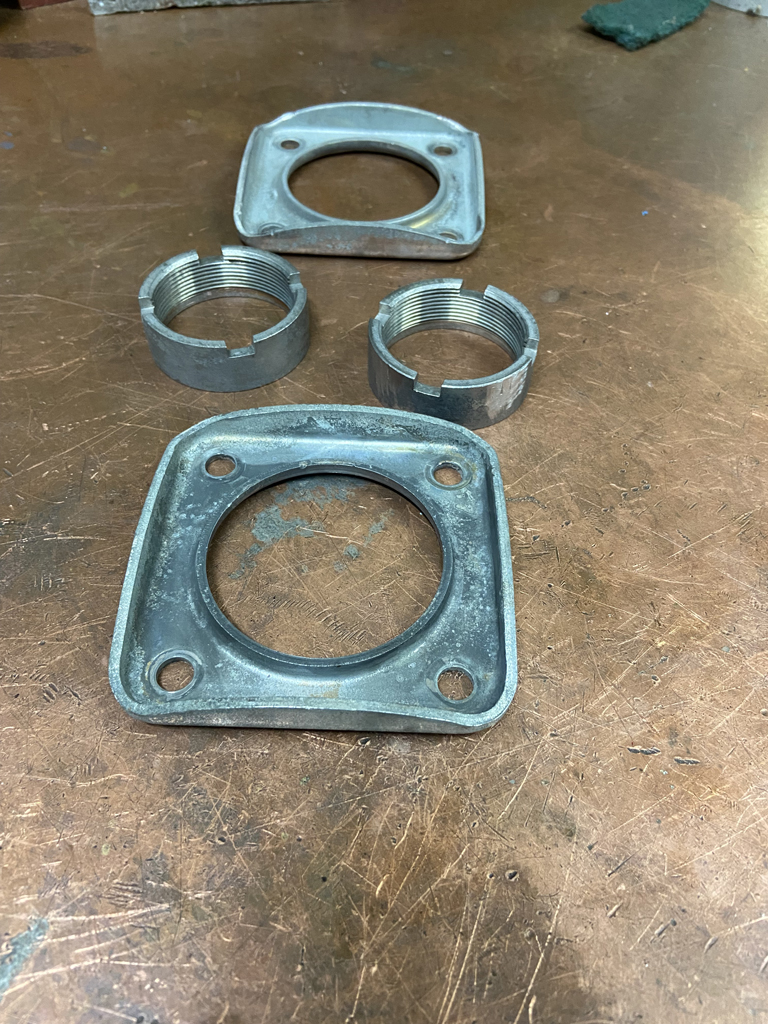 After - installed onto trailing arms: 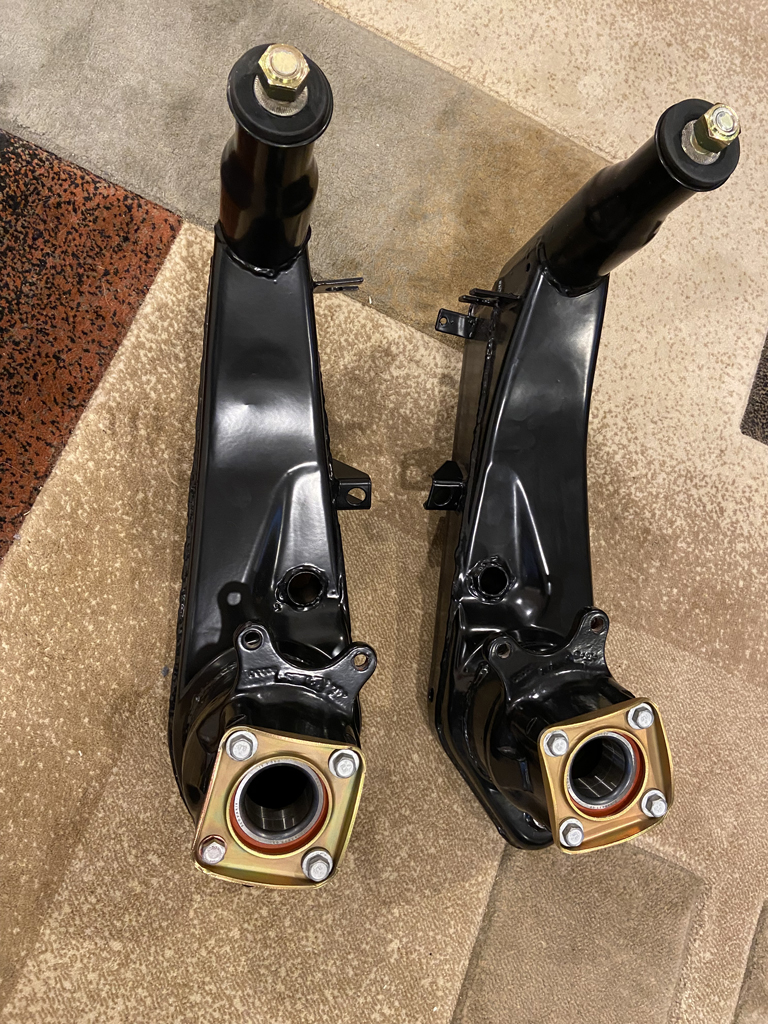 Next up - get the 5 lug hubs cleaned up and pressed. |
| 930cabman |
 Dec 6 2021, 01:45 PM Dec 6 2021, 01:45 PM
Post
#456
|
|
Advanced Member     Group: Members Posts: 3,643 Joined: 12-November 20 From: Buffalo Member No.: 24,877 Region Association: North East States 
|
Lookin good, and yes, life can get the way big time. It took many years for our 914's to get in the condition they are(were) and will take a bit of time to get them right again.
Also, the boys at RD know how to rock it out. I can't say enough about them |
| TRS63 |
 Dec 7 2021, 02:05 AM Dec 7 2021, 02:05 AM
Post
#457
|
|
Member   Group: Members Posts: 323 Joined: 14-September 20 From: Germany - Stuttgart Member No.: 24,690 Region Association: Europe 
|
I finally took the time to read your thread from start to finish..amazing work here and a lot of very helpful details/pictures, thanks a lot!
Also loving to see another one TIG welding! Cheers Antoine |
| 914_7T3 |
 Dec 7 2021, 11:09 AM Dec 7 2021, 11:09 AM
Post
#458
|
|
Please forgive me, I'm new to all of this!    Group: Members Posts: 1,862 Joined: 3-April 17 From: Los Angeles, CA Member No.: 20,991 Region Association: Southern California 
|
Phil,
Your suspension components look great! (IMG:style_emoticons/default/shades.gif) Not ideal to have so many things coming at you at the same time, hope you can get her rolling in time for the move! |
| Superhawk996 |
 Dec 9 2021, 05:44 PM Dec 9 2021, 05:44 PM
Post
#459
|
|
914 Guru      Group: Members Posts: 6,505 Joined: 25-August 18 From: Woods of N. Idaho Member No.: 22,428 Region Association: Galt's Gulch 
|
Cranked out a few more plated parts. Had intended to ship these out for professional plating but I don't have a local plating shop anymore and thought I might conserve the cash.
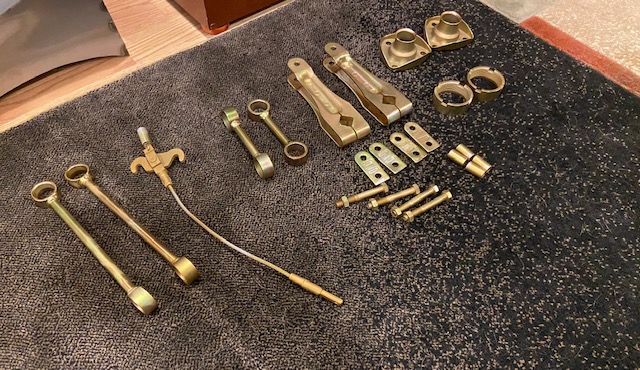 I can't seem to find a local plater that will quote the job without me schlepping part to them for quotation. I'm not in the mood to drive parts an hour across town as if we don't have the magic of the digital era. My last known reliable shop that was literally 15 minutes from my house went out of busines a few years back. (IMG:style_emoticons/default/sad.gif) If anyone around Detroit has a good recommendation for a shop that will quote off photos and is known to be reliable (i.e. good work and doesn't lose small parts), please post a response here. It takes way too much time and effort to do this myself but at the moment I really have another viable alternative at the moment. |
| Superhawk996 |
 Dec 9 2021, 06:44 PM Dec 9 2021, 06:44 PM
Post
#460
|
|
914 Guru      Group: Members Posts: 6,505 Joined: 25-August 18 From: Woods of N. Idaho Member No.: 22,428 Region Association: Galt's Gulch 
|
Slowly getting warmed up to start some chassis welding again. But, like exercising, I can't just seem to jump right back in and start welding on critical structural components.
The warmup is to work on the section of the rear bulkhead behind the driver that has heavy pitting and some large pinholes thanks to the OEM NVH pad holding water. 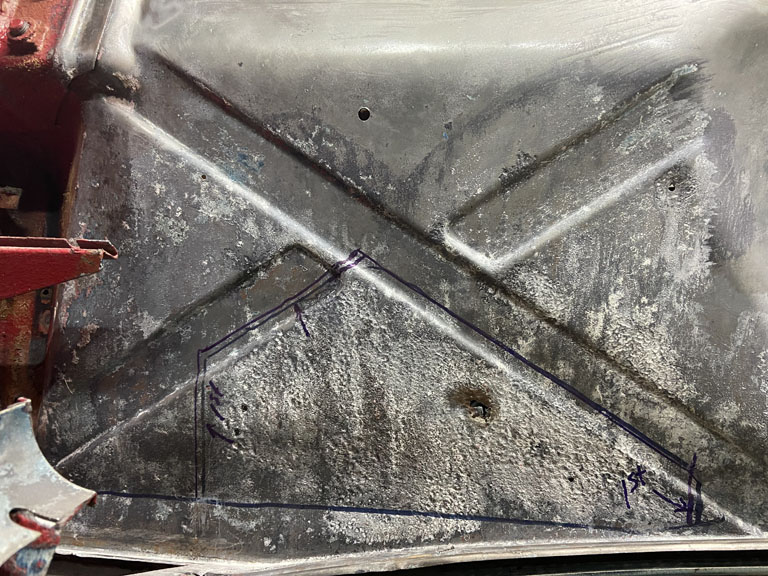 Back in the spring I tried to see if I could close one of the pinholes up with some really low amperage on the TIG. No dice. Maybe it could be done with a copper backer but there really isn't much sense in just trying to plug the holes. The heavy, deep, pitting really necessitates new metal. 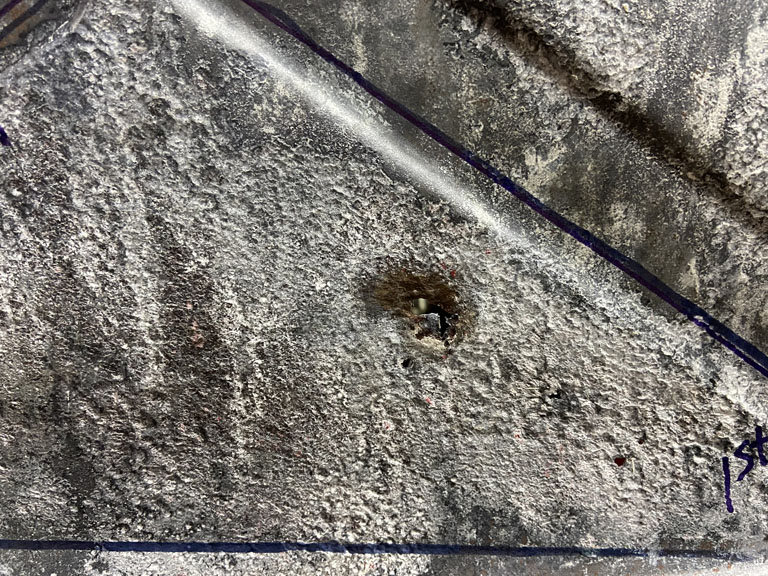 So I decided to pound out a small patch panel. 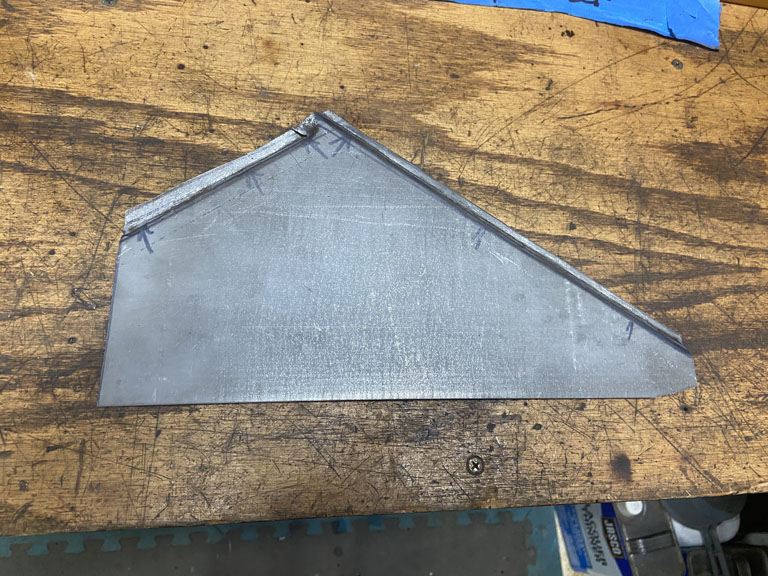 Initial rough fit looking good. Will tackle this over the weekend. 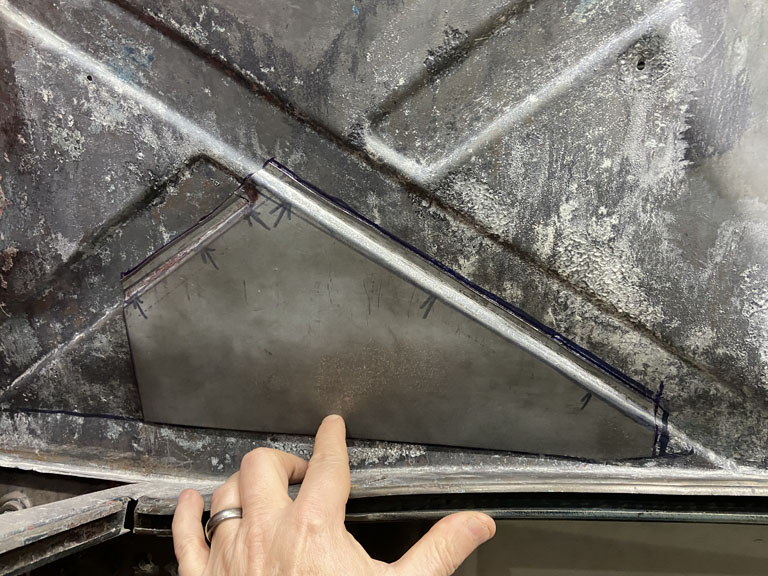 |
  |
1 User(s) are reading this topic (1 Guests and 0 Anonymous Users)
0 Members:

|
Lo-Fi Version | Time is now: 1st November 2024 - 03:20 PM |
Invision Power Board
v9.1.4 © 2024 IPS, Inc.


