|
|
|
Porsche, and the Porsche crest are registered trademarks of Dr. Ing. h.c. F. Porsche AG.
This site is not affiliated with Porsche in any way. Its only purpose is to provide an online forum for car enthusiasts. All other trademarks are property of their respective owners. |
|
|

  |

| Spoke |
 May 9 2007, 07:25 PM May 9 2007, 07:25 PM
Post
#121
|
|
Jerry  Group: Members Posts: 6,994 Joined: 29-October 04 From: Allentown, PA Member No.: 3,031 Region Association: None |
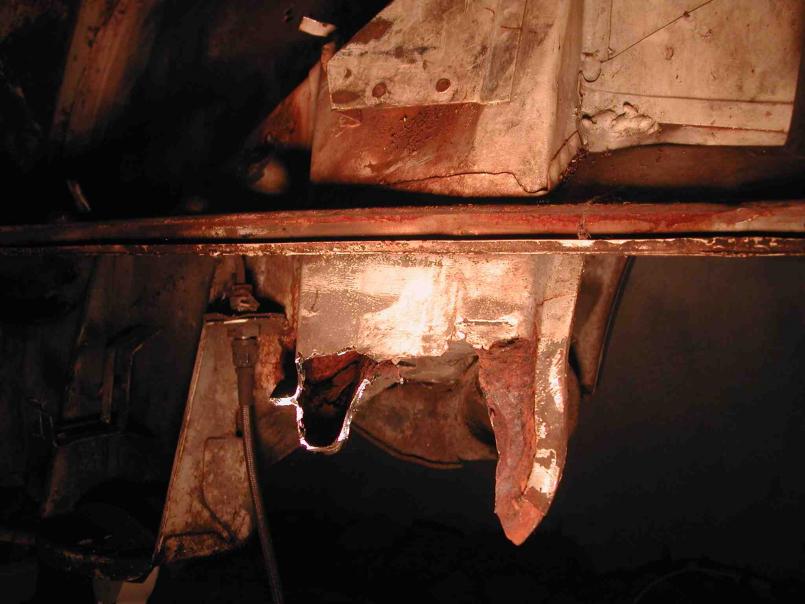
Took the grinder to the console rust. There's a hole in the console upright which was hidden by the outside support piece.
So should I be looking elsewhere for rust? How bad does this look? I've poked around and didn't find any soft spots. What is the gauge of steel? Is this 16 gauge? Attached image(s) 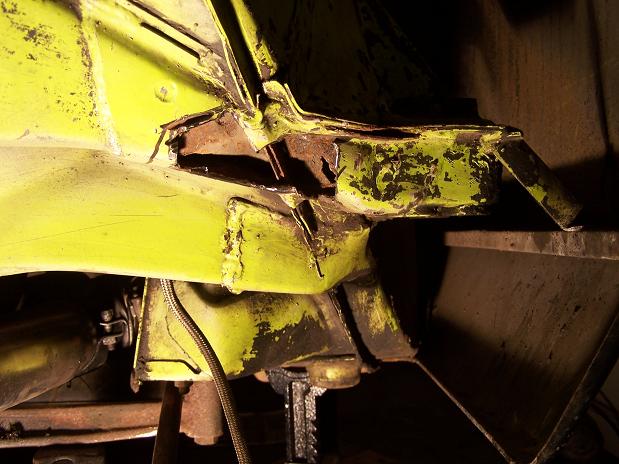 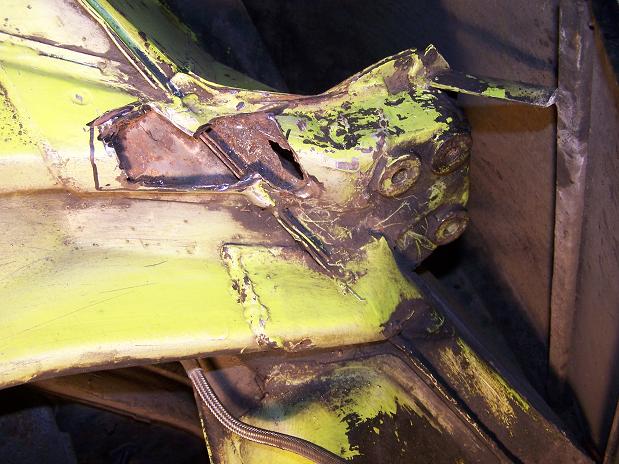 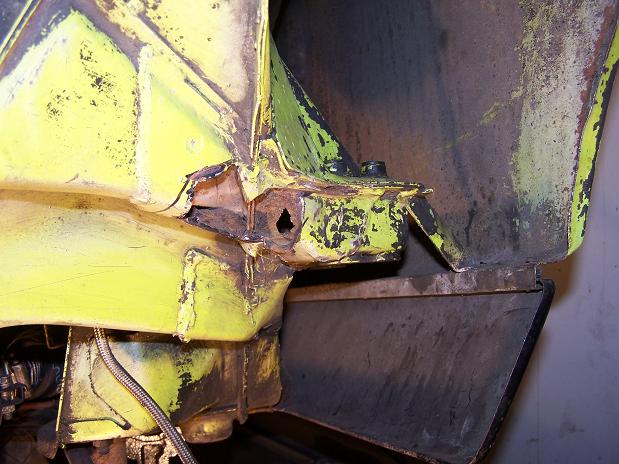
|
   |

 
|
| Gint |
May 9 2007, 08:20 PM
Post
#122
|
|
Mike Ginter Group: Admin Posts: 16,086 Joined: 26-December 02 From: Denver CO. Member No.: 20 Region Association: Rocky Mountains |
Damn.
Make real sure that nothing is soft in there. I'd seriously consider getting a new suspension ear and doing it "100%", "while you're in there". You don't want to spend time repairing that area and finding out later that the console gave out from rust that you could have sured today. |
|
|
|
| highways |
May 10 2007, 05:16 AM
Post
#123
|
|
Senior Member Group: Members Posts: 613 Joined: 18-June 05 From: Los Angeles, CA Member No.: 4,296 |
Yes, do the whole thing. You don't want to see this...
 |
|
|
|
| Spoke |
May 26 2007, 10:20 AM
Post
#124
|
|
Jerry Group: Members Posts: 6,994 Joined: 29-October 04 From: Allentown, PA Member No.: 3,031 Region Association: None |
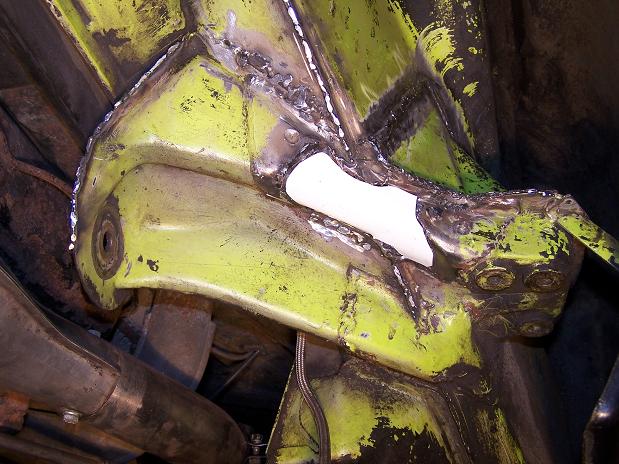
I've grinded all the soft stuff out. I will weld up patches on all the missing parts and put it back together and seam weld everything. Haven't seen anything else soft on this side and driver's side.
Attached image(s) 
|
|
|
|
| Spoke |
May 26 2007, 07:01 PM
Post
#125
|
|
Jerry Group: Members Posts: 6,994 Joined: 29-October 04 From: Allentown, PA Member No.: 3,031 Region Association: None |
A little break from body work and fender repair to "upgrade" the tach from a 74 with single turnsignal indicator to 72 with individual turnsignal indicators.
Also will add a 3000uF capacitor to the tach windings to reduce the overshoot of the stock tach. Removed the needles and faceplates. Old plate on the left new plate on the right. Tach in center was used to test the operation with the capacitor.  Here's the tach with the capacitor to test fit its placement. I will hot melt glue the cap to the turnsignal tubes to secure it. 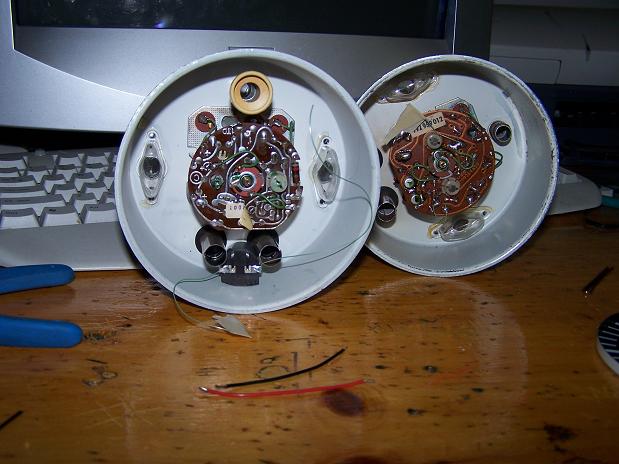 |
|
|
|
| Spoke |
May 26 2007, 07:19 PM
Post
#126
|
|
Jerry Group: Members Posts: 6,994 Joined: 29-October 04 From: Allentown, PA Member No.: 3,031 Region Association: None |
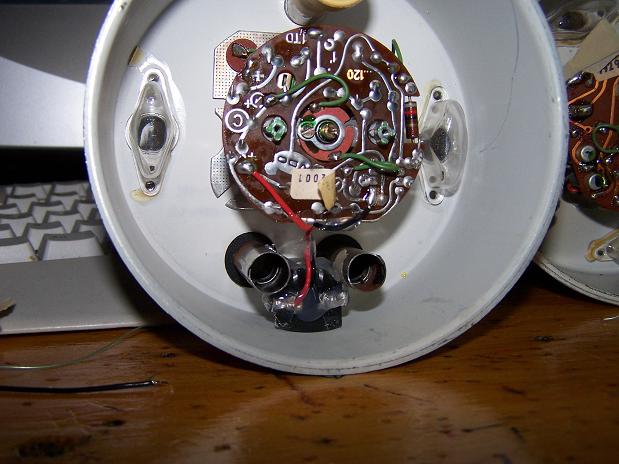
Capacitor wired and hot-melt glued into place. Glued the wire at the tach board edge and capacitor top for strain relief from vibration.
 With the faceplate and needle installed, a little blurry test of the turnsignal and highbeam indicators. Ready for a road test to check for operation before replacing the glass and bezel. I am also replacing the glass as the one from my 74 had a plastic lense and the 72 has a glass lense. 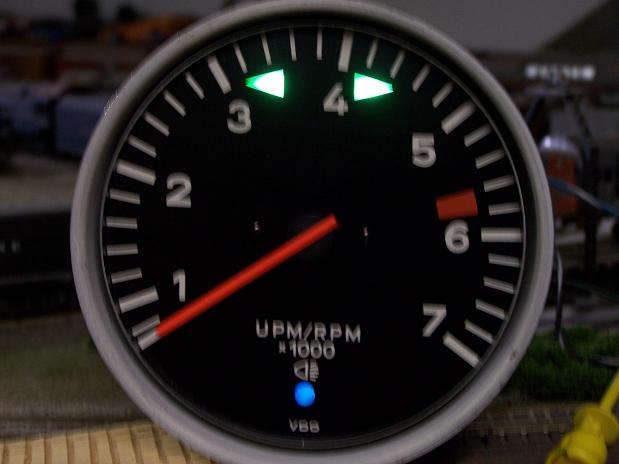 |
|
|
|
| Spoke |
Jun 7 2007, 12:30 AM
Post
#127
|
|
Jerry Group: Members Posts: 6,994 Joined: 29-October 04 From: Allentown, PA Member No.: 3,031 Region Association: None |
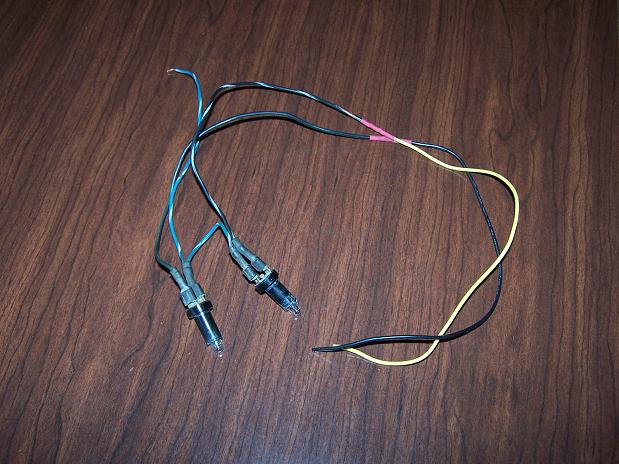
I have a set of lamps for the turn signal indicators from the old tach that I had. Added a length of wire to reach to the emergency flasher switch. I'll tap on to the front or rear turnsignal lamps which connect to the switch.
 Turnsignal indicators soldered to the turnsignal lamps. 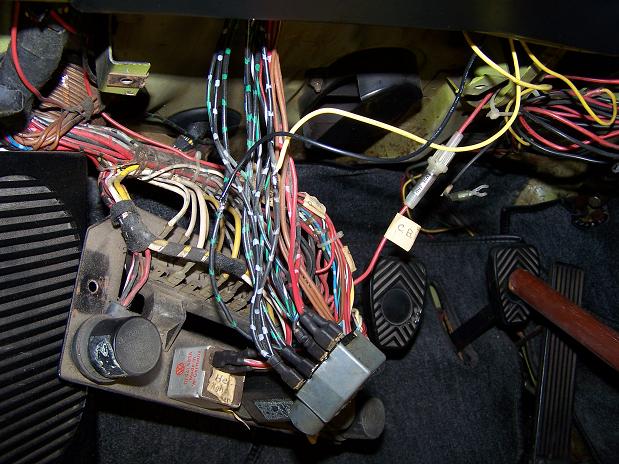 Here's the dash all refurbished and ready for install. The trim rings and frame were in good shape so I just cleaned and waxed them. Among the refurbishments: Backdated tach with separate right and left turnsignal indicators. I used the old tach case, faceplate, and glass. The 74 had a plastic lense. From the 74 I used the tach mechanism, needle and faceframe. Painted the needle with red flourescent paint. Added 3000uF capacitor across the tach windings to get rid of the bouncing. This cap worked wonders in calming the needle. Now the needle moves smoothly high and low without any bouncing or overshoots. I think 3000uF is a bit too much. The tach at times seems a bit lethargic in response but the stability of the needle makes up for it. Opened up the speedometer and cleaned the faceplate and glass and painted the needle. The speedo's lense was the only glass lense on the car when I bought it. Opened the gas/temp gauge to replace its plastic lense with a glass lense. Painted the needles on both gauges. 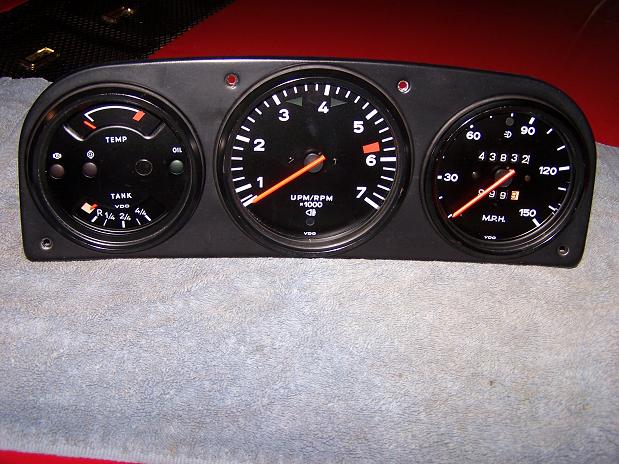 |
|
|
|
| TravisNeff |
Jun 7 2007, 12:42 AM
Post
#128
|
|
914 Guru Group: Members Posts: 5,082 Joined: 20-March 03 From: Mesa, AZ Member No.: 447 Region Association: Southwest Region |
Nice job! Can you explain tach overshoot? tach bounce?
|
|
|
|
| Spoke |
Jun 7 2007, 06:03 AM
Post
#129
|
|
Jerry Group: Members Posts: 6,994 Joined: 29-October 04 From: Allentown, PA Member No.: 3,031 Region Association: None |
QUOTE(Travis Neff @ Jun 7 2007, 02:42 AM)  Nice job! Can you explain tach overshoot? tach bounce? The tach needle is a very free moving mechanism. The tach electronics convert the opening and closing of the coil points or electronic ignition into a DC voltage. The DC voltage is proportional to the speed of the engine thus the tach needle goes up with increased engine speed and down when engine speed is decreased. If the dc voltage on the needle is allowed to change rapidly like when the throttle is blipped in neutral or when the engine is slowed quickly, the tach will jump up or drop quickly to the correct engine speed but then overshoot because of its own momentum. The overshoot then oscillates a couple of times before settling down to the correct engine speed. A capacitor across the needle windings dampens the change of voltage thus making the needle movement slower and eliminating the overshoot. The bigger the cap the more damping action. Just the right amount of capacitance across the windings will yield a nice fast response without the overshoot. 3000uF like I used is too much. If I dig into the tach again, I'll change to perhaps 2000uF which should give more responsive operation without bouncing around. |
|
|
|
| Spoke |
Jun 7 2007, 06:30 AM
Post
#130
|
|
Jerry Group: Members Posts: 6,994 Joined: 29-October 04 From: Allentown, PA Member No.: 3,031 Region Association: None |
OK, back to the welding.
I've had a change of plans for the green car. Plan was to do the body work on the rear flares and paint. But the clutch in the red 914 is starting to slip pretty bad. Too much throttle in 3rd, 4th, or 5th gear will start the slipping. Acceleration is really touchy. So it's time to get the red car off the road. I have a new engine to go in along with a clutch which hopefully is in better shape than the one on the car now. I can't have 2 914s and neither are operational so the green car will be repaired and put back together without finishing the bodywork. The bodyword will be finished as time permits between spirited drives (IMG:style_emoticons/default/driving.gif) Filled the 6 holes from where the reflector was mounted. My welding sucks but I'm getting better all the time. Can't run a full bead yet. I tried the stop/start method, running a bead about a 1/4 inch and stopping. Learning proper speed and power settings. 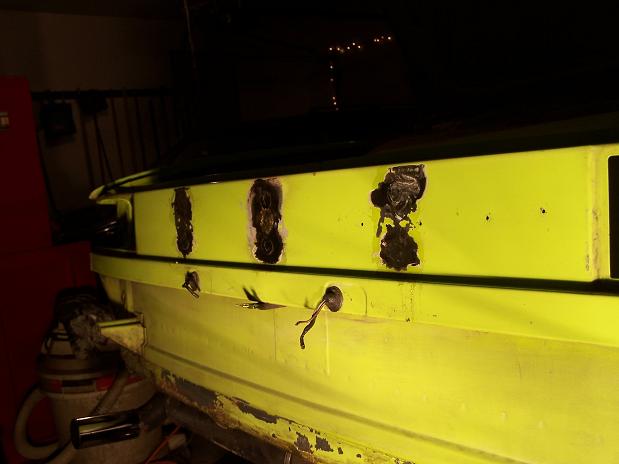 Welded up the little holes under the tie plate with 14 ga steel. Seam welded everything I could see from this vantage point without removing the engine or rocker panel. Will go back on the seam welds when the tie plate is welded. 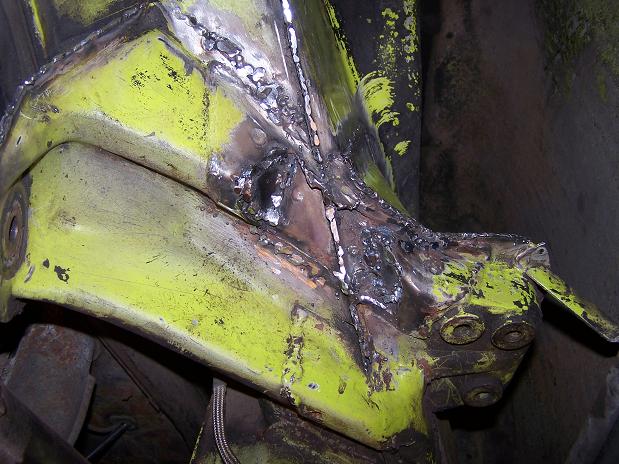 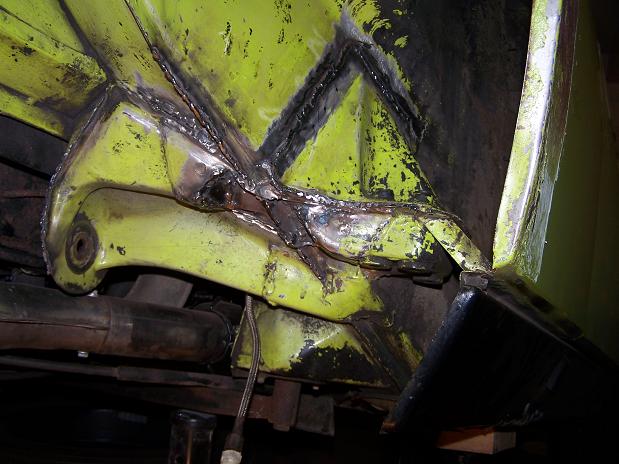 |
|
|
|
| Spoke |
Jun 8 2007, 09:58 PM
Post
#131
|
|
Jerry Group: Members Posts: 6,994 Joined: 29-October 04 From: Allentown, PA Member No.: 3,031 Region Association: None |
With a piece of cardstock, I fashioned a template for the replacement tie strip.
 Tie strip cut from 14 ga steel. Bend and final shaping and its ready for welding. 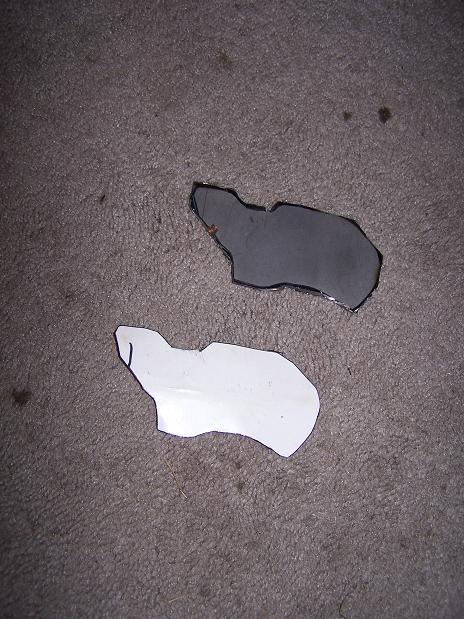 |
|
|
|
| Spoke |
Jun 8 2007, 10:01 PM
Post
#132
|
|
Jerry Group: Members Posts: 6,994 Joined: 29-October 04 From: Allentown, PA Member No.: 3,031 Region Association: None |
Welded up the metal around the taillight which was pancaked from a shunt. When I un-pancaked it, or as my neighbor would say, "I un-fucked it", the metal tore open so had to be welded up. The rear quarter panel is just about ready for final shaping.
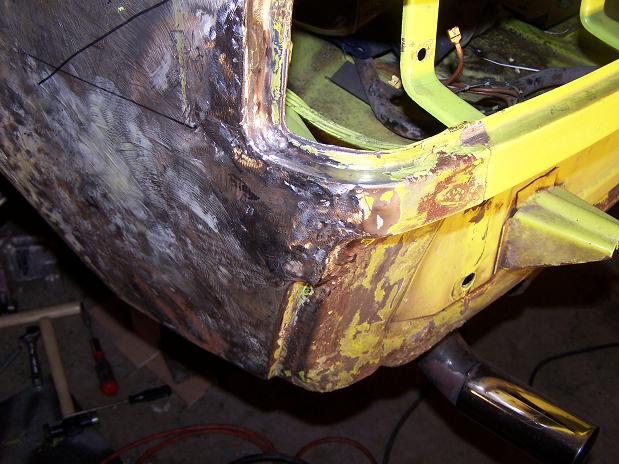 Tie strap welded in and excess weld grinded down and ready for paint.  It was no wonder that this tie plate rusted out as the edges of the plate were not welded all the way around and several openings were left un welded and un-seam sealed. 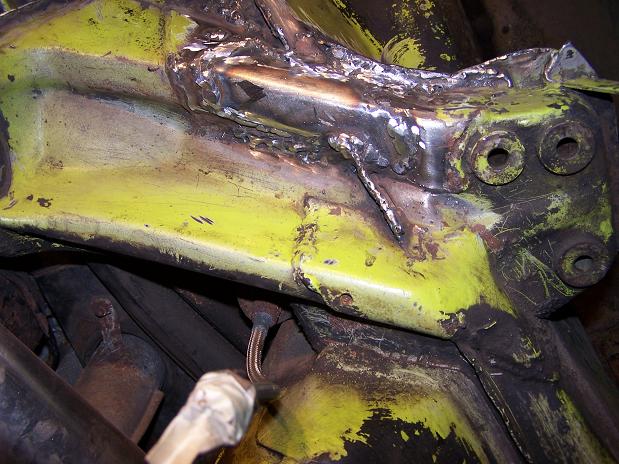 |
|
|
|
| Spoke |
Jun 9 2007, 05:09 AM
Post
#133
|
|
Jerry Group: Members Posts: 6,994 Joined: 29-October 04 From: Allentown, PA Member No.: 3,031 Region Association: None |
Sanded and degreased the area for painting. Rattle canned the primer and used my airbrush to put down the final coat.
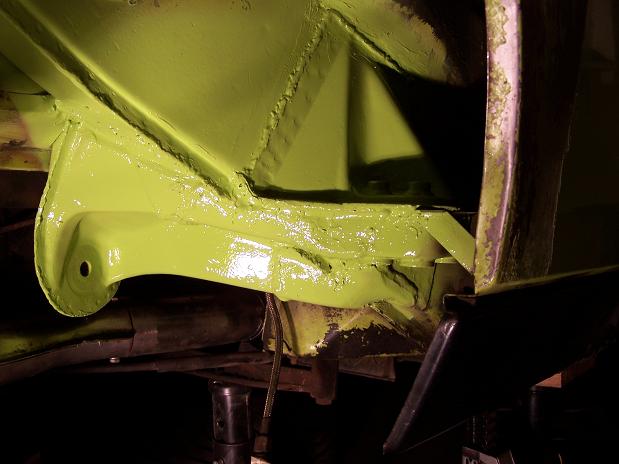 I only painted the area around the console repair. I resisted the desire to paint the entire wheel well or even paint and seam weld the driver's side. You know, avoiding the "while I'm in there" syndrom.  I didn't paint or seam seal the entire console since I couldn't remove the rocker panel since the car is wedged in the corner of the garage and it didn't have its back wheels on to move it. Will finish this job later when I pull the rockers. 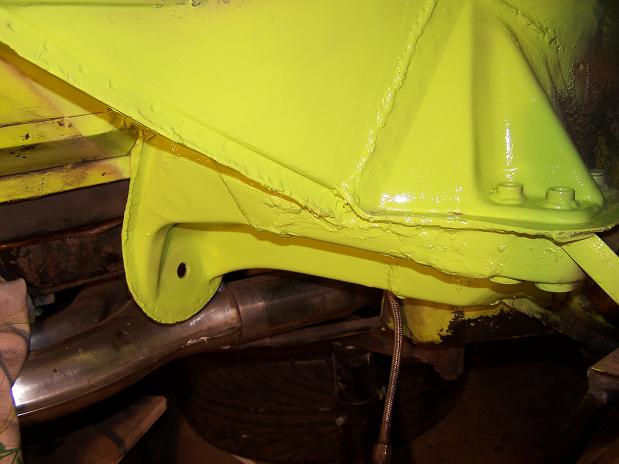 |
|
|
|
| Spoke |
Jul 20 2007, 10:03 PM
Post
#134
|
|
Jerry Group: Members Posts: 6,994 Joined: 29-October 04 From: Allentown, PA Member No.: 3,031 Region Association: None |
Keeping with my theme of doing small jobs while keeping the car on the road, next little job is to smooth the back panel after welding the holes and paint it.
After straightening the back panel, I applied a layer of glaze for the final coat. Attached image(s) 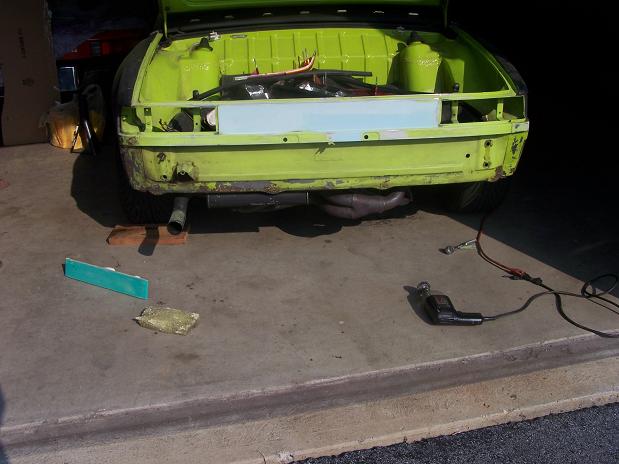 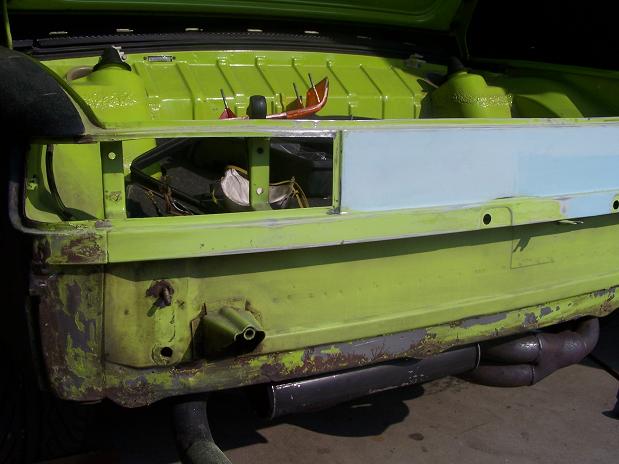 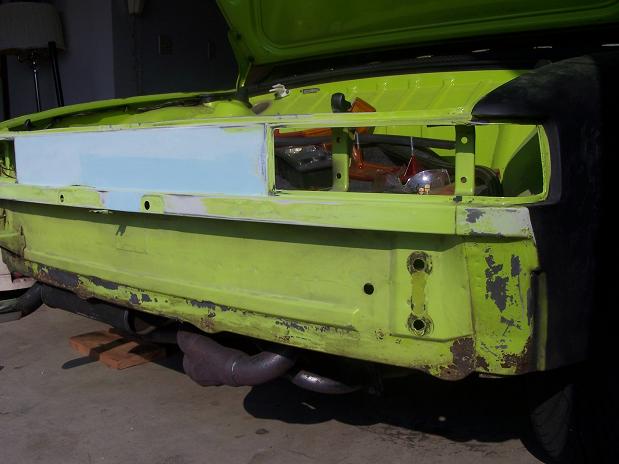
|
|
|
|
| Spoke |
Jul 20 2007, 10:16 PM
Post
#135
|
|
Jerry Group: Members Posts: 6,994 Joined: 29-October 04 From: Allentown, PA Member No.: 3,031 Region Association: None |
Only painting the outside and inside of the panel as well as the trunk lock support member.
I'm airbrushing the paint on to maximize the pint of paint left. Still need to do both rear fenders as well as a rust spot on the front passenger fender. Attached image(s)   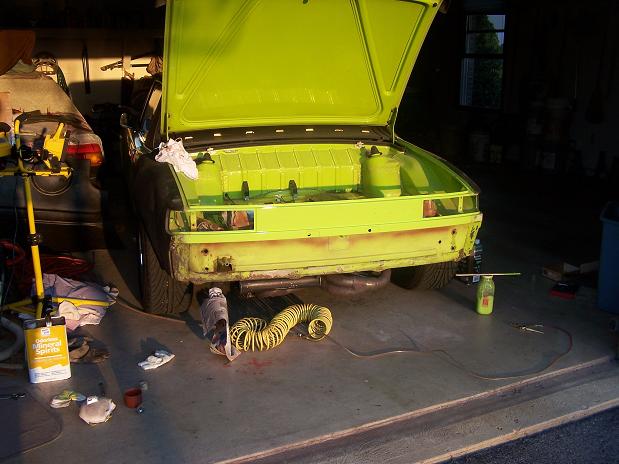
|
|
|
|
| Spoke |
Jul 20 2007, 10:18 PM
Post
#136
|
|
Jerry Group: Members Posts: 6,994 Joined: 29-October 04 From: Allentown, PA Member No.: 3,031 Region Association: None |
All painted and emblems reattached.
Attached image(s) 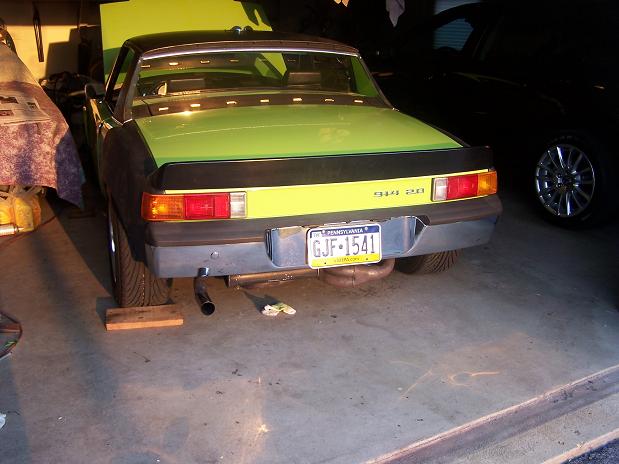 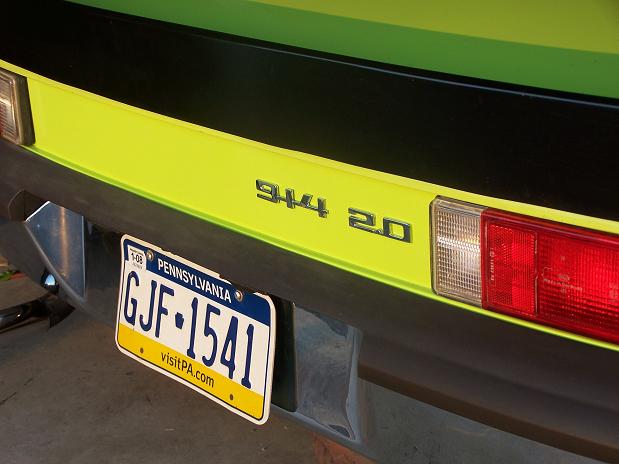
|
|
|
|
| jonferns |
Jul 21 2007, 05:19 PM
Post
#137
|
|
Advanced Member Group: Members Posts: 2,081 Joined: 29-March 07 From: New Jersey Member No.: 7,631 Region Association: North East States |
Looks good
|
|
|
|
| Spoke |
Aug 13 2007, 06:32 AM
Post
#138
|
|
Jerry Group: Members Posts: 6,994 Joined: 29-October 04 From: Allentown, PA Member No.: 3,031 Region Association: None |
Next job is to get the back of the car cleaned up, rust-wise, install the rear swaybar brackets, and eventually put the muffler heat shield back on.
For now, need to sandblast the rear trunk floor top and bottom. Just surface rust so no major work needs to be done other than cleanup rust and paint. I tried to cover everything on the car to make sure the sand doesn't penetrate into unwanted areas. Even covered up the jack and trunk lock mechanism. I have many old bedsheets which work good in protecting the car from flying sand. Attached image(s) 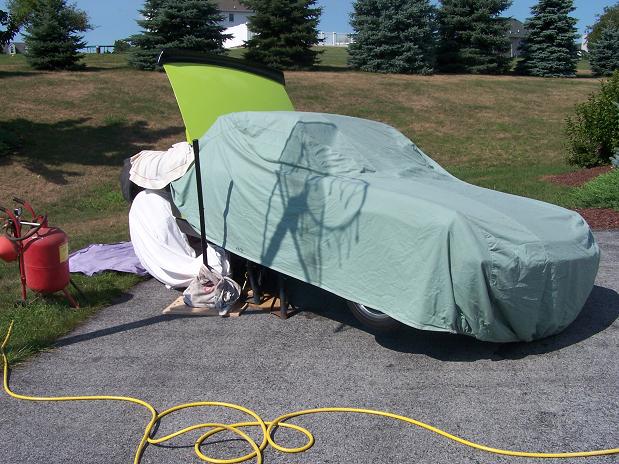 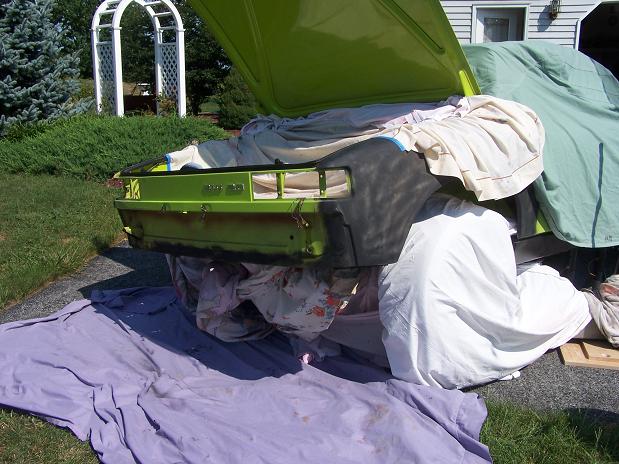 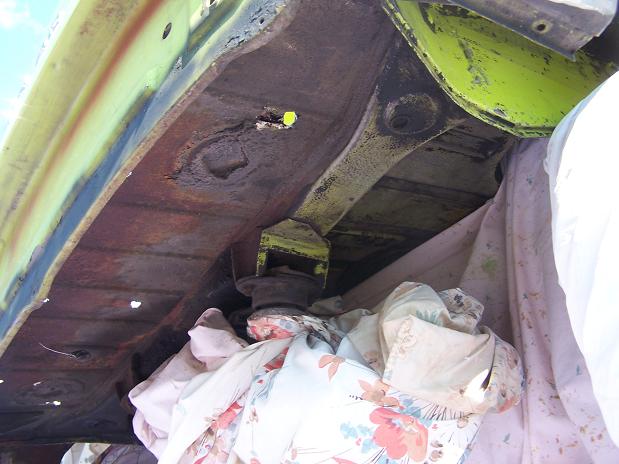 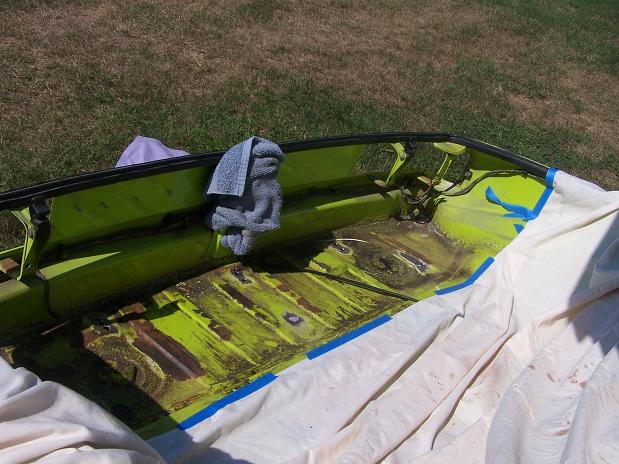
|
|
|
|
| Spoke |
Aug 14 2007, 05:07 AM
Post
#139
|
|
Jerry Group: Members Posts: 6,994 Joined: 29-October 04 From: Allentown, PA Member No.: 3,031 Region Association: None |
Sandblasted and painted some other parts including rear swaybar and muffler hanger.
Attached image(s) 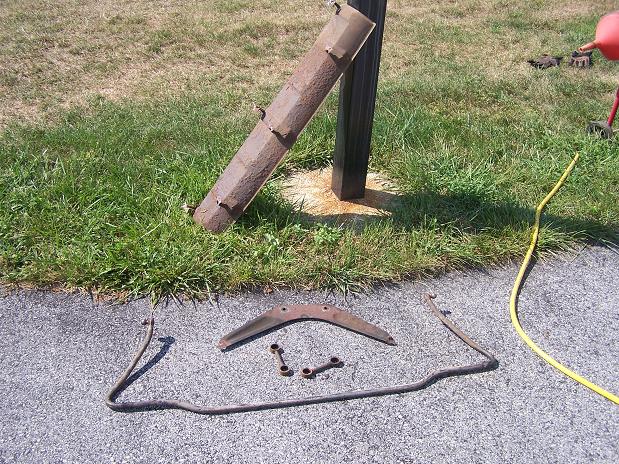 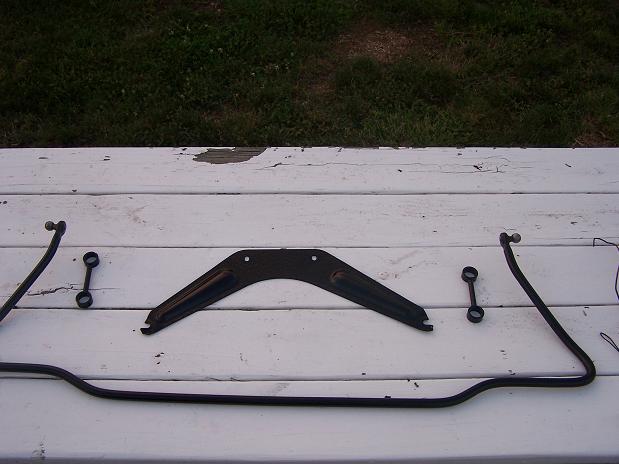
|
|
|
|
| tdgray |
Aug 14 2007, 03:39 PM
Post
#140
|
|
Thank God Nemo is not here to see this Group: Members Posts: 9,705 Joined: 5-August 03 From: Akron, OH Member No.: 984 Region Association: None |
Lookin Good Spoke... keep it up.
|
|
|
|
|
1 User(s) are reading this topic (1 Guests and 0 Anonymous Users)
0 Members:

|
Lo-Fi Version | Time is now: 25th June 2024 - 05:12 PM |
Invision Power Board
v9.1.4 © 2024 IPS, Inc.