|
|
|
Porsche, and the Porsche crest are registered trademarks of Dr. Ing. h.c. F. Porsche AG.
This site is not affiliated with Porsche in any way. Its only purpose is to provide an online forum for car enthusiasts. All other trademarks are property of their respective owners. |
|
|

  |

| rjames |
 Jan 16 2007, 07:13 PM Jan 16 2007, 07:13 PM
Post
#81
|
|
I'm made of metal  Group: Members Posts: 3,995 Joined: 24-July 05 From: Shoreline, WA Member No.: 4,467 Region Association: Pacific Northwest |
My guess is that if you replace the hoses you'll be rid of the smell. I have the same exact thing happening, and the fuel pump and filter are new. The only things not new are the fuel lines up front- I'll be doing that when I go to remove the tank to install a sway bar this spring.
|
   |

 
|
| martinef1963 |
Jan 16 2007, 09:07 PM
Post
#82
|
|
The Saga Continues... Group: Members Posts: 320 Joined: 9-November 04 From: Miami, FL, USA Member No.: 3,080 Region Association: South East States |
QUOTE(Spoke @ Mar 13 2006, 11:17 PM)  Before and After I added a little wheel bling. Wheels from my red car. Spoke Damn - I was going to ask if you were getting rid of the 4-lugger.... (IMG:style_emoticons/default/biggrin.gif) |
|
|
|
| Spoke |
Feb 9 2007, 04:56 PM
Post
#83
|
|
Jerry Group: Members Posts: 6,994 Joined: 29-October 04 From: Allentown, PA Member No.: 3,031 Region Association: None |
OK, took the gas tank apart. Outside of the tank looks good.
Attached image(s) 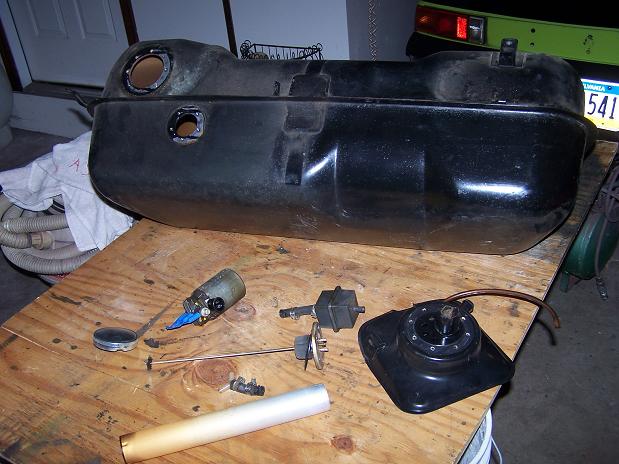
|
|
|
|
| Spoke |
Feb 9 2007, 04:57 PM
Post
#84
|
|
Jerry Group: Members Posts: 6,994 Joined: 29-October 04 From: Allentown, PA Member No.: 3,031 Region Association: None |
When I pulled the fuel gauge sender out, it came out in pieces, as the little nut on the bottom had unscrewed itself and dropped to the bottom of the tank.
Attached image(s) 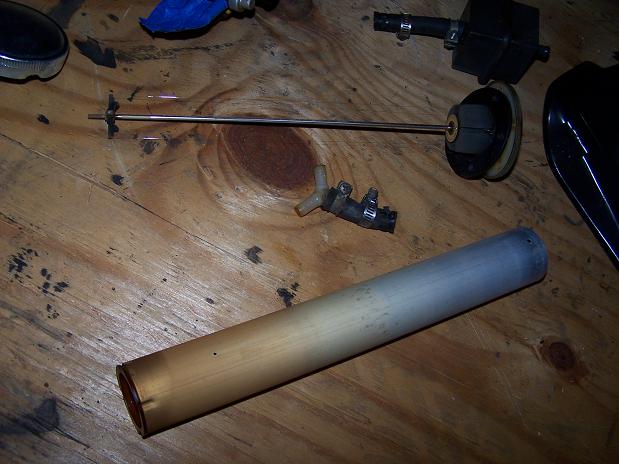
|
|
|
|
| Spoke |
Feb 9 2007, 05:00 PM
Post
#85
|
|
Jerry Group: Members Posts: 6,994 Joined: 29-October 04 From: Allentown, PA Member No.: 3,031 Region Association: None |
Inside of the tank looks very good. The only rust that I could see is in the bottom left of the pic. Don't think I'll be resealing the tank.
What can I used to clean out the gum out of the tank? Attached image(s) 
|
|
|
|
| rjames |
Feb 9 2007, 06:00 PM
Post
#86
|
|
I'm made of metal Group: Members Posts: 3,995 Joined: 24-July 05 From: Shoreline, WA Member No.: 4,467 Region Association: Pacific Northwest |
I'm sure others will chime in here, but do a search as I think there've been a few past threads regarding cleaning up the inside of a tank. (IMG:style_emoticons/default/beer.gif)
|
|
|
|
| Spoke |
Feb 9 2007, 09:07 PM
Post
#87
|
|
Jerry Group: Members Posts: 6,994 Joined: 29-October 04 From: Allentown, PA Member No.: 3,031 Region Association: None |
In the #26th post in this thread, Sir Andy pointed out that a dent in the front trunk was the sign of impact damage.
He, being Sir Andy, was 100% correct. As I took the car apart, I've seen other damage or repairs from at least 1 front end impact. The driver side A-arm that I replaced as part of the 5-lug was bent such that the position of the ball joint on the arm was about 1/2 inch more rearward than the passenger side arm. The front panel below was replaced in its entirety. I'm assuming the piece was welded on but its obvious now that the seam is rusting on both sides. The other thing is the piece doesn't have the bolts to hold on fog lights. There's a flat spot on the front where the bolt should go. How can I determine where the bolts should go for fogs? Attached image(s) 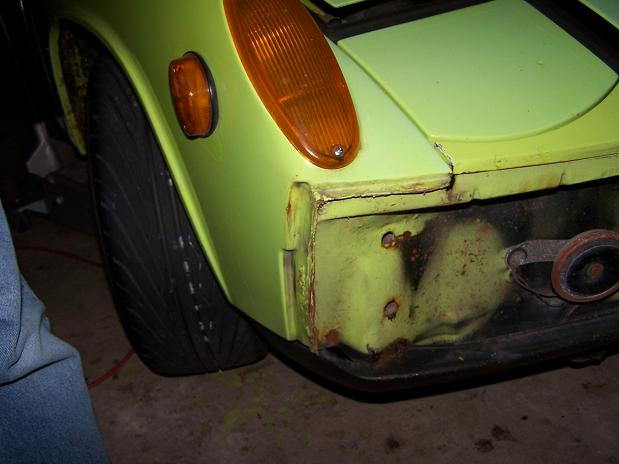 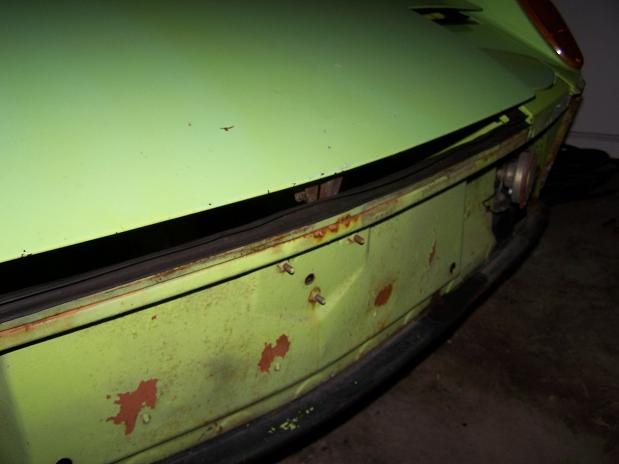 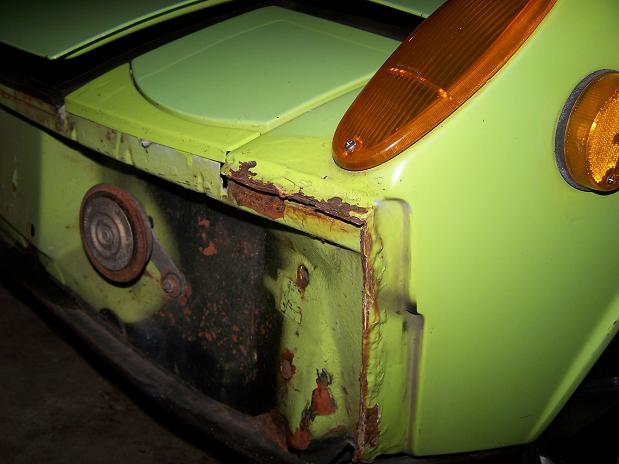
|
|
|
|
| Johny Blackstain |
Feb 10 2007, 10:13 AM
Post
#88
|
|
Walnut Elite Stratocaster player Group: Members Posts: 3,434 Joined: 5-December 06 From: The Shenandoah River Member No.: 7,318 Region Association: MidAtlantic Region |
QUOTE(Spoke @ Feb 9 2007, 10:07 PM) In the #26th post in this thread, Sir Andy pointed out that a dent in the front trunk was the sign of impact damage. He, being Sir Andy, was 100% correct. As I took the car apart, I've seen other damage or repairs from at least 1 front end impact. The driver side A-arm that I replaced as part of the 5-lug was bent such that the position of the ball joint on the arm was about 1/2 inch more rearward than the passenger side arm. The front panel below was replaced in its entirety. I'm assuming the piece was welded on but its obvious now that the seam is rusting on both sides. The other thing is the piece doesn't have the bolts to hold on fog lights. There's a flat spot on the front where the bolt should go. How can I determine where the bolts should go for fogs? Just a thought- put the bumper back on w/out the grills & mark where you think the fogs should be. Use the circle as your guide by just placing the grills in place. Then, take off the bumper, grab a fog light w/ bracket, hold in place & mark out where the hole should be. (IMG:style_emoticons/default/thumb3d.gif) (IMG:style_emoticons/default/cool_shades.gif) |
|
|
|
| scotty b |
Feb 10 2007, 11:44 AM
Post
#89
|
|
rust free you say ? Group: Members Posts: 16,375 Joined: 7-January 05 From: richmond, Va. Member No.: 3,419 Region Association: None |
QUOTE(Spoke @ Feb 9 2007, 03:00 PM) Inside of the tank looks very good. The only rust that I could see is in the bottom left of the pic. Don't think I'll be resealing the tank. What can I used to clean out the gum out of the tank? Kerosene, diesel fuel, laquer thinner |
|
|
|
| Spoke |
Feb 10 2007, 12:36 PM
Post
#90
|
|
Jerry Group: Members Posts: 6,994 Joined: 29-October 04 From: Allentown, PA Member No.: 3,031 Region Association: None |
A little rear end bling. Eric Shea hubs, 180LB springs, and new bearings. The hubs are very nicely done. Quite a difference from the converted hubs on the car. The hubs on the car do not have the extra bosses around the studs thus some studs are longer than others. Plus not all are straight and they have been welded to the hub.
Eric, do you want the hubs that are on the car? As mentioned, the lugs are welded to the hubs. I believe the hubs are the later style. Once the gas tank is cleaned and fuel hoses replaced, I'll finish up the 5-lug rear end including installing the rear factory swaybar. Attached image(s)  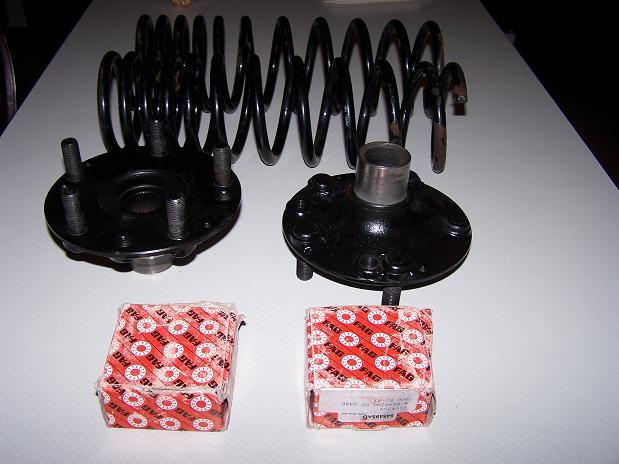 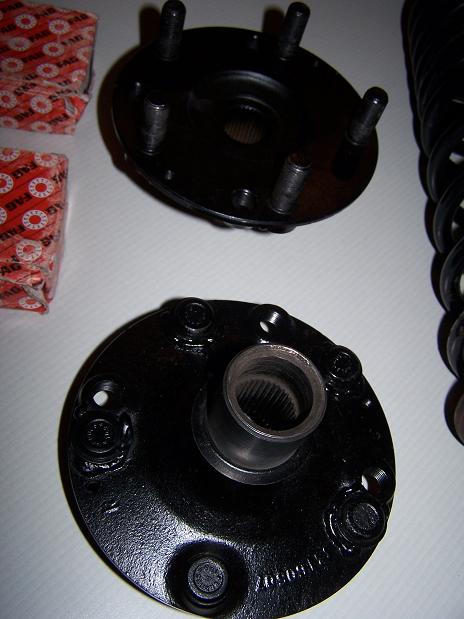
|
|
|
|
| Spoke |
Mar 7 2007, 10:09 AM
Post
#91
|
|
Jerry Group: Members Posts: 6,994 Joined: 29-October 04 From: Allentown, PA Member No.: 3,031 Region Association: None |
OK, I finally started to work on the 914 again after the winter freeze. Also changed the name of this thread since I've now had the car for 1 year.
Cleaned out the gas tank cavity. Removed the undercoating and cleaned out all the junk. Looks a little nicer now. Putting in the electric washer pump now. Bought a generic pump from my FLAPS and decided to mount it out of the way under the cowling. Attached image(s) 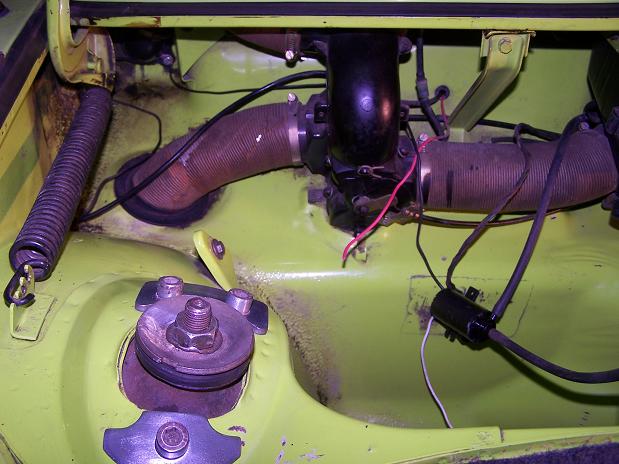 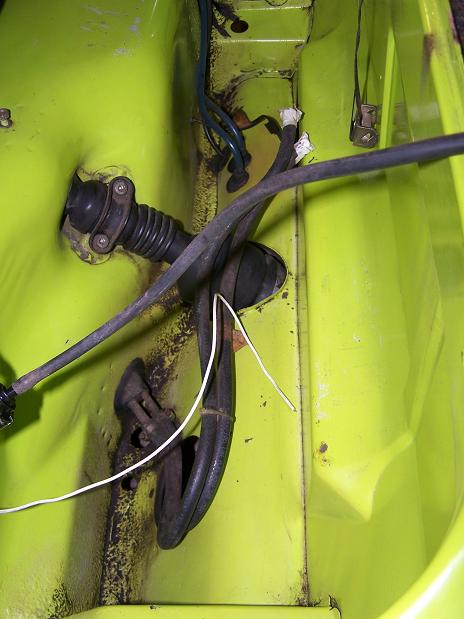 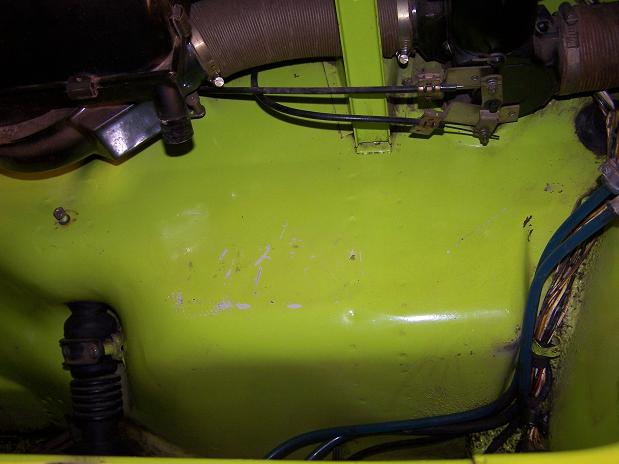 
|
|
|
|
| Spoke |
Mar 7 2007, 10:13 AM
Post
#92
|
|
Jerry Group: Members Posts: 6,994 Joined: 29-October 04 From: Allentown, PA Member No.: 3,031 Region Association: None |
I wanted to mount the washer pump out of sight and didn't want to drill holes into the car to mount.
So I got a long tiewrap and fastened it to the cowling upright. As briefly as this pump is used, this fastening will be fine. I couldn't mount it where SirAndy did since the inlet and outlets were not in the same positions. The wires for the pump nicely route into the interior directly behind the pump. Attached image(s)  
|
|
|
|
| Spoke |
Mar 7 2007, 10:20 AM
Post
#93
|
|
Jerry Group: Members Posts: 6,994 Joined: 29-October 04 From: Allentown, PA Member No.: 3,031 Region Association: None |
Found this bolt lodged in the seam sealer and painted. Unless the PO dropped this bolt and then painted the area, this bolt came from the original manufacture.
Attached image(s) 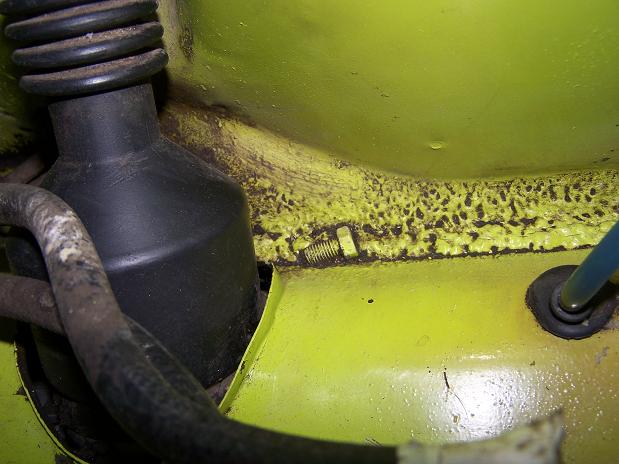
|
|
|
|
| Eric_Shea |
Mar 7 2007, 11:04 AM
Post
#94
|
|
PMB Performance Group: Admin Posts: 19,279 Joined: 3-September 03 From: Salt Lake City, UT Member No.: 1,110 Region Association: Rocky Mountains |
QUOTE Eric, do you want the hubs that are on the car? As mentioned, the lugs are welded to the hubs. I believe the hubs are the later style. I do need cores but... probably not those, since you sent those arms I think we be good. There was a certain 914-6 (2233) that has a 10mm nut in the seam sealer in the rear trunk (IMG:style_emoticons/default/biggrin.gif) That car is Saturn (Chrome) Yellow no? |
|
|
|
| Aaron Cox |
Mar 7 2007, 11:13 AM
Post
#95
|
|
Professional Lawn Dart Group: Retired Admin Posts: 24,541 Joined: 1-February 03 From: OC Member No.: 219 Region Association: Southern California |
nice work! you turned those wheels into real beauties....!!
love the flares! |
|
|
|
| Part Pricer |
Mar 7 2007, 12:08 PM
Post
#96
|
|
Believe everything I post Group: Benefactors Posts: 1,825 Joined: 28-December 02 From: Danbury, CT Member No.: 35 |
QUOTE(Eric_Shea @ Mar 7 2007, 12:04 PM) That car is Saturn (Chrome) Yellow no? No. It is Ravenna Green. |
|
|
|
| Eric_Shea |
Mar 8 2007, 11:06 PM
Post
#97
|
|
PMB Performance Group: Admin Posts: 19,279 Joined: 3-September 03 From: Salt Lake City, UT Member No.: 1,110 Region Association: Rocky Mountains |
QUOTE No. It is Ravenna Green. Gottcha (IMG:style_emoticons/default/wink.gif) I went back through the thread and saw that... it's so weird though... some of those pictures are spot on for Saturn and others look green. Post 87 looks like Saturn. The first pic in post 91 too... (IMG:style_emoticons/default/wacko.gif) |
|
|
|
| Spoke |
Mar 18 2007, 11:43 AM
Post
#98
|
|
Jerry Group: Members Posts: 6,994 Joined: 29-October 04 From: Allentown, PA Member No.: 3,031 Region Association: None |
Intalled the washer tank. The pump can be seen at the bottom of the cowl brace. Drilled out the cap as per Sir Andy's thread. Also connected all wires to the washer arm on the steering column. I decided to put the switch on the ground side of the pump.
Attached image(s) 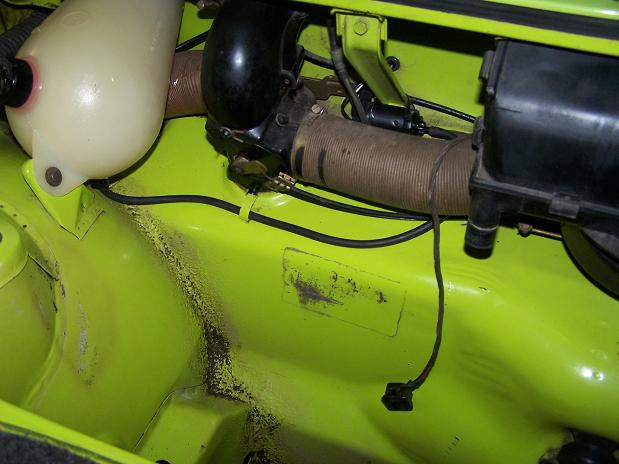
|
|
|
|
| Spoke |
Mar 18 2007, 11:49 AM
Post
#99
|
|
Jerry Group: Members Posts: 6,994 Joined: 29-October 04 From: Allentown, PA Member No.: 3,031 Region Association: None |
Cleaned out the tank and sending unit with degreaser from my FLAPS. The stuff did a job on the built up gum and residue in the tank and the sending unit. I mixed the degreaser with hot water in a about 1:4 (degreaser:water) ratio. Compare these pics with the ones a few posts ago for before and after cleaning.
Attached image(s) 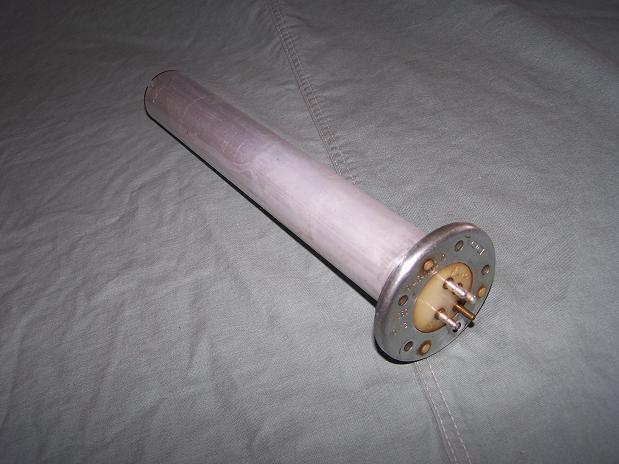 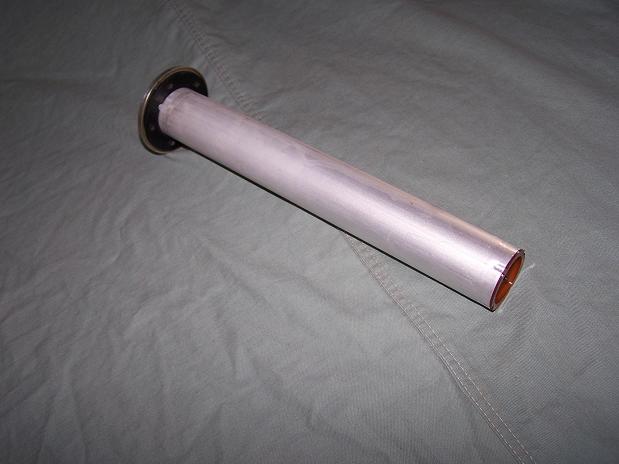
|
|
|
|
| Spoke |
Mar 18 2007, 04:27 PM
Post
#100
|
|
Jerry Group: Members Posts: 6,994 Joined: 29-October 04 From: Allentown, PA Member No.: 3,031 Region Association: None |
Pulled the front trunk gasket so to fix the rust on the passenger fender. Rust also on the driver side but hasn't worked its way up to the exposed fender.
Attached image(s)  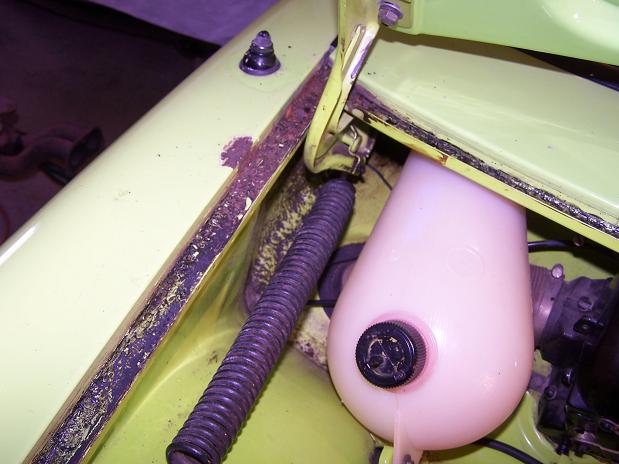 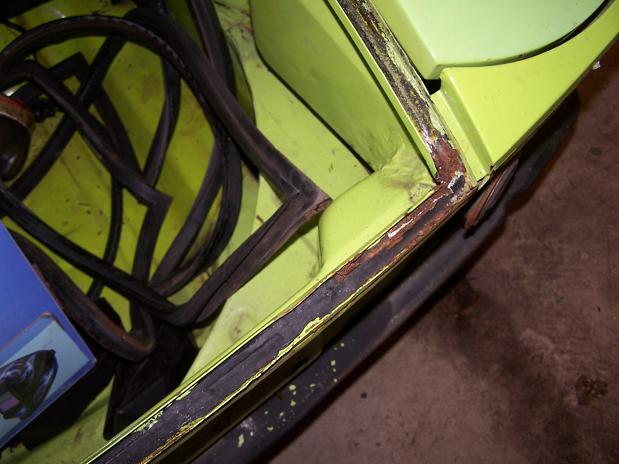 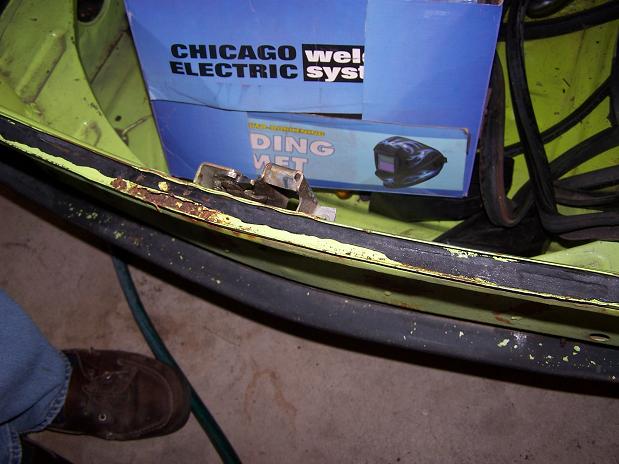 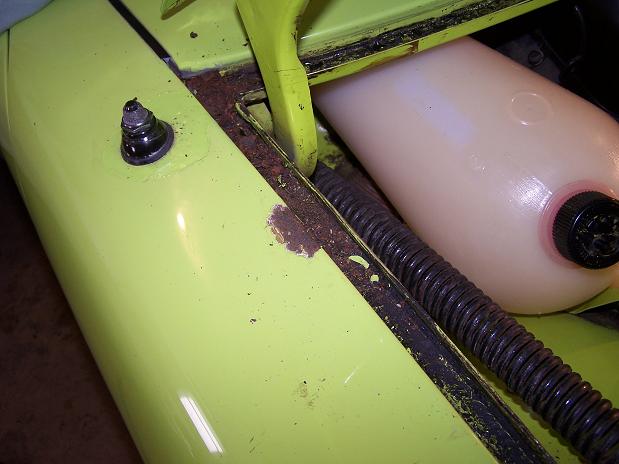
|
|
|
|
|
1 User(s) are reading this topic (1 Guests and 0 Anonymous Users)
0 Members:

|
Lo-Fi Version | Time is now: 25th June 2024 - 07:23 PM |
Invision Power Board
v9.1.4 © 2024 IPS, Inc.