|
|

|
Porsche, and the Porsche crest are registered trademarks of Dr. Ing. h.c. F. Porsche AG.
This site is not affiliated with Porsche in any way. Its only purpose is to provide an online forum for car enthusiasts. All other trademarks are property of their respective owners. |
|
|
  |
| FourBlades |
 Jan 18 2009, 04:15 PM Jan 18 2009, 04:15 PM
Post
#161
|
|
From Wreck to Rockin     Group: Members Posts: 2,056 Joined: 3-December 07 From: Brevard, FL Member No.: 8,414 Region Association: South East States 
|
Had a few minutes today to weld up the passenger sail.
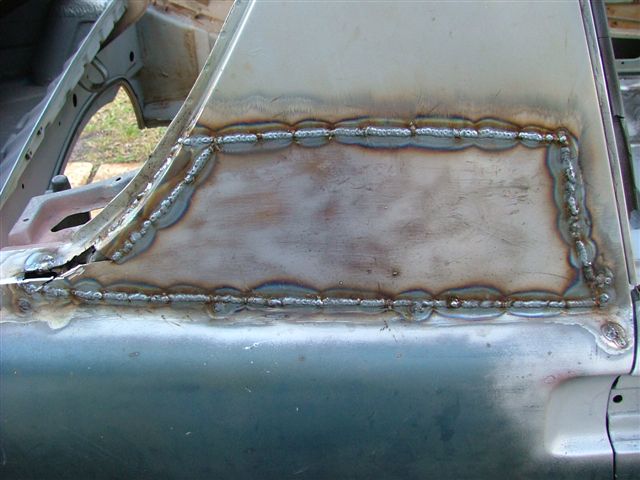 Still needs another small patch. John |
| FourBlades |
 Feb 3 2009, 05:32 PM Feb 3 2009, 05:32 PM
Post
#162
|
|
From Wreck to Rockin     Group: Members Posts: 2,056 Joined: 3-December 07 From: Brevard, FL Member No.: 8,414 Region Association: South East States 
|
The cleanup continues. Ground the passenger sail panel.
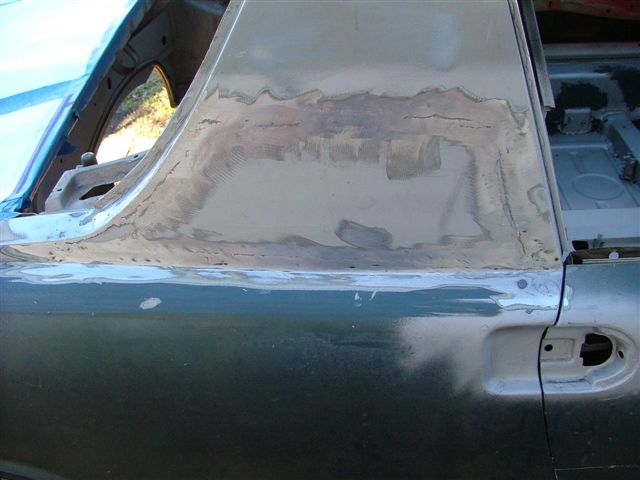 Seam sealed the engine bay and passenger area. I really globbed the sealer on. The so called brushable sealer is really a pain to put on neatly. 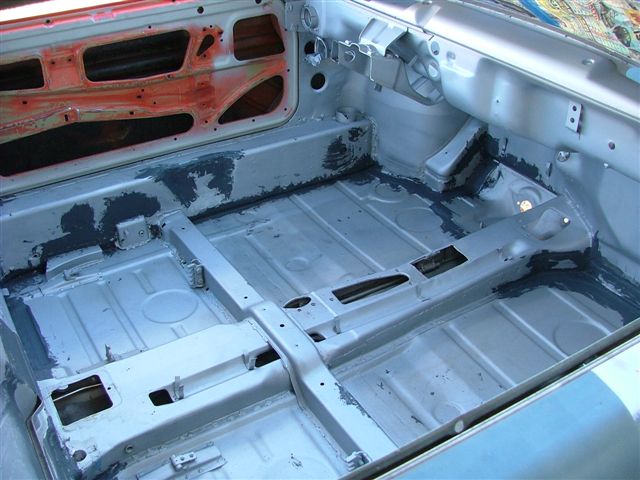 |
| FourBlades |
 Feb 3 2009, 05:37 PM Feb 3 2009, 05:37 PM
Post
#163
|
|
From Wreck to Rockin     Group: Members Posts: 2,056 Joined: 3-December 07 From: Brevard, FL Member No.: 8,414 Region Association: South East States 
|
Fitted the really nice door I got from SMG914. Thanks man, I wish you had a
passenger door to match it. (IMG:style_emoticons/default/biggrin.gif) I am going to have to weld a bunch of holes in the skin of my passenger door. 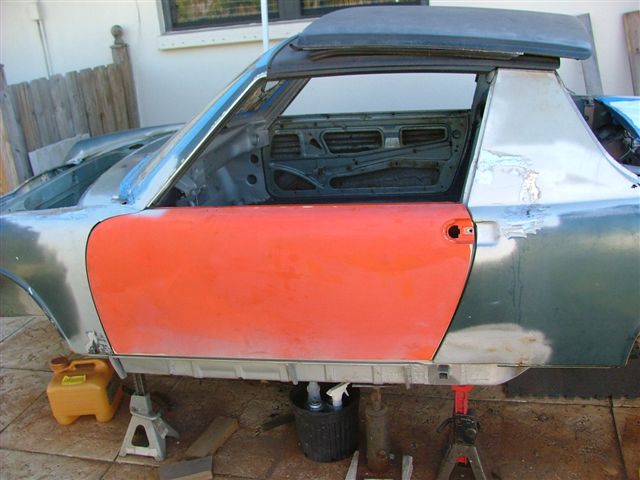 Removed all the last bits of trim to get ready for painting!!! Gonna have some time off work here soon and I want to get this thing painted. 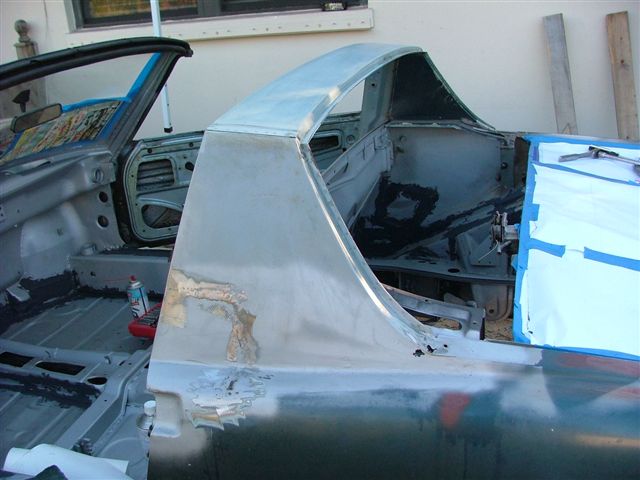 I have a buncha questions about painting I will post in a different thread. John |
| AgPete139 |
 Feb 4 2009, 11:36 PM Feb 4 2009, 11:36 PM
Post
#164
|
|
AgPete139   Group: Members Posts: 91 Joined: 12-February 08 From: Houston, TX Member No.: 8,701 Region Association: South East States |
Wow, and wow. Projects like these inspire me...nice job, man. (IMG:style_emoticons/default/pray.gif) You'll have patience with the rusting. Wow. Keep it up!
Pete |
| FourBlades |
 Feb 6 2009, 05:08 PM Feb 6 2009, 05:08 PM
Post
#165
|
|
From Wreck to Rockin     Group: Members Posts: 2,056 Joined: 3-December 07 From: Brevard, FL Member No.: 8,414 Region Association: South East States 
|
Spent 6 hours today fixing my passenger door. I sand blasted the inside as much
as I could to remove all the rust. There were 5 areas which had rusted through. The PO thoughtfully fixed this hole by putting on a layer of plastic tape and then painting over it. (IMG:style_emoticons/default/mad.gif) Any newbie knows you need at least 2 layers of tape for it to be considered a permanent repair. (IMG:style_emoticons/default/laugh.gif) Remember this when you are inspecting that newly painted car that is for sale. This atrocity was actually pretty well hidden unless you looked for it. 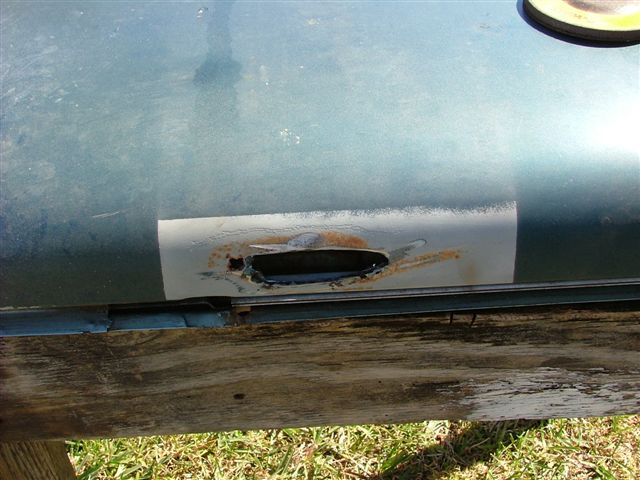 I hope it does not hurt the "originality" of the car by not repairing it again with tape, but I thought maybe metal would be better. 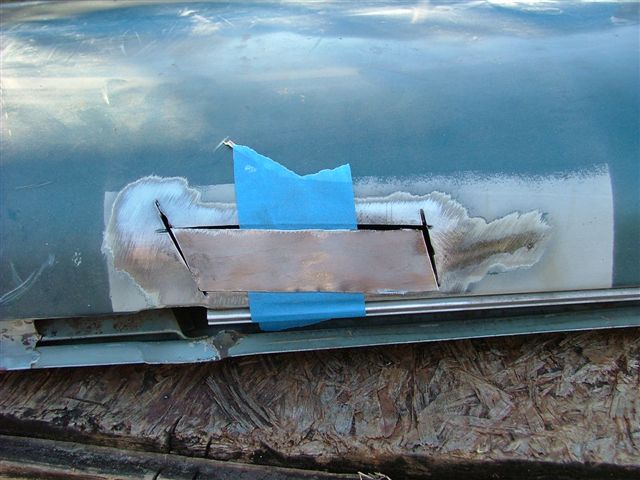 Using tape behind the patch helps hold it flush. This works better than taping on the top of the patch because the mig wire just pushes the patch off the tape that way. Welded and ground it down. 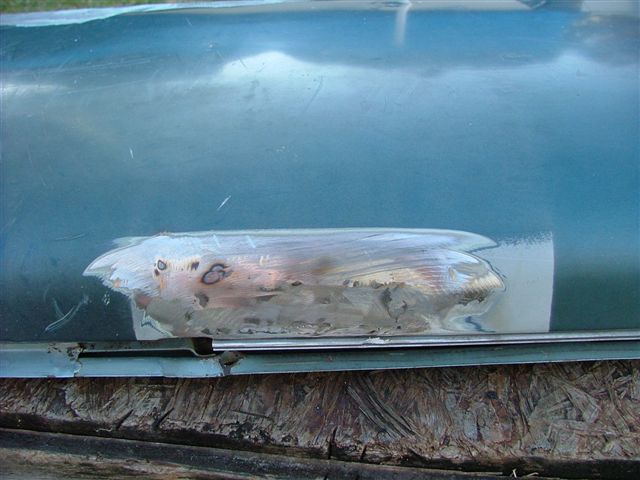 Fixing some other holes. 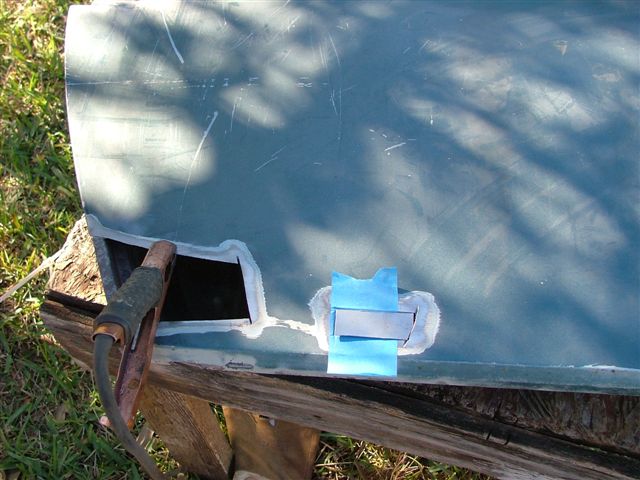 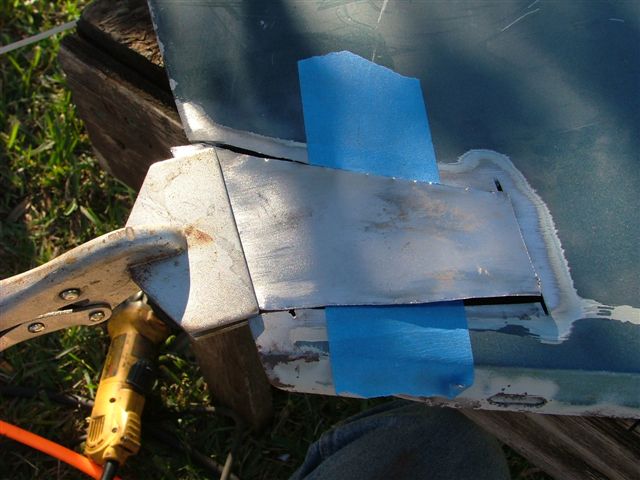 Ground them. 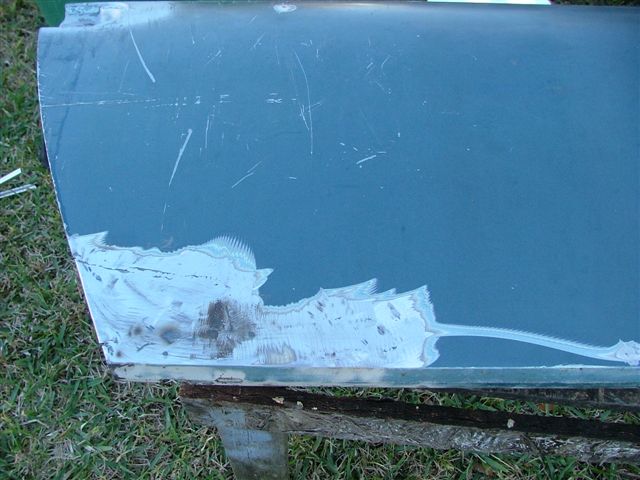 I was using an air gun to cool the welds as I went, but I must have overheated the door skin because I ended up warping it nicely. There are a couple high spots and one big oil canned spot. I tried shrinking it with a propane torch and wet rag but it did not help much. So how do I shrink these spots? John |
| rjames |
 Feb 6 2009, 07:04 PM Feb 6 2009, 07:04 PM
Post
#166
|
|
I'm made of metal     Group: Members Posts: 4,165 Joined: 24-July 05 From: Shoreline, WA Member No.: 4,467 Region Association: Pacific Northwest 
|
QUOTE So how do I shrink these spots? Metal shinking disc? At least I've seen it done that way in other restos. Just found a link: Linky One question, which will undoubtedly show my ignorance- What dictates when seam sealer should be used? |
| sean_v8_914 |
 Feb 7 2009, 11:52 AM Feb 7 2009, 11:52 AM
Post
#167
|
|
Chingon 601     Group: Members Posts: 4,011 Joined: 1-February 05 From: San Diego Member No.: 3,541 |
that link just cost me an hour (IMG:style_emoticons/default/wink.gif)
|
| FourBlades |
 Feb 7 2009, 05:32 PM Feb 7 2009, 05:32 PM
Post
#168
|
|
From Wreck to Rockin     Group: Members Posts: 2,056 Joined: 3-December 07 From: Brevard, FL Member No.: 8,414 Region Association: South East States 
|
Those shrinking disks scare me. I have heard of them exploding and cutting people up badly. Maybe that is just me being paranoid. I tried using acetylene and managed to remove the oil canning (think pressing in on the metal and it snapping back out) but could not completely flatten it. This is partly because you can't get to the back of the panel due to the door beams but mostly due to the fact that I don't know what I am doing. Seam sealer: I believe you use it on all welded seams except the outside skin of the car. The layers of the paint job should protect these seams from water. John |
| jc914 |
 Feb 7 2009, 06:11 PM Feb 7 2009, 06:11 PM
Post
#169
|
|
Member   Group: Members Posts: 289 Joined: 15-September 08 From: Miami, Florida Member No.: 9,548 Region Association: South East States |
(IMG:style_emoticons/default/beerchug.gif) (IMG:style_emoticons/default/popcorn[1].gif) I keep on looking at your post once again amazing work
|
| FourBlades |
 Feb 8 2009, 04:43 PM Feb 8 2009, 04:43 PM
Post
#170
|
|
From Wreck to Rockin     Group: Members Posts: 2,056 Joined: 3-December 07 From: Brevard, FL Member No.: 8,414 Region Association: South East States 
|
Passenger tail light opening was horribly rusted. I cut it out and made a
replacement piece. This took a hour or so to make using the flimsy little brake I have. 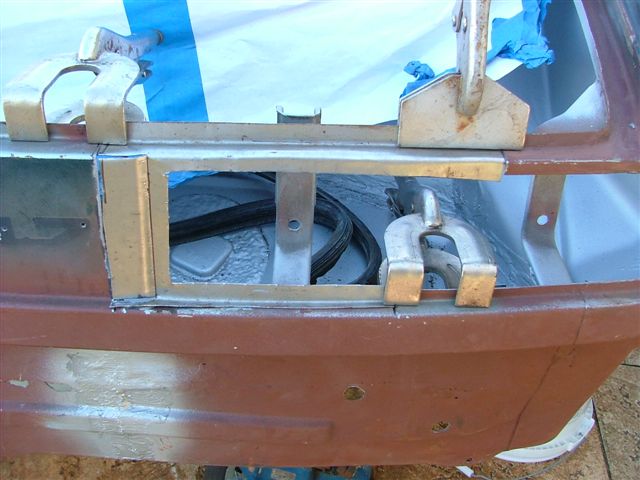 Clamped a piece of flattened, copper pipe behind the seam. I really tried to weld slowly to avoid warping this thin sheet metal. 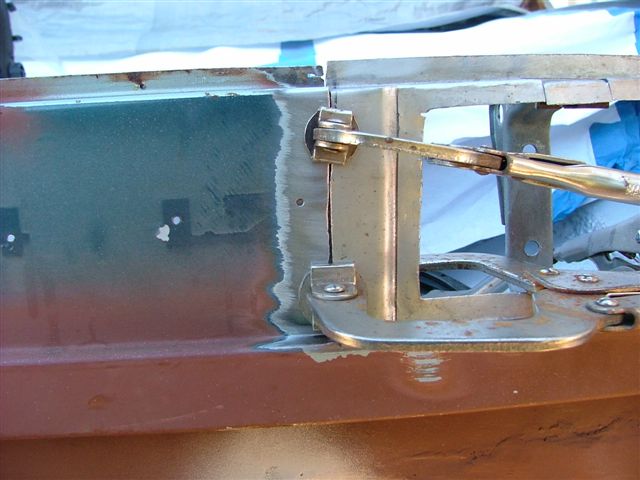 Put on a few tacks, stop, take a picture, wait a while. 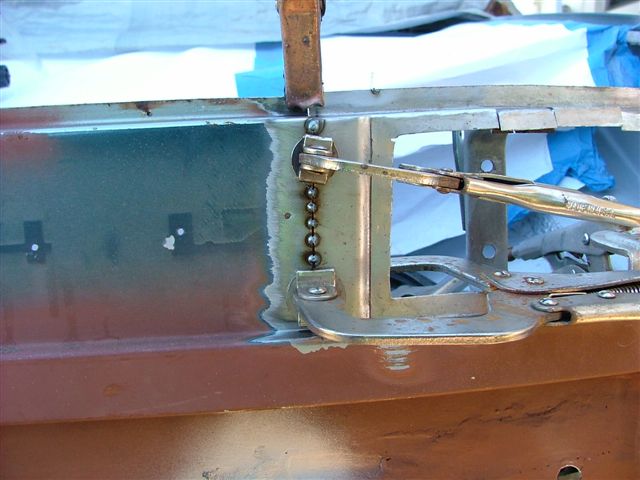 Keep on until it is fully welded. 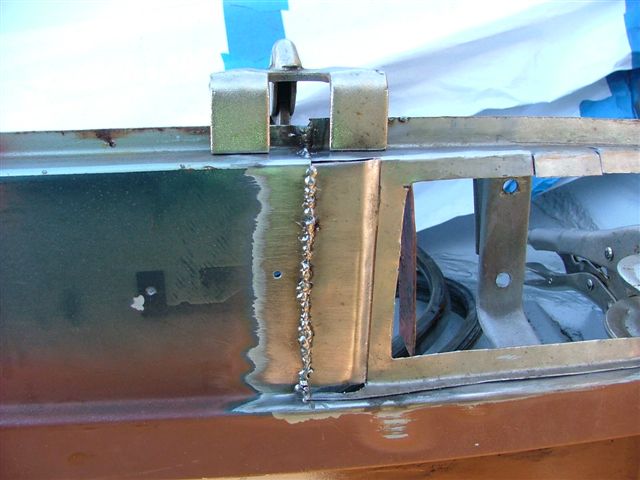 Slowly welded the rest. Using a copper backer makes a really big difference. I like to use a lot of clamps to also take up some of the heat. 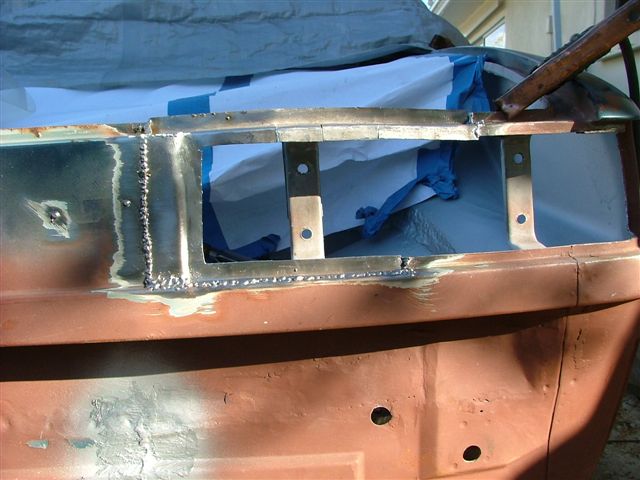 Test fit the tail light. I needed to do some trimming and hammering to make it fit like this. 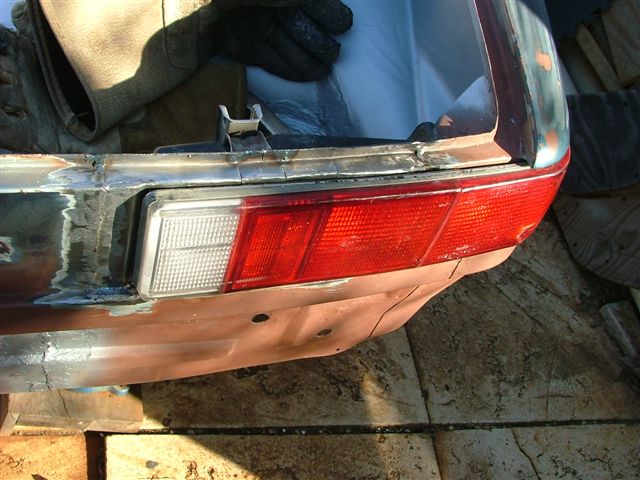 Painted and ready to rust out all over again. 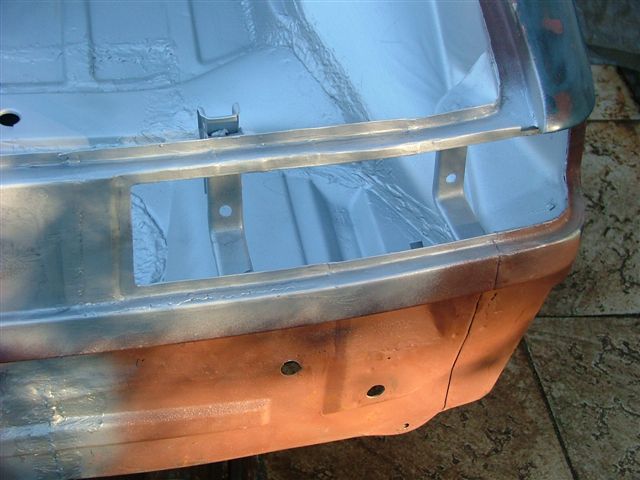 John |
| MDG |
 Feb 8 2009, 04:49 PM Feb 8 2009, 04:49 PM
Post
#171
|
|
Wolf in wolf's clothing.      Group: Members Posts: 8,652 Joined: 3-February 09 From: Toronto Member No.: 10,018 Region Association: None |
"Painted and ready to rust out all over again."
(IMG:style_emoticons/default/laugh.gif) if it does, with your skills the rust won't stand a chance. This project is an inspiration - fantastic stuff man! mike |
| FourBlades |
 Feb 11 2009, 09:16 PM Feb 11 2009, 09:16 PM
Post
#172
|
|
From Wreck to Rockin     Group: Members Posts: 2,056 Joined: 3-December 07 From: Brevard, FL Member No.: 8,414 Region Association: South East States 
|
You call this a rust spot??? Pfffftttt!
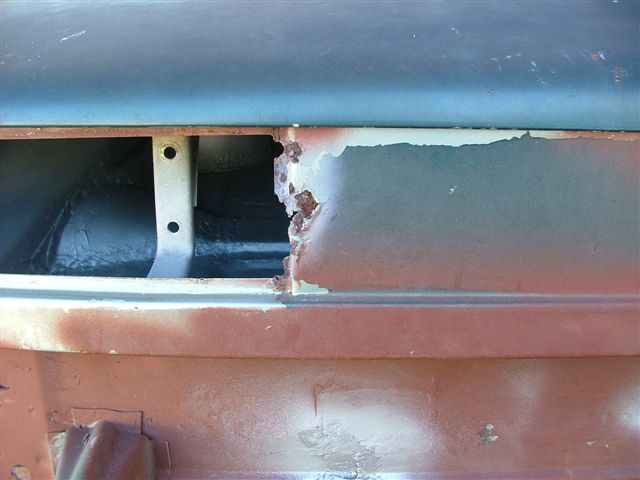 I guess I have to fix it... 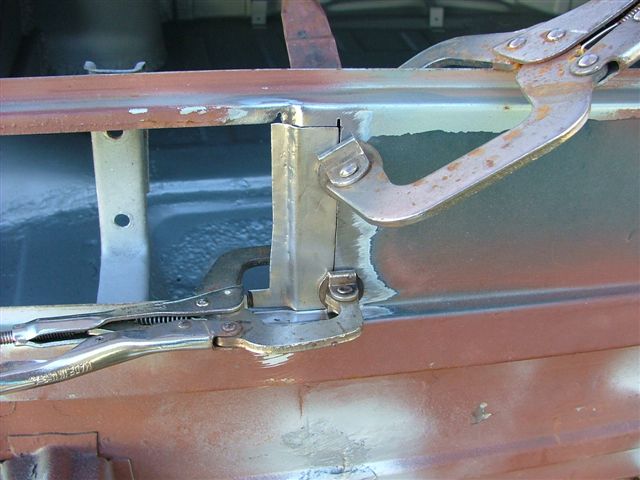 All welded and grounded up. Checking the tail light fit. 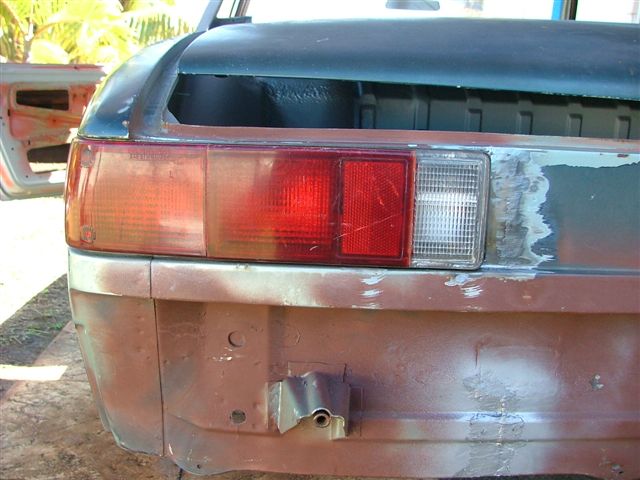 Wow, the tail lights and trunk lid still fit. 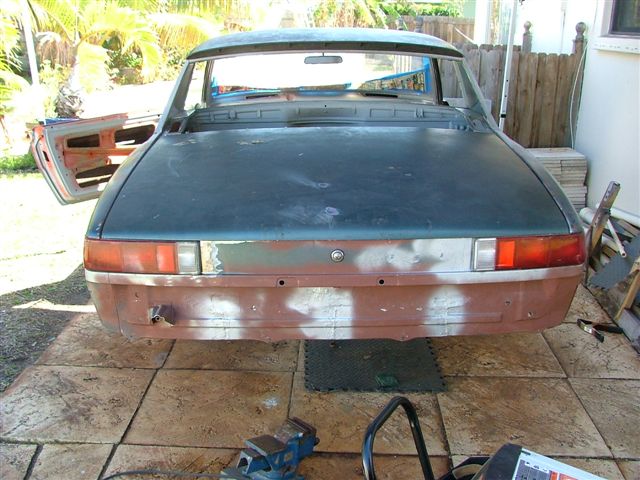 Now working on stripping the old paint and troweling on the bondo. If you are using crumpled up newspaper to fill in a dent, does it matter if you are using those shiny ad inserts or is only regular news print considered a concours repair? (IMG:style_emoticons/default/piratenanner.gif) (IMG:style_emoticons/default/aktion035.gif) (IMG:style_emoticons/default/rolleyes.gif) Ha ha, ok, so that was a joke, I know you should only use Road and Track magazines. John |
| MDG |
 Feb 11 2009, 09:58 PM Feb 11 2009, 09:58 PM
Post
#173
|
|
Wolf in wolf's clothing.      Group: Members Posts: 8,652 Joined: 3-February 09 From: Toronto Member No.: 10,018 Region Association: None |
 not only does your work continue to amaze . . . it appears you've trained your car to levitate (IMG:style_emoticons/default/blink.gif) huh, could this be the end of jackstands!?! |
| FourBlades |
 Feb 12 2009, 08:54 AM Feb 12 2009, 08:54 AM
Post
#174
|
|
From Wreck to Rockin     Group: Members Posts: 2,056 Joined: 3-December 07 From: Brevard, FL Member No.: 8,414 Region Association: South East States 
|
Ha ha, Michael, actually it looks high because I got it sitting on 22s. (IMG:style_emoticons/default/av-943.gif) How has TO been this winter? I love Ontario but its a little too cold for me... John |
| MDG |
 Feb 12 2009, 09:55 AM Feb 12 2009, 09:55 AM
Post
#175
|
|
Wolf in wolf's clothing.      Group: Members Posts: 8,652 Joined: 3-February 09 From: Toronto Member No.: 10,018 Region Association: None |
Ha ha, Michael, actually it looks high because I got it sitting on 22s. (IMG:style_emoticons/default/av-943.gif) How has TO been this winter? I love Ontario but its a little too cold for me... John hey John, had a ton of snow in January - more than usual for this area. Now it's typical February slop; mid 40's - rain/snow/rain . . . it's one big puddle - at least it'll help wash away some of the salt (IMG:style_emoticons/default/dry.gif) my dad is down in Naples - lucky bastard. your car is coming together great! m. |
| carr914 |
 Feb 12 2009, 10:19 AM Feb 12 2009, 10:19 AM
Post
#176
|
|
Racer from Birth                                                                                                     Group: Members Posts: 122,847 Joined: 2-February 04 From: Tampa,FL Member No.: 1,623 Region Association: South East States  |
Fitted the really nice door I got from SMG914. Thanks man, I wish you had a passenger door to match it. (IMG:style_emoticons/default/biggrin.gif) I am going to have to weld a bunch of holes in the skin of my passenger door.  John That's because I beat you to the passenger door. It's on my Six. So we have another connection. (IMG:style_emoticons/default/biggrin.gif) T.C. you can just see the Tangerine door in my Signal Orange car in this pic 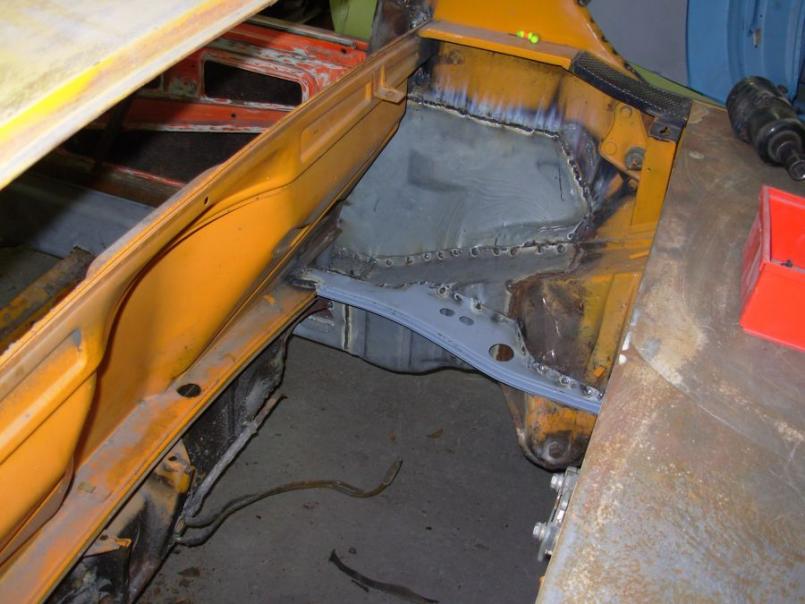 |
| PanelBilly |
 Feb 12 2009, 11:58 AM Feb 12 2009, 11:58 AM
Post
#177
|
|
914 Guru      Group: Members Posts: 5,866 Joined: 23-July 06 From: Kent, Wa Member No.: 6,488 Region Association: Pacific Northwest 
|
Your making me want to start another project, The stage you in is so much fun. Turning old into new, its like art with metal.
Sigh, I guess I need to finish the two cars I have in the shop first. |
| FourBlades |
 Feb 12 2009, 04:22 PM Feb 12 2009, 04:22 PM
Post
#178
|
|
From Wreck to Rockin     Group: Members Posts: 2,056 Joined: 3-December 07 From: Brevard, FL Member No.: 8,414 Region Association: South East States 
|
This is a fun stage. Its only taken 15 months of work to get here too. (IMG:style_emoticons/default/biggrin.gif)
T.C. if you wake up one morning and your passenger door is gone then you will have a pretty good idea where it went. Seriously, the door Steve gave me is almost too nice for my Frankenfourteen. I refurbished my old passenger door. It took about 4 or 5 hours and about a gallon of bondo to smooth it out, ok, maybe a quart. (IMG:style_emoticons/default/blink.gif) This is the door I was welding on a few days ago. I used my new fuji turbine sprayer for the first time and managed to put a nicely orange peeled couple coats of epoxy primer on it. Here it is resting on the IMSA car to keep it out of the weather. It looks better in the picture than in reality. 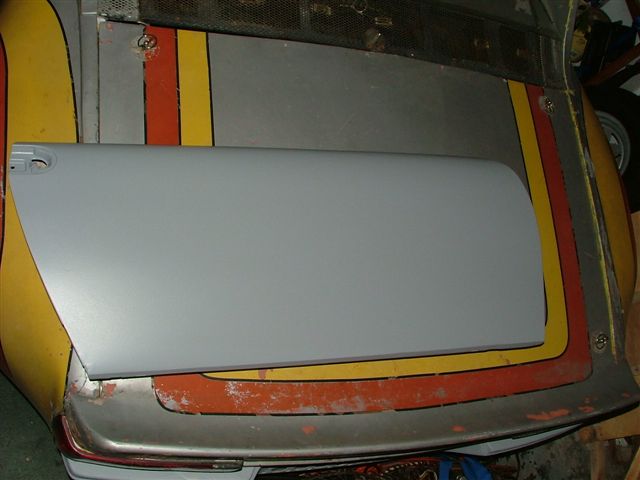 John |
| ConeDodger |
 Feb 15 2009, 11:01 AM Feb 15 2009, 11:01 AM
Post
#179
|
|
Apex killer!                Group: Members Posts: 23,867 Joined: 31-December 04 From: Tahoe Area Member No.: 3,380 Region Association: Northern California 
|
Ummmmm Wow! (IMG:style_emoticons/default/drooley.gif) (slinks away in shame)
|
| jimkelly |
 Feb 15 2009, 03:57 PM Feb 15 2009, 03:57 PM
Post
#180
|
|
Delaware USA     Group: Members Posts: 4,969 Joined: 5-August 04 From: Delaware, USA Member No.: 2,460 Region Association: MidAtlantic Region |
|
  |
2 User(s) are reading this topic (2 Guests and 0 Anonymous Users)
0 Members:

|
Lo-Fi Version | Time is now: 8th January 2025 - 04:10 PM |
Invision Power Board
v9.1.4 © 2025 IPS, Inc.


