|
|

|
Porsche, and the Porsche crest are registered trademarks of Dr. Ing. h.c. F. Porsche AG.
This site is not affiliated with Porsche in any way. Its only purpose is to provide an online forum for car enthusiasts. All other trademarks are property of their respective owners. |
|
|
  |
| jc914 |
 Mar 8 2009, 06:09 PM Mar 8 2009, 06:09 PM
Post
#201
|
|
Member   Group: Members Posts: 289 Joined: 15-September 08 From: Miami, Florida Member No.: 9,548 Region Association: South East States |
Incredible work once again (IMG:style_emoticons/default/smilie_pokal.gif) (IMG:style_emoticons/default/biggrin.gif) (IMG:style_emoticons/default/beerchug.gif) (IMG:style_emoticons/default/clap56.gif) (IMG:style_emoticons/default/pray.gif) (IMG:style_emoticons/default/pray.gif) (IMG:style_emoticons/default/mueba.gif) (IMG:style_emoticons/default/aktion035.gif)
|
| FourBlades |
 Mar 14 2009, 04:26 PM Mar 14 2009, 04:26 PM
Post
#202
|
|
From Wreck to Rockin     Group: Members Posts: 2,056 Joined: 3-December 07 From: Brevard, FL Member No.: 8,414 Region Association: South East States 
|
Three coats of color laid on!
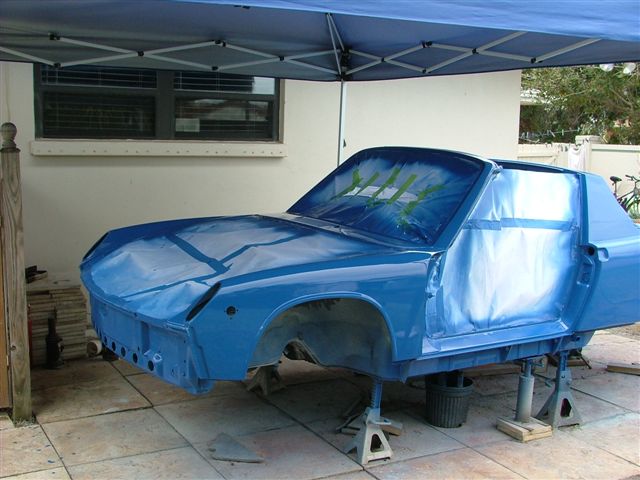 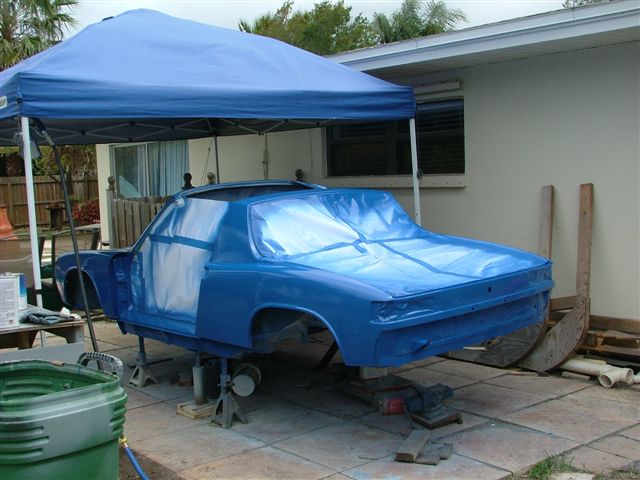 Here I am in my Sunday best finishing the last coat. I have a supplied air respirator and I put the air pump inside my garage and mostly close the door. The flow of air helps keep you cool and you don't smell the paint at all. This set up was about $500 on ebay but worth it for saving your health. 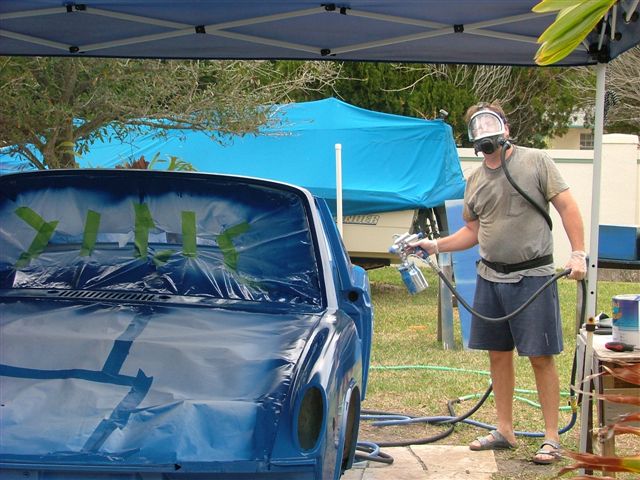 I realized when I was done that I had painted my feet pretty well... (IMG:style_emoticons/default/laugh.gif) (IMG:style_emoticons/default/laugh.gif) (IMG:style_emoticons/default/laugh.gif) The paint looks pretty good to me. A few small drips and not many dust spots. I wet down the whole area before starting. Still have to paint the doors and the interior. John |
| ssstikircr |
 Mar 14 2009, 04:51 PM Mar 14 2009, 04:51 PM
Post
#203
|
|
Member   Group: Members Posts: 210 Joined: 11-January 09 From: Fair Oaks, Ca Member No.: 9,920 Region Association: Northern California |
Looks GREAT so far!!! (IMG:style_emoticons/default/aktion035.gif)
(IMG:style_emoticons/default/popcorn[1].gif) |
| carr914 |
 Mar 14 2009, 05:13 PM Mar 14 2009, 05:13 PM
Post
#204
|
|
Racer from Birth                                                                                                     Group: Members Posts: 122,848 Joined: 2-February 04 From: Tampa,FL Member No.: 1,623 Region Association: South East States  |
From a throw-away 914 to this far is amazing John. I'm truly glad that you have the IMSA car- it's definately in the right hands.
T.C. |
| al weidman |
 Mar 16 2009, 04:41 PM Mar 16 2009, 04:41 PM
Post
#205
|
|
Al Weidman   Group: Members Posts: 156 Joined: 22-February 08 From: Oroville, Ca. Member No.: 8,736 Region Association: Northern California |
John, as you can see, there are allot of us that have seen what you have accomplished and have been inspired to tackle our own projects. I too have some front hood channel and headlight channel to repair, where the rubber moulding fits. What gauge metel did you use for your fabrication? Thanks, and be sure to keep us involved on your interior and motor installation, that 2270 is really going to scoot. Al. (IMG:style_emoticons/default/welder.gif) (IMG:style_emoticons/default/pray.gif) (IMG:style_emoticons/default/pray.gif) (IMG:style_emoticons/default/pray.gif)
|
| FourBlades |
 Mar 16 2009, 06:25 PM Mar 16 2009, 06:25 PM
Post
#206
|
|
From Wreck to Rockin     Group: Members Posts: 2,056 Joined: 3-December 07 From: Brevard, FL Member No.: 8,414 Region Association: South East States 
|
Hey Al, thanks for the good words. I used 22 gauge steel for all the channels.
I think the original might be more like 20, but its close. I used a small brake to make up sections of channel to repair the problem areas, cut out the bad parts, then carefully tacked the new piece in. Keep adding tacks until they overlap, work slowly so it does not warp. The hardest part I found was smoothing the welds where the ends of the channel joined the original metal. It is not too hard, just time consuming. This would be an easy job if you had a spot welder and a brake. You could just replicate exactly how Porsche did it. The truth is that keeping this thread has really helped to keep me motivated. If I did not have a way of sharing this and getting comments from people I think I would have quit a long time ago. Starting a thread is a great way to motivate yourself to keep working, hint hint. John |
| dlee6204 |
 Mar 16 2009, 07:25 PM Mar 16 2009, 07:25 PM
Post
#207
|
|
Howdy     Group: Members Posts: 2,162 Joined: 30-April 06 From: Burnsville, NC Member No.: 5,956 |
You get motivated. We get motivated. We all get motivated. It's a win-win situation for everybody! (IMG:style_emoticons/default/driving.gif) You have done some amazing work on the car so far. I was never really a fan of the adriatic blue until I saw it on your car... now I can't take my eyes off it! (IMG:style_emoticons/default/drooley.gif) Great job! (IMG:style_emoticons/default/beerchug.gif)
|
| pjf |
 Mar 22 2009, 07:53 AM Mar 22 2009, 07:53 AM
Post
#208
|
|
Member   Group: Members Posts: 132 Joined: 27-September 04 From: Ipswich, MA Member No.: 2,840 |
Great job! My apologies if you have already mentioned these things but I was wondering where you got the fiberglass rockers and also what brand primer and paint are you using?
|
| FourBlades |
 Mar 23 2009, 09:06 AM Mar 23 2009, 09:06 AM
Post
#209
|
|
From Wreck to Rockin     Group: Members Posts: 2,056 Joined: 3-December 07 From: Brevard, FL Member No.: 8,414 Region Association: South East States 
|
I bought the rockers on ebay. I will have to try to dig up the seller's name when I am at home. I am using Dimension single stage paint from Sherwin Williams, over their two part epoxy primer. I wanted single stage to make repairing chips and dings from track use easier. I picked Sherwin Williams because they are 10 minutes from my house. They make paint that is resold by other people including NAPA. The primer is about $50 a gallon including both parts. The adriatic blue acrylic enamel is $200 a gallon when you include reducer and hardener. Other colors can be a lot more, like yellow is about $700 a gallon! Yellow may be faster, but speed clearly costs money. John |
| ConeDodger |
 Mar 23 2009, 09:20 AM Mar 23 2009, 09:20 AM
Post
#210
|
|
Apex killer!                Group: Members Posts: 23,868 Joined: 31-December 04 From: Tahoe Area Member No.: 3,380 Region Association: Northern California 
|
Nice work John! Color is so exciting. Now for the reassembly!
|
| FourBlades |
 Mar 23 2009, 09:24 AM Mar 23 2009, 09:24 AM
Post
#211
|
|
From Wreck to Rockin     Group: Members Posts: 2,056 Joined: 3-December 07 From: Brevard, FL Member No.: 8,414 Region Association: South East States 
|
Thanks Rob. I can't wait to put parts on instead of taking them off. I am sure I will have tons of questions for everyone... John |
| pjf |
 Mar 23 2009, 08:19 PM Mar 23 2009, 08:19 PM
Post
#212
|
|
Member   Group: Members Posts: 132 Joined: 27-September 04 From: Ipswich, MA Member No.: 2,840 |
Thanks for the paint info. If you have the Ebay seller of the rockers that would be great. Fit and finish good? I've read on other threads that rockers don't always fit as they should.
|
| FourBlades |
 Mar 25 2009, 07:35 PM Mar 25 2009, 07:35 PM
Post
#213
|
|
From Wreck to Rockin     Group: Members Posts: 2,056 Joined: 3-December 07 From: Brevard, FL Member No.: 8,414 Region Association: South East States 
|
The ebay seller's id was zero-kewl914. Hope its ok to post this.
The panels fit really well and the jacking holes are in the right places. I have been slammed with work and visitors for a while, but I will post some close up pictures when I get a chance to fit them. I notice he has nothing for sale right now, maybe check in a few days. John |
| jcambo7 |
 Mar 26 2009, 02:37 AM Mar 26 2009, 02:37 AM
Post
#214
|
|
Senior Member    Group: Members Posts: 1,691 Joined: 24-December 08 From: Graham, WA Member No.: 9,867 Region Association: Pacific Northwest |
Looking great. (IMG:style_emoticons/default/popcorn[1].gif) (IMG:style_emoticons/default/piratenanner.gif) (IMG:style_emoticons/default/driving.gif) (IMG:style_emoticons/default/aktion035.gif)
|
| FourBlades |
 Apr 2 2009, 07:36 PM Apr 2 2009, 07:36 PM
Post
#215
|
|
From Wreck to Rockin     Group: Members Posts: 2,056 Joined: 3-December 07 From: Brevard, FL Member No.: 8,414 Region Association: South East States 
|
Getting ready to paint the interior. It is critical to have a clean and well
organized work area, free from extraneous dirt and debris as illustrated here. 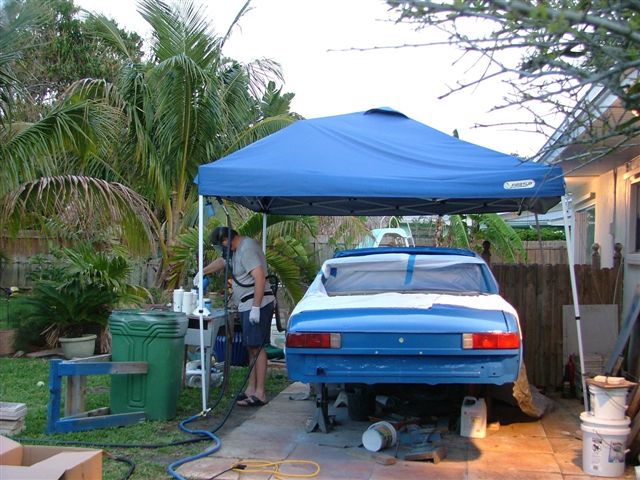 Painting! Bought a set of 8 ounce cups that make maneuvering the paint gun in tight areas much easier. I also bought a very light and flexible air line that runs the last six feet to the gun. Between the two you are holding less weight due to much less paint and lighter hose. 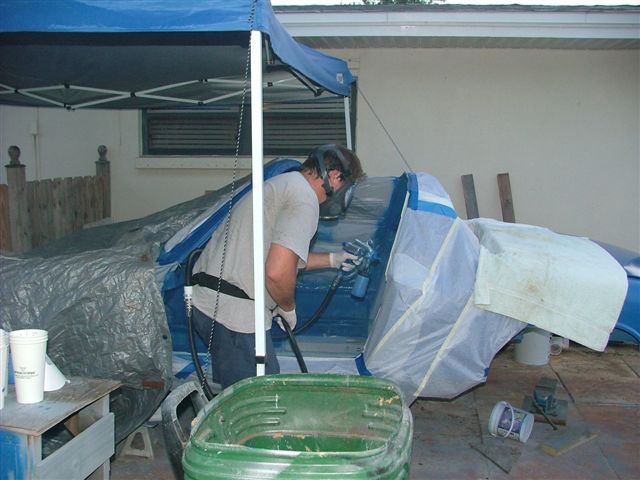 Chemistry set for big kids. Buying 100 disposable cups with measuring lines printed inside really helps as well. 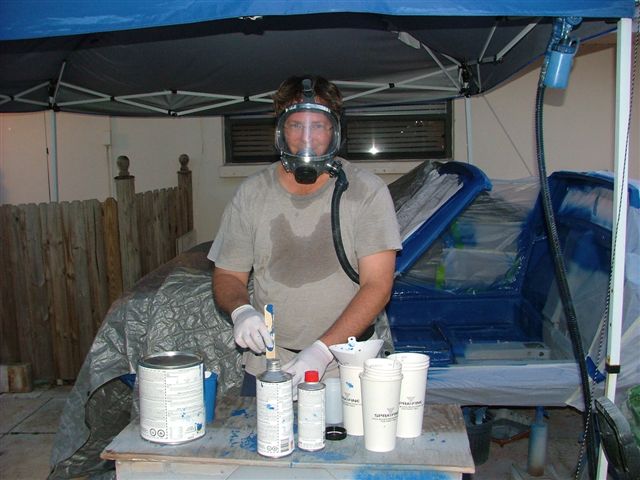 Painted! 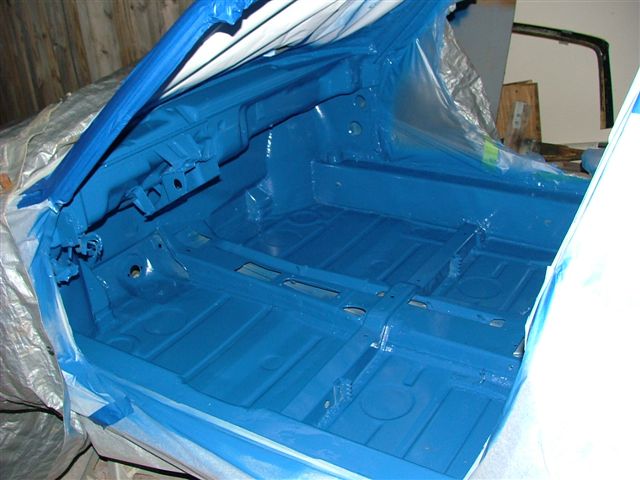 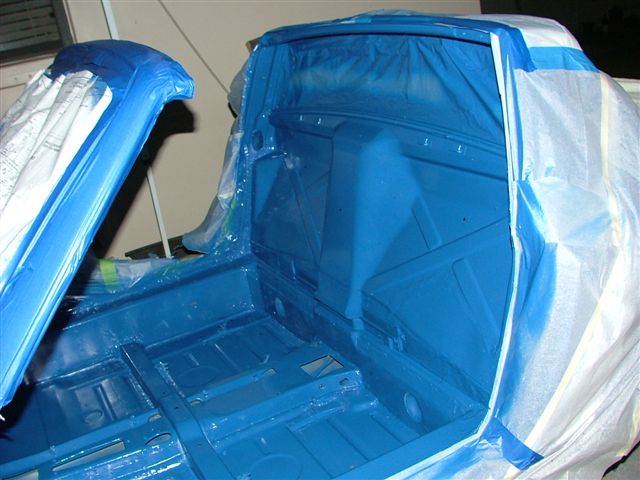 Getting dark so I rigged some big lights to help do the third coat. Feeling pretty smug about now when every freaking bug in the neighborhood decides to show up and land in my new paint. 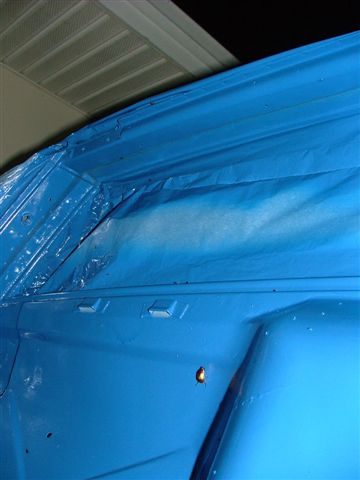 Last major area to paint is the engine bay. |
| FourBlades |
 May 4 2009, 06:51 PM May 4 2009, 06:51 PM
Post
#216
|
|
From Wreck to Rockin     Group: Members Posts: 2,056 Joined: 3-December 07 From: Brevard, FL Member No.: 8,414 Region Association: South East States 
|
Putting the FreeMotion (roller bearing) front suspension pieces on. This is pretty
easy to put together. I used a large wood working vise to press the bearings into the sleaves that go on the control arms. Very cool kit, I want one for the rear suspension now... 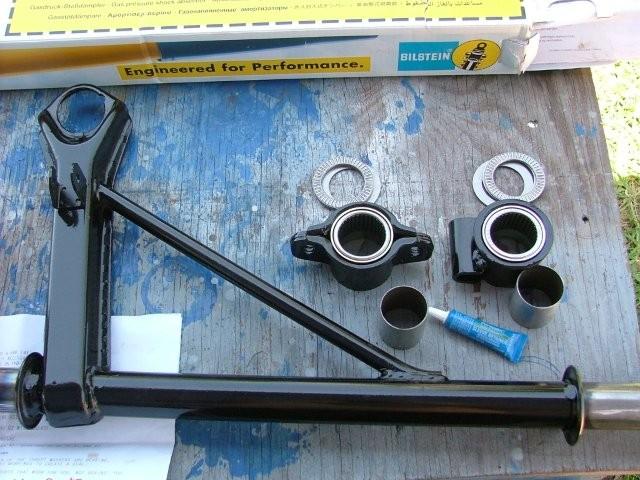 Put on the control arm and stock anti roll bar. 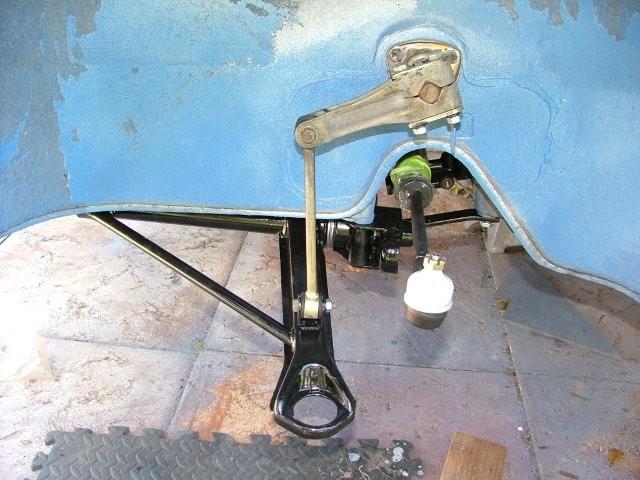 Control arms move up and down with no resistance at all when the anti roll bar is not attached. Got delrin bushings for the roll bar but it adds a lot of resistance to moving the control arm. Adding a new ball joint and nut using the special tool. I got the old nuts off by cutting most of the way through them with a dremel tool, being careful not to touch the control arm itself. Then used a 28 inch pipe wrench. It helps to try the pipe wrench from different angles around the nut. If you are willing to sacrifice the nut, it is not too hard to get it off without the special tool, took me maybe 10 minutes per side. I don't see any easy way to torque the new one on to 194 ft/lbs (IIRC) without the special tool or some home brewed equivalent. $10 per new nut and $50 for the tool will save you a lot of irritation if you have the dough. 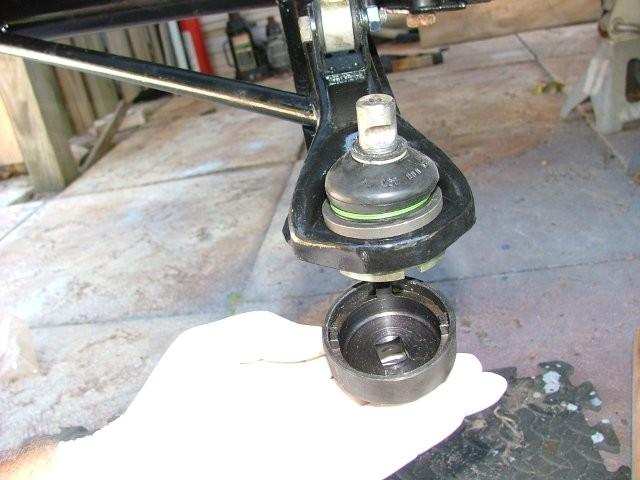 Added new Bilstein shocks to early 911 struts. 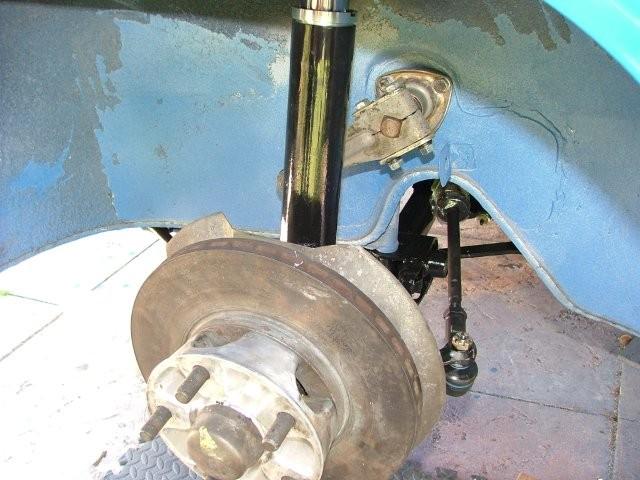 The first wheels and tires on this car since November 2007!!! 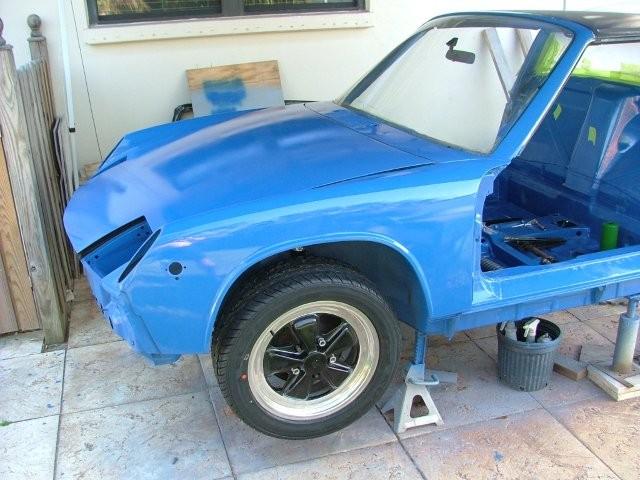 Shouldn't be more than a few years now until its a driver again. (IMG:style_emoticons/default/piratenanner.gif) (IMG:style_emoticons/default/piratenanner.gif) (IMG:style_emoticons/default/piratenanner.gif) John |
| McMark |
 May 4 2009, 07:22 PM May 4 2009, 07:22 PM
Post
#217
|
|
914 Freak!                Group: Retired Admin Posts: 20,179 Joined: 13-March 03 From: Grand Rapids, MI Member No.: 419 Region Association: None |
Yeah! That FreeMotion setup is nice, eh?! I'm waiting for my 6000 mile test set of FreeMotion rears to come back so I can pull them apart and see what they look like.
If there are no issues, then I'll have them for sale. |
| FourBlades |
 May 4 2009, 07:32 PM May 4 2009, 07:32 PM
Post
#218
|
|
From Wreck to Rockin     Group: Members Posts: 2,056 Joined: 3-December 07 From: Brevard, FL Member No.: 8,414 Region Association: South East States 
|
Mark, That is cool, looking forward to it. The friction involved in rubber bushings is really obvious when attaching the control arm to the anti roll bar. I greased up the delrin bearings in all the anti roll bar bushings and it still takes much more force to move it than I would have thought. John |
| MrKona |
 May 4 2009, 07:38 PM May 4 2009, 07:38 PM
Post
#219
|
|
Senior Member    Group: Members Posts: 597 Joined: 25-July 05 From: Santa Rosa, CA Member No.: 4,469 Region Association: None |
Great thread! What size Fuchs wheel is that? What size tire? By the way, I like the look of the black Fuchs. It's what I plan to go with for my five-lug conversion.
|
| bcheney |
 May 4 2009, 07:54 PM May 4 2009, 07:54 PM
Post
#220
|
|
Senior Member    Group: Members Posts: 1,341 Joined: 16-November 03 From: Orlando, FL Member No.: 1,348 Region Association: South East States |
Nice looking work John. That color is awesome! You are really doing a great job with that car. I hope to stop by and see it sometime. My father in law lives in Indialantic on Coral Way West.
Brian |
  |
1 User(s) are reading this topic (1 Guests and 0 Anonymous Users)
0 Members:

|
Lo-Fi Version | Time is now: 9th January 2025 - 06:44 AM |
Invision Power Board
v9.1.4 © 2025 IPS, Inc.


