|
|

|
Porsche, and the Porsche crest are registered trademarks of Dr. Ing. h.c. F. Porsche AG.
This site is not affiliated with Porsche in any way. Its only purpose is to provide an online forum for car enthusiasts. All other trademarks are property of their respective owners. |
|
|
  |
| FourBlades |
 Mar 7 2014, 09:48 PM Mar 7 2014, 09:48 PM
Post
#381
|
|
From Wreck to Rockin     Group: Members Posts: 2,056 Joined: 3-December 07 From: Brevard, FL Member No.: 8,414 Region Association: South East States 
|
Got my car weighed by Joe Sharp at the Tropical Ramble last fall. Joe is just an
all around exemplary human being. (IMG:style_emoticons/default/beerchug.gif) 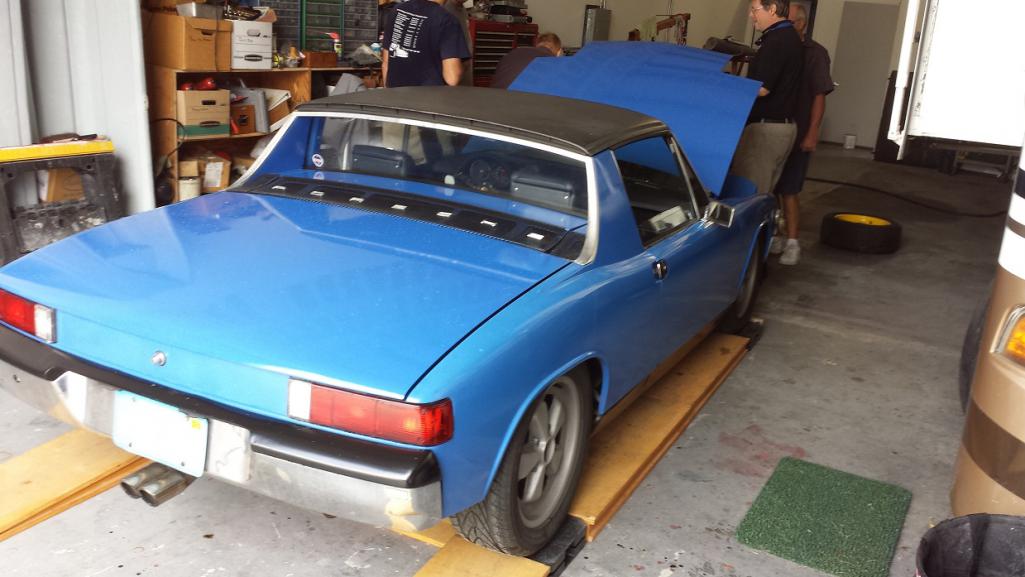 Car weighs in at 2028 pounds with 1010 and 1018 cross weights. Very happy with the weight and the alignment done for me by Porsche of Melbourne. 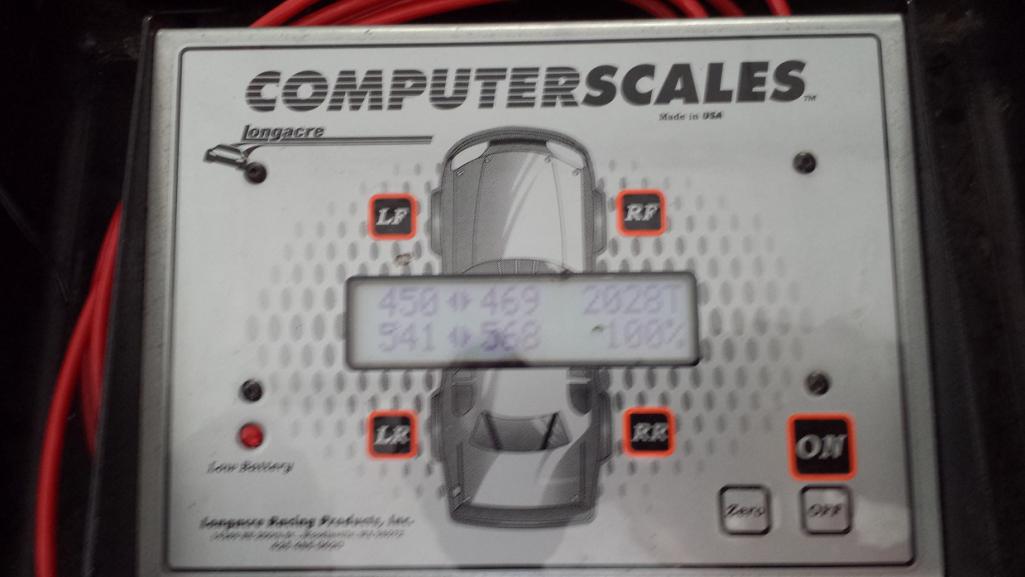 Just wanted to add this to the ongoing story of the car. (IMG:style_emoticons/default/smile.gif) (IMG:style_emoticons/default/smile.gif) (IMG:style_emoticons/default/smile.gif) (IMG:style_emoticons/default/smile.gif) (IMG:style_emoticons/default/smile.gif) Today I did one of the best upgrades ever for my car for the money. I spent 15 minutes and replaced my old rear targa seal with Mark's new and improved one with the fuzzy seal. Gone are 95% of the mysterious squeaks and creaks while driving the car. I was starting to think my rear shocks were sticking or something was rubbing in my rear suspension when all along it was the freaking top. I have had the rubber tubing on the rear latch posts for years and still got creaks like crazy. Do yourself a favor and install one of these. http://shop.914rubber.com/914-Rear-targa-s...le-914RTS-N.htm (IMG:style_emoticons/default/smile.gif) (IMG:style_emoticons/default/smile.gif) (IMG:style_emoticons/default/smile.gif) (IMG:style_emoticons/default/smile.gif) (IMG:style_emoticons/default/smile.gif) John |
| FourBlades |
 May 19 2014, 07:27 PM May 19 2014, 07:27 PM
Post
#382
|
|
From Wreck to Rockin     Group: Members Posts: 2,056 Joined: 3-December 07 From: Brevard, FL Member No.: 8,414 Region Association: South East States 
|
Still had a few last creaks and squeaks coming from the rear of the car that were
very annoying. Getting the new fuzzy top eliminated most of them but not all. Just to be sure, I tried taking the top off and driving, no change. My rocker panels were a little loose so I tightened them up with a few more screws, no change. It sounded like my engine cover was creaking so I drove around with it taped open with a big piece of foam to cushion it, no change. Finally, I took the rear wheels off and remembered I have grease zerks in the rear trailing arms. Once I found my grease gun and got it working again I greased all 4 zerks like crazy. With the top back on, the engine cover closed, there are no more annoying creaks and groans at all! I think this is a custom setup I got from PMB, not sure the zerks or need for greasing is stock. It has probably been 4 years since I last greased them. It is so nice to drive around over bumps and around corners without any annoying sounds to distract from the rumble of the engine. It may be my imagination but I swear the handling is better, maybe some serious sticktion was happening in the rear arms? John |
| FourBlades |
 Oct 28 2014, 08:32 PM Oct 28 2014, 08:32 PM
Post
#383
|
|
From Wreck to Rockin     Group: Members Posts: 2,056 Joined: 3-December 07 From: Brevard, FL Member No.: 8,414 Region Association: South East States 
|
It was a nice cool day so I decided to tackle some new rust spots on my door that have been getting steadily worse.
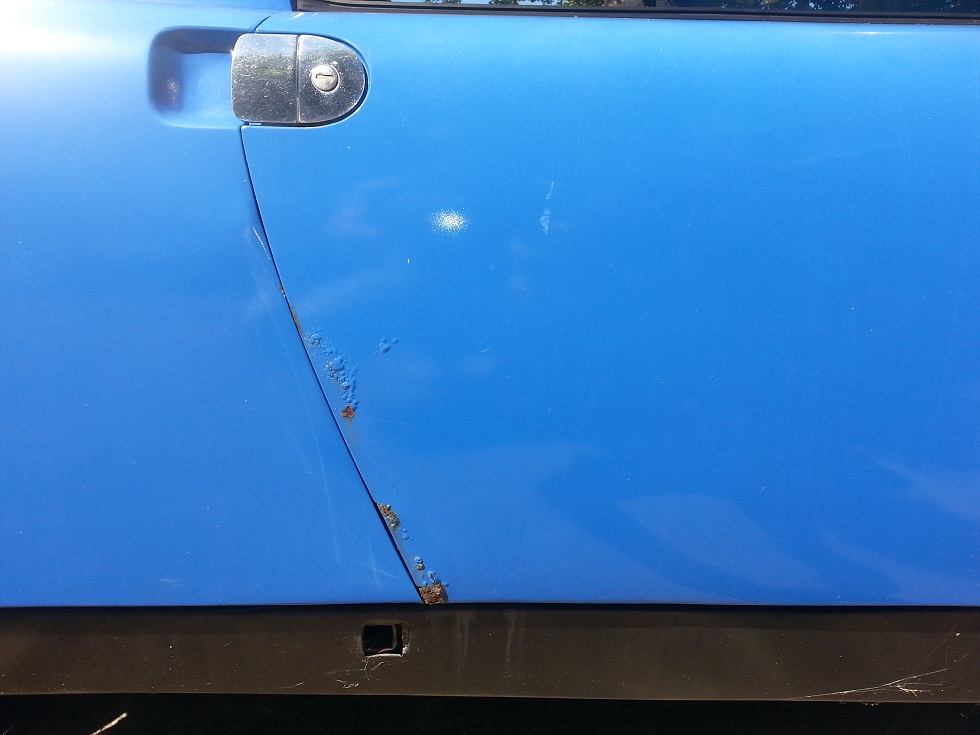 Took off the door and took it apart. Got out the spot blaster. 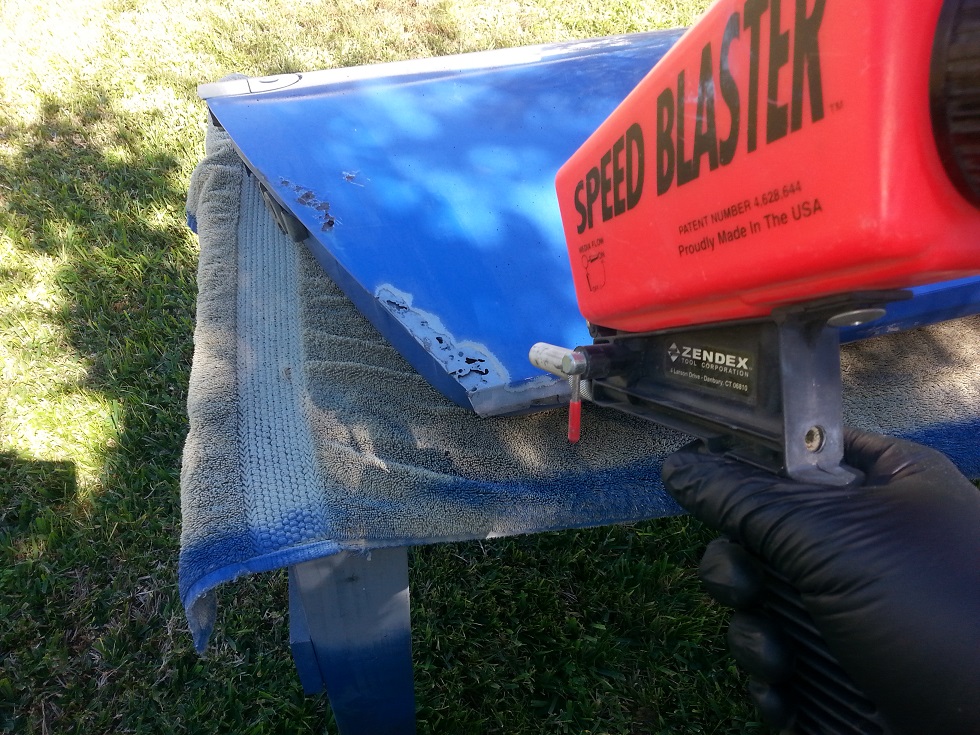 Rusted through in several places. 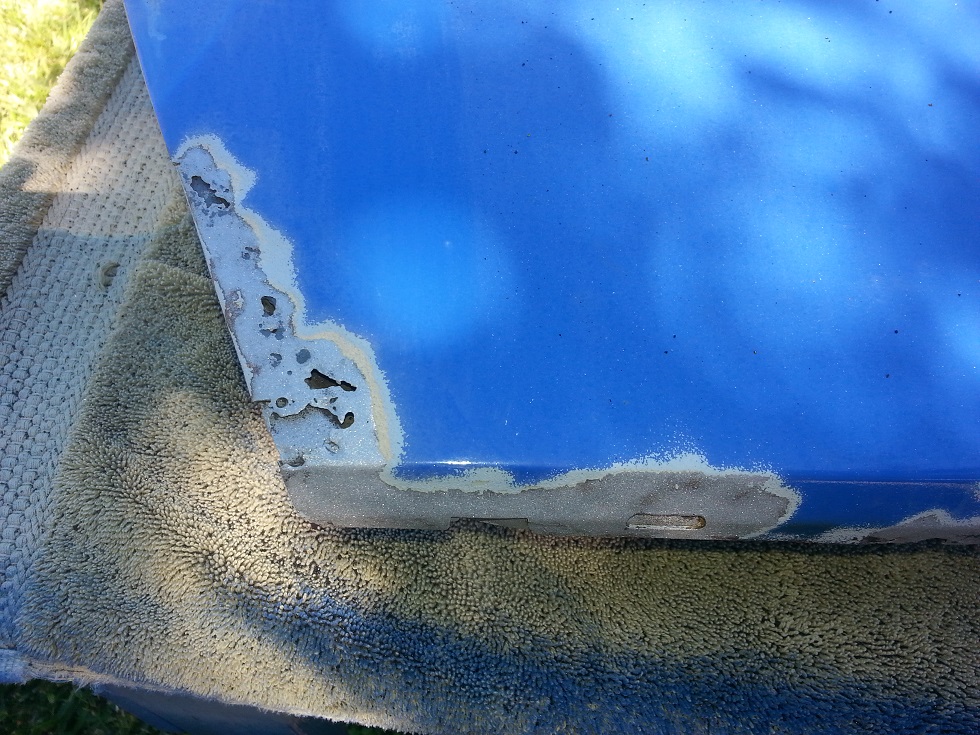 Started cutting out the bad stuff. 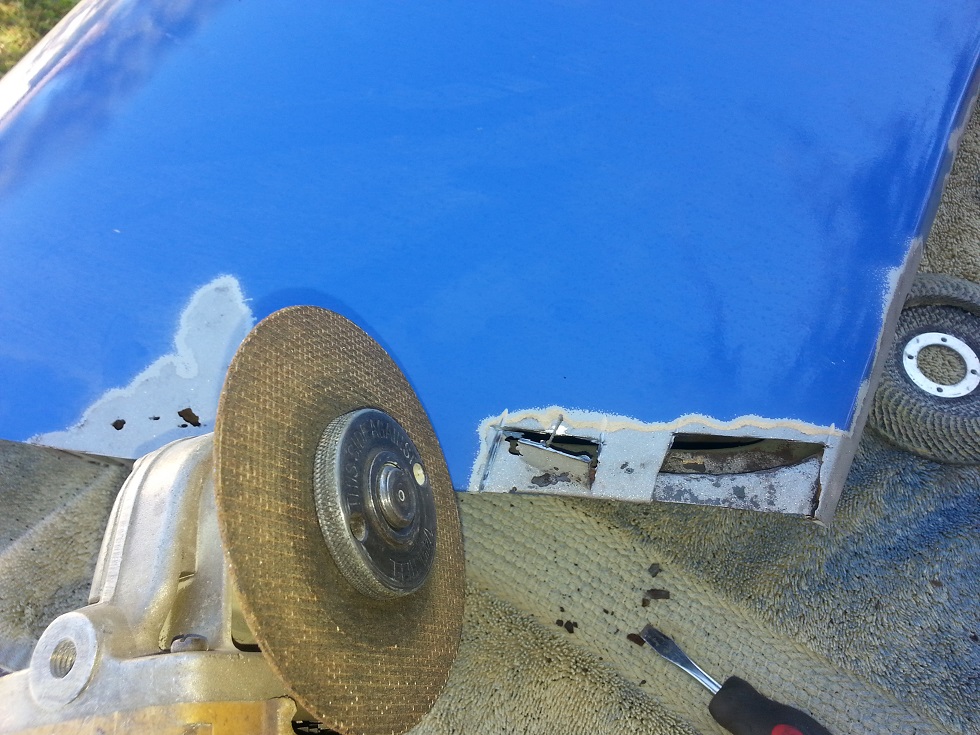 Ready for some patches. 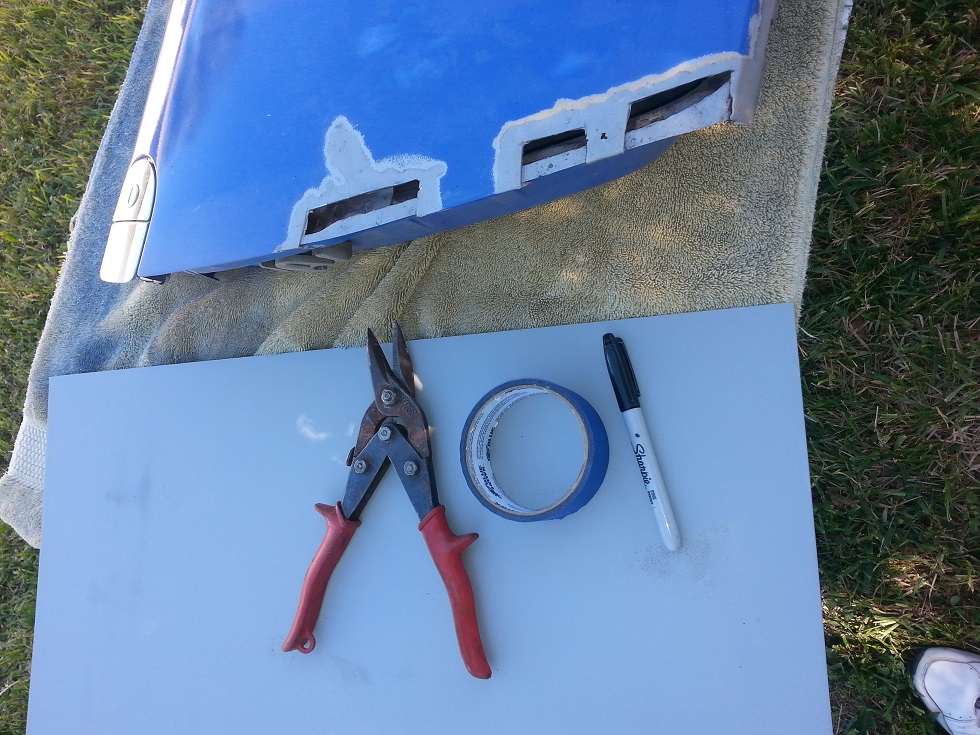 Welded and cleaned up with the blaster. A little spot blaster is so much faster and easier than wire wheeling. I think it gets into the tiny crevices better too. The spot blaster is only good for small areas. You would go insane trying to strip even one whole door with it. 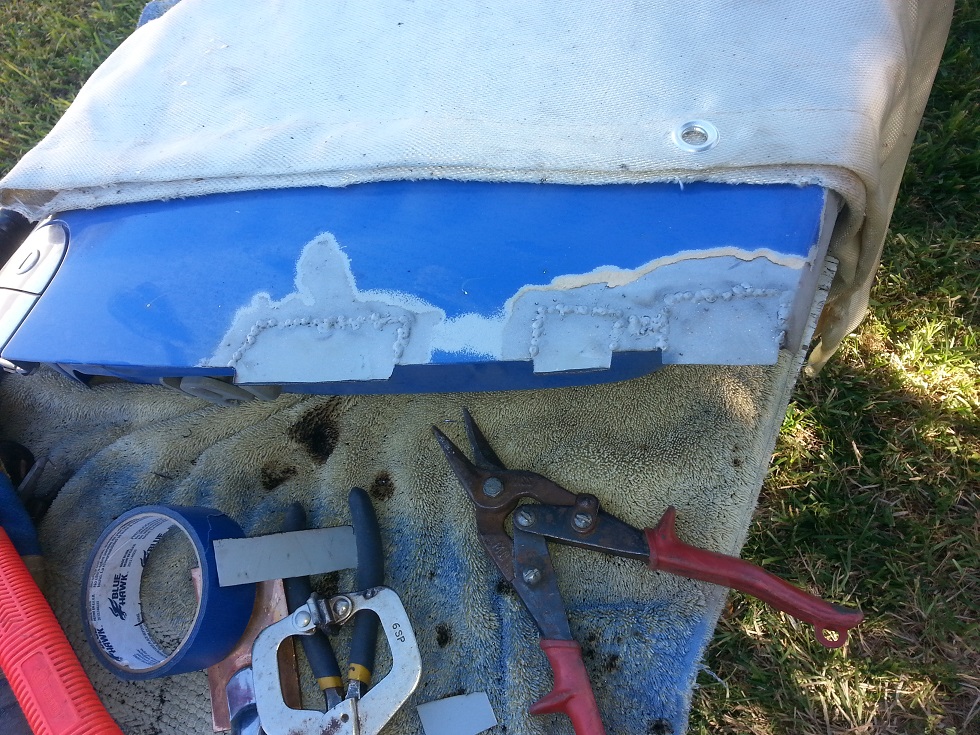 Sprayed some primer for now. 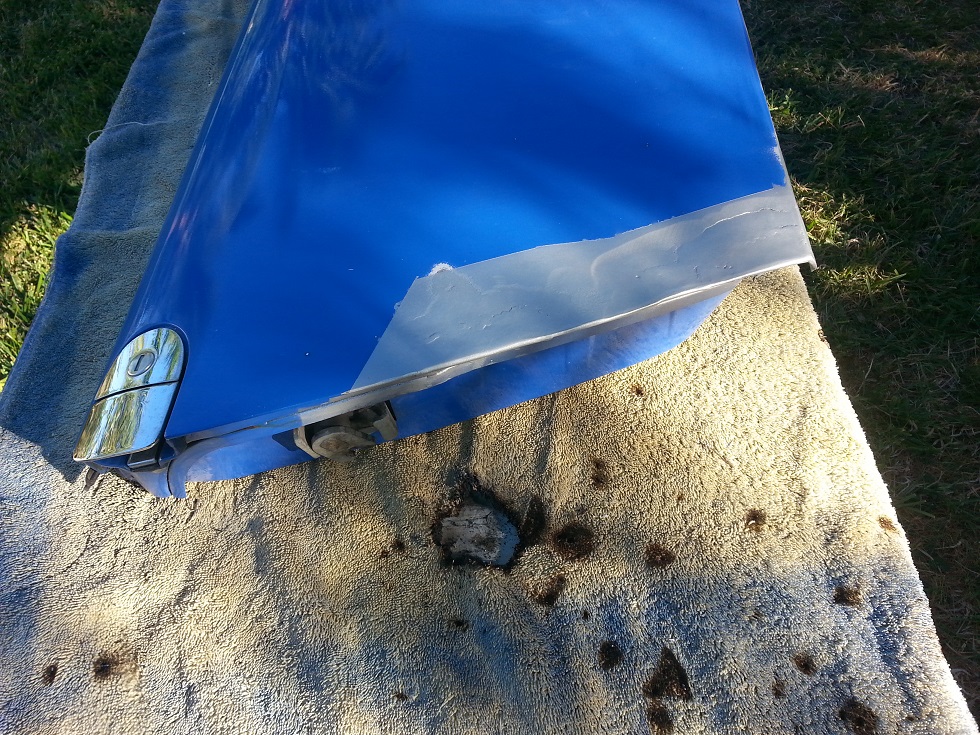 Back together and on the car. I will body work it and respray the whole door later. The door edge shape needs some work. 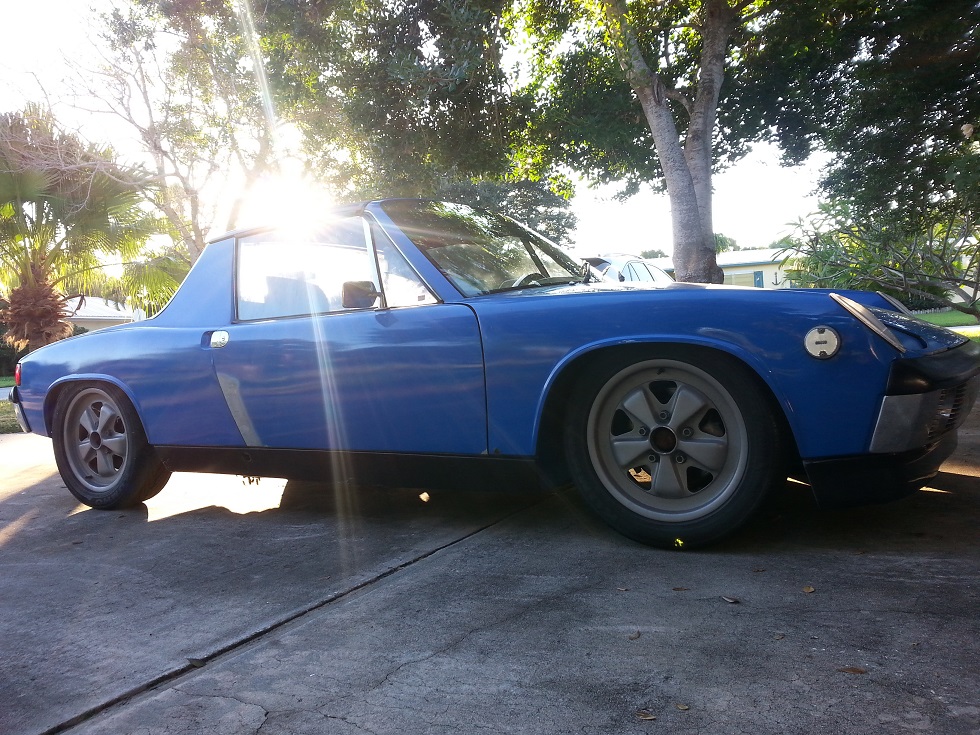 This took about 4 hours altogether. The rust came through from the inside of the door because I neglected to prime the inside of the door skin everywhere. These spots are behind the door impact bars that are in later doors and I just never got enough paint back there. Sprayed a crap load in there this time so hopefully no repeats. The patches I did to other parts of the door skin way back are still good on both sides. (IMG:style_emoticons/default/beerchug.gif) John |
| FourBlades |
 Aug 3 2019, 02:11 PM Aug 3 2019, 02:11 PM
Post
#384
|
|
From Wreck to Rockin     Group: Members Posts: 2,056 Joined: 3-December 07 From: Brevard, FL Member No.: 8,414 Region Association: South East States 
|
Wow, five years later and you can multiply those little rust holes by 10... (IMG:style_emoticons/default/barf.gif) I am working on fixing it all and have it primed and starting to block sand. I got a new garage as well...this one has A/C. (IMG:style_emoticons/default/biggrin.gif) John |
  |
1 User(s) are reading this topic (1 Guests and 0 Anonymous Users)
0 Members:

|
Lo-Fi Version | Time is now: 24th December 2025 - 05:02 PM |
Invision Power Board
v9.1.4 © 2025 IPS, Inc.


