|
|

|
Porsche, and the Porsche crest are registered trademarks of Dr. Ing. h.c. F. Porsche AG.
This site is not affiliated with Porsche in any way. Its only purpose is to provide an online forum for car enthusiasts. All other trademarks are property of their respective owners. |
|
|
  |
| ericread |
 Apr 27 2008, 08:40 PM Apr 27 2008, 08:40 PM
Post
#81
|
|
The Viper Blue 914     Group: Members Posts: 2,177 Joined: 7-December 07 From: Irvine, CA (The OC) Member No.: 8,432 Region Association: Southern California |
AMAZING JOB!!! (IMG:style_emoticons/default/aktion035.gif)
Keep up the good work! (IMG:style_emoticons/default/piratenanner.gif) |
| FourBlades |
 May 29 2008, 08:11 PM May 29 2008, 08:11 PM
Post
#82
|
|
From Wreck to Rockin     Group: Members Posts: 2,056 Joined: 3-December 07 From: Brevard, FL Member No.: 8,414 Region Association: South East States 
|
Building the armageddon proof clutch tube!!!
I have heard too many horror stories of people's clutch tubes failing while far from home so I decided to go big on my replacement tube. 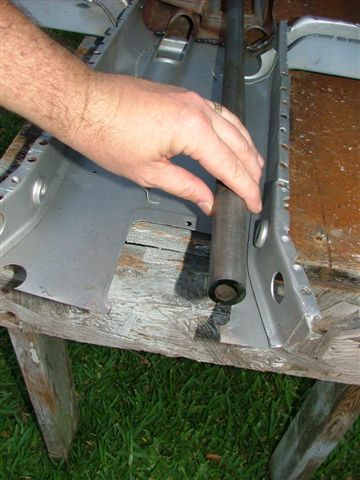 Ok, so that was a joke. (IMG:style_emoticons/default/biggrin.gif) (IMG:style_emoticons/default/biggrin.gif) (IMG:style_emoticons/default/biggrin.gif) McMaster kind of overdid it on the tube size that I ordered. This one looks like a good barrel for my 75 caliber sniper rifle project. (IMG:style_emoticons/default/idea.gif) After getting the correct tube sizes, I started piecing the tunnel together. I had a good rear section from another board member and I welded it to what is left of my front section. 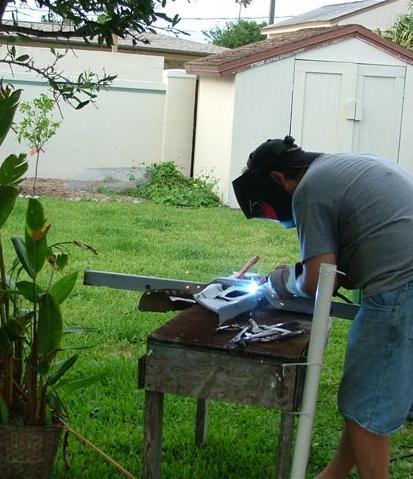 |
| FourBlades |
 May 29 2008, 08:23 PM May 29 2008, 08:23 PM
Post
#83
|
|
From Wreck to Rockin     Group: Members Posts: 2,056 Joined: 3-December 07 From: Brevard, FL Member No.: 8,414 Region Association: South East States 
|
Took me a while to figure out what tubes and cables came out where in
the engine bay. This is what I came up with. 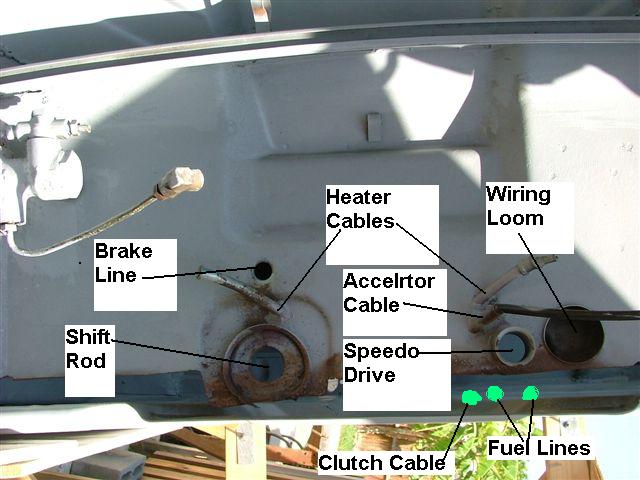 The bottom of my outer fire wall was rusted to nothing adding to the confusion. After test fitting the tunnel plus clutch, accelerator and shift rod, it looked like this. 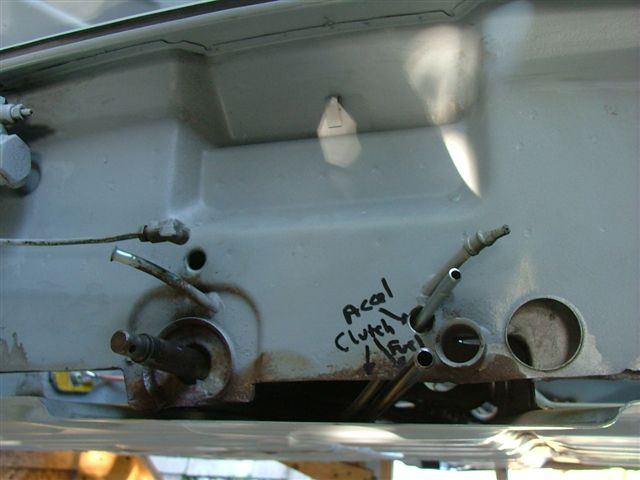 Then I checked to make sure the shift rod did not contact the tubes in any of the gear positions. I also did not fit the heater tubes at this time because I am using a tangerine header system without heat exchangers. This is a view up the tunnel from the engine bay. The shift rod is in the upper left and the tubes for the clutch and accelerator curve across the bottom. 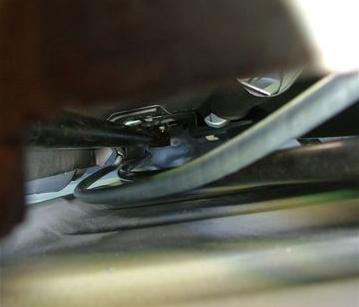 When I was convinced it all fit right, I mostly welded the tunnel in. This feels like a big milestone for some reason, many more to go. 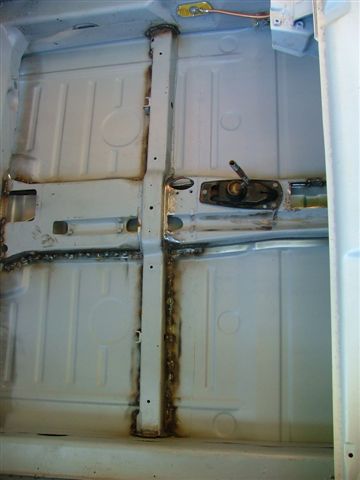 John |
| Bartlett 914 |
 May 30 2008, 08:41 AM May 30 2008, 08:41 AM
Post
#84
|
|
Advanced Member     Group: Members Posts: 2,218 Joined: 30-August 05 From: South Elgin IL Member No.: 4,707 Region Association: Upper MidWest |
John you make these things look easy. I did the same thing only from the underside of the car. I know there is a lot of work in this. Looks good!
|
| Richard Casto |
 May 30 2008, 08:49 AM May 30 2008, 08:49 AM
Post
#85
|
|
Blue Sky Motorsports, LLC    Group: Members Posts: 1,465 Joined: 2-August 05 From: Durham, NC Member No.: 4,523 Region Association: South East States |
John,
Keep it up! I love this thread. (IMG:style_emoticons/default/smile.gif) But it also makes me feel bad for not working on my car more and updating my progress thread. (IMG:style_emoticons/default/sad.gif) Richard |
| FourBlades |
 Jun 2 2008, 05:06 PM Jun 2 2008, 05:06 PM
Post
#86
|
|
From Wreck to Rockin     Group: Members Posts: 2,056 Joined: 3-December 07 From: Brevard, FL Member No.: 8,414 Region Association: South East States 
|
John, Keep it up! I love this thread. (IMG:style_emoticons/default/smile.gif) But it also makes me feel bad for not working on my car more and updating my progress thread. (IMG:style_emoticons/default/sad.gif) Richard You were on a serious roll in your thread and blog, Richard. We all want to see what you have been up to lately. You are through the tear down and rust clean up, now the fun part, welding stuff on starts. I try to pick one or two pieces of metal to put on in a session as a way of motivating myself. I try not to tackle too large a project or I tend to procrastinate. John |
| Slider |
 Jun 2 2008, 07:48 PM Jun 2 2008, 07:48 PM
Post
#87
|
|
Problems are like cockroaches you find 1 and theres a 100 more   Group: Members Posts: 223 Joined: 11-March 07 From: Fort Collins Colorado Member No.: 7,591 Region Association: Rocky Mountains |
Nice Job!
Im glad to see someone bringing another one back from the dead.. |
| FourBlades |
 Jun 11 2008, 09:18 PM Jun 11 2008, 09:18 PM
Post
#88
|
|
From Wreck to Rockin     Group: Members Posts: 2,056 Joined: 3-December 07 From: Brevard, FL Member No.: 8,414 Region Association: South East States 
|
More work on the tunnel for welding porn fans. Bottom edges of the tunnel
where it meets the floor were rusted out. Made some L shaped patches to bridge this gap. I have made 3 of the 5 needed to complete this repair. Here is patch number 3.  Clamped the patch in place. 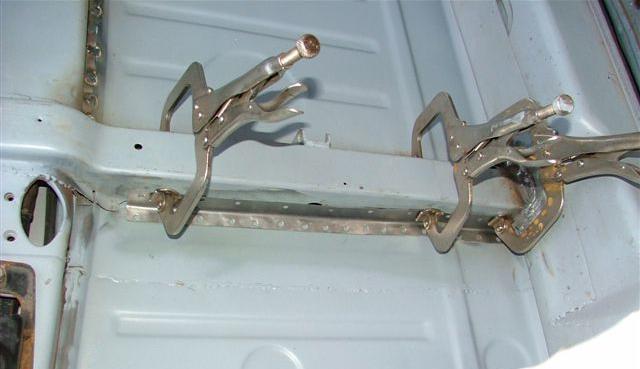 Plug welded through the holes. Some welds turned out smooth and flat and some turn into big globs metal that are a pain to grind down. All were prepared the same way so there is something to this art that eludes me still. I noticed that using higher voltage tends to make welds that lay flat, while lower voltage tends to make high, globby welds. 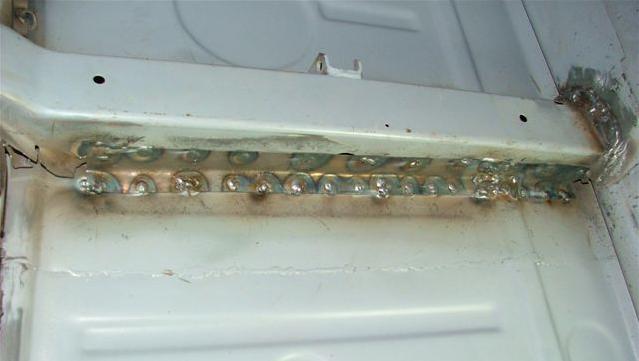 One more gap on the side of the tunnel to go. 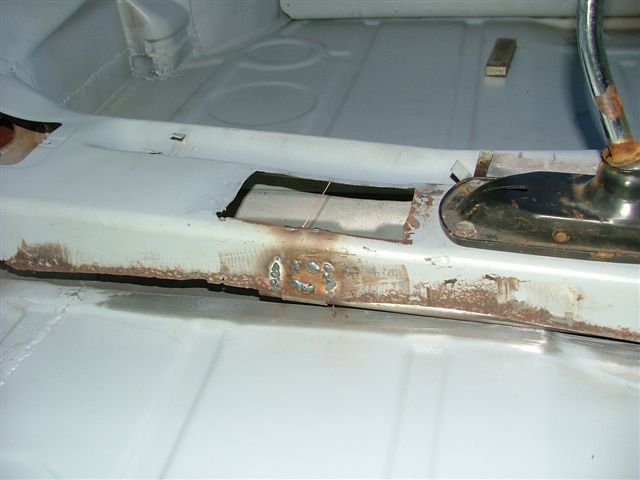 Summer time here in America's wang (Florida) means more than just another embarrassing election fiasco, it is light until later in the evening but it is also stinking hot and humid. You gotta love to sweat if you live here. Took me 2 hours to get all my tools out, make the patch, weld it on, and put everything away. It feels very satisfying once you are done, especially after a difficult day at work. John |
| craig downs |
 Jun 12 2008, 12:36 AM Jun 12 2008, 12:36 AM
Post
#89
|
|
Senior Member    Group: Members Posts: 769 Joined: 25-November 05 From: mira loma ca. Member No.: 5,189 Region Association: Southern California |
Awesome work
I'm glad I didn't have to go thru what your going thru. Its funny how this car had sentimental value to the POs and just left it to rot out in the middle of a field. |
| FourBlades |
 Jun 12 2008, 07:49 AM Jun 12 2008, 07:49 AM
Post
#90
|
|
From Wreck to Rockin     Group: Members Posts: 2,056 Joined: 3-December 07 From: Brevard, FL Member No.: 8,414 Region Association: South East States 
|
It does not make a lot of sense. I wish they had covered it with a tarp at least. I think they put off restoring it for so long that it became a hopeless case. Then they sold it to the first unsuspecting fool to come along, which would be me. I wanted to fix this car to learn how to do it, and I have learned a lot. I also learned that I would not restore a car this bad again unless I was retired and had plenty of time to do it. I am getting so impatient to have a 914 to drive that I may just buy a decent one and keep it until this one is done. John |
| 914Tom |
 Jun 12 2008, 02:22 PM Jun 12 2008, 02:22 PM
Post
#91
|
|
Member   Group: Members Posts: 122 Joined: 11-February 07 From: Germany Member No.: 7,526 |
great motivation to get my lacy butt off the coutch and out in the garage to my 76 who needs still some (IMG:style_emoticons/default/welder.gif) Thank you |
| FourBlades |
 Jun 12 2008, 05:12 PM Jun 12 2008, 05:12 PM
Post
#92
|
|
From Wreck to Rockin     Group: Members Posts: 2,056 Joined: 3-December 07 From: Brevard, FL Member No.: 8,414 Region Association: South East States 
|
All right, 914Tom, lets see some pictures of your car!!! John |
| Eric_Shea |
 Jun 12 2008, 06:58 PM Jun 12 2008, 06:58 PM
Post
#93
|
|
PMB Performance                Group: Admin Posts: 19,289 Joined: 3-September 03 From: Salt Lake City, UT Member No.: 1,110 Region Association: Rocky Mountains  |
Ut-ummm... (IMG:style_emoticons/default/WTF.gif)
All this welding seems to be taking valuable time away from necessary projects! (IMG:style_emoticons/default/mad.gif) 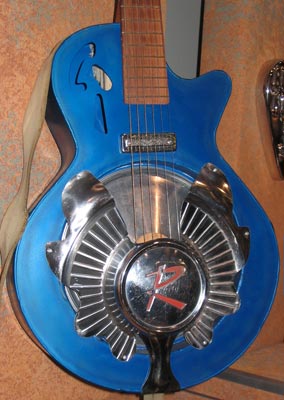 |
| FourBlades |
 Jun 12 2008, 09:09 PM Jun 12 2008, 09:09 PM
Post
#94
|
|
From Wreck to Rockin     Group: Members Posts: 2,056 Joined: 3-December 07 From: Brevard, FL Member No.: 8,414 Region Association: South East States 
|
That is freaking crazy. How big a tire can you fit on that rim???
I can't do anything anyway without the appropriate hub cap. (IMG:style_emoticons/default/biggrin.gif) (IMG:style_emoticons/default/biggrin.gif) Here's what I was working on before 914 fever hit. 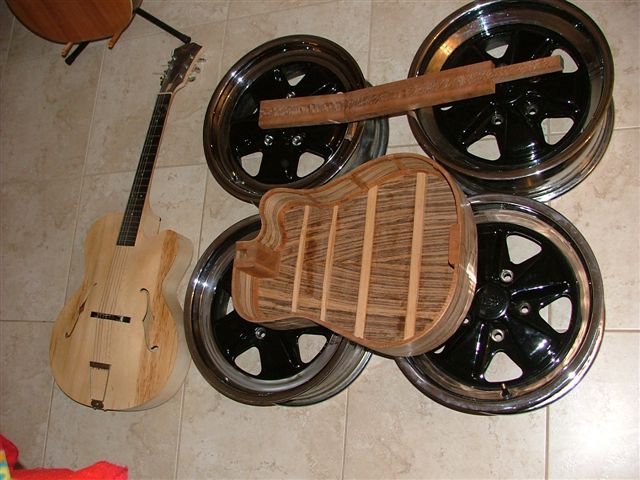 The archtop was made from a sign off an old building that was torn down. The other is the body of a bookmatched zebrawood accoustic. Zebrawood is a real pain to resaw and bend, but it looks great and is harder than rosewood. It would make a resonator so biting and bluesy it would make the sun cry and the moon howl. (IMG:style_emoticons/default/happy11.gif) If only I had time... 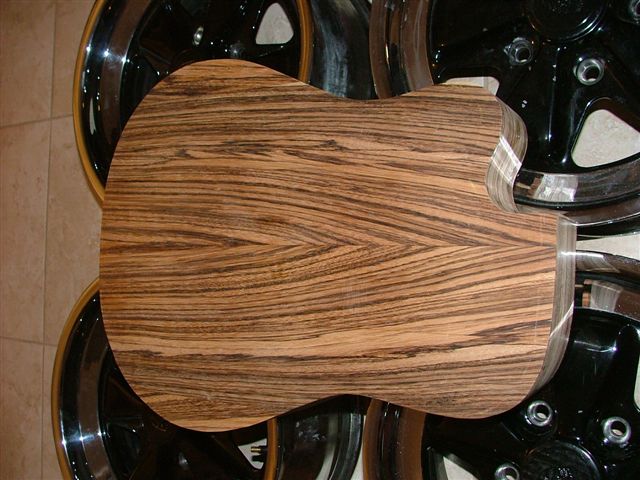 Aaaaaa, it wouldn't be very traditional anyway... |
| Eric_Shea |
 Jun 12 2008, 10:27 PM Jun 12 2008, 10:27 PM
Post
#95
|
|
PMB Performance                Group: Admin Posts: 19,289 Joined: 3-September 03 From: Salt Lake City, UT Member No.: 1,110 Region Association: Rocky Mountains  |
|
| 914Tom |
 Jun 14 2008, 06:43 AM Jun 14 2008, 06:43 AM
Post
#96
|
|
Member   Group: Members Posts: 122 Joined: 11-February 07 From: Germany Member No.: 7,526 |
OK, here is my projekt.
bough it winter 2003-2004. (IMG:http://img107.imageshack.us/img107/701/img0002nk8.th.jpg) the door sack is result of an bend a-pillar, the left trunk hinge was broken as you can see, no motor in and lot of rust. (IMG:http://img221.imageshack.us/img221/4103/img0011ig7.th.jpg) the left an right outer rocker was gone, the inner was rotten to a high of 5cm. (IMG:http://img127.imageshack.us/img127/6760/img0086rn4.th.jpg) (IMG:http://img129.imageshack.us/img129/76/img0019po7.th.jpg) now, the underside ist ready weldet, and prepered with undercoat. at this time all the underside ist coverd witch shiny orange. the car is level again and the fenders are waiting for getting weldet on. still a long way to go. (IMG:style_emoticons/default/welder.gif) yesterday i pached the left door. (IMG:http://img129.imageshack.us/img129/76/img0019po7.th.jpg) (IMG:http://img177.imageshack.us/img177/423/img0124ui4.th.jpg) the slow progress is result of my little girl who was born in 2004 an a babyboy in mar 2007. so only 1/2 day a week (if it comes high) is available for the teener . so long, (IMG:style_emoticons/default/bye1.gif) TOM |
| FourBlades |
 Jun 14 2008, 10:58 AM Jun 14 2008, 10:58 AM
Post
#97
|
|
From Wreck to Rockin     Group: Members Posts: 2,056 Joined: 3-December 07 From: Brevard, FL Member No.: 8,414 Region Association: South East States 
|
Tom, Great work! Looks like you are making some good progress. Maybe someone has a door post from a wrecked car for you. Seems like it would be hard to repair that area otherwise. You should start your own progress thread so we can see what you are doing. Good luck...John |
| FourBlades |
 Jul 7 2008, 08:18 PM Jul 7 2008, 08:18 PM
Post
#98
|
|
From Wreck to Rockin     Group: Members Posts: 2,056 Joined: 3-December 07 From: Brevard, FL Member No.: 8,414 Region Association: South East States 
|
Got some rebuilt calipers recently from Eric Shea.
MMMM, tasty!!! 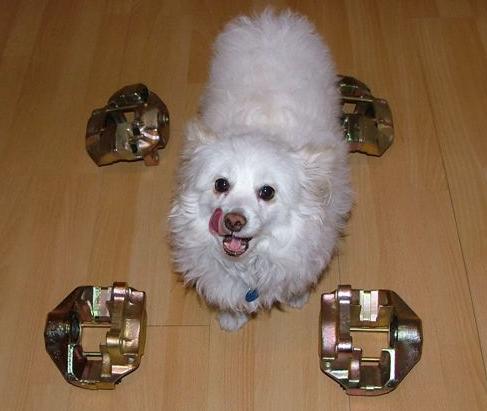 Eric's calipers are a thing of beauty and very reasonably priced, although there is a $100 core charge per foo foo dog. John |
| FourBlades |
 Jul 7 2008, 08:35 PM Jul 7 2008, 08:35 PM
Post
#99
|
|
From Wreck to Rockin     Group: Members Posts: 2,056 Joined: 3-December 07 From: Brevard, FL Member No.: 8,414 Region Association: South East States 
|
Closing up the firewall. I salvaged the e-brake tubes from an old firewall by
cutting out some sheet metal around them on the inside and outside walls. 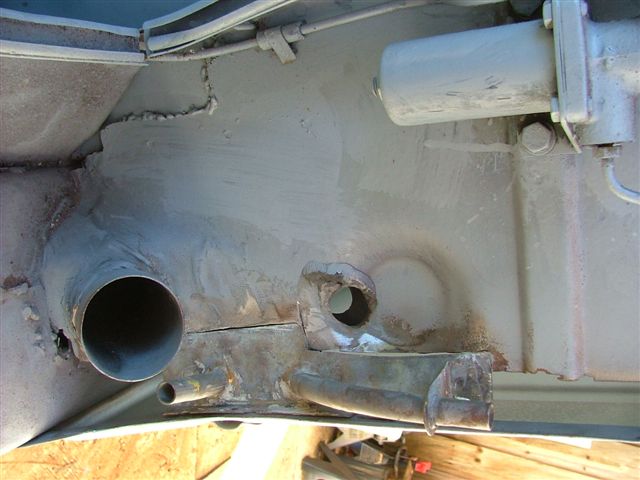 Here is the inside section. 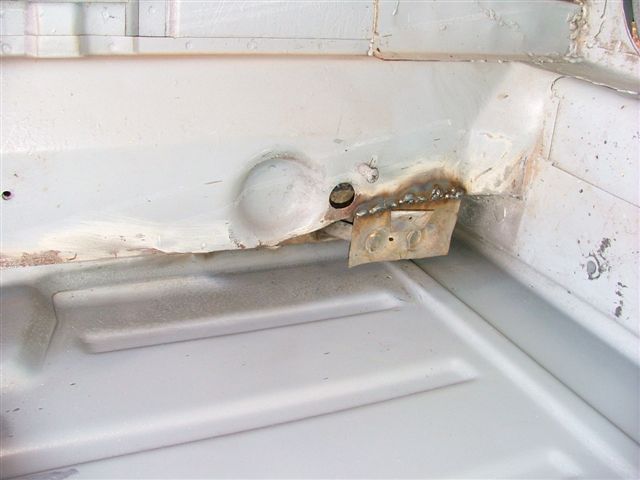 Did a hideous job of welding the outer piece in. Not sure why the welds came out so badly. Also made a small patch for the left side. 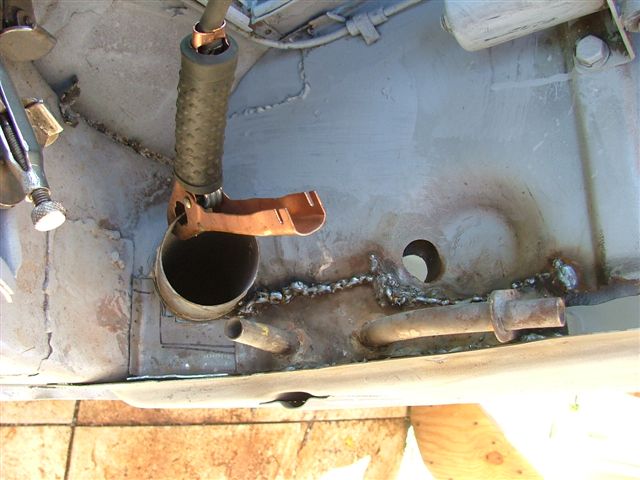 Made a patch for the passenger firewall section. 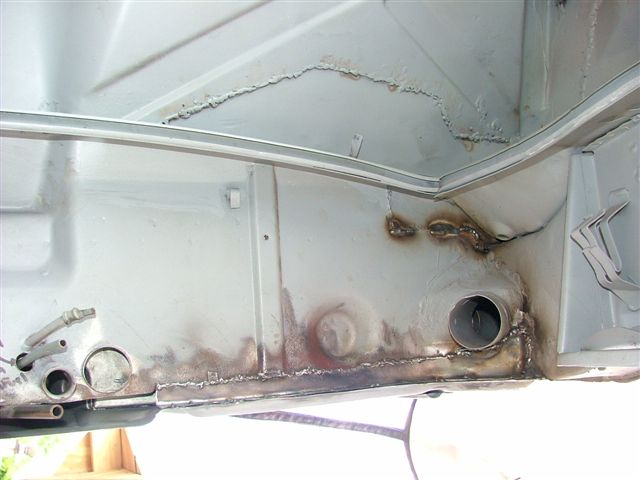 These welds turned out better. It ended up taking 9 separate patches to complete close up the inside and outside of the firewall and the result would make Mary Shelley proud. This is definitely a case where I would have been better off just buying the inner and outer repro pieces from Auto Atlanta. The hassle of drilling out all the spot welds to get the fragements of the old crap out would have been less than all the careful cutting and fitting I had to do for a look that will never pass for factory. The more I work on this, the more I want the sheet metal repairs to be close to original. |
| FourBlades |
 Jul 7 2008, 08:46 PM Jul 7 2008, 08:46 PM
Post
#100
|
|
From Wreck to Rockin     Group: Members Posts: 2,056 Joined: 3-December 07 From: Brevard, FL Member No.: 8,414 Region Association: South East States 
|
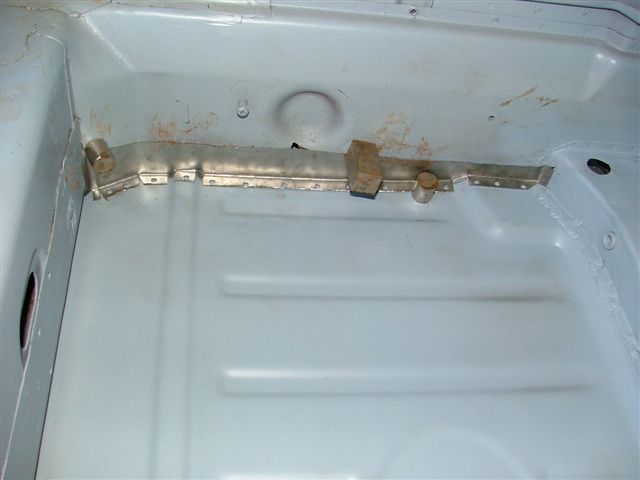
Inside of the firewall.
 Firewall and tunnel sprayed with Eastwood silver rust encapsulator. 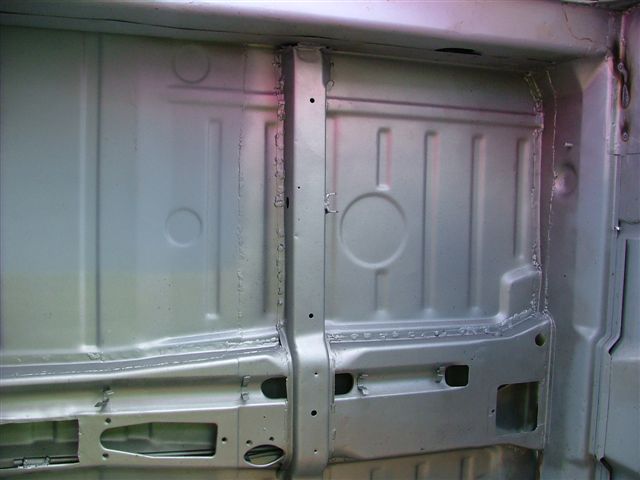 Almost done with the chassis work. Then its on to cosmetic sheet metal. (IMG:style_emoticons/default/mad.gif) The last post not withstanding I am tempted to make this thing into a rat rod and spray matte black primer over the rest of the rust and holes and be done with it... (IMG:style_emoticons/default/happy11.gif) John |
  |
5 User(s) are reading this topic (5 Guests and 0 Anonymous Users)
0 Members:

|
Lo-Fi Version | Time is now: 7th January 2025 - 11:33 PM |
Invision Power Board
v9.1.4 © 2025 IPS, Inc.


