|
|

|
Porsche, and the Porsche crest are registered trademarks of Dr. Ing. h.c. F. Porsche AG.
This site is not affiliated with Porsche in any way. Its only purpose is to provide an online forum for car enthusiasts. All other trademarks are property of their respective owners. |
|
|
  |
| zonedoubt |
 Mar 14 2011, 11:09 PM Mar 14 2011, 11:09 PM
Post
#1
|
|
Canadian Member    Group: Members Posts: 668 Joined: 14-May 03 From: Vancouver, BC Member No.: 696 Region Association: Canada |
I had a spare throttle valve that I wanted to refurbish and install on my 1.8L L-jet engine. The spare throttle valve has both advance and retard vacuum port. The one currently on my engine has only the one vacuum port. Read here for some background on this.
When I inspected the spare throttle valve, I found the rotating action was a bit sticky and there was considerably grime built up around the shaft and spring. The seals also looked in poor condition, both having a small cracks, and both were fairly hard. These seals keep air from leaking into the valve body along the shaft. Knowing how vacuum leaks affect the L-jet injection system, I thought I’d take the throttle body apart, clean it up, install new seals, and put it all back together. Put on some safety glasses, the spring is under tension. Disassemble the throttle body as follows: 1) Bend down the edge of the nut retaining washer. 2) Remove the nut from the end of the throttle shaft. 3) Slide the thrust washer, spring, bushing, and both lever arms off the throttle shaft. The spring is easily and safely removed by grabbing one end with a pair of needle-nose vise-grip pliers. Remove the two screws that fasten the disc to the shaft. The screws are usually staked on the back side. If they are, use a small file or carefully use a grinder on the end of the screws to enable removal. 4) Once the disc has been removed, the throttle shaft can be pulled out of the throttle body. 5) Each of the shaft seals is retained by a metal ring that is press fitted into the valve body. Use a small flat screw driver to carefully pry up the ring, being careful not to deform the ring. 6) The seals should pop out of the throttle body and may even come out with the metal retaining rings. 7) Clean the whole assembly with brake cleaner. Throttle valve disassembled: 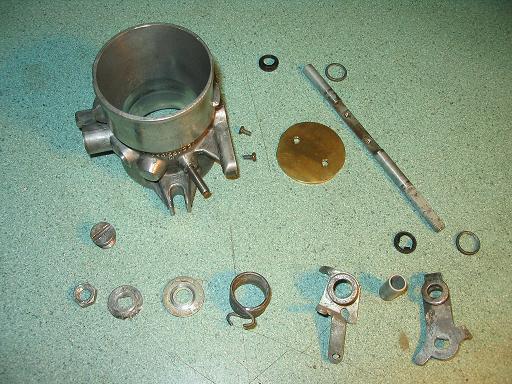 The poor condition of the seals is confirmed once they are removed. Note the original seal has a very thin lip that contacts the shaft. I don't know if this is how they are meant to be or if they have just worn down. Original seal: 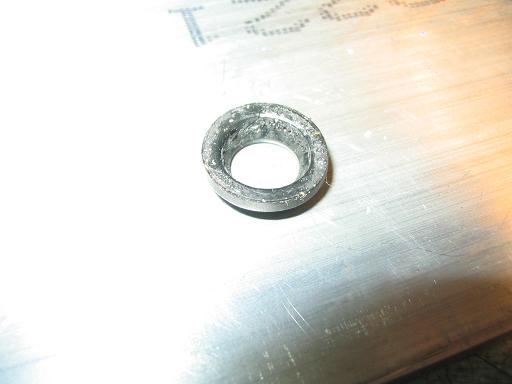 Before putting it back together, I tried to source new replacement seals (p/n 022 133 069). These are NLA from the dealer and the few online stores that sold them no longer had any in stock and weren’t getting any more. (Hmmm...maybe a 914Rubber opportunity?) I did think about getting some out of another throttle body, but I figured anything that I found used would be in no better condition. 35+ year old rubber parts are going to certainly be worn and hardened. So I went to my local bearing and seal supplier and picked up a couple spring loaded oil seals (aka lip seals) that would fit. The ones I found in cheap and ready supply were 8mm ID x 14mm OD x 4mm thick. The spring would provide a positive seal around the throttle shaft. These particular ones also have a secondary dust lip that will keep out dust and debris (and keep vacuum in!). The material is Buna-N so it’s suitable for oil and grease. Replacement oil seal (also shown installed into metal retaining ring): 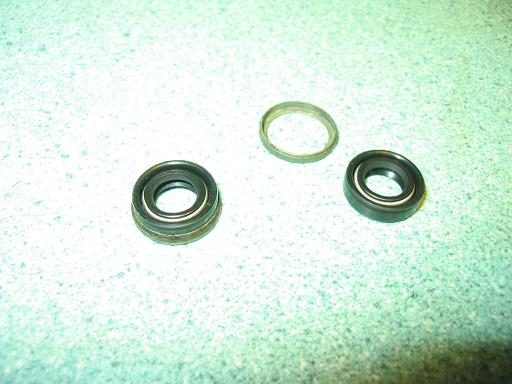 The original seal is also 14mm diameter so the replacement fits nicely in the metal retaining ring. The metal ring has a lip around the edge to retain the seal. Unfortunately, the bore on the upper end of the throttle body is quite shallow (about 2mm deep), so some modification to the TB is required. Now it’s a matter of modifying the throttle body to fit the seals. The bottom side (where the throttle switch mounts) has a deep bore so it’s no problem fitting the replacement seal. Bottom end of throttle body: 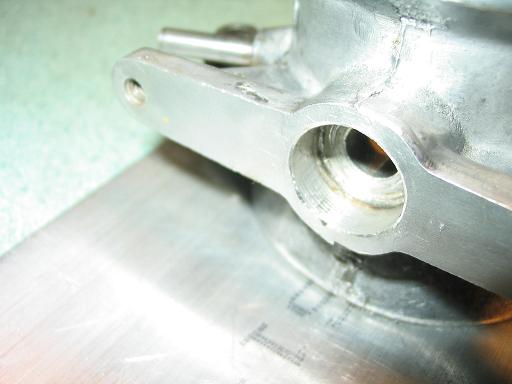 On the top side of the throttle body (where the throttle cable lever fits), I elected to bore out a hole to fit the seal. In order to bore aligned straight, I lined things up in the drill press with the throttle shaft hole centered under the chuck. A made a jig out of ¼” aluminum plate onto which the throttle body is bolted. The plate is positioned and clamped into the drill press vise. I took some time to make sure everything was lined up and locked it all down so it wouldn’t move when I started milling the hole. Throttle body mounted on drill press jig: 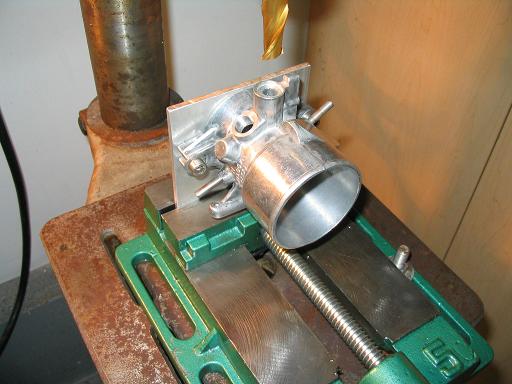 I used a flat bottom end mill and counterbored deep enough to fit the seal with the retaining ring on top. I didn’t want to go any farther as removal of additional material would decrease the bearing area of the shaft. The aluminum body is easily machined: 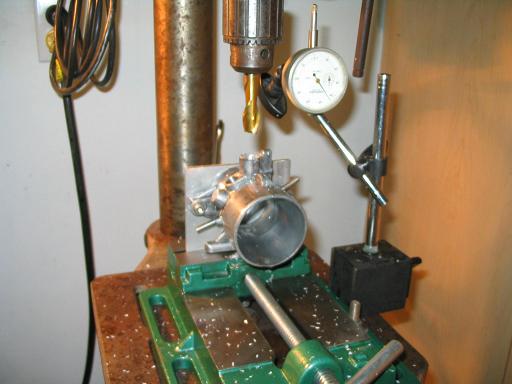 Counterbore in top end of throttle body: 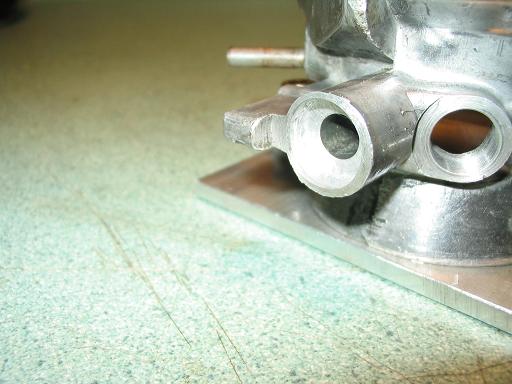 Reassembly is the reverse of disassembly (or however Haynes says it). Install the new seals. Use an appropriately sized extended socket to drive the retaining ring and seal into the throttle body. I put the seals in with the spring side towards the inside of the throttle body. New seal installed: 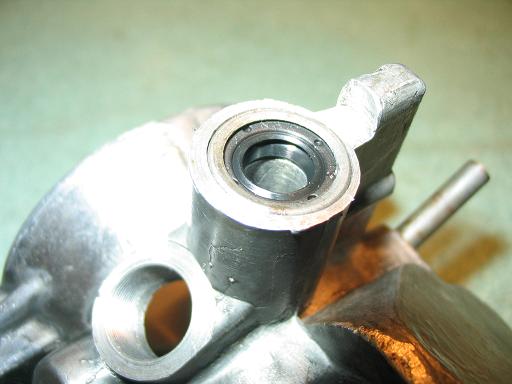 Apply a little grease to the shaft and slide it through the seals. Throttle shaft installed: 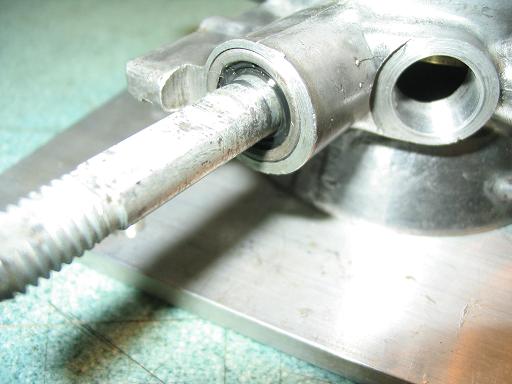 Make sure to apply some red Loctite to the disc retaining screws or stake the back side. You don’t want the screws loosening up and flying into the intake. Install the spring and lever arms in the correct orientation. Reassembled throttle body with new and improved seals: 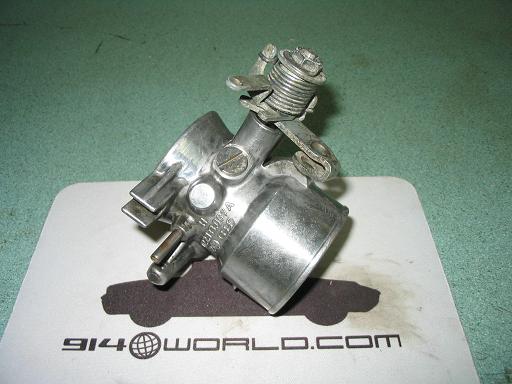 The rotating action of the valve is now smooth. And it’s surely leak free around the shaft ends. Now it’s just a matter of removing the one on my engine, swapping the switch, and installing the refurbished assembly to test it out. |
| windforfun |
 Mar 15 2011, 11:55 AM Mar 15 2011, 11:55 AM
Post
#2
|
|
Senior Member    Group: Members Posts: 1,999 Joined: 17-December 07 From: Blackhawk, CA Member No.: 8,476 Region Association: None 
|
Very nice!!! While you're at it, you might want to check your TPS for wear. The time for a new one might be near.
|
| zonedoubt |
 Mar 15 2011, 12:05 PM Mar 15 2011, 12:05 PM
Post
#3
|
|
Canadian Member    Group: Members Posts: 668 Joined: 14-May 03 From: Vancouver, BC Member No.: 696 Region Association: Canada |
|
| McMark |
 Mar 15 2011, 12:45 PM Mar 15 2011, 12:45 PM
Post
#4
|
|
914 Freak!                Group: Retired Admin Posts: 20,179 Joined: 13-March 03 From: Grand Rapids, MI Member No.: 419 Region Association: None |
That's awesome! (IMG:style_emoticons/default/aktion035.gif)
|
  |
1 User(s) are reading this topic (1 Guests and 0 Anonymous Users)
0 Members:

|
Lo-Fi Version | Time is now: 26th December 2024 - 08:32 PM |
Invision Power Board
v9.1.4 © 2024 IPS, Inc.


