|
|

|
Porsche, and the Porsche crest are registered trademarks of Dr. Ing. h.c. F. Porsche AG.
This site is not affiliated with Porsche in any way. Its only purpose is to provide an online forum for car enthusiasts. All other trademarks are property of their respective owners. |
|
|
  |
| Trekkor |
 Nov 2 2012, 12:42 PM Nov 2 2012, 12:42 PM
Post
#1
|
|
I do things...      Group: Members Posts: 7,809 Joined: 2-December 03 From: Napa, Ca Member No.: 1,413 Region Association: Northern California |
Wanting more tire, the time finally came to go wider body.
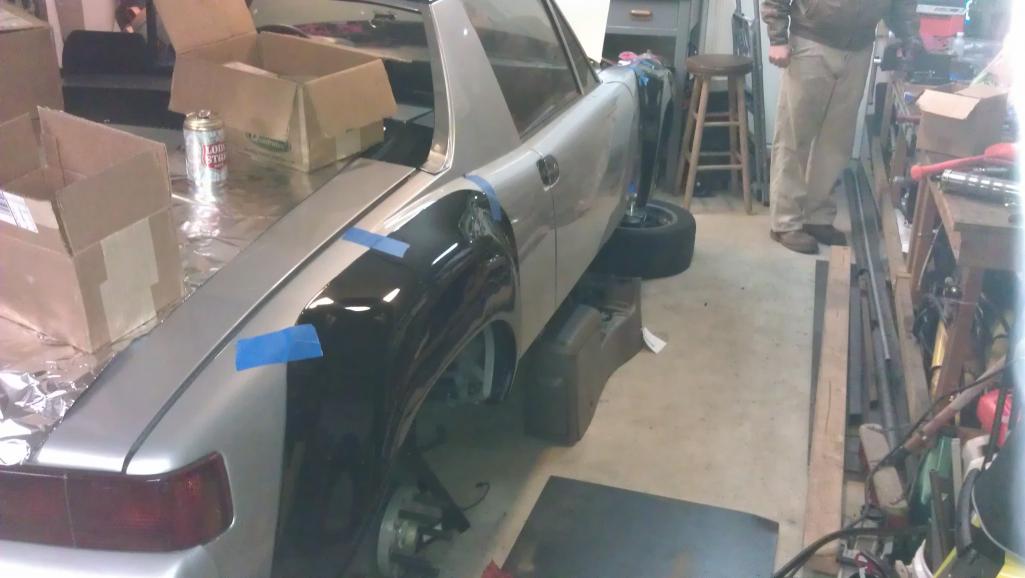
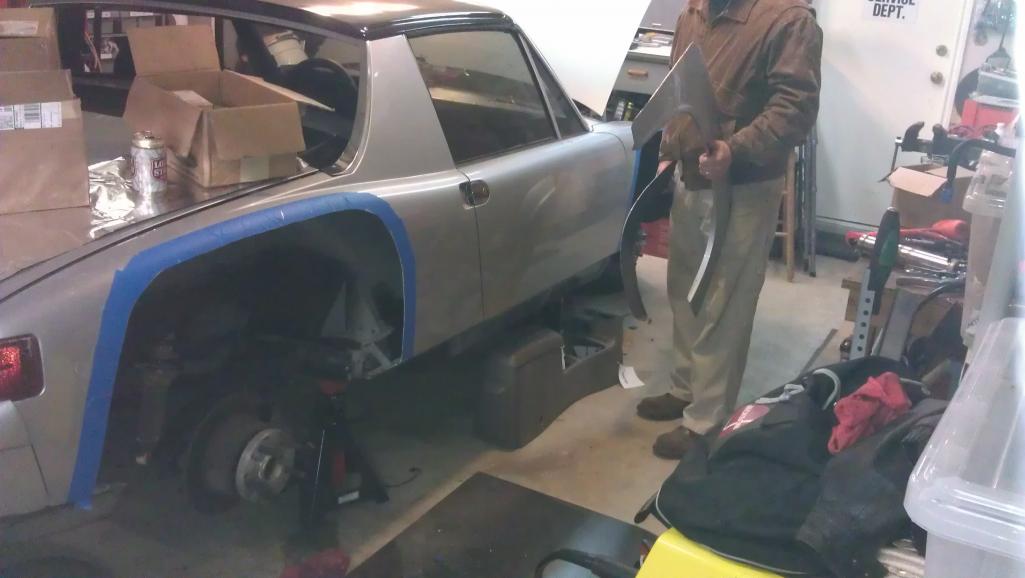
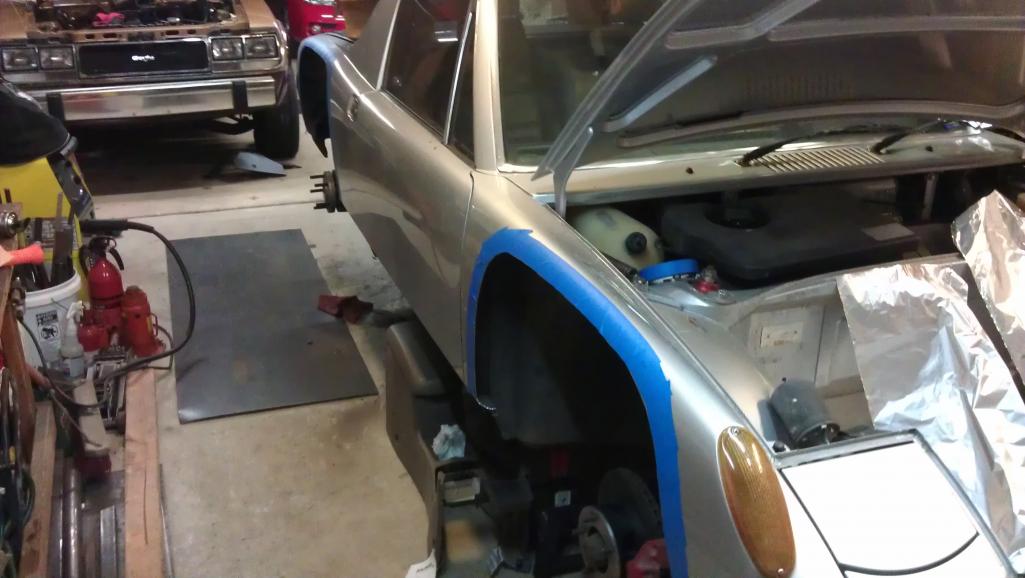
Here, you can see how easy and fast you can produce a good looking flare install. I started with professionally painted flares and plastic edge molding. Measure and mark the car carefully before cutting: (IMG:http://www.914world.com/bbs2/uploads_offsite/i944.photobucket.com-1413-1351881777.1.jpg) (IMG:http://www.914world.com/bbs2/uploads_offsite/i944.photobucket.com-1413-1351881777.2.jpg) (IMG:http://www.914world.com/bbs2/uploads_offsite/i944.photobucket.com-1413-1351881778.3.jpg) After holding/clamping the flares in their finished position, trace a light pencil line along the outside edge of the flare onto the car. Apply 2" masking tape to the line. The inside edge of the tape becomes your cut line: (IMG:style_emoticons/default/sawzall-smiley.gif) (IMG:http://www.914world.com/bbs2/uploads_offsite/i944.photobucket.com-1413-1351881778.4.jpg) (IMG:http://www.914world.com/bbs2/uploads_offsite/i944.photobucket.com-1413-1351881778.5.jpg) KT |
| Trekkor |
 Nov 2 2012, 12:45 PM Nov 2 2012, 12:45 PM
Post
#2
|
|
I do things...      Group: Members Posts: 7,809 Joined: 2-December 03 From: Napa, Ca Member No.: 1,413 Region Association: Northern California |
I used both the sawzall and a jigsaw with a metal cutting blade.
(IMG:http://www.914world.com/bbs2/uploads_offsite/i944.photobucket.com-1413-1351881951.1.jpg) The sawzall was good for starting both ends and the jigsaw was good for the rest. KT |
| Trekkor |
 Nov 2 2012, 12:50 PM Nov 2 2012, 12:50 PM
Post
#3
|
|
I do things...      Group: Members Posts: 7,809 Joined: 2-December 03 From: Napa, Ca Member No.: 1,413 Region Association: Northern California |
Takes a bit of courage and confidence to hack into a really nice looking car!
(IMG:http://i944.photobucket.com/albums/ad286/trekkor/746%20returns/P1090963.jpg) KT |
| Trekkor |
 Nov 2 2012, 12:56 PM Nov 2 2012, 12:56 PM
Post
#4
|
|
I do things...      Group: Members Posts: 7,809 Joined: 2-December 03 From: Napa, Ca Member No.: 1,413 Region Association: Northern California |
Run the molding over the flare edges, leaving them long.
Hold/clamp the flare to the car and drill through both the flare and the steel to accommodate a large head rivet. A helper may be useful. (IMG:http://www.914world.com/bbs2/uploads_offsite/i944.photobucket.com-1413-1351882566.1.jpg) Start at each end and carefully fit the flare to the contour of you car. You can decide how many rivet to use and the spacing you like. Drill the holes about 1" from the molding. Remember, there is 2" of surface to mount your flares. KT |
| Trekkor |
 Nov 2 2012, 12:58 PM Nov 2 2012, 12:58 PM
Post
#5
|
|
I do things...      Group: Members Posts: 7,809 Joined: 2-December 03 From: Napa, Ca Member No.: 1,413 Region Association: Northern California |
Take your time, double check before any cutting or drilling.
(IMG:http://www.914world.com/bbs2/uploads_offsite/i944.photobucket.com-1413-1351882726.1.jpg) (IMG:http://www.914world.com/bbs2/uploads_offsite/i944.photobucket.com-1413-1351882726.2.jpg) KT |
| Trekkor |
 Nov 2 2012, 01:04 PM Nov 2 2012, 01:04 PM
Post
#6
|
|
I do things...      Group: Members Posts: 7,809 Joined: 2-December 03 From: Napa, Ca Member No.: 1,413 Region Association: Northern California |
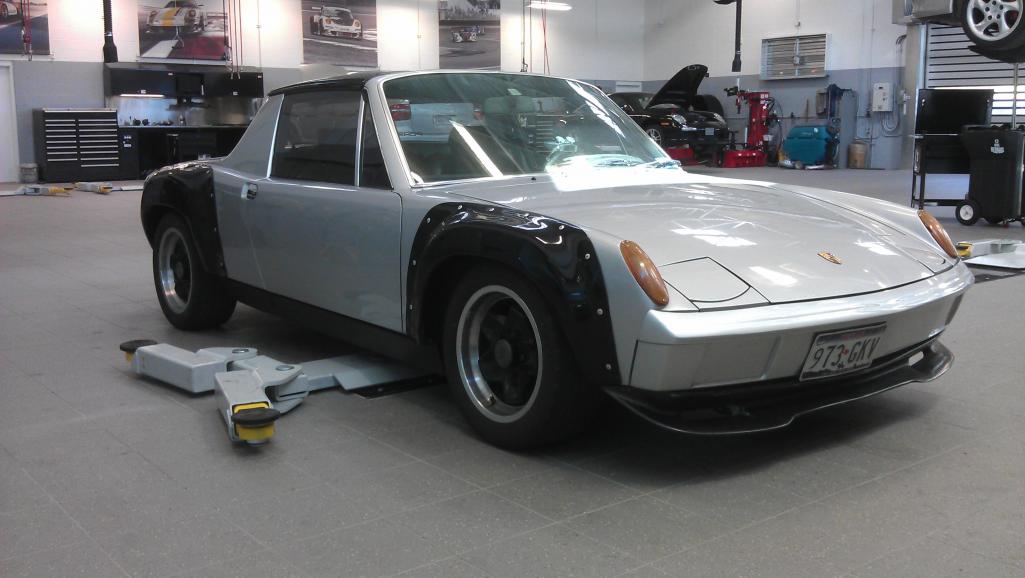
After you are done, trim the excess molding with a fresh razor knife.
(IMG:http://www.914world.com/bbs2/uploads_offsite/i944.photobucket.com-1413-1351883065.1.jpg) 8" front wheels, 10" rears. The flares can be quickly removed for repair or replacement. Also, if you decide to go with metal flares in the future, nothing done will interfere with that process. Hope this helps someone! KT |
| Trekkor |
 Nov 2 2012, 01:11 PM Nov 2 2012, 01:11 PM
Post
#7
|
|
I do things...      Group: Members Posts: 7,809 Joined: 2-December 03 From: Napa, Ca Member No.: 1,413 Region Association: Northern California |
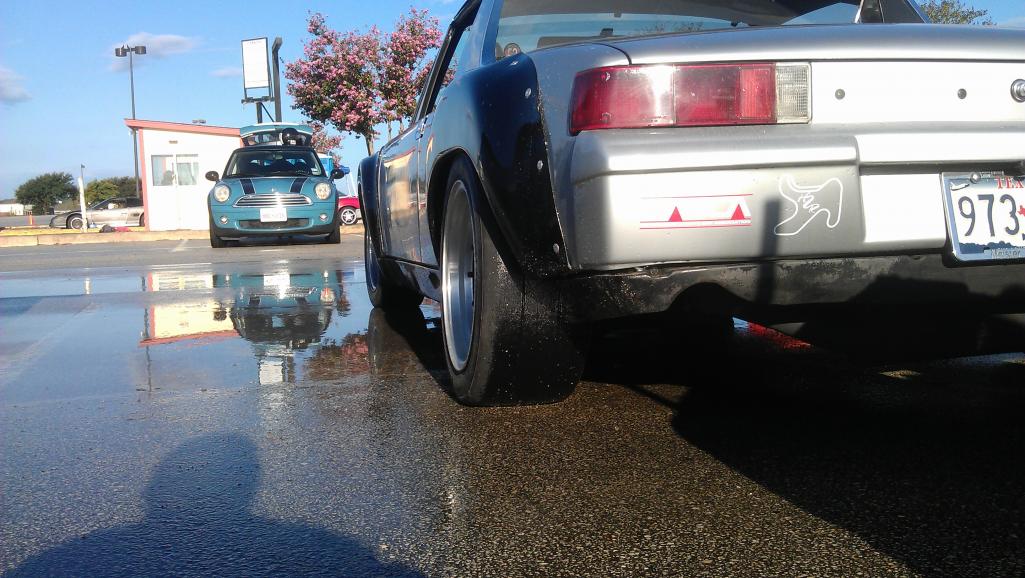
This is how much rear tire I gained!!
11" tire on a 10" rim: (IMG:http://www.914world.com/bbs2/uploads_offsite/i944.photobucket.com-1413-1351883505.1.jpg) KT |
| Woody |
 Nov 2 2012, 01:40 PM Nov 2 2012, 01:40 PM
Post
#8
|
|
Sandbox Rabblerouser and head toilet scrubber     Group: Members Posts: 3,858 Joined: 28-December 10 From: San Antonio Texas Member No.: 12,530 Region Association: Southwest Region |
|
| Trekkor |
 Nov 2 2012, 01:46 PM Nov 2 2012, 01:46 PM
Post
#9
|
|
I do things...      Group: Members Posts: 7,809 Joined: 2-December 03 From: Napa, Ca Member No.: 1,413 Region Association: Northern California |
QUOTE I have grown to really like the look. Me too. Nice look with the two tone. Thanks for the post. KT |
| Woody |
 Nov 2 2012, 01:59 PM Nov 2 2012, 01:59 PM
Post
#10
|
|
Sandbox Rabblerouser and head toilet scrubber     Group: Members Posts: 3,858 Joined: 28-December 10 From: San Antonio Texas Member No.: 12,530 Region Association: Southwest Region |
|
| gothspeed |
 Nov 2 2012, 03:17 PM Nov 2 2012, 03:17 PM
Post
#11
|
|
Senior Member    Group: Members Posts: 1,539 Joined: 3-February 09 From: SoCal Member No.: 10,019 Region Association: None |
Ahhhh wonderful flares ............. (IMG:style_emoticons/default/biggrin.gif)
Hey woody, if you don't mind me asking, what size spacers are you running front/rear on your cookie cutter wheels? |
| Woody |
 Nov 2 2012, 03:27 PM Nov 2 2012, 03:27 PM
Post
#12
|
|
Sandbox Rabblerouser and head toilet scrubber     Group: Members Posts: 3,858 Joined: 28-December 10 From: San Antonio Texas Member No.: 12,530 Region Association: Southwest Region |
Ahhhh wonderful flares ............. (IMG:style_emoticons/default/biggrin.gif) Hey woody, if you don't mind me asking, what size spacers are you running front/rear on your cookie cutter wheels? 25mm on each wheel with the cookie cutters or the BBSs. The spacers are from a 944. Sometimes I will run an additional 5mm spacer on top of the 25s but only for street use. I wouldn't run stacked spacers for angry driving. Most sanctioning bodies wont allow bolt on spacers either, they must be the pass through type with longer studs. |
| gothspeed |
 Nov 2 2012, 03:34 PM Nov 2 2012, 03:34 PM
Post
#13
|
|
Senior Member    Group: Members Posts: 1,539 Joined: 3-February 09 From: SoCal Member No.: 10,019 Region Association: None |
Stacked 25mm on each wheel with the cookie cutters or the BBSs. The spacers are from a 944. Sometimes I will run an additional 5mm spacer on top of the 25s but only for street use. I wouldn't run stacked spacers for angry driving. Most sanctioning bodies wont allow bolt on spacers either, they must be the pass through type with longer studs. Right on man! ....... this info will help me choose stud lengths when I finally get my flares welded on ...... (IMG:style_emoticons/default/beerchug.gif) |
| Trekkor |
 Nov 3 2012, 08:54 PM Nov 3 2012, 08:54 PM
Post
#14
|
|
I do things...      Group: Members Posts: 7,809 Joined: 2-December 03 From: Napa, Ca Member No.: 1,413 Region Association: Northern California |
I found a few more pics:
(IMG:http://www.914world.com/bbs2/uploads_offsite/i944.photobucket.com-1413-1351997670.1.jpg) (IMG:http://www.914world.com/bbs2/uploads_offsite/i944.photobucket.com-1413-1351997671.2.jpg) (IMG:http://www.914world.com/bbs2/uploads_offsite/i944.photobucket.com-1413-1351997671.3.jpg) KT |
| Dasnowman |
 Nov 4 2012, 02:53 AM Nov 4 2012, 02:53 AM
Post
#15
|
|
You miss 100% of shots you don't take!   Group: Members Posts: 265 Joined: 24-May 12 From: Tricities, B.C./ Lake Whatcom Member No.: 14,477 Region Association: Canada |
Run the molding over the flare edges, leaving them long. Hold/clamp the flare to the car and drill through both the flare and the steel to accommodate a large head rivet. A helper may be useful. Start at each end and carefully fit the flare to the contour of you car. You can decide how many rivet to use and the spacing you like. Drill the holes about 1" from the molding. Remember, there is 2" of surface to mount your flares. KT Love this write up what flares are these where they from link? So do they come with a template or you just outline the outside of the flare then measure 2" in? I was thinking about doing this but this write up it's a forsure now! thanks What prepwork did you do to the cars cut fenders to prevent rust? Also have you ever thought of using plusnuts or rivnuts on the body then use SS button nose screws and washers to hold them on? I think thats the root I will go. |
| Krieger |
 Nov 4 2012, 09:35 AM Nov 4 2012, 09:35 AM
Post
#16
|
|
Advanced Member     Group: Members Posts: 4,763 Joined: 24-May 04 From: Santa Rosa CA Member No.: 2,104 Region Association: None 
|
Dang KT those look good! Where were you when I did my flares?
|
| Woody |
 Nov 4 2012, 09:38 AM Nov 4 2012, 09:38 AM
Post
#17
|
|
Sandbox Rabblerouser and head toilet scrubber     Group: Members Posts: 3,858 Joined: 28-December 10 From: San Antonio Texas Member No.: 12,530 Region Association: Southwest Region |
Run the molding over the flare edges, leaving them long. Hold/clamp the flare to the car and drill through both the flare and the steel to accommodate a large head rivet. A helper may be useful. Start at each end and carefully fit the flare to the contour of you car. You can decide how many rivet to use and the spacing you like. Drill the holes about 1" from the molding. Remember, there is 2" of surface to mount your flares. KT Love this write up what flares are these where they from link? So do they come with a template or you just outline the outside of the flare then measure 2" in? I was thinking about doing this but this write up it's a forsure now! thanks What prepwork did you do to the cars cut fenders to prevent rust? Also have you ever thought of using plusnuts or rivnuts on the body then use SS button nose screws and washers to hold them on? I think thats the root I will go. I taped the fenders up till I got the position I liked, then outlined them with a sharpie, then used that line to lay my tape. I used 2" masking tape as my cut line. Then I used 1" tape on the fenders to plot where I was going to rivet. I painted all rough sheet metal edges with a stick of touch up paint. Looks like Trekkor and I used a very similar method. |
| aircooledtechguy |
 Nov 4 2012, 09:44 AM Nov 4 2012, 09:44 AM
Post
#18
|
|
The Aircooledtech Guy    Group: Members Posts: 1,966 Joined: 8-November 08 From: Anacortes, WA Member No.: 9,730 Region Association: Pacific Northwest |
I actually prefer the riveted/bolted-on look and really dig the two-tone look as well. (IMG:style_emoticons/default/aktion035.gif)
|
| Trekkor |
 Nov 29 2012, 03:31 PM Nov 29 2012, 03:31 PM
Post
#19
|
|
I do things...      Group: Members Posts: 7,809 Joined: 2-December 03 From: Napa, Ca Member No.: 1,413 Region Association: Northern California |
FYI:
The source of my tires! (IMG:http://www.914world.com/bbs2/uploads_offsite/i944.photobucket.com-1413-1354224666.1.jpg) KT |
| Jeff Hail |
 Nov 29 2012, 06:03 PM Nov 29 2012, 06:03 PM
Post
#20
|
|
Senior Member    Group: Members Posts: 1,141 Joined: 3-May 07 From: LA/ CA Member No.: 7,712 |
I think you need to flare that open wheeled chair next. Just doesnt look right with all that rubber hanging out.
Attached image(s) 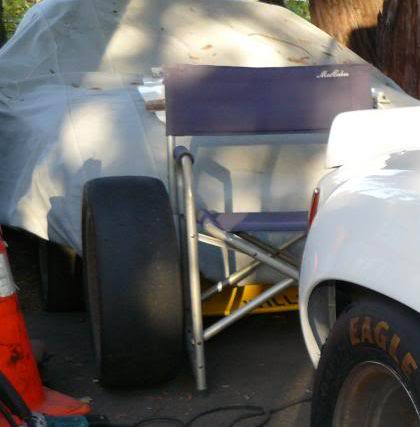
|
  |
1 User(s) are reading this topic (1 Guests and 0 Anonymous Users)
0 Members:

|
Lo-Fi Version | Time is now: 22nd November 2024 - 10:15 PM |
Invision Power Board
v9.1.4 © 2024 IPS, Inc.


